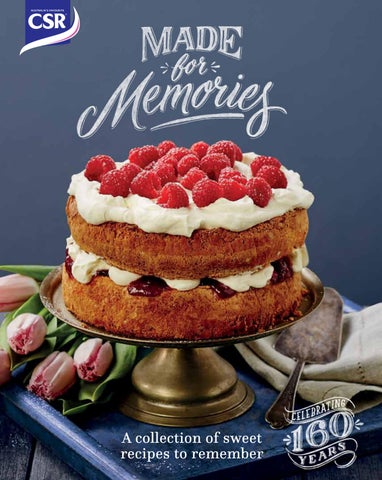
If you have any enquiries regarding the current product availability, you can contact the Sugar Australia Consumer Advisory Team on 1800 800 329 or visit our website (CSRsugar.com.au).
This publication is copyright. Other than for the purposes of and subject to the conditions prescribed under the Copyright Act, no part of this publication may be reproduced or copied in any form or by any means (whether graphic, electronic or mechanical, including photocopying, recording, or otherwise), or stored in a retrieval system or transmitted without prior written permission. Enquiries are to be addressed to the publisher.
Published by Sugar Australia Pty Ltd
265 Whitehall Street Yarraville, Victoria, Australia 3013
Printed and bound in China by C&C Offset Printing Co., Ltd., a registered trading company in Hong Kong, Business Registration
Certificate number 11665156-000-03-07-5, 14/F., Ting Lai Road, C&C Building, Tai Po, N.T., Hong Kong.
CSR is a registered trademark licensed to Sugar Australia Pty Ltd. ISBN 978-0-646-94174-5
Layout and design by Scooter Creative Pty Ltd, Port Melbourne.
Acknowledgements:
We would like to thank everyone who shared their recipes and the sweet memories behind them, along with the following people who helped us bring the Made for Memories cookbook to life.
Recipe Development and Food Styling
Food and prop styling: Theresa Stastny
Assistant to stylist: Ralph Kaus
Recipe development: Theresa Stastny
Recipe testing: Noël Kelly
Photography
Mike Long Photography
Design and Art Direction
Scooter Creative Pty Ltd
Printing
Managed locally by C&C’s Australian representative Lithocraft Pty Ltd
Marketing Team
Kate Donnelly, Katherine Wall and Carolyn Uzelac
Catching crumbs from Grandma’s melting moments or devouring Mum’s date & walnut loaf – the sweet treats we love most are more than quality ingredients, just right timing or secret recipes. Our favourite recipes are shared with much loved family or lifelong friends, across the generations or with neighbours next door. Nothing tastes sweeter than new memories made and the past being remembered.
To celebrate 160 years in Australian pantries, we have collected the sweetest recipes from across Australia and now we want to share them with you. We hope this cookbook will act as a reminder of just how special it can be to pass on a recipe or perhaps provide the inspiration to create new traditions that are Made for Memories.
My Aunt Belle was the best baker in our family. She taught myself and all of my siblings how to bake the best breads and pastries. This is one of the first recipes she taught us. 1 love bringing her a batch of these when 1 go to see her. 1 think she planned this all along.
1. Preheat oven to 180°C (160°C fan-forced). Line 2 baking trays with baking paper. Place peanut butter, butter, brown sugar and white sugar in a large bowl and using an electric mixer, beat until combined. Add the egg and the vanilla and beat again until just combined.
2. In a separate bowl, combine the dry ingredients. Add to the wet ingredients and mix until combined.
3. Measure out one tablespoon of dough and roll into a ball. Continue with the remaining dough placing the balls 3cm apart as they will expand when cooking.
4. Gently press the centre of each biscuit using your thumb to create an indent on the top. Then place the trays in the oven and bake for 12-15 minutes or until golden brown. Remove from oven and place biscuits on cooling rack.
5. To assemble, let biscuits cool completely then place a ½ teaspoon of the raspberry jam in centre of the biscuits to fill the indents.
Use any of your favourite jams as a substitute for the raspberry jam – strawberry, apricot or blueberry jam all work well.
Passionfruit slice was one of Mum's go to recipes when we were growing up, with the passionfruit coming straight from Dad’s work. Whenever Mum had a cooking day, she would always make this recipe. Every time she makes this slice to share we can guarantee that someone will ask for the recipe!
Travis H., Emerald QLD
Trisha’s passionfruit slice
Method
1. Preheat oven to 180°C (fan-forced 160°C). Grease and line a 27 x 18cm lamington pan.
2. In a large bowl, add flour, coconut and white sugar and combine well. Then add melted butter and vanilla. Mix well and press mix into prepared tray and cook for 15 minutes. Remove from oven and let cool.
3. Then, combine remaining ingredients and spread the passionfruit mix over the cooled base.
4. Reduce heat to 160°C (fan-forced 140°C) and return pan to oven and cook for a further 10 minutes or until set. Let cool completely before serving.
Add whipped cream with a little CSR Soft Icing mixture for an extra indulgent treat!
When 1 make these biscuits, the beautiful almond and lemon aroma fills my kitchen and takes me back to the many festivities our family celebrated and the times spent baking these biscuits before Christmas, Easter and birthdays. They are called Nonna Geatana's pinci pinci biscotti as it was my mother who taught me how to make them and the shape they resemble.
Pina
C., Strathmore VIC
Method
1. Preheat oven to 180°C (160°C fan-forced). Line 2 trays with baking paper.
2. Using an electric mixer, combine egg whites and soft icing mixture in a large bowl and whisk until frothy. Using a wooden spoon, add remaining ingredients and mix well.
3. Measure out one tablespoon of dough and roll into a small ball. Continue with remaining dough. Place the ¾ cup of soft icing mixture into a shallow bowl and roll the balls to coat. Place the balls onto the prepared trays and slightly pinch both sides and push down in the centre with the index finger.
4. Bake for 20 minutes or until golden brown. Allow biscuits to cool on tray. To serve, dust with a sprinkle of soft icing mixture.
This recipe makes about 45 biscuits so you will need to bake them in batches so as not to crowd the trays.
If you do not wish to use the alcohol, replace with 1 teaspoon of lemon juice.
My Mum and Grandma used to make these all the time. As a child 1 remember watching them bake and helping out where 1 could - it’s just a lovely memory from my childhood.
Tania D.A.,
Willagee WA
Method
1. Preheat oven to 160°C (fan-forced 140°C) and line 2 oven trays with baking paper.
2. Using a wooden spoon, mix butter until creamy. Add flour, soft icing mixture and custard powder and stir to combine.
3. Measuring approx. 1 tablespoon of dough at a time, roll dough into balls. Place the balls on prepared trays keeping them at least 3cm apart. Using a fork lightly dusted with icing mixture, press on each ball to gently flatten.
4. Bake for 15 minutes or until just cooked through. Swap trays halfway through cooking process to ensure even cooking. Remove from oven and let biscuits cool completely.
5. Meanwhile, make the filling by placing the butter and soft icing mixture into a small bowl. Use an electric mixer to combine until light and fluffy. Add the lemon zest and juice and beat until just combined.
6. To assemble, spread the filling mixture over the flat side of half the biscuits and sandwich together with remaining biscuits.
Try substituting the lemon zest and juice in the filling with orange, lime, tangerine or other citrus fruits.
Since she was a little girl, my daughter has always loved to bake. After making it together many times, my daughter surprised me on Mother's day by baking blondies all by herself. Blondies are now a favourite in our house!
1. Preheat oven to 180°C (fan-forced 160°C). Lightly grease and line a 27 x 18cm lamington baking tray with baking paper.
2. Place the butter and brown sugar in a large mixing bowl and beat together until light and fluffy. Mix in the eggs and vanilla.
3. In a separate bowl, combine the flour, baking powder and salt. Whisk to combine. Add the dry ingredients to the wet ingredients along with the cranberries and chocolate. Combine well.
4. Place dough in prepared tray and press to create an even layer.
5. Bake for 30 minutes or until golden brown.
Try using milk or even dark chocolate instead of the white. You can also replace the cranberries with chopped apricots or sultanas or any of your favourite dried fruits.
Yiayia Stella would make baklava for special occasions and it was always over and above a birthday cake. But at the same time she would make it for everyday occasions, when you would say you were coming over to visit she would say “1’ve made baklava…” and it was just something that made you feel loved and taken care of, because you know that love had gone into the making of it.
Aphrodite Vicky H., Everton Hills QLD
Method
1. Preheat oven to 150°C (fan-forced 130°C). Process nuts in a food processor. Place in a bowl. Add the raw caster sugar, almond meal, ground cinnamon and ground cloves to the nut mixture and combine well.
2. Lay sheets of filo pastry flat on the kitchen bench. Set aside 6 sheets of pastry for the base, 4 for the middle layers and 12 for the top. Cover pastry with a damp tea towel to prevent from drying out. Using a pastry brush, grease a tray (28 x 34 x 5cm) with the melted butter.
3. Place one sheet of pastry in the tray. Brush top of sheet with melted butter. Repeat this process until you have 6 sheets of pastry in the tray.
4. Spread 2 cups of nut mixture evenly over the pastry. Place 2 sheets of pastry on top, brush each sheet with melted butter as you go. Repeat this process, then add 2 more cups of nut mixture and finish with 12 sheets of pastry, brushing each sheet with melted butter. The final 12 sheets become the top of the baklava.
5. Score the baklava into diamond portions using the tip of a sharp knife. Do not cut all the way through. Sprinkle water on the top layer of pastry. Bake for 1 to 1½ hours or until golden. Remove from oven and leave to cool completely.
6. Make the syrup by placing all the ingredients into a saucepan. Bring to a boil then lower the heat and simmer for 5 minutes. Pour hot syrup evenly over cooled baklava. Leave for several hours or overnight to allow syrup to soak into pastry.
This recipe has been baked every year, at Christmas and Easter time, for as long as 1 can remember. Every time 1 take kourambiethes out of the oven the memory of my mum baking them comes back to me.
Rebecca I., Deer Park VIC
Method
1. Preheat oven to 180°C (160°C fan-forced). Line two oven trays with baking paper.
2. Place butter and caster sugar in a large mixing bowl and, using an electric mixer, beat until pale and fluffy.
3. Add egg yolk, brandy and vanilla, and continue mixing until well combined.
4. Add the flour and baking powder into the butter mixture, mixing until dough comes together and is soft but not sticky.
5. Tip out onto a lightly floured work surface. Roll dough into small crescents and place on the prepared oven trays. Bake for 15-20 minutes or until lightly browned.
6. Allow to cool slightly. Dust a separate tray with soft icing mixture and place the warm biscuits on top. Dust liberally with more soft icing mixture to serve.
If you do not wish to use alcohol, substitute orange juice for the brandy.
For a nutty crunch, try adding ½ cup toasted and chopped pecans or almonds when adding the flour.
Shortbread kisses were the first thing 1 ever baked with Mum and, to this day, the memory remains as one of the funnest and messiest days 1've ever had in the kitchen! 1 was taught to make these shortbread kisses by my mum and she was taught by her mum, but we've each made our own mark on the recipe. My mum added the pistachios and 1 added the raspberry and mascarpone - so the recipe is a combination of us all really.
1. Heat oven to 180°C (fan-forced 160°C) and line a baking tray with baking paper.
2. Place butter and caster sugar in a bowl and using an electric mixer cream together until light and fluffy.
3. Combine flour and cornflour in a separate bowl. Add flour mix to butter mixture. Stir in vanilla essence and pistachios until well combined.
4. Place dough on a lightly floured work surface and knead for 20 seconds or until smooth. Then roll dough to a 5mm thickness.
5. Cut biscuits using a 6cm cookie cutter and place them on the prepared tray.
6. Cook for 10 minutes or until the biscuits are golden. Allow to cool before topping.
7. To assemble, whisk the mascarpone and pure icing sugar together in a small bowl. Using a piping bag place a dollop of the mascarpone mix on each biscuit. Then top each biscuit with a raspberry and a sprinkle of the pistachios.
If you do not have a piping bag, place mascarpone mix in a zip lock bag. Seal the bag and then cut the corner of the bag to create a quick and disposable piping bag.
On a cold and frosty morning, in Brisbane suburbia (a.k.a. a brisk summer's day in other parts of Australia ) my mother would lovingly prepare a steaming bowl of porridge with brown sugar and a little cinnamon. The brown sugar would melt into a delicious caramel syrup and the cinnamon would add spicy notes - a perfect bowl of winter happiness. One bite of these brown sugar and oat biscuits and the memories of waking up in winter to a bowl of porridge shared across the table with my family come flooding back!
Sarah R., Seddon VIC
Method
1. Preheat oven to 180°C (160°C fan-forced). Sift the three flours into a large bowl. Stir through the oats and nutmeg.
2. In a separate bowl, whisk the melted butter and brown sugar until the mixture is smooth and light. Whisk in the eggs and vanilla.
3. Add the wet mixture into the dry ingredients and stir until well combined and dough forms. Lightly knead dough into a ball, wrap in cling wrap and place in fridge to chill for approx. 15-20 minutes or until chilled.
4. Line baking trays with baking paper. Remove dough from fridge. Roll 2 tablespoons of dough into a ball and place on the lined tray. Continue with the remainder of the dough making sure to leave room for biscuits to spread slightly on trays when baking.
5. Using a fork, lightly press on each ball to flatten slightly. Place trays in the oven and bake for 10 minutes or until lightly browned. Leave the cookies to cool on the baking trays as they are delicate when just cooked.
These travel well and are great for school lunches or to take on a road trip.
1. Preheat oven to 180°C (fan-forced 160°C). Line a 20 x 30cm lamington pan with baking paper.
2. Combine the butter and ½ cup of caster sugar in a bowl and, using an electric mixer, beat until light and fluffy. Add the egg, beating until combined.
3. Add the flours and mix well. Then stir in the buttermilk until just combined.
4. Press mixture into the prepared pan until it is even and smooth. Spread the jam evenly over the mix.
5. To make the topping, place the eggs and white sugar in a separate bowl and whisk to combine. Add the desiccated and shredded coconut, mix well and place on top of the jam layer.
6. Bake for 40 minutes or until top is golden brown.
Abi’s fudge brownies
Prep: 10 minutes Cook: 30 minutes Makes: 8 pieces
Ingredients
125g butter, cubed and softened
60g dark cooking chocolate, roughly chopped
2 large eggs, lightly beaten
1 teaspoon vanilla extract
1 cup CSR Raw Sugar
¾ cup plain flour
1 tablespoon cocoa powder
½ cup chopped walnuts
Method
1. Preheat oven to 180°C (160°C fan-forced). Line an 18 x 18cm slice tray with baking paper.
2. Place the butter and chocolate in a small saucepan and heat gently over a low heat until just melted. Alternatively, microwave in 15 second bursts until melted. Transfer to a mixing bowl and allow to cool slightly.
3. Whisk the eggs and vanilla into chocolate mixture, until well combined. Then add the raw sugar and mix well.
4. Sift in the flour and cocoa and stir until all flour is incorporated. Fold walnuts into mixture.
5. Pour into prepared tray and bake for 30 minutes. Allow to cool slightly before removing to a cooling rack.
Replace the walnuts with chopped chocolate, pistachios or any of your favourite nuts.
2½ cups plain flour, sifted 1 teaspoon bicarbonate of soda
Method
Replace mixed fruit with a combination of dried cranberries, chocolate chips and sultanas.
3 teaspoons fresh ginger, grated
2½ tablespoons CSR Golden Syrup, warmed Icing
1 cup CSR Pure Icing Sugar
1½ tablespoons milk
1 teaspoon vanilla extract
1. Preheat oven to 160°C (140°C fan-forced). Line two oven trays with baking paper.
2. Place butter and white sugar in a large bowl and, using an electric mixer, beat until pale and fluffy.
3. Mix in the flour, baking soda and the ginger. Add the golden syrup and mix to form a dough.
4. Tip dough onto a lightly floured work surface and knead lightly. Shape into a disc, cover with plastic wrap and refrigerate for 30 minutes.
5. Once dough has chilled, roll out to a 5mm thickness and, using a biscuit cutter, cut out desired shapes and place onto the prepared oven trays. Bake for 15 minutes or until just golden. Remove to a wire rack and let cool before icing.
6. To prepare the icing, combine all of the ingredients in a small bowl and mix until smooth. Drizzle each biscuit with icing and let dry before serving or storing.
Replace fresh ginger with 2 teaspoons of ground ginger.
1. Using a paddle attachment, place the softened butter, caster sugar, eggs, thickened cream and brandy in a mixing bowl. Mix until well combined.
2. Add plain flour to wet ingredients and mix until just combined.
3. Turn the dough onto a lightly floured work surface and knead until dough is smooth (approx. 4 minutes). Add more flour to the bench and dust a rolling pin. Roll the dough into a rectangle of 2mm thickness.
4. Using a fluted pastry cutting wheel, cut dough into 2 x 5cm strips. Cut a slit 10cm in length in the middle of each rectangle. Then, take one end of the pastry and pull it through the slit to create the twist. Set aside on a tea towel and continue with the remaining dough.
5. Heat the oil, on medium heat, in a deep and heavy based saucepan. Test the oil is ready by placing a small piece of dough in the oil and if bubbles form around the dough, the oil is ready. Working in batches, place a few krustai in the oil, turning to brown both sides. Do not over crowd the pan. When golden brown, place on paper towel and continue until all have been cooked.
6. To serve, dust generously with pure icing sugar.
1. Preheat oven to 180°C (fan-forced 160°C). Line 2 baking trays with baking paper.
2. Using an electric mixer, beat butter, brown and white sugar in a mixing bowl until light and creamy. Add vanilla and eggs, one at a time, mixing well after each addition.
3. In a separate bowl, whisk together flour, bicarbonate of soda and salt.
4. Add dry ingredients to wet ingredients stirring gently. Fold in chocolate chips.
5. Allow dough to chill in fridge for 15-20 minutes.
6. Measure a tablespoon of dough and place onto prepared trays leaving at least 4cm between each.
7. Bake for 8-10 minutes or until golden.
Add a handful of your favourite chopped nuts for a crunchy biscuit.
Elena K., Farrer ACT
Annabel P., Hawthorn VIC
This delicious treat always seemed to be available. Nanna loved to bake it. 1t was always popular in the afternoon at the local cricket on weekends.
1. Preheat oven to 180°C (fan-forced 160°C). Lightly grease a 27 x 18cm lamington pan.
2. To make the base, place all base ingredients into a food processor and process until combined. Press evenly into the prepared pan. Bake for 15 minutes or until golden. Let cool in pan.
3. To make the marshmallow layer, place the white sugar, water and gelatin into a saucepan and bring to a boil. Boil for 3 minutes then remove from heat and allow to cool. Place mix in a bowl and using an electric mixer, with a whisk attachment, beat well until light and fluffy. Add the food colouring and beat until well combined. Spread marshmallow mix evenly onto cooled base.
4. Top the marshmallow layer with the hazelnuts and drizzle with the melted chocolate. Cut and serve.
If you do not have a food processor, place the Weetbix in a sealed zip lock bag and crush with a rolling pin or any other utensil at hand. Then mix all base ingredients in a bowl until combined and press into prepared pan.
This recipe is easy, fail proof and loved by all. The lamington is an Australian icon and this cake is just like having a lamington without the fuss of dipping all those squares into icing!
Sarah
P., Uraidla SA
Sarah’s lamington cake
Prep: 20 minutes Cook: 30 minutes Makes: 9 pieces
Ingredients
Cake
¾ cup CSR Caster Sugar
120g butter
3 eggs
200g plain yogurt
1 teaspoon vanilla extract
225g self raising flour
1 cup raspberry jam
(See recipe on page 69)
Icing
120g dark chocolate, finely chopped
125ml thickened cream
1 cup moist shredded coconut
Method
1. Preheat oven to 180°C (fan-forced 160°C). Grease and line a 20cm square cake tin.
2. Beat caster sugar and butter in small bowl using an electric mixer until pale and creamy.
3. Add eggs, one at a time, beating well after each addition.
4. Stir in yogurt and vanilla extract. Then fold in flour until just combined.
5. Spread cake mix into prepared cake tin. Bake for 25-30 minutes or until golden. A skewer inserted into the centre of the cake will come out cleanly when cooked through.
6. Remove from oven and let stand for five minutes before turning out onto a wire rack to cool.
7. While cake is cooling, make the icing by placing chocolate in a heatproof bowl. Heat cream in a small saucepan, do not boil. Pour hot cream onto chocolate and gently stir until chocolate has melted and mix is glossy. Let the mix set until it has reached a spreading consistency.
8. Meanwhile, cut cake in half lengthwise. Remove top and spread jam on top of the bottom layer. Return the top layer and liberally ice with the set chocolate mix. Sprinkle with the coconut and serve.
Try toasting the coconut for added flavour.
Mum used to make this cake when we were living in Mt Macedon in the 1970s and 80s. The house was so old that it only had a wood stove so this cake has always been a labour of love. Everyone always enjoys the fresh orange flavour of this cake and it is always a popular request when birthdays roll around. Mum now uses CSR Raw Caster Sugar instead of white caster - it's her secret ingredient!
1. Preheat oven to 160°C (140°C fan-forced). Brush a 22cm round spring form cake tin with the melted butter. Line the base of the tin with baking paper.
2. Place the 2 oranges in a saucepan and cover with water. Bring to boil and cook for 15 minutes. Drain. Return the oranges to the pan and, again, cover with cold water and bring to boil and cook for a further 15 minutes. Drain and rinse under cold water. Coarsely chop the whole oranges and remove and discard any seeds. Then place the chopped oranges into a food processor and process until smooth, including orange peel.
3. Using an electric mixer, beat the eggs and raw caster sugar until thick and pale. Fold in the processed oranges, then add the almond meal and baking powder by gently folding into the mixture. Pour into prepared baking tin.
4. Bake for 1 hour or until a skewer inserted into the centre comes out cleanly. Set aside for 15 minutes to partially cool in the tin.
5. To make the orange syrup, place the zest, juice and caster sugar in a small saucepan. Bring to a simmer over low heat and cook for 2-3 minutes or until sugar dissolves and syrup has thickened.
6. Turn the partially cooled cake out onto a serving plate. Using a skewer, gently poke holes in the top of the cake. Spoon the syrup over the cake so that the syrup soaks into the holes. Serve with a scatter of the toasted almonds.
Boiling the oranges twice will reduce the bitterness of the pith of the orange.
1 created this cake because there are few things 1 enjoy more than chocolate, wine and sharing with great friends!
Kylee A., Rutherglen SA
Method
1. Preheat oven to 180°C (160°C fan-forced). Grease a 20 x 6cm round cake tin. Line the base and sides with baking paper ensuring the paper extends 2-3cm above the lip of the tin.
2. Beat the eggs and brown sugar with an electric mixer for 5 minutes or until the mix is thick and creamy. Gradually beat in melted chocolate until combined. Add the cream and Muscat and gently fold to combine.
3. Pour mixture into the prepared tin and place in a large roasting pan to form a bain marie. Place the roasting pan in the oven and pour enough boiling water into pan to come halfway up the sides of the cake tin.
4. Cover loosely with foil and bake for 45 minutes. Remove the foil and bake for a further 30-45 minutes or until a skewer inserted in the middle comes out cleanly.
5. Remove pan from oven and cool cake whilst sitting in bain marie. To serve, turn cake onto a serving plate and dust with cocoa and garnish with a handful of raspberries.
Great served with ice cream or cream and a sip of Muscat or port wine.
This cake rises quite high and then will lower after removing from oven and cooling.
My mum grew up in Canada and, despite living in Australia for the past 35 years, she still loves the treats that remind her of her childhood. These red velvet lanterns are my way of updating a classic red velvet recipe and letting my mum know just how special she is!
Bridie
O., Carlton VIC
Method
1. Preheat oven to 180°C (fan-forced 160°C). Grease 2 square or round 12 count cupcake tins.
2. Combine flour, cocoa, bicarbonate of soda and salt in a mixing bowl.
3. In a separate bowl, add oil and white sugar. Using an electric mixer, beat until pale. Add eggs, one at a time incorporating well after each addition. Then mix in food colouring and vanilla.
4. Add ¹/3 of the dry ingredients into the oil mix and combine well. Then add half the buttermilk and, again, combine well. Repeat process to incorporate the ingredients. Lastly, add the vinegar and beat for a further 20 seconds to incorporate.
5. Using a ¼ cup measure, pour the batter into the prepared tins and bake for 15 minutes or until a skewer placed in the middle of a cake comes out cleanly. Remove from oven and let cool for 10 minutes then turn cakes out onto a wire rack to cool completely.
6. Meanwhile, make the cream filling by whipping the cream to soft peaks then adding in the vanilla. Combine but do not over whip.
7. To assemble, cut off the top of each cake, place 4 raspberries on the base and pipe cream around the raspberries and in the middle of the cake. Replace the top and, if using a square shape, turn it by a quarter to create a lantern shape. Then pipe a dollop of cream on the top and serve.
1 was taught to make this cake by my grandma in her kitchen. My grandma was English and an amazing cook, so good that she actually cooked for the Queen of England! 1 always wanted to learn to cook just like her.
Catherine O., Fairlight NSW
Grace’s devil’s food cake
Prep: 20 minutes Cook: 40 minutes Makes: 8 serves
Ingredients
Cake
2 cups self raising flour
1 teaspoon salt
¾ cup cocoa powder
2 cups CSR White Sugar
250ml vegetable oil
250ml strong coffee, hot
250ml milk
3 eggs
1 teaspoon vanilla extract
Icing
80ml water
1 cup CSR White Sugar
½ teaspoon cream of tartar
4 egg whites
Method
1. Preheat oven to 170°C (fan-forced 150°C). Lightly grease and flour two 20cm round cake tins and line bases with baking paper.
2. Place the flour, salt, cocoa and white sugar in a mixing bowl and whisk to combine. Add the oil, coffee and milk and beat on a medium speed for 2 minutes. Then add the eggs and vanilla and continue beating for a further 2 minutes.
3. Divide the batter evenly between the prepared tins. Bake for 40 minutes or until a skewer placed in the centre of the cake comes out cleanly. Cool for 10 minutes in the tins then turn out onto a wire rack to cool completely.
4. Meanwhile, make the icing by placing water, white sugar and cream of tartar in a heavy based and very clean saucepan. Bring the sugar mix to a boil. Do not stir and continue to boil for 5-7 minutes or until thick clear bubbles appear. Place the egg whites in a separate very clean and heatproof mixing bowl. Using a whisk attachment on an electric mixer, beat whites until soft peaks form. Keep whisking and very carefully pour the sugar syrup into the egg whites in a slow and steady stream. Continue whisking until mixture has cooled. This can take up to 10 minutes. The icing should be fluffy and glossy.
5. To assemble cake, place one layer of the cooled cakes on a serving plate, top with half of the icing and spread evenly. Place the second cake layer on top and spread the remaining icing evenly over the top of the cake.
This is the sort of cake that should be eaten with your hands and not a fork!
When my children were growing up we loved to cook on the weekends and it meant a lot to me to pass on my cooking knowledge. My daughter always said the pomegranate seeds looked like shiny rubies!
Lorretta Z., Orange NSW
Loretta’s pistachio tea cakes with pomegranate syrup
Prep: 20 minutes Cook: 35 minutes Makes: 4 mini loaves
Ingredients
Cake
200g unsalted butter, at room temperature
1 cup CSR Raw Caster Sugar
4 large eggs
1 vanilla bean, scraped
Zest of one large orange
220g pistachios, finely ground
1 cup plain flour, sifted Syrup
¼ cup CSR Golden Syrup
1 teaspoon pomegranate molasses
1 tablespoon orange juice
60g pistachios, roughly chopped
1 small pomegranate, seeds removed
Method
1. Preheat oven to 150°C (130°C fan-forced). Grease and line four 14 x 7cm mini loaf tins.
2. In a mixing bowl, beat the butter and raw caster sugar together until pale and fluffy. Add the eggs one at a time making sure each is incorporated before adding the next. Then add the vanilla and orange zest.
3. Remove the beaters and gently fold in the pistachios and the flour.
4. Divide the batter evenly between the four prepared tins. Place tins on a tray and bake for 30-35 minutes or until a skewer inserted comes out cleanly.
5. Leave cakes to cool in tins slightly, then turn out and allow to cool completely on a wire rack.
6. Meanwhile, make the syrup by placing the golden syrup, molasses, juice and pistachios in a small bowl and combine well. Once cakes have cooled completely, place on a serving platter and drizzle with the syrup and then top with a sprinkle of pomegranate seeds.
To easily remove the seeds from the pomegranate, cut the pomegranate in half. Take one half and place seed side down to face your palm. Over a bowl and using a wooden or large metal spoon, vigorously hit the outside of the pomegranate and the seeds will fall out.
When 1 was growing up we had a huge lemon tree in the backyard on the farm. The tree was always full of fruit so Mum and Nan were always cooking with lemons. This recipe is kind of tribute to that memory. These mini lemon lime syrup cakes always impress at dinner parties but are surprisingly simple to make!
This recipe makes one large bundt if desired. Cook for 35 minutes or until skewer inserted into the centre of a cake comes out cleanly.
Method
1. Preheat oven to 180°C (160°C fan-forced). Grease 6 mini bundt cake tins with melted butter.
2. Finely grate the zest of the lemon and lime. Set aside.
3. Using an electric mixer, cream the butter and caster sugar together in a bowl until pale and fluffy. Add eggs, one at a time, beating well after each addition.
4. In a separate bowl, combine the flour, salt and poppy seeds and using a metal spoon, fold the dry ingredients into the egg mixture until just combined.
5. Divide mixture evenly between the six prepared tins. Bake for 15-20 minutes or until a skewer inserted into the centre of a cake comes out cleanly. Set aside for 2 minutes before turning out onto a wire rack over a baking tray.
6. While the cake is baking, make the syrup by placing all of the ingredients in a saucepan and bring to the boil. Simmer for 5 minutes and remove from the heat. Pour warm syrup evenly over cakes.
Jane S., Portland VIC
Ella’s apple sponge cake
Prep: 20 minutes Cook: 35 minutes Makes: 8 serves
Ingredients
2 eggs
¾ cup CSR Raw Caster Sugar
+ 1 tablespoon to sprinkle
½ teaspoon vanilla extract
85g butter
75ml milk
1 cup plain flour
½ teaspoon ground cinnamon
2¼ teaspoon baking powder
2 apples, peeled, cored and roughly diced
This is my go-to cake when 1 have visitors coming over because the cake can be served warm and it doesn’t need to be iced.
1t is a particular favourite of my daughter’s but then again 1 haven’t yet met anyone who doesn’t like it!
Ella V., Grantville VIC
Try using pears instead of apples or a mixture of both.
Method
1. Preheat the oven to 200°C (180°C fan-forced). Grease and line the base and sides of a 20 x 20cm square cake tin with baking paper. Melt the butter with the milk and allow to cool slightly.
2. Using an electric mixer, whisk the eggs, raw caster sugar and vanilla extract in a large bowl until the mixture is thick and mousse-like and the whisk leaves ribbons on top when the beaters are lifted from the batter. Continue whisking and pour the cooled butter and milk mixture into the egg mix.
3. In a separate bowl, sift the flour, cinnamon and baking powder. Using a spatula, gently fold the dry ingredients into the wet ingredients until just combined.
4. Pour the mixture into the prepared tin and arrange the diced apple evenly over the batter. Don’t worry if they start to sink a bit. Sprinkle with the tablespoon of raw caster sugar and bake for 10 minutes, then reduce the oven temperature to 180°C (160°C fan-forced) and bake for a further 20-25 minutes or until well risen and golden brown.
5. Remove the cake from the oven and allow to cool partially in the tin. Remove from the tin and place the cake top side up on a cooling rack. Serve warm or cooled with a scoop of ice cream.
1 have fond memories of baking with my mum and grandmother growing up and always being first in line to lick the bowl. Now 1 am passing these memories onto my daughter.
Josephine G., Templestowe Lower VIC
Josephine’s angel cake with lime glaze
Prep: 20 minutes Cook: 50 minutes Makes: 8 serves
Ingredients
Cake
6 large eggs, at room temperature
2½ cups self raising flour
1½ cups CSR Caster Sugar
Zest of 1 lime
1 teaspoon vanilla extract
¼ teaspoon salt
Lime glaze
1 tablespoon egg white
¼ cup lime juice
1¾ cups CSR Soft Icing Mixture
Zest of 1 lime, to garnish
Method
1. Preheat oven to 180°C (160°C fan-forced). Grease and line a 20cm round cake tin. Make certain to line the sides
2. Sift the flour twice into a bowl. Set aside.
3. Separate the eggs and place the whites into a very clean mixing bowl. Beat the whites until peaks form. Slowly add the caster sugar, a tablespoon at a time whilst still beating. Continue beating until the sugar has dissolved and the whites are stiff
4. Add the egg yolks one at a time then continue to add the vanilla and zest. Remove the beaters and using a metal spoon, gently fold the flour into the egg mix.
5. Pour mixture into the prepared cake tin and bake for 40-50 minutes or until lightly browned and cake bounces back when lightly pressed. Let the cake cool slightly, then remove from the tin and place on a cooling rack.
6. To make the icing, place all of the ingredients, except the zest, into a small bowl and mix well. When the cake has completely cooled, drizzle on the icing and then garnish with the fresh lime zest.
Use your favourite citrus in place of lime – lemon, orange or even mandarin work beautifully. Why not try a combination of citrus?
1 have been making this recipe for years mainly because 1 love cheesecake, but the real reason this recipe is so special is because it is the first dessert 1 made for my now fiancé. He loved it so much we’re planning to serve mini cheesecakes at our wedding next year!
Samantha M., Wangaratta VIC
1. Lightly grease a 20cm spring form tin. To make the base, place the biscuits and butter in a food processor and process to a fine crumb. Place mix into prepared tin and press firmly to create an even layer. Place in fridge and allow to chill.
2. To make the cake, place the cream cheese and caster sugar in a large mixing bowl and, using an electric mixer, beat until smooth. Add zest and juice to the mix and stir to combine. In a separate bowl, place the boiling water and gelatine and stir to dissolve the gelatine. Then add to the cream cheese mix. Gently fold in the whipped cream and combine well then pour mix onto the chilled crust layer. Place in fridge for at least 3 hours or overnight to set.
3. Meanwhile, make the lemon curd by placing all of the ingredients into a heavy based saucepan. Cook on very low heat and stir constantly until thickened. Strain the thickened egg mix with a fine sieve and set aside and allow to cool until ready to assemble the cake.
4. To assemble, spread the cooled curd over the set cheesecake and serve.
Melissa’s carrot cake
Prep: 25 minutes Cook: 60 minutes Makes: 8 serves
Ingredients
Cake
½ cup CSR Brown Sugar
125ml CSR Golden Syrup
185ml olive oil
3 eggs
1 teaspoon vanilla extract
1 cup self raising flour
1 teaspoon bicarbonate of soda
½ teaspoon ground cinnamon
3 medium carrots, peeled and grated
Candied carrot garnish
2 carrots, peeled and sliced into fine ribbons
3 cups CSR White Sugar
2 cups water
Cream cheese icing
250g spreadable cream cheese
½ cup CSR Pure Icing Sugar
½ teaspoon vanilla extract
My husband proposed to me with a huge mouthful of this yummy cake - of course 1 said yes!
Melissa G., Wendouree VIC
To make carrot ribbons, peel the carrots and use a vegetable peeler along the length of the carrot to create perfectly thin ribbons. Candied carrots can be made up to 2 days ahead of time and placed in air tight container in the refrigerator until needed.
Method
1. Preheat oven to 170°C (150°C fan-forced). Grease a 20cm round cake and line the base and sides with baking paper.
2. Place the brown sugar, golden syrup, oil, eggs and vanilla in a large mixing bowl. Whisk until well combined.
3. In a separate bowl, sift the flour, bicarbonate of soda and cinnamon. Stir to combine then add the grated carrot.
4. Add the dry ingredients into the wet mixture and stir to just combine. Pour batter into the prepared tin and bake for 1 hour or until a skewer inserted into the middle of the cake comes out cleanly. Remove from oven and let rest in the tin for 5 minutes then gently turn out and place on cooling rack.
5. Meanwhile, prepare the candied carrots by placing the white sugar and water into a medium saucepan. Bring to a boil, stirring until sugar has dissolved. Add carrots and reduce heat to a slow simmer and cook for 10 minutes or until carrots are translucent. Remove from heat and let carrots cool completely.
6. To prepare the icing, place all ingredients into a mixing bowl and using an electric mixer, beat until combined and fluffy.
7. To assemble, place the completely cooled cake onto a serving plate. Spread icing liberally onto the cake and top with an arrangement of candied carrot ribbons.
1rene makes the most magnificent sponge cakes to celebrate her grandchildren’s (my niece and nephews) birthdays. As their uncle 1 would always look forward to an invitation and those sponges. 1rene’s recipe was never written down so a sponge “masterclass” was held and each step carefully written down while watching 1rene in action - it really is a simple recipe and every time 1 make it 1 think of all the happy birthdays we’ve shared.
Andrew J., Glen Iris VIC
Irene’s sponge cake
Prep: 20 minutes Cook: 20 minutes Makes: 8 serves
Ingredients
Cake
4 extra large eggs
¾ cup CSR Caster Sugar
²/3 cup cornflour
¼ cup custard powder
1 teaspoon cream of tartar
½ teaspoon bicarbonate of soda
To assemble
250ml thickened cream
½ cup CSR Soft Icing Mixture
+ extra for dusting
1 vanilla bean, scraped
½ cup raspberry jam
(See recipe on page 69)
1 cup fresh raspberries
Method
1. Preheat oven to 180°C (fan-forced 160°C). Grease and flour two 20cm round, deep cake tins. Line the bases with baking paper.
2. Place eggs and caster sugar into a medium sized clean bowl. Using an electric mixer, beat for approx. 7 minutes or until mixture is thick and creamy.
3. Sift the cornflour, custard powder, cream of tartar and the bicarbonate of soda into a separate bowl. Using a metal spoon, gently fold the dry ingredients into the egg mixture until just combined taking care not to over mix.
4. Divide the batter evenly between the prepared tins. Bake for 20 minutes or until the cake surface springs back when touched lightly in the centre. Let cake cool in the tins for 5 minutes then turn out onto wire racks and let cool completely.
5. Meanwhile, make the cream filling/topping by whipping the cream to a soft peak. Fold in the soft icing mixture and vanilla seeds. Continue whipping until desired thickness is achieved.
6. To assemble the cake, place one cake layer on a serving plate. Spread the raspberry jam evenly on top of the layer. Then evenly spread half of the whipped cream over the jam. Gently place the remaining cake layer on top and spread the remaining cream evenly over this layer. Finish with the fresh raspberries and a dusting of soft icing mixture.
For a twist on a classic recipe, try using marmalade, fig jam or your favourite jam in place of the raspberry jam.
This
is just a beautiful old fashioned cake, perfect to enjoy for any occasion!
Jennifer P., Prospect TAS
Jennifer’s pear & ginger cakes
Prep: 30 minutes Cook: 25 minutes Makes: 12 mini cakes
Ingredients
Cake
200g butter, room temperature
1¼ cups CSR Brown Sugar
60ml CSR Golden Syrup
2 eggs, lightly beaten and at room temperature
1¼ cups plain flour
1½ teaspoon baking powder
2 tablespoons ground ginger
2 teaspoons mixed spice
2 medium pears, grated (retain juice for the syrup)
60ml milk
Pear syrup icing
Pear syrup reduction
100g butter, room temperature
2 cups CSR Soft Icing Mixture
Glace ginger, to garnish
Method
1. Preheat oven to 175°C (155°C fan-forced). Grease and line the base of 12 cup friand tin.
2. Grate the pear into a bowl with a strainer to reserve juice.
3. Using an electric mixer, beat the butter and brown sugar together until light and fluffy. Add the eggs one at a time beating well after each addition. Add golden syrup and mix well
4. In a separate mixing bowl, sift together the flour, baking powder, ground ginger, mixed spice and fold into the wet mixture. Then fold the grated pear and milk through the batter.
5. Divide batter evenly between the tins. Bake for 25 minutes or until golden brown. The cakes are cooked when a skewer inserted in the centre of the cake comes out cleanly.
6. While the cake is baking, make the icing by placing the retained pear juice, approx. ½ a cup, into a small saucepan. Place on a low heat and reduce the liquid by half to make a syrup. Allow to cool. In a small bowl combine the cooled syrup, butter and soft icing mixture, until smooth. Ice the cooled cakes and top with a sprinkle of finely diced glace ginger pieces.
If you would like this recipe to be gluten free, try a blend of millet flour, buckwheat flour or rice flour.
If you prefer one large cake, bake for 50mins – 1 hour.
Sonali’s blueberry lovers cake
Prep: 40 minutes Cook: 40 minutes Makes: 8 serves
Ingredients
Cake
225g butter, cubed
1¼ cups CSR Caster Sugar
3 eggs
350ml Greek yogurt
60ml milk
1 cup blueberries (fresh or frozen)
Blueberry jam
4 cups blueberries (fresh or frozen)
2¼ cups CSR Jam Setting Sugar
10g butter
Blueberry Swiss meringue
buttercream
6 egg whites
1½ cups CSR Caster Sugar
400g unsalted butter, room temperature
½ cup blueberry jam
Fresh blueberries to garnish
Method
Cake
1. Preheat oven to 180°C (160°C fan forced). Lightly grease three 20cm round cake tins and line the base with baking paper.
2. Using an electric mixer, cream the butter and caster sugar together in a large bowl until smooth and creamy. Add the eggs, one at a time, beating well after each addition until well combined.
3. Fold in half of the flour and yogurt until just combined. Continue to fold in the remaining flour, yogurt and milk, again, until just combined.
4. Divide the mixture between the three prepared pans and do the same with the blueberries. Bake for 40 minutes or until a skewer inserted into the centre comes out cleanly. Remove from oven and set aside in the pan to cool slightly, approx. 10 minutes. Carefully turn out cakes onto wire racks. Turn upright and cool to room temperature.
Blueberry jam
1. Place a small plate in the refrigerator. Crush blueberries in a food processor or blender. Place blueberries and jam setting sugar in a large, heavy based saucepan. Heat mixture over a low heat, stirring occasionally until sugar is dissolved.
2. Add the butter, then increase heat and bring to a rolling boil. Boil for approx. 4 minutes.
3. Remove from heat. Test that the jam has set by placing a small amount of the jam on the cold plate. Wait a moment then drag your finger across the surface of the jam and if it bunches up in wrinkles when moved, it is ready.
4. Store in sterilised jars.
Blueberry Swiss meringue butter cream
1. Place the egg whites and caster sugar in a large bowl that can be placed over a saucepan of lightly simmering water. Whisk continuously until sugar is dissolved and the bottom of the bowl is warm to touch.
2. Remove bowl from heat and whisk on high speed, with electric beaters, until meringue holds stiff peaks and looks glossy. The bowl should have completely cooled by now.
3. Add the butter, two tablespoons at a time, until thick and fluffy. If it begins to look curdled, continue to whip until it comes back together, before adding in remaining butter.
4. When the buttercream has come together, add the blueberry jam and mix in till smooth and well combined.
To assemble
1. Place one layer of the cake on a serving platter. Place 4 tablespoons of the blueberry jam on cake and spread evenly.
2. Spread a third of the icing on top of the jam. Place a second cake layer on top and repeat with jam and icing. Then place the last layer on top and finish with another layer of jam, icing and top with a handful of fresh blueberries.
1n our family, my mum and 1 work together making these cupcakes - Mum bakes them and 1 decorate them.
Chloe S., Leongatha VIC V IC
Method
1. Preheat oven to 180°C (fan-forced 160°C). Line a 12 count cupcake tin with paper cases.
2. Place butter and caster sugar in a mixing bowl and cream together until pale and fluffy.
3. Add eggs one at a time mixing well after each addition, then add the vanilla and beat until all is well combined.
4. Add half the flour and then half the milk and repeat until all ingredients are combined.
5. Divide the batter evenly in the prepared tin. Bake for 12 minutes or until a skewer inserted in the middle of a cake comes out cleanly. Remove from oven and let cool completely.
6. Meanwhile, make the butter cream by placing the butter in a mixing bowl and creaming the butter until smooth and pale. Add the soft icing mixture and milk and beat until smooth. Add food colouring as desired and mix to combine well. Place butter cream into a piping bag fitted with a circle tip and pipe onto cupcakes. Sprinkle with your favourite decorations.
Jennifer’s lemony yoghurt raspberry cake
Prep: 30 minutes Cook: 70 minutes Makes: 8 serves
Ingredients
Cake
150g butter, room temperature
1 cup CSR Caster Sugar
3 eggs, room temperature
½ cup plain yoghurt
Juice of ½ lemon
Zest of one lemon
½ cup corn starch
½ cup rice flour
2 teaspoons baking powder
200g sunflower seeds
1 cup frozen raspberries
Icing
1½ cups CSR Pure Icing Sugar
3 tablespoons lemon juice
Fresh raspberries, to serve
Method
The first time 1 made this cake we were on holidays on the west coast of Tasmania. We found some raspberries hanging over a fence, so we took them and 1 made this cake. 1t has sort of become my signature dish for my business, so it amuses me that it was first made with stolen berries!
Jennifer P., Prospect TAS
1. Heat oven to 175°C (fan-forced 155°C). Grease and line the base and sides of a 20cm round cake tin. Place sunflower seeds onto an oven tray and bake until lightly browned. Stir seeds occasionally. Place the roasted seeds into a food processor and pulse to grind to a fine meal.
2. In a large mixing bowl, add the butter and the caster sugar and beat until light and fluffy. Add the eggs one at a time until well combined. Then gently fold in the yoghurt, lemon juice and zest.
3. In a separate bowl, sift the corn starch, flour and baking powder. Mix in the sunflower meal.
4. Add the dry ingredients to the wet ingredients and gently fold until just combined.
5. Place half the batter into the prepared pan. Top with half of the frozen berries and then the remainder of the dough. Finish with remaining berries.
6. Bake for 60-70 minutes or until a skewer placed in the centre of the cake comes out cleanly. Let cake cool slightly in the tin for approx. 10 minutes. Then turn out and let cool completely on a cooling rack.
7. Meanwhile, make the icing by placing the pure icing sugar and lemon juice in a small bowl and combine well. To assemble, place cooled cake on a serving plate. Drizzle the icing over the cake and serve with fresh raspberries.
Bee’s golden syrup roll
Prep: 30 minutes Cook: 10 minutes Makes: 8 serves
Roll
3 eggs
½ cup + 2 tablespoons
CSR Caster Sugar
½ cup corn flour
2 heaped teaspoons plain flour
1 teaspoon cream of tartar
½ teaspoon of bicarbonate of soda
½ teaspoon cinnamon
1 tablespoon CSR Golden Syrup, warmed
Filling
250ml cream
1 tablespoons CSR Golden Syrup
To serve
CSR Pure Icing Sugar, to dust
CSR Golden Syrup, to serve
My nan’s golden syrup roll, like a Swiss roll only tastier because it’s made with CSR Golden Syrup or what Nan called ‘Cow Cocky’s Delight’. This recipe is a family favourite. 1 loved "helping” her make it and now my grandkids enjoy "helping” me!
Cathy B., Moolboolaman QLD
Method
1. Preheat oven to 180°C (fan-forced 160°C). Grease and line with baking paper a 24 x 30cm Swiss roll tin.
2. Beat eggs for 3 minutes with an electric mixer, add ½ cup of caster sugar and beat until thick and frothy.
3. Sift flour and remainder of the dry ingredients into a bowl. Fold in egg mixture and warmed syrup. Bake for 10 minutes.
4. When cooked, quickly roll in a slightly damp cloth that has been sprinkled with the 2 tablespoons of caster sugar. Let cool completely.
5. Meanwhile, make the filling by whipping the cream and folding in the golden syrup. Set aside until ready to use.
6. When the roll has cooled completely, unwrap from the tea towel. Spread the filling on evenly and reroll without the tea towel. Chill for at least one hour.
7. To serve, dust with pure icing sugar and serve extra golden syrup on the side.
Add a squeeze of lemon or lime juice to the golden syrup before serving for a fresh and zesty syrup!
1. Preheat oven to 180°C (fan-forced 160°C). Place paper cases in a 12 count cupcake tin.
2. To make the cupcakes, place chocolate and margarine into a microwave proof bowl. Cooking in 30 second bursts, until chocolate has melted and has a smooth consistency.
3. In a separate bowl, whisk the eggs and caster sugar together then add the chocolate mix and stir to combine.
4. Sift flour, cocoa powder and baking powder together and fold into wet ingredients. Divide batter evenly between the paper cases. Bake for 20 minutes or until a skewer placed in the middle of one of the cakes comes out clean. Place cupcakes on a wire rack to cool completely.
5. Meanwhile, make the ganache by placing the chocolates and butter in a heatproof bowl. Place the cream and the zest in a saucepan and bring to a boil then pour through a strainer over the chocolate. Let stand for a minute for the chocolate to start melting then stir until chocolate has melted and the mix is smooth. Let cool to spreading consistency.
6. To assemble, spread icing over each cupcake and sprinkle with chopped Jaffas.
1. Preheat oven to 170°C (150°C fan-forced). Grease a 20cm, round cake tin and line the base with baking paper.
2. In a large bowl, sift in the flour and baking powder. Add the shredded coconut and stir to combine.
3. In a separate bowl, whisk the raw caster sugar, egg, milk and coconut nectar until well combined. Fold the wet ingredients into dry ingredients then add the lemon juice and zest. Stir until just combined.
4. Pour batter into prepared tin and bake for 20-30 minutes or until a skewer comes out cleanly when inserted into the centre of the cake and top is golden.
5. Allow to cool in the tin for 5 minutes and then remove to a wire rack. Let cool completely. To serve top with a sprinkle of the toasted coconut.
Besan flour is made from dried chickpeas and can be found at most large supermarkets.
1 created this recipe because everyone needs a go-to chocolate cake, and this one can be adapted for almost any occasion. My childhood birthday memories always include chocolate cake - is there anything better? Now 1 love to whip this cake up for my family or friend’s birthdays. My sour cream and chocolate bundt cake is the ultimate dessert for all chocolate lovers!
Jessica H., Everton Park QLD
Jessica’s sour cream & chocolate bundt cake
1. Preheat the oven to 180°C (160°C fan-forced). Thoroughly grease a 23cm bundt tin with butter. In a large mixing bowl, cream the butter, caster sugar and brown sugar with an electric mixer until pale and fluffy, for approx. 4 minutes. Add the vanilla extract and beat again. Add one egg at a time and continue to beat until mixture is combined and creamy.
2. In a separate bowl, sift the plain flour, cocoa powder, baking powder and bicarbonate of soda and lightly whisk. Add the dry ingredients to the wet mix, along with half of the hot water and gently fold with a spatula. Add the rest of the hot water and continue to fold. Add the sour cream and fold until the mixture is completely combined and smooth.
3. Pour the chocolate batter into the prepared bundt tin and bake for approx. 40 minutes or until a skewer inserted into the middle of the cake comes out cleanly. Leave the cake to cool for about 15 minutes in the tin before carefully transferring to a wire rack to cool completely.
4. Meanwhile, make the chocolate ganache by chopping the dark chocolate into small pieces. Place the pieces in a small heat proof bowl and set aside. In a small saucepan, add the cream and place on a medium heat. Once the cream is warm, but not boiling, pour over the chocolate and gently stir the mixture until chocolate has melted. Let stand for a few minutes to set slightly. When the cake has completely cooled, drizzle with the ganache. Serve any extra ganache on the side.
1’m an old-fashioned country cook. 1 like making things that 1 like eating and 1 like sharing what 1 make with others. My family and people from around town will often ring me or turn up at the house for a bottle of my green tomato pickles!
1. Place tomatoes, onions and vinegar in a large pot or a clean bucket and let soak overnight. Make sure the mix is covered, if not add a bit more vinegar.
2. After soaking, place tomato mix into a large jam pot. Add salt and simmer on medium heat for 1 hour. Then add the white sugar, mustard and spices and simmer for a further 30 minutes.
3. Place the cornflour and water in a small separate bowl and stir until smooth. Add the mix to the pickles stirring constantly. Simmer again for 10 minutes or until mixture has thickened.
4. Ladle hot mix into hot sterilised jars and seal.
I use a heavy based pot so I never have to worry that the pot will burn.
Karla’s festive spiced jam
Prep: 25 minutes Cook: 50 minutes Makes: 2 litres
Ingredients
2kg green pears, cored and diced
2 cups + 4 cups CSR White Sugar
¼ cup water
1½ teaspoons ground cinnamon
Juice of 1 lemon
2 apples, finely diced
2 green pears, finely diced
Method
This recipe was designed for Christmas time. 1 wanted to create something that we could enjoy with our kids on Christmas morning while they were opening presents!
Karla B., Robe SA
1. In a heavy based saucepan, place the 2kg of pears, 2 cups of white sugar and water.
2. Cook over low heat until sugar starts to dissolve. Then turn heat to medium and cook until pears are soft, stirring mixture frequently for 20-30 minutes.
3. Remove from heat and blitz mixture to a puree consistency.
4. Return to heat and add the remaining 4 cups of white sugar, cinnamon, lemon juice and finely diced apples and pears to the mixture.
5. Cook for a further 20 minutes until jam reaches 220°C or until a spoonful placed on a chilled plate wrinkles when you push a fingertip over the top of it.
6. Ladle hot mix into hot sterilised jars and seal.
This jam is delicious on toast, English muffins or crumpets.
Mum’s mango chutney
Prep: 45 minutes Cook: 2 hours Makes: 3 litres
Ingredients
2 cups CSR White Sugar
1½ litres apple cider vinegar
4 brown onions, peeled and diced
5 green apples, peeled, cored and diced
3 medium tomatoes, diced
1¼ cups sultanas or raisins
½ cup glace ginger, roughly chopped
2 teaspoons fresh ginger, grated
1½kg mango, peeled and diced or frozen pieces
¼ teaspoon cayenne pepper
½ teaspoon cinnamon
½ teaspoon nutmeg
½ teaspoon allspice
1 tablespoon salt
When the kangaroos left enough mangoes on the tree, Mum would send us across the paddock to harvest a few of the biggest we could find. We’d take the mangoes home and let them ripen on the veranda before Mum would make mango chutney. Dad loved this chutney on his sandwiches. When mustering left him too busy to come home for lunch we’d bring the sandwiches to him - we couldn’t let Dad miss out on something so delicious!
Tegan F., Emerald QLD
Method
1. Place the white sugar and half the vinegar in a large heavy stock pot and bring to a boil. Turn heat down to a simmer and cook for 5 minutes or until the liquid has thickened into a syrup.
2. Add the remaining ingredients into the syrup and mix well.
3. Add remainder of vinegar to taste.
4. Bring to a simmer for approx. 2 hours stirring frequently to avoid mix catching on base of the pot.
5. Ladle hot mix into hot sterilised jars and seal.
This chutney is wonderful with pork or chicken dishes.
My dad’s plum tree is always heavy with fruit just after Christmas, which is lucky because my family loves this chutney with leftover turkey and ham.
1. Combine brown sugar, white sugar and vinegar in a heavy based saucepan. Place on a low heat and stir until the sugars dissolve. Bring the sugar mix to the boil and then stir through the remaining ingredients and, again, bring to the boil.
2. Reduce the heat to low and simmer stirring often to stop the mix from catching on the base of the pan.
3. Skim the top of any foam or impurities during the cooking process. Simmer for 45-50 minutes until chutney has thickened.
4. Pour into hot sterilised jars and seal. Allow to rest in a cool dark place for at least one month to allow chutney to season before serving.
Try
This chutney is the perfect way to finish beef or chicken burgers.
brushing this chutney on ham or roast pork to create a succulent glaze.
This is my favourite marmalade. 1 grew up on a farm and my grandparents lived on the adjoining farm. Between the two, there was an abundance of seasonal produce and fruit falling from the trees in both orchards! My grandmother and mother perfected the art of preserves and jam making. There is something nurturing and very relaxing about the process of jam making, so take your time with this one!
1. Slice the cumquats thinly, separating the seeds and discarding any obvious membranes from the middle of the cumquats. Place finely sliced cumquats into a large heavy based saucepan and add the water.
2. Wrap all the seeds into a small piece of muslin and tie firmly to create a parcel, then add to the saucepan. Place saucepan on a medium heat and slowly bring to the boil, then lower the heat to a simmer and cook until the rind softens. Add white sugar and continue to cook on low until the marmalade thickens. Remove any impurities that rise to the top and stir often so the mix does not catch on the base of the pan.
3. Remove the seed parcel, squeeze out the excess liquid using tongs or two spoons, and dispose. Continue simmering, stirring frequently, for 30-45 minutes or until the marmalade has thickened. Test if it is ready to set by spooning a tablespoon onto a small plate and placing in the fridge for approx. 5 minutes or until cool. Marmalade is ready when the surface wrinkles when you push the tip of a finger through it.
4. When ready, ladle hot mix into hot sterilised jars to prevent cracking. Seal jars.
The seeds hold the pectin and will help the marmalade set successfully. It is important to squeeze the seed parcel to release all of the pectin.
This marmalade is a decadent addition to a cheese platter! It works equally as well on fresh buttered toast, croissants or sourdough bread.
Carmen’s quince paste
Prep: 45 minutes Cook: 2½ hours Makes: 2½ litres
Ingredients
3kg of quince
CSR White Sugar (equal quantities of cooked fruit to sugar)
1 lemon, cut in quarters
This recipe has become a family tradition of sorts. My mother-inlaw used to make it and 1 learnt from her, now my sister-in-law and 1 make it to keep her memory alive and continue the tradition.
Carmen P., Strathmore VIC
Method
1. Wash and place quinces in a large jam pot and cover with water. Bring to the boil and cook for an hour or until quinces are tender. Drain and set aside to cool. Peel, remove the pulp from the core with a knife and puree the pulp.
2. Weigh the puree and place in a large heavy based pot. Add an equal weight of white sugar and the lemon quarters. Mix well and cook to the desired thickness and colour. Stir frequently to prevent mix from sticking to the base of the pot. Cook for 1½ hours or until desired thickness.
3. Wet rectangular moulds or individual jelly moulds with cold water and pour in the paste. Let stand to set for a few hours or overnight.
4. Remove from moulds and serve. To store paste, place in covered plastic containers, or wrap with baking paper and then place in a zip lock bag.
The longer the mix cooks, the thicker and darker it becomes. To make quince jam, rather than paste, cook for approx. 1 hour or until desired consistency is achieved.
4 granny smith apples, peeled, cored and quartered
4 cloves of garlic, peeled
3 tablespoons salt
1.25kg of CSR White Sugar
180ml Ezy-sauce
1 heaped tablespoon mustard powder
1 heaped tablespoon curry powder
3 tablespoons cornflour
3 tablespoons cold water
Method
This recipe has been handed down from my grandma, she played an influential role in my life and singlehandedly raised eleven children. She is 90 now, so 1 have taken on the responsibility of making it for the rest of the family.
Janis B., Warrnambool VIC
In our family the chutney is always boiled with two 20 cent pieces at the bottom of the pot –this is supposed to stop the chutney sticking to the pot. I don’t know if it works, but I've never not done it!
1. Place a large pot of water on to boil. Core and score a small cross in the base of each tomato. Working in batches blanch the tomatoes in the boiling water for 3-5 minutes or until skin starts pulling away from the tomato. Then place the blanched tomatoes into iced water to cool. Peel and dice the tomatoes.
2. Next, working in batches, place the onions, apples, and garlic in a food processor and blitz until finely chopped. Then place the chopped onion mix and tomatoes into a large, heavy based stockpot. Add the salt and combine well.
3. On a medium heat, bring mix to a boil. Stir in the white sugar and Ezy-sauce and reduce to a simmer. Cook for approx. 2 hours stirring frequently.
4. In a small bowl, combine the mustard powder, curry powder, cornflour and water. Stir well making sure to get any lumps out.
5. Add the cornflour mix to the chutney while stirring constantly. Simmer for a further 5-7 minutes until mix has thickened.
6. Ladle hot mix into hot sterilised jars and seal.
A happy and satisfied consumer (ie. my good husband ) says this recipe makes the world’s best marmalade, and leaves store bought marmalade for dead!
Samantha W., Oasis Gardens QLD
Method
1. Finely slice the orange and the lemons. Retain the seeds.
2. Peel the grapefruit and scrape the pith off of the peel and the fruit and discard. Finely slice the peel and the flesh and retain the seeds.
3. Cut a small square of muslin, place all seeds in the muslin and tie up edges of fabric with a piece of kitchen string to create a parcel for the seeds. This will produce the pectin to help set the marmalade.
4. Place the fruit, peel and seed parcel in a large bowl and cover with 7 cups of water and allow to stand overnight.
5. Then place entire mix in a large jam pot and bring to a boil. Lower the heat to a simmer and cook for 1.5 hours. Remove the seed parcel, squeeze out the excess liquid, using tongs or two spoons, and discard. Add the white sugar and simmer for a further 30 minutes, or until marmalade has thickened. Stir frequently. Test if it is ready to set by spooning a tablespoon onto a small plate and placing in the fridge for approx. 5 minutes or until cool. Marmalade is ready when the surface wrinkles when you push the tip of a finger through it.
6. Ladle hot mix into hot sterilised jars and seal.
When 1 was a little girl, my grandfather made a special step for me so 1 could help him cook - 1 was too short to reach the stove! Raspberry jam was one of my favourite recipes to cook with him as it was my job to take charge of stirring the pot. Now, whenever 1 make jam, 1 think of him and remember how he taught me so much about cooking.
Reese R., South West Rocks NSW
Method
1. Place a small plate in the freezer. Place the raspberries and lemon juice in a large heavy based pot. Bring the mix to a boil over medium heat. Continue to boil stirring occasionally for 4 minutes or until raspberries have broken.
2. Add the jam setting sugar and bring back to a boil for 4 minutes. Remove from heat. Place a spoonful of jam on the cold plate. The surface of the jam should wrinkle when you push your finger tip through it. Boil for a further 2 minutes if jam is not thick enough.
3. Spoon hot jam into hot sterilised jars and seal.
Keep a jar of raspberry jam in the pantry at all times – you never know when a recipe will call for it.
chocolate scones
Mu m ’ s chocol ate scones
it h m a nd a r i n g l a ze with mandarin glaze
My background is English and scones are very British. When 1 was young my mum would make scones and we would cut the shapes and then have an afternoon tea party!
Sally-Ann H., Roseville NSW
Mum’s chocolate scones with mandarin glaze
Prep: 20 minutes Cook: 15 minutes Makes: 8 scones
Ingredients
Scones
1²/3 cups self raising flour
¹/3 cup cocoa powder
½ cup CSR Raw Sugar
½ teaspoon salt
150ml cream
120ml soda water
Glaze
1¼ cup CSR Pure Icing Sugar
Zest and juice of 1 mandarin
Method
1. Preheat oven to 180°C (fan-forced 160°C). Line a baking tray with baking paper.
2. Sift all dry ingredients into a bowl and whisk to combine. Make a well in the centre of the dry ingredients. Pour the cream and soda water into the well. Using a fork gradually stir the wet ingredients into the dry ingredients and mix until just combined. Then, using your hands, bring the mixture together but do not knead.
3. Place mixture onto a lightly floured surface and form a rectangle, which is approx. 5cm tall. Cut the dough into 8 squares and place on a prepared tray.
4. Bake for 15 minutes or until a skewer comes out cleanly when inserted into the centre of a scone. Place scones on wire rack to cool completely.
5. Meanwhile, make the glaze by placing all ingredients into a small bowl. Stir to combine well. Drizzle on cooled scones and serve.
Don’t over work the dough, the more you handle it the crumblier it gets.
Roseville
My Dad was always the baker in our family. He loved getting up early on a Sunday and making fresh bread for us to enjoy for the week. 1 loved it especially when he made these amazingly sticky and sweet buns. 1t was such a wonderful treat.
Charlie S., Rockingham WA
David’s quick cinnamon buns
Prep: 30 minutes Cook: 30 minutes Makes: 12 buns
Ingredients
½ cup CSR Brown Sugar, firmly packed
60g butter, melted
2 tablespoons maple syrup
100g pecans, chopped
1 teaspoon cinnamon, ground
3 cups plain flour
½ cup CSR White Sugar
1¼ teaspoons baking powder
½ teaspoon bicarbonate of soda
1¼ cups buttermilk
1 teaspoon vanilla extract
1 tablespoon water
2 tablespoon CSR Brown Sugar
Method
1. Preheat oven to 220°C (fan-forced 200°C). Lightly grease a 32 x 22cm tin which is at least 5cm deep.
2. For the topping, combine the melted butter, brown sugar, maple syrup and cinnamon. Then pour the topping into the prepared tin, spreading to the edges. Scatter the pecans, evenly over the topping and set tin aside.
3. In a large bowl, sift the flour, white sugar, baking powder and bicarbonate of soda. Add the buttermilk and vanilla into the dry ingredients and fold to combine.
4. Transfer the dough onto a floured surface and knead until smooth, this should take approx. 30 seconds. If dough sticks, add a bit more flour to work surface. Roll the dough into a 23 x 30cm rectangle. Brush the surface of the dough with water and dust evenly with the extra brown sugar.
5. Starting with the longer edge, roll the dough into a log and pinch the seam closed. Using a knife cut the log into 12 equal slices before turning each slice onto its flat side and flattening slightly. Place in prepared tin, ensuring there is approx. a 2cm border between the buns and the edge of the tin.
6. Bake for 25-30 minutes or until golden brown. Remove from oven and immediately invert onto a wooden board or heat proof serving platter scraping out any pecans and syrup that remain in the tin and spreading over the top of the buns. Serve immediately or store, when cooled, in an airtight container at room temperature for two days.
You can use your favourite nut to replace the pecans – try almonds, walnuts or even macadamias! il
My mum used to make date and walnut loaf - it was always ready to go in the pantry! As a teenager in the 1970s 1 would eat it when 1 came home from school, or if 1 came home late at night for supper.
1 remember my friends coming over and asking if we had any date and walnut loaf.
1 think Mum’s recipe is the best because it has sultanas in it!
Robbie C., Mt Martha VIC
Mum’s date & walnut loaf with honey butter
Prep: 20 minutes Cook: 30 minutes Makes: 8 serves
Ingredients
Loaf
1 cup dates, chopped
½ cup nuts walnuts, roughly chopped
½ cup sultanas
1 teaspoon bicarbonate of soda
15g butter, melted
1 cup CSR Dark Brown Sugar
250ml boiling water
2 cups plain flour, sifted
½ teaspoon salt
1 egg, lightly beaten
Butter
150g butter, room temperature
2 tablespoons honey
Method
1. Heat oven to 180°C (fan-forced 160°C). Grease two small loaf tins 25 x 8 x 4cm.
2. Place dates, walnuts, sultanas, bicarbonate of soda, butter and dark brown sugar in a large heat proof bowl. Add boiling water and mix well.
3. Add flour, salt and beaten egg. Gently mix until just combined.
4. Pour batter into prepared tins and bake for 20-30 minutes or until golden brown and baked through. Let cool slightly and remove from tin.
5. Meanwhile, make the butter by placing butter and honey in a small dish and using a wooden spoon, mix well.
6. Serve loaves warm or cold with the honey butter.
If you don’t have a loaf tin then you can use an empty can with a piece of foil over the top!
My wife, Amber, hasn’t always been the best in the kitchen. The first time she made this banana bread we were running late to meet our friends so Amber thought she would hurry things along by increasing the oven temperature. Needless to say, the banana bread she served was hard as a rock and burnt to a crisp! Since then Amber has perfected her banana bread but each time she makes it we can’t help but laugh about that first attempt!
Matt H., Caulfield VIC
Amber’s banana bread with brown sugar icing
Prep: 30 minutes Cook: 1 hour Makes: 8 serves
Ingredients
Bread
110g butter, melted
½ cup CSR White Sugar
½ cup CSR Dark Brown Sugar
2 eggs
½ cup of sour cream
2 teaspoons vanilla extract
1½ cups self raising flour, sifted
½ teaspoon salt
3 very ripe bananas, peeled and mashed
Icing
75g butter
60ml milk
1 cup CSR Brown Sugar, packed
2 cups CSR Soft Icing Mixture
1½ teaspoons vanilla extract
Method
1. Preheat oven to 180°C (fan-forced 160°C). Lightly grease a 23 x 13cm loaf pan.
2. In a large bowl whisk together the melted butter, white sugar and dark brown sugar. Add the eggs, sour cream and vanilla, whisking until well combined.
3. In a separate bowl, whisk the flour and salt together. Add the flour mix into the wet mixture and stir until just combined. Fold in the bananas.
4. Pour batter into prepared pan and bake for 60 minutes or until crust is golden brown and a toothpick inserted into the centre comes out cleanly. Leave in pan to cool completely.
5. Meanwhile, make the icing by placing the butter, brown sugar and milk in a heavy based saucepan. Bring to a boil on a low heat stirring constantly. Continue to boil for 2 minutes. Let cool and pour into a mixing bowl. Using an electric mixer, add the soft icing mixture 1 cup at a time and beat well after each addition. Add vanilla and mix well. Spread icing on cooled cake and serve.
Sunday mornings were always family time in our house. 1t was the one day of the week that we would wake up slowly and really enjoy each other's company. Over the years Mum taught my brother and 1 to make these pancakes so now we continue the Sunday morning tradition and make pancakes for our own families.
Lucy W., Olinda VIC
CSR Dark Brown Sugar gives these pancakes their robust caramel flavour.
Hazel’s cinnamon buttermilk pancakes with blueberry syrup
1. In a large bowl, sift the flour, baking powder, bicarbonate of soda, salt and cinnamon. Add the dark brown sugar and whisk to combine.
2. In a separate bowl, whisk together buttermilk, eggs and melted butter.
3. Fold the wet ingredients into the dry ingredients until just combined. Batter will be thick. Let batter rest for 5 minutes.
4. Meanwhile, make the syrup by placing 1 cup water, blueberries and raw caster sugar in a small saucepan. Bring to a boil, then reduce heat and simmer for 10 minutes.
5. In a separate small bowl, combine the remaining 2 tablespoons of water with the corn flour and mix well until smooth. Slowly add the corn flour mix to the syrup stirring constantly. Continue cooking for a further 4 minutes or until syrup has thickened. Set aside until ready to serve.
6. Heat a large, non-stick fry pan on medium heat and spray with the oil. Measure a ¼ cup of batter and pour into prepared fry pan. Continue with 2 more scoops of batter making certain to leave a bit of room for the pancakes to expand without crowding the pan. Cook for approx. 3 minutes and when bubbles start to form on the top, flip the pancakes. Cook for a further minute or until cooked through. Continue cooking the pancakes in batches until all of the batter has been used. Keep warm until ready to serve with warm syrup.
1. Preheat oven to 200°C (fan-forced 180°C) and line a 12 count muffin tin with papers.
2. To make the crumble, place the flour, dark brown sugar and butter in a small bowl. Rub in the butter using your fingertips until the mix is a fine crumb. Blend muesli in a food processor to a crumb consistency and then add to the flour mix. Place in fridge until ready for use.
3. To make the muffins, place the butter, buttermilk, raw caster sugar and egg in a large bowl and whisk to combine well. In a separate bowl, place the flour, bicarbonate soda, baking powder and salt and whisk to combine. Add the blueberries and stir to cover with flour. Gently fold the dry ingredients into the wet ingredients until just combined. Batter will appear lumpy which is correct.
4. Spoon batter evenly into papers and sprinkle each with a bit of the chilled crumble mix. Bake for 20 minutes or until muffins are golden and firm on the top.
Beth’s spiced zucchini bread
Prep: 20 minutes Cook: 50 minutes Makes: 8 serves
Ingredients
Bread
²/3 cup vegetable oil
1 cup CSR Brown Sugar, firmly packed
2 tablespoons
CSR White Sugar
2 teaspoons vanilla extract
2 large eggs
2 medium zucchinis, grated
Method
1½ cup flour, sifted
½ teaspoon baking powder
½ teaspoon bicarbonate of soda
¼ teaspoon ginger
¼ teaspoon cloves
¼ teaspoon nutmeg
½ teaspoon salt
Topping
½ cup CSR Golden Syrup
¼ cup pepitas
1. Preheat oven to 180°C (fan-forced 160°C). Lightly grease a large loaf pan.
2. Place the oil, brown sugar, white sugar and vanilla in a large mixing bowl and whisk to combine. Add the eggs and continue whisking to incorporate.
3. In a separate bowl, place the flour and remaining ingredients and whisk to combine well. Add the zucchini and fold through the flour then add the dry ingredients into the wet ingredients. Gently fold through until just combined.
4. Place batter into the prepared pan and bake for 50 minutes or until a skewer inserted into the middle of the bread comes out cleanly. Let cool in pan for 10 minutes then remove from pan and place on a cooling rack to cool completely.
5. To serve, drizzle the golden syrup over the cake and top with a sprinkle of pepitas.
Beth T., Palmerston NT
Hannah V., Perth WA
Roberta’s sweet chocolate & apricot damper
Prep: 15 minutes Cook: 40 minutes Makes: 8 serves
Ingredients
2 cups self raising flour, sifted
½ teaspoon salt
25g butter
175ml milk, extra for brushing
2 tablespoons
CSR Dark Brown Sugar
Method
2 tablespoons
CSR Golden Syrup
½ teaspoon cinnamon, ground
100g dark chocolate, roughly chopped
120g dried apricots, roughly chopped
1. Preheat oven to 180°C (160°C fan-forced). Line a baking tray with baking paper. Mix flour and salt in a large bowl. Add the butter and rub it into the flour with the tips of your fingers, until it resembles fine crumbs.
2. Place the milk in a jug and add the dark brown sugar, golden syrup and cinnamon and combine. Add wet ingredients to the dry mixture and combine to form a soft dough.
3. Add the chocolate and apricots and gently incorporate into dough.
4. Turn out onto a lightly floured work surface and shape into a soft, smooth ball. Place the ball onto the baking tray. Cut a cross into the top of the dough and brush with the extra milk.
5. Bake in oven for 30-40 minutes or until golden and damper makes a hollow sound when gently tapped on the base. Serve warm or at room temperature.
Lyndal’s poached fruit & cinnamon loaf
Prep: 35 minutes Cook: 3½ hours Makes: 10 serves
Ingredients
Poached quince
1 litre water
1¼ cup CSR Raw Sugar
500g quinces
1 cinnamon quill
1 star anise
Loaf
4¼ cups self raising flour
Method
4 eggs
1½ cups
CSR Raw Sugar
120ml olive oil
300ml milk
2 teaspoons ground cinnamon
Poached quince Reserved poaching liquid, to serve
1. To prepare the fruit, place water and raw sugar in a large jam pot and bring to a boil. Then reduce heat to a slow simmer. Add spices. Peel, core and quarter the quince and add to pot. Cover and cook on low heat for approx. 2 hours for tender quince. Strain quince and retain syrup for serving. Let quince cool before dicing. Set aside until ready to use.
2. To make the loaf, line a large bread tin with baking paper and preheat oven to 160°C (fan-forced 140°C).
3. Combine all loaf ingredients in food processor and pulse until just combined. Pour mixture into the prepared tin and scatter half of the reserved poached fruit evenly on top of the batter.
4. Bake for 1½ hours or until a skewer inserted into the centre of the loaf comes out cleanly. If the top is browning too quickly cover with foil and return to oven.
5. Allow to cool for 10 minutes before turning out onto a wire rack.
6. Serve warm with the reserved syrup and remaining quince.
Lyndal M., Mornington VIC
Roberta L., Coral Bay WA
1 loved staying with my grandparents as a child, especially in the colder months, when Nanna would make bread pudding. We would sit by the huge fireplace and eat bread pudding with heaps of custard!
Jane R., Rosebery TAS
Gwen’s pear & brioche bread pudding
Prep: 25 minutes Cook: 30 minutes Makes: 6 serves
Ingredients
300g brioche, sliced
½ cup sultanas
60ml rum
2 pears, cored and roughly diced
300ml cream
130ml milk
2 eggs
¼ cup CSR Demerara Sugar, plus 1 tablespoon to sprinkle
1 teaspoon vanilla paste
½ teaspoon nutmeg, ground
Method
1. Preheat oven to 180°C (fan-forced 160°C). Lightly butter a 1.2 litre oven proof baking dish.
2. Toast brioche slices and cut into cubes. Place in prepared baking dish and set aside.
3. Place sultanas and rum into a small bowl and microwave for 30 seconds on high to soften sultanas. Strain remaining liquid from the sultanas and reserve. Sprinkle sultanas and the pear pieces over the brioche cubes.
4. Place the strained sultana liquid, cream, milk, eggs, demerara sugar, vanilla and nutmeg in a large jug and whisk to combine well.
5. Pour over the pear and brioche mix evenly. Gently press the brioche cubes to make certain they have been soaked well with the liquid mixture. Let stand for 10 minutes. Then sprinkle with the extra demerara sugar and bake for 30 minutes or until golden brown. Serve warm.
For an alcohol free version, replace rum with orange juice.
This is delicious served with custard, cream or even ice cream.
This is the first cake 1 baked by myself without supervision. 1 was about 8 years old and 1 baked it for my dad, and have continued to bake it ever since!
Valeria Z., Littlehampton SA
Valeria’s plum jam crostata
Prep: 45 minutes Cook: 40 minutes Makes: 8 serves
Ingredients
1½ cups plain flour
½ cup self raising flour
1 cup CSR Caster Sugar
2 egg yolks
1 whole egg
180g butter, softened
300g plum jam
CSR Pure Icing Sugar, for dusting
Method
1. Preheat oven to 180°C (fan-forced 180°C).
2. Place flours in a large bowl and whisk to combine. Make a well in the centre of the flour mix and place the caster sugar, butter and eggs in the well.
3. Using a fork, combine ingredients by gently mixing the dry ingredients into the wet ingredients. When the dough has come together, knead by hand until smooth. Form a ball and wrap in cling wrap. Place in fridge to chill for 30 minutes.
4. Place the dough on a lightly floured work surface. Using ²/3 of the dough, roll to a 27cm round and line a 23cm tart tin. Spread the jam evenly over the pastry base.
5. Roll out the remaining dough and cut strips. Place the strips in a lattice pattern over the jam layer. Press the edges of the pastry to seal and cut any excess away with a knife.
6. Bake for 40 minutes or until golden brown. Cool and dust with pure icing sugar.
Try using any of your favourite jams in place of plum jam for a twist on this recipe!
When we first moved into our house, 1 fell in the love with the beautiful, old, gnarly lemon tree that was sitting in the back yard. 1t reminded me of the tree that sat in my nanna and pop’s garden just down the road. 1 used to love visiting on the weekends and picking the ripe, juicy lemons for my grandparents tree, and 1 loved the idea that 1 could pass on this tradition to my children as well. My youngest daughter gets very excited about the lemons ripening on the tree now, and so we have to come up with lots of lemon-y recipes so they don’t go to waste! This tart was born from that need and is now a firm hit with my family!
Hayley K., Byford WA
is now a firm hit th y f y
Hayley’s lemon tarts
Prep: 1 hour Cook: 1 hour Makes: 6 tarts
Ingredients
Pastry
1½ cups of plain flour, sifted
3 teaspoons CSR Pure Icing Sugar
140g butter
1 egg yolk
2 tablespoons water
Lemon curd
½ cup CSR Caster Sugar
2 eggs
2 egg yolks
Zest and juice of 2 lemons
Candied lemons
2¼ cups water
1 cup CSR Caster Sugar
2 lemons, thinly sliced
Method
1. Preheat oven to 180°C (fan-forced 160°C). Grease six 12cm diameter tart tins.
2. To make the pastry, place the flour, pure icing sugar and butter in a bowl and rub the butter into the dry mix with your fingertips until it resembles coarse bread crumbs.
3. Add the egg yolk and water. Knead together to form a dough and chill in fridge for 20 minutes.
4. Roll chilled dough to 5mm thick. Cut six 14cm circles into dough and line each of the tart tins ensuring an even crust around sides and bottom.
5. Place squares of baking paper on top of the prepared pastry and fill with baking weights or rice to blind bake. Bake for 15 minutes. Then remove the paper and weights and bake the pastry cases for a further 5 minutes or until golden brown.
6. Meanwhile, make the curd by placing all of the ingredients into a heatproof bowl and whisk to combine. Place the bowl over a saucepan of just simmering water ensuring the bowl does not touch the water. Whisk constantly for 8-10 minutes or until mix has thickened. Remove from heat and strain. Set aside and let cool completely.
7. To make the candied lemons, place the water and caster sugar into a small saucepan and bring to a boil. Continue to boil until sugar has dissolved. Add the lemon slices and boil for 25-30 minutes or until lemons are translucent. Drain and place lemon slices on a tray lined with baking paper to cool.
8. To assemble, spoon curd evenly into the 6 pastry cases. Top each tart with 2 or 3 slices of the candied lemon.
My mum’s always teaching me how to cook things and this recipe for churros is one of my favourites. Mum and 1 used to eat churros when we visited the show so she started making them at home. One year she made them for my birthday so we were able to share them with my whole family - everybody loved them! The best part of this recipe would have to be the chocolate sauce.
1. Combine ½ cup white sugar with the cinnamon in a shallow bowl. Set aside.
2. In a small saucepan over medium heat, whisk together the water, 1½ tablespoons white sugar, salt and 2 tablespoons vegetable oil. Bring the mixture to a boil then remove it from the heat. Stir in the flour, mixing until it forms a ball.
3. Heat 2 litres of oil in a large, heavy based pot on medium-high heat until it reaches 180ºC. Transfer the dough to a pastry bag fitted with a large star tip.
4. Working in batches, carefully pipe the dough over the pot of oil to a length of about 10cm. Then using scissors or a sharp knife, cut the dough so it releases into the oil. Pipe two to three churros into the oil at a time, frying them until they’re golden brown and cooked through. Transfer the churros to a paper lined tray to drain for 2 minutes.
5. Roll each of the churros in the cinnamon and sugar mixture. Continue the frying and coating process with the remaining dough.
6. To make the chocolate sauce, place the chopped chocolate in a heat proof bowl. Heat the cream in a small saucepan but do not boil. Pour heated cream over the chocolate. Gently stir until chocolate has melted and sauce is smooth.
If you do not have a thermometer for the oil, test to see if it's ready by placing a small ball of dough into the oil. If the oil bubbles around the ball, then the oil is ready for use.
Emma’s blackberry pie
Prep: 45 minutes Cook: 55 minutes Makes: 8 serves
Ingredients
Pie crust
2½ cups plain flour
225g cold butter, cut into small cubes
1 teaspoon salt
1 teaspoon CSR White Sugar
6-7 tablespoons ice water
2 tablespoons CSR Coffee Crystals
Pie filling
6 cups of blackberries, fresh or frozen
½ cup of CSR Raw Sugar
2 tablespoons cornflour
1 tablespoon lemon juice
1 tablespoon water
½ teaspoon lemon zest, grated
½ teaspoon cinnamon
Egg wash
1 egg
1 tablespoon water
1 remember spending the day with my cousins collecting blackberries, and truth be told, eating more than we collected, before returning to the farm where Grandma would make the most delectable blackberry pie!
Emma B., Emerald, QLD
Be sure to rest the pastry before baking.
Method
1. Preheat the oven to 180°C (fan-forced 160°C).
2. To make the dough, place flour, butter, salt, white sugar and coffee crystals in a mixing bowl. Whisk to combine well. Add 6 tablespoons of the water and stir to bring dough together. If it is too dry, add a bit more water. Roll dough into a ball and wrap in cling wrap and chill for 30 minutes.
3. Meanwhile, make the filling by placing the berries and raw sugar in a small heavy based saucepan. Heat on low and bring to a simmer. Continue to cook on low for 5 minutes or until sugar has dissolved.
4. Place cornflour, lemon juice and water in a small bowl and mix to combine. Whilst stirring the blackberry mix, add the cornflour mix and stir until thickened. Remove from heat and add the zest and cinnamon. Stir to combine well and let mix cool.
5. Make the egg wash by combining the egg and water with a fork. Set aside.
6. Place chilled dough on a lightly floured work surface. Cut into 2 equal pieces. Roll each piece to fit a 24cm pie tin. Line the base of the tin with one of the pastry sheets. Fill with cooled blackberry mix. Brush the edge of the pastry with a bit of the egg wash. Place the second sheet of pastry on top of the filling. Trim the edges with a knife and pinch the edges to seal.
7. Cut slits on the top to create vents for the steam. Brush the top of the pastry with the egg wash and top with a sprinkle of coffee crystals.
8. Bake for 55 minutes or until crust is golden brown.
Rosemary’s pumpkin pie
Prep: 20 minutes Cook: 55 minutes Makes: 8 serves
Ingredients
Pie crust
250g Granita biscuits
100g butter, melted
Pie filling
1 egg
1 egg yolk
¼ cup CSR Brown Sugar
1 teaspoon cinnamon
½ teaspoon ground ginger
Pinch of ground nutmeg
Pinch of ground cardamom
Pinch of ground cloves
Zest of ½ a lemon
1 cup pumpkin puree
190ml evaporated milk
Maple cream
300ml thickened cream, whipped
2 tablespoons maple syrup
Cinnamon, to serve
My mother used to make pumpkin pie when we were kids in Canada. This recipe brings back so many childhood memories of growing up in the snow!
Rosemary H., Bridgewater VIC
Method
Pie crust
1. Place biscuits in a food processor and pulse until fine crumbs form. Then add the melted butter and pulse to combine.
2. Press crust firmly into a 23cm pie tin, ensuring crust goes up the sides evenly. Chill prepared piecrust in the fridge while making the pie filling.
Pie filling
1. Preheat oven to 200°C (180°C fan-forced). In a large bowl, beat eggs and then mix in brown sugar, spices and lemon zest. Mix in pumpkin puree and then stir in evaporated milk. Combine well.
2. Place prepared pie crust on a baking tray and pour filling into pie crust. Bake in preheated oven for 10 minutes then take pie out of oven and turn oven temperature down to 170°C (150°C fan-forced). Place foil around the edge of the pie, covering only the crust, to prevent burning. Return pie to oven and bake for a further 40-45 minutes, or until the filling is set. Serve hot or cold with maple whipped cream and a sprinkle of cinnamon.
If you do not have a food processor, place biscuits in a zip-lock bag and crush with a rolling pin or mallet.
Cle-Ann S., Preston VIC
This recipe showcases summer - mangoes, pavs and BBQs. This is a perfect recipe to get family and friends together.
Cle-Ann’s mango, passionfruit & mint meringue stacks
Prep: 25 minutes Cook: 1 hour Makes: 6 serves
Ingredients
Meringue
4 egg whites
Pinch of cream of tartar
1 cup CSR Caster Sugar
Cream
300ml cream
¼ cup CSR Pure Icing Sugar, sifted
1 teaspoon vanilla bean paste
To assemble
2 mangoes, thinly sliced, skin removed
4 passionfruit, pulp removed
Handful of fresh mint leaves
Method
1. Preheat oven to 120°C (fan-forced 100°C). Using a pencil, trace two rectangles on baking paper that measure 20 x 15cm. Place template pencil side down on a large baking tray.
2. Whisk egg whites on a high speed until soft peaks form. Add the cream of tartar and gradually add caster sugar, one tablespoon at a time, while beating until the mix is glossy and stiff peaks form.
3. Transfer the mix into a large piping bag. Add a dot of meringue in each corner of the tray to hold the baking paper down. Pipe the mix in large lines inside the border of your template. Bake for 60 minutes then turn off the heat and let it cool completely inside the oven. You can leave overnight to dry out completely.
4. To make the cream, beat the cream until it starts to thicken. Add the pure icing sugar and vanilla and continue to beat until stiff peaks form.
5. To assemble, place one of the sheets of meringue on a serving platter. Top with half the whipped cream, half of the mango slices and half of the passionfruit pulp. Sprinkle with mint leaves. Place the second sheet on top and repeat with fruit and mint leaves. Serve immediately.
Try using any of your favourite fruits to add a twist to this meringue stack – cherries, nectarines, or even finely sliced pineapple are all delicious additions.
Treacle pecan pie reminds me of my childhood, it was my mother’s favourite even though she only ate the topping! We bake this pie every Christmas; it is a tradition that 1 would like to keep in the family. 1 cook it for my children and now that my girls are teenagers, they are learning to cook it too.
2. Place the flour, butter and salt into a bowl. Rub the butter into the flour with your fingertips until the mixture resembles fine breadcrumbs. Add the water to the mixture and mix dough with hands until it just comes together. Form into a ball, wrap in cling wrap and chill in fridge for 30 minutes.
3. Lightly flour a work surface and roll chilled dough to a 30cm round. Place in a 23cm round pie tin and trim any excess dough with a knife. Place a sheet of baking paper on top of the dough and then place baking weights or dry rice on the paper. Blind bake pastry for 20 minutes. Remove paper and weights and bake for a further 7-10 minutes or until golden.
4. Lower heat to 175°C (fan-forced 155°C). To make the filling, place butter, dark brown sugar, treacle and salt in a heavy based saucepan. Heat on low for 5 minutes until butter melts and sugar has dissolved. Remove from the heat and let cool.
5. Place eggs and vanilla in a mixing bowl and whisk until combined. Add the cooled treacle mix and whisk until well combined. Place the pecans at the base of the prepared crust and pour the treacle mix over to fill the pie crust.
6. Cover the edge of the crust with foil to prevent it from burning. Bake pie for 35 minutes or until the filling has set. Cool pie in tin and serve when cooled.
This recipe always reminds me of cold, wintery nights with my family when 1 was growing up - puddings with lots of custard were always so comforting when it was stormy outside!
Fiona K., Spotswood VIC
Fiona’s golden pudding with caramelised pears
Prep: 35 minutes Cook: 30 minutes Makes: 4 serves
Ingredients
Syrup
2 tablespoons CSR Brown Sugar
30g butter
125ml CSR Golden Syrup
125ml water
½ teaspoon vanilla extract
Batter
30g butter, room temperature
1 tablespoon CSR White Sugar
1 egg
½ teaspoon vanilla extract
125ml water
1½ cups self raising flour, sifted
Caramelised pears
45g unsalted butter
3 medium pears, cored and quartered
¼ cup CSR Dark Brown Sugar
1 tablespoon water
1 teaspoon vanilla paste
1 stick cinnamon
½ teaspoon salt
Method
1. Preheat oven to 180°C (fan-forced 160°C). Lightly grease a 1 litre capacity baking dish.
2. Make the syrup by placing all ingredients into a saucepan and bring to a boil. Remove from heat and pour into the prepared baking dish.
3. To make the batter, place butter and white sugar into a mixing bowl and cream together using a wooden spoon. Add the egg and vanilla and combine well. Fold in the water and flour and mix to create a batter.
4. Dollop batter evenly over the top of the syrup and then bake for 20-25 minutes or until pudding is golden brown.
5. Meanwhile, make the pears by melting the butter in a frypan. Place pears on one cut side in the pan and brown on low heat for 3 minutes then turn to the other cut side and continue browning for a further 3 minutes.
6. Add in the dark brown sugar, water, cinnamon and salt. Turn pears skin side down and swirl pan to incorporate ingredients and coat pears. Continue cooking for a further 2-3 minutes until pears are tender and sauce has thickened.
7. Serve the warm pudding with the warm pears.
Replace vanilla paste with seeds from one vanilla bean.
The best thing about Mum’s baked rice pudding was challenging my brother to paper, scissor, rock to see who got the to eat the baked crust!
Dion M., Marian QLD
Joyce’s baked rice pudding with rhubarb & orange syrup
Prep: 20 minutes Cook: 35 minutes Makes: 4 serves
Ingredients
Pudding
1 cup medium grain rice
1 litre milk
¼ cup CSR Caster Sugar
Pinch of salt
1 teaspoon of vanilla paste
Zest of half a small orange
Rhubarb & orange syrup
4-5 stems rhubarb, trimmed and cut into 2½cm pieces
1 tablespoon CSR Raw Sugar
½ cup CSR Golden Syrup
Juice of one small orange
Method
1. Preheat oven to 170°C (fan-forced 150°C). Line a baking tray with baking paper.
2. To make the pudding, place all of the ingredients into a saucepan and bring to a boil. Turn down to a simmer and cook for 15 minutes, stirring frequently to prevent the rice sticking to the base of the saucepan.
3. Transfer rice mixture into a 1.5 litre capacity baking dish. Bake for 35 minutes or until rice is tender and liquid has been absorbed.
4. Meanwhile, make the syrup by placing the rhubarb pieces on prepared tray. Sprinkle with the raw sugar and bake for 15 minutes or until just tender. Set aside.
5. Place orange juice and golden syrup in a small saucepan and bring to the boil. Reduce to a simmer and cook for a further 5 minutes. Remove from heat and let cool slightly. Gently fold in the rhubarb and set aside.
6. To serve, drizzle sauce over warm pudding and serve extra sauce on the side.
Sara’s macadamia nut tarts & golden syrup ice cream
1. Preheat oven to 160°C (140°C fan forced). To prepare the tart cases, lightly grease six 11.5cm shallow tart tins and line the bases with greaseproof paper.
2. In a food processor, process the Ginger Nut biscuits until they become a fine crumb. Place the biscuit crumbs in a bowl and add the macadamia nut meal, raw caster sugar and melted butter. Combine well and divide the mixture evenly between the six prepared tart tins. Firmly press the mix to create an even crust on the base and sides. Place the filled tins on a baking tray and chill until ready to use.
3. Meanwhile, make the tart filling. In a medium sized saucepan, place golden syrup, brown sugar, butter and bourbon. Cook on a medium heat until the butter has melted and the sugar has dissolved. Remove from heat and let cool slightly.
4. Whisk eggs in a large bowl, add the golden syrup mixture, vanilla bean paste and orange zest. Combine well then fold in the macadamia nuts.
5. Divide the macadamia mixture evenly between the chilled cases. Bake for 25-30 minutes or until the filling is firm and the tarts are lightly browned. Serve warm with golden syrup ice cream (see recipe below).
Golden syrup ice cream
1. Place cream, milk, vanilla seeds (or paste) and demerara sugar in a heavy based saucepan. Stir over a medium heat, until sugar has dissolved. Once sugar has dissolved, bring to a boil and then remove pan from heat.
2. Whisk eggs and egg yolks in a medium sized heat proof bowl until well combined then whisk in the golden syrup. Add approx. ¹/3 of the cream mixture to the egg mixture and whisk until combined to temper the eggs. Gradually incorporate the remainder of the cream mixture with the egg mixture whisking constantly.
3. Return the mixture to the saucepan and place on a low heat, stirring continuously. Heat the mixture until it thickens and will coat the back of a spoon. Quickly remove the custard from heat and strain mixture through a fine sieve into a heatproof bowl. Cover the custard mix and place in the refrigerator to chill completely.
4. Once chilled, churn mixture in an ice cream machine as per the manufacturer’s instructions. Place the churned ice cream in the freezer until ready to use.
Tarts Prep: 30 minutes Cook: 30 minutes Ice cream Prep: 35 minutes Churning time: per ice cream machine Makes: 6 serves Use plain chocolate biscuits for the base to
If you do not have a vanilla bean or paste, 1 teaspoon of vanilla essence or extract will work in place.
Mum’s sago plum pudding was my father’s absolute favourite pudding and mostly appeared on special family occasions. This recipe always reminds me of him.
Jenny L., Merriwa NSW
Method
1. Lightly grease a 1-1.2 litre capacity pudding bowl or a metal pudding steamer with lid. Place sago and milk in a small bowl. Cover and refrigerate overnight or for at least 3 hours.
2. Place the remaining ingredients in a large bowl. Add the soaked sago and milk mixture to the bowl and combine well.
3. Pour the batter into the prepared pudding bowl. Cover with lid or place a sheet of baking paper and then a sheet of foil on top of your bowl and secure with kitchen string to form a lid.
4. Place pudding bowl in a large pot. Add water to just half way up side of steamer. Boil for 3 hours. Top up water level with boiling water as needed.
5. Remove from water and leave to cool for 5-10 minutes in the bowl then tip out onto a serving plate. Serve warm with lashings of custard.
Try using mixed peel, dried cranberries or finely chopped dried apricots in place of the sultanas.
Mum would always make banoffee pie for Dad, and 1 remember watching him eating it and loving it. When 1 was old enough to learn 1 begged Mum to teach me and since then 1 have made it for all my friends and family. To this day banoffee pie is the dish everyone always requests!
Kathryn C., Hervey Bay QLD
Method
1. Preheat oven to 170°C (150°C fan forced). To make the crust, place biscuits in a food processor and process until it is a fine crumb. Add the butter, caster sugar, and ginger and pulse until well blended.
2. Press the biscuit mixture evenly into a large pie tin. Bake for 8-10 minutes or until slightly browned. Set aside to cool.
3. Meanwhile, make the pie filling by placing brown sugar, butter and water in a medium sized saucepan. Place on low heat and stir constantly until sugar has dissolved.
4. In a small bowl, blend cornflour into milk and then add to the brown sugar mix, stirring constantly until mixture comes to a boil and thickens. Remove pan from heat and whisk in the egg yolks.
5. Pour filling into chilled pastry case and place in refrigerator for at least 1 hour to cool completely. When cooled, top with sliced bananas, whipped cream and a sprinkle of chocolate shavings.
Use a Flake bar crumbled for a quick substitute for chocolate shavings.
1. Preheat oven to 180°C (fan-forced 160°C). Line 2 baking trays with baking paper. Lightly grease the outside of 12 cream horn moulds with butter.
2. To prepare the pastry, cut each sheet into approx. eight 3cm wide strips lengthwise. Brush each strip lightly with water. Place the cream horn mould horizontally half an inch from the narrow edge of the pastry strip. Fold the pastry strip over the mould and seal the corner of the pastry into back of the pastry strip. Without lifting the mould, roll the mould along with the pastry strip towards yourself, wrapping the pastry evenly around the mould. Sprinkle the wrapped pastry with the raw sugar and place seam side down on the prepared tray. Repeat with remaining pastry working in batches.
3. Bake the first batch for approx. 30 minutes or until pastry is golden. Remove from oven and place on wire rack to cool completely. Remove the moulds.
4. To make the filling, place all of the ingredients except the shredded coconut, in a mixing bowl and using an electric mixer, beat until thick and creamy. Place cream in piping bag and pipe into cooled horns. Dip the cream end into shredded coconut and serve.
Viola’s kanafeh
Prep: 20 minutes Cook: 15 minutes Makes: 6 serves
Ingredients
Custard
500ml milk
150ml cream
¼ cup corn flour
¼ cup fine semolina
4 tablespoons
CSR Caster Sugar
1 teaspoon orange blossom water
1 teaspoon rose water Canola spray for ramekins
Method
Syrup
1 cup CSR Caster Sugar
125ml water
1 tablespoon lemon juice
¼ teaspoon rose water
¼ teaspoon orange blossom water
To assemble
2 cups cornflakes, crushed ¼ cup finely chopped pistachios
1. Preheat oven to 180°C (160°C fan forced). Spray six 200ml capacity ramekins with the non-stick cooking spray.
2. Place the custard ingredients in a large, heavy based pot. Add the custard ingredients and whisk to remove any lumps. Place pot on medium heat and stir mixture continuously for 8-10 minutes or until mixture thickens and resembles thick custard.
3. Once thickened, divide the custard between the prepared ramekins. Then top each evenly with the crushed cornflakes and place ramekins on a baking tray.
4. Bake for 10-15 minutes or until crumbs have browned.
5. Meanwhile, make the syrup by placing all the ingredients in a pot and bring to the boil. Lower the heat and simmer for a further five minutes.
6. To serve, top each custard with a generous amount of the syrup and sprinkle with pistachios. Serve immediately.
Marrickville NSW
Susan T., Sutherland NSWCarmen
Tilly’s sticky date pudding
Prep: 25 minutes Cook: 45 minutes Makes: 9 serves
Ingredients
185g pitted dates
235ml water
1 teaspoon bicarbonate of soda
120g butter
¾ cup CSR Caster Sugar
1 teaspoon vanilla extract
2 eggs, room temperature
Method
1¼ cup self raising flour, sifted
Caramel sauce
¾ cup CSR Brown Sugar, firmly packed
115g butter
150ml thickened cream
½ teaspoon vanilla extract
1. Preheat oven to 180°C (fan-forced 160°C). Grease and line a 21cm square cake tin with baking paper.
2. Place dates, water and bicarbonate of soda in a saucepan and simmer for approx. 15 minutes or until the dates become tender. Remove from heat and set aside to cool.
3. To make the pudding, place butter and caster sugar in a mixing bowl. Using an electric mixer, beat until light and fluffy. Add the eggs one at a time mixing well after each addition. Then add the vanilla until well combined.
4. Fold in the cooled date mixture and then the sifted flour.
5. Pour batter into prepared tin and cook for 45 minutes or until a skewer inserted in the middle of the pudding comes out cleanly.
6. To make the sauce, place all ingredients into a small saucepan. Bring to a boil, then simmer on low for 5 minutes stirring frequently. Serve over warm pudding.
1. Preheat oven to 180°C (160°C fan forced). Lightly brush a 12 cup muffin tin with melted butter. You will need two tins or can bake tartlettes in two batches.
2. Place lemon juice in a medium size bowl and add water. Cut cheeks off apples and finely slice, leaving skin on. Place slices in lemon water to stop them from going brown. Cut each pastry sheet into 9 equal squares. Remove apples from water and towel dry to remove excess moisture.
3. Place squares of puff pastry into prepared muffin tins and brush with melted butter. In a small bowl, mix demerara sugar and cinnamon. Sprinkle on prepared pastry squares.
4. Top squares with a fan of apple slices, approx. 7-8 slices on each square. Brush apples with a bit more melted butter and sprinkle with the remaining sugar mix.
5. Bake in oven for 25-30 minutes or until pastry is golden. Remove from muffin tin and place on cooling rack. Warm golden syrup for approx. 10 seconds in the microwave and brush on top of warm tartlettes for a glossy finish. Serve when cooled and top with a sprinkle of Soft Icing Mixture.
P., Strathmore VIC
The smell of baking my mother’s crumble reminds me of home, makes me humble and is a perfect treat on a cold winter’s day.
Renae Q., Yarraville VIC
Renae’s apple & blueberry crumble
Prep: 25 minutes Cook: 45 minutes Makes: 8 serves
Ingredients
2 tablespoons butter
8 green apples
3 tablespoons CSR White Sugar
3 tablespoons CSR Brown Sugar, firmly packed
¼ cup water
1 pinch nutmeg
2 cups fresh or frozen blueberries
1 tablespoon flour
Crumble topping
1 cup self raising flour
¼ cup CSR Brown Sugar, firmly packed
3 tablespoons CSR Raw Caster Sugar
1 teaspoon ground cinnamon
45g butter, room temperature
Method
1. Preheat oven to 180°C (fan-forced 160°C). Lightly grease a 2 litre capacity baking dish.
2. Peel, core and roughly dice apples. Place butter in large saucepan and melt. Then add the apples, white sugar, brown sugar and water. Cook over medium heat until apples are just tender. Remove from heat and gently fold in the nutmeg, blueberries and flour. Place apple mix in the prepare dish.
3. Make the crumble topping by placing all ingredients into a mixing bowl. Rub the butter into the mix using your fingertips until incorporated. Sprinkle crumble mix evenly over the apple mixture. Bake for 45 minutes or until crumble is golden brown.
4. Serve warm with custard, cream or ice cream.
Use any of your favourite fruits either fresh or frozen – peaches, raspberries and pears are all wonderful additions to this recipe.
Bake it better... Choosing the right sugar
White Sugar
With its pure taste and clean white colour, CSR White Sugar is ideal for baking as well as sweetening tea and coffee.
CSR White Sugar is 100% graded to ensure the crystals dissolve evenly to give you consistent results.
Caster Sugar
With the same pure sweetness as CSR White Sugar, CSR Caster Sugar is ideal for recipes, like pavlova or sponge cake, that require a light and delicate texture. With extra fine crystals that are 100% graded, CSR Caster Sugar dissolves quickly and evenly to produce consistent results making it a versatile sugar for baking and cooking.
Brown Sugar
With a high concentration of natural molasses,
CSR Brown Sugar offers a rich caramel flavour and moist texture making it ideal to add sweetness to savoury sauces and marinades or to keep sticky date puddings deliciously moist.
Raw Sugar
Delicately flavoured and mildly aromatic, the presence of natural molasses in CSR Raw Sugar brings a warm golden colour and honey-like flavour to pies, pastries and slices. With a crystal size similar to that of CSR White Sugar, CSR Raw Sugar can be used in place of CSR White Sugar in recipes that would complement the flavour and colour that CSR Raw Sugar brings.
Raw Caster Sugar
CSR Raw Caster Sugar combines the honey-like flavour of CSR Raw Sugar with the fine crystal size of CSR Caster Sugar making it a great choice for fruit based cakes and crumbles. Dissolving quickly and caramelising evenly, CSR Raw Caster Sugar, gives baked goods a light golden finish.
Dark Brown Sugar
CSR Dark Brown Sugar contains the highest concentration of natural molasses of any CSR sugar. This brings an intense flavour and decadently moist texture to recipes like fruitcake and gingerbread. In recipes that call for brown sugar, CSR Dark Brown Sugar can be used in place to increase the complexity and intensity of flavours.
Soft Icing Mixture
For fluffy butter cream frosting or melt-in-your-mouth shortbread, CSR Soft Icing Mixture contains a blend of finely ground cane sugar and gluten free starch to make it the ideal choice for recipes that require a smooth finish and soft texture.
Pure Icing Sugar
With its fine texture CSR Pure Icing Sugar is perfect for Royal icings that require a hard finish when set as well as baked treats such as friands. Being 100% pure sugar, CSR Pure Icing Sugar should be sifted well to loosen any lumps before use.
Coffee Crystals
With the largest crystals of any sugar in the CSR range, CSR Coffee Crystals dissolve slowly to infuse full flavoured sweetness into baked goods. The course texture of CSR Coffee Crystals makes them ideal for sprinkling over pie crusts to add colour and crunch.
Demerara
CSR Demerara brings warm caramel notes and a subtle molasses flavour to fruit based tarts and baked goods. With a courser texture and large crystal size, CSR Demerara dissolves slowly adding a caramelised finish when sprinkled over muffins, cakes or biscuits.
Golden Syrup
Made from 100% natural cane sugar, CSR Golden Syrup adds an unmistakable flavour to sweet and savoury dishes alike, while enhancing baked goods with its warm, golden colour and deliciously moist texture.
Treacle
With a distinctively strong and slightly bitter flavour due to its high concentration of natural molasses, CSR Treacle is richer in colour than CSR Golden Syrup making it ideal to add to fruit cakes and puddings.
Jam Setting Sugar
CSR Jam Setting Sugar blends natural sugar crystals with apple pectin to provide a quick and easy solution to jam making. Ideal for use with fruits that are low in pectin, like strawberries, raspberries and apricots, CSR Jam Setting Sugar can be used with fresh or frozen fruits.
Measures and Conversions
Cake pans
Springform cake pan
20cm8 inch
20cm8 inch
23cm9 inch
25cm10 inch
Metric
spoon sizes
SpoonMetric ¼ teaspoon1.25ml
½ teaspoon2.5ml
1 teaspoon5ml
2 teaspoons10ml
1 tablespoon (equal to 4 teaspoons) 20ml
Cup conversions for metric & imperial
Ingredient1 cup½ cup
flour, plain/self-raising150g4¾ oz75g2½ oz coconut, desiccated85g2¾ oz45g1½ oz