Jim Zuckerman’s
P H O T O I N S I G H T S
October 2023
Making twilight
Dead center
AI with Photography
Photography quiz
Photo tours

Ask Jim
Student Showcase
Back issues
On the cover: Spiral staircase in the Queen’s House taken on Jim’s England/Wales photo tour. This page: An AI image of a Berber bride from Morocco composited with a photograph of 15th century tombs in Marrakech, Morocco.

Years ago, I used to carry a very heavy backpack. I’d carry with me pretty much everything, just in case. This was in the days of film when I shot medium format cameras. I even habitually carried a fisheye, a powerful flash, extra film backs for the Mamiya RZ 67, and I carried another system -- the Mamiya 7 -- because it had the widest lens I could get in this format. And the tripod I carried wasn’t very light.
As a result of carrying all this gear, lumbar discs were depressed and now I have lower back issues. On my recent photo tour to the Hudson River Valley in New York, two male clients had ridulously heavy packs. One of the men already had serious back issues, worse than I do, and he still carried a pack close to 40 pounds. Mine now weights a little less than half that number.
As we get older, we should be wiser. For an aging photographer, this means doing whatever is necessary to protect one’s back from excessive weight. We all want to get great pictures, but if the cost of that is back surgery or a wheelchair, it’s not worth it.

My standard equipment list is now a 100-500mm zoom, a 24-105mm lens, a 16-35mm lens, and a 1.4x teleconverter. I also carry one extension tube which turns my telephoto zooms into a macro lens. I only add the Sigma 14mm, which is very heavy, when I know I’ll be using it for dramatic interiors. I rarely bring a tripod now unless I’ll be doing a lot of night photography. I carry my laptop and iPad in a wheeled carryon so they don’t add weight to my backpack. This is how I’ve avoided back surgery and, additionally, the reduced weight has made traveling and photography a lot more enjoyable.
Jim Zuckerman photos@jimzuckerman.com www.jimzuckerman.comCreating Twilight
When photographing cityscapes, architecture and ancient ruins, twilight is much more dynamic than simply shooting at night with a black sky. The cobalt blue sky associated with twilight contrasts beautifully with the warm-toned lights illuminating the buildings, monuments and city streets. The problem is that twilight lasts only a short time (unless you are shooting in the far north or south during the summer months), and you can’t be everywhere at once. Usually, you can photograph one location at twilght
every night. In the time it takes to change locations, whether walking or driving, the peak colors of twilight will probably be lost.
When I am faced with a photographic situation that isnt ideal, I try not to let reality get in my way. I always try and find a work-around to get what I want.
For example, the lower left picture of one of the striking statues at Luxor, Egypt, was taken after dark. I like it, but it’s not as good as the modi-


fied version next to it in which I simulated twilight.
For the image above of the New York skyline prior to 9/11, the buildings are dramatic but the sky is, in my opinion, devoid of interest. I added a cobalt sky, above, for visual impact. You can see that made a huge difference.

The most accurate way to do this is to take color samples from a real twilight sky and then apply those tones to replace black.
Study the image of Chicago on the next page. This is a straight, unmanipulated image taken at twilight. To replace the black sky behind the New York skyline image, I took two color sam-
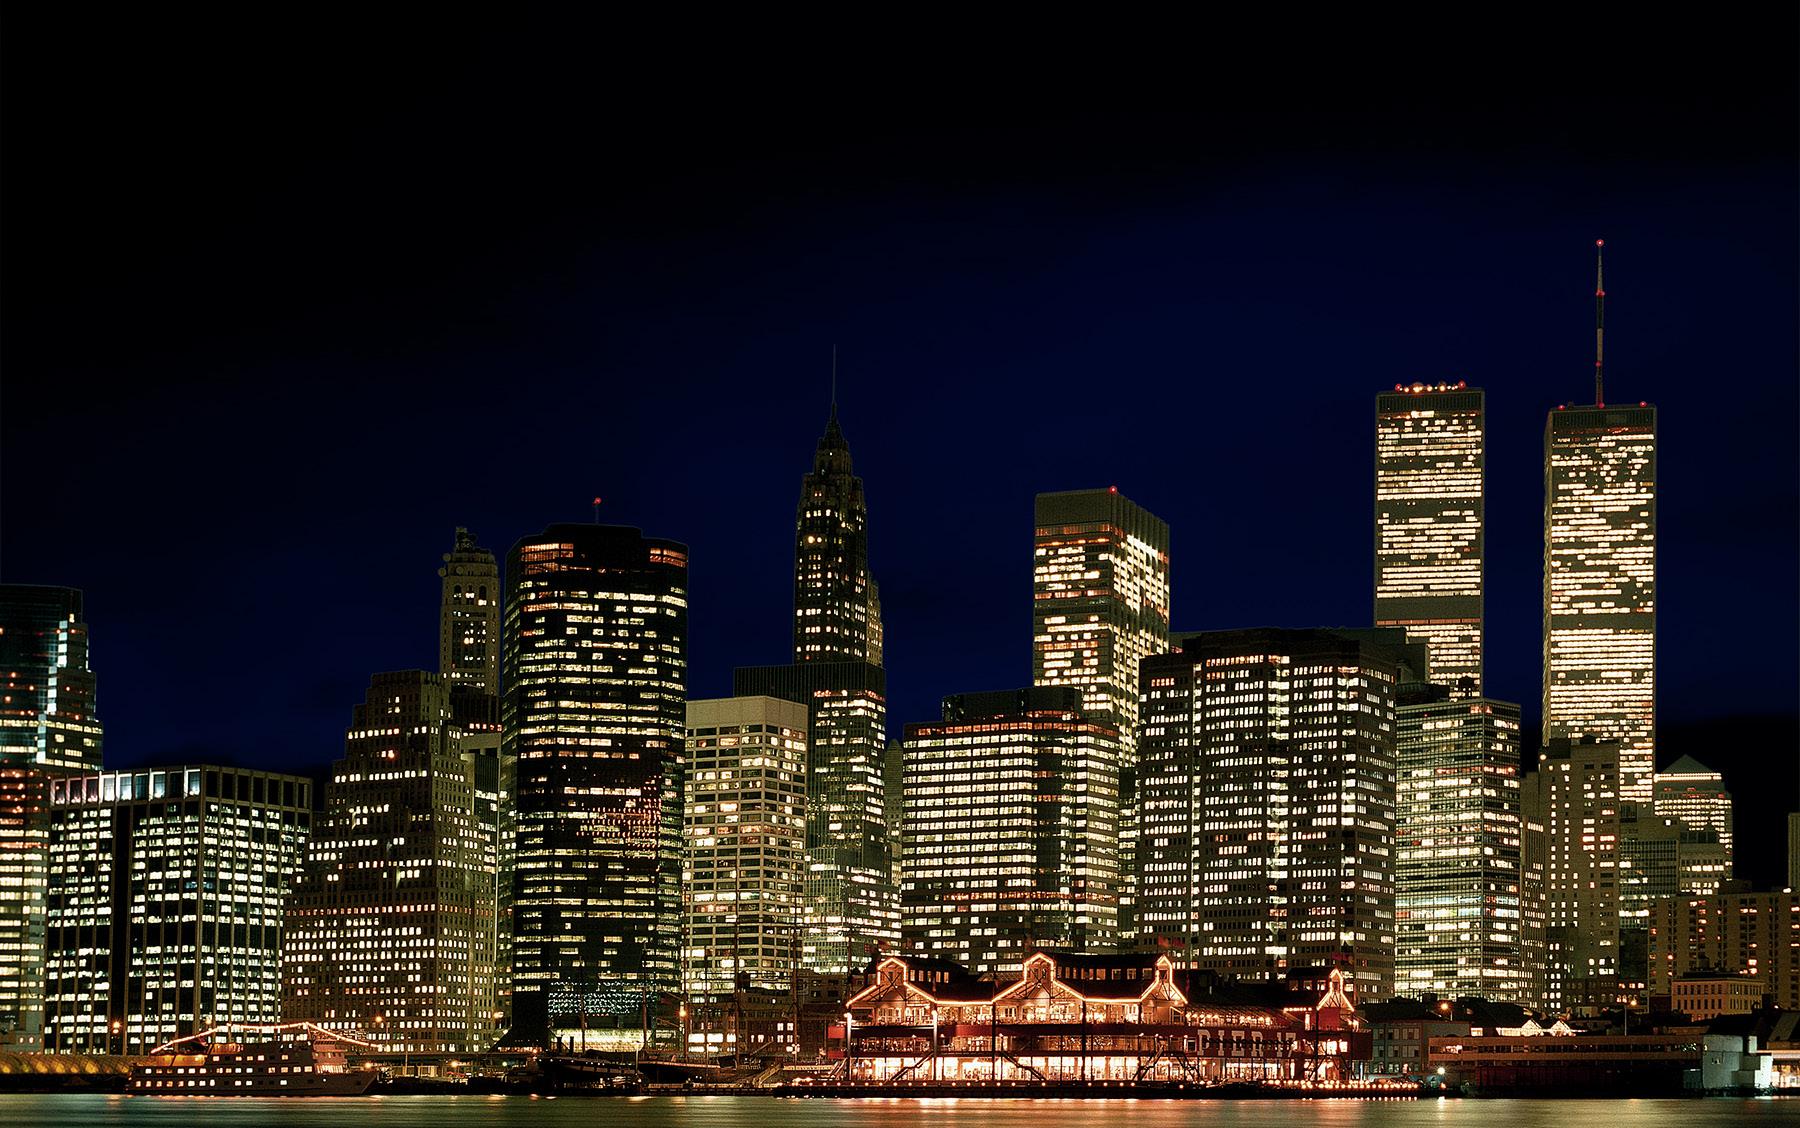
ples using the eyedropper tool in Photoshop’s tools palette. The first color sample is indicated by the red circle in the top left area of the image, above. This specific color then appears in the foreground color box at the bottom of the tools palette. I then took a second color sample indicated by the red circle at the bottom portion of the visible sky. To do that, I had to hold down the option key on a Mac computer (or the alt key on a PC). That places the lighter color in the background color box.

The two sample colors are shown at right as they appear in the bottom of the tools palette. If for some reason your tools palette isn’t open and visible on your desktop, simply choose the pulldown menu option, Window > tools.

The Birds of Costa Rica

May 13 - 23, 2024

Now you have to make a selection of the night sky above the cityscape or architecture you’re working with. Because buildings have sharply defined edges, this is usually done with the magic wand tool or the quick selection tool. If the black sky blends with shadows on groundbased elements, though, you will probably have to use the more precise selection tools, namely the lasso tool or the pen tool.
Once this is done, feather the edge of the selection by one pixel using the command, Select > modify > feather.
Now choose the gradient tool. Drag the cursor from the top of your image to the bottom portion where the sky meets the architecture. This creates a gradient of color from the dark cobalt

blue color to the lighter blue near the horizon. This creates a realistic gradient, but there are four other factors to pay attention to.
First, when the gradient tool is selected, five small icons appear at the top left area of the tool bar. The far left icon defines the tool as a ‘linear gradient’. That’s what you want, and that’s what should be selected as indicated by the red circle, below.
Second, you can vary the ratio of dark to light

blue by how you drag the cursor when the gradient tool is selected. You can opt to have more dark blue with just a little of the light blue near the horizon, or any variation of this. Begin dragging the cursor in a downward direction by choosing the starting point at the top, near the top, or in the middle of the selected area of the dark sky and you’ll see the possibilities.
Third, once you place the gradient of cobalt blue color in the sky, the specific shade of blue as well as the contrast between the dark and light tones can be manipulated. And -- a cobalt sky doesn’t always have to be used with a night shot. It can be placed above a daytime picture as I did in the image of the famous Egyptian Sphinx, above. I took this at sunset, but I decreased the exposure on the ruins and added the cobalt sky and the moon.

To manipulate the color and tone of the sky, I use Image > adjustments > levels and Image > adjustments > color balance for contrast and color, respectively. In the Sphinx image, for example, I moved the shadows slider in the levels dialog box at the far left in toward the center of the histogram. This replaced the dark blue at the top of the frame with black.
Fourth, all digital images have noise. Even if you use 100 ISO, there is a visible yet subtle noise pattern. When you fill a selection with a color, or a gradient, there is no noise in that area. Upon close examination, that doesn’t look correct, especially when you compare the photo portion with the digitally added color.
So, you have to add noise to the gradient. This is done with Filter > noise > add noise. I usually choose ‘3’ on the slider in the dialog box. §
the case for DEAD CENTER
Sometimes people become too rigid in their thinking, and this is no less true when applied to the art of photography. I’ve seen people take pictures with the rigidity of following a rule book instead of being flexible, innovative and creative.
A case in point is the Rule of Thirds. This divides a frame into thirds, both horizontally and vertically, and states that major elements should be composed along those divisions. In the picture at right taken on the rim of Bryce Canyon, I placed the dead tree along the right vertical third and the horizon along the upper horizontal third. This is in accordance with

the Rule of Thirds, and probably everyone is going to agree this is a good way to compose a picture. I also agree on this point. I used the same approach with the fennec fox, below.


Ethiopia Photo Tour

Jan, 21 - Feb. 3, 2025

The head of the fox lies along the right vertical third while the horizon is approximately (although not exactly) on the lower horizontal third. Photos need balance, and one could say the negative space of the sky on the left side of the picture has ‘weight’ and therefore it balances the fox on the right.
This is not the only way to make a successful composition. Think of the Rule of Thirds as a suggestion rather than a rule. You can deviate from this traditional approach by placing the main subject even in the middle of the image area. This underscores symmetry and creates perfect balance. It also directs our attention exactly where we want it, and the picture is particularly striking if the graphic design of the subject is bold and beautiful.
I used this technique for the wintry landscape on page 11 as well as in the shot of the large pagoda at Schwedagon in Myanmar, below.

Instinctively and automatically, it seems there are subjects that belong in the center of the frame like portraits. The 5-year old costumed girl I captured in a parade in Indonesia is an example. No other type of framing made sense. But with landscapes, cityscapes,and so many other subjects, several types of compositions are possible and attractive. Try the dead center approach, even when it goes against what you’ve been taught for years. It is very effective. §

AI plus PHOTOGRAPHY
Many photographers have a misconception about combining photography with the new capabilities of image making in artificial intelligence. During the online course I teach on AI (beginning Oct. 14), the question I get the most is how to import photos into the AI software, and what will AI do to digital images.

First, the new capability in Photoshop for replacing backgrounds using AI is in its infancy. I tried it and didn’t like it at all. The automatic ‘select subject’ was very
disappointing, and the new backgrounds often didn’t make sense with respect to the subject. In addition, the replacement backgrounds are images drawn from

Adobe stock; in other words, they are photos taken by other photographers. Who wants to make composites with the pictures of other people? Not I.
If you want to replace a background in one of your photographs, use the traditional and time-tested methods in Photoshop: make an accurate selection and paste another image into it.
What is brilliant, however, is the generative fill feature in the new Photoshop. It can eliminate complex, unwanted elements like nothing we’ve ever had before. I will demonstrate some amazing examples in the next issue of Photo Insights.
Most of my work in AI now is done with the software, Midjourney. This is what I
teach in my four-part online course. What many photographers want to do, besides create unique and hereto-fore impossible images, is to use AI’s capability to work on their own photos -- to embellish, to make new backgrounds, and to modify them in artistic ways.

AI, specifically Midjourney, can do those things, but it’s not what photographers expect. Midjourney interprets your pictures. An original photograph is used as the basis for that interpretation, and what is produced

resembles the photo in certain aspects but is an entirely new image. One could say that your photograph is the inspiration for the AI generated result.
On pages 14 and 15 as well as on this page, I show the before and after comparison pictures so you can see exactly what I’m talking about. In all three cases, the pairs of images are related, but Midjourney interpreted the photographs artistically such that an entirely different image resulted.
For example, I ran the portrait of the young Indian girl from Rajasthan, India, below left, through Midjourney, and my only instruction (i.e. prompts) was “Embellish this image artistically.” The result is a beautiful portrait, but the headpiece is significantly different, the girl appears to be much younger, her jewelry has
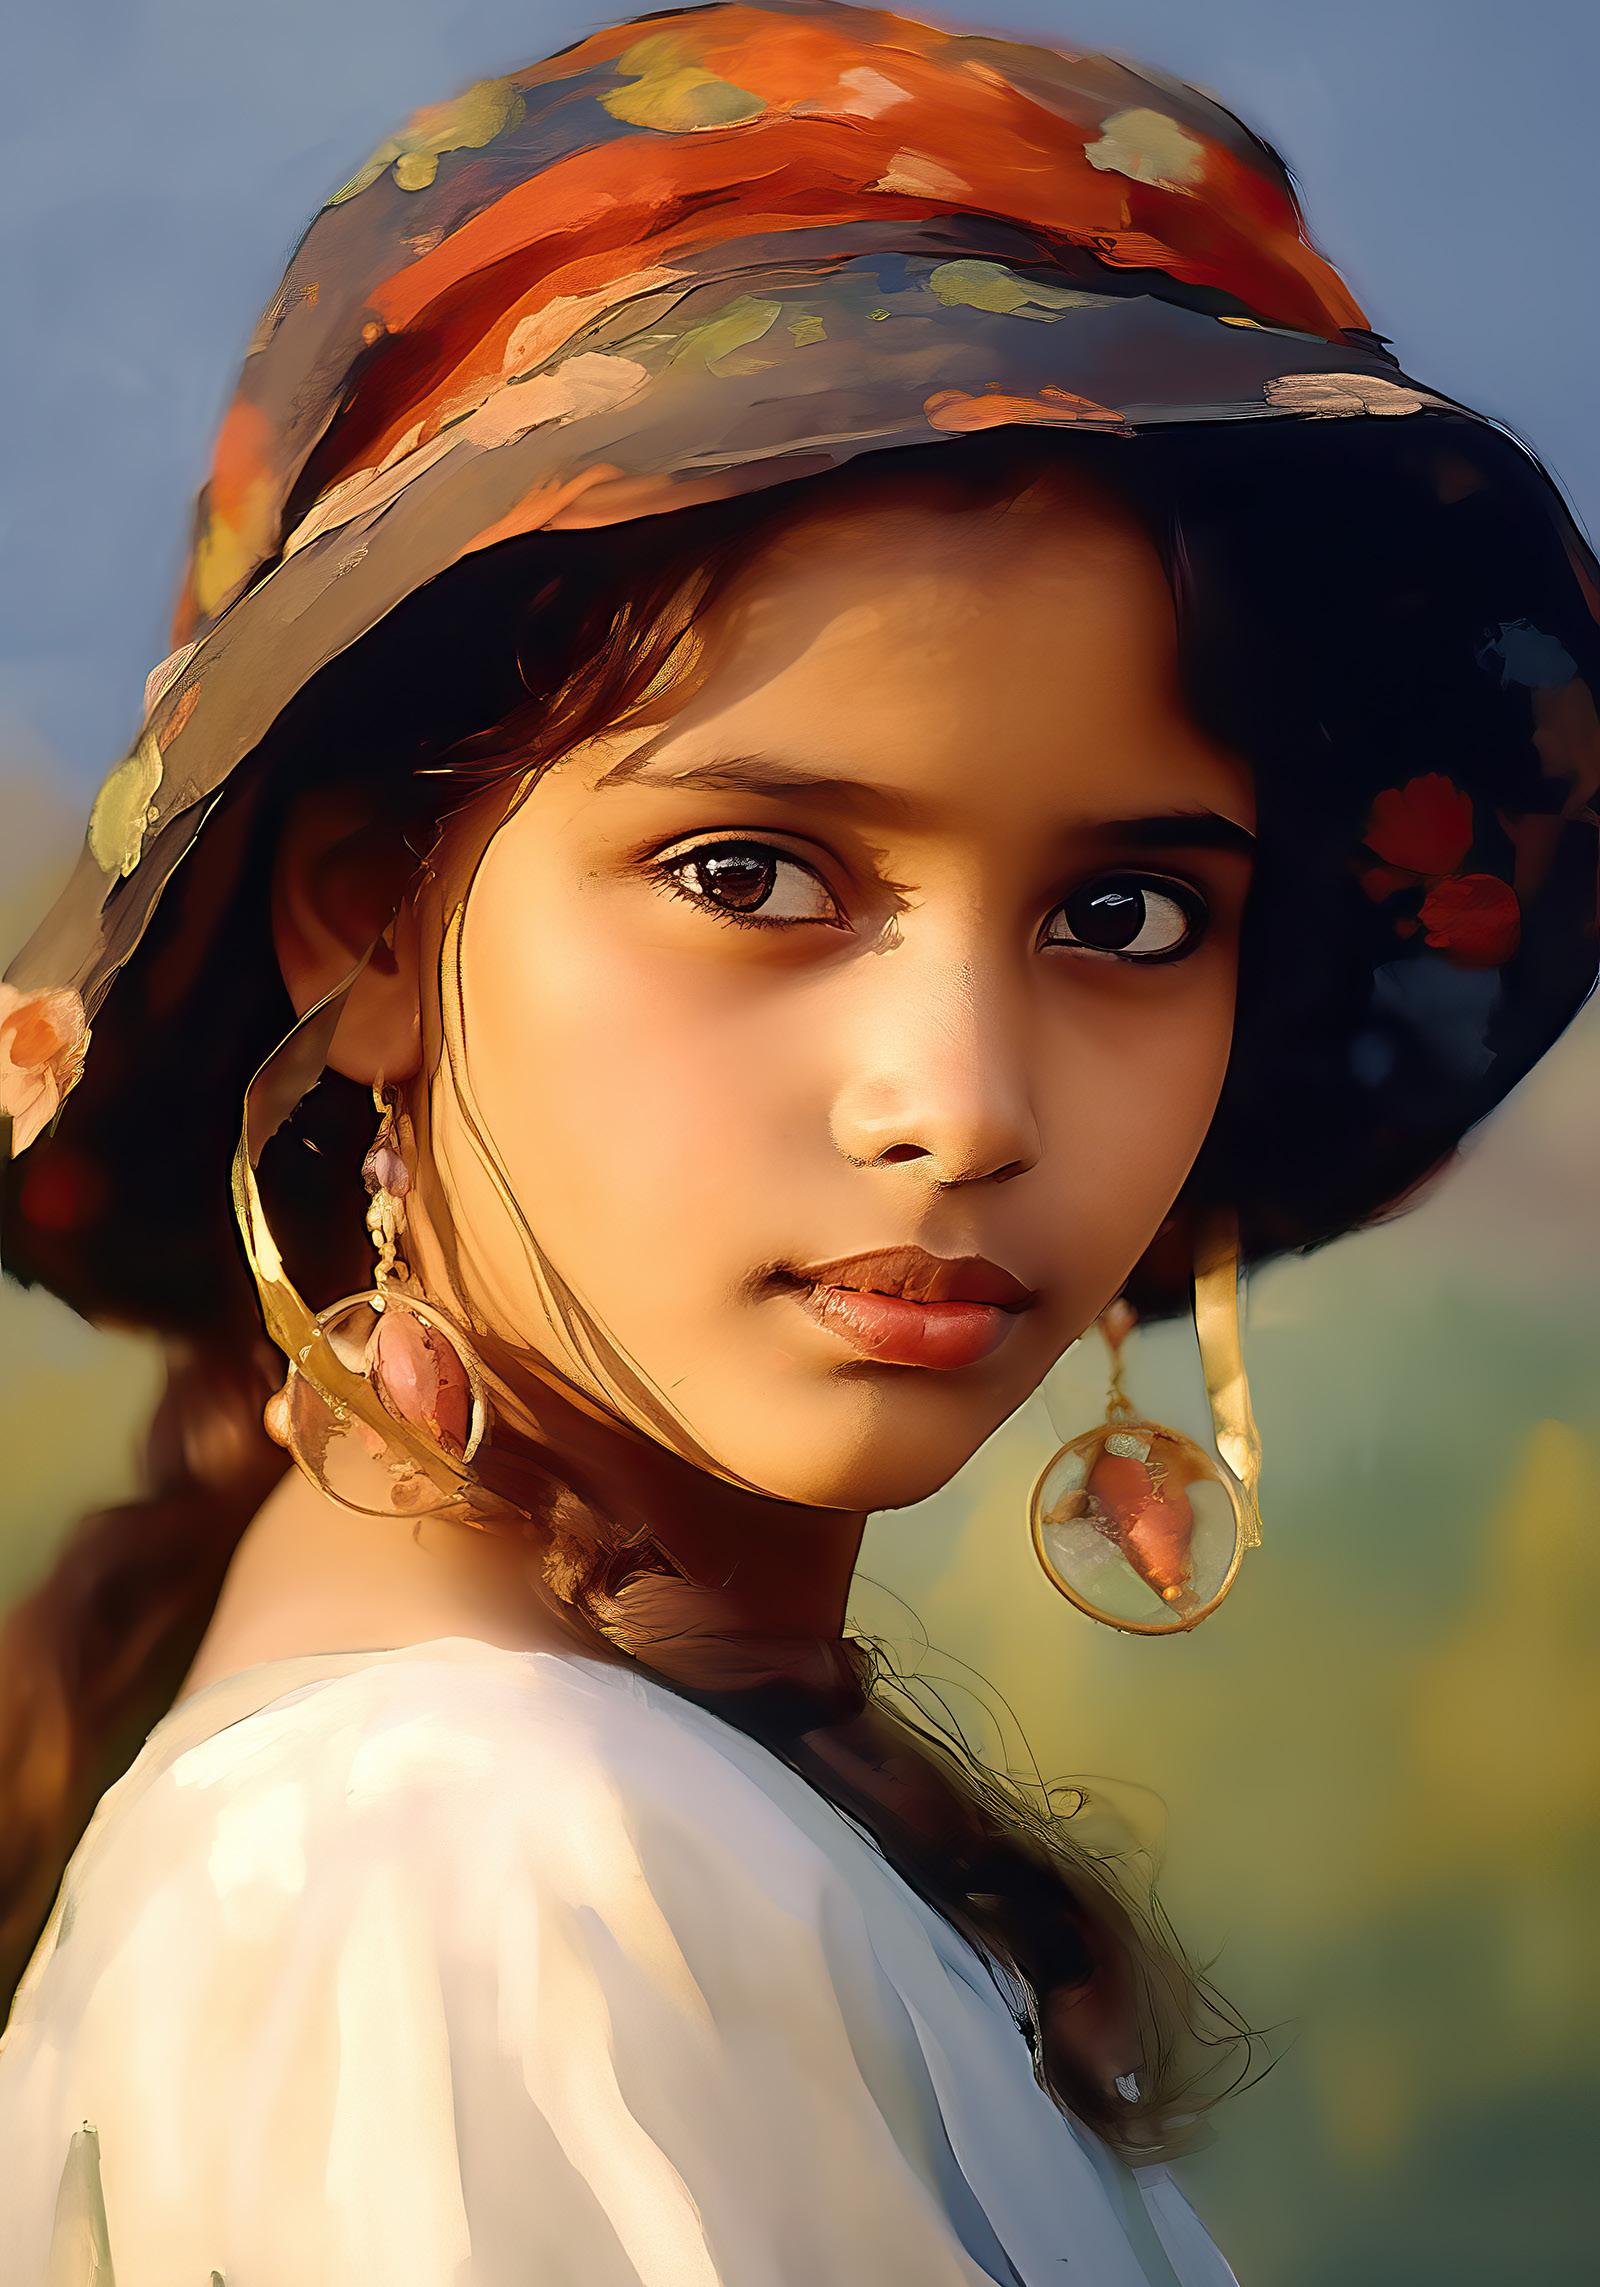

been changed, the color scheme is different and, of course, the girl’s face is completely new. Note also how the AI girl is looking over her shoulder. This is a different type of pose than what I originally captured. The one main similarity is that AI kept is her ethnicity. Both girls are unmistakably Indian.
I’ve noticed when Midjourney interprets a photograph that’s devoid of people, it tends to introduce the human element into the scene. Such was the case in the image on page 15. This is a room in an historic home in the Hudson River Valley in upstate New York. AI embellished the scene artistically, but in the process it added a woman. I like very much what Midjourney did, but if I don’t want the addition of the human element, I have to add ‘no people’ to the prompts. That works much of the time, but sometimes what you request isn’t exactly what you get. §
AI ONLINE WORKSHOP
Learn how to produce stunning images with Artificial Intelligence


Starts October 14, 2023

Photography Quiz
1. With few exceptions, mirrorless cameras have solved the dust-on-the-sensor problem.
a. True
b. False
2. The photographic lens, i.e. the focal length, that most closely captures what we see is:
a. 100mm
b. 50mm
3. 35mm
4. None of the above
3. For ‘purist’ photographers who only want to capture what they see with their eyes, they should never:
a. Shoot in black and white
b. Use a large lens aperture for shallow depth of field
c. Use a wide angle lens
d. Use a telephoto lens
e. All of the above
f. None of the above
4. Which color space provides a larger color spectrum?
a. sRGB
b. Adobe RGB 1998
5. Which white balance setting is best for mixed lighting such as tungsten and daylight?
a. AWB
b. Tungsten (or indoors) white balance
c. Daylight (or sunny) white balance
d. Flash white balance
6. Raising the center column of a tripod to its maximum height is:
a. A good idea to get an elevated perspective
b. A good idea as it saves the hassle of bringing a larger and heavier tripod
c. A bad idea because it increases instability thus making long exposures more risky
d. None of the above
7. When shooting indoors, the only way to get an accurate exposure such that you have good detail in the windows and good detail in the interior room is:
a. To use a gray card to determine eposure
b. To use a tripod
c. To use HDR
d. To use a polarizing filter
8. Salt water you may encounter, such as when photographing tidepools, is:
a. Able to destroy your camera with one splashed drop
b. No big deal if you have a water-absorbing microfiber cloth
9. When using HDR, the more contrast in the scene, the more frames you need in the HDR sequence.
a. False
b. True
10. If you see dust in one of your pictures, the dust particle resides on:
a. The front glass element of the lens
b. The viewfinder
c. The ground glass
d. The sensor
UPCOMING PHOTO WORKSHOPS
Winter Wildlife Workshop
Photograph beautiful North American mammals plus a snow leopard in natural environments. Mountain lions, red foxes, arctic foxes, bobcats, lynx, wolves and more are in their full winter coats. This is a very special workshop.

January 6- 10, 2024
Snowy Owl Workshop

Close up encounters with these beautiful birds of the North. Capture bird in flight shots in a snowy environment. Jim guides you in camera settings and technique to take the best pictures possible.
January 11 - 15, 2024
Carnival in Venice
Photograph amazing costumes in a Medieval environment, inside a 16th century palace and in an iconic gondola. The photography as well as the experience is amazing.
February 4 - 10, 2024

Click on any ebook to see inside


WINTER WILDLIFE WORKSHOP

January 6 -10, 2024

What’s wrong with this picture?
Even non-photographers know what’s obviously wrong with this picture. The extended wings of this woodstork I photographed in Florida were cropped off. Anyone who photographs birds knows you have to take a lot of frames, especially when trying to capture birds in flight, to get one or two good ones. This was an outtake, but I still liked it because of the nesting behavior, the backlighting and, although the wings were truncated, I like the graphic design of the bird.
Now that we have the remarkable generative fill technology, I wondered if I could rectify the problem. So, I extended the ‘canvas’ at the top of the image using the crop tool, then I chose the pulldown menu command, Edit > generative fill. Like magic, the wings were rebuilt. The proportion of the image, though, was changed. It was more square because I added ‘real estate’ at the top of the frame, which lengthened the short side of the image. I didn’t like that, so I applied generative fill again.

This time, I used the crop tool to extend the canvas, i.e. the image area, to the left as well as the right. I again used Edit > generative fill, and the image widened to the 2 x 3 ratio I wanted. But the sky was still pretty boring. I solved that problem by choosing Edit > Sky replacement and selected a sky that worked for me.
Then, I noticed the original image had some unwanted noise because it was taken way back in 2007 with my first serious digital camera, the Canon 1Ds Mark II. Even though that camera cost $8000, it had a large problem with noise. So, I ran the image through Topaz DeNoise using the ‘severe noise’ function, and that took care of the problem.
Finally, I opened ACR with Filter > camera raw filter so I could use the ‘shadows’ slider to bring back some of the lost detail in the shadows of the bird. §

SHORT AND SWEET
1. Details matter. You can often find beautiful images where you least expect them Keep your eyes open for color, design, texture, and especially strong graphic design. I photographed this arrangement of clay pots behind lounge chairs at a poolside in a hotel in Chefchaouen, Morocco.

2. If you have the opportunity to photograph the New York skyline from the New Jersey side of the Hudson River, take it. At dusk and twilight, the reflection in the mirrored skyscrappers of the western sky is simply breathtaking. I recommend shooting Manhattan from Hamilton Park to get this view.

3. We can’t always shoot in ideal lighting scenarios like sunrise, sunset, and an overcast sky that provides diffused light. When you are forced to take pictures and the bright sun is flooding a scene with contrasty light, the only way to mitigate that is to use HDR. This allows you to make the best of a bad situation.

4. Being able to shoot in low light environments with high ISO settings is much less of a problem now than in the past. I shot this industrial-looking building in London very early in the morning when the light level was low. I used f/16 and 16,000 ISO. With the application of Topaz DeNoise, the noise virtually disappeared. §

Coast of France and the Loire Valley

April 4 - 13, 2024

ASK JIM
Every month, Jim answers a question from his online students, from people who participate in his tours and workshops, or from subscribers to this magazine. If you have a question you’d like Jim to answer, please drop him a note at photos@jimzuckerman.com.
Q: Jim . . . Do you use skylight or UV filters on your lenses to protect them?

Robert Martinez, Pittsburg, Pennsylvania
A: I’ve used them in the past, but I no longer do. If you drop a lens, a filter can potentially protect it from serious damage. I’ve seen this happen when a friend of mine forgot to zip up his camera backpack, and on the way to being lifted up to his back, a 70-200mm fell out onto concrete. The UV filter broke, but the lens was OK. This is a rare event, of course, and the lens has to fall just right in order for the filter to help protect it. For me, I find that filters can get in the way of lens hoods, and if I want to use another filter, such as an ND filter, I don’t want to shoot through two pieces of extra glass. That means I have to take the time to remove the protective filter. So, I don’t use protective filters at all now. To date, I’ve never dropped a lens.
Partial List of Photography Tours 2024
WINTER WILDLIFE

Jan 2024
SNOWY OWLS

Jan 2024
CARNIVAL in VENICE

Feb. 2024
ABANDONED in GEORGIA

March 2024
HOLLAND & BELGIUM

Apr/May 2024
WHITE HORSES, FRANCE

May 2024
COSTA RICA BIRDS

May 2024
LAVENDER FIELDS, FRANCE

Jul 2024
INDONESIA

Jul/Aug 2024
ICELAND DRONE TOUR
Aug/Sept 2024
PATAGONIA


Oct 2024
LOUISIANA SWAMPS

Oct 2024
For a complete list of all the photo tours/workshops Jim conducts, go to his website: www.jimzuckerman.com.
Online Course in AI

Starts October 14, 2023

Produce brilliant images right out of the starting gate!

Student Showcase
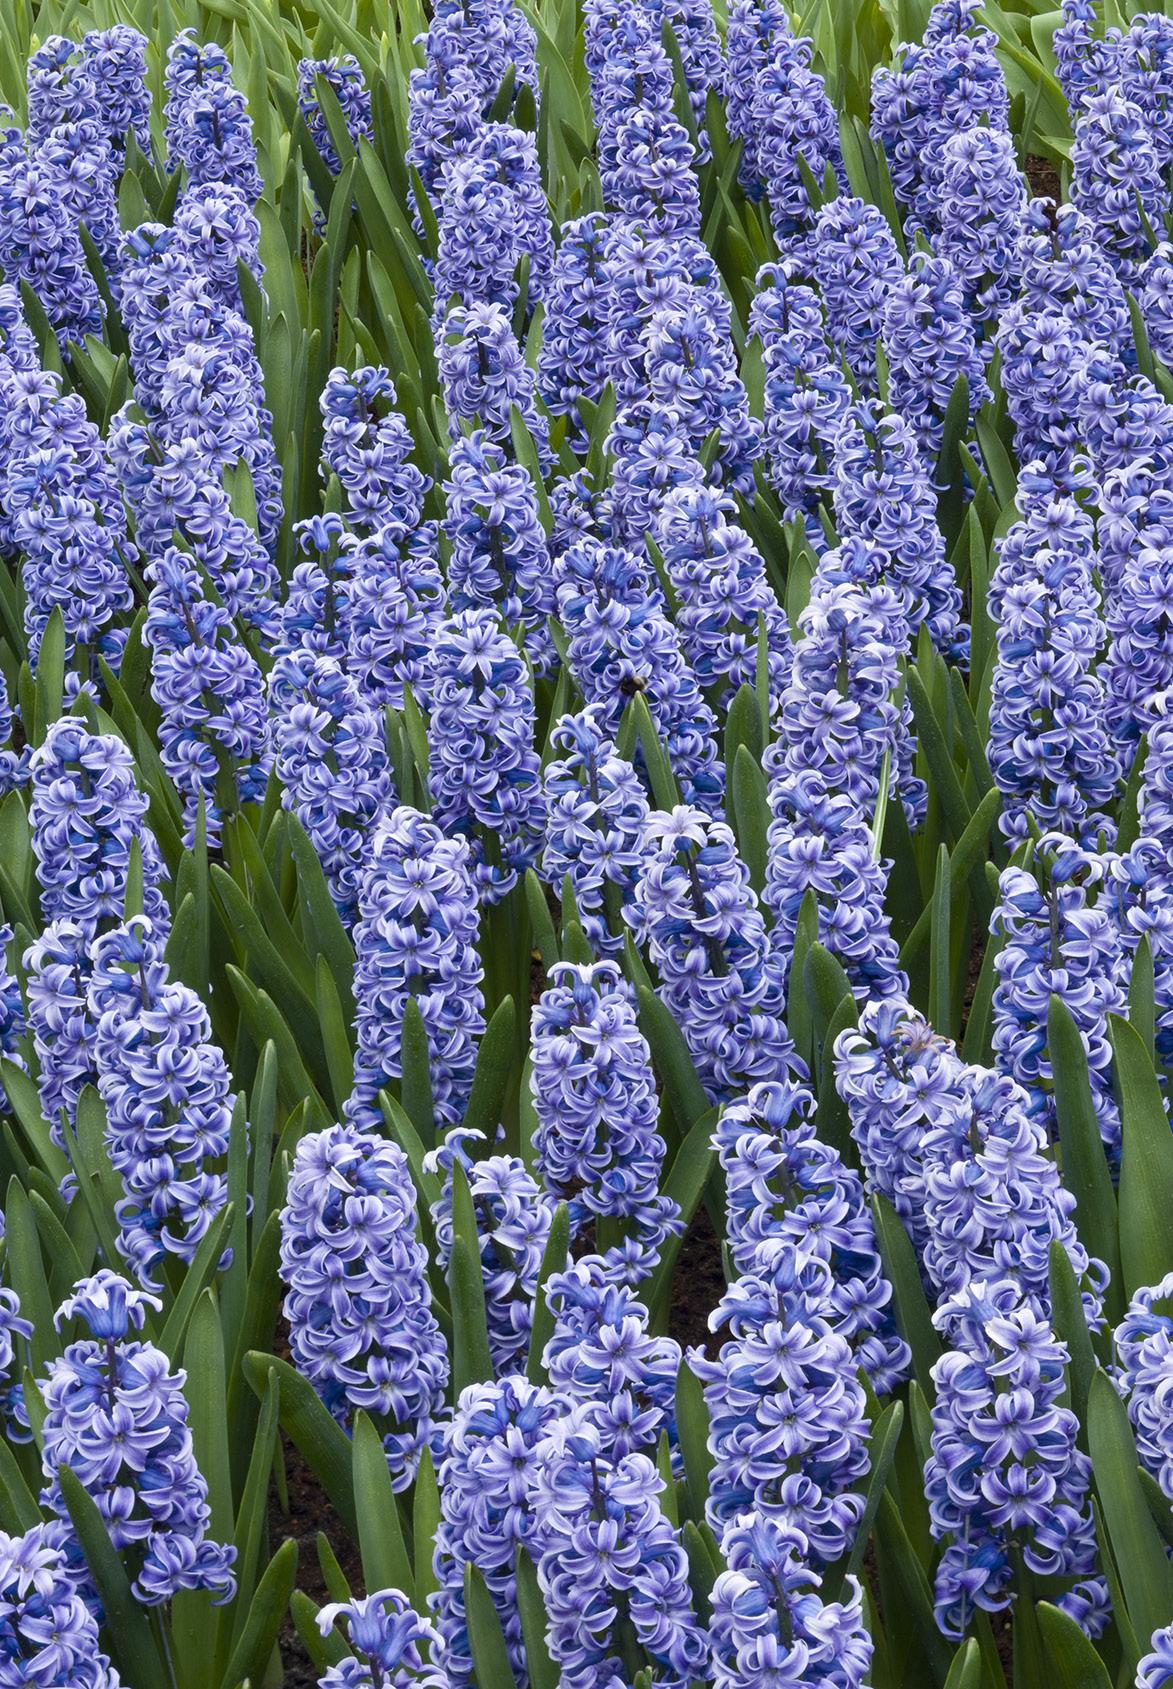
Each month, Jim features one student who took beautiful and inspiring images on one or more of his photography tours or workshops. It’s really fascinating how photographers see and compose such different images even though we may go to the same places. Everyone takes great photographs on Jim’s trips.


Student Showcase, continued


Beginning Photoshop course
4 online sessions: Finally learn how to be super creative with your images


HOLLAND & BELGIUM
April 24 to May 2, 2024















1/3 focus law
Subject index for past Photo Insight issues
‘15
3D sphere Mar. ‘16
90 degree finder Mar. ‘13
Abstracts in soap Feb. ‘15
Abstracts, Shooting
Aerial photography
Aerial photography
‘19
‘13
‘21
African safari May ‘16
AI plus Photograpjhy
Airplane windows
Alien landscapes
Anatomy of 8 photographs
Angled perspectives
Aperture vs. shutter speed
Aperture priority
Aurora Borealis
Auto white balance
Autofocus, when it fails
Autofocus failure
Autofocus failure
Autofocus challenges
Auto ISO
Auto White Balance
Autumn Foliage
Autumn Color
Autumn foliage photography
Back button focus
Backgrounds, wild
‘23
‘13
‘16
‘19
‘14
‘17
‘13
‘15
‘15
‘17
‘18
‘17
‘21
‘18
‘20
‘21
‘18
‘12
Backgrounds, busy Apr. ‘13
Backlighting
Backlighting
Birds in flight
Birds in flight
‘16
‘22
‘13
‘14
Birefringence May ‘18
Birds in flight
Birds in flight, camera settings
‘16
‘23
Bird Photography Jun ‘19
Black backgrounds Aug. ‘23
Blacklight photography Feb. ‘21
Black velvet Mar. ‘14
Black and white conversions Mar. ‘17
Black and white solarization Sep. ‘17
Black and white with color Jan. ‘20
Black and white plus color Mar. ‘23
Blown highlights Feb. ‘18
Blue monochromes Jan. ‘22
Black Plexy Aug. ‘22
Blur, field Nov. ‘18
Blur technique Oct. ‘17
Bokeh Jun. ‘15
Botanical gardens, shooting Apr. ‘22
Butterfly photography
Jul. ‘14
Camera buying guidelines Dec. 21
Camera settings for landscapes Feb. ‘23
Camera setting priorities Jun. ‘17
Canon R5 Mar. ‘21
Capturing lightning Jun. ‘13
Capturing what you don’t see May ‘21
Catchlights Jul. ‘16
Changing perspective May ‘21
Cheap flash stand Apr. ‘13
Children photography Jun. ‘14
Choosing a telephoto lens Dec. ‘20
Chromatic aberration May ‘13
Chrome Dec. ‘18
Cityscapes Aug. ‘14
Cityscapes May ‘16
Clone tool, fixing an issue Sep. ‘17
Clone tool technique
Jul. ‘20
Composites and Light Dec. ‘17
Compositing images
Compositing, 7 steps
Apr. ‘19
Jan. 22
Composition, different approach Jan. ‘15
Content-aware, New Aug. ‘20
Content aware move tool
Contrast vs. exposure
Jan. ‘23
Jul. ‘15
Converting to black and white Mar. ‘22
Correcting keystoning
Creating a star field
Creating Art out of Motion
Creating a Sketch
Jun. ‘21
Jan. ‘14
May ‘22
Dec. ‘17
Creative blurs Jan. ‘14
Custom functions Jul. ‘23t
Dark backgrounds
Nov. ‘19
Dawn photography Jan. ‘17
Dawn photography
Dead center
Dead center
Dealing with smog
Feb. ‘17
Jan. ‘13
Oct. ‘23
Oct. ‘16
Decay photography Sep. ‘15
Define Pattern Sep. ‘18
Depth of field Aug. ‘16
Depth of field confusion Jan. ‘20
Depth of field and distance
Dec. ‘18
Depth of field and obliqueness May ‘21
Depth of field, shallow Apr. ‘20
Depth of field vs. sharpness Nov. ‘20
Double takes Apr. ‘20
Drone photography Mar. ‘23
Drop shadows
Apr. ‘19
Dust, Minimizing Aug. ‘19
eBook, how to make Jan. ‘13
Elevated vantage points Aug. ‘23
Eliminating people from photos Jun. ‘22
Embedded in Ice Oct. 17
Energy saving bulbs Sep. ‘14
Equidistance and telephoto lenses Apri. ‘23
Exploring the power visuals of AI Mar. ‘23
Exposing for the sun Sep. ‘16
Exposure, the sun Jul. ‘13
Exposure technique Sep. ‘13
Exposure, snow Jan. ‘14
Exposure triangle Nov. ‘14
Exposure, to the right Apr. ‘15
Exposure compensation Sep. ‘16
Exposure compensation Mar. ‘21
Extension tubes Dec. ‘13
Extension tubes
Jul. ‘23
Face sculpting Apr. ‘21
Face sculpting Feb. ‘22
Festival photography Sep. ‘20
Fill flash Sep. ‘13
Filter forge Feb. ‘13
Fireworks Jul. ‘13
Fireworks, Compositing Jun ‘20
Fisheye lenses May ‘13
Fisheye lenses Feb. ‘15
Fisheye fantasies Oct. 21
Flash backlighting May ‘15
Flash, balancing exposure Oct. ‘15
Flash, balancing off-camera Dec. ‘18
Subject index for past Photo Insight issues
Interiors Oct. ‘15
iPad: Loading photos
Aug.‘17
iPhone photography, pros and cons Apr. ‘22
Jungle photography Dec. ‘14
Kaleidoscopic images
Kaleidoscopis images
Jan. ‘15
Aug. ‘20
Keystoning, correcting Aug. ‘15
L Bracket
L Bracket
Landscape photography
Landscape photography
Landscape photography
Feb. ‘18
Feb. ‘21
Dec. ‘12
Apr. ‘14
Nov. ‘16
Layer Masks, The Power of Feb. ‘22
Light fall-off
Light painting
Lighting a face
Lightning photography
Liquify
Liquify Distortions
Lenses, Essential
Long lens portraits
Feb. ‘14
Dec. ‘21
Oct. ‘13
May ‘20
Feb. ‘18
Sept/Oct. ‘19
Aug. ‘23
Oct. ‘18
Long Lenses for Flowers Jul. ‘20
Low light photography
Luminar 4
May ‘15
Jan. ‘20
Macro flash Nov. ‘12
Macro flash
Macro flash
Macro flash
Macro photography and DOF
Macro trick
Managing soft focus
Mannequin heads
Metering modes
Meters, How They Work
Meters, when they fail
Sep. ‘14
Aug. ‘15
Aug. ‘22
Feb. ‘22
May ‘19
Jul. ‘21
Apr. ‘16
Nov. ‘16
Jul. ‘18
Dec. ‘16
Metering situations, Impossible Jul. ‘19
‘16 HDR, hand held
‘17 HDR, hand held
‘18 HDR panoramas
‘16 HDR, choosing the number of frames
wind
Highlights, overexposed
Histograms, Why I Don’t Use
Histogram problems
Home nature projects
Hotels with a view
Humidity
Hummingbird photography
Hyperfocal distance
Image resizing
Implying motion
Impossible DOF
Impossible DOF
Indestructible camera bag
Infrared photography
Insane ISO settings
‘20
‘13
‘13
‘13
‘18
‘16
‘17
‘14
‘14
‘22
Middle gray
Milky Way, Shooting thet
Minimizing dust on the sensor
Mirrors
Mirror images
Model shoot
Moon glow
Mosaics
Mundane to Ideal
Museum photography
Nov. ‘15
Nov. ‘21
Jan. ‘19
May ‘23
Jan. ‘17
Oct. ‘16
Jun. ‘17
Nov. ‘19
Mar. ‘13
Natural Light Portraits Aug. ‘21
Negative space
Jan. ‘16
Neon edges on black Aug. ‘14
Neutral Density filters
Jun. ‘18
Neutral Density filters and water Mar. ‘22
Night photography
Night Safaris
Feb. ‘14
Jun. ‘18
Night to Twilight Dec. ‘17
Noise reduction
Oil and water
Optical infinity
Feb. ‘17
May ‘20
Jun. ‘16
Organization of photos Mar. ‘18
Out of focus foregrounds
Jan. ‘20
Subject index for past Photo Insight issues
Paint abstracts May ‘13
Paint abstracts
Aug. ‘21
Painting with light Sep. ‘15
Panning motion Dec. ‘16
Pano-Mirrors with a twist Jan. ‘18
Parades Sep. ‘13
Parallelism Nov. ‘19
Parallelism and DOF Feb. ‘21
Perspective, Super Exaggeration of Dec. ‘21
Photo shsaring Apr. ‘23
Photo terms Nov. ‘22
Photography to Art Dec. ‘17
Photography solutions Jan. ‘18
Photoshop, content Aware Nov. ‘12
Photoshop, sketch technique Apr. ‘13
Photoshop, replace background Apr. ‘13
Photoshop, actions palette Dec. ‘13
Photoshop, layer masks Feb. ‘13
Photoshop, the clone tool May ‘13
Photoshop, soft foliage Oct. ‘13
Photoshop, mixer brush tool Sept. ‘14
Photoshop, b & w with color Jun. ‘14
Photoshop, drop shadows Jul. ‘14
Photoshop, creating texture Feb. ‘14
Photoshop, face mirrors Feb. ‘14
Photoshop, liquify Mar. ‘14
Photoshop, face mirrors Aug. ‘14
Photoshop, digital spotlight Sep. ‘14
Photoshop, enlarge eyes Nov. ‘14
Photoshop, darken the periphery Dec. ‘14
Photoshop, mirror images Dec. ‘14
Photoshop, beam of light Apr. ‘15
Photoshop, polar coordinates Mar. ‘15
Photoshop, chrome May ‘15
Photoshop, actions palette Nov. ‘15
Photoshop, cut and paste Nov. ‘15
Photoshop, geometrics Oct. ‘15
Photoshop, plugins Oct. ‘15
Photoshop, multiple selections Apr. ‘16
Photoshop, sharpening Apr. ‘16
Photoshop, Flood plugin Apr. ‘16
Photoshop, Desaturation Aug. ‘16
Photoshop, making a composite Aug. ‘16
Photoshop new tool May ‘20
Photoshop, place one element behind Aug. ‘18
Photoshop, the pen tool Feb. ‘16
Photoshop, canvas size Jan. ‘16
Photoshop, using the earth Jun. ‘16
Photoshop, define patterns May ‘16
Photoshop, paste into Nov. ‘16
Photoshop, b & w with color Feb. ‘17
Photoshop, open a closed door Apr. ‘17
Photoshop, palettes May ‘17
Photoshop, My favorite plugins Jan. ‘20
Portrait options Jan. ‘19
Portrait techniques Nov. ‘15
Portraits Mar. ‘13
Portraits, mixed lighting Aug. ‘14
Portrait Professional Nov. ‘19
Portraits, Lens choice Sept/Oct. ‘19
Portraits, side lighting Sep. ‘17
Portraits, window light Mar. ‘15
Portraits, outdoors May ‘17
Post-processing checklist Dec. ‘13
Post-processing: Contrast Aug. ’17
Practicing graphic design, Part I Dec. ‘22
Practicing graphic design, Park II Jan. ‘23
Practicing graphic design, Part III Feb. ‘23
Pre-capturing technology May ‘23
Predictive Focus
Problem/solution
Sep. ‘18
Apr. ‘17
Problem Solving in Photoshop May ‘22
Problem with cruises Jan. ‘18
Protecting extremeities from the cold Dec. ‘22
Protecting highlights Dec. ‘12
Puppies Jan. ‘15
Puppy photography
Feb. ’18
Reflections Feb. ‘13
Reshaping faces
Oct. ‘22
Restoring old photos Jun ‘20
Ring flash, advantages Jul. ‘21
Ring flash versatility Oct. ‘21
Rule of Odds May ‘22
Safari May ‘13
Safari strategies Jul. ‘15
Seeing as the lens does Nov. ‘14
Seeking Cool Snow Photos Jan. ‘21
Selective filtering
Selective focus
Mar. ‘18
Jun. ‘15
Self-critiques Jul. ‘13
Self-critiques
Self-critiques
Oct. ‘13
Nov. ‘20
Sensor cleaning Jun. ‘18
Sepia and dark contrast Jun. ‘15
Sepia, Traditional look of Shade
Shady side
May ‘14
Jun. ‘18
Shadows, Paying Attention to Mar. ‘18
Sharpness problems
Mar. ‘14
Shooting in Inclement Weather Nov. ‘22
Shooting through textured glass May ‘23
Shooting through wire mesh Sept. ‘14
Shooting into the light Jun ‘20
Silhouettes
Jun. ‘13
Silhouettes, How to make Apr. ‘22
Silhouettes, Exposing for Sept/Oct. ‘19
Silvered landscapes Mar. ‘20
Sketch, How to Make
Skies make or break a picture
Sky replacement
Jun ‘19
Aug. ‘21
Nov. ‘20
Sky replacement strategies Aug. ‘22
Snow exposure
Snow exposure
Nov ‘17
Nov. ‘19
Soap abstracts Aug. ‘23
Soft light
Jan. ‘13
Smart phone photography May ‘19
Stained glass Mar. ‘17
Star photography
Jul. ‘16
Star photography and noise Jan. ‘18
Stock photography Sep. ‘14
Sunrise & sunset Jan. ‘19
Subject index for past Photo Insight issues
Tamron 150-600mm Apr. ‘14
Ten reasons photos are not sharp Jan. ‘19
Texture, Adding Mar ‘19
Texture Mapping in 3D Jul. ‘21
Topaz AI Gigapixel Mar ‘19
Topaz glow Jan. ‘15
Topaz glow Sep. ‘17
Topaz Impression Sep. ‘15
Topaz Remask 5 Oct. ‘17
Topaz Simplify 4 Dec. ‘12
Topaz simplify 4
Topaz Studio
Translucency & backlighting Nov. ‘18
Travel photography Feb. ‘13
Travel portraits Mar. ‘14
Travel tips Apr. ‘14
Travel photographer’s guide Jun. ‘17
Tweaking exposure on the fly Apr. ‘23
Twilight photography in the rain Apr. ‘19
Twilight, Creating Oct. ‘23
Tripods Mar. ‘18
Two subject sharp rule May ‘14
Two subject focus rule
Two subject focus rule
Urban heights
Ultra distortion
Unusual Panos
‘20
‘21
‘21
‘18
‘22w
Upside Down Reflections Aug. ‘21
Warm fingers in winter Nov. ‘15
Water drop collisions May ‘18
What NOT to do in photography Apr. ‘18
When You Needed a Zoom
‘21
White on White Dec. ‘20
White vignette Aug. ‘15
White balance
‘15
Quiz answers
White balance, custom
Wide angle conundrum
Wide angle lenses
Wide angle portraits
Wide angle lenses
Wide angle lenses: Outside the Box
Wide angle keystoning
Wildlife photos with wide angles
Window light
Window light portraits
Window frames
Winter photography
Winter bones
Winter photography
Winter photography
‘23
‘16 White balance, What
‘19
‘13
‘14
‘17
‘22w
‘17
‘15
‘15
‘18
‘16
‘12
‘13
‘15
‘18
Wire Mesh, Shooting Through Jul. ‘18
Workflow
‘13
90% - 100%: You could have been a pro
80% - 89%: Your glasses probably need a new prescription
70% - 79%: Don’t quit your day job
< 70%: You should really be using an iPhone

