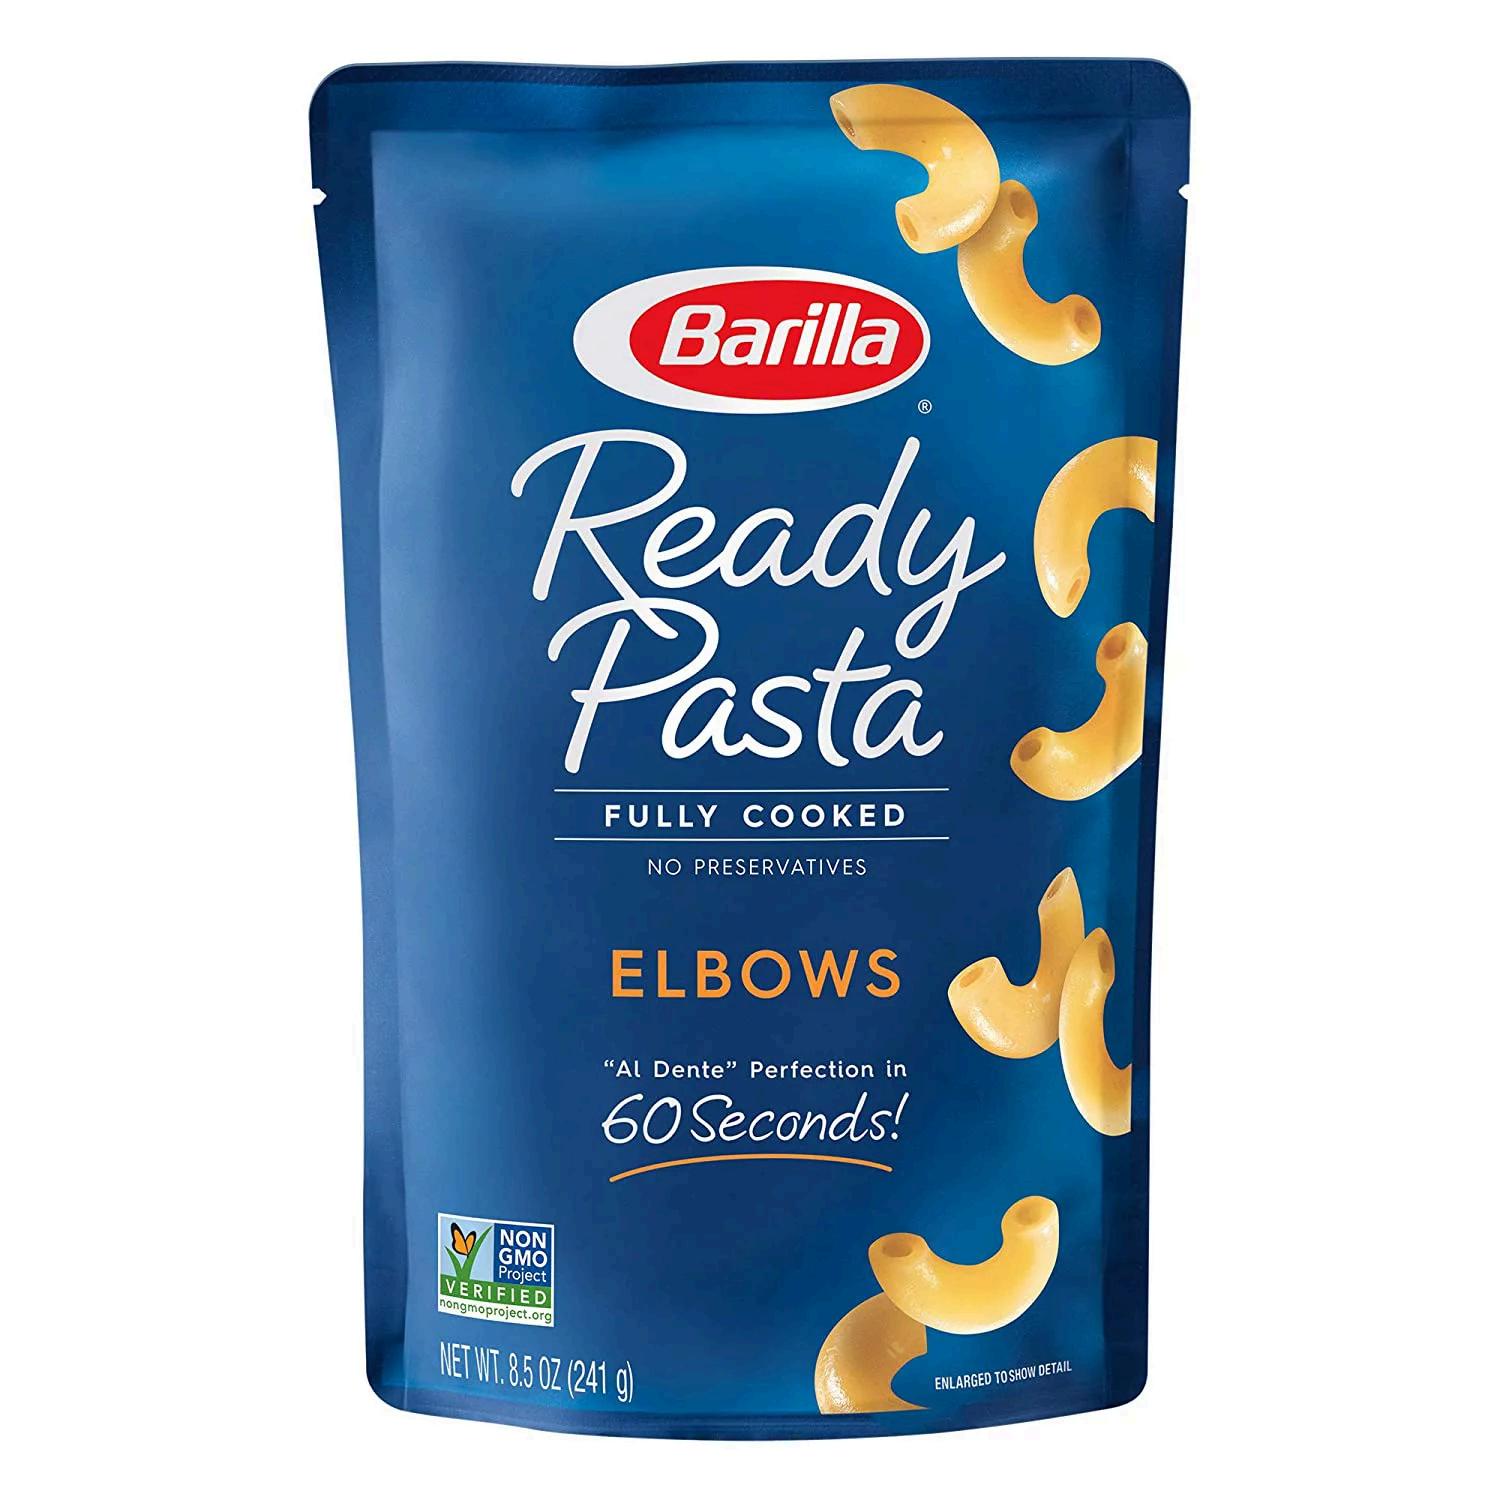
Ready Pasta (Elbows)
IN SEASON
All year round
FLAVOR PROFILE
Fully cooked pasta
HOW TO USE
Microwave for 60 seconds and it is ready as regular pasta
NUTRITION
9% of sodium, 42g of protein of Carbohydrate, 8% of Dietary Fiber
STORAGE
Sealed in packages or bags
Ready Pasta (Elbows) Cobb Salad
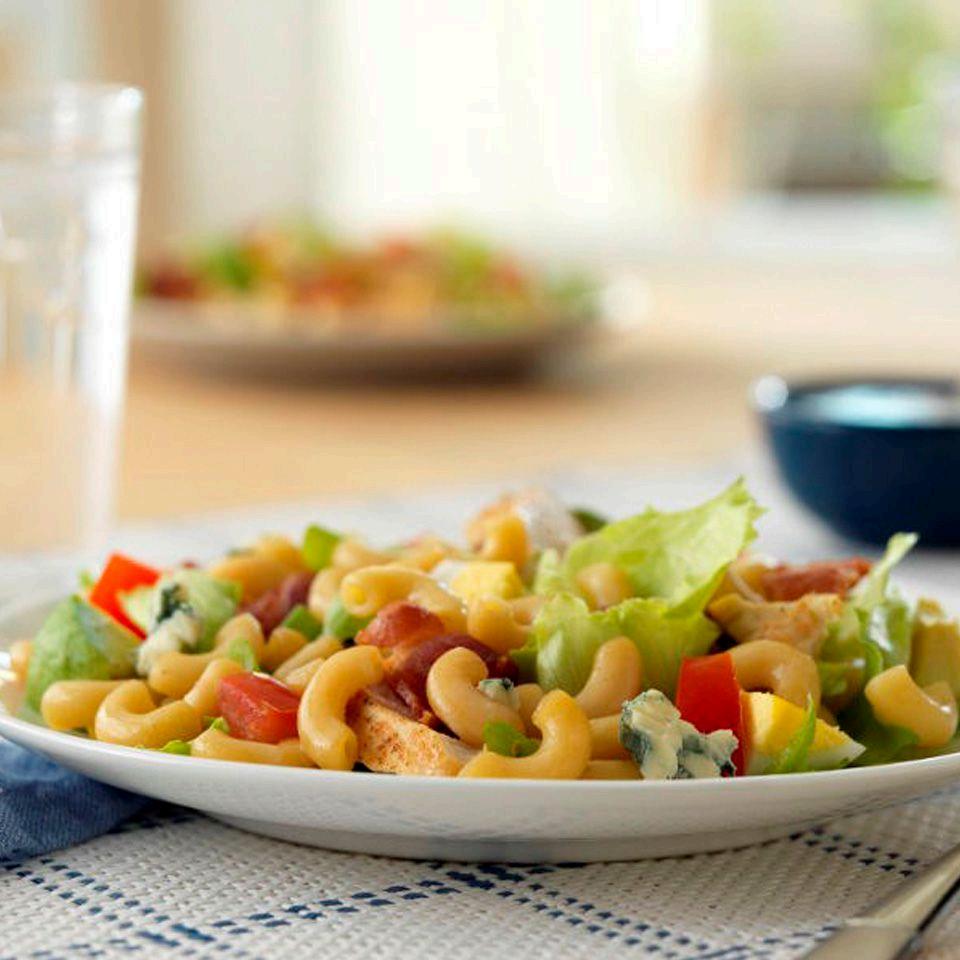
Photo and Recipe Credit: Barilla Canada, “Barilla Ready Pasta,” 2019, via https://www.allrecipes.com/recipe/264336/ready-past a-cobb-salad-with-ready-pasta-elbows/
Ready in 16 minutes
Serves 2 people
800 calories
Ingredients
● 1 pouch Barilla Ready Pasta Elbows
● 2 slices bacon, crispy and cut in strips
● 1 cup iceberg salad, shredded
● 1 hard-boiled eggs, chopped
● 1-4 oz grilled chicken breast sliced
● 2 ripe plum tomatoes, diced
● ½ avocado, diced
● 3 green onions, chopped
● ¼ cup blue cheese, crumbled
● 4 oz Ranch style dressing
Preparation
1. Tear corner of Ready Pasta pouch to vent, heat in microwave for one minute; pour on a plate and let cool down.
2. Toss pasta with all ingredients together in individual-sized serving bowls
Tips
For a vegan/vegetarian alternative, replace meat with non-meat protein alternatives (chickpeas, black beans, soy “meat,” tempeh)
Super Quick Elbows with Tomato Basil Sauce and Cheese
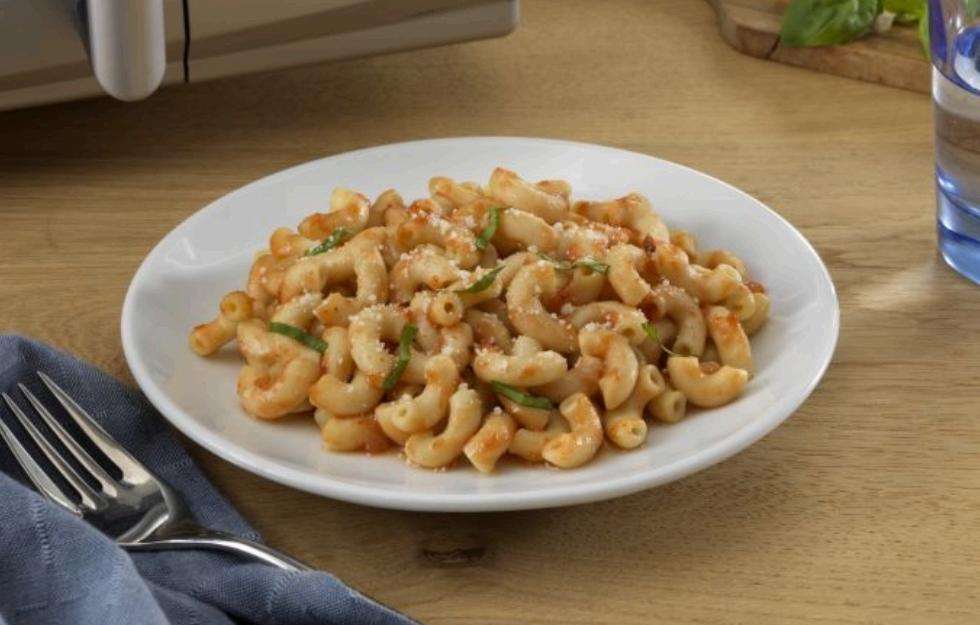
Photo and Recipe Credit: Barilla Canada, “Super Quick Elbows with Tomato Basil Sauce & Cheese,” via https://www.barilla.com/en-us/recipes/ready-pasta/su per-quick-elbows-with-tomato-basil-sauce-and-cheese
Ready in 5 minutes
Serves 2 people
800 calories
Ingredients
● 1 pouch Barilla Ready Pasta Elbows
● 1 cup of Barilla Tomato & Basil Sauce
● 2 leaves of basil, julienned
● 2 tbsp Parmigiano-Reggiano cheese, grated
Preparation
1. Tear corner of Ready Pasta pouch to vent, heat for 60 seconds in the microwave.
2. Warm sauce and basil in a bowl for 2 minutes in the microwave.
3 Combina pasta with sauce and top with cheese
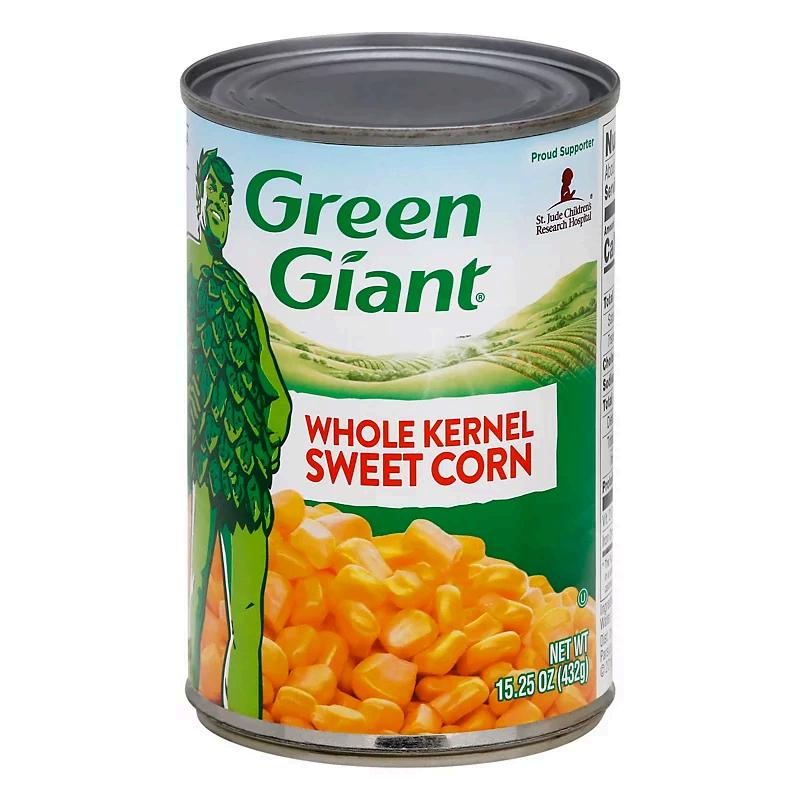
Canned Sweet Corn IN SEASON
All year round
FLAVOR PROFILE
Sweet, crisp, and tender
HOW TO USE
Sprinkle… on salads
Baked into cornbreads, muffins
Stir… into soups, stews
Blend into sauces
NUTRITION
In a can of Sweet Corn, you are able to get 12 mg of Calcium and 3 times more Calcium than cooked White Rice. 392 mg of Potassium is the same amount as Potassium in a boiled Sweet Potato.
STORAGE
Sealed in a mason jar or container with a lid.
Recipe credit: Undocupantry, AB540 and Undocumented Student Center
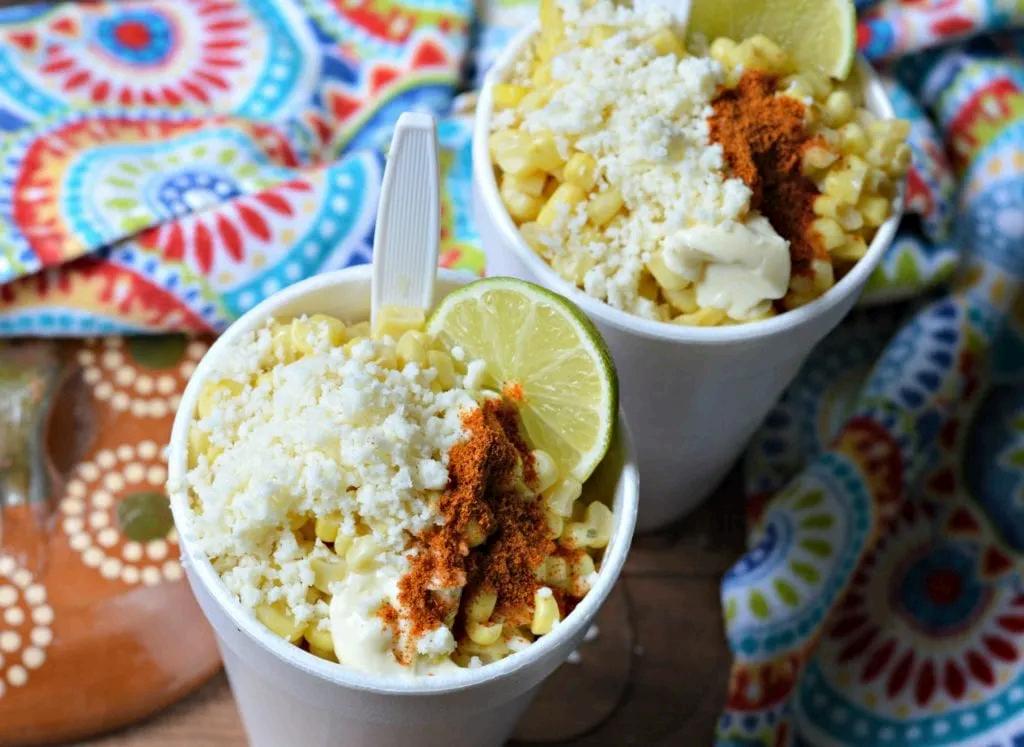
Photo: My Latina Table, “Authentic Mexican Esquites (Mexican Corn Salad),” via https://www.mylatinatable.com/authentic-mexican-esq uites-mexican-corn-salad/
Ready in 7 minutes
Ingredients
● 1 can of sweet corn
● 1 tbsp butter
● Salt to taste
● ⅓ cup of Parmesan cheese or Cotija
● Chile powder or Hot Cheetos powder
● 2 tbsp mayonnaise (adjust according to preference)
Preparation
1. Start by adding the butter to a frying pan.
2. Add the corn kernels and cook for 5 minutes over medium heat
3 Serve in cups
4 Add cheese, mayonnaise on top, and finish with chili powder or Hot Cheetos powder
5 Eat as is, or mix Enjoy!
Tips
Esquites can be eaten hot or cold, depending on preference.
Canned Tuna

IN SEASON
All year round
FLAVOR PROFILE
Bland, hints of salt, depending on the brand, it can be moist and flaky
HOW TO USE
On top of rice, tostadas, and salted crackers
Tossed… in a salad and pasta
NUTRITION
2% of calcium, which is the same amount in tortillas. 22 g of protein to build muscle. 4% of Potassium, which is the same amount as black beans. Contains 3 times more Iron than peas.
STORAGE
Sealed in Tupperware or in a Mason jar with a lid.
Tuna Salad
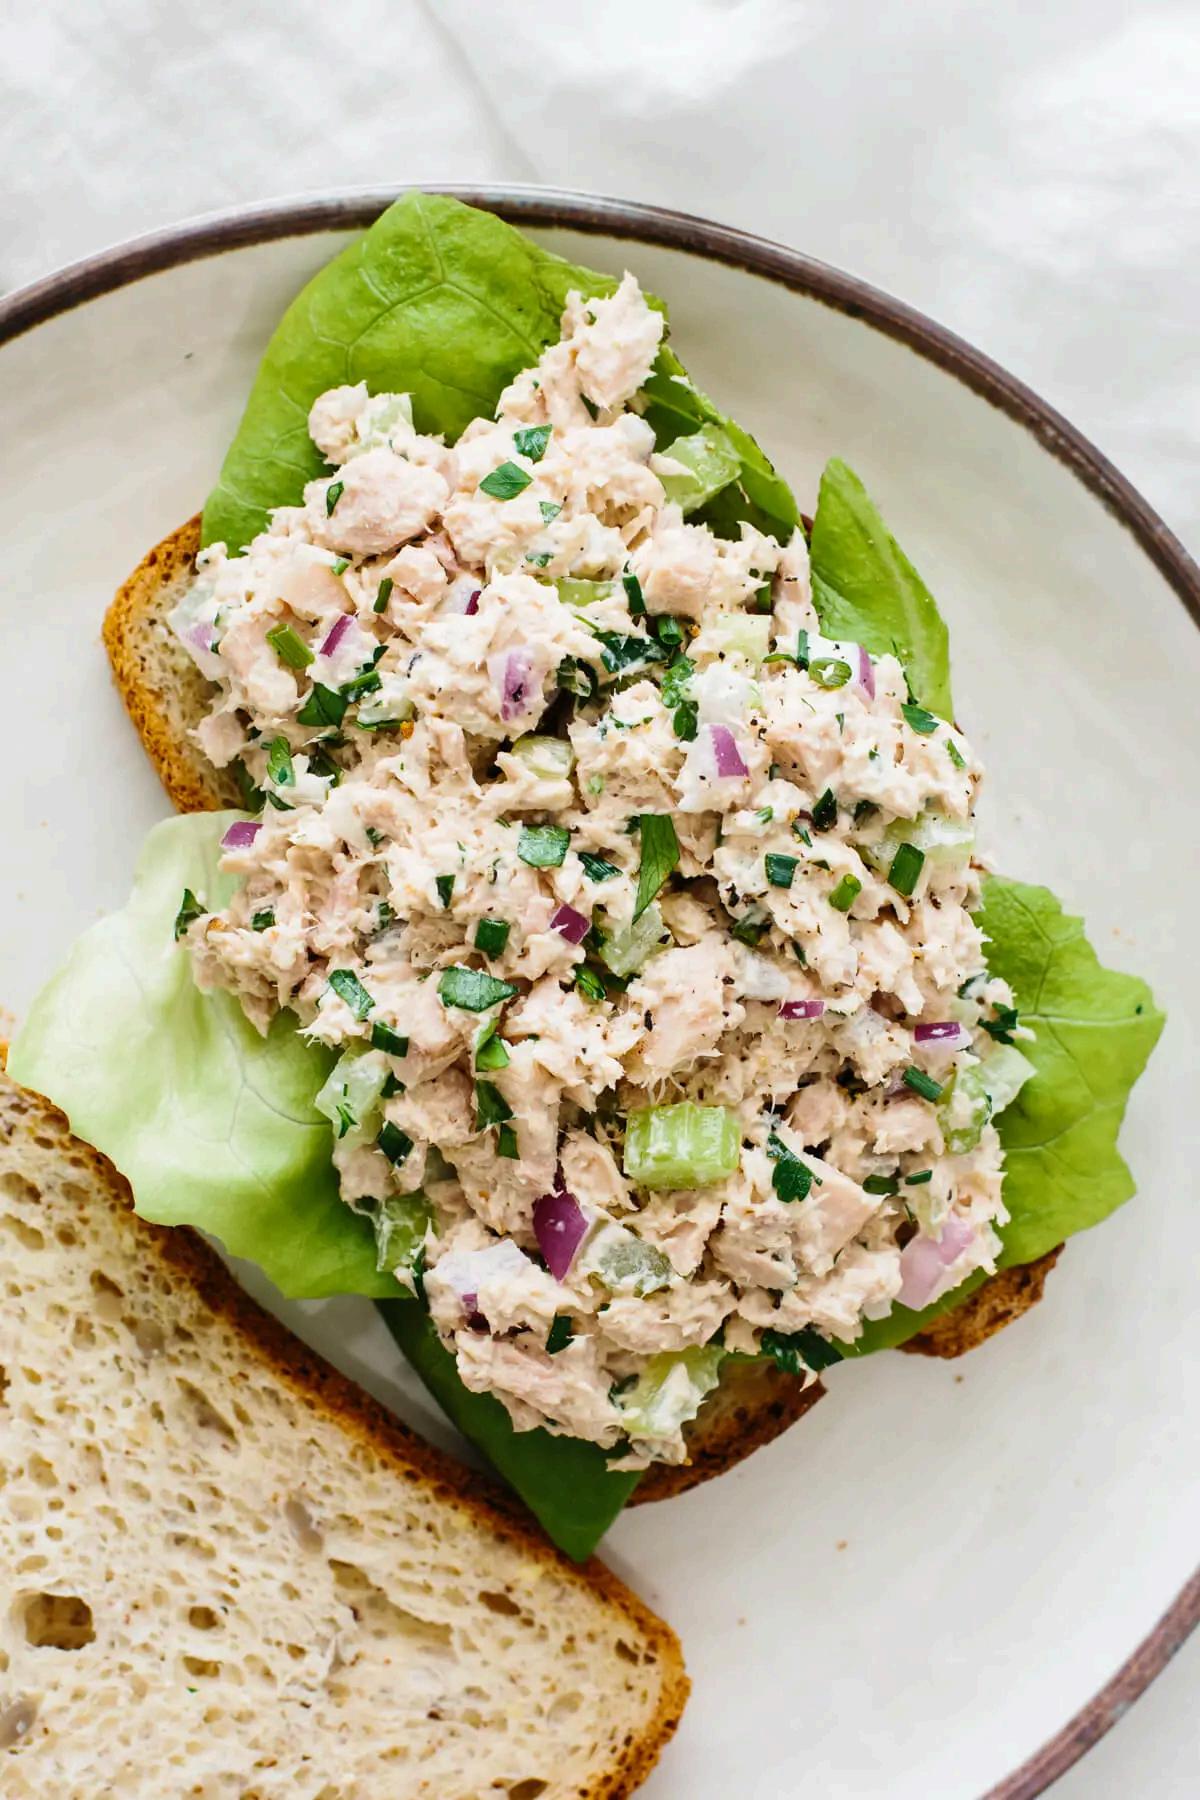
Ingredients
● 1 canned tuna
● 2 medium sized tomatoes
● ¼ cup of cilantro
● A pinch of sea salt
● ⅛ cup of white or red onion
● ¼ cup of cucumber
● 1 lemon or lime
● Optional: ¼ cup of mayonnaise
Preparation
1. Open the canned tuna. Drain the liquid from the canned tuna. Add the tuna to the bowl.
2. Wash your tomatoes, cucumber, and onion. Chop the tomatoes, cucumber, and onion into small cubes
3 Wash and drain your cilantro and roughly chop the cilantro
4 Add the chopped tomatoes, cucumber, onion, and cilantro into the same bowl as the tuna
5 Add lemon or lime juice to the bowl
6. You may add mayonnaise if you want, and add the sea salt.
7. Carefully mix your ingredients together.
8. Can be eaten right away or stored in an airtight container in the refrigerator.
Ingredients
Tuna Noodle
Casserole
Recipe credit: Undocupantry, AB540 and Undocumented Student Center
Phot
Casser
https://www oodle-casser
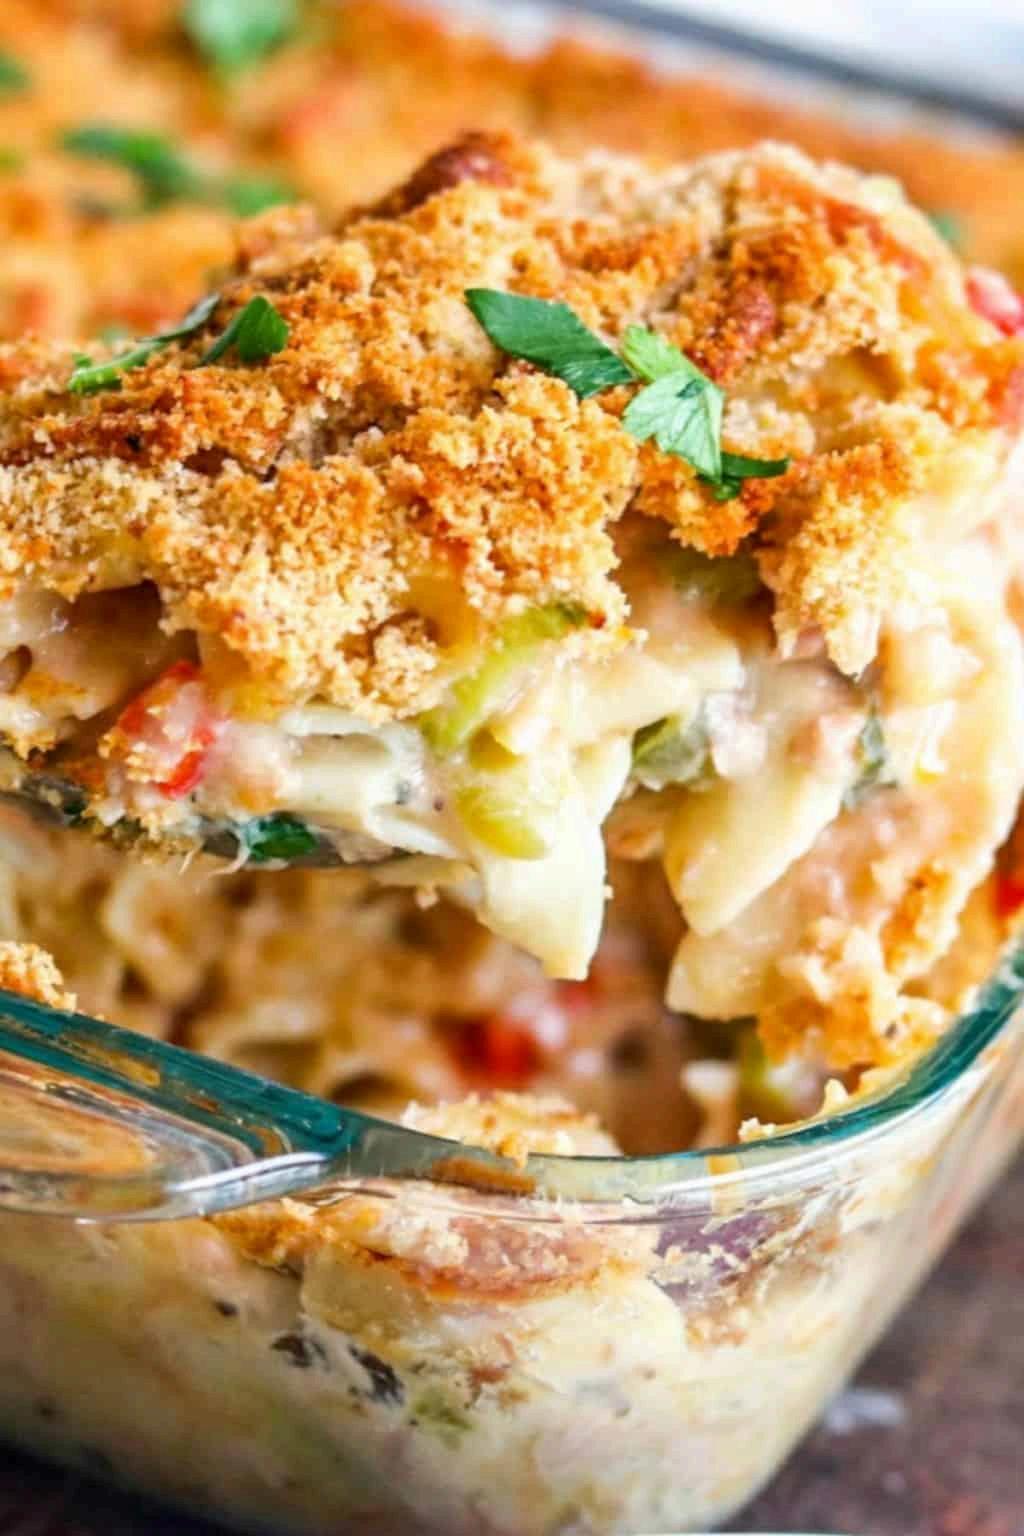
● 1 canned tuna
● ½ cup beans and legumes
● Pasta noodles
● 4 cups spinach
● ¼ cup Alfredo sauce
● Oil
● Dash: basil, oregano
Preparation
1 Preheat the oven to 400°F
2 Cook pasta according to the packaging instructions on the stovetop
3. Coat the casserole dish with oil.
4. Combine all ingredients in the casserole dish.
Tips
Tuna noodle casserole can include chopped celery, diced white onions, and other vegetable varieties
Tuna Melts on Pepper
Recipe credit: Undocupantry, AB540 and Undocumented Student Center
Ingredients
● 1 canned tuna
● 1 bell pepper, green
● 1 tbsp mayonnaise
● ⅓ cup mozzarella cheese, shredded
● Dash: everything cheese, shredded
Preparation
1 Preheat the oven to 425°F
2 Slice peppers into quarters
3 Mix tuna and mayonnaise
4. Combine all ingredients into a casserole dish.
5. Bake for 10 minutes.
6. Remove from the oven, top with cheese.
7. Bake for another ~3 minutes.
8. No cheese? Use dairy-free cheese.
Tips
Bell peppers can be cut in half and the hollow part can be filled with the mixed tuna and mayonnaise.
Arugula Chickpea Tuna Salad
Recipe by Siya Pun
A quick and easy meal to prepare before or after class for an energy boost!
Ingredients
● 2 tbsp of olive oil
● Arugula
● Canned chickpeas
● Lemon juice
● Canned tuna
● Diced red onion
● Sesame salad dressing
● Spices:
○ Garlic powder
○ Onion powder
○ Smoked paprika
○ Cayenne pepper (optional for added spice)
○ Za'atar
○ Salt
○ Pepper
○ Dill seasoning
● Optional: nutritional yeast for added Vitamin B12
Preparation
1. Prepare by opening and draining cans of tuna and chickpeas. Lightly mash tuna after draining,
2. Dice red onions
3. Drizzle olive oil in a bowl and toss in chickpeas to cover in oil
4. Mix in garlic powder, onion powder, smoked paprika, cayenne pepper, za 'atar, salt and pepper
5 Add tuna and lightly mix it in the bowl
6 Top with arugula
7 Squeeze lemon juice and add dill seasoning
8 Toss salad and your quick meal is ready!
Hot Pepper
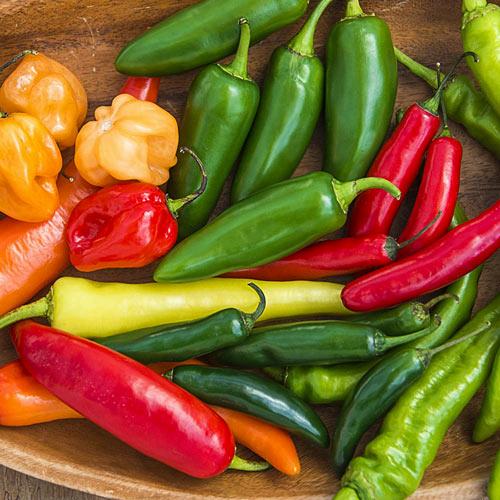
Credit: Gurney’s, “Hot Pepper Mix,” via https://www.gurneys.com/product/hot_pepper_mix_
IN SEASON
Summer, Fall; June-November
FLAVOR PROFILE
Generally spicy, although different types of hot peppers may have distinctive flavors such as lemony, bitter, etc.
HOW TO USE
The most common way to use hot peppers is incorporating them in sauces or salsas, but they can also be pickled, dried, prepared into chili poppers or chili, etc.
NUTRITION
Vitamin C: immune support, wound healing, protects tissues from damage
Vitamin B6: Pyridoxine: converting food into energy, formation of red blood cells and neurotransmitters
Vitamin A: pair with fat for best absorption; vital to eye function
STORAGE
Store hot peppers in a container and refrigerate
Spicy Rice
Casserole
Recipe credit: Taste of Home, Undocupantry, AB540 and Undocumented Student Center
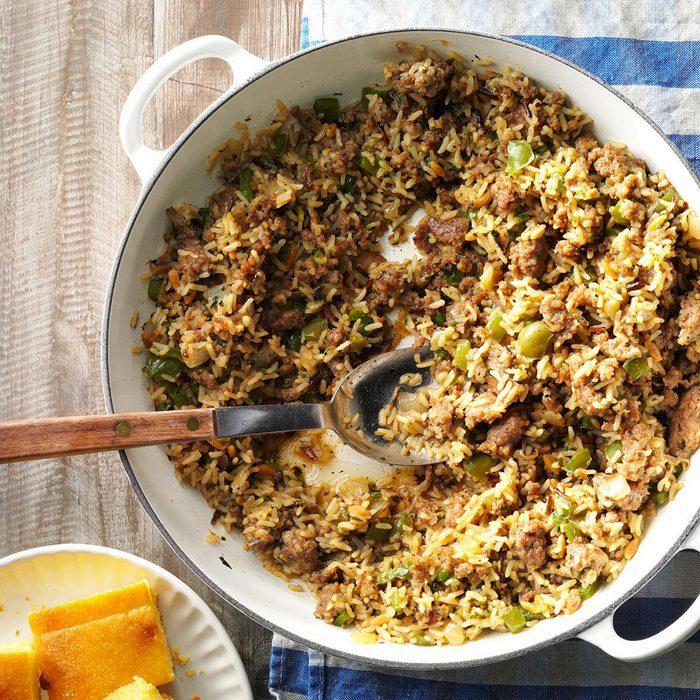
Photo: Taste of Home, “Spicy Rice Casserole,” via https://www.tasteofhome.com/recipes/spicy-rice-casse role/
Ingredients
● 3 tbsp canola oil
● 4 eggs, lightly beaten
● ½ tsp sesame oil
● 1 onion chopped
● 1 tsp ginger, finely chopped
● 1 clove garlic, finely chopped
● ½ hot pepper, deseeded and finely chopped
● 2 bell peppers, deseeded and finely chopped
● 1 lb broccoli, chopped
● 4 cups of rice, cooked
● 4 tbsp soy sauce
● ¼ cup oyster sauce
Preparation
1. In a large skillet, heat 1 tbsp of canola oil and sesame oil over medium-high heat. Add eggs and stir until cooked through.
2 Set aside the eggs, wipe the skillet, and add remaining canola oil Add onion, ginger, garlic, both hot pepper and bell peppers, broccoli, and cooked rice Increase heat slightly and cook until rice is crispy (about 5 minutes)
3 In a small bowl, combine oyster sauce with soy sauce. Pour mixture over rice and continue cooking until the rice has absorbed the liquid.
4. Add cooked eggs back into the skillet and mix. Serve.
Chicken Panang Curry
Recipe by Siya Pun

Ingredients
● 2 chicken breasts
● Panang curry paste or panang curry sauce
● Coconut milk (if not using panang curry sauce)
● Salt (to taste)
● Oil
● ¼ cup shallots
● 1 tbsp thai chilies
● ¼ teaspoon curry powder (optional)
● Broccoli
● Green beans
● Chicken broth (optional: low-sodium chicken broth)
● Bokchoy
Preparation
1 Thoroughly wash bok choy and separate sprigs
2 Rinse broccoli and green beans
3 Chop up chicken breast into bite-sized pieces
4 Chop up shallots
5 Heat up oil in a large pot and throw in shallots and thai chilis
6. Cook up for a few minutes until shallots starts to brown
7. Add panang curry paste if not opting for panang curry sauce
8. Pour in coconut milk for the paste (if not using panang curry sauce)
9. Add chicken breast into pot and pour in a small amount of chicken broth and curry powder
10 Cover with lid and simmer for 10-12 minutes
11 Uncover and add broccoli, green beans, and bok choy
12 Cook for an additional 5 minutes
13 Serve with rice!
Poblano Peppers
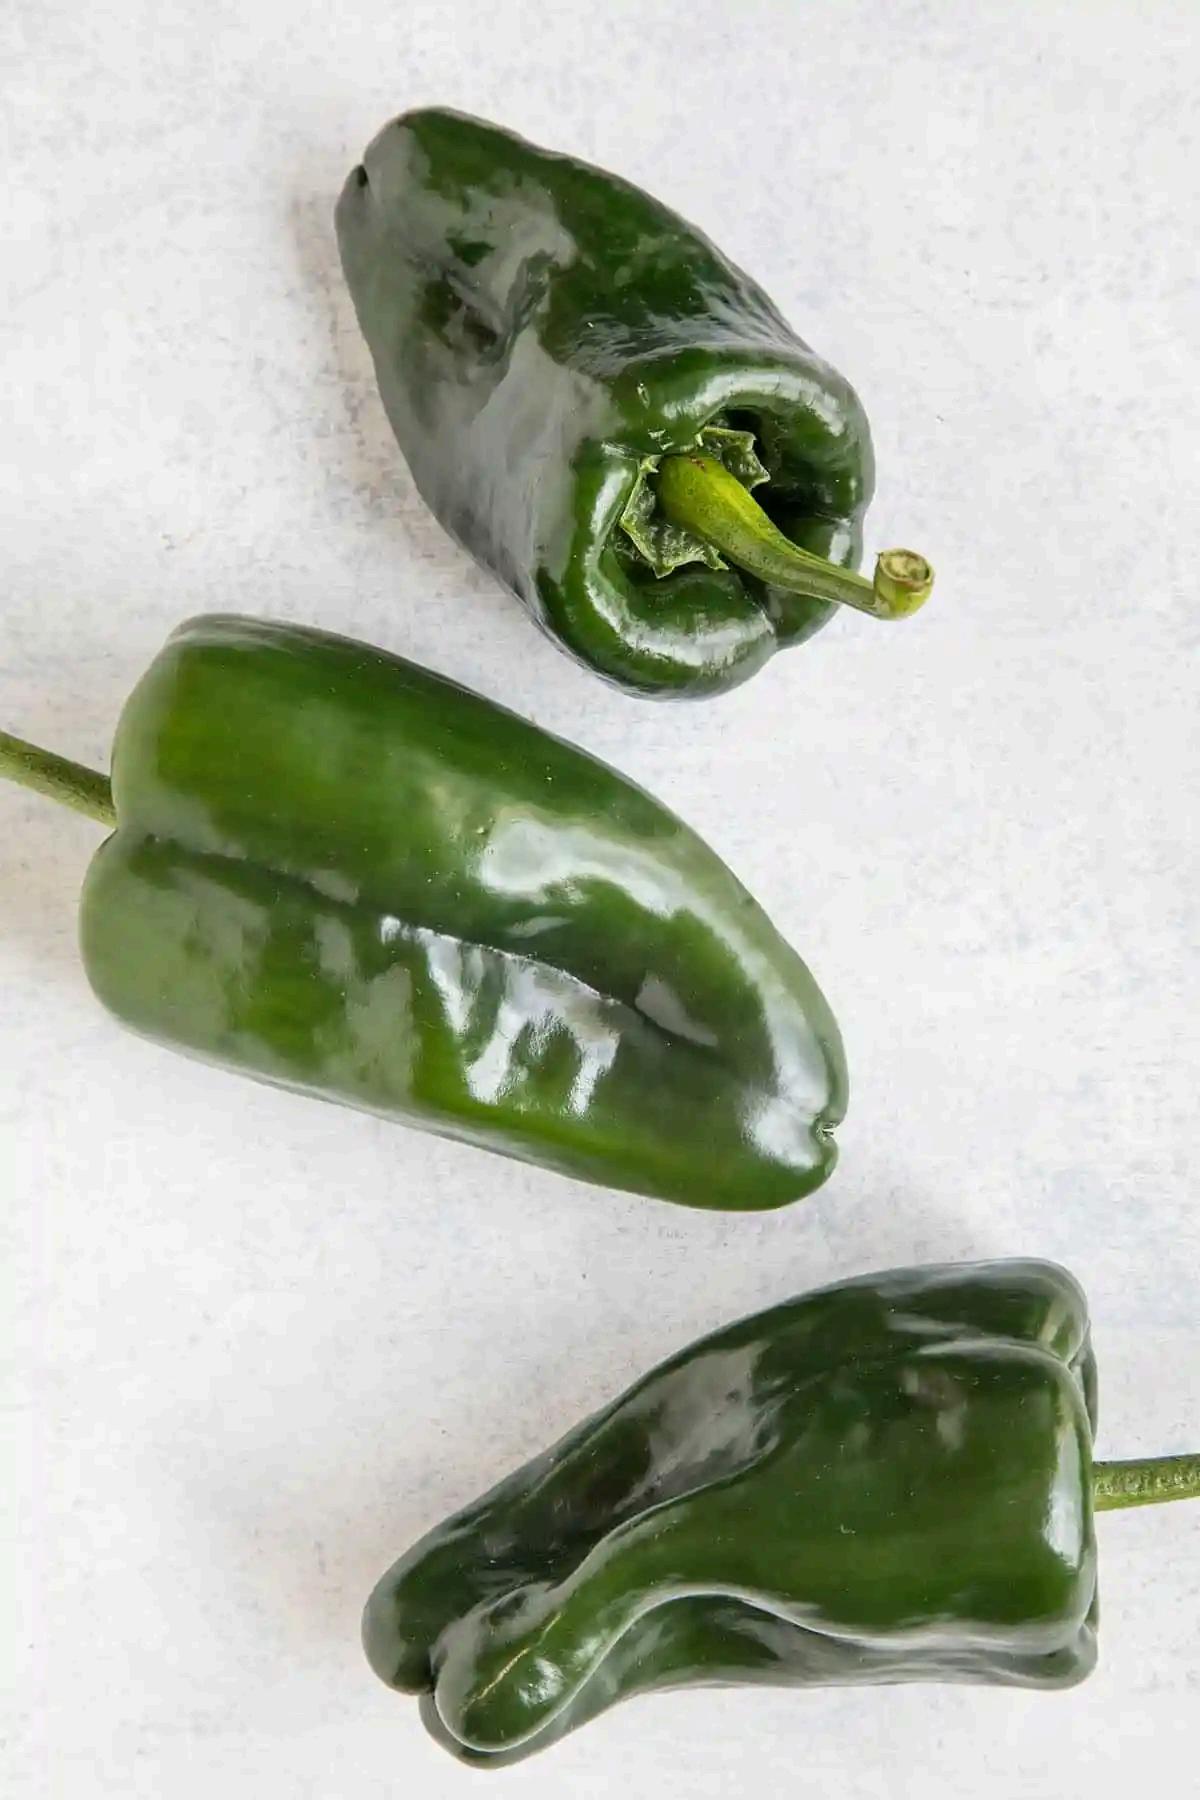
Photo Credit: Mike Hultquist, “Poblano PeppersBeloved Mexican Pepper (All About Them),” via https://www.chilipeppermadness.com/chili-pepper-typ es/sweet-mild-chili-peppers/poblano-chili-peppers/
IN SEASON
Summer, Fall
FLAVOR PROFILE
Green pepper with a smokey taste, mildly spicy
HOW TO USE
Cut the top of the pepper off where the stem is
Use your hand to remove the insides of the pepper, where all the seeds are.
Cut the pepper on one side longways to open it up
Now you can cut the pepper into slices or pieces.
NUTRITION
Antioxidants: protects tissue from damage
Dietary Fiber: bone health and muscle function
Phosphorous: important component of all tissues, especially bones
STORAGE
Refrigerate at all times, preferably in a bag sealed in the vegetable section of the fridge.
Can also store in the freezer; preserve for 10-12 months
Chili Stuffed Poblano Peppers
Recipe by Lorrie Grabczynski

Photo Credit: Taste of Home, “Spicy Rice Casserole,” via https://www.tasteofhome.com/recipes/spicy-rice-casse role/
Ingredients
● 1 lb of ground turkey
● 1 can of chili
● ¼ tsp of salt
● 1 ½ cups of shredded Mexican cheese
● 1 medium tomato
● 4 green onions
● 4 poblano peppers
● 1 tsp olive oil
Preparation
1. Preheat the oven to 350°F or use a broiler.
2. Fully cook ground turkey until no longer pink. Add chili and a pinch of salt. Add cheese, tomatoes, and green onions
3 Cut the top part of your pepper to remove the stem Remove the seeds and the insides
4 Cut the pepper in half and coat every side with oil
5 Line a tray with aluminum foil and place the peppers (with the opening down) on the foil. Place it in the oven for about 5 minutes, or until the skin of the pepper begins to blister.
6. After cooking the peppers, carefully remove the peppers from the oven. Remove the foil and flip them back over on the tray or dish. Add your chili filling into the open side.
Turnips
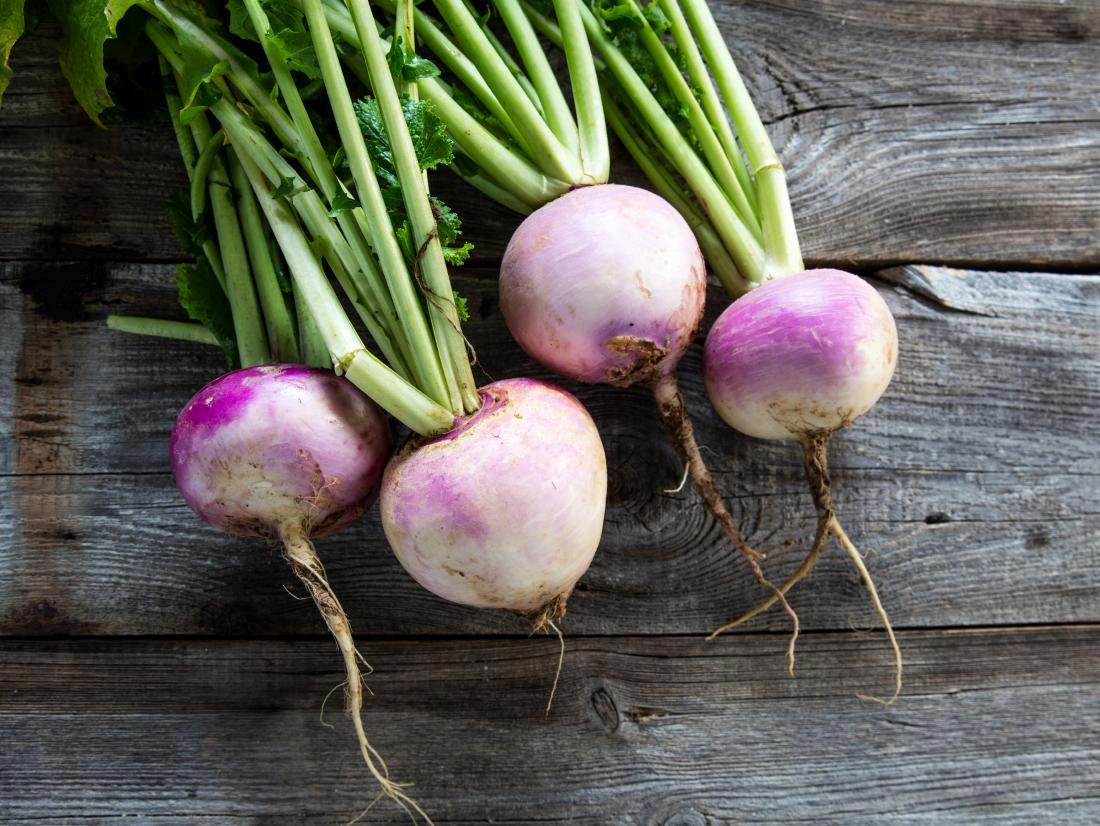
Credit: Medical News Today, “What are the benefits of turnips?,” via https://www.medicalnewstoday.com/articles/284815
IN SEASON
Winter FLAVOR PROFILE
Young turnips taste like carrots, medium aged turnips taste like potatoes, older turnips taste bitter when eaten raw
HOW TO USE
Wash in cold water to remove dirt
Peel if there is a thick skin. Younger turnips have thin skin and do not usually need to be peeled.
Cut off the green top
Turnips can be sauteed, mashed, or roasted.
Can be eaten raw or cooked
NUTRITION
Vitamin A: pair with fat for best absorption; vital to eye function
Vitamin C: immune support, wound healing
Vitamin K: helps to make various proteins that are needed for blood clotting and the building of bones
STORAGE
Twist or cut off the tips to keep them from pulling moisture from the roots
Turnips are best stored in dry, cool, and dark environments.
Leek, Turnip, and Rice Soup
Recipe by Lorrie Grabczynski
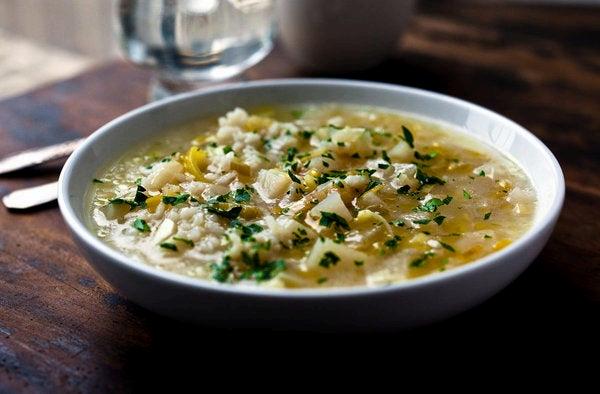
Credit: Andrew Scrivani, “Leek, Turnip and Rice Soup,” via https://cooking.nytimes.com/recipes/12179-leek-turni p-and-rice-soup
Ingredients
● 2 tbsp extra virgin olive oil
● 4 large leeks, white and light
○ Green parts only, cleaned and sliced
● 1 lb turnips, cut in ½ inch dice
● 2 garlic cloves, minced
● 2 quarts canned vegetable stock or water
● ½ cup of rice
● 2 tbsp chopped fresh parsley
● Salt and pepper to taste
● 1 bay leaf
Preparation
1. Heat oil on medium heat in a soup pot and add leeks.
2. Cook, stirring often until leeks start to soften and then add turnips. Continue to cook until turnips are translucent and leeks are thoroughly tender
3 Stir in the garlic and cook until fragrant
4 Add stock or water, salt, bay leaf, and rice
5 Bring to a boil, reduce heat to low
6. Cover and simmer for 30 minutes while tasting and adjusting for seasonings.
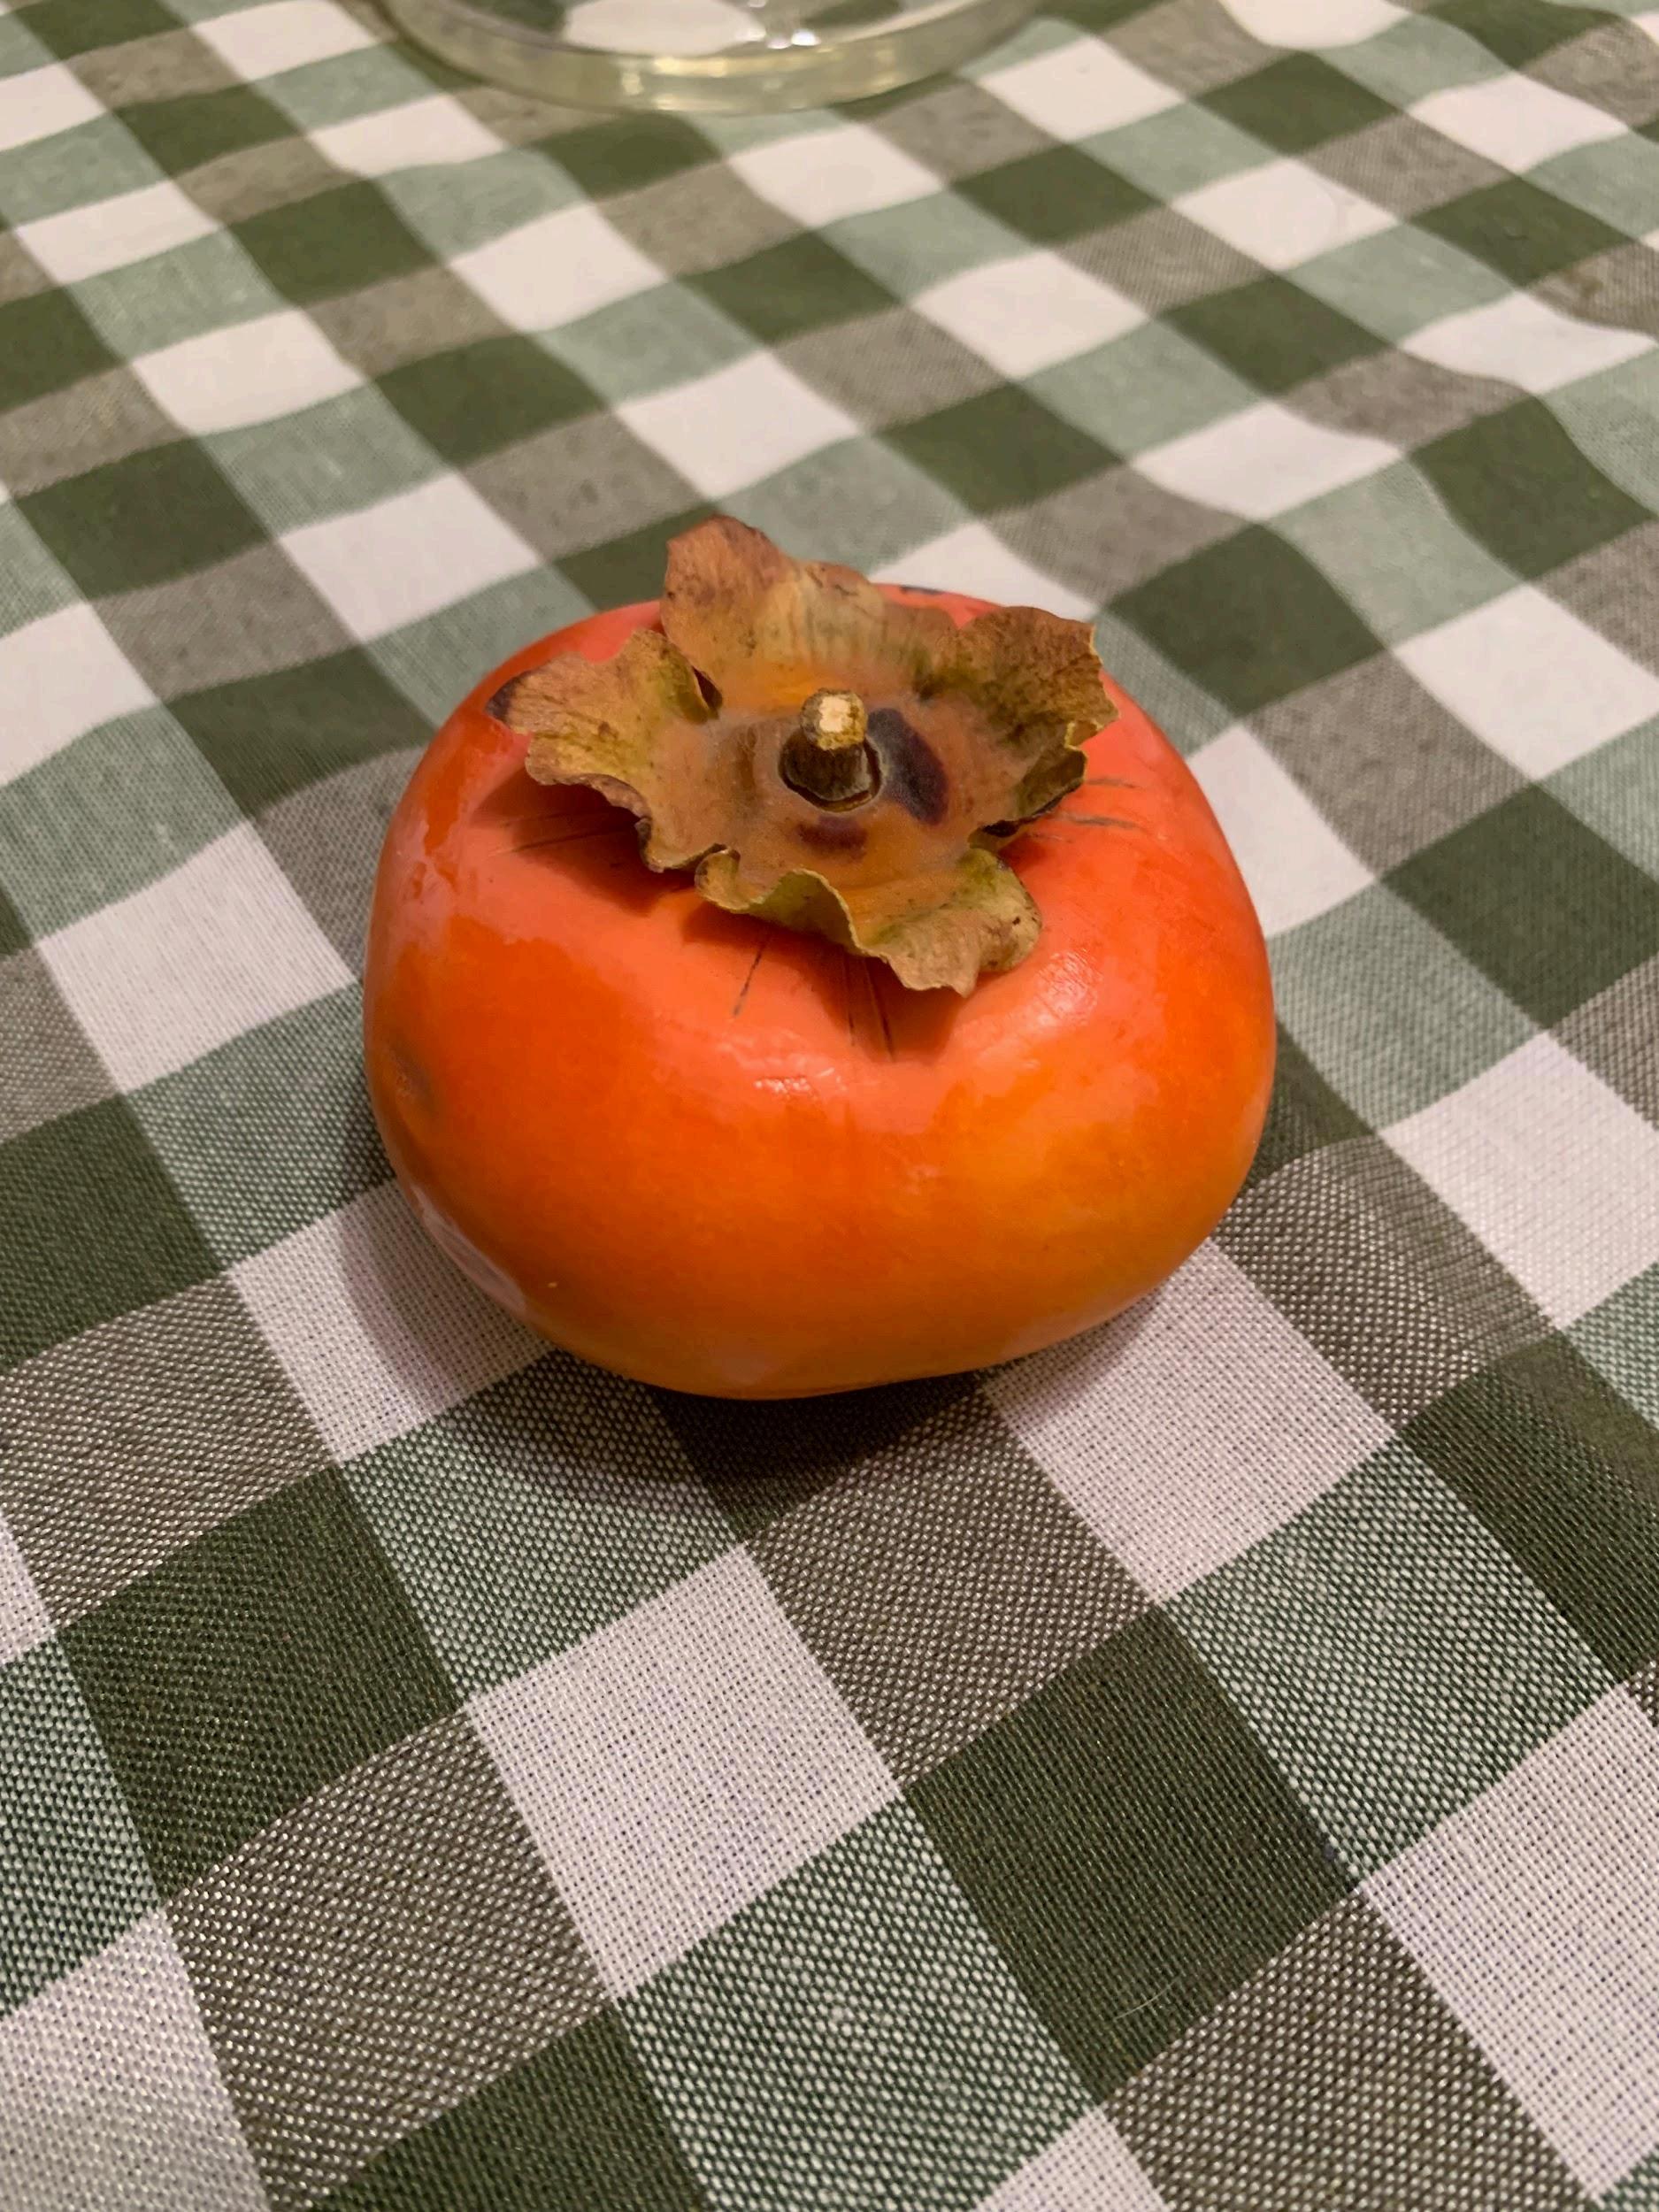
Persimmon
IN SEASON
October-December
FLAVOR PROFILE
Ripe persimmons resemble a tomato and offer a pleasant, sweet flavor
HOW TO USE
Cut away the leaves, wash or peel, and slice as you would an apple! Use in salads, breads, and jams
NUTRITION
Vitamin C: immune system, wound healing
Potassium: fluid balance, muscle contractions, nervous system functions
Iron: pair with vitamin C for enhanced absorption; transport of oxygen, overall growth
STORAGE
Store at room temperature and use when ripe (similar to a tomato)
Vegetable Hand Rolls (Temaki)
Recipe by Lisa Lin (Healthy Nibbles)
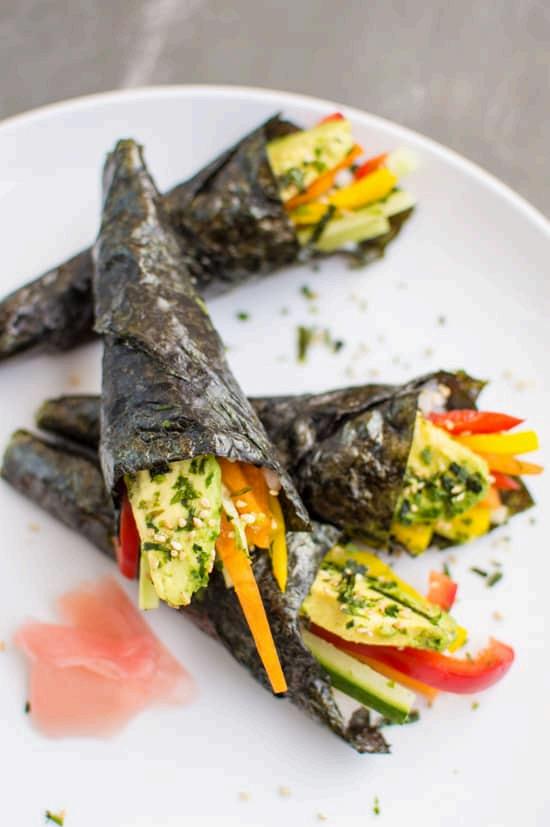
Photo Credit: Lisa Lin, “VEGETABLE HAND ROLLS (TEMAKI),” via https://healthynibblesandbits.com/vegetable-hand-roll s/
Ingredients
● 1 cup (180g) uncooked sushi rice/long grain rice
● 3 tbsp sushi seasoning
● 10 sheets toasted sushi nori
● ½ English cucumber
● 1 medium red bell pepper
● 6 oz (170g) preserved daikon
● 2 medium persimmons
● 2 small avocados, pitted and sliced
● Furikake for topping (optional)
Preparation
1 Cook the sushi rice Mix in the sushi seasoning While the rice is cooking, prepare the vegetables by cutting them into matchstick-size pieces. If you want to, add persimmons in the hand rolls, peel the persimmons, and cut it into matchstick-size pieces.
2. Cut the nori sheets in half. Spoon some rice onto the nori (about 2 to 3 tablespoons). Spread the rice so that you fill one half of the nori. Top the nori with the sliced vegetables. Roll the nori
Eggplant
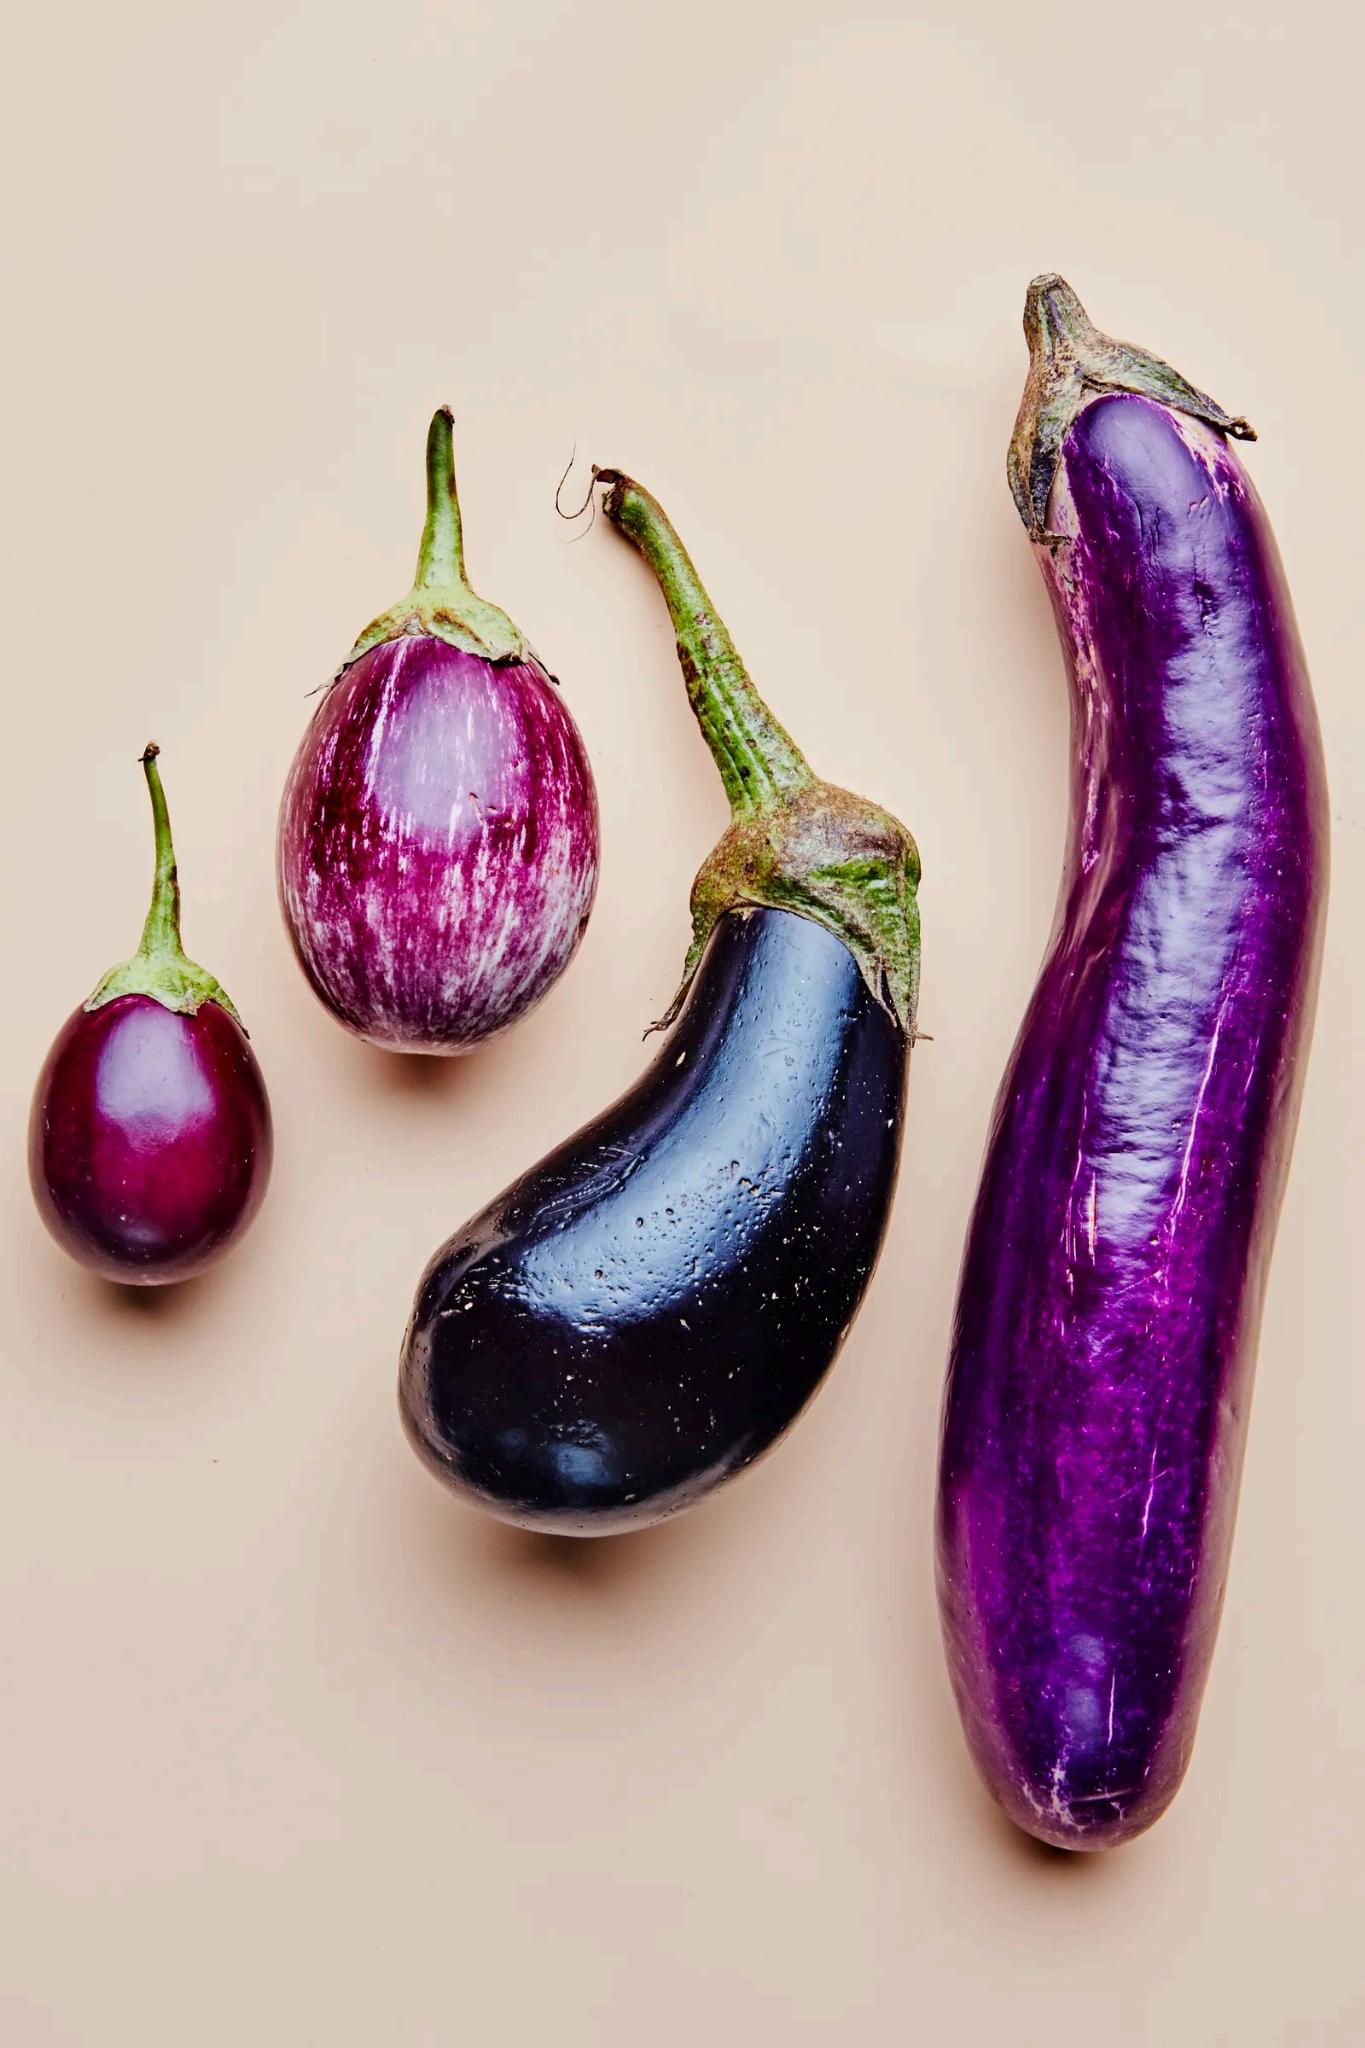
By Emma Fishman, Food
By
Hardeman, via https://www.bonappetit.com/story/how-to-cook-eggpl ant-perfectly-every-time
IN SEASON
Mid-summer to mid-fall
FLAVOR PROFILE
Can be bitter, but becomes creamy and earthy when absorbing flavors from other ingredients it is cooked with
HOW TO USE
Trim stems Leave the skin on, unless it is thick or unless the flesh will be mashed or pureed Peel the skin if tough Cut into slices, cubes, or halves.
NUTRITION
Manganese: Bone health, antioxidants, blood sugar regulation
Folate: production of red blood cells, production of genetic material, and overall growth
Copper: immune support, nervous system function, energy production, activates genes
STORAGE
Store unwrapped in a cool place or in a perforated plastic bag in the refrigerator crisper. Standard and Asian eggplants can be used interchangeably in recipes.
Eggplant Curry
Recipe by Linda Fraser
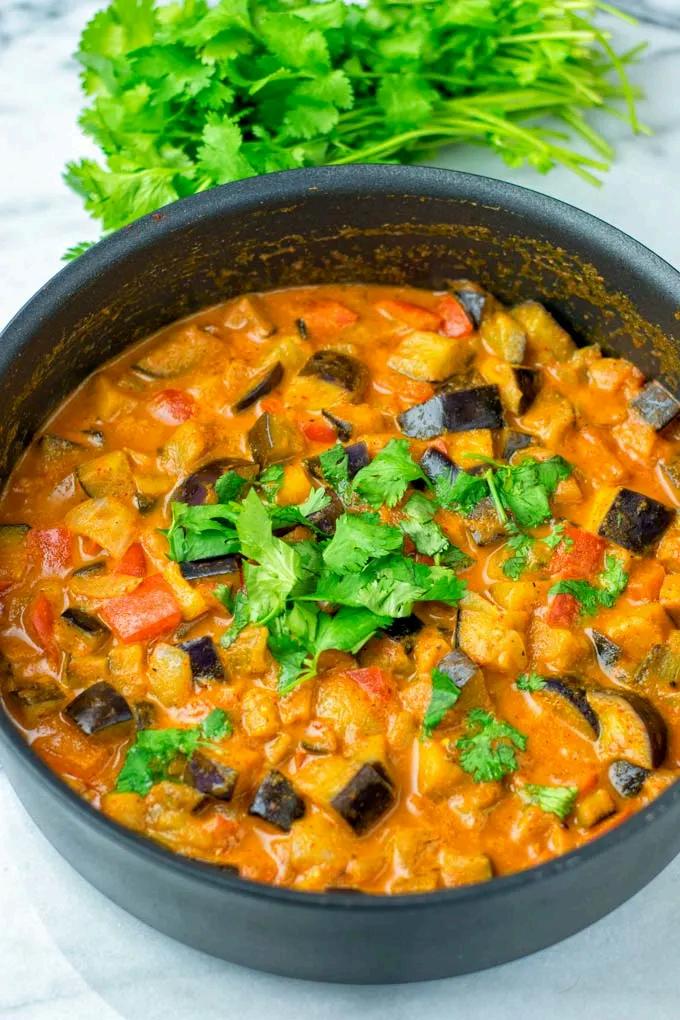
Credit: Florian Nouh, “Eggplant Curry,” via https://www.contentednesscooking.com/eggplant-curr y/
Ingredients
● 2 large eggplants
● 3 tbsp oil
● 1 bunch scallions, finely chopped
● 1 cup mushrooms, halved
● 3 garlic cloves, crushed
● 1 fresh red chili, finely chopped
● 1 tsp chili powder
● 1 tbsp curry powder (cumin, coriander, turmeric)
● 1 tsp salt
● 14 oz. chopped tomatoes
● 1 tbsp cilantro chopped (plus extra for garnish)
Preparation
1. Preheat the oven to 400°F. Brush each eggplant with 1 tbsp oil and prick with a fork Bake for 30-35 minutes until soft Meanwhile, heat the remaining oil in a saucepan and then add scallions, mushrooms, garlic, and chile (optional), and cook for 5 minutes
2. Stir in chili, curry powder, and salt. Cook 3-4 minutes. Add tomatoes and simmer for 5 minutes.
3. Once the eggplant is out of the oven and cool enough to touch, cut in half lengthwise and scoop soft flesh into a bowl and mash briefly. Add the mashed eggplant and chopped cilantro to the pan.
4. Bring to a boil and simmer for 5 minutes, or until the sauce thickens Serve garnished with cilantro!
Pomegranate
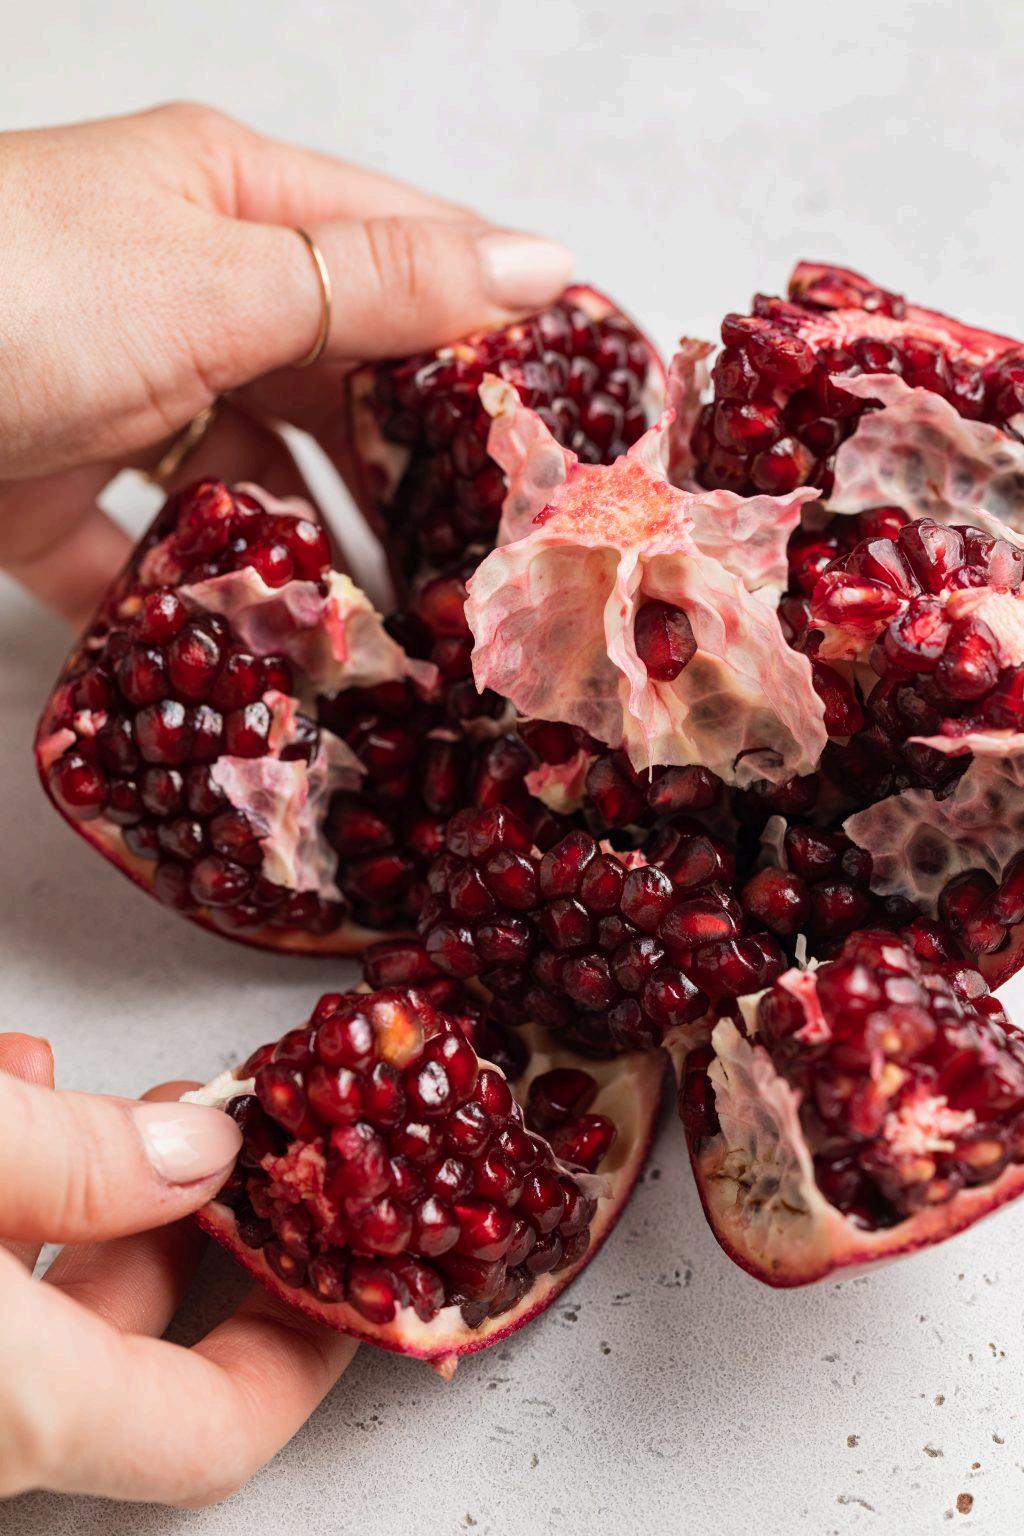
Photo By Samantha of Sam Does Her Best, “How to Cut a Pomegranate,” 2022 via https://samdoesherbest.com/how-to-cut-pomegranate/
IN SEASON
Fall (September-November)
FLAVOR PROFILE
Pomegranates are juicy, astringent, and sour with a wooden taste
HOW TO USE
Cut the “flower” portion off the top and score the fruit in half with shallow cuts so the juice doesn’t leak Gently pull the halves apart with your thumbs planted in the center of the removed flower. Remove the seeds (arils) from the white membrane!
NUTRITION
Vitamin K: pair with fat for best absorption, bone strength
Vitamin A: pair with fat for best absorption, eye strength
Vitamin B9 Folate: production of red blood cells, production of genetic material, and overall growth
STORAGE
Pomegranates stored out of direct sunlight and in a cool room temperature place can last a few weeks, but pomegranates can last roughly two months in a refrigerator.
Pear and Pomegranate Salad
Recipe by Serene Herrera
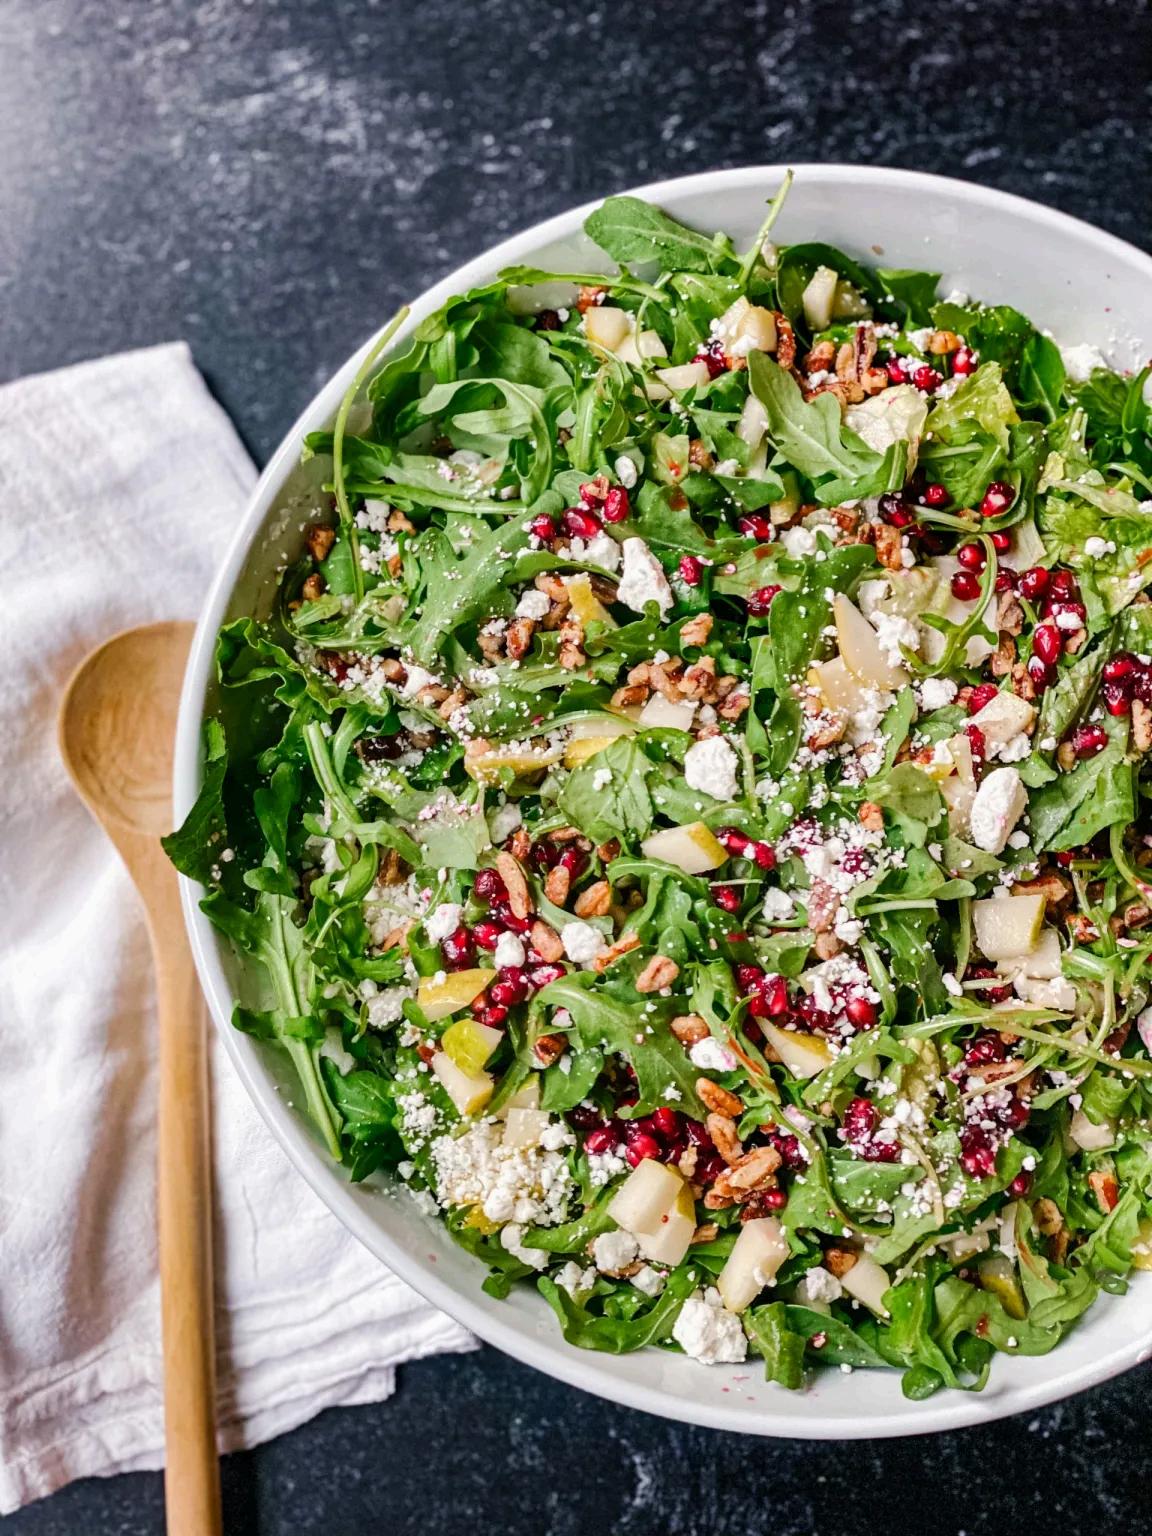
“Pomegranate
Salad with Orange Vinaigrette,” via https://plumstreetcollective.com/pomegranate-pear-sal ad-orange-vinaigrette/
Ingredients
● ¼ cup pomegranate seeds
● 1 pear sliced or chopped per preference
● 3 cups packed baby spinach
● ¼ cup crumbled feta cheese
● ¼ cup pecan halves
● Optional: orange poppyseed vinaigrette
● Vinaigrette
○ ⅓ cup fresh orange juice
○ ¼ cup extra virgin olive oil
○ 1 tbsp dijon mustard
○ 1 tbsp apple cider vinegar
○ 1 tbsp poppyseeds
○ 1 tbsp honey
Preparation
1. For the salad, add the spinach to a large bowl and layer the remaining ingredients on top. Top with desired dressing or use orange poppyseed vinaigrette
2 Orange poppyseed vinaigrette directions:
a Add all ingredients to a medium sized jar Tighten the lid and shake until thoroughly mixed Drizzle over salad Toss to combine. Serve immediately and enjoy!
Garlic
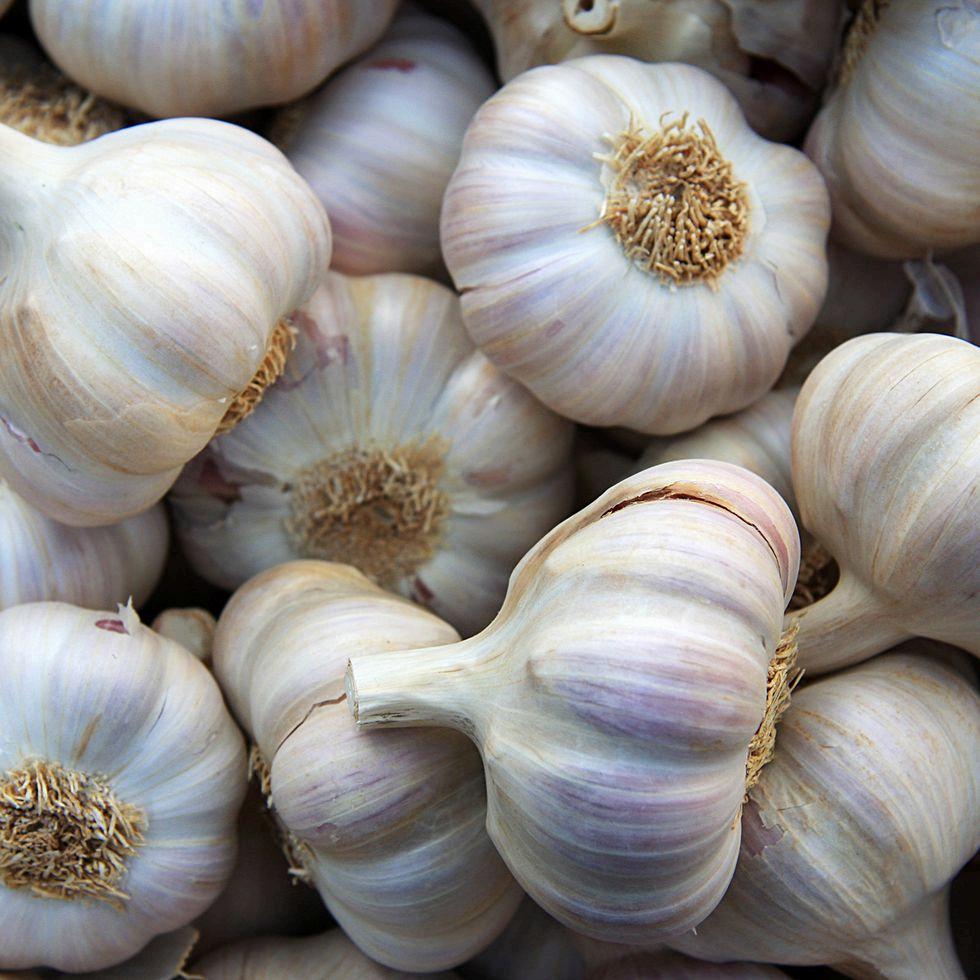
Photo By Rixipix, “The Health Benefits of Garlic, According to Registered Dietitians,” 2022 via https://www.goodhousekeeping.com/health/diet-nutrit ion/a40447277/garlic-health-benefits/
IN SEASON
Fall-Summer
FLAVOR PROFILE
It has a strong pungency when raw and a rich flavor when cooked
HOW TO USE
Garlic can be eaten raw or prepared in several ways such as fried and roasted
NUTRITION
Potassium: fluid balance, muscle contractions, nervous system function
Calcium: muscle contraction, regulating blood pressure, structural component of bones and teeth
Phosphorous: structural component of bones, teeth, cell membranes, and genetic material
STORAGE
Garlic will keep up to six months when stored in a dry and dark place
Garlic Clove Spaghetti
Recipe by Garlic Girl
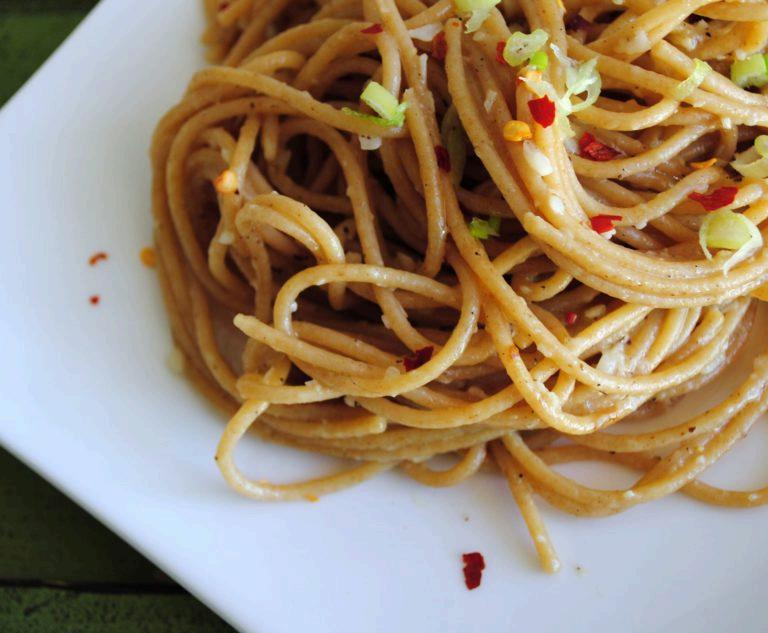
Photo Credit: Garlic Girl, “40 CLOVE GARLIC SPAGHETTI,” 2011, via https://garlicgirl.com/2011/08/09/40-clove-garlic-spa getti/
Ingredients
● 1 lbs whole-wheat spaghetti
● 2 pork loin blade chops
● 40 cloves fresh garlic peeled
● ¼ cup half and half milk
● 4 tbsp oil
● 2 tbsp butter
● ½ tsp crushed red pepper
● 2 green onions chopped
● Salt and ground pepper to taste
Preparation
1. Saute garlic cloves in oil on low for 40 minutes. Stir often so they roast evenly without burning. Cook until tender and lightly caramelized. Remove garlic, set aside.
2. In the same pan, add oil and turn heat to medium-high. When oil begins to shimmer, add the pork chops, salt and pepper, brown on both sides When the sides are brown, cook on low until cooked through Remove, set aside
3 Cook spaghetti and make sure to reserve 1 cup of the water Set aside Add 1 tablespoon of the butter to the strained spaghetti to prevent the pasta from sticking together.
4. In a blender, combine garlic and half and half and blend briefly until it has the consistency of hummus.
5. In a small pan on medium heat, add butter, the garlic mixture (you do not have to use all of it, just enough to taste), and ¾ cup of the water from the pasta. Heat and stir until emulsified.
6 Reheat the pan that you cooked the chops in with a little oil (without the pork chops) Heat should be at medium-high Toss in the crushed red peppers for about 10 seconds, and then toss the pasta Briskly toss and scrape the pan so that the pasta gets coated with the flavors from the pork and garlic. Add the remaining water from the pasta to help the process along, and then add the garlic and half and half mixture. Continue to toss until evenly coated.
Orzo with Garlicky Spinach
Recipe by Bruce Weinstein and Mark
Scarbrough
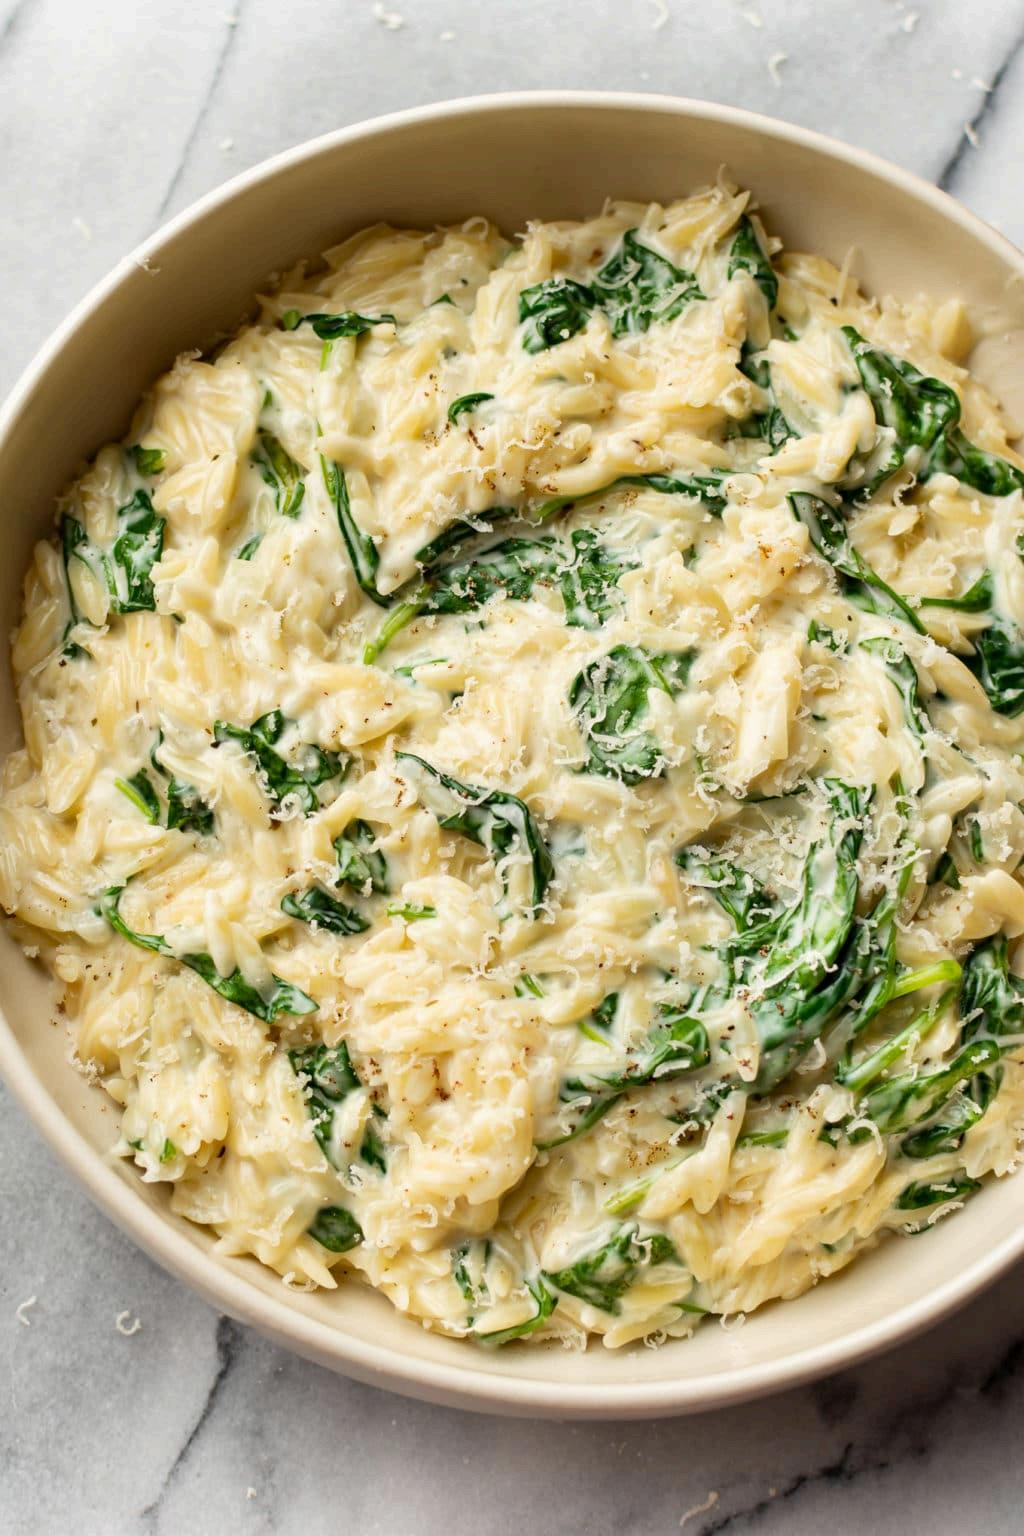
Salt and Lavender, “Creamy Garlic Spinach Orzo,” 2021, via https://www.saltandlavender.com/creamy-garlic-spinac h-orzo/
Ingredients
● ¾ cup uncooked orzo
● 1 tbsp butter
● 4 cups spinach
● 2 tsp minced garlic
● 1 oz Parmesan cheese
● ¼ cup chicken broth
● 1 tbsp white balsamic vinegar
● ⅜ tsp salt
● ¼ tsp crushed red pepper
Preparation
1 Cook pasta according to package directions, omitting salt and fat
2 Melt butter over medium heat Cook for 1 minute or until browned
3. Add spinach and minced garlic. Cook for 1 minute.
4. Stir in orzo, Parmesan cheese, chicken broth, vinegar, salt, and crushed red pepper.
Udon With Chicken and Garlicky Peanut Dressing
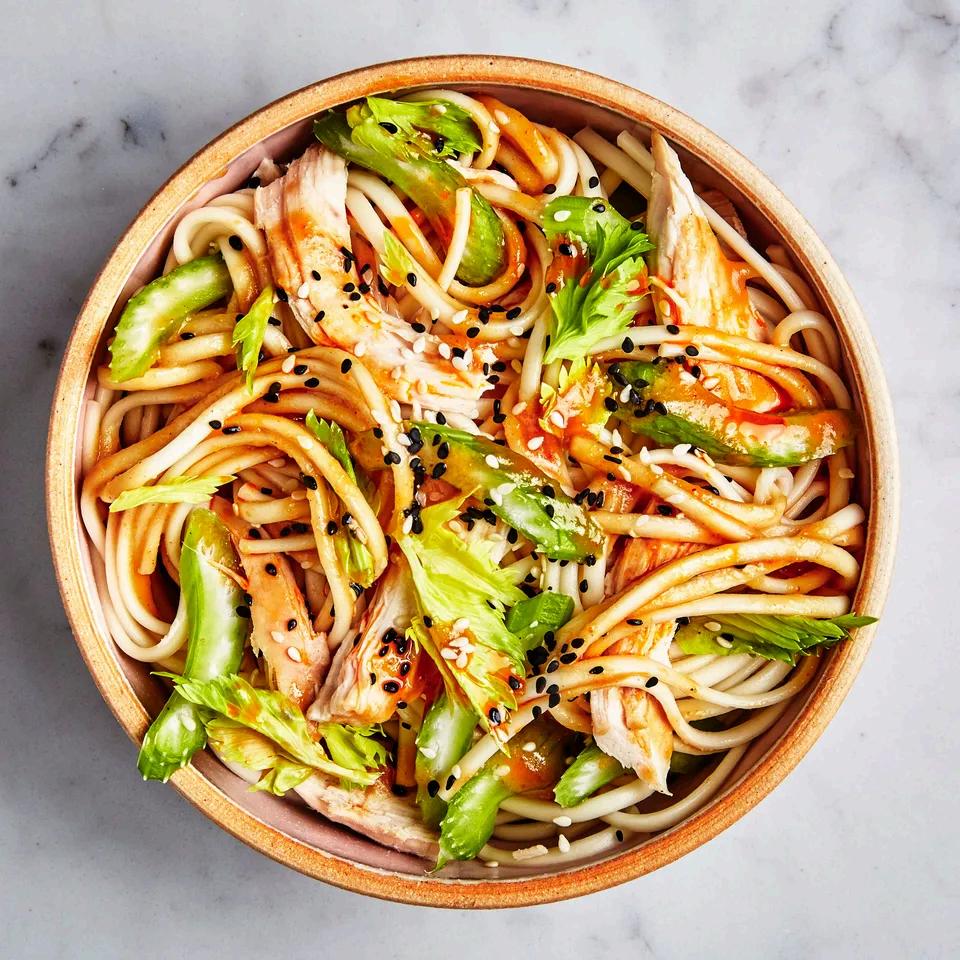
Recipe by Claire Saffitz
Ingredients
● ¼cup natural creamy peanut butter
● ¼cup soy sauce
● ¼ cup unseasoned rice vinegar
● 1 tablespoon honey
● 1 garlic clove, finely grated
● ¼cup vegetable oil
● 8 ounces dried udon noodles
● Kosher salt
● 8 ounces shredded rotisserie chicken (about 2 cups)
● 1½ cups thinly sliced celery hearts and leaves
● 1½ cups mung bean sprouts
● 1 small daikon (Japanese white radish), peeled, cut into matchsticks
● 2 teaspoons black and/or white sesame seeds
● Chili oil (for serving)
Preparation
1 Whisk peanut butter, soy sauce, vinegar, honey, and garlic in a small bowl until smooth Gradually add `vegetable oil, whisking constantly until emulsified; set aside.
2. Cook noodles in a large saucepan of boiling salted water according to package instructions until al dente. Drain; rinse under cold water, then drain again.
3. Toss noodles, chicken, celery, bean sprouts, and daikon in a large bowl with three-quarters of reserved dressing to combine and evenly coat; season with salt Top with sesame seeds and drizzle remaining dressing and chili oil over
4 Do Ahead: Dressing can be made 1 day ahead Cover and chill
Tomatoes
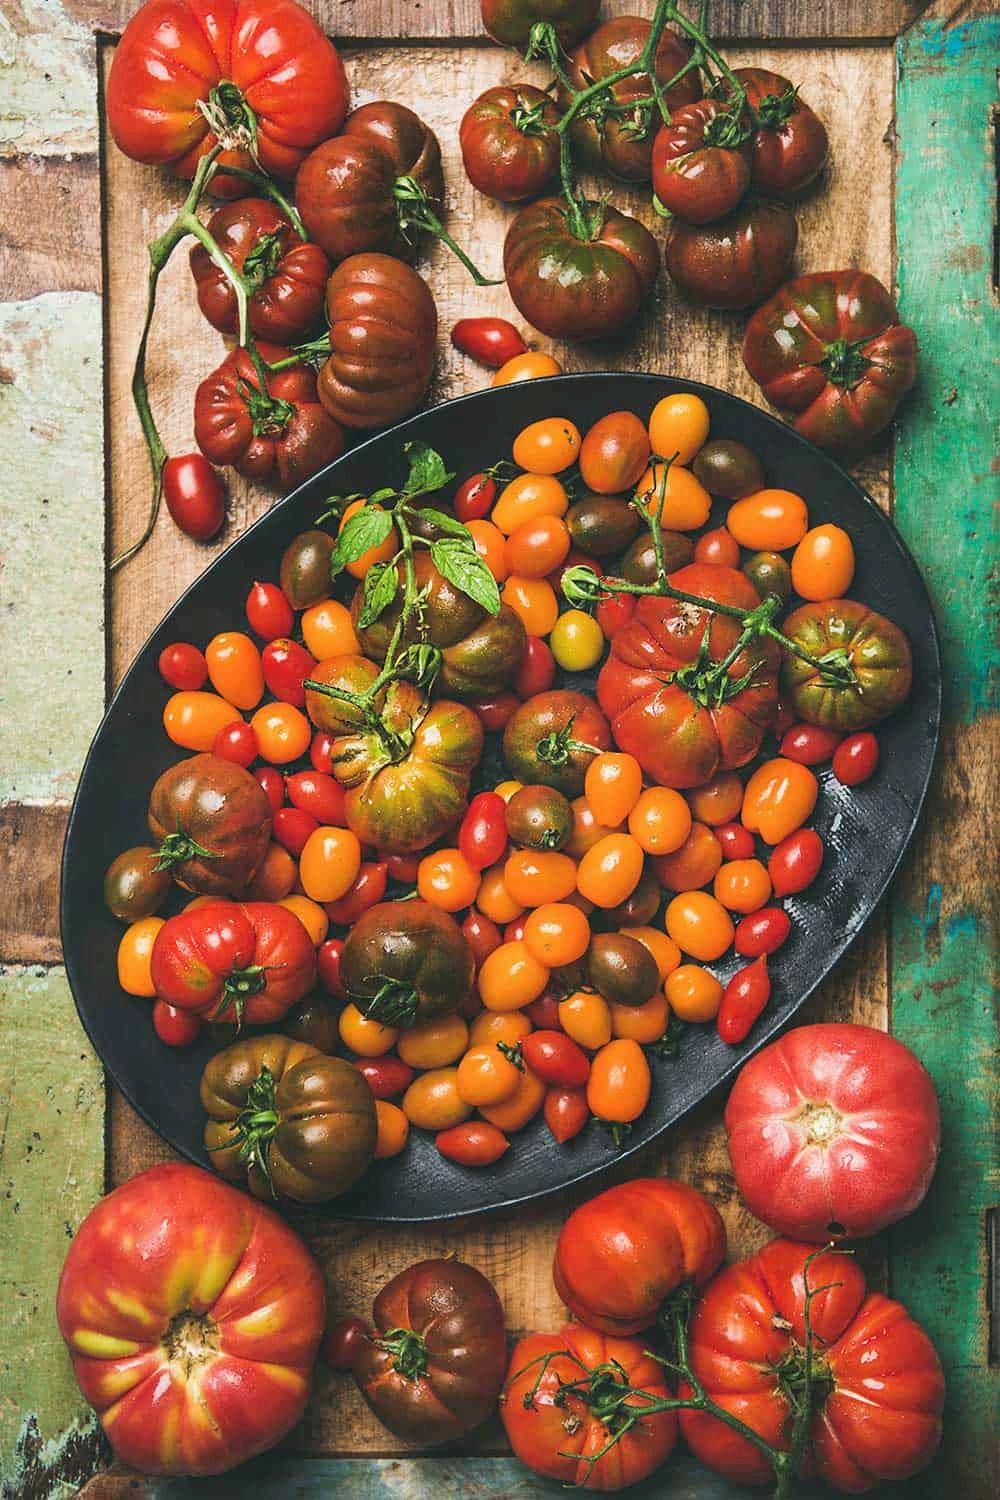
By Kris Longwell, “Types Of Tomatoes And How To Use Them,” 2021 via https://howtofeedaloon.com/types-of-tomatoes-and-ho w-to-use-them/
IN SEASON
Summer, June-September
FLAVOR PROFILE
Sweet, tart, tangy, and often described as balanced
HOW TO USE
Can be eaten sliced and fresh, made into sauce or soup, roasted, dried, and more
NUTRITION
Vitamin C: immune support, wound healing, protects tissues from damage
Vitamin A: pair with fat for best absorptions; vital to eye function
Potassium: fluid balance, muscle contractions, nervous system functions
STORAGE
Ripe tomatoes should be stored in cool temperatures or refrigerated Unripe tomatoes are best stored stem down at room temperature, away from the sun, and preferably wrapped in a single layer
Roasted Tomato Avocado Toast
Recipe by the Whole Serving
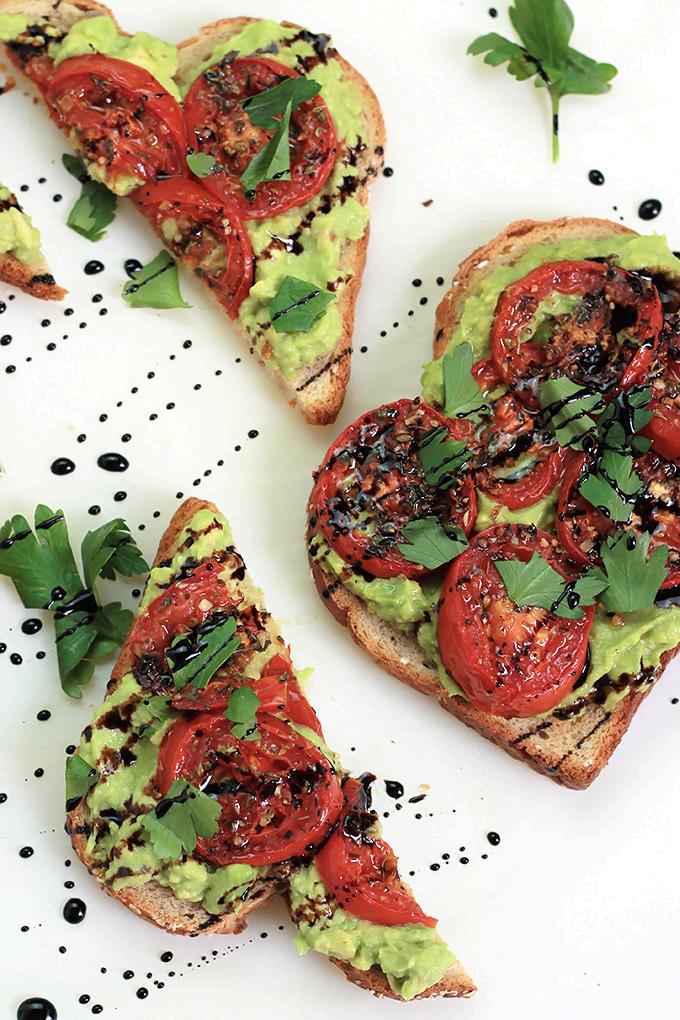
Photo Credit: The Whole Serving, “Roasted Tomato Avocado Toast,” via https://thewholeserving.com/roasted-tomato-avocadotoast/
Ingredients
● Serving size: 4 pieces of toast
● 3 tomatoes
● 4 sliced bread of your choice
● 2 ripe avocados
● Juice from 1 lime
● Flat leaf parsley for garnish
● Italian seasoning
● Olive oil
● Red pepper flakes (optional)
● Balsamic vinegar
● Sea salt
Preparation
1 Preheat the oven to 375°F Slice tomatoes and place on a baking pan Sprinkle with the Italian seasoning, sea salt, and drizzle with a bit of olive oil Roast the tomatoes for 15-20 minutes
2 While the tomatoes are roasting, cut the avocados in half, remove the pit, and scoop the flesh into a medium bowl. Add the lime juice and mash the avocados until the desired texture is achieved.
3. Toast the bread in a toaster or in the oven. Spread the avocado mash over the toast, place slices of tomato over the avocado mush, drizzle with balsamic glaze, and finally garnish with flat leaf parsley and red pepper flakes Serve immediately and enjoy!
Radishes
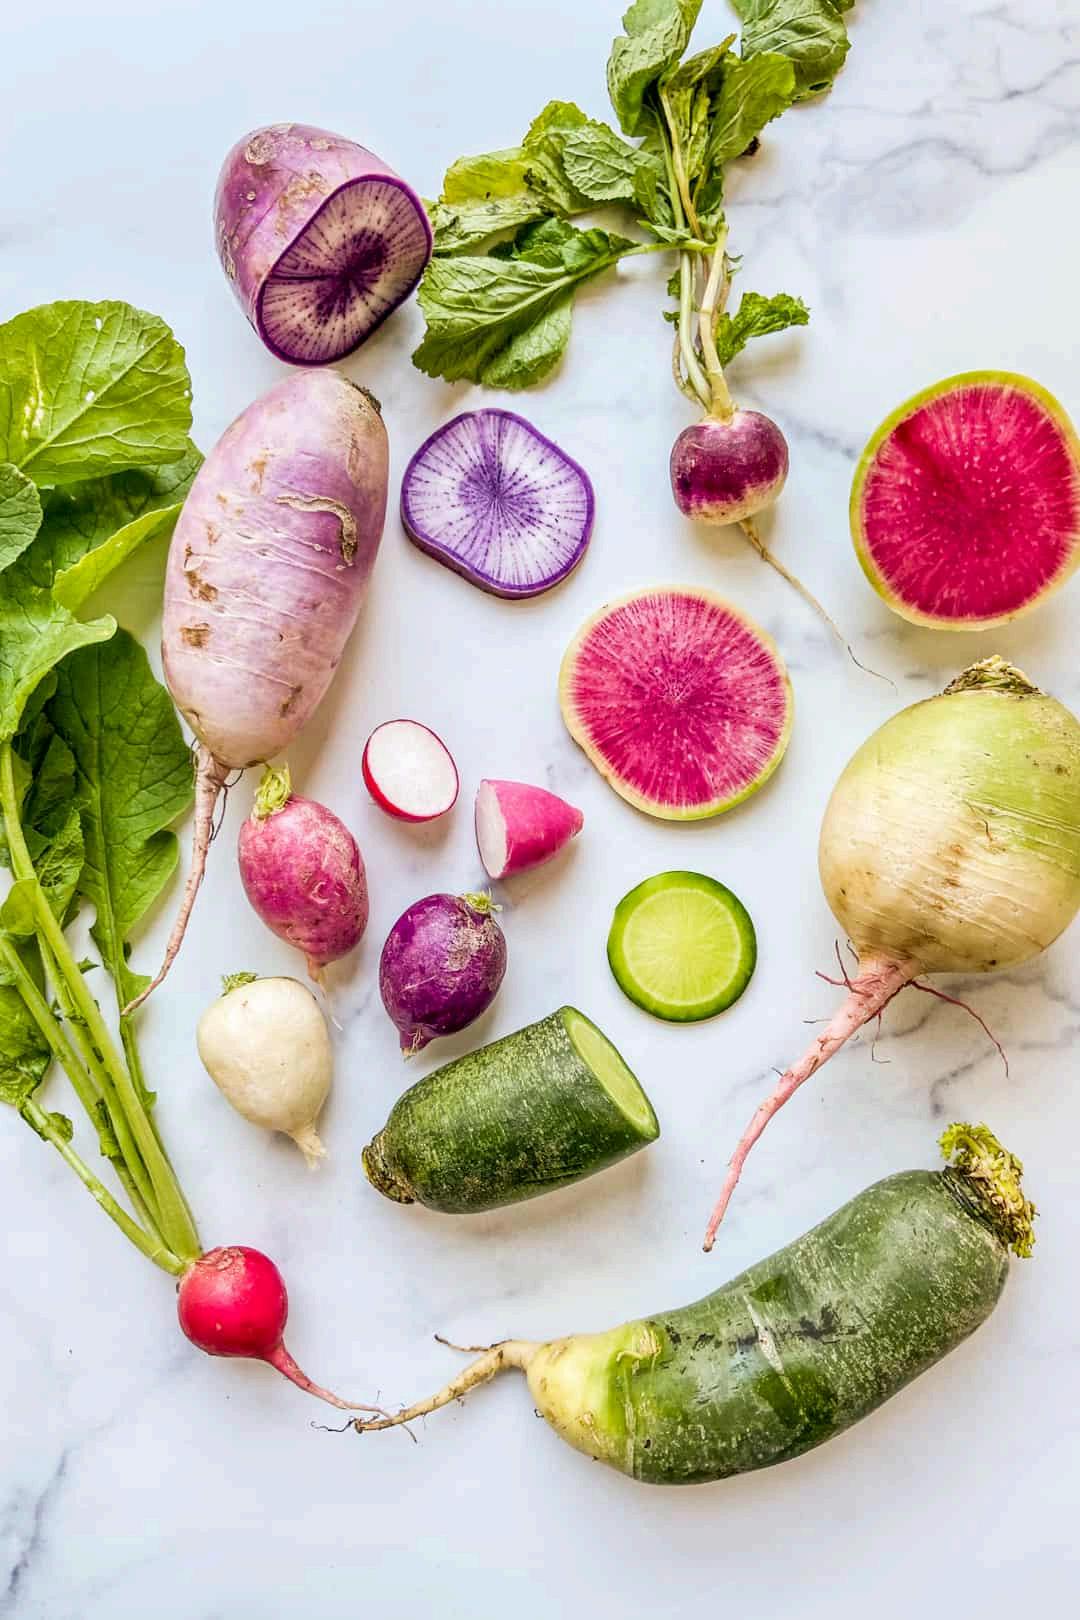
Photo By This Healthy Table, “Types of Radishes + How to Use Them,” via https://thishealthytable.com/blog/types-of-radishes/
IN SEASON
Fall-Winter
FLAVOR PROFILE
Sharp flavor, when raw-spicy and zesty
HOW TO USE
Wash and trim off leaves (they can be sauteed with oil or as garnish)
Can be eaten raw, sauteed, or boiled
NUTRITION
Vitamin E: protects tissues from damage
Vitamin C: immune support, wound healing
Folate: vital to metabolize nutrients in our body
STORAGE
Cut off leaves and roots Put a damp paper towel at the bottom of a sealable plastic bag and fill with radishes. Cover the radishes with another damp paper towel.
Corn Salad with Radishes, Jalapeno, and Lime
Recipe by Christopher Testani
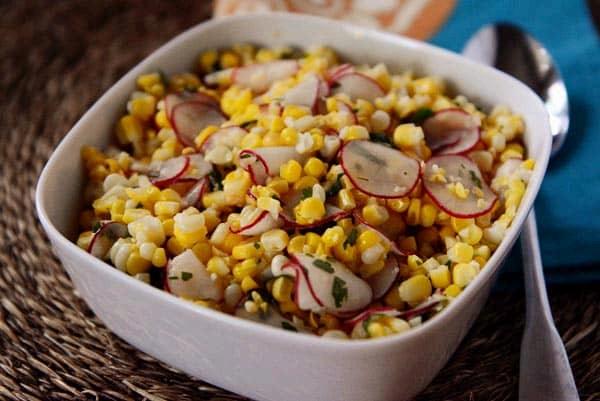
Photo Credit: Mel’s Kitchen Cafe, “SWEET CORN SALAD WITH RADISHES, JALAPENO AND LIME,” 2014, via https://www.melskitchencafe.com/sweet-corn-salad-wi th-radishes-jalapeno-and-lime/
Ingredients
● 1.5 cans of corn
● 6 radishes
● ½ jalapeno (or whole)
● 3 tbsp lime juice
● 2 tbsp cilantro leaves
● 1.5 tbsp olive oil
Preparation
1. Chop radishes, jalapeno, and cilantro leaves to your preference.
2. Combine all ingredients in a bowl (season with salt to taste)
3 Salad can be stored in fridge for 1 day
Winter Squash
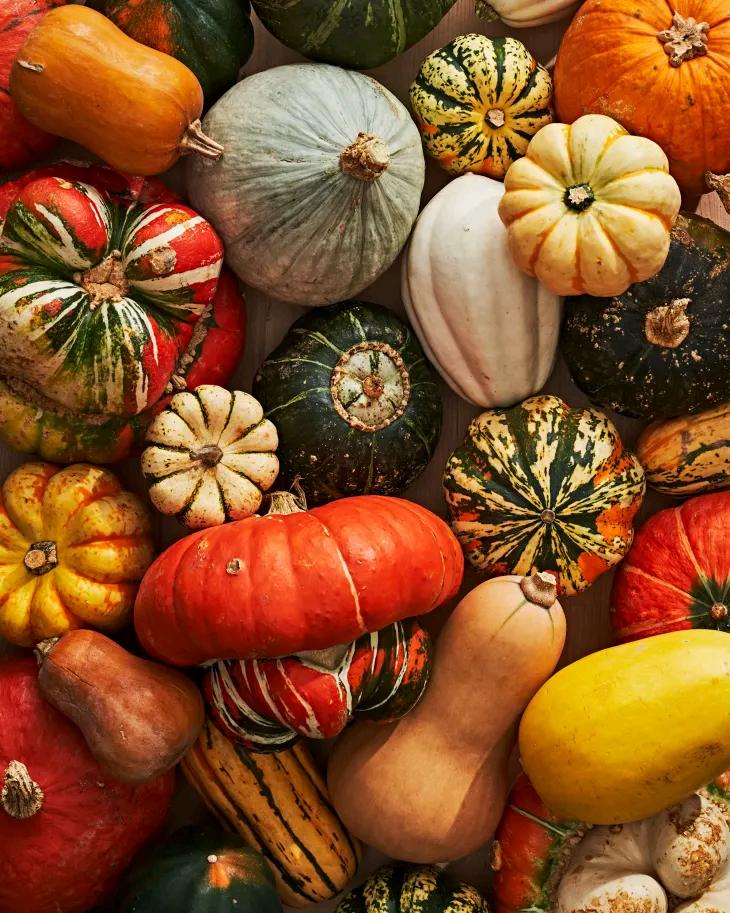
Photo: Andrew Bui; Food Styling: Jessie YuChen, “The 16 Varieties of Winter Squash You Need to Know,” 2022, via https://www.thekitchn.com/the-11-varieties-of-wintersquash-you-need-to-know-ingredient-intelligence-1578 57
IN SEASON
Fall-Winter
FLAVOR PROFILE
Sweet, nutty, rich, and smooth
HOW TO USE
Cut, grill, broil, roast, and/or puree for soup
Cut into cubes and grill, broil, or roast. Season cubed winter squash and combine with salads, rice, or by itself.
Rind is edible when cooked but squash is usually peeled
Seeds are edible raw or roasted.
NUTRITION
Vitamin A: pair with fat for best absorption; vital to eye function
Vitamin C: immune support, wound healing, protects tissue from damage
Potassium: fluid balance and muscle contractions
STORAGE
Store the fresh, uncut squash in a cool and dark place.
Butternut Squash Soup
Recipe
by Maplebird
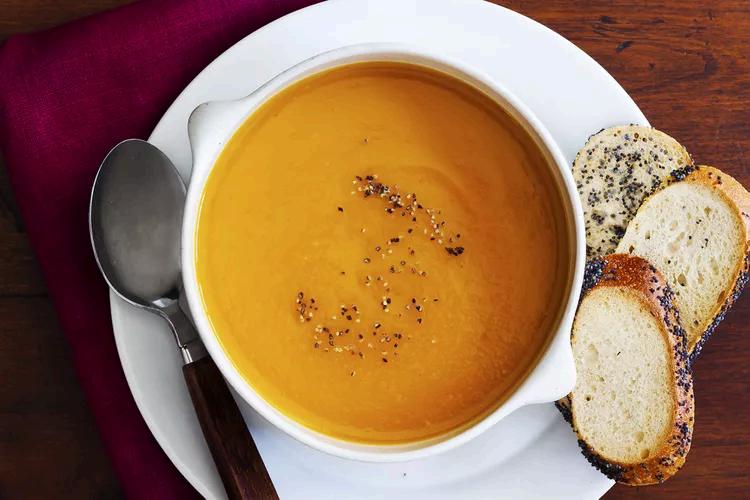
Photo Credit: Meredith, “Butternut Squash Soup,” 2022, via https://www.allrecipes.com/recipe/77981/butternut-s quash-soup-ii/
Ingredients
● 2 tbsp butter
● 1 medium white or yellow onion, peeled and diced
● 1 medium butternut squash, peeled, seeded, and cubed
● 1 medium carrot, peeled and chopped
● 1 stalk celery, chopped
● 2 medium potatoes, cubed
● 23 oz vegetable broth or chicken stock
● Salt and pepper to taste
Preparation
1. Melt the butter in a large pot over medium-high heat. Saute chopped onions until lightly browned.
2 Season with salt and pepper Add in all the chopped vegetables
3 Pour enough vegetable broth/chicken stock to cover vegetables and bring to boil
4 Reduce heat to low, cover pot and simmer for 40 minutes Puree using an immersion blender, or transfer in batches to a food processor or blender. Blend until smooth. Return to pot and mix in any remaining stock to attain desired consistency.
Butternut Squash
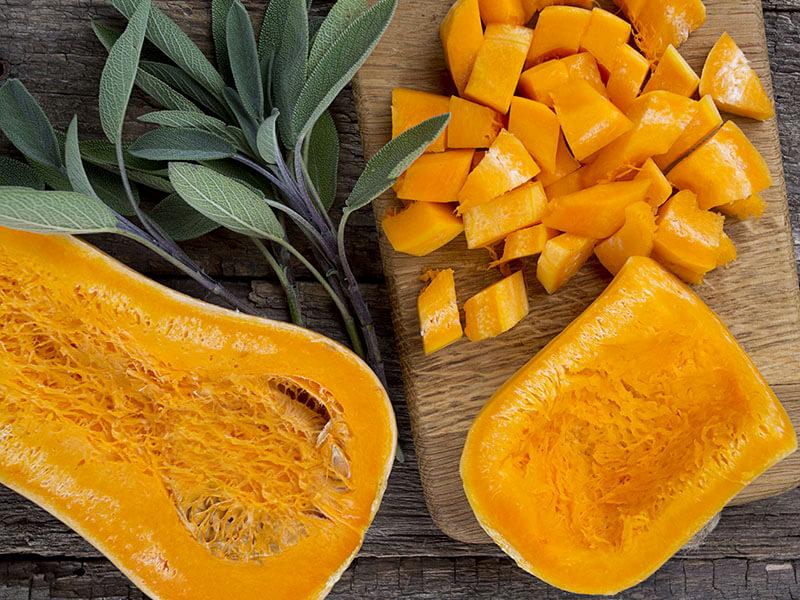
Photo: Andrew Bui; Food Styling: Jessie YuChen, “The 16 Varieties of Winter Squash You Need to Know,” 2022, via https://www.thekitchn.com/the-11-varieties-of-wintersquash-you-need-to-know-ingredient-intelligence-1578 57
IN SEASON
Fall-Winter
FLAVOR PROFILE
A mild taste similar to eggplants or green beans
HOW TO USE
Remove the tough tip without cutting into seed pods or the juice inside will come out Can be steamed for 5 minutes or boiled in hot water for 3 minutes
NUTRITION
Vitamin A: pair with a fat for best absorption; vital to eye function
Vitamin C: immune support, wound healing
Potassium: fluid balance and muscle contractions
STORAGE
Store the fresh, uncut squash in a cool and dark place
Butternut Squash Basmati Rice
Recipe by Asha Gomez
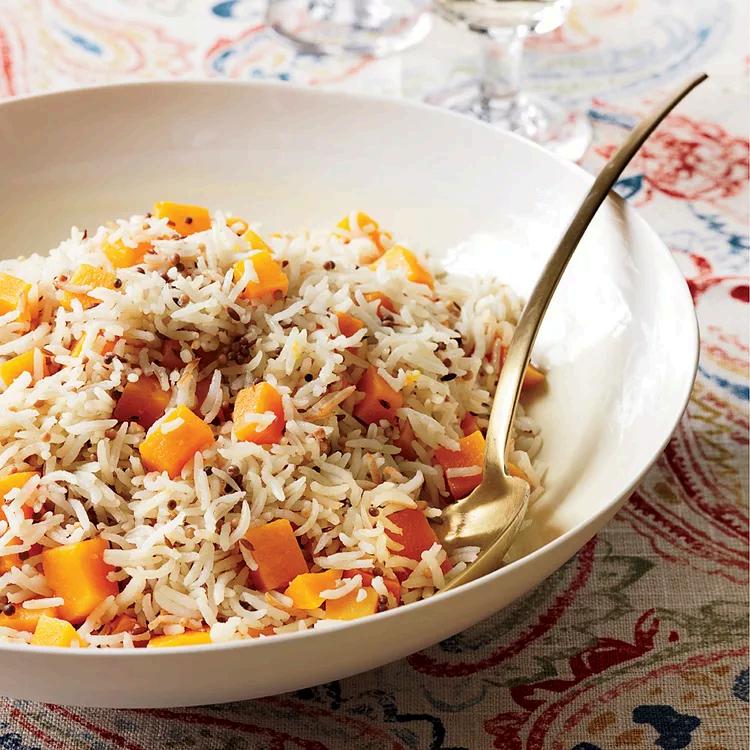
Photo: Jonny Valiant, “Butternut Squash Basmati Rice,” 2019, via https://www.foodandwine.com/recipes/butternut-squa sh-basmati-rice
Ingredients
● 1 tbsp unsalted butter
● 1 tsp whole cumin seeds (can be substituted with cumin powder)
● 1 tsp mustard seeds (can be substituted with wasabi or mustard powders)
● 1 cup basmati rice (can be substituted with other rice)
● 2 cups water
● ¾ lb peeled butternut squash, cut into ¼ inch cubes
● 2 tsp salt
Preparation
1. In a medium saucepan, melt butter. Add cumin and mustard seeds and cook over high until mustard seeds begin to pop (about 30 seconds)
2. Add rice and diced squash. Stir to coat with butter. Add water and salt. Bring to a boil.
3. Cover and cook over very low heat until squash is tender and water is absorbed (about 15 minutes)
4 Remove from heat and let the rice stand, covered, for 5 minutes
5 Fluff the rice with a fork and serve
Sweet Potato
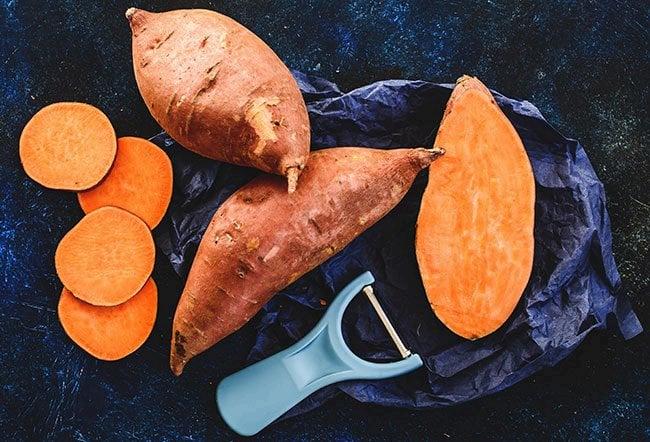
Photo by Medicine Net, “What Do Sweet Potatoes Do for Your Body?,” 2021, via https://www.medicinenet.com/what_do_sweet_potatoe s_do_for_your_body/article.htm
IN SEASON
Fall-Early Winter
FLAVOR PROFILE
Tastes sweet when cooked When eaten raw, they can have a strong, fresh taste
HOW TO USE
There are many ways you can prepare sweet potatoes, including: boiled, roasted, baked, fried, and the peel can be removed or left on
NUTRITION
Vitamin A: pair with fat for best absorption; vital to eye function
Vitamin B6 Pyridoxine: converting food into energy, formation of red blood cells and neurotransmitter
Potassium: fluid balance, muscle contractions, nervous system functions
STORAGE
Do not store it in the refrigerator Instead, store in a dark, cool, and dry place
RECIPE Chicken, Sweet Potato, and Black Bean
● ½ cup of shredded cheddar/jack cheese
● 2 tsp olive oil
● ½ lime, juiced
● 1 tbsp cilantro (optional)
Phot
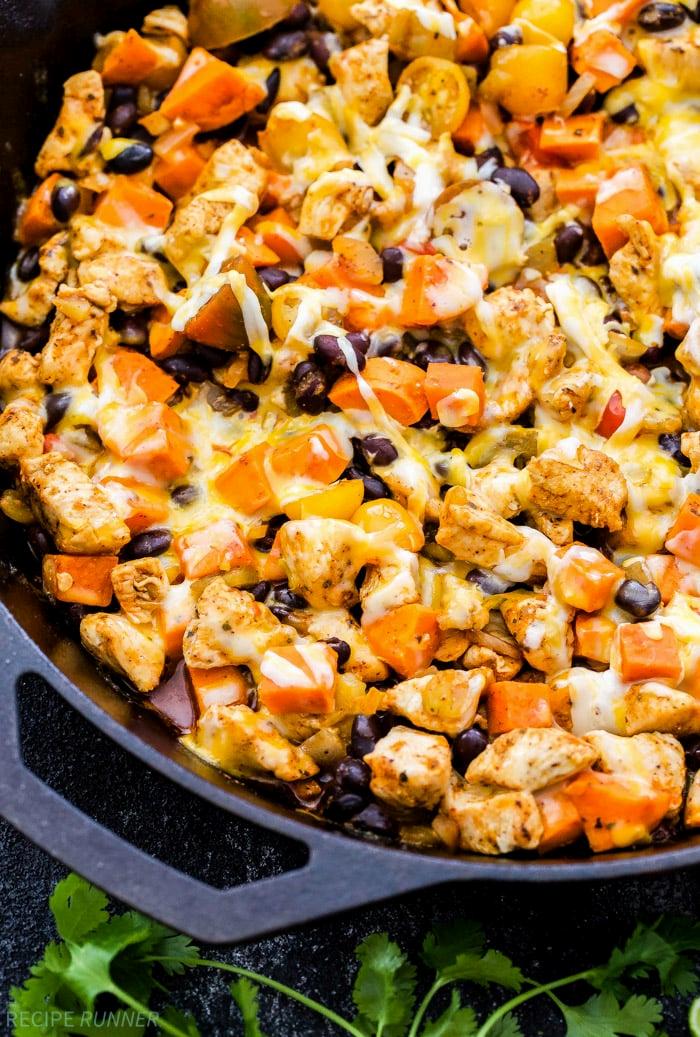
weet
Potato and Black Bean Skillet, 2017, via https://reciperunner.com/mexican-chicken-sweet-potat o-black-bean-skillet/
Ingredients
● 1 sweet potato, peeled and diced
● 1 cup of cherry tomatoes, halved
● ½ cup of diced onion
● ½ cup of diced green chilis
● 1 lb boneless skinless chicken breasts, cut into bite-sized pieces
● 1 can of black beans (or other beans of choice), rinsed and drained
● ⅓ cup of salsa or red enchilada sauce
● 1 tsp ground cumin, chili powder, and oregano (each)
● ¼ tsp of granulated garlic and pepper (each)
Preparation
1. Heat the oil in a large cast iron or non-stick skillet over medium-high heat. Meanwhile, combine all of the spices in a small bowl.
2. When the skillet is hot, add in the chicken and spread into an even layer, then sprinkle with half of the spice blend.
3 Saute the chicken for approximately 3 minutes then add in the onion
4 Continue to cook for several more minutes or until the onion has softened and the chicken is cooked through
5 Lower the heat to medium and add the remaining spice blend, sweet potato, cherry tomatoes, black beans, green chilis, and salsa/enchilada sauce. Stir mixture and cook until heated through, about 2-3 minutes.
6. Squeeze lime juice over everything, then top with shredded cheese.
7. Cover with a lid or lay a piece of foil on top of the skillet until the cheese has melted
8 Garnish with cilantro and serve
Lima Beans
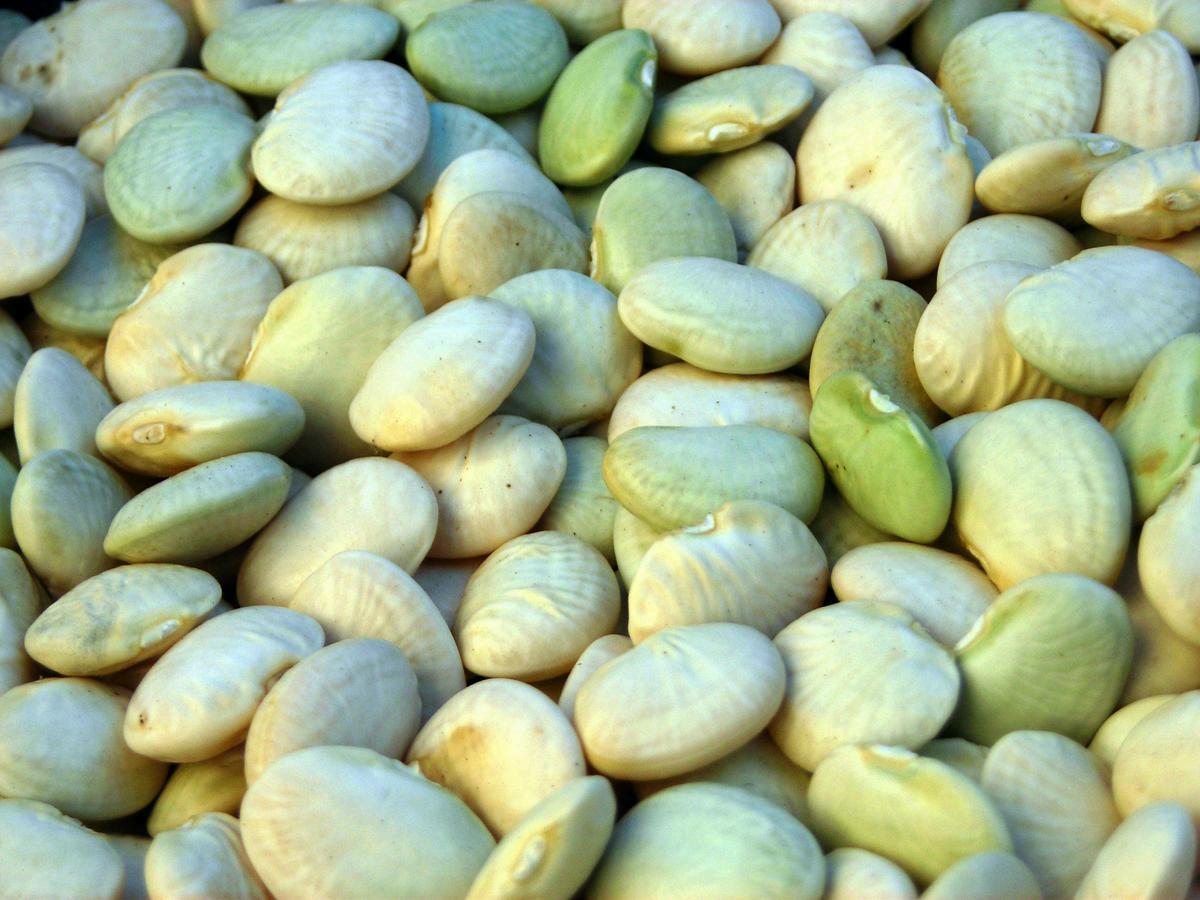
Photo: Southern Exposure Seed Exchange, “Thorogreen (Cangreen Bush) Bush Lima Bean,” via https://www.southernexposure.com/products/thorogr een-cangreen-bush-bush-lima-bean/
IN SEASON
All year round
FLAVOR PROFILE
Buttery flavor and creamy texture
HOW TO USE
Soak in water for six to eight hours at room temperature
NUTRITION
Dietary fiber: lower cholesterol levels; help regulate digestive health
Phosphorous: important component of all tissues, especially bones
Protein: important building blocks of bones, muscles, skin, and blood
STORAGE
Before cooking, store dried lima beans in a cool, dark place for up to 6 months in an airtight container
Lima Bean Soup
Recipe by Kathleen Olsack
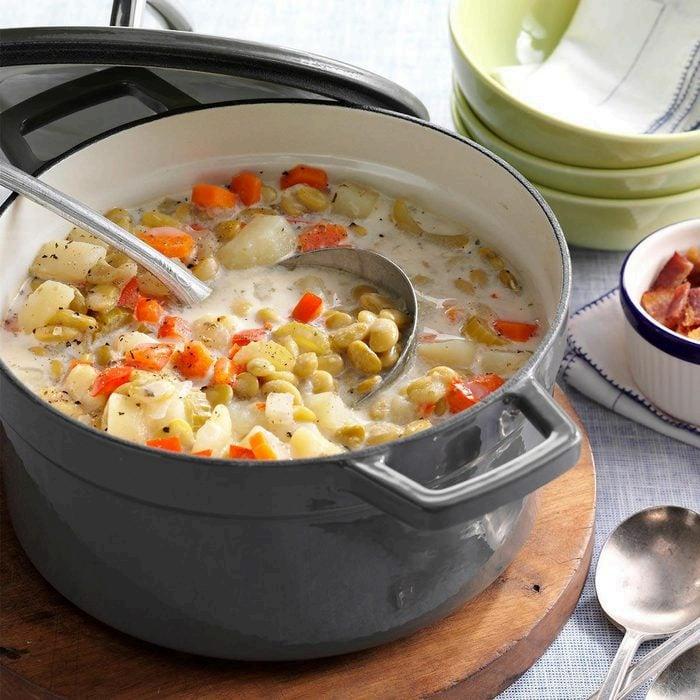
Photo: Taste of Home, “Lima Bean Soup,” via https://www.tasteofhome.com/recipes/lima-bean-soup /
Ingredients
● 3 cans chicken broth
● 2 cans lima beans, rinsed and drained, or 3 cups of dried lima beans
● 3 medium carrots
● 2 medium potatoes
● 2 small onions
● 2 small sweet red peppers
● ¼ cup butter
● Salt, pepper oregano
● 1 cup half and half cream
Preparation
1 In a large pot, combine all ingredients; bring to a boil over medium heat Reduce heat; cover and simmer for 25-35 minutes.
2. Add cream; heat through but do not boil.
Tips
For a vegan/vegetarian alternative, replace chicken broth with vegetable broth; half and half cream can be replaced with coconut milk half and half, oat milk, any alternatives to your preference
Okra
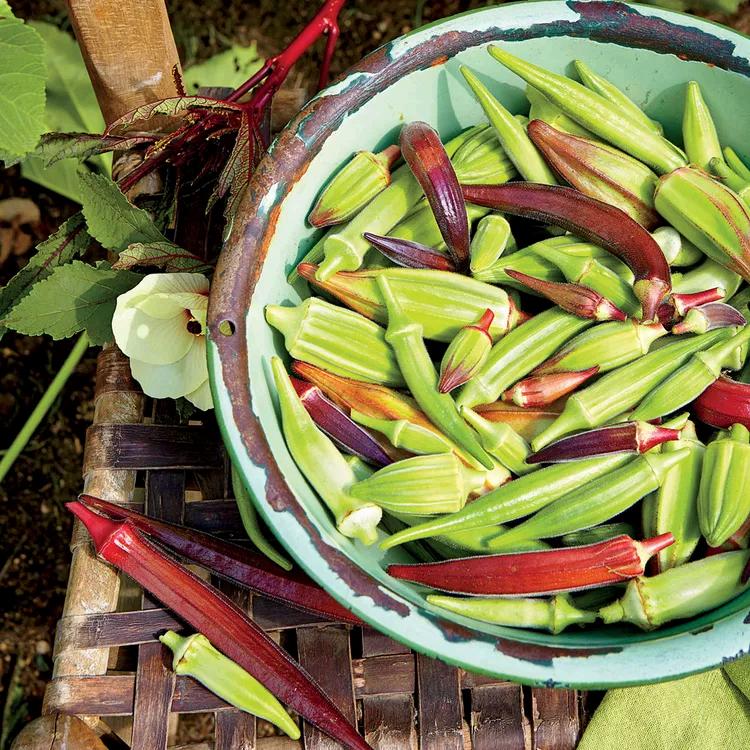
Photo: Becky Luigart-Stayner, “3 Easy Ideas for Okra,” 2017, via https://www.southernliving.com/food/veggies/okra/ok ra-virginia-willis
IN SEASON
Summer-Fall
FLAVOR PROFILE
A mild taste similar to eggplants or green beans
HOW TO USE
Remove the tough tip without cutting into seed pods or the juice will come out Can be steamed for 5 minutes or boiled in hot water for 3 minutes
NUTRITION
Vitamin A: pair with a fat for best absorption; vital to eye function
Vitamin C: immune support, wound healing
Magnesium: bone and heart health
STORAGE
Refrigerated at all times Put it in a plastic bag and do not wash until ready to eat to maximize its shelf life Will last 2-3 days
Freezing it will extend its shelf life to 10-12 months
Okra and Chickpeas in Fresh Tomato Sauce Recipe
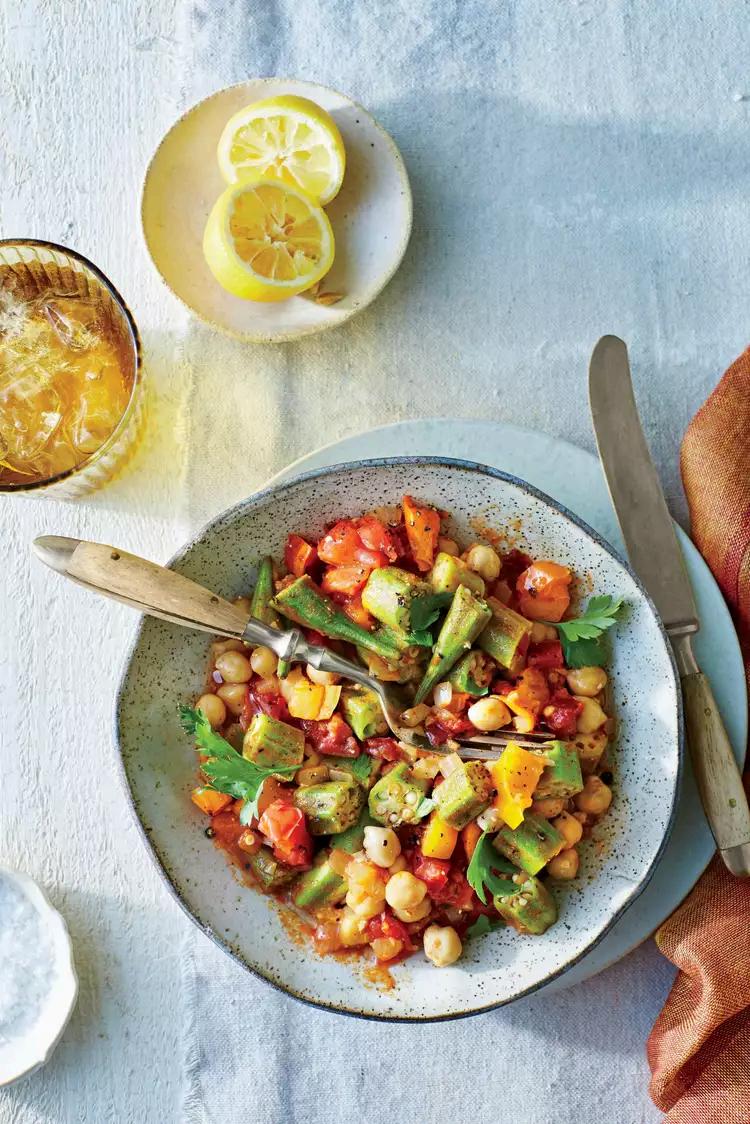
Ingredients
● 2 tbsp extra-virgin olive oil, plus more for serving
● 1 medium-size yellow onion, chopped (about 1 3/4 cups)
● 2 garlic cloves, very finely chopped
● 5 ripe tomatoes, cored and chopped (about 4 cups)
● 1 tbsp ground cumin
● 1 tbsp harissa (or Sriracha chili sauce)
● 1 tsp lemon zest, plus 1 tbsp fresh juice (from 1 lemon)
● 1 pound fresh okra, stems trimmed, cut into 1/2-inch-thick slices
● 1 1/2 tsp kosher salt, divided
● 3/4 tsp black pepper, divided
● 1 (15 5-oz ) can chickpeas, drained and rinsed
● 1/4 cup chopped fresh flat-leaf parsley
Preparation
1. Heat oil in a large skillet over medium-low. Add yellow onion, and cook, stirring often, until soft and translucent, about 6 minutes. Add garlic and cook, stirring often, until fragrant, 45 to 60 seconds. Add tomatoes, cumin, harissa, lemon zest, and lemon juice, and cook, stirring once or twice, until tomatoes start to break down, about 5 minutes
2 Add okra, 1 teaspoon of the kosher salt, and 1/2 teaspoon of the black pepper Reduce heat to low, and cover the skillet Cook, stirring occasionally, until okra is just tender, about 10 minutes.
3. Add chickpeas, and stir to combine. Cover and cook just until chickpeas are heated through, about 3 minutes. Stir in chopped parsley and remaining 1/2 teaspoon salt and 1/4 teaspoon pepper. Serve immediately.
Lemon Verbena

Photo: Guini Ridge Farm, “Lemon Verbena,” via https://www.guiniridge.com/shop/herb/verbena-herb/ aloysia-citrodora-lemon-verbena/
IN SEASON
Year-round
FLAVOR PROFILE
Its flavor is refreshingly lemony, with a smooth, almost creamy mouthfeel
HOW TO USE
This lemon-scented herb has a number of culinary uses ranging from rich roasts to sweet citrusy desserts and jams Lemon verbena can be used to make flavorful olive-oil based salad dressings, subtle lemon ice cream, and lemon verbena jelly, as well as season poultry dishes, salsa verde, and soups.
NUTRITION
Lemon verbena leaves and extracts are rich in a polyphenol compound called verbascoside. According to older and newer studies, this compound has strong antioxidant activity. In addition to verbascoside, lemon verbena contains several other plant compounds with antioxidant properties, including geranial, neral, luteolin, and limonene.
STORAGE
Lemon verbena can be stored by placing it in clean ice cube trays, covered with water, and placed in the freezer to freeze. When ready to use, simply remove a few cubes and keep the rest in the freezer.
RECIPE Lemon Verbena Sorbet
Recipe by Clotilde of Chocolate & Zucchini
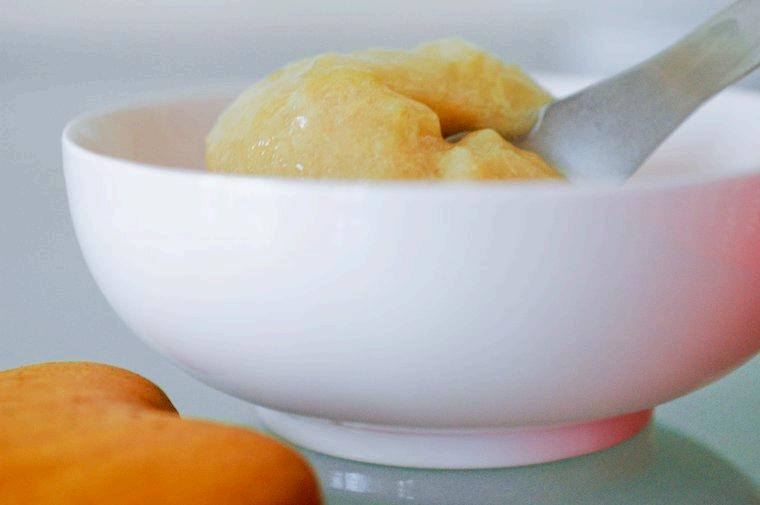
Photo: Clotilde Dusoulier, “Lemon Verbena Sorbet Recipe,” via https://cnz.to/recipes/ice-cream-sorbets/lemon-verbe na-sorbet-recipe/
Ingredients
● 15 grams (about 2 cups) fresh lemon verbena leaves, rinsed and gently patted dry
● 180 grams (1 cup minus 2 tbsp) unrefined cane sugar (the soft kind, not granulated)
● 1 large organic lemon, scrubbed
● 1 tbsp limoncello
Preparation
1. In the bowl of a blender or food processor, combine the lemon verbena leaves and the sugar Using a vegetable peeler, shave three strips of zest from the lemon, and add them in Process until finely ground
2 Transfer to a mixing bowl, add the juice of the lemon, the limoncello if using, and 600 ml (2 ½ cups) cold water. Whisk to combine, cover, and let this mixture steep in the fridge for 2-3 hours.
3. Strain through a fine sieve to remove the little flecks of leaf (teeny bits may remain, but that is okay), and churn in the ice cream maker, food processor, or blender.
4 The texture is best when the sorbet is freshly churned If you have leftovers, apply a piece of plastic wrap closely to the surface to prevent crystallization Let the sorbet soften for 20-30 minutes in the fridge before serving
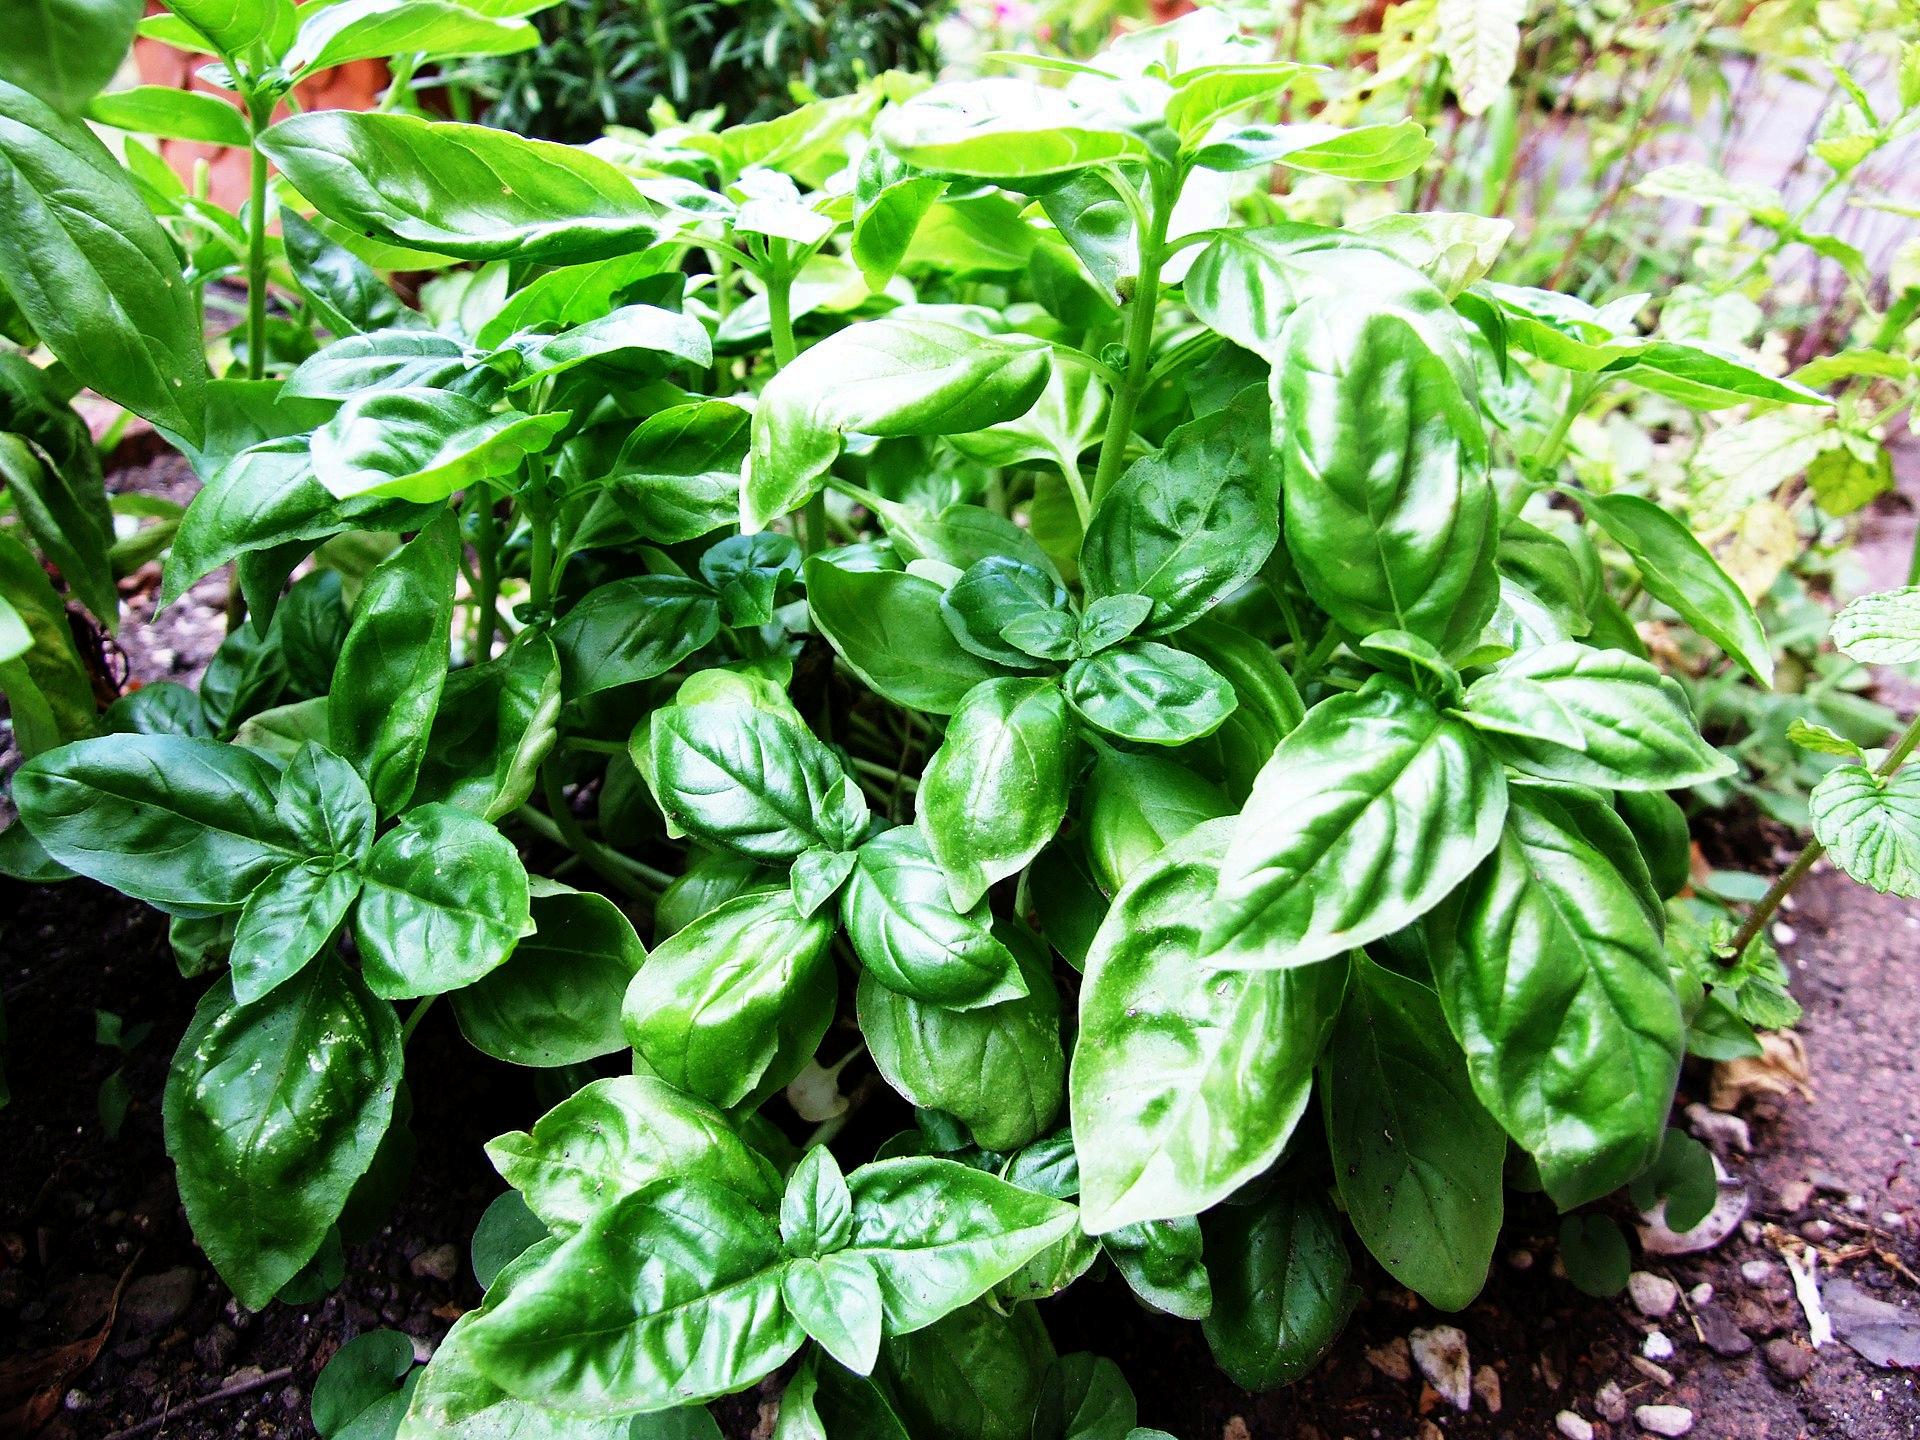
Photo: Castielli, “Basil Basilico Ocimum basilicum albahaca (Thai Basil),” 2009, via https://en.wikipedia.org/wiki/Basil#/media/File:BasilBasilico-Ocimum_basilicum-albahaca.jpg
IN SEASON
Summer-Fall
FLAVOR PROFILE
Mildly and slightly sweet
HOW TO USE
Salad dressing sauces, fresh in rolls and wraps, and wilted into a stir fry Pairs well with cheese and meat Use fresh in salads or sauces
NUTRITION
Potassium: fluid balance, muscle contractions, nervous system functions
Calcium: muscle contraction, regulating blood pressure, structural component of bone and teeth
Magnesium: muscle and nervous system function, blood sugar regulation, bone and heart health
STORAGE
Refrigeration can blacken basil leaves Trim the stems and place them in a glass or jar of water in cool temperatures
RECIPE Creamy Tomato Basil Soup
Recipe by Sabrina Snyder
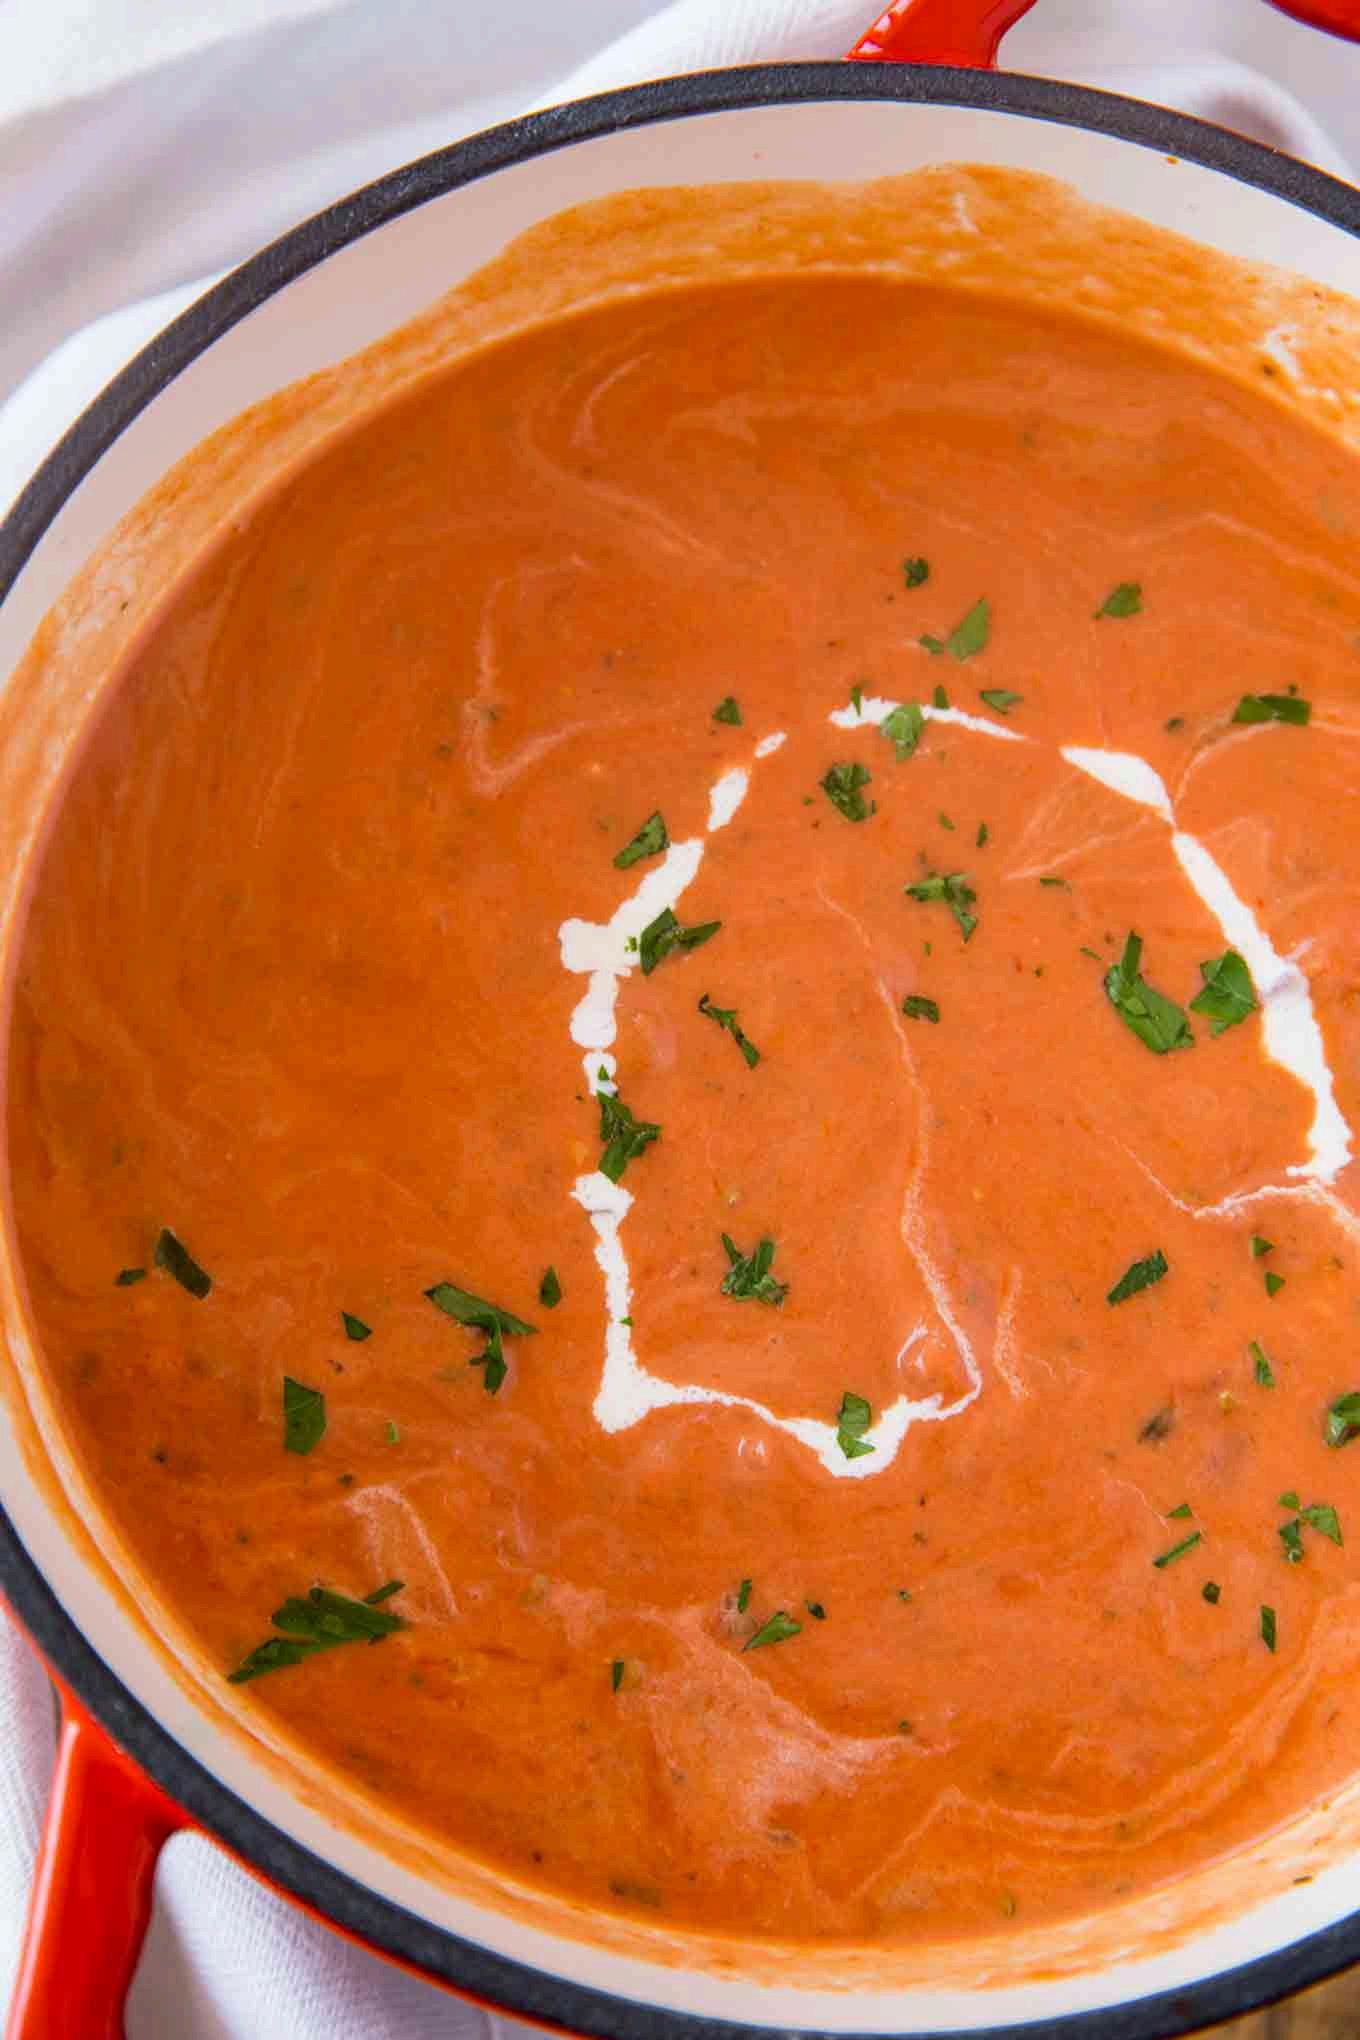
Photo: Sabrina Snyder, “Tomato Bisque,” 2019, via https://dinnerthendessert.com/tomato-bisque/
Ingredients
● 2 tbsp oil
● 2 tbsp unsalted butter
● 1 yellow onion, chopped
● 2 cloves garlic, minced
● 1 tsp kosher salt
● ½ tsp pepper
● 2 tbsp flour
● 4 cans vegetable broth
● 1 can tomatoes (whole peeled if possible)
● 3 ounces tomato paste
● 1 tsp sugar
● 1 cup heavy cream
● 5 basil leaves, chopped (or more if desired)
Preparation
1. Add the oil and butter to a pan on medium heat.
2. Add the onion and garlic and cook for 2-3 minutes or until translucent.
3. Add in the salt, pepper, and flour and whisk well until the flour is cooked for roughly 30 seconds and fully incorporated. Add in the broth slowly while whisking. Add in the tomatoes, tomato paste, and sugar. Add in chopped basil leaves
4 Lower the heat to low and let cook for 20 minutes Using a blender, pour soup contents and blend until completely smooth
5 Add in the cream, and let cook for an additional 5 minutes before serving
6. Serve with grilled cheese for a comforting dish!
Cilantro
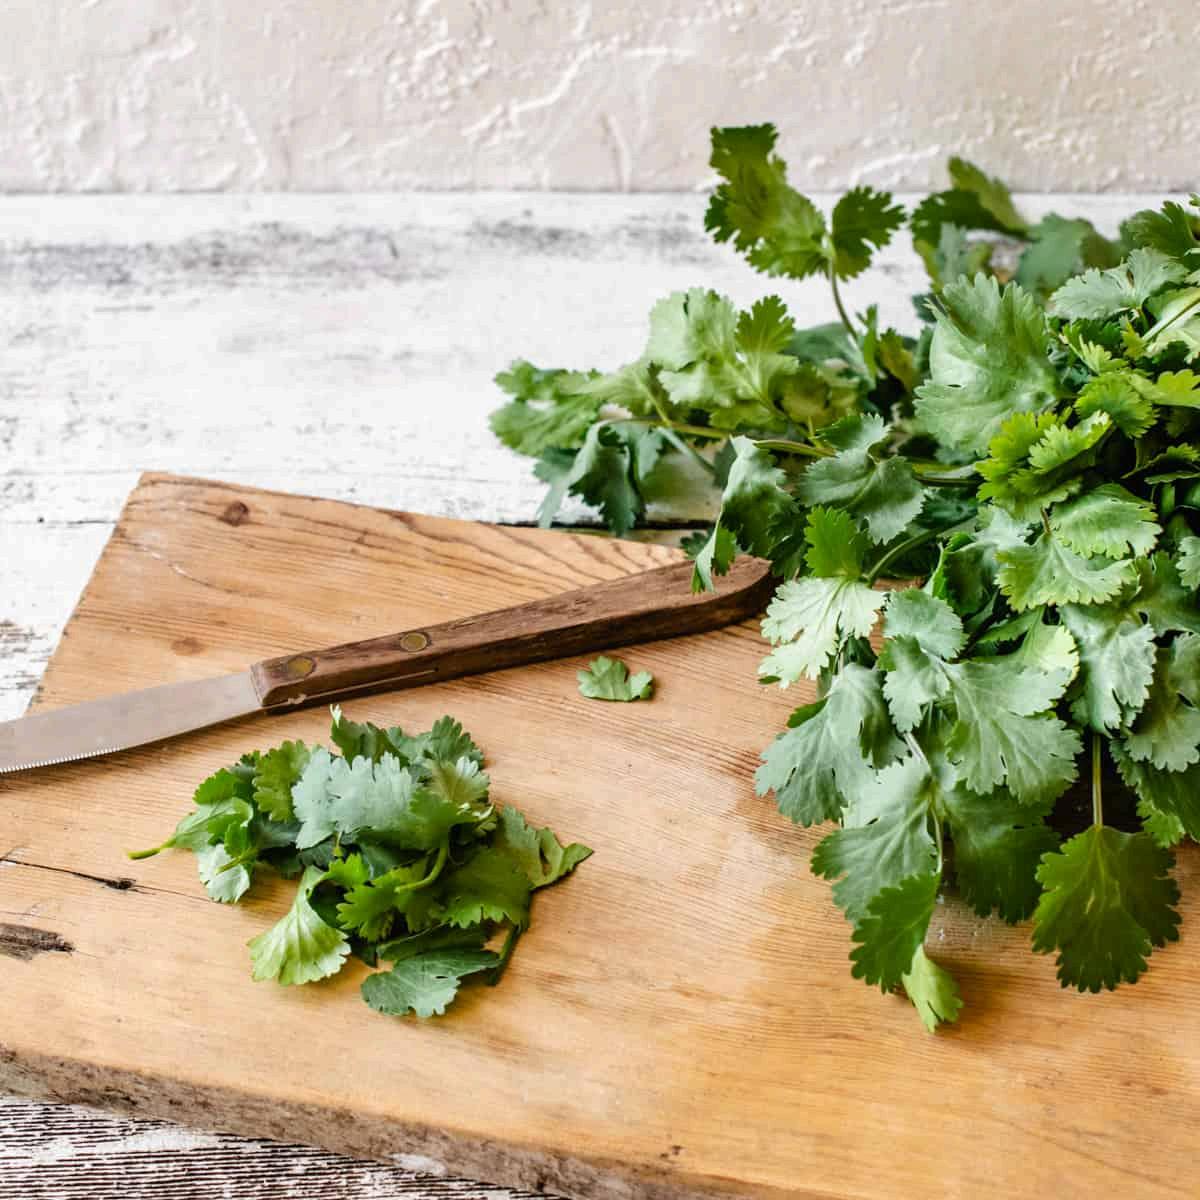
Photo: Erin, “how to keep cilantro fresh,” 2021, via https://thefrozenbiscuit.com/how-to-make-cilantro-last -longer/
IN SEASON
Fall FLAVOR PROFILE
Crisp, like green onions but less strong For some, it may taste soapy
HOW TO USE
Wash well and pat dry with paper towels
Remove ones that are yellow or wilted.
Remove leaves you want to use and cut into smaller pieces (not too much, they bruise easily)
Can be used as garnish for salsa, pasta, soup, or sandwiches.
Best used fresh
NUTRITION
Folate: vital to metabolize nutrients in our body
Vitamin A: pair with a far for best absorption; vital to eye function
Dietary Fiber: lower cholesterol levels; help regulate digestive health
STORAGE
Can be frozen; dried cilantro in Ziplock, sealed bag can be placed in fridge
Can be put in a jar with water and covered with a plastic (Ziplock) bag, water must be changed daily
RECIPE Cilantro Rice
Recipe by Kiano Moju, Alison Roman, and Alexis Deboschnek
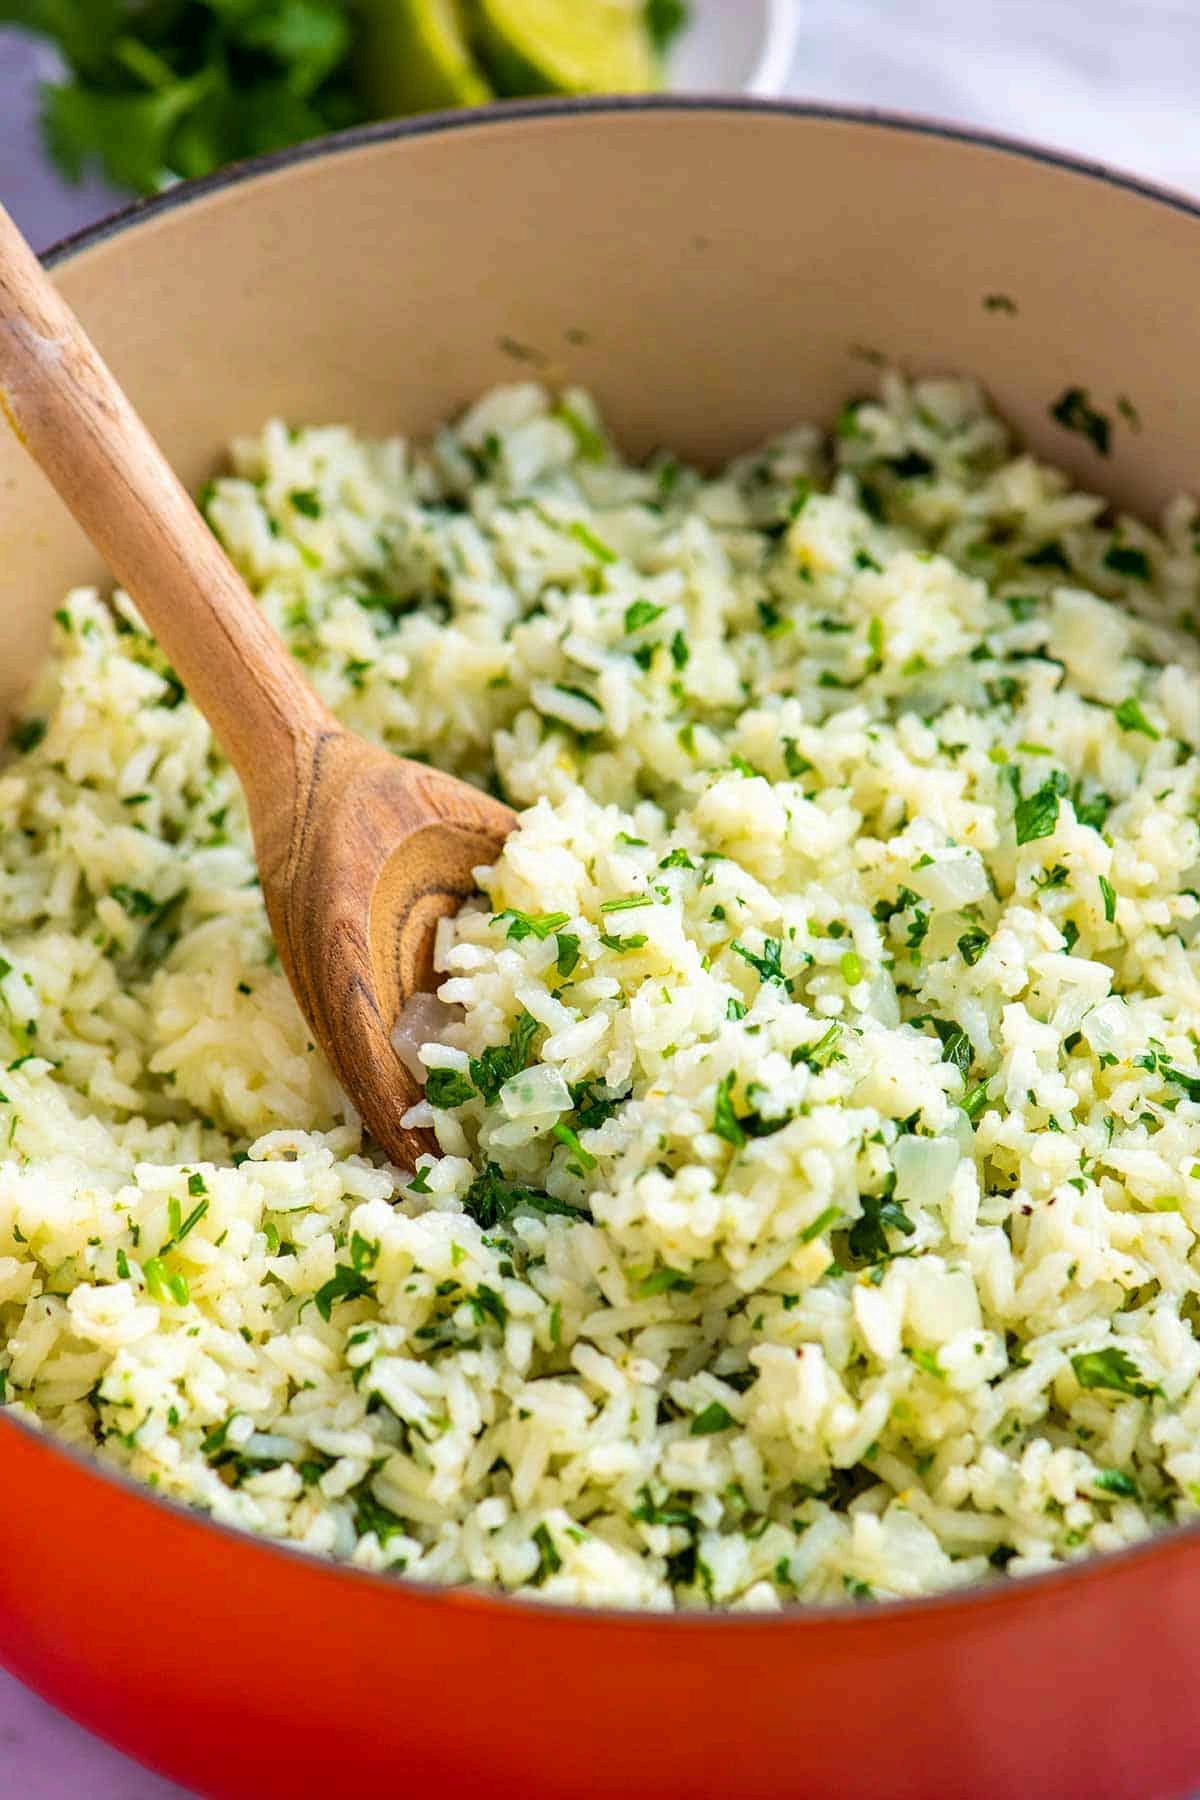
Photo: Adam and Joanne of Inspired Taste, “Adam and Joanne, the creators of Inspired Taste,” via https://www.inspiredtaste.net/42876/cilantro-lime-ric e/
Ingredients
● 1 cup rice
● 2 dried bay leaves (or fresh)
● 1.5 cups of water
● 2 tbsp lime juice
● Salt to taste
● ½ cup chopped fresh cilantro
● 1 tsp lemon juice (optional)
Preparation
1 In a saucepan, add rice, bay leaves, and water, and bring to a boil
2 Once boiling, reduce the heat, cover, and simmer for 18 minutes.
3. Remove lid, fluff rice with fork, and cover. Let rest and absorb any steam for 10 minutes.
4. Remove bay leaves, add lime juice, lemon juice, salt, and cilantro. Stir to combine.
Moringa

Photo: Sow Exotic, “Moringa (Moringa oleifera),” via https://sowexotic.com/products/moringa-moringa-olei fera
IN SEASON
Year round
FLAVOR PROFILE
Bitter and slightly sweet Tastes like matcha
HOW TO USE
Sprinkle… on salads, eggs, roasted vegetables, pasta, and risotto
Bake… into savory bread, brownies, muffins, and cookies
Stir into soups, dips, sauces, casseroles, and stews
Shake… into apple juice, coconut water, and salad dressings
Blend into sauces, green juices, smoothies, and ice cream
Dehydrate… as tea
NUTRITION
7 times more vitamin C than oranges, 15 times more potassium than bananas, and muscle building calcium, protein, iron, and amino acids.
STORAGE
Wrapped in a damp towel and put in the fridge. Can be put in a jar with water and covered; water must be changed daily.
Leaves
Stir-Fry (Thoran) with Grate Coconut
Recipe by Arun Velekkat
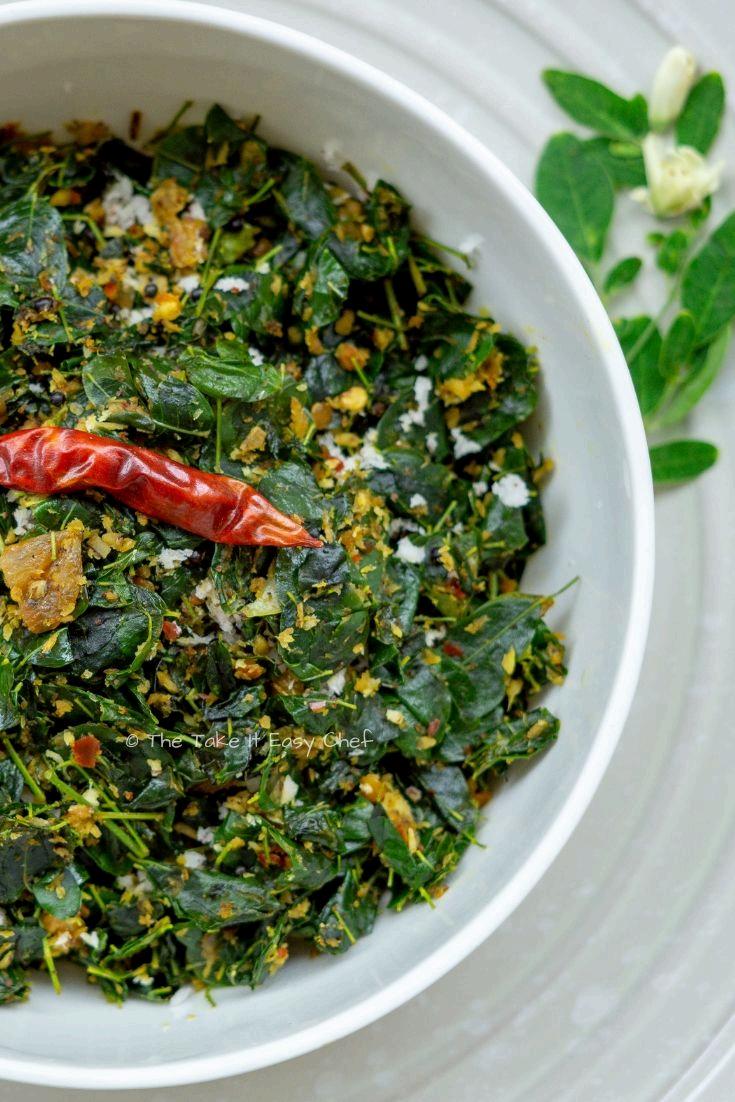
Photo: Arun Velekkat, “MORINGA LEAVES STIR-FRY,” 2017, via https://www.thetakeiteasychef.com/moringa-drumstic k-leaves-stir-fry-recipe
Ingredients
● 250 grams moringa (drumstick) leaves
● ¼ cup grated coconut
● Salt to taste
● 1 tbsp oil
● ½ tsp mustard seeds
● ¼ cup shallots
● 1 tbsp crushed dried chilies
● 1 sprig curry leaves (optional)
● ¼ tsp turmeric powder (optional)
Preparation
1. Wash and drain the moringa leaves. Get rid of all the thick sprigs.
2 Crush the shallots with the flat surface of your knife Finely chop shallots
3 Take the moringa leaves, grated coconut, turmeric powder, and salt in a mixing bowl
4 Combine well
5 Heat the oil in a pan, splutter mustard seeds followed by the chopped shallots.
6. After the shallots are cooked to tender, add crushed chillies and curry leaves (optional).
7. Saute for a couple of minutes on medium heat.
8. Add the mixed moringa leaves and combine well.
9 Cook with the lid closed for 10 minutes Add salt if required Stir occasionally
10 Open the lid, stir well, and cook for 2 minutes
11 Switch off, and serve hot with some rice and curry
Rutabaga
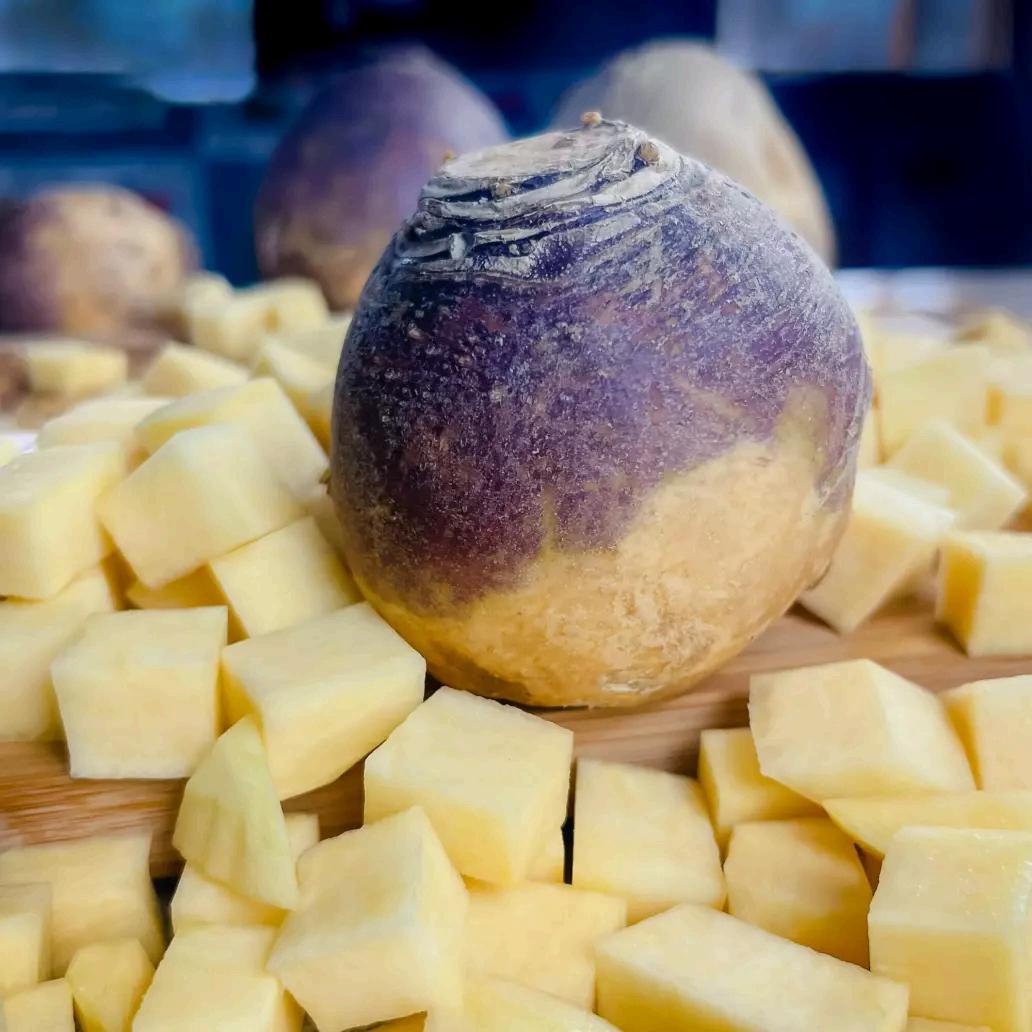
Photo: Getty Stewart, “How to Select, Store and Cook Rutabaga,” 2022, via https://www.gettystewart.com/how-to-select-store-and -cook-rutabaga/
IN SEASON
Fall-Winter
FLAVOR PROFILE
As part of the turnip family, raw rutabagas have an earthy, slightly peppery flavor
When cooked, they are buttery, savory, and mildly sweet.
HOW TO USE
Wash in cold water to remove dirt with a vegetable brush. Lay the rutabaga flat on the cutting board and slice off the stem and root. Then stand the root upright and remove the
skin with the knife, working from top-to-bottom.
Can be: mashed (similar to mashed potato), spiralized into rutabaga noodles, diced into cubes, baked into a rutabaga-based cake, fried in air fryers.
Can be eaten raw, cooked, boiled, roasted, pickled, dehydrated, or grilled
NUTRITION
One cup of rutabaga contains approximately 50% of your daily value of vitamin C. They’re also rich in fiber, vitamin B6, potassium, and magnesium and low in calories An entire medium-sized rutabaga has only 145 kcal
STORAGE
Rutabagas will be kept for months in a cool storage place They store well in plastic bags in a refrigerator or cold cellar
Store rutabagas in the fridge if there is no cool storage place. Keep in a plastic, perforated bag. Add a damp paper towel if your rutabagas start to shrivel and a dry towel if there is noticeable moisture in the bag.
Raw Rutabaga Salad with Apples
Recipe by by Lizzie Streit, MS, RDN
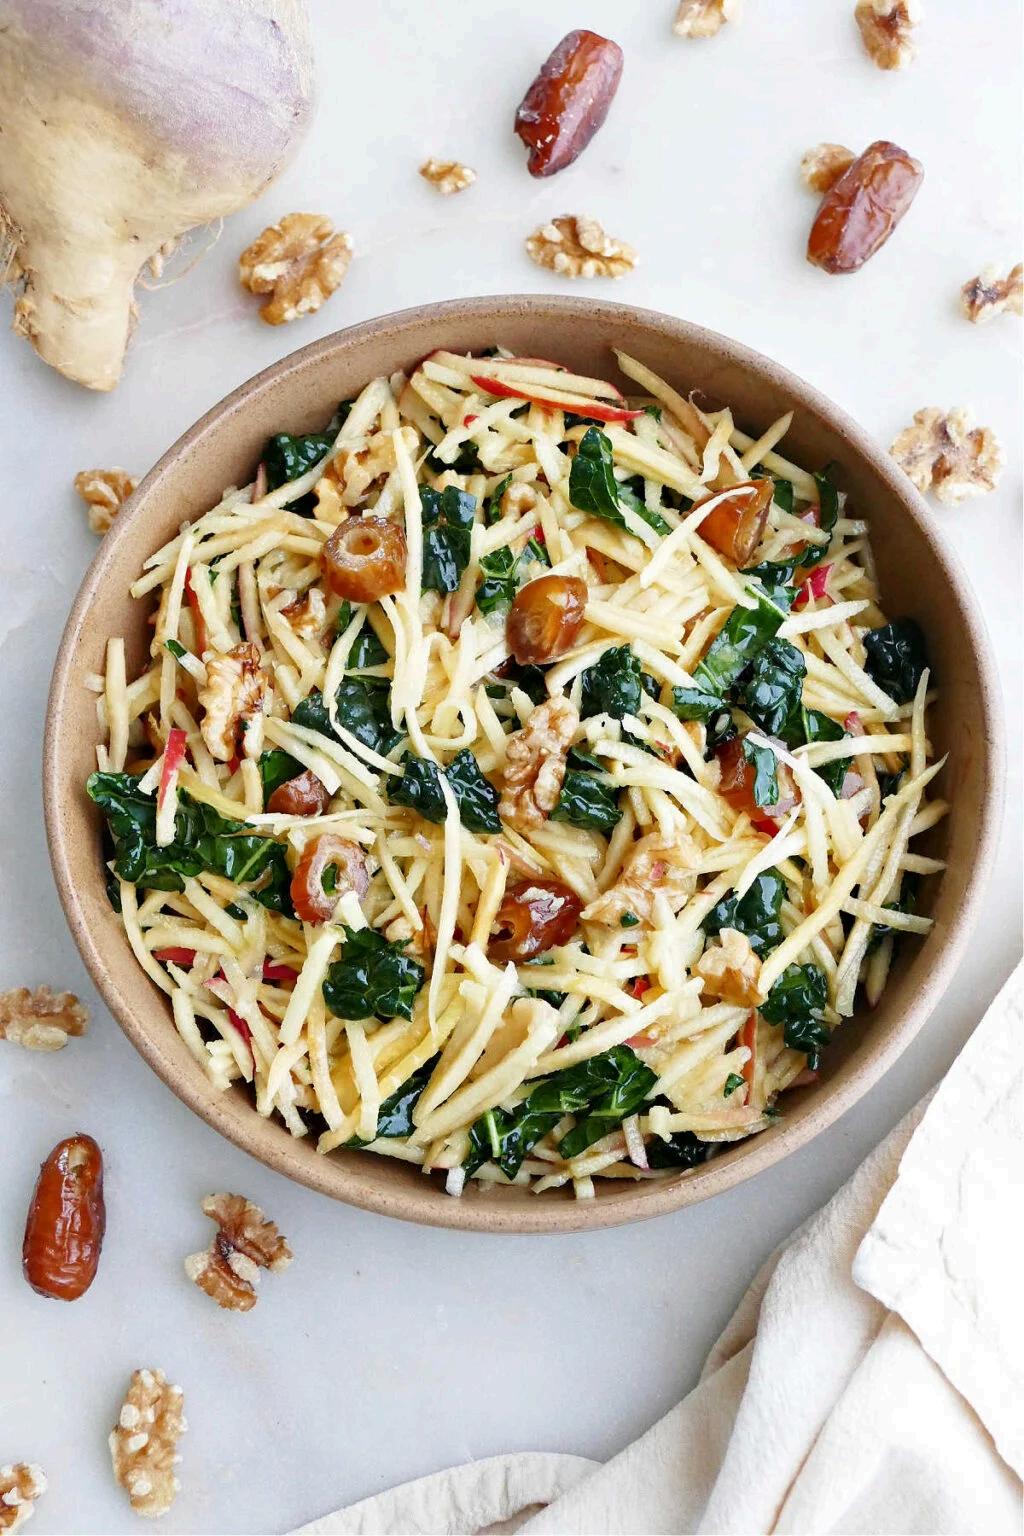
Photo: Lizzie Streit, “Raw Rutabaga Salad with Apples,” 2022, https://itsavegworldafterall.com/raw-rutabaga-salad-w ith-apples/
Ingredients
● 1 rutabaga - trimmed and peeled
● 2 small apples - or 1 large apple
● 1 cup finely chopped kale
● ½ cup chopped walnuts
● 5 pitted dates - sliced; more to taste
● For the dressing
○ ¼ cup olive oil
○ 2 tbsp apple cider vinegar
○ 1 tbsp honey
○ 2 tsp dijon mustard
Preparation
1. Prepare the rutabaga and apples by slicing them into matchsticks with a knife or by using a julienne peeler. You can also grate the rutabaga and apples with a hand or box grater. Combine the slices with the finely chopped kale in a large bowl. Add the walnuts and dates.
2. In a separate bowl, combine the ingredients for the dressing and whisk until smooth Pour over the salad ingredients and toss until coated
3 Enjoy chilled for about 20 minutes or at room temperature! Can be stored in the fridge for up to three days with an airtight container
Tips
Dates can be substituted for dried apricots.
Walnuts can be substituted for other nuts such as pecans, peanuts, or pistachios.
Rutabaga Fries
Recipe by by Yumna Jawad
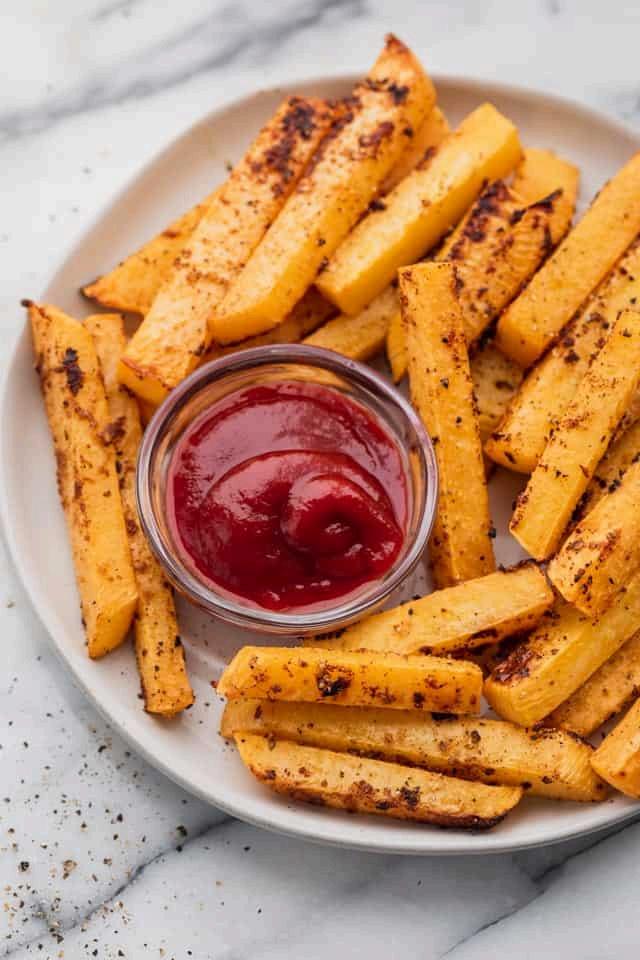
Photo: Yumna Jawad, “Rutabaga Fries,” 2021, https://feelgoodfoodie.net/recipe/oven-baked-rutabaga -fries/
Ingredients
● Rutabaga with skin peeled
● Olive oil; avocado oil, canola oil, or vegetable oil works as well
● Seasonings (adjust and add other seasonings to preference)
○ Paprika
○ Garlic powder
○ Salt and pepper
Preparation
1 Preheat the oven to 425°F Line a baking sheet with parchment paper
2 Place the rutabaga on a cutting board and use a sharp knife to cut it vertically down the middle through the stalk This creates two equal halves that can rest flat on the cutting board and make it easier to continue prepping
3. With each rutabaga half on its flat side, slice each half into semi-circles. You can cut them into ½ inch thickness.
4. Lay the pieces on a cutting board and slice them into spears or sticks to mimic the shape of french fries. Place them in a large bowl for mixing seasonings
5 In a bowl, add in seasonings of preference Then drizzle some olive oil all over the fries and rub them together so they’re all well coated by the oil and seasoning
6 You want to line up the rutabaga spears with enough room between them so they’re not touching. This helps to create a more crispy factor so the rutabaga fries don’t turn out mushy.
7. Combine rutabaga spears with oil and spices, and toss until evenly coated.
8. Bake for 30 minutes, flipping the rutabaga spears halfway through; they should be cooked through and crisped on the outside
