THEWALDENWAY
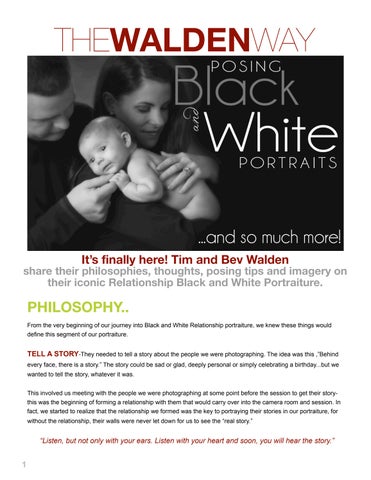
...and so much more! It’s finally here! Tim and Bev Walden
share their philosophies, thoughts, posing tips and imagery on their iconic Relationship Black and White Portraiture.
PHILOSOPHY.. From the very beginning of our journey into Black and White Relationship portraiture, we knew these things would define this segment of our portraiture.
TELL A STORY-They needed to tell a story about the people we were photographing. The idea was this ,”Behind every face, there is a story.” The story could be sad or glad, deeply personal or simply celebrating a birthday...but we wanted to tell the story, whatever it was. This involved us meeting with the people we were photographing at some point before the session to get their storythis was the beginning of forming a relationship with them that would carry over into the camera room and session. In fact, we started to realize that the relationship we formed was the key to portraying their stories in our portraiture, for without the relationship, their walls were never let down for us to see the “real story.”
“Listen, but not only with your ears. Listen with your heart and soon, you will hear the story.”
1
Second portrait of this family. (film scan)
An Early Story... of a brave battle fought for many years. From our archives, this portrait tells a story I vividly remember at the beginning of Relationship portraiture. We got a call from this mom’s mother, asking us to do a portrait of her daughter, hubby and son-that day! If you know us, you understand that we NEVER schedule a portrait that quickly. We want to meet our clients and plan the session and you guessed it-learn the story! However, once we learned the story, we did our first portrait of this family that day, in color, and without a planning session. The clothing was a mess! None of this mattered as the mom pictured above had just been diagnosed with ovarian cancer in a very late stage. The doctors actually discovered it as they delivered her son, pictured above with the blonde hair, in this portrait shot at a later date when “mom” was in remission. Throughout the next several years, we did portraits of her and the family as she battled the cancer, but this portrait stands out as it tells her story best. She wanted us to portray her in this image with her thick hair as a sign of victory. The older son has a look of peace, yet a deeper sense of sadness from the turmoil in his young life. The younger son is really the star of this portrait. Mom called him her angel as without his birth, the cancer would have never been discovered. Notice her expression of complete love and joy as she gazes on her angel! Dad towers above all, looking at his family, arms encircling them for protection. All interconnected...all one strong family...all in love. Though we could not stop the tragedy of her death years later due to this cancer, we were honored to play a role in preserving this memory for her husband and children.
2
PRIMARY SUBJECT
SECONDARY SUBJECT SECONDARY SUBJECT
PRIMARY SUBJECT
How the pose tells the story... Primary and Secondary subjects What makes a subject PRIMARY? Looking into the camera directly as others look away or down. Lighting them and having others go darker. Having everyone looking at them as they look into the camera. Severe cropping of secondary subjects.
SECONDARY SUBJECT PRIMARY SUBJECT
3
PRIMARY SUBJECT
SECONDARY SUBJECT- SEVERE CROPPING
How the pose tells the story... Primary and Secondary subjects
What makes a subject SECONDARY? Being put in shadow. Closed eyes.
SECONDARY SUBJECT IN SHADOW SECONDARY SUBJECT-CLOSED EYES
Severe cropping. Looking down or away. Softening background subjects.
SECONDARY SUBJECTS PRIMARY SUBJECT
PRIMARY SUBJECT
4
Another story... a life well lived. This man, Bev’s dad, was a man whose life was filled with helping others. Though not an executive in a fancy firm, he changed the lives of those he met with his kindness. From fixing bicycles, washers and dryers to volunteering at the local VA hospital, his goal was to leave others better than he found them. His story is one of a man who worked with his hands all of his life, yet was a gentle soul.
Do you have to see the face to tell the story?
5
Let’s look at some examples of PRIMARY AND SECONDARY SUBJECTS
What elements do you see in these images that make subjects either primary or secondary?
6
Working with Primary and Secondary Subjects LIGHTING AND HOW IT FLOWS
When light comes in from this side, don’t darken subjects in the flow of light! They are receiving equal light.
She is the secondary subject through downward gaze. He is the primary subject with eyes into the camera.
7
Working with Primary and Secondary Subjects LIGHTING AND HOW IT FLOWS
Now the secondary subject is on the shadow side, so it is ok to darken her. She is not in the light flow.
Image enhancement must follow the pattern of light and shadow; you cannot just lighten or darken at will. At capture, have your vision intact for the final product. Don’t try to create it in post-capture work.
8
Working with Primary and Secondary Subjects LIGHTING AND HOW IT FLOWS
Capture
Almost there
Image enhancement must follow the pattern of light and shadow; you cannot just lighten or darken at will. Final
9
Tim’s advice... YOU are the determining factor! Your camera room personality will determine the degree of your posing success, especially in a reality based style of portraiture such as our Relationship style portraits.
Be outgoing, friendly and positive. Gently but firmly control the camera roomyou must be the “alpha” dog! Be SUPER animated, especially with young children.
10
Tim’s advice... Don’t be afraid to try new ideas. The gems hide among the junk.
11
Tim’s advice... Work quickly with small children. Your best sessions may only last fifteen minutes!
12
Tim’s advice... End each session on a positive note...don’t wear out the children to the point of crying if you want them back in the future!
13
Tim’s advice... Walk around every situation. Most likely, your best image is not the one you are taking.
14
Tim’s advice... 1-Capture (as it happens) 2-Adjust (the big changes) 3-Refine (when the magic stays, refine the details)
15
Tim’s advice... Let your poses flow, one into another. This creates variety in the BEST way and is not as tiring for children.
16
Tim’s advice... Let your poses flow, one into another. This creates variety in the BEST way and is not as tiring for children.
DAD HOLDS BABY ALONE
MOM STEPS IN FROM SIDE
MOM HOLDS BABY ALONE
17
MOM LEANS IN FOR KISS
DAD STEPS IN AND LEANS DOWN FOR A KISS
Stay tuned... for the next segment of “The Walden Way”
...and so much more!
18
THEWALDENWAY
...and so much more!
PHILOSOPHY... ! When we started doing Relationship portraits, we printed them in our darkroom. Since our sink, due to its size, would hold 3-20x24 trays at the most, we were forced to make our largest size 20x20. Why 20x20 and not 20x24?
!
With Relationship portraits, we offered them only in a square format to make it easier to sell in groupings. No more vertical and horizontal formats which make it much harder to sell several together. Using the Hasselblad camera with a square back was also a plus. For cameras that don’t have a square back, there are ways to mark a square through the viewfinder so you know your crop lines. After a time of doing it, you will start to see square!
SELL IN GROUPINGS-As they say, desperation is the mother of invention. As we struggled on how to create significant “size” on our clients’ walls when the largest size we could print was 20x20, we made some key decisions that helped us.
!
Sell in groupings: Early in the development of our Relationship portraits, we knew to get the money we wanted and to tell the story, we needed to sell in a series. Much like a newspaper reporter sent to cover a house fire, the first image he takes is a wide shot, showing the house on fire and the street with the firetrucks-it simply conveys information in general terms.
!
However, when he moves into a close-up of the occupants of the house crying and holding each other as they watch their home burn, now the story gets more intimate and emotional.
!
This same thought process was how we determined the path to selling in series.
ABBREVIATION
ABBREVIATION ESTABLISHING IMAGE
The Establishing Image with Abbreviations The Establishing Image: In order to anchor the series, we always create and sell an “Establishing” image. This is usually the portrait of the entire family,
ABBREVIATION
looking into the camera. It is nicely composed and well lit. It shows all of the faces since the Abbreviations often have subjects in shadow or severely cropped and all faces are not looking into the camera and fully lit.
!
Usually, the Establishing Image is three quarter or full length crop and is a size or two larger than the Abbreviations. Many different groupings are possible, whether this image is larger than the others or simply part of a grouping that is all the same size.
!
The Abbreviations: Let’s take a look now at the Abbreviations. The Establishing Image is the center of the spoked wheel while the Abbreviations are the spokes that go different directions. Sometimes, it is a mom kissing her baby. Other times, it is an entire family looking at one member of that family (usually the baby or youngest.)
!
Abbreviation images are often more graphic and dramatic and are the heart of the story. Just like the newspaper reporter’s shots, these images make the “house” a “home.”
!
Often shot close-up, they capture the thick eyelashes of a two-year old or the freckles on a five-year old. Eyes are the windows to the soul and certainly, Abbreviations highlight the eyes of our subjects that are looking into the camera.
!
ESTABLISHING IMAGE
!
ABBREVIATION
There are different approaches to creating groupings.
As you saw in the previous grouping, the Abbreviations were variations of mom, dad and baby as that is their only child. Variety comes through different angles and posing, severe cropping and using the Primary and Secondary philosophy.
!
Here, you see the Abbreviations with a mom and her three children. Variety is coming through different subjects, all with mom as the thread throughout.
!
ABBREVIATION
What you will usually see when you pose the entire family is a compromise on expressions as the children are all different ages and to get all of their expressions perfect is difficult. That is why we love to break the group down into what we call “individuals” of each child although there is always a parent in the portrait when we shoot this style...always!
!
With each Abbreviation, the children usually have the best expression because we are interacting with them as individuals and can tailor our actions to their ages.
! ! !
ABBREVIATION
ABBREVIATION
ESTABLISHING IMAGE
Organizing the session...
!
In the camera room, we call Relationship sessions “controlled chaos!” The reason is that poses are not shot in a certain order. However, we do have the end (sale) in mind as we are shooting these sessions.
!
In other words, make sure you cover all of the posing variations to be able to make complete groupings later.
!
What is important is capturing the subjects with authentic expressions that may be gone in a split second. If dad walks out of the dressing room with his two-year old in his arms while mom is still getting the baby ready, then we start with dad and toddler. If mom is holding the baby in a really dynamic way while watching, we may quickly pull her over and capture that.
!
You must keep track in your mind the poses you have covered and what may still be missing so that your sale goes smoothly and you don’t have to re-shoot. We always ask at the end of the session if we have missed anything, so our clients can help us remember.
!
Rarely do we work for a smile unless is it real.
ABBREVIATION
and remember...
! 1-Capture (as it happens) ! 2-Adjust (the big changes) !
3-Refine (when the magic stays, refine the details)
This is a copy of the original letter Bev’s dad wrote to his mom as he went off to war. What a valuable treasure, worth more than silver and gold. Priceless...definitely yes!
Journaling... punch up the emotion & value Journaling adds emotion! Simply put, journaling is writing a letter to those you love, whether husband, wife, son or daughter...grandparents, nieces, nephews or even best friends.
!
When you, as a storyteller and photographer, add this idea for your clients and then provide the way to do it, you become very special in their eyes!
!
We decided to do this when we realized the impact it would have when combined with our emotional and storytelling portraits. But...the best part is how it adds such value to them.
!
We ask them to buy their son or daughter’s wedding gift today when they are looking at images of their sons and daughters as babies or toddlers. How amazing would it be to find these portraits on their children’s wedding table along with the letter that was written when they were a baby or toddler! And the key-they never knew the letter was in the back of the portrait, hidden in a pouch, for twenty plus years!
!
*You can find the layered PSD files here if you would like to use our materials. http://waldencoaching.com/2014/06/17/journaling-pages/ *You must be registered on our website to access this material.
!
Tim’s advice...
!
Create an environment in your place of business where emotions can freely flow. We use quotes and poetry throughout the studio, in our marketing pieces and even on our pricing schedules!
!
Let your walls down and your clients will too.
Here are a few faves to get you started!
!! ! ! ! ! ! ! ! ! ! ! ! ! ! ! ! ! ! ! ! ! ! ! ! !
Quotes on Photography…
Taking pictures is like tiptoeing into the kitchen late at night and stealing Oreo cookies. - Diane Arbus Lately I've been struck with how I really love what you can't see in a photograph. - Diane Arbus My favourite thing is to go where I've never been. - Diane Arbus You don't take a photograph, you make it. - Ansel Adams Twelve significant photographs in any one year is a good crop. - Ansel Adams A true photograph need not be explained, nor can it be contained in words. - Ansel Adams There are always two people in every picture: the photographer and the viewer. - Ansel Adams Sometimes I do get to places just when God's ready to have somebody click the shutter. - Ansel Adams I can look at a fine art photograph and sometimes I can hear music. - Ansel Adams We don't make a photograph just with a camera, we bring to the act of photography all the books we have read, the movies we have seen, the music we have heard, the people we have loved. - Ansel Adams Chance favors the prepared mind. - Ansel Adams You are the camera, your eyes are the shutters. What you absorb through them is what you paint and it's you that is mixing the colours, not the camera. (Richard F. Barber) To me, photography is the simultaneous recognition, in a fraction of a second, of the significance of an event. ~Henri CartierBresson A photograph is neither taken nor seized by force. It offers itself up. It is the photo that takes you. One must not take photos. ~Henri Cartier-Bresson The important thing is not the camera but the eye. ~Alfred Eisenstaedt A photo you took yourself is a tiny time machine. You know where you were standing. You hear the sounds. Best of all, you know why you took that photo. ~Pepper Hume The camera is an instrument that teaches people how to see without a camera. ~Dorothea Lange The camera always points both ways. In expressing your subject, you also express yourself. ~Freeman Patterson Photos are our autobiography, a way of telling who we are. ~Jan Phillips A photo must make the viewer feel all the senses with one. ~Todd Plough You don't take a photograph. You ask, quietly, to borrow it. ~Author Unknown When you photograph people in colour you photograph their clothes. But when you photograph people in B&W, you photograph their souls! ~Ted Grant The goal is not to change your subjects, but for the subject to change the photographer. ~Author Unknown Photographers deal in things which are continually vanishing and when they have vanished there is no contrivance on earth which can make them come back again. ~Henri Cartier-Bresson The creative act lasts but a brief moment, a lightning instant of give-and-take, just long enough for you to level the camera and to trap the fleeting prey in your little box. ~Henri Cartier Bresson
Tim’s advice...
!
Create emotion in your place of business with the right music-yes, the little things all add up!
!
We have approved stations (classical & jazz) we listen to on Pandora and we purchased their commercial free plan so that we have the right atmosphere set all of the time without worrying about the wrong song coming on.
Perhaps love is like a window, perhaps an open door It invites you to come closer, it wants to show you more And even if you lose yourself and don't know what to do The memory of love will see you through.
!
John Denver
Stay tuned... for the next segment of “The Walden Way”
...and so much more!
THEWALDENWAY Posing is like a template…some clients are simply plug and play; they look great no matter what you do. Others require a little more. You can start with a “pose” template, but then you need to adjust it to fit their body and personality.
! POSE TIP:LEADING LINES In this portrait, your eye enters the left side of the image where the couch back comes into the portrait edge, goes to her hand resting on the couch and then starts again at the left side. Bingo! Leading lines here help the viewer stay looking at the portrait longer, not exiting out.
!
The couch’s leading line meets her arm and hand, which, because of the curve, directs the viewer’s eye back into the portrait, creating the perfect scenario of a circular path for the eye.
! !
Remember, we read left to right, so be sure your leading lines start at the left and go into the portrait from there. A secondary leading line is her bent arm which takes the viewer to the face, then around her hair and back down the resting arm.
! POSE TIP:LEADING LINES
His hand is a strong leading line, directing the viewer to his face.
! POSE TIP:REPEATING SHAPES In this portrait, having “dad” exaggerate his elbows and sticking them out farther than what may be normal added to the feeling in this portrait of dad as the security for the son. Also, because of the repeated triangular shape, it helps hold the the portrait together and makes a stronger impact on the viewer.
!
In the portrait below, having hubby prop his hands on his hips creates a nice triangle and then leaning her in quite drastically creates repeated shapes and similar angles.
! POSE TIP:REPEATING SHAPES
! POSE TIP:REPEATING SHAPES
...and so Triangular composition is the most basic shape we use in our photography. The triangle, with its wide bottom and narrow top, creates a stable feeling for the viewer. Repeating this shape as much as you can creates strength in the portrait.
On the other hand, when you turn the triangle upside down where it has to balance on its point, the feeling becomes very unstable to the viewer.
Can you fine the triangles in these images?
Tim’s advice... In a class many years ago, one of the teachers said something that I never forgot and still use today. It is this, “If it bends, bend it!”
she is leaning/bending back from the waists to give movement
wrist and arms are bent
elbows and wrists bent
elbows and wrists bent
Tim’s advice...
!
Visualize what the portrait will look like ahead of time and set up as much as possible ahead of time-don’t wait until your client is there.
!
It may not be exactly what you thought, but most of the time, it will morph into a beautiful portrait with fewer tweaks than if you had nothing set up.
!
The more knowledge you have, the better able you will be to visualize what will work. Know the client’s personalities, the clothing, etc.
Tim’s advice... Less is more. Often too much variety of poses, backgrounds and props can be an enemy of excellence. You have a window of time to choose what’s most important to get in a session..get through 4 outfits or select the best scenario and finesse it as close to perfection as possible. I choose the latter.!
!
Stay tuned... for the next segment of “The Walden Way”
and in the up and coming segments, we will explore many posing philosophies that apply to both color and black and white imagery.
THEWALDENWAY
...and so much more!
PHILOSOPHY... Posing groups seem to be challenging for most photographers, whether just beginning or a seasoned pro. As we waded through building our Relationship brand and products, we decided that the family group would be the anchor of a group of images. (see March workbook for more on Anchor and Abbreviation images) So...we needed to do a great job on posing groups as it would become the center piece in our clients’ homes.
POSING GROUPS-THINK ABOUT A STAFF OF MUSIC... As we listened to a dear friend, Drake Busath, teach a few years ago, he said something so simple, yet profound and it was to think of your group as music notes on a staff. Each circle represents someone’s head in the group and they should never be in a straight row. Rather, they should be up and down, all at different levels, to make a beautiful “melody.” This is a fantastic word picture! Every time we pose groups, we make sure we move our subjects into position so that their heads are not straight across nor on top of each other vertically. And yes, it takes practice!
SOMETIMES, SYMMETRY TAKES A BACK SEAT ... Looking at these two images, the top one is perfectly symmetrical with equal space between each subject and is a nice image. However, adding movement by adding diagonal lines (leaning the subject) is even better. See how mom is closer to the older daughter and how she leaned to get there.
Nice arrangement
Better arrangement
BE ALERT TO WHAT PEOPLE DO ON THEIR OWN... When we shot film, we called this the “13th” image. People relaxed when they thought you weren’t paying attention to them and often, what they did was better than what we were doing! Be alert to what people are doing at all times and don’t correct them if it looks good. And...tell mom or dad to let things go as they are quick to jump in and start to correct their kids if they think they are misbehaving.
When you think all is lost... Baby cries, toddlers get antsy...what do you do? In this case, as we continued to work with the youngest little girl, the baby kept lifting her head up, so mom decided to lay down and snuggle her. When we saw this happen, we captured it. This is the great result!
and this scenario is not unusual... just when we get baby, mom and dad in position, all of the sudden, the young toddler decides he wants no part of this and runs to the back corner! Simply by ignoring him and continuing with the session, he realizes he is being left out! So he jumps back in and in this case as with many others, he looks straight into the camera as everyone else looks at the baby! It is classic. And it is usually the one purchased for the wall.
http://hansonfong.smugmug.com/ SiteFiles/Investment/ 21481152_GQskMq/ 2003257812_xfHx5DG
Two of our most prized posing possessions... In photographing subjects in color, what you pose your subjects on matters...how it looks is important because it shows and becomes part of the portrait! Just the opposite is true in posing groups in the Relationship black and white style. Your props don’t show at all or very little-it’s all about heights. In this scenario: different heights of stools and blocks to help us get a musical “flow.”
Posing is from the ground up... Posing is like golf...what you do with the lower part of your body sets you up for success in the upper part of your body. In Relationship portraiture, the same principle applies; posing is from the ground up. Before the clients arrive, we arrange our bar stool and small nesting stools to simulate what we are planning to do. We have the Hanson blocks to the side and ready. Of course, we usually have to tweak our set up once we start, but we are in the ball park and more comfortable once we have everything in place. Realize that the back of the bar stool, although it sometimes shows, will be darkened in post production. It is the only prop that ever shows in a Relationship portrait.
Let’s look at some poses of smaller groups and how we use our props.
First, get dad in place. Then we bring in the son. He is standing on the floor as he is tall enough. For shorter subjects, we can stand them on either the nesting stool or a Hanson block. Then we simply, without moving either one’s body, can flow into these different poses by having dad lean down. Notice dad’s knees are at different heights-when the son leans on them, he is automatically leaning as well and creating movement.
Or we can raise them both off the floor and do more variations. Note: With small toddlers, getting their feet off the floor is a key to success!
Tim’s advice... End on a high note when young children are involved. They will be excited to come back again and again! We let them pose the last shot and this is usually the result!
Tim’s advice... A great portrait of a large group is really just several beautiful portraits of smaller groups within the larger. I often start with a smaller grouping (especially with small toddlers as I get to know them) and work my way to the larger group.
Tim’s advice... Body language is important to see, understand and then, be flexible in your posing to accomodate it. Remember what I always say are the 3 steps: 1. Capture the moment 2. Adjust the small things if possible. 3. Refine to perfect the image if the moment and magic holds to allow it.
Stay tuned... for the next segment of “The Walden Way”
and in the up and coming segments, we will explore many posing philosophies that apply to both color and black and white imagery.
THEWALDENWAY
...and so much more! PHILOSOPHY... ! Sitting in a room where prints were being judged at a state convention, I saw many black and white prints spin around. Most of them were judged low and as I sat and watched, I realized one of the most important principles that is still a foundation for us to this day! They were too busy!
SIMPLICITY-Remember the old saying KISS…meaning, Keep It Simple Stupid! This principle is as true today as it was years ago. When you keep adding things to a portrait, it gets busy and the viewer is distracted. With black and white imagery, it is even more critical to keep it SIMPLE! Painfully simple is the goal.
!
I tell our clients to think of a mime-what do you see? They are dressed in solid, dark clothing with white gloves and their faces are painted white. Why? To draw attention to their hands and faces so they can tell their story. With Relationship portraits, it is the same idea. We want to focus on the hands and faces-that is where the story resides.
Why dark turtlenecks? It’s a simplicity thing…
The Black Turtleneck Story: Years ago, we started asking all of our clients to wear black turtlenecks and black slacks as we started our journey into Relationship portraits. Shooting with film and with proper lighting, we could hold the detail in the deepest blacks and it gave us a dramatic effect in our portraiture and highlighted the faces and hands.
!
In fact, we purchased and still have 40-50 black/dark turtlenecks and mock necks in sizes from “onesies” to a man’s XXXL available for those clients who don’t have their own. We wait until the end of the winter season and then order them from online stores at great savings!
! Fast forward: When digital photography came along, we realized it was easier to lower the contrast and we did this by raising the dark tones in the scene (background and clothing) and then we deepen the images in Photoshop while carefully maintaining all detail. With gray or camel color tops, we could expand the tones in the capture and then darken them in post-processing. It gave us more control of the final product. What we DID NOT lower was the contrast in the lighting. We also switched backgrounds from a dark brown to this one by David Maheu called Harvest Gold (see link below).
!
We use it with a background spot to give it dimension and if we need to, we can lighten the entire background with a background fill light.
!
http://www.backgroundsbymaheu.com/harvest-gold.html
!
What about the girls?
As you see in our Relationship imagery, boys are fine in turtlenecks, but what about the girls? We were asked by our clients what to dress their daughters in and as we thought about it, we realized that black dresses that were also simple in nature could not be found in our area stores.
!
To combat this challenge, we asked a seamstress we knew if she could sew a simple black dress in several sizes for our clients’ daughters to wear. It was one of the best decisions we made. We have used these dresses for years now and they still look great and timeless!
Tim’s advice...
!
With the hands taking such a prominent role, you must do a great job with posing them.
!
My #1 rule in posing hands of adults and children together: let the child’s hand trickle over and through the adult’s hand. Turn the adult’s hand upside down, facing the ceiling.
Tim’s advice...
!
Hands in other situations…some of the best hand posing advice we have ever been given is this, “If it bends, bend it!” Hands are the most natural hanging to the side. Have your subjects let their hands dangle at their sides, then you can gently pull them into position for your image. It really works!
Hand hanging at side…
…looks natural when resting on the leg.
Tim’s advice...
!
Hands in other situations…in large family groups, you must be hyper aware of each hand placement, especially since they are contrasted against dark or black clothing. Make sure each is gracefully bent and placed so that they flow through the image without being distracting. It does take practice!
Stay tuned... for the next segment of “The Walden Way”
...and so much more!
THEWALDENWAY
Points on posing {anybody} that you absolutely need to understand!
Capturing special moments is vital...
but you still need to pay attention to posing foundations!
Leaning creates energyleaning creates diagonal lines.
FOUNDATIONAL:
DIAGONAL LINES
However, leaning must be exaggerated for the camera to see it and translate it.
s e n i l . l t a n n e o m g Dia move e t a cre
Hair positioned diagonally adds movement along with her leaning.
Use props to create diagonal lines.
Dia gon al lin can be s es pos oftly ed.. .
or angular.
Leaning against another person creates diagonals.
Simple head shot needs diagonal lines too!
Bodies can be posed to create diagonal lines.
Stretching out the arm elongates the body and creates a nice diagonal.
Leaning creates diagonals and gives life to your images.
FOUNDATIONAL:
IMPACT Through expression...
IMPACT
through expression...you must engage the mind and be quick to capture expressions!
IMPACT through unusual compositions...
IMPACT through unusual compositions...
Cropping into heads creates unusual compositions.
IMPACT through lighting...
and in this case, subject matter.
Learn the different light patterns and then use them to create IMPACT!
Even leave the light in the image for something different!
IMPACT through the unexpected...
Laughter at just the right moment.
Daughter looks on from stairs.
Brother is not happy without all attention on him!
IMPACT through the unexpected...
Tim’s advice... “The camera is like a sponge, absorbing movement, so you must overcompensate.” It won’t feel natural to your client, but do it anyway.”
Tim’s advice... “A great way to define IMPACT is this... Impact=Strong Composition & Unusual Approach.”
BW
Stay tuned... for the next segment of “The Walden Way”
THEWALDENWAY Posing children
Patience... patience... patience! “When I’m too big for you to hold, I’ll hold you instead” said Ashlyn, all of five years old! Children are honest, quirky, full of surprises and most of all, endearing to photograph!
!
I remember early in our careers that we were a bit uncomfortable with photographing children until we had our own. Then we realized we had to learn some tips and tricks to be successful in this undertaking.
!
So this chapter of the pose book is dedicated to those who feel they need a leg up in this area.
! !
featuring the Enemies of Creativity.
!
Did you know creating the perfect portrait has “enemies?”
!
We call it
Enemies of Creativity.
!
We battle these enemies daily, especially when we are dealing with children!
ENEMIES ! OF! CREATIVITY
1.
WRONG AGES TOGETHER WITHOUT PARENTS IN THE PORTRAIT!
As we often say, there are many enemies of creativity, and the pre-planning session is the time to overcome them! Let’s look at the first HUGE ENEMY OF CREATIVITY-very young children in the portrait without the parents, especially if the combination is an infant and young toddler!
!
It quickly becomes a session where the main goal is to get the children looking the same way at the same time with a decent expression and not crying or trying to hurt each other. It is never the great, magical portrait the parents think it will be! It doesn't matter how many degrees you have at this point-we all look the same with this set of circumstances.
!
So, our number one goal in a pre-planning session is to ask the parents to allow us to photograph each child individually if they have more than one child and they are under five years old.
!
We can divide, conquer and guarantee a stunning portrait if we can work with each child alone or with a parent. When you add several siblings together without parents, especially kids under five, it is chaos in the camera room and creativity goes out the door! Plus by working with each child individually, you can draw the best expressions from them as you relate to them on their level.
!
The secondary request to handle this enemy is to do a family portrait with all of the children PLUS the parents. Parents are the glue that holds the entire group together. The baby feels secure in mom’s arms, but very unsure in a sibling’s lap, especially if that sibling is a toddler.
ENEMIES ! OF! CREATIVITY
2.
TOO MANY PEOPLE IN THE CAMERA ROOM !
The next enemy to overcome; parents, grandparents, aunts, uncles, nannies, etc. in the camera room, distracting the child. So, the next suggestion we make is to ask the parent if they (and any extra people) are ok with leaving the camera room if we feel we can get better results without them.
!
When we ask them ahead of time in the pre-planning session instead of in the heat of the battle during the photo session, they are never offended and very willing to help.
!
Many times, children are better when we interact with them alone rather than with an audience. With too many people around, children lose their focus and start paying attention to the parent whispering to them to do a good job instead of watching us for instructions.
ENEMIES ! OF! CREATIVITY
3.
CHILDREN TOO COMFORTABLE IN OUR FACILITY! This “enemy” may sound strange as we are all about making our clients feel comfortable, but let’s qualify what we mean and the ages it applies to. With any child under five years old, we are concerned about the kids getting too comfortable with us and our studio to the point that they start running through the camera room and playing.
!
So, we ask that the parents carry their children into the dressing room from their car, not putting them down at all if they are dressed and ready to go. We start the session very quickly with any family members that are ready. Again, we want to grab the intimate images quickly and the beginning of the session, when the children, especially toddlers, are trying to figure out their surroundings and are clingy.
!
Most of the time, we are talking about Relationship black and white imagery as this style is what we strongly suggest our clients do when their kids are very young as we can include the parents more easily with this style.
!
Once kids get used to their surroundings in the camera room, the images get more interactive and not as intimate.
!
Think about this for a moment-once you let a small child get down and start running, what are the chances they want to be picked up again? Very slim! They don’t ever run out of energy, so we just don’t let their feet touch the ground for as long as we can hold it off.
!
For color sessions, if we are photographing children five and up without a parent, we have short stools that we stand them on. It is amazing the difference it makes! They actually stay in the same spot and stand still when their feet are not on the ground. If we put a child up on a chair as in these example, mom or dad are sitting just out of view as “spotters” for safety.
ENEMIES ! OF! CREATIVITY
4.
KIDS THAT ARE COACHED BEFORE THE SESSION!
When we meet with the parents for the pre-planning session, we talk about the strategy for the best outcome and that includes them not instructing their kids to practice their smiles. Although this seems like common sense to a parent, once we tell them how hard it is to break through a camera smile their kids have practiced, they understand! People can’t produce great expressions on command!
!
If you tell a child to smile, it will be fake. Actually, we ask them not to practice any expressions. What we ask our clients to do instead is to help us learn the personalities of each child and then trust us to get the expression we need.
!
We ask our clients to understand the the GEMS lie among the JUNK. The gentle and subtle smiles hide among the JUNK and it’s ok that we throw away the JUNK.
!
From the time of the pre-planning session to the actual session, we ask our clients not to coach their children about the upcoming appointment, but just to say they are going to Walden’s to get their portraits done and that they will have a great, fun time!
!
Another aspect of coaching kids before the session is the parent telling a child how important this session is to them, especially since it will be an investment. With children, when they have been told that this session is very important, it puts pressure on the child. If the child is compliant, they become very stiff in the session because they want to do a “good job.” The walls don’t come down.
!
The other side are kids that rebel against the instructions to be good and they can throw temper fits and be difficult to handle.
ENEMIES ! OF! CREATIVITY
5.
VARIETY IN OUTFITS AND BACKGROUNDS!
Too many outfits? Too many background changes? All of this variety can become so demanding that is distracts from the original vision for the portrait. This is an enemy of creativity.
!
Clothing is an enemy if your client has too many outfits, especially with a small child. They typically don’t like their clothing changed and the session can become a nightmare rather than peaceful when the outfit changes become overwhelming for the child. Plus remember that you are judged by how your session ends, so stack the deck in your favor by ending the session before the child throws a fit. Limiting the outfits to one or maybe two max will help you in this area.
!
The little things that make images magical are lost when variety becomes more important than getting a wonderful portrait. We are portrait photographers, not fashion or catalog photographers! We go into each session with a vision and outcome in mind and too many changes makes fulfilling the vision nearly impossible.
!
And let’s think about the sale when you have too much variety in clothing or backgrounds. Now, a client may look great in the blue outfit, but what if their kids look better in the “white outfit?” This can create a confusing scenario and cause the sales experience to be negative instead of positive as you and your client struggle to find images that will hang well together. When you limit variety of clothing and backgrounds, arrangements become much easier to sell.
Tim’s tips:! Working with ! Children ENGAGE THEIR MINDS! While sitting in a lecture by Drake Busath on a cruise ship several years ago, we heard him say something so simple, yet so profound, that we have never forgotten it and it is this,
! “When working with children, you must ENGAGE THEIR MINDS!” Sounds simple, right? !
When you have children in front of your camera, how do you engage their minds? And why does it matter? First of all, it matters because we are not looking for trance-like expressions, but for vibrant, alive, expressions. This comes from engaging their minds with guessing games and intensity of delivery.
!
The guessing game. We hold up one, two or any number of fingers very quickly and ask them to tell us how many fingers we held up. Even if they are wrong, they are right! Kids love this challenge. Or, we try to guess their favorite food, their best friend’s name, their favorite color, ice cream flavor, pet’s name and on and on. The trick here is that we have that info written down on their information sheet, so we know some answers before we ask the question. When we tell them we know the answer and then we actually do, they think we are magic.
! The point here is to engage their minds! !
Next, we have a very energetic and intense delivery style when we ask the questions, kind of like our pants are on fire. If you speak in a monotone or quietly, you will NOT get their attention.You must have an urgency in your tone of voice. If you aren’t comfortable with doing this, practice. It really works!
!
Liberally use the word “WAIT!” For example, we say we want to guess their favorite color. They always want to help us by telling us, so we say (in an urgent voice) WAIT! DON’T TELL ME! The suspense and intensity of not allowing them to tell us the answer really works to get great expressions in children and helps get the attention of those who aren’t paying much attention to you, the photographer. It’s as if they are going to burst with excitement if you don’t eventually let them tell you the correct answer to the question.
!
On the other end of the spectrum, whispering works too. Have a story ready to whisper that makes no sense so they can correct you. I tell one about a purple pig that his adventures!
!
What we don’t do is get loud, crazy and playful unless it is absolutely the last resort. Toys sometimes work, but they can backfire too when the children are so young that they want to hold the toy and then stretch out their arms for it.
Tim’s tips:! Working with ! Children HAVE THE PARENT WHISPER IN THEIR EAR! In a Relationship style portrait, have the parent help you get great expressions of their children by a whisper. Ask the parent to whisper something they don’t want you to know and it instantly changes the expression on the child. For example, we tell the parent to whisper who the child’s girlfriend or boyfriend is, even if they’re too young to actually have a girlfriend or boyfriend. They know what it means and often start to giggle and loosen up. It’s a great trick!
Tim’s tips:! Working with ! Children SIMPLICITY BY ELIMINATION! If you’re having trouble with a pose where hands look distorted or claw-like, always eliminate. Simplicity for the greater cause is the best way out of those situations. Some clients have elegant hands that are very easy to pose while others have very stiff hands. If you can use the hands connected in a way that
Stay tuned...! for the next segment of “The Walden Way”
THEWALDENWAY
Posing Principles Every Photographer Should Know
BW
“We are in the flattery business, not the reality business.” We believe the foundations of posing the human form are timeless! Once foundations are learned and become second-nature, then it is time to start testing the boundaries.
!
But…to break the boundaries without first understanding posing foundations creates a portrait that is often of poor quality.
!
Tim’s dad used to say we are in the flattery business, not the reality business. With digital cameras, we must know more and do more to enhance each image in order to get it back to how the client’s loved ones see them. Seeing every pore and wrinkle is not flattering, though it is reality. Poorly done posing is not flattering either! Capturing those “natural moments” does not replace a beautifully posed portrait.Yes, there is a time and place for those, but they should not comprise the entire session with a client.
!
In film days, we often used diffusions over the lenses of our cameras to soften the skin of our subjects and now we use Photoshop for that, but the posing foundations have never changed. Timeless!
Let’s get started…
Curves are feminine When posing women, we always look for ways to create curvy poses, tilting and bending to get both fluidity and femininity. And remember, the camera is like a sponge, so you must exaggerate the tilting and leaning to get the desired effect.!
Elongating the body I (Bev) love poses that are dreamy, romantic, drawn out, elegant, exaggerated…and an elongated body creates fluidity in a pose. Of course, you must have the right subject for this look. Women, children or the combination of women with children work the best for this. !
!
Note the secondary color (ribbons and flowers) and how they create flowing lines that lead the eye fluidly through the image just by the intentional placement.!
Notice drawn out foot.
Eyes off center This is a great way to create impact in an image. When you turn a subject’s face towards the key light and then bring their eyes back around, there is more white of the eye seen which draws the viewer’s attention to the eyes of the subject, adding impact.
Body Lighting We turn the body away from the Key light and then ask our subjects to turn their faces back towards the light. In doing this, we accomplish two things. First, we create movement from the turning of the body. Second, we avoid washing out the front of the body and the detail in the clothing. !
!
Slimming women It doesn’t seem to matter if a women comes in that is thin or even what we would consider a normal build. We always watch our posing so that it doesn’t add any weight or bulk to our subjects. Here are some favorites.!
!
Crossing the front leg closest to the camera over the back leg and cropping close to the knee is slimming. In some cases, we will have the subject gently grab the dress and bring it in tightly to exaggerate the figure.
Body blocking with furniture, others in the image or pillows held on
High angles help slim the jaw area and always create a pleasing image, especially if the subject is heavy.
Thin those arms Even on the thinnest women, arms can look heavy in sleeveless or body hugging tops. !
!
Avoiding this issue for us it to ask women to wear half or long sleeves. We still pull arms out, away from the body to create a nice waist line. At times, if our subject is comfortable crossing their arms, we will add that pose in.
Notice hands at different heights-this adds movement and keeps the image from being stiff and static.
The “Turtle” neck stretch Along with using the correct lens and lighting and a high angle, having subjects stretch their neck forward, towards the camera (the Turtle Neck) will greatly slim the neck and take weight off.
Note: Some subjects tend to slump forward, so make sure their back is straight and they simply lean forward from the waist up and then stretch the neck forward.
Group focus When photographing a group, in order to keep all subjects in focus and to avoid distortion, we ask our clients to imagine a piece of glass is placed in front of the group, touching the nose of the person closest to the camera. Then we ask everyone to lean in until their noses touch the glass or as close as they can.
Watch those limbs Generally, limbs are kept close to the body and should not come directly towards the camera in order to avoid distortion. However, there are some exceptions when done with purpose. These would be dramatic effect, telling a story or to add a unique compositional element.
Here, we are telling a story of this man’s life and how he worked with his hands, so they are brought out in front of him and greatly exaggerated.
Keep hands pulled in close to the body.
Proper body cropping Knowing the difference between a half-length and threequarter length, a head and shoulder and full length will serve you well. Once you know the basics, you will feel comfortable in any situation.
Head and Shoulder: A Head and Shoulder crop is between the shoulder and elbow. It should be adjusted as needed. For example, when doing a business man in a suit, we crop a little below where his suit coat comes together.!
Half length: This crop is at the waist.
Three Quarter: This crop is halfway between the knees and waist.!
Full length: This crop includes the full body, from head to toe, leaving room below the feet and twice that amount above the head.!
Repeating shapes Strengthen compositions with repeating shapes in the image. These shapes can happen by strategically posing the body or with static elements in the image.
Head tilt Masculine vs. Feminine! (This assumes the shoulders are turned off axis to the camera.)!
!
For most portrait situations, a slight to moderate head tilt will improve the image, adding motion and energy. !
!
The rule of thumb says that a masculine tilt is where the head tips towards the back shoulder furthest from the camera while a feminine tilt, depending on the message they want to send, can look right either way. A woman’s head can be tilted toward the masculine side, but a man’s head should rarely be tilted to the feminine side.!
!
Personal note: For us, we look at both with women and choose what best fits the situation.
Images above from free digital tutorials
This has been an intense and long project, but at the same time, very fulfilling. It is our hope that it helps every photographer, from those just beginning to the seasoned professionals.!
!
Although it was my (Bev’s) undertaking to create this pose e-book, I could not have accomplished it without Tim! He is such a wise, talented and widely respected artist and gave me so much help when I was stuck and of course, he provided the majority of the images in the book.!
! Enjoy!! !
Tim and Bev Walden!
Not a member of the Coaching Community yet? It’s easy to join…go to!
! www.waldencoaching.com! ! and click on the JOIN tab at the top.! !