3 minute read
Section 3: Blood Administration and Blood Sampling

from Bionector Handbook
by VygonGroup

bionector®
SECTION 3 - Blood Administration and Blood Sampling
Advertisement
bionector® Clinical Performance Study 3A
bionector®
bionector®

bionector®
bionector® Clinical Performance Study 3B
bionector®
Background
More and more emphasis is being put on the ability to prove that blood can successfully be flushed/eliminated from needleless devices. This is due to the risk of biofilm formation which can increase the risk of catheter colonisation and thus catheter related blood-stream infection. Some needleless devices have a clear housing so the fluid pathway can be visualised post-flush. Of course having a transparent housing does allow the user to determine when macroscopic blood is present. However, can they conclude at what point microscopic blood has also been eliminated?
Objective
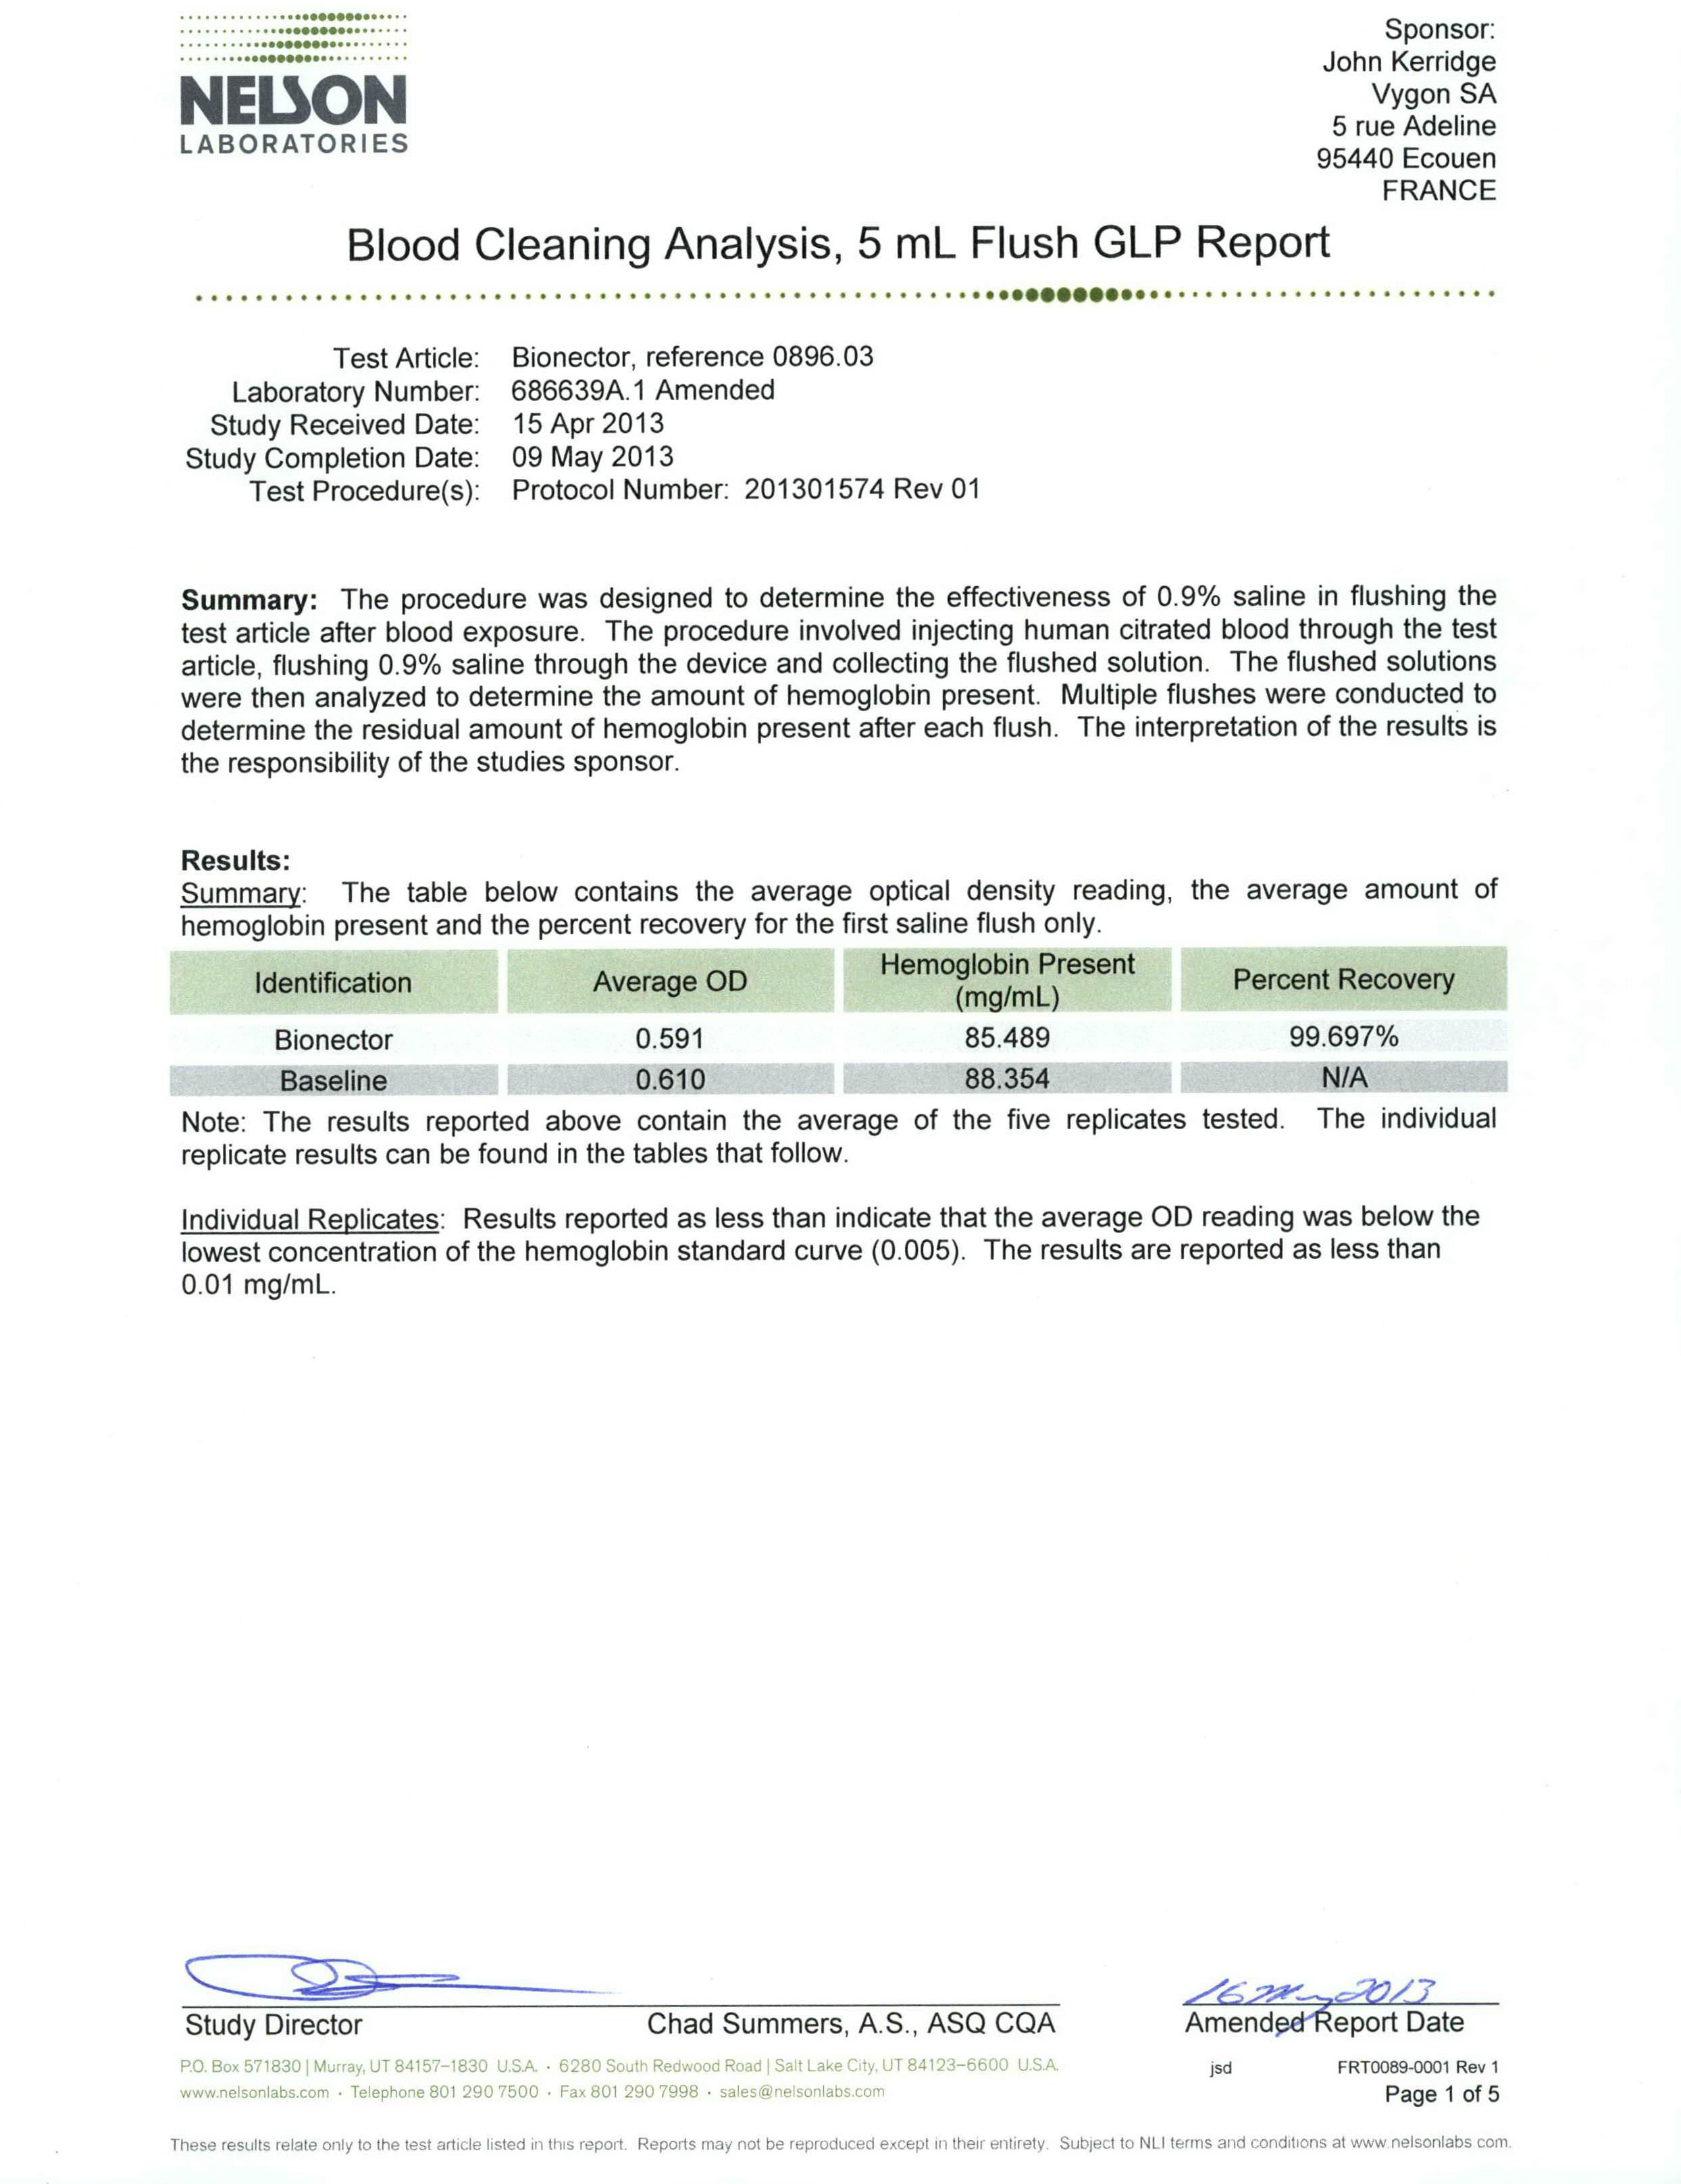
To demonstrate that Bionector can be successfully flushed and to conclude experimentally what volume of flush is required to eliminate blood from the device.
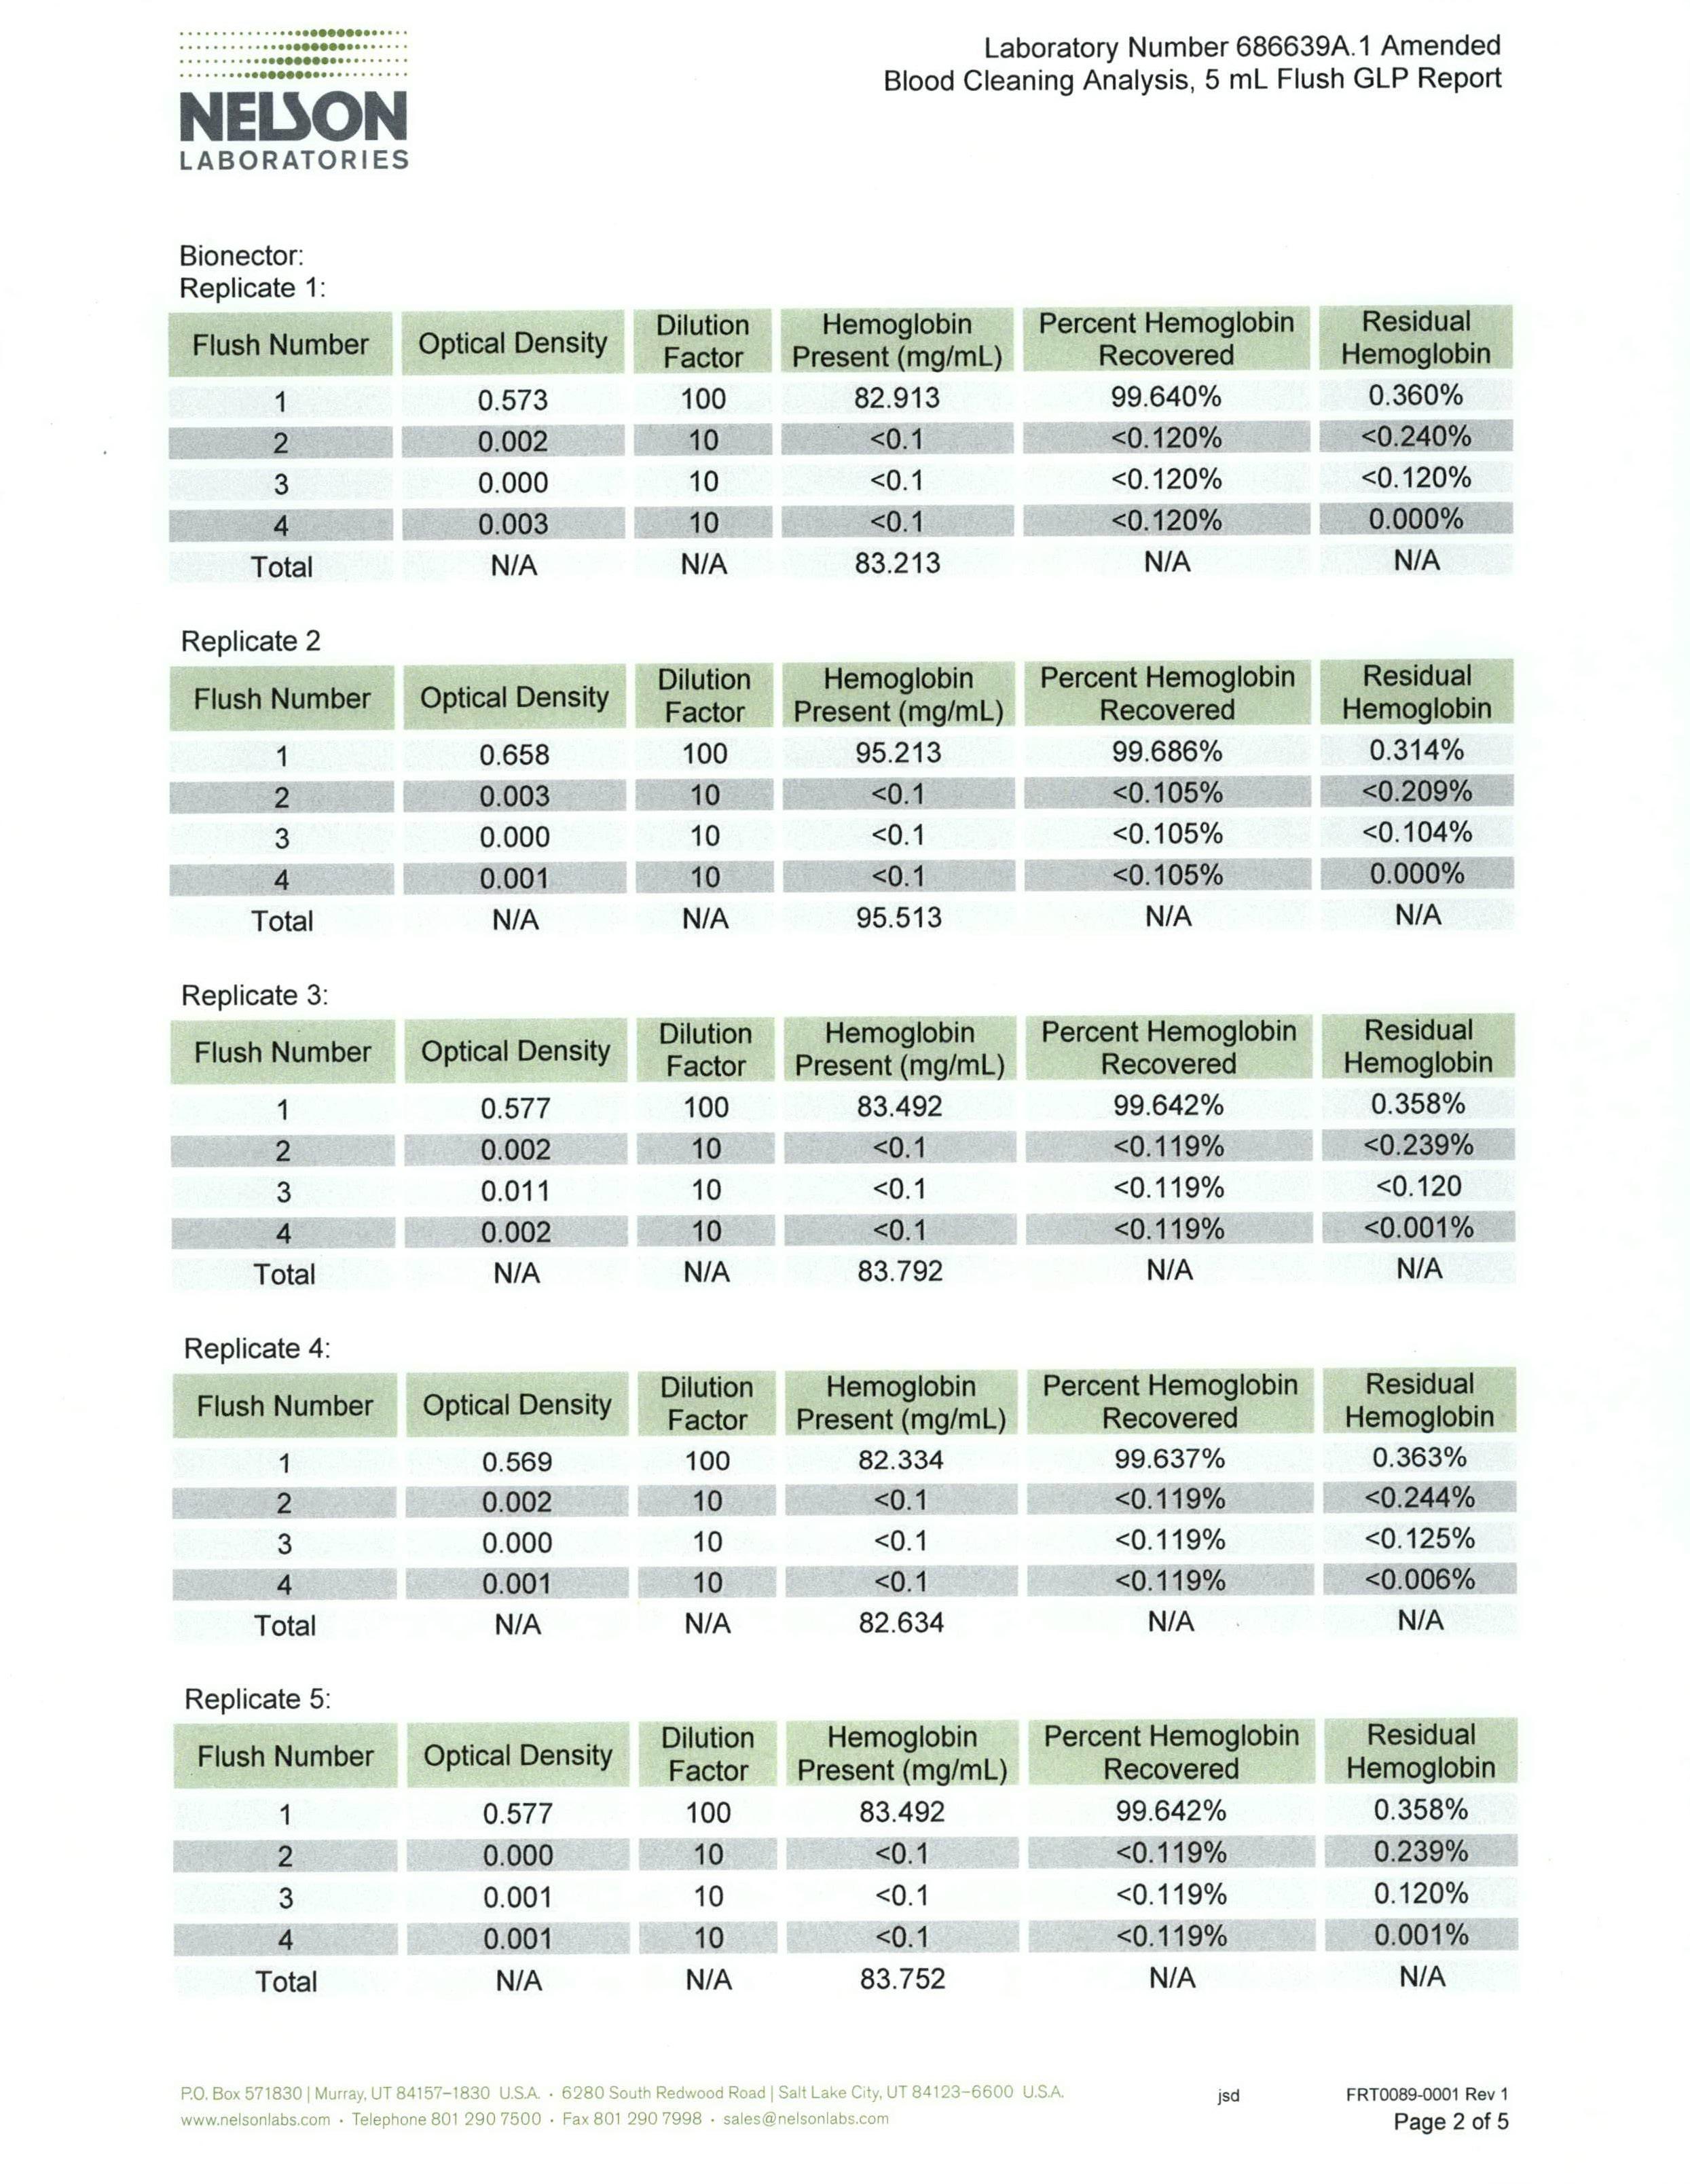
Test summary & results
Inoculation of blood into valve
Prior to the procedure, ensure the blood is stored at room temperature. Attach a 1ml syringe to the proximal end of a Bionector and attach a needle to the distal end. Draw the blood (volume approximately 0.7ml). Expel the blood from the Bionector and remove the needle. Flush the Bionector with three 5ml boluses of sterile 0.85% saline solution. Obtain each 5ml bolus by successively flushing 1ml aliquots; collect each of these three washes into sterile test tubes.
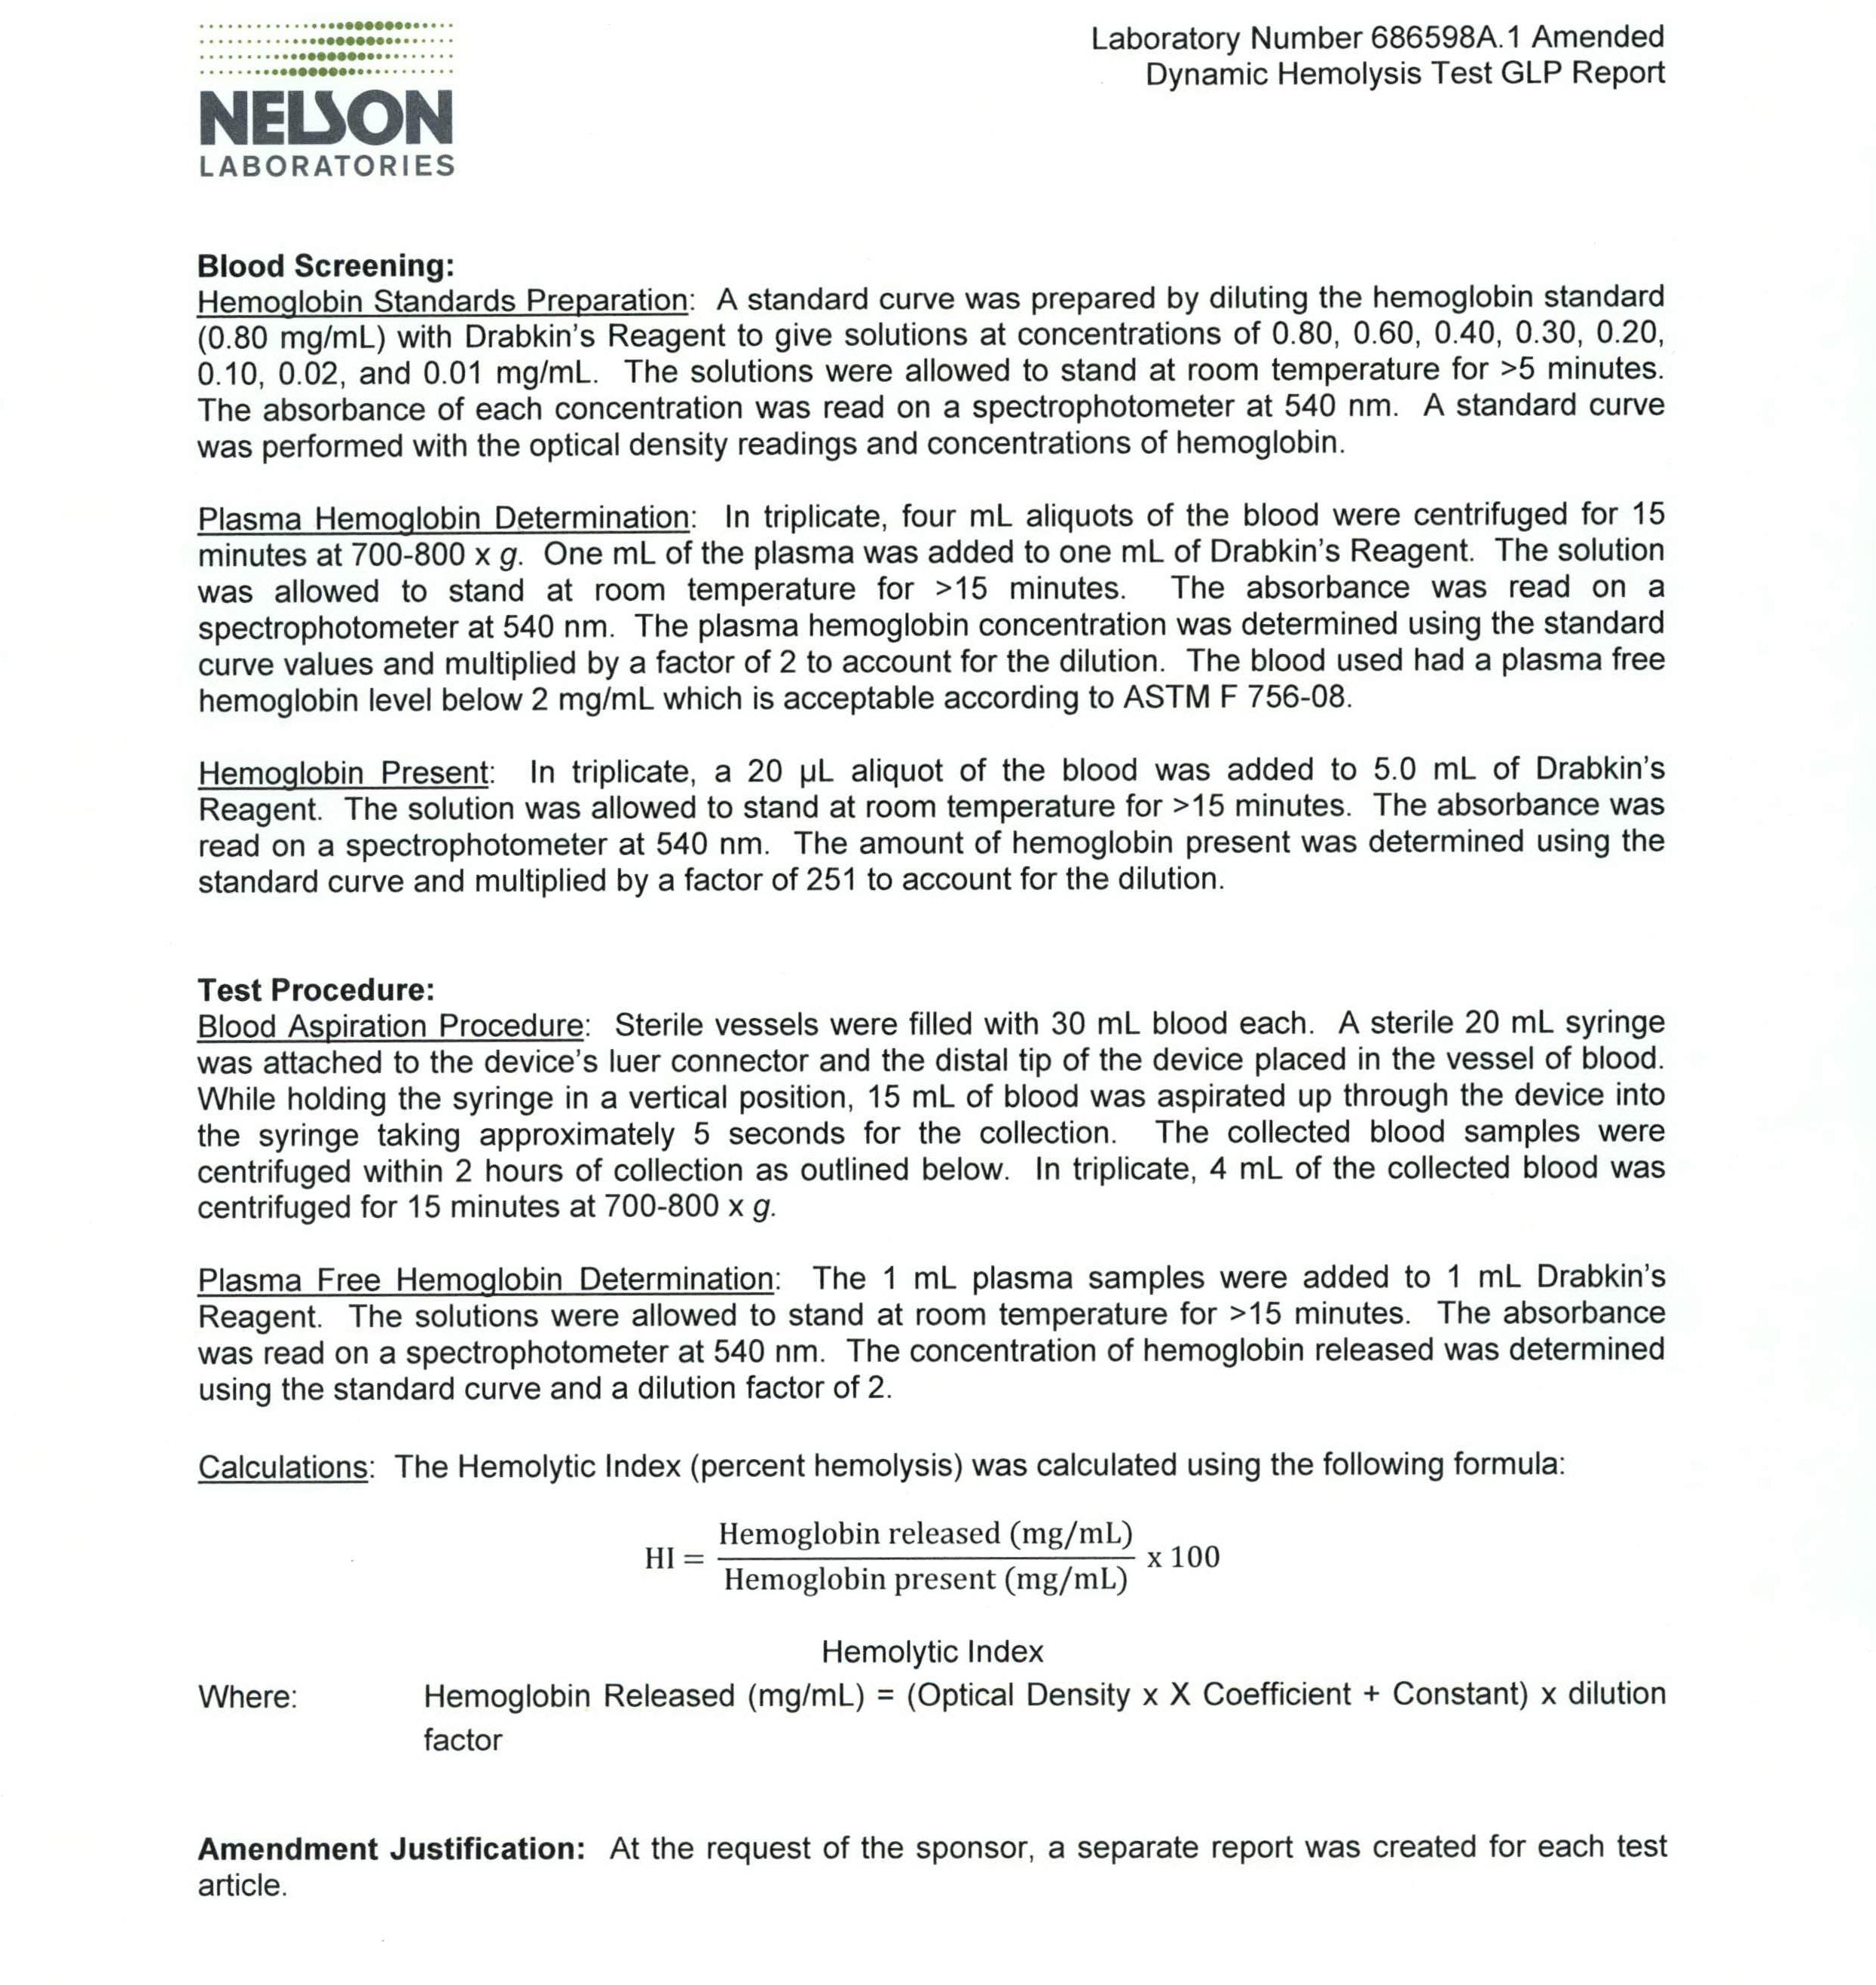
Concentrate the red blood cells collected in the bolus by centrifugation for 10 minutes at approximately 2,500rpm. Dissolve the pellet produced in 5ml of Drabkin’s reagent to release haemoglobin.
Determination of haemoglobin
Prepare haemoglobin (standard catalogue No. 3075). Prior to the process, bring the ampoule to room temperature for at least one hour. Immediately before use, hold the ampoule between the thumb and index finger and swirl the ampoule gently by inverting for 30 seconds, allowing bubbles to rise before opening.
Procedure (standard runs):
1. Dilute the standard 1:250 (0.1ml + 24.9ml) = Standard 1. 2. Dilute number 1 above 1:1 = 1:500 (5ml of Standard 1 + 5ml of Drabkin’s) = Standard 2.
3. Dilute Standard 2 above 1:1 = 1:1,000 (5ml of Standard 2 + 5ml of Drabkin’s) = Standard 3.
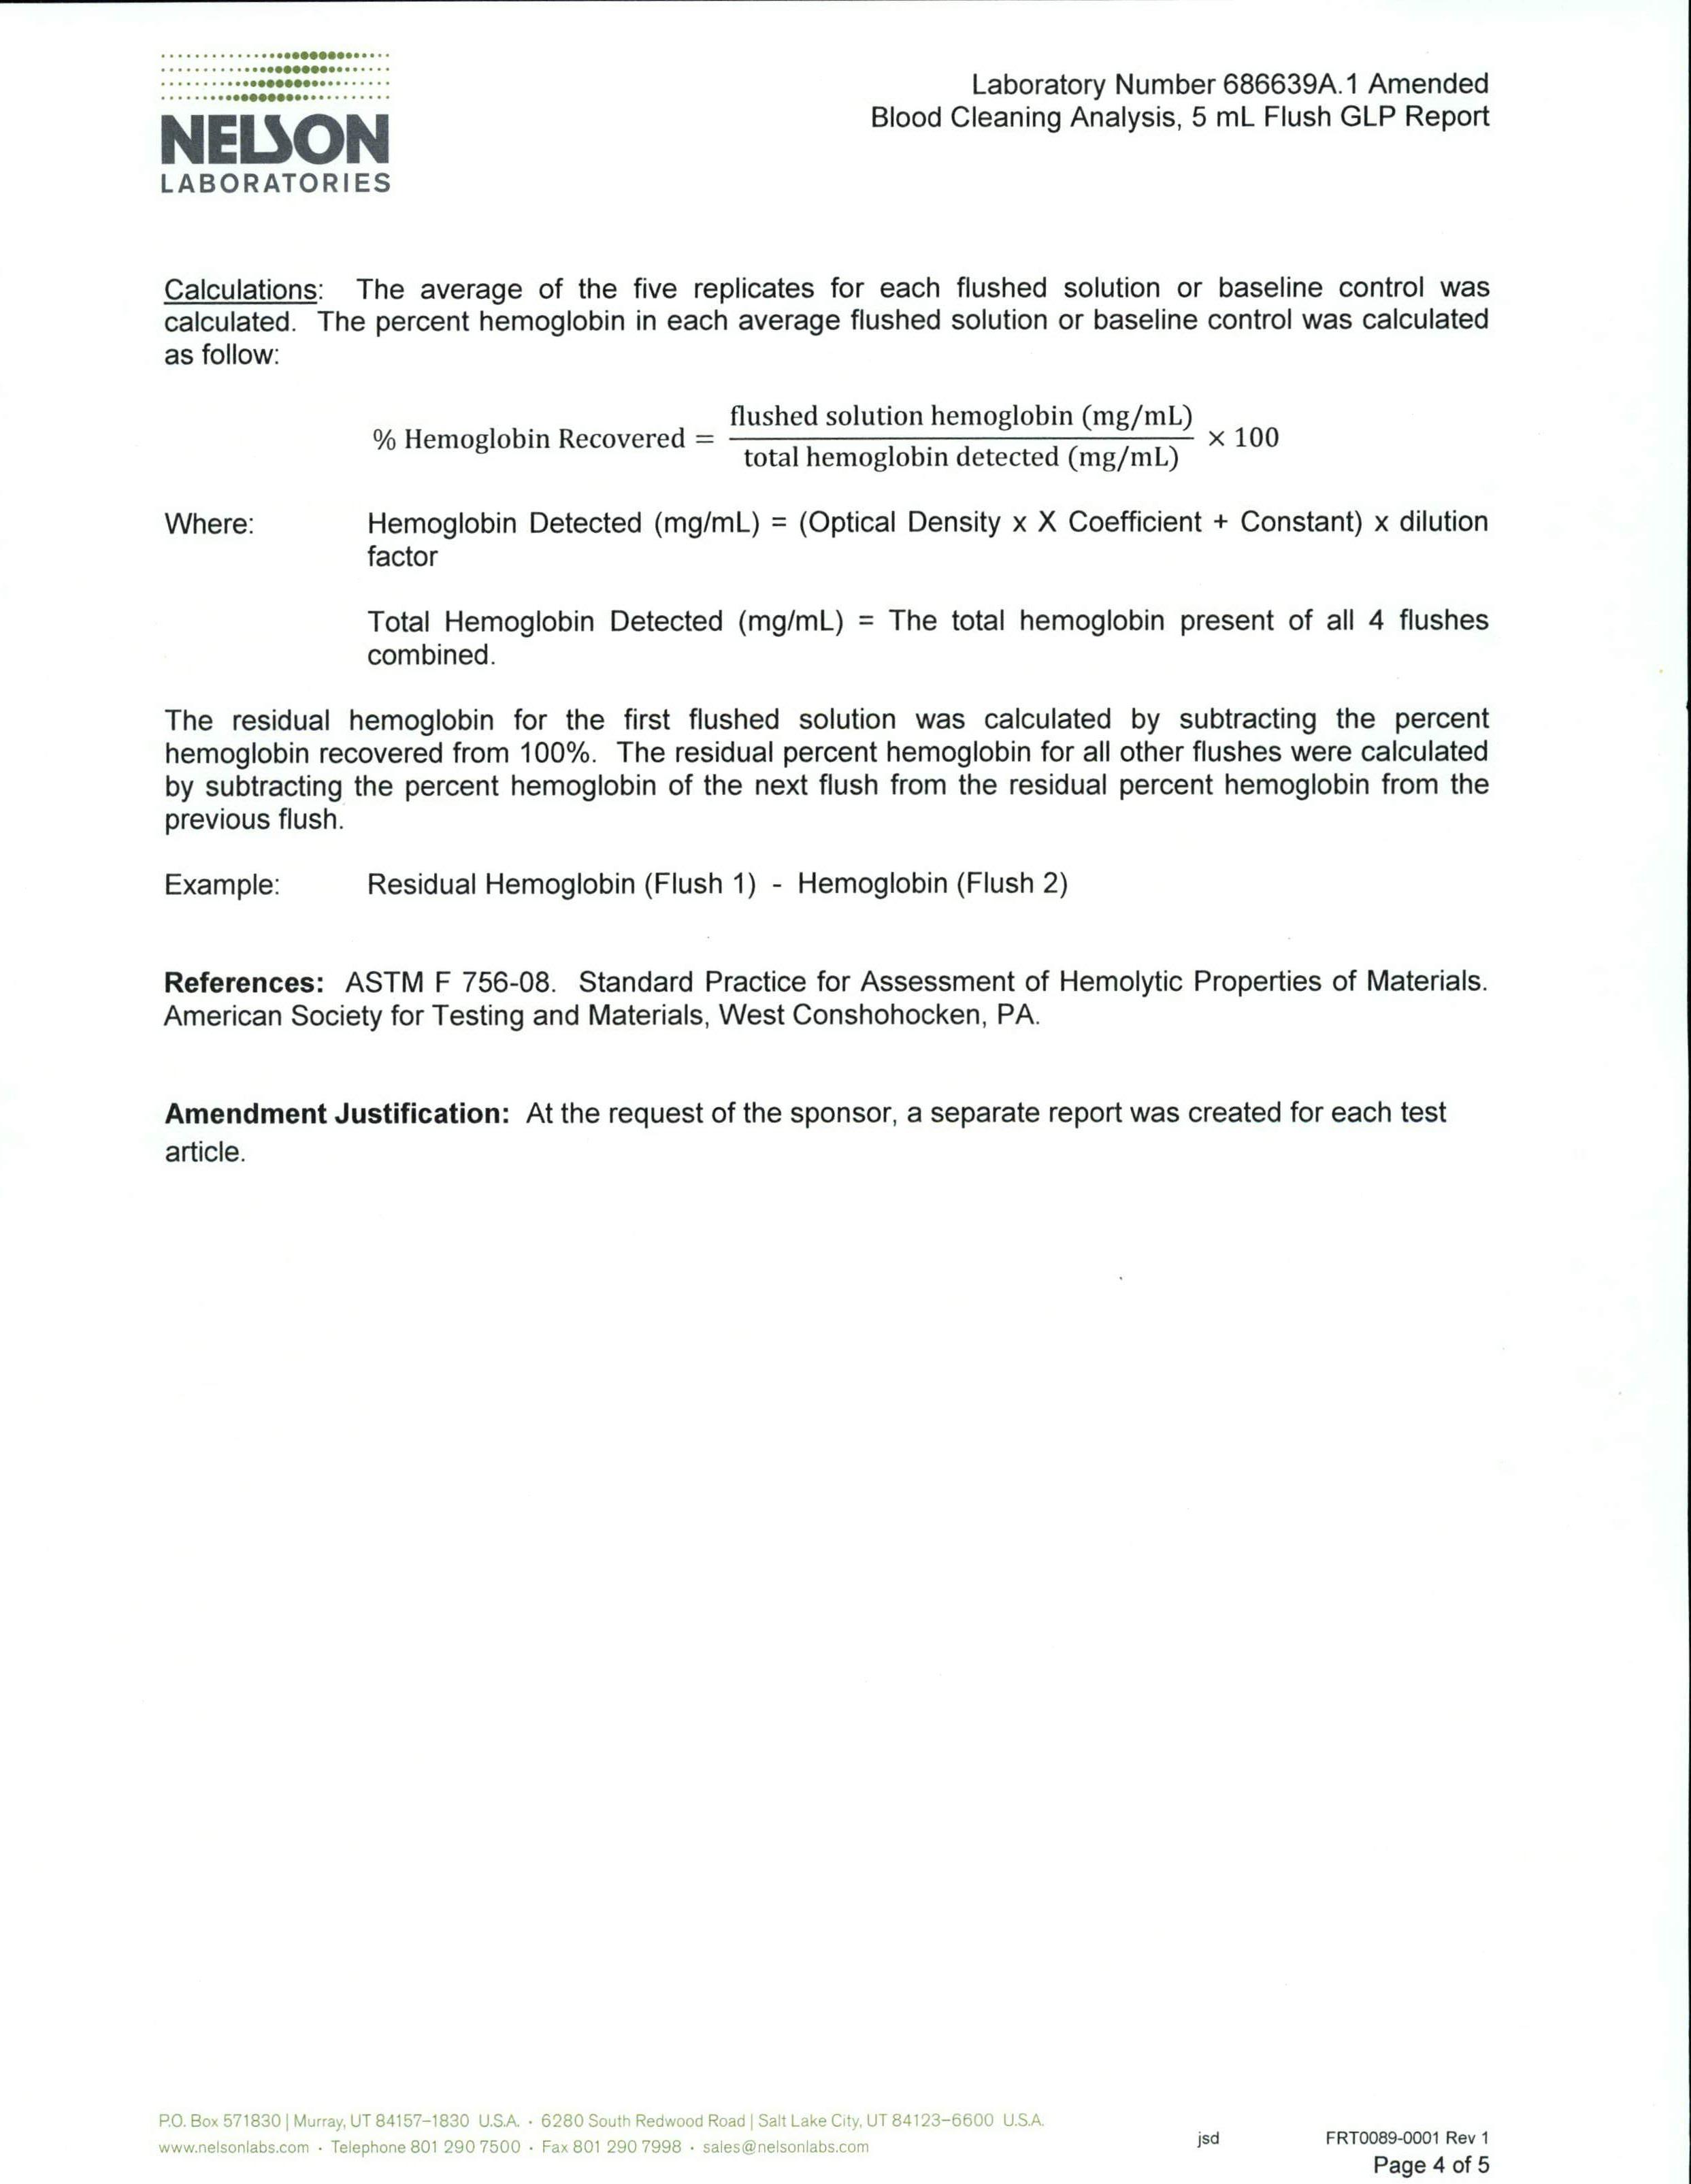
Allow to stand for five minutes and then read at 540nm. Set the spectrophotometer to zero using Drabkin’s reagent. Run Standard 3, followed by Standard 2, then Standard 1; this will give a standard curve.
Take some blood and allow it to reach room temperature for one hour as above, then dilute the blood as above 1:250, 1:500 and 1:1,000 with the Drabkin’s reagent. Follow the same procedure (standard runs), starting run with the Drabkin’s reagent for blank, followed by the lowest dilution concentration to the highest.
After a 5ml bolus has been collected and analysed in Drabkin’s reagent, test its absorbance as above. Start the test with bolus No. 3, followed by No. 2, and finally, No. 1. The absorbance of each of the three boluses will be calculated from the standard curve to determine haemoglobin content. Most of the recovery is expected to be obtained in the first bolus. Conclusion
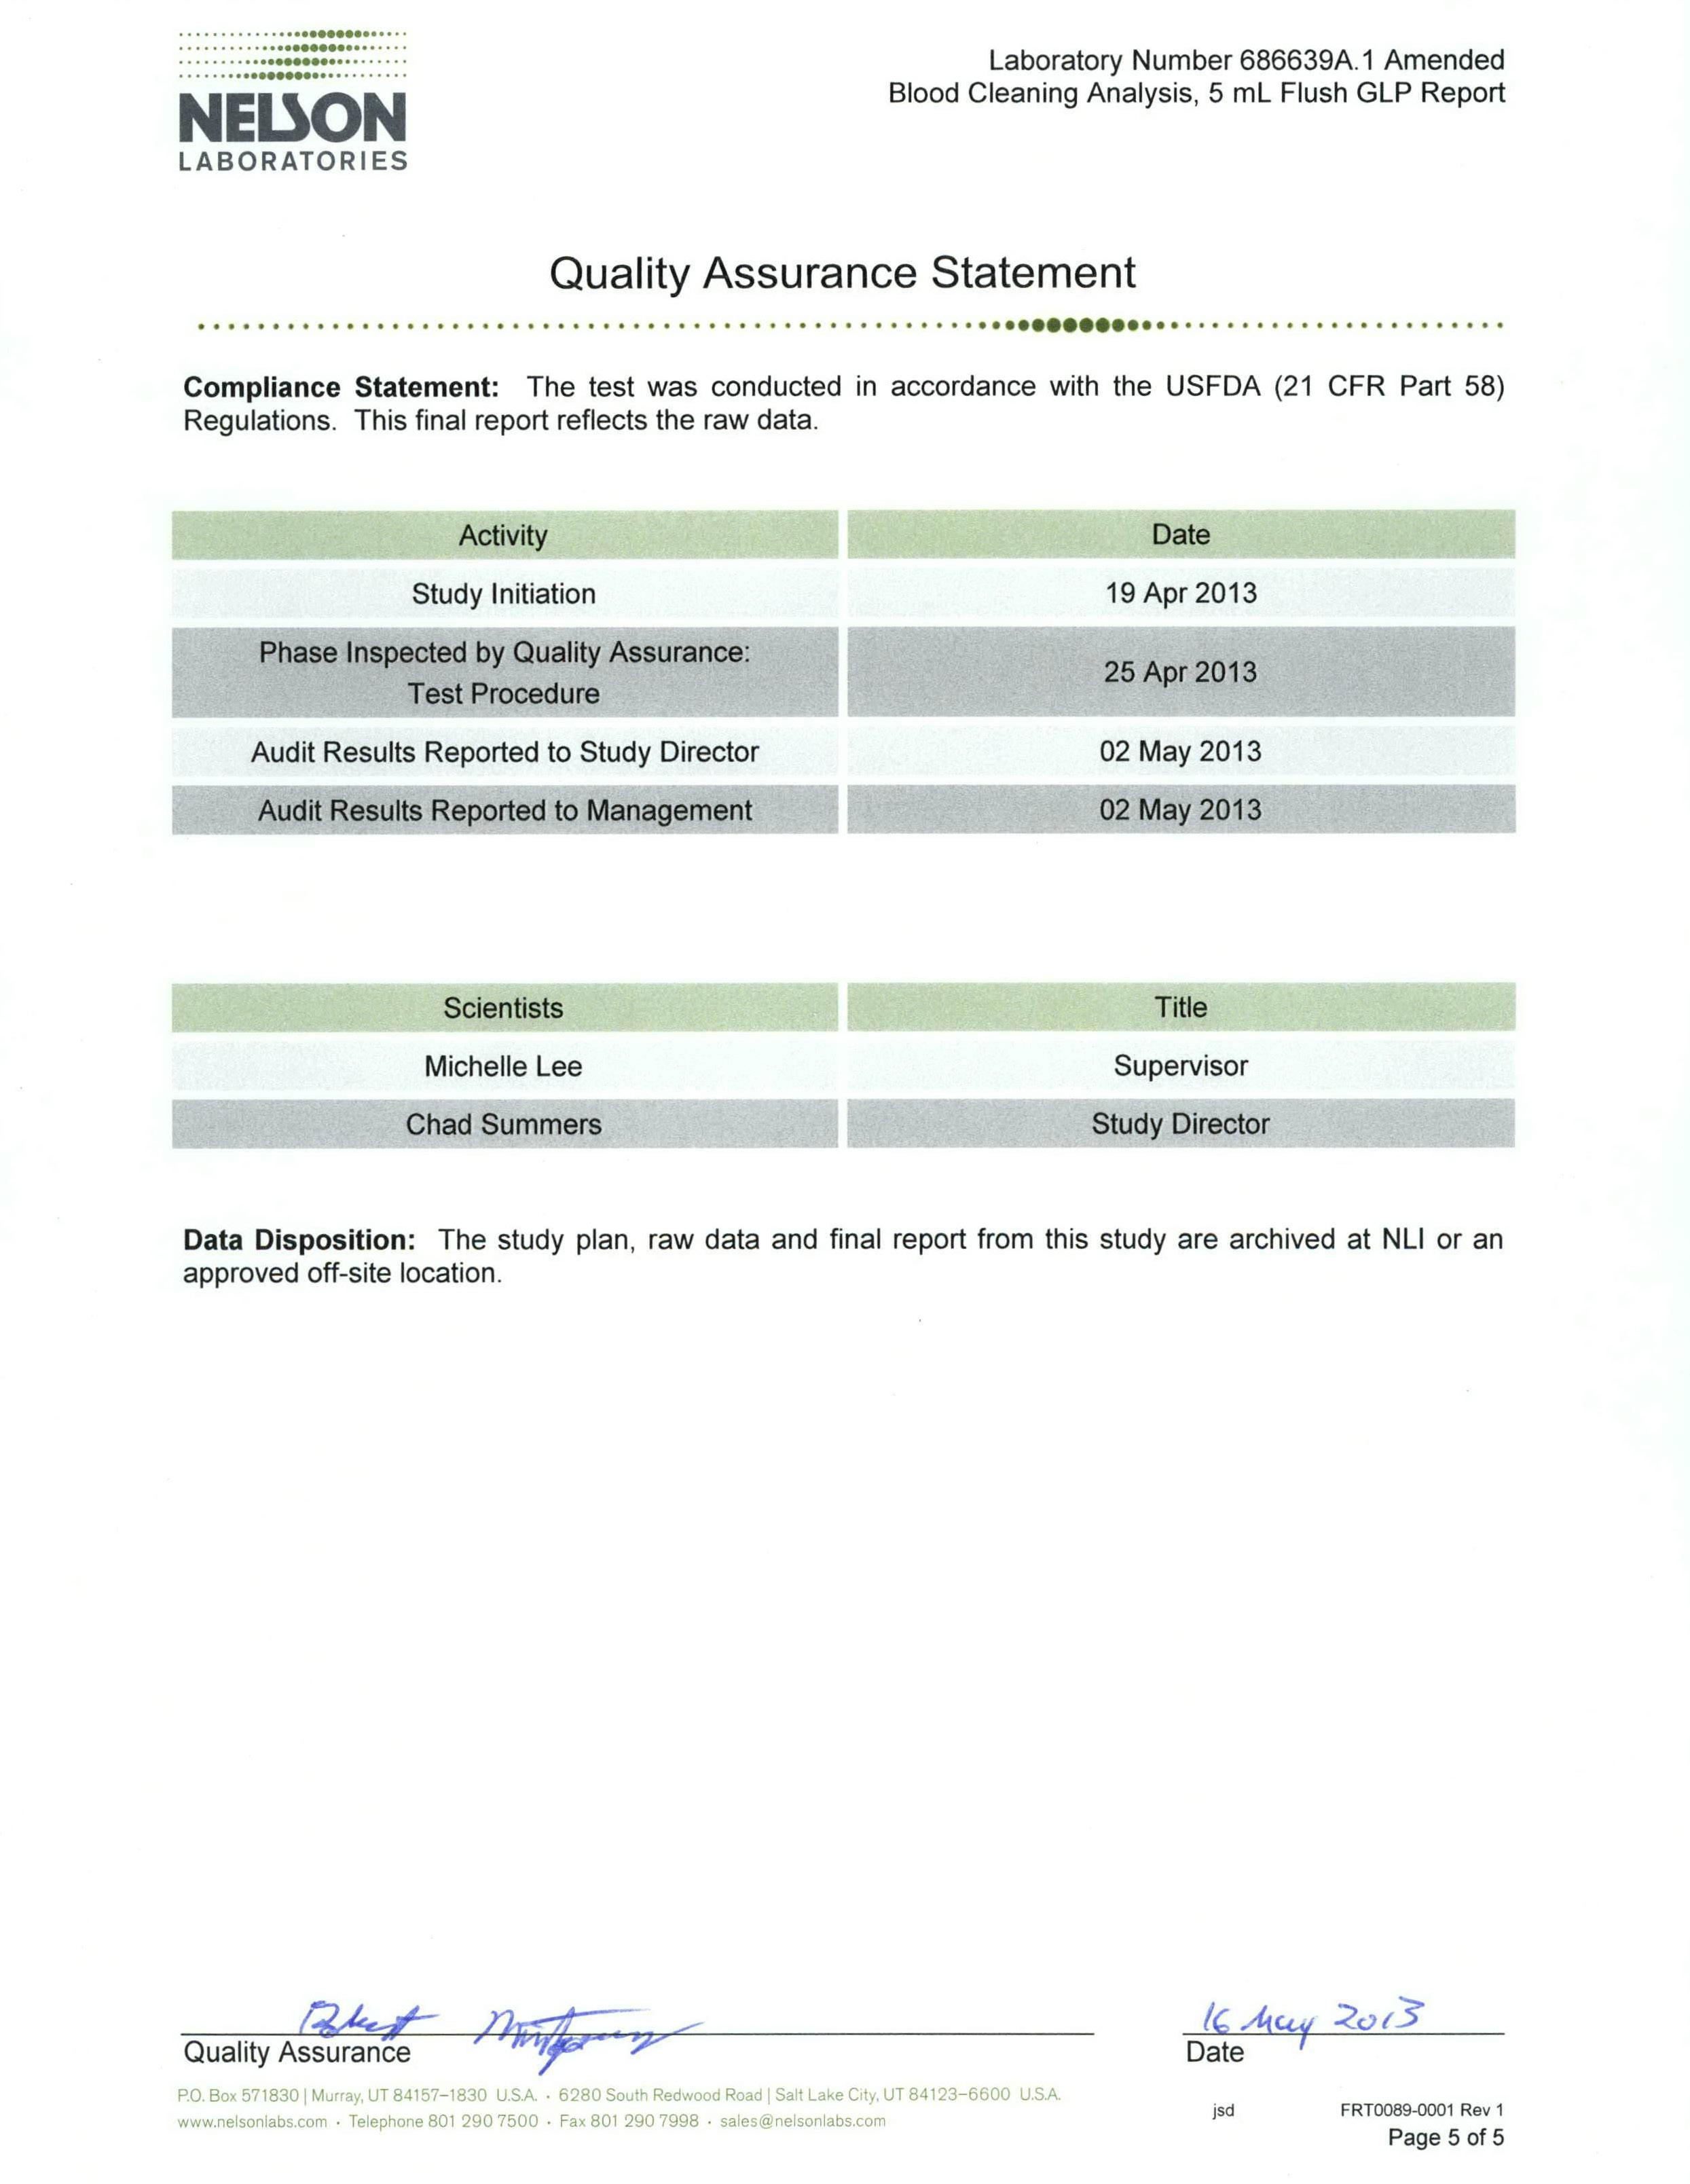
The test results demonstrate that blood can effectively be flushed from Bionector using normal saline. 99.57% of the blood challenged was cleared with the first 5ml flush, 99.97% was cleared with the second 5ml flush and 99.99% was cleared with the third 5ml flush.
bionector®
bionector®
bionector®

bionector®
bionector®