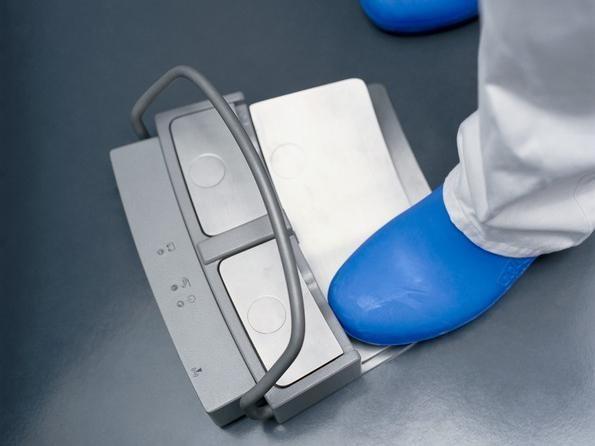
MP2 Basic Knobology
Last edited 8/23/23
Josh Fage, MD
Save image
Adjust image orientation
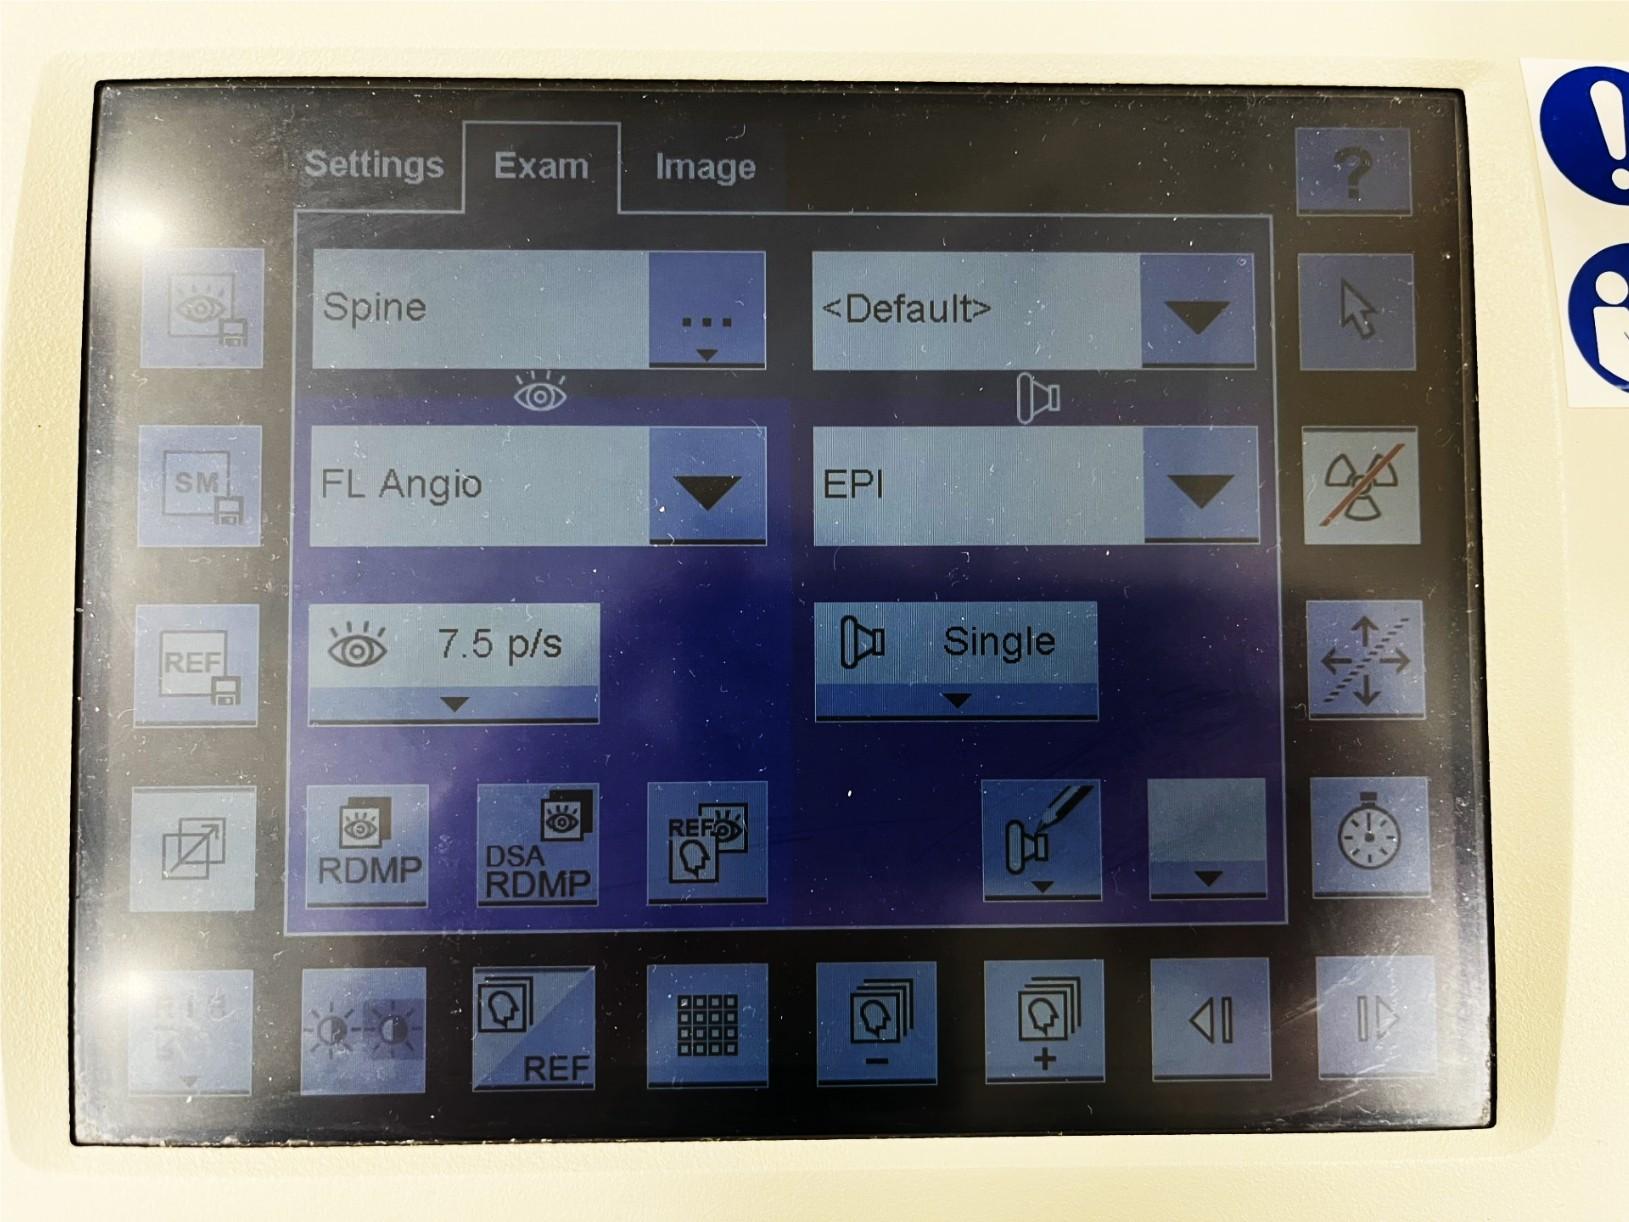

Last edited 8/23/23
Save image
Adjust image orientation
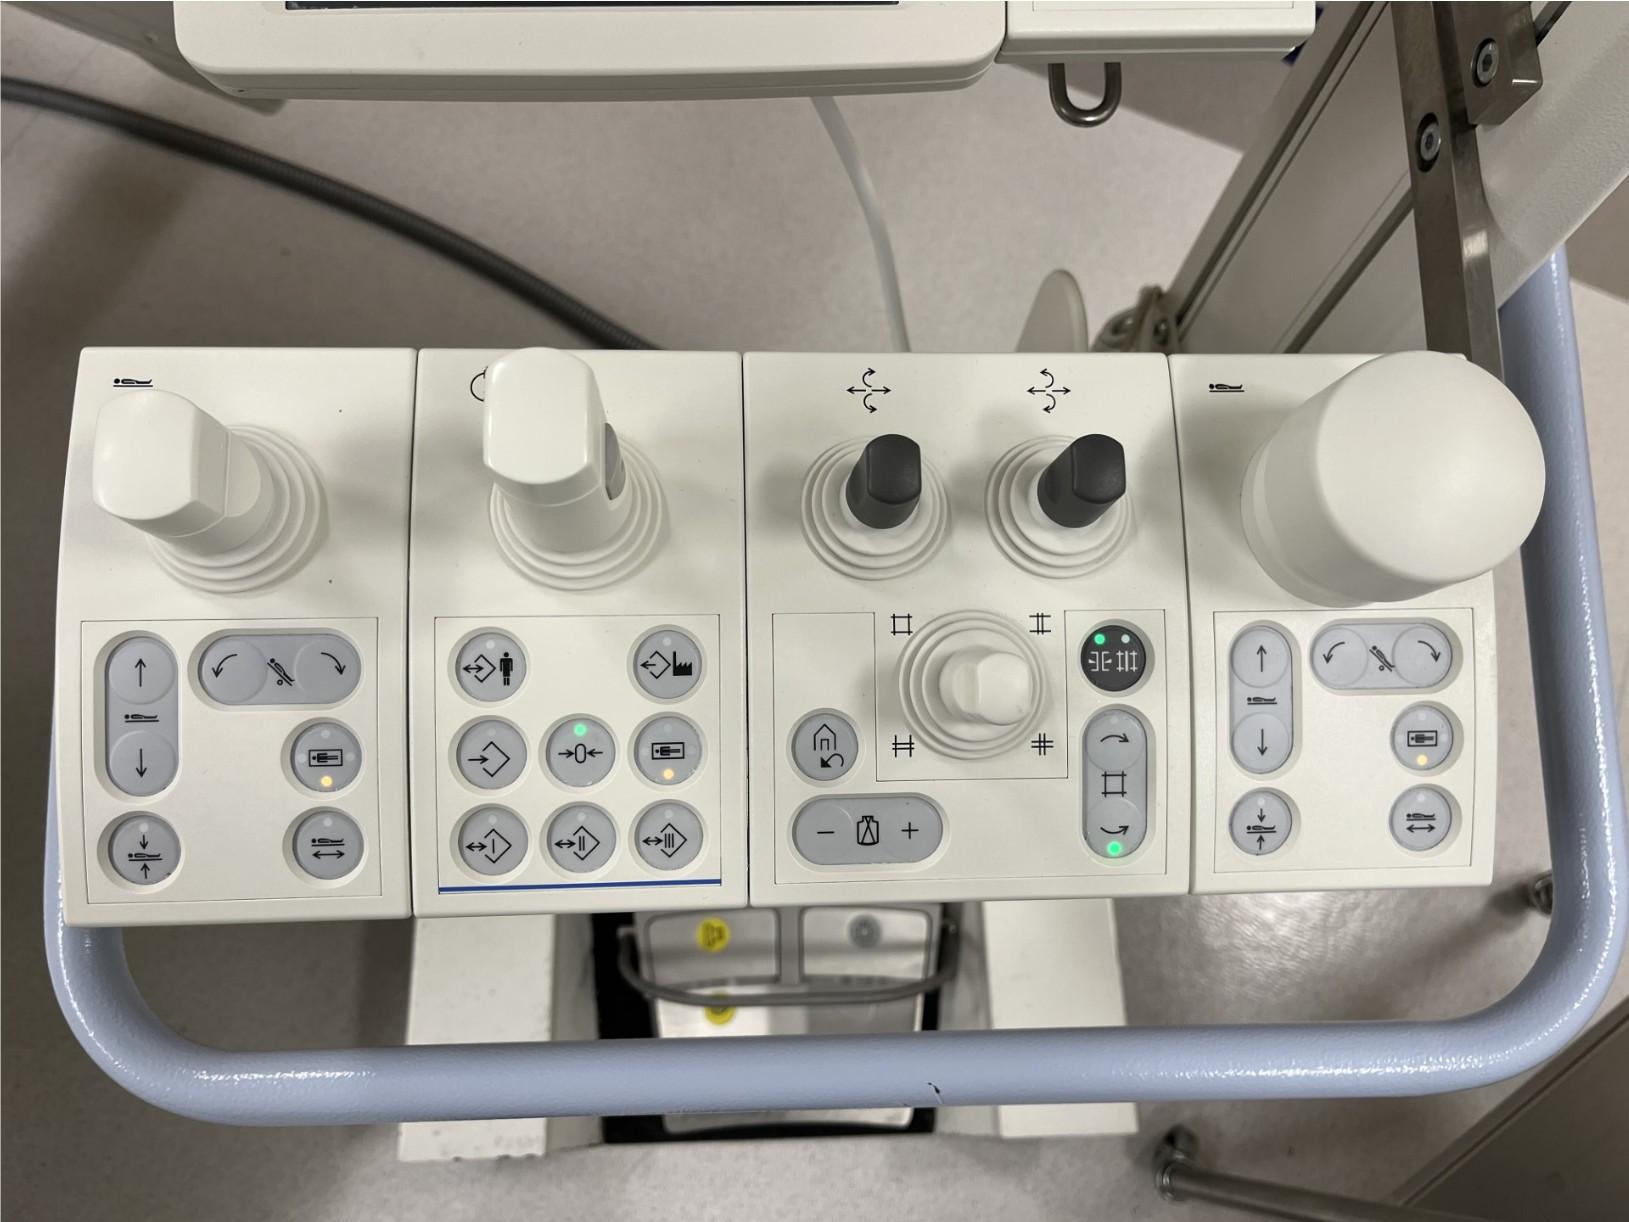
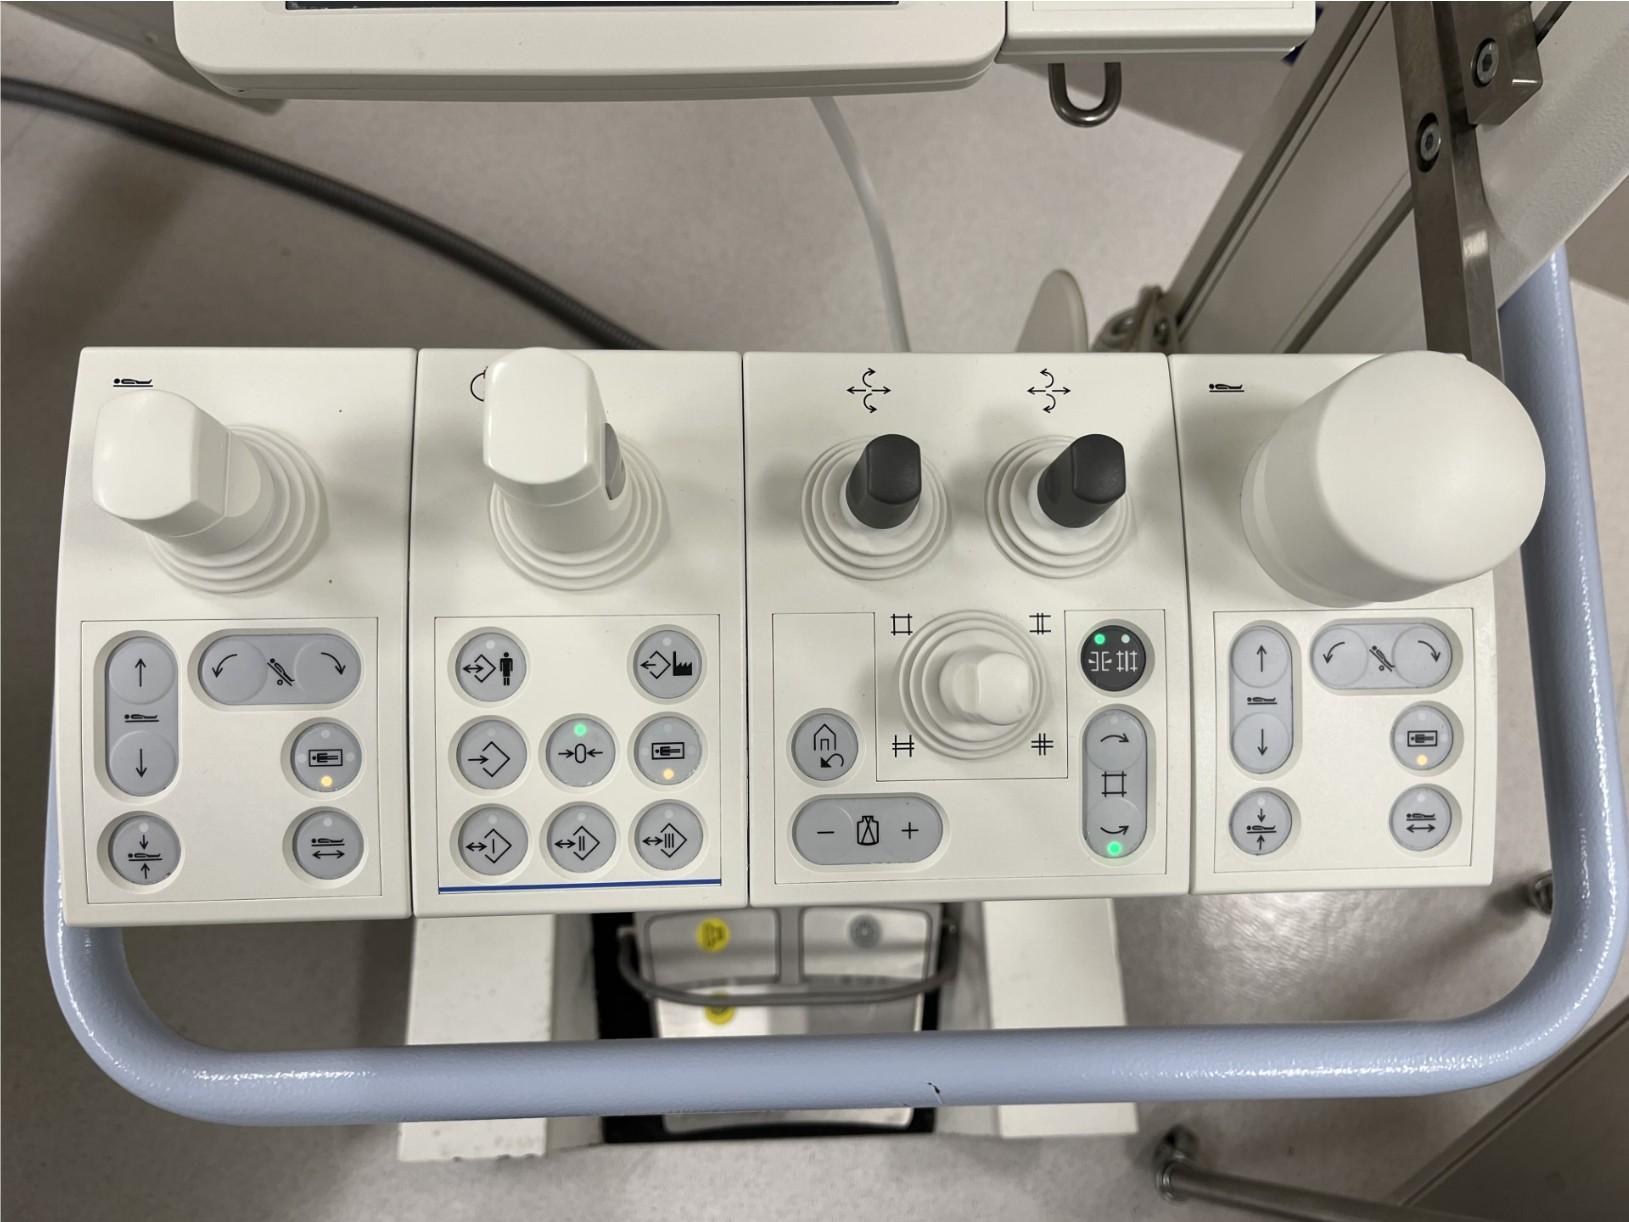
Press top knob/1 and move joystick left/right or up/down to move bed
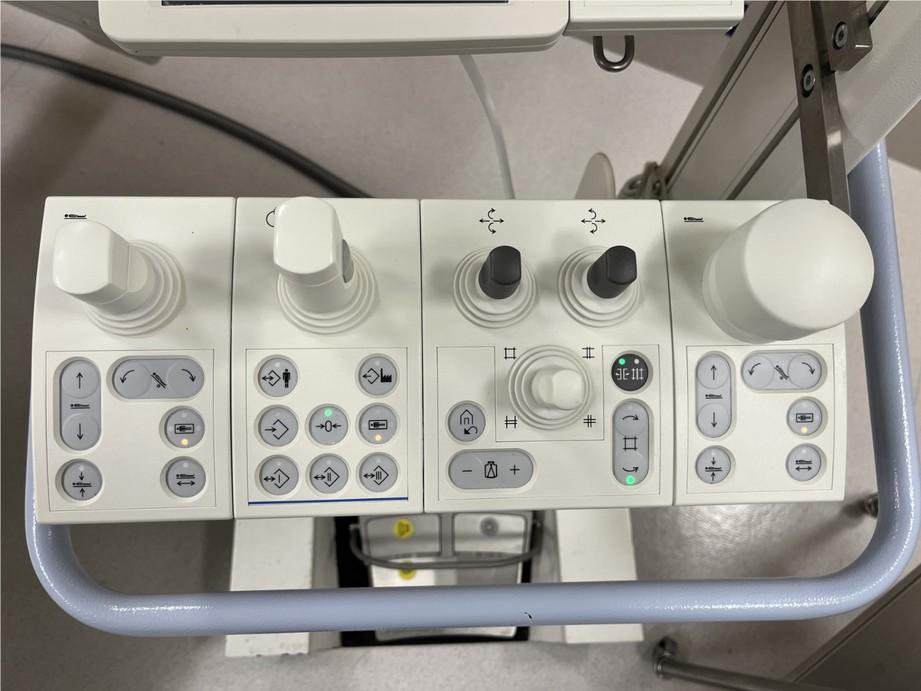
Move bed up/down
Up/down and lateral table movement locks (locked if green)
Turn on laser light (also can be used for orientation selection; press and hold 3s to change as desired)
Three buttons:
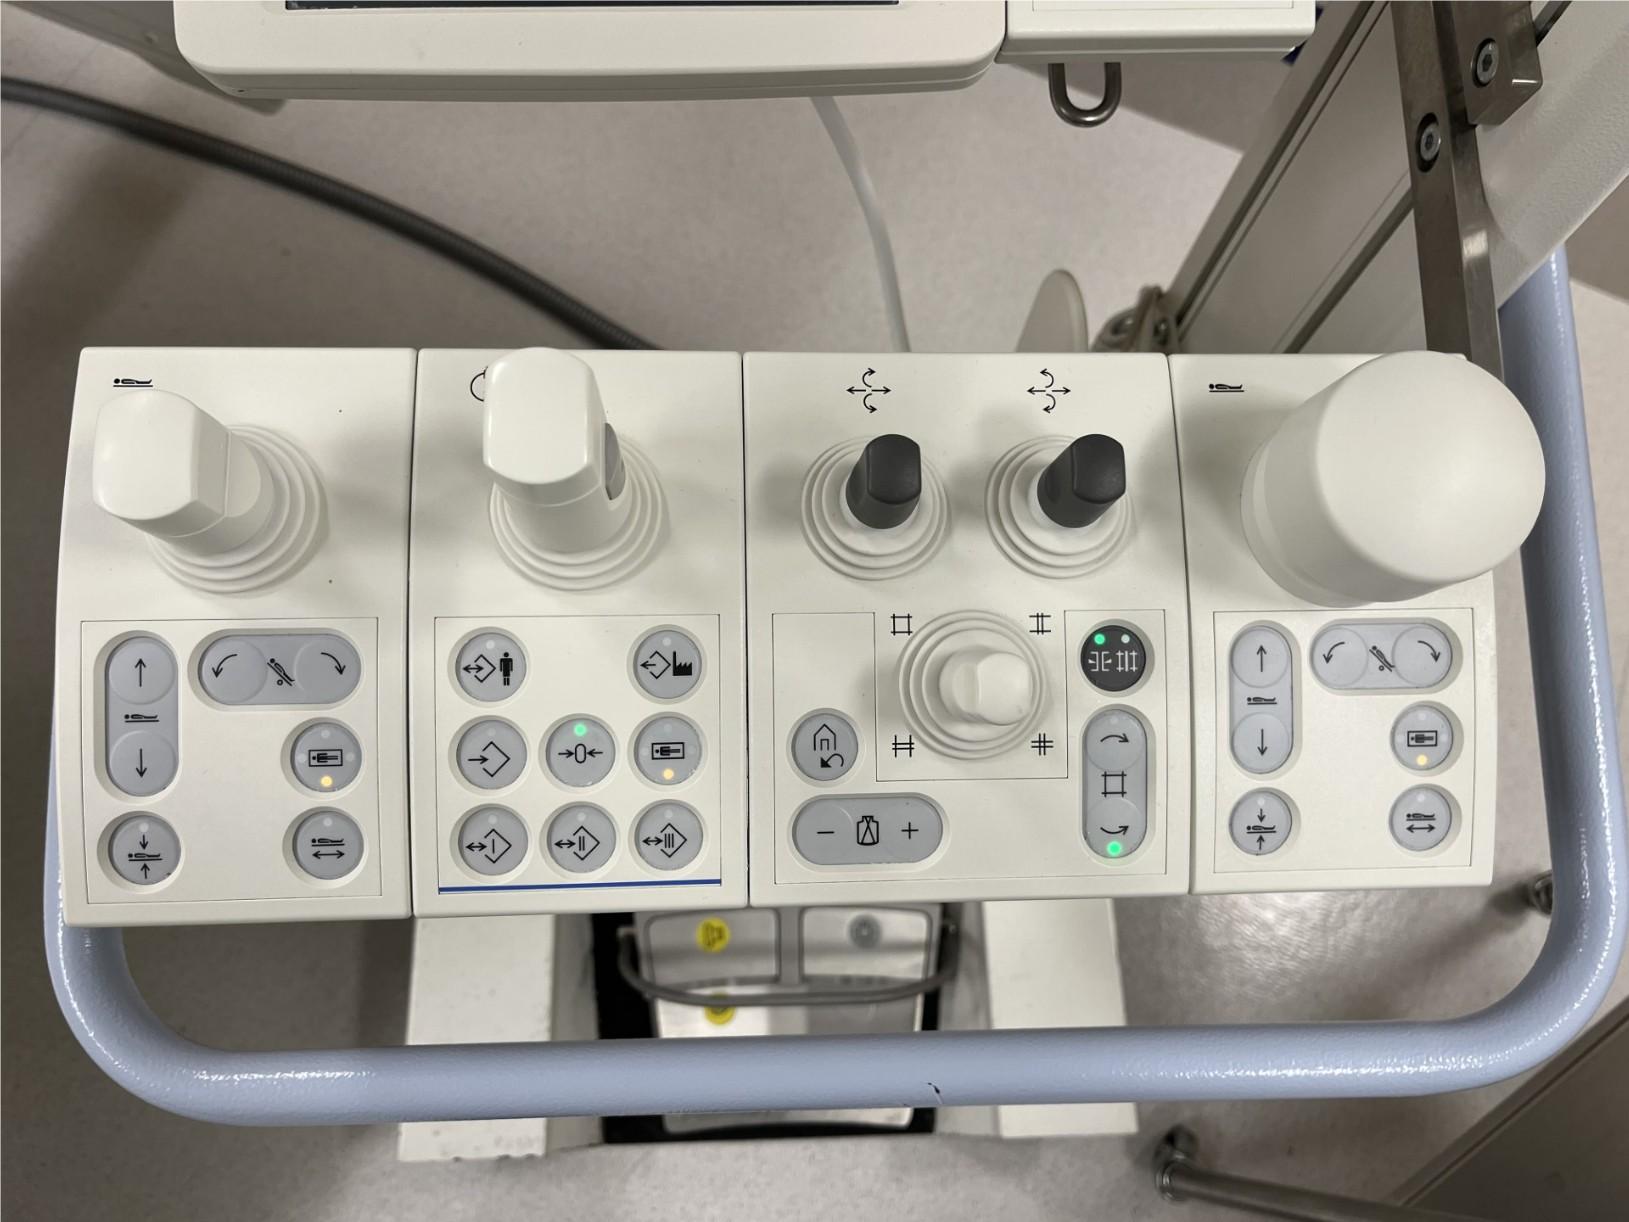
While pressing 1:
Adjust I.I. craniocaudal tilt
Adjust I.I. obliquity
While pressing 1/2/3:
Move both I.I./bed to left/right
Move both I.I./bed up/down
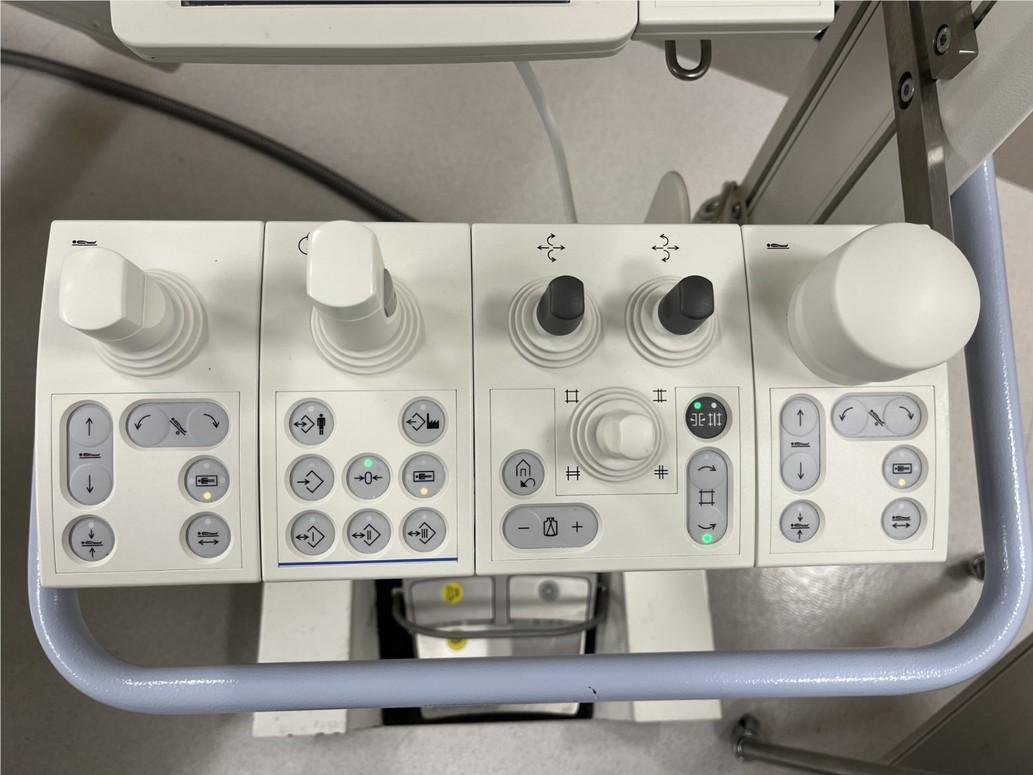
While pressing 1/2:
Move I.I. towards head/foot of bed
While pressing 3 at top or bottom aspect: Move I.I. up/down (adjust geometric magnification)
See prior programmed positions
ZeroStop PreventsC-armmovement beyond0degreesand allowsforeaseofreturn oftheC-armtoneutral
Programmable Positions
Open menu for default positions (including frontal and lateral)
How to program a position:
1. Press 1
2. Save position by pressing 1 of buttons 2/3/4
How to move to saved position:
1. Press previously saved button for desired position
2. Press 1/2 buttons on knob and move forward. Must hold until you hear door close sound.
Soft filters (filter diaphragms)
Adjust collimation
Adjust zoom factor (electronic magnification)
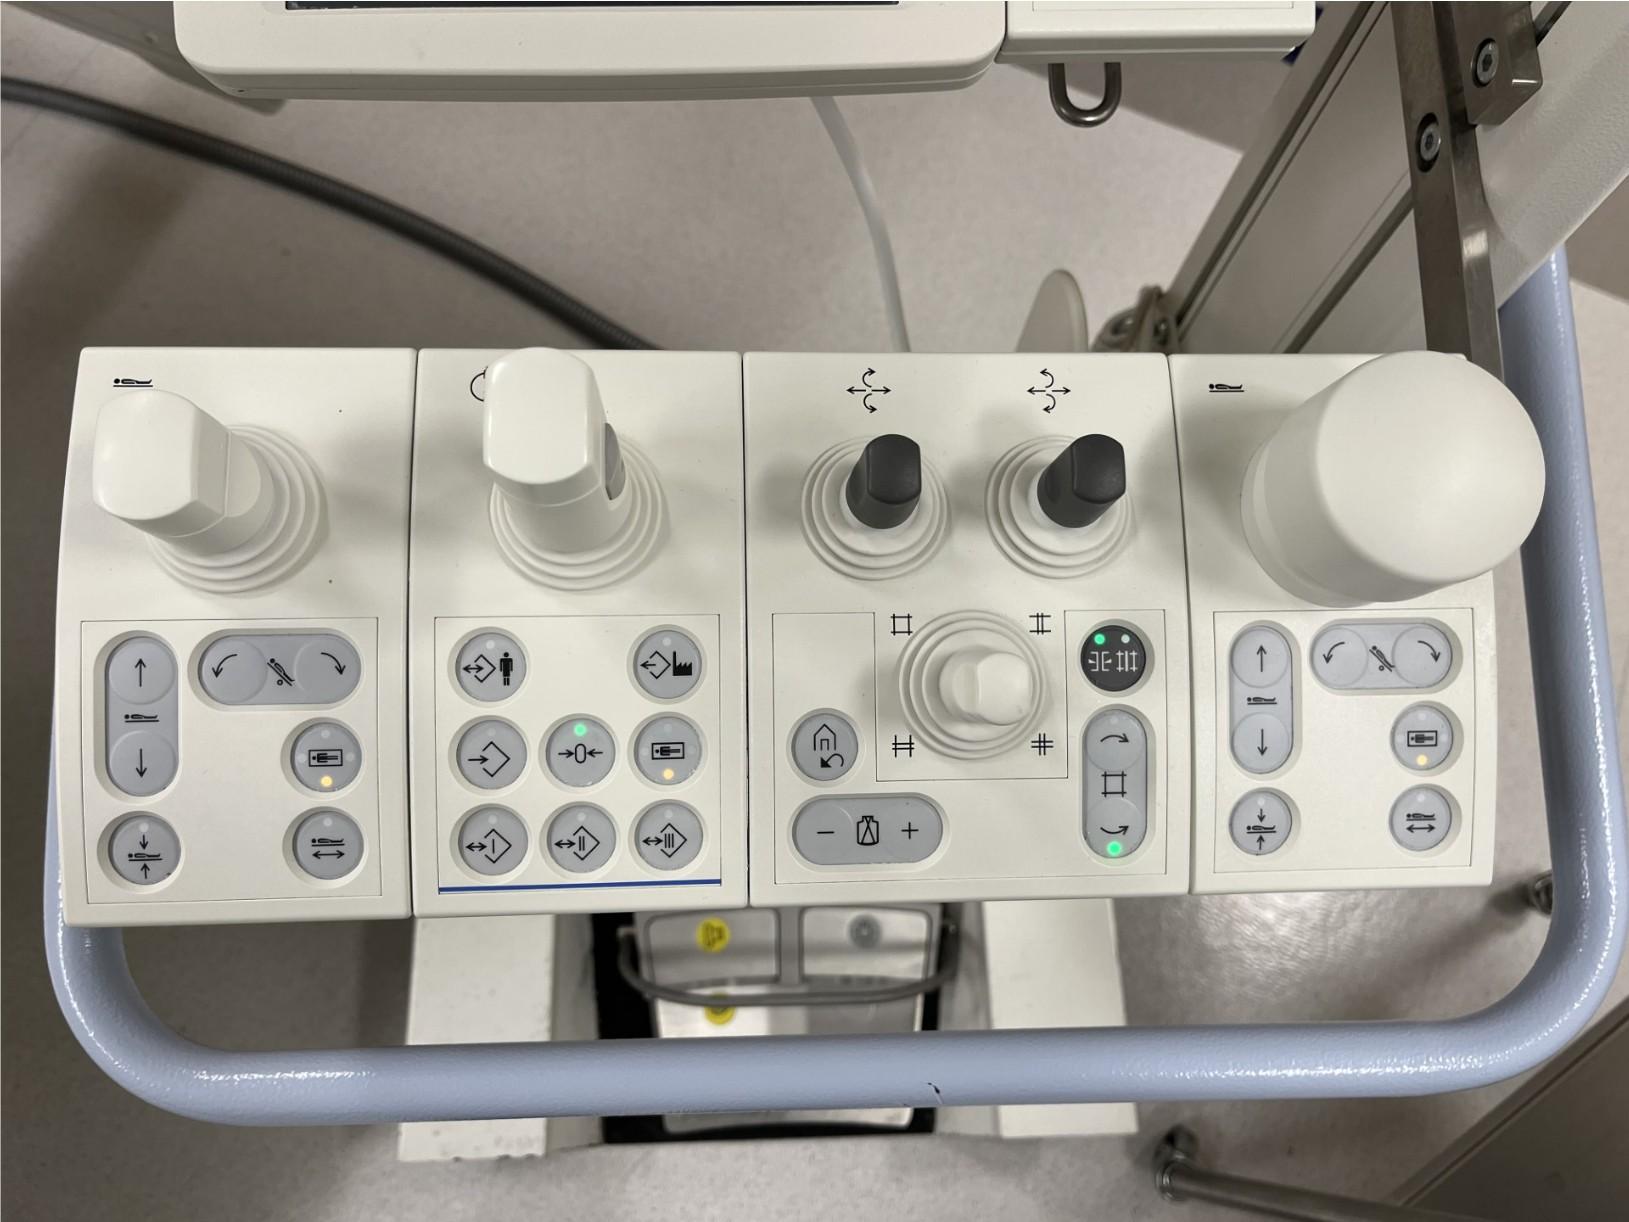
Adjust bed position in all directions by pushing down and moving knob
Orientation selection (press and hold 3 s)
Turn on Laser Light
Adjust craniocaudal angulation
Oblique I.I.
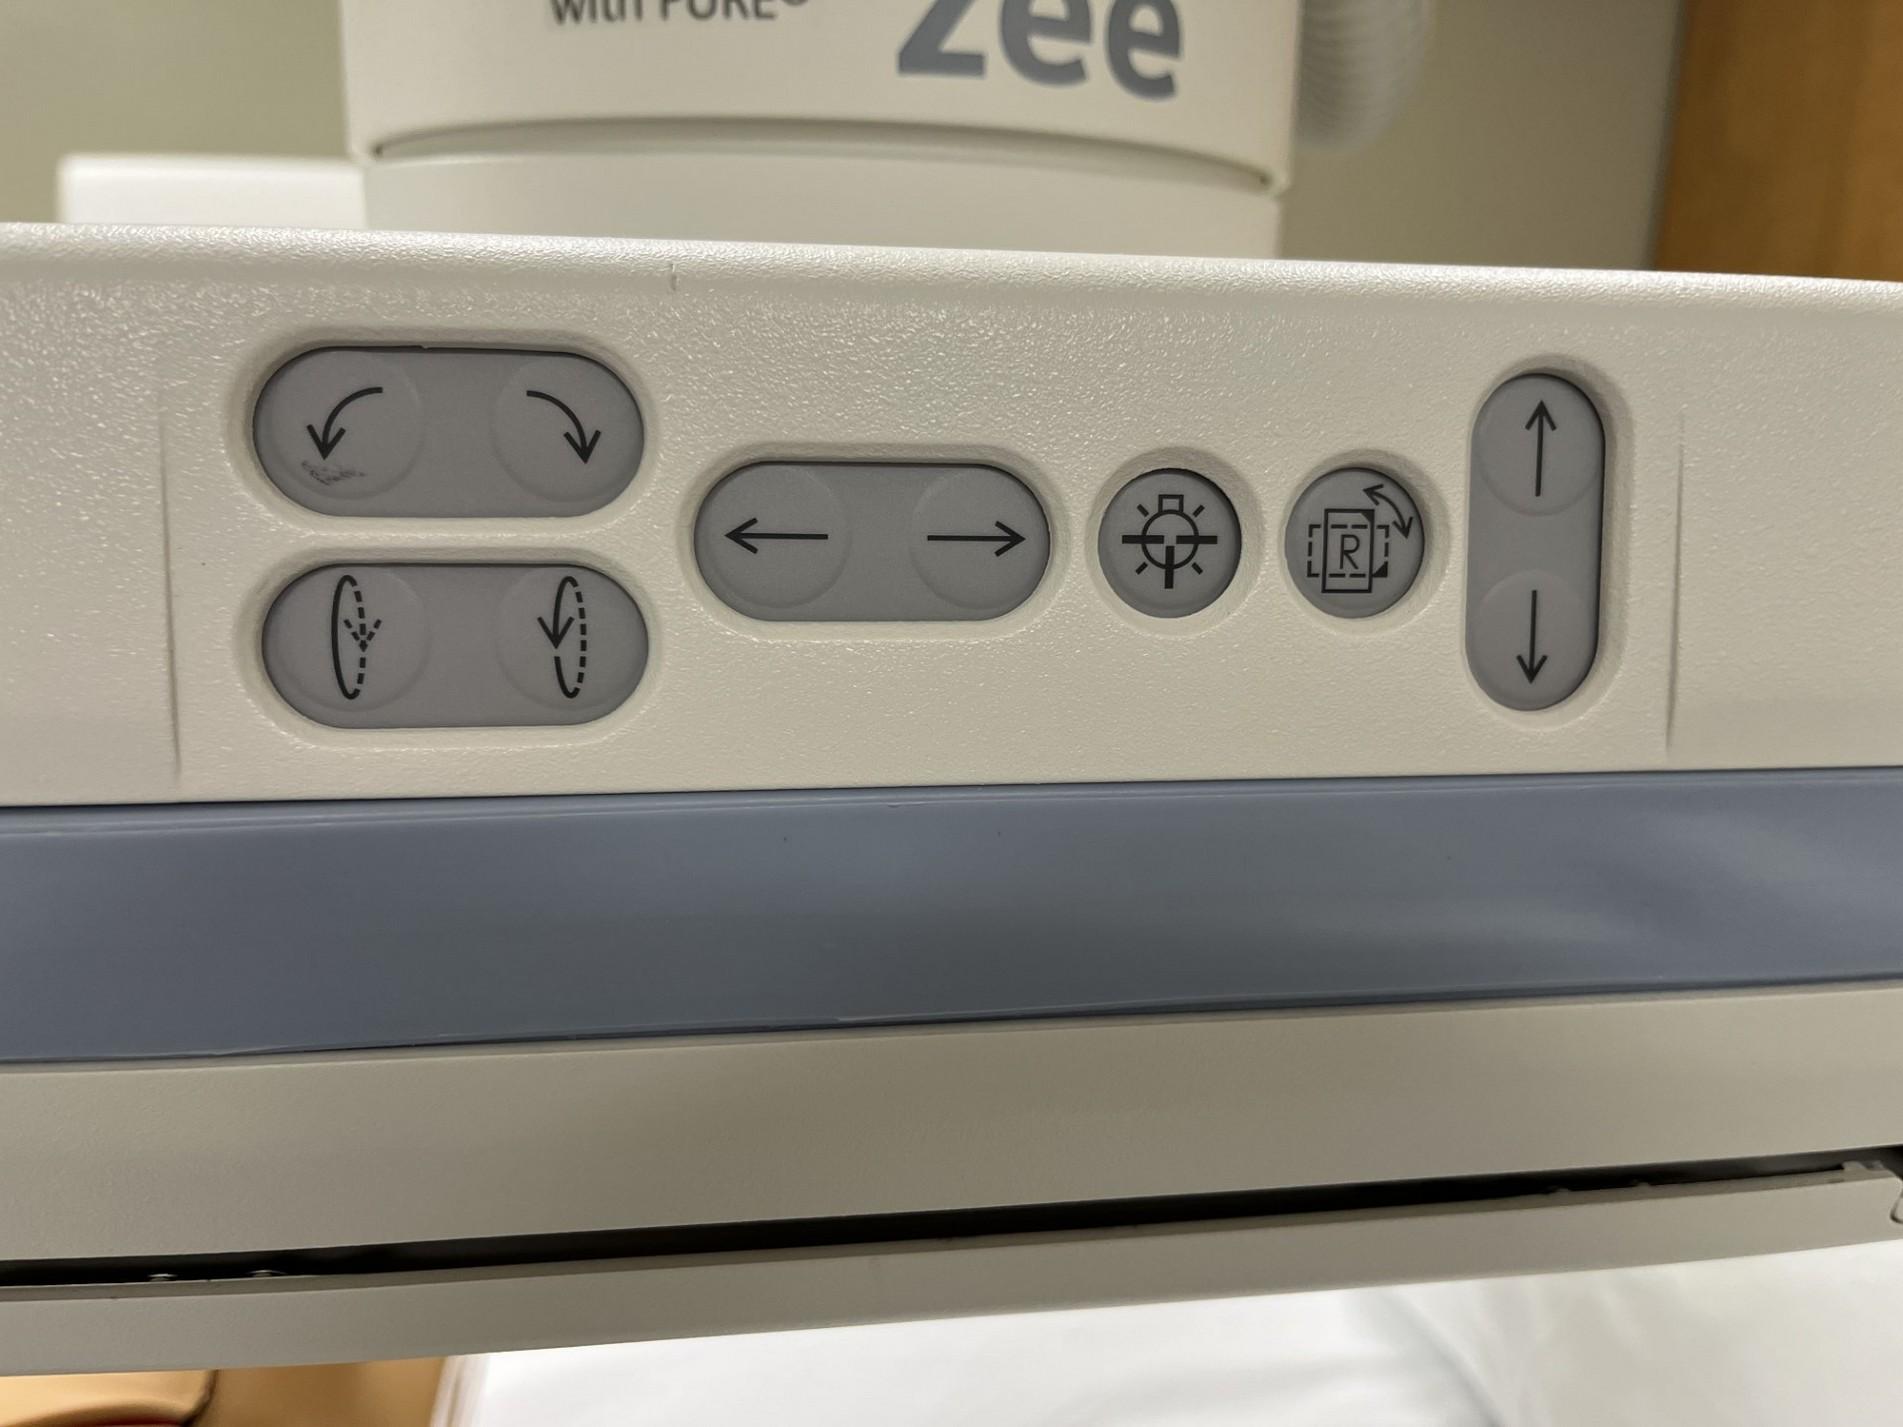
Move I.I. towards head/foot
Move I.I. up/down