
DECORATIONS
BASIC CAKES
PAINTING WITH CHOCOLATE
FIGURINES IN FONDANT
Cakes

Content CHAPTER 1 Themed cakes 10 Layer cakes 16 Modeling basics 24 CHAPTER 2 Rose 32 Half a football 33 Pine tree 34 Bow 35 Crown 36 Unicorn horn 37 CHAPTER 3 Pig 40 Frog 42 Fox 44 Lion 46 Owl 50 Dog 53 Cat 56 Panda 60 Fish 63 Penguin 66 CHAPTER 4 Bumba 70 Unicorn 73 Fat unicorn 76 Smurf 80 Dinosaur 84 Baby 88 Pardoes 92 CH APTER 5 Rainbow 100 Ice lolly 102 Raspberry 104 Blueberry 106 Chocolate candy 107 Apple 108 Watermelon 110 Pear 112 Cherries 114 Orange 116 Donut 118 Hamburger 120 Cupcake 122 CHAPTER 6 Giant cupcake 126 Christmas 130 Easter 137 Halloween 142 Valentines 150 Mother’s day 152 Communion 156
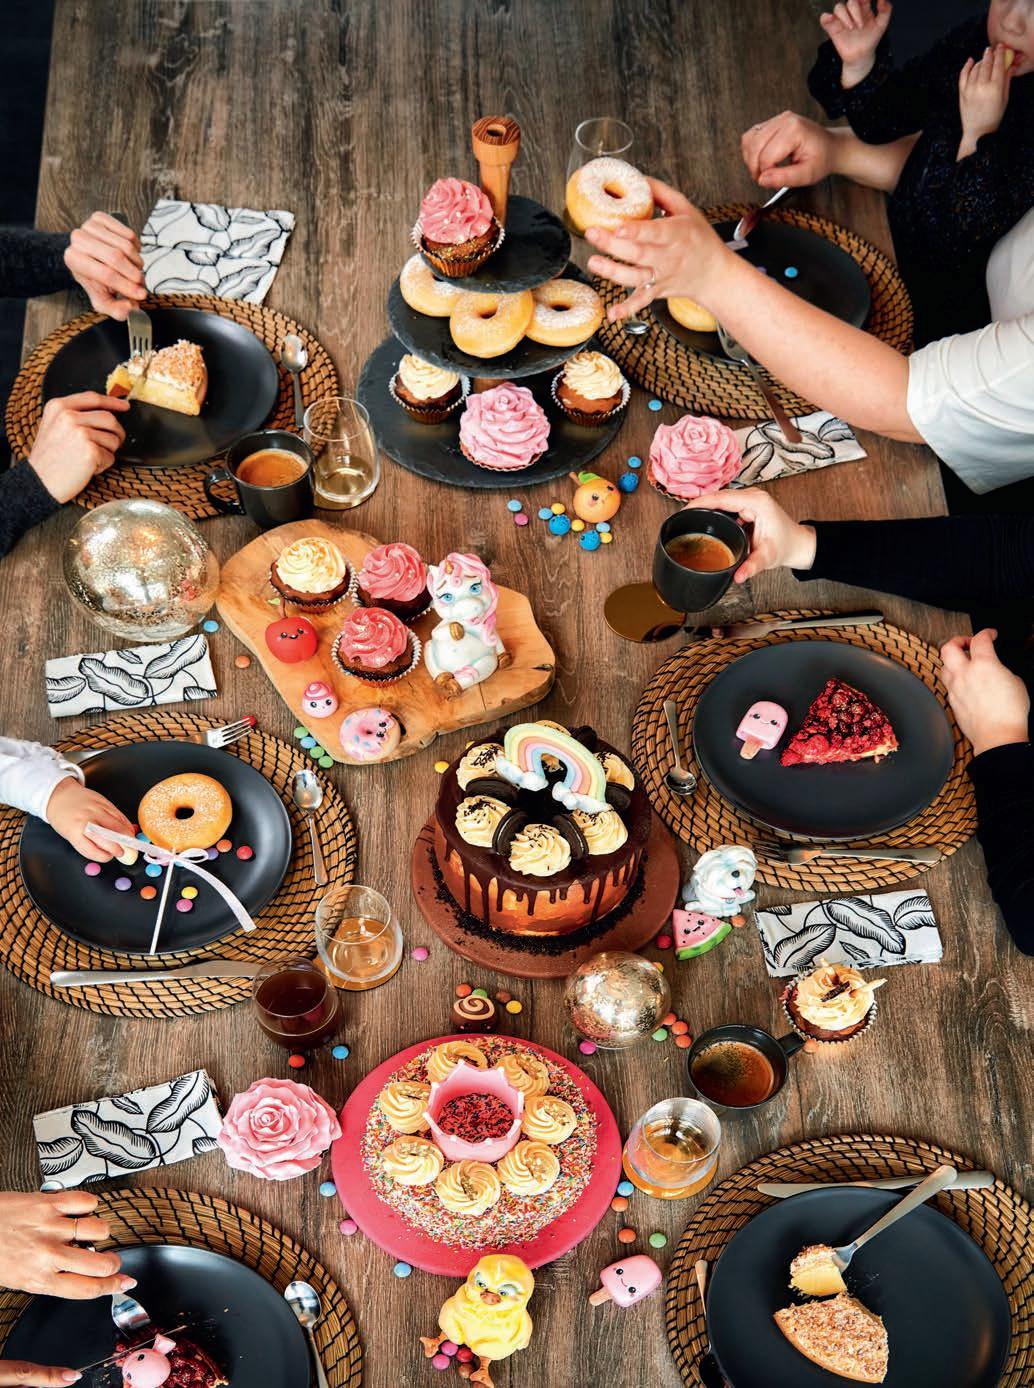
TH EMED CAKES
You can make a themed cake in different ways. In doing so you will discover what suits you best. We’ll start with the basics rst.
A themed cake is usually made with sponge cake. The outside of the cake can be quite heavy and that is why it is important to keep the inside as light as possible. The extra lling you put between your sponge layers is up to you. We prefer to keep this lling simple as well. After the cake is baked, we use sugar water to make sure the cake doesn’t get dry inside. Then we will mask the outside with butter or ganache and nally, the fondant goes on top. There are many different ways to bake, ll and mask a themed cake, but in this book I want to show you the way I always do it.
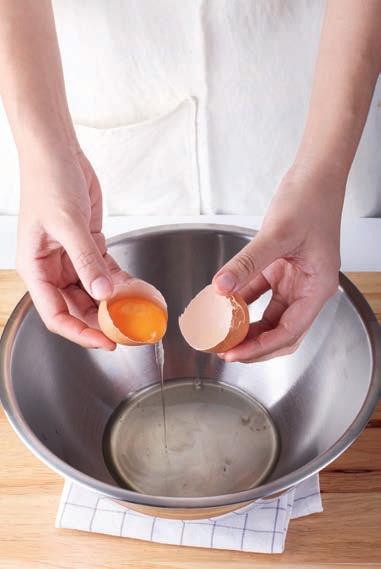
We start with the sponge cake

8 BASIC R ECIPES
6 eggs
200 g (7 oz) granulated sugar
40 g (1½ oz) good-quality butter
200 g (7 oz) our
1 tsp baking powder
1 dash of vanilla extract
a pinch of salt
SPONGE CAKE
PREPARATION
Preheat the oven to 180°C (356°F). Beat the eggs lightly and then add the granulated sugar. Beat for a while until you have an airy foamy mass. Melt the butter and add this to the egg mixture. Keep mixing. Mix the flour with the baking powder and sift it gently into the batter. Then add the vanilla extract and salt.
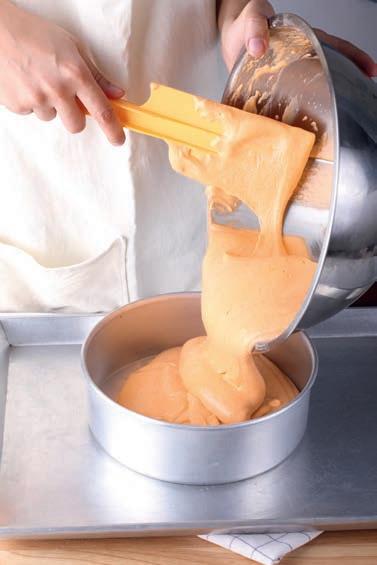
Grease a 23 cm diameter and 6 cm high springform pan with a little butter. Pour the batter into the springform pan and set it in the oven for 40 minutes. Remove it from oven and let it cool.
Would you like to make cupcakes? Then use this same recipe! Many people go for a Madeira or pound cake recipe when they make cupcakes, but in combination with the fondant or other decorations this quickly becomes too heavy. Sponge cake always stays light and is therefore also perfect for cupcakes or cake pops!
CAKE DECORATIONS 9
BASIC R ECIPES . tip.
A NIMALS
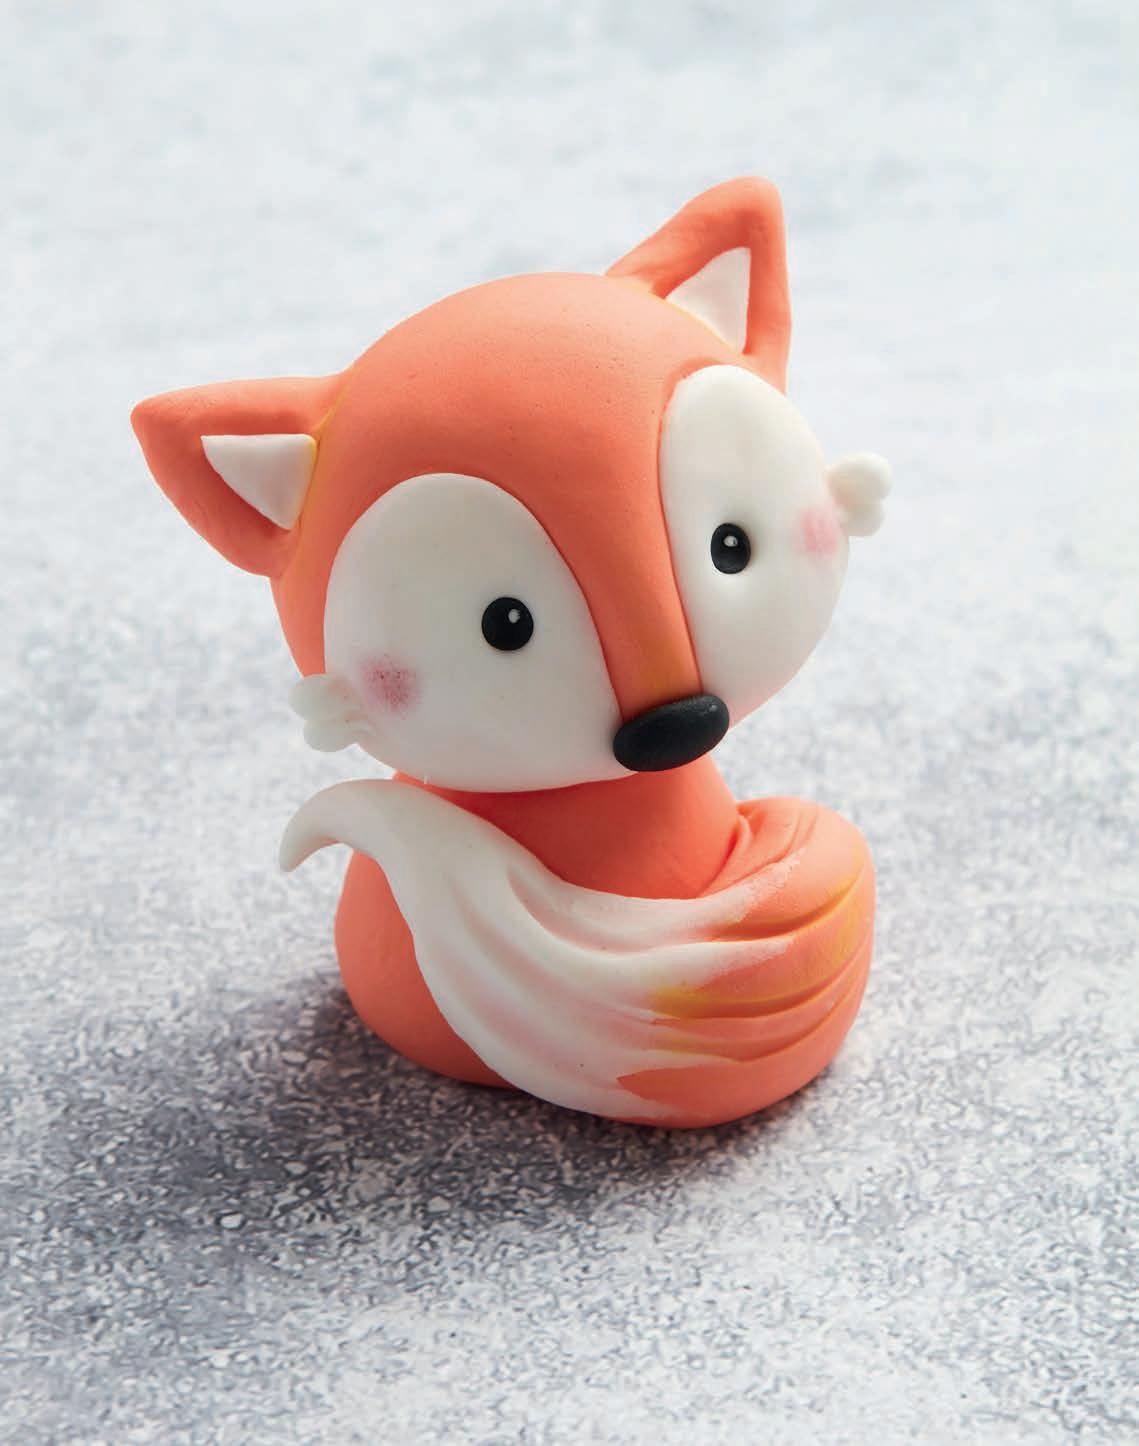
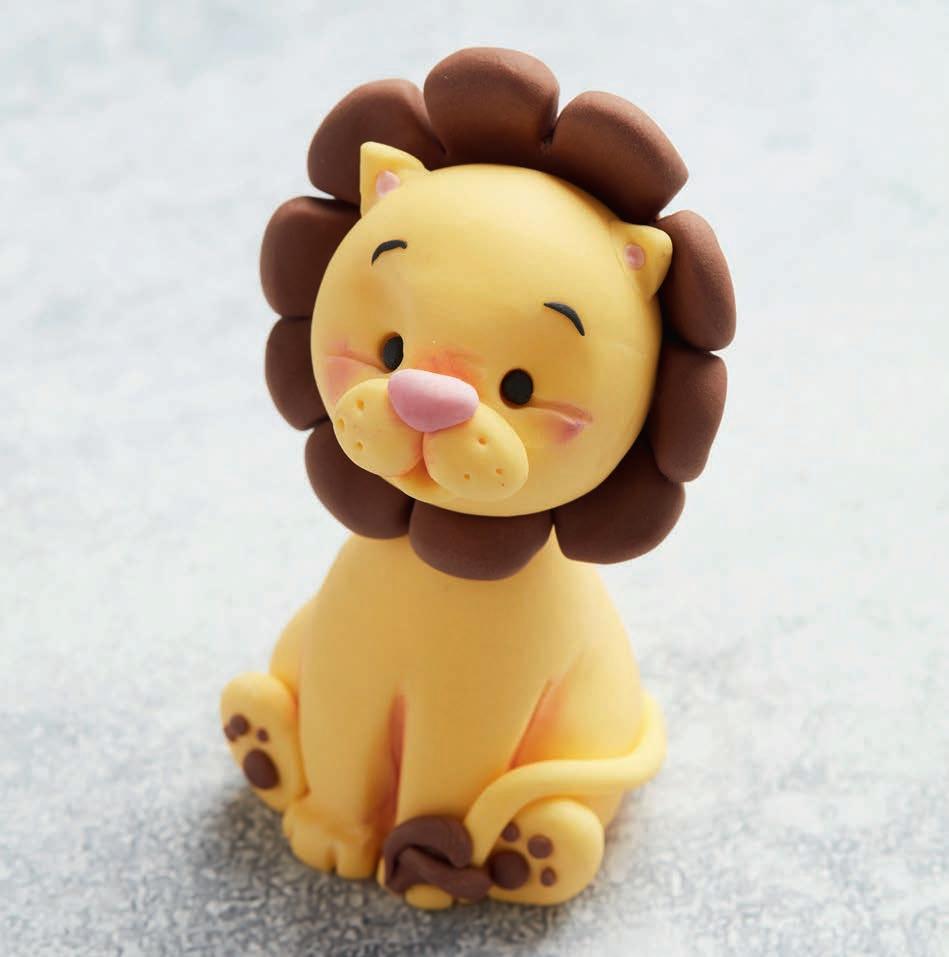
LION
LEVEL OF DIFFICULTY: ✪ ✪
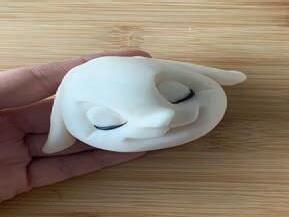
6. Fill the eyes with black rolled fondant and place a pink triangle on the two very small yellow balls.
7. Pierce each yellow ball with a toothpick to create some holes, this to suggest the whiskers.
8. Use a toothpick to draw a line under the outsides of both eyes.
9. Add the eyebrows with black.
10. Form two small yellow triangles for the ears and blend them nicely with the pointed modeling stick against the head.
11. Place a small pink triangle inside each ear to create the inside of the ear.
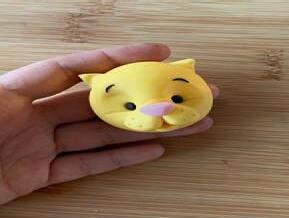
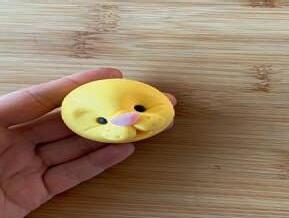
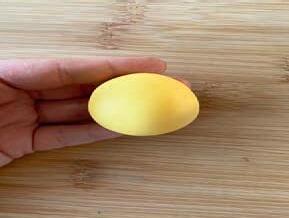
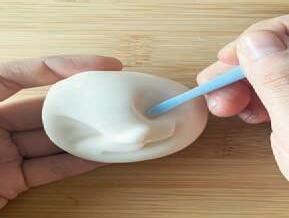
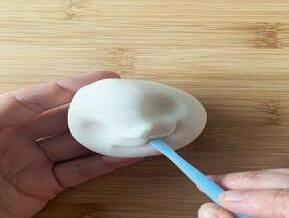
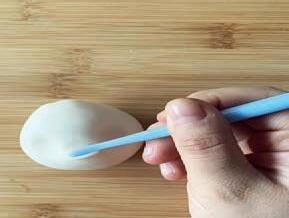
1. Form a ball out of yellow fondant for the head.
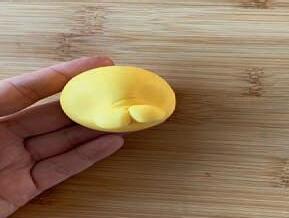
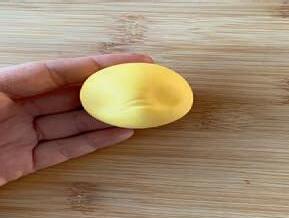
2. Push in the eye sockets with your ngers and with a toothpick make some pleating lines above the position of the nose.
3. Make two smaller balls of yellow fondant and stick them where the nose should go.
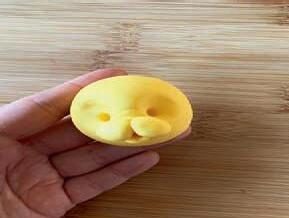
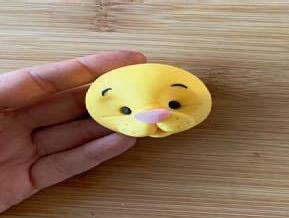
4. Form a small ball and push it under the two smaller balls. With the spherical modeling stick push in the middle to accentuate the mouth.
5. With the spherical modeling stick, push an eye on both sides. Create the eyebrows on each side of the face using the pointed modeling stick.
12 AN I M ALS
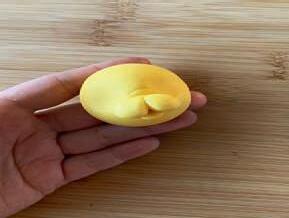
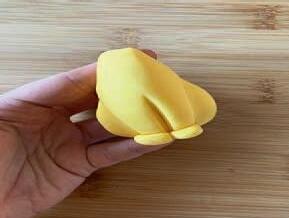
12. Now again, form a ball, this time out of brown or black fondant. This will be the lion’s mane.
13. Flatten it with your ngers or roll it with your rolling pin until you have a nice round circle. Make sure it is larger than the head of the lion.
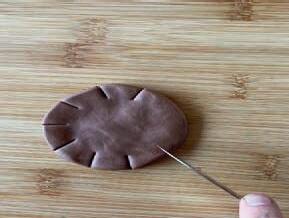
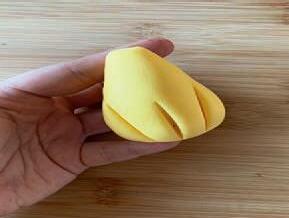
14. Use a knife to make cuts on the outside of the circle, as evenly as possible, with your knife.
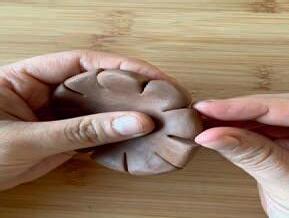
15. Round every piece between two cuts, by twisting it carefully between your ngers.
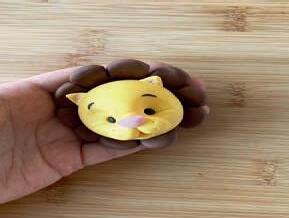
16. Wet the inside of your circle and stick the lion’s head nicely in the middle.
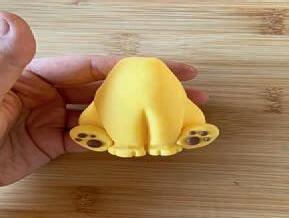
17. For the body, form a cone-like shape out of yellow fondant.
18. Using the blunt side of your knife, make three lines in the bottom of the cone: one in the middle and two that slant to the outsides.
19. Push the two outer lines a little deeper, with your ngers.
20. If necessary, go over the lines again with the pointed modeling stick to make them less sharp.
21. Add a piece of fondant to the bottom of each front leg. Using a toothpick, blend these into the legs to create the lion’s toes.
22. Now add the hind legs. Make sure they are deeper than the two front legs lying down. If necessary, push the legs a little more backwards.
23. Form small balls of brown fondant and make the foot pads on the hind legs.

CAKE DECORATIONS 13
24. Roll a long sausage from yellow fondant and stick this on one side of the body.
25. Make three teardrop shapes from brown rolled fondant and add them to the end of the tail.
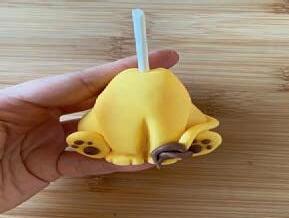
26. Stick a stick at the top of the body and let it dry for at least one day. After drying, slide the head carefully over the stick.
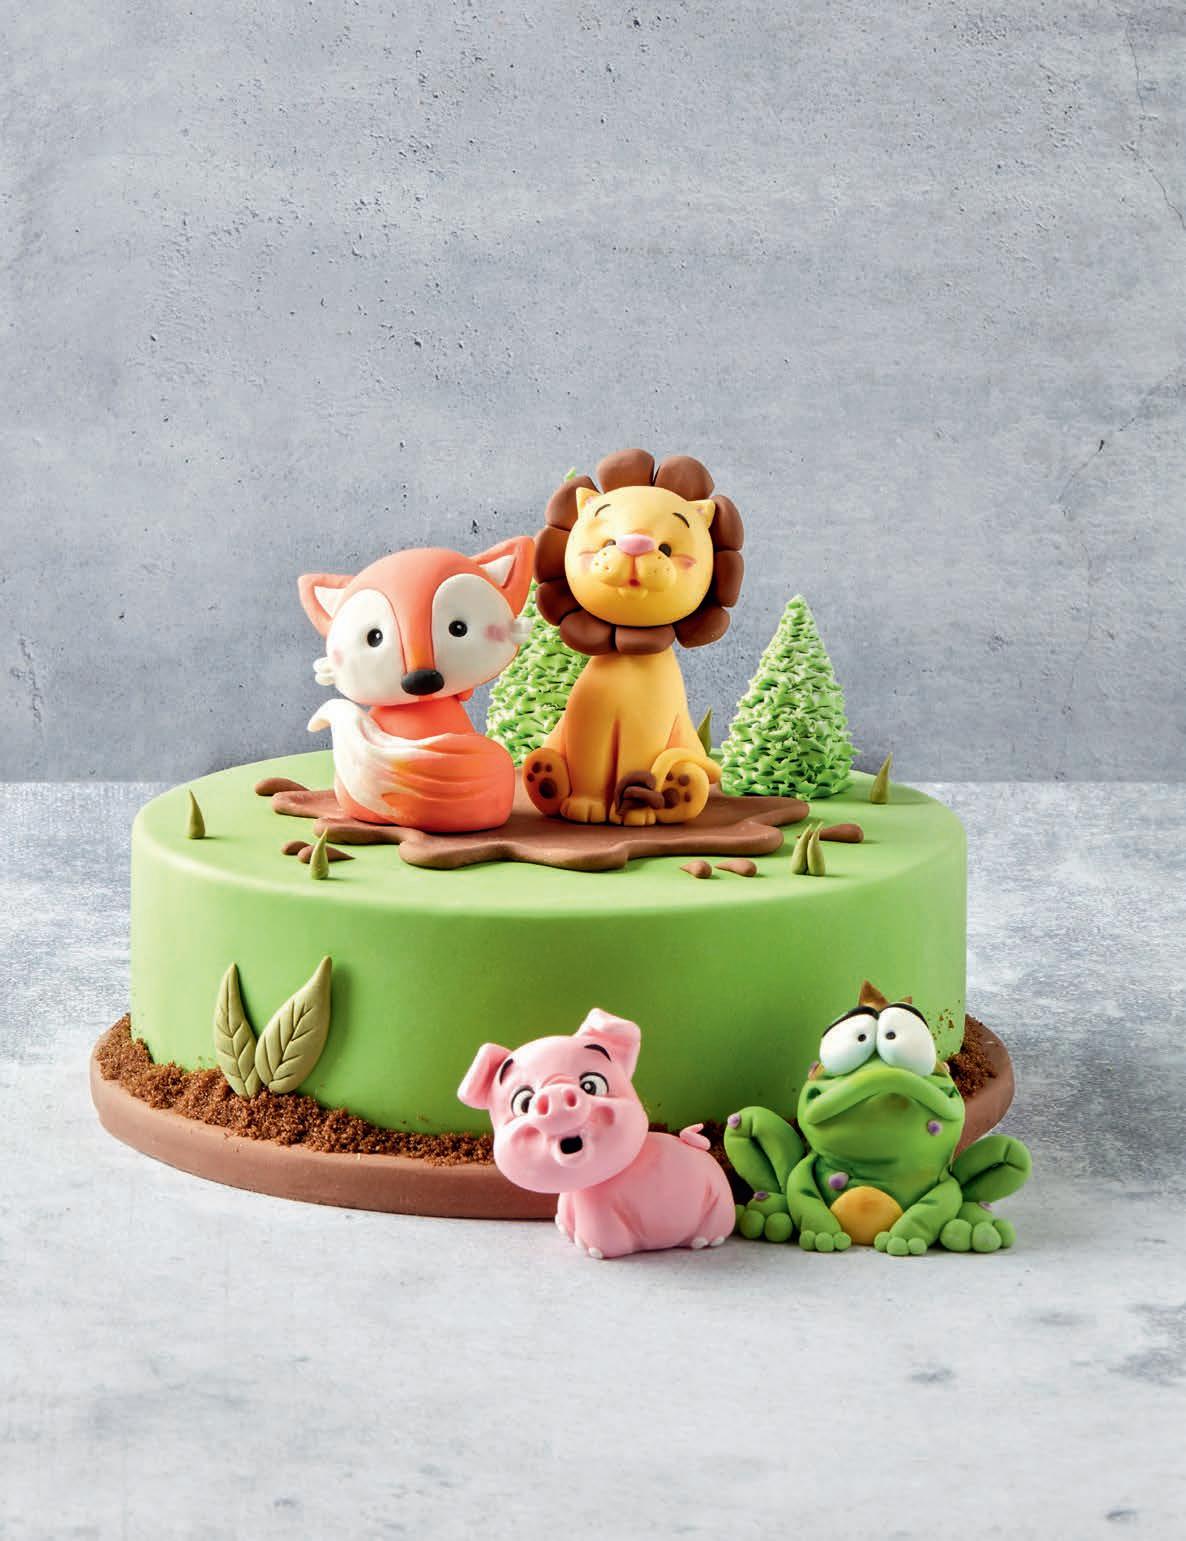
The body of this lion is suitable to use for a lot of different animals.
14
. tip.
CAKE DECORATIONS 15
16
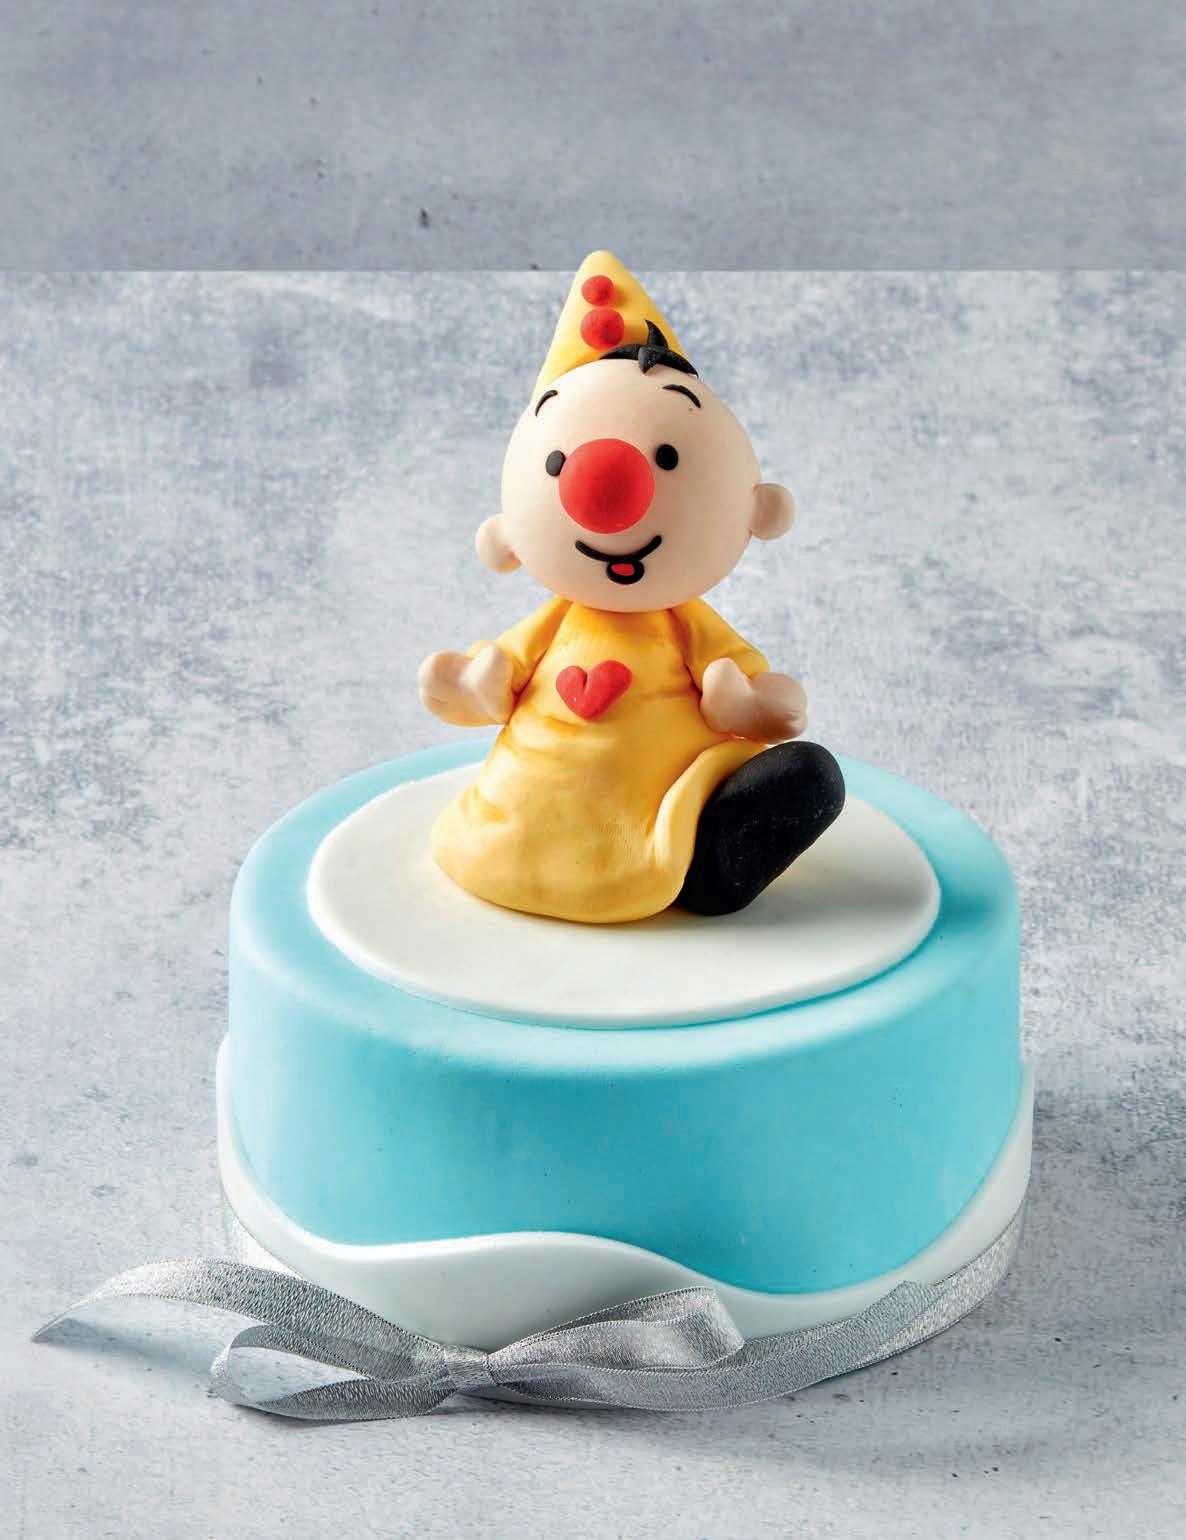
BU MBA
LEVEL OF DIFFICULTY: ✪
5. For the eyes, stick a small black ball on each side of the nose.

6. Roll black fondant between your ngers to form two very small ne sausages and stick them neatly above both eyes. Try to make them as level as possible.
7. Roll a ne black rolled fondant sausage for the mouth. Stick this just under the nose. Add a small piece red rolled fondant to the middle of the mouth to create the illusion that his mouth is open.
8. Give this red ball a small black line. Make sure it ts nicely on the mouth.
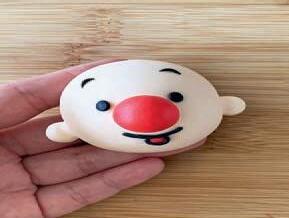
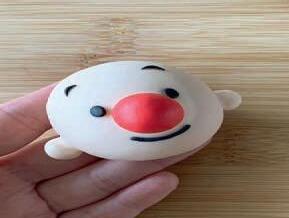
1. Form a ball for the head out of skin-colored fondant.
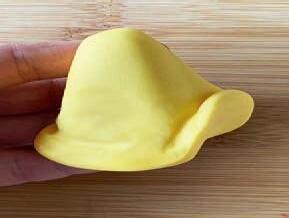
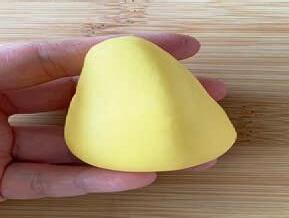
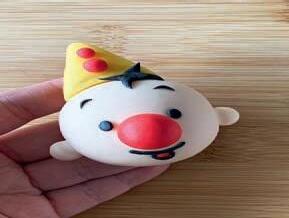
2. Make two skin-colored balls for the ears. These must be a lot smaller than the head. Make the ears as even as possible and stick them just below the centerline.
3. Blend both ears nicely against the side of the head.
4. For the nose, you form a ball out of red rolled fondant. Stick this in the middle, slightly higher than the ears. Do not push the ball too much; this will make it too at.
CAKE DECORATIONS 17
W E LLKNOWN CHARACTE R S
Little lamb
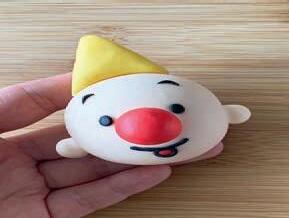
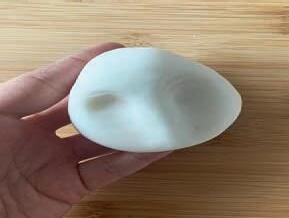
6. Accentuate the mouth by pushing the bottom deeper in with the pointed modeling stick. Also push the bottom of the eyes deeper. Draw a line around each side of the eye to indicate the jaw.
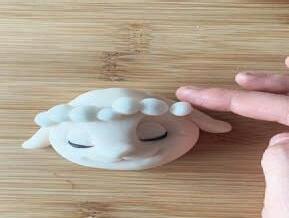
7. Place a white ball in both eye sockets.
8. Add a black line under both eyes.
9. Place an ear on each side of the head and blend them at the top into the face.
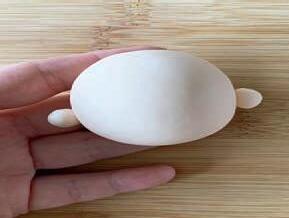
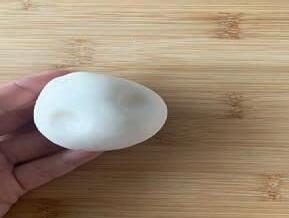
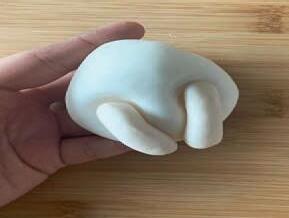
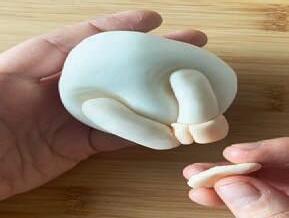
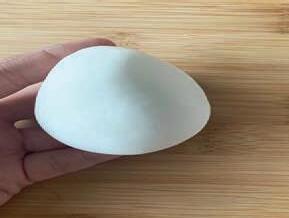
1. Form a ball for the head out of skin-colored rolled fondant, but make sure the top comes together slightly pointy.
2. Push in the eye sockets with your ngers.
3. For the nose, place a small piece of white rolled fondant in the middle under the eye sockets.
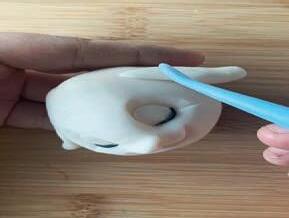
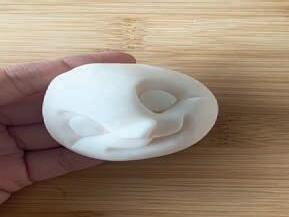
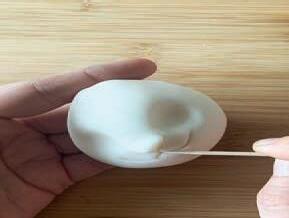
4. Then push the bottom of the nose into a more triangular shape.
5. Now draw the mouth with a toothpick. Start directly under the nose and then work outwards. Do this for the other side as well.
CAKE DECORATIONS 19 F E STIVE O C CASI O N S
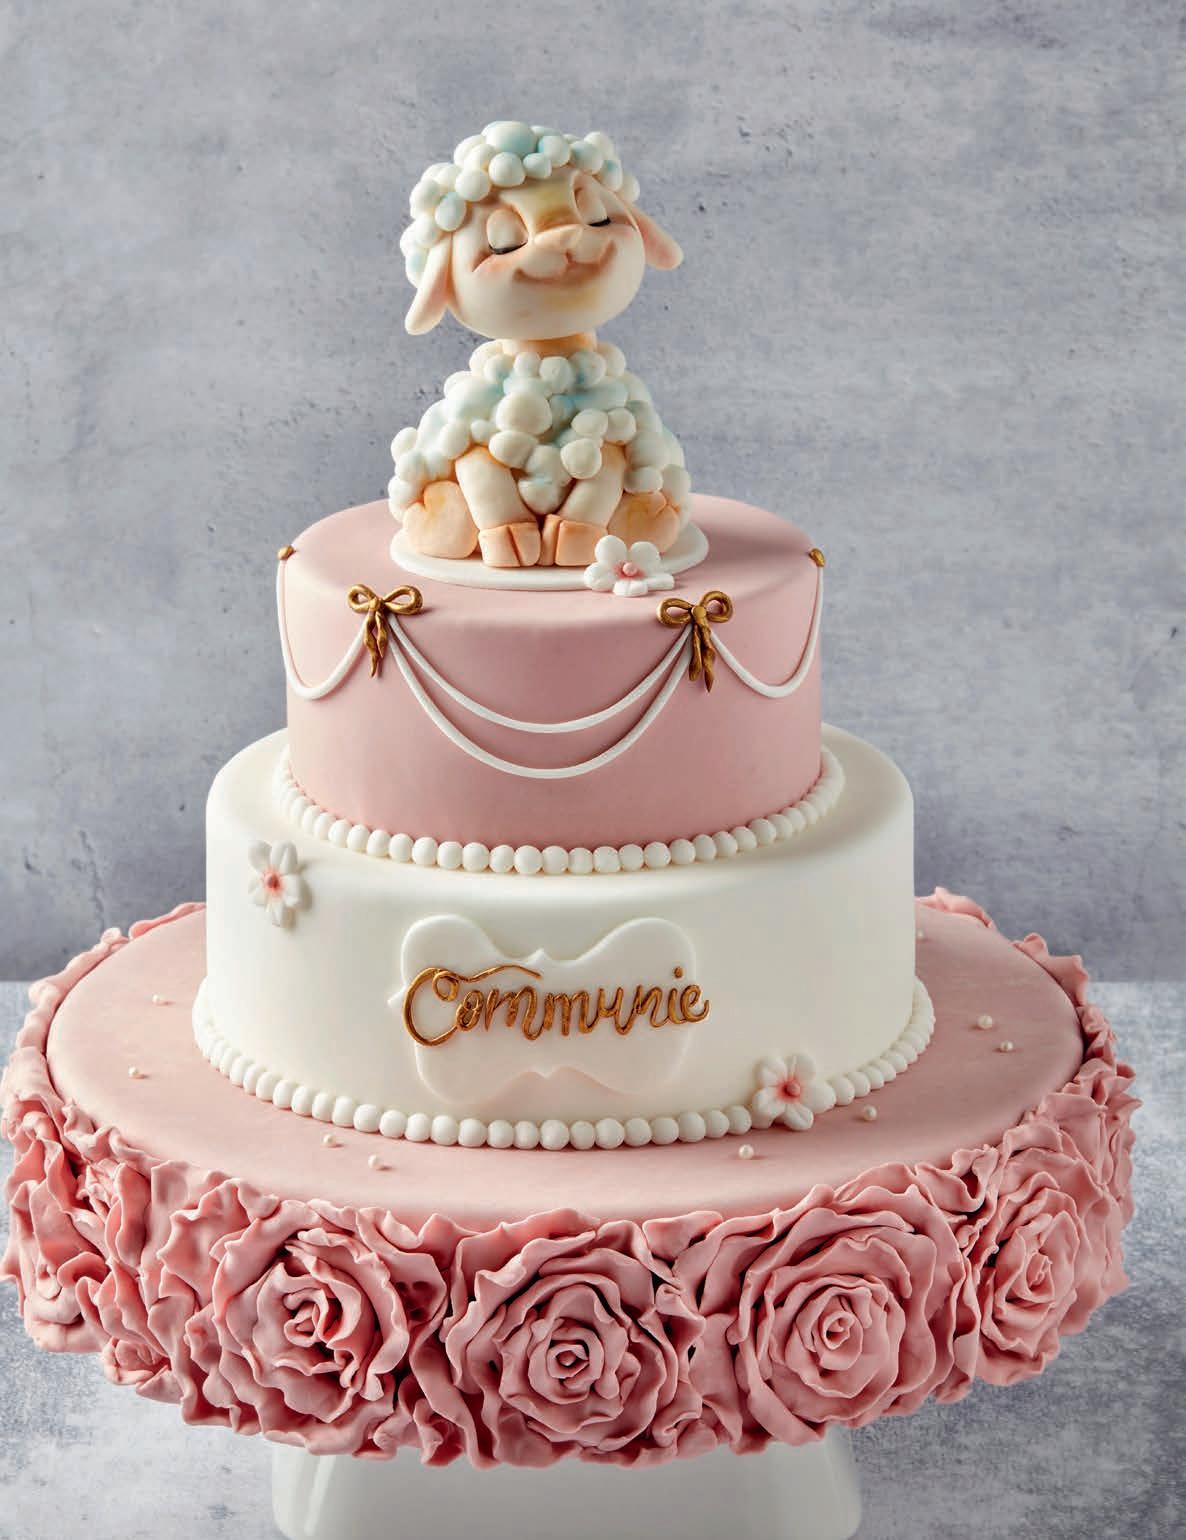
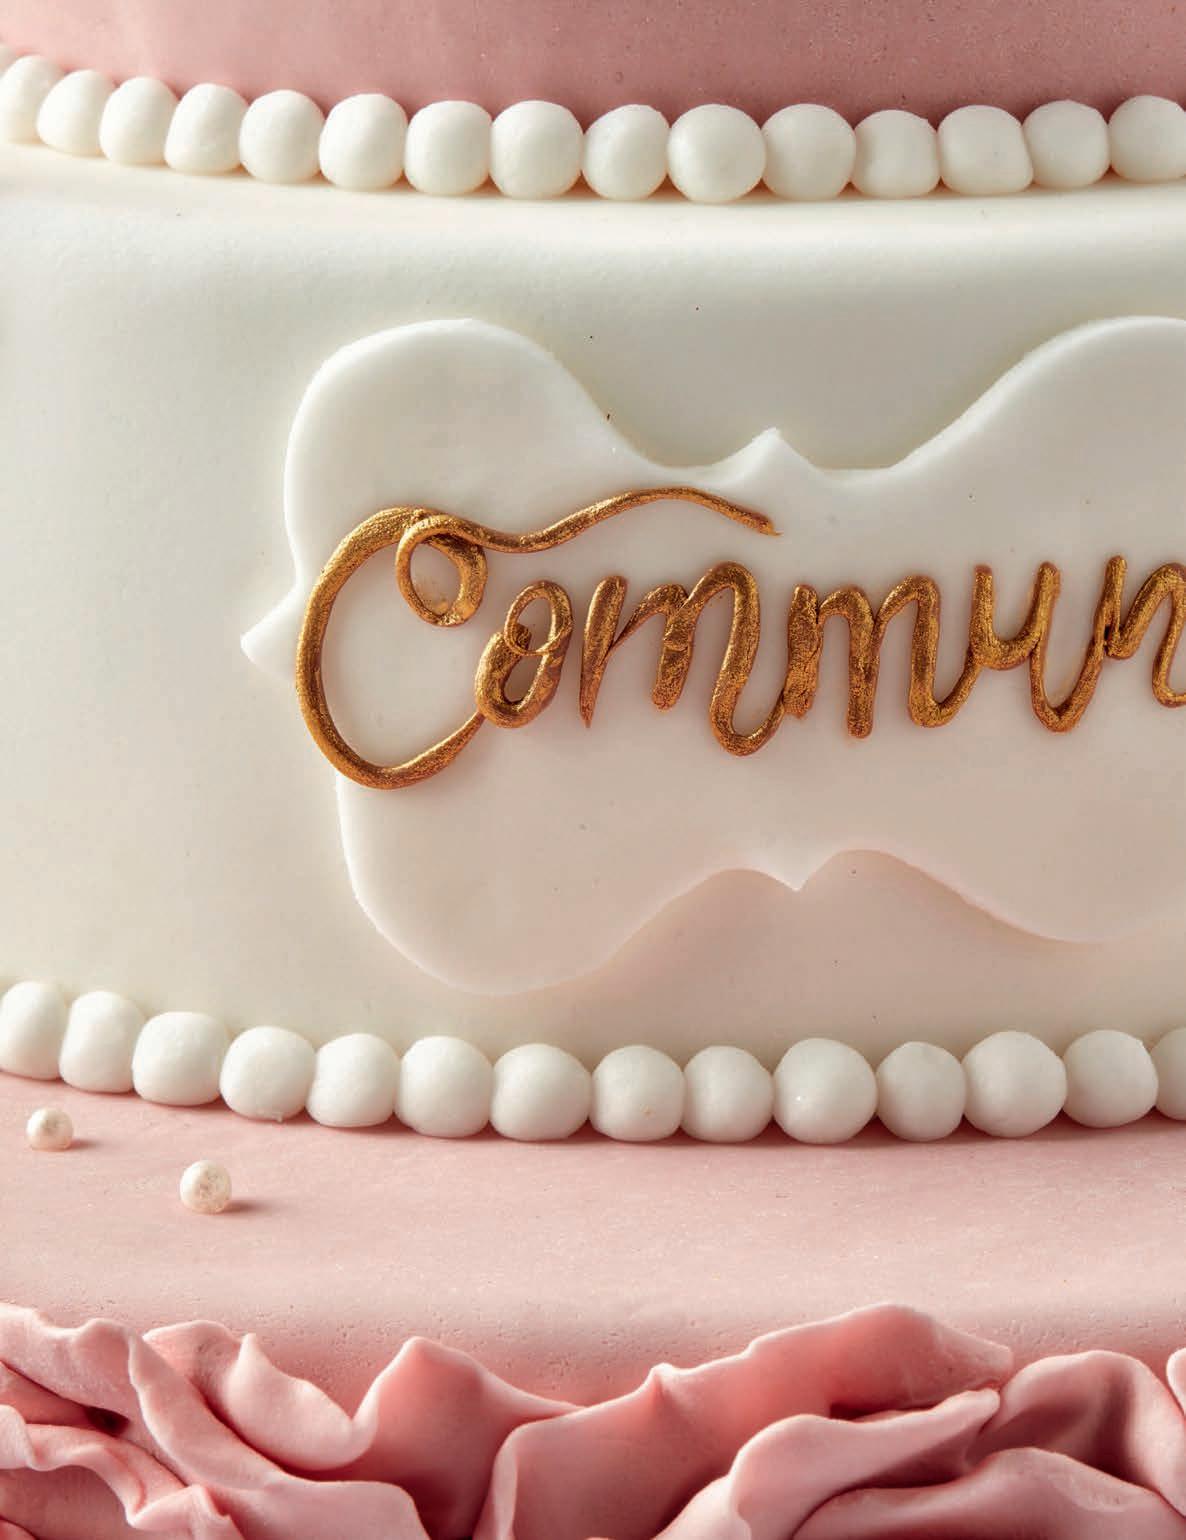
C OMM UNION LEVEL OF DIFFICULTY: ✪ ✪ - CAKE: ✪
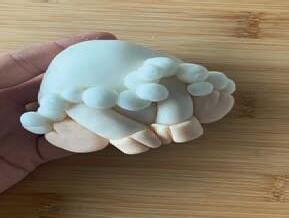
10. For the lamb’s wool make balls in different sizes out of white fondant and place them randomly on the top of the head. Start with the hairline rst and work your way up until the whole head is covered.
11. For the body, form a ball out of white rolled fondant. Push in two large cavities with your ngers and place at those spots white fondant for the two front legs. At the bottom of each leg, add a hoof made of skin-colored rolled fondant and draw a line in each one.
12. For the back hooves, push two skin color solid balls and draw a line in them. Make sure these two are behind the front legs.
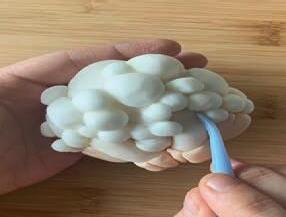
13. Now cover the body with the wool, just the way you did it with the head.
14. Blend out the wool when you’re done if you prefer that.
15. Place white fondant at the top of the body to form the neck and nish it by covering it with wool.
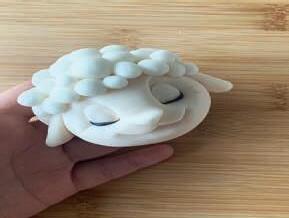
16. Carefully put two sticks in the neck and let it dry. Place the head on the sticks once the body is dry.
Cake
Three layers have been put on top of each other to stack this cake. So don’t forget to put in dowels! The bottom layer is nished with roses made of pink sugar paste. For this I used the same technique as the basic roses (p. 32), I just placed them straight on the cake. First you put a teardrop shape somewhere on the cake, and then add the rose petals straight onto the cake as well. Please note that this is quite time consuming. I usually stack the layers rst and nish off with the roses.
For the middle layer I have cut a label from white fondant and I then placed the name letter by letter on it by cutting out very thin strips each time. Then I used a very ne brush to paint the letters in gold.
The upper layer is decorated with drapes by cutting them the same way as for the text. Cut out thin strips of white rolled fondant and attach these to the cake piece by piece.
20
. tip.
Finish the bottom layer with a little bit of edible glitter and little pearls. This gives the cake that extra wow factor.
WWW.LANNOO.COM
Register on our website and we’ll send you a newsletter to update you about new books and interesting personal offers.
Photography: Heikki Verdurme, Johan Blommaert, Tatyana Van Huffel (step by step pictures) and Shutterstock
Cover Image: Johan Blommaert
Graphic Design: Whitespray
Translation: Karen Van Huffel
D/2022/45/451
9789401486408
If there are any questions or comments: redactielifestyle@lannoo.com
All rights reserved. Nothing from this edition may be reproduced, recorded in an automated database and/or published in any form or in any way, whether electronic, mechanical or in any other manner without the prior written permission of the publisher.