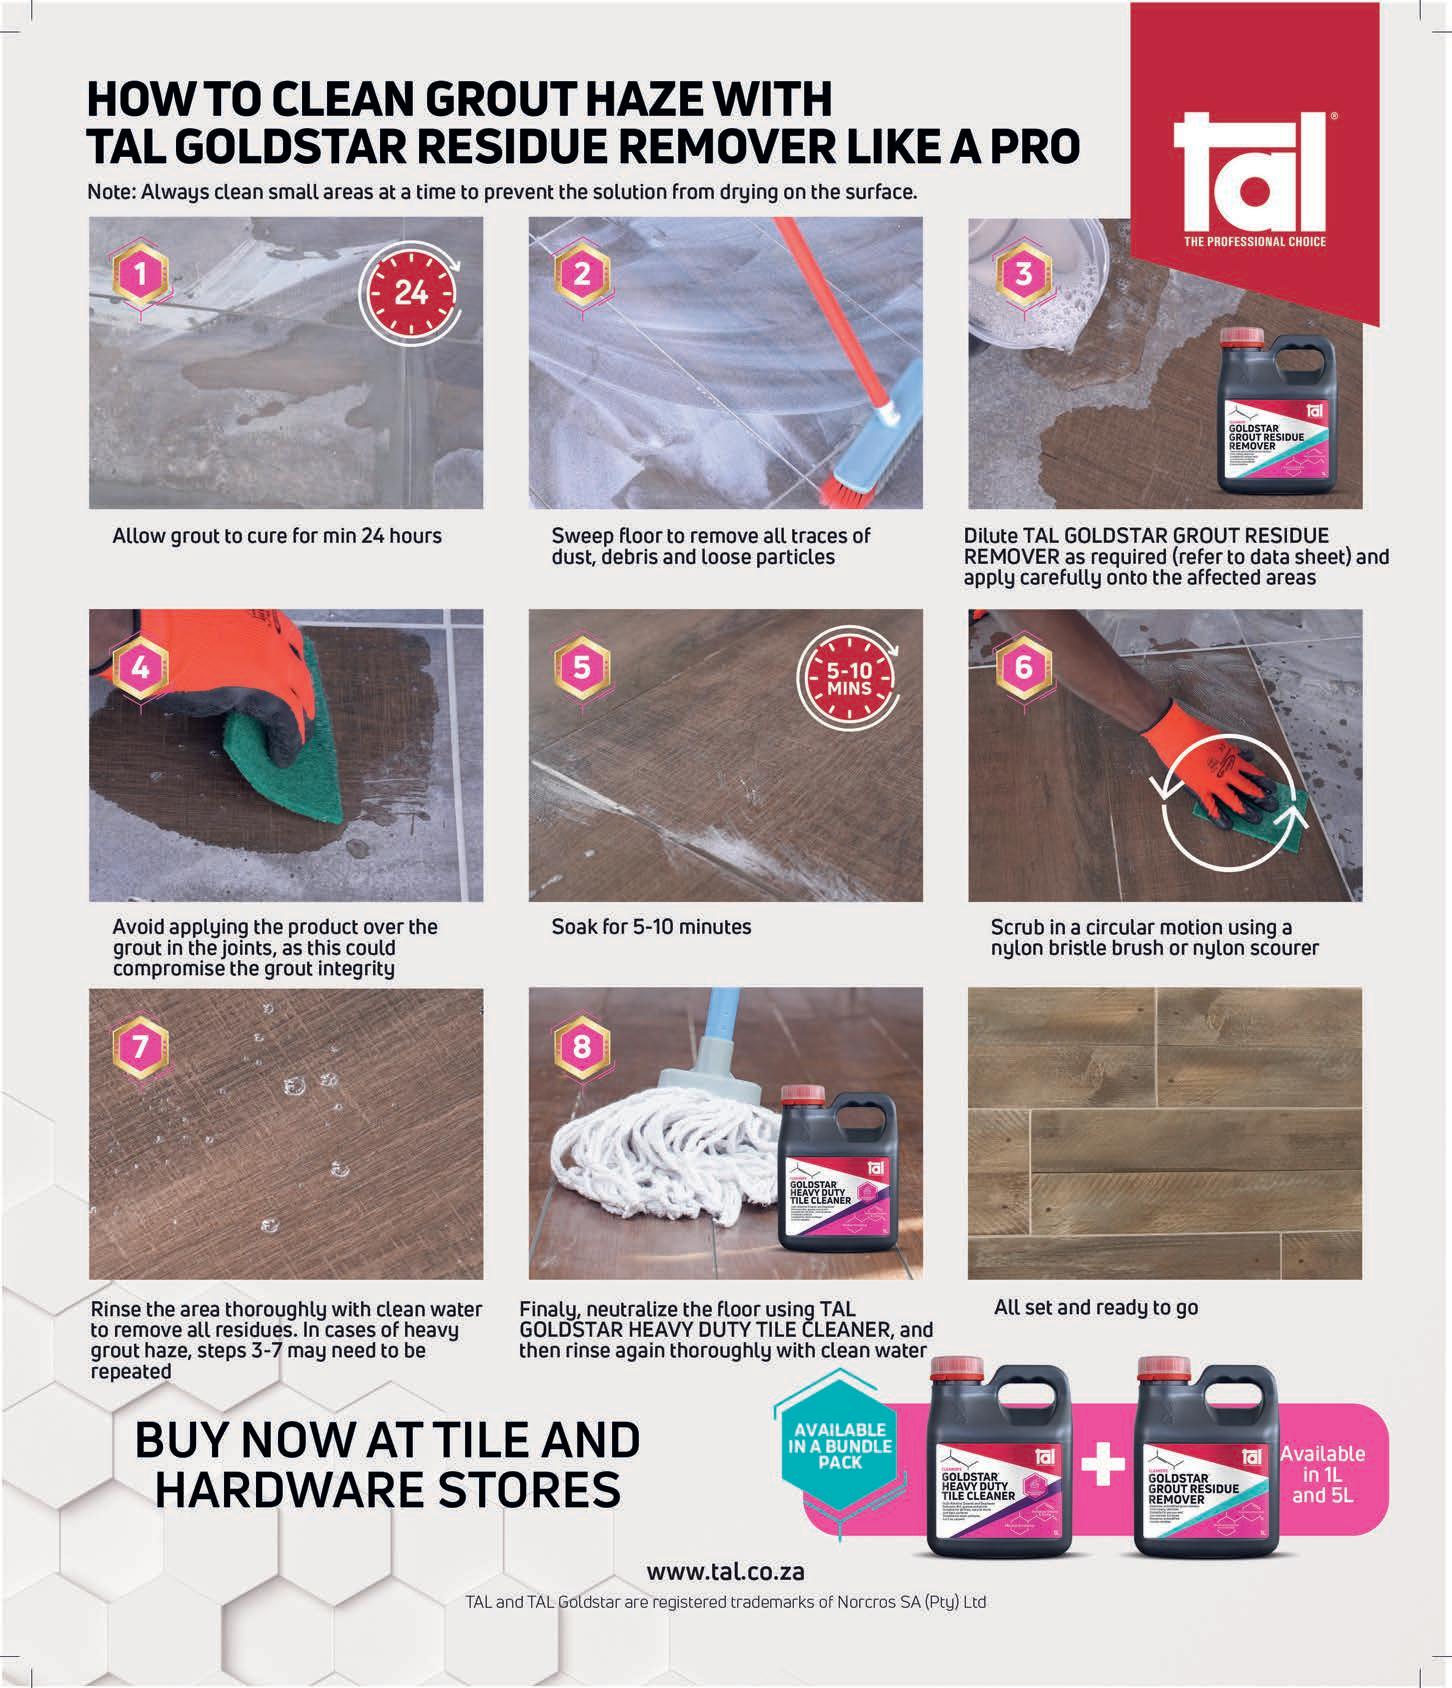
Subscriptions and Distribution: Fatima Dramat fatimad@picasso.co.za
Online Editor: Stacey Visser
Printing: CTP Printers, Cape Town
MANAGEMENT
Management Accountant: Deidre Musha
Business Manager: Lodewyk van der Walt General Manager, Magazines: Jocelyne Bayer
Copyright: Picasso Headline. No part of this publication may be reproduced in any form without written permission from the publisher. The publisher is not responsible for unsolicited material. EasyDIY is published by Picasso Headline. The opinions expressed are not necessarily those of Picasso Headline. All advertisements/advertorials and promotions have been paid for and therefore do not carry any endorsement by the publisher.
RESILIENT HOMES, sma rt er living
esilience has become one of the most valuable features a South African home can have. It is no longer just about how a space looks, but how well it performs under pressure.
From heavier rainfall and rising energy costs to ageing infrastructure and daily load shedding, our homes are being tested in new ways. Renovation, in this context, is less about major overhauls and more about making smart, informed improvements that protect your home over time.
This first EasyDIY issue of 2026 focuses on the essentials that matter most. We unpack the tools every homeowner should have on hand, examine why roofing standards are under renewed scrutiny and share practical maintenance guidance that helps prevent small problems from turning into expensive repairs. These are not glamorous upgrades, but they are the ones that quietly make homes safer, more efficient and longer lasting.
At the same time, resilience does not mean compromising comfort or style. We explore renovation trends shaping 2026, from colour choices that transform living spaces to bathroom fittings that balance design with water efficiency. These features show how thoughtful decisions can future-proof your home without requiring a full renovation.
Smarter living also takes centre stage. With plug-and-play smart home technology now widely available, homeowners and tenants can enhance convenience, security and energy management in under an hour, with no rewiring or specialist installation required.
EasyDIY has always been about empowering South Africans to take control of their spaces with confidence. As we step into 2026, that commitment remains the same: practical advice, achievable projects and smarter ways to build homes that are ready for whatever comes next.
RainaJulies
BITS ‘N’ BOBS
3 THE HOMEOWNERS’ TOOLKIT
Here’s your essential, no-nonsense guide to building a basic but effective toolkit.
MAINTENANCE
7 STEEL SHEET CLADDING
The HDGASA unpacks what every homeowner should know before choosing steel sheeting.
9 MAINTENANCE 101
How to keep your home safe, dry and damage-free
EXPERT ADVICE
12 RENOVATION TRENDS
Top resilient-renovation trends along with accessible ways to future-proof your homes – one upgrade at a time.
13 COLOUR PALETTE TRENDS
How to transform your living room to capture different moods
14 TAPS FOR A BATHROOM RENOVATION
Balancing aesthetics, function and water efficiency in a luxurious, timeless fashion . DIY 101
16 CREATING A SMART HOME
No rewiring, no specialist installation and no long-term commitment required .
19 DIY BUILT-IN WARDROBE
Transform an outdated melamine cupboard into a sleek built-in wardrobe
The basic but essential HOMEOWNER’S toolkit
Whether you’re xing a sticking door, sealing a leaking window or installing new shelves, every homeowner needs a reliable toolkit. The right tools don’t just make DIY easier; they prevent small issues from becoming expensive repairs later. Here’s your essential, no-nonsense guide to building a basic but effective toolkit for South African homes
CORE TOOLS FOR EVERYDAY FIXES
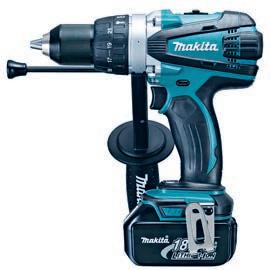
1. Impact drill
South African homes often have solid brick or concrete walls, making an impact drill non-negotiable. It delivers the extra force needed to drill into tough substrates without burning out the motor. Choose one with variable speed control and a comfortable grip for extended use. We suggest the Makita 18V Cordless Impact Driver Drill DHP458ZK.
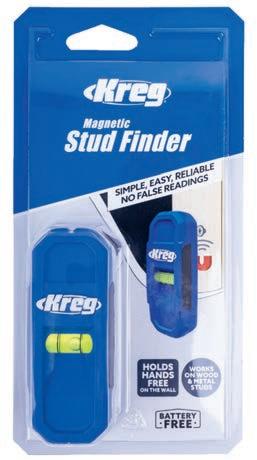
3. Stud finder for SA’s solid walls
Many South African homes have plastered brick walls rather than drywall. Look for a stud finder designed to detect density changes in solid surfaces – helpful for locating pipes, conduits or reinforcement before drilling. The KREG KR KMM1000 Magnetic Stud Finder is the perfect tool for your kit.
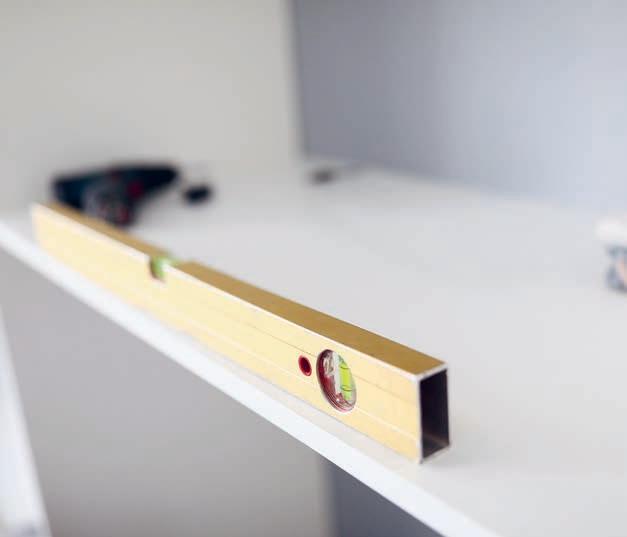
2. Spirit level
Whether you’re hanging frames, mounting shelves or installing cabinets, a spirit level ensures everything sits perfectly straight. A 400–600mm level is ideal for general household use. Try the TOTAL 3-piece Spirit Level Set.
4. Multitool for precision cutting
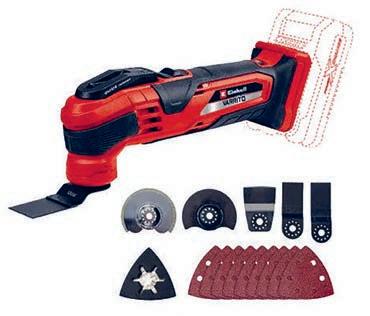
An oscillating multitool is the Swiss Army knife of DIY. It cuts, sands, scrapes and trims in tight corners where other power tools can’t reach. Perfect for cutting door frames during flooring installations, trimming PVC pipes or shaving off excess material. Try the Einhell Varrito Cordless Multifunctional Tool.
TOOLS FOR ONGOING HOME MAINTENANCE
Once you’ve mastered basic fixes, expand your kit with tools that help diagnose problems early and keep your home in good shape.
1. Moisture meter
Damp is one of South Africa’s most common household headaches. A moisture meter helps you identify early signs in walls, ceilings and floors – before mould or structural damage sets in. Bosch’s GMM 1-15 Professional Material Moisture Meter is a great addition to your upgraded kit.
2. Caulking gun
SAFETY GEAR
Never underestimate safety equipment. Gloves, ear protection, dust masks and goggles are essential for drilling, grinding, cutting or mixing chemicals. If you’re working overhead or in confined spaces, add a headlamp for extra visibility.
A BASIC GEYSER EMERGENCY KIT
Your geyser is one of the hardest-working features in your home – and one of the priciest to repair when things go wrong. A simple geyser kit can help prevent costly bursts and energy loss.
• Drip tray: a mandatory requirement in new installations. A drip tray helps channel leaks safely away from ceilings and prevents major water damage.
• Geyser insulation blanket: reduces heat loss and improves energy efficiency, especially in colder regions. It helps your geyser maintain temperature, lowering electricity usage.
• Valve-testing tool: regularly testing the temperature and pressure relief valve (TP valve) prevents dangerous pressure build-up. A basic valve-testing tool allows you to check that everything is functioning correctly.
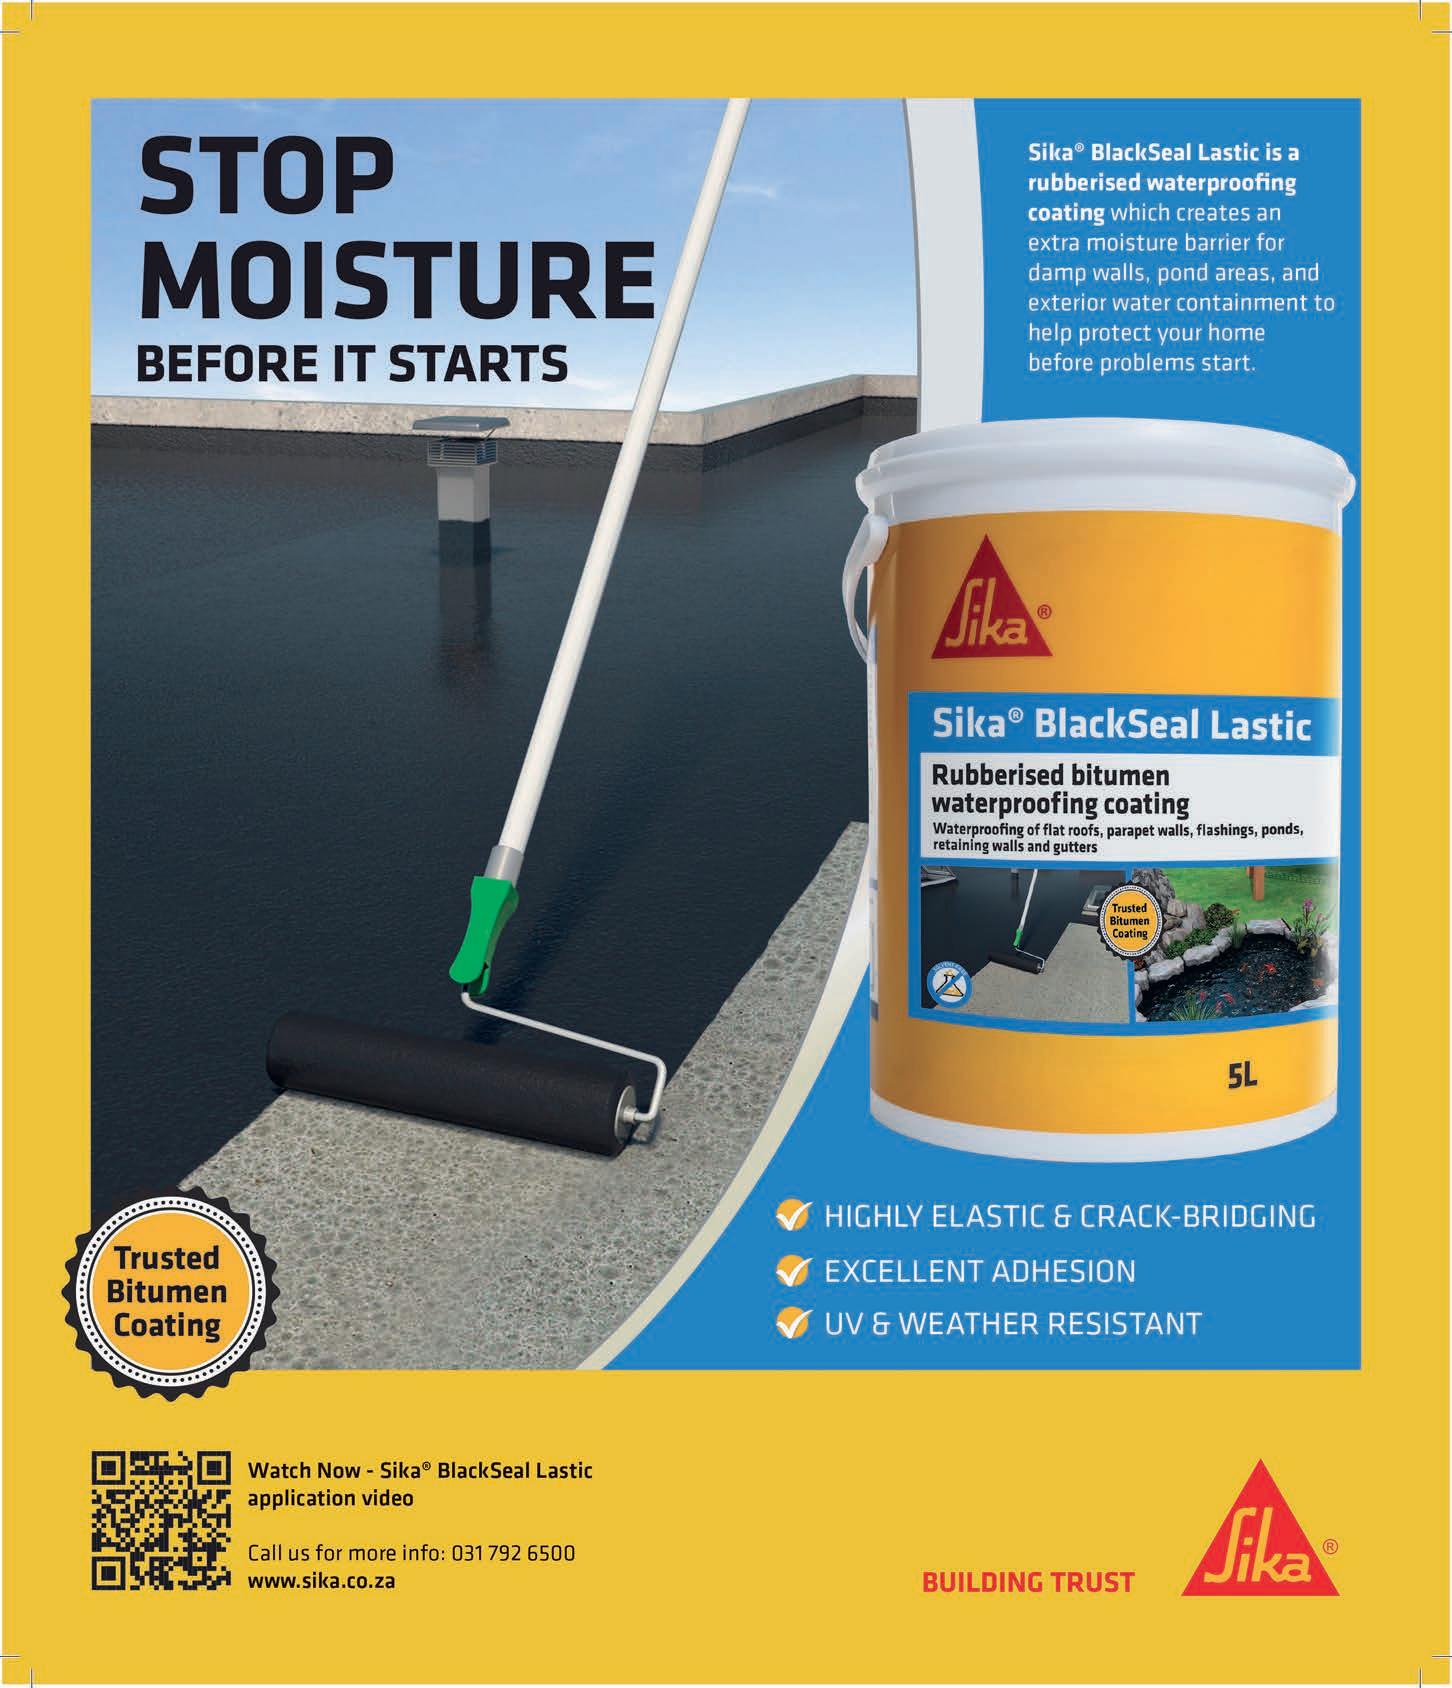
WATERPROOFING ESSENTIALS
A well-waterproofed home withstands harsh weather, leaks and damp. Keep these on hand:
• Bitumen paint for roofs, flashing and foundations.
• Waterproofing membranes for reinforcing problem areas.
• Sanitary-grade silicone for kitchens and bathrooms. Invest in reputable brands to ensure longevity and adhesion.
RENT, BORROW OR BUY
Perfect for applying silicone around bathroom fixtures, sealing window frames or repairing cracked external joints. A smooth-action caulking gun gives you better control and cleaner lines. Try the Alcolin Caulking Gun Plastic Blk/Yellow 057-89.
Not every DIY job needs a new tool. Here’s a simple way to decide what makes sense for your home and budget.
BUY if you’ll use it often
• Hammer
• Screwdrivers
• Tape measure
• Pliers
• Basic drill
BORROW if it’s a one-off job
• Ladder
• Spirit level
• Hole saw
• Clamps
RENT if it’s specialised or heavy-duty
• Tile cutter
• Floor sander
• Pressure washer
• Large demolition tools
Safety, maintenance and what homeowners need to know Steel ROOF CLADDING
Steel roof cladding on South African homes is more popular than ever, but not all cladding is created equal. Dennis White, head of the Southern African Metal Cladding and Roo ng Association, in association with the Hot Dip Galvanizing Association of South Africa, unpacks what’s driving the push for mandatory standards, the real dangers of sub-standard roo ng and the essential checks every homeowner should make before choosing steel sheeting
Steel cladding has become a popular, affordable choice for South African homes, but only when you buy the correct thickness and protective coating. Many people don’t realise that steel cladding varies widely in quality. Choosing the wrong product can lead to leaks, early rust and serious safety risks.
The biggest issue is the continued sale of ultra-thin, sub-standard cladding in parts of the market. Some sheets are as thin as 0.18mm with a 4-micron galvanized coating. The National Building Regulations call for at least 0.46mm with a 14-micron coating. Anything thinner simply won’t last – and in a fire, it can fail dangerously fast.
Modern roofs also face new challenges, such as drip spot corrosion, where water from solar panels and other inert surfaces drips onto galvanised steel and creates rust spots within months. Preventative maintenance and proper installation are essential to avoid costly repairs later.
To protect consumers, industry bodies, the Southern African Metal Cladding and Roofing Association (SAMCRA) and the Hot Dip Galvanizing Association of South Africa (HDGASA), are pushing for the new SABS metal-cladding standard to become mandatory. This would ensure all roofing sold in South Africa meets minimum safety and durability requirements.
For homeowners, the message is simple: check the thickness and the coating, and buy only certified steel cladding. It’s the difference between a roof that lasts decades and one that fails when you need it most.
WHY IT MATTERS FOR DIYERS AND HOMEOWNERS
For anyone planning a roof repair, extension or new build, understanding steel thickness and galvanising standards is essential. Choosing compliant, properly coated steel sheeting improves structural safety, ensures better corrosion resistance, reduces long-term maintenance and prevents costly failures.
With the right material and proper maintenance, your steel roof can last for decades – and keep your home safe in the process.
WHAT TO CHECK BEFORE YOU BUY STEEL SHEETING
Steel thickness
• Look for minimum 0.46mm thickness for compliant, safe roofing.
• Avoid ultra-thin options like 0.18mm –they are unsafe and won’t last.
Galvanized coating thickness Choose sheeting with at least a 14-micron zinc coating. Anything under 4 microns offers very poor corrosion protection.
Certification and compliance
• Ask the supplier for proof that the product complies with SANS 10237: The design, testing and installation of self-supporting metal cladding.
• Avoid unlabelled or uncertified cladding.
Type of protective coating
Galvanised only, or galvanised plus painted/organic coatings if planning to install solar heaters and/or PV panels. For coastal or high-moisture areas, choose a higher-spec coating.
Check for drip spot corrosion risks
Ask your installer about measures to prevent corrosion.
Inspect the sheets in person
• No dents or scratches.
• Uniform colour and coating with no patches or thin spots.
Confirm the span capability
Ensure the sheet thickness and profile are strong enough to span between your rafters or purlins. When in doubt, ask the supplier for span tables.
• Choose suppliers that can provide documentation and guidance.
Plan for ongoing maintenance
• Clean gutters and remove debris regularly.
• Check for rust or scratches once a year and touch up immediately.
• Biannually, hose areas of cladding not washed by rain with potable water.
Fire safety considerations
Remember, very thin steel sheeting fails quickly in a fire. For any home structure, ensure the roofing material meets minimum safety standards.
A practical guide to preventing expensive home repairs Maintenance 101
A well-maintained home doesn’t just look good; it saves you thousands in preventable repairs. This easy guide breaks down the essential checks every homeowner should do, plus simple step-by-step instructions to keep your home safe, dry and damage-free
ROOF MAINTENANCE: TILES, WATERPROOFING AND RIDGE CAPS
Your roof is your first defence against rain. A 10-minute visual check can prevent major structural damage.
What to look for:
•Cracked, slipped or missing tiles.
•Ridge caps lifting or gaps in mortar.
•Damaged or exposed waterproofing membranes.
•Debris build-up that diverts rainwater.
3-step roof check
Step 1 walk the perimeter
From ground level, visually inspect for uneven tile lines, cracked tiles or ridge problems.
Step 2 check the roof edges
Look for lifting tiles, deteriorating waterproofing or spots where water might enter.
Step 3 inspect from the ceiling
Inside the roof space, look for damp marks, dark stains or daylight coming through – all signs of leaks.
Tools needed:
• Sturdy extension ladder.
• Binoculars (for safe ground inspection).
• Chalk or marker (to note cracked tiles).
• Silicone sealant and applicator.
CHECK YOUR GEYSER FOR EARLY FAILURE SIGNS
A burst geyser is one of the most expensive – and disruptive – household failures. Early detection is everything.
What to look for:
• Drips or pooling water near the drip tray.
• Rust on the tank, pipes or mounting brackets.
• A continuously running pressure relief valve.
• Water temperature that is fluctuating or not heating properly.
3-step geyser inspection
Step 1 look for leaks
Open the ceiling hatch and use a torch to inspect around the geyser, drip tray and connections.
Step 2 check the valves
Lift the geyser’s pressure relief valve for a second. A small burst of water is normal – continuous flow is not.
Step 3 inspect for rust
Surface rust on the tank or fittings means the protective coating is failing. Call a plumber before it worsens.
Tools needed:
• Flashlight.
• Adjustable spanner.
• Small bucket or trowel.
• Ladder (for ceiling access).
CLEAN AND SEAL GUTTERS BEFORE STORM SEASON
Clogged gutters are one of the biggest causes of damp, roof leaks and foundation damage.
What to look for:
• Leaves, soil and plant growth.
• Rusted or sagging gutter sections.
• Cracks or gaps at joints.
SIMPLE MOISTURE DETECTION – FIND DAMP BEFORE IT SPREADS
Damp destroys walls, paint, cupboards and flooring. Early detection saves thousands of rands.
What to look for:
• Bubbling paint.
• Musty smells.
• Mould on skirting boards.
• Cold, damp-feeling walls.
3-step damp check
Step 1 touch test
Run your hand along walls – damp patches feel noticeably cooler.
Step 2 check skirtings and corners
These are the first areas to show signs of rising damp or leaks.
Step 3 use a moisture meter
A basic DIY moisture meter gives an instant reading and helps pinpoint hidden damp.
3-step gutter care
Step 1 clear debris
Use gloves to remove all leaves and dirt, then flush with a hose.
Step 2 check flow direction
Water should flow easily towards the downpipe – adjust brackets if needed.
Step 3 seal and protect
Use gutter sealant on joints and consider installing gutter guards to reduce future blockages.
Tools needed:
• Garden gloves.
• Hand trowel.
• Hosepipe with spray nozzle.
• Gutter scoop or small plastic spade.
Tools needed:
• Moisture meter (optional but useful).
• Paper towels.
• Masking tape (to mark wet areas).
SAFETY FIRST:
MUST-FOLLOW RULES
DIYers often skip these basics – and that’s when accidents happen.
• Switch off power at the mains before checking plugs, fixtures or the DB board.
• Never climb onto a wet roof.
• Use gloves when clearing gutters or working with sealants.
• Keep someone nearby when accessing the ceiling or roof.
• Let a qualified plumber or electrician handle anything beyond basic inspection.
HANDY MAINTENANCE
TIMELINE
A quick guide to when each task should be done.
Monthly
• Check for leaks around geysers.
• Inspect gutters for blockages.
• Test plugs and light switches.
Quarterly
• Scan ceilings and walls for moist spots.
• Check roof tiles and ridge caps.
• Lightly sand and reseal wooden doors in rainy seasons.
Annually
• Full roof waterproofing assessment.
• Replace worn geyser valve.
• Deep clean all gutters before summer or winter storms.
ELECTRICAL SAFETY: DB BOARD AND PLUG POINT CHECKS
Load shedding causes power surges that damage appliances and wiring. Quick checks help reduce the risk.
What to look for:
• Breakers that trip repeatedly.
• Burn marks or melted plastic at plugs.
• Loose sockets or flickering lights.
3-step electrical check
(If in doubt, call a qualified electrician – safety first.)
Step 1 test breakers
Manually switch off each DB board breaker, then switch back on to ensure they function properly.
Step 2 check plug points
Press plug points firmly; any movement means the mounting screws need tightening.
Step 3 surge protection
Install surge protection at the DB board or use surge-protected multiplugs for sensitive electronics.
Tools needed:
• Basic voltage tester.
• Screwdriver set.
• Surge protectors.
• Label stickers for the DB board.
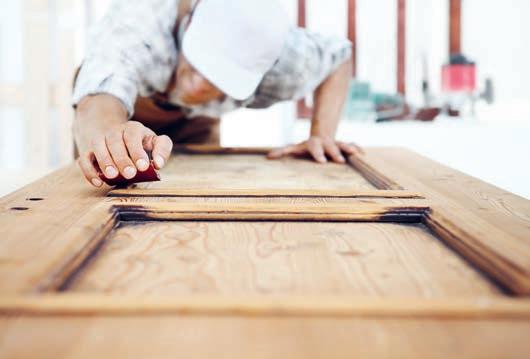
MAINTAINING WOODEN DOORS AND FRAMES
Humidity and seasonal changes cause wooden doors to swell, stick and warp.
What to look for:
• Doors scraping the floor.
• Frames swelling after rain.
• Cracked varnish or peeling paint.
3-step wood care
Step 1 sand lightly
Remove swelling or rough edges with fine-grit sandpaper.
Step 2 seal properly
Apply a high-quality wood sealer or varnish, especially on the top and bottom edges.
Step 3 maintain yearly
Reapply sealer once a year to protect against moisture and UV damage.
RED FLAGS: SIGNS YOU NEED A PRO
A DIYer can catch issues early – but some calls require experts:
• Constant dripping from the pressure valve.
• Rust forming around geyser drip trays.
• Roof sagging or major tile displacement.
• Warm plug points or a burning smell.
• Persistent damp despite cleaning or sealing.
• Doors swelling so badly that they can’t close.
Tools needed:
• Medium-grit sandpaper.
• Wood sealer/varnish.
• Paintbrush.
• Rubber mallet (for sticking doors).
Final tip: Prevention costs little – repairs cost plenty
Set aside just one weekend a month for home maintenance. With a torch, ladder and a few basic tools, you can prevent most major home disasters – from geyser bursts and roof leaks to electrical faults and damp
TOP trends for resilient renovations
Some of the top resilient-renovation trends set to shape 2026, plus ways South Africans can future-proof their homes – one upgrade at a time.
By Orlando Luis, CEO of Brights Hardware
1
Solar and backup power for daily use, not just emergencies
Solar adoption continues to grow as households install systems to reduce reliance on municipal supply and generate their own clean energy during the day. Smaller rooftop setups and entry-level solar options remain popular because they quickly cut monthly electricity costs.
Backup power remains a key renovation priority, from rechargeable bulbs and portable power stations to inverter-and-battery setups and hybrid solar systems. These systems aren’t about prepping for outages anymore; they’re about cost control, continuity and comfort.
Whether starting small or investing in a full system, the goal is predictable: reliable energy, not just surviving load shedding. To keep pace with this shift, new-to-market innovations are emerging, such as compact modular backup-power stations that can be expanded over time, smart plugs that track real-time energy use and micro-inverter solar kits designed for smaller spaces or balconies.
Water-wise living
Rainwater harvesting remains an effective way to reduce reliance on municipal water. A water tank connected to a gutter downpipe can supply water for irrigation, laundry, toilet flushing, pool top-ups and more, with systems scaled to suit any home, from small slimline tanks to larger capacity installations that can be interconnected.
Another trend that will continue into 2026 is greywater recycling. Greywater systems divert water from baths, showers and washing machines into the garden, saving up to 200–300 litres per day. To support the growing demand for water security, innovative new products are entering the market, including clip-on low-flow shower modules, compact greywater diverter pods for smaller homes, touchless tap-sensor adapters that prevent wastage and micro inline water filters for safe use of harvested rainwater.
Climate-adaptive building
Waterproof coatings, roof maintenance, gutter repairs and sealing external cracks are fast becoming non-negotiables. Added to this are improved insulation, reflective paints and passive ventilation strategies that help stabilise indoor temperatures and reduce heavy reliance on fans and air conditioners during heatwaves.
In high-risk areas, fire-resistant roofing, cladding and coatings are gaining traction for long-term protection. To manage the increased risk of flooding we are seeing in many places, nonreturn valves, improved drainage, strategic landscaping and raised electrical points help protect homes during severe rain events.
Manufacturers are developing clever home-protection solutions, such as smart leak-detection sensors, weather-responsive roof vents that adjust based on heat and humidity, and heat-activated fire-resistant coatings that expand to protect exterior surfaces.
4
Smart homes
Motion-sensor lights, smart plugs, programmable switches and Wi-Fi-enabled bulbs are becoming must-haves. Homeowners will also increasingly adopt monitoring devices to track water and electricity consumption patterns and identify waste. Affordable plug-and-play wireless security sensors and app-based cameras will also continue to grow as part of a broader shift toward accessible, DIY-friendly protection. New innovations include multidevice automation hubs, AI-driven routines that learn household behaviour and wireless sensors that track everything from door activity to water usage. These tools make smart, efficient living accessible across a wide range of budgets.
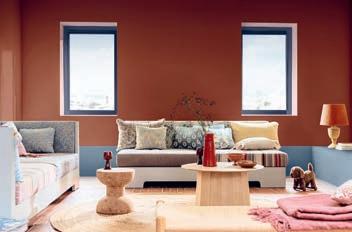
FOUR LIVING ROOM palettes to match your mood
PEACEFUL LIVING WITH BLUE HUES
Create a peaceful retreat with shades of indigo, navy and powder blue. These timeless colours instantly bring a sense of calm and balance to any living space, perfect for unwinding in the evening or enjoying a quiet morning. Deep indigo walls add a cocoon-like feel; layer plush sapphire upholstery and cerulean accents through vases, cushions or a woven rug. A hint of silver or brushed brass adds depth without disturbing the calm. This palette is a foolproof way to make your space both relaxing and refined.
BRING VIBRANCY AND PLAYFULNESS INTO YOUR HOME
Want your space to feel energetic and full of life? Lean into sunflower yellow, hot pink, emerald and tangerine. Try an accent wall for a dramatic touch, layer in cushions and throws in a mix of lively, contrasting shades. Finish with abstract art and playful ceramics to create a space that’s uplifting and uniquely you. This approach is all about expressing yourself and creating a home that radiates joy and possibility.
A living room is more than a space to sit; it’s where energy gathers, moods shift and stories unfold. Palesa Ramaisa, Dulux colour expert, shares her tips to transform the living room with four unique colour palettes, each capturing its own mood and personality For more information about the Colour of the Year 2026, visit Dulux’s webpage. You can also follow the #COTY26 #AkzoNobel #Dulux #ABlueForYou! #BelieveInblue and #RhythmOfBlues hashtags on social media.
EMBRACE
CALM WITH QUIET NEUTRALS
Soft neutrals, such as oatmeal, gentle greys and bone white, set a soothing backdrop that helps you unwind the moment you walk into the room. Pair a pale linen sofa with chunky throws and a plush woven rug for comfort. Incorporate natural wood accents and understated ceramics for warmth and texture. Add simple greenery and soft, ambient lighting to complete the space, creating a restful sanctuary where you can recharge and let the stress of the day melt away.
CREATE WARMTH AND CONNECTION WITH EARTHY TONES
If warmth and connection are what you’re after, draw on earthy tones like terracotta, olive, ochre and clay. Use coloured cushions and wood furniture with visible grain for texture and comfort. Finish the look with hand-thrown pottery, woven baskets and leafy plants to echo the outdoors and foster a sense of belonging – turning your space into an inviting haven that feels grounded and cosy.
The same four walls can evoke completely different feelings. Whether you crave tranquillity, vibrancy, harmony or warmth, your choice of colours can set the tone – and each new palette is an open invitation to feel at home, your way.
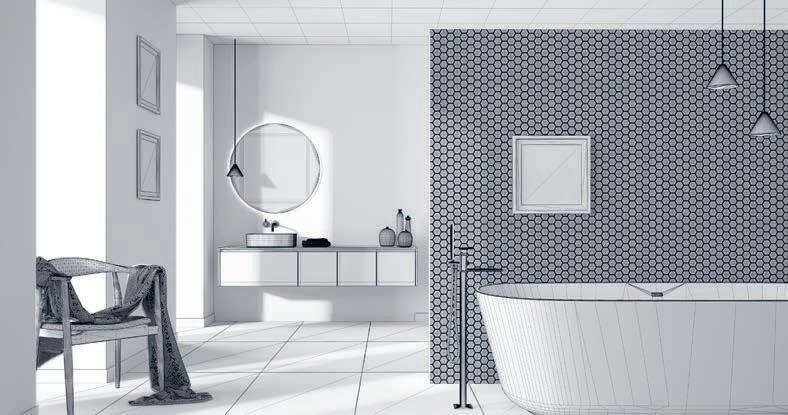
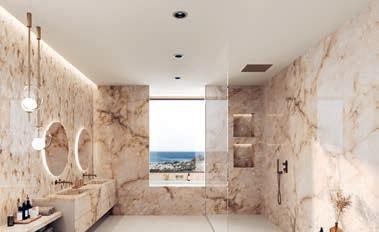
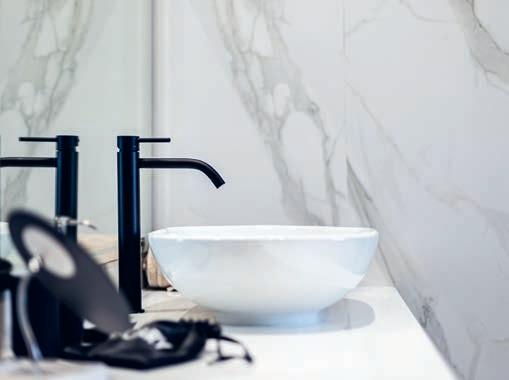
Beautiful taps for your LUXURY BATHROOM renovation
Balancing aesthetics, function and water ef ciency. By Nicole Russel, marketing manager, Italtile
Ahigh-end bathroom is defined by the harmonious blend of premium finishes, high-quality, durable materials and thoughtful touches that elevate the everyday routine into an indulgent ritual. If you’re about to undergo a luxury bathroom renovation, lavish the same attention on the choice of taps as you would tiles. Tiles might be the foundation canvas, but bathroom taps enhance the look you’re curating and add the finishing touch, balancing aesthetics, provenance, durability, functionality and budget.
TAP TYPES
We categorises bathroom taps by placement (basin, bath, wall-mounted, freestanding), style (pillar taps, mixer taps, monobloc, waterfall), functionality (sensor taps, touchless taps) or the number of holes required for installation (single-hole, widespread, centre-set). Mixer and monobloc taps are increasingly popular modern options, while pillar taps are the traditional choice.
A FOCUS ON FINER DETAILS AND FUNCTIONALITY
The secret to a stunning bathroom design lies in the details. When selecting taps, match the style to your bathroom design for a cohesive look.
•Style options: sleek chrome or matt black taps suit contemporary spaces, while brass or vintage-style taps fit classic or nostalgic looks. Stainless steel taps are the perfect choice for transitional style (the design space between traditional and contemporary).
•Mechanism: single-lever taps are user-friendly and space-saving. Dual-control taps offer precise temperature control, but take up more space.
•Installation: wall-mounted taps create a clean look and free up counter space. Sensor taps, such as our sleek, hands-free Idral Electronic Basin Taps and Idral Infra-Red Sensor Electronic Taps, are hands-free and hygienic.
•Durability: choose durable materials like brass or stainless steel with noncorrosive finishes like chrome or matt black. Always test the ergonomics in-store before purchase.
A QUICK ROUND-UP OF WATERWISE TAPS
•For lush, gilded glamour, go for the Tivoli Cavallino Range or the knurled beauty of the Tivoli Verona Matt Gold Range
•Consider the Nobili Sofi Chrome Range for timeless elegance that transcends the trends.
•The Tivoli Amara Matt Black Tap Range offers low reflection, inky-black elegance.
•Exclusive, high-end Program One, limited edition luxury with industrial edge.
•Choose the affordable luxe of the Divina Anelia Range.
•Get smart, hands-free hygiene with the Idral Infra-Red Sensor Electronic Range.
EXPERT tips for taps
When you’re shopping at a premium retailer, you can trust that the brands already meet strict quality benchmarks. Still, it helps to know what sets luxury taps apart. By Raina Julies
WHAT MAKES A TAP “LUXURY”?
•Superior materials: solid brass bodies and corrosion-resistant finishes.
•Precision engineering: smooth, reliable European ceramic cartridges.
• Advanced coatings: PVD or high-performance plating for long-lasting colour.
•Design pedigree: Italian and European craftsmanship with timeless lines.
•Efficiency built-in: water-saving aerators without compromising pressure.
These features ensure your investment feels luxurious long after installation.
CARE AND MAINTENANCE
Luxury taps deserve gentle care to protect their finish and performance. Follow these quick maintenance habits:
•Daily wipe-down: use a soft microfibre cloth to remove water spots before they dry.
•Avoid harsh chemicals: skip bleach, scouring powders and abrasive creams –they can dull or scratch the finish.
•Mild cleaning only: warm water and a drop of dishwashing liquid are ideal for routine cleaning.
•Polish with intention: for brushed or matt finishes, wipe with the grain, not against it.
•Protect moving parts: every few months, gently clean around the aerator to prevent limescale build-up.
•Deal with limescale safely: use diluted white vinegar on a cloth (never soak the tap) and rinse thoroughly.
•Keep it dry: regular drying prevents mineral marks, especially on darker or metallic finishes.
BEST TAP STYLES FOR SMALL BATHROOMS
Maximise function and keep the room feeling open with these space-smart choices:
•Wall-mounted mixers: free up countertop space and create clean lines.
•Monobloc basin mixers: one hole, one lever, minimal visual clutter.
•Slimline spouts: ideal for narrow vanities.
•Waterfall spouts: add a luxurious focal point even in compact bathrooms.
•Short-projection taps: prevent water splashing and keep small basins usable.
HOW TO MATCH YOUR TAPS TO YOUR TILE STYLE
Beautiful bathrooms come down to harmony. Use this quick guide:
•Marble or marble-effect tiles: pair with brushed brass, soft gold or chrome for timeless elegance.
•Cement/concrete tiles: matt black, gunmetal or brushed steel add industrial refinement.
•Subway tiles: chrome for classic; brass for modern heritage appeal.
•Textured stone: warm metallics bring out the natural tones.
•Glossy porcelain: mirror-polished chrome enhances shine; matt black creates contrast.
CREATING a smart home
You do not need a full renovation to enjoy the bene ts of a smart home. With readily available smart devices found at leading South African retailers, homeowners and tenants can upgrade their spaces in under an hour – no rewiring, no specialist installation and no long-term commitment. By Raina Julies
PROJECT 1: SMART LIGHTING AND PLUG CONTROL FOR EVERYDAY LIVING
• SKILL LEVEL: Beginner
• TIME: 30–45 minutes
• ESTIMATED COST: R500–R2000
• AVAILABLE AT: Major hardware, electronics and online retailers nationwide.
WHAT YOU’LL NEED
• Smart LED bulbs.
• Smart plugs.
• Stable 2.4GHz Wi-Fi connection.
• Smartphone with Android or iOS.
• Smart home app (Google Home, Amazon Alexa or Apple Home).
STEP-BY-STEP GUIDE
Step 1 choose your smart products Start with practical, everyday upgrades:
• Smart bulbs for living rooms or bedrooms.
• Smart plugs for lamps, heaters, kettles or coffee machines.
TIP
Sticking to one brand ecosystem helps simplify setup and ongoing use.
Step 2 install – no tools required
• Switch off the light or appliance.
• Replace the bulb or plug in the smart plug.
• Switch the power back on.
Step 3 connect using the product app
• Download the manufacturer’s app.
• Connect the device to your home Wi-Fi.
•Name each device by room for easy control.
TIP
Most products include QR codes or quick-start guides inside the box.
Step 4 set up smart routines Use the app to:
• Turn lights on at sunset.
• Schedule appliances to switch off automatically.
• Control devices remotely when you are away from home.
TIP
Voice control can be added via compatible smart speakers.
Why retail smart home DIY makes sense
• Budget-friendly entry point.
• No structural changes required.
• Ideal for rental properties, estates and townhouses.
• Supports energy-conscious living amid rising electricity costs.
• Products are widely available and easy to upgrade over time.
Easy add-on options
• Motion-sensor smart bulbs for passages.
•Smart door or window sensors.
•Smart power strips for home offices.
• Entry-level indoor smart cameras.
Pro tip for shoppers: Keep your original fittings and packaging. Smart devices can easily be removed and reinstalled if you move, making them a portable investment rather than a permanent fixture.
PROJECT 2: SMART MOTION SENSOR INSTALLATION
• SKILL LEVEL: Beginner
• TIME: 20–30 minutes
• ESTIMATED COST: R300–R1 200
• AVAILABLE AT: Major hardware, electronics and online retailers.
WHAT YOU’LL NEED
• Smart motion sensor (battery-powered or USB-powered).
• Stable 2.4GHz Wi-Fi connection.
• Smartphone with Android or iOS.
• Manufacturer’s app.
• Mounting adhesive or screws (usually included).
Choose sensors designed for indoor use unless the product is clearly rated for outdoor installation.
STEP-BY-STEP GUIDE
Step 1 choose the right location
Position the sensor where movement is most likely to be detected:
• At the entrance of a passage.
• Near bathroom doors.
• Overlooking a garage or entryway. Mount the sensor at chest height and avoid pointing it directly at windows, heaters or air conditioners, which can cause false triggers.
Step 2 install the sensor
• Clean the wall or surface with a dry cloth.
• Attach the sensor using the supplied adhesive strip or screws.
• Ensure it is firmly secured and facing the correct direction. Most sensors are wireless and do not require drilling.
Where motion sensors work best
• Passages and staircases.
• Bathrooms and guest toilets.
• Garages and storerooms.
• Home offices after hours.
Step 3 connect the sensor to the app
• Download the manufacturer’s app.
• Insert the batteries or connect the power supply.
• Follow the in-app instructions to connect the sensor to your Wi-Fi network.
• Name the device based on its location, for example, “Hallway Sensor”.
Step 4 pair the sensor with lights or devices
Using the app, link the motion sensor to:
• Smart lights.
• Smart plugs.
• Smart power strips. Set the sensor to trigger the device when motion is detected.
Step 5 set timing and sensitivity
Adjust the settings to:
• Choose how long lights stay on after motion is detected.
• Control sensitivity to avoid unnecessary activation.
• Set active hours, such as night-time only. These settings help save electricity and prevent nuisance alerts.
Pro tip: Test the sensor for a full day before finalising its position. Small adjustments to angle or height can significantly improve performance.
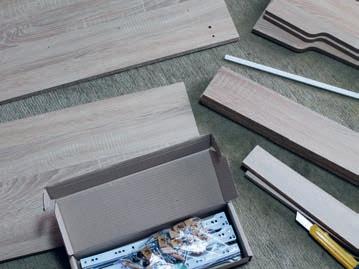
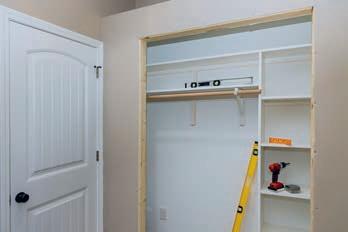
Converting a standard bedroom cupboard INTO A BUILT-IN wardrobe
Create a built-in wardrobe with simple framing, custom shelving, new doors and a awless painted nish. By Raina Julies
If you’ve inherited an old, free-standing melamine cupboard – or your existing built-ins are dated
– you can transform the space into a clean, contemporary wardrobe without calling in a contractor. This project walks you through safely removing old cabinetry, building a new carcass inside an alcove using drywall or ply boards, and finishing the upgrade with rails, shelving and new doors.
1
Removing old melamine cupboards safely
Before removing melamine, take a few safety precautions:
•Empty the cupboard completely and remove any loose shelves.
•Turn off power to the room if the cupboard is near plugs or wiring.
•Wear PPE: gloves, a dust mask and safety goggles.
•Unscrew the cupboard doors first, then remove handles and hinges.
•With a screwdriver or drill, loosen the screws connecting the cupboard to the wall.
•Use a pry bar to gently lift the unit away from the wall.
•Avoid excessive force to prevent plaster damage.
•Patch any holes left behind with interior filler and leave them to dry.
Once the space is clear, sweep and inspect the alcove for damp, uneven floors or cracked plaster.
2
Building new carcasses with drywall or ply boards
To achieve a built-in look, you’ll create a rigid wardrobe frame (carcass) inside the alcove.
Choosing materials:
•Drywall (gypsum board) is easy to cut and ideal for creating side panels or dividing sections inside wide alcoves.
•Plywood (18–21mm) is best for structural strength, shelving and internal compartments.
3
Steps
1. Measure the alcove carefully: height, width and depth. Most South African alcoves are around 600mm deep, perfect for hanging rails.
2. Using 38 × 38mm or 50 × 50mm pine, build a simple timber frame along the sides and top of the alcove.
3. Fix the frame into the walls using masonry screws and wall plugs suitable for brick or concrete.
4. Attach drywall or ply boards to the frame using drywall screws and seal joints with drywall tape and filler, then sand them smooth.
Adding rails, shelving and door runners
Now the basic structure is in place, it’s time to personalise the storage.
Hanging rails
• Standard hanging height: 1.6–1.7m for long garments, 1.1m for double hanging.
• Use heavy-duty metal rails with strong end supports, especially for winter coats.
Shelving
• Cut plywood shelves to the width of your carcass.
• Fix cleats (small timber strips) along the walls to support each shelf.
• Screw shelves into place for stability.
Door runners
If you plan on installing sliding doors:
• Buy a top-and-bottom runner kit, sized to your opening.
• Ensure the carcass sides are perfectly vertical – use a spirit level before installing runners.
• Fix the bottom track to the floor and the top track to the horizontal frame above the opening.
Finishing:
filler, sanding, priming and painting
To achieve a professional, fitted look:
1. Fill screw holes and gaps with wood filler or interior crack filler.
2. Once dry, sand all surfaces with 120- to 180-grit sandpaper for a smooth finish.
3.Apply a good primer especially on MDF which absorbs paint.
4. Paint with durable acrylic PVA or a satin wood paint for a crisp, modern look.
5. Install handles, adjust hinges or runners and touch up edges.
T923:
• Full Auto Ranging
• Full colour LCD display 5999 count
• Cat III 600V True RMS
• Diode, Capacitance and Temperature measurement
• Robust rubber casing with double insulated test leads and hard outer shell casing
and
T235H:
• Manual Selector Dial
• LCD display 1999 count
• Cat IV 600V True RMS
• Diode, Capacitance, Transistor and Temperature measurement