STM_Mako Laundry General Installation_and_Warranty 2025
We strongly recommend installation be performed by a PLUMBING PROFESSIONAL.
This product is fully warranted against faulty workmanship and materials. Inspect thoroughly before installation to confirm the product is undamaged.
The installer is responsible for any final door or drawer adjustments required after installation.
Inspect Your Product
Before installation, thoroughly check all components for any damage or defects that may have occurred in transit.
Do not proceed with installation if damage or faults are found — contact your merchant or St Michel Customer Service immediately. Note: Warranty does not cover removal, re-installation, or repair costs resulting from damage identified after installation has begun.
Check Your Site
• Ensure walls are plumb and floors are level.
• Confirm stud and nog locations to provide solid fixing points for wall and tall cabinets.
• Any wall the product is fixed to must be structurally suitable to support its weight.
• If installing on brick or concrete, seek advice on the correct fixing method from your hardware specialist.
Measure & Mark Services
Before positioning cabinetry, measure and clearly mark the locations of plumbing, waste, and electrical outlets. Use the appropriate hole saw size and consult a licensed plumber or electrician for all service connections.
Installation Tips
• Regularly check levels during installation.
• Remove doors and drawers during installation to prevent damage.
• Do not slide or drag cabinets — lift or use a trolley where possible.
• Adjust all doors and drawers after installation if required.
Important
Damage or faults resulting from incorrect installation, misuse, or lack of maintenance are not covered by warranty.
Ensure all installation and service work complies with current NZ building and plumbing codes.
IMPORTANT:
What You’ll Need (Not Supplied):
The following items are not supplied and must be provided by the installer:
Stages of Easy-Plumb Kit assembly and connection to sink
2A: Connect Waste Body & Overflow Kit to sink.
1
Stage 1
Stage 2
Stage 3
2B: Connect Space Saver to Waste Body.
• Sink
• Waste Body
• Overflow kit
• 40 to 50 Adaptor
Helpful Tip:
Once Step 1 is complete - turn sink upside-down to make Steps 2 & 3 easier.
2C: Connect Rinse Bypass Kit to space saver
• Y-Junction
2 3
Connect to 40 to 50 Adaptor
Apply O-Ring lubricant before inserting pipe
After completing all connections, if required, use wall brackets to secure to the back of cabinet
Cut this end to align with trap. Remove burrs & chamfer pipe end (allow 40mm engagement)
Stretch seal over end to sit square on shoulder
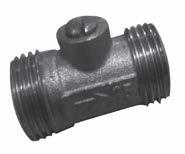
The sealed Spigot is to be drilled opened if required to drain condensing or heat pump dryer.
• 50 to 40 Reducer (if required)
• Flexible Hose
• Screwed Socket
Flexible Hose & Screwed Socket
Connect to cabinet*
Connect to Y-Junction
Helpful Tip:
*You’ll find installing the Easy-Plumb kit easier if you connect the Flexible Hose & Screwed Socket to the cabinet first (see Step 6C in Section 6).
After installing the sink and benchtop on to the cabinet, then attach the Flexible Hose to Y-Junction (see Fig 7D).
Section 3: Attaching top-mounted sink to benchtop
3A: Applying the Bench Seal
Adhere the supplied bench seal around the sink underside, being careful to lay it evenly and smoothly (without ridges).
Lay tape evenly and smoothly.
3B: Lower benchtop over the sink and lock Anchor
Carefully lower the benchtop onto the sink rim. Ensure it is the correct way up and tap hole is in correct location.
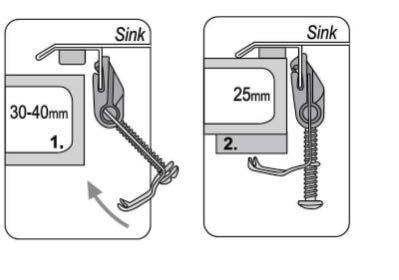
3C: Add wooden packer to adjust thickness
Insert a 15-25mm thick wooden packer (not included) between the benchtop and the Anchor Braces to achieve the required thickness.
3D: Secure the sink to the benchtop with the Anchor Braces.
After completing this section, attach the tap to the benchtop (see Section 5) before placing the benchtop and sink onto the cabinet. This will make connecting the tap much easier.
Anchor Brace (side view)
Anchor Brace fixed in position.
packer
Anchor Braces
packer (15-25mm)
packer (15-25mm)
Place the Anchor Braces on the basin tabs
Tighten the Anchor Braces’ screws with a hand screwdriver to secure the sink in place.
Braces
8 x Anchor Braces (use 6 for Mako 400 model)
Benchtop
Bench Seal tape
Use 15–25mm thick wooden packers (not supplied), cut to suit.
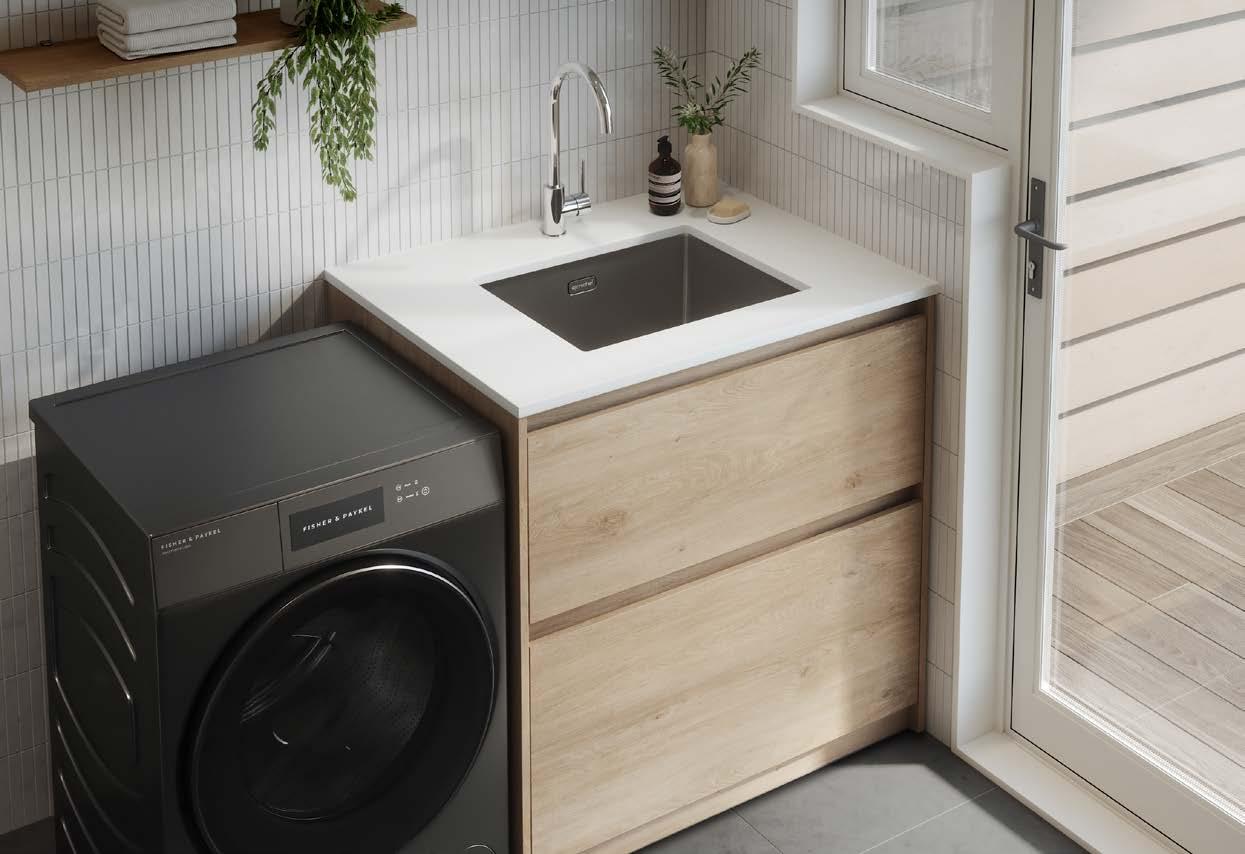
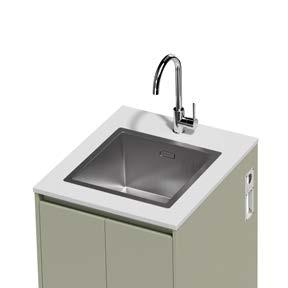
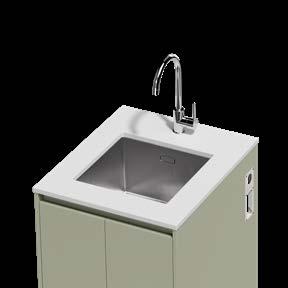
Top-mounted sink shown here
Section 4: Attaching under-mounted sink to benchtop
Apply silicon into sink location recess on benchtop underside.
4B: Lower sink into sink location recess.
Helpful Tip: Ensure taphole aligns with sink overflow to ensure correct position.
4C: Fit Brackets and align sink
Place the Fixing Brackets over the threaded sockets and loosely tighten into position using the Screws provided. Align sink into desired position
4C: Secure sink and remove excess sealant
Check that the sink is correctly aligned on benchtop. Tighten Screw Anchors with a Phillips screwdriver, take care to not over-tighten. Clean off any excess sealant around the edges.
Helpful Tip:
After completing this section, attach the tap to the benchtop (see Section 5) before placing the benchtop and sink onto the cabinet. This will make connecting the tap much easier.
4A: Silicone the rim underside
4 x Fixing Brackets
4 x Screws
Section 5: Connecting Miro Tap (if included in purchase)
Important – Please read all instructions before installation
This product must be installed by a qualified plumber.
Please read all instructions carefully before beginning installation.
This mixer is suitable for both equal and unequal pressure systems. It is configured at manufacture for mains pressure installations to comply with WELS requirements.
Refer to the instructions below for information on configuring for equal, unequal, or low-pressure systems.
This mixer is not suitable for gravity-fed systems and must not be used with uncontrolled heating systems such as wetbacks or solar units, unless a tempering valve is fitted.
5A: The hole dimension is 35mm
Before installation, ensure that:
• All pipework has been thoroughly flushed to remove debris.
• An inline filter is fitted to prevent foreign particles from damaging the ceramic cartridge.
To ensure optimum performance and customer satisfaction, please adhere to all installation and care instructions provided.
hole dimension is 35mm. & blue mark).
5B: Secure bolt to tap body
5A: The hole dimension is 35mm. & blue mark).
5C: Connect Hot and Cold Hoses
5A: The hole dimension is 35mm. & blue mark).
5A: The hole dimension is 35mm. & blue mark).
5A: The hole dimension is 35mm. & blue mark).
5D:
5D: Install Base Ring and Washers
5D:
Install the base ring, plastic washer, and metal washer as shown.
Fix the bolt to the bottom of body tighten it by screwdriver
5E: Secure bolt to tap body
Attach 2 x Flexible Hoses to water supply. Take out the aerator from the spout and flush the mixer.
TECHNICAL SPECIFICATIONS
Operating pressure
Min: 35kPa, Max 1000kPa
Recommended: 150 - 500kPa
Recommended installation of a pressure limiting valve if supply pressure exceeds 500kPa
Operating temperature
Cold: Min 5℃
The hole dimension is 35mm. & blue mark).
Hot: Max 75℃
NB: “New Zealand Building Code Clause
G12 - Water Supplies” specifies all outlets used primarily for personal hygiene shall deliver water at a safe temperature.
Inlet connections: All ½” BSP
INSTALLATION INSTRUCTIONS
Equal high pressure (mains) installations
Remove the high flow grey aerator and Flow Restrictor.
Unequal pressure or low pressure installation
Unscrew the ferrule and remove the Neopert flow restricted aerator. Replace it with the high flow grey aerator using the O-ring to seal. Install the flow restrictor to the cold supply.
Installation for sink mixer
A 35mm diameter hole is required in the bench top. The bench top cannot exceed 40mm thick Flow restrictor
Connect the flexible hoses as shown, ensuring the red and blue marks are correctly matched.
5F: Mixer operation
Helpful Tip:
Energy Saving & Safety features:
• Cold-start opening
When the lever is in the centred upright (cold) position, only cold water flows, reducing unnecessary hot-water use.
• Mid-stroke click at 38 °C
Provides tactile feedback at the comfort temperature to help prevent excessive heating and support user safety. This temperature is theoretical and must be set by the plumber on-site.
Section 6: Preparing for laundry cabinet installation
6A: Install Isolation Taps
Connect the 2 x Isolation Taps supplied to hot & cold water outlets.
Connect to sink tap
Connect to water outlet
1x red cap (HOT)
6B: Attaching Aperture and Blanking Plate
Seal around cabinet’s exposed edges of the aperture with appropriate sealant.
Attach Aperture and Blanking Plate to appropriate sides.
2 x isolation taps 1 x blue cap (COLD) Sealant (not supplied)
Zip Tie Provided to lock drain hose to aperture plate.
12 x Screws
6C: Connecting hose to cabinet
Aperture Plate: Fit on the appliance side for drain hose or and water inlet hose.
Blanking Plate: Fit to cover unused opening.
Use Screwed Socket to attach Flexible Hose to laundry cabinet side (both parts supplied with Rinse By-Pass Kit).
6D: Position cabinet
Clip on HOT or COLD cap
Remove cap to connect to washing machine
Zip tie provided to lock drain hose to aperture plate.
Plate
6E: Level cabinet
Locate laundry cabinet into position to align with plumbing 1 x Hex Key Supplied with cabinet 4 x black cover caps Supplied with cabinet
To level cabinet adjust feet height with hex key (access holes are inside the cabinet). Fit caps to cover holes.
Flexible Hose
Screwed Socket Attach
Attach Plate
Section 7: Installling laundry cabinet
7A: Fix cabinet to wall
Fix cabinet to wall through back plate. Use packers if wall is not square.
Helpful Tip:
It’s easier to feed the washing machine drain hose through the Flexible Hose before connecting the Flexible Hose to the Y-Junction
Once the drain hose is visible at the base of the Flexible Hose, connect the Flexible Hose to the Y-Junction
7B: Apply silicone to cabinet top edges
Apply a bead of silicone to the top edges of cabinet to fix benchtop onto cabinet.
7C: Lower benchtop into position
7D: Connect tap hoses and Flexible Hose
Connect tap hoses to appropriate isolation taps.
Connect Flexible Hose to Y-Junction
Carefully lower benchtop, with sink and Easy-Plumb kit attached, into place.
IMPORTANT:
Two people should perform this task to avoid injury or damage.
S-trap here
Important:
Have a dryer?
If your dryer requires drainage, drill out the sealed Spigot on the Y-Junction before attaching the Flexible Hose.
S-trap here
NOTE: Spigot Hose Clamp is not provided. Y-Junction
Sealed Spigot
Section
8:
Seal unit to wall & final door or drawer adjustments
8A: Apply sealant along back edge of unit
Apply a continuous bead of waterproof sealant along the seam where the benchtop and cabinet meet the wall.
Smooth the bead for a neat finish, ensuring complete coverage along the entire back edge. Allow the sealant to cure fully before use.
The materials used in this unit are water resistant, not waterproof. To prevent water from getting behind the unit, always seal all edges and joints where moisture exposure may occur.
8B: Final doors and drawers fitting & adjustment
Install drawers & doors back onto the cabinet refer to Section 9 & 10 for door and drawer installation and alignment.
Correct placement of drawers / doors
NOTE: Ensure doors & drawers are replaced back in the same position.
Incorrect placement of drawers / doors
Section 9: Reinstalling & adjusting doors
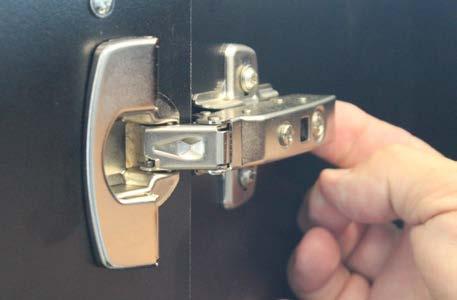
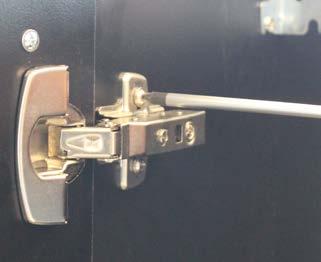
Unclipping Hinge
Door Removal and Reinstallation
1 Support the door’s weight.
2
To remove, start with the top hinge and work down, pressing the release clip at the back of each hinge to unclip as shown in photo.
3 To reinstall, support the door, align each hinge mount, and press until it clicks securely into place.
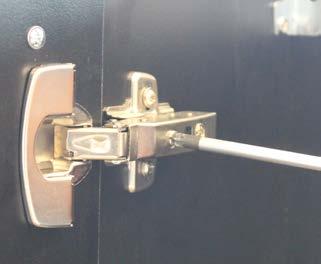
Side adjustment
To move doors sideways or to level each door - turn screw A Clockwise or Anti Clockwise.
Depth adjustment
To move the door inward or outward from the carcass - turn screw B Clockwise or Anti Clockwise
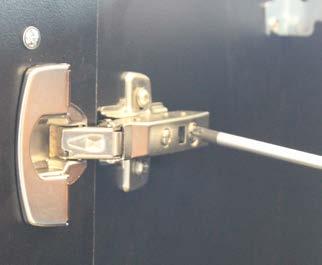
Height adjustment
Loosen the top and bottom screw C on each mount plate, adjust door height by moving door up or down, then re-tighten C screws
NOTE - The fitting & adjustment of door & drawers is the responsibility of THE INSTALLER
9A: Reinstalling doors
9B: Hinge Adjustment
Section 10: Reinstalling & adjusting drawers
10A: Removing drawer
Remove drawers carefully by releasing the runners and lifting the drawer clear of the unit:
Press grey levers inward while pulling drawer out
10B: Inserting drawer
Lift drawer up and out
Insert drawer on an angle
Fit the drawer onto the runners at a slight angle, then push in until you hear a double click as the catches engage.
It is automatically connected to the runner by two catches. Listen for a double click
See video instructions at: stmichel.co.nz/resources/installation-specification/
Adjust the drawer front for height, side and tilt as needed, then secure the settings in place.
10C: Remove Caps
10D: Height adjustment (drawer front)
10E: Side adjustment (drawer front)
Remove caps for adjustment & replace when you have finished.
Warning: Avoid pushing the blue button - this will cause the drawer front panel to detach
10F: Tilt adjustment (drawer front)
Height adjusted by using thumb wheel left & right ± 2mm
Side adjustment on right hand drawer profile only ± 1.5mm.
10G: Permanently set adjustment
Slide the end cap on the rail to access the adjustment hole. Insert screwdriver into the hole and rotate gently to adjust the drawer front tilt.
Use screw supplied (taped under drawer) to permanently fix adjustment in place. This will close any gap at the front of drawer.
Tilt direction when adjusting the drawer front
11A: Care & Maintenance Guide
St Michel products are made from materials well suited to the laundry environment. However, it’s important that your laundry space is well ventilated to reduce moisture build-up. High humidity can lead to permanent dampness and mould, which may cause deterioration of materials over time.
11B: Benchtops
Cherry Pie® Solid Surface Benchtop Surfaces
St Michel’s Cherry Pie® solid surface benchtops are crafted from high-performance solid-surface acrylic designed for durability, easy maintenance, and a timeless finish. When maintained correctly, your Cherry Pie® surface will continue to perform to a high standard, retaining its finish and integrity over time.
Everyday Care
Most dirt or residue will simply wipe away with a damp cloth and mild soapy water. Rinse with clean water and dry with a soft cloth to prevent streaks. Avoid harsh or abrasive cleaners that contain acids, chlorine, ammonia, or caustic agents. Always check the cleaner label to ensure it’s safe for use on acrylic surfaces.
Heat Protection
Do not expose the benchtop or wash sink to water or heat above 55 °C. Cherry Pie® solid surface will withstand moderate heat; however, sudden or prolonged direct heat can cause damage. Do not place heat-generating devices directly on the surface or leave them operating close to the benchtop for extended periods
Staining
Cherry Pie®, unlike marble and granite, is non porous and will resist most household chemicals such as cosmetics, however, some chemicals and strong dyes can cause damage and discolouration. If spillage occurs, wipe up immediately and rinse area thoroughly.
Minor Scratching
Take care with sharp household utensils and ceramic accessories (particularly unglazed bases, avoid sliding). More serious scratches can be removed by a professional using an orbital sander and then re-polishing to restore.
Helpful Tip
Stubborn lime-scale marks can often be removed using Restorex (available at restorex.co.nz) or Bar Keeper’s Friend These products should be used occasionally and sparingly.
11C: Cabinetry & Accessories
St Michel cabinets are manufactured from high-quality, locally sourced materials. These materials are water-resistant, not waterproof, so care must be taken to prevent moisture damage.
To ensure the long life of your cabinet:
• Do not allow water to remain on cabinet surfaces.
• Sponge off and dry any water spillages, leaks or flooding in or around the cabinet immediately.
• Keep heat sources away from cabinetry.
• Avoid contact with metal or other sharp objects that could scratch or damage the surface.
Cleaning Guidance:
Avoid abrasive cleaning agents or those containing ammonia, bleach or strong solvents. We also advise against using furniture polish, acetone, ethanol, benzene, or coarse cleaning sponges. Always check the cleaner’s label to confirm it is safe for use on your cabinet material.
Regular Cleaning:
• Use a soft cloth wrung in hot water with a mild all-purpose cleaning agent.
• Cabinetry with textured or structured surfaces should be cleaned along the surface grain to remove dirt effectively.
• Finish by wiping with a clean, damp cloth to remove residue and prevent streaks or stains.
11D: Stainless Steel Sinks
St Michel stainless steel sinks are fabricated from highgrade 304 brushed stainless steel and designed for everyday use in laundry environments.
Everyday Care
After use, wipe your stainless steel sink with a soft, damp, soapy cloth. Rinse thoroughly and dry with a soft cloth to help prevent water marks and streaks. For regular cleaning, use a mild detergent and a soft cloth.
Hard Water Areas
Please note “hard water” can cause a build up of light grey film on the steel causing a discolouration. To remove this, apply a mild abrasive cream cleaner (such as Jif) with a nonscratch scourer to lift marks and restore the shine.
Avoid
• Do not use wire wool, steel wool, or abrasive cleaners, as they can leave fine metal particles that may rust.
• Avoid harsh chemicals such as bleach, caustic soda, silver dip, drain cleaner, or other strong solvents. If contact occurs, rinse the surface immediately and dry thoroughly.
Section 12: Troubleshooting
Problem Likely Cause Solution
I have noticed damage on my product. Should I install it?
I can’t find sink/cabinet dimensions & specifications for my cabinet
My sink has limescale marks. How do I get rid of them?
How do I go about processing a service request?
I need some spare parts for my product. How do I get them?
My softclose drawer is not closing properly
Local water supply and/or sink has not been regularly cleaned
No - advise the contact you purchased the product from before proceeding with the installation
Find all our specifications by locating your laundry model at stmichel.co.nz or call us on 09 837 4276
We recommend regular cleaning to avoid limescale build up. For occasional cleaning to remove stubborn limescale Restorex or Bar Keeper’s Friend
Refer to warranty information - Section 13
Either call your retailer or give us a call on 09 837 4276 with your spare part requirements
I’m not sure what I should clean my sink and cabinet with.
Incorrect installation or an obstruction is preventing the drawer from closing
Check that there is nothing obstructing the drawer such as plumbing or a tap hose
Check that the drawer box has been installed correctly - Section 10
Check that the cabinet is installed correctly i.e. level & wall is plumb - see Section 1 and consult your installer
Mild detergent and warm water as per Section 11 of this guide.
Section 13: Warranty
*Residential Warranty applies to any St Michel products being utilised in a normal domestic capacity.
* Commercial Warranty applies to any St Michel products installed in a commercial situation. Commercial situations are defined as public washrooms, public buildings, schools, sports centres, gymnasiums, hospitals, motels, hotels and retirement villages.
What is covered
Subject to conditions of use. We warrant our products to be free of substantial defects in materials and workmanship for the warranty period above, from the original date of purchase. This is in addition to the conditions and guarantees of the Consumer Guarantees Act (1993)
In the event of a substantial defect in materials or workmanship, we will, at our sole discretion, repair or replace the defective product or provide a refund up to the original purchase price of the product.
What is not covered by this warranty
• Defects resulting from use other than normal residential use, or resulting from the product not being used or cared for in accordance with the Care & Maintenance - section 5
• Defects that have been caused by accident, abuse, neglect or misuse including (but not limited to) any form of damage including water damage, sink defects caused by water temperature in excess of 55°C. Defects resulting from humidity or other environmental conditions or any Act of God
• Defects caused by improper installation. The relevant St Michel installation instructions must have been strictly followed, and the product installed in accordance with the relevant building and plumbing codes and in a good tradesman like manner. We recommend that the product is installed by a Licensed Building Practitioner or Registered Plumber. Electrical installation must be carried out by a registered electrician.
• Claims by the customer, or anyone claiming through the customer, for labour, material, or any other costs incurred in removed defective goods and refitting any replacement.
• Noise or vibration that is normal for that particular product, e.g. drawer runner or hinge opening and closing sounds
• Damage caused by overloaded drawers or shelves
Please be aware that in keeping with our policy of continuous improvement, St Michel reserves the right to change the specification in design and materials without notice and with no obligation to refit products or components as previously manufactured.
How to make a claim
If you wish to make a claim against your warranty, please do so by completing the online Warranty Service Request form by visiting our website page www.stmichel.co.nz/resources/warranty-care
Once we receive your claim we will review it and may contact you for further information. Once we have assessed the claim and determined that it is the result of a defect covered by the warranty, we will arrange for the repair, replacement or refund that we determine to be the best solution.
Please also be aware that if once we visit the site to investigate or repair the product and find that it is not in fact a defect or product fault and therefore not covered by this warranty, that we may charge for the time and travel incurred
INSTALLERS MAY BE LIABLE
Installers need to know that under the Consumer Guarantees Act (CGA) they are responsible for any product they supply AND/OR install.
If a Homeowner supplies a product which you believe is not up to the job, you must say so.
If a product or service, provided by you, fails any CGA guarantees, the Consumer can ask for the job to be fixed at no extra cost. If the repair takes more than a reasonable time to fix, the Consumer can arrange the repair and claim the cost from you, or cancel the job and refuse to pay for the work done.
ALSO if the work has caused other loss or damage, you may also be liable for consequential loss. Always buy a recognised brand from a recognised merchant. WWW.PDANZ.ORG.NZ