THE WORLD’S BEST RECORDING TECHNOLOGY MAGAZINE
CELEBRATING 40+ YEARS 1985 — 2026 TM
MUSIC PRODUCTION TECHNIQUES / INDEPENDENT IN-DEPTH PRODUCT TESTS / ENGINEER & PRODUCER INTERVIEWS / LIVE SOUND
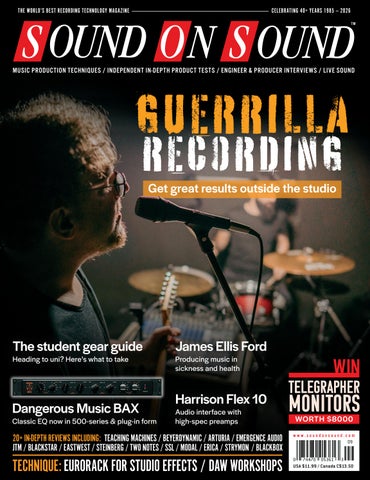
GUERRILLA RECORDING Get great results outside the studio
The student gear guide Heading to uni? Here’s what to take
Dangerous Music BAX
Classic EQ now in 500-series & plug-in form
James Ellis Ford Producing music in sickness and health
Harrison Flex 10 Audio interface with high-spec preamps
20+ IN-DEPTH REVIEWS INCLUDING: TEACHING MACHINES / BEYERDYNAMIC / ARTURIA / EMERGENCE AUDIO JTM / BLACKSTAR / EASTWEST / STEINBERG / TWO NOTES / SSL / MODAL / ERICA / STRYMON / BLACKBOX
TECHNIQUE: EURORACK FOR STUDIO EFFECTS / DAW WORKSHOPS
TELEGRAPHER
MONITORS WORTH $8000
www.soundonsound.com
USA $11.99 / Canada C$13.50
www.ilio.com
800.747.4546
LE ADER
LOCATION LOCATION LOCATION S
ome of the most fun recording sessions I’ve been involved with have happened outside the studio. However, recording on location isn’t only fun. It’s also a great learning experience for everyone involved. Every guerrilla recording session I’ve done has taught me something of lasting value. Most of all, location recording brings home to me how much effect the immediate environment has on what gets recorded. I’m not just talking about acoustics here, although that’s undoubtedly important. I’m thinking of the ways in which our surroundings influence our behaviour. For example, I’ve recorded in churches and chapels, but also in primary school classrooms. In both cases, the choice of venue goes a long way towards determining the vibe of the session. Places of worship instil a sense of respect and humility, even in artists who’ve never been to church in their lives. Going back to school triggers nostalgia, playfulness, and sometimes rebellion. I’m not sure I’d go to the lengths of seeking out murder sites or abandoned asylums to record in, but if you make a particular kind of music, I can well imagine that doing so would contribute to the desired atmosphere. Studios too exert a psychological influence, though familiarity can make this easy to overlook. How many other creative workspaces are routinely
SOUND ON SOUND LTD (HEAD OFFICE) ALLIA BUSINESS CENTRE KING’S HEDGES ROAD CAMBRIDGE, CB4 2HY, UK T +44 (0)1223 851658 sos@soundonsound.com www.soundonsound.com
built without natural light? And what is the impact of that decision on artists? Recording facilities in educational institutions are often well equipped, but they’re usually bland, impersonal, corporate environments. If no great records have been made in music tech departments, that’s not solely down to the artists or the production team. Familiarity also makes it easy to ignore the ways in which studio design and layout shapes our own behaviour as engineers and producers. How many of our decisions are guided solely by sonic considerations, and how many by what’s easier or more convenient in our particular circumstances? Did we place that synth at the top of the rack because it’s our favourite, or do we use it most often because it happens to be at the top? Do we always set the drums up in that particular spot because that’s where they sound best, or just because we can easily see the drummer through the control-room glass? Leaving the comfort of the studio forces us to focus on what really matters: getting the best possible performance from the artist, and capturing it in a compelling way. And shouldn’t that always be the priority wherever we record? Julian Rodgers has distilled many years’ experience of location recording in his invaluable cover feature this month — and even if you never set foot outside the studio, it should be required reading.
“Leaving the comfort of the studio forces us to focus on what really matters: getting the best possible performance from the artist, and capturing it in a compelling way.”
ADMIN IS T R AT IO N
ADV ER T ISIN G
sos.feedback@soundonsound.com
admin@soundonsound.com
usadsales@soundonsound.com
Editorial Director Dave Lockwood Executive Editor Paul White Editor In Chief Sam Inglis Technical Editor Hugh Robjohns Reviews Editor David Glasper Reviews Editor Matt Houghton Reviews Editor Chris Korff Production Editor Chris Korff News Editor Luke Wood
Managing Director/Chairman Ian Gilby Editorial Director Dave Lockwood Marketing Director Paul Gilby Finance Manager Keith Werthmann
North America Sales Manager Dan Brown Regional Sales Manager David Carson UK Media Sales Manager Chris Cope
S UB S CR I P T I ON S subscribe@soundonsound.com www.soundonsound.com/subscribe
WOR L DW I D E E D I T I O N S
Circulation Manager Luci Harper Administrator Nathalie Balzano
P R ODUC T I ON
M AR K E T IN G marketing@soundonsound.com
O N LIN E support@soundonsound.com Digital Media Director Paul Gilby Design Andy Baldwin Web Content Editor Callum Hall Web Editor Adam Bull Digital Media Manager Atheen Spencer www.soundonsound.com twitter.com/soundonsoundmag facebook.com/soundonsoundmag instagram.com/soundonsoundmag
graphics@soundonsound.com
UK/WORLD
Editor In Chief
E DI T OR I A L
WWW.SOUNDONSOUND.COM/SUBSCRIBE
NORTH AMERICA
Sam Inglis
Production Manager Michael Groves Designer Mick Reilly Designer Andy Baldwin
DIS T R IB U T IO N distribution@soundonsound.com
International Business Development Nick Humbert
Printed in the USA Not for re‑sale outside North America
ISSN 1473‑5326 A Member of the SOS Publications Group The contents of this publication are subject to worldwide copyright protection and reproduction in whole or part, whether mechanical or electronic, is expressly forbidden without the prior written consent of the Publisher. Great care is taken to ensure accuracy in the preparation of this publication but neither Sound On Sound Limited nor the Editor can be held responsible for its contents. The views expressed are those of the contributors and not necessarily those of the Publisher or Editor. The Publisher accepts no responsibility for the return of unsolicited manuscripts, photographs, or artwork. © Copyright 2026 Sound On Sound Limited. Incorporating Music Software magazine, Recording Musician magazine, Sound On Stage magazine, SPL magazine, Sound Pro magazine and Performing Musician magazine. All rights reserved. All prices include VAT unless otherwise stated. SOS recognises all trademarks.
September 2026 / www.soundonsound.com
3
20 YEARS OF ACOUSTIC RESEARCH INTO ONE SOLUTION.
www.trinnov.com
96 THE MODULAR STUDIO
IN THIS ISSUE
www.soundonsound.com
September 2026 / issue 11 / volume 41
FEATURES 68 Modular
C
O V
E
R
Luke Sanger talks about his love of the Make Noise Shared System, SuperCollider, and the innovation of the Eurorack scene.
88 Guerrilla Tactics:
Tracking Bands Outside The Studio
When the point of a recording is to capture the live energy of a performance, conventional studio spaces and techniques aren’t always the best option.
WIN
TELEGRAPHER RACOON & CARBON FOX MONITORS WORTH $8000
96 The Modular Studio Not just for synthesis, Eurorack can be a versatile addition to the traditional recording setup. We look at what modular can offer and how to use it in the studio.
114 The Student’s Studio Starting a music production course this autumn? Read our essential guide to setting up your first home studio.
119 How I Got That Sound
PAGE 48
Jonny Solway explains how he got the super‑dry drum sound on Demob Happy’s track ‘Autoportrait’.
120 Inside Track: James Ellis Ford When illness threatened to end James Ford’s stellar production career, he responded with a unique solo album recorded from his hospital bed.
128 RTM & The 21st Century Tape Revival We track the analogue renaissance back to its source: Europe’s last remaining factory manufacturing magnetic tape.
6
September 2026 / www.soundonsound.com
134 Mark Fell Driven by curiosity, Mark Fell’s unique approach to technology has shaped a long and adventurous career in electronic music.
146 Why I Love... Mixing In The Box Paul White describes his journey from outboard racks to Apple Macs.
60 SOLID STATE LOGIC ODYSSEY
ON TEST
54 Erica Synths Bullfrog Drums
32 Arturia Pigments 7
84
14 8
28 Steinberg SpectraLayers Pro 13 Spectral Editing Software
Arturia Rev Ocean
140 Handcrafted Audio
80 Strymon TimeLine MX Multi-delay pedal
Reverb Plug-in
Handcrafted Mallets
beyerdynamic DT 30 IE
Sample Library
26 Teaching Machines FuzzBillion
Harrison Flex 10
Multi-voice Distortion Processor
76
Blackbox Analog Design HG-Q Blackstar Beam Mini
USB Audio Interface
16 Julian Michael Technologies
Plugin Station
Portable Guitar Amp
140 The Crow Hill Company
Brackish Pads
Plug-in Management Utility For Mac
50 Modal Element One Polyphonic Synthesizer
Sample Library
42 Dangerous Music BAX Analogue Hardware & Plug-in Equaliser Range
22 EastWest DrumX Sample Library
12
Sample Library
Microphone Preamp
Stereo Equaliser & Valve Saturator
18
Franklin Audio MP-10
142 Sound Dust Drift Clouds
Software Synthesizer
In-ear Monitors
70
Drum Machine
Emergence Audio Envoy Virtual Percussion Instrument
67
86 T-Rex Fuzztopia Dual Distortion & Fuzz Pedal
36 Two notes Captor X+ Reactive Load & Guitar Cabinet Emulation
66 Zlosynth Arplus Eurorack Module
Mylar Melodies RANDOM8 Eurorack Module
85 Neural DSP Darkglass Ultimate Bass Guitar Rig Modelling Plug-in
60 Solid State Logic Odyssey Digitally Controlled Analogue Mixing Console
WORKSHOPS 100 Pro Tools 102 Cubase 106 Studio Pro 110 Reaper www.soundonsound.com / September 2026
7
ON TE ST
beyerdynamic DT 30 IE In-ear Monitors
MARK GORDON
B
eyerdynamic have long been associated with professional monitoring, and products such as the iconic DT 100 headphones have been a mainstay of the recording studio since the 1970s. More recently, the company have turned their attention to in-ear monitoring with the DT 7 IE series, offering models tailored to different monitoring applications: the DT 71 for drums and bass, the DT 72 for guitar and voice, the DT 73 for classical instruments and keyboards, and the DT 70 (reviewed in SOS June 2025) for mixing and critical listening. The new DT 30 IE takes a rather different approach. Instead of being aimed at a specific type of performer, it is designed as a universal stage monitor that delivers beyerdynamic’s monitoring experience at a more affordable price. Entering a fiercely competitive market populated by well-established rivals, the DT 30 IE promises professional performance through a straightforward formula: a compact, universal-fit design, a single 11mm dynamic driver, detachable MMCX cable and a claimed passive isolation of up to 39dB. So, has the company’s considerable experience at the premium end of the
8
September 2026 / www.soundonsound.com
Beyerdynamic’s affordable new IEMs go to show that sometimes it pays to keep things simple. market filtered down into a genuinely capable IEM for everyday musicians?
Small Package The DT 30 IE arrives in a compact, well-presented package, complete with a robust hard-shell carry case that feels more than capable of surviving life in a gig bag. Inside, beyerdynamic include six pairs of ear tips: three sets of silicone tips and three pairs of memory-foam tips, in different sizes. The inclusion of both materials is particularly welcome, as not only is comfort a very personal thing, but achieving a good seal is fundamental to getting the best performance from any in-ear monitor. Removing the DT 30 IE from the case, the first thing that struck me was just how small the earpieces are. Beyerdynamic say the physical design was informed by hundreds of ear scans to achieve a secure, comfortable fit, and judging by my initial impressions, they appear to have achieved exactly that. This isn’t only visual, either. Having reviewed several in-ear monitors over recent years, including models employing multiple balanced-armature drivers, I was surprised by just how compact the
DT 30 IE feels. The low-profile shells sit comfortably within the ear, protrude very little and immediately give the impression of a product designed with practical stage use in mind. The over-ear cable routing helps keep the earpieces securely in place, and the detachable MMCX cable itself is reinforced with Kevlar to improve durability — a reassuring feature for equipment that’s likely to spend much of its life being repeatedly packed, unpacked and used on stage. One possible reason for the compact form factor is beyerdynamic’s decision to employ a single 11mm dynamic driver rather than the multiple balanced-armature or hybrid configurations that have become increasingly common at this price. Whilst driver count has become something of a marketing battleground in recent years, more drivers does not automatically equate to better performance.
Fit Matters Before discussing how the DT 30 IE sounds, it’s worth pointing out that reviewing any in-ear monitor presents a unique challenge. Not only is our
Grace Design m300 series DI owners are quick to mention their huge headroom and extra-deep low-end. And that regardless of how cranked a keyboard or active bass is, they handle any signal that comes their way without breaking a sweat. We attribute this not only to our expert power supply and circuit design, but also the amazing Lundahl custom transformers we’ve designed in. These DI’s just hold together no matter what gets thrown their way, and everything comes out rock-solid, clear and musical. Find out more about this bottomless(ness) for yourself at gracedesign.com.
“The bottom line is, if you want a direct box that is dimensional, clean and robust, and lets the nuances of your instrument and the performance shine clearly, I highly recommend checking out the m303.” — Paul Vunk Jr. / Recording “Having used the DI on a range of instruments now, I can tell the m303 will become my go-to workhorse in the studio. Its transparency and low distortion characteristics give me the flexibility I’m looking for when I want to capture an honest and true sonic picture.” — Danielle Goldsmith / TapeOp “I’ve used and owned a lot of DI boxes over the years, and I can genuinely say that the m303 is the best I’ve ever heard.” — Hugh Robjohns / SOS
s s e l m o t t o b
ON TE ST
BEYERDYNAMIC DT 30 IE
perception of sound inherently subjective, but the performance of any IEM is heavily influenced by factors such as ear shape, tip selection and, perhaps most importantly, achieving a good seal. Without a secure fit, bass response can appear noticeably lighter and the overall tonal balance can change significantly. For that reason, it’s well worth spending time experimenting with the supplied ear tips and ensuring a good fit is achieved. Once correctly fitted, I found the DT 30 IE both comfortable and secure, providing an impressive level of isolation that creates a stable monitoring environment without ever feeling intrusive.
One Driver, Different Philosophy As I mentioned, the DT 30 IE uses a single 11mm dynamic driver, a design choice that differs significantly from many of its competitors. My reference IEMs — the ACS Evoke 2 custom moulds — employ dual Knowles balanced-armature drivers, representing a very different approach to reproducing sound. Balanced-armature drivers have become popular for professional monitoring because of their efficiency, detail retrieval and excellent midrange clarity. They often deliver an immediate and highly articulate presentation that makes it easy to distinguish vocals, snare attack and other important elements within a busy monitor mix. A dynamic driver, by comparison, reproduces the entire frequency range
The DT 30s employ traditional full‑range moving-coil drivers, eliminating the need for crossovers.
10
September 2026 / www.soundonsound.com
from a single diaphragm. This removes the need for multiple drivers and crossover networks and can result in a more cohesive and integrated presentation. Whilst implementation is ultimately more important than driver type alone, dynamic-driver IEMs are often associated with a smoother, more natural and more ‘speaker-like’ sound. With a nominal impedance of 18Ω, the DT 30 IE is easy to drive from virtually any source, whether that’s a wireless IEM system, a mixer’s headphone output or a dedicated headphone amplifier.
Hearing Test My initial listening impressions immediately suggested a different character to the ACS Evoke 2. The DT 30 IE sounded noticeably more polite, with less emphasis on the midrange and an overall sound that felt rather more hi-fi in nature. Compared with the ACS, which places vocals and other mid‑frequency information firmly at the forefront, the beyerdynamic system offers a slightly more relaxed and less analytical presentation. Rather than drawing attention to individual frequency ranges, the sound feels cohesive, allowing instruments to blend naturally, while remaining clear and well balanced. This certainly shouldn’t be seen as a criticism. The smoother balance makes the DT 30 IE an extremely pleasant IEM to listen to, particularly over longer periods, when an overly aggressive upper midrange can become fatiguing.
On Stage Of course, listening to recorded material is one thing; using an IEM in the environment for which it was designed is another. When I tested the DT 30 IE during a live performance, my initial listening impressions were largely reinforced. Compared with my ACS custom moulds, the DT 30 exhibited a slightly fuller low end, while the midrange remained less forward. The result was a smooth, relaxed
presentation that was enjoyable to listen to throughout the performance. As a drummer, however, I did notice one subtle difference. My monitor mix includes a click track and spoken vocal cues, and these felt just a little less immediate than they do through my ACS monitors. It certainly wasn’t difficult to hear them, but I was slightly more aware of having to concentrate on these elements, particularly during the first few songs. Whether this is a positive or negative will depend very much on your role within the band. As the only member of my group monitoring a click track, I’m asking rather different things of an IEM from, for example, a guitarist or vocalist. Those looking for a more natural and less analytical presentation may well prefer the DT 30 IE’s smoother tonal balance, while performers who rely heavily on hearing transient detail or spoken cues may favour a more forward midrange. Beyerdynamic have resisted the temptation to join the specification race, instead producing a compact, well-built IEM that prioritises comfort, practicality and a balanced, enjoyable sound. While performers who rely on hearing every last detail in a complex monitor mix may prefer a more forward presentation, the DT 30 IE strikes an excellent balance between accurate stage monitoring and musical enjoyment. Its compact fit, impressive isolation, robust construction and refined sound all combine to produce an IEM that performs well beyond what its modest asking price might suggest. Whether you’re taking your first steps into in-ear monitoring or simply looking for a dependable universal-fit IEM, the DT 30 IE deserves a place on the shortlist.
summary Beyerdynamic’s DT 30 focuses on the qualities that matter most in everyday use: comfort, durability, isolation and a balanced sound. The result is an IEM that feels every bit like a professional monitoring tool, but at a price that puts it within reach of almost any working musician.
$ $149.99. T beyerdynamic USA +1 631 293 3200 E info@beyerdynamic-usa.com W www.beyerdynamic.com
Expert advice, award-winning service, and the world’s best brands.
For nearly 50 years, Sweetwater has helped millions of customers find the perfect gear. Give us a call and discover how our deep product knowledge, legendary customer support, and superior selection can transform your shopping experience.
Sweetwater.com/recording (800) 222-4700
Personalized Advice & Support
Free 2-year Warranty
Fast, Free Shipping
Payment Options for Every Budget
Highly trained Sales Engineers and on-site support team.
Buy with confidence, knowing we have your back.
Most orders leave the same day.
Flexible payments and up to 48-month financing.
ON TE ST
Emergence Audio Envoy
Virtual Percussion Instrument Percussion lacking a certain something? Emergence Audio’s new Envoy instrument could be just the thing... JOHN WALDEN
E
mergence Audio have built quite a fan base within the film and media composer community. This is primarily built around their Kontakt-based libraries that combine the company’s bespoke Infinite Motion Engine with a specific sample-based instrument. Many of the instrument sources might appear fairly conventional — violin, cello, flute, piano, guitar, for example — but the engine means that those sounds are playable in some unique and often textural ways. With some 18 titles currently built around the Infinite Motion Engine, Emergence Audio have now developed a new engine — the Cadence Engine — which they describe as a ‘Rhythmic Variator’. The first product that utilises this new engine is Envoy. The underlying sample library features some 600 analogue percussive synth and Eurorack sound sources and occupies approximately 2.5GB of drive space. It requires Kontakt 8.1 (or later) to run but will also work with the free Kontakt Player.
Make It Flow The Cadence Engine features two identical sound layers. Each layer can hold its own sound preset from the Envoy sample library and,
12
in very broad terms, these consist of low, mid and high (in a frequency sense) percussive sounds. Each layer also has its own sequencer, sophisticated randomisation options, envelope, modulation and effects chain. There is also a Master Effects section. It’s the sequencing engine where things get really interesting. Each layer can be set to a different step count, rate, direction and feel, and this means you can just as easily create polyrhythms as you can standard rhythms. In addition, each of the sequencing engines is divided into four ‘blocks’, each with up to eight steps, but the step count can be set independently within each block. You can also set velocity, pitch, length, pan and a combi low-pass/ high-pass filter independently for each step within each layer. A master LFO provides modulation options and, if required, its rate can be set independently from that of the sequencers. Even with a static configuration, triggering the two layers can create some very interesting rhythmic options. However, the icing on the rhythmical cake is the Flux Randomizer. This allows you to apply a user-defined degree of randomisation to every parameter lane within the step sequencer, and it can be enabled for all four
September 2026 / www.soundonsound.com
blocks of the sequencer, or just for selected blocks. Again, these randomisation options can be applied independently for each layer. With low Flux Randomizer percentage values, the changes add subtle variation that just feels ‘human’, and you can wind it up from there, eventually arriving at more experimental or unsettling results. I’ve barely scratched the surface here but, once you get the hang of it, it’s both impressive and rather addictive.
In A Heartbeat You know those ‘heartbeat and ticker’ rhythms that always have you on the edge of your seat in modern drama, crime and action TV/film scores? If I had to briefly give a sense of what Envoy’s sounds — driven by the Cadence Engine — can do, then that would capture the essence of it, although there’s lots more besides. You actually get four versions of the Kontakt front end — Omni, Zoned, Split Omni and Split Zoned — each of which presents you with the sound presets mapped in different ways
across the keyboard. This gives you plenty of options, from easy, one-finger, triggering of both layers, through to split triggering and the ability to load multiple percussive sounds for triggering by each layer for additional sonic variation. Even a quick look at the UI will tell you that the Cadence Engine is going to come with something of a learning curve. The PDF documentation is a must-read when getting started but it’s well worth the investment of time. While Envoy is not a casual purchase, working film and media composers will love it. Yes, it is something of a niche sound set, but it’s deep, powerful and rhythmically creative. I’m already impatient for the next Cadence Engine product, but Envoy provides a very impressive debut.
summary Emergence Audio’s new Cadence Engine and the Envoy sound library make for a fascinating combination. Media composers will love the rhythmic possibilities it offers.
$ $199 W www.emergenceaudio.com
ON TE ST
If you like reverb tails that build and bloom, it’s well worth diving into this Ocean... PAUL WHITE
S
upporting all the usual Mac/Windows plug-in formats, Rev Ocean is an algorithmic reverb. We might have seen plenty of those, but this one offers us something different, and should be appreciated particularly by those creating downtempo music, with plenty of space between notes in which the reverb tail can evolve and blossom. Certainly, it’s a perfect fit for the ‘ambient hippy music’ I like to make on occasion!
Key Controls The GUI is clean, with surprisingly few but pleasingly interactive controls. An ever-changing cloud visualiser display front and centre adds some visual interest. There are some truly lovely reverb effects to be had, and some are very different from what you might expect a typical algorithmic reverb to serve up. Three reverb modes, Abyss, Foam and Tide, determine how the reverb tail evolves, and whichever you select, a fader above the mode name ranges from ‘straight reverb’ to ‘full-on character’. Size, Decay and Brightness knobs control the key reverb parameters, and are joined by settings for Pre Delay (which can sync to the project tempo), Ducking and stereo Width. A further parameter, Transient, affects the wet sound only, and smooths the transients before they hit the reverb engine — this gives the reverb a smoother feel, which can help the dry sound to remain more present. Input Filter sets upper and lower frequency limits (again only for the signal feeding the reverb engine), and separate controls set the Wet signal volume and the wet/dry Mix.
Fluidity When the mode fader is turned up, the fluid nature of the reverb tails adds subtle movement that’s most obvious when using longer decay times and larger size settings. Conventional decay times can be anything up to a minute, but set Decay to maximum and you can also ‘freeze’ the reverb tail. Intriguingly, if there’s reverb-tail modulation in the patch (the key to which lies in those three modes), this will continue when Freeze mode is engaged, so it’s super easy to create continuously shifting ambient beds. Abyss is the more dramatic of the three modes. This brings in layered reverse textures combined with pitch‑shifting, to create a harmonically rich, evolving tail that seems to incorporate elements of both shimmer‑style reverb and reverse delay. But it has an ever-changing character too, and can turn a simple piano line into an ambient epic, with hints of ghostly strings and disembodied voices appearing in the tail. The effect is reminiscent of some granular effects, but it’s rather more subtle than those. Tide gives the reverb a fairly fast attack (which the Transient control can smooth) and uses modulated filtering for smooth spectral changes, somewhat
14
September 2026 / www.soundonsound.com
Arturia Rev Ocean reminiscent of slightly filtered synth strings. Less dramatic than Abyss, it still adds far more interest than a straightforward reverb. Foam, another useful alternative, creates a softer swelling reverb texture that builds and blooms after the original note. As the Size control approaches maximum, picked sounds or those with sharp transients hint at subtle echo-like repeats in the reverb tail. This can sound very appealing, but if it’s not what you want (eg. if treating drums or percussion) you can use Transient to soften the attack of the reverb’s input signal. Interestingly, the Size and Decay controls interact: if you set up a long decay time then reduce the size, the decay will be shortened. The way the reverb tails evolve varies enormously depending on the size setting, so it brings more variety than you might expect, whichever mode you’ve chosen. Using the slider above
Reverb Plug-in
the mode selector to control the strength of the tail processing offers further scope for fine-tuning the effect, and when pulled right down the quality of the unmodulated reverb remains impressively smooth and musical.
Rev Ocean Devotion? No matter where I put the controls, I was hard pushed to get an unusable sound out of Rev Ocean and I found that it combined with Arturia’s EFX Ambient plug-in to create a hugely impressive range of textural effects. If you simply need to add a touch of plate reverb to a vocal or snare, Arturia offer other suitable reverb plug-ins. But for ambient, cinematic or shoegaze genres, Rev Ocean is a perfect fit that combines wonderfully fluid, musically supportive reverb effects with ease of use.
summary A very different textural reverb plug-in that’s a perfect fit for downtempo music with lots of space between the notes, and has other strings to its bow too.
$ €49 (about $56). W www.arturia.com
So advanced, test equipment can't measure it. Someday, all audio gear will be designed like this.
D-1 28-bit DAC It’s a new listening standard which has reset all my expectations. The D-1 somehow captures the dynamics, ambience, impact, transients and three-dimensionality of real life.
Depth and separation is breathtakingly 3D. Once you experience the D-1 DAC, going back to whatever you are currently using, no matter how much you paid for it, is going to be difficult.
Bob Katz, countless hit records, Digital Domain
John Cuniberti, Recording Engineer / Producer, countless gold + platinum records
What you have done is incredible. Simply stunning. Depth and detail that pulls me into the music.
In a word, outstanding — truly in a league of its own. Space, depth, and width are all immediately stunning. Clarity is terrific, very natural. It has rightfully earned its place in my arsenal.
Michael Romanowski, 5-time Grammy winning Immersive Mastering Engineer
Emily Lazar, Grammy winner, 10x nominated Mastering Engineer
The [D-1] sound is elegant and beautiful. The ambient information is clearer. I love what you’ve done here. You can’t have it back!
This DAC is astonishing. The difference is truly amazing. Your DAC is like switching from 35mm to IMAX. The color, depth, and low-level detail is breathtaking.
John Greenham, 4-time Grammy winning Mastering Engineer (Billie Eilish, Lady Gaga)
Paul Blakemore, 5x Grammy nominated, Chief Mastering Engineer, Concord Music
imersiv.com by Millennia
In-depth pro comments
ON TE ST
Blackstar’s new pocket-size amp punches well above its weight! PAUL WHITE
B
attery-powered mini guitar amps have suddenly become very sophisticated. Similar in size to the Positive Grid Spark Go or the JBL BandBox Solo — though a touch deeper — the new Blackstar Beam Mini is powered by a rechargeable battery offering up to 18 hours of operation per charge, with an approximately two‑hour recharge time. Remarkably, given its size, it offers stereo operation thanks to Blackstar’s Super Wide Stereo technology, creating a deceptively spacious stereo image despite the close spacing of the speakers. This compact amp can also be used as a Bluetooth speaker for music playback or backing tracks, and can function as an audio interface via its USB-C port (which is also used to charge the internal battery). USB audio recording on iOS and Android tablets and phones is also supported. The enclosure and speaker system were designed in partnership with UK acoustics specialist Chris Ellis, and are based around two small but powerful 60mm, full-range speakers, with a pair of passive radiators positioned at either end of the cabinet and vented through slots in the front baffle.
Ins & Outs A guitar input jack on the right side panel feeds a high-headroom circuit based on Blackstar’s Amped input stage. There is a headphone/line output on the rear, and this can also double as a microphone input when used with a TRRS 3.5mm jack wired for CTIA headsets, in which case the mic signal can be treated with compression and reverb. The USB‑C port provides two further input sources (nominally a stereo feed from your computer/DAW), plus four discrete outputs: USB channels 1+2 mirror the line outputs, USB channel 3 provides a clean DI signal, while USB channel 4 carries the headset mic signal. An app setting defines the speaker behaviour when using the headphone port; the speakers can either still play (useful if you want to take a DI signal while using the amp on stage), or it can be set to mute the speakers for silent practice. I found that
18
September 2026 / www.soundonsound.com
Blackstar Beam Mini Portable Guitar Amp I needed some additional EQ to get the DI’ed sounds to match what I heard from the Beam Mini itself, although that’s not surprising as the characteristics of the Beam Mini speakers play their part. Along the top of the Beam Mini is the backlit Light Beam display strip, which shows setting in real time during adjustment. The large encoder to its right is velocity-sensitive, and can be turned slowly for fine adjustments or quickly for larger parameter changes. A set of five buttons below the strip select Patch, Gain, EQ, FX and Volume for editing.
The EQ here is basically a high-cut filter, while the FX control adjusts the strength of all active effects simultaneously and also doubles as a tap‑tempo button. Five presets can be stored directly on the amp and recalled with the encoder in Patch mode. When you’re using an acoustic or bass amp model, Gain adjusts the amount of preamp compression.
Model Behaviour We’re told that a crucial part of the modelling process involved optimising the tone stack for each amplifier model,
Timeless tone for modern studios. Introducing the Auteur Quad2. Auteur Quad2 is a four-channel rackmount edition of our lauded Auteur mic preamp. Auteur preamps are known for their snappy, transparent, American-style IC-based input stage while also providing a fat, colorful British-style output stage via US-made Cinemag transformers. This hybrid implementation of vintage and modern designs makes Auteur astonishingly versatile. While it sounds great on everything, it particularly shines on detail-heavy sources that benefit from added weight, like drums or vocals — while offering plenty of headroom for your budget. Visit www.blacklionaudio.com to learn more.
©2026 All Rights Reserved, Black Lion Audio. All other trademarks are property of their respective owners.
ON TE ST
EastWest team up with Jimmy Jam for a refreshing take on some classic drum machines. JOHN WALDEN
T
he latest addition to EastWest’s impressive virtual instrument catalogue is DrumX. The library has been built by sampling 10 of the most iconic drum machines — the TR-808, TR-909, TR-606, LinnDrum, LM-1, DR-55, DR-110, DMX, DrumTraks, and SP-12 — that between them have been used on countless hit records. Of course, DrumX is far from the first virtual recreation of these classic drum machines. However, the feature set offers some serious sound‑design options, EastWest don’t skimp on their sampling and, as with the rather wonderful Iconic synth library (see SOS January 2025), they have brought in a seasoned collaborator — in this case, Jimmy Jam. Jimmy contributes sound design and rhythms that might easily have been drawn from his work with an A to Z of top artists over the last 40 years. It’s an intriguing combination.
What’s What DrumX is built for EastWest’s powerful Opus front-end, which can run standalone or in DAWs as a VST2, VST3, AU and AAX plug-in. On my macOS review system, the full library came in at approximately 30GB. Once you have browsed and loaded a suitable preset, the Player page of the UI provides you with the main DrumX-specific controls. A set of global sound‑design controls and the master output control occupy the top row, while a colour-coded MIDI keyboard shows the
22
EastWest DrumX Sample Library
sample mapping at the bottom. The central portion of the display shows the standard 4x4 drum pad layout (on the left) alongside sound‑design parameters for the currently selected drum pad (on the right). Beneath this, a single lane for the step sequencer is displayed and, again, this is for the currently selected drum pad. However, if you prefer to program your grooves with all the sequencer lanes visible at the same time, then the Grid button toggles the main pad view to a suitable multi-lane step sequencer view. The samples themselves have been used to construct a number of different types of preset. There are 10 DX Kit presets, one each for the 10 drum machines. Where the original hardware offers multiple options (for example, for kick or snare), you can swap between these for a specific pad. You also get Stacked, Layered, Pitched and All Kits presets. The Stacked presets each contain a single drum type — kick or snare, for example — but with samples from each hardware unit mapped across the pads. The Layered presets make use
September 2026 / www.soundonsound.com
EastWest DrumX $199 pros • A perfect pairing with Iconic. • Yet another reason why ComposerCloud is a seriously good deal.
cons • Perpetual licence is perhaps not a casual purchase for some.
summary DrumX is like instant recall for classic drum machine sounds of the last 40 years. Hats off to both EastWest and Jimmy Jam.
of a single pad and feature a single drum type, but you can select any of the samples for that drum type. The Pitched presets also take a single drum type and map it at different pitches across the MIDI note range. If you want
To find a dealer visit www.musicmarketing.ca
ON TE ST
EASTWEST DRUMX
to mix and match sounds from different drum machines into a single preset, then the DX All Kits let you do just that, with a neat Finalize Kit button that can unload all the unused samples to optimise memory usage once you are happy with your selections. However, for instant gratification, the Jimmy Jam Kits presets are where to start. These add some of Jimmy’s custom samples into the mix and, in addition, feature his full customisation of the sounds using DrumX’s array of sound‑design tools. Each preset — and there are over 200 of them — also includes a step sequencer groove created by the man himself. Browsing these quickly lets you appreciate just what DrumX is capable of. There are some epic sounds here to use either straight out the box or as great starting points for your own adaptations.
Sound Design Those Jimmy Jam presets also hint at the possibilities offered by DrumX’s sound‑design tools. Sound stacking aside, there are three elements available to the sound‑shaping toolkit. First, the global options along the top of the UI — Transient, Drive, Crush and Comp — provide macro-style controls linked to processing options within the Opus mixer. You also get global control over the effects returns from the reverb and delay.
Second, you can switch to the Opus Mix page which, as well as the usual level, pan, mute and solo options, also provides a flexible insert and send effects environment. Opus includes an excellent range of stock effects spanning categories such as EQ, dynamics, distortion, modulation, harmonics, delay and reverb. There is plenty here to sweeten your sounds or to get more creative with if you want them to pop out the speakers. Third, there are those DrumX-specific controls that fill the right side of the UI — the Pad Inspector panel — and the Tape Saturation knob, all of which can be set independently for each drum pad. The Pad Inspector panel includes envelope controls, a set of general controls (volume, pan, tune and transpose), a Room option (which blends in a sampled room ambience layer) and FX controls (high- and low-pass filters and sends to the reverb and delay effects). However, you also get some controls that are specific to a particular drum machine and based upon what the original hardware had to offer. What you see here can also depend upon which drum pad is selected, as per the original hardware. Finally, the large Tape Saturation knob lets you select the type and degree of tape saturation applied. Interestingly, DrumX’s documentation indicates that these machine-specific controls and
DrumX includes an effective step sequencer and ships with a well-stocked library of grooves created by Jimmy Jam.
24
September 2026 / www.soundonsound.com
the tape saturation are implemented through additional sampling of the original machines rather than emulated processing. However it’s achieved from a technical perspective, there’s a lot of sound‑design potential.
Into The Groove The sequencing engine will feel instantly familiar but is nicely done. Grooves up to 64 steps in length can be created based upon eighth, 16th or 32nd note step resolution. The lower single-pad lane offers note on/ off and accent options, while the Grid page offers just note on/off but in a multi-lane display. The lower panel also provides options to add a global swing and to drag and drop the current groove to a track within your DAW. Usefully, you can also browse all of the Jimmy Jam groove presets here and load them independently of the drum preset you might be using. These are a great resource, but you can, of course, also create your own groove presets.
Iconic Pairing Auditioning the Jimmy Jam presets is a lot of fun but also conjures up plenty of ‘oh, that sounds like...’ moments. Indeed, DrumX is like having access to a high-quality set of electronic drum machine sounds that feel like they have been lifted from a series of classic hits. I had exactly the same response when auditioning Iconic’s presets for the first time. Pairing DrumX with Iconic provides an impressive combination of (yup!) iconic sounds for pop, EDM, electronica, hip-hop, R&B and more from the last 40 years. This will undoubtedly have been by design on EastWest’s and Jimmy Jam’s part, and the end result is very impressive. Whatever your views on perpetual licences versus subscriptions, for working composers, the addition of DrumX to EastWest’s ComposerCloud subscription just makes it even better value for money. DrumX provides a huge selection of high-quality classic drum machine sounds in a convenient format for a fraction of the price of the vintage hardware. It’s also a perfect pairing with Iconic. $ $199 or via ComposerCloud subscription ($19.99/month or $149/year).
W www.soundsonline.com
ON TE ST
Teaching Machines Multi-voice FuzzBillion Distortion Processor Much more than just a fuzz pedal, this unique distortion device offers literally billions of possibilities... WILLIAM STOKES
T
here used to be a much clearer dividing line between guitar pedals and studio gear. Today, though, more and more designers are essentially housing fully-fledged studio-quality hardware in a sturdy case, often with both instrument and line-level connectivity, and popping a footswitch or two on the front. It’s a far cry from the little board-friendly boxes made ubiquitous by the likes of Boss and MXR! The FuzzBillion, by Wales-based two-man company Teaching Machines, is a case in point. Yes, it has a footswitch and sort of looks like a guitar pedal. But the manual makes clear that it was not conceived purely as a toy for guitarists: “The FuzzBillion is a distortion device for guitar, bass and synthesizers. It can be used with guitar or line-level signals. The numerical switches provide the ability to
26
September 2026 / www.soundonsound.com
shape the distortion in ways far beyond conventional distortion devices.”
Overview We’re told that the FuzzBillion was conceived “whilst Frank [Naughton, Teaching Machines’ co-owner] was playing with various different distortion circuits and wanted a quick way to swap between them”. I can believe it. In addition to the footswitch there are 11 numerical switches, whose single-digit setting is scrolled up/ down using its pair of buttons, plus a gain knob. And on both side panels there’s a jack socket, one for the input, one for the output, each accompanied by a button to swtich between high-impedance instrument and transformer-balanced line-level operation. The switches relate to various diodes and amplifiers (germanium, silicon, LED, etc), and each of those makes its own contribution to the overall distortion sound. As Teaching Machines put it modestly, this gives you access to a “very wide range of tones” — with 10 variations (0 to 9) on each of 11 switches, the total number of possible circuit variations is literally in the billions: 100,000,000,000 to be precise! And that’s before you bring the gain knob into play...
Ostensibly, from left to right these 11 switches set (deep breath...): a gain boost; three clipping amplifiers; a tone control; two octave fuzz parameters; a PLL, or ‘phase-locked loop’ that behaves a little like a pitch-tracking oscillator; a bias offset, which essentially moves the input signal’s zero point up or down to cause wave clipping; an output clip, which is a more traditional and controlled type of clipping; and, finally, another tone control (a single-pole low-pass filter) for the output. Whew! Listing the wheel switches like this makes them sound like an indulgent heap of components, but make no mistake: these have been designed and sequenced with great care. The sequence reflects the signal path so, in practice, those aforementioned combinations aren’t just, well, combinations. Some components respond differently to others depending on their parameters. For instance, the PLL will track differently depending on the settings of the octave fuzz that precedes it. Some, like the bias offset, are bipolar: settings 1 to 5 behave differently to settings 6 to 9. And once you’ve set values across the board, going back and adjusting the value of an
earlier switch in the chain can change things entirely...
A Creative Catalyst Beyond the simplicity of patch recall, the numerical switches offer a benefit that struck me immediately, and would not be possible with pots — you can switch straight from zero to maximum or vice versa in a single increment. I confess that I switched to 9 on more than a few occasions when I intended to choose 1 — somewhat counterintuitively for me, the row of ‘+’ buttons lies below the wheels, and the ‘-’ buttons above them. But this often created happy accidents! With this sort of setup, the FuzzBillion is just the type of creative catalyst I like: feeding an analogue drum machine into the FuzzBillion, for example, I experimented in the first instance simply by flicking everything from 0 to 9 in different combinations, as if they were binary switches. Needless to say, with a few adjustments here and there, it wasn’t at all long before I was squeezing out some supremely dirty, full-bodied, snarling distortion. Or do I mean “really beautifully detailed, musical distortion?” While this sort of ‘blind exploration’ is often rewarded, so too is a deeper, more detailed analysis of the functions. You can consult the manual to see literally what types of diodes are instantiated with different settings of wheel 11 (want 1N60P diodes with 1kΩ resistor in series? Number 6. 1N4148 diodes? Number 7). Or which setting you need if you want to replace the
diode in the feedback loop operating on the upper half of the waveform with a capacitor (wheel 3, setting 4). You get the idea, and I’m sure you can learn a lot that way too. But, as I say, blind exploration is just as rewarding. Punching in numbers at random, pairing them with different gain settings, and even just different input levels, threatened to keep me occupied for hours. Annoyingly, it almost always sounded good — great in obvious ways, but it certainly didn’t help with my decision making! On occasion, of course, the sound would disappear entirely, but the simple workflow is such that I was never unable to retrace my steps. Best of all, when you find a setting you like, you can simply write it down as a number for instant recall. By the way, with 11 digits, it’s compatible with lots of phone numbers, so if you’ve ever wondered what yours sounds like...
In The Real World? The FuzzBillion can do a lot of things, that’s for sure. But what is it best at? As both a touring guitarist and a studio practitioner, there are plenty of pedals I’m more than happy to abuse with the soles of my shoes at a muddy festival — my Morley volume pedal or my EHX Memory Man, for instance. These are the kinds of pedals that you limit to just one or two applications, and hammer them on and off at pertinent moments during a performance. Then there are pedals that are such beautiful items, so inviting of careful parameter shifts, that not only would I far rather keep them on the table where I can constantly make
adjustments, but I don’t really want my feet to go anywhere near them — like Audio Kitchen’s The Big Trees, or Planetarium’s Neon Egg. The FuzzBillion is in the latter camp. It’s almost impossible to imagine plumbing such a thing into an actual pedalboard. Besides, it’s pretty chunky; you might have a hard time finding a case with a high enough lid! Having said that, I can very well imagine the FuzzBillion performing a DI box-type role in a live setting, particularly for a bass guitar or synth. A parallel that might, perhaps, sit on top of your guitar amp; I intend to test that application. And in another sense, it almost feels in use like an entire pedalboard on its own, created exclusively for tone‑shaping. In a studio setting, I can well imagine it sitting permanently on a send, ready to cover pretty much any of the distortion needs you could dream up in a recording or mixing session. Drums, vocals, synths, guitars; all can be handled very capably. The last several pages of the manual present spaces to note and name number combinations, so recalling that go-to snare saturation, that bass thickener or guitar solo annihilation would be a breeze. It need not only work with combination settings, of course; things like wheel 2’s Fuzz Loop Gain can very much be made to work in isolation, as a type of pedal-within-a-pedal. Simple but effective.
Verdict The FuzzBillion, then, is a rare breed of all-analogue hardware that punches terrifically hard and in three distinct ways: it’s designed for character, grit, attitude and chaos; its sonic range is simply staggering; and you can recall any of its sounds accurately. It feels so far beyond the traditional three-knob fuzz pedal — and, frankly, so far beyond any notion of ‘guitar pedal’ — as to warrant an entirely different categorisation. Desktop pedal? Footswitch outboard? Studio box? Mini-board? Whatever you want to call it, footswitch or no, the FuzzBillion is an outstanding and incredibly creative processor.
summary A truly excellent-sounding, phenomenally flexible distortion unit that will play marvellously with just about anything you care to throw at it.
Both the input and the output of the FuzzBillion can be set for use with instrument- or line-level gear.
$ £435 (about $580) plus import duty. W https://teachingmachines.co.uk www.soundonsound.com / September 2026
27
ON TE ST
Steinberg SpectraLayers Pro 13 Spectral Editing Software
Steinberg’s spectral editor opens up yet more powerful processing options.
Steinberg SpectraLayers Pro 13 $359
JOHN WALDEN
pros
pectral editing has come a long way over the last five years. Great strides have been made in terms of capabilities for this kind of software (for example stem separation/ unmixing) and in how users can access and utilise what are very sophisticated audio processing tools. Much of this has been underpinned by rapid advances in machine learning/AI technology. All of which perhaps helps to explain why Steinberg maintain a regular annual update cycle for SpectraLayers Pro. So, fairly hot on the heels of v12 (reviewed in the October 2025 issue of SOS), we
• New and improved modules, especially for voice/dialogue applications. • Very useful workflow improvements.
cons • Occasional users might not always feel compelled to keep up with the rapid upgrade schedule.
summary SpectraLayers Pro 13 brings plenty of new processing options, particularly for those working with dialogue/voice recordings, and a suite of UI/workflow improvements that all users will benefit from.
28
With both new and improved module options, SpectraLayers Pro 13 has plenty to tempt those specialising in post-production tasks such as dialogue enhancement, audio restoration or sound design.
September 2026 / www.soundonsound.com
S
now have SpectraLayers Pro 13. This release certainly has its share of new and improved processing modules, but there are also some significant workflow and UI refinements. So, if SLP is an integral part of your audio workflow, is there enough that’s new or improved to make SLP13 a worthy upgrade?
In Repair There is plenty to explore as SLP13 delivers a number of new modules. While v12 perhaps focused more on music-orientated unmixing options, in v13, the emphasis seems to be placed on audio post-production tasks such as voice/dialogue processing and audio
Play like you always have. Sound like you never could. Discover the Roland Aerophone Brisa, a revolutionary digital wind instrument designed with flute players in mind.
ROLAND.COM/BRISA
ON TE ST
JEM GODFREY
N
ever a company to rest on their laurels, Arturia released Pigments 7 a mere 321 days after releasing Pigments 6. This is impressive, however it could be argued that of the two, it was Pigments 6 that was the revolutionary one. This new version is more in the evolutionary category, but the refinements it offers are all welcome upgrades — and let’s not forget these updates have commendably always been free, so we can’t really complain can we? Bravo Arturia, and thank you. The end.
New Filters & Effects Just kidding. So what’s new in this seventh iteration? Well, there are three new filters to start with — the three Rs of Ripple, Reverb and Rage. Ripple runs the waveform through a succession of all‑pass filters that could easily pass for ring modulation at more robust settings, even though it isn’t. There are three flavours of heft that you can select for your waveform to limbo
32
September 2026 / www.soundonsound.com
Arturia Pigments 7 Software Synthesizer
Hot on the heels of version 6, Pigments 7 brings workflow improvements, increased efficiency and some really rather special new effects. under, the most extreme of which can make things sound like they’re simultaneously being flanged and supersawn (is that a verb?), and this is a good thing. Interestingly, turning the resonance control to zero appears to impact the waveform pitch more than when it’s fully cranked, which changes the filter shape to a dramatic‑looking single sawtooth with the resultant tone more of a sharp phaser. Reverb is next and my favourite of the three, the resonance control cleverly seeming to double up as the size control for the reverb time of the filter’s effect. If you modulate this, the resultant sound is like being crept
up on by Wembley Stadium, which then hides behind a tree when you turn round because it immediately disappears when you release the key or stop the modulation. I’ve not come across this before. It’s a novel way of adding size and movement to a big lead sound without having to drench it in reverb, for example. Lastly there’s Rage, which does exactly what you expect and there are five flavours to choose from: diode, distortion, soft clip, tape and transistor. All self-explanatory and all very musical. My favourite setting here is transistor, which puts you straight into 303 territory, should you
Arturia Pigments 7 $199 pros • Characterful new filters and Corroder effect. • More focused Play page for performance and quick editing. • Clear visual modulation feedback. • Great‑sounding content refresh and tutorials. • Better CPU efficiency and envelopes.
cons • No major new synthesis engine. • No user wavetable creation or import. • Some complex patches remain demanding on the CPU.
summary Pigments 7 is an essential update for existing users that offers thoughtful improvements and a refined workflow. For the uninitiated, now has never been a better jumping-on point.
wish to holiday back there for a bit with your bucket hat on. Filter two has the same complement of filter types and you can blend them variably between series and parallel.
I couldn’t resist running a saw wave through two fully resonant Rage distortion filters in series. The result was suitably cross, with the sweep of the second one really picking out the screaming harmonics of the first. Not a bad way to spend half an hour. In terms of new effects, we now have something called Corroder to play with and it’s fantastic. Not only do we get a stereo width control, which is not something you generally get with distortion effects, but if you whack the drive control all the way up you start to get ratio-based intervallic overtones caused by a very short delay line that changes as you play different notes. It’s startlingly musical. Not only that, but you can use pretty much anything else as a mod source, including the various Pigments synth engines and even an audio input. If Corroder was just a plug-in on its own, I’d happily buy it — the tone is warm and creamy, but still with plenty of definition, almost like an old analogue guitar pedal. In fact, if
somebody put Corroder into a stompbox, I’d be first in the queue for that too! In the filter section the classic filter has been beefed up with audio-rate modulation, which it can either generate itself or can pull over from the waveform engines. Even without the additional modulators, it’s perfectly possible to create clangourous bell sounds or other complex tones just using the filter’s FM without really troubling the oscillators much beyond a sine wave, although the results seemed very subtle indeed when using it on the modal engine for some reason.
The New Look The update’s most visible workflow change is the redesigned Play screen. Lots of soft synths can dump you right in at the deep end with their GUI, which can be intimidating and even push you away from wanting to start experimenting. This Play mode, which is a sort of a cross between the browser page on Absynth 6 and those YouTube demos that reFX make for their Nexus expansion packs,
www.soundonsound.com / September 2026
33
ON TE ST
ARTURIA PIGMENTS 7
the ground up. It’s a really good way to get to know the instrument quickly if you’re new to it, and takes away that feeling that you’re just randomly twiddling and pressing things and hoping for a happy accident. Even if you’re an old hand at this programming lark, you might still find you learn a thing or two, and the tutorials themselves don’t take long to motor through, so why not?
which is a shame. One of the things I enjoy most about my Groove Synthesis 3rd Wave, for example, is the sheer ease of the wavetable creation and the possibilities it opens up. I have a tired old Roland V-Synth XT that I still use a lot for the ‘Freak Lead’ patch, but it is near impossible to sample it with any great accuracy because it moves and evolves so much due to the feedback oscillator. Having now sampled it as a wavetable, it can morph and move just like the original without any multisampling glitches. It’s one of the many reasons why wavetable synthesis is so useful across so many different applications, and so popular now. With Pigments otherwise being such a comprehensively powerful synth, I hope it’s on the ‘to do’ list at Arturia Towers. The 150 new presets that come with Pigments 7 are excellent, as you would expect. While perfectly capable of being an analogue, er, analogue, where this synth really wants to be is right here in 2026, probably accompanying that unicycling badger on your feed that keeps popping up. Either way, without doubt these will be the sounds you’ll be hearing in a stadium somewhere next summer.
But Wait...
Conclusion
Carrying on with v7 goodies, you get 30 new samples in the sample engine vaults plus 50 new wavetables. You can import your own samples, but you still can’t import or create your own wavetables,
I feel that, while it’s impressive to release a major version upgrade of a synth and then a whole other one in under the space of a year, perhaps it would have been more effective to have
Simplified interface, also good for throwing shapes to.
presents audio‑reactive visuals that change with your playing and with each category. It also simplifies the interface for engine selection, pitch control, filter control, ADSR, effects selection and basic control and four assignable macros. It makes it feel more like playing a hardware synth and less like running a railway signalling network. That said, visually Pigments is a very engaging and friendly synth to use, with everything nicely laid out and well animated. Colour-coded tabs help with deeper navigation, and nothing feels intimidating to use. I particularly like the sound designer bios that you get when you hover over the lightbulb icon. It’s little touches like that that make a difference, and it’s a reminder that there are actual human beings putting their time, effort and talent into curating and improving Pigments, which we owners get as a free upgrade. It would be nice if there were a few more themes, or maybe even a few sliders in the preferences pane where you could pick your own colour scheme to really customise your user experience, but this is proper first-world problem stuff, I know. That said, as they’ve gone to the trouble of providing two themes, maybe a few more wouldn’t hurt? Speaking of helpful, friendly things, Pigments 7 also comes with some genuinely useful sound‑design tutorials that walk you through the creation of 15 different patches from
34
September 2026 / www.soundonsound.com
The new Corroder effect is one of the highlights of Pigments 7.
A very nice touch is that you can get to know a little about the people that made the sounds on your next hit record.
taken a little extra time to bring a bit more to the party. Of course, the improvements on version 6 are well implemented, gratefully received and bring about
a more complete synthesizer for us to enjoy, but would we have noticed that we were missing 50 wavetables, 30 new samples and three new filter
types, refined envelopes and some CPU optimisation if it hadn’t happened? Maybe not. I feel a bit mean writing that to be honest, maybe more companies should put photos of the staff in their synths... But let’s not end on a downer. Pigments 7 is a vastly capable, fantastically versatile, super modern‑sounding and hugely flexible synthesizer that can cater to the needs of virtually everything from pop production to long-form composition. It can be immediate with the Play page when inspiration is what matters, but it can also be a very deep sound‑design tool with sampling, wavetable synthesis, physical modelling and virtual analogue engines to play with. Perhaps with Pigments 8 we can hope for an FM engine and user wavetable import or creation to add yet more avenues of exploration. As for me, I’m going to add Pigments 7 to my startup template first thing in the morning. $ $199. Free to existing Pigments users. W www.arturia.com
Two channels of classic optical compression, now with a switchable 12AT7 tube or solid state signal path, extended ratio range, increased headroom, and more. Available now from your ART dealer.
www.soundonsound.com / September a r t 2026 p r o a u d35 io.com
ON TE ST
Two notes Captor X+
Reactive Load & Guitar Cabinet Emulation high and low input levels, and a 6.35mm As well as updating their excellent reactive load box, Two (quarter-inch) stereo headphone jack. notes have upped the ante on the software side considerably... On the rear are the 12V DC power BOB THOMAS
A
s the name makes clear, Two notes’ new Captor X+ replaces the Captor X in the company’s hardware product range. The original Captor, a rugged, compact, single-channel reactive load box, attenuator, amplifier DI and two-slot loudspeaker simulator, was released in 2017 and remains available. To that, the Captor X added DSP, to support a microphone/loudspeaker simulator that could store up to 128 presets. These were created using the company’s free Torpedo Remote app, and the contents were drawn from an onboard library of 32 DynIR virtual cabs, up to 512 cabinet impulse responses (IRs) and a selection of EQ and effects. Three switchable levels of attenuation, switchable stereo/dual‑mono outputs and MIDI-based preset recall and parameter control completed the picture.
Plus Points The new model enhances that offering in two significant ways. First, it adds
36
September 2026 / www.soundonsound.com
a (post-load) Virtual Load Shaper, in which virtual loudspeaker impedance curves can be used to reshape the tonality of the amp. Second, it includes a True Stereo DynIR Engine, which makes possible independent positioning and panning within the sound field for the two mics in a DynIR cabinet-based stereo preset, and for the two impulse responses in a stereo IR preset. The Captor series’ signature metal housing and cosmetics are retained, and the Captor X’s front- and rear-panel control and connector layouts are too. Approximately half its volume and panel area is occupied by a ‘wind tunnel’, used to cools the internal reactive load; apparently this is assisted by a thermally-controlled fan when necessary, but it’s a low-noise type and didn’t even fire up once during the review period, so I assume it’s only needed for high-wattage amps. A white LED in the tunnel indicates power on, and a red one signals clipping of the input and/or output signals, and flashes during USB data transfer. The front panel hosts four rotary control knobs, a button to toggle between
inlet, MIDI ports (both mini‑jack and USB-C), ground-lift and three-position attenuation (0, -20 or -38 dB) switches, a 6.35mm speaker in (ie. from amp) jack socket and another for speaker out (to loudspeaker), as well as two balanced XLR DI outputs.
Two notes Captor X+ $600 pros • Superb overall performance. • Stellar value for money. • Torpedo Remote makes configuring and editing presets a breeze.
cons • None.
summary Genuinely a superb load box, attenuator, speaker simulator, IR loader and DI that will fit into recording, amplifier capture and on-stage workflows, and buys you access to an equally effective software amp, cab and effects modelling suite with NAM support.
There are a few bundled software tools, and I encourage you to read the separate boxes about Genome 2.0, Capture Studio and NAM and AmpNet model support. But here I want to focus on the Torpedo Remote app, which is available for macOS (10.7 to 10.13+) and Windows (7, 10 or 11), and there’s a slightly different version for iOS/ Android devices too. Its main purpose is the creation, editing and management of Captor X+ presets, which can be created in two modes: Virtual Cabinet mode employs Two notes DynIR mic/cabinet simulations; and IR Loader mode utilises third‑party IRs. The desktop version, which connects to the Captor X+ over USB, is essential for the upload and management of the onboard DynIR virtual cabinet and user IR libraries. The mobile app connects via Bluetooth. When creating a preset in Virtual Cabinet mode, the Cab tab in the Torpedo Remote user interface allows you to choose one of the 32 DynIR cabinets in the Captor X+’s onboard library. The Miking section allows you to choose two microphones from a list of eight, and you can independently position these in the virtual studio, set their output levels and, in Stereo mode, pan them. In Dual Mono mode, you can route the mics separately or blended to the L-R outputs. In the IR Loader mode, the Miking section allows you to select any two of the IRs you’ve loaded into the Captor X+’s library. As with the virtual mics, you can set their individual output levels, stereo pan positions and Dual Mono routing.
Genome 2.0 Included with the Torpedo Captor X+ is a download of Two notes’ excellent Genome software. Essentially, it’s a powerful all-in-one amp modeller, effects suite and virtual cabinet engine. I reviewed Genome shortly after its launch, in SOS April 2024 (https://sosm.ag/ two-notes-genome), but very recently it received a significant upgrade. I plan to cover Genome 2.0 in more detail in a separate review soon, but the headlines are that this standard version usually costs $130, and gives you access to all the functionality, and a good array of components (amps, effects, cabs The standard version of Two notes’ excellent etc), with the ability to purchase further premium amp, cab and effects modelling software, Genome, components as add-ons. There’s a free version too, is included and the latest version includes support and that’s well worth downloading if you want to for various third-party model formats. get a feel for it before buying; this omits just a little of the functionality and obviously gives you access to fewer components (you can still purchase add-ons). Finally, there’s also a top-tier offering, Genome Suite, that costs more but provides access to all the premium features and components (bar a handful of models that appear to have been created in partnership with other brands) both now and in the future. The standard Genome download bundled with the Captor X+ includes 24 of Two notes’ proprietary TSM & TSM-AI amplifier models, 49 pedals, 16 studio effects, 16 DynIR virtual cabinets and an IR loader. If you need more amps and pedals, Genome’s Codex ‘unification engine’ is now fully compatible with TSM, NAM, Aida-X and Guitar-ML Proteus amp and drive pedal captures. And version 2.0’s new Paradex feature (not included in the free version) plays back multi-parametric amplifier and drive pedal models captured and trained in Two notes’ free Capture Studio (of which more in the separate box). Multi-parametric captures model the effects of your amplifier’s controls, so allow you to adjust them in real time. Genome arrives with 222 factory presets, and can store a maximum of 1024. Once you’ve chosen or created a preset, you can use Genome’s Mixfit preset-based tone-shaping and refinement tool to create a balanced, mix-ready version.
The IR length determines how many can be stored: for 20ms IRs it’s 512, while for 200ms ones it’s 44.
Signal Path The post-load‑box signal passes to the Virtual Load Shaper, which lets you change the tonal profile of the signal by using one
of the five preset virtual impedance curves, or by creating a custom version using the swept-frequency Presence and parametric Resonance controls. The signal then passes through a noise gate. Here, you can select a soft or hard gating action, and the threshold can be set manually or, courtesy of a learn function, automatically.
Cooling is by a combination of a built-in ‘cooling tunnel’ and a fan — but the latter is only engaged when it’s needed, and when perched on top of this THD UniValve during the review period, it didn’t kick in once.
www.soundonsound.com / September 2026
37
ON TE ST
TWO NOTES CAPTOR X+
The Torpedo Remote software is really easy to use, and its depth of integration with the Captor X+’s onboard DSP is great — the two in combination make for an intuitive, enjoyable and creative experience. That said, there are so many possibilities that it can still take some time to get your head around everything! The Torpedo Remote screens are visually appealing, and the consistency of design across the mobile/Bluetooth and desktop/ USB-C versions again makes creating and managing presets and DynIR cabinet and IR libraries beautifully simple. I was also impressed by the subtlety of control available in the app. On the subject of subtlety, the Virtual Load Shaper is a great example of what’s possible: listening in detail to the sonic differences between the curves in a Virtual Cabinet preset is an education in itself. There’s also impressive subtlety in your choice of virtual mics and their positioning, which give you plenty of scope to optimise the relationship between your chosen amp and DynIR cabinet. Arguably less subtle is the noise gate’s threshold-learning facility — but it’s effective; I can’t fault its operation! The microphone and output effects (a term that encompasses the various EQ options too) are effective, easy to use and deliver impressive results, and the enhancer has become a particular favourite — I’m definitely going to steal its approach of using midrange compression to adding body to a sound. Combining that enhancer with the Virtual Load Shaper gives you a convincing amplifier response with a tone-shaping equaliser that, again, I can see myself using often going forwards. And it’s all capped off by the pleasing variety and character of the 12 room reverbs. It’s not just about the sound, though — the routing options open up very practical configurations. For instance, the ability of the Captor X+, in Dual Mono mode, to send a clean amped feed in parallel with the effects-enhanced output makes it the ideal system centrepiece when recording clean tracks for re‑amping. I used that clean feed very successfully to capture one of my own amps with both Two notes’ Capture Studio software and in hardware on my Neural DSP Nano Cortex. I could even imagine a 5W mini valve amp and a Captor X+ on my pedalboard. And I shouldn’t forget to mention the Captor X+’s MIDI implementation, which covers much more than preset switching — although I may personally never need
40
September 2026 / www.soundonsound.com
Capture Studio: Emulate Your Own Amps!
The quality of amp captures is impressive but, especially if you wish to capture control behaviour, it can take quite some time! Courtesy of its Codex and Paradex components, the latest release of Two notes’ Genome software (see separate box) can replay both the latest open-format Neural Amp Modeler (NAM) A2 models, and the multi-parametric AmpNet models. But you can also use Two notes’ free Capture Studio program, currently in public beta, to create them. So, following Capture Studio’s on-screen instructions, I set up my amp, audio interface, re‑amp box and the Captor X+ review unit, and configured the necessary audio parameters. Creating a NAM capture of my THD UniValve amp took around five minutes. The time taken for an AmpNet capture depends very much on the number of control knobs involved, and in this case my amp’s four controls meant it took approximately 25 minutes. The offline training time for a NAM A2 or AmpNet model depends on the power of the computer being used, and my research suggests that offline training times on a powerful modern desktop machine will be in the region of 30 minutes for NAM A2, and 45 minutes per knob for AmpNet. On my 2013 Mac Pro 6.1 studio machine, the Capture Studio training times were slower, being measured in multiples of hours, not minutes — so while I’m very impressed by the models I created using the beta of Capture Studio, I plan on waiting for the release version (and probably upgrading my computer) before I start using it in earnest!
to use continuous controller messages to access every editable parameter on the Captor X+, there will be those who do or who like to experiment with external controllers, and I’m extremely impressed that Two notes have ensured we can do that.
Final Thoughts Almost as soon as I began using the Captor X+ and its companion Torpedo Remote app, I realised that this compact combination vastly outperforms the VB-101 and earlier version of Torpedo Remote that I reviewed in 2010 — that combination had impressed me hugely at the time, and cost over four times the price of this latest setup so, to me, this price-to-performance ratio comparison alone makes the Captor X+ absolutely insanely good value for money. Of course, the competition hasn’t stood still. But while there are other good reactive loads out there, and others who have made leaps in amp and effects
modelling and IRs, the quality on offer here is as good as anything I’ve heard, and I can’t think of any other integrated system that does what the Captor X+ and Torpedo Remote do. To create something that genuinely competes with this package, you’d have to mix and match different components, and in doing so you’d lose much of the elegance and simplicity that makes this bundle so attractive. All of which is why, despite all the other wonderful guitar-amp gadgets and software I have already, I will be purchasing this particular Captor X+. If you’re a guitarist or bassist who could make good use of a superb load box, attenuator, speaker simulator, IR loader and DI that will fit into your recording, amp-capture and possibly on-stage workflows too, I strongly recommend that you put a Captor X+ at the top of your shopping list. $ Captor X+ $599.99. W www.two-notes.com
You’re only limited by the weakest link in your audio chain. Step up to Mesa, the only desktop interface with legendary Lynx quality.
You work hard to get the perfect sounds and performances on your recordings... carefully selecting the right mics, preamps, instruments, and effects processing. Why throw it all away by using a digital converter/interface that doesn’t meet your own high standards? The Lynx Mesa delivers the identical level of superb audio quality found in the highly-acclaimed Lynx Aurora(n), in a convenient desktop format. “It’s an extremely flexible mixing and routing system, with virtually no limitations as to what can be sent where. Even the outputs have their own dedicated faders.”
- SAM INGLIS, SOUND ON SOUND
“The converters in the Mesa are the same as those found in the Aurora(n) series. This makes them some of the cleanest, most transparent converters on the market.”
- PAUL VNUK, RECORDING
Get complete specs & info at lynxstudio.com Lynx Studio Technology • Costa Mesa, CA • 714-545-4700 • lynxstudio.com
ON TE ST
Dangerous Music BAX Analogue & Plug-in Equalisers M AT T H O U G H TO N
I
have real respect for Dangerous Music’s hardware. Whether it be performing analogue summing, D-A conversion or processing, everything of theirs I’ve owned or had in for review has not only sounded superb, but has measured well too. Very well, in fact. Chief designer Chris Muth has achieved some extraordinary technical specs — for instance, the class-leading crosstalk discussed in my SOS March 2023 review of their 2-BUS-XT summing mixer (https://sosm.ag/dangerous-2bus-xt-crosstalk). What Dangerous aren’t so well known for is software. Until now they’ve only dipped their toes in those waters, but their new BAX EQ plug-in suggests that might be about to change. For reasons unknown, it seems SOS never reviewed the BAX EQ hardware it emulates; that stereo analogue mastering EQ was released in 2011 and would soon enjoy a stellar reputation. Neither have we yet looked at the 500-series version that was launched at NAMM in January 2026.
42
September 2026 / www.soundonsound.com
Dangerous Music’s BAX EQ earned an enviable reputation. Now there’s both a 500-series version and, in a partnership with dynamic-convolution pioneers Acustica, a new, official plug-in emulation. So rather than assess the new plug-in in isolation, I figured it would make good sense to assess it alongside both of the hardware equivalents — and to make that possible, the company kindly sent over a 19-inch rackmount BAX EQ and a pair of BAX 500 modules.
Dangerous & Acustica The new BAX EQ plug-in has been developed from the ground up, using a very different approach from the 2014 plug-in, which was developed under licence by Brainworx and later made its way into the Universal Audio plug-in ecosystem. To my knowledge, that was the only official Dangerous Music plug-in out there until November last year, when I was surprised to see, in a partnership with Acustica Audio and Studio DMI, the CONVERT-AD+ plug-in appear. This
emulates Dangerous’s A-D converter of the same name (a converter might not be an obvious target for a plug-in emulation, but there’s more to that unit than the conversion!). I sensed that the project might, for Dangerous, have been a low-key way to start exploring software options. Either way, it was clearly a positive experience, because Dangerous looked to the same partnership to develop their BAX EQ plug-in. SOS readers may know something of Acustica’s Volterra-kernel‑based ‘dynamic convolution’ approach, but to simplify, they capture many thousands of impulse responses from analogue hardware at a range of control settings and signal levels, and then create a plug-in around a sophisticated playback engine that rapidly switches between these IRs. Sonically, it can be incredibly convincing,
particularly for ‘static’ effects like EQ and preamps. It hasn’t always been the most CPU-efficient technology, and users once complained about laggy GUIs and other inconveniences seemingly being the trade‑off. But that’s in the past: Acustica have built on that technology, and the latest engines combine dynamic convolution and an algorithmic approach to deliver sonically convincing plug-in emulations of analogue hardware that feel much more responsive. It seems to me a very good fit for Dangerous...
BAX Back Story But before I dive into the plug-in, it makes sense to explore the hardware. At the heart of Dangerous’ stereo rackmount BAX EQ
lies a variation on the famous tone-control circuit developed by British electrical and audio engineer Peter J Baxandall in the early 1950s. The classic Baxandall EQ comprises a pair of first-order (6dB/ oct) shelves, one for the low frequencies and another for the highs. It’s based on an active, negative-feedback, RC (resistor-capacitor) bridge network wrapped around a single inverting amplifier stage, but from a user point of view its attractiveness lay in the simplicity of operation (the circuit meant a single knob could be used for both boosting and cutting) and that the gentle, broad boosts and cuts made it pretty hard to do significant damage. It’s hardly surprising, then, that the Baxandall EQ found a home in many a hi-fi amp... Those same features, plus the very low phase‑shift, had strong potential in music production too, but in Baxandall’s original circuit the turnover frequencies were fixed (100Hz low shelf, 10kHz high shelf, I believe), which limited its utility. Several console designers adapted it, not least by offering multiple, switchable turnover frequencies, and pairing it with high-/ low‑pass filters or peaking/bell bands. Such variations can be found, for example, in the EQ stages of the Trident A-Range, and various Neve and Electrodyne desks. But it was Chris Muth at Dangerous Music who first developed a dedicated stereo rackmount version: the BAX EQ. Released in 2011, this treads a broadly similar path to those console EQs of yesteryear, in that its Baxandall shelves have multiple user-selectable turnover frequencies, and are joined by second-order Butterworth high- and low-pass filters (a design that creates a smooth roll off, with no ripple or resonant bump). As with the shelves, these
Both of the hardware versions and the plug-in have stepped frequency controls for each band, with seven settings each (plus off) for the high- and low-cut filters, and eight positions for each of the shelves.
Dangerous Music BAX pros • Superb analogue hardware EQs. • The plug-in is a wonderfully accurate emulation. • Plug-in M-S matrix and channel control linking are very useful. • Stepped controls on all versions make audition and recall of settings easy. • A surprisingly versatile and effective design.
cons • None really, but they’re professional tools and are priced accordingly!
summary The original hardware is a superb adaptation of the classic Baxandall shelving EQ for professional mixing and mastering applications. The new 500-series and Acustica-powered plug-in versions do an impressive job of imitating it, and have some selling points of their own to boot.
filters have a range of user-selectable frequencies. The bands are arranged in series, with the signal flow following the left-right front-panel control sequence: the high-pass filter feeds the low and high shelf, which in turn pass the signal on to the low-pass filter. It differs significantly from those old console EQs, though. It was conceived primarily with mastering and stereo mix-bus applications in mind and, as such, the ±5dB gain range for the shelves is controlled in stepped 0.5dB increments, using separate knobs for each channel. The incredibly fine control over the levels makes A/B comparison of settings a breeze and manual recall similarly quick and easy, and the high-/low-pass filters combine with the shelves to create sometimes surprising scope to rebalance the energy in complex programme material. But having had a BAX EQ here for a few weeks now, I’d stress that its uses extend way beyond mastering, as I’ll discuss in more detail further below. Add to your consideration the excellent technical performance, and it’s not hard to see why this equaliser has earned such plaudits. What the BAX EQ doesn’t offer you is any direct control over the midrange. While the available turnover frequencies are such that the shelving curves can reach well into it, obviously they affect the high/low end too. So in this respect (if no other!) it’s akin to using the www.soundonsound.com / September 2026
43
ON TE ST
Modal Element One Polyphonic Synthesizer
Modal embrace simplicity with their latest instrument, the Element One.
WILLIAM STOKES
“T
he synth for people who just want to play” is how British company Modal Electronics open proceedings for the Element One, their new 37-key, eight-voice digital synth. I daresay that line will either put you off to the point of immediately turning the page (in which case I’ve already lost you, and am now writing to myself), or it will pique your interest as someone who, perhaps, has always found the barrier of entry when it comes to synthesis just that little bit too high. A compact and accessibly designed piece of hardware designed to provide a competitor for the likes of the microKorg 2, the Element One is a lightweight polyphonic synth with up to eight virtual-analogue oscillators per voice, onboard effects, slots for 500 presets and an accompanying app. “We’ve often had a lot of criticism for things being too complicated,” Modal Electronics’ Berry Nielsen told SOS at this year’s
50
September 2026 / www.soundonsound.com
Superbooth event. Ease of use is the name of the game here, with simple panel sections, the promise of minimal menu-diving, and a long list of out-of-the-box playable presets that come categorised by musical feel (‘vintage’, ‘dark’, ‘mellow’ and so forth). There’s also the free MODALapp, which, as you might expect, offers in-depth screen-based editing and graphic parameter readouts, along with comfortably navigable preset backup and management. Physically the Element One feels solid enough, with its steel front panel and full-size keys, but most of the overall real estate is comprised of a plastic chassis. It has a smart-looking illuminated logo on the rear, and a very usable selection of I/O including headphone and stereo line outputs, inputs for expression and sustain pedals, a 3.5mm audio input, analogue clock sync, DIN MIDI in and out, and
USB-C. It also runs on a 9V power supply, which is handy. It offers some very nicely weighted aftertouch on the keyboard, which should not go unrecognised. A simple physical interface centred around a 1.54-inch OLED screen and two encoders, the Element One’s front panel hosts sections for its three LFOs, two oscillators and the multi‑mode filter, along with a section for the filter and amplitude envelopes, whose encoders can also be assigned to control any four of a multitude of other parameters under the hood. The left side of the panel hosts a joystick-style X/Y controller for expression and pitch‑bending. The idea is that once you’ve decided on all of the above’s various functions (including the filter response and oscillator algorithm), all controls are presented thus for quick access and stress-free performability for players of any experience level.
Words & Music I can’t lie: I seriously struggle with the spiel accompanying the Element One. It reads like I’ve just told Chat GPT to reassure me that I don’t need to know anything about music technology,
with lines like “you’re a musician, not a computer programmer” and “you shouldn’t have to learn ‘synth science’ just to get a great sound.” For one thing, a synthesizer isn’t a computer. And for another, I don’t think I’ve ever in my life heard anyone use the term ‘synth science’. “Most synths make you dive through endless digital menus just to change a sound.” Argh, make it stop! ‘Most synths’? If you’re not familiar with the Dunning-Kruger effect, now is the time to look it up. Now, let’s remember: the Element One’s product engineering and marketing will be taken care of by different departments. This review is of the Element One itself, not of the language accompanying it. Which is lucky, because that language is, for all intents and purposes, the vernacular of somebody (let’s assume it’s an actual
person) who doesn’t know a thing about synthesizers. If it’s simply a case of the left hand not speaking to the right, this by no means has to be a problem (some of the finest synthesizers I can think of have been named and marketed quite horribly). And of course, we know that Modal Electronics do know a lot about synthesizers! The Element One is the latest in quite a list of impressive instruments; from the formidable analogue/digital hybrid Modal 002 to the deep-diving Argon, Cobalt and Carbon series. Those synths offer variously characterful takes on wavetable synthesis, self-professed ‘experimental’ synthesis, sequencing, modulation and the rest, and by all accounts do so very well. So let’s put aside the marketing for a moment; the sounds on offer here are highly respectable. There’s a wide array of algorithms on offer, which can be selected in twos and mixed via the two oscillators, all of which come with their own predetermined Parameter A and B for quick editing of key sonic
Modal Element One $599 pros • A wide array of possible sounds with quality effects. • Large range of filter models. • Full size keyboard with aftertouch. • Sturdy metal faceplate. • Accompanying app allows for screen-based editing and patch management.
cons • Awkward-feeling workflow, with more screen navigation than promised. • A general lack of balance between accessibility and functionality. • A fairly steep list price tag.
summary A decent enough eight-voice digital synth at its core, but the Element One doesn’t quite deliver on its promise of intuition, ease of use and a low barrier of entry.
qualities, and also include built-in processes such as cross-modulation, pulse-width modulation and bit-crushing. These include things like PWM Triangle Pinch, FM Triangle: Square, Noise AM
www.soundonsound.com / September 2026
51
ON TE ST
Erica Synths Bullfrog Drums Drum Machine
RORY DOW
I
f Netflix viewing has taught us anything, it’s that a series can be two episodes long. By this rationale, Erica Synth’s Bullfrog series is now ready for prime time. In our April 2024 issue, Robin Vincent reviewed the Bullfrog (www.soundonsound.com/reviews/ erica-synths-x-richie-hawtin-bullfrog), a synthesizer with the worthy goal of serving as an educational tool for students of electronic music. It was
54
September 2026 / www.soundonsound.com
Erica add to their ‘not just for education’ education range with an extremely playable drum machine... designed in conjunction with techno linchpin Richie Hawtin and offers school-proof build quality, without compromising on grown-up features. For Erica Synths’ head honcho, Ģirts Ozoliņš, the Bullfrog concept is a personal mission. The manifesto is to create an educational set of instruments that neither patronises students nor unnecessarily simplifies the design.
Ģirts is a former teacher, which makes his belief in creating instruments with education at the centre all the more relatable. It’s a heartwarming mission that seems to be a long-term thing (they’ve just teased a third instalment: the Bullfrog Mix). Do not dismiss the Bullfrog instruments as toys for kids, however. The cutesy frog icon should not be taken as a reason
‘O’ of the word ‘frog’) round out the front panel.
Sample Basics
to overlook these instruments. Keep reading, and you will discover that these are serious instruments.
Roll The Drums
Erica Synths Bullfrog Drums $779 pros • Possibly the most immediate X0X-style drum machine on the market. • It sounds great. The overdrive is ‘chef’s kiss’. • As educational devices and a wider system, the Bullfrog series is shaping up nicely.
cons • Only one pair of outputs means no processing individual voices. • Some of the UX could still confuse a new user. • The manual needs another proofread.
summary The Bullfrog Drums is the latest in Erica Synths’ education‑oriented electronic musical instrument series. They’ve managed to deliver a sample-based drum machine that is mostly a doddle to use, sounds phenomenal and doesn’t feel like a toy.
And so to Episode 2 in the series: Bullfrog Drums, which is clearly designed to be used alongside the Bullfrog Synth. The Bullfrog Drums is an eight-channel sample-based drum machine that lets you completely replace its internal samples. It has an X0X-style 64-step sequencer, a dedicated CV channel (ideal for sequencing the Bullfrog Synth), and even an internal microphone for recording your own samples. At 405 x 185 x 60mm, the Bullfrog Drums is a medium-sized desktop unit, larger than your average Elektron box but not as big as an original TR-808 or 909. The build quality is fantastic, with a metal enclosure and dark-stained wooden sides. It uses sizable knobs, and there is plenty of space on the front panel for fat fingers. A small three-character LED display and data encoder help with presenting values and settings. There are 19 cherry keys for track, pattern and kit selection, as well as sequencing and transport controls. A scattering of illuminated buttons change modes and enable settings, and the built‑in speaker and microphone (neatly hidden in the
At the heart of the Bullfrog Drums are seven identical sample-based channels. The eighth track is reserved for CV sequencing. Each sample track has a dedicated volume knob along the top of the unit and a single red LED that glows to show you the volume. The signal flow is simple. You choose a sample, adjust its pitch, decay, start, end and loop point, DJ-style filter cutoff (low-pass or high-pass), resonance, overdrive and pan position. Then start programming a pattern. Alternatively, you can load kits (a collection of sounds) and patterns (all the sequencer stuff) separately. The Bullfrog Drums comes pre-loaded with kits and patterns, as well as seven banks of 32 samples chosen by Richie Hawtin and the Erica team. The banks are organised into categories: Kicks, Snares, Toms & Low Percussion, Claps & Noisy Percussion, Various, Hi-Hats, and Cymbals. You can add your own samples, or even completely replace the factory samples, by accessing the internal drive via USB-C. Interestingly, the manual states that samples can only be 512KB, and must be 48kHz and mono. However, I was able to load and play back much larger samples of 6MB (a minute in length) with no problem, and even play back stereo samples, although they do get collapsed down to mono. There is 64MB RAM available for samples. Accessing the samples is easy. You select one of the seven tracks, press the Sample button, and spin the data encoder. Samples are given a Bank letter and a number. For example, ‘B05’ would be the fifth file in the Snares folder. There is no category restriction for any track, so any sample can be assigned to any track. It’s fast and intuitive, and a great way to have all your favourite one-shots instantly accessible.
Sound Design The possibilities for sound design are bare-bones, but there is enough here to manipulate any sample into something unrecognisable, if you wish. As well as ±24 semitones of pitch‑shifting, you can adjust start and end points, loop samples, play with the filter, and reverse the sample. It’s a simple enough set of parameters to www.soundonsound.com / September 2026
55
ON TE ST
ERICA SYNTHS BULLFROG DRUMS
play with, but it’s surprisingly versatile if you want to mangle a sample into something interesting. And most of these parameters can be automated in the sequencer. The filter and drive combination are worthy of special mention. Both sound fantastic. The overdrive in particular has a way of bringing samples forward in a mix, and imparts anything from subtle vintage saturation to heavyweight distortion. Once you’ve put together a kit that you like, you can save it to one of 64 kit slots, which are grouped in four banks of 16. Patterns and kits can either be linked, where each pattern recalls the kit it was saved with, or kept separate so you load kits and patterns independently.
It’s A Sampler, Too Sampling takes place from either the line input on the rear, or the onboard microphone. You can set a threshold for auto-trigger recording, monitor the input, adjust levels, and automatically assign the recorded sample to the current track. Recordings seem to be capped at 12 seconds in length. The Level indicator LEDs show signal level. After recording, you can trim start and end points and even save multiple samples from one recording. Recorded samples auto-save to a folder on the internal drive. The internal microphone, as you can
imagine, isn’t the most high-fidelity, but it’s great fun, and I can see this being a major source of entertainment in a classroom environment. Ultimately, however, if you’re going to be using the Bullfrog Drums in the studio, you’re probably going to stick to using the computer to record and trim samples before dropping them onto the internal drive.
The Sequencer X0X-style sequencing is the order of the day here, with 16 cherry keys acting as your step inputs, or you can tap‑record using the first eight keys as drum pads. You can save up to 64 patterns on board in four banks of 16. A pattern stores the drum triggers, CV/Gate info, parameter locks and automation. The workflow is, once again, purposefully simple. Select a track, and start tapping keys to enter notes in the sequencer. You can enable Accents, which will give you two trigger strengths, or leave it disabled for simple on/off triggers. The manual is rather quiet on exactly what accent is doing, but to my ears it sounds like a simple volume increase. For patterns longer than 16 steps, you can access up to four bars with the dedicated buttons. Every track can have its own loop point, clock division (which Erica slightly confusingly call ‘Scale’), shuffle settings and direction (forward, backwards, a couple of flavours of ping-pong, and random).
There are plenty of per-step features too, including ratchets, probability, odds (play step only on a certain pattern repeat), micro‑timing and parameter locks. Parameter locks can be written either by holding a step button and moving any sound parameter control, or by recording in automation as the pattern plays. There are a few parameters which are exempt from parameter locks: level, reverse, loop enable, and sample selection. I would have loved to see sample select in particular, and reverse, as automatable items. Of course, a drum machine is nothing without some juicy performance features. Mute and solo per track allow you to build up and tear down the pattern as it plays. You can add MPC-style note repeats on the fly. And, of course, tweak all those lovely front‑panel controls (top tip: pressing Shift and moving any control alters that parameter for all tracks). Using all these functions together means you can develop a pattern on the fly and then recall it back to a safe state, or switch to a new pattern, without ever stopping the sequencer.
CV/Gate Track The eighth track drives the single CV and gate output found on the rear of the unit for controlling a monophonic synthesizer or perhaps a single drum voice. The obvious pairing is, of course, the Bullfrog Synth.
Round The Back
In addition to the 12V DC power socket and switch, the Bullfrog Drums’ rear panel houses master left and right outputs (balanced, line level), a 3.5mm stereo headphone output, a balanced mono audio input for sampling, a 1V/oct CV output, a +5V gate output, configurable-PPQ analogue clock in
56
September 2026 / www.soundonsound.com
and out, a Reset input, and MIDI in and out on standard 5-pin DIN sockets. USB-C handles class-compliant MIDI, and mounts the Bullfrog as a USB drive for sample uploads, pattern/kit backup or firmware updates when connected to a computer.
SGI Stereo Stereo Instrument Line Driver The Radial SGI Stereo lets you place your amps anywhere - onstage or in an iso room, while preserving the tone and feel of a short instrument cable. By converting your stereo signal to balanced audio, you can run up to 300 feet over a single CAT5 line with no noise or loss of clarity. Manage volume, maintain your stereo effects, and design your setup around sound, not cable constraints.
qu
ipped wit
h
e
Stereo Studio-Grade Tone, No Matter the Distance
ON TE ST
ERICA SYNTHS BULLFROG DRUMS
The CV output is calibrated to 1V/oct and the gate output to 5V. For each step in the sequencer, you can select pitch (in musical notes), gate length and even add 303-style slides. Again, it’s a simple system, but ideal for learners to get their feet wet with CV/gate.
In Use On paper, the Bullfrog Drums is a very simple drum machine. It plays back seven tracks of single samples, plus one voice of CV/gate. There’s nothing revolutionary about any of it, but one thing Erica Synths are good at is packing a sonic punch, and the Bullfrog Drums does exactly that. The audio processing, and particularly the combination of filter and overdrive per track, makes everything sound alive. I would wholeheartedly recommend this drum machine to anyone with a need for simple and fast drum programming. There are limitations that might rule this out for certain buyers. Only one pair of outputs means no processing of individual voices. No sample layering. No synthesis. Not much support for longer samples, although the latest firmware (v1.1) did add shortcuts for automatically spreading start points, end points or loop points, evenly distributing playback offsets across the sample duration — something they call ‘pseudo time-stretching’. From an educational perspective, the experience is simple to grasp and would suit beginners well. There are a couple of foibles that will probably confuse a first-time user. For example,
58
September 2026 / www.soundonsound.com
Measuring 405 x 185 x 60mm and weighing 2.7kg, the Bullfrog Drums is officially a ‘bantam weight’ drum machine. OK, I’ve just made that up, but it’s not too big and not too small, and the front‑panel mic is hidden in the ‘O’ of the Bullfrog logo, which is pretty neat.
it’s quite easy to lose a pattern you’ve worked hard on by forgetting to save the pattern before you load another one, and whilst this is a performance feature (quickly getting back to a saved state), there’s no warning for first-time users; it’ll just forget all your edits when you load the new pattern. Occasionally the front panel can be a cause of head-scratching too. Buttons that are grouped (Sample, Start, End, Reverse and Loop are a prime example) don’t always behave the same way,
even the freshest of freshers. That said, Erica Synths provide an ancillary primer document called the ‘Creative Manual’, written by YouTuber Jeremy Leaird-Koch (aka Red Means Recording) that explains rhythm and drum programming in a way that would apply to any drum machine. It’s just a shame that the main product manual doesn’t follow the same kind of educational rigour. The Bullfrog Drums is still a great product. It’s got a killer sound and, once you get beyond the occasional
“I would wholeheartedly recommend this drum machine to anyone with a need for simple and fast drum programming.” and I feel that can be confusing to someone new to music technology (or even a seasoned great reviewer!). It also doesn’t help that the manual contains errors. It claims the maximum sample time is five seconds when it’s clearly not. And it even refers to HexDrums several times, a completely different product. Perhaps I am being more critical than usual in these last few paragraphs. That’s because if you make a claim that a product is for educational purposes, then it should be utterly intuitive to use. And any documentation should be error-free, clear and explain concepts and workflows in a way that makes sense to
idiosyncrasy, it becomes fast and easy to use. Load it up with your favourite drum machine samples, and you’ll have everything you need to bang out a rhythm track in no time. It wouldn’t be my top choice for sample chopping, but you can do it in a pinch. Sometimes you need a product that does one thing with simplicity and style, and the Bullfrog Drums fits that bill. Whether you’re in the classroom, on stage or in the studio, it has a lot to offer. $ $779 W www.ericasynths.lv
“I can play SWAM instruments just like I would play any real instrument, with all the nuances and expression I want, and it’s captured perfectly in the recording. It’s freed up my creative process significantly.” Tom Scott (Grammy-Winning Saxophonist, Composer, and Arranger)
•
String Sections (Violins, Violas, Cellos, Basses)
•
Solo Strings (Violin, Viola, Cello, Bass)
•
Solo Woodwinds (Clarinets, Saxophones, Flutes, Double Reeds)
•
Solo Brass (Trumpets, Trombones, Horns & Tubas)
Experience the exceptional realism of SWAM Physical Modeling
www.ilio.com | 800.747.4546
ON TE ST
Solid State Logic Odyssey Digitally Controlled Analogue Mixing Console The legendary British console makers have a new flagship model for pro studios. Highly configurable. Mightily impressive. Is this the future of analogue? M AT T H O U G H TO N
S
SL have a rich and storied history and, naturally, they draw on that in the design and promotion of products today. Notably, their 4000- and 9000-series consoles were particularly influential, and not just in terms of visual impact. The ‘4K’, as it’s often known, was the first commercially available large console to feature both dynamics processing on every channel and a total recall system. Of course, there was that famous ‘glue’ compressor on the mix bus too...
Two By Two But there’s way more to SSL today than trading on past success. I’ve visited their
60
September 2026 / www.soundonsound.com
Oxfordshire headquarters — where their big, professional mixers are still designed, developed and manufactured — a few times in recent years, and each time I’ve been struck not just by the product designers’ expertise, but also their passion and enthusiasm. They evidently feel that there remains much to be learned from studying their back catalogue, but in pretty much every conversation also display ambition, and a drive to innovate and advance. New SSL consoles have been coming relatively thick and fast of late. Only a couple of months ago, we published my review of their Origin Evo (SOS June 2026: https:// sosm.ag/ssl-origin-evo), an all-analogue affair about which I remain hugely enthusiastic — in a nutshell, a traditional SSL mixer, with better technical specs and some
slick modern features. Notably, compared with the original Origin, it adds dynamics processing and a high-/low-pass filter section on every channel. And it’s only a year since I reported on their groundbreaking Oracle (https://sosm. ag/ssl-oracle). A radical new design, this one put flesh on the bones of a ‘future analogue’ concept SSL have been working on behind the scenes for years. The signal path is again entirely analogue, but everything’s digitally controlled: the analogue electronics sit in stylish rack furniture, and the user interacts with a digital control surface that’s laid out much like a traditional mixer. So it facilitates many advantages of digital mixers (such as reassignable controls and accurate, near-instant total recall) while offering analogue-like reach-and-grab immediacy. The Oracle’s sound and facilities are astonishingly good, and it’s hugely more power-efficient than the consoles of yore. But while it was clear as soon as I laid eyes on it that there was plenty to commend
SSL Odyssey From $295,000 pros • The culmination of years of research — and it shows! • Modular configuration options. • Up to 96 in-line channels, and 96 control strips. • Dynamics processor on every channel. • Significant updates to O-Control software. • Immersive audio workflow support. • Compatibility with SSL Oracle. • DAW control plug-ins.
cons • This was never going to be inexpensive, was it?
summary A highly configurable large-format analogue console that benefits massively from a thoughtfully designed digital control system. The Odyssey delivers all the punch and clarity SSL are known for and supports traditional analogue workflows, while also accommodating the many other needs a high-end studio might have today. It’s SSL’s new flagship model, and it’s every bit as impressive as you’d hope.
the Oracle, I recall one of my first questions to the product team being something like: “A lot of vintage SSL console owners use their channel compressors — had you considered including them?” Naturally, they had, but the absence of them in the Oracle was by design. Still, I inferred from some knowing looks that the Oracle wouldn’t be the ultimate destination on this journey. And if you have even a passing knowledge of classical literature, you’ll know the word ‘journey’ segues perfectly to the subject of this review... SSL’s latest behemoth flagship
The channel processing modules and routing diagram, shown on both a channel-bay screen and on the O-Control software.
mixer, called the Odyssey, joins the ‘O Series’ alongside the Oracle, the Origin and the Origin Evo, all designed by Niall Feldman, SSL’s Director of Special Projects. In some respects, the Odyssey is to the Oracle what the Origin Evo is to the Origin. As with the Oracle, there’s a largely digital control surface, and the analogue signal-path electronics are housed in multiple large rack units. As with the Origin Evo, each channel has a dynamics processor and low-pass filter that its sibling lacks. So the O Series comprises two all-analogue consoles and two digitally controlled analogue ones, and in each case there’s one offering channel dynamics and a full ‘bracket filter’. I don’t anticipate more consoles being added to it any time soon, but of course the digital side of things — the firmware, the O-Control software (that supports both console models) and the DAW integration facilities — can be upgraded, and since I reviewed the Oracle there’ve already been significant updates to O-Control. And while we might not expect new consoles, I’d be surprised if SSL didn’t exploit the fruits of their O-Series R&D to deliver new outboard gear at some point.
Make It Large? I often think of any generously proportioned mixer that offers good technical performance, an abundance of master-section and input channel facilities, and more than, say, 24 channels and eight subgroups, as ‘large-format’. However you define it, there’s no doubt that the Odyssey earns that moniker, but there are multiple possible sizes, configurations and customisation options. The smallest available control surface has a centre section (for the stereo bus, subgroups, aux returns, monitor facilities and so on) plus 24 in-line channels, organised in three eight-channel bays. The
largest gives you a whopping 96 in-line channels, each with a corresponding console channel strip. For any configuration, the console uses one rack of analogue electronics for the centre section, and another for every 24 in-line channels. The control console can be specified with more control channel strips, added in eight-channel bays (so 32, 40, 48, 56, 64, 72, 80, 88 or 96), and obviously you can specify an Odyssey to resemble a traditional analogue console, with a control strip for each and every channel. But since each bay can be mapped to any group of eight analogue channels, there are other options. For instance, you could have a 24-channel control console as a front end for 96 analogue channels. The workflow would be more akin to that of a digital mixer, in terms of channel selection, but you’d still benefit from the abundance of controls on each channel strip. It’s also worth noting here that, even if you were to opt for the ‘full monty’ (96 channels, 96 control strips), you could still bring whatever channels you wanted ‘into focus’ on a bay near your seat between the monitors. With the analogue and control-console channel counts decided, you have options in terms of the physical layout. The furniture in which the centre section sits is two bays wide (the same as 16 in-line channels), though the controls only occupy half that. The other half can be configured to meet your needs: you might place an eight-strip bay there, for example, or, as on the 48-channel review console, a desk surface to give you space for things like your computer keyboard, Stream Deck, paper copies of a score or lyrics and so forth. Eight-channel bays can be placed to the left or right of the centre section, and you can place wedge-shaped desk sections between them. There’s perhaps little point in that for smaller configurations, but on a large Odyssey such as the main image
www.soundonsound.com / September 2026
61
ON TE ST
Zlosynth Arplus Eurorack Module
S
till a relatively new face on the Eurorack scene, Petr Horáček, from Brno in the Czech Republic, is fast making a name for himself under the Zlosynth banner. Incredibly, the Arplus is only the third module in the company catalogue, following the Achordion and Kaseta, but once again it demonstrates Horáček’s deftness with digital, not to mention an aptitude for cleverly reappropriating long-standing musical principles in a fresh and interesting way. A quick recap on those preceding modules: the Achordion is a 10HP chord-generating wavetable oscillator, providing up to 18 voices that can be quantised to various scales. It offers various playing modes, from single tones to chords,
66
September 2026 / www.soundonsound.com
and its 37 wavetables range from simple waveforms to bell-like sine shapes to harsh distortion-infused tones. The Kaseta, meanwhile, is a smartly designed tape-style delay and looper with four virtual heads, each of which has its own volume, feedback and panning controls. Add to this a rather lovely adjustable saturation and wow and flutter, and you’ve got a highly versatile looping, pinging, tone‑shaping machine. It’s all DIY, but the builds aren’t difficult (trust me: if I can build it, so can you). Why do I bring these up? Because in many ways the Arplus draws on both, completing an initial triumvirate of modules quite beautifully. “Arplus started as a Karplus‑Strong experiment on the Achordion,” Horáček said in our Modular Profile in the May issue. “A mix of things I found interesting and complementary: scale quantisation, arpeggio patterns and string voices all in one place.” Karplus-Strong being based on quick delays, this module presents six voices of string synthesis that can be set to arpeggiate, and also be excited by an external audio signal. It takes the Achordion’s notion of scale selection to another level with an astonishing 31 different scales to choose from, allowing for chords of up to eight notes. It has adjustable polyphony, filtering and envelope-adjacent contour, meaning in practice that its behaviour can feel crisp and stilted, long and languid or anything in between. The first thing to say is that the Arplus’ raw sounds are every bit as good as you could hope for from a Karplus-Strong-based module. From twangy to plucky to woody to metallic; as a loving user of modules like Mutable Instruments’ Rings, I can say with some confidence that it capably matches the best modules in its category for sonics. At the same time, I found it to make the best of friends with spatial effects — particularly delay. I tend to think physical‑modelling synthesis benefits from the implication of a physical space anyway, but the
way the Arplus moves through notes in a chord or scale lends itself very nicely to residual echoes of what’s come before. Also, fair to say Karplus-Strong sounds can by nature become quite harsh and stark at times, in which case a soft analogue delay becomes the perfect emollient. As for those 31 scales, this is one area where the Arplus really flexes. It’s also a good opportunity to make mention of the fact that recent years have seen an interesting and important move toward what is often called the ‘decolonisation’ of music production environments. Put simply, a vast majority of the time, production software and hardware skews toward Western understandings of rhythm, tonality and temperament, yet in reality a majority of the world does not conceive music in this way. So, suffice to say, variety of this kind is a welcome sight. Instead of bludgeoning you with scales, the Arplus organises them nicely into groups, with dedicated buttons for both group and individual scale selection. The groups consist of Western diatonic, microtonal Arabic maqam, Indian melakarta and Japanese pentatonics, with a further Full category for quarter‑, semi‑ and whole-tone scales. Within these are an array of scales that I won’t try to list in full here, but let’s just say that whether you’re looking for a Mayamalavagowla scale, a Hirajoshi scale or a Nawa Athar scale, the Arplus has you covered. A number of arpeggio shapes are also on offer, along with controls for the root note (Tone), number of notes (Size) and number of ‘strings’ used. As I say; these three first fruits from Zlosynth together complete a satisfying three-piece ecosystem. Whether Petr Horáček chooses to make that triangle a square or to turn the page on to a different synthesis department entirely, I’m very much looking forward to whatever’s next. William Stokes $
$399
W
www.zlosynth.com
Mylar Melodies RANDOM8 Eurorack Module
A
nyone familiar with Alex Theakston’s videos as Mylar Melodies will be aware of his enthusiasm for performing with Eurorack, the Music Thing Turing Machine and the idea that constant subtle modulation plays a big part in making engaging, interesting music with modular. Combining these passions is the RANDOM8, his debut module, made in collaboration with Befaco, which gives you eight channels of highly controllable random voltage in a neat 8HP package. But the RANDOM8 is much more than just eight channels of S&H — it can provide modulation and melodies for your whole system if you like — and as soon as you begin to use it it’s clear how much thought has gone into what probably seemed like a very simple idea to begin with. First off, and this is a stroke of genius, all eight outputs have a dedicated attenuation knob, immediately begging the question, why don’t all modulation modules have built-in attenuation? This means that you can immediately scale your voltage to a usable range with no additional modules or patching. Secondly, those same knobs also allow you to further tailor the outputs with the options in the one-layer‑deep menu system. Menu system? Oh fu... but no, it really is very simple and not an impediment to using and enjoying the module. In fact it’s so simple I’ll explain how it works now and then we can all move on with our lives. The eight buttons are labelled Preset, Dividr, Prob, Style, Offset, Scale, Slide and Steps. You select the parameter you wish to edit by pressing the corresponding button for one second and then turning the knob of the channel you wish to affect. To exit the menu press any button. There. Easy. The timing of the actually-not-quite-so random voltages is determined by the trig input for each channel. Each channel will output a new voltage whenever it receives a trigger, unless of course you’ve dialled up the Dividr, in which case it will wait for up to eight trigs before generating a new voltage. The trig inputs cascade, so an input at the top will trigger all the channels below unless
W E N USB Solo mk2 from
High spec MIDI to CV converter with both USB and 5 pin DIN MIDI V/Oct & Hz/V – Gate & S-trig – 3 aux outputs – clock & DIN Sync Can be used as a USB MIDI Interface (while still converting to CV) All of the features of the Pro Solo mk3 but with the addition of USB See website for full information
SPLIT, MERGE, EXTEND OR CONVERT All the MIDI you need, right where you need it
Thru-5, 12 & 25
Merge-4 & 8
Split a single MIDI source into 5, 12 or 25 identical copies
Combine the data from 4 or 8 MIDI sources into a single output
LNDX & LNDR
MIDI USB Host mk3
Extend MIDI up to 1000 metres LNDX (shown) has etherCON connector
MIDI IN & OUT on DIN for your USB-only keyboards, controllers & synths – without using a computer
WE MAKE MIDI WORK FOR YOU Contact the MIDI Specialists
kentonuk.com J#233 - Product Ad V17 - US.indd 1
www.soundonsound.com / September 2026
67
22/01/2026 16:33
ON TE ST
Blackbox Analog Design HG-Q
Stereo Equaliser & Valve Saturator
JULIAN RODGERS
W
hile we may not need analogue outboard today, plenty of us are still very drawn to what it has to offer. But as I discussed in a recent SOS podcast about ‘hybrid’ studios — those that use a combination of analogue outboard and software — even engineers who have racks full of high-end equipment can sometimes struggle to integrate their hardware into modern workflows. And the most
70
September 2026 / www.soundonsound.com
This hybrid valve/solid‑state processor offers some unusual facilities — not least the ability to be remotely controlled from your DAW. commonly cited reason for reaching for a software equivalent? It’s very simple: recall. To address this, a small but increasing number of manufacturers have been developing recallable analogue hardware that combines the sonic appeal of analogue processing with
the convenience of digital control and often software-based workflows. The SSL Odyssey reviewed elsewhere in this issue of SOS is a striking example, but Bettermaker, Wes Audio, Cranborne Audio, Tegeler Audio and several others have delivered elegant plug-in controlled analogue processors in recent years.
The Blackbox Analog Design HG-Q I’m reviewing here is another. For all practical purposes, it’s a high-end but fairly conventional analogue equaliser, complete with a tactile front panel that’s been designed to allow traditional manual operation. But the LED rings tell you the knobs turn endless rotary encoders, not pots, which in turn suggests there’s a little more going on behind the scenes. Below, I’ll examine the HG-Q’s merits as an EQ, of course, but I’ll also consider whether the hybrid approach genuinely makes this hardware more practical in modern production workflows than conventional analogue outboard.
Design & Concept The HG-Q, housed in a substantial 3U, 19-inch rackmount chassis, is a stereo three-band equaliser with a hybrid solid-state and valve topology. Each band features separate cut and
boost controls that normally operate in series (more on the alternative below), and the solid-state cut/boost stages result in a clean-sounding, flexible EQ. Each band’s boost stage, though, can introduce more character if desired: pressing its Sat button engages a parallel valve stage, which contributes different amounts of saturation according to the signal level. Frequency selection is switched per band too, with a choice of eight fixed frequencies: 30, 50, 70, 100, 140, 200, 280 or 400 Hz for the low band; 22, 330, 460, 650 or 900 Hz, or 1.2, 1.8 or 2.5 kHz for the mid band; and 2, 3.5, 5, 6.5, 7, 10, 12 or 15 kHz for the high band. The bandwidths are adjustable too (16 fixed points), and at its narrowest settings the HG-Q is capable of precise, surgical cuts. By default, each band offers up to 8dB of cut or boost, but the central global control section includes a 2x button that doubles this to ±16dB, for more radical processing. So while an EQ like this would be very at home employed in a mastering setup or on a stereo bus, it should be just as good for shaping source tracks in a recording session. Things can become still more interesting if you press the Par button adjacent to the cut control. Doing this changes the EQ topology, arranging the boost and cut stages in parallel and then summing their outputs. This gives you access to the sort of simultaneous boost-and-cut behaviour often associated with classic Pultec-style equalisation, but it’s considerably more flexible than that — not least because a band’s cut and boost stages can be set to different frequencies, and the phase interaction between those parallel paths means more complex tonal shaping is possible. As well as power, bypass and the aforementioned 2x mode, the centre section hosts controls for managing stereo operation. The two channels can be linked, run independently in dual mono, or configured in Mid-Sides mode, with the necessary matrixing handled in the analogue domain. In this mode, the Mid and Sides channels can each be soloed, making it easy to hear exactly what’s being processed. Completing this centre section are a 12dB/oct high-pass filter (20, 35, 40 or 100 Hz) and an attenuation control with four settings, marked simply 1-4.
Blackbox Analog Design HG-Q $5995 pros • Great sound. • Flexible and versatile. • Zero effort, reliable recall.
cons • Expensive. • Hardware controls can’t be used to write automation.
summary A high-quality analogue three-band EQ and valve saturator, with a versatile feature set that makes it as useful for recording as for mixing and mastering — and with the notable benefit that it can be remotely controlled and recalled instantly using a DAW plug-in.
The rear panel is uncluttered: an IEC power inlet is joined by a USB connection for the software remote control, plus two pairs of XLRs for the balanced stereo analogue I/O. Unusually, those XLRs are arranged as an input pair and an output pair, rather than the connectors being grouped by channel. I can see the logic, but personally I’d find the latter configuration more intuitive.
First Impressions & Physical Interaction First impressions of the HG-Q are of a substantial piece of equipment. It feels solidly built and has reassuring weight to it, and the plain black faceplate hosts both clear legending and a comfortably spaced control layout. The encoders feel good in use, too. Each one has a detented action, a brightly illuminated LED ring, and a satisfying ratcheted click as it moves from position to position. The translucent switches feel a little less premium, offering no tactile click when pressed — instead, you push them in, they illuminate bright blue to indicate their state, and pressing again extinguishes the light. It works, it supports the recallable nature of the unit, and some will welcome the silent operation, but I do miss the satisfying confirmation of a more mechanically positive switch action! The LED implementation is very effective, with multi-colour illumination used throughout, and the Black Box logo is also illuminated blue in normal operation, changing to red in certain www.soundonsound.com / September 2026
71
ON TE ST
Harrison Flex 10 USB Audio Interface
Going It Alone
With the Flex 10, Harrison’s designers have delivered features not usually found in a desktop interface, including transformer saturation and real VU meters. SAM INGLIS
M
usic tech can be novel and exciting, but it can also be utilitarian. Audio interfaces usually fall under the latter umbrella, and that’s fine. We don’t want our audio interface to spring surprises or fuel creativity. We want it to funnel sound to and from our computer, with a minimum of fuss. However, audio interfaces are often paired with other gear that does colour the sound in musical ways. In particular, engineers like to feed them from mic preamps with transformers, valves and other sources of non-linearity. So if transformer-balanced preamps are
76
September 2026 / www.soundonsound.com
and console design, which they’ve successfully translated to the world of audio interfaces. Now, another renowned manufacturer of analogue consoles is attempting the same feat.
desirable, why not build them into the audio interface? The obvious answer is because fancy preamps are expensive to make, and this is borne out by the sprinkling of existing interfaces that do feature interesting preamps. The likes of Heritage Audio’s i73 series, Focusrite’s ISA C8X and Neve’s 88M and 1073SPX-D are, inevitably, more costly than typical ‘vanilla’ interfaces with the same number of inputs and outputs. For this reason, manufacturers such as SSL and Focusrite have equipped their lower-cost interfaces with analogue circuits that mimic transformer saturation using more affordable components. SSL, Neve and Focusrite all have a rich heritage of analogue preamp
For their first attempt to build an audio interface, Harrison partnered with Icon Pro Audio rather than develop everything themselves. The result was a desktop interface that featured two preamp channels derived from Harrison’s 32Classic console. The 32Ci (www.soundonsound.com/reviews/ icon-pro-audioharrison-32ci) was a relatively affordable product, in part because it used a transformerless version of Harrison’s preamp circuit. It was also a curious one. Icon’s quirky approach to the digital side of things delivered some unusual features, but presented its share of frustrations. Two years on, Harrison have had another go at making their preamp tech available in an audio interface, and this time they’re not sharing the limelight. Superficially, the new Flex 10 embodies many characteristics that are common to desktop interfaces. It is a USB interface,
housed in a wedge-shaped case. At heart, it’s a stereo-in, four-out device, but adds ADAT Lightpipe I/O for digital expansion. And it provides a simple but effective direct monitoring arrangement that does not require the installation of a software control panel. But the Flex 10 is a little more expensive than your average desktop interface, and the main reasons for this are to do with its analogue circuitry. Specifically, the Flex 10’s two main input channels are anything but average. In fact, the Flex 10 goes all-in on providing an authentic Harrison analogue experience in an audio interface. The main input channels use a novel implementation of Harrison’s preamp circuit, which not only allows you to switch a transformer in and out of the signal path, but also to vary the degree of saturation independently of signal level. What’s more, both channels have a balanced, switchable insert point, and instead of offering a single combi socket, each provides an XLR input for mic signals plus separate quarter-inch jacks for line-level and instrument sources. A continuous gain control on each channel is augmented by buttons for -20dB pad, polarity reversal, phantom power and line/mic input selection. The last of these is overridden automatically when anything is plugged into the front-panel instrument socket. Also present and correct is perhaps the most characteristic feature of the classic Harrison preamp design: the unique filter configuration, which allows the high- and low-pass filters to be swept over a much wider range than is usual. The low-pass can be screwed all the way down to 160Hz, while the high-pass spans 25Hz to 3.15kHz. Used together, they can deliver anything from gentle taming
of rumble or hiss, through the classic ‘telephone’ effect to complete silence.
H Bomb In most respects, the preamp section of the Flex 10 is identical to Harrison’s 500-series 32Cpre+, but it has a unique ace up its sleeve. The 32Cpre+ is a conventional transformer-based preamp, although, unlike many such designs, it doesn’t use the transformer as a gain stage: the Jensen JT-MB-CTCA in the 32Cpre+ has a 1:1 turns ratio and thus operates at unity gain. But because this transformer is the first device in the signal path, its contribution to the sound is entirely dependent on the source. The only way to vary the amount of transformer saturation with this sort of circuit topology is to feed it a hotter signal in the first place. In the Flex 10, by contrast, the transformer is located after the preamp and filters, with just the meter taps and insert points between it and the A-D converter that is the signal’s ultimate destination. And it’s accompanied by a custom H-Drive circuit that gives the user control over how hard this transformer should be driven, whilst keeping the overall signal level constant. In use, this is very much like the Console Mode that Focusrite developed for the ISA C8X, and more user-friendly than the typical arrangement whereby you juggle input gain and output attenuation settings in search of the saturation sweet spot. H-Drive is available for all three input types: mic, line and instrument. The Flex 10 also has a unique selling point on the output side. Both input channels have seven-LED ladder meters, and there are further ladders in pairs to report peak levels at the main and alternate outputs. But the stand-out
Harrison Flex 10 $599 pros • Includes two fully featured Harrison mic preamps. • Genuine VU meters on the outputs. • H-Drive circuit allows the user to introduce variable transformer saturation. • Simple to use. • Very well built. • Makes a great stereo preamp or ADAT expander even if you don’t use the audio interfacing. • Remarkable value for money.
cons • External PSU is a disappointment. • ADAT input can’t be monitored directly.
summary The Flex 10 takes Harrison’s 32Cpre+ preamp design and runs with it to create a uniquely classy yet affordable desktop audio interface.
feature is the addition of a pair of proper VU meters, which can be fed from either of the two output pairs. Like transformers, VU meters are intrinsically costly, so this feels like a touch of opulence on Harrison’s part. The aforementioned main and alternate outputs both appear on the rear panel, on balanced quarter-inch jacks. This panel is also home to the XLR mic inputs and quarter-inch line sockets, four more jacks for the balanced inserts, and a socket for the mandatory 12V DC wall-wart power supply. A single Type‑C connector is used to pipe data to and from the host computer, and there’s a single ADAT Lightpipe in and out, plus MIDI in and out on TRS mini-jacks. The instrument sockets are on the front panel, as are two further quarter-inch sockets for headphones.
The Flex 10’s two analogue inputs provide separate XLR and jack sockets for mic and line-level signals.
www.soundonsound.com / September 2026
77
ON TE ST
PAUL WHITE
S
trymon’s original TimeLine delay pedal was introduced over 15 years ago, and still has a place on the pedalboards of many top players. It’s understandable that Strymon decided this new version, the TimeLine MX, shouldn’t stray far from the ethos of the original: like that model, it offers a wide choice of delay algorithms, and has a friendly user interface that puts all the main controls on the top panel. At seven inches, the aluminium case is just a quarter-inch wider. But although the physical format feels familiar, what lies beneath really has changed with the times. The original had a SHARC-based architecture, but the new model employs a modern 800MHz, tri-core ARM processor. This delivers significantly more processing power, and enables the pedal to run two independent processing engines simultaneously. 32-bit floating‑point processing is used,
80
September 2026 / www.soundonsound.com
Strymon TimeLine MX Multi-delay pedal
The TimeLine has proved enduringly popular, on stage and in the studio. But as technology has evolved over the last 15 years, Strymon decided that the time was ripe for a significant redesign... along with what Strymon describe as low-noise, high-performance A‑D and D‑A converters. In some respects, then, this evolution mirrors what Eventide did when adopting a more modern DSP platform to follow the ‘single algorithm at a time’ H9
with the dual-algorithm H90. Strymon also plan for the TimeLine NX to be compatible with their Nixie 2 software, which will allow USB or wireless editing via Bluetooth — though at the time of writing, this functionality was not yet available.
The analogue circuitry now includes discrete JFET input preamps, along with a low-impedance output stage, and the dry signal remains entirely in the analogue domain — this avoids unnecessary A-D/D-A conversion, ensuring that converter latency doesn’t combine with that of other digital pedals to compromise the playing feel. The bypass control can be set to engage a true bypass, which uses relay switching, or a buffered one; in the latter mode the delay and reverb tails can fade naturally. (When stereo outputs are in use, the bypass mode sets itself to buffered automatically.) While this pedal has a similar footprint to the original, the layout has changed somewhat, the most noticeable difference being a larger, more informative OLED display, but there are alternatives to the default view: in Stage mode, the preset name can fill the screen, and there’s also a mode in which the preset name can scroll across the screen if it’s too long to fit. Small touches, perhaps, but considerate ones, and they’re very useful in practice!
Making Connections The connectivity has been updated too. Traditional 5-pin MIDI in and out is still provided (for patch access and parameter control), but the MX variant adds MIDI over USB-C (this connection will also be used for firmware updates and Nixie 2 editing), along with an expression jack. The latter is compatible with an optional TRS expression pedal, MultiSwitch, MultiSwitch Plus, or a TRS MIDI connection. Handily, MIDI Clock sync options can be saved on a per-preset basis.
All the connections are on the rear panel, which means that the pedal can be placed closer to pedals on either side. Selectable instrument or line-level operation ensures compatibility with non-guitar sources, including keyboards and studio equipment, and with a quoted maximum input level of +10dBu and typical signal-to-noise ratio of 116dB, the TimeLine MX should be very much at home whether used on stage or in a studio production environment. The centre-negative power connector requires a 9V, 500mA DC supply; if your own PSU doesn’t deliver that much current, you’ll have to buy one, as there isn’t one included with the pedal. All the signal connections (stereo in and out, send and return) take the form of unbalanced TRS stereo jacks. As with the original, there’s a looper, but as you’d expect it’s been improved. The 30-second maximum loop time has now been extended to five minutes, and there’s now a One Button looping mode in addition to the multi-button mode — in One Button mode it can be used on the fly without having to switch to a dedicated looper mode, which could be very useful. The looper can be placed before or after the delay effects (but apparently not between them). The rightmost (Tap) footswitch can be used for both setting delay time and accessing the One Button looper, and other footswitch functions include triggering infinite delay repeats or infinite reverb sustain.
Controls & Layout Seven of the eight smaller knobs — Time, Repeats, Filter, Grit (which adds distortion
MIDI is now catered for in three ways: traditional 5-pin DIN sockets, MIDI over USB-C, and a TRS MIDI option using the expression pedal jack. The USB also caters for firmware updates and will facilitate communication with a forthcoming software editor.
Strymon TimeLine MX $679 pros • Superb sound quality. • Can recreate a number of traditional delay types as well as offering special effects. • Two effect algorithms can be combined, with various routing and panning options. • Comprehensive MIDI functionality. • Five-minute looper with single‑switch and multi-switch modes.
cons • Software editor not available when launched. • A significant investment.
summary A very worthwhile update to a classic digital multi-delay pedal, the TimeLine MX benefits from a dual effects engine and an array of other useful features and new algorithms.
or tape artefacts as required), Speed, Depth and Mix — are now arranged in a straight line along the middle of the pedal, with the Value turn/press encoder knob tucked away to the right of the display. Holding the Value knob down for three seconds gets you into the global settings mode, where changes can be made to the looper options, display settings, Tap switch function, MIDI, expression options and so on. An expression pedal is able to provides continuous control over any of the TimeLine MX’s knobs. Note that while most of the delay types can be adjusted up to 2.5 seconds, the dBucket and Oil Can algorithms are restricted to 800ms, and the drum echo to two seconds. The reverb decay can be turned up in excess of 40 seconds, which should be more than enough for anyone.
www.soundonsound.com / September 2026
81
ON TE ST
MINI REVIEWS
T-Rex Fuzztopia Dual Distortion & Fuzz Pedal It’s always a good sign when I want to spend two hours playing through a new pedal before I even thinking about writing it up! T-Rex don’t give away too much regarding what is inside their new FuzzTopia other than that it is based on analogue circuitry — but whatever they’ve done, it not only sounds good but turns out to be incredibly versatile too. If you’re used to seeing fuzzboxes with two or three knobs, don’t let Fuzztopia’s busy front panel intimidate you, because what you have in your hands is actually a two-in-one pedal that offers separate controls and bypass switching for both fuzz and distortion. The upper row of knobs controls the fuzz section and the bottom row, which has an identical layout, controls the distortion. As you’d expect from T-Rex, the pedal is very solidly built and it operates from a standard 9V DC power supply (or battery), requiring just 60mA. A button on the rear panel keeps the two sections separate or activates both together, regardless of which footswitch is pressed. While a little wider than a typical single‑function pedal, the connectors are all on the back panel, so you can place this pedal right up against others to save space on your pedalboard. T-Rex describe the FuzzTopia as a hybrid between retro fuzz and warm distortion and, as I discovered, it can recreate anything from mild overdrive, through blues and classic rock to multiple shades of fuzz. Both channels have a drive control (labelled Fuzz and Distortion, respectively) and an output volume control, but between them is a tone control and, importantly a blend, for balancing the driven and dry sounds. The tone control only affects the driven sounds, so any clean sound you mix in is unchanged by the tone control settings.
86
September 2026 / www.soundonsound.com
When a section is active, the knob functions are backlit in red. Each section has its own footswitch. Looking at the Distortion section first, this has a very wide range of adjustment, from virtually clean to heavily saturated classic rock. Using the blend knob to mix in some of the dry sound can help maintain note definition and picking
“In the studio, this pedal can help coax a wide range of guitar sounds from even a fairly basic amp modelling plug-in.” dynamics, and the tone control goes from warm to biting. By balancing the drive and blend functions, the FuzzTopia can get close to the Tube Driver sound popularised by David Gilmour, but really it can do anything from slightly hairy country to AC/DC meets Free to... well, any long‑haired guitarist from the 1960s to the present day! Flip to the Fuzz section, which we’re told references the sound of earlier germanium pedals, and what soon becomes apparent is that the tone control works differently from that in the distortion section, and is the key to recreating fuzz tones that go from the raspy ‘Satisfaction’ and
Jeff Beck Yardbirds tones to the Fuzzface or more fluid EHX Big Muff sounds favoured by Hendrix, Jack White and, again, Mr Gilmour. As fuzz circuits go, this one is very well behaved, with none of that spluttery, mis-biased noise at lower drive settings that some older fuzz units are known for. At its extreme anticlockwise setting, the tone control delivers that raspy ’60s fuzz sound, while moving it clockwise passes through a number of useful tonalities, with warm, fat fuzzes at the fully clockwise end of the scale. Again, the blend control can be used to dial in extra note definition if needed. For most purposes, a fuzz drive setting of around a quarter of the way up does the trick, but if you like the sensation of a fuzz that’s trying to wrest control away from you, Hendrix-style, then maxing out the drive will do just that. It’s possible to use both sections at the same time but, unless the gain settings are reined in, the background noise becomes noticeable and the amount of drive can get somewhat unruly. Nevertheless, there are some great tones to be forged here. When using the sections separately the distortion section is very quiet, while the fuzz exhibits some audible circuit hiss. This type of noise is a function of the high-gain circuitry used in fuzz circuits, and it could be argued that it’s part of the character of fuzz; pretty much all fuzz circuits generate some hiss. The FuzzTopia is such a deliciously versatile and tonally satisfying pedal that I had expected it to come with a boutique price tag, but it actually costs less than some fairly basic overdrive pedals. I like that the distortion section can be run as a natural-sounding overdrive for that pushed-amp sound, but it has enough range to deliver those big‑hair solos too. And the fuzz section is capable of delivering just about any fuzz sound you might desire — unless you are a fan of the spluttery, dying battery sound! In the studio, this pedal can help coax a wide range of guitar sounds from even a fairly basic amp modelling plug-in (though I might be tempted to use a gate to tame sounds recorded via the fuzz), while for live performance it offers all the drive and fuzz tones you might need in the space of a single pedal. I can feel a rework of my pedalboard coming on, as the FuzzTopia really is one great-sounding piece of kit! Paul White $ $189. W www.t-rex-effects.com
ICONIC DESIGN, REBORN.
Meet the NEW QU
Reengineered with the latest technology and versatile connectivity for today's sound engineers.
TECHNIQUE
Tracking Bands udio Outside The St
88
September 2026 / www.soundonsound.com
When the point of a recording is to capture the live energy of a performance, conventional studio spaces and techniques aren’t always the best option. JULIAN RODGERS
N
ot all bands enter the studio seeking a meticulously constructed production. Often, they want a compelling representation of what they already do live. When the purpose of making a recording is to secure live work, staying true to what they deliver on stage matters more than building something that only exists in the studio. The studio paradigm evolved at a time when recordings were the primary commercial product. Today, that’s often no longer the case. This raises an important question: what are we actually trying to achieve when we record? Modern recording technology enables bands to work outside a traditional studio. However, constraints remain, particularly at the semi-professional level where most bands operate. In a well-equipped studio, the space and workflow can adapt to the band. In lower-budget or mobile situations, the opposite is often true, with the band adapting to the limitations of the setup. For example, you might have a capable DAW and sufficient I/O, but a more limited choice of microphones, stands, cabling, DI boxes and monitoring.
The recording space might be less than ideal. But this doesn’t mean a good recording can’t be made. Trying to do too much with too little gear, space and time in a session can compromise the performance if handled insensitively. A more effective approach is often to remain flexible, keeping the technical footprint as light as possible during tracking while retaining options for refinement later. This doesn’t remove the need to get things right at source, but modern tools do allow certain tasks to be deferred. Used judiciously, they can reduce setup time and minimise disruption to the band’s normal way of working. In this context, the challenge is to capture a convincing performance quickly, without getting in the way of it — and without trying to replicate a full studio experience where it isn’t necessary or even desirable.
Live & Liver If the aim is to represent what a band does live, it’s reasonable to ask: why not simply record a gig? Live multitrack capture is increasingly accessible, particularly at larger gigs using digital consoles. But in a live setting, the performance is directed towards an
audience, and what feels effective in the room doesn’t always translate when heard out of context. A performance that works well on the night may not hold up in isolation. For these reasons, a controlled, live-style session, carried out in a rehearsal room or similar environment, can often produce a more balanced and usable result than a typical gig recording, while still preserving the feel of a band playing together. Simpler setups mean there’s less to go wrong, and in time-limited sessions — particularly with bands who aren’t very experienced in studio recording — they often lead to more confident and natural performances. Playing in a studio is a skill in itself, and bands often perform best when conditions are familiar. That’s where their natural feel comes from, and problems can arise when studio workflows are imposed without consideration. Click tracks are an extreme example. Playing to a click is a genuine skill, and introducing one into a session where it isn’t already part of the band’s process will probably do more harm than good. Overdubbing is likewise a learned art. The natural interaction between musicians playing together isn’t there when playing to an existing recording. And even in a live session, prioritising acoustic isolation can have unintended consequences. Moving players away from their usual positions or disrupting sight lines can affect
Actually recording a live show can be a good way of capturing a band’s performance energy, but the recording inevitably ends up being secondary to the event.
Photo: Kelda Hole
www.soundonsound.com / September 2026
89
TECHNIQUE
The Modular Studio
Eurorack For Signal Processing & Effects
Not just for synthesis, Eurorack can be a versatile addition to the traditional recording setup. We look at what modular can offer and how to use it in the studio.
WILLIAM STOKES
W
hen Dieter Doepfer designed the A-100 system in 1995, his priorities were “good sound quality; diversity of modules available; ease of integration into a MIDI system; and, maybe most important of all, affordability”. That system consisted of VCOs, VCAs and VCFs, envelopes, LFOs, and sequencers: circuits that together constituted, well, an analogue synthesizer, believe it or not! Safe to say, since those nascent days of Eurorack, things have moved on considerably. The subsequent explosion of developers operating in the 3U format has now settled into more of a steady
96
September 2026 / www.soundonsound.com
expansion, and while developers continue to produce fine examples of traditional — and non-traditional — synthesizer circuits like the ones listed above, many have also crossed into the contiguous worlds of effects, sampling, signal processing, interfacing and many more besides. Recent innovations in the realm of digital have had an enormous impact on the Eurorack landscape, with more and more microprocessor-based modules performing a litany of functions to a superb standard. Here in 2026, the very notion of what a Eurorack system can be is all but unrecognisable compared with what it was in the mid-1990s. Entire systems can be constructed without an oscillator or filter —
indeed without an analogue module — in sight. But those core tenets laid out by Dieter Doepfer have not changed. Sound quality, diversity and affordability are still the name of the game for Eurorack, as is today’s subject: integration. Of course, the integration we’re talking about extends far beyond MIDI, essential as that is. There are a host of Eurorack modules just begging to open up a new world of hardware in your general studio workflow, or indeed give rise to a brand new one. The usual joke I hear is that Eurorack is a financial rabbit hole; but it would be a disservice not to acknowledge that while it’s certainly on the pricey side, it’s positively budget-friendly compared
to all manner of 19-inch rack gear or 500‑series modules. At the upper end of the reverb spectrum, for instance, a Strymon StarLab module will set you back around $650, but that doesn’t sound so bad when there are 500-series equivalents that retail for more than twice that price. In my case (no pun intended) I have a 6U 104HP system that comes with me to every studio session without fail. That system does not have a single module dedicated to synthesizing waveforms; in fact I found myself recently describing it to one engineer simply as a “miniature, portable studio”. When I arrive at a session, I will set up a dedicated pair of input channels on the console for the system mixer’s principle output, a dedicated pair of outputs on the console for two of the mixer’s inputs and leave it that way for the duration of the session. It means that if I — or anybody else — has a particular idea for processing a sound, whether in parallel to recording or after committing a performance to the DAW, I can set up a patch and achieve all manner of results with quite some speed. This could take the form of signal processing, creative effects, resampling, or it could be a conduit to other things in the studio, opening up new ways of accessing what’s already around me.
Or both. An impedance mismatch may also rob the signal of high end. A guitar or other passive instrument will need some sort of help to get it up to a sufficient level, as will microphones, whilst a true line-level source may need attenuating. There are several Eurorack modules that accommodate this in various ways: some mixers, such as the Cosmix Pro from Cosmotronic, have a useful gain switch on particular channels to boost signals (by a healthy 18dB in the Cosmix Pro’s case), while others like ALM/ Busy Circuits’ utility Mega Milton have a dedicated ‘line-Euro’ I/O section. You might also take the opportunity to condition the signal on the way in as well as changing the gain, particularly if you’re using something like another analogue synth voice. With physical space being at a premium in a modular case, you’re less likely to find the kinds of hefty transformers
you would in something like a Neve 1073LB. But there are some very decent preamps available, with some making good use of FET-based designs. The ER‑MicAmp from CB Electronics is a quality FET-based pre with a combi-XLR input and XLR output, as well as 3.5mm insert I/O and — tremendously useful — bipolar envelope, trigger and gate CV outputs for triggering events in your system with incoming audio. It’s also compatible with CB Electronics’ XPatch App software for full digital control and state recall. Expert Sleepers’ Little Mikey is another option in this department, its front panel offering a Hi-Z switch for sources like guitars that need to work into a high impedance, a -20dB pad, and phantom power for incorporating active mics. Scottish company Instruō have also recently joined the discussion in this respect with the FET-based Íre, which includes an envelope
Instrument, Line, Euro To best help our Eurorack system and studio setup make friends, the first thing we need to do is make sure they’re seeing eye to eye when it comes to signal strength. Modular level, or Eurorack level, is less hot than professional line level (roughly equivalent to the -10dBV semi‑pro standard), but hotter than the level generated by mics, or passive instruments such as electric guitars. There are several ‘line level’ alignment standards in use. The hottest signal you’re likely to encounter is +24dBu, which is about 35V peak to peak — that is, from the extremity of the negative peak to the extremity of the positive peak. Modular level maxes out at 10V pk-pk (+13dBu), so modulars and analogue consoles can play together, but only with careful management of peak signal levels. The output from a guitar is typically less than 1V pk-pk, so if you’re planning on plugging an electric guitar straight into your low-pass filter module like it’s a guitar pedal, you’re likely to be disappointed: either you’ll hear very little or (if you decide to pump up the signal after the fact) you’ll be left with an incredibly loud noise floor.
Modules like 4MS’s Leveling EQ Amplifier offer the kind of processing found in traditional outboard, but at a price that compares very favourably to 500-series modules.
www.soundonsound.com / September 2026
97
Pro Tools
TECHNIQUE
Learn the secrets of Avid’s Pro Series dynamics processors, and you might not need to invest in third-party plug-ins! JULIAN RODGERS
T
he Avid Pro Series plug-ins have been around for many years, and they remain very capable utility processors. If I have one criticism, it’s that some of their most useful workflow features are easy to overlook. It can be tempting to buy the latest ‘must-have’ third-party plug-in, but the plug-ins you already own may offer powerful features you’re not using. Plug-ins that emulate analogue hardware are appealing not just because they offer a familiar sound, but because they offer a focused set of controls. By contrast, well-specified utility plug-ins such as the Pro Series can offer more control, but that extra flexibility can also make them appear complicated. I’ll focus on three Pro Series plug-ins and show how a few easily overlooked controls can solve common mixing problems.
New Depths When it comes to mix bus compression, it’s hard to ignore classic hardware. For example, if you want the familiar SSL-style bus compressor sound, there are plenty of excellent emulations available, including Avid’s own Impact plug-in, which is included with the Complete Plug-in Bundle. Increasingly, though, I find myself reaching for Pro Compressor instead. For me, it comes down to intent. I’m less interested in recreating the precise sonic fingerprint of a particular piece of hardware than I am in achieving the musical effect that makes bus compression so useful in the first place. Rather than relying on the overused term ‘glue’, I’d describe good mix bus compression more specifically as creating
Attenuation Span Pro Compressor, Pro Expander and Pro Limiter all feature an Attenuation Listen mode which lets you solo just the gain reduction, so you hear exactly what the plug-in is attenuating. It’s a useful way to fine-tune attack and release settings. Look for the small speaker icon above the gain reduction meter in the Compressor and Expander or use the dedicated Listen button in Pro Limiter.
100
September 2026 / www.soundonsound.com
an interdependence between the different elements of a mix. It introduces movement that makes the arrangement feel more involving, but it’s easy to go too far, and this is where Pro Compressor’s Depth control can help. One of the biggest strengths of The Depth control on Avid’s Pro Compressor allows you to set a maximum Pro Compressor is amount of gain reduction. the amount of control control. If you’re regularly seeing more it gives you over how bus compression than about 3dB of gain reduction, you is achieved. Low-frequency energy often might be moving beyond gentle mix bus dominates compression, and while many compression and into territory that’s often dedicated bus compressors include better suited to subgroup processing. a high-pass filter in the side-chain to mitigate this, Pro Compressor’s side-chain Bleed On The Tracks filter is considerably more flexible. And for times when the side-chain filter gets the When mixing drums I rarely want to detector responding in the right places but eliminate bleed completely. Bleed is part occasional events still cause too much gain of the sound of a real drum kit: removing it reduction, Pro Compressor also includes entirely can rob a recording of some of its a Depth control. You adjust the threshold natural cohesion, and can also introduce and side‑chain filter until the compressor distracting artefacts of its own. More often is reacting exactly when you want it to, than not, all I want to do is push it into then use the Depth control to limit the the background. maximum amount of gain reduction. It’s an Toms provide a good example. elegant way of refining the compressor’s Begin by setting Pro Expander up as behaviour: you can set the threshold to a conventional hard gate. Adjust the get the compressor to react in the way threshold until the gate opens reliably, you want, then use Depth to prevent then use the side-chain EQ (typically I’ll occasional peaks or low-frequency weight use a bell filter centred on the drum’s from pulling the whole mix down too far. fundamental) to minimise false triggering As a starting point for mix bus from other kit pieces. compression, I’ll typically select a 2:1 Once those settings are established, ratio, and set an attack time somewhere deliberately back away from aggressive between 30 and 100 ms, depending gating. Rather than trying to mute the on how much transient attack I want bleed completely, reduce the Depth control to preserve. Release is probably the so that some of it remains. Typically, that most important control. One thing Pro means somewhere around 6‑12 dB of Compressor doesn’t offer is the automatic attenuation between hits. Also reduce the release mode found on many hardware ratio to soften the transition from open to bus compressors, so I’ll typically start fairly closed, turning the processor into a gentle fast, somewhere around 100-200 ms, expander rather than a hard gate. adjusting it to suit the tempo and feel of A fast attack is usually appropriate, the track. while release is best adjusted by ear The aim is subtle compression. I’m to preserve a natural decay. The hold usually looking for around 1-2 dB of gain control delays the start of the release reduction, and, if needed, the compressor stage, so use it with release to shape the action can be reined in using the Depth drum’s decay. The yellow marker on Pro
Expander’s transfer curve is particularly useful here, Hysteresis introduces different thresholds for showing the signal’s opening and closing the expander. Once the instantaneous hit has opened the expander, the level has to position during fall a little further before the expander starts release and making to close again. If you’re hearing chattering or it easier to judge repeated triggering immediately after drum exactly what’s hits, introducing a little hysteresis will often eliminate it. happening as the expander closes. The result is more natural than hard gating. The toms move forward in the mix, the spill becomes less distracting, and the performance retains the sense that it was played on a real drum kit rather than assembled from isolated samples.
Chattering
Take It To The Limit The final example involves Pro Limiter: an extremely capable brickwall limiter with a clean sound and integrated loudness metering. It’s an obvious choice if you’re working to a LUFS-based delivery specification. The feature I’d like to highlight, however, is one that’s easy to miss. Users of Pro Tools’ old Maxim limiter may remember a ‘Link’ button that tied the Threshold and Ceiling controls together. Other limiters have this feature: for example, FabFilter’s Pro-L 2 has a Unity Gain button which achieves the same result. Pro Limiter offers exactly the same functionality, but instead of a dedicated button, you simply hold Shift while adjusting either control. The linked control follows, maintaining the existing offset between the two. Linking’s most useful application is for judging the sound of limiting. Limiting harder by lowering the Threshold makes the output louder, and that increase in level can easily be mistaken for an improvement in sound quality. By holding Shift while lowering the Threshold, the Ceiling comes down by the same amount, keeping the apparent output level broadly constant. That makes it much easier to judge what the limiter is actually doing to the source material rather than being distracted by the inevitable loudness increase. Once you’re happy with the amount of limiting, simply release Shift and raise the Ceiling to your
Pro Limiter: holding Shift while adjusting the Threshold or Ceiling controls lets you adjust both at the same time, which keeps the output level consistent, making it easier to judge the sound of your limiting.
desired peak output level. You retain the limiting settings you’ve chosen while restoring the loudness benefit that the limiter was intended to provide. This linked adjustment is also useful when limiting individual channels. Although Pro Limiter is thought of as a mastering processor, it can be used as a channel or group limiter, and using the Shift-link technique with the Threshold and Ceiling moving together makes it easy to apply transparent, look-ahead peak limiting without making it louder. At the mixing stage, automatic delay compensation will usually make this latency unproblematic, but it’s not appropriate for recording through. These three examples all illustrate the same principle. The Avid Pro Series plug-ins are very capable, but they don’t demand that you use every available feature. Whether it’s building a flexible mix bus compressor with Pro Compressor, using Pro Expander to control rather than eliminate bleed, or evaluating limiting more accurately with Pro Limiter, the most effective workflows often rely on just a handful of carefully chosen controls. The advanced features are there when you need them, but they don’t have to change how you work. More often than not, understanding the problem you’re trying to solve is more valuable than exploring every parameter on the interface. If these plug-ins are already included as part of your Pro Tools subscription, support plan or plug-in bundle, they’re worth revisiting before assuming you need a premium third-party alternative. Sometimes the smartest way to use a sophisticated plug-in is simply knowing which controls to leave alone.
Character Reference Pro Limiter’s Character soft saturation may be less obvious than expected unless driven hard. In a simple sine-wave test, I found that Character remained very subtle at conservative levels, only producing clearly measurable distortion once the input was pushed above around -12dBFS. So if Character appears to be doing very little, check how hard you’re driving into the limiter. Hard gating has its place, but subtler expansion can yield a more natural sound.
www.soundonsound.com / September 2026
101
Cubase
TECHNIQUE
A partnership with Celemony brings Cubase users a powerful new virtual session musician... JOHN WALDEN
I
was really impressed with Celemony’s Tonalic, the full version of which I reviewed in SOS May 2026: https://sosm.ag/ celemony-tonalic). It’s a very different prospect from the sort of generative AI engines that have grabbed headlines in the last couple of years, so do give that review a read if you want to explore it in more detail. But the bottom line is that, in both its Arranger and Studio versions, Tonalic does a remarkable job of putting multiple, believable virtual session musicians inside your DAW.
102
September 2026 / www.soundonsound.com
What does this have to do with Cubase? Well, the recent 15.0.30 update brought to songwriters working in Cubase Artist or Pro an intriguing new feature: Celemony’s Tonalic can be integrated directly into the Cubase feature set. What’s more, you get free access to Tonalic Essential, a ‘taster’ version that gives you all the core functionality of Tonalic Arranger, but focuses only on guitar. That could be useful in itself to many writers, but it also demonstrates very well the wider possibilities of Tonalic. And since, in Cubase, those possibilities extend beyond what some other DAWs can do, that’s what I want to take you through today. For
Tonalic is fully integrated into Cubase, making it incredibly easy to create performances that automatically follow the Chord Track as your song idea develops.
example, in this integrated form, Tonalic can follow the chords in your Cubase Chord Track: change a chord or two as your song idea develops, and Tonalic’s performances will also automatically adjust.
Session Player The content supplied with the Elements version is drawn from the Tonalic sessions recorded by Uwe Bossert (Tonalic’s musical director). It consists of both nylon- and steel-strung acoustic guitar, as well as electric guitar performances. While this only represents a fraction of the content available with an Arranger or Studio subscription, there’s still a collection of
a chord sequence for the Cubase Chord Track. Second, choose performance clips in the new Tonalic panel, in the Project window’s Left Zone, and add them to a track in the main Project window. Third, if required, fine-tune the performances in the Lower Zone’s Editor panel. When creating a guide track like this, rather than a finished performance, this can all be done remarkably quickly. It’s not dissimilar to the way you might use MIDI clips and any virtual instrument, then. But there’s more to Tonalic than that, so next, I’ll drill down into the nitty gritty of those three steps...
Hit The Right Chord Before Tonalic can work its magic, you have to tell it what chords you want it to follow. To do that, just populate Cubase’s Chord Track in any of the standard ways. That could be manual chord entry using your controller keyboard, or you could drop an existing MIDI/audio clip to the Chord Track and let Cubase work out the chords, or you might simply drag chords from the Lower Zone’s Chord Pads panel onto the Chord Track. With a sequence of chords in place on the Chord Track, any Tonalic performance clips that you place on the Cubase project timeline will be adjusted by Tonalic automatically, to follow both the project tempo and the specified chords.
Go Left
nearly 300 patterns that’s organised into ‘sets’. Sets are groups of multiple patterns designed to be used together, so as to make building a coherent performance easy. But with suitable choices, you can easily mix and match content from different sets. The range of performance styles includes strumming, picking, arpeggios, power chords and melodic lines and, as well as the main patterns within a set, you also get transitions (parts that can emphasise a song section change) and endings. So if you simply wish to create a guitar-based ‘placeholder’ track to use as your song idea develops, this compact content collection included is more than adequate. Creating such a placeholder guitar track involves three steps. First, create
Our second step takes us to the new Tonalic panel in Cubase’s Left Zone. In essence, this allows you to browse the available Tonalic content. You can search based on the instrument type, the musician and various performance style/ genre tags, eventually arriving at a list of individual performance clips that match your search criteria. You can then preview a specific clip in the panel, either on its own or with a default drum/bass backing that can help you judge whether the performance style might fit you needs. If a clip seems promising, an Alternatives button to the right of the clip highlights further similar choices. You can also click on any clip and the panel’s contents will change to show all the clips in the same set as your first clip — you’ll find all the associated Patterns, Transitions and Endings here. Once you’ve chosen a clip, simply drag and drop it to an empty spot in the main Project window; Cubase will create a suitable track for it. Technically, it’s an audio track (rather than a virtual instrument track), and it offers all the usual features
(routing, inserts, sends, strip, etc) found in a standard audio track. Tonalic clips can be extended, shortened, moved, copied or deleted, just as with any MIDI/audio clip. Indeed, creating your complete guitar performance is simply a matter of dragging, dropping and arranging the required performance clips along the timeline. For what’s intended to be a simple guide performance, this might be as simple as extending a single clip to fill a song section — you really can create a guide performance faster than you could play it, which could be great for ‘rapid prototyping’ of ideas. But you can, of course, take a little more time, and create some performance variety by sequencing different performance clips along the timeline. Every time you start playback, Tonalic’s clever engine reinterprets the performance within each clip to match both the project tempo and the chord sitting above it within the Chord Track. The technology under the hood is impressive but, from the user’s perspective, for getting a first-pass guitar part that fits your evolving song idea, it’s incredibly easy, fast and very effective.
The Lowdown In this ‘early songwriting stage’ context, the third step — which is very much optional — is to refine the performance in a Tonalic-specific version of the Lower Zone’s Editor panel. If you select and double-click any Tonalic clip (or a series of clips) in the Project window, this Editor panel pops open. It duplicates some of the Left Zone panel’s clip-selection options that I’ve already discussed, but there’s an important feature here: do any clip auditioning in this panel during playback, and what you hear will automatically sync with the Chord Track changes.
The timing within Tonalic’s performances can be locked to the grid, or to a selected track that acts as a Groove Master.
www.soundonsound.com / September 2026
103
Cubase
TECHNIQUE
USING CELEMONY’S TONALIC
There are some further features, but the available options depend on which Tonalic version you have installed. For the free Essential users, there’s the ability to adjust the Swing and Timing of the performance, and if there are multiple Tonalic tracks in your project, you can set one as the Groove Master, whose Swing and Timing are applied to all the other Tonalic performances. In use, it’s pretty darned effective, and can give a greater sense of performance coherence. And should you want to apply the same sense of groove to non-Tonalic tracks in your project, you can always render/bounce your Tonalic performance to audio, and derive a Groove Quantize preset from that.
bearing on the emotional impact. Its toolset also lets you adjust individual notes within a chord, in Melodyne-esque fashion. It’s truly remarkable and undoubtedly useful from a songwriting perspective. And while this obviously doesn’t come free to Cubase users, it’s wonderful that it can be so deeply integrated into our DAW of choice!
Re-write Magic Having created your initial performance, a key up side of Tonalic is that each time you want to experiment with changing up a chord or two, there’s no need for multiple re-recording passes. It’s all handled by Tonalic’s engine; it will simply adapt the clips to follow your changes. I’ve included
“Even if you do play guitar, the speed and convenience may well beat miking up, recording and then re-recording every time you make a tweak to the song.” As described in my Tonalic review, the full versions give you a bit more than expand content. Indeed, the Studio version offers a number of additional features for adjusting the sound and style of a performance, but Studio’s Refine option is particularly impressive. This lets you control the voice leading/chord voicings that are used when your clip-based performances follow the Chord Track. It gives you the ability to shape the rises or falls within a performance, which can have a huge
a few short audio examples on the SOS website (https://sosm.ag/cubase-0926) to demonstrate what’s possible, but it really is impressive to witness. By way of example, for those who like to get more harmonically adventurous with their chord choices, it’s worth noting that Tonalic will cope with any chord flavours you can create on the Chord Track. You perhaps have to apply a little more thought to the selection of suitable performance clips, especially if the chord sequence
contains rapid passing chord changes. But given due care and attention by you, Tonalic certainly has the ability to cater for jazz-style performances.
Guitar Made Easy For songwriters who don’t play the guitar, there’s plenty in the bundled Tonalic Essential to flesh out song structures with guide guitar performances while you work. Yes, if you want to turn that placeholder into a finished track for the final mix, a little more work in terms of clip selection may be required to add variety and the necessary sense of ‘human’ to the overall performance, but sometimes speed is of the essence. Heck, even if you do play guitar, the speed and convenience may well beat miking up, recording and then re-recording every time you make a tweak to the song. Even if you want to play your own ‘real version’ on the final production, it can be really liberating sometimes to focus on your songwriting rather than your performance, or to hear what a less familiar playing style might have to offer. All in all, this is an impressive collaboration between Steinberg and Celemony. Tonalic has been so slickly integrated into the Cubase workflow that it can sometimes feel like AI — even though there’s none of that involved here! The only real catch with the bundled Essential for busy songwriters is that, having tried it, subscribing to a more extensive version of Tonalic may become too tempting to resist!
In the paid Tonalic Studio version, the Refine button (bottom right) lets you customise voice leading, chord inversions and even aspects of the individual notes within a performance.
104
September 2026 / www.soundonsound.com
Studio Pro
TECHNIQUE
Integrate your modular into Studio Pro using the newly updated CV Instrument.
The CV Instrument plug‑in. As of version 8.1, this now includes four modulation slots, which by default are filled with two LFOs and two ADSR envelopes. You can route these to any audio output on your interface, but the outputs must be DC-coupled.
ROBIN VINCENT
W
e last explored the CV Instrument in version 7. It’s an understated plug-in that translates MIDI notes into CV pitch and gate voltages for playing external modular and analogue gear. With some imaginative use of pitch-bend, you could also use automation lanes to generate a continuously varying voltage for some creative modulation. In version 8.1, Fender have integrated some rather interesting modulation possibilities, which gives us an opportunity to have another look at the way the CV Instrument could bridge the gap between your DAW and your voltage-run external gear.
106
September 2026 / www.soundonsound.com
But first we need to go over a couple of things to ensure we’re all on the same page.
Understanding Control Voltage Within a DAW such as Studio Pro, we’re very used to dealing with music and control in terms of MIDI. With MIDI, you can send notes, velocity, aftertouch, pitch-bend, modulation and control change data direct to virtual instruments or external MIDI synths and modules. Everything has a channel, you have individual controller numbers, and it’s all very ordered, intentional and specific. With control voltage, or CV, you just have a variable voltage that you use for everything.
You can interpret that voltage as notes changing the pitch on a VCO, or you can interpret it as modulation changing any parameter on any module you wish to plug it into. In terms of Studio Pro and the CV Instrument, this allows us to take MIDI notes and translate them into a voltage corresponding to pitch, and with this update, use some in‑built modulators to control external modular gear.
DC Coupling Control voltages are identical in form to audio signals, so instead of moving between machines as data on data cables (as MIDI does), they move between machines as audio
signals on audio cables. The main difference is that audio signals are oscillations we can hear; they wobble at a frequency within our audible range and push speaker cones in and out fast enough to generate sound. With CV, the movement is much slower, and often, as when you want a steady pitch, the voltage does not change at all. This can cause difficulty for some audio interfaces; since they expect frequencies in the audible range, they may have built-in filtering to block out slow-moving or static voltages. What we need is an audio interface that doesn’t do that. The magic term is ‘DC coupled’, which refers to an output or input that allows for flat DC voltages. If your audio interface doesn’t have any DC-coupled outputs, then this is not going to work. Check your documentation, as many audio interfaces often have a couple of DC-coupled connections that you can use.
The New CV Instrument The original CV Instrument was designed to convert MIDI notes into CV pitch and CV gate signals, and that’s what we still find in the top half of the upgraded CV Instrument. But in the bottom half we have four very exciting-looking modulators. By default these are presented as two LFOs and two ADSR envelopes, but each slot can be either, giving you a nice amount of scope. Before we get into the details of each modulator, we need to have a word about signal routing. The modulators are going to be generating voltages, and these need to be routed to your modular via a DC-coupled output on your audio interface.
The second drop-down menu of the LFO or ADSR is the output selection field. Click on it and then simply select the output from the list that corresponds to the DC-coupled output you want to use. You may have gone into the Audio I/O setup in Studio Pro and diligently named all of your outputs to help with this, but that won’t matter because the modulator ignores that completely and just lists them by number.
but this will vary depending on the power of your audio interface outputs. To account for this, Studio Pro uses a percentage to adjust the range of the modulation. Click on the little white handles in the section below the output selector to drag into a smaller range. A little blue dot bounces between the handles like a game of Pong, showing the movement of the waveform.
“You can confidently sequence and modulate a whole analogue-controlled synth voice from directly inside your project.” It’s important that you’re not using that output for anything else, and that you don’t monitor it through your speakers. You won’t be able to hear it, and it might offset your audio output and potentially damage your speakers. Once you’ve chosen your outputs, all you need to do is physically connect the output to a suitable CV input on your modular. You may need a quarter‑inch to mini‑jack adaptor to plug a Eurorack patch cable into your audio interface, but it all depends on your gear.
LFO The LFO offers multiple waveshapes, voltage ranging, sync, rate, and a really useful decay option. Going from top to bottom, we have: • Voltage Range: The LFO is bipolar and will run to + and - whatever voltage your audio interface can manage. Typically this will be ±5V,
The LFO offers a choice of five waveforms, and you can set the LFO’s voltage range.
• Waveform: Click anywhere on the current waveform to bring up the list of options. You can choose from sine, triangle, saw, square and sample & hold for some randomness. With each selection, the blue dot visualises the movement of voltage. • Sync: The Sync button pulls the LFO in line with the project tempo and turns the Rate knob into a time division. • Key: It’s supposed to vary the rate of the LFO depending on the pitch of incoming notes, but currently I can’t for the life of me get it to do anything. • Free: With this enabled, the LFO is restarted on every new note. • Rate: Speed of LFO in Hz or time division when sync’ed. • Delay: Add up to two seconds of delay to the LFO so you can strike a note and have the modulation begin shortly afterward, like vibrato.
ADSR Our other option is the familiar shape of the ADSR (Attack, Decay, Sustain, Release) envelope. The ADSR is triggered on every MIDI note it receives and continues at the sustain stage for as long as the note is held. On every new note, the ADSR is retriggered, and it is not tied to any of the settings from the CV Gate Out section regarding Gate mode or Trigger time. As with the LFO, it has a full bipolar range available to it, which is unusual for an envelope and gives it the ability to modulate from a negative voltage. www.soundonsound.com / September 2026
107
Studio Pro
TECHNIQUE
THE CV INSTRUMENT
If you set the V- slider to 0, the ADSR will begin and end on a much more normal 0V. The blue dot shows us the movement of the various envelope stages between the white handles of the range. Beneath that we have the familiar visualisation of the envelope stages. Each stage has a blue dot handle that you can click and drag to alter the value. Attack, decay and release can all go up to 10 seconds. In the middle of each of the timed stages is an empty dot handle that you can drag to change the shape of the curve. At the bottom, we have knob controls for the ADSR as well as a delay control for up to 20 seconds. There’s a lot of detail you can get into within a regrettably cramped space; the CV Instrument would really benefit from a resizing, or the ability to open the modulators in a larger window.
In Use The LFOs can be used immediately, without any reference to any other part of the CV Instrument or Studio Pro. Just select an output and plug it into your modular. The envelopes need a MIDI Note On event to trigger them and a MIDI Note Off event to reach the release state. It doesn’t matter what the note is; the envelopes will trigger together on any Note On event, so you could set up a pattern of notes that has no reference to pitch at all. Press play and you’ll have four envelopes pouring their movement into your modular. However, I think it’s fair to say that you would probably tie an envelope or two to the playing of actual notes from Studio Pro, through the CV Instrument and into your modular. If nothing else, Studio Pro is a pretty decent sequencer, and having it also throw out envelopes into your VCA and filter makes it very useful indeed.
CV Pitch Out So, to use the ADSR envelopes as part of a sequence, we need to set up the CV Pitch output, which takes a little bit of calibration. The CV Instrument has no idea
108
September 2026 / www.soundonsound.com
With those two things set and the connections made, hit the Calibrate button. The button will flash blue, and you’ll hear various pitches being tested out. If all goes according to plan the Calibrate button will get a nice big green tick, and any sequence or playing of notes from your MIDI controller will yield a nicely in-tune response from the VCO. If it doesn’t calibrate, try adjusting the input level, shifting the pitch up or down, and trying different waveforms. I’ve found that harmonically rich waveforms such as sawtooth and square tend to work better than sine waves.
CV Gate Out
The CV Pitch Out module features a calibration routine, which maintains pitch tracking between your MIDI notes and your VCO.
how much voltage your audio interface can muster. So in order to accurately map MIDI notes to the 1V/oct Eurorack standard, the CV Instrument has to measure the pitch change it’s sending out and calibrate itself against it. (CV Instrument will also work with the less common Hz/V standard.) You will need a VCO and a couple of cables. Set your VCO to note C3 and plug the audio output of the VCO directly into a spare input on your audio interface. Next, plug the CV output you’ll be using for pitch from your audio interface into the V/oct input on the VCO. In the CV Instrument on the left is a section called Audio In. From the drop-down menu, select the input that you have plugged the output of the VCO into. You should see a level indication in the meters, and if you’ve turned up the little Monitor Vol knob, you should be able to hear the drone of the VCO. Adjust the input level until you get it around the -12dB mark. In the CV Pitch Out section, select the output on your audio interface that you are going to use to send pitch CV to the V/oct input on the VCO.
You would normally use the CV Gate Out to trigger an envelope in your modular to open a VCA or move a filter. If you are making use of the CV Instrument envelopes, then you can bypass that altogether and ignore the CV Gate Out. However, the CV Gate Out does have some features that make it potentially interesting. You can choose between Gate and Trigger. A Gate will send a high voltage for as long as you hold a key, or the length of a sequenced note. A Trigger sends out a short pulse on every key press or note. You can manually set how long you’d like that pulse to be. You also get to choose between V-Trig and S-Trig modes. V-Trig is used by almost everything; it maintains 0V and then puts out a high voltage when activated. S-Trig is the opposite, and was used in vintage Moog Modular systems. Finally, you can add a bit of Glide if you wish.
Modulate Away The combination of the CV Pitch Out, ADSR outputs and LFOs is very powerful. You can confidently sequence and modulate a whole analogue-controlled synth voice from directly inside your project. There’s no limit to how many CV Instruments you can have loaded, and with Studio Pro’s new Instrument Sets feature, you could configure a number of CV Instruments to be permanently wired into your modular and instantly available in any project.
”The O.H.M Amp has completely changed the way I monitor my recordings in ways I never imagined. It's not just useful in my studio anymore, it's non-negotiable.” Ash Soan - Drummer Extraordinaire
Learn more
The sound of yesterday, built for tomorrow.
Reaper
TECHNIQUE
Reaper might not have a dedicated dynamic EQ, but it can turn any EQ into one that’s more powerful than most third-party tools! STEVE ZIMMERMAN
D
ynamic EQ can be a great tool for tackling various problems, including where one sound masks another intermittently, causing the tone to change and making parts difficult to ‘sit’ in a mix. In such situations, a static EQ can mean tonal compromise, and while you can use automation, this is very fiddly to do manually, particularly if you need to refine the automation later. You might have noticed that Reaper doesn’t have a dedicated dynamic EQ. But that’s because it doesn’t really need one! Not only are there are plenty of capable third-party plug-ins (including the freeware TDR Nova), but Reaper has the power to make any EQ dynamic. What’s more, you can use any signal in your project as a side-chain trigger, and even trigger
different bands in the same EQ plug-in from different signals! Below, I’ll take you some examples.
Ducked Reverb With ReaEQ? I’ll start with one from a recent project. I had a bright-sounding reverb (a Lexicon 224 emulation) on one track and loved what it added to the percussion-and-marimba intro. When the hi-hats came in, though, there was too much top-end ‘sizzle’. So I decided to duck some of the reverb track’s high frequencies only when there was a hat hit. Similarly, I wanted to duck some of the reverb’s low frequencies when a synth bass played. I placed an instance of ReaEQ on the reverb track and identified the first frequency range I wished to cut in the reverb (around 4kHz). I set ReaEQ’s
Increasing the track’s channel count to 4 (left), and adding a ‘receive’ from the hi-hats to the track’s internal channels 3+4
110
September 2026 / www.soundonsound.com
Using an audio signal to modulate parameters on ReaEQ.
frequency and bandwidth on a ReaEQ Band filter. Then I set up the routing to ensure the gain of this band would react to the hi-hat: I added two more channels on the reverb track by clicking on ‘2 in+out’ (top right of ReaEQ window), and increased the track channels to 4. By the way, this Reaper track channels feature has plenty of uses — check out Matt Houghton’s SOS October 2023 Reaper workshop for more examples: www.soundonsound.com/ techniques/reaper-using-tra cks-internal-channels. The next step was to send audio from the hi-hat track to the reverb track’s channels 3+4. There are multiple ways to do this, but the easiest approach is a simple drag/ drop. In the main window’s
Track Control Panel Drag, you can drag from the hi-hat track’s routing button on to the reverb track. A pop-up appears, and you can select the destination (channels 3+4 on the reverb). Alternatively, in the mixer, drag from the routing button or any send slot onto the reverb track; the same routing dialogue pops up. To make ReaEQ to react to this side‑chain signal, I turned to Reaper’s powerful Parameter Modulation feature: I clicked on the EQ band’s gain slider, then clicked the ‘Param’ button and selected ‘Parameter modulation/ MIDI link.’ In the window that popped up, I chose ‘Audio control signal (side-chain)’, then set ‘Track audio channel’ to ‘3+4’. With ReaEQ now
receiving the trigger signal, I set the EQ up to duck as follows: • E nsured the top slider was at its default midpoint. This makes the gain 0dB when the control signal is below the threshold. • Pulled the ‘Min volume’ slider down below the level on the input meter above. At this point, a green-bordered rectangle appears in the ‘Audio control signal shaping’ window. • Set the Direction to ‘negative’, to trigger a cut (set to positive if you want a boost). If you do this and find there’s too much gain reduction, reduce Strength and/or increase ‘Min volume’. If there’s too little gain reduction, reduce ‘Max volume’. And if the ducking effect is too abrupt or noticeable, try increasing the attack and release. To add a second side-chain signal from the bass, you just rinse and repeat. Activate a low‑shelf band and this time increase the track channels to 6. Set up a new receive from the bass track, and another band in ReaEQ, this time a low shelf. Set the desired frequency and bandwidth (slope) for the filter, click on the band’s gain slider and click ‘Parameter modulation’. Set up this new parameter modulation to respond to track channels 5+6, and adjust the settings as above. With that, the reverb has one instance of ReaEQ with two bands of dynamic EQ, each responding to a different signal — more than you can achieve using most third-party plug-ins!
Linked Thinking... A more conventional use of dynamic EQ is taming problematic frequencies on a source, without all the external side-chain work. De-essing is a great illustration: a dynamic EQ targeting just the sibilance (usually somewhere in the 5-10 kHz region) often sounds more transparent than even a split-band compressor. We can, of course, use parameter modulation so that ReaEQ responds dynamically to the main audio input signal that it acts on. But we also want to shape the ‘internal side-chain’ signal — a filtered version of the input signal that emphasises the sibilance. For this, we need
ReaEQ configured as a two-band dynamic EQ, with each band reacting to a separate side-chain control signal.
two instances of ReaEQ on the channel: one to define the control signal, and a second responding to the first, but acting on the whole signal. We have plenty of capable de-essers, so for this example I’ll tackle a different problem that’s set up in the same way: dynamically pulling down an unwanted resonance in a bass sound. Start by inserting ReaEQ and enabling a band‑pass filter. Set its frequency and bandwidth to operate on the problem area. As this is only a control signal, we don’t want this ReaEQ instance to pass its audio to the track’s main stereo signal path, so set the number of track channels to 4, and send its audio to channels 3+4 only.
Now load another ReaEQ with another band filter. As in the previous example, click the gain slider and set up parameter modulation so the gain is modulated by the side-chain signal on track channels 3+4 (our band-passed signal). You could manually set the frequency and bandwidth to match those of the control instance of ReaEQ, but if you later needed to adjust the settings you might need to make those changes on both instances — not ideal! Instead, you can link the instances’ frequency and bandwidth controls. Click on the Frequency slider, click ‘Param’ and select ‘Parameter Modulation/MIDI link.’ This time, instead of selecting ‘Audio control signal,’ check the ‘Link from MIDI or FX parameter’ box and select the band-pass filter frequency of the other ReaEQ. In the same way, link the two ReaEQ instances’ bandwidth sliders for the relevant band. When you adjust the frequency/bandwidth of the control-signal filter, the ReaEQ that’s acting on the main signal will now follow suit. If you like, you can make these links bidirectional, so adjusting the frequency/bandwidth on either EQ affects both instances. That way, it’s quick and easy to set up
Here, a simple band-pass filter is used to isolate one element within a complex source, and set to output to track channels 3+4 so it can be used as a control signal.
www.soundonsound.com / September 2026
111
TECHNIQUE DYNAMIC EQ
Reaper
ReaEQ on the destination track, this ‘inverse control link’. For time with two band filters — we’ll use instance you might want the incoming kick and snare signals to set up two EQ instances to modulate these bands. (or bands within the same This time, you can’t link the frequency EQ) so that a boost on one and bandwidth directly to the other creates a complementary instances of ReaEQ. But you can link the cut in the other. That way, parameters by using MIDI CC. Before we you could, say, make two get into that, note that such linking isn’t shelves operate as a tilt filter, always desirable. For example, when or use two EQs for pre- and layering a breakbeat under a drum kit, de-emphasis before and and you want to duck the breakbeat kick after a saturation plug-in. when the main kick hits, the two kicks Again, this involves won’t necessarily have most energy at MIDI linking of controls, this the same frequency. In that case you time with three different might even want to modulate something CCs. ReaEQ isn’t the best other than gain, such as the frequency plug-in this case — since its Direct linking of parameters on different instances of ReaEQ enables and/or slope of a high-pass filter. With gain range is asymmetrical you to adjust both the control signal EQ and the main signal-processing that in mind, here’s how to set up the (+12 to -150dB) the cuts EQ from either instance’s GUI. MIDI CC linking. and boosts are not scaled Conventional 7-bit MIDI CC gives us only equally; better to use gain reduction for any frequency and 128 values, but Reaper can pair them to give us a plug-in with equal boost bandwidth. To do this, simply click on the 14-bits. That’s 16,384 control values, which is more and cut ranges, such as frequency/bandwidth controls on the first than enough for very fine level control. Insert Reaper’s bundled JS 4-Band instance of ReaEQ and link them to the ReaControlMIDI on the source track, enable Control EQ. Just set the frequency corresponding controls on the second Change, and select an unused CC value pair, such and bandwidth controls as instance in exactly the same way. Our as CC 20+52. Click the slider for that CC, then click above, but in the Parameter bass resonance tamer can then easily be ‘Param’ and ‘Parameter Modulation/MIDI link’, to link link dialogue set the offset pressed into service as a de-esser simply to the band-pass filter frequency. Open the routing and scale for the receiving by sliding either instance’s band up a few for that track, and locate the send to the destination EQ’s band gain to -100%. octaves. Yes, the initial setup takes some track. In addition to the audio send, enable a MIDI Because these setups time, but the it can be saved as a Reaper send (you can use whichever channel you wish). On involve a fair bit of work, you FX chain, and thereafter quickly imported the receiving channel’s ReaEQ, click the frequency can copy the ‘destination’ onto any track in any project. slider, then click on ‘Param.’ Select ‘MIDI link’, ‘CC EQ plug-in to the same track One EQ, Multiple Side-chains 14 bit’, ‘20/52’ (or whatever CC number you picked). as the source EQ plug-in Now, when you move the frequency slider on the and ReaControlMIDI, and This sort of ‘self-side-chained’ dynamic source track’s band-pass EQ, the value controls save all three as a recallable EQ could be achieved quickly with the MIDI slider in ReaControlMIDI, and that in turn FX chain. Next time you any third-party dynamic EQ, but most controls the band frequency slider on the receiving want to use a side-chained dynamic EQs can react to only one EQ. Repeat with a different CC number if you wish to dynamic EQ, insert this side-chain signal. In Reaper, we can link the bandwidth of both EQs. FX chain on the source create a dynamic ReaEQ whose bands track, then simply copy respond to any number of internal or Complementary EQ the destination EQ to the external signals, with different filters or destination track and set other processing applied. For instance, When you know how to link parameters of multiple up a MIDI send from source you can use filtering to isolate one sound plug-ins on different tracks like this, various to destination! in a mixed drum kit, and use it to trigger possibilities open up and a very handy option is an cuts or boosts elsewhere in the kit. In our next example, we’ll set up two instances of ReaEQ, each with a single band-pass filter at, say, 60Hz for the kick and 500Hz for the snare, respectively. (You could have two band-pass filters in one instance, of course, but the two instances give us the two independent control signals we’ll need.) Send the output of each EQ to a different channel pair (eg. kick to 3+4, snare to 5+6), and route these to the track you want to process. It’s not strictly necessary, but sending to the same track channels on the receiving track helps Gain reduction (right) being applied in response to the band-pass-filtered control signal (left) rising to avoid confusion. Then set up a third above the threshold.
112
September 2026 / www.soundonsound.com
FilterFreak Get Your Freak On
FilterFreak can do it all – from classic funky envelope filters, massive dance floor sweeps, to pumping up the low end, and classic LFOs or tempo-locked programmable rhythms. Choose from one or two bands of variable shape resonant filters and let FilterFreak deliver warm, fat, analog tones along with surprisingly deep features you can’t get from hardware.
“FilterFreak can do the most amazing things to make something simple sound interesting.” – Tom Elmhirst (Adele, Amy Winehouse, The Black Keys, Florence & The Machine)
Free 30-Day Trial at www.soundtoys.com
FE ATURE
The Student’s Studio LUKE WOOD
I
f you’re just about to start a music technology course, then you’ve probably already been looking into home studio gear and noticed the overwhelming amount of options available. There’s never been a better time to get into audio: even some of the lowest‑cost gear on the market now comfortably outperforms the high-end equipment of old, and it’s possible to get impressive-sounding results with even the most modest of setups. But the abundance of reasonably priced kit that’s available these days is both a blessing and a curse — there may be plenty of choice, but it can be hard to know exactly what you actually need to get yourself up and running. In this article, we’ll take a look at some of the most important elements of a modern home studio rig, and highlight some key options in each category with a focus on affordability and a particular eye on the needs of students.
Compact Audio Interfaces
Sitting at the heart of every home studio setup is the audio interface. This key bit of kit serves as a way of getting audio in and out of your computer, and they’re available in a huge range of shapes and sizes. We’ll concentrate on compact, desktop devices here, all of which are capable of handling mic, line-level and instrument inputs, as well as offering at least one monitoring output and a built-in headphone amp. Some can be expanded over ADAT, making it possible to add more I/O as needs increase, and there’s always the option of a compact interface becoming a secondary or portable rig as and when you decide to upgrade. The Audient iD4 ($269.99) is a two-channel interface that features one of the company’s console mic preamps and a JFET instrument input, along with a stereo monitor output and a built-in Audient iD4
114
September 2026 / www.soundonsound.com
Starting a music production course this autumn? Read our essential guide to setting up your first home studio. headphone amp with both quarter-inch and 3.5mm outputs. Direct, zero-latency monitoring is available from a dedicated top-panel control. It boasts impressive technical specs, too, with the A-D and D-A converters achieving dynamic range figures of 121 and 126 dB respectively. SSL 1
Focusrite Scarlett Solo
Described as “the songwriter’s 2-in/2-out interface”, Focusrite’s fourth-generation Scarlett Solo ($159.99) features a single mic preamp and a dedicated instrument input, and boasts Air Presence and Harmonic Drive modes that offer a vintage console-style sound. There’s a stereo output for connecting a pair of monitors along with a powerful built-in headphone amp, and the Solo comes supplied with a software bundle that includes Ableton Live Lite, Pro Tools Intro+ and Cubase LE. The smallest of Heritage Audio’s vintage-inspired interfaces, the i73 Pro One ($599) houses a single Class-A transformer-coupled preamp with pad and polarity switches, while its second channel offers connectivity for line-level sources; output trim controls make it possible to intentionally drive the preamp harder for effect without risking clipping at the conversion stage. As for outputs, the i73 Pro One offers a stereo monitor output and a built-in headphone amp, and in a move that’s increasingly rare for an audio interface, also includes built-in MIDI I/O. Heritage Audio i73 Pro One
The latest addition to SSL’s interface range, the SSL 1 ($159.99) features two channels. The first is equipped with a preamp, a high-pass filter and a Legacy 4K mode that emulates the sound of SSL’s iconic 4000-series console; the second will accept either line- or instrument-level signals. A large top-panel volume knob controls the main stereo output, and there’s also a built-in headphone amp. The unit is supplied with the SSL Production Pack, which includes a selection of plug-ins and virtual instruments. Neve’s first dedicated audio interface, the 88M ($1365) comes with a higher price tag, but is based around the same Marinair transformer-coupled preamp circuitry as their flagship large-format console, the 88RS. It’s equipped with two channels that will both accept mic, line and instrument sources, Neve 88M and units made after January 2026 also feature digital inputs that allow it to function as a hardware insert, so users can process recorded DAW tracks with the preamp circuitry. Along with stereo outputs and a headphone amp, the 88M also features balanced insert points for both channels, and can be expanded with an additional eight inputs and outputs over ADAT. Elsewhere, there are options such as Fender’s Quantum LT 2, Lewitt’s Connect 2 and Connect 6, Universal Audio’s Volt 176, Antelope Audio’s Zenith 2 and Yamaha’s UR12 MK3.
crossfeed to better emulate the immediate, detailed and honest-sounding experience of working on speakers. character. A closed-back design, the Audeze are a big name in the Hi-X 15s are cost-effective ‘all-rounder’ Headphones play an important high-end headphone market, headphones that can be put to work at role in any studio setup, and so they caused quite a stir with every stage of the production process. when it comes to mixing they the launch of the MM-100s, Two of the designs in the can be especially valuable to which deliver much of the beyerdynamic range have recently those working in spaces with performance of their praised been treated to a design overhaul that difficult acoustics. Generally Manny Marroquin signature introduces some significant performance speaking, closed-back designs model at a much lower cost enhancements. The closed-back DT 770 are best suited to tracking work $399 — reduced to $299 at the Pros and open-back DT 990 Pros both and mixing in noisy environments due come loaded with the company’s new to the isolation they offer, while Audeze MM-100 time of going to press. Equipped with the company’s renowned STELLAR.45 driver system, which extends open-back cans tend to offer planar magnetic drivers and patented their frequency range to 5Hz-40kHz and a more natural, speaker-like sound, but waveguides, the open-back MM-100s offers a lower impedance that makes the with the compromise of providing less punch well above their weight in terms headphones compatible with a wider isolation from external noise. of performance, as well range of playback devices. The H200s ($179.99) are ADAM as remaining comfortable The headband and earcup Audio’s first in-house headphone design, over long sessions thanks designs have been updated and aim to offer the same signature sound to a lightweight design and too, with both models as their popular loudspeaker range. They gel-filled earpads. boasting improved comfort feature a closed-back design and employ Austrian Audio’s entry-level over long sessions. Both are the company’s PEEK drivers, allowing Hi-X 15s ($149) utilise the priced at $229.99. them to offer good isolation as well as company’s High Excursion Sennheiser’s HD 490 Pros high-quality playback. Interestingly, they technology, and come ($429) utilise an Open-frame come with a dedicated DAW plug-in that loaded with 44mm drivers Architecture construction offers two distinct voicing modes and that are said to deliver an that helps to lower harmonic an Externalization function that uses Sennheiser HD 490 Pro Sound On Sound - PSI Audio AVAA C214 Ad – August 2026_PRINT.pdf 1 8/10/26 1:21 PM
Headphones
www.soundonsound.com / September 2026
115
FE ATURE
THE STUDENT’S STUDIO
distortion and minimise resonances, while high-quality components deliver accurate, dynamic reproduction throughout their frequency range. They boast a lightweight design and switchable earpads, and are claimed to be the most comfortable headphones in pro audio! Recently, Sennheiser introduced the HD 480 Pro, a new closed-back model that’s been designed to match the sound of the HD 490 Pro as closely as possible while offering some additional isolation. You’ll also find cost-effective closed-back models from the likes of Rode, Yamaha and Audix, while brands such as Shure, AKG and Audio-Technica manufacture both open- and closed-back headphones at a wider range of prices.
instrument and voiceover duties and an ‘all-rounder’ vocal and instrument promises to outperform its modest price mic aimed squarely at home studios. tag. It’s available in a Standard version Its dual-diaphragm capsule has that costs $129 and includes a clip, foam been engineered to reduce the windscreen and carry bag, as well as the proximity effect, meaning it’ll deliver Vocal Set, which comes in at $149 and natural-sounding results even when adds a shockmount close-miking, while Shure’s Interference and magnetic pop filter Shielding Technology helps to block the to the included unwanted RF from the likes of phones, accessories. laptops and Wi-Fi routers. The mic costs The latest version $219 and is supplied with a clip and of the sE Electronics features an internal pop X1 A is said to improve filter. It’s also possible on the original, to purchase it as part of a design which already the Home Recording had a reputation for Kit bundle ($299), which competing with far includes a shockmount more expensive mics. and an external, Housed in a rugged detachable pop filter. metal chassis, the mic Telefunken are best sE Electronics promises first-class known for their high-end While it’s nice to have different options X1 A sound at a home large-diaphragm to call upon when miking something up studio cost ($99), offering a transparent capacitor designs, in the studio, a single ‘all-rounder’ mic character that works well across a range but their range also that can deliver decent results on just of vocal styles and instruments. A 100Hz includes the M80 about anything is a good place to start. high-pass filter is joined by a -20dB pad, ($249), a handheld Plenty of the big names offer entry-level and with SPL handling mic that combines models that draw inspiration from their of 150dB, the X1 A will the convenience and Telefunken M80 more extravagant stand up to just about ruggedness of a stage offerings, and while anything you point mic with the clarity and low-noise they may feature it at! performance of a studio-focused design. fewer bells and Sennheiser’s A natural-sounding frequency response whistles than their home‑studio-focused means it can be put to work on a wide more expensive range includes two range of vocals and instruments, and its counterparts, they models: the MK 4 supercardioid pattern offers great spill don’t usually give ($429) and MK 8 rejection and helps to avoid feedback much up in terms ($799). The former during live use. of sound. is a fixed-cardioid Other options include the likes of Boasting mic that features the Aston Origin, Audix A131, AIM Audio the same a capsule based on Essence, Rode NT1, AKG’s new C-Series European-made the company’s e965 line-up and Audio-Technica’s AT2020. capsule and Open Sennheiser MK 4 high-end stage vocal Acoustics design Austrian mic; the latter looks almost identical, but as their popular Audio OC16 features a pair of capsules that allow for OC18 but at a lower There’s also the option of modelling five switchable patterns cost of $449, Austrian Audio’s mics, which come with (omni, wide cardioid, OC16 delivers a clean and companion plug-ins that allow cardioid, supercardioid natural sound that works well them to emulate the sound and figure-8), along with on everything from drums and behaviour of a range of 60 and 100 Hz high-pass and guitar amps to vocals classic designs. They offer filter options and and string instruments. It’s a convenient way to experiment a -10/-20 dB pad. Both a fixed cardioid mic, includes with the impact that different are voiced to deliver a switchable 40/160 Hz polar patterns and frequency natural-sounding high-pass filter, and responses have on a recording, results on a wide comes supplied in as well as a cost-effective way range of vocal and a carry case with a clip to have an array of different instrument sources. and shockmount. tonal options to hand. Choices Shure’s SM4 Lewitt’s dedicated in the current market include Home Recording home studio offering Universal Audio’s Sphere DLX Microphone’s name comes in the form of the LCT and LX, Antelope Audio’s Edge makes its intentions 240 Pro, a cardioid capacitor line-up and the Slate Digital clear, serving as mic that’s aimed at vocal, Shure SM4 ML-1A / VMS system. Lewitt LCT 240 Pro
Microphones
Modelling Mics
116
September 2026 / www.soundonsound.com
you eight drum pads, wheels, eight rotary eight rotary encoders encoders and and four faders. a set of transport/ A MIDI keyboard can play a crucial role The Novation function buttons, in a home-studio setup, and as well as Launchkey 25 and at $99, offers their obvious role of inputting notes, ($189.99) pairs a cost-effective entry many models also pack in a selection a full-size 25-note into the ever-popular of faders, encoders, drum pads and keybed with pitch MPC family. function buttons that provide hands-on Novation Launchkey 25 and mod wheels, 16 The latest version control over DAW mixers, plug-ins and velocity-sensitive of the M-Audio virtual instruments. We’ll concentrate pads that can be used for triggering Oxygen 25 comes in at $129, and pairs on compact models here, but if you’re drums or clip launching, eight endless 25 full-size keys with a healthy selection after something with more keys, there rotary encoders and DAW transport of hands-on controls including eight drum are larger models to be found in controls. The Launchkey Mini 25 is even pads, pitch and mod wheels, eight rotary each of the ranges. smaller still, owing to its mini keybed encoders and a set of transport buttons Designed specifically for small studios and the use of touch strips rather than that are automatically mapped in most and portable setups, Arturia’s MicroLab pitch/mod wheels, but it retains the major DAWs. Mk3 is about as compact as a MIDI pads, encoders and The smallest of Nektar’s Impact range, keyboard can get, transport controls. the LX25 MKIII ($129.99), features 25 and costs just $99. Its If drum programming keys, eight velocity-sensitive drum pads, 25 velocity-sensitive is your thing, then nine encoders, pitch and mod wheels and mini keys are joined the MPK Mini IV is a set of function buttons. NKS support by a pair of pitch/mod well worth a look. It means that it works seamlessly with touch strips, and that’s combines Akai Pro’s software from Native Instruments and it! If you’d like a bit renowned MPC pads a whole host of third-party partners, while more hands-on control, with a set of 25 mini Nektar’s custom scripting offers in-depth then opting for the keys, pitch and mod integration with a range of major DAWs. MiniLab 3 ($149) gets Arturia MiniLab 3
Controller Keyboards
www.soundonsound.com / September 2026
117
FE ATURE
THE STUDENT’S STUDIO
Compact Desktop Speakers
Genelec’s 8010A ($900) promises to deliver the accurate While headphones can offer a great and powerful sound mixing solution, especially for those of their larger with challenging room acoustics, it’s speakers in an certainly a very different experience incredibly compact to working on speakers, and the latter package. The system provide an important reference for crucial employs a three-inch factors like stereo imaging and vocal woofer and 0.75-inch presentation. Sticking to a smaller system tweeter and keeps is usually a wise move for typical home within ±2.5dB between studio spaces, and much like interfaces, 74Hz and 20kHz, and decent compact monitors can still be is capable of reaching put to good use if you decide to Genelec 8010A a maximum SPL of upgrade further down the 96dB. A pair of Bass Tilt switches line, whether as a secondary (-2 and -4 dB) are joined by reference system or as part of a Desktop setting designed to a portable setup. combat desk reflections, and The smallest member some built-in decoupling is of the ADAM Audio family, provided by Genelec’s IsoPod the D3V ($349.99) pairs the stand system. company’s AMT tweeters Designed to provide full-range with a 3.5-inch woofer, audio at short listening distances, and employs a passive Kali Audio’s IN-UNF ($699) radiator design that helps system has been designed the system to play down specifically for desktop setups. It to 45Hz (-6dB). Analogue comprises a bass unit loaded with connectivity is complemented ADAM Audio D3V two 4.5-inch woofers and a pair by built-in USB-C audio, and of satellite speakers that feature rear-panel Position, Desk and the same coaxial midrange/tweeter Room switches use the onboard DSP to unit as the company’s praised IN-5 optimise them for different placements, and IN-8 studio monitors. Along with desk sizes and room acoustics. analogue line-level connectivity, the IK Multimedia’s iLoud Micro Monitors system offers digital inputs via optical ($299.99) have a reputation for sounding and USB-C, and features a set of DIP much larger switches that can be used to adjust the than they are, response to suit different placements and despite and room acoustics. only being equipped with three-inch drivers, their frequency response extends down to 55Hz (-3dB). A built-in isolation stand allows Kali Audio IN-UNF them to be IK Multimedia placed at two different iLoud Micro Monitor angles, and onboard Mackie’s recently refreshed CR DSP provides a selection of EQ profiles Series features two compact models, that tailor the response to the room and the CR3.5 and CR3.5BT ($99 and positioning. Along with their line-level $129); the two are identical in terms inputs, the iLoud Micro Monitors also of specification, but the latter offers offer wireless Bluetooth playback. Given wireless connectivity over Bluetooth. their size, they lend themselves well to Desktop and Bookshelf modes optimise portable rigs, and can be purchased with the system for close and distant a fitted carry case. listening, and a Tone control makes it
118
September 2026 / www.soundonsound.com
possible to dial in some additional low- and high-frequency energy for casual listening. Quarter-inch TRS, RCA and 3.5mm inputs are provided, and helpfully, the system is also equipped with an onboard headphone output. Other contenders include the likes of KRK’s ultra-portable GoAux systems, EVE Audio’s EXO 24 and the PreSonus Eris 3.5, all of which focus on delivering a solid performance at a keen price, while a higher budget opens up options such as Neumann’s KH80 and Focal’s Shape 40.
Plug-in Subscriptions
Mackie CR3.5
Designed to provide all of the processing and effects you need to record, produce and mix your own material, the Complete Access package includes every plug-in from SSL, Slate Digital and Harrison Audio. It contains emulations of vintage SSL and Harrison designs, as well as a healthy selection of modern effects and SSL’s new AI-powered AutoSeries plug-ins. If composition is your thing, then EastWest’s ComposerCloud+ offers access to the company’s entire product line-up, kitting you out with everything from their award-winning orchestral sample library collections to vintage synth emulations and innovative hybrid instruments. And of course, there’s our very own SOS For Artists, which offers an all-in-one package that starts at $12.99/ month and spans from initial creation and production through to mixing, mastering and distribution. Lite versions of Cubase and Ableton Live are joined by plug-ins from the likes of Baby Audio, Eventide, Arturia and Synchro Arts, while the built-in distribution platform offers a convenient way to upload your finished tracks to over 150 streaming platforms.
FE ATURE
Hear The Sound W https://open.spotify.com/
track/7kWwphH6Q6vu9WMtQIcrQf
W www.youtube.com/
watch?v=WU46YWJ4Lqc
Jonny Solway • Demob Happy ‘Autoportrait’ J O E M AT E R A
J
onny Solway is the chief engineer at Dean Street Studios in London, and has worked with big names including Robbie Williams, Take That, James Arthur and Little Mix. Asked to break down a favourite sound from his catalogue, he nominates the small but extreme drum sound on Demob Happy’s 2019 track ‘Autoportrait’. “The track has a very Queens Of The Stone Age vibe to it, with the sound of the drums very chopped up, but everything was played live. The sound of the kit has almost become programmed-sounding. It was a fairly simple mic setup: a pair of overhead mics, and then two crush mics — SM57 and Shure harmonica mic — going through a pair of 1176 peak limiters on a Brit
Mode setting [ie. with all the ratio buttons pressed in at once], one on the floor by the snare, one behind the drummer. “We placed a Neumann U87 close to the kit, looking over the bass drum towards the snare, which gave quite a good country tone. And the cymbals were taken off for the recording so that there would be no external ring.”
Terror On The Tracks “We also re-amped it to a tiny little guitar amp, an Orange Tiny Terror, in a booth. That gave us a quite crunchy and midrange‑y tone. The band were incredibly specific about all this, so they brought in a tiny kick drum, too. It was like 12 inches, quite small as they weren’t up for big-sounding drums. They wanted really tight, tiny, dry sounds and it was one drum at a time being played. The drummer was having to air-drum the parts he wasn’t playing and it was built up from that.
“The whole pattern was kick in, kick out, snare, top and bottom, then it was incredibly edited together. The whole thing, if you looked at it in Pro Tools, the drum parts are built up from those different sounds in the live room. The intro was that tiny amp heavily sampled. We were going for a mixture of lo-fi and hi-fi-sounding stuff.” On top of this drum sound, band and engineer then added a claustrophobic percussion effect. “As the live room at Dean Street Studios is quite dry, we basically made and boxed together four baffles and then we placed our hand with a mic in it along with a shaker. It was almost as tight and dry as you could get a shaker sound. We were just after a dry, tight, almost programmed, chopped sound. Then in the mix we used Soundtoys’ Decapitator and Soundtoys’ FilterFreak [plug-ins] to carve out a lot of high and low where it was needed.”
Jonny Solway: “They wanted really tight, tiny, dry sounds and it was one drum at a time being played. The drummer was having to air-drum the parts he wasn’t playing and it was built up from that.” www.soundonsound.com / September 2026
119
INSIDE TRACK
PAUL TINGEN
J
ames Ellis Ford is one of the UK’s leading producers, with an impressive credit list featuring prominent bands and artists like Arctic Monkeys, Blur, Depeche Mode, Florence + the Machine, Haim, Pet Shop Boys, Foals, Gorillaz, Beth Gibbons and many more. As an artist, Ford was one half of electronic duo Simian Mobile Disco, and released his first solo album The Hum in 2023. Come the end of 2024, Ford was on top of the world, with a successful album by Beth Gibbons, Lives Outgrown, following projects like Depeche Mode’s Memento Mori (2023), Black Country New Road’s Forever Howlong and Pulp’s More (both released in 2025), and a trip to India with Gorillaz for the writing and recording of a forthcoming album. The Depeche Mode, Gibbons and Gorillaz albums are all meditations on death, loss and the afterlife — concepts with which Ford would soon become uncomfortably familiar. “It was really out of the blue,” he recalls. “I’d been working pretty hard, and in the run-up to Christmas [2024] started to feel as if I had burnout or something. Then, on Christmas Eve, I was absolutely floored. I could not get off the sofa. Soon afterwards I was in hospital, and it all began. Given some of the albums I had produced, I was wondering, ‘Did I partly manifest this into my life?’”
Other Worlds
James Ellis Ford When illness threatened to end James Ford’s stellar production career, he responded with a unique solo album recorded from his hospital bed. 120
September 2026 / www.soundonsound.com
Ford was diagnosed with acute myeloid leukaemia, an aggressive white blood cell cancer. The prognosis was nine months of treatment, with only a 30 percent chance of survival, and Ford found himself confined to a room at St Bartholomew’s Hospital in central London. Remarkably, he not only survived, but continued to work from his hospital bed, contributing to the War Child charity album Help 2, completing the Gorillaz album The Mountain, and recording his own solo record Lost In Another World. “The fact that I kept working in hospital, despite four chemo treatments and one failed stem cell transplant, may seem mad, but honestly, it kept me alive in many ways. Having something positive to focus on was hugely important to me. When you’re as ill as I was, you’re vulnerable and you feel like a useless lump that makes everyone sad. I’m
used to making music every day, and I really wanted to stay connected to a world that I recognised. “It’s like a prison sentence. Each chemo treatment is 10 days, and afterwards there’s a period of 15 to 20 days when you don’t have an immune system. You’re like a boy in the bubble while they try to keep you alive until your immune system comes back online. I fell life-threateningly ill after three of my four chemo treatments, but for whatever reason not after my second treatment. My energy started to come back, and these 15 to 20 days in isolation offered a window of opportunity to work on music.” Ford’s wife collected some music equipment from his studio, and brought it to his hospital room. “My home studio computer is running from a laptop with Pro Tools, making it really easy for my wife to pack up my laptop, my UAD Apollo Twin soundcard, my Teenage Engineering OP-1, a Sennheiser MD 441 microphone, and my trusty Sony 7506 headphones, which I use all the time. I mixed some of the War Child album songs on them in hospital! My wife also brought a little Make Noise 0-Coast modular synth that’s about the size of a book, and a really cool and inspiring Japanese ’80s synth, a Suiko, which is like a Koto synth. It’s not in a Western scale, and has these slightly FM-like sounds. Plus a friend bought me a Sony Walkman cassette player, which I used to bounce stuff on and off and to get some tape effects. All stuff that fit in a backpack!”
The hospital bedside setup on which James Ford made Lost In Another World.
Wards & Music “In terms of my process, I’d be lying in bed or sitting at the table and I’d get ideas and would start sketching them out in Pro Tools. One source of inspiration was some of the loops I often make in my studio. I have two Revox A77 tape machines, and like doing this Frippertronics thing, where you record onto one tape machine and then the tape goes to the second tape machine and you feed the output of the second tape machine back to the first tape machine and you get these long delays. “It’s a great way of building amazing soundscape-like long loops that feel very alive and human. When I make these loops, it’s me trying to be Roedelius for a few hours, just because I find it soothing. I had a few of those loops on my laptop. Other than that, I mainly www.soundonsound.com / September 2026
121
INSIDE TRACK
JAMES ELLIS FORD
protective against the disease returning. However, the transplant failed just before Christmas last year, and my immune system was failing. To be honest, I nearly died. Eventually, my immune system came back online.” Ford’s return to hospital late last year affected his work on the War Child album in particular. An Instagram post from December 18th, 2025 shows Ford’s hand and arm with needles stuck in, and his laptop with a session on the screen, accompanied by Ford’s comment: “Remote producing a session at Abbey rd while having a blood transfusion was not on my 2025 bingo card. Weird year. Weird life.” “We had been given Abbey Road for a week,” he recalls. “The artists recording there included Damon Albarn, Grian Chatten and Kae Tempest, a supergroup with Johnny Marr, Arctic Monkeys, Foals, Cameron Winter from Geese, Pulp, Fontaines DC. I was meant to be producing all of that stuff. Instead I was present for some of these sessions from the ICU, as a head on a laptop. I was using Audiomovers and the same table, laptop and headphones as I had when doing my album earlier in the year. I was listening in real time, and could press my space bar and talk to everyone’s headphones... all while having a blood transfusion! It was a surreal and mad experience. Luckily, there were many great engineers and producers, like Marta Salogni, David Wrench, Loren Humphrey and others, who covered for me. For the Olivia Rodrigo session, Catherine Marks was there. It also was a wonderful, life-affirming experience to see all these people work for free and put a lot of energy and love into the project.” Ford had started work on the War Child album months earlier, approaching many of the artists involved. “Depeche Mode were the first to deliver. Their process is notoriously slow, and I worked on the track remotely with Martin [Gore], and added some touches once it was finished. I was amazed at how quickly they turned it around. The Arctic Monkeys track came from a demo with a chorus and a guitar riff that Alex [Turner] had lying around since the album AM [2013]. I pushed him to write a new middle eight and he rewrote the verses, so it’s a hybrid of his new and his old writing style. The band then recorded it in Abbey Road, using a few bits from his demo, and while I was in hospital, Alex re-sang it and
124
September 2026 / www.soundonsound.com
More vintage analogue equipment at James Ford’s studio. From top: Grampian 636 spring reverb, Otari eight-track tape recorder, two API 560 graphic EQs, UREI 1176, dbx 165 and UREI 1178 compressors, plus a further compressor of unknown make.
added harmonies, and sent that to me, and we changed the arrangement a little bit, all using Zoom and email. “The album was a mixture. Some people, like Big Thief, did their contribution remotely, and just sent us the track. The Last Dinner Party song
was a demo I’d done with them a long time ago, and we freshened it up. Beth Gibbons’ song had been on my hard drive for a while, and we felt it would be relevant for the album. I had been going back and forth with Olivia [Rodrigo] about what song to cover, and she came up with
NOV 13-14, 2026
SAN FRANCISCO
MONO C O N F E R E N C E
+
M U S I C
Join 750+ music creators
for 2 days of connections, creativity, and growth Artists Workshops • Career and Creative Panels • Exhibition Live Performances • Interactive Workshops • Office Hours
EARLY BIRD TICKETS ON SALE NOW monomusic.co
IN ASSOCIATION WITH
FE ATURE
An 80cm-wide roll of freshly made tape is cut into quarter-inch strips at the RTM factory.
FRANCK ERNOULD
I
n his SOS December 2024 leader, Sam Inglis declared: Tape Is Back! Actually, like vinyl records, analogue tape never really disappeared. Manufacturing and sales continued, even as digital and then hard‑disk recording ruled among audio professionals. The magnetic recording industry was once huge: there were more than 20 manufacturers in the US, including 3M and Ampex, and 12 in Europe, with BASF, Agfa, EMI, MSS, Zonal and Pyral among the largest. Japan, too, had Maxell and TDK. Today, there’s only one analogue tape factory left in Europe: RTM Industries, aka Recording The Masters, located in Avranches, Normandy, France. Their catalogue includes professional and consumer audio tape in various formats and lengths, and even cassettes!
A Brief History Of Tape German engineers developed magnetic recording in the 1920s. The original medium was steel wire or steel tape; fidelity was poor, but it allowed longer
128
September 2026 / www.soundonsound.com
RTM & The 21st Century Tape Revival
We track the analogue renaissance back to its source: Europe’s last remaining factory manufacturing magnetic tape. recordings than discs of the era. Tape as we know it was invented in the 1930s by BASF for the Magnetophon that AEG had just developed. German engineer Fritz Pfleumer had patented a process for putting iron oxide powder on cigarette paper, using a lacquer as binder. BASF replaced the paper with cellulose acetate, improved the iron powder and the binder, and supplied AEG with magnetic tape for the Magnetophon in 1934. The new machine created a sensation at the Berlin International Radio Fair in 1935; the audio quality was pretty good, and
it was used intensively by radio stations, contributing to Hitler’s propaganda all around Germany. Tape quality got better, and the next major step forward was the introduction of AC bias by AEG in 1943, delivering 60dB dynamic range and a frequency response of 50Hz to 10kHz. Tape could be cut with scissors and edited at will, easily copied, erased, shipped, and allowed long recording times (up to 22 minutes). Before the outbreak of the Second World War, AEG demonstrated an early Magnetophon tape recorder to US
electronics giants General Electric in hopes of securing a licence agreement. GE failed to recognise the potential of the early Magnetophon, putting their faith in wire recording instead. The Magnetophon was rediscovered by an American officer in Frankfurt at the end of WWII, brought to the US and further developed by manufacturers Ampex. Chemicals specialists 3M supplied tape using PVC as a base film, with better oxide. In 1948, Bing Crosby, who had funded Ampex, recorded his syndicated radio shows on tape with Ampex Model 200 machines, giving the new system a major application. Analogue tape recording then spread worldwide and revolutionised the entertainment and information industry. In the United Kingdom, EMI unveiled the Magnetophon-based BTR1 in November 1947.
How It’s Made Today, magnetic tape is still made of a thin plastic base film, bonded with ferric oxide on one side and an antistatic coating on the other side. On RTM SM911 ‘pro’ tape, the base film is 30µm thick, the magnetic layer itself 16µm, and the back coating 2µm. On RTM LPR90 ‘consumer’ tape, the relative thicknesses are 20, 11.5 and 4.5 µm. Every physical aspect is important: base film must not be too rigid or elastic to cope with mechanical
These bottles contain samples of all the ingredients needed to produce magnetic tape: ferric oxide, resins, solvents and more.
pressures such as acceleration and braking during fast‑forward/rewind. Back coating is key to a regular winding, with or without flange. The thickness of the oxide coating determines the maximum output level, the number of magnetic particles it contains affects treble response, and its regularity ensures the absence of dropouts. In a two-track, quarter-inch master tape rolling at 15
inches per second, the playing head encounters 80 million magnetic particles per track per second. Ferric oxide and coating are laid down on the plastic carrier by a specific coating machine. The one used by RTM is one of the last ever made, the E9, purchased from the RMG International plant in Oosterhout, Netherlands in 2012. It handles huge rolls: 6km long
The drying oven, opened to reveal a floating strip of freshly coated tape.
www.soundonsound.com / September 2026
129
FE ATURE
RTM : M A N U FACT U RING TA PE
catalogue. The former BASF formulae SM900 and SM911 are Standard Play tapes with a total thickness of 50µm, for professional users (SM means Studio Master), available in quarter-inch, half-inch, one-inch and two-inch formats. LPR35 and LPR90 (Long Play Recording) tapes are made for people owning 10.5-inch tape recorders, and are only available in quarter-inch. They
As well as audio professionals, audiophiles represent a major market for RTM tape. Reel-to-reel master tape copies are a fast-growing sub‑segment of the analogue sound revival. They are more exclusive than vinyl reissues, and much more expensive, costing from £350 for an album. The master tape is copied in real time from a Studer A810 playback machine, in 20-tape batches, on Revox
“In a two-track, quarter-inch master tape rolling at 15 inches per second, the playing head encounters 80 million magnetic particles per track per second.” are only 35µm thick, which allows up to 45 minutes to be recorded on a single reel, the length of a vinyl record. Tape is spooled on plastic reels (trident), metal reels (with NAB hub) or pancakes; one-inch and two-inch tapes are supplied in precision reels. Lengths scale from 180 to 1524 metres, on five-inch to 10.5-inch reels. Prices range from £21 for quarter-inch tape on a five-inch plastic spool to £293 for two-inch, 30ips tape.
PR99 slave machines, each perfectly calibrated at 15ips. Runs are limited to a few hundred copies, often signed and numbered. Specialist labels include Analogue Productions (USA), Audionautes Recordings, Horch House (Germany), Chasing The Dragon (UK), Opus3 (Sweden), Hemiolia, IPI, The Sound Of Tape and 2xHD Fusion. Last year, Warner Music asked RTM to duplicate the first Rhino High Fidelity master tape copies,
including Yes and T-Rex albums, with 500 copies of each released. Although the thinner LPR ‘consumer’ tape can accommodate most full albums on a single reel, labels often prefer to use thicker and better-quality ‘pro’ tape, even if this means splitting an album across two tapes. More and more audiophiles own former professional tape recorders, and there are brand‑new models appearing recently, at five-digit prices from companies like Analogue Audio Design (created by a former RTM employee), Ballfinger, Metaxas & Sind, Pole Audio, Revox and Sonorus Audio.
When Is A Master Not A Master? These audiophile tapes derive their value from their alleged proximity to the original master tape of the sessions. There may be some opacity here: for obvious reasons, record companies don’t let priceless original master tapes out of their vaults, but only safety copies, or even copies of these copies. Even the acknowledged ‘original master’ could in fact be a copy of the edited master made in the control room. In the days before mix automation, it was common for the two-track master to be spliced together from multiple
This diagram shows the manufacturing process from beginning to end.
132
September 2026 / www.soundonsound.com
Reel-to-reel ‘master’ tapes being duplicated at the RTM plant.
passes of a mix. This master would then have been copied on continuous tape. Mastering would then produce another tape with the mastering engineer’s processing, known as the ‘production master’. This was then copied, and the copies used to cut lacquers. Many lacquers were required; by electroplating, a metal ‘father’ was created from the lacquer. This, in turn, was used to produce ‘mothers’, from which the stampers used on the pressing machines were moulded. For international releases, records were pressed in different countries, with multiple copies of masters sent to record plants and cutting facilities. To sum up: there is only one master, but there are many sub-sub‑masters, not always labelled as such. And each generation adds a little hiss and slightly degrades the frequency response. Tape naturally ages, and as the years pass, the number of recordings for which a genuine analogue master survives in playable conditions diminishes. There have been plenty of high-resolution digital transfers of
’60s or ’70s albums made to address this problem for CD remastering, and they sound pretty good. But for ‘analogue-only’ audiophiles, is this proposition of “high-res digital master copied on analogue tape” as attractive? Anyway, RTM sell tens of thousands of studio tapes annually, and the audiophile market share is larger than the pro audio component.
Cassette Capers Since 2018, RTM have also manufactured audio cassettes. With some minor modifications, the installations designed for measurement tape can be adapted for the very thin cassette format — total thickness is just 16µm for C60 and 11µm for C90. A C60 contains 87.5m of tape, a C90 131m. The formula is based on SM900. Since a pancake of cassette tape is 3km long but just 3.81mm wide, it doesn’t handle as easily as other tape. RTM’s in-house technician was able to develop a specific cutting tool to manage this. Cassette plastic shells are subcontracted, but RTM have invested in loading and duplicating machines from
Lyrec and Tapematic, and everything is now made on-site. RTM now offer full production runs of pre-recorded cassettes, including high-speed duplication, loading, shell printing, inner card, box and wrapping. “We duplicate hundreds of thousands of cassettes per year,” explains Kamil Hamidou, Cassette and Duplication Sales Manager. “We duplicate for all major labels, with runs up to 10,000 units per album, plus small labels and bands, to add visibility, to get off the ‘Spotify and YouTube’ aspect. Releasing an album on cassette has a fashion effect!” RTM also sell blank audio cassettes at prices from £7 for a C60 or £8 for a C90. Cassette business has grown fast in recent years, and now provides a significant portion of RTM’s turnover. Sales of audio tape rose by 35 percent from 2024 to 2025, and the trend has continued in 2026. “We see more interest from recording studios,” says Hamidou, “as young engineers want to record more human, live performances, in analogue. It seems the rise of AI, meaning perfection, isn’t as cool any more.” www.soundonsound.com / September 2026
133
FE ATURE
Mark Fell Machine Learning
Driven by curiosity, Mark Fell’s unique approach to technology has shaped a long and adventurous career in electronic music. ROBIN RIMBAUD
E
merging from Sheffield’s fertile experimental scene and first gaining recognition through the influential duo SND, Mark Fell has consistently explored the relationships between computational processes and human perception. His work resists easy categorisation, in that it can be deeply mathematical yet unexpectedly playful, conceptually demanding yet physically engaging, revealing how technology is never neutral but always carries its own aesthetics and politics. In an era now increasingly defined by artificial intelligence and automated creativity, Fell’s perspective feels more relevant than ever. Rather than asking what technology can do for music, he asks rather more fundamental questions: how
134
September 2026 / www.soundonsound.com
do technological systems influence our ways of listening? What assumptions are embedded within the software we use every day? And how might artists subvert those conventions to discover genuinely new forms of expression? Every artist begins somewhere, long before ideas acquire names or methods become philosophies. In Fell’s case, that journey starts with a deceptively simple question: how does a young boy growing up in a working-class family in an industrial town come to see technology not merely as machinery, but as a means of making sense of the world through sound? The answer lies not in a single moment of revelation, but in a lifelong curiosity — one that would lead him to continually question established musical conventions while searching for entirely new forms of expression.
“I grew up on the border between Rotherham and Sheffield, in the industrial bit. When I was a kid, Sheffield obviously was the centre of electronic music. There was Cabaret Voltaire, the Human League, all this stuff, and I was 13 years old and starting to get into it all, and I went to a family gathering at my uncle’s in the East end of Sheffield. It was totally boring and I was the weird kid and then someone said, ‘Have a go on your cousin’s synthesizer, it’s in the coal shed!’ So I went in there, turned it on, and, I’m not exaggerating, literally, when my finger touched that dial, it was like the universe turned from black and white to colour. “It was just a monosynth from RadioShack or something like a Realistic, but I sat in there all night. They couldn’t get me out of the room! Then I picked up a Powertran Transcendent 2000 from our next-door neighbour who was a technician in the science department at the university. So, that’s where the story starts.”
Photo: Rebecca Salvadori
For many young people growing up in the North of England during the 1980s, creativity became both a refuge and a form of resistance. Against a backdrop of industrial decline, political upheaval and communities fractured by the miners’ strike, electronic music offered an escape from everyday realities while opening the door to entirely new ways of thinking. For Fell, those years of isolated experimentation and self-discovery would ultimately lay the foundations for a lifelong exploration of sound, technology and artistic possibility. “It’s worth remembering that at that time, in that particular part of Britain, in the North, you had the miners’ strike and it felt like social infrastructure was just falling apart. I was becoming more politically aware. I was a bright kid, you know, like the nerd, but I was getting more rebellious, more into philosophy and art. So, it was part of my journey into an alternative being. “I still have this huge box of cassettes, with photocopied covers from around 1981, with me messing around on a drum machine and monosynth, and it sounds exactly like what I do now! These were recorded on an old cassette deck. I didn’t have a mixer so what I used to do was cut the cables off various things and just twist the wires together to mix things. “This period lasted for about five or six years, with me being quite isolated. You know, when you’re in a small town, you have to make compromises about who you hang out with. I was the kid with a weird hairdo and a synthesizer, and electronic music was part of this, almost like a kind of cocoon. Towards the end of the ’80s, I got into art school at Sheffield City Polytechnic, which was a great place to study. And, you know, it was the birth of Sheffield, techno and stuff. My ambition was basically to make a piece of music that I liked, and I failed miserably for a long time. At the same time, I always had this kind of realisation that I was good at what I did, I just kind of knew. “I never anticipated making a living out of this, and my ambition in terms of a career, not that I ever really had one, was to be a weird anarchist dropout that just wanted to live on the dole for the rest of his life. But then I became a parent [to Rian Treanor, now a highly respected electronic music producer based in Rotherham in the UK], and realised I didn’t want to live that kind of life anymore, and got a job at Hull School of Art & Design as a technician.
This was a great job as I was a Learning Advisor on a new course called Phonic Art and supporting students, but academic environments can tend to be quite toxic and around 2002 decided I’d return to working independently, following my own agenda, and miraculously have been doing that ever since.”
SND The first introduction to Fell’s work for many was SND, his collaboration with Mat Steel, pioneering a form of almost broken dance music at the forefront of new digital minimalism. Stripped of traditional melody and vocals, their sound relied more on algorithmic pattern-making processes. I was curious as what led to this defining sound? “I was still in the metaphorical shed with the synthesizer, and reading literature and finding out about experimental film and politics. I didn’t just want to make techno or house music. I wanted to make this weird radical version of it dealing with that
vocabulary, but I didn’t know what that was going to be until I found it. I didn’t have the tools or the knowledge to resolve that issue. “Then around 1995 a bunch of things started to emerge: Ryoji Ikeda, Mika Vaino and Panasonic, the Mille Plateaux label, Mego, and so on, and it was a brilliant time. I think it gave me a way of seeing my own work and my own questions in a new light, and it enabled me to step outside a lot of habits that were holding me back. This set me on the path to where I am today. I began working with Mat Steel as SND and with Jez Potter as Shirt Trax. “Throughout my development as an artist, I would have one synth, then save some money, sell it and buy another. So, I progressed in that way. My history of making music is through real-time engagement with dials and knobs. I’ve never studied music, nor knew any music theory. Then around 1988 I sold everything, and got an Atari ST computer with Pro-24, which later became Cubase. I had one MIDI sound module with
The SND Live Setup
“This was our [SND ] live setup around 2003-2005. A laptop running Max generates all the patterns. This is connected to a two‑in, two‑out MIDI interface. There are two controllers, including a CM Labs Motor Mix, which has motorised faders, endless dials and buttons that light up, configured with Max objects that use System Exclusive. The unit had two sets of MIDI I/O, one for controller data, and the other for setup via SysEx. We would use this to control the gain of the two or three layers in our tracks. Some of the long faders were used to do more precise control of pattern generation data, for example interpolation between two distinct rhythmic patterns. Also, the buttons lit up with eight columns, so we sometimes used two rows of these to switch events on and off like an 808-style drum grid interface. The rotary encoders at the top could have a very high resolution, so we could use floating points, which was useful in some cases. And we figured out how to label them on the LCD screen. The other controller, a Beringer BCR2000, has endless dials, which we generally used for sound parameters — filter, tuning etc. All the sound was produced by an E-mu e6400 sampler with a connected Zip drive. These were amazing samplers with great modulation matrix and by far the best filters around at the time. The outputs from the E-mu run into a Mackie Onyx mixer.”
www.soundonsound.com / September 2026
135
ON TE ST
The Crow Hill Company Brackish Pads Plug-in Instrument
HHHHH Brackish Pads is an unusual instrument inasmuch as it takes the concept of lo-fi pads to a subterranean level by exploring microtonality, stammering playback and dark-sounding tones that are bent out of shape, all tempered by a healthy dose of unpredictability. It certainly sets a mood that can go from reflective to deeply dark and disturbing, so if you want to inject some sinister or unsettling emotion into your pad sounds you’ve come to the right place. Some of its more polite offerings might also slot into ambient music compositions, especially if you tweak the balance of the different patch elements. Supporting all the mainstream plug-in formats, Brackish Pads comes as a fully functioning instrument so does not rely on a third-party host such as Kontakt. The full installation takes around 1.25GB. The designers tell us that the idea for Brackish Pads came about when they were working on their Crystal Pads instrument, leading to a new approach to pad design that culminated in Brackish Pads. By exploiting unpredictable note modulations and microtonal shifts, Crow Hill’s designers set about expanding on the idea of including random-sounding elements by adding a dedicated partial they termed ‘Critters’, about which more shortly. Brackish Pads features 16 sets of three sampled sounds, termed partials, that lean towards those scoring for picture, though there are also applications for perhaps less-relaxing ambient and electronic music too. Importantly, all the creative tweaking is done using relatively few controls, and automating parameters can produce further tonal evolutions. With its khaki-coloured window (more than a little reminiscent of stagnant water), the instruments shows a keyboard along the bottom, a large dual‑concentric control on the left, three sliders and four further rotary controls. That large control looks after Expression plus low- and high-pass filtering, and all controls can be automated. Coloured keys on the keyboard show the notes that activate four Pump Triggers, which have different envelopes, and which are linked to the compressor controlled by knob six. The effect is not tempo-sync’ed — you just record one trigger key press
140
September 2026 / www.soundonsound.com
every time you want a note to pump once. The lowest keyswitch brings in granular processing, which is nicely subtle and adds an endearing sparkle. Knobs three, four and five control Cassette, Delay and Splosh (a type of reverb), while the sliders numbered seven to nine handle Basic, Complex and Critters partial levels. Each partial fader has a transpose control beneath it with a range of ±12 semitones. Cassette adds the character of the pad being played back from a cassette tape that has spent too much time on the parcel shelf of the car on a sunny day. A preset select menu is used to select one of the 16 patches, which can then be modified to a significant degree using the controls. However, there seems to be no way to combine the partials from different patches. While the first of the three partials is labelled Basic, that doesn’t mean clean and unruffled. Rather, it means that the weirdness is reasonably restrained. For example, taking the ‘Marsh Ghosts’ preset, the Basic partial sounds like a cross between grumbling cellos and a twin-engine prop plane passing overhead, underpinned by the rumble of an underground train approaching the station. The Complex partial sounds distant and disturbing, almost like a watery choir in a large cave. For this preset the Critters partial is fairly deep and almost peaceful, swelling in slowly, getting brighter and then fading again, but in some of the other patches the Critters partial is the most dramatically fragmented, usually coming and going in an apparently inconsistent way. Put it all together and the ‘Marsh Ghosts’ patch conjures up a distant storm with a sense of impending doom. ‘Water Mocassins’ is a less scary patch than its name might imply, and by rebalancing the Partials it is possible to get some fabulous evolving pads that remain surprisingly well behaved. If there’s a common element to all the patches it is that there’s usually a sense of unstable pitch-wobble creating a disturbing undertow that sometimes hints at a badly maintained Mellotron and at others somebody warming their leftover curry using a lightsaber. In most cases there’s
a good balance between musicality and instability, without the pitch fluctuations getting too excessive, though dialling in a lot of Cassette will give you excess when you need it. Adding the Splosh reverb makes more difference than you might imagine too, adding a degree of solidity to the sound. If you’re working on music for film or TV, this instrument is perfect for conjuring up a sense of unease or as a prelude to something dramatic happening. Think Blade Runner but all the replicants are on Prozac, or perhaps an impending visit from The Walking Dead. I can’t see many applications in mainstream pop, but for generating emotive cinematic soundscapes for picture, or for atmospheric music compositions, I think Crow Hill have done a brilliant job both in sound design and in the straightforward control that Brackish Pads offers. A real bargain at the price. Paul White £29 www.thecrowhillcompany.com
Handcrafted Audio Handcrafted Mallets Kontakt Instrument
HHHHH Handcrafted Audio take the marimba and the vibraphone to the max in their new release, Handcrafted Mallets. Combining acoustic samples and a synth built using said samples, the developers have put three distinct instruments, namely Handcrafted Marimba, Handcrafted Vibraphone and Handcrafted Mallet Synth, under one roof to meet all your mallet needs. The first two cover the acoustic possibilities of the instruments, with over 30,000 samples that capture tone and character in pristine
PODCASTS ELECTRONIC
PEOPLE &
MUSIC
MUSIC INDUSTRY
Gérard Assayag
System 7
AI and Musical Performance
Steve Hillage & Miquette Giraudy
Gérard Assayag talks about his pioneering work in creative AI and computer music at IRCAM, exploring co-creativity, computer-aided composition, musician–machine interaction and the evolving relationship between artificial intelligence and musical performance.
Steve Hillage and Miquette Giraudy talk to Kevin Paul about their techno project System 7 and ambient project Mirror System, discussing their studio setup, live performances and creative approach to making music.
ELECTRONIC
RECORDING
MUSIC KOGG
Experimental Electronic Duo KOGG’s Selena Kay and Cerys Hogg talk to Caro C about combining their classical and jazz disciplines with creative sound design, custom instrument building, live performance and rhythmic experimentation.
& MIXING Advanced Effects Six Creative Examples
Eddie Bazil explores a range of advanced effects techniques, using practical audio examples to demonstrate how creative combinations of delays, reverbs, harmonisers, flangers and phasers can add depth.
Follow our channels by subscribing to the shows on Apple Podcasts, Spotify, Amazon Music or wherever you get your podcasts.
All shows are mastered to the highest quality the podcast channel will support and are in stereo.
Check out our website page for further details
www.soundonsound.com/podcasts
ON TE ST
SAMPLE SHOP
detail. Each instrument features multiple articulations, three mic positions, and signals sent through two legendary reverbs — the Lexicon 960 and Bricasti M7 — with the flexibility to dial in each signal to achieve your sound of choice. The creative possibilities of moving beyond traditional mallet instrument sounds begin right from the main page, with two sliders that control timbre and distance. Timbre controls the hardness of the mallet, while the Distance fader moves smoothly from an intimate close sound to exaggerated distant tones, suggesting landscapes bordering on surreal at the extreme. Even in the default presets, just playing around with the two sliders instantly adds movement and depth, propelling your composition forward based on the feedback from the changing sound. It’s very satisfying to play and the multitude of random combinations ensures that you won’t tire quickly from even this very basic manipulation of the sounds. An important note about setting up the Handcrafted Vibraphone: a sustained tone is one of the defining characteristics of a vibraphone, but to access that straight out of the box, you need a sustain pedal; without it, the sound triggered is short and percussive. For those working without a pedal, one fairly simple solution is to assign a knob on your keyboard to CC64 (Sustain). You now have access to the pedal features of the vibraphone, adjustable further via speed and depth sliders in the instrument. The synth is where the experimental side of this instrument really kicks in. The original mallet recordings were used to create over 500 presets resulting in a palette of gritty basses, granular soundscapes, shimmering pads and sound‑design elements. With the flexibility to shape these sounds even further, it is really quite remarkable how much raw material you have to play with. I wondered how to achieve the sounds of more traditional techniques, like a one-handed roll on the marimba for example, since my hands on a keyboard are not nearly as light and dexterous as I would like. It took a mix of finding the right patch, adjusting the attack, and practising a lighter touch on the keys to emulate the sound. No prizes for authenticity, but it evoked the same feeling as the sound I was going for, so it will have to do. The instrument, available for both the free and full versions of Kontakt, is very easy to get started with. The patches
142
September 2026 / www.soundonsound.com
are rich and expressive, and the synth sounds are full of inspiring textures, truly expanding the box inside which your composition lives. A minor suggestion on the usability of the arpeggiator/sequencer — I wish there was a way to manually input values for parameters like note length and velocity, as opposed to dragging the mouse up and down to increase or decrease the values. The icons, while beautiful, are rather small and it becomes especially tricky with something like velocity where you’re relying on accurately matching the opacity of several glowing white circles to adjust the intensity of each note. Things do get a bit fuzzy. All in all, Handcrafted Audio have a wonderful instrument on their hands that puts the mallet instrument in the spotlight, rather than have it sit back within a larger ensemble (although it can most certainly do that). Highly recommended. Sonal D’Silva $199 www.handcrafted.audio
Sound Dust Drift Clouds Kontakt Instrument
HHHH To anyone familiar with the Sound Dust product archive, the one thing we know we can depend upon is a beautifully unexpected approach to organic sound creation. Their latest creation approaches stringed instruments in a typically different way: it’s a library of solo viola, cello and bass, not played with conventional bows, but with industrial-grade garden twine, with a sustain that would be equivalent to a bow five metres in length! Conceived by sonic creative Pendle Poucher, an appropriate mechanism for bowing was created, employing a fishing reel and a retractable dog lead, with the latter performing the heavy pulling/bowing. There are 22 x 2 different articulations, combined into a sizeable 9GB of sample data, fully multisampled with velocity and pitch layering. There are also some useful synthesized waveforms to bolster the string content, and even the sound of silence and crackles. The result is predictably unique, in the form of a Kontakt instrument which offers two partials for each snapshot (patch). These are represented on the instrument
itself as an upper ‘Cloud’ layer and lower ‘Shadow’ layer. The Cloud layer is described as the ‘meat and potatoes’ of the instrument, hosting a greatest number of controls and tools. These include an ADSR envelope, the ability to switch between polyphonic and paraphonic operation, and an inviting EQ knob that applies 100 different static EQ settings, and can affect individual layers or the whole snapshot. The Cloud layer also plays host to an extensive effects section, with five different keyswitchable elements that can usefully be brought into performance. While the same samples are available in the Shadow layer, this is more simplistic, equipped with ADSR envelope and a looping operation. The modulation wheel is hard-wired to act as a balance control between the layers, and becomes a superb performance tool for creating movement. ‘Drift’ offers varying forms and degrees of modulation, although not with the usual predictability of LFOs, but by means of the Wandering Engine. This eschews conventional LFO orthodoxy in favour of wonky waves that ebb, flow and slew, often reaching a near halt before starting back up again. It’s a rather beautiful concept! In a not dissimilar manner, the Portal page is portrayed as a ‘happy drunk in control of your parameters’. It’s effectively a form of modulation matrix, but one that thrives on the element of surprise. The interface admirably invites experimentation, but there can be moments of head‑scratching as you try to fathom exactly how on-screen icons interact and behave with the instrument’s output. The result is a wonderful mixture of full control and happy accidents, which begins with the selection of beautifully crafted samples. A healthy contingent of snapshots are included, which offer useful and simple starting points, as well as some drift-based inspiration. As a sonic collection, it’s a superbly crafted compendium of often gritty, grainy and beguiling string sounds, brought further to life through modulation and performance controls. Dave Gale $70 www.sound-dust.com Audio examples of this month’s libraries are available at www.soundonsound.com.
NEXT MONTH IN
Building A Freelance Career
Many talented people struggle to make a stable income from music. Often, it’s not audio skills, hard work or self-promotion that are missing, but a clear understanding of your own business model — and what you have to offer potential clients. In October’s SOS, we explain how to identify the business factors that are holding you back.
Subscribe at www.soundonsound.com/subscribe
AD INDEX To Advertise in Sound On Sound please contact: usadsales@soundonsound.com ADAM Audio.............................................................................................................................. 105
Landscape.......................................................................................................................................93
Allen & Heath................................................................................................................................87
Lynx Studio Technology......................................................................................................41
AMS Neve.........................................................................................................................................25
Millennia Media..........................................................................................................................15
ART Pro Audio..............................................................................................................................35
Mono................................................................................................................................................ 125
Audeze...............................................................................................................................................17
Oeksound...................................................................................................................................... IBC
Black Lion Audio (RAD Distribution).........................................................................19
PSI Audio...................................................................................................................................... 115
DPA Microphones.....................................................................................................................73
Radial Engineering...................................................................................................................57
FabFilter............................................................................................................................................23
Roland.................................................................................................................................................29
Garbage Ideas..............................................................................................................................53
Solid State Logic.........................................................................................................................21
GIK Acoustics................................................................................................................................51
Sonible...............................................................................................................................................45
Grace Design....................................................................................................................................9
Soundtoys................................................................................................................................... 113
Groove Synthesis 3rd Wave........................................................................................OBC
SPL USA.............................................................................................................................................95
Heritage Audio........................................................................................................................ 109
Strymon.............................................................................................................................................33
Ilio Spectrasonics.....................................................................................................................IFC
Sweetwater....................................................................................................................................11
Ilio Audio Modeling.................................................................................................................59
Toontrack Music.........................................................................................................................39
IsoAcoustics...................................................................................................................................69
Trinnov.............................................................................................................................................4-5
Josephson Engineering.......................................................................................................75
Wave Distro................................................................................................................................ 117
Kenton Electronics...................................................................................................................67
Wolff Audio.....................................................................................................................................13
SHOWCASE
David Carson (Regional Sales Manager): david.carson@soundonsound.com Piano Organ Synth
Note-for-Note Sheet Music - MIDI Files
TRANSCRIPTIONS Learn Your Favorite Keyboard Parts Exactly As They Were Recorded
Visit ManyMIDI.com Free Sample
Experience acoustic perfection anywhere with the only studio trailer designed specifically for recording artists, composers, musicians, podcasters, and video personalities. De s i g n yo u r d rea m stu d i o at : m o b i l e s o u n d stu d i o s .c o m
OFFICIAL MERCHANDISE STORE
T-SHIRTS
SWEATSHIRTS
HOODIES
MUGS
www.soundonsound.com/merch 144
September 2026 / w w w. s o u n d o n s o u n d . c o m
Money Back Guarantee
Find the BEST acoustic fabrics from top brands at the LOWEST prices… Guilford Of Maine
Maharam
Luum
Knoll Textiles
DesignTex
…and more!
…up to 95% OFF retail
NEW
!
AUDIO & VIDEO CABLES, PANELS, CONNECTORS, ACCESSORIES. What you need, when you need it.
bstockfabric.com
REDCO AUDIO
1-203-502-7600
w w w. s o u n d o n s o u n d . c o m / September 2026
145
MIXING IN THE BOX PAUL WHITE
M
y interest in home recording started when the first TEAC open-reel four-track machine came on the market. It then evolved via eight-track, half-inch 16-track, one-inch 16-track, ADAT and finally to a DAW, which in my case ended up being Logic Pro after I was weaned on an Atari running C-Lab’s Creator. At the end of my open-reel days I had a mixer that ran almost the full width of my garage studio, with up to 64 inputs available at mixdown. Even though I had a third-party automation system installed, it didn’t really provide the facilities or mix recall I needed, as it only offered level automation and involved a lot of messing about with timecode. At the time I used the studio both for my own work and for paying clients, and when someone came back a few months later wanting to make a small change to a previous mix, getting all the mixer EQs and outboard settings to match was a real challenge —
especially if I’d swapped out some of the outboard gear in the meantime. When I first moved to a DAW, I tended to treat it much like a tape machine on steroids, so I still kept some of my old outboard gear. Very soon, though, I came to realise that whatever the perceived differences between physical hardware and the better software emulations, for me the benefits of complete and accurate session recall far outweighed any small compromises. As an engineer friend of mine used to say — and he worked for some of the highest-profile musicians around — there comes a point where you have to ask yourself, “Will it affect sales?” I’ll still use hardware pedals when recording some of my own guitar parts, and if I’m after a genuine amped sound, I still prefer to mic up a real amplifier rather than rely on modelling plug-ins. But I’ve put my collection of standalone mic preamps back in the cupboard, as I found that the preamps in my mid-priced audio interface were perfectly capable and very clean.
It’s true that hardware mic preamps can sound quite different when driven hard, but much of that character can now be recreated using plug-ins such as PSP’s VintageWarmer or United Plugins’ Front DAW. Although I didn’t choose this way of working to save money — despite my Yorkshire heritage — it does show that musicians working on a budget can achieve seriously professional results with a fairly modest DAW system. If someone asked me to make an album using nothing more than GarageBand and its stock plug-ins, plus a budget audio interface, it wouldn’t present too much of a challenge. What makes a far bigger difference to the end result is the quality of the monitoring (whether speakers or headphones), choosing microphones that suit the job, and paying attention to some basic room acoustic treatment. And when it comes to recording vocals, a thick duvet is worth a dozen expensive mic preamps! Fortunately, capable loudspeakers and headphones are now very
“For me the benefits of complete and accurate session recall far outweighed any small compromises.” 146
September 2026 / www.soundonsound.com
affordable and, once you get much beyond the $1000 mark with monitors, the law of diminishing returns takes over remarkably quickly. If your mix sounds good on a well-chosen pair of nearfields and also on a decent set of mid-priced headphones from one of the established brands, the chances are it will sound perfectly good once it’s uploaded to a streaming service. What was once my ‘grown-up’ 16-track studio has now been replaced by an M2 Mac mini, an eight-input audio interface (that can be expanded to 16 when needed) and my trusty Event Opal monitors, which have just celebrated their 17th birthday. It suits the way I work because I tend to keep multiple projects on the go, revisiting and refining them several times before they’re finally signed off. By keeping everything in the box, I know I’ll always be able to pick up exactly where I left off, without having to leave my creative headspace to start patching in outboard gear. Of course, this is simply my own preferred way of working and you may have a completely different and equally valid approach!
the next evolution of soothe
Since releasing Soothe in 2016, our goal has been to create original and useful tools that help audio engineers focus on what matters. With each plug-in and iteration, we’ve deepened our understanding in DSP and UX. Soothe3 continues that evolution with our most transparent processing and refined user experience yet. Learn more at oeksound.com