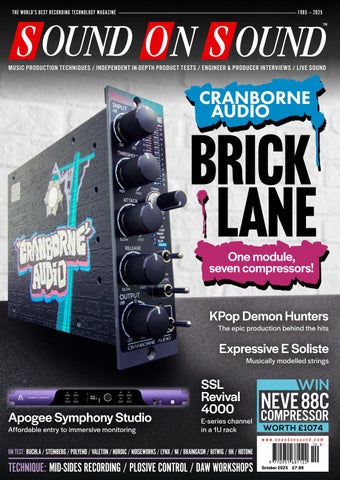
SOUND ON SOUND THE WORLD’S BEST RECORDING TECHNOLOGY MAGAZINE
THE WORLD’S BEST RECORDING TECHNOLOGY MAGAZINE
1985 — 2025 TM
MUSIC PRODUCTION TECHNIQUES / INDEPENDENT IN-DEPTH PRODUCT TESTS / ENGINEER & PRODUCER INTERVIEWS / LIVE SOUND
CRANBORNE AUDIO
OCTOBER 2025
BRICK LANE One module, seven compressors!
www.soundonsound.com
KPop Demon Hunters
The epic production behind the hits
Expressive E Soliste
Musically modelled strings
Apogee Symphony Studio VOLUME 40 • ISSUE 12
Affordable entry to immersive monitoring
SSL Revival 4000
E-series channel in a 1U rack
WIN
NEVE 88C COMPRESSOR WORTH £ 1074
www.soundonsound.com
ON TEST: BUCHLA / STEINBERG / POLYEND / VALETON / NORDIC / NOISEWORKS / LYNX / NI / BRAINGASM / BITWIG / HH / HOTONE
TECHNIQUE: MID-SIDES RECORDING / PLOSIVE CONTROL / DAW WORKSHOPS
October 2025 £7.99
rode.com
Exclusively distributed in the UK and Ireland by Source • T: 020 8962 5080 • W: sourcedistribution.co.uk/rode
58 INSIDE TRACK
IN THIS ISSUE
www.soundonsound.com
October 2025 / issue 12 / volume 40
FEATURES 8 SOS For Artists This month, we set ourselves a real-world challenge: compose and release a new tune, using the tools provided in an SOS For Artists subscription!
WIN
NEVE 88C W O R T H £ 1 0 74
38 How I Got That Sound Producer, engineer and mixer Dave Sardy explains how he turned an acoustic guitar into a synth‑like drone on Oasis’ ‘(Get Off Your) High Horse Lady’.
46 Stereo Miking: Mid-Sides Our series on the fundamentals of stereo demystifies Mid-Sides and explains the practical advantages of an M-S mic array.
58 Inside Track: KPop Demon Hunters Five years in the making, Netflix’s smash hit animated movie tested its music production team to the limit.
80 Talkback
PAGE 84
Producer and artist Sijya on why she loves remixing, guitar pedals and Broadcast’s Tender Buttons.
96 Isabel Gracefield: Mulatu Astatke
120 Spotlight: Dante Interfaces
Recording a band live in the room is always a challenge — especially when it’s led by a jazz legend who switches instruments without warning!
Once the preserve of large studio facilities, Dante is now becoming common in smaller setups. We talk you through some of the options.
109 Modular: SchneidersKeller
136 Q&A
SchneidersKeller’s Edd Butterworth and Jean-Marcel Fricke haven’t just opened a shop: they’re trying to start a community.
Your studio and recording questions answered.
116 Ultimate Plosive Control Pesky pops proving problematic? Here’s how to pull them down...
6
October 2025 / www.soundonsound.com
138 Why I Love... Working In The Box Atheen Spencer doesn’t miss the bad old days of lugging heavy gear around the country.
74 LYNX MESA
ON TEST 40 Apogee Symphony Studio
118 IK Multimedia Prism Reverb 119 LANG Electronics 312L 74
Diffuse Field Microphone
86 Buchla Music Easel C O V E R
Analogue Synthesizer
32 Cranborne Audio Brick Lane 500 Modal PWM Compressor
54 Expressive E Soliste Software Instrument
125 Fracture Sounds
Orchestral Atmospheres Sample Library
104 HH Q16FX Analogue Mixer
106 Hotone Verbera Convolution Reverb Pedal
124 Sonora Cinematic Softstruck Sample Library
26 SSL Revival 4000 Input Channel
Thunderbolt Audio Interface
USB Audio Interface
92 Braingasm Ocula
Lynx Mesa
12
Majetone Dream Kit: Zenith
22 Steinberg SpectraLayers Pro 12 Spectral Editing Software
Software Synthesizer
82 Native Instruments Circular Software Sequencer & Sound Engine
118 Strymon Cloudburst Reverb Plug-in
108 TiNRS Bopp & Steve Eurorack Module
125 Native Instruments Scene:
Nightshade Sample Library
Polyend Press Stereo VCA Compressor Pedal
500-series Microphone Preamplifier
USB Audio Interface
112 Bitwig Connect 4/12
14
Reverb Plug-in
18
Valeton GP-5 Multi-effects Pedal
124 Nine Angles For Forte Spat Curve Sample Library
68 Noiseworks DynAssist Vocal Pre-production Software
30 Nordic Audio Labs NU-24K Capacitor Microphone
109 Omnitone Rhythmi & Beatsi Eurorack Module
WORKSHOPS 126 Studio One 130 Pro Tools 132 Cubase 134 Logic
www.soundonsound.com / October 2025
7
TECHNIQUE
This month, we set ourselves a real-world challenge: compose and release a new tune, using the tools provided in an SOS For Artists subscription!
THE SOS TEAM
T
he last few SOS For Artists (SOSFA) columns have been orientation sessions really, to take you through some of the key features. This time, we decided we should get more hands-on, so
we set ourselves a challenge: use only the tools available as part of SOSFA to create a track from start to finish — right through to mixing, mastering, release and promotion. As we do that, we’ll dig deeper into the many tools provided in SOSFA. You can find an audio example detailing the progress
An overview of the Logic project for the first stages of our nu‑disco track, the composition of which is explained in the main text.
made this month on the SOS website at: https://sosm.ag/sosfa-1025. The brief we gave ourselves was to create and release a nu‑disco track, but obviously the principles apply more widely and we’ll also be working with other genres in future workshops. Since lots of us are familiar with Apple’s Logic, we’re using that as the host DAW for this project, but pretty much everything we do here can be done using the ‘lite’ versions of Cubase and Ableton available as part of the SOSFA subscription — or, for that matter, any other DAW.
Electric Piano
The AAS Session Bundle, included with SOS For Artists, had a lot to offer for this project!
8
October 2025 / www.soundonsound.com
Every good nu‑disco track needs a funky electric piano (EP), and that’s catered for by the excellent AAS Lounge Lizard Session 4 plug-in, which is part of the AAS Session Bundle in SOSFA. So the first task is to get that installed. Installation is quick and painless (it took us less than five minutes and just 66.6MB of drive space). It’s probably worth noting at this point that to download and authorise the plug-ins that feature in your subscription, you’ll need to create an account on the relevant manufacturer’s website if you don’t have one already. We found that it made the EP
The Lounge Lizard settings used for the electric piano sound described in this article.
more fun to play in this genre if we dialled in a touch of the built-in room reverb, and added a little bite to the sound by increasing the Hammer and Fork settings.
Into The Groove With Lounge Lizard up and running, our next step was to build a groove and sketch out some chords. The quickest way? Grabbing a few beats from the Sample section of the SOSFA dashboard. At this stage, you probably want to get something together quickly so you have something solid to write to — so your choices don’t necessarily need to make the final edit. In terms of tempo, 124 bpm seems to be around the sweet spot for nu‑disco that will keep it club-friendly and not seem out of place alongside other tracks in the genre. There’s so much content in the SOSFA Samples section that it’s a good plan, in the Search tab, to select the Advanced Filters to narrow your search options down. For this particular search we filtered by drums only, dance genre and a tempo in the range of 118-128 bpm. To make the search quicker, we then homed in on Disco and House, which returned three pages of options — with more time you might want to rummage through a few more genres to get some fresh ideas, but you get the point. We set the search to ‘loop’, so as to exclude one-shots — again, the aim is to be quick and keep the creative juices flowing, and you can always come back and select some one-shots later for the final beat construction, or even use the sampler to chop up the chosen loops, as we did in last month’s workshop. Auditioning beats is quick and easy, and a couple stood out right away, so we dropped them into the Creator section at
the bottom of the SOSFA Samples page, just to hear how well they worked together. Once the first sample is added to that panel, you can switch the bpm to match your project. You can load up to eight samples at once in the Creator section, and while you’re audition them it’s a great time to mark good loops as favourites, and add them to specific collections for later use. If you get into this sort of habit, writing should become even quicker over time. We ended up with eight loops for this project, and although the kicks in a couple of the samples didn’t quite gel, on balance we had a great-feeling groove, so we decided to move on, and made a note to address any clashes in the DAW later on.
With your sample auditioning complete, you need to download and import your loops into your DAW, and you have a couple of options. You can just download the original stereo files, to get started quickly. Alternatively, you can download the processed tracks from the player, in which case they’ll already be at the correct tempo for your project. Since one of the best tools for warping tracks is Ableton Live, and we have a version of Live Lite right here in the SOSFA dashboard, we decided to grab the unprocessed samples by dropping them into the Collections folder in our account, and download them from there. Handily, the Creator is still showing up at the bottom of the screen when you go into your Collections tab, so it’s easy to cross‑reference and make sure that you’ve got everything. You can also clearly see what you’ve already favourited and downloaded as the icons become highlighted, so there’s no duplication of effort now or in the future.
Warped Thinking Although beat warping can be done in other DAWs, the simplicity and cleanliness of doing this in Ableton is hard to beat. With the beats stored in a folder, it was quick to drag them each onto their own track in Ableton. As luck would have it, the original tempo for all of them was 120 bpm, so they could be warped in one go. Selecting all tracks, warping in Beats mode and using the command Warp From Here (start at 124 bm)
Using the advanced filters in the SOSFA sample search narrowed down the results, making it easy to find suitable loops.
www.soundonsound.com / October 2025
9
TECHNIQUE
C R E ATING & R E LE A SING A N U ‑ DIS CO T R ACK : PA RT 1
had this lot sync’ed in seconds at the new tempo. Then, it was a matter of exporting the Warped beats into a new folder in the main project, and shifting the original beats to the main Samples folder for future use (keep everything tidy like this, you’ll thank yourself later!). These were then dropped onto their own tracks in Logic, and grouped into a Summing Stack (again, keeping everything tidy to make processing easier). A happy side‑effect of the warping process was that it seemed to tidy up those clashing kicks.
Chord Sequence & Electric Piano Groove This beat now gave us a groove to play with — something to noodle over for the next few hours. Of course, it would be possible to speed this process up by grabbing some EP loops from the Samples tab and develop them, but for this project we wanted to come up with an original groove and chord sequence; really, that’s the fun part, isn’t it? For some of you, it might help to drop a looped bass line in to groove over too. In the interests of getting this project done by the deadline for this article, we opted for a very simple four-bar pattern as the main groove, and later added a B and C section for variety. Heavily quantising keyboard parts can kill that live performance feel, so here we just used it to tweak the odd notes, to bring them into alignment where they part clashed with others. Another trick to help retain the all-important vibe is to shift whole chords at once, rather than individual notes, making sure that the prominent note of the chord hits close to the beat.
Put The Bass In The next part of creating our groove would normally be to structure the entire piece, write out the chord sequence and then bring in a real bassist... And we have tools coming soon that can help you with that. But in the interests of demonstrating what you can do with SOSFA’s tools already, we created a synth bass line using the GForce Axess plug-in. We kept to a fairly simple bass line, just to flesh the track out a little, and developed it more during a dedicated arrangement stage, once other parts had been added. To add thickness, we doubled this part using another sound from the AAS Ultra Analog plug-in. During the mixing stage, the Axess handled more of the sub frequencies, and the Ultra Analog some of the higher, more
10
October 2025 / www.soundonsound.com
tonally distinctive frequencies, to make sure that the bass line remains audible even on phone-speaker playback.
A String Arrangement No nu‑disco track would be complete without a string part, and we found just the tool for the job in the form of Sonuscore Elements. This runs in NI’s Kontakt sampler, and while it’s a cut-down version, it still offers us plenty of useful options. We ended up using three articulations — the Staccato, Legato and Tremolo options — which added some nice variety to the part. The legato strings are actually doubled with the staccato, the latter set at a lower velocity, just to give a faster start to the legato note. That’s not always necessary, but can help when working in an uptempo genre like this.
Structure & Arrangement Next, it was time to start developing the structure of the track, so it was a matter of copying and pasting the beat to last for around three and a half minutes, then dropping the various parts across it to create plenty of variety, and prevent the track from feeling repetitive. There’s still a lot of work to do on the arrangement, and things will change further still during the mixing stage, where we can start bringing in some fun effects. The beat was continued for four bars at the end of the track too, with DJ transitions in mind, although you can also provide the track stems during release for this purpose. One of the first things we wanted to do was to bring in a piano part to double up on the EP for thickness, and to add some nice, jazzy incidental parts. The Spitfire Originals piano is perfect for this. Some piano plug-ins can sit very low in the mix so, for now, we
just gave it a boost using the Dynamics control, duplicated the EP groove to the piano track, then added a further track for incidental parts. The main string riff is played three times in this track, and we wanted this section to build with the inclusion of new, different parts each time. Normally we’d suggest hiring a real guitarist to add a new part, but since the brief was to demonstrate what’s available in SOSFA, we turned to the AAS Strum Session plug-in, to see if it could introduce more rhythm in the second and third instances of the main riff. This great little plug-in has a bank each of electric and acoustic sounds, and a selection of strum patterns that you can add to each. We used three MIDI notes to trigger a chord sequence, a minor key (Cm in this instance) and the chosen loop pattern. Although there are full strumming patterns available, we opted for a fairly sparse one, partly because it suits the genre but also because it allowed us to blend the part in more easily, to disguise the fact that it’s not a real guitarist! The rhythm it provided really lifted the main section, and drove things along nicely. When we get around to adding some effects to this part, it should sound reasonably convincing to the untrained ear. Next up, to increase the energy and sense of build‑up even more, we decided to add a synth part towards the end of the track. Since we already had the AAS Ultra Analog plug-in loaded, we used this. There are some really useful presets in this plug-in, and we opted for a multitimbral one that worked well for both pad and lead parts — a great starting point, though some slight tweaking was required to get it to sit nicely alongside the other sounds.
The Creator tab lets you audition multiple samples from the SOSFA online library together. You can match their tempo, and figure out what works well and what doesn’t before downloading.
A fresh part was created to lift the original chord sequence and fill in any gaps in the arrangement. A short riff created for the B section was pasted into the Strum track to see how it would sound doubled and the result almost sounds like a vocoder in the mix — a happy accident that worked, so we decided to keep it! At this stage, just two more elements were missing: percussion and risers. For this, we quickly scanned through the samples section again, and downloaded a percussion loop. Although it was OK ‘as is’, we ended up starting it on beat 2 of the bar, just to get a little more swing, with a view to tweaking it more later as the arrangement develops. Likewise, we found a couple of risers, one quite a high, swooshing sound and another deeper sound. These were dropped in just before the final instance of the main groove and will be developed further using effects and cymbal crashes at the end of the sounds to mitigate the abrupt endings.
Next Time... And that brings us up to date. For now, the main structure of the track is built,
The version of Ableton included in SOSFA provides a quick and easy way to time-stretch your samples.
and we have a very rough mix balance — albeit one with parts that currently overlap too much in terms both of frequencies and stereo positioning. The next stages will be to further develop the beat, and then dive into the mixing and mastering using the plug-ins available in SOSFA.
The final steps on this project will be to go through the process of creating artwork, adding metadata, releasing the track and promoting it. That’s not an easy feat without the assistance of a major‑label budget, but there are a few tricks that we can use!
www.soundonsound.com / October 2025
11
ON TE ST
Steinberg SpectraLayers Pro 12
Spectral Editing Software
It’s only 12 months since the last version, but SpectraLayers has made some huge advances. JOHN WALDEN
T
he world of spectral editing is on something of a roll, much of it driven by the integration of AI-based algorithms into many of the typical processing and restoration tasks for which it is most often used. It’s perhaps not surprising, therefore, that this product category is seeing a pretty rapid upgrade cycle as manufactures try to keep up with — and ahead of — their competition. All of which perhaps explains why Steinberg have adopted an annual upgrade cycle for SpectraLayers Pro, and we now have version 12. So, just what’s new in the world of audio editing magic within SLP12?
How To Unbake A Cake There is ‘new and improved’ scattered throughout the v12 update but, for many users, the highlights will be the further developments in SpectraLayer’s ability to do the audio equivalent of unbaking a cake. Four of the Unmix modules — Song, Drums, Noisy Speech and Transcription — plus the Voice DeNoise module get improvements in v12. For example, the Unmix Noisy Speech module, which separates an audio recording into ‘speech’ and ‘noise’ layers, generates noticeably cleaner results, making it easier to improve the intelligibility of a spoken voice in a post-production setting, even when working with what might seem like potentially challenging source material. From a music production perspective, it’s the Unmix Song and Unmix Drums modules that will attract the most attention. In testing both with a range of materials, the step up from v11 was very obvious. With Unmix Song, for example, the extracted vocal layer, which contains all the lead/ backing/harmony vocals within the original mix, is obviously cleaner than with v11. Indeed, the quality of all the resulting layers is getting remarkably close to having a set
22
October 2025 / www.soundonsound.com
SpectraLayers Pro 12 makes sophisticated spectral-based complex audio editing tasks incredibly accessible to any level of user.
of mix busses — drums, vocals, guitars, bass, piano, sax/brass and other — to work with, albeit with any effects associated with each instrument group already baked in. In use, the thing I found most remarkable was that, in the main, the majority of any remaining artefacts are focused on the effects elements of the original sounds (for example, sounds heavily processed by modulation effects); the fundamental sounds were generally dealt with very cleanly. This includes the drum and bass layers. Are they perfect? Well, no, but Steinberg have made significant steps forward here, particularly in terms of the cleanness of the drum transients (I’ll come back to transients later), while the bass appears much more solid. To my ears at least, SLP12 has now set a quality bar in terms of full song unmixing for others to match. The Unmix Drums module brings both improved results and new layer options as you now get six layers in total: kick, snare, hi-hat, toms, ride and crash. The kick/snare separation is generally very clean (and the snare layer does a respectable job with ghost notes) but perhaps the most notable improvement I found was with the hi-hat, which, in most cases, seemed crisper than before. Depending upon your use case, and the nature of the drum submix you are dealing with (straight from the mixing desk or an unmixed drum layer), you may still find yourself with some manual editing to do. However, if all you need to do is make minor adjustments to the drum balance or use the
resulting drum layers as triggers to replace or enforce the sounds with samples, it can facilitate either of these tasks.
New Modules SLP12 adds four new modules: Unmix Instrument, Unmix Soundtrack, Voice Enhance and DePlosive. Unmix Instrument is an interesting new option in that it allows you to identify any single sound as an unmixing target. The only catch is that you have to ‘register’ the required sound first and this really requires a few seconds (up to 10) where the sound can be heard in isolation. In practice, this may not always be possible but the concept is interesting so I hope it is something that is developed over time. In contrast, I think post-production audio engineers will find the new Unmix
Steinberg SpectraLayers Pro 12 £290 pros • Very noticeable improvements within the AI-based processing modules.
cons • Rapid upgrade cycle may frustrate more occasional users.
summary Steinberg continue to make rapid progress with SpectraLayers Pro, with this release bringing very obvious technical and operational improvements.
Aim… Ready… RECORD!
Backlit Controls
Peak Level Meter
Reversible Pickup
190° Shockmount
Pop Filter
Transformer
Electronic
Based in Berlin, Aim Audio’s highly experienced team is bringing back volume production to the original home of the world’s most famous Studio Condenser Microphones. Launching with products that are not only ground-breaking and exquisite, they also have what we call Useful INNOVATIONS in Audio DESIGN. Both our new INSPIRE and ESSENCE mics were conceived entirely from the ground up and feature our patented switchable Transformer or FET output stages, a host of other genuinely useful innovations and a sound that’s been meticulously tuned by a tribe of leading musicians, audio engineers and experts from all around the world. While the INSPIRE + PACK also includes a hard case, our custom ORBIT shock-mount, with its unique 190° adjustment that redefines what a shock-mount can and SHOULD do, and the SENTRY reversible magnetic Pop Filter. A one stop shop for home producers, hobbyists or seasoned studio vets alike, this outstanding package will bring your ideas to life as well as INSPIRE new ones, always finding a way to fit into any session and help you make better recordings.
Distributed worldwide by:
sales@audiodistributiongroup.com
aimaudio.com
ON TE ST
SAM INGLIS
A
n illustrious heritage can be a mixed blessing. On the one hand, you have brand recognition that newer companies would kill for. On the other, people can be reluctant to accept that a manufacturer with a heritage might want to move on from it. Shure, for example, have produced some outstanding mics in recent years, but the SM57 remains the best-seller. On this side of the Atlantic, Solid State Logic have continually pushed the technological envelope, first with super-sophisticated analogue consoles like the J- and K-series, then with hybrid designs such as the AWS and Duality. Today, those who associate the SSL name primarily with innovation can point to the digital T-series mixer and the fully recallable yet analogue Oracle as beacons of this philosophy. But
26
SSL Revival 4000 Input Solid State Logic dust off the blueprints of their Channel E-series console to create a classy channel strip. there will always be people who hanker after the ‘SSL sound’ of consoles from the 1980s, and the company have been pretty good at catering to this market too. As long ago as 2006, SSL’s XLogic range included a faithful 1U recreation of the G-series bus compressor, as well as a product called the E-Signature Channel, which offered pretty much the full feature set of a channel strip from the revered E-series console, with some additional bells and whistles. Today’s range includes 500-series recreations of various elements from their mixers, as well as plug-in emulations of most of the sought-after SSL designs. And, as of now, it also features a 1U rackmounting hardware processor that offers pretty much the full feature set of a channel strip from the revered E-series console...
The Revival The new Revival 4000 is, however, far from being a reissue of the XLogic E-Signature Channel. To the core feature set, that device added a switchable alternative mic preamp circuit employing SSL’s transformerless
October 2025 / www.soundonsound.com
VHD technology, and a second dynamics stage that recreated the notorious Listen Mic Compressor. It also featured a slot for an optional A-D converter card. All three are absent from the Revival 4000, but this time around, SSL have added a de-esser and a balanced insert point. There are also numerous points of difference concerning how this is all switched and laid out, and the cosmetics of the two units are quite unlike, but perhaps the biggest difference concerns the price. The E-Signature Channel retailed at around £4000, placing it out of reach of most project and home-studio owners. Since then, SSL have built up offshore manufacturing facilities that have allowed them to drastically reduce prices, and the Revival 4000 costs just £1499. Offshoring once carried connotations of shonky build quality, but every SSL hardware product I’ve reviewed has
a ±20dB range that applies to both mic and line inputs. Consequently, if you want to drive it harder for a bit of warmth, that’s very much possible, while a huge amount of gain is available through the system as a whole, as there’s a further ±20dB trim on the output stage. The de-esser is a simple one-knob affair with a three-LED gain-reduction meter, but the main dynamics section presents the ‘full fat’ SSL channel compressor and expander/ gate. In fact, it’s more comprehensive than the implementation in their recent 4K G plug-in, thanks to its switchable hard-knee and linear-release options. Release times are fully variable, as are the compressor ratio and expander/gate range, but in both cases there’s the traditional choice of two fixed attack times. A single button switches between gate (1:infinity) and expander (1:2) mode, and the compressor and expander/ gate have separate five-segment LED meters. A quirk of SSL’s design is that the gain-reduction meters on linked units remain independent, even though they are both compressing by the same amount.
been rock solid, and the Revival 4000 is no exception. With its thick metal fascia, smoothly and evenly weighted controls with detents at the zero positions, and clear, precise legending, it feels every bit a professional product. Nor have SSL cheaped out in any way on the design; the Revival 4000 has an integrated PSU, and practically every switched function has an LED to let you know whether it’s active or not. Internally, the mic preamp uses the same Jensen JT-115K-E transformer found in the original E-series channel strip. All the audio I/O is on the rear panel, starting with an XLR mic input and a combi XLR/jack line input. (The latter is not designed to accommodate instruments that need to see a high input impedance.) Insert send and return, on balanced jacks, are followed by a compressor side-chain input on another combi socket, and a separate stereo link jack. Finally, the output signal emerges on a male XLR.
True Grit The SSL mic preamp might not have the cachet of some other vintage designs, but it’s certainly versatile. The variable gain control runs from +20 to +70 dB, and there’s also an input pad and a trim control with
“There’s something that just feels indefinably ‘right’ about the SSL EQ.” For further control over the dynamics, it’s possible to switch either or both of the main filter and EQ sections into the compressor side-chain. However, the provision of a dedicated de-esser eliminates one of the main reasons to do this, allowing you to use the EQ for tone-shaping instead. And both the filters and the EQ are extremely powerful tools for this purpose. The filters have a huge range, extending up to 500Hz for the high-pass and down to 3kHz for the low-pass, while the main EQ section is highly versatile. The low-mid and high-mid bands are fully parametric, and their ranges overlap significantly, so you can for instance notch out a resonance whilst applying a broadband boost in the same region. The low and high bands can be switched between shelving and bell modes, and a BLK button switches the EQ response to ‘black knob’ mode, as found in most SSL consoles after 1983. In both modes, there’s something that just feels indefinably ‘right’ about the SSL EQ. With ±15dB range on every band, it’s capable of radically altering the timbre of any signal, yet it rarely sounds strained or
harsh. Conversely, even small adjustments have an authoritative effect, so you’re never left wondering whether your settings are actually doing anything.
All Singing I think most of us accept nowadays that if we want ultra-precise control, super-fine detail and comprehensive recall, software is the way to go. Our reasons for choosing hardware are more to do with the broader sonic qualities that it can impart, whether that be coloration from valves and transformers or the unique dynamic characteristics of opto cells and VCAs. In doing so, we are often sacrificing features in return for that character. What’s striking about the SSL Revival 4000 is that although it’s consciously billed as a vintage-inspired product, it never feels limited in terms of functionality. If anything, in fact, you could argue that it has more features than most of us are likely to need, and that tasks such as de-essing and gating are best left to the mix and handled by plug-ins. That’s no reflection on SSL’s circuits, which work perfectly well, but it’s not as though a de-esser really has analogue mojo. Personally, therefore, I’d perhaps rather SSL had retained the Listen Mic Compressor from the E-Signature Channel in place of the de-esser, though the expander/gate has always been a core feature of the original SSL console channel strip. Some vintage-inspired processors are one-trick ponies, imparting their sonic qualities pretty much regardless of how they’re set up. By contrast, the Revival 4000 is endlessly versatile. Yes, you can coax some grit and colour from it, but you have to make a conscious decision to do so. Used normally, it’s just a very good front end for any source in any style of music — and, thanks to its separate line input, an excellent line-level processor at mixdown. In fact, it says everything you need to know about the SSL console’s influence on music that this actually feels like a perfectly contemporary product. It may be billed as a revival, but it never really went away!
summary The Revival 4000 demonstrates exactly how much SSL got right when they designed the original E-series console!
£ £1498.80 including VAT. T Headline Audio +44 (0)1908 477 142 W www.headlineaudio.com W www.solidstatelogic.com
www.soundonsound.com /October 2025
27
Discover SOS For Artists : A Complete Platform for Modern Music Creators
Your end-to-end music production suite
Designed to support independent artists, producers, and collaborators at every stage of the music-making journey, SOS For Artists is a new subscription service that brings together all the tools needed to take your music from idea to release.
Create 1. Sample Selection Made Simple
Over 3 million royalty-free samples — with new packs added every week. Up to 2,400 samples per year included in your subscription plus an advanced preview tool that lets you tempo-match.
2. Instruments & Synths
Included with SOS For Artists is a curated collection of high-quality plug-in instruments from respected brands like Spitfire, UJAM, Arturia, GForce, Sonuscore, and more.
www.sosforartists.com
“Efficient, DAW-integrated tools to streamline sample selection and composition.” 3. Stem Extraction with AudioShake
An integrated stem-splitting plug-in allows you to isolate vocals, drums, bass, or instrumental parts from full mixes — right inside your DAW or via the web platform.
4. Starter DAWs Included
For newcomers, the subscription includes lite versions of Steinberg Cubase and Ableton Live.
ESSENTIALS
FREE PLAN ign up and explore S the features Upgrade at any time Kickstart your creativity with 7,800 samples Preview the Mastering tool Preview the Distribution service
ONLY
99*
£
PRO
or £12.99** per year per month £1,000 worth of Tools inc 18 Plug-ins 1200 Sample Credits Unlimited MP3 + up to 36 WAV masters per month Unlimited Distribution
ONLY
199*
£
or £19.99** per year per month £2,000 worth of Tools inc 45 Plug-ins 2400 Sample Credits Unlimited MP3, WAV + HD WAV masters Unlimited Distribution
* Prices exclude VAT. Taxes will be applied at the UK / EU Country rate at checkout. ** Monthly price does not offer same number of Plug-ins or Sample Credits
*** Also available in most countries worldwide in your local currency.
Produce “Refined tools for mixing and mastering, suitable for both quick demos and professional releases.” 1. Mix & Effects Tools
The effects collection includes EQs, Compressors, Reverbs, Delays, Saturators, and creative FX from trusted names. Highlights include Eventide’s CrushStation, Arturia’s Rev PLATE-140, TAIP by Baby Audio, and MixBox SE from IK Multimedia, plus Synchro Arts’ powerful VocAlign and RePitch plug-ins.
2. Mastering — Fast, Intelligent
SOS For Artists includes access to the advanced AI mastering engine from LANDR — available both online and as a plug-in. It analyses your track’s dynamics, frequency spectrum, tempo, and stereo image to deliver a tailored master.
Distribute 1. Global Digital Distribution
Distribute your music to over 150 platforms including Spotify, Apple Music, Tidal, Amazon, and Deezer. Just upload your tracks, artwork, and metadata, set a release date, and go live within 2–7 days. Migrating from another distributor? Bring your existing catalogue and retain play stats and followers.
2. Royalty Splits & Monetization
The Royalty Split feature allows you to divide earnings with collaborators. Just enter percentages. Payments are processed with low thresholds — starting at just $1 via PayPal — and you retain 100% of your royalties.
3. YouTube Integration
Link your official YouTube artist channel to keep distributed content and subscriber base in one place.
4. Cover Song Licensing
Mechanical licenses for cover songs are handled automatically with a simple one-time fee. A direct link to the Harry Fox database helps you verify original composers and credit them properly.
5. Promotion & Reporting
Promotion tools include Linktree-style landing pages and content creation tips to help boost visibility. Detailed royalty reporting shows trends, top countries, and top-performing platforms.
“Release your music across 150 major platforms including Spotify, Apple Music, Tidal, Amazon and Deezer while maintaining catalogue integrity and metadata continuity.” www.sosforartists.com
ON TE ST
Nordic Audio Labs NU-24K Capacitor Microphone
This highly impressive new large-diaphragm mic brings a touch of Nordic noir to the studio. SAM INGLIS
F
innish engineer Martin Kantola has been building microphones for more than 30 years. Like many ‘boutique’ makers, he was initially inspired by the classic Neumann valve mics, but in 2019, he started building a new large-diaphragm capsule to his own design. The D100K is a 30mm, edge-terminated capsule for which Nordic Audio Labs claim “excellent off-axis phase response, super realistic transient response and [a] very smooth top end”. So far, this capsule has been offered in the multi-pattern NU-100K and the NU-880K, which uses two D100K capsules mounted at a 90-degree mutual angle to offer stereo and horizontal B-format output. Nordic Audio Labs also manufacture the unique NU-314K, a large-diaphragm pressure mic with a pure omni pattern, and the NU-47V, which aims to match the sound of the immortal Neumann U47 but without using valves. Apart from the NU-47V, all Nordic mics share a similar look and feel, and they’re very much premium products, typically costing several thousand pounds. For those who want to explore the advantages of the D100K capsule in a somewhat more affordable package, Nordic Audio Labs have now launched
30
October 2025 / www.soundonsound.com
the NU-24K: a no-frills, fixed-cardioid mic that has neither a valve nor an output transformer, but uses a proprietary solid-state circuit called FloFET that is claimed to sound “smooth and flattering”.
Hey, Good Lookin’ The NU-24K ships in a small Peli-type case, with a Rycote InVision shockmount. To say that this is an attractive mic to look at is a serious understatement. The proportions are spot-on, build quality is absolutely impeccable, the understated black finish with gold legending is classy without being tacky, and the open headbasket with its super-fine gauze is a work of art. The aforementioned D100K capsule is clearly visible through this gauze, but does not give up its mysteries easily. In some large-diaphragm capsules, the membrane is transparent enough that you can see the pattern of holes in the backplate, but not so here. As I’ve already mentioned, the NU-24K is a transformerless, solid-state mic, and as such requires standard 48V phantom power, from which it draws a modest 3.5mA. The specifications make for interesting reading, if you’re so inclined. The polar pattern is described as “cardioid to supercardioid (frequency dependent)” — which, to be fair, is true of most large-diaphragm capacitor mics — and output impedance is an unusually low 22Ω. Self-noise is quoted at 17.6dBA “with 6dB/oct roll-off towards 2kHz”, which suggests that the FloFET circuit somehow shapes an otherwise fairly high noise level to be less obnoxious in practice. In my experience, noise is most troublesome when it’s higher up the frequency spectrum, so this isn’t a bad idea, and subjectively, noise is not an issue with the NU-24K. Sensitivity is a fairly standard 18mV/Pa. The NU-24K is marketed primarily as a vocal mic. This sometimes indicates that the manufacturer has deliberately attenuated the low end, but not here: the -3dB points are at 17Hz and 27kHz, and the frequency response chart shows quite a large bump centred around 35Hz, which is deeper than even the most Russian of basses can produce. From 100Hz or so upwards,
the response is broadly flat to about 3kHz, whereupon a presence lift rises steadily, plateauing between 10 and 20 kHz and extending right up to that 27kHz mark. On paper, this make the NU-24K look like a very bright mic — or, given its strong bass, like a mic with a ‘scooped’ frequency response.
Off The Charts Any engineer who’s been around the block will tell you that microphone frequency response charts, at best, tell a small part of the story. A mic that employs a K67-style capsule without de-emphasis might measure somewhat like the NU-24K yet sound totally different, with an edgy character and an
capsule is the most important component in any mic, and I’m convinced that Martin Kantola has come up with something truly special in the D100K. Nearly all capacitor mic capsules fall into one of very few design families, and the vast majority are based on the Neumann K47 or K67. The D100K sounds nothing like any Neumann-derived capsule I’ve ever heard. By contrast, it does have a lot in common sonically with the fabled AKG ‘brass ring’ CK12, and of all the mics I put it up against, the NU-24K was most similar to my old C414 EB. In fact, it has all the strengths of that classic, but arguably sounds better. The 414 sometimes seems to add a touch of fur to the source, perhaps because of its relatively small output transformer; switch to the NU-24K and it’s like someone has taken a veil off the same mic. Turn again to a U87 and you’re left wondering why the Neumann sounds so nasal and honky. There were some sources, such as resonator guitar, where that quality was desirable, but in the majority of cases I preferred the NU-24K.
“Female vocals can be a challenge to record well, and whilst no mic is universally good for every singer, I’d go as far as to say that I don’t recall ever hearing a mic that works better on this source.” uncomfortable emphasis on sibilants. That’s absolutely not the case here. That treble lift, or mid scoop if you prefer, manifests itself here as clarity rather than sharpness. And although we typically associate the quality of smoothness with a subdued high-frequency response, I think Nordic Audio Labs are absolutely correct to claim it for the NU-24K. I had the opportunity to try it on several different vocalists during the review period, and also tested it on instruments such as acoustic guitar. Female vocals can be a challenge to record well, and whilst no mic is universally good for every singer, I’d go as far as to say that I don’t recall ever hearing a mic that works better on this source. It’s no slouch on male vocals either, and what particularly struck me in both cases was how natural its capture of the human voice is. It may well be emphasising the high end, or subtly attenuating the midrange, but what’s more important is what it’s not doing. This is a mic that doesn’t smear transients, or emphasise nasal resonances, or sound hard when the singer belts it out. Other large-diaphragm mics, even very good ones, often sound slightly artificial or woolly in comparison. The unusually open headbasket probably plays a role here, but the
A Bit Of All Right I’ve had the good fortune to review lots of new microphones for this magazine, including some very expensive boutique models. Many have impressed me, but few have impresed me as much as the NU-24K. This is a pretty special microphone, to the point of making me wonder if it’s time to retire some of my beloved vintage models. It’s clear, natural and smooth, but not at all sterile or boring. I loved it on the human voice, liked it very much on most acoustic instruments, and several times wished for a pair so that I could try them out as drum overheads. The NU-24K has all the makings of a future classic, and belongs in the top drawer of any mic locker.
summary The NU-24K is beautifully made and looks stunning, but it’s the sound that will sell it. This is just a superb vocal and instrument mic.
£ £1495 including VAT. W www.kmraudio.com W www.nordicaudiolabs.com
www.soundonsound.com /October 2025
31
ON TE ST
Cranborne Audio Brick Lane 500 Modal PWM Compressor
Cranborne say their Brick Lane is the fastest compressor in the West — but it’s also capable of modelling the characteristics of classic opto, FET and valve units, and much more. HUGH ROBJOHNS
I
n just seven years, Cranborne Audio have built a very fine reputation for their steadily expanding range of innovative, high-performance products. Cranborne’s ethos is to push the boundaries of what’s possible with analogue audio electronics, both technologically and in terms of what the user can achieve with their products. Their approach has resulted in remarkably transparent products with exemplary specifications, combined with the ability to introduce delicious musical character at the twist of a knob or flick of a switch. For example, the company’s debut product, the Camden mic preamp (reviewed in SOS October 2018: https://sosm.ag/cranborne-camden500), remains unquestionably amongst the finest mic preamps available at any price, yet it also offers a glorious range of vintage tonalities if required. Their Carnaby EQs (the latest being the Carnaby HE2, reviewed in SOS October 2024: https://sosm.ag/ cranborne-carnaby-he2) offer a new approach to EQ and tone-shaping. And talking of exemplary specs, their 500-series racks incorporate exceptional digital conversion that comfortably outperforms many high-end mastering converters.
Overview The latest addition to Cranborne’s product portfolio is their first compressor — a single-slot, 500-series mono module that continues the company’s predilection for London-inspired names, called the Brick Lane. Its full title, though, the Brick Lane 500 Modal PWM Compressor, hints that this is no run-of-the-mill compressor... Whereas traditional analogue compressors might employ an electro-optical cell, vari-mu valve, FET or VCA as a gain-controlling element, the
32
October 2025 / www.soundonsound.com
Cranborne Audio Brick Lane 500 £679 pros • Astounding technical performance and highly skilful implementation. • Incredibly transparent PWM compression with beautifully optimised parameters. • Seven highly effective emulations of traditional compressor topologies, with variable saturation effects. • Simple control set allowing fast, intuitive operation. • Comprehensive deep-dive parameters for detailed customisation. • OptoSync module control linking. • Astounding value for money.
cons • None.
summary Another extraordinarily versatile and great-sounding product from Cranborne! In the Brick Lane they’ve extracted phenomenal performance and variety from a skilful implementation of sophisticated PWM compressor technology.
A Brick Lane installed in an API 500-6b Lunchbox rack. Note the Stress control beneath the meters, and the seven operating modes below it — for more about those, see the ‘Compression Modes & Emulations’ box.
Brick Lane 500 uses a sophisticated pulse width modulation process instead (see box). This technology has been employed in dynamic range compressors before, but remains relatively unusual; it offers
significant technical benefits over more traditional solutions, but it’s also very complicated and, in the past, expensive to implement. Its implementation has therefore been restricted mostly to
high-end manufacturers like Dave Hill/ Crane Song, George Massenburg Labs and Great River. Nevertheless, PWM technology theoretically affords the very best technical performance that an analogue compressor can deliver, particularly in terms of speed, ultra-low distortion (especially at high gain reductions), control linearity and consistency. And, since digital side-chain control suits the technology very well, this approach can also allow unrivalled operational versatility.
PWM Compression: A Primer While Cranborne’s implementation is novel, pulse width modulation compression itself is not a new technology. It evolved in the late 1960s, when fast transistors became available at low cost. A few compressors employed the PWM technique in the ’60s and ’70s, including the EMT 156 and PYE 4060 — models that now command huge second-hand prices, and have a reputation for sounding smooth and transparent, with significantly lower distortion at high gain reductions compared with contemporary designs that used other topologies. Conventional compressors employ a gain-control element in the signal path to reduce the amplitude of the output signal, as determined by ‘side-chain’ circuitry, which analyses the signal (either from the input or output) to produce a control voltage that varies the gain reduction. That gain-control element is usually configured as a continuously adjustable voltage divider, essentially acting as a remote-controlled volume knob. In contrast, the PWM concept is a radically different approach. It’s equivalent to an output switch being flicked on and off at an incredibly high speed (typically around 250kHz): when the switch is open, the audio signal’s
energy is allowed through to the output, and when it’s closed, it isn’t. If the ratio of open and closed durations is varied for each switching period, a precise amount of audio energy (and hence signal volume) is allowed through to the output. For example, if the pulse width is 100 percent, then all of the source energy is passed to the output and there is no attenuation, whereas if the pulse width is reduced to 50 percent of the switching period, only half the energy is passed, giving a 6dB reduction in level. This is clearly a form of audio sampling, yet the pulse-width modulated samples are never quantised and so never become ‘digital’ — it remains a fully analogue signal path. However, both anti-alias and reconstruction filtering are still required to adhere to the Nyquist theorem. Those early PYE and EMT compressors (and some more modern PWM compressors too) rely on very complex analogue circuitry to control the PWM process. By contrast, the Brick Lane uses a digital microcontroller that affords incredibly accurate and consistent control, but also allows compression parameters to be modelled in myriad ways to perfect absolutely precise and transparent dynamic control — or to emulate the subtle musical imperfections of vintage compressors.
www.soundonsound.com / October 2025
33
ON TE ST
Apogee Symphony Studio Designed with immersive audio in mind, the Symphony Studio is also a top‑class all-round audio interface. PHIL WARD
A
pogee’s new Symphony Studio range of USB interfaces is aimed particularly towards immersive audio production duties. In that context, and like the Audient ORIA interface I wrote about in SOS July 2024, the headline specification that substantially defines each of the three Symphony Studio models is not so much their input count but their output count. To put some numbers on that, the three models in the range offer two inputs and 12 outputs (the 2x12), eight ins/eight outs (the 8x8), and eight ins/16 outs (the 8x16).
Apogee Symphony Studio From £1929 pros • Hugely versatile immersive output configuration. • Really great‑sounding inputs. • Comprehensive control from the Apogee Control 2 app.
cons • No I/O expansion through ADAT or audio over IP. • No integration with room/monitor optimisation.
summary Apogee’s Symphony Studio is a jack of all trades, but it has them all pretty much mastered. Highly recommended.
40
October 2025 / www.soundonsound.com
Now, you might wonder about how suitable the 8x8 model is for immersive duties, because with ‘only’ eight outputs the largest immersive monitor array the 8x8 can address would be, for example, 5.1.2 (left, centre, right, left surround, right surround, LFE, left height, right height). While perhaps being a viable initial route into the world of immersive monitoring, that falls short of the generally accepted Dolby Atmos bed minimum of 7.1.2. So the 8x8 Symphony Studio model feels like a kind of hybrid between an interface aimed squarely at the contemporary immersive world and a traditional one intended for more conventional recording and mix duties. In terms of retail price, the 2x12 is the entrylevel Symphony Studio model and its output count does place it firmly in the realm of immersive mix duties. The 12 outputs enable it to address what I’d consider the sweet spot of entry-level immersive monitoring: 7.1.4. But with just two inputs, you’re only going to be tracking the odd overdub. At the other end of the Symphony Studio range, the 8x16 is not only able to address a full-fat Dolby Atmos 9.1.6 monitoring system, but its eight inputs can potentially track a modest band. That 8x16 capability comes at a cost though, because it commands a significantly higher price than the 2x12 and 8x8. Before I leave the I/O counts behind, something to consider, especially in regard to the 2x12 and 8x8 models, is that their I/O counts are absolute. Symphony Studio
USB Audio Interface models offer no input or output expansion via, for example, ADAT or Dante. So if you were to settle on the 2x12 but then found you needed more inputs, or decided on the 8x8 and subsequently wanted to expand your immersive monitoring, you’d be out of luck.
Three Of A Kind Beyond their I/O counts the three Symphony Studio models are functionally the same. I was loaned an 8x16 model for this review, but everything I’m about to write
Round the back things are surprisingly simple, with just eight XLR inputs, twin D-Sub ports for the 16 outputs, and an IEC mains socket.
is equally appropriate to the 2x12 and 8x16. Symphony Studio models are all housed in the same 1U rackmount enclosure. The subtly profiled and classily finished aluminium front panel combines Apogee’s corporate purple with a gloss‑black centre section that houses an OLED display. Along with the display, the front panel is populated by eight buttons in two groups of four, and a rotary encoder/push button. Both sets of buttons switch the contents of the display and the action of the rotary encoder to offer the appropriate configuration functions. The left‑hand group of buttons provides input selection for level adjustment and configuration via the rotary encoder, enables input‑specific phantom power, and toggles the Apogee ‘Soft Limit’ function on and off. The right‑hand group of buttons provides access to basic monitor control functions (volume, mute, dim), headphone output selection and control, and a Home function that returns the menu to the top level. Finally on the right of the front panel are two headphone sockets (one 6.3mm and one 3.5mm) and a power switch.
On the rear panel is a line of XLR input sockets that reflect the particular model’s input count. The input sockets are conventional XLRs, without combi instrument jack sockets, so if you want to connect a guitar, for example, some species of unbalanced jack to XLR conversion will be required — although at the kind of professional level a Symphony Studio is likely to find itself, I’d imagine a guitar preamp or at least a DI box will be available. Adjacent to the input XLRs are, depending on the particular Symphony Studio model, one or two DB25 D-Sub output sockets for monitor connection. Each DB25 provides eight balanced outputs. D-Sub sockets are reasonably common on pro hardware that’s intended for permanent rack installation, but they are less often seen on products, such as the Symphony Studio, that might find themselves in less permanent home or project studios. In a rack‑installed scenario, a D-Sub socket will likely be connected to a patchbay of some description that offers signal access via jack or XLR, but in studios a rung or two down the
Screen 1: The Apogee Control 2 home display shows inputs on the left and outputs on the right.
professional hierarchy, connecting monitor cables terminated in XLR or TRS jack plugs demands some cumbersome D-Sub to XLR or jack break-out cables. An option of course would be to have some custom fulllength D-Sub‑to‑monitor cables made, but that won’t be inexpensive if the monitoring system comprises, say, 12 speakers. I can see why Apogee would go the D-Sub route for Symphony Studio outputs (cost saving and rear‑panel real-estate) but for some users I think D-Sub might fall into the curveball category. Apart from the mains power input, the last rear‑panel feature to mention is the obligatory USB-C socket for DAW host connection. A cool touch is that the particular USB socket fitted, and the USB-C cable supplied, incorporate a retaining thumbscrew feature that ensures there’s no chance of the plug being inadvertently pulled. I liked that — it makes USB feel a bit more ‘pro’.
Hardware & Software While the core functionality of the Symphony Studio can be configured from its front‑panel buttons and rotary encoder (or
www.soundonsound.com / October 2025
41
TECHNIQUE
Part 4: Mid-Sides & Visualisation Tools We conclude our primer on coincident arrays by exploring the theory and practice of Mid-Sides miking.
HUGH ROBJOHNS
L
ast month we continued our exploration of coincident (X-Y) stereo microphone arrays, and looked at how the Stereo Recording Angle (SRA) can be altered, either by changing the mutual angle between the two mics, or by changing the mic polar patterns. In this instalment, I’ll delve into another form of coincident mic array — the mysterious Mid-Sides format — and discuss some tools that can help visualise and calculate the SRAs of different stereo arrays. As always, you can find the audio examples that accompany this series at https://sosm.ag/this-is-stereo-media.
in the left (red) channel. But as soon as it starts to move towards the right, some left-channel information is also carried partly in the right (green) channel too. The further the source moves right, the stronger it gets in the right channel.
A central sound source is carried equally in the left and right channels, of course. For the Mid-Sides format, the Mid channel carries everything, no matter where it is positioned in the stereo image. But a central sound is 6dB louder than if
Mid-Sides The term Mid-Sides seems to induce fear or confusion in many and, because the explanations often use equations, some seem to think it will be hard work! But Mid-Sides is really nothing more than the conventional left-right (L-R) stereo format viewed through a different lens, and in practice it’s very easy. L-R and M-S both carry exactly the same information, and are completely interchangeable through a simple ‘matrix’ process. Diagram 1 illustrates how audio information is portrayed in each channel in both formats. In the L-R format (top), a fully-left sound source is carried only
46
October 2025 / www.soundonsound.com
Diagram 1: M-S and L-R are both stereo formats, and carry exactly the same stereo information, but different parts of the signal are conveyed on each of the two channels.
Diagram 2: EMI’s Stereosonic Shuffler employs a high-shelf cut in the Sides channel to narrow the stereo image slightly at high frequencies.
that sound was fully left or right, because the same signal exists in both channels (if you add two identical signals the result is 6dB louder). The Sides channel, as the name implies, is strongest for signals that exist only in one channel (whether left or right) at either side of the stereo image. The signal strength falls as the source moves towards the centre, and a central sound source is not carried in the Sides channel at all. And all of this behaviour is defined by two simple equations:
route into another matrix that outputs L-R. The stereo channels L and R that we start with become M (=L+R) and S (=L-R). Those M-S signals go into a second matrix to derive L and R again (L=M+S and R= M-S). But look what happens if we substitute those M and S terms in the second matrix for the Left and Right terms that we started out with:
• M id = Left + Right (the sum of both channels). • Sides = Left - Right (the difference between channels).
As you can see in the rightmost part of those two equations, we now have twice as much output signal level as we started with. Put another way, the output of the second matrix is 6dB louder than the original signal. Sometimes that won’t matter, as it’s not difficult to adjust the signal level manually, but usually we need to preserve unity gain and headroom throughout a signal chain. A simple solution is widely (but not universally) adopted: each matrix is designed with 3dB attenuation at both its outputs. That way, when two matrix processes are combined, the overall signal maintains unity gain. If you notice a slight (3dB) loss in level when passing a signal through a single matrix, this will be why!
Hopefully you can see that, since you’re adding the left and right, the Mid channel is exactly the same as a conventional mono sum. The Sides channel, on the other hand, essentially carries all the stereo-width ‘goodness’ that you lose when summing to mono — the wider a sound source in the stereo image, the stronger it will be in the Sides channel. Importantly, exactly the same sum and difference matrix processing converts the other way, too:
appear to come from ‘outside’ the speakers, but do so in a very unstable (and, often, arguably unpleasant) way. The Mid and Sides signals can also be processed independently too, and a very powerful technique is to boost and/or cut the level of the Sides signal using an equaliser. This allows the stereo width to be adjusted in a frequency-selective way. For example, rolling off the low end in the Sides leaves all the bass in the Mid channel only, so it’s all in the centre of the stereo image — this is a standard process for cutting vinyl records. Alternatively, using a high-shelf cut in the Sides channel narrows the stereo image slightly at high frequencies, and that’s exactly how EMI’s Stereosonic Shuffler works (Diagram 2), as mentioned last month in Part 3.
Mid-Sides Stereo Array So far, I’ve discussed creating Mid-Sides signals from left-right stereo using a matrix process. But we can also
• Left output = M+S = (L+R)+(L-R) = 2L • Right output = M-S = (L+R)-(L-R) = 2R
• Left = Mid + Sides (sum) • Right = Mid - Sides (difference)
Practical Benefits Of Mid-Sides
Consequently, whatever format you feed into an M-S matrix, the opposite format will appear at its output. L-R becomes M-S, and M-S becomes L-R; it’s the same process for both conversions. There’s a small but important caveat, though! Imagine you want to convert L-R to M-S to adjust the stereo width, and then convert the narrowed/widened signal back to L-R (this is precisely what most stereo-width controls do in mixers). The first matrix outputs an M-S signal that we
OK, enough of all the maths! What is M-S actually useful for in practice? The main advantage of the M-S format is that varying the ratio of the Mid and Sides components adjusts the width of the stereo sound stage. With no Sides signal you’re left with pure mono. And as the Sides level is increased, the stereo width increases with it. Full (100 percent) width is when the Mid and Sides signals are exactly equal in level, and pushing the Sides level higher still creates an ‘out-of-phase’ effect, whereby sounds
Diagram 3: A Blumlein Mid‑Sides array, matrixed to create a ‘virtual’ L‑R stereo array.
www.soundonsound.com / October 2025
47
ON TE ST
Expressive E Soliste Expressive E’s trademark physical modelling paired with MPE control delivers an extremely playable instrument.
ROBIN BIGWOOD
W
ith the French company Expressive E, the clue is most definitely in the name. These days they may be best known for the Osmose, their groundbreaking MPE (MIDI Polyphonic Expression) synth and controller keyboard, but they develop virtual instruments too and Soliste is the latest. It’s a suite of modelled solo string instruments — violin, viola, cello and double bass — that run in recent versions of macOS or Windows as VST2, VST3 or Audio Unit plug-ins, with three activations possible via a virtual or hardware iLok. And it’s definitely built with real-time expressivity in mind. Acoustically modelled instruments typically promise greater versatility and a more involved playing experience than their sample-based counterparts, and are often magnitudes smaller in installation size. It’s an especially attractive concept for a virtual bowed string instrument; in a solo guise they’ve always been notoriously difficult to deliver in sampled form. On top of that Soliste has enhanced compatibility with specialised MIDI controllers: the Osmose first and foremost, and also Expressive E’s standalone gesture controller, Touché. But it will work with other MPE controllers and even quite basic non-MPE keyboards too.
54
October 2025 / www.soundonsound.com
Fired up in your computer, all the separate Soliste instruments present with identical controls in clean, modern-looking, three-way resizeable windows. They’re designed to give musical results straight off the bat, but there’s some considerable sound‑design depth available should you want to explore it.
Open Strings A Soliste plug-in window presents three main control areas. In the middle, below the big graphic depiction of the instrument, you get to choose a timbre characteristic based on a notional ‘resonant body’ material. VLN.356, Soliste’s violin, offers a choice of six: Spark, Hollow, Sleek, Antique, Lyric and Mellow. As you step through them the large instrument graphic changes colour and texture, so if you fancy trying a Mellow yellow and white violin, or a Hollow one made of cork, it’s there. The other instruments offer either four or five materials, incidentally. To the left are a few controls relating to pitch, and particularly vibrato. Assisted vibrato will do a pitch wobble for you, with variable amplitude, frequency and fade-in time. If you use your pitch-bend wheel, or a key-generated bend from an MPE controller, that’s taken into account too, adding to the effect. You can also turn the whole thing off, for completely manual control and sleek non-vibrato tones.
Software Instrument
Then, to the right, appropriately, are controls relating to the bow, and thus the actuation and excitement of the virtual strings. To dig in with this aspect of the plug-in you’ll want to click the ‘more’ button, which opens up a page-full of parameters. Pitch also gets a ‘more’ page, offering deeper, more finessed control of the auto-vibrato (especially in its sensitivity to MPE pressure, aftertouch, and configurable MIDI CC messages). There’s also a portamento section there, that’s compatible with the Osmose’s see-saw Pressure Glide feature, or can introduce inter-note swoops based on key velocity thresholds. Jumping straight in, using an Osmose as the MIDI controller, and using the default Classic Mode preset, a freshly instantiated Soliste instrument delivers impressive expressivity with essentially zero effort. Typical MPE behaviour is to the fore: sounds can creep in, triggered by slow and shallow key-touches, but then swell and intensify radically as you press deep into the aftertouch. Play legato and the melodic line is sewn together with brief but complex transitions; in particular, wide jumps down to a lower note sometimes take a moment to settle, and for the fundamental harmonic to fully emerge. Key-actuated vibrato and
Expressive E Soliste €299 pros • Engaging, complex sound quality, broad timbral range and first-class playability. • Bespoke handling of MPE MIDI controllers like the Osmose, but usable with almost all. • Comparatively small installation size of about 400MB per instrument.
cons • Not notably naturalistic-sounding... but that’s arguably not what Soliste is ultimately about. • Lack of keyswitched articulations hampers real-world use, for some jobs. • Double (let alone triple) stops are not supported.
summary A physically modelled quartet of orchestral string instruments, with great expressive potential for both MPE and conventional MIDI controllers. The sound strongly channels acoustic behaviour but offers a specific, attractive quality all its own.
The busy bowing parameters page, a click away from the main interface. There is a lot of flexibility here, to change both the fixed behaviour of the physical model and the way it responds to control inputs from your controller.
bends also sound complex and natural. Strike faster, or play with a detached touch, and attacks become crisper. The musical effect often tends towards sweet and impassioned, and it’s easy to create lines that surge and recede in much the same way that a real violinist achieves. Happily, not a great deal is given away when using a basic non-MPE MIDI controller. With those, by default, key-presses are responsible for a velocity-controlled attack phase and the mod-wheel dials in the intensity of the sustained part, and it can sound really good.
Back & Forth I expect the vast majority of users will end up using (whether they know it or not) Soliste’s Sustain bowing mode, most of the time. That simply means that while you hold a note, sound continues indefinitely, subject to real-time control of other parameters, as if your virtual string player was keeping the bow in constant motion. But there are other modes including a potentially very convincing held tremolo, and two ‘back and forth’ options which, on an Osmose (for example), can give rise to virtual bowstrokes on both the press and release of a key, with optional sustain on the downstroke phase. With no sustain an Osmose key effectively becomes a bow about 2cm long, which isn’t of much use other than for very fast passages or rapid repeated notes. However, movement of your modulation wheel can be brought into play to simulate longer bow movement. And it should be here that Expressive E’s Touché controller really comes into its own. I wasn’t able to test this combo, but everything suggests that stroking Touché’s larger surface will simulate yet longer individual bow strokes.
One thing Soliste doesn’t support is double stopping: playing two notes at once. Attempt it and Soliste just plumps for one note or another, monosynth style. I can see there could be challenges in implementing it while also supporting overlapping legato note inputs, and it’s probably impossible alongside the Osmose pressure glide feature. But to have no way of achieving it at all is an unfortunate omission. So, an impressive range of control is available by varying keyboard touch, but additional playing styles — articulations, in normal sample library parlance — are very much available, accessed via a Presets sidebar. Spiccato, martelé, tremolo, pizzicato and others can be selected with the mouse, and many have a secondary Character option. They include general adjectival descriptions —
light, intense, and so on — or something more technical, such as a ‘harmonics’ option for the already glassy-sounding sul ponticello, or a gloriously ghostly ‘flautando’ for sul tasto. These variations all derive from settings in the bow page, including a normally hidden set of five advanced parameters that go deep into the underlying physical model, affecting bow position (relative to the bridge), pressure and noise. Explore extremes in those and Soliste can produce some quite striking, novel sounds, which can be saved as user presets. A preset, by the way, recalls just the entirety of these bow page parameters, not any other settings. Further sound-shaping flexibility can come from real-time MIDI control: nearly all parameters (including the effects) can be mapped to up to six incoming MIDI CCs, pitch-bend or aftertouch, in the MIDI sidebar. A nifty combo of MIDI Learn for the message type, and click-to-assign for the destination, makes this a breeze to set up.
Performance Practice I’ve mentioned some aspects of the playing experience already. But what of the sound and character of Soliste? Well, because there’s no functional demo version of the plug-ins available, I would encourage prospective buyers to first listen carefully to Expressive E’s YouTube showcases. They’ll let you form an opinion much more rapidly than me waxing lyrical for paragraphs on end. However, I will offer a few insights. I personally don’t think many listeners would mistake Soliste, in an exposed solo say, for a recording of a real instrument. Actually I ought to nuance that: you might, for individual notes or some simple accompaniment figures, probably more
A Soliste preset is comparable to a sample library’s ‘articulation’, but currently there’s no way to select them on the fly with a key-press or other MIDI message.
www.soundonsound.com / October 2025
55
INSIDE TRACK
The Making Of KPop Demon Hunters Five years in the making, Netflix’s smash hit animated movie tested its music production team to the limit. PAUL TINGEN
R
eleased on 20th June this year, KPop Demon Hunters has already become the second most-watched movie on Netflix, with over 200 million views. Its soundtrack album has reached number one in more than a dozen countries, while the single ‘Golden’ has topped both the UK and US singles charts. At one point, seven of the soundtrack album’s songs could be found in the Billboard Top 100. Ian Eisendrath was producer on all seven tracks, in addition to producing all of the
58
October 2025 / www.soundonsound.com
vocals, jointly vocal arranging alongside EJAE, conducting the orchestral sessions, and supervising the music editing and mixing processes, which were handled by music mixer Curtis Douglas. A graduate from the University of Michigan who has always been strongly interested in “music that drives story”, Eisendrath has worked as executive music producer and music director/supervisor on many Broadway productions, as well as several movies and TV productions. In 2022, he was hired by Spring Aspers, President of Music at
Sony Pictures, to be at the heart of the music-making for the KPop movie. “We had a really wonderful process where the directors, Maggie Kang and Chris Appelhans, Michelle Wong, and I, would spend many hours in meetings, delving into what each moment in the movie should sound like. What was the character arc? The tempo and tone of the music? What did the feeling need to be? How does the story progress from the first line of the lyric to the last? What are the references we want to share with the songwriters? Sometimes these references were the demos that EJAE
Producer Ian Eisendrath coordinated the fantastically complex production process behind the music for KPop Demon Hunters.
and [Costa Rican composer] Daniel Rojas had made. More often, we worked with various groups that had stabs at creating these musical moments.” Many different songs were written for each moment in the film, of which there often were dozens of different versions. Vocal sessions were extraordinary, with hundreds of backing vocals and over 1000 vocal takes for most songs. Eisendrath worked with recording engineer Derik Lee to carefully comp the vocals on each song, often “syllable by syllable”, and they handed up to 500 vocal tracks per song to mixer Curtis Douglas, who spent weeks working on them in similar levels of detail.
To The Max EJAE started work on the project at the end of 2020, before the movie had been given the green light. Born Kim Eun-jae in Seoul, EJAE is currently living in New York. A singer, songwriter and producer, she has written material for K-pop acts like Aespa, Twice and others. She also ended up being the singer for the main character in the movie, Rumi. “I got onto the project via a friend, Daniel Rojas. In the beginning it was just the two of
As well as co-writing many of the songs, EJAE is also the singing voice of lead character Rumi.
us creating demos for the directors to use in early screenings, there wasn’t a script yet. Our job was to try to figure out the sound of the girls in the movie, to develop a blueprint for the kind of K-pop songs in it, and for the traditional Korean aspects. None of our early demos ended up in the movie, apart from some melodies of ‘How It’s Done’. “With regards to K-pop, it differs from American pop in that there are many more things going on. Whether it’s chord or melodic changes throughout the songs, or tons of stacked vocals, K-pop is very maximalist. K-pop is usually girl groups with multiple members, and each member has to shine. There may be a rapping section, or a high note section, where a vocalist shows off her vocal skills. Because it’s a group thing, there are many background vocals. Harmonies are huge in K-pop.” “EJAE and Danny wrote many, many songs,” recalls Ian Eisendrath. “When I joined the project, these demos allowed me to understand what kind of songs the film-makers were thinking of in specific moments. Spring [Aspers] then handpicked and hired an unbelievable stable of writers who were all experienced K-pop hit‑makers. They included The Black Label
producers like 24, Ido, Teddy Parks and Kush, as well as Lindgren, Stephen Kirk and Jenna Andrews. “Early in that process, we realised that bringing in EJAE as a collaborator for The Black Label instrumentals was a real win, because they have their distinctive sound, and EJAE has hers, and combining their forces worked really well. After things started to get going, a good friend of mine, Mark Sonnenblick, who I met while working in theatre and on other film projects, and who is great at writing lyrics for narrative songs, came in to collaborate with EJAE, as well as with Jenna and Stephen. “The challenge for them was to write lyrics that work as a pop lyric, while also fitting the story and the character. These songs needed to have great hooks, and also allow the movie characters to reveal themselves and push the narrative forwards. You can have the most beautiful songs, but if nothing happens during them, except for someone sharing a feeling, the song will be cut down or cut entirely from the movie. You can have maybe one of those songs, because there are only 80 to 90 precious minutes to tell a story.
www.soundonsound.com / October 2025
59
ON TE ST
Noiseworks DynAssist
Vocal Pre-production Software With ARA2 compatibility, this clever software slots right into your DAW workflow and promises to take much of the pain and time out of getting your vocals mix ready. M AT T H O U G H TO N
O
bviously, a great vocal recording starts with a decent mic in front of a great performance. But once that performance is captured, there can be a lot of effort involved in improving the recording before it’s time to actually start mixing. Such prep work was traditionally done by an assistant but that’s only now the case for a select few in‑demand mix engineers — it allows them to mix quickly, and put their full focus on the more creative and musical side of mixing. The rest of us must be our own assistants, but the tasks are the same: detailed clip-gain work to make sure the vocal part has a broadly consistent level and every word and syllable is audible, as well as cleaning up undesirable sounds that could interact unhelpfully with your processing chain — things like bumps of the mic stand, plosive pops, loud breaths, sibilance, any hum on amps and pedals,
68
October 2025 / www.soundonsound.com
and tape hiss. Get all your ducks lined up at this stage, and you’ll find that it’s so much easier to bring out the magic in your recordings using your bread-and-butter mixing tools, such as compressors, EQs, saturation, reverbs and delays, along with the usual fader and pan moves. It’s a similar (albeit slightly different) story when working with dialogue, where you’ll typically want to aim for a nice, consistent level, with every word and syllable clearly heard, whether it’s a whisper or an excited exclamation, and with the breathing, popping and essing and so on firmly and transparently under control — sometimes eliminated, sometimes just lowered, for a more natural feel. A key difference with dialogue is that recordings are often much longer, so a lot of these issues are necessarily addressed on the fly, along with your edits and fades. There have always been tools that can take some of the sweat and tears out of this prep stage, but some can cause you
The default view, after the initial analysis has been performed, with the Ride tab open.
almost as much work as they save. Take breath control, for example: until recently, every real-time or offline breath control plug-in I’d tried was a case of ‘close but no cigar’, and while I might be able to correct any artefacts manually, doing that takes a lot of attention and time. That’s why
Noiseworks DynAssist £129 pros • Simple idea, brilliantly executed. • A genuine labour-saver. • AI used only for detection, not for the actual processing. • User has complete control over the end result. • One of the best breath controllers out there.
cons • Can’t protect manual edits if you need to adjust other settings.
summary A superb labour-saving plug-in, DynAssist can help you prep your vocals and dialogue for mixing in next to no time, and includes one of the best breath control facilities out there. A company worth keeping an eye on.
I’ve tended to rely on a manual approach to breath control; it’s more effective, it’s quick to do for a 3-4 minute song, and with experience it can be done reasonably swiftly as you audition and edit dialogue.
DynAssist All of which preamble brings me to my first encounter with software developers Noiseworks, whose DynAssist software aims to perform much of this prep work for you, swiftly and, potentially, entirely automatically. In 2025, it almost goes without saying that DynAssist makes use of machine learning, but I feel it important to highlight that it only employs this ‘AI’ to detect the signal levels and identify different content in the signal; the actual processing it applies is conventional level automation, and the user has full DAW-automation-style control over the result. DynAssist is a VST3/AU/AAX plug-in for 64-bit macOS and Windows systems, and for most DAWs the best approach is to use it as an ARA plug-in. In case you’re not yet familiar with ARA, this is an offline plug-in format that most DAWs, including Studio One, Reaper, Cubase and Pro Tools, now support, and it enables third-party software to function in much the same way as your DAW’s own offline tools such as pitch and time correction. There are other direct transfer systems for DAWs that don’t support ARA, though, and these are detailed in the PDF manual.
Different DAWs have slightly different ways of opening the ARA plug-in but generally it’s a case of right-clicking on a track or event and selecting the plug-in, or selecting a track/event and navigating your DAW’s menu to locate and load it. Your audio will then open within DynAssist, typically at the bottom of the DAW’s GUI. Personally, I prefer to pop it out into its own floating window, as I can then resize to taste with a drag of the corner, and show/hide it as desired. Within the DynAssist GUI are four main tabbed windows: Ride, Vox Gate, Breath and Sibilance, each providing control over a different function. At the bottom, whichever view you’ve selected, you’ll see a waveform with a node-based automation line overlaid, and switching tabs updates this view to highlight the relevant data. A final fifth tab puts all the parameters in one place; obviously this looks busier, but it’s sometimes convenient to have direct access to everything from one screen. At the top left is a toggle that lets you select between vocal and instrument modes. Essentially, instrument mode omits the breath control and sibilance tabs, and offers a different approach to gating, of which more below. On the other side, another toggle determines whether DynAssist operates in Track mode (whereby it analyses all clips on the DAW track on which you’ve inserted it) or Clip mode (it analyses only the currently selected clip). The latter can be really
helpful in the initial tweaking stages, since you can leave DynAssist’s automatic re-analysis feature switched on so you can audition the results quickly, without unhelpful pauses. There are also the usual global facilities, including bypass, undo/ redo, a preset management section, a link to open the manual, and a basic settings pop-up, where you can enable tooltips, change the default Track/Clip mode behaviour, and adjust the GUI scaling. At the bottom of the GUI are a number of useful features, not least buttons to engage auto-analysis and for loop selection. Not only does the latter sync with you DAW to facilitate loop selection for playback, but again, if auto-analyse is on, it will only analyse that section, making it much quicker to audition different settings. It’s a good idea, and especially so for long dialogue recordings, as you can refine settings on a shorter selection before applying them to the full part, which will likely be very similar. The auto-analysis can also be switched off, by the way — again, this allows you to make changes more quickly, since DynAssist won’t have to recalculate its settings after every tweak, though obviously you won’t hear the result until the analysis has been performed. A pen button lets you manually adjust the automation points (that are created automatically according to the settings in the main tabs) with the mouse cursor. As well as directly editing individual points in this way, you can make marquee
The Vox Gate uses machine learning to identify non-vocal/dialogue areas in a file, and lets you decide how much they’re attenuated.
www.soundonsound.com / October 2025
69
ON TE ST
NOISEWORKS DYNASSIST
selections and pull all the contained points up/down simultaneously, which is useful. You can navigate around the waveform using the mouse wheel to zoom in/out, with Cmd (Mac) or the Windows key acting as a modifier to scroll horizontally. It was a breeze with my MacBook Pro’s trackpad too. All in all, it’s intuitive and works well — very much like editing in your DAW’s own automation lanes.
Ticket To Ride Starting in Ride view, the aim here is to level the dynamics of your vocal part. Conceptually, it’s not dissimilar to using two-stage compression, with a parallel compressor bringing up lower level details, and then a regular one pulling down the louder parts. A big difference, of course, is that it’s an offline process, not a real-time one, and that has a couple of potential advantages. For one thing, DynAssist’s analysis means it ‘already knows’ where the signal level rises and falls, so it can be more accurate and transparent, and less ‘reactive’, side-stepping common issues such as pumping or overreactions to brief peaks. Another key difference is that its output is editable level automation, so it’s super‑easy to control any issues thrown up by that ‘compression’. And since DynAssist’s level changes are all applied at the start of the signal chain, before your processors and effects, it’s arguably more akin to an automatic clip‑gain envelope process than either compression or fader riding. You don’t really need to think about ‘make‑up gain’ in the way you would with a compressor either, since DynAssist lets you specify a target LUFS-I loudness by dragging a tab on the left to the desired
value, and to my mind, there are a couple of benefits to this approach. For example, you can assess any tweaks you make safe in the knowledge that loudness isn’t skewing your perception. Also, you can make the signal levels predictable for any further processing. For instance, you might have a go-to chain for processing vocals, and within it various threshold-dependent tools such as compressors. You may even have this feeding into a similarly structured bus‑processing chain, with thresholds calibrated to specific levels. If you already know how loud your source must be to hit those chains in their sweet spot, you can make it so — increasing your chances of a decent ‘faders up’ mix, and thus making mixing quicker and easier. It’s also worth noting that although it must take the time to perform an analysis when you update settings, DynAssist introduces no latency on playback in the way an insert plug-in might. So if you’re one of those types who tends to add more virtual instrument parts at all stages of your production, DynAssist won’t get in the way. There are just a handful of user controls, and I don’t think you really need more. A Speed slider determines how detailed the level correction will be, with fewer automation points being created if you drag the slider over to the right, and very detailed automation when it’s fully left. Beneath, a Smooth slider effectively scales the range of gain/cut being applied, so you can decide just how assertive your vocal riding will be, while Max and Min parameters set the threshold boundaries within which the vocal riding will be performed; these can be linked so that both are adjusted at once, or unlinked, as you prefer. Finally, an Avoid Clipping
Sibilance is indicated in light grey on the waveform. In some places, other processes have applied gain such that the overall automation curve shows a boost (green) even where one of two esses (light grey)is being attenuated.
toggle prevents the level of the part being boosted above 0dB true peak when engaged. I should note that performing the analysis function — whether automatic or not — will override any manual automation edits that you’ve made. And because whenever you make a change to any parameter, in any tab, DynAssist needs to re‑analyse the audio, you must for now either leave your manual edits until last, or render them before any re‑analysis. Helpfully, you do get a pop up warning before losing any changes. Better still, when I suggested to Noiseworks that it might be good to allow the user to ‘protect’ areas from analysis, in much the same way I can in Synchro Arts’ Revoice Pro (another ARA plug-in), I was told they’d had the same thought, and that this is already very much in their development plans.
Gate Expectations
This might just be one of the most effective automatic breath-control tools out there!
70
October 2025 / www.soundonsound.com
The next tab lets you engage or bypass the Vocal Gate and, courtesy of ‘AI’, this is a content-aware process: it knows which parts of the recording are vocals and which aren’t, and you don’t need to set a threshold. As I mentioned already in passing, Instrument mode works slightly differently: this does give you a conventional threshold control, the idea being that you can manually set up the gating to suit any other instrument/sound source you might want to process. Essentially, this gate automatically detects any ‘silence’ between vocal phrases and attenuates it, to prevent
Bridging in-room and personal headphone monitoring Our UNIOTM Ecosystem gives the ability to optimise, align and seamlessly navigate your monitoring options, for the flexibility to work anywhere, anytime – from stereo to immersive. Now, with the introduction of Personal Reference Monitoring – our pioneering new active monitoring headphone solution – UNIO offers the very highest level of headphone accuracy. genelec.com/unio
Explore UNIO
ON TE ST
Lynx Mesa Thunderbolt Audio Interface Lynx have drawn on their existing Hilo2 and Aurora(n) designs to create a powerful desktop audio interface. SAM INGLIS
I
t’s one of the more niche league tables in the world, but Hugh Robjohns’ chart of measured dynamic range performance on the SOS Forum tells you a lot about the current state of audio interface design. In general, newer interfaces score more highly than older ones, though a few classics such as the UA 2192 and Lavry AD11 still compete. And, as you’d expect, the upper reaches are dominated by relatively costly products. The Lynx Hilo2, released late last year, is the only current interface that features in the top five for both A-D and D-A measurements. Such performance naturally comes at a price, and depending on which variant you opt for, you can expect to pay upwards of £4k for a two-input device that operates only at line level. Mastering engineers and serious classical music purists will love it, but many small studio owners will find it unaffordable and its I/O too limited.
74
October 2025 / www.soundonsound.com
The idea that Lynx could address both concerns in a single product sounds counterintuitive. Surely there would be no way to simultaneously increase the Hilo2’s input count, add mic preamps and monitor control, and reduce cost, without resorting to drastic measures like offshoring their manufacturing, or drastically reducing sound quality? Well, apparently there was a way — and the result is the Lynx Mesa.
Going Hi How have they achieved this? For one thing, whereas the Hilo2 can be configured as a Thunderbolt, USB or Dante device using optional cards, those options have been closed off on the Mesa, which is available only in a fixed Thunderbolt variant. Lynx have also saved a few pennies by not including any way to actually connect it to your computer, so you’ll need to add a certified Thunderbolt 3, 4 or 5 cable with Type‑C connectors to your shopping basket. Additionally, the Mesa lacks the Hilo2’s internal PSU and battery
power option, drawing its current instead from an external ‘line‑lump’ PSU. On the analogue side, the Hilo2 is a two-in, four-out device, whereas the Mesa is the other way around, losing the XLR line outputs but gaining a second pair of inputs. What’s more, all four of its analogue inputs are on combi XLR/jack sockets and feature the same comprehensive digitally controlled mic preamps that are available for the same company’s Aurora(n). The Mesa has two built-in headphone amps to the Hilo2’s one; these have independent volume controls but always present the same signal. Another Mesa feature derived from the Aurora(n) and not found on the Hilo2 is built-in multitrack recording to an SD card. In terms of digital I/O, the Mesa retains the Hilo2’s single optical input and output, which can operate either as ADAT Lightpipe or stereo S/PDIF, as well as the word‑clock I/O on BNC connectors and the dedicated coaxial S/PDIF I/O. However, it lacks the Hilo2’s dedicated AES3 in and out on XLRs. A single Type‑C socket takes care of connection to the host computer.
Touch Typing Although there’s a lot in common under the hood with other Lynx products,
Lynx Mesa £2499 pros • Slick design with superb touchscreen implementation. • Good audio specs and subjective sound quality. • Easy to set up and use. • Built-in SD card recording. • Highly flexible internal routing and mixing.
cons • Limited monitor control. • Internal mixer has no EQ, dynamics or solo/PFL bus. • Both headphone sockets carry the same signal. • No Thunderbolt cable included.
summary The Mesa is a stylish, powerful and good-sounding desktop Thunderbolt interface, with an excellent touchscreen implementation and the useful ability to record directly to SD cards.
the Mesa represents a clean break in terms of industrial design. Its stylish, asymmetrical case is made from chunky metal, and seems designed to act as a heat sink; at any rate, it gets pretty warm in use. The gently sloping top panel makes the ideal home for the full colour touchscreen, which is impressively clear from all viewing angles, bright enough to use in direct sunlight, and precise and responsive to touch. It’s joined there by four buttons, a large rotary encoder and potentiometer volume controls for the two headphone sockets. These are found to the right of the curved front panel, with a slot for an SD card to the left. All other I/O is tucked away on the rear panel.
The obvious comparisons are with the Neumann MT48 and its close sibling, the Merging Anubis. The Mesa does indeed bear some similarities to these devices, both in terms of physical design and functionality, and perhaps the most striking of them relates to the use of the touchscreen. I’ve reviewed other touchscreen-equipped interfaces where the screen felt at best a luxury and at worst a form of window dressing. That’s not the case with either the Mesa or the MT48/ Anubis, which exploit their screens to the fullest. In both cases, in fact, the screen offers pretty much all the functionality that’s available from the control panel application running on the attached computer. So, not only can you configure the Mesa and perform basic housekeeping, but you also get full control over its internal mixer. There’s even a built-in Help system, which is a nice touch. There are also some important contrasts between the Mesa and the Neumann/ Merging products. I’ll get to the functional differences later, but from a control point of view, the main one is that the MT48 and Anubis serve the control panel and mixer as web pages. This means they can be accessed from any device that can run a browser and connect to the same Wi-Fi network as the host computer, so you can for example make adjustments from the live room, or allow musicians to set up their own cue mixes. By contrast, the Mesa currently offers no remote control options, but on the plus side, its graphical interface is rather more attractive to look at than those of the MT48 and Anubis.
Megamix At base sample rates, the Lynx Mesa presents a total of 16 inputs and outputs to your DAW. On the input side, these comprise four mic/line/instrument inputs, coaxial S/PDIF, a stereo loopback input, and up to eight optical digital inputs. On the output side, your DAW simply sees
eight pairs of outputs labelled Play 1-2, Play 3-4 and so on. Each physical output pair in effect has its own mixer, with its own independent balance drawn from both the inputs and the DAW playback channels. Playback from any of the 16 SD card channels can also be freely mixed in on a per-output basis. It’s an extremely flexible mixing and routing system, with virtually no limitations as to what can be sent where. Even the outputs have their own dedicated faders. Having said that, there are no signal-conditioning facilities at all apart from polarity switches and high-pass filters on the four analogue inputs. If you like your low-latency cue mixes to feature EQ and dynamics, or effects such as reverb and delay, that’s not possible here. Curiously, there’s also no solo or PFL bus, which seems a strange omission in an otherwise comprehensive mixing arrangement. On a Mac or PC, control over the mixer is handled using a utility called Mesa-Remote. As previously mentioned, this pretty much duplicates the functionality that’s available from the touchscreen. It also uses similar graphics and colour schemes, though Lynx have chosen to lay things out differently to take advantage of the larger display area available on a typical computer. One of the few functions exclusive to Mesa-Remote is the ability to save and load mixer Scenes. These can be assigned to six on-screen buttons, for instant recall. Inputs, playback channels, SD playback channels and outputs each have their own bank of faders, which appear in four rows. The output faders are always visible, and indeed it’s necessary to select an output pair in order to see what mix is being adjusted. The other three rows can be collapsed, but I do feel the Mesa-Remote user interface could use a little refinement. With more than two fader banks expanded, the entire interface won’t fit on a laptop screen, and if the output channels are out of view, there’s no colour coding or
The Mesa features four analogue inputs, all with preamps and all capable of accepting DI guitar signals.
www.soundonsound.com / October 2025
75
ON TE ST
Native Instruments Circular Software Sequencer & Sound Engine NI’s Circular offers a dizzying range of creative possibilities. JOHN WALDEN
D
esigned by Frank Elting (the mind behind three of NI’s popular granular Kontakt instruments, Straylight, Pharlight and Ashlight), and with sound‑design input from the Most Human Colors, Samuel Estes and the Solos, NI’s Circular comes from a stellar team. It also boasts an intriguing concept, UI and feature set. So, is Circular going to help you keep your musical world going round? Time to explore...
Circular Tour Let’s start with a brief summary of Circular’s main features. In essence, Circular provides a four-layer, sample-based sound engine for use within Kontakt (full version or Kontakt Player). It ships with some 9GB of sample data which suggests the 168 included sounds are deeply sampled. The sounds themselves are derived from a wide range of sources including guitars, music boxes, prepared pianos, tuned metalwork, various brass instruments, vocals and a range of synths, some familiar and some processed to give a more unusual sonic flavour. The individual sounds are very classy and easily good enough to make the sonic cut in even the most demanding of musical contexts. From these source sounds, the design team have built around 250 presets (Kontakt Snapshots) divided into Atmospheres and Sequences. You can, of course, build your own Snapshots based upon the included sounds and, rather wonderfully, you can also load your own (single) samples into any of Circular’s four sound layers and then make use of the full sequencing, effects and modulation options the engine provides. A four-layer sound engine is a familiar virtual instrument format but where Circular gets interesting is in the features it combines to trigger, sequence, modulate and process those sounds. This is also where things get pretty deep and, while there is a lot of instant gratification to be had from the supplied Snapshots, I think it’s fair to say that Circular does require you to dip more
82
October 2025 / www.soundonsound.com
The central display in Circular’s Play page provides easy access to some of the sequencing options while also being hypnotic to watch.
than a toe in the shallow end if you want to fully appreciate what it is capable of. Space precludes a comprehensive description here, but I’ll try to summarise the main elements before exploring one or two of the more interesting elements in more detail to give a sense of what’s possible. Hold on tight...
Circular Simplicity? Circular’s controls are laid out across four main pages — Play, Sequencer, FX and Mixer — accessed via the tab headers contained within the ever-present toolbar at the top of the UI. The toolbar also provides access to three macro-style knobs (part of the modulation system; by default, the Variation knob is linked to your mod wheel for hands-on operation), the main Snapshot preset browser, key/ scale settings (no duff notes allowed from Circular’s powerful sequencing/arpeggiation features) and global Settings (Circular can support polyphonic aftertouch and MPE; the response can be adjusted here). The Play page provides easy access to the four sound layers. You can pick the individual sounds, adjust their relative levels, and decide which incoming MIDI notes (highest, lowest, all) each layer will be triggered by. However, via the very
attractive central circular graphic, you can also begin to create and edit sequences for each of the four layers. This graphical interface is obviously where Circular derives its name from. It reminds me of Patterning, one of my favourite iOS music apps (see the October 2018 review) and, as we will see in a minute, it shares one key feature with that app. Selecting one of the four layers — A, B, C or D — brings that to the foreground for manual editing within the circular display and also pops open a panel that provides options for generating either random or Euclidean patterns or enabling a MIDI record function. The latter lets you play Circular in real time and then drag and drop the full Circular performance to (up to) four tracks within your DAW should you wish.
Not So Simple Sequencer However, it’s the Sequencer page where you begin so see Circular’s true depth. Again, selecting one of the four slots brings its sequencer settings into view. There is obviously a lot going on here but a key feature to note is that, like Patterning, the sequences for the four layers are completely independent of each other. Should you wish, you can therefore specify different settings for elements such as step counts (up to 64 steps), step playback rates, playback
The Sequencer page is where Circular gets deep.
directions and step lengths in each layer. If polyrhythmic patterns appeal, Circular has you covered in a rather impressive fashion. The pattern lanes are arranged in three vertical sections with Step Duration, the Parameter Lane (actually five lanes for Velocity, Probability, Note (pitch), Length and Step FX) and Sound Lane. Amongst a whole host of options here are the ability to specify per-step values for Step Duration, Step FX and the sound used. Yes, you can load a different sound (from the presets or a user sample) on a per-step basis. If you want, for example, a single lane to provide a compact set of drum or percussion samples, then that’s totally possible. For each of the four layers, you can choose from a number of different sequencing modes. This includes a No Sequencing option so the sound within a layer can just be freely played via the MIDI keyboard. The PDF manual does a good job of explaining the purpose of these various modes but, whether you want sustained polyphonic playback for chords, or arpeggiation for more melodic playback, it’s all possible. Interestingly, the step counts, loop range, and loop starting point can be configured differently within each of the three lane zones of the UI (and differently between each of the four layers). And, as well as lots of randomisation options within the sequencing engine, this includes the option to randomise the starting step. At the base of the Sequencer page is a further panel with two tabs. The Sound tab gives you a set of synth-engine-like controls, including tuning, filter, amp and envelope options that can be configured differently for each sound within the Sound Lane as opposed to just the overall A, B, C or D layer. The Modulate panel lets you configure the two LFO and Shaper modulators. Other modulation sources include velocity, aftertouch, the macro knobs, key tracking,
With comprehensive effects, modulation and mixing features, you are not short of sound‑design options.
MPE slide, and a few others. Clicking on one of Circular’s parameters in the Sequencer, FX or Mixer pages brings that parameter’s modulation setting into this panel, where you can link it to any two modulation sources and edit how the modulation is configured. Again, it’s powerful stuff.
Full Rack Circular doesn’t skimp on the effects options either. As well as insert (four per layer), global (again, four slots) and two send effects, you also get three per-step effects. The layer effects are fairly conventional and mainly draw from Kontakt’s built-in repertoire of effects (reverb, delay, compression, EQ, modulation), but the per-step effects — which operate on the sequencer notes — have all sorts of creative options amongst them including bending, ornamentation, gater, tape, arpeggiation, rachet and grain. The latter are very cool and operate via the Grain FX bus. Again, this offers four slots. There are some truly weird and wonderful options to be found here. However, this is topped off by the fact that you can use modulation to control in real time which of the three per-step effects is active. The possibilities are mind-boggling.
The Argument For Circular? The included Snapshot presets provide an excellent demonstration of how good Circular can sound but, even here, some time is needed to fully grasp what can be done. The various presets exploit the engine’s capabilities in different ways and you do have to put some effort into working out just how to exploit each one in a musical context, particularly in terms of the modulation and multi-layered sequence triggering. However, did I mention that Circular is deep? I did... and it is. It’s also not likely to
Native Instruments Circular £179 pros • Fantastic sounds for modern scoring applications and electronic music styles. • Very deep feature set.
cons • For some, the very deep feature set!
summary With a high-quality sound set, and a powerful four-layer sequencing feature, Circular has plenty to offer media and electronic music composers provided they are prepared to dig deep.
be in the casual purchase price range for most potential users so, before you take the plunge, do be aware that I think it requires a genuine investment of time to realise the very considerable creative possibilities it has to offer. That said, the rewards are worth it; Circular sounds fabulous in a quirky, hypnotic kind of a way and, while it might not be for everyone, working film, TV and other media composers looking for a modern hybrid sound palette that combines organic and contemporary elements will undoubtedly appreciate the scoring potential. This is the kind of tool where you could easily create a complete cue from a single Snapshot once you have mastered the various modulation possibilities. It’s also an instrument that electronic music producers could put to very good use. OK, so this is perhaps not an instrument for those that prefer to paddle in the shallower end of the virtual instrument world, but if you are prepared to dive deep, then hold your breath; Circular has plenty of wonders to explore. £ £179 including VAT. W www.native-instruments.com
www.soundonsound.com / October 2025
83
ON TE ST
Buchla Music Easel Analogue Synthesizer
Fifty years after Don Buchla first released his portable electronic music studio, is the world finally ready for the Music Easel?
PAUL NAGLE
T
he development of synthesizers into the myriad forms we know today can be traced back to the 1960s and two American designers, one whose name became synonymous with ’synthesizer’, the other who thought the word was too limiting for his instruments. The two men are, of course, Bob Moog and Don Buchla and both leave legacies far greater than implied by terms such as East Coast or West Coast Synthesis. Although it’s true they were geographically separated, Moog and Buchla invite as many comparisons as contrasts, but there’s no denying that Moog’s impact has been the most keenly felt across the industry. Even to this day, Don Buchla remains a much more elusive character, his contributions less widely understood and appreciated.
86
October 2025 / www.soundonsound.com
While I can’t hope to redress the balance in just a few thousand words here, I would like the opportunity to dally in the Buchla universe and check out a recently reissued classic, the Buchla Music Easel. Born out of the artistic melting pot that was the San Fransisco Tape Music Center, this was an electronic instrument designed for portability, patchability and live performance. It seems criminal that it’s not as well known and loved as the Minimoog, ARP 2600 or Synthi AKS. Around eight years ago, having long been curious about Buchla and his instruments, I treated myself to an Easel — as a kind of retirement present. For reasons I’ll come to later, it was eventually returned, but I’ve always regarded it as the missing link in my personal quest to learn about every important synth. Without giving away too many spoilers, much has
changed since then, not least that the Easel is now available in two updated versions: Retro and Modern.
First Steps Drawing from modules Buchla had already designed, the Music Easel first appeared in 1972. While the bulk of this review will concentrate on the more feature-rich Modern version, both it and the Retro have the same long pedigree — and have been given enhancements to extend their life far into the future. Both models are supplied in robust cases, ideal for the performing musician. Upon connecting the external laptop-style power supply, you’ll probably need to reach for the Quick Start patch sheet (unless you’re already up to speed on the Buchla way). Disappointingly, a full printed manual is not supplied. Indeed, you
have to assemble its components yourself from resources on the Buchla website. Accordingly, to supplement the original 1974 ‘Operating Directive’, I added the 208c addendum, the 218e V3 user guide and the EMBIO manual. Incidentally, all the components of the Modern Easel (which I’ll refer to as simply Easel from now on) are available individually. The 208c or Easel Command is the main instrument, the 218e the updated keyboard and the EMBIO is the ‘Electric Music Box I/O’. Ten banana cables are supplied, along with four shorting bars, a MIDI adaptor (Type‑A) and a TiniJax lead. This lead closely resembles a 3.5mm mini-jack lead, but it’s not; it’s a fraction wider at 3.58mm. Before making any assumptions, it’s therefore worth taking stock of the sockets strewn about the panel, ready to baffle then hopefully delight. Starting with the EMBIO, its CV and gate connections are 3.5mm, ready to talk to Eurorack. MIDI is present in TRS mini-jack form and there’s another mini-jack located on the 208c, the headphone output. Every other small jack, including the mixer on the EMBIO and the audio outputs on the 208c, are in the archaic TiniJax format — because that’s how Buchla have always done it. It would have been nice if they were more obviously different because, as you can imagine, it makes things slightly awkward when interfacing with non-Buchla gear or when using the external audio input. I’m told
TipTop’s stackable Eurorack cables work reliably in both types but haven’t tried them personally. There are a couple of USB-C connections (also for MIDI), and the audio outputs and sustain input are reassuringly normal quarter-inch. Everything else is, well... bananas. The Easel is mostly modular in concept; there are some hard-wired connections and a multitude of switches, but you won’t get far without patching. In a Buchla system, this means banana cables, which have one advantage over Eurorack (and 5U format) in
and a spring reverb. Additionally, there’s a voltage inverter and an audio input (with envelope follower), plus a Program Interface slot. Volume controls for the two channels and a headphone output round things off. Courtesy of the 218e keyboard, the Easel gains portamento, an arpeggiator, four assignable voltage sources and several control outputs. While both Retro and Modern Easels include MIDI, only the Modern’s EMBIO provides those handy CV and gate inputs, along with a set of extra utilities. The Easel is one of those rare vintage synths capable of patch storage and recall. Thanks to voltage control and the Program Interface slot, prepared cards could be inserted and even hot-swapped during performance, invoking radical shifts at the flick of a switch! That option still remains, but if you purchase the Program Manager, it will provide a solder-free alternative, one which is supported by an app for Mac and Windows.
“Buchla have succeeded admirably, refining features and boosting flexibility without compromising the essential Easel nature.”
Photo: Tim Rafferty
Buchla Music Easel £4999 pros • A self-contained performance synth with a long pedigree. • Distinctive wavefolding, audio-rate modulation and Lo Pass Gates offer worthy alternatives to more familiar subtractive synthesis. • It’s an instrument to fire the imagination. • Features MIDI and, in the case of the Modern version, CV/gate inputs.
cons • Not cheap — but what classic is? • The mix of 3.5mm and 3.58mm jacks is initially hard to fathom (and identify). • Its MIDI is not for the faint-hearted.
summary A beautiful-sounding electronic music box that deserves to be better known. The updates in these models are significant, particularly if you ever struggled to make the earlier keyboard work consistently. Created for the electronic composers of the ’70s, the Easel is still a unique voice today.
being naturally stackable. Multiples are not required. The cables are colour-coded for length and the sockets coloured by function, with black denoting a CV input and various hues representing the available modulation sources. Furthermore, pulse outputs, which are used for timing information, envelope triggering and so on are red, making it easy to see your options at a glance. Unlike Moog, Buchla preferred to keep audio and voltage connections separate, considering the differences as ‘sound versus structure’. Thus, bananas carry control signals (0-10 V) with shielded cables reserved for audio. One small exception is found in the Quick Start patch but we’ll leave that as a treat for later. I should mention that the banana sockets are all pretty tight at first and tough to disconnect one-handed, at least for this puny, partially retired knob‑twiddler. Fortunately, they do loosen up after about a week of regular use and, long-term, I suspect they’ll prove more trustworthy than, say, Eurorack connections.
The Eclectic Electric Music Box The Easel is a collection of tools assembled to serve electronic musicians from the tape music era — and beyond. Central to operations are two oscillators, the Complex Oscillator and Modulation Oscillator, the former notable for its wavefolding. The latter is a modulator in either low or high frequency ranges as well as being an audio source in its own right. In supporting roles are a voltage-controlled envelope, a ‘Pulser’, a five-step sequencer, a source of random voltages, two low-pass gates, white noise
What, No Cutoff Knob? The central playground of the 208c is a feast of helpfully coloured and responsive sliders. Admittedly, an over-stacked banana can sometimes get in the way, but that’s where those shorting bars come in handy — for connecting common source and destination pairs without impeding access. Typically, the sliders are divided into two types, one providing direct access, the other for voltage control via an adjacent CV input. In the case of the Dual Lo Pass gate (LPG), raising the Level 1 or 2 sliders will open the gate and produce a drone. If you’ve played an ARP Odyssey or other synth with a VCA gain control, this will be familiar. Before plunging in, it’s worth adjusting to the clean, raw tonality on offer. For those of us who grew up with synths from Roland, Korg and Moog, the Easel hints at an alternate reality, one in which filter cutoff and resonance don’t take centre stage. Actually, the Easel does have filters — two of them; they’re components of the Dual Lo Pass Gate — but they behave rather differently to the low-pass filters we’re used to. And, actually, the Lo Pass Gate module included isn’t even the one Buchla want us to have... The tale goes like this: Easels sold today via the UK distributors are shipped with a Lo Pass Gate module that is fully RoHS compliant, meaning all its components can be legally tossed into landfill(!). However,
www.soundonsound.com / October 2025
87
ON TE ST
Braingasm Ocula Diffuse Field Microphone This unusual-looking mic is designed specifically for Decca Tree arrays.
HUGH ROBJOHNS
B
raingasm are a specialist microphone repairer based in Rome, Italy. In addition to servicing, restoration and modification of vintage capacitor microphones (including re-skinning capsules), the company’s lab also undertakes repairs of a wide range of outboard studio
92
October 2025 / www.soundonsound.com
equipment, and even offers an audio electronics design service. These days it seems quite a lot of microphone repair companies branch out into manufacturing their own microphone designs, and Braingasm are no exception, offering a small but very interesting range of studio capacitor microphones. The current portfolio includes the MP1 small-diaphragm cardioid mic
(sold in stereo pairs), along with three large‑diaphragm models: the Ferro (fixed cardioid) and Multideluxe (multi‑pattern) mics both have FET-based impedance converters, while the Magnitude is a multi-pattern valve microphone. These microphones employ a range of different technologies including transformer or transformerless outputs, valve or FET impedance converters, fixed or variable polar patterns, large or small diaphragms — and so offer not only different features but also different tonalities, making each one interesting and characterful in its own unique way. Yet they are all comfortingly familiar to anyone conversant with the typical fare of standard studio microphones. However, the subject of this review has a far less familiar format — indeed, it’s unique as far as I know! The Ocula is described as a Diffuse Field Recording System, but if that means nothing, perhaps if I say it’s available in both dual‑ and triple‑matched sets, the latter might give a better clue as to its design. For these are compact, omnidirectional electret microphones with the capsule housed within a custom-made Acoustic Pressure Equalising sphere (see the ‘APE Concept’ box). This configuration was first introduced in the revered Neumann M50 microphone, which has become virtually synonymous with the Decca Tree stereo technique employed widely in classical orchestral and film soundtrack recordings. Although Neumann ceased production of the M50 in 1971, it was replaced by the TLM50 in 1990 (now discontinued) and then the M150 Tube model from 2001. The APE concept is not unique to Neumann, though, and several other manufacturers offer APE spheres as accessories for their own small-diaphragm omnidirectional microphones. Nevertheless, the Braingasm Ocula is unique, as far as I know, in being a compact omni microphone with a permanently attached APE.
Ball Games Pub quiz afficionados will no doubt be aware that an American pool ball is 57mm in diameter, while a British snooker ball is slightly smaller at 52.5mm. I mention this only to give a familiar reference: the shiny black Ocula microphone is a little smaller than both, having a diameter of 40mm — the same diameter as the Neumann M50 design.
Each Ocula mic weighs around 56g and has an integral 3/8-inch threaded insert at the bottom for attaching to a mic stand. The model name and serial number are engraved onto the top of the sphere, while the audio output is carried on a fixed, 5m long (3.4mm diameter) Sommer cable exiting from the rear of the sphere. I found this cable prone to tangling, but a Velcro tie is attached to help maintain the coils in some semblance of order when stored. A genuine Neutrik XLR plug is fitted to the cable, but inside is a tiny circuit board carrying four SMD transistors and a handful of resistors and capacitors to convert between the unbalanced capsule signal and the electronically balanced XLR output. Standard 48V phantom power is required, and this is converted by the circuit board to the 3V bias required by the capsule. The capsule is mounted in a rubber grommet, with the grille slightly proud of the ball surface (presumably because the diaphragm is recessed within the electret’s metal housing). Braingasm have used a high‑quality 10mm omnidirectional electret capsule manufactured in Japan by Primo, the EM-1272-Z1. Specs-wise, Braingasm’s published specs align exactly with Primo’s, stating self-noise to be a very respectable 14dBA, with a high sensitivity of 39mV/Pa, and a maximum SPL of around 119dB. That self-noise figure is comparable to many
small-diaphragm DC-biased capacitor microphones, and is truly excellent for a 10mm electret. Rather than state the complete microphone’s frequency response or provide a response chart, the specs only give the ‘amplifier response’ (10Hz to 35kHz), which isn’t very helpful... but a datasheet on the Primo website shows the full frequency response chart of the raw capsule, which is essentially flat from 60Hz up to 2kHz, above which the response rises gently, reaching +4dB at 10kHz before tailing off to -6dB at 20kHz. I suspect the absence of data below 60Hz relates only to the size of the company’s measuring facility — the Ocula delivered a fine and well-extended LF response during my evaluations. However, that raw capsule response will be substantially modified by the presence of the APE sphere, resulting in a boosted high-end response due to the physics of acoustic pressure
Braingasm Ocula From £720 pros • Intriguing entry into true Decca Tree mic techniques. • Elegant engineering. • A very compact microphone housing with low visual impact. • Supplied with a versatile ball-mount for easy positioning. • Low-noise, high-output capsule.
cons • Not quite as affordable as one might hope.
summary A unique and very practical self-contained diffuse-field omni mic with integral APE sphere, as popularised in the Decca Tree mic technique.
As I mentioned earlier, the Ocula microphone is sold in stereo‑ or triple‑matched pairs, with the matching said to be within ±0.5dB across the whole usable bandwidth. I was supplied with a stereo matched pair for this review, which shipped in a cardboardbox,although each microphone is protected in its own velvet bag, with the cable coil secured by a Velcro strip. Also included with the set are a pair of high-quality and remarkably compact orbital (ball) mounts, made by a company called Artcise. When attached to these ball mounts each Ocula mic can be angled exactly as desired very quickly
“The Braingasm Ocula is a well-designed and well-engineered product filling a particular niche in the market microphone very nicely indeed...” build-up. So, I estimate the Ocula’s actual frequency response rises to a peak of around +9dB at 10kHz, before falling back to about +3dB at 20kHz. Hopefully, Braingasm will publish a genuine measured frequency response chart of the complete Ocula mic before too long.
The APE Concept The Acoustic Pressure Equaliser (APE) is a concept developed in the very late 1940s by the NWDR (Nordwestdeutscher Rundfunk) laboratory — the R&D department of the Northwest German broadcast organisation. The NWDR team was led by Herbert Großkopf, carrying out research into how differently shaped microphone capsule housings affected the overall frequency response and directivity. Großkopf, by the way, is probably better known for patenting the continuously variable polar-pattern control, the rights to which Neumann acquired and launched on the studio world in 1949 as the M49 multi‑pattern studio microphone. The APE concept was first introduced in a product just two years later, in 1951, when Neumann brought out the M50 omnidirectional microphone. The M50 actually looks very similar to the M49, as it shares the same outer casing and has similar electronics. Inside, though, the capsule diaphragm is just 12mm in diameter and is embedded flush at the surface of a 40mm Perspex ball. In terms of the sphere’s acoustic physics, as on-axis soundwaves reach the diaphragm, the presence of the sphere’s surface leads to an increase in air pressure for wavelengths comparable to, or smaller than, the diameter of the sphere. In the case of a 40mm sphere, that translates into a graceful HF boost above 2.5kHz, rising to about +5dB, and this is very handy as it almost
perfectly counteracts the natural loss of HF energy as sound travels through the air into the diffuse field. And that was the aim, of course — to provide a flat overall response for a microphone placed in the diffuse sound field, as it would be for orchestral recording, for example. Additionally, though, the sphere also causes a high-frequency shadowing effect for sounds arriving off axis, and this correspondingly reduces the microphone’s sensitivity to off-axis high‑frequency signals. In other words, it makes the omnidirectional microphone behave more like a directional microphone at high frequencies — not quite as much as a true cardioid, but more than a hypocardioid. So, for orchestral recording, where the microphone will be working at a distance in the diffuse field, an omnidirectional capsule embedded within a sphere combines the low-frequency extension of a standard omni with a natural high-frequency boost compensating for inherent air losses to maintain detail and brilliance. And, when making stereo recordings, the HF directivity allows the microphones to be pointed outwards to increase the inter-channel level differences between channels, enhancing the stereo imaging in a similar way to traditional pressure-gradient mics — and all without sacrificing the low-end performance of pressure-operated mics. Hurrah! Jägermeisters all round!
www.soundonsound.com / October 2025
93
INTER VIE W
Photo: Alexis Maryon
PLA Y ON
Isabel Gracefield: Recording Mulatu Astatke
Recording a band live in the room is always a challenge — especially when it’s led by a jazz legend who switches instruments without warning! SAM INGLIS
“I
Mulatu Astatke, now 81, is considered the father of Ethio-jazz.
96
October 2025 / www.soundonsound.com
n engineering culture, there’s this idea that everything is always being recorded with the perfect microphone in the perfect position,” says Isabel Gracefield. “But my experience of really big, high-pressured sessions is that often it’s that first, instinctive decision. You check it’s OK and it’s working, and then you move on. “A lot of times you’re doing these quite prestigious projects and it’s just: that mic was spare, it was sat on top of the piano, so I grabbed it and put it on the stand. And I’ll often say to the assistants, ‘Can you just put it somewhere you think is sensible?’ and I’ll listen to it — and if it’s OK, great, because there’s eight other things that we’re dealing with. And so, it’s not always micro-finessed. It’s just if you don’t like it, it changes.” The sessions for Mulatu Plays Mulatu were at the top of the scale both for pressure and prestige. Over six days at London’s RAK Studios, with Isabel and her
The sessions for Mulatu Plays Mulatu took place at RAK Studios in London, under Head Engineer Isabel Gracefield.
Photo: Alexis Maryon
team engineering, Mulatu Astatke took his band through new interpretations of 11 compositions drawn from his own back catalogue. Producer Dexter Story then flew to Addis Ababa to track overdubs by musicians there, before Gracefield mixed what may prove the valedictory album by the 81-year-old father of Ethio-jazz.
Slow Cooking The complex live sessions tested the resources of both RAK and its Head Engineer Gracefield. Meticulous planning was vital, but so too were pragmatism and adaptability. Above all, it highlighted the importance of the technical team’s ability to serve the artist and the music. “We started talking with the label at least three months beforehand,” recalls Gracefield. “We had multiple Zooms with the label and the producer and James Arben, who plays sax on the record and is also the MD. They were really clear that they needed to keep to the stage plot as close as possible in the studio, because when Mulatu
turns to this side, he expects to see this person. Obviously their live plot is amazing for playing live, but instinctively I looked at it and just went ‘That’s not a recording plot!’ All the drums and percussion were on one side. “So there was a lot of negotiation about whether we could put the drums and the percussion on opposite sides, because I wanted to have a coherent stereo picture. All those choices had to go through the label, the producer and the MD, to make sure Mulatu was going to be comfortable when he walked into the room. It took a while to negotiate how everyone was going to be in the space.”
All Together Now The Studio 1 live room at RAK is a large space that can optionally be divided into two, isolated areas. Gracefield’s original plan had been to set up the louder instruments such as drums and brass in one of these, with Ethiopian instruments and other delicate sources in the other. However, rehearsals for the
sessions forced a major change of plan, when Mulatu Astatke decided that RAK sessions would not include the Ethiopian instruments after all. It also became clear that dividing the space wouldn’t work from the point of view of Astatke communicating with his band. This left Isabel and her team with some serious engineering challenges, because alongside drums, congas, trumpet and saxophone, the band also included much softer instruments such as cello, upright bass and Astatke’s vibraphone. With lines of sight being vital, hiding these away in booths was not an option, so microphone choices became as much about managing spill as they were about getting the perfect sound for each individual source. Screens and gobos were used to reduce spill as much as possible, and Gracefield employed a lot of dynamic mics, often positioned very close to the instruments they were capturing. Happily, the results were often in line with what the musicians had hoped to hear. “We
www.soundonsound.com / October 2025
97
ON TE ST
Analogue Mixer
HH Q16FX Digital mixing might be all the rage, but sometimes a simple analogue desk is exactly what you need. PAUL WHITE
W
hile we now have a variety of digital mixers from which to choose, many with quite different modes of operation, there’s something reassuring about a conventional, knob-laden analogue desk that you can pick up and use straight away with barely a glance at the operation manual. The HH Q16FX is exactly such a product, offering all the essentials for hands-on mixing. It is solidly built in a metal case with a lifting handle inset into the left‑hand side, and has direct mains power (100-240 Volts) rather than an annoying external PSU. Practical colour coding is used for the control knob caps to aid navigation.
HH Q16FX £419 pros • Rugged construction. • Intuitive layout. • Good audio quality with sensible effects.
cons • No obvious cons, as long as you don’t need more than one foldback monitor mix.
summary A straightforward and easy-to-use mixer that will serve well on a range of gigs. The USB interfacing and built-in feedback detection are handy extras to have!
104
October 2025 / www.soundonsound.com
If you’re not familiar with the HH name, the original company launched some of the first solid-state guitar amps and PA systems, their most distinctive feature being their electroluminescent front panels. Today the name belongs to UK brand Headstock. Designed in the UK and then built ‘off shore’, the HH Q16FX is one of a range of Q-series analogue mixers offering from six to 16 channels. These seem to be designed primarily for live-sound applications, though they also function as 2‑in/2‑out 24-bit audio interfaces running at 48kHz. In the Q16FX, the 16 channels are deployed as eight mono mic/line channels, two stereo line-only channels and two stereo/mono mic/line channels. Channels 1‑8 include a single-knob compressor, and every channel has a three-band EQ operating at 12kHz, 2.5kHz and 80Hz. The mono channels have a separate 75Hz low‑cut filter too. DSP effects are included, with a choice of 16 effect types based around the mainstays of reverb, delay and echo. A nine-band graphic EQ is available to process the main or monitor mix, and this includes a feedback detection feature so you know which band is causing the problem. Channels can be routed to the man output and/or to a pair of subgroups — useful if you want to control the whole drum mix using a single fader. There’s a single pre-fader aux send per channel for setting up a monitor mix, and there’s also
a post-fader send for the internal effects, but with the option to also send that signal to an external effects unit. The mono mic inputs and main mix outputs are on balanced XLRs, with all the other connections being quarter‑inch jacks, other than the inputs for the USB/phono channel (which are on RCA phono sockets and USB‑B).
Channel Features The eight mono channels have identical features, starting with separate inputs for mic (XLR) and line (jack) sources. A further TRS jack functions as an insert point. Phantom power is toggled globally from a rear‑panel switch. The input gain control and low-cut button are at the top of the channel strip, followed by the one-knob compressor and the three-band EQ, which has a ±15dB range. The aux and effect sends come next, followed by the pan knob. The single pre-fader send means you can only set up one dedicated monitor mix, though for smaller gigs I have to confess that I usually take the lazy approach and just feed a copy of the main mix taken from the monitor outs to the foldback speakers. Stereo/mono channels 9+10 and 11+12 lose the insert point and compressor but otherwise have similar appointments to the first eight channels. Stereo operation is for the line inputs only — if used as a mic channel, then the channel is mono. That leaves channels 13+14 and 15+16, which are line-only stereo channels with no input gain control and no low-cut filter. All the controls from EQ downwards are the same as for the other channels.
The channel faders run from -∞ to +10 dB, and a peak LED warns of overloading. There are the usual mute and solo buttons, as well as routing buttons for main and submix, with the pan control steering between sub 1 and sub 2. The solo mode can be switched between solo-in-place and PFL modes (the latter routes soloed channels to the monitor and headphone outs) using a button next to the main output meters. A channel’s signal can be sent to the subgroups and/or main bus (or neither), and the subgroups can themselves be sent to either the left or right channel of the main stereo bus, or both (the former scenario allowing for a single stereo bus; the latter for two mono busses feeding the main mix).
Master Section The master section of the mixer is dominated by a nine-band graphic equaliser, which may be inserted into the main output or the aux output. There are rotary controls for the effects send and aux return, and a volume control for the phono/USB inputs, with a button to route these to the main mix bus. The headphone output can carry the main output, the phono/USB input or the subgroups (and also the solo signal when solo/PFL is in use). The graphic EQ panel houses buttons for Feedback Detection, EQ bypass and main/aux routing for the graphic EQ. Note that feedback detection is not
the same thing as automatic feedback suppression: red LEDs within the sliders illuminate if the energy in that band seems excessive, indicating that feedback may be occurring, leaving it up to the engineer to pull that band down. If the feedback detection is turned off, all the fader LEDs stay illuminated. Faders are used for the aux and effects sends, the two subgroups and the main left/right outputs, with a pair of 12-section LED meters showing the output, PFL or solo levels. The effects section is tucked away in the top right‑hand corner of the panel with a rotary switch selecting which of the 16 effects is in use. These are all variations on delay and reverb, which is by far the most sensible choice for a live desk. A button activates the effects and there’s a knob that adjusts one key parameter for each effect type — typically delay repeats or reverb decay time. I would have liked a tap tempo button for the delays as that’s a feature I use a lot when mixing live shows, but here you have to use the parameter knob to set the delay time. A footswitch jack allows for remote effects bypass. All the connections for the master section run along the top edge of the panel, and these comprise stereo returns for the aux and effects (if using an external processor), the mono aux and effects send outputs, footswitch and headphone jacks, two subgroup outs and stereo monitor outs.
All the controls and connections are on the top panel, with the exception of the power and phantom power switches, the IEC mains inlet, and the USB port, which are on the rear.
The two main outs are XLRs and there are also stereo RCA phono ins and outs. The USB‑B socket for interfacing is on the rear panel, along with an IEC mains inlet, power switch and the 48V phantom power switch.
Impressions This mixer is delightfully predictable and intuitive with status LEDs where needed, which is just what you need when mixing live sound. The bright red LEDs can be a bit dazzling when working in a dark corner, but then that’s true of most similar mixers too. As long as you pay heed to gain structure when setting the input and fader levels, the mixer operates with minimal background noise, and the one-knob compressors work really well, even on electric guitar. The effects section offers useful delay and reverb treatments, but note that when you change presets it can take a couple of seconds for the new parameters to settle down. Having a footswitch option to bypass the effects is very welcome. The built-in USB audio interface means that you can record a stereo mix, either at gigs or as part of a recording project at home. The interface is class compliant so should work without the need for additional drivers, and the USB return could come in handy for backing tracks or intermission music. It worked right away on my Mac, identifying itself as an HH Q Series Mixer in System Settings. For most applications the fixed three-band EQ works fine, and unless you are a seasoned sound engineer, dealing with a pair of fully parametric mid bands can sometimes be more trouble than it is worth anyway. The EQ frequencies are well-chosen and there’s plenty of range to get the job done. The graphic EQ can help smooth out room issues, and the feedback detection could be useful if you’re not certain which frequency band is howling away. Taming feedback with a graphic EQ isn’t as benign as an automatic feedback suppressor that deploys very narrow notches, but on a mixer of this type it is a welcome and practical addition. To summarise then, there’s nothing revolutionary about this mixer but it offers all the essentials, plus sensible effects and feedback detection, in a very practical and affordable package. It is solidly built, well thought-out and should meet a range of live sound and basic recording needs. £ £419 including VAT. W www.hhaudio.com W www.headstockdistribution.com
www.soundonsound.com / October 2025
105
ON TE ST
USB Audio Interface
Bitwig Connect 4/12 NICK ROTHWELL
I
t seems to be something of a rule that every music software company must, at some stage, get into the hardware business. Ableton played the control surface game with the Push and Push 2, and added audio with the Push 3. Now Bitwig have entered the ring with a desktop audio interface, although its controller features are also deceptively powerful, and it has connectivity clearly aimed at the modular synth market.
First Impressions The Connect 4/12 is visually striking. It sports a colour scheme incorporating Bitwig’s signature bright orange, and prominently features a large dial on its top surface, much in the style of Universal Audio’s Apollo series or the Mackie Big
112
October 2025 / www.soundonsound.com
Bitwig’s first hardware product takes a characteristically individual approach to audio interfacing. Knob. The Connect’s case is all metal, and the unit is reassuringly heavy. The top surface presents the interface’s most unusual feature: a row of 3.5mm sockets, intended primarily for modular synth control but usable for (unbalanced) audio at a pinch. To the left of the big dial are stereo meters calibrated in 4dB increments from -40 to 0 dBFS, and status LEDs for audio input type, phantom power and MIDI I/O. There are transport controls bottom left, and mode switches below and to the right of the dial, which itself is set in a 360-degree ring of LEDs (32 of them). Mini-jacks aside, all other connections are on the back panel. Sadly, there’s no silkscreened guide on the top, so you do have to peer over the back and squint
a little to see the labels. There are two balanced quarter-inch audio inputs (one a combi jack to support a microphone), six balanced line outputs, headphone out (annoyingly this isn’t on the front of the device), and two mini-jacks for MIDI in and out via the bundled adaptors. Power and connectivity (USB 2) are via a USB-C socket, and there’s no facility to use an external power supply (though at no point in my testing did I feel like I needed one). There’s not even a power switch. Buttons on the back select the input type for inputs 1 and 2 (instrument/line). If there’s an XLR plugged into input 1 then the device assumes a microphone is attached and goes into microphone mode, otherwise not; there’s no manual microphone selection. A dedicated
Bitwig Connect 4/12 £439 pros • Well designed ‘hands on’ functions on the front panel. • High-resolution dial works well for editing, scrolling and scrubbing. • Neatly integrated into Bitwig Studio as control surface and modular interface. • Good build quality.
cons • Limited number of audio inputs. • Some functions disabled at high sample rates. • No scroll or zoom functionality for Launcher clips.
summary Bitwig have scored a triple whammy with the Connect 4/12: it’s a solid hands-on audio interface, a wellintegrated control surface and a powerful link between the Bitwig DAW and a modular synth environment. It pushes all the right buttons.
button toggles phantom power. Inputs 1 and 2 can be ganged into a stereo pair, in which case they both operate at line level. So far so good — and the Connect is class-compliant so you can just plug it in and you’re away. (Some brief testing confirmed that it also works on a USB-C‑enabled iPad.) The dial, which is aluminium and feels smooth and solid, lets you set input and output levels: click the relevant button marked In 1, In 2, Main or Phones, then turn the dial, and the ring of LEDs unfurls in orange for visual feedback. The maximum gain for the main two inputs is 30dB for instrument and line input and 62dB for microphone. The minimal setting (no LEDs lit) is unity gain — there’s no way to attenuate. Output is attenuated only, there’s no signal boost. The Connect claims to be compatible with the Mackie Control protocol. Sure
The Connect’s control panel application.
enough, when I fired up Ableton Live and configured the Connect as a Mackie control surface, the transport buttons worked, as did the dial for scrolling. The integration is, shall we say, minimal; the behaviour with Bitwig Studio is much more immersive, as we’ll see.
Audio This is probably about as far as you’ll get without reading a manual, and since my unit arrived without one, I had to do a bit of hunting around on the Bitwig site to find one, at which point I discovered that there’s also a dedicated control panel application for setup and mixing on-screen. If you’ve already gone ahead and connected the device to a computer and fired up your DAW of choice, you’ll notice that it actually claims to have six inputs, not four. Inputs 5 and 6 are a dedicated loopback connection from the (pre-fader) main outputs, useful for capturing live mixes or non-DAW computer audio. It’s a credit to the device that pretty much all of the functions of the control panel app
can be accessed pretty immediately from the front panel. There’s a hardware monitor from input 1 and/or 2 direct to main outs or headphones — the dial’s LEDs turn red to indicate monitor level. The audio features are rounded out by three dedicated buttons to the right of the dial. Mono switches the output to mono, useful for checking a mix. Alt toggles the main mix to an alternative pair of outputs, such as a second pair of speakers. Dim is a toggle which attenuates the main mix by a configurable amount. I recently played a couple of small live gigs with the Connect, and Dim is exactly what you need to talk to your live engineer during a soundcheck. The audio interface will run at high sample rates (176.4 or 192 kHz) but doing so disables inputs 3 and 4, outputs 9 to 12, and direct monitoring.
Bitwig Control The Connect 4/12’s control functions fall into two groups: parameter control and transport. As a parameter controller, the device operates rather like any other MIDI
Round the back we find a USB‑C port, 3.5mm MIDI I/O sockets, and the analogue audio I/O.
www.soundonsound.com / October 2025
113
TECHNIQUE
Ultimate Plosive Control Initial track (top) and isolated pops copied to second track (bottom).
Pesky pops proving problematic? Here’s how to pull them down... CRAIG ANDERTON
N
o matter how carefully you set up a mic’s position or pop filter, when vocalists sing close to the mic some pops can still make it through, so you have to deal with them after the fact. Traditionally, most pop removal relies on filtering extremely low frequencies. But reducing these low frequencies often also affects the warmth and depth of the vocal. This may or may not matter, but when it does then filtering out pops with EQ becomes problematic. And while there are clever AI‑based tools out there now, in my experience they don’t always quite hit the mark. Thankfully, attending to pops manually is really easy...
Cancel Culture My preferred method uses good old-fashioned editing and polarity inversion: first I copy only the pops to a second track, then I flip that track’s polarity so that, with the levels at unity, the copied pops cancel those on the original track. You can then adjust the second track’s level and use processing to ‘uncancel’ some of the pop sound and shape its timbre to taste. Not only does this technique not affect the vocal itself, but also the pops themselves don’t sound ‘thin’, and changing the reduced pop’s timbre doesn’t affect the timbre of the vocal itself. Even a little high-pass filtering
116
October 2025 / www.soundonsound.com
copy — perfect alignment on the timeline at a very low frequency will usually do is crucial for proper cancellation. In the what’s needed. MixConsole’s Pre section, simply invert It really is that simple, and you can the second track’s polarity. Then play do this in any DAW, but below I’ll take the two tracks together: the pops will you through it step by step in Cubase. be gone! First, identify the pops at the beginnings of words, and slice at the beginning Tonal Tweaks and end of the pop. Remember to zoom in close enough to make sure that the Then, simply adjust the second track’s slice is before any attack-related part level to set the desired amount of pop of the pop, and that the cancellation across the slice after the pop is on whole track. If necessary, a zero crossing (there’s add a touch of high-pass an option in Cubase and filtering to alter the tone of most other DAWs to do this the pops. Of course you’ll automatically when you probably want any more make a cut). Then, create general vocal processing a second audio track. to apply to the whole vocal Now, select all the pops including your treated on the first track, and click plosives, and you can do on a selected pop and that if you submix the two hold the mouse button tracks to a group track down. While continuing (use that track for your to hold the mouse button processing and effects down, press and hold the sends), or by rendering Command/Ctrl and Alt/Opt a sum of the two tracks. keys. While still holding If you’d like to hear these modifier keys, drag this technique in action, the pops down into the there’s an audio file on the second track and release SOS website at http://sosm. the mouse. The order of ag/ultimate-plosive-control clicking, holding down the in which you can hear mouse button and using the raw track and the these modifier keys will Cubase’s MixConsole showing pops fully cancelled, prevent the pops from and then the pops the setup for this simple moving left or right as you blended to taste. pop-cancellation technique.
“Simply adjust the second track’s level to set the desired amount of pop cancellation.”
SUBSCRIBE & SAVE TABLET | WEB | REPLICA | PRINT PLUS BONUS PDF
SMARTPHONE COMPATIBLE
1 ICONIC MAGAZINE
6 GREAT WAYS TO READ IT
SCAN ME
TO SUBSCRIBE
TABLET - PHONE - WEB - PDF - REPLICA - PRINT All this for less than the price of a Coffee+Pastry each month!
www.soundonsound.com/subscribe • Go DIGITAL - get 12 monthly Tablet issues + all locked Web articles + monthly Full Issue PDF download the day the issue goes live. • Go PRINT+DIGITAL - get the best of both worlds and save over 50%.*
iOS / ANDROID
Every Digital sub includes a 5‑device licence to our App: mix and match across iOS/Android Tablet and Smartphone.
ONLY READING SOS IN PRINT?
Choose our full Print+Digital bundle for unlimited 24/7 access.
* The 50% discount offer is based on the UK retail price of the Print magazine, Tablet and Web subscription when sold separately. Subscriptions can be cancelled at any time and you will receive a pro-rata refund for all outstanding issues.
SPOTLIGHT
Universal Audio Apollo x16D
Dante Interfaces
Once the preserve of large studio facilities, Dante is now becoming common in smaller setups. We talk you through some of the options...
LUKE WOOD
S
ince its introduction in 2006, Audinate’s Dante AoIP (Audio over IP) protocol has become hugely prevalent in the worlds of high-end live sound and broadcast. It’s easy to see the benefits for such applications: the ability to run over standard Ethernet networks, support for high channel counts and sample rates, being able to route input
120
October 2025 / www.soundonsound.com
sources to multiple destinations, redundant backups that’ll help to avoid show-stopping failures, and so on. Those same benefits make Dante a compelling choice for large, multi-room commercial recording and post-production facilities, too, but there are now a growing number of products aimed at smaller studios. Generally speaking, Dante interfaces fall into two categories: simple devices that offer a selection of Ethernet ports that can be used to
connect your I/O devices of choice, and more traditional audio interfaces that feature their own selection of local I/O and use Dante connectivity as a means of expanding their channel count and integrating with other networked devices and systems. In this month’s Spotlight, we’ll be taking a look at a mixture of the two, but specifically those that are capable of passing audio between a DAW and Dante network via USB or Thunderbolt.
Avid MTRX Studio
Avid MTRX Studio / MTRX II Designed to bring the power of Avid’s large modular I/O systems to smaller spaces and budgets, the MTRX Studio is a 1U unit that includes 64 channels of Dante connectivity alongside 18 analogue mic and line-level connections, 64 DigiLink channels and 16 ADAT channels. Connectivity with Pro Tools HDX systems is complemented by an optional Thunderbolt 3 card that allows for a native connection to Macs and PCs, and comprehensive routing functionality via DAD’s DADman software application makes it possible to pass audio from any input to any output, allowing users to share connectivity across multiple devices and different DAWs simultaneously. There’s built-in support for monitoring Dolby Atmos in layouts up to 9.1.6, and EuCon integration means that the interface’s monitoring functions can be controlled directly from Avid control surfaces. Its larger sibling, the MTRX II, then offers a modular platform that supports 256 Dante channels in its standard form (along with 64 DigiLink and MADI channels), and can be expanded to accommodate a massive 1280 channels that can be distributed to multiple audio networks — even if they’re running different sample rates and sync’ing to different clocks. £ MTRX Studio (Thunderbolt) £5229, MTRX
II from £8263.80. Prices include VAT. W www.avid.com
DAD AX Center / AX64 / Core 256 The newest addition to Digital Audio Denmark’s Thunder Core family packs a huge amount of connectivity into a compact 1U unit — fully expanded, the AX Center boasts a whopping 984 inputs and outputs! In its standard form, it supports 256 channels of Dante alongside 64 channels of MADI, 16 channels of ADAT, as well as featuring a pair of mic/instrument inputs and eight analogue outputs (two stereo monitor pairs and two stereo headphone outputs); the unit’s Thunderbolt 3 connection is capable of carrying 256 inputs and outputs to/from a host computer. A pair of expansion slots make it possible to add yet more I/O, with options including analogue mic pres and line-level I/O, AES, MADI and yet more Dante — with the appropriate cards installed, the total Dante I/O count tops out at 512. If that’s not enough, then its larger sibling, the AX64, includes eight expansion slots and supports a staggering 1872 input and output channels! Finally, there’s the Core 256, a digital-only interface that features 256 channels of Dante and 64 channels of MADI, and has been designed with live sound and post-production duties in mind. Routing and monitoring control for all three interfaces is taken care of by the company’s DADman application. £ AX Center £4284, AX64 £4830,
Core 256 £3162. Prices include VAT.
Dante Virtual Soundcard An alternative to a hardware interface comes in the form of Audinate’s Dante Virtual Soundcard application. As its name suggests, the software allows an Ethernet-equipped Mac or PC to appear as an audio interface on a Dante network, making it possible to route audio between computer applications and any connected hardware devices. Two variants are available: Standard and Pro, both with a selection of licensing options — Standard can be rented for 30 days or bought as a perpetual licence, Pro is available either as an annual subscription or on a fixed-term licence. The key distinction between the two is channel count: Standard will accommodate up to 64 inputs and outputs at 44.1/48 kHz (falling to 32x32 at 88.2/96 kHz and 8x8 at 176.4/192 kHz), while Pro offers 128x128 operation at sample rates up to 96kHz, and 16x16 at 176.4/192 kHz. Because the necessary processing takes place on the host computer, DVS does incur higher latency than opting for a hardware interface, although for situations that don’t require real-time monitoring — capturing a live performance from or offering playback for a virtual soundcheck on a Dante-equipped console, for example — it can offer a neat, cost-effective solution. • • • • •
Standard 30-Day: $19.99. Standard Single Machine: $49.99. Standard Transferable: $99.99. Pro Annual: $124.99 per year. Pro Term: 1-Year $124.99, 3-Year $299.99.
W www.getdante.com
W www.digitalaudio.dk
DAD AX Center
DAD AX64
www.soundonsound.com / October 2025
121
SPOTLIGHT
DANTE INTERFACES
Focusrite Red 8Line
Focusrite Red 8Line/16Line
Focusrite’s RedNet range includes a versatile selection of interfaces, converters and monitoring controllers that all feature Dante connectivity, catering to everything from compact studio and live recording rigs to modular, scalable systems for large, multi-room facilities. The Red 8Line is a 1U unit that, as its name suggests, features eight analogue line-level inputs and outputs, along with 16 channels of ADAT I/O, stereo S/PDIF connectivity, a pair of the company’s Red Evolution mic preamps, two high-impedance instrument inputs and 32 channels of Dante. The Red 16Line then increases the local analogue line-level I/O count from eight to 16. Both units can be hooked up to Pro Tools HDX systems thanks to DigiLink ports, while native Mac and PC connectivity is provided over Thunderbolt 3. £ Red 8Line £2729.99, Red 16Line £3649.99. Prices include VAT.
W www.focusrite.com/red Focusrite RedNet TNX
Focusrite RedNet TNX
The latest addition to the RedNet line-up offers a Thunderbolt-equipped alternative to their PCIeNX card, bringing high-channel-count Dante connectivity to laptops and desktop users with no spare PCIe slots. Out of the box, it’ll support 128 inputs and 128 outputs to/from a Dante network at 192kHz, and that count can be doubled to a whopping 256x256 channels by purchasing an optional software upgrade from Audinate’s Dante Activator software — when running in 256x256 mode, the maximum sample rate is 96kHz. Connection to a host computer is handled via Thunderbolt 3, and a pair of rear-panel ports that each provide 15W of power make it possible to run the RedNet TNX alongside other Thunderbolt devices. Dante connectivity is taken care of by two Ethernet ports that can be configured to operate in switched or redundant modes; with the former, the TNX will act as a network switch, allowing it to be daisy-chained
with other Dante devices, while the latter can be used to create a redundant backup system. Drivers are available for both Mac and Windows systems, with all of the device’s routing and monitoring functionality handled by Focusrite’s RedNet Control software. £ £1899.99 including VAT. W www.focusrite.com
Neumann MT 48
While the MT 48 was originally designed to support RAVENNA and AES67 networked audio, Neumann say that their users requested a version that would be compatible with Dante. From the end of 2024 onwards, the MT 48 has been shipped with a Dante Ready sticker on its packaging. By default, it still comes loaded with the original firmware, but those who wish to add Dante connectivity can do so by installing a free firmware update from Neumann, and purchasing the appropriate licence from Audinate — there are 8x8- and 64x64-channel options available. With the appropriate firmware and licence installed, the MT 48’s Ethernet port can be used to connect the interface to a Dante network, expanding its built-in I/O with up to 64 channels of Dante inputs and outputs. Local connections include a pair of built-in mic/line inputs and four line-level outputs, along with ADAT I/O and a pair of quarter-inch TRS sockets that can function either as MIDI or GPIO ports. Connectivity to a host computer is provided by a USB-C socket. £ £1675 including VAT. W www.neumann.com
122
October 2025 / www.soundonsound.com
RME Digiface Dante
RME Digiface Dante
RME’s Digiface range includes five simple interfaces that cater to the most commonly used digital and AoIP formats. The Digiface Dante packs in 64 channels of Dante and 64 channels of MADI I/O, offering a massive 256 channels of audio over USB 3.0. Dante connectivity is provided by four gigabit Ethernet sockets (two Primary and two Secondary), while a pair of BNC connectors can be configured either as word‑clock or MADI I/O. As well as serving as inputs and outputs, the dual Primary and Secondary Dante ports allow the interface to function as a network switch, and also make it possible to set up a redundant secondary network for some peace of mind in mission-critical applications. Despite the focus on digital formats, the Digiface Dante is equipped with a quarter-inch TRS socket that can function either as a headphone output or a stereo line-level analogue output. Signal routing and mixing is carried out by RME’s renowned
TotalMix software, although the lack of DSP in the Digiface line-up means that the range of built-in effects and processors included in TotalMix FX are not available. In addition to its primary function as a USB audio interface, the Digiface Dante is capable of acting as a standalone 64-channel Dante/ MADI converter. £ £1174 including VAT. W www.rme-audio.de
Universal Audio Apollo x16D
Designed with both live sound and studio applications in mind, the Apollo x16D combines Universal Audio’s renowned
DSP-based UAD plug-ins with the flexible routing and redundancy options provided by AoIP networking. For live applications, the interface offers a convenient way to integrate UAD plug-ins into a live console running on a Dante network, while studio users benefit from the ability to easily set up a multi-room Apollo-based system over a standard network. The latest addition to the Apollo line-up complements the standard Apollo x16’s connectivity with 16 Dante inputs and outputs, and it’s possible to link up to four units for a maximum of 64 channels of Dante I/O at sample rates up to 96kHz. Monitoring options cover everything from stereo to a variety of immersive formats (Dolby Atmos, Auro-3D, Sony 360 Reality Audio) in layouts up to 9.1.6, with built-in room-correction facilities provided by Sonarworks integration. The Apollo x16D can be purchased in two versions: Essentials+ and Ultimate+, which come bundled with 33 and 124 UAD plug-ins/four LUNA Extensions respectively. £ Apollo x16D Essentials+
Neumann MT 48
£2797, Ultimate+ £3715. Prices include VAT. W www.uaudio.com
www.soundonsound.com / October 2025
123
TECHNIQUE
Studio One
The Chord Selector Wheel.
The Chord track continues to mature, and now lets you use Nashville Numbering. ROBIN VINCENT
W
e’ve followed the development of the Chord track over the years, and have got stuck into it a few times in these workshops. We marvelled at its introduction in version 4, revelled in its appearance in the Show Page in version 5, and admired the quality of the printout on lead sheets and guitar tablature in version 6. In version 7.22, the Chord system gets an additional approach, and I thought that would be a good opportunity to check in with how chords flow through Studio One. This new facet is called Nashville Numbering. There’s nothing new about Nashville Numbering; it’s a tried and tested way of representing chords that’s terribly useful for session musicians, cover bands and worship environments where keys can find themselves changed without a moment’s notice. It’s the idea that instead of naming chords in a song by a set key (using C, F and G and so on), you would use a numbering system where the key root major chord would be 1 and the rest would be numbered relative
126
October 2025 / www.soundonsound.com
to that. So, in our C, F and G example, they would be 1, 4 and 5. If you’ve had any musical training, those numbers would already be familiar, and you might have even come across them as roman numerals such as I, IV and V. The fabulous thing about this system is that if someone decides to change the key, you don’t have to print the whole sheet out again, or scribble new letters over your music. All that’s required is that you know a bit about how chords in different keys relate to each other. So if you’re playing in the key of C, then the number 5 chord could be G, but if you’re playing in E, then the 5 chord would be B. In G it would be D, and so on. So, regardless of whatever key you wish to play in, the Nashville Numbered chord sheet will remain the same. When using major chords, you can simply use the numbers 1 to 7 to represent all the notes in a major scale. Once your chords become more exotic, it can get a little bit more complicated. You can use sharp or flat symbols, which is easy enough, but getting into chord types you have a ‘-’ for minor, a little ⁷ for dominant
7th, a triangle for major 7th and a circle for diminished. Many of these are outside the realms of a standard alphanumeric keyboard, but what’s important is how Studio One presents and interprets the information.
Striking A Chord Let’s recap how and where the chord system gets its fingers into Studio One. At the top of the arrange page, along with things like the Marker, Video, Lyric and Arranger tracks, you will find the Chord track. Double-click (or Ctrl/Cmd‑click) in space and it will create a bar-sized, resizable box with the chord C written in it. Double-click the box, and the Chord Selector Wheel will pop up, giving you access to every chord you ever thought of. You can select chords by name, type or interval, or you can click in the keyboard to find the name of any combination of notes you wish to represent. It’s a handy and educational tool. However, all this adding chords by hand seems a little long-winded considering that the necessary musical information is probably already in the
from the browser, and Studio One will lay out all the chords for you without your having to create a single track. In all instances, the chord detection is pretty good. You might need to do a bit more editing and adjustment when extracting from an audio track, but that does depend on the source material. Once your Chord track is fully populated, it has a few tricks up its sleeve. The first one will bring up a large display of the current and next chord. So, if you were recording a new guitar track, you could easily follow the chords of the song on screen. To pull up the Chord Display, click on the little note symbol on the Chord track header. There are three views you can look at. The Chord Track view gives you the current chord and next chord so you can play along with your song. The Input Chord view will show you the name of whatever chord you are playing on a connected MIDI keyboard. The Editor view will show you chords that are currently selected in the note editor. The next trick is that you can pull the chords from the Chord track into an instrument track, and it will create an event containing the MIDI notes of each chord. It’s just simple triads that last for the length of the chord box, but it could be a great way to turn a guitar track into a different instrument. You are of course free to edit the chord notes, but this will not be reflected in the Chord track unless you pull the edited
event back over the original chord box. This interplay gives you a lot of versatility as you shift chords from Chord track to Instrument track and back again.
Following Suit You can take this a step further by imposing the Chord track onto tracks that already exist. The brilliant thing about this is that you can experiment with different chord progressions and harmonic structures without having to re‑record all your instrument and audio parts. The Chord track becomes a bit of a harmonic playground. To make this happen, you need to enable the Follow Chords function for both the Chord track (press the big Follow button) and the tracks that are going to be following it. You’ll find this as an option in the Inspector for the track. Halfway down there’s a drop-down menu for Follow Chords. Initially this is set to Off, but there are three other options. In Parallel mode, the notes align with the root note of the target chord and existing note relationships are maintained. In Narrow mode, all the notes shift to the nearest note in the target chord. And Bass mode is the same as Parallel, but where the bass or root note shifts to the nearest note of the target chord. Remarkably, Studio One can also do this for audio tracks. Now, polyphonic pitch‑shifting is not always fabulous and can produce a lot of artefacts. In the manual, PreSonus suggest that this
“With Nashville Numbering, the key becomes very important, as that denotes the chords that the numbers refer to.”
tracks of your project. Well, Studio One has considered this and gives you the convenient opportunity to extract chords from either MIDI or audio tracks to populate the Chord track automatically. For a MIDI instrument track, you’ll find the Extract to Chord Track option under the right-click Instrument Parts menu. For an audio track, you’ll find it under the right-click Audio menu. You can also pull a MIDI file into the Chord track directly
The Chord track can now show your chords in the Nashville Numbering style in the Chord Display.
www.soundonsound.com / October 2025
127
Pro Tools
TECHNIQUE
Pro Tools offers a number of ways to implement side‑chaining in your mixes. JULIAN RODGERS
I
n audio production circles, ‘side‑chaining’ is one of those terms which is often used in a rather narrow and not entirely accurate way. You’ve probably encountered the term as shorthand for one particular use: compressing a source using an external signal as a trigger, to create a ‘ducking’ or ‘pumping’ effect. While valid and very effective, that technique represents only one of the ways side‑chains are used. For simplicity I’ll refer to compression, but these principles apply to any dynamic process: compression, gating, expansion or limiting. In Pro Tools, as in other DAWs, dynamics processors rely on side‑chains. Whether you’re using Smack or Pro Compressor, you’re working with a detector circuit that operates with reference to a side‑chain. The better you understand that, the more control you’ll have.
What Is A Side‑chain? All conventional dynamics plug-ins control the level of audio passing through them by monitoring the level of a control signal and comparing it to a reference level: the level at which an action should begin. This reference level is called the threshold, and what happens in response to the control signal (the side‑chain signal) crossing the reference level (the threshold) depends on the type of process (compression, expansion and so on), and the settings of the other controls (principally ratio, attack and release times). The side‑chain is the path carrying the control signal that feeds the detector in a dynamics processor. It’s what the plug‑in is “listening to” in order to decide when to apply gain reduction, and how much. By default, the side-chain signal is derived from the input signal to which compression is being applied. This is known as an internal side‑chain. All compressors, even simple ones like Dyn3 Compressor/Limiter, have a side‑chain path. What varies is how accessible and adjustable that side‑chain path is. Some plug‑ins, like the 1176‑style BF76, have unconventional control sets
130
October 2025 / www.soundonsound.com
Screen 1: A common production technique is to high‑pass filter a compressor’s internal side-chain, so that kicks and basses don’t trigger excessive compression. Some compressor plug‑ins have these filters built in, but if not, you can set up your own filtering in the Pro Tools mixer.
with no threshold control or access to the side‑chain path for filtering, but the side‑chain path is still there. More advanced Pro Tools plug‑ins like Channel Strip and Pro Compressor expose additional controls for shaping the side‑chain signal, allowing you to fine-tune how the detector responds.
Internal Vs External Some compressor plug‑ins allow you to override the default internal side-chain routing by offering an external ‘key’ input. This allows you to employ a completely different audio signal as the side‑chain source. One application for this is to set up a compressor to ‘duck’ audio out of the way of another signal. For example, if you use the bass drum signal as the side-chain source for compressor on a pad sound, you can get the pad to ‘pump’ in time with the beat. To use an external side‑chain signal in Pro Tools, you assign a bus to the Key Input selector in the plug‑in’s header section. You can feed that bus using a send, or you can hold Control (Mac) or Start (Windows) while clicking an output assignment to route a track’s output to more than one place. Pro Tools indicates this multiple routing with a ‘+’ next to the output. This is neat, but gives less control as the fader controls both paths, so the
same level is going to the mixer and also to the compressor’s side-chain input. While useful, external side‑chaining is the exception rather than the rule. Most compression tasks rely on internal side‑chains. The real power often lies not in choosing a different signal entirely, but in shaping the internal side-chain in various ways.
Filtering Much more common than using an external side-chain is applying a filter to the internal side‑chain. High-pass filters are most commonly used, and for good reason: low-frequency elements such as kick drums and basses often dominate the action of compressors, triggering excessive and distracting gain reduction. For example, if you’re compressing the mix bus and every kick drum causes an audible dip in volume, a high-pass filter on the side‑chain can moderate that trigger. This lets you focus the compression to react more to the snare or midrange energy, giving a more musical rhythmic response as the movement created by the compressor is focused away from the bass energy. In Channel Strip, Pro Tools users have access to various filter types including high-pass, low-pass, band-pass and notch. These can be used to isolate or suppress
specific frequency bands in the detector path. This is how some de-essers work, by making the side‑chain sensitive to energy around 6kHz so that the compressor cuts only when there is loud sibilance. Pro Compressor takes this further, with more precise control of the filters. Both offer a key listen button, indicated by a small speaker icon in the side‑chain section, allowing you to audition the side‑chain signal directly — hugely helpful for tuning by ear. Even the older Dyn3 plug‑in includes basic high- and low-pass filters, making it more capable than it might first appear. On the other hand, plug‑ins like Smack, which emulates vintage hardware with simpler controls, offers three preset side‑chain filtering options. It’s better suited to coloration than surgical level control. Try using Smack more as a saturation plug‑in than for level control. It’s very good at that. If you are using a compressor without filters in the side‑chain, you can get the same result with a bit of manual routing. Staying with Pro Tools’ stock plug‑ins, Impact is a very respectable SSL‑style compressor and doesn’t have a filter in the side-chain (the original hardware SSL one didn’t either). But all you need to do to achieve a filtered side‑chain is set up a signal path that gives you somewhere to insert an EQ. In Screen 1, I’m routing my mix through an aux input (Mix) and then on to a master fader. I’m then sending the Mix to another aux (Impact SC) where I have a high‑pass filter inserted, and have routed that aux on to the Ext Key input in Impact, thereby feeding a filtered version of the
mix to the detector to exclude the bass energy from the compressor action.
Channel Linking Most Pro Tools users work in stereo, and most stock Avid compressors treat stereo signals in a particular way: the External Key input is mono, while the internal side‑chain signal is stereo. But the detector is linked between channels, and responds to the loudest signal present in either the left or right channel. This preserves the stereo image by ensuring both channels are compressed equally. Otherwise, the stereo image would shift when more compression is applied on one side than the other. This approach mirrors how VCA meters behave in Pro Tools: unlike aux or master fader meters that show the summed level of a group, VCA meters show the peak level of the loudest contributing track. The detectors in Dyn3, Channel Strip and Pro Compressor all work the same way; they react to the highest input level across the stereo field. Whether of not you want this linked behaviour is a creative choice, and many third-party plug-ins such as FabFilter’s Pro-C 2 offer variable channel linking, allowing users to partially or fully unlink stereo channels. This isn’t currently available in Avid’s own plug‑ins, but there is a workaround. If you want to try unlinked compression, instantiate a multi-mono plug‑in instead of a multi‑channel version. If you use the Unlink button in the plug‑in header, the two channels will operate independently.
Screen 2: Most of Pro Tools’ bundled compressors will only work in linked mode on stereo tracks. If you want to unlink the left and right channel side‑chains, you need to use a multi‑mono instance.
If you maintain identical settings on both channels, you’ll essentially have unlinked stereo (dual mono) compression. To see the different gain reduction amounts on each channel, Option/Alt‑click on the channel selector in the plug‑in header to view both channels in separate windows.
ARA Compression? Traditional compression using AAX plug‑ins like Dyn3, Channel Strip and Pro Compressor happens in real time, following the principles established in analogue hardware. But Pro Tools has recently opened up new possibilities through ARA integration. Plug‑ins like NoiseWorks DynAssist or Wavelab Go offer analysis-based level control. Rather than reacting to peaks as they happen, these tools can access the entire audio clip and apply processing accordingly. This allows for highly transparent loudness normalisation or intelligent dynamics shaping. Ideal for mastering or loudness compliance. With these tools taking care of level management, compressors are freed up for what they do best: adding energy, movement, and tone. In Pro Tools, plug‑ins like Pro Compressor and Channel Strip give users the power to shape the internal side‑chain. Whether you’re aiming for mix bus glue, vocal consistency, or drum punch, understanding the role of the detector is key. Compression is ultimately about timing, emphasis and context. And all of that begins with what the compressor hears, which is the side‑chain.
www.soundonsound.com / October 2025
131
Q
What batteries should I put in my CAD Equitek E-200 mic?
I have a CAD Equitek mic that I bought second hand a while back, and I love it. It’s the multi-pattern E-200 one, and I’ve been using it happily for several years. Recently it stopped working properly, becoming increasingly distorted shortly after powering on. Since it uses phantom power, I hadn’t realised until I downloaded the manual that it also needs internal batteries to work properly! It’s an old mic, and the manual says I should put rechargeable NiCad batteries in there. But these were banned here in the UK several years ago [indeed, they’re now heavily restricted in many territories — Ed.], and I can’t find them anywhere! What should I put in the mic? Is it a write off, or is it safe to use a different type of battery? James Thompson via email Matt Houghton, Reviews Editor The short answer is that you can safely put rechargeable NiMH batteries in your mic. It will work just fine. But there’s a slightly longer explanation that might give you reassurance and stop some head‑scratching by other E-200 owners! Like you, I have an Equitek E-200 that I bought used. I can definitely appreciate why this mic appeals to you, and certainly wouldn’t want to write it off! In the cardioid mode, as well as conveying the usual detail you get from a capacitor mic, I find that this one exhibits a really smooth and classy character that makes it great for my own vocals. It’s something that I’ve always put down to the fact that there’s not the significant top-end lift you find on some vocal mics, and a dip in the response, centred around 6-7 kHz, seems to tame harshness. That, in turn, tends to make dynamics processing more forgiving, and I find this mic can be really handy if I want to track vocals through a hardware compressor. It might not be the perfect match for every voice, but for some it sounds great. Anyway, back to the question. Earlier this year, my mic also started to exhibit the sort of problems you describe, and
I tracked this down to failing batteries. The date printed on those batteries indicated that they’d been in my mic since at least the early ’00s — over two decades! — and this makes me think that quite a few unsuspecting ‘second owners’ could be running into this issue around now, if they haven’t already. As you’ve probably already gleaned, the mic employs a pair of rechargeable 9V batteries to supplement the phantom power supply, a sophisticated arrangement that makes more current available for its internal amplifiers. When not in use, the mic has internal circuitry, powered by phantom power, to trickle-charge those batteries. The manual specifies NiCad (nickel-cadmium) batteries and, like you, I discovered that these are simply not available to buy today, due to 2016 legislation restricting the use of cadmium in the EU and UK. A little digging revealed that the more modern NiMH, or nickel-metal hydride, batteries are available in the same physical form factor, and that these can often be simple drop-in replacements for NiCad ones. But I also learned that while you can keep trickle-charging NiCad batteries when they’re fully charged, that’s usually not the case for NiMH ones. They are more ‘fussy’ about the charging circuitry and can, if overcharged, overheat. Not knowing the details of the mic’s charging circuitry, and fearing the worst, I emailed CAD’s customer support for advice. They confirmed (almost instantly — great support for a nearly 30-year-old product!) that the Equitek E-200’s trickle-charging circuitry is compatible with rechargeable NiMH batteries, and that these are, in fact, preferred to NiCad ones. So I bought and charged a couple, and popped them inside. And my mic has performed just as well as it always did ever since.
“I can definitely appreciate why this mic appeals to you, and certainly wouldn’t want to write it off!”
136
October 2025 / www.soundonsound.com
The Equitek E-200 capacitor mic uses (and charges) two rechargeable 9V batteries as a power reservoir that makes more current available for its built-in amps than is available over standard 48V phantom power. It’s an old mic and though NiCad batteries were originally specified, NiMH types will work just fine.
NEXT MONTH IN
40th ANNIVERSARY SPECIAL ISSUE Join us as we celebrate 40 years as the world’s best music technology magazine!
November issue on sale Thursday 23rd October. Available at TG Jones, WH Smith Travel and all good newsagents.
Subscribe at www.soundonsound.com/subscribe
Digital version (no WH Smith reference)
The Advertisers Index
To Advertise in Sound On Sound please contact: chris.cope@soundonsound.com
NEXT MONTH IN
ADAM Audio UK
www.adam-audio.com
17
LEWITT Audio
www.lewitt-audio.com
35
Aim Audio
www.aimaudio.com
23
Moog Music
www.moogmusic.com
49
AMS Neve
✆ 01282 457011
77
Neumann
www.neumann.com
21
API Audio
www.apiaudio.com
19
PSPaudioware
www.pspaudioware.com
37
Audient
✆ 01256 381944
5
Rupert Neve Designs
www.rupertneve.com
79
Black Lion Audio (RAD Distribution)
www.blacklionaudio.com
95
sE Electronics
www.seelectronics.com
39
CB Electronics
www.cbelectronics.co.uk
89
Sensoria
www.sensoria.org.uk
115
DPA Microphones
www.dpamicrophones.com
65
Slate Digital
www.slatedigital.com
43
Fabfilter Software Instruments
www.fabfilter.com
63
Sound Service UK
www.soundservice.uk
13
Genelec
www.genelec.com
71
Soundtoys
www.soundtoys.com
111
GIK Acoustics Europe
www.gikacoustics.com
11
Source Distribution
✆ 020 8962 5080
3
Groove Synthesis
www.groovesynthesis.com
OBC
Spitfire Audio
www.spitfireaudio.com
85
Harrison Audio
www.harrisonaudio.com
57
Synthax Audio UK
www.synthax.co.uk
15
HEDD Audio
www.hedd.audio
73
Toontrack
www.toontrack.com
IBC
Heritage Audio
www.heritageaudio.com
101
Ueberschall
www.ueberschall.com
25
Hifiman
www.hifiman.com
61
Universal Audio
www.uaudio.com
51
✆ 020 8544 9200
91
Warm Audio
www.warmaudio.com
IFC
40th ANNIVERSARY SPECIAL ISSUE Join us as we celebrate 40 years as the world’s best music technology magazine!
Kenton Electronics
w w w . s o u n d o n s o u n d . c o m / November 2016
www.soundonsound.com
137
WORKING IN THE BOX AT H E E N S P E N C E R
T
here was a time when performing at a gig meant 10 trips to a Transit van, carrying kit that was primarily constructed from wood, metal and carpet. As for recording, that didn’t become mobile until the introduction of the Portastudio, where we suddenly started to get a taste of the locational freedom that was to come. However it wasn’t until an early encounter with an Atari Falcon that things really began to change for me, as the idea of being able to operate purely in the digital realm started to become a reality. By the early 2000s I had switched my MDF2, weighted controller, synth, double
X-stand, 10U wheeled rack unit, desk, eight PAR cans (with stands), Hysis tops and 18‑inch bass bins for a Toshiba laptop, a small keyboard and portable wheeled PA — not because it was necessarily better, but because this five‑foot‑two female was physically breaking from carrying too much kit and not having a roadie! I could also now own a nice, feminine car instead of a bright yellow ex-British Rail DAF van (although I do still miss blasting down the M1 in that van, affectionately known as Big Bird). Having always been a fan of minimalism in my home, and with the live rig shrinking, my studio started to go the same way. At first I adopted Cakewalk and could record
a small number of audio tracks into my computer. Later I switched to laptops and Logic. Fast forward to today and not only do I have total locational independence but I also have a Rhodes, Moog, Sequential, Oberheim and symphonic orchestra tucked into the laptop bag on my shoulder. In recent years, plug‑ins have become cone-rippingly good, and with a top pair of studio headphones and a small controller I can work from absolutely anywhere. If I need to upload the end result to share with session musicians or remixers then I just plug in my phone and use the hotspot setting, or find a coffee shop with speedy WiFi and a good selection of biscuits.
“Removing options definitely speeds up the workflow, and if you’re not feeling inspired on any particular day, you can easily take your studio to the beach.” 138
October 2025 / www.soundonsound.com
When it comes to performing smaller local gigs, I can hop onto public transport with a five‑octave keyboard that weighs less than 6kg, a lightweight column keyboard stand and a Bose S1 Pro, with all of the sounds coming from either standalone versions of my favourite plug‑ins, or from presets set up in Ableton or MainStage. If needed I can also drop an interface into my bag (often the AG06) for submixing into a bigger PA system at the venue. Removing options definitely speeds up the workflow, and if you’re not feeling inspired on any particular day, you can easily take your studio to the beach. While it’s true that you can miss the tactile joy of real knobs and faders, I just love the flexibility that working in the box offers, and besides, it’s easy to take a portable studio into a professional studio, so I still get to play with plenty of fun toys.
We are proud to unveil the next milestone title in our collection of SDX expansions for Superior Drummer 3, the Real to Reel SDX by multi-awardwinning producer/mixer/engineer Kevin Killen (U2, Peter Gabriel, Elvis Costello). Have a look and a listen on our site today.
MORE FROM OUR SDX ARCHIVES.
WWW.TOONTRACK.COM