SOUND ON SOUND THE WORLD’S BEST RECORDING TECHNOLOGY MAGAZINE
THE WORLD’S BEST RECORDING TECHNOLOGY MAGAZINE TM
MUSIC PRODUCTION TECHNIQUES / INDEPENDENT IN-DEPTH PRODUCT TESTS / ENGINEER & PRODUCER INTERVIEWS / LIVE SOUND
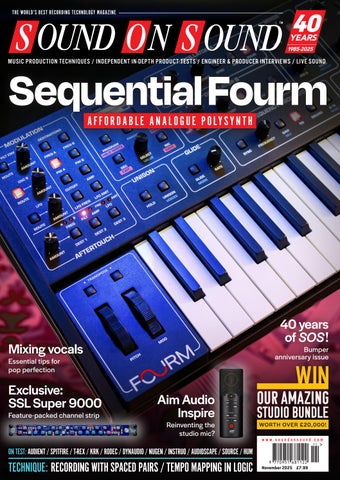
Sequential Fourm A F F O R D A B L E A N A L O G U E P O LY S Y N T H
NOVEMBER 2025
www.soundonsound.com
40 years of SOS!
Mixing vocals
Bumper anniversary issue
Essential tips for pop perfection
Exclusive: SSL Super 9000 Feature-packed channel strip
Aim Audio Inspire
VOLUME 41 • ISSUE 1
Reinventing the studio mic?
OUR AMAZING STUDIO BUNDLE WORTH OVER £20,000! www.soundonsound.com
ON TEST: AUDIENT / SPITFIRE / T-REX / KRK / RODEC / DYNAUDIO / NUGEN / INSTRUO / AUDIOSCAPE / SOURCE / HUM
TECHNIQUE: RECORDING WITH SPACED PAIRS / TEMPO MAPPING IN LOGIC
November 2025 £7.99
ALL SYSTEMS GO
BATTERY-POWERED PORTABLE PA SYSTEM
This bundle is a complete Mackie battery-powered portable PA system, including two Thump GO loudspeakers, two ThumpSub GO subwoofers, ProFX10 GO mixer and rechargeable batteries. FEATURES:
• Complete battery-powered portable PA system • 2 Thump GO battery-powered loudspeakers • 2 ThumpSub GO battery-powered subwoofers
• ProFX10 GO battery-powered mixer • 2 SPM400 speaker poles • Rechargeable batteries included • Optional spare batteries sold separately • Custom bags sold separately
LEARN MORE: PRODUCT PAGE SCAN HERE
Exclusively distributed in the UK and Ireland by Source • T: 020 8962 5080 • W: sourcedistribution.co.uk/mackie
LE ADER
LIFE BEGINS AT 40 T
hat always used to sound like a coping mechanism, but the world has changed. Pop and rock music is no longer exclusively youth-focused. In 2025, the average Sound On Sound reader is as likely to be figuring out how to spend their retirement as they are to be entering college. The economics of the music industry are very different now to how they were in 1985, especially at the high end. Today, it’s not only commercial studios who are buying analogue synths and boutique compressors. It’s people who have done well for themselves and want to take their passion for music seriously. That is a market that manufacturers and magazines alike ignore at their peril. Meanwhile, young musicians face issues that weren’t around when this magazine started. Live venues are closing down, and high ticket prices are freezing out younger audiences. AI music is a growing threat, while streaming services make the major labels of old look like charities. It’s harder than ever for young musicians to make a living. But if music becomes purely a pastime for the middle-aged, it will eventually die. That’s why I resist the idea that SOS should be the synth equivalent of Classic Rock magazine. We have to be here for those creating for the future, as well as those who love
ALLIA BUSINESS CENTRE KING’S HEDGES ROAD CAMBRIDGE CB4 2HY T +44 (0)1223 851658 sos@soundonsound.com www.soundonsound.com
the music of the past. We must cater to everyone who’s serious about recording and electronic music now, be they a hedge fund manager living the dream or a teenager who dreams of scoring the next Bond movie. To my mind, reading SOS should be like hiring a producer with a 40-year track record. Producers aren’t employed to make the same record over and over again. Their function is to draw on what they’ve learned in the past to make each new project as good as it can be. Theirs is the voice of experience, not the voice of nostalgia. It’s a voice that informs, encourages, enlightens, entertains and, where necessary, challenges. And that’s how I see Sound On Sound. Since 1985, we’ve witnessed great upheaval in music, publishing and society as a whole. The SOS team has lived through and learned from all of these changes. The magazine you read today distils 40 years’ collective wisdom from countless talented people. But it’s always directed at helping you take your next step forward, whether that means choosing a new piece of kit or learning a new technique. No matter if your studio is in a wing of your mansion or a corner of your bedroom, Sound On Sound will always be by your side — and on your side. Here’s to the next 40 years. And life.
ADV ER T ISIN G
admin@soundonsound.com
sos.feedback@soundonsound.com
adsales@soundonsound.com
Managing Director/Chairman Ian Gilby
Editorial Director Dave Lockwood
UK Media Sales Manager Chris Cope
Editorial Director Dave Lockwood
Executive Editor Paul White
Marketing Director Paul Gilby
Editor In Chief Sam Inglis
Finance Manager Keith Werthmann
Technical Editor Hugh Robjohns Reviews Editor David Glasper Reviews Editor Matt Houghton
P R ODUC T I ON
Production Editor Chris Korff
graphics@soundonsound.com
News Editor Luke Wood
Nick Humbert
Printing Warners Midlands plc Newstrade Distribution Warners Group Distribution Ltd, The Maltings, Manor Lane, Bourne, Lincolnshire PE10 9PH, UK.
support@soundonsound.com
ISSN 0951‑6816
Digital Media Director Paul Gilby
A Member of the SOS Publications Group
www.soundonsound.com/subscribe Circulation Manager Luci Harper
November 2025 / www.soundonsound.com
International Business Development
Designer Andy Baldwin
subscribe@soundonsound.com
4
marketing@soundonsound.com
O N LIN E
S UB S CR I P T I ON S
NORTH AMERICA
M AR K E T IN G
Designer Mick Reilly
Design Andy Baldwin
UK/WORLD
“No matter if your studio is in a wing of your mansion or a corner of your bedroom, Sound On Sound will always be by your side — and on your side.”
EDI T O R I AL
Production Manager Michael Groves
WOR LDW I D E E D I T I O NS
Editor In Chief
A DM I N I S T R AT I O N
Reviews Editor Chris Korff
WWW.SOUNDONSOUND.COM/SUBSCRIBE
Sam Inglis
Administrator Nathalie Balzano
Web Content Editor Callum Hall Web Editor Adam Bull Digital Media Manager Atheen Spencer www.soundonsound.com twitter.com/soundonsoundmag facebook.com/soundonsoundmag instagram.com/soundonsoundmag
The contents of this publication are subject to worldwide copyright protection and reproduction in whole or part, whether mechanical or electronic, is expressly forbidden without the prior written consent of the Publisher. Great care is taken to ensure accuracy in the preparation of this publication but neither Sound On Sound Limited nor the Editor can be held responsible for its contents. The views expressed are those of the contributors and not necessarily those of the Publisher or Editor. The Publisher accepts no responsibility for the return of unsolicited manuscripts, photographs, or artwork. © Copyright 2025 Sound On Sound Limited. Incorporating Music Software magazine, Recording Musician magazine, Sound On Stage magazine, SPL magazine, Sound Pro magazine and Performing Musician magazine. All rights reserved. All prices include VAT unless otherwise stated. SOS recognises all trademarks.
Official Nord UK & Ireland representative: headlineaudio.com/nord-keyboards support@headlineaudio.com
76 INSIDE TRACK
IN THIS ISSUE November 2025 / issue 1 / volume 41
FEATURES 8 SOS For Artists Remember the nu‑disco tune we wrote last month, using the loops and instruments in SOS For Artists? Now it’s time to flesh it out, mix it and master it...
www.soundonsound.com
WIN
COMPLETE STUDIO BUNDLE WORTH OVER £20,000!
50 How I Got That Sound Engineer and record producer Kyle Lehning recalls why England Dan & John Ford Coley’s ‘Love Is The Answer’ always makes him smile when he hears it.
54 Modular We take a dip into the many possibilities offered by simultaneous modulation.
64 Mixing Pop Vocals There’s more to crafting perfect pop vocals than slapping on a bit of compression and Auto-Tune!
76 Inside Track: Greg Kurstin For their first major‑label release, Wolf Alice hired super-producer Greg Kurstin to channel their inspiration.
90 Stereo Miking: Spaced Arrays Building on the concepts explored in previous parts of this series, it’s time to weigh up some of the pros and cons of coincident and spaced arrays.
100 Talkback Estudio Novena founder Felipe Castro talks about his obsession with control rooms and the vintage gear and techniques that inspire his work.
6
November 2025 / www.soundonsound.com
PAGE 86 128 Spotlight: Broadband Absorbers Gear will only perform as well as its surroundings allow, so to get the best from your setup it’s worth paying attention to the room itself.
146 Why I Love... Sound On Sound SOS founder Ian Gilby on why the magazine he started 40 years ago means so much to him.
40 RODEC MX MODULAR
BONUS CONTENT
40 Ideas That Changed Music: Part 1
ON TEST
114 HUM Audio Devices N-STRIP
54 ADDAC System ADDAC816
72
Channel Strip
Instruo Seashell
Our four-part series charts the most important technical breakthroughs in music history
82 Source Audio Encounter Reverb & Delay Pedal
Desktop Synthesizer
Percussion VCA
26 KRK Kreate 5
Eurorack Module
18
Spitfire Audio Château Piano
36 Aim Audio Inspire & Essence
Active Monitors
Sample Library
Capacitor Microphones
106 Neural DSP Mantra
56 SSL Super 9000
Lounge Lizard EP-5
68 Nugen Audio DialogCheck
Virtual Instrument
53 Ohmforce Bohm System
Speaker Calibration Processor
Eurorack Module
120 Audiomodern Soundbox
Endeavours Bathing Delay Pedal
96 AudioScape ASA-6A Variable‑mu Compressor
40 Rodec MX Modular
124 Audix PDX520
Analogue Mixing Console
Dynamic Microphone
52 Schlappi Engineering
Boundary Layer
Sample Library
Eurorack Module
Pitch-shift & Filter Pedal
C O V E R
127 Circle Cynths OBSO
22 Electro-Harmonix POG3
Vintage Drums Sample Library
102 Supercritical Synthesizers
Redshift 6
124 Old Blood Noise
Virtual Instrument Platform
Monitors
127 Steinberg Simon Phillips
Metering Plug-in
110 Audient ORIA Mini
60 Dynaudio Acoustics M2 MkII
Channel Strip
Vocal Processing Plug-in
126 Applied Acoustic Systems
28 Sequential Fourm
Polyphonic Synthesizer
126 Soniccouture Polarity Tension Sample Library
Synthesizer
12
Toontrack Real To Reel SDX Superior Drummer Expansion
14
T-Rex TwinBlaze Valve Distortion Pedal
WORKSHOPS 132 Studio One 136 Live 138 Pro Tools 140 Cubase 142 Logic www.soundonsound.com / November 2025
7
TECHNIQUE
Remember the nu‑disco tune we wrote last month, using the loops and instruments in SOS For Artists? Now it’s time to flesh it out, mix it and master it... THE SOS TEAM
L
ast month, we used SOS For Artists (SOSFA) tools to write a track in the nu‑disco style, with some smatterings of acid jazz thrown in. Now, it’s time to finish it, by building on the beat, and mixing and mastering the track. If you’re starting out and haven’t yet chosen your DAW, SOSFA includes versions of both Steinberg Cubase and Ableton Live DAWs, and these are more than up to the job of mixing a track like this. But most existing SOS readers will already have a preferred DAW, and we chose to mix this track in Apple Logic Pro. Below, we’ll tell you how we did that, using a combination of Logic’s stock plug-ins — of the sort you’ll find in any DAW — and some of the tasty third-party plug-ins included in the SOSFA subscription.
The Groove In part 1, we pulled a few loops and one-shots from the sample library, and quickly dropped them onto the DAW timeline so we could stay in a creative frame of mind and get the track written quickly. But the beat still needed a lot of work — it wasn’t quite locking in with the bassline. And because the four-on-the-floor pulse is one of the main
8
November 2025 / www.soundonsound.com
driving factors of nu‑disco, it seemed logical to start addressing this by focusing on the kick drum. Since the two kick sounds that we’d selected previously worked well together, we routed them to their own subgroup, where we could shape the composite sound with Logic’s stock EQ. One sample focused on the sub frequencies, while the other offered more by way of low mids — a combination that should help to ensure the driving beat remains audible, even on the worst and smallest of speakers. A compressor was also inserted on the bus, with a fairly fast attack but just enough gain reduction (a few dB) to ‘glue’ the sounds together. And we looked to Logic’s Direction Mixer to keep everything centred too. Technically speaking, bass doesn’t have to be mono or centred, but treating it like that ensures its energy is distributed equally across the speakers (something that allows you to get more level in your mix, and ensures a consistent bass level in multi-speaker environments such as clubs). Again, the other drum sounds were already working pretty well, but the samples didn’t gel perfectly and we could hear some beats ‘flapping around’. To tighten things up, we used Logic’s quantise tools; you’ll find similar tools in
An overview of the whole project, showing how much layering of samples and instruments was used to flesh out the original track.
pretty much every DAW. A few clashing frequencies were tackled using EQ, notably by removing of a lot of sources’ lower frequencies, to ensure that the kicks and bass had plenty of room in which to do their thing without affecting the rest of the mix balance. That tactic might not work for every genre, but for this one, it’s just the ticket! The snare and claps were kept fairly central, but we applied some light stereo spread to the hats and loops, just to make the mix feel a bit more ‘open’. And we looked to Audified’s U78 plug-in to add a touch of saturation to one of the percussion ‘toppers’, just to give it a little extra edge. There’s a percussion loop that appears near the end of the mix, and because all the parts are playing together by that stage of the track, there’s not much space to work with. As well as compressing this part a bit, to help it sit it in the mix, we used low-frequency EQ cuts to address clashes with the kick and bass. To give the rhythm a bit more impact and avoid it getting too repetitive, we took a splash and a crash cymbal from the SOSFA library, and dropped them onto the track at certain points. These were kept relatively low in level, and we tamed some harshness with EQ (mainly parametric bell cuts) and compression, until we were happy they did the job.
All those tracks were brought down to a handful of groups when mixing, so composite layered sounds could be treated as one.
Finally, the kick part seemed to drop out in certain places so, since everything in this track was tightly aligned to the grid, we created a second kick track that wasn’t routed to the master bus, but had a consistent level, so it could be used as a side-chain source to duck the bass at the start of every beat, just to ensure the sound remained consistent. While we’re on the subject of the bass sound, you might recall that we used the Gforce Axxess plug-in to deliver the sub frequencies, and AAS Ultra Analog to give us more energy in the mids, to make sure that the bass line would deliver the goods at the bottom end but also higher up when the mix got more crowded, and when listening on smaller speakers. Once again, we panned this right in the centre, before balancing it by ear against the kick, looking to make it really drive the groove. Compression and EQ were used to shape each sound a touch, and some broader bass-bus compression, triggered from the side-chain kick, not only kept the part from masking the kick but also brought a bit of cohesion to the sound.
from Arturia’s REV Plate-140. We set that up on its own track as a send effect. The string part worked well musically and the sound was decent in isolation too, but it wasn’t cutting through the mix quite enough. To address that, you might look to EQ or processing, but it’s often more effective to consider the instrumentation first. In this case, we doubled the staccato line, to give us both a centralised dry version and a wet version, and widened the latter slightly for more stereo. To help sustain the listener’s attention, we introduced a touch of echo from IK Multimedia’s MixBox in the mid-section, and repeated this trick in the outro. All of which was great, but the part still wasn’t quite cutting through enough so, finally, we duplicated the MIDI part again, this time to trigger an AAS Lounge Lizard electric piano (EP)
patch. This brought a little extra attack, punch and presence to proceedings, which did the trick. Originally, we’d written the main keyboard part using Lounge Lizard too. But, early in the writing process, we duplicated this with Spitfire Originals Intimate Grand Piano, to fill out the sound. We panned the EP slightly left, and the piano slightly right, and used light, fast-attack compression and some parametric EQ cut to clean up some mud in the mid frequencies, before dialling in a touch of tremolo in Lounge Lizard, for a nice retro vibe. To add more presence, we again switched off the internal reverbs of both the piano and the EP, and used the REV Plate-140 send we’d set up earlier to put the parts in the same ‘space’. We turned off the Noise setting in Lounge Lizard too, and added a little extra bite by tweaking the Fork settings, to balance this part better against the attack of the piano. We recorded the incidental piano and electric piano parts onto their own tracks, and added a touch of delay to the EP in place of the tremolo, to lend it a more spacious feel. Since the guitar part had been generated by AAS Strum Session (rather than recording a guitar ourselves), we didn’t want to lean on it too hard, so only used it in a couple of sections. But even this really enhances the groove. Initially, it sounded a little too ‘clinical’ for this track, but some processing soon solved that: subtle treatment with AudioThing’s Valves plug-in, followed by more audible distortion from MixBox, gave it a more suitable character, after which we turned to a graphic EQ (again in the MixBox rack) to quickly pull down some frequencies that had started protruding that bit too much.
Other Instruments The Sonuscore Elements string parts carried the main part of the melody, so we decided to place these centrally too, but these sat much higher up in terms of frequencies, where there was more space. They were kept firmly in that place by rolling off some lower frequencies that didn’t seem important to the overall mix. Sonuscore’s built-in reverb is decent, but it didn’t deliver quite what we wanted here, so we disabled it and reached for a more subtle and elegant plate reverb,
The processing used to adapt our clean-and-clinical virtual guitar part, to better suit the vibe of the track.
www.soundonsound.com / November 2025
9
TECHNIQUE
C R E ATING & R E LE A SING A N U ‑ DIS CO T R ACK : PA RT 2
Before using the LANDR Mastering Pro plug-in, we processed the mix with Baby Audio TAIP — nudging things in the right direction can help you to achieve better results with the LANDR plug-in.
For the outro, we duplicated the AAS Ultra Analog synth part, hard-panning each version so they sat opposite each other. Using slightly different sounds on each track helped to prevent phasing issues and tonal changes on mono playback systems, but we were also careful to match the ADSR settings — this ensures that the parts remain consistently balanced across the stereo field. For similar reasons, we panned the short riff in the mid section to the left: this helped to balance the guitar part playing on the right. Before we finally turned our attention to level automation, we added in some fills and drops. The two risers needed minimal processing, with just slight EQ being applied to pull down unneeded high and low frequencies. We sent the white‑noise sound to the plate reverb and stereo spread plug-ins, while we kept the bass riser fairly central. To stop things from becoming overly repetitive — always a risk when working with lots of loops — as well as to enhance the impact of each main drop, we also edited out some of the drum elements that preceded them. And with all the elements positioned, shaped and coming in and out of focus as we wanted, it was time to bounce things down...
WAV files aren’t good for carrying metadata, it’s generally best to export as AIFF or Broadcast WAV (we used AIFF). 16-bit, 44.1kHz files might have been the norm for CD but that’s arguably an obsolete format, and since we intend this track and its stems to be uploaded to sync platforms, it made sense to use the 24-bit, 48kHz standard of the film and TV industry (even if the mix doesn’t use all those bits!). When you’re bouncing your mix, if you haven’t done so already, it’s often also a good time to bounce in place your source tracks for archival
purposes. The idea is to future-proof your project: otherwise, if you ever need to revisit the track in the future for remixes, alt mixes or additional stems, you risk being hampered by virtual instruments or effects that have become unavailable or unsupported by operating systems. We opted to master only the stereo mix rather than work with the stems; a lot of work had already gone into getting the track balanced, but in any case we had the option of reopening the mix, should more detailed work be required. Working in Logic on a fresh template, we set up our stereo bounce, alongside two reference tracks. Aiming high, the chosen reference tracks were ‘Must Be The Music’ by Dave Lee and Jamiroquai’s ‘Canned Heat’, mixed by Mick Guzauski — two incredibly clean mixes from engineers at the top of their game. Our track was routed to a bus with Logic’s stock EQ, Baby Audio’s TAIP and the LANDR mastering plug-in inserted. The EQ was simply there to catch any stray, unwanted low-end frequencies that we might have overlooked, while TAIP added a touch of air and a lovely retro warmth that nudged the track more toward the desired ball park. The LANDR Mastering Pro plug‑in, our third and final step, analyses your track and, rather than reference specific genres, it tries to find tracks across different genres that share similar characteristics, before deciding
Bouncing & Mastering For reasons that we’ve explained in previous workshops, we wanted to bounce both a master stereo mix and some stems. There are no set rules in terms of format, but since standard
10
November 2025 / www.soundonsound.com
Audified’s MixChecker Ultra: a handy tool for checking mix translation, especially if you’re working on headphones.
on what processing it should apply. As we’ve suggested when reviewing this, it’s not going to compete with professional mastering and if you have the skills and experience yourself you might prefer to use more traditional mastering tools. But it’s a pretty effective option when you need to achieve decent results quickly, and those with a particularly high output (for example if you make lots of library music), or who need to get material out on their social channels quickly and can’t afford to wait, might find it particularly useful. In any case, we wanted to see what it could do for this track... With the default settings, the LANDR plug-in delivered an impressive overall loudness. It didn’t sound bad, either, although we felt the need to pull things back slightly to bring the loudness and dynamics closer to those of our reference tracks. We also tried switching the plug-in to its Warm setting, and preferred this — it gave the track a little more body and, yes, a warmer overall tonality. Finally, we used the plug-in’s
EQ& Compression? In the main text, we’ve mentioned compressors and EQs quite a bit in passing. Along with your faders, pan pots, reverbs and delays, these can be thought of as your main ‘bread-and-butter’ mixing tools. This isn’t a detailed mixing tutorial, so we’ve not dwelled on the precise settings too much, but if you need to brush up on your EQ and compression skills, check out the articles listed below. They’re all free to read on the SOS website! W Compression Made Easy: https://sosm.ag/compression-made-easy W Drum Compression: https://sosm.ag/drum-compression W How To Achieve Better Separation In Your Mixes: https://sosm.ag/mixing-for-better-separation
additional controls to open up the stereo width a little, and dial in yet more ‘air’ to taste. As a last check, we inserted Logic’s EQ and Audified’s MixChecker Ultra on the monitoring path. The EQ was just used for its frequency analyser, to compare the overall balance of the three tracks, while MixChecker helped us to ensure that everything remained audible and well balanced on different systems. It’s a fun little plug-in that really does seem to capture the vibe of the spaces that it’s emulating, and the binaural processing can often have you reaching
to remove your headphones to check the source of the sound! For anyone mixing primarily on headphones in a home studio, it can be a really valuable tool.
Putting It Out There! With our track now ready for release, we’ll turn our attention next month to the process of adding metadata, creating artwork and promotional materials, and uploading everything to SOS For Artists for release. We’ll also consider how you might go about promoting it, with the sort of budget that’s realistic for independent musicians!
www.soundonsound.com / November 2025
11
ON TE ST
Sequential Fourm Polyphonic Analogue Synthesizer
28
November 2025 / www.soundonsound.com
Sequential’s latest is a miniaturised, analogue, four-voice polysynth inspired by the Pro-One and Prophet lines. But does it still feel like a Sequential? RORY DOW
S
equential entered a new era in 2021 when Focusrite bought the company out. The synthesizer industry is relatively small, so it can be a fraught time when someone takes over a beloved, well-established brand. Even though this new synthesizer is built on the legacy of the mighty Sequential Circuits Pro-One, it feels different to anything Sequential have done before or after the Focusrite buyout. Sequential has always been a premium brand, so is a smaller desktop synth with mini keys really a good idea?
Top Fourm The Fourm is a four-voice analogue synthesizer with two VCOs, a four-pole resonant low-pass filter, two ADSRs, one LFO, an arpeggiator and a sequencer. The front panel should be recognisable to any synth fan. The Pro-One obviously inspires it. Where it deviates from its 40-year-old ancestor, aside from the addition of polyphony, is the miniature keys, which are a new design Sequential are calling ‘Tactive’ (a fancy term for
Sequential Fourm £799 pros • All the fun of the Pro-One, and much more. • Four-voice polyphony on a monosynth structure makes a lot of sense here. • Polyphonic aftertouch on a mini keybed (which feels great to play!) • The sequencer is great fun. • It sounds phenomenal.
cons • Only the preset saving system.
summary Sequential’s latest synth aims to lift a Pro-One‑style design into the modern age by upgrading it, and making it smaller and more affordable at the same time. They haven’t just had their cake and eaten it — they’ve pulled it off, with icing on top. The result is a four-voice analogue synthesizer with a very playable mini keybed that supports polyphonic aftertouch. It has all the familiar weighty sound of a Pro-One with polyphony and modern features. What’s not to like?
polyphonic aftertouch). Plus, as we’ll find out, a lot more. If the idea of polyphonic aftertouch on a mini keybed worries you, then dismiss those negative thoughts. The aftertouch response is fantastic, better than on many full-sized keyboards. In fact, the build quality, finish and hands-on experience of the Fourm are superb throughout. It feels like a premium product, just in a smaller form, which is a smart move from Sequential, as it maintains their reputation as a high-end brand. In essence, the Fourm is a low(er)-cost, well-built, classic analogue synth that feels like a full-sized product, and should replicate many familiar mono and polyphonic sounds. At 563 x 259 x 82mm, the Fourm will sit easily on a desk. It’s lightweight but features an all-steel chassis, which means it will travel well. The one-knob-per-function (almost) interface feels authentic, and there is a small screen for settings, patch naming and so on.
Synth Engine The architecture is straightforward but well-balanced, and sticks reasonably closely to that of the Pro-One. Firstly, there are two voltage-controlled oscillators. Both oscillators can generate sawtooth and pulse waves, with the second oscillator also adding triangle waveform. You can combine these waveforms, as each one has a simple on/off switch. Oscillator 1 has a classic Prophet-style sync mode, and oscillator 2 has two low-frequency modes — one with keyboard tracking, and one without. A simple mixer offers volume controls for the two oscillators, plus noise, which can be switched between white, pink and violet modes for different noise profiles. There’s also a feedback circuit that will take the filter output and feed it back into the input for beefier sounds, or outright chaos, if that’s your thing. You may notice that the Noise and Feedback amount controls are missing on the front panel. Sequential have clearly done their best to include a knob for every function, but there are limits. Instead, the Noise and Feedback functions have a button that serves two purposes: one is to turn the function on or off, and the other, activated with a long press
combined with turning the data encoder under the LCD screen, is to change the amount (with appropriate feedback on screen). Any button with a blue label on the UI indicates a secondary function that involves the data encoder. Luckily, many of these are functions you won’t need to reach for often, although I personally would have loved a dedicated noise amount knob. The mixed signal heads to the filter next. It’s a simple four-pole resonant filter derived from the Prophet series. There are controls for cutoff, resonance and envelope amount, and then there are four levels of key tracking: off, quarter, half and full. There isn’t much more to say about the filter, except that it’s one of my favourite-sounding filters in recent years. It loses no bass end when the resonance is increased, and it sounds well balanced at any frequency. There is no harshness and no unexpected volume bumps. It’s just a lovely filter. As with all Sequential synths released in the last decade or more, there’s a Vintage parameter that adds detuning and instability to oscillators and the filters to emulate old gear. It’s been nice to witness these parameters evolve over the years, because what started as oscillator ‘slop’ (I was never keen on that name!) has developed into a very musical and, I suspect, far more complex parameter that emulates the ageing of electronic circuits and affects the oscillators, filter, envelopes and individual voices. The result can range from subtle note-to-note variations to “Is this broken?”. I love it.
Modulation With such a simple synthesizer section, a lot rests on modulation and playability. The Fourm replicates the Pro-One-style modulation section almost exactly. That means no modulation matrix. The front panel handles everything. There are four potential modulation sources: filter envelope, oscillator 2 (for some lovely cross-mod sounds), LFO and aftertouch. Sources can be assigned to one of two ‘busses’: the Modulation Wheel bus and the Direct Modulation bus. The first is multiplied by the position of the modulation wheel, allowing you to assign that modulation to the wheel, and the second is a direct connection. Any source can be assigned to either bus, and any destination can be affected by either bus, or by both (except aftertouch, which is always direct). This is achieved
www.soundonsound.com / November 2025
29
ISSUE ONE FREE DOWNLOAD
November 1985 Midge Ure
October 1986 Paul McCartney
October 1987 Radiophonic Workshop
May 1988 E-mu Emulator III
April 1989 Howard Jones
September 1990 Fostex G16
May 1991 Soundcraft Spirit Studio
September 1992 Alesis ADAT
May 1993 C-Lab Notator Logic
June 1994 Soundtracs Topaz
HAPPY B IRTHDAY March 1995 The Beatles
July 1996 George Michael
March 1997 Roland JP-8000
August 1998 Novation SuperNova
November 1999 Focusrite ISA430
October 2000 Mackie HDR24/96
July 2001 Carillon AC1
August 2002 Steinberg Cubase SX
July 2003 Moog Voyager
December 2004 Apple iMac G5
June 2005 Pro Tools M‑Powered
August 2006 SSL Duende
January 2007 Mixing On Headphones
November 2008 Universal Audio UAD2
December 2009 Celemony Melodyne DNA
March 2010 Lexicon PCM Native
June 2011 The iOS Revolution
April 2012 Lana Del Rey
November 2013 DSI Prophet 12
September 2014 Neve Genesys Black
May 2015 Sonarworks Reference
A big thank you to all the readers, advertisers, contributors and partners who have made SOS the world’s number one music technology title for the last 40 years!
October 2016 NI Maschine
January 2017 Arturia MatrixBrute
October 2018 David Guetta
May 2019 Neumann NDH 20
May 2020 Apple Mac Pro
July 2021 EW Hollywood Orchestra
November 2022 Jean-Michel Jarre
July 2023 Ableton Push 3
December 2024 Tascam Model 2400
October 2025 Cranborne Brick Lane
ON TE ST
Aim Audio Inspire & Essence Capacitor Microphones A new German manufacturer takes aim at the mic market, promising real innovation.
SAM INGLIS
B
erlin is, arguably, the spiritual home of the capacitor microphone. Although the first commercial models were made in the USA by Western Electric, it was German researchers and manufacturers who developed the “condenser mic” as we know it today, and German companies such as Neumann, Microtech Gefell, Sennheiser and Schoeps are still household names. (Well, they are in my house.) Yet although Neumann’s head office is still in Berlin, their factory was moved to Wedemark, near Hannover, in the early ’90s, and there has been no microphone manufacture on a large scale in the German capital for the last three decades — until now. Aim Audio are a new company whose stated mission is to bring back volume mic manufacturing to Berlin. That in itself is a lofty ambition, but it’s not the only bold move that Aim are making. Rather than selling clones or copies of classic German models, they are intent on demonstrating
36
November 2025 / www.soundonsound.com
that the capacitor mic is not yet a mature technology. Their debut products thus display a wealth of innovation, including some patented new developments.
Straight Outta Berlin Aim Audio are entering the market with two microphones: the flagship multi-pattern Inspire, and a more affordable fixed-cardioid derivative called the Essence. Both incorporate a number of novel features, and the focus on innovation is also apparent in accessories such as the Orbit shockmount and the Sentry pop filter. In fact, a fairly large part of the price differential between the two models is accounted for by the fact that the Inspire is available only as part of the Inspire+ Pack, which includes the Orbit, the Sentry and a good-quality Peli-style hard plastic case. By contrast, the Essence comes with no accessories to speak of, though the Orbit can be bought separately. This could be more significant than you’d expect, because both mics share a distinctive form factor that
isn’t compatible with many third-party shockmounts. In cross‑section, the body is a flattened ellipse that is too wide to fit easily into something like a Rycote InVision mount. So, unless you buy the Orbit separately, the only way to attach the
Aim Audio Inspire & Essence £729/£549 pros • High-quality industrial design and construction. • Effective shockmount and pop filter. • Unique switchable output stage. • Classy, modern sound. • Good value for money.
cons • Essence doesn’t come with a shockmount and won’t fit most third‑party mounts.
summary Aim Audio’s debut mics combine familiar large-diaphragm sound character with genuine ergonomic innovation.
Essence to a mic stand is to do so directly, using the threaded socket adjacent to the XLR connector on the base of the mic. The Aim mics’ unusual dimensions aren’t just for show: they provide a large and relatively flat area at the front of the mic, which is fully exploited in the design of the Inspire. Following the lead of some AKG C414 variants, most settings on the Inspire and Essence are configured using buttons that light up to indicate their status. The one exception is the polar pattern on the Inspire, which is chosen using a five-position thumbwheel. This is a sensible decision, to my mind, because it means you can see what pattern is selected without having to plug the mic in. The upper group of four buttons on the Inspire engage features that are familiar from other mics: -10 or -20 dB pad settings, and a choice of two high-pass filters. One is a steep rumble filter turning over at 80Hz, while the other is designed to offset the proximity effect, with a gentler slope and a higher corner frequency. The Essence is simpler, with just one pad and one filter option.
Back To Front At the bottom of both the Inspire and Essence you’ll find a button bearing a logo
Aim Audio’s custom Sentry pop filter attaches magnetically to the Orbit shockmount.
that slightly resembles a human brain. This illuminates red when phantom power is applied, and is used to set the brightness of the LEDs; it’s also possible to turn them off completely if you so desire. But the really interesting controls are those located in the group above this. On the Inspire, this includes buttons labelled Front and Back, which flip the polar pattern by 180 degrees if you are in subcardioid, cardioid or hypercardioid mode. I was initially sceptical about how useful this would be, and then I remembered all the times I’ve had to remove mics from their mounts and put them back the other way around to get them pointing where I wanted! It also means that you can keep the controls visible and accessible when close miking something like a guitar cabinet. The patented pièce de resistance of Aim’s design, however, is found in both the Inspire and the Essence, and is toggled using buttons labelled Transf and Elec. These switch between an old-school, transformer-balanced output stage and a modern transformerless electronically balanced circuit, whilst keeping the output level from the mic the same. And Aim haven’t used any old off-the-shelf transformer: they’ve developed their own custom toroidal design with a “nanocrystalline Vitroperm core”. That sounds like something out of Star Trek, but the toroidal shape does have advantages over the more usual rectangular transformer. On paper at least, it permits a given turns ratio to be achieved with less wire, thus decreasing the resistance of the coils and lowering thermal noise. Finally, both mics also have an LED located in the upper middle of the front panel. This is described as a peak level indicator, although its purpose is more subtle than you might expect. Aim say that as the mic itself has generous internal headroom, it’s easily capable of putting out signal levels that will clip downstream devices. They also say that in their testing, they found that many such devices did not properly indicate momentary overs or brief clipping on transients. The purpose of the peak level LED, therefore, is not to protect the mic’s own circuitry, but to give the user a heads up that engaging the pad might help prevent their mic preamp or interface from clipping. It can illuminate orange or red, with red being approximately 6dB above orange, but in general its operation is somewhat programme-dependent, so these don’t kick in at a precise voltage level or dBu measurement.
The Inspire’s ability to give visual feedback doesn’t end there. Switching the polar pattern in a large-diaphragm capacitor mic involves changing the DC voltage that is applied to the capsule’s rear backplate. The new voltage takes time to stabilise, so it’s prudent to wait a little before using the new pattern. The Inspire lets you know exactly how long you need to wait, courtesy of an LED within the pattern wheel that flashes until the voltage has stabilised. Powering all this from standard 48V phantom power has required some ingenious engineering from the Aim team. Phantom power does not supply enough current to drive the relay that switches between the two output stages, so the mics use a charge pump to build up a reservoir of stored power against the time when you might want to do so. In practical terms, this means that if you’ve only just plugged the mic in, or you’ve switched the output back and forth a couple of times, you need to wait a while before you can toggle the output stage.
Into Orbit Germany’s reputation as an industrial powerhouse has taken a battering in recent years, but on the evidence of the Inspire and Essence, the Berliners still know how to build things to a high standard. Aim have managed to create something that is simultaneously functional and striking in appearance, The metal shell feels rock solid and the semi-gloss black finish is flawless, as is the fine mesh headbasket. I like the Inspire’s case, too, which prioritises offering real protection over looking fancy. It’s clear that the Inspire and the Orbit have been designed as a system. On either side of the mic body, you’ll find two small recesses about halfway up. To fit the mic into the mount, you simply push it downwards until the matching protuberances on two sprung arms lock snugly into these holes. To remove it again, you grasp the mic in one hand and use the other to push downwards on the levers at the top of these arms. This is one of those modest innovations that makes a surprisingly big difference to usability. Getting the mic in and out of the mount is much quicker than it is with any other system I’ve tried, and the mic always fits into its mount in exactly the same, repeatable way. The Orbit connects to the stand using a fairly conventional clutch that allows
www.soundonsound.com / November 2025
37
ON TE ST
Rodec MX Modular
Analogue Mixing Console Compact and stylish, this console aims to cater for those working across the DJ, stage and studio worlds — and includes some novel performance features. RORY DOW
I
f you DJ’ed at any club in Europe during the 1980s or 1990s, you’ll likely have been crossfading on a Rodec mixer, specifically the MX-180. From radios, amps and speakers in the 1950s and 1960s, to DJ mixers in the 1980s and 1990s, they remained a small but successful outfit making boutique products. Things have been relatively quiet for Rodec over the last 15 years, though, so it was a pleasant surprise when they began teasing the MX Modular at various trade shows in 2023. Finally, it’s here. The MX Modular is a culmination of many of Rodec’s previous specialisms. It’s a mixer, of course, but it feels distinctly
40
November 2025 / www.soundonsound.com
different from any mixer you might have encountered. It’s aimed at the traditional mixer market, but also at the audio interface and DJ markets. You can customise the number of mono or stereo channels (any combination of eight mono or four stereo). It incorporates a 10-slot 500-series rack that allows for personalisation of the first eight channels, as well as the master channel. It’s also an 18 I/O, class-compliant USB audio interface capable of sample rates up to 192kHz. There’s even an assignable crossfader — something that might at first appear to be a playful nod to Rodec’s club heritage but which, it turns out, is genuinely useful in the studio and on stage. The idea is simple: put your favourite 500-series preamps, EQs and dynamics
directly inside the mixer that you perform and track with. Instead of a traditional inline console, with fixed channel strips, you treat the desk as a curated Lunchbox that houses your mixer, effects and audio interface.
Basic Channel The mixer’s 16 channels are split into two groups of eight. The first group consists of mono/stereo channels that are configurable and removable. If your main focus is tracking, you might choose to populate the main panel with eight mono channels. If, on the other hand, you’re a DJ or work with lots of stereo sources (many modern synths, samplers and drum machines, for example) then you might opt instead for four stereo channels. The model sent for this review had four mono and two stereo channels, which feels to me like a nice ‘compromise’ setup for a smaller studio. Whether it’s mono or stereo, each channel is equipped with an on/off button that serves as the channel mute, a solo button, a pan control, two auxiliary send
Rodec MX Modular From £6749 pros • High-end electronics deliver a gorgeous sound. • Beautiful build quality. • Well‑thought-out hybrid DAW/ analogue workflow. • More than a 16-track mixer: 500-series rack and 18 I/O interfacing built-in.
cons • The price may put some people off (but it’s not exorbitant for what’s on offer).
summary The MX Modular is Rodec’s new 16-channel flagship ‘performance mixer’. With an integrated 10-slot 500-series rack, 18 I/O, class-compliant digital audio interface, built-in digital effects, and some nice performance features including a crossfader and flexible channel muting, it offers a unique package of features that could appeal to small bands, audio engineers, electronic musicians, sound designers, DJs, and mastering engineers — which is just about all of us, right?
pots, and toggle buttons for momentary mode, pre-fade listen, and bus 1, bus 2 and master bus routing. There’s also a small three-position switch that allows you to assign the channel to either side of the X/Y crossfader. The second group of eight channels is found above the monitor section, and it’s configured as four stereo pairs, with a simple level pot and an on/off button. When used as an audio interface, these four pairs can be individually switched to send aux 1, aux 2, bus 1 or bus 2 as a digital signal, either as a dry send signal or as a wet return signal. The built-in class-compliant USB-C audio interface has 18 inputs and outputs, and Rodec have thoughtfully added an extra pair of inputs at the beginning of the list for the master bus. This is something that many mixers with built-in soundcards get wrong — its inclusion means that you don’t have to waste a pair of channels for your computer audio. The first pair of inputs and outputs is always the master channel, whether that’s your DAW’s master stereo output, your general computer audio, or, in the reverse case, the master stereo pair from the MX Modular. For computer audio, there’s a dedicated return level control, an on/
off switch, and a solo button, allowing you to easily solo your computer’s main audio output whilst all the direct outputs and USB outputs remain active. This makes it easy to process an entire mix in your DAW and monitor only the processed output. Bravo to Rodec for this simple yet elegant solution to dealing with master channels over USB. The MX Modular is an inline console, meaning that every channel (individually on channels 1-8 and as a group with channels 9-16) can accept as its source either the analogue or USB input, and you can choose whether the audio signal going to the computer is pre- or post-fader. In short, you can track to your computer with effects, bypass those effects, and mix the recorded stems back on the MX.
Monitor Section This mixer’s monitor section is compact and straightforward, yet it’s also very flexible
in its design. In addition to the master fader, there’s a dedicated monitor volume pot for your speakers, and a quarter-inch headphone jack with its own level control. There’s a mono button for checking for mono translation (‘phase issues’), and a master insert switch for engaging any master insert effects. Additionally, an external input volume pot sets the level of an extra, faderless analogue stereo input that feeds the master bus directly. The monitor section also houses all the aux and bus controls. Both aux channels are stereo, so they’re ideal for monitor mixes or stereo effects. They send to two built-in digital effects processors and to the rear-panel balanced outputs simultaneously. Internally, the digital effects processors will be mixed with the physical aux returns. There are no independent volume controls for the digital effects, so if you wish to use both at once you’ll need to adjust the
As the name implies, this console is fully modular, and there’s a range of different options for populating both the upper and lower sections of the frame.
www.soundonsound.com / November 2025
41
Discover SOS For Artists : A Complete Platform for Modern Music Creators
Your end-to-end music production suite
Designed to support independent artists, producers, and collaborators at every stage of the music-making journey, SOS For Artists is a new subscription service that brings together all the tools needed to take your music from idea to release.
Create 1. Sample Selection Made Simple
Over 3 million royalty-free samples — with new packs added every week. Up to 2,400 samples per year included in your subscription plus an advanced preview tool that lets you tempo-match.
2. Instruments & Synths
Included with SOS For Artists is a curated collection of high-quality plug-in instruments from respected brands like Spitfire, UJAM, Arturia, GForce, Sonuscore, and more.
www.sosforartists.com
“Efficient, DAW-integrated tools to streamline sample selection and composition.” 3. Stem Extraction with AudioShake
An integrated stem-splitting plug-in allows you to isolate vocals, drums, bass, or instrumental parts from full mixes — right inside your DAW or via the web platform.
4. Starter DAWs Included
For newcomers, the subscription includes lite versions of Steinberg Cubase and Ableton Live.
ESSENTIALS
FREE PLAN ign up and explore S the features Upgrade at any time Kickstart your creativity with 7,800 samples Preview the Mastering tool Preview the Distribution service
ONLY
99*
£
PRO
or £12.99** per year per month £1,000 worth of Tools inc 18 Plug-ins 1200 Sample Credits Unlimited MP3 + up to 36 WAV masters per month Unlimited Distribution
ONLY
199*
£
or £19.99** per year per month £2,000 worth of Tools inc 45 Plug-ins 2400 Sample Credits Unlimited MP3, WAV + HD WAV masters Unlimited Distribution
* Prices exclude VAT. Taxes will be applied at the UK / EU Country rate at checkout. ** Monthly price does not offer same number of Plug-ins or Sample Credits
*** Also available in most countries worldwide in your local currency.
Produce “Refined tools for mixing and mastering, suitable for both quick demos and professional releases.” 1. Mix & Effects Tools
The effects collection includes EQs, Compressors, Reverbs, Delays, Saturators, and creative FX from trusted names. Highlights include Eventide’s CrushStation, Arturia’s Rev PLATE-140, TAIP by Baby Audio, and MixBox SE from IK Multimedia, plus Synchro Arts’ powerful VocAlign and RePitch plug-ins.
2. Mastering — Fast, Intelligent
SOS For Artists includes access to the advanced AI mastering engine from LANDR — available both online and as a plug-in. It analyses your track’s dynamics, frequency spectrum, tempo, and stereo image to deliver a tailored master.
Distribute 1. Global Digital Distribution
Distribute your music to over 150 platforms including Spotify, Apple Music, Tidal, Amazon, and Deezer. Just upload your tracks, artwork, and metadata, set a release date, and go live within 2–7 days. Migrating from another distributor? Bring your existing catalogue and retain play stats and followers.
2. Royalty Splits & Monetization
The Royalty Split feature allows you to divide earnings with collaborators. Just enter percentages. Payments are processed with low thresholds — starting at just $1 via PayPal — and you retain 100% of your royalties.
3. YouTube Integration
Link your official YouTube artist channel to keep distributed content and subscriber base in one place.
4. Cover Song Licensing
Mechanical licenses for cover songs are handled automatically with a simple one-time fee. A direct link to the Harry Fox database helps you verify original composers and credit them properly.
5. Promotion & Reporting
Promotion tools include Linktree-style landing pages and content creation tips to help boost visibility. Detailed royalty reporting shows trends, top countries, and top-performing platforms.
“Release your music across 150 major platforms including Spotify, Apple Music, Tidal, Amazon and Deezer while maintaining catalogue integrity and metadata continuity.” www.sosforartists.com
FE ATURE
Hear The Sound W www.youtube.com/watch?v=_ QZjJU-mtFU
W https://open.spotify.com/
track/2jto2mk883akXynLqkdung
Kyle Lehning • England Dan & John Ford Coley J O E M AT E R A
F
amed recording engineer and record producer Kyle Lehning started his recording career at the age of 18 in Nashville. His career trajectory saw him go on to work with a virtual Who’s Who of the American country music scene, from legends such as Waylon Jennings, Kenny Rogers and
George Jones to Randy Travis, Anne Murray and Bobby Bare. He also worked with a number of pop and rock artists, such as Little Richard, Chuck Berry and England Dan & John Ford Coley. During the ’90s he even did a stint as President of Asylum Records Nashville. Here, he recalls a memorable creative moment that helped one of his countless hits stand out.
Intense Modulation “One of my favourite sounds of my career was made during the making of the England Dan & John Ford Coley hit, ‘Love Is The Answer’, which was written by Todd Rundgren, and appears on the pop-rock duo’s 1979 album, Dr Heckle And Mr Jive. When we had finished tracking and most of the overdubs were completed, Steve Forman, a celebrated Los Angeles percussionist, came in to add some sounds. Besides tambourine we came
Kyle Lehning: “These days an effect like that could be programmed a number of ways with various plug-ins but back then, it was a combination of skill and luck.” 50
November 2025 / www.soundonsound.com
up with a suspended cymbal roll in a few spots. The fun part was running it through the Marshall Time Modulator. It was 1978 and this effect box was fairly new. It could do some very intense phasing and other kinds of whacky sounds. It was so intense that I had fairly recently managed to blow out the voice coils in a pair of UREI 604Es. “We came up with some spots we felt would work and started to record. Getting the intensity of the roll and the timing of the phasing right was a process of trial and error. A lot of error. These days an effect like that could be programmed a number of ways with various plug-ins but back then, it was a combination of skill and luck. Skill from Steve, and luck from me manipulating the knobs. I’m not sure I ever really knew what knob did what, but after a couple of hours of twisting we had the track. It was recorded in mono, but when the record was mixed, by the great Bill Schnee, we decided to stereo-ise it by using a Harmonizer. The sound shows up very subtly on the intro. It comes in strong on the bridge and right before the outro and once again, subtly, in the fade. Hearing that record and that particular sound on the radio always brings a smile to me.”
WORLD OF SOUND
LOOP TO INSPIRE
200+ PROFESSIONAL LOOP PACKS. 200,000 + LOOPS AND SOUNDS. 40 + GENRES. INSPIRE YOUR SOUND - NOW WITH ULTIMATE DISCOUNTS ON ALL PRODUCTS AND BUNDLES.
All products include the ELASTIK player. Always in sync with your host in tempo and key. Create millions of new sound combinations with the INSPIRE function. Shape your loops with powerful algorithms. Apply polyphonic key and scale changes with RETUNE. Export full packs or single samples as WAV files. Manage your library with the intuitive Downloader app.
ueberschall.com
ON TE ST
Schlappi Engineering Boundary Layer Eurorack Module
A
s if I haven’t harped on about it enough by now; Schlappi Engineering are a developer going from strength to strength, in many respects in the vanguard of module design in 2025. While their last few fearless offerings consisted of outrageously modulatable oscillators
52
November 2025 / www.soundonsound.com
(witness the Three Body), musical binary counters (the Nibbler) and analogue-does-digital signal mangling (BTFLD), the Boundary Layer is a module whose design actually harks back to a much more classic synth topology. How will Schlappi fare in the heritage game? OK, ‘heritage’ probably isn’t the right word here: the Boundary Layer is hardly a Moog-inspired ladder filter. But it does take more than a few cues from the likes of the Serge DUSG and Make Noise’s modern classic, the Maths. Those modules are case studies in just how much is possible with moving voltage, almost in its purest form. At its core the Boundary Layer is a three‑channel function generator with oodles of cross-modulation, audio-rate oscillation and slew-generating possibilities, endowed with generous amounts of I/O, and all in a respectable 16HP. The three channels are, in the first instance, identical: each has controls for the rise and fall time of its slope, along with a CV control for modulating that rise or fall, or both. These neighbour three switches: one for cycling the envelope, one for inverting the input voltage and one, very usefully, for choosing whether incoming voltage applies to the rise stage of the envelope, the fall stage, or both. With nothing patched to the CV input, the CV knob and accompanying Invert switch become controls for editing the shape of the slope, with the switch toggling between a rounded logarithmic or plucky exponential curve. When it comes to inputs, beyond the expected Trigger and CV jacks there’s Slew and Bound. Slew, if you feed it gates, essentially shifts the function of the envelope from attack-decay to attack-release; feed it CV working at 1V/octave and it’ll deliver pleasingly editable portamento between values. Which is to say, er, slew. The Bound input comes into play with the Cycle switch on, replacing the threshold of the slope’s rise
and fall with an external signal. This, I found, is marvellous for creating syncopated patterns and stuttering, semi-predictable behaviours. As for outputs, beyond the conventional voltage output there’s an EOC gate output, which can be switched to mark the end of either the rise or fall stage of the envelope by a header on the rear of the module. Each channel generously has its own header, so different channels can behave differently if you wish. Envelopes, modulation, slew limiting; this is all, of course, highly functional. You hardly need me to tell you how useful it is to have a source of super-responsive function generation at your fingertips, particularly if you’re familiar with the Boundary Layer’s predecessor, the single-channel Boundary. But far from simply three Boundarys (or should that be ‘Boundaries?’) layered up, the Boundary Layer’s magic really lies in the way it combines its three channels. This starts with the panel’s six holistic jacks: the three All inputs for triggers, CV and slew can be used to control all channels simultaneously, but with the added benefit of having an OR logic relationship with each channel’s own gate — that is to say, the channel will be triggered when a gate at either input is high. Even with various triggers creating asynchronous slopes across the Boundary Layer (and across a patch), the occasional trigger sent to the Trig All input allowed me to whip the whole lot back into order while still feeling just the right amount of free and loose. The three All outputs are labelled Max, Mid and Min, and respectively select the highest, median or minimum of the three channels’ output voltages. Once again, this gives the Boundary Layer that excellent ability to combine CV in a most inventive but natural way, and it goes without saying that beyond the mathematics of the Max, Mid and Min outputs, impulsive patching is rewarded just as royally.
When set to cycle, the rise and fall stages can naturally move fast enough to go well into the upper reaches of audio rate. I was mildly disappointed to find that it can’t track accurately at 1V/ octave like a conventional oscillator, but what it can of course do is hard‑sync with an external oscillator, meaning that even the simplest input signal can take on some seriously gritty — and modulatable — timbral character. Internal patching is also lots of fun with the Boundary Layer, for instance patching the End of Rise output of each channel to the trigger input of its neighbour to create cascading strumming movements. Another patch I found tremendously rewarding was to set channel 1 to audio rate and send the outputs of channels 2
and 3, set slower, to its Bound and CV inputs respectively, creating some very rich timbral movement. Indeed, if it wasn’t obvious by now, the strength of Schlappi Engineering modules is their uncanny ability to endow a patch with incredibly bold movement, sonic grit and a general feeling of being ‘on the edge’ in a way that is somehow as wild as it is controllable. The Boundary Layer is no exception to this rule, taking one of the most simple concepts in synthesis and still managing to open up new and intriguing creative avenues. Approve. William Stokes £
£279
W
www.schlappiengineering.com
Ohmforce Bohm System Eurorack Module
T
he humble kick drum has come a long way and perhaps we’ve reached the peak with the Ohmforce Bohm “frontier of kick synthesis” system, for this is not one but three modules dedicated to generating that single doompf. The main Bohm module generates and articulates the kick drum, the Groove module adds rhythmic ghost kicks and rumble in the wake, and the Performer offers DJ-style effects and side-chain ducking. All of it together uses 18 knobs, two sliders, one encoder and a good chunk of your rack. It looks impressive and the layout feels very playable, with room around the knobs and a solid feel to those faders. Plug in a trigger, spin the encoder to scan between different kick engines, and fiddle with the knobs for some instant kick-crafting satisfaction. I found that the initial feelings of intimidation quickly melted away. The main Bohm module is a kick‑drum generator with nine different sound variations drawn from a wavetable and transient synthesizer. There’s the FM-2X 2-operator FM kick, the HZ-1 wavetable, the OLP4 4-operator experimental FM thump, the PM-K1 physical model of a bass drum, the PX3 weird wavetable and sample combo, the SP-6 that leans into digital sounds, the VX-T that adds a transient synthesizer, the WT-4 that takes wavetables into a more analogue
direction, and the XT-88 where you can pull in your own samples and wavetables. They each take a moment to load, so you know it won’t be capable of moving from sound to sound on every trigger. None of them wanders very far away from each other, and of the nine the ‘real’ PM-K1 bass drum feels the least convincing. Each model takes on the nine parameter knobs in a broadly similar way, with length, sustain and attack tackling the duration, pitch modulation, transient tone and sub-bass oscillator colour. Exploring the knobs gives you plenty of variation and everything has a corresponding patch socket for modulation. The FX knob gives you control over a post-kick effect. If you tap the encoder, you can dig into the settings on screen
“From what first appears to be an overly complicated way to produce a kick, Ohmforce have pulled together a coherent console of performance tools for kick-driven music makers.”
and choose between distortion, soft/ hard clipping, and wavefolding. On some models, you get some bit-crushing. Then we have the Bohm Groove. This is a secondary kick drum voice designed to produce what are known as techno rumbles; a concept I’ve not seen tackled quite so directly in modular before. It essentially builds a reactive space around the wake of a kick drum that gives it a sort of pursuing throb or breath using reverb, noise, grit and a sub frequency to pulse in up to three taps. It can go from ghost kicks to heavily sculpted walls of noise. Rounding off the trio we have the Bohm Performer. This combines a side-chain ducking effect with a very lively DJ effects section. If you plug the rest of your mix into the audio inputs, then the duck control will pull the level down on every trigger to let the kick drum punch through. It generates that classic throbbing EDM sound and is very gratifying. The FX section has a few options, including a DJ filter and the terrific Beat and Slip rolls
www.soundonsound.com / November 2025
53
ON TE ST MODULAR
that throw in exciting beat-synchronised rolling and repeating effects. Once you’ve found your kick, added some rumble, plugged in your mix and switched on your slip slicing, it is an absolute riot to play with. Your focus is pulled into fitting everything else around your crafted kick engine as it bangs, throbs and slices its way through your performance. But we’re not done yet. There’s a whole underground level of premeditation available to those prepared to dip into the menu system. Bohm has a sort of song engine where you can line up snapshots of kick drums and step through them in manual
or automated modes. So, if you want different kicks for the verse and chorus, you can step through those. There’s a lot of scope for overriding controls to keep certain things in flux while the snapshot changes. Ohmforce have managed to retain a free-flowing, improvised vibe while offering the assurance of precisely programmed kick‑drum changes. From what first appears to be an overly complicated way to produce a kick, Ohmforce have pulled together a coherent console of performance tools for kick-driven music makers. The sounds themselves are lively and penetrating, but when you add in the
ADDAC System ADDAC816 Percussion VCA Eurorack Module
T
he ADDAC816 Percussion VCA is a diminutive module combining an envelope with a VCA to accept audio signals and render them, well, percussive. This functionality is all packed onto a faceplate of... [checks notes] 5HP? Bother, nothing interrupts an otherwise perfectly arranged case of modules more than odd numbers; is it too much to ask to shave off one or stretch to six? In any case, I would be more upset about the real estate if the ADDAC816 wasn’t so darn useful. It features inputs for an audio signal and for triggering its envelope, and two main knobs for envelope gain and decay. There is a toggle switch for short or long decay times, or none (indeed, if desired, the ADDAC816 can behave as a perfectly ordinary VCA). Send it, for instance, white noise, and at its most basic level it’ll instantly create a very passable — and click‑free — drum sound (it’s also fully compatible with tonal sounds, of course). But atop this, several choice functions make for some considerable creative scope.
54
November 2025 / www.soundonsound.com
There is also an Envelope Out jack, meaning you can also send its curve to, for example, a filter for more tonal movement. It’s also possible to modulate the envelope decay time in tandem with an onboard attenuverter and create more organic, expressive responses — I could also feed this input syncopated gates and create quasi-polyrhythmic patterns. The Envelope Gain circuit is excellent, in that not only does it respond differently to higher voltages in terms of decay length (more voltage means a longer journey back to zero), it can also be used to saturate and distort incoming audio either subtly or to an extremely tasty degree. A gritty parallel for a soft kick drum? Yes please! Even if none of the above appeals to you, this little VCA and envelope combo is supremely useful, especially if you’re working within a small system. In that instance I can’t imagine many patches you’d make without it. Another great offering from Lisbon’s finest. William Stokes £
£139
W
www.addacsystem.com
rumble, ducking and DJ effects, you get a fabulously workable groove machine. The ‘techno rumble’ feels like it’s filling a very specific role that is perhaps limited in scope but is undoubtedly useful to those trying to produce the effect through other means. The Performer, on the other hand, could easily be a standalone module and is much more genre-agnostic. Bohm is not all kicks for all people, but it’s comprehensive, focused, and enthralling in live performance. Robin Vincent £
Bohm £329, Bohm Groove £124, Bohm Performer £89.
W
www.ohmforce.com
Simultaneous Modulation Modular Technique
I
nstruo’s new semi-modular Seashell has a rather lovely function built into its software component: a 4x4 modulation matrix whose depth can be holistically controlled by one macro knob on the hardware interface. It reminded me of how — while it’s often most natural in a patch to assign one control signal per destination — there is enormous creative scope in sending a single voltage source to several destinations simultaneously. This isn’t a novel idea: many keyboarded synthesizers have the option to pair filtering with the oscillator pitch, for instance, allowing lower notes to take on a different sonic character to higher notes. But we can take this idea further. Imagine an LFO modulating the filter on a wavefolded oscillator. If we patch a voltage source to control both the rate of the LFO and the amount of wavefolding, the timbral shift of that oscillator combined with the speeding up of the LFO results not just in more movement, but a drastic increase in the sound’s overall intensity and aggression. Another example I heard recently involved a guitar with delay on it; as the delay time was slowed (resulting, of course, in a temporary pitch‑shift), the guitar was also panned across the stereo field. This created an incredibly effective sense of it ‘diving’ and ‘resurfacing’ on the other side of the image — far more interesting than the sum of its parts. Pairing modulation destinations is a brilliant way to combine movement within a patch and create rich, bold and multifaceted movement. Try it! William Stokes
ON TE ST
Channel Strip
SSL Super 9000
Solid State Logic once again raid their archive of preamp and EQ designs to put together a high-powered input channel. SAM INGLIS
S
ometimes I wonder whether SSL’s engineers ever sleep. The pace of development in Begbroke has been intense for several years now, but 2025 has been extraordinarily productive. First, they ushered in the new year with the 18 USB audio interface and the invaluable Alpha 8 line-level ADAT expander. But these were only an amuse bouche for the main course, the mighty Oracle digitally controlled analogue mixing console; and the flow of new products shows no sign of stopping there. Last month saw the company unleash the Revival 4000 hardware channel strip, and they’ve now added a companion piece in the shape of the Super 9000.
56
November 2025 / www.soundonsound.com
In some ways, these products represent the yin and the yang of Solid State Logic. The Revival 4000 repackages the sound of the classic E-Series console channel for the 21st Century, preserving as many vintage characteristics as possible. The new unit, by contrast, is billed as SuperAnalogue, a trademarked term indicating that it draws on the more recent design heritage of the J-Series and Duality consoles. In general, this prizes sonic hygiene, minimising noise, distortion and phase‑shift, though as we’ll see, the Super 9000 does possess a darker side too. Both units can also be seen as modern descendants of products from SSL’s XLogic range, which debuted in the early part of this century. The Revival 4000 had much in common with the XLogic E-Signature Channel, while the Super
9000 is, in some ways, the modern-day counterpart of the XLogic SuperAnalogue Channel. And, since SSL have kept faith with their original design philosophy over the years, the same core processing elements are present in all of them. Although their circuit designs may belong to different eras, the Revival 4000 and the Super 9000 are more similar feature-wise to each other than to channel strips from other manufacturers.
To The Nines The Super 9000 maintains the same high standard of construction as other recent SSL launches. Its smart, dark‑blue faceplate with orange and white legending looks simultaneously cheerful and businesslike, and there’s the usual SSL use of coloured caps to differentiate controls by function. Given how many controls there are, I think SSL have done well to fit everything in a single 1U faceplate without resorting to dual-concentric controls or knobs with a pull action, and the layout is clear and logical. Whereas the knobs on the Revival 4000 sit almost flush against the front panel, though, those of the Super 9000 stand several
SSL Super 9000 £1499 pros • Hugely flexible. • Sonically pristine, but with the option of Variable Harmonic Drive to colour things if needed. • Excellent value considering the features on offer.
cons • No front-panel input or instrument DI socket.
summary SSL over-deliver again, with perhaps their most sonically versatile channel strip to date.
millimetres off the panel, with the washer and the base of the knob shaft visible. All of the audio I/O is on the rear panel, along with a standard IEC mains inlet. The aforementioned XLogic range was launched at a time when studios were transitioning from hardware recorders to DAWs, and audio interfaces didn’t always offer completely transparent A-D conversion. The E-Signature Channel and SuperAnalogue Channel therefore had the option to add an integrated converter card, enabling them to be connected digitally to the recording system. SSL haven’t made this possible with either of the new channel strips, and I doubt anyone will much miss it now that even affordable audio interfaces offer abundant, high-quality analogue inputs. In time-honoured fashion, the signal path begins with a preamp stage — and it’s here that the Super 9000 perhaps departs furthest from the XLogic SuperAnalogue Channel. That unit provided just a single, stepped gain control to harness its super-clean SuperAnalogue preamp circuit, whereas the Super 9000 mimics the Duality console in offering not one but two SSL preamp designs. The default
path once again uses the SuperAnalogue preamp, this time with continuous rather than stepped gain, but the Super 9000’s dark side is accessed through a button labelled VHD. This switches to SSL’s Variable Harmonic Drive circuit, which is designed to impart the saturation artefacts we associate with valves and transformers. Unlike the Revival 4000, the Super 9000 doesn’t actually have an input transformer, but the two units share the same gain-control arrangements. The continuously variable mic gain control spans a 50dB range from +20 to +70 dB, augmented by a switchable pad. Since there’s also a trim control with a ±20dB range, this means that the Super 9000 can comfortably accommodate any signal it’s likely to encounter, and probably quite a few that it’s not very likely to encounter. VHD has its own dedicated potentiometer, too, but is not variable in the sense of providing an ‘amount’ or drive control. The amount of saturation depends solely on the signal level and the setting of the main gain pot; you drive it harder by increasing the input gain, and use the trim control to compensate if needs be. What gets varied by the VHD knob is the balance between second- and third-order harmonics in the saturation products. This is what allows VHD to emulate both valve saturation, which generates predominantly even-order harmonics, and transformer distortion, which is primarily odd-harmonic in nature. And should you wish to emulate a transformer-equipped valve preamp, you can of course set the control somewhere in the middle.
Super Duplicates The Super 9000 has two physical inputs, both located on the rear panel. The first is on female XLR and feeds the mic preamp,
while the second is a line-level input on a combi XLR/jack. This bypasses the mic preamp, but is within the purview of the trim control. In having both inputs on the rear panel, the Super 9000 follows the Revival 4000, but departs from the old XLogic SuperAnalogue Channel. On that unit, the second input was located on the front panel, and supported a high-impedance mode for direct injection of guitars, basses, electric crumhorns and the like. The Super 9000 has a button labelled Hi-Z, but this does not turn the ‘line’ jack into a guitar input. Rather, it switches the input impedance of the mic preamp from 1.3kΩ to 11kΩ. This can make a difference to the sound under some circumstances, particularly with transformer-balanced mics that happen to have a relatively high output impedance. As on the Revival 4000, the second input is selected using a button labelled Line, but the Super 9000 also sports a button at the other end of the front panel marked Input Flip. As the name suggests, this swaps the two inputs over so that the ‘mic’ XLR feeds the line input path, while the ‘line’ XLR/jack feeds the mic preamp. Under normal circumstances, SSL envision that the line input would be connected to an output on your audio interface, in order to access the Super 9000’s EQ and dynamics at mixdown. In this context, Input Flip allows you to switch the mic preamp into the mixdown chain for effect, without the need to re-patch. This is a neat idea. Of course, front-panel inputs and the ability to DI electric guitars would also be valuable, but you can’t keep everyone happy, and panel space is already at a premium with so many features on offer. The Super 9000’s input stage has what looks like a four-segment meter, but this functions only on the VHD path, and indicates saturation intensity rather than signal level as such. The SuperAnalogue preamp and the line input have no dedicated visual indication of signal presence at all, although the five-segment output level meter at the other end of the front panel can be repurposed as an input level meter.
The Big Squeeze Following the preamp, the default processing order takes the signal through the dynamics section. Again derived from the circuits used in the 9000-series and Duality consoles, this is based around a THAT 2181A VCA chip. In time-honoured
www.soundonsound.com / November 2025
57
ON TE ST
Monitors
Dynaudio Acoustics M2 MkII We visited AIR Lyndhurst Studios to put the newly revamped M2 monitor through its paces. PHIL WARD
R
eviewed in the July 2025 issue, the M1 MkII is the entry-level model in the completely remodelled Dynaudio Acoustics M Series. When the chance arose to experience the new M2 MkII at London’s AIR Lyndhurst Studios, it seemed a great opportunity to find out what an M Series monitor can achieve in a space far larger, and somewhat more luxurious, than my compact studio at home. While the M1 MkII is a relatively compact two-way system based around twin 18cm bass/midrange drivers and a 28mm tweeter, the M2 MkII is a significantly more ambitious three-way system comprising two 24cm MSP (magnesium silicate
60
November 2025 / www.soundonsound.com
polymer diaphragm) bass drivers, a 75mm soft‑dome midrange driver and, again, a 28mm tweeter. While the M1 MkII just about falls into the ‘nearfield’ category in terms of its size, low‑frequency bandwidth and maximum SPL capacity, the M2 MkII would be a genuine contender for the main monitor role. The M2 MkII is primarily designed to be stand-mounted but could potentially be soffit‑installed, and in contrast to the trapezoidal shape of the M1 MkII, its textured‑finish, 22mm‑panel MDF enclosure is conventionally rectilinear, apart from its softened front edges. The trapezoidal enclosure of the M1 MkII likely offers benefits in terms of suppressing internal acoustic resonance, so why have Dynaudio
Acoustics not chosen a similar enclosure shape for the M2 MkII? The reason is likely to be that, being a three-way system, the main enclosure volume houses only bass drivers, and their low-pass filtering will occur below the frequencies at which higher internal cabinet resonance might potentially be an issue. The enclosure also incorporates internal panels that brace it and diffuse internal standing waves. The M2 MkII bass drivers are reflex‑loaded by four flared ports of generous diameter that should offer high levels of laminar airflow. The ports are relatively long, but with low‑pass filtering kicking in at 600Hz, it’s likely that any unwanted organ-pipe resonance will be above the bass driver’s pass-band. The ports are tuned to around 38Hz, according to Dynaudio Acoustics monitor
designer Phil Pyatt, which ties in pretty well with the M2 MkII’s specified low-frequency cutoff of 40Hz.
Active Duty While the M1 MkII is a fully passive design, the M2 MkII is a hybrid of active and passive. Its midrange and high‑frequency drivers are integrated at 4kHz via a passive crossover filter network, while its bass drivers and the midrange/high‑frequency ‘module’ are integrated by active filtering at 600Hz and driven by separate Dynaudio Acoustics DA20 DSP power amplifier channels. The passive MF/ HF crossover filtering is achieved using a network of air-cored inductors and plastic film capacitors that results in nominally second‑order (12dB/octave) filter slopes. The fourth-order (24dB/octave) active filtering is implemented within the DSP front end of the DA20 amplifier, with the low-pass-filtered signal routed to one output channel and the high-pass-filtered signal routed to the second output channel. The fundamental reason for choosing the hybrid active/passive route is that implementing passive crossover filters at relatively low frequencies is always tricky. This is firstly because the large‑value series inductors necessary in a low-pass filter invariably introduce power-sapping resistance, and secondly because it’s at lower frequencies that driver input impedance varies most extravagantly, and that makes controlling passive filter slopes problematic. The M2 MkII midrange driver, for example, has its fundamental resonance and significant associated impedance variations between 300Hz and 350Hz; that’s only an octave away from the 600Hz crossover frequency, and would be difficult to manage optimally with passive filtering. Active filters, because they are positioned before the power amplification (and not even in the analogue domain in the case of the M2 MkII), don’t notice driver impedance variations.
much less is being asked of the driver. High‑frequency dome drivers, even those like the Esotar3 of slightly larger diameter than the usual 25mm, are typically most stressed at the lower end of their working range, and though the Esotar3 is up there with the best available, restricting its operation to above 4kHz can only be of benefit to the overall performance. The 4kHz midrange/high‑frequency crossover is of course made possible by the M2 MkII being a three-way system with a separate midrange driver. Said driver is a 75mm diameter soft‑textile dome that’s unique to the new M Series, although closely related to the one used in the original M Series. That driver had fallen out of use in Dynaudio’s current mainstream hi-fi and professional product range, and was specifically reintroduced and revised with a neodymium-iron-boron magnet for the MkII M Series. The new magnet provides significantly increased sensitivity and consequently reduced thermal compression. ATC and PMC are well known for their use of dome midrange drivers, and have long argued in favour of the format. There’s also little doubt that the Dynaudio dome is
Dynaudio Acoustics M2 MkII £12,000 pros • Really impressive, informative bass. • Dispersion characteristic helps with room acoustics. • Fabulous midrange driver. • The bass drivers and tweeter aren’t bad either.
cons • None.
summary My second experience of the new MkII M Series was as rewarding as the first. The M2 MkII is a fine monitor that deserves serious consideration.
conventional arrangement, and furthermore results in a very open airflow path directly under the diaphragm dust cap. These are positive attributes for a bass driver. The larger voice-coil diameter potentially brings significantly higher thermal power handling and reduced susceptibility to thermal compression, and the improved airflow means reduced non-linear damping. With those two advantages, you might wonder why all motor systems aren’t arranged in Dynaudio style. The answer is that the Dynaudio arrangement is both expensive to manufacture and tends to result in significantly higher moving mass (that big voice coil). More generally, it’s because the design of any driver is the result of balancing a multitude of often conflicting requirements (cost being one), and history has shown that the conventional motor system arrangement more often offers more opportunities to optimise that balance. This is especially the case with drivers required to cover bass and midrange. In the specific bass‑only case of the M2 MkII, the Dynaudio arrangement offers a particularly appropriate set of parameters and performance characteristics.
“I was struck by just how much new detail I was hearing and how much mix insight and perspective the M2 MkII was offering.”
Drivers Although the HF driver is the same Esotar3 unit fitted to the M1 MkII, its implementation is significantly different in the M2 MkII, because rather than working from 1.6kHz upwards, it’s not called upon until 4kHz. This increase in crossover frequency of over an octave will likely be beneficial in terms of high‑frequency distortion and thermal compression, simply because so
itself a very high‑performance driver, and in much the same way that the development history of the ATC midrange dome stretches back to 1976, Dyanudio’s history with dome midrange drivers is equally long and storied. The M2 MkII’s bass drivers are similarly invested with some of Dynaudio’s original thinking. In this case it’s the arrangement of the voice coil and magnet — known to speaker engineers as the motor system (a driver is effectively a linear electric motor with a diaphragm stuck to one end). In the vast majority of contemporary moving‑coil bass driver motor systems, a voice coil encircles a steel pole piece with a ceramic magnet, top plate and bottom plate located externally. However, in the original Dynaudio motor system arrangement, a much larger‑diameter voice coil surrounds the entire magnet and top plate assembly. Diagrams 1 and 2 illustrate a conventional and a Dynaudio motor system arrangement. You’ll see from the diagrams that the Dynaudio‑style motor system enables a much larger‑diameter voice coil than the
The Low Down Employing a pair of 24cm bass drivers not only enables the M2 MkII to deliver very healthy maximum sound pressure levels and extended low‑frequency bandwidth; it has a further consequence that is probably significant in terms of the way the M2 MkII integrates with room acoustics. The two 24cm bass drivers are spaced about 35cm apart, and work in parallel up to the 600Hz crossover point. Being spaced apart
www.soundonsound.com / November 2025
61
TECHNIQUE
10 Power User Tips There’s more to crafting perfect pop vocals than slapping on a bit of compression and Auto-Tune! MIKE SENIOR
O
f all the mainstream genres, pop arguably presents the highest bar to the mix engineer in terms of vocal production. The singer usually needs to sound bright, airy, and super-up‑front, but without becoming harsh or abrasive. You want every detail of the artist’s phrasing and lyrics to come through clearly on the widest range of listening systems, but without making the backing sound weak by comparison. And you often need to adapt your mix settings in response to
dramatic arrangement changes as well. In this article, I’d like to suggest a few tricks that I’ve found really useful for getting a polished end result.
1. Try Spectral Pre-processing There’s a family of specialist spectral-processing plug-ins that are usually associated with mastering and bus-processing applications, and which use FFT-based dynamics processing to enhance mix detail and smooth out mix tonality imbalances — I have in mind here things like Oeksound’s Bloom, Baby Audio’s
Smooth Operator, and Soundtheory’s Gullfoss. I’ve found that these same algorithms can also deliver a useful improvement in tonal consistency when applied directly to lead vocal tracks. It’s usually difficult, though, to know exactly what’s going on behind the scenes with these plug-ins, and exactly what each parameter’s doing, so I prefer to place them right at the beginning of the plug-in chain, where they can’t mess with any of my other vocal processors. Spectral-processing plug-ins can be pretty heavy on both CPU load and in terms of latency too, so it’s not a bad idea to freeze such plug-ins in your DAW once you’ve set them up.
2. Tune By Hand
Although spectral-processing plug-ins such as Soundtheory’s Gullfoss are more commonly associated with mastering, they can also make solo vocal tracks more tonally consistent and therefore easier to balance.
64
November 2025 / www.soundonsound.com
There are plenty of plug-ins that are designed to automatically correct vocal tuning, but if you’re after a high-class result then I’d strongly advise against taking that shortcut — by the time you have the degree of correction you need, you’ll also have ironed out all the singer’s expressive pitching nuances, as well as probably degrading the sense of vocal ‘air’ and mangling the consonants with processing artefacts. Instead, you’ll usually get better results if you just use simple pitch offsets to target the tuning specifically of the syllables that really need help. That way, you won’t have any unwanted tuning artefacts for notes that were already in tune, you don’t lose all those heart-tugging micro-level pitch variations, and you can avoid
processing noisy signals like breaths and consonants, which in my experience don’t tend to respond well to pitch-shifting.
3. Control The Extremes
Photo: Antoni Shkraba Production
Almost all singers naturally move around somewhat while performing, and that causes a certain amount of unpredictable tonal variation, especially at the vocal spectrum’s frequency extremes. Below about 300Hz, for instance, any front-back movement of the singer will cause the degree of proximity effect to vary if you’re using a mic with a directional polar pattern (as most singers do). Above 5kHz or so, the delicate air vibrations are extremely directional and very easily shadowed, so any turning of the singer’s head will cause significant differences in the amount of tonal airiness. In both these cases, using multiband compression to reduce the variability can help the vocal hold its place more consistently in the mix balance. In both cases, I prefer to keep the time constants relatively fast (attack and release times of around 10ms and 40ms at the low end, and around a millisecond each at the high end) so that the processing can react swiftly to the characteristics of each different vocal phoneme.
4. Brighten Just The Vowels If you try to brighten a lead vocal with simple high-end EQ boost, you’ll usually find that the sound gets abrasive before it’s airy enough. This is because, for most singers, the airiness of their vowels doesn’t match the brightness of the noisy elements of the vocal recording. Sibilants (‘s’ and ‘sh’ sounds) are commonly overbearing, for
instance, because many people place their vocal mic at lip level where these sounds are naturally exaggerated, but any other noise-based consonant (‘k’, ‘f’, ‘t’) can also be much brighter than a singer’s sustained vocal tone. Those little snicky noises you get from the physical mechanics of the lips and tongue (especially if the singer has a dry mouth) are another common culprit. A de-esser can help with excessive sibilance, but with other consonants you’ll usually find transient-reduction processing or region-specific EQ more effective. For mouth noise, a de-clicker plug-in (which you’ll find in restoration packages like iZotope RX) can sometimes help, but personally I prefer editing those out manually to avoid any undesirable impact on the rest of the vocal tone — their little waveform spikes are usually pretty easy to see if you zoom in far enough.
5. Multiply Your Mults Splitting up your lead vocal recording over multiple tracks (often called ‘multing’) is tremendously useful in pop production, where musical arrangements often change dramatically between song sections. It’s not uncommon, for instance, that you might want to dial back the amount of low end on a lead vocal as you move from a sparser verse into a fuller-textured chorus, to avoid overall mix muddiness. And at the same time you might want to add in a longer reverb or some kind of modulation effect to help emphasise the arrival of that important song section, or compress a bit more heavily to give more of a sense of energy and aggression. Sure, you could do all that with layers and layers of automation data
— but it’s a lot easier to just mult the verse and chorus vocal parts to separate tracks with independent settings. Multing can also really help with managing backing vocals, allowing you to group together similar licks and phrases for easier communal balancing and processing.
6. Don’t Forget The Timing People seem to spend an awful lot of time talking about tuning pop vocals, but I think it’s equally important to make sure the timing’s on point. The singer is so loud in a typical pop mix that any vocal timing vagaries can really undermine the song’s overall groove. Most DAWs have extremely flexible built-in time-stretching facilities that make these kinds of edits a breeze, but even if your software doesn’t (or the processing side-effects sound horrible), it’s no excuse — I’ve done almost all my vocal timing tweaks with simple audio editing tools for years. Slice points in breaths or noisy consonants (things like ‘f’ and ‘s’) will usually be inaudible, and editing unobtrusively in the middle of held vowels is also pretty straightforward, as long as you remember to match the waveforms on either side of the edit and to smooth over the join with an equal-gain crossfade (the straight X-shaped one, not any of the curved ones).
7. Region-specific EQ Set-and-forget processing such as EQ, compression and de-essing is undoubtedly useful for lead vocals, but it has its limits: the human voice is simply too varied and unpredictable a sound source for a one-size-fits-all approach. The trick is to
Multiband dynamics control at the frequency extremes can help compensate for tonal variations caused by the singer’s movements while recording.
www.soundonsound.com / November 2025
65
TECHNIQUE
MIXING POP VOCALS
Audio Examples Online! If you’d like to hear some of these techniques in practice, then head over to https://sosm.ag/mixing-pop-vocals, where you’ll find a selection of audio examples breaking down the vocal mixing process for my recent mix of the indie pop song ‘April Blues’ by new artist Moni Blue. www.instagram.com/songsbymoni Photo: Lotta Seither
Multing the lead vocal to different tracks can help adapt the sonics to suit different arrangment contexts, while effects-level automation can grab the listener’s attention and support your arrangement.
go as far as you can with ‘static’ processor settings without overdoing things, and then use manual processing to fix any remaining rough edges. In this regard, region-specific EQ (which I believe is now available in all the software DAWs) is a godsend. High-pass filtering around 100Hz can tame plosive ‘pops’, for instance. Low-pass filtering can soften breath noises without unnaturally deleting them, and can take the aggressive edge off hard consonants. Narrow-band notch filters can scotch those needling harmonics that some performers produce when singing certain vowels loudly in their higher register. And the beauty of this kind of processing is that, by nature, you only need to worry about processing side-effects during that specific audio region, even if you need to go extreme with the settings to get the job done.
8. Balance On A Single-driver Midrange Speaker The more solidly your lead singer maintains their subjective level in a pop mix’s balance, the louder you can have the vocal fader without making the rest of the mix sound small by comparison. Clearly dynamics processing has a part to play in this, but regardless of what compressors or limiters
Mouth noises such as lip smacks are usually pretty easy to spot on the audio waveform if you zoom in far enough — there are a few in the highlighted section in this screenshot, for instance — and can easily be edited out manually.
66
November 2025 / www.soundonsound.com
you use, you’ll still need to level-automate the vocal in great detail if you want to compete with chart mixes. You’ll only be able to do this effectively if you can really hear what you’re doing, and this is where I recommend listening to your mix in mono, through a single-driver midrange speaker such as an Avantone Mixcube or Tantrum Audio Angry Box. By doing this, you can avoid the inherent phantom-image instability of stereo listening, you won’t get phase cancellations between speaker drivers if you move your head, and you are also presented with a tonal balance that naturally focuses your ears on the midrange frequencies that are most important to mass-market mix translation. As a result, a single-driver midrange speaker is great for making fine vocal-balance changes more clearly audible, so your level-automation decisions can be more accurate and reliable.
9. Work That Clip Gain! Pop vocal processing typically involves a lot of stages of dynamics processing, and those become more difficult to set up if your raw vocal’s levels are very variable. You can make life easier for yourself if you slice up your vocal recording into phrases and then use each region’s clip gain setting to do some preliminary broad-brush levelling. Moreover, I’m increasingly finding clip-gain changes useful on a more ‘micro’ scale as well, because they make it easy to boost small details in a vocal performance that can really aid lyric transmission — things like duller-sounding closed-mouth consonants (eg. ‘m’ and ‘n’), diphthong consonants (eg. ‘y’, and ‘w’), and underpowered plosives (eg. ‘b’ and ‘p’) or voiced consonants (eg. ‘d’ and ‘g’).
Moni Blue, the artist featured in the audio examples.
Yes, it’s possible to address all those things with automation, but somehow I’ve found it easier to get natural-sounding results with clip gain instead — and I can then focus more on the subjective musical balance when riding the vocal fader.
10. Automate Your Effects Pop production is all about continually re-engaging your audience’s attention, and in practical terms that means constantly surprising the listener to refresh their interest. In this respect, variations to the lead vocal are particularly powerful, because most people connect most strongly with the singer in any song, but at the same time you don’t want to vary the vocal melody itself so much that you compromise its memorability. Which is why it really pays to automate your vocal effects, especially if you do so abruptly. You see, in real life we normally move between different acoustic environments gradually — unless you’re The Flash, it takes a little time to walk from one room to the next! So sudden changes to vocal delay/reverb effects in a mix can be profoundly attention-grabbing, even if most non-techie listeners won’t be able to put their finger on exactly why. In addition, though, more subtle dynamic adjustments to your vocal effects can powerfully support the build-up of your musical arrangement. So don’t just ride your vocal’s level — ride its effects levels too.
ON TE ST
HUGH ROBJOHNS
T
he intelligibility and/or clarity of speech is quite obviously of paramount importance in almost all audio-programme content, whether that’s film, TV, radio, podcasts, YouTube and TikTok videos, computer games... or whatever. Unfortunately, poor‑quality dialogue remains a primary cause for complaint amongst broadcasting and streaming viewers and listeners — after all, it’s impossible to enjoy a programme (or to convey useful information to a listener) if the speech is hard to follow. Since we all know, intuitively, whether dialogue is intelligible or not — we can either understand the words easily, or we can’t — it might seem like it should be easy for programme makers to judge. Yet, speech intelligibility can actually be quite hard for them to assess, and this is the problem Nugen aim to address with their DialogCheck plug-in. But before I start exploring the plug-in itself I’d like to discuss the complex nature of the problem in a little more detail.
Quantifying The Problem A key reason for the difficulty in judging intelligibility is that key production staff will typically spend weeks or months working with the script before filming or recording — so, even if a performer mumbles their lines, they already know what they are supposed to be saying. Sound recordists typically follow a script too, so, again, poor diction can easily go
Nugen Audio DialogCheck
Metering Plug-in
The problem of dialogue intelligibility has proven a stubborn nut to crack — but this new meter promises to make consistently clear voices easier to achieve... unnoticed because the brain, primed by the script, automatically ‘fills in the gaps’. When it comes to post-production, either poor delivery during the recorded scene or a mix with heavy effects or music may well seem perfectly intelligible to the post-production crew, too — not only because of their prior knowledge and familiarity with the content, but also because they’re auditioning it using high-quality monitoring equipment in acoustically treated listening environments, and enjoy the spatial separation afforded by multi-channel speaker systems. Casual viewers/ listeners, on the other hand, are new to the production, so they don’t have that prior knowledge of the script, and they’re also unlikely to be listening to high-quality loudspeakers in a good acoustic environment. Worse still, they probably have to contend with all manner of background noises that can mask the dialogue or distract their attention.
Although some of these impediments to speech intelligibility are far beyond the control of the programme creators, many elements within the production process can be controlled. And the first step in optimising speech clarity is being able to quantify it — accurately, reliably and repeatedly — both in its raw state when being captured, and in the context of a full production mix. So, the fundamental question to answer is: how can we quantify speech intelligibility? And that’s a conundrum that’s been exercising the minds of clever people for some time. Some of the answers have come from Fraunhofer IDMT, who have developed a solution called the ‘Listening Effort Meter’. It’s a technology that combines automatic speech recognition with psychoacoustic modelling, and is powered by twin AI neural networks. During its development, the LE-Meter’s results were validated through extensive listening tests,
A screenshot of the DialogCheck GUI after playing through a podcast interview of clean and perfectly intelligible dialogue. Note the very high median clarity value, and the narrow range between the upper and lower quartiles. The consistency of clarity is also shown in the statistical distribution graph on the left-hand side.
68
November 2025 / www.soundonsound.com
Nugen Audio DialogCheck £279 pros • Easy to comprehend, recognisable metering format. • Familiar operating concepts. • Simple but quantified and repeatable numeric evaluations. • Compatible with all standard DAWs and production channel formats.
cons • None.
summary An ingenious and highly effective tool which evaluates speech intelligibility within a standard and very familiar DAW plug-in metering paradigm.
comparing the algorithm’s figures with subjective human assessments of speech intelligibility and clarity.
Enter Nugen Nugen Audio, working with Fraunhofer IDMT and with input from Netflix, have combined this LE-Meter technology with their own expertise in history-view metering formats (as seen in their VisLM loudness meter, for example), to create a plug-in called DialogCheck. It’s available in 64-bit VST3, AAX and AU plug-in formats, secured using PACE iLok, and compatible with computer platforms later than Windows 7 and macOS 11. All standard channel formats from mono up to 7.1.4 are supported, and the plug-in automatically detects speech within a complete mix, ignoring silences or music-only sequences, for example, so that they don’t negatively impact the numerical Clarity indices. I should stress that this is an intelligibility analyser or metering system, not a signal processor, or ‘improver’ — it doesn’t change the mix in any way. Rather, it highlights sections in time where its analysis suggests that speech intelligibility might be impaired, and provides reliable numbers to quantify the perceived speech clarity. Nugen’s history view concept is critical to the plug-in’s operation and usefulness. Being timecode-locked to the DAW, it allows sections of poor intelligibility to be easily identified, thus making reworking of low-clarity sections fast and easy. For example, once a region of poor clarity is identified, the post-production department could improve noise reduction processing of the raw sync source files, or maybe decide to replace the original location sync sound with ADR. And during the mix stages, the mix might be rebalanced to leave more ‘space’ around the dialogue, with lowered effects or music. Although most users will probably run the programme audio through the plug-in in real-time, during a mix or perhaps a QC assessment, the plug-in can also be used faster-than-real-time using an offline render, for rapid assessment of programme conformation to the streamers’ or broadcasters’ policies.
DialogCheck Display
center supported side-address cardioid KMR Audio
transformerless active balanced condenser
sales@kmraudio.com
Available now from
Studiocare Professional Audio
sales@studiocare.com
THE WORLD’S BEST RECORDING TECHNOLOGY MAGAZINE
FULL ISSUE PDF THE WORLD’S BEST RECORDING TECHNOLOGY MAGAZINE
1985 — 2025
THE WORLD’S BEST RECORDING TECHNOLOGY MAGAZINE
1985 — 2025
THE WORLD’S BEST RECORDING TECHNOLOGY MAGAZINE
TM
TM
MUSIC PRODUCTION TECHNIQUES / INDEPENDENT IN-DEPTH PRODUCT TESTS / ENGINEER & PRODUCER INTERVIEWS / LIVE SOUND
MUSIC PRODUCTION TECHNIQUES / INDEPENDENT IN-DEPTH PRODUCT TESTS / ENGINEER & PRODUCER INTERVIEWS / LIVE SOUND
CRANBORNE AUDIO
BRICK LANE One module, seven compressors!
Powerful. Flexible. Affordable. Is this the future for Moog?
1985 — 2025 TM
MUSIC PRODUCTION TECHNIQUES / INDEPENDENT IN-DEPTH PRODUCT TESTS / ENGINEER & PRODUCER INTERVIEWS / LIVE SOUND
SSL Oracle Hybrid mixing without the compromises
The evolution of echo chambers How the great studios created magical reverb
Sound Devices Astral KPop Demon Hunters The epic production behind the hits
Expressive E Soliste
Revolutionary radio miking
The ‘squash mic’ trick
Your drum tracks will never be the same again!
Musically modelled strings
Apogee Symphony Studio Affordable entry to immersive monitoring
SSL Revival 4000
E-series channel in a 1U rack
WIN
NEVE 88C
ALLEN & HEATH
WORTH £ 1074
WORTH £ 2280
www.soundonsound.com
www.soundonsound.com
ON TEST: BUCHLA / STEINBERG / POLYEND / VALETON / NORDIC / NOISEWORKS / LYNX / NI / BRAINGASM / BITWIG / HH / HOTONE
TECHNIQUE: MID-SIDES RECORDING / PLOSIVE CONTROL / DAW WORKSHOPS
QU-6 MIXER
COMPRESSOR
TECHNIQUE: WHAT MASTERING CAN AND CAN’T DO / STEREO RECORDING
of 2025 was created
gets physical!
WORTH £1472
music onto every platform
www.soundonsound.com
ON TEST: DREADBOX / APPLE / STEINBERG / MACKIE / HIFIMAN / TWO NOTES / ROYER / ELYSIA / NEUMANN / POLYEND / HEDD
ON TEST: CLAVIA / WARM AUDIO / GROOVE SYNTHESIS / OUTPUT / SPITFIRE / ACON DIGITAL / MERIS / HAZELRIGG / AIAIAI / GS MUSIC October 2025 £7.99
WIN
Alex Warren Erica Synths FOCUSRITE ‘Ordinary’ Steampipe SOS For Artists NOVATION & ADAM STUDIO BUNDLE How the biggest hit Physical modelling The easy way to get your
September 2025 £7.99
TECHNIQUE: HOW STEREO WORKS / COMPOSING WITH CHANCE
August 2025 £7.99
This complete digital replica of the Print magazine includes all articles and adverts published in that edition. Buy and download instantly - no shipping costs! Only £3.99 each edition (or FREE with all Digital subscriptions).
In many ways, the DialogCheck display resembles typical loudness history metering systems, which, if you have experience of Nugen’s other products, isn’t surprising. The centre of the GUI, which can be scaled as required, is
Get your FREE PDF today! https://sosm.ag/FreePDF
www.soundonsound.com / November 2025 quarter-stn-Full Issue PDF UK.indd 1
69 25/09/2025 16:16
ON TE ST
Instruo Seashell
Desktop Synthesizer
Instruo’s first foray into standalone synthesizers is both ambitious and original. SIMON SHERBOURNE
I
nstruo are an A-list brand in the Eurorack community, known for their innovative, feature-rich modules. The Seashell is the company’s first standalone synth, taking its inspiration from their Cš-L complex analogue oscillator module. But it’s a more ambitious concept than a Eurorack module with its own case (although it will play with your Eurorack gear). It’s a versatile semi-modular synth that runs standalone via MIDI or CV, or integrates into a computer-based setup, with audio streaming and software control over USB. The Seashell is beautifully built and surprisingly small, significantly smaller than the familiar 3U of Eurorack. Unlike some desktop synths from Eurorack shops (think Make Noise Strega or Bastl SoftPop II for example) you can’t pop the panel out and mount it in a rack: it’s an all-in-one metal
72
November 2025 / www.soundonsound.com
enclosure, with connectivity on the rear as well as up front. There’s a power supply but you can also power the unit from USB-C, which, combined with its digital connectivity, makes the Seashell a terrific laptop companion. I’ve found that analogue synths powered by USB can suffer terribly from noisy interference, but happily this is not the case with Seashell.
Standalone Basics The Seashell’s compact panel is dominated by two large tuning knobs for the dual oscillators. It might not seem an obvious decision to devote so much of the limited real estate to oscillator frequency, but with quantisation, sync and cross‑modulation on board these are performable controls. In its initialised state, the Seashell’s two sources route into the filter, and the single envelope generator controls both the filter and the amplitude at the
main output and headphone feeds on the rear panel. A gate/envelope trigger button lets you start exploring the synth with no connections other than some headphones. As a synth the Seashell combines a ‘bottom-up’ block that defaults to a sine wave passing into a wavefolder, with a harmonic oscillator (saw/pulse/triangle) that can run at audio or LFO rates. Similar to the Buchla Easel’s complex and modulation oscillator pairing, but with the addition of a filter like Majella’s Implexus. Each oscillator in fact has multiple modes, or rather their various derived sources can be routed through the main voice path in different ways. When controlling the Seashell from the hardware these are selected by stepping through a series of combos via the Source button. The initial mode is folded sine plus pulse. Tapping Source moves you to dual (unfolded) sawtooths; a second tap and it’s folded sine plus saw, and so
Instruo Seashell £649 pros • Sonically versatile. • Fantastic computer integration.
cons • Plug-in currently VST only. • Needs the software control for full potential.
summary A classy desktop synth that offers a unique hybrid workflow.
on. There’s no mixer for the oscillators, instead half the modes route just one source into the main filter path. Even here there are various ways the other oscillator can come into play. Osc 2’s three signal flavours are always available at dedicated patch outputs, and the folded osc 1 signal also has a dedicated persistent output, as does the filter if you want to take a pre-VCA feed. Visual feedback for the source mode is provided via a single LED, using a mixture of colour coding and pulsing. Similar systems are used to show envelope mode, oscillator sync mode and pitch tracking for the oscillators. The scheme is logically consistent, but it’s one of those things that you have to learn, and then likely re-learn if you have a break from the synth.
saw options from oscillator 2 (and the triangle it provides via patch point) are all incredibly solid and smooth. The same adjectives serve for the filter — a 12dB/ octave resonant low-pass design. As well as traditional subtractive operation, the filter is designed to give low-pass gate style results if you disable the VCA and modulate the cutoff from zero with the envelope set to exponential mode. The wavefolder can be hand cranked from a slider, or modulated by the envelope or the CV input that’s shared with the filter. There’s also an attenuator that sums in whatever is present at osc 1’s FM input, which is osc 2 unless you’ve patched something. This ‘analogue symmetry’ control is effectively an animated bias that changes the folding character.
give the synth some life and presence at source without relying on post processing. Dialling this in from the central pot first introduces some subtle spread, which then morphs into a reverb at higher settings. This is great at low and high settings, although through the middle of the range it introduces a ringy resonance a fifth above the fundamental which I found a bit wearing. After my first session exploring these top-level Seashell features I felt I’d sussed out what it could do as a synth. Not so. Of course we’ve not even looked at the digital hybrid features that make it so interesting, but there’s also a lot more sonic potential to unlock. Oscillator sync is provided with three ratios: osc 2 can sync osc 1 at its current frequency or at lower octaves. Then there’s FM routing to either oscillator via dedicated inputs and attenuverters, and independently switched linear and exponential ranges. Each oscillator is normalled to its counterpart’s FM input, so circular FM is available with no patching. Results can range from subtle vibrato using osc 2 in its LFO mode, to bubbling chaos and noise with bi-directional cross‑modulation. Adding sync to the FM mix constrains the more extreme results to tonal, animated sounds.
“Connected to a computer via USB, the Seashell has another life.”
Native Sound Sonically, the wavefolded source provides a range of progressively warm, harmonic starting points, with a classic West Coast flavour. The pulse and
In modes without the wavefolder you get more traditional subtractive monosynth sounds. The Seashell is not above serving up some wonderful sticky and squelchy acid if you like, and a detuned saw and pulse combo can paint rich Moogy textures despite the filters having little in common. As you explore more you can find sci-fi soundscapes and filthy drum & bass vocal basses. The other key component that creates Seashell’s ‘native’ sound, if it can be said to have one, is the Diffusor. This is a stereo spatial processor designed to
At the back of the unit we find 3.5mm sockets for line/headphone output (with associated level knob), MIDI in and assignable CV in, along with a 5V power socket and USB‑C port.
Digital Hybrid Connected to a computer via USB, the Seashell has another life. First, it’s an audio interface, with its main stereo output piped to the host, and able to monitor a mix of stereo audio coming from the computer with its own internal sound. Second, it syncs with a companion
www.soundonsound.com / November 2025
73
INSIDE TRACK
Greg Kurstin • Wolf Alice
76
November 2025 / www.soundonsound.com
Photo: Brantley Gutierrez
For their first major‑label release, Wolf Alice hired super-producer Greg Kurstin to channel their inspiration.
PAUL TINGEN
“I
came from indie music and jazz, but had my biggest breaks in pop,” smiles Greg Kurstin. “I’m fine with that. It doesn’t matter who it is or what the genre is, a good song is a good song, whether by David Bowie, Talking Heads, the Beatles or the Ramones. I’ve always been a sucker for a good pop song, so my tendency is to go there. “I’ve had contrasts going on all my life. I started out playing guitar in post-punk bands, but also played jazz piano. When I was 15, I discovered Mingus, Coltrane, Miles and hard‑bop, and got heavily into that. It took over my life. I was planning to become a jazz musician! Then, in the early ’90s, I accidentally got signed to David Byrne’s label Luaka Bop, with the indie band Geggy Tah. I learned how to write, produce and program, using drum machines, samples and sequencers. Afterwards I became a side musician with Beck and the Flaming Lips, still operating in the alternative rock
world. Eventually, in the early 2000s, I decided that I wanted to be a songwriter and producer, but at that time, the only people who needed songwriters were pop singers, because indie bands were self-sufficient. “But I also do weird music. So I move around a lot in different genres. As a producer, with any project I’m working on,
“Wolf Alice were probably attracted to my range,” says Kurstin. “They know who they are, as a band, so they don’t need someone who is too much like them. They wanted someone who could help them expand their sound. They don’t want to be labelled as a rock band. They went into different territory with their new record, and I really appreciated that. I was excited to learn with them, and to figure out with them how to get the sounds that they were going for. That was the fun part of this record, because I don’t think I’ve made this kind of record with anyone yet. It was a little bit dangerous, for all of us, because we’re all trying to figure it out. That’s very exciting in the record-making process!”
Greg Kurstin: “My studio is set up so that you can run anything through anything with a hit of a button.” I don’t want to put my stamp on it so people could say ‘That’s a Greg Kurstin production.’ Instead I’m trying to help an artist or a band achieve what they’re trying to do, in the best possible way. That’s the goal.” Following hits with Lily Allen, Adele, Sia, Kelly Clarkson, Pink, Lady Gaga, Beyoncé and many others, the latest act to benefit from Greg Kurstin’s broad experience is rock band Wolf Alice, whose fourth album The Clearing is their first on a major label.
Organic Mood “When I first met them, they told me that they wanted to track as a band, with at least the rhythm section playing together and if possible more. Sonically, they wanted to do something very organic. Joff [Oddie, guitarist] said he wanted to hear
www.soundonsound.com / November 2025
77
ON TE ST
Source Audio Encounter Reverb & Delay Pedal
This clever dual-engine effects pedal offers ambience for days! Source Audio Encounter $499 pros
• Very easy to use. • Capable of a wide range of ambient delay/reverb combinations. • MIDI and Neuro Hub support. • Free Neuro 3 editor/librarian
cons • There really is little to dislike here!
summary A lovely ambient reverb/delay effect. While there are always extra things you could wish for, what you get here strikes a great balance between what is technically possible and what’s actually practical for the user.
82
November 2025 / www.soundonsound.com
PAUL WHITE
Y
ou might already be familiar with Source Audio’s Collider and Ventris dual-engine pedals, and their new Encounter comes in the same format. Of course, it is loaded with a different set of effect algorithms, and in this case it’s ambient reverb or delay algorithms that can be loaded into either engine. You get a choice of serial or parallel routing options, too. As with the Collider, this pedal can store up to eight presets that are accessible from the front panel (though the default setting is four), or 128 presets that can be accessed using MIDI. The Encounter can also be integrated with other Source Audio pedals, using their optional Neuro Hub technology, or linked to them using MIDI. There are four preset LEDs and a Select button for stepping through them. If set to Preset Extension mode (eight presets), the LED that is lit
shows presets one to four while presets five to eight use an unlit LED to show the preset number. Source’s Neuro 3 software (iOS, Android, Mac or Windows) has been massively upgraded, and includes a really neat new feature called SoundCheck. This incorporates faithful emulations of all Source Audio’s pedals, along with a series of test phrases played on different instruments that can be run through the virtual pedals. The user can then use Neuro 3 to audition pedals or use the editing function to create patches that can then be shared with other users, saved in a library or saved to a pedal.
Controls & Functionality The Encounter’s most important functionality can be accessed from the controls on the pedal itself, with no deep menu‑diving involved, but using the Neuro 3 editor allows access to further adjustments that you can’t reach using the front-panel controls. Onboard MIDI support allows the Encounter to slot into a MIDI-controlled rig using CC messages to change parameters and Program Change messages to navigate presets. Stereo ins and outs allow for any mono/stereo permutation. If you don’t need to preserve tails, you can use the Analogue mode, which uses a relay
to bypass the effect and keeps the dry signal in the analogue domain. A rear-panel mini–jack Control input, with associated small button, accepts a tap-tempo switch, a Neuro Hub, a dual expression pedal or, if you have one already, the discontinued Reflex Universal Expression Controller or Hot Hand Motion Controller. A separate quarter-inch Pedal In jack that’s assignable to various functions takes an expression pedal or a switch. A USB port allows for connection to a computer running the Neuro 3 software. As with the Collider, there are six rotary pots, plus a rotary switch for selecting the effect algorithms. The pots control Delay, Mix, Feedback,Tone, Control 1 and Control 2, and the precise function of some controls changes according to the algorithm selected. Mix adjusts the wet/dry balance, while Feedback sets either the delay feedback or the reverb decay time. Tone does the brighter/darker thing while the Control 1 and
Any permutation of mono and stereo inputs and outputs is possible, while both MIDI in and thru are supported, and there’s a versatile control input jack.
Control 2 knobs relate to the current algorithm — for example, generally setting mod rate and depth for the delays. By default, a patch comprises one reverb and one delay, and should you only need one effect then either can be bypassed. But a simple routine unlocks the system so that either engine can be loaded with either type of effect. So you could run two delays at the same time, or two reverbs, or have the effects running reverb into delay rather than the usual delay into reverb. There’s also a simple routine to enable Preset Extension mode if the default four presets aren’t enough. The leftmost footswitch, which operates bypass and is used to set the delay time by tapping, has a red/green status LED and a switch that sets a choice of three tap divisions. The LED blinks red to green at the set tap rate. When both sides of the pedal are bypassed, the footswitches can also be used to navigate presets by pressing and holding. The right‑hand footswitch again has an LED along with a three-way switch that flips the controls from adjusting reverbs to adjusting delays. In the centre position all control changes are locked out.
www.soundonsound.com / November 2025
83
COMPE TITION
Win!
Universal Audio Volt 876
Complete Studio Bundle T
his month, Sound On Sound celebrates an amazing 40 years in continuous publication. Happy birthday to the world’s best music technology magazine! To mark this momentous occasion, and to thank you, our readers, for your invaluable support, we’ve teamed up with some of our favourite brands to offer you the chance to win the prize of a lifetime: a complete music production and recording studio, containing some of the world’s greatest gear, worth over £20,000!
Worth Over £20,000
The Hardware
monitors, plus hands-on control over level, mute, dim and talkback. There’s digital I/O via ADAT (and word clock for sync), plus full‑size MIDI ports, and two headphone outs for monitoring and foldback. Two of the preamp inputs are conveniently located on the front panel for ease of access when the Volt 876 is rackmounted. UA will also be providing two of their acclaimed guitar pedals, plus a selection of microphones. The UAFX Anti and UAFX Knuckles are based on classic
SD-5 kick mic, an SD-7 snare mic, two SD-3 triple mic packs (six in total) for toms and hi-hats, and a pair of SP-1 pencil mics for overheads. A further SD-1 dynamic mic is ideal for capturing bass or guitar, while the large-diaphragm capacitor SC-1 will take any vocal in its stride. All these mics are compatible with UA’s pioneering Hemisphere modelling platform, offering a huge array of meticulously modelled microphones. We’ve also partnered with electronic instrument legends Roland, to include their brand-new V-Drum kit, the TD516. This next-gen kit offers premium sound and flexibility, enhanced playability, and complete digital integration with its five electronic shells (kick, snare and three toms). Two crashes and a ride are also included, as is a digital hi-hat with precise open/closed behaviour and touch muting. Whether you’re tracking detailed performances in the studio or demanding more nuance from your live setup, the TD516 provides ultra-dynamic control, deep connectivity, and the realism players expect from top-tier V-Drums.
To enter, please visit: https://sosm.ag/40th-anniversary-competition
At the heart of this studio will be the brand-new Volt 876 interface from Universal Audio. This 1U rackmounting interface provides a generous 24 inputs and 28 outputs via USB, including eight analogue inputs boasting UA’s premium preamp and analogue 1176-style compression. The preamps can be set to Vintage mode, offering the sound of UA’s classic 610 preamp, while the monitor section includes provision for two pairs of
Universal Audio UAFX Anti
86
Universal Audio UAFX Knuckles
Universal Audio SD-7
November 2025 / www.soundonsound.com
’90s guitar amps, offering iconic rock and metal tones in a stompbox format; the former is based on the Dual Rectifier and the latter on Peavey’s revered 5150. Both also boast a TS-style distortion stage plus a noise gate. On the mic front is a complete UA drum recording setup, comprising an
Universal Audio SD-5
Universal Audio SD-3
Universal Audio SP-1
Universal Audio SD-1
Universal Audio SC-1
DPA 4099 Core+ & Clamp Mount DPA 4099 Core+ & Universal Mount
CAD Audio E100SX
Cad Audio GXL800
Roland TD516
Harrison 32Classic Mix Strip
Slate Digital ML-1A
Danish microphone legends DPA will be offering up not one but two of their new 4099 Core+ instrument mics. Based on their established 4000-series capsule technology, the new Core+ version promise best-in-class noise performance, alongside unbeatable sonic transparency. DPA will also provide two different mounting options, the Universal Mount and the Clamp Mount, allowing you to fit the mics to almost any instrument imaginable. CAD Audio will also be providing two microphones: the E100SX
large-diaphragm hypercardioid mic from anniversary edition of their acclaimed their acclaimed Equitek range, and Reflexion Filter Pro, to help you get the a GXL800 small‑diaphragm cardioid best from your new microphones. model, which between them will handle Rounding off the microphone almost any audio source. collection is the Warm Audio WA-44 Digital modelling experts Slate — a ribbon microphone based on Digital are giving away their a classic American design. They’ll ML‑1A: a quality mic in its be pairing that with their acclaimed own right, but when paired WA-MPX valve microphone with Slate Digital’s Virtual preamp, which pays tribute to the Microphone System software legendary Ampex 351. it offers accurate emulations Console legends Harrison, of dozens of classic modern meanwhile, will be weighing and vintage mics. in with the 32Classic Mix Strip, As well as marking our a complete channel strip comprising 40th birthday, 2025 also a premium transformer-coupled marks a quarter of a century mic pre, a four-band parametric for microphone giants EQ, high‑ and low‑pass filters, sE Electronics. For this and flexible routing options prize, sE will be providing — essentially the classic sound a limited-edition 25th of Harrison in a 1U rack. Warm Audio WA-44
sE Electronics Reflexion Filter Pro 25th Anniversary Warm Audio WA-MPX
“We’ve teamed up with some of our favourite brands to offer you the chance to win the prize of a lifetime...”
www.soundonsound.com / November 2025
87
COMPE TITION
ADAM Audio D3V
KRK Rokit 8 G5
AIAIAI TMA-2 Studio Wireless
Fostex T50RPMK4
Focusrite Scarlett 2i2 4th Gen
Monitoring options are audio to a computer. It boasts two of Finally on the hardware front well catered for, with both ADAM Focusrite’s most detailed and quiet are two software controllers. The Audio and KRK contributing preamps ever, plus Auto Gain and Novation Launch Control XL 3 offers to this massive prize bundle. Clip Safe modes, meaning you may hands‑on control over every major The ADAM D3V is a compact never lose a recording to clipping DAW, as well as third-party soft synths, powerhouse, boasting the refined ever again. effects plug‑ins and MIDI hardware. ribbon-tweeter sound we associate British console legends Allen It boasts no fewer than 24 endless with ADAM but in a super-compact & Heath, meanwhile, are bundling rotary encoders, eight faders, 16 and portable format. For when in their ZEDi10 compact console, assignable buttons and both USB serious low end is required, KRK’s which combines premium analogue and 5-pin MIDI connectivity. Rokit 8 G5 boasts LF extension mixing of up to four mono The Black BT SusEx Pedal, SSL E Series and two stereo sources, down to 32Hz (-10dB) courtesy meanwhile, is an EQ Module of KRK’s trademark yellow Kevlar plus musical ‘British’ EQ innovative pedal‑based cone, and a high end that reaches on the first five channels, foot‑operated unit up to 40kHz. An integral DSP both monitor and effects aux that combines engine lets you tailor their response busses, flexible monitoring wah‑wah‑like control with with three distinct Voicing Modes. options and even a built‑in instantaneous switching, BlackBT The winner will also receive not 4-in/4‑out USB audio interface. courtesy of an auto-sensing one but two headphone monitoring Users of the popular 500-series SusEx Pedal system that can tell where you options. AIAIAI are offering their module format will be well catered foot is placed on the pedal and TMA-2 Studio Wireless, a premium for, with three premium modules. modify its behaviour accordingly. It can closed-back moving‑coil design SSL will be giving away their E-Series transmit data via a traditional expression with the unique ability to operate EQ Module and E-Series Dynamics pedal jack, or using wireless MIDI via wirelessly, at low latency and with Module, essentially packing the Bluetooth LE. near-lossless audio quality. SSL E Series sound of an E-Series console The Software Fostex, meanwhile, are including Dynamics Module channel strip into two 500-series their T50RPMK4, a planar slots. Meanwhile, Cranborne Every modern studio needs a DAW, and magnetic set of headphones that boast Audio are giving away a Brick Lane with this prize bundle you get a choice exceptional transient performance, high compressor — a unique design that of two: Bitwig are offering up their sensitivity and ultra-low distortion — ideal uses PWM compression to offer the flagship Bitwig Studio, a multi-platform for critical listening tasks such as mixing sonic flavour of almost any type of suite of production tools with a modern, and mastering. compressor ever conceived. intuitive UI that makes working with Also celebrating an amazing 40 years IK Multimedia are donating their audio a breeze. Its powerful modulation in business this year are Focusrite, Tonex Pedal, an avanced amp and options make it a sound designer’s whose best‑selling Scarlett 2i2 4th effects modeller that not only comes dream, while naturally it can also perform Gen USB interface will also come as with a plethora of virtual guitar rigs, but all the usual audio and MIDI production part of this prize bundle. The 2i2 4th even allows you to capture tricks, as well as offering compatibility Gen offers a compact, portable yet your own for use on stage with a huge range of third-party plug-ins high‑quality means of capturing and in the studio. and hardware controllers.
Allen & Heath ZEDi10
88
November 2025 / www.soundonsound.com
Cranborne Audio Brick Lane
IK Multimedia Tonex Pedal
Novation Launch Control XL 3
Bitwig Studio
SoundBridge DAW
SoundBridge ReChord
Native Instruments Komplete Ultimate 15
EastWest Composer Cloud+
Toontrack Superior Drummer 3
SoundBridge RitMix
SoundBridge, meanwhile, are also providing a lifetime licence for their brand-new self-contained production ecosystem. SoundBridge: DAW is a musician-oriented platform with a streamlined UI that’s aimed at fostering creativity and avoiding overwhelm, whether you’re sketching ideas or mastering finished tracks. It includes a range of bundled instruments and processors, plus powerful audio and MIDI recording editing facilities. SoundBridge are also including their RitMix virtual drum machine, based around an MPC-style pad grid and 16-step sequencer, plus their reChord arpeggiator and melody generator. No computer-based studio would be complete without some sample-based instruments, and they don’t come more complete than Native Instruments’ flagship collection, Komplete 15 Ultimate. This gargantuan collection brings together some of the world’s most popular virtual instruments and effects, so that you’ll never be wanting for a sound ever again — whether
Soundtoys 5
SOS For Artists
you’re crafting a dancefloor filler or an orchestral movie score. Sampling legends EastWest will also be offering a full year’s access to their flagship ComposerCloud+ subscription, offering access to some of the world’s finest sampled instruments, including the complete Hollywood, Fantasy and Symphonic Orchestra series, their extensive rock, pop and world instrument collections, vocal instruments, synth and keyboard collections, and much more. From Swedish sample maestros Toontrack comes the benchmark‑setting Superior Drummer 3, a comprehensive virtual drum instrument that offers meticulously sampled drum kits and other percussion elements, plus a huge collection of MIDI grooves. Beloved effects coders Soundtoys will be providing their comprehensive Soundtoys 5 collection, comprising their complete catalogue of plug‑ins — from the Little AlterBoy pitch- and
formant-shifter to their Decapitator saturation processor and EchoBoy delay, plus many more. Finally, we at SOS will be delighted to offer the winner a year’s free access to our complete music production ecosystem, SOS For Artists. Comprising full access to premium software and plug‑ins, an AI-powered mastering service, a huge searchable sample database, and even the tools you need to publish and release your music, SOS For Artists will help you on every step of your musical journey. And as one last cherry on top of this enormous cake, the SOS team will offer the winner a free one‑hour remote consultation on how to get their new gear up and running as quickly as possible. To be in with a chance of winning this enormous prize bundle, simply follow the URL shown, and answer all the questions there, by Monday 26th January 2026. Thank you for your support over the last 40 years, and good luck!
www.soundonsound.com / November 2025
89
TECHNIQUE
Part 5: Spaced Arrays
Building on the concepts explored in previous parts of this series, it’s time to weigh up some of the pros and cons of coincident and spaced arrays. HUGH ROBJOHNS
P
reviously in this series I focused on a range of coincident microphone techniques, and you’ll recall that with all such techniques, perceived position on playback depends entirely on level difference in the two channels. This time, we turn our attention to spaced stereo arrays, which introduce time-of-arrival differences between the two microphones. These give an entirely different sense of stereo imaging — less precise and more diffuse — but it’s often also subjectively appealing, and there can be benefits as I’ll explain below.
Precision Position First, let’s pick up on that point about ‘precision’. With coincident arrays, equal volumes in each channel create a ‘phantom’ central image source in the speakers, and introducing a level
90
November 2025 / www.soundonsound.com
Diagram 1: Perceived pan position caused by differences in inter-aural level (left) and timing (right).
offset between the channels moves the sound source towards the louder channel’s speaker. It’s not equal for all frequencies, though. For mid and high frequencies, which tend to be portrayed wider than intended when auditioned over stereo loudspeakers,
an offset of around 4dB places the sound about a quarter of the way out towards one speaker. 8dB is half-way, 12dB is three-quarters, and 16dB puts the source firmly in one speaker (see Diagram 1). These are only rough guide numbers — different listeners and
different monitoring environments might need smaller or larger offsets to achieve the same perceived image positioning. But slightly larger offsets are typically needed to match positions for the lower frequencies. It’s why EMI developed the Stereosonic Shuffling correction process I described back in Part 3. (There are other issues that affect the precision of stereo imaging over speakers, and various remedies, but I’ll save that for another article!) Coincident mic arrays aren’t the only means of creating the impression of different spatial positions, though. As Dr Fletcher discovered with his ‘curtain of sound’ experiments, reproducing small inter-channel timing differences also works — though arguably with less well-defined image locations. Remember, the ear/brain uses inter-aural timing differences to help locate sound sources around us, and for a source located 90 degrees to one side, the difference in arrival times for a sound at each ear is about 0.67 milliseconds. Yet, if we introduce that kind of time delay between channels replayed over stereo loudspeakers, the sound source will be perceived as being barely half-way towards the earlier loudspeaker — this is because sound is coming from both loudspeakers, each introducing their own time delays for sound arriving at each ear. Essentially, it’s an unnatural and confusing situation, as far as the ears/brain are concerned. We can still create the impression of a sound source being fully in one
Diagram 2: If the distance between mics is less than 51ms, no sound will appear to be ‘fully panned’.
loudspeaker, but the time offset between channels actually needs to be around 1.5ms (again, see Diagram 1). So, if we’re to utilise inter-channel timing differences to create the illusion of sound source positions between stereo loudspeakers, how can we arrange a pair of microphones to capture only suitable inter-channel timing differences that relate proportionally to the real sound source positions? It’s probably fairly obvious that to capture time-of-arrival differences between the two channels, we’ll need to space the mics apart by a small distance: sound from a central source will arrive at both mics at the same time (giving a central phantom sound image), but sound from a source located to the left will reach the left microphone slightly before the right one, resulting in a small time difference between the channels.
With the two microphones spaced apart, the inverse-square law of sound propagation — sound energy decreases with distance from the source — means that the more distant mic will also always receive a slightly lower sound level than the closer mic, so a small level difference between channels will be captured too. However, if the mics are reasonably far away from the sources, but not too far apart from each other, any channel level difference will be insignificant in terms of sound image location information. Moreover, if we use omnidirectional microphones, the relative angle of sound incidence won’t affect the sound level either...
Spaced Omnis So, we have a pair of omnidirectional microphones spaced apart specifically to capture time-of-arrival differences
Subjective Differences: Audio Examples In the main text, I said that spaced-omni microphones portray stereo positioning in a radically different way from coincident mics, and that most listeners perceive spaced-omni recordings as creating a much less precise sense of image positioning. To relate the differences to another artform, if the coincident format is likened to a fine-art oil painting, the spaced-omni approach is perhaps more reminiscent of an impressionist watercolour — while a bit blurry and unfocused, the information is there, and sometimes that sound character is precisely what is desired. Personally, I think the spaced-omni approach suits orchestral music in particular, as it gives an homogenous, spacious
and luxurious kind of sound; it doesn’t generate lots of potentially distracting detail. A second benefit associated with the A-B technique is that omni mics usually have a much more extended low end than typical directional microphones, as well as negligible phase-shift and a more natural and neutral sound character. Consequently, the spaced-omni approach is often favoured in situations where those features are beneficial to the material being recorded, over and above the format’s stereo imaging characteristics. As well as understanding the theoretical difference, it’s good to experience the differences
in sound for yourself. So, if you get a chance, check out audio examples 7, 8, 11 and 12 in the media files associated with this series (on the SOS website: https:// sosm.ag/this-is-stereo-media). These illustrate the stereo imaging characteristics of spaced-omnidirectional microphones versus coincident arrays. I recorded two basic A-B pairs in my ad hoc session with the Teme Valley South Churches Choir (TVSCC). Track 11 (OCCO Omnis) was captured with a pair of Sennheiser MKH 20 omni mics, spaced at 69cm to give an SRA of 96 degrees, at a medium distance from the choir. You can compare the stereo imaging with the (decoded) Mid-Sides array (track 7), mounted
in the same location and using the same family of microphones (MKH 30/40). When decoding the Mid-Sides array, adjust the Side channel’s level to achieve a similar overall stereo width as the OCCO omnis — about +2dB if using the Voxengo plug-in. Track 12 (Wide Omnis) uses the same Sennheiser MKH 20 omni microphones, but spaced much wider (83cm) for an SRA of 75 degrees. These mics were placed further from the choir, alongside the Neumann SM69 set up as coincident figure-8s (track 1). Again, these two mic arrays have the same nominal SRA, so their imaging characteristics can be compared directly, albeit with a more distant perspective than the previous examples.
www.soundonsound.com / November 2025
91
ON TE ST
N I C K M AV R I D I S
M
easuring a staggering five rack units tall, this behemoth, single-channel valve compressor undeniably has one of the poorest height-to-channel-count ratios! And with nine valves and five transformers employed in the design, the AudioScape ASA-6A will probably not win any medals when it comes to efficiency either. So you’d hope that what might appear to be an absurdly over‑the‑top design can cast some sort of magic on your audio. Does it manage to do that? Let’s find out...
Design & Improvements Of course, it wasn’t AudioScape’s idea to claim so much rack space! From the overall form factor, the RCA ‘umber grey’ chosen for the meticulously crafted housing, the big VU meter and both the bulky RCA-style knobs and the two red pull-knobs at the top, it’s pretty clear that the ASA-6A is based on the vintage RCA BA-6A variable‑mu
96
November 2025 / www.soundonsound.com
AudioScape ASA-6A Variable‑mu Compressor
AudioScape’s take on the classic RCA valve compressor is much more than just a clone... compressor. Developed in the early 1950s, in that famously ‘bigger is better’ country near Greenland, the BA-6A found use mainly in radio stations, but over time it also became highly valued in music recording studios. Today, original units are very sought after and, you guessed it, awfully pricey. Naturally, then, there’s a demand for more reasonably priced recreations. Florida-based AudioScape have quickly earned a reputation for building high-quality but relatively affordable US-made replicas
of classic processors such as the UREI 1176, the Pultec EQP-1A and the Gates Sta-Level. It won’t be surprising to those familiar with the brand, then, that their ASA-6A manages to remain very true to the original RCA design, to the extent that it employs NOS valves wherever available, custom-wound transformers, carbon composition resistors and paper-in-oil capacitors. Yet, AudioScape have also chosen to enhance the parameter set, to address some of the limitations of the original (for
AudioScape ASA-6A £3399 pros • Makes literally everything sound bigger, better and ‘more expensive’. • Enhanced parameters meet today’s engineering needs. • Doubles as a superb saturation device. • Impressive looks.
cons • Everybody (including you!) will call you nuts if you buy it!
summary This colossus is a faithful yet smartly modernised recreation of the classic RCA BA-6A variable‑mu compressor. Warm, rich, round and musical, its sound is every bit as impressive as its appearance.
example, its fixed attack time). All of the original BA-6A’s values remain selectable (they’re clearly labelled ‘stock’) but the number of front-panel controls has doubled. The user can control both input and output level and separately set the compression threshold, and can independently set the attack and release times too. There’s also a switchable 120Hz side-chain filter, as well as an attenuator that can be switched into the negative feedback (NFB) circuit, to increase both the level and harmonics. And while it’s a mono unit, the side-chains of two ASA-6As can be combined for stereo use. On the subject of controls, the chunky RCA-style knobs all look great, though I did feel they might benefit from a slightly higher turning resistance. The red knobs at the top are effectively drawer-handles: pull these, and the upper half of the
front plate tilts forward to reveal all the transformers, valves, calibration pots and the power switch. With so many valves used, both for gain reduction and amplification, it’s good that the valve types employed in the ASA-6A don’t, at the time of writing at least, cost a fortune to replace. This colossal compressor’s most important function is performed by one of its two 6SJ7 pentodes. It’s a classic variable‑mu design, in which gain reduction is achieved by shifting the valve’s bias; the hotter the signal, the more the grid voltage becomes negative, and thus the lower the amplification. With the classic BA-6A, the operator achieves compression by juggling the input and output levels, but the level inevitably influences the sound character too. You can work that way with the ASA-6A if you wish, but its separate threshold control means you have independent control over the harmonics and the gain reduction. In fact, you can even switch the Bal-Limit knob to its off position to disengage the compression entirely, and use the whole heap of valves and transformers as a wonderfully over-engineered saturation processor! Overall, there’s up to around 40dB of gain available, and up to about 30dB of gain reduction is achievable. The labels Single and Dual refer not to any stereo-pairing configuration, but rather to the timing curves. Single means fast attack, slow release. Dual gives you the opposite, as well as affecting the range of the additional controls. The minimum attack time for Single is approximately 1ms, while the maximum release may reach up to 1s.
Getting used to the interaction between the various parameters might at first seem a little challenging, but it’s not too complex and, as always, you’ll get to grips with it before too long. There being so many valves in the ASA-6A, it’s no surprise that it runs quite hot — it could easily double as a coffee warmer or control-room heater! — so all that space in the massive box isn’t just for show; it means there’s room for air to circulate and for heat to dissipate. And speaking of warm valves, allowing half an hour for the ASA-6A to warm up before use is definitely a good idea, since in the first minutes after switching on it sounds somewhat glassy and flat to my ears.
Big Box, Even Bigger Sound! Once up to temperature, though, the AudioScape ASA-6A definitely sounds the way it looks! Even without compression and without driving it too hard, this is a processor that enriches and slightly softens every signal in a pleasing way. Indeed, almost all signals seem to benefit from the classic sonic enhancements that we attribute to American valve equipment: everything immediately sounds bigger and more full-bodied. It makes me wish I could patch one of these in every one of my console’s channel inserts. That said, there will obviously be times that you aren’t looking to add this sort of character. The transformers in the ASA-6A can make signals sound a tad ‘grainy’, and a little detail gets lost. Driving the amps too hard may result in woolliness and lead to a fuzzy and ‘wobbly’ bass sound. If you
As on the RCA BA-6A, the upper half of the front plate tilts forward to provide easy access when rackmounted to the valves and the on/off switch.
www.soundonsound.com / November 2025
97
TALKBACK
Felipe Castro WILLIAM STOKES
E
studio Novena in Mexico City is just four years old, yet has already played host to artists from across Latin America, as well as global chart-toppers like Charli XCX. This, says founder Felipe Castro, is down to its simple but unwavering value system: good gear and a good environment means good recordings. “I’ve always liked having great instruments for everyone who comes to record,” the producer and engineer explains. “Many people come to record here because I love recording drums and have been collecting vintage gear for a long time, which I feel is the core identity of the studio. The live room has specific sweet spots which were designed to make certain instruments sound fuller and sweeter. If you record vocals right in the centre or in the far-right corner, they will sound fuller. Or if you place the drums at either end of the room they will sound more focused. I am really in tune with every part of the studio!” This focus on the studio environment extends far beyond the technical, of course. “The studio has become a hub and second home for many international and local musicians in the city,” Castro reflects. “There’s an open door policy, where people can come hang out whenever we aren’t in session.” At the moment I can’t stop listening to TEED’s album When The Lights Go is the one I’ve listened to the most in recent years. It’s an album that I think perfectly reflects the evolution of music: an excellent record that combines songwriting with electronic music. His vocals are beautiful and very special. I love the depth of the songs, their excellent melodies and impactful rhythms. ‘Blood In The Snow’ and ‘Forever’ are my
100
November 2025 / www.soundonsound.com
favourites; they are masterpieces for me. It was produced, composed, and mixed by Orlando Higginbottom — I was with him, in a studio here in Mexico City, but at the time wasn’t familiar with TEED’s music. When the album came out, I was shocked! The sound of the dark synths combined with some very bright elements... it creates a contrast that I think is so well-crafted and precise. I like all kinds of music, but as a fan of British electronic music, synth music, this album feels different from the rest of what I was discovering these years. The artist I’d most like to record I would have loved to record David Bowie — during any of his eras! He was always years ahead of everything that was coming out culturally. It must have been incredibly exciting, to be in any of his sessions. I’ve read and researched a lot about his collaborators and the studios where he worked. I love how he always came up with very strange and unique intros for each song, like ‘Ashes To Ashes’, ‘Fame’, and ‘Aladdin Sane’. I also love the use of certain pieces of gear, like the EMS Synthi AKS and the Eventide H910, which Brian Eno and Tony Visconti used, starting with Low. The way Mick Ronson and Carlos Alomar crafted arrangements and enhanced the songwriting. How Gerry Leonard used his looping technique and pedal effects to reinterpret the songs... Years ago, I was really lucky to have the chance to chat with Mario J McNulty, who worked with Bowie on lots of projects, particularly on the albums Reality and The Next Day, and in studios like The Looking Glass and Magic Shop. The first thing I look for in a studio I’m obsessed with knowing everything about the control room. Especially the speakers. Working in a new place can always be a good surprise — or a bad
one. That’s why I prefer studios that have monitors like Yamaha NS10s, at the least, or Neumann, perhaps vintage Genelecs, or certain specific models from ADAM or Tannoy. Trusting, or knowing how a studio sounds, is extremely important to me. Also, if I see a studio has any Chandler gear, I immediately feel confident, especially the TG2 preamp. I could just record everything with that! I also really like and frequently use Overstayer equipment. What else... If I spot something from Burl, like the BAD8 or B4, I’m also very reassured. In terms of instruments, a Juno, a Moog or a Mellotron in the room is of course always a welcome bonus. And aside from gear, natural light is super important to me in a studio. And I love when there’s a dog or a cat hanging around too! The person I would consider my mentor His name is José Jaras, and he was the one who opened the doors of his studio in Santiago, Chile to me at the end of 2010. He just shared all his passion and knowledge with me — about things like drum tuning, about selecting the right gear for each project. He shared his philosophy and his respect for the studio. I just loved the way his studio sounded. He had so many CDs to listen to on the studio monitors, and it was the first time I could hear the fine details of the music that had shaped me. We spent a lot of time analysing what we listened to in there. My go-to reference track or album ‘Charcoal Baby’ by Blood Orange is the song I listen to in every place I go to work. I think that song is so very well mixed. It has everything I’m looking for in a song that moves me, that I can listen to over and over again. It’s been several years and it’s still one of my favourites! I feel it transmits the spirit of the song in its sound so well.
Funnily enough, an interview with James in Sound On Sound about producing Arctic Monkeys really inspired me when I first started producing [www.soundonsound.com/ people/james-ford-producing-arcticmonkeys]. His ‘2011 era’ impacted me a lot, because at that time I didn’t know he was a producer. So when I found out I became obsessed with everything he was doing. I really love his drum style and the overall sound of the first Last Shadow Puppets album. In that interview he talks a lot about the way he records drums, which became a central inspiration for how I now record drums. He inspired me to use the Glyn Johns technique as well as using PZM microphones as room mics. I love how even producing both Arctic Monkeys and the Last Shadow Puppets, he chose to create very different drum sounds for each and give them both unique identities.
My secret weapon in the studio is At the moment in my studio I am working a lot with the Overstayer Modular Channel. It is a great stereo channel strip with very expressive filters, it has a simple and very flexible EQ. The VCA compressor and the different ways of saturating the signal are extremely musical. I use it a lot, obviously, for recording drums — that could be the overheads, kick, snare or room — but also for piano, or simply in the mix bus. I would love to get another one, to be able to use two together. The studio session I wish I’d witnessed I would have loved to be at the Pet Sounds sessions with the Beach Boys. Hearing the Wrecking Crew play live and create that wall of sound, plus listening to the Beach Boys sing their harmonies? That would have been absolutely incredible. I would have especially loved to witness how they recorded ‘Don’t Talk’ or ‘God Only Knows’.
Felipe Castro: “Trusting, or knowing how a studio sounds, is extremely important to me.” The producer I’d most like to work with James Ford is one of the producers I would most like to collaborate with these days. I love British music, and everything he has worked on has inspired me so much. From his work with the Last Shadow Puppets to his latest albums, he’s worked with a lot of people who I’ve learned a lot from, just by listening, and before I knew he produced I was already a fan just by watching him play drums! A true genius.
The studio experience that taught me the most Seven years ago, I joined a very special album project for a band called Pillanes, which was assembled just for that occasion. The band consisted of seasoned artists who had written some of Chile’s most important songs. For the session we had to set up a 32-channel studio, in a house in the port city of Valparaíso, and I only had two weeks to pull everything together. On top of that, the project was secret! We spent 10 days living together, enjoying ourselves, but also working hard because there were no finished songs when we arrived to record. The album was essentially composed through jams. It was such an adventurous experience. One I’d love to relive. The advice I’d give myself of 10 years ago I really need to learn more about rights and how to negotiate contracts. I started out very young, during a time when the music industry was much tougher than it is now — at least in Chile, where I’m originally from and where I began my music career. There were no real references, there wasn’t a very active market. It’s crazy for me to think that, despite this, I’ve managed to emerge and build a professional career in this field. Maybe I should have taken the advice to leave the country earlier...
www.soundonsound.com / November 2025
101
ON TE ST
Synthesizer
Supercritical Synthesizers Redshift 6 Like a medieval cathedral, the Redshift 6 is a massively ambitious creation. There are other similarities too...
Supercritical Synthesizers Redshift 6 £1099 pros • It sounds fantastic. • Easy and intuitive workflow. • Different Parts means multitimbral, six synths in one, or anything in between. • Well-designed variable Characters. • Great onboard distortion.
cons • It’s not finished! • Might look a little dated to some. • The screen could occasionally be put to better use.
summary Though frustratingly still lacking several functions, what’s already on the table is brilliant-sounding and incredibly flexible. The Redshift 6 can be one powerful instrument, six synths in one, or anything in between.
102
November 2025 / www.soundonsound.com
WILLIAM STOKES
I
f you’re a modular user, you may recognise the name Supercritical from their two Eurorack offerings, the Demon Core Oscillator and Neutron Flux Filter; two modules of formidable power that bring the worlds of analogue and digital together with finesse. If you happen to own either of those two modules, you will likely be pleased to know that they are both key constituents of the Redshift 6, the company’s first polyphonic desktop synthesizer and nothing if not a powerful statement of intent. It’s worth acknowledging early on that there’s also the distinct possibility that you’ve seen the Redshift 6 doing the rounds for some time already. Even when featured on the SOS YouTube series at Superbooth 2025 it had already been out for some time; and in fact was even on display at the Superbooth before that.
Why, then, are we only publishing a review of it now? Well, it comes down to a simple, endemic issue with the electronic instrument industry, about which I have in previous reviews made my feelings clear. Upon its release the Redshift 6 was, in simple terms, not finished. And, depending on your perspective, it might still be described as not finished. I say this for reasons which will become clear, but for now I’ll leave it at the fact that key buttons, such as FX, yield only a message saying ‘coming soon’, and I’d hazard a guess that anyone who bought a Redshift 6 upon its release will be starting to wonder what ‘soon’ really means.
Hex Appeal In any case, I do have a synth before me, in the flesh. What is it? Well, its not trying to emulate anything that’s come before, that’s for sure. On the chassis it says it’s a ‘six-voice variable character synthesizer’. Each of its six voices comprises
a staggering 16 digitally controlled analogue oscillators, including one for white noise. The interface itself strikes me, if I’m honest, as a little dated-looking, with its big rubbery hexagonal buttons, small screen and transparent red plastic sides; more at home next to 2005’s Roland V-Synth XT than next to my Torso S-4 sampler or Make Noise 0-Coast. But who knows, in a few years it might be aesthetically on trend again, as these things often go. Plus the sides light up, which I will never complain about. What’s important is that the build quality here is substantial and leaves nothing to be desired. The workflow of the Redshift 6 ostensibly revolves around the screen and its accompanying soft knobs, with the panel buttons used to access its various screens. A handful of large endless encoders on either side of the panel then provide instant access to key parameters: on the right side are controls for the filter, including cutoff, resonance, filter mode and envelope amount, and on the left are controls for overdrive, ‘Character’ (discussed anon), and oscillator stacking, detuning and balance. At the bottom are buttons for things like viewing the DCO details and filter cutoff. The closest thing to a ‘home screen’ is that called up by the Perform button, which displays a handful of useful parameters simultaneously such as the active preset, bpm and drive amount. A ring of buttons at the bottom of the panel is labelled Voices. Although, confusingly, these in fact are for editing parts, not voices, they are well positioned and do make quick work of accessing the Redshift 6’s various layers.
On the back panel are quarter-inch sockets for headphones, stereo main outputs and two sets of aux outputs. These are accompanied by some MIDI ports of the time-honoured five-pin DIN variety, a USB‑B port, an input for the external power supply, and a power switch.
I should say: it all really works. My fears of menu-diving were all but allayed when I happily came to realise that more or less all screens were only one layer deep, and even more convenient is the modulation matrix workflow, which if desired can involve simply holding the relevant modulation source button (this could be the mod wheel, one of four LFOs, any of the envelopes, and so forth) and moving almost any parameter to have it
and phase control. Impressive. With all six voices going together, it’s possible in effect to sound a whopping 96 oscillators at once. There’s ‘super-saw’, then there’s ‘super-super-super-super-super-super...’ you get the picture. I can’t but voice my disappointment to find the button for synth Engine not to be functional in this firmware, meaning that all I had to play with was a fairly traditional (and rather rudimentary at that) dual-oscillator topography. This engine only offers sawtooth or pulse waves, with pulse-width modulation and detuning available, but that’s about it. No waveshaping of the sawtooth and no other waveforms. Alas. But what does ‘variable character’ mean? This pertains to one of the Redshift 6’s most impressive features, which is the fact that it can morph between the idiosyncrasies of several different types of synthesizer, digitally controlled but sonically all remaining in the analogue realm. Fair to say if I’d managed to include such a function on a synth, I’d probably lead with it in the name as well. In technical terms, this combination of analogue circuit design and digital control algorithms means that a raft of parameter behaviours can be altered according to which ‘character’ is selected: ostensibly these comprise tuning stability, gain staging, filter type, envelope shape and distortion behaviour. Five ‘characters’ are on offer: Liquid (represented by a droplet icon) is described by Supercritical as “spacey resonance, [with] filter pings dripping with dew”; Crisp (represented by what looks like either a piece of toast or a T-shirt) is “a bright state‑variable filter”; Fat (represented as a ladder) is described as “our take on a ladder-ish filter character”; Sour (a smiley face) amounts to “the squelchy acid thing”; and finally Mean (a smiley face with horns) imbues “highly unstable bad behaviour and distortion”. These are possible thanks to the aforementioned Neutron Flux Filter design, Supercritical’s ‘ultra-flexible’
“The Redshift 6 is a powerful synth with masses of very exciting potential.” modulated by that source. This presumably also includes MPE, the sequencer and something called ‘Math’, though none of these is either functional or, in the case of Math, elucidated in the manual. Though I missed some graphical features — for instance moving parameters to reflect modulation — the fact that it’s then also possible to get an editable overview of all modulation on the Mod Matrix screen means that there’s little to complain about when it comes to fine-tuning movement.
Character Study The Redshift 6’s aforementioned Demon Core ‘Multiperiod Digitally Controlled Oscillators’ are powerful, to say the least. Their design, in a nutshell, allows a single analogue core to produce several simultaneous waves, each with pitch
Did we mention that the sides light up?
www.soundonsound.com / November 2025
103
ON TE ST
Neural DSP Mantra
Neural DSP step out of their amp‑sim comfort zone, with a multi‑module mix processor aimed at polishing your vocal recordings. JOHN WALDEN
I
f you have much interest in guitar-rig simulation, then Neural DSP should be familiar to you: though only founded in 2017, they have quickly established themselves among the leading lights in
Neural DSP Mantra €199 pros • Powerful suite of vocal processing options in a single plug-in. • Quick and intuitive to use. • A range of good presets, and not just for vocals!
cons • Could it be more affordable?
summary An impressive first move outside of guitar-rig modelling for Neural DSP, this powerful all-in-one vocal processing suite boasts a slick workflow and is capable of very good results.
106
November 2025 / www.soundonsound.com
this sector. Their product range started with some very well‑received guitar/bass rig plug-ins, including some developed in collaboration with A-list guitarists, bands and amp brands, before bravely expanding into hardware, with products such as the Quad Cortex and, more recently, the Nano Cortex (reviewed in SOS February 2025: https://sosm.ag/neural-dsp-nano-cortex). Their latest software, Mantra, is not just another wonderful virtual guitar rig, but rather a vocal processing chain. Could it win Neural an audience amongst producers and engineers? Let’s find out.
Links In The Chain Mantra is intended to put all the tools you need for vocal production — bar the mic, of course! — in a single AU/VST2/VST3/ AAX plug-in. Elements of the GUI design and layout will be familiar to users of Neural DSP’s guitar rig plug-ins, and as well as looking modern, it’s super easy to navigate. The processing options are organised
Vocal Processing Plug-in
into three sections: Correction, Harmonies and Post FX. You can switch between them using the large buttons located towards the top of the display, and double-clicking on the same buttons toggles the processing for that section on and off. The control set for the selected section fills the main part of the display. As the labels suggest, Correction provides a collection of corrective processing tools, Harmonies provides a suite of options for generating automatic harmony parts from a vocal, while the Post FX section provides delay, reverb and modulation effects. That last section also includes a rather neat doubling effect, for when you just want to thicken a vocal part without digging into the details of the Harmonies section. In the topmost row of global controls, one that’s worth noting is the Monitoring switch, which selects between two modes. In Mixing mode, you get all of Mantra’s features and the full depth of its processing capabilities, but with a modest latency. Cubase registered 56ms on my test system, which would not be an issue in a mixing context but is obviously too much for live performance and artist cue mixes. Hence
The Correction section features seven individual processing modules.
Tracking mode: this reduces the latency (to a minimum of 3ms on my test system) by disabling a couple of features and employing some slightly ‘lighter’ processing algorithms. As with Neural’s guitar rig modelling, Tracking mode means Mantra can be used in real time while tracking or even performing live. This is an important element of the plug-in’s feature set and will, I’m sure, appeal to many potential users.
Processing Options When the Correction section is selected, a set of seven mini panels is displayed along the bottom of the plug-in. The signal chain, running from left to right, consists of Tune, Gate, Sculpt, De-Esser, EQ, Compressor and Saturation. As far as I can tell, this order is fixed, but it has been arranged logically and, in use, it didn’t ever feel constraining. Each of the mini panels displays one key control for that module, as well as the module’s individual bypass switch. However, clicking on an individual module brings it into focus, expanding its mini panel to show a more detailed control set, and further controls or visual information associated with that module are then shown in the central portion of the GUI. Gate is pretty straightforward, but elsewhere there’s plenty to discover. For example, the Tune module provides automatic real-time pitch-correction based on chromatic, major or different forms of the minor scale. Although you can’t define a custom scale, you do get full control over the speed of tuning, the sensitivity of the pitch analysis (Tolerance) and the option to ‘humanise’ the correction. You can do overcooked correction as an effect, of course, but you can also just apply enough processing to gently nudge the occasional stray note back into line. You can also apply a semitone-based pitch‑shift, and shift the formants. Whether used on pre-recorded tracks or a live source to give your singer a confidence boost (note that engaging the Tune module in Tracking mode increased the latency to around 13ms on my system), I thought this module pretty impressive. The De-Esser, EQ, Compressor and Saturation modules are all well-featured
too, but do exactly the kinds of things you’d expect. With the De-Esser you can define the frequency range it operates within, pick between three intensity settings and adjust the amount. The EQ module provides a combination of low- and high-pass filters, low and high shelving, and four parametric bands, as well as a neat control that adjusts the gain range for all EQ bands simultaneously — so you can exaggerate or dial back your overall EQ moves, while preserving the relative boosts/cuts of the different bands. Compressor offers three ‘types’: Tube (an LA-2A‑style optical tube-amplified compressor), Stress (a FET-style compressor like the 1176) and Multi (a modern multiband compressor). The available control set changes according to your choice. Similarly, the Saturation module offers three types: Tape, Tube and the more aggressive-sounding Digital. Used individually, or in combination, all four of these modules are very effective, and the control sets easy to navigate. The Sculpt module — in essence, a ‘tonal balance’ module — deserves a few more words. It can analyse the frequency content of the input and then suggest a customised EQ curve that’s intended to smooth out any overbearing frequencies. This is done with reference to a number of built-in target profiles, of which there are currently nine in total, with labels such as Balanced, Mids Forward, Vintage Warmth and Modern Scooped. You can control the depth of the EQ adjustment using an EQ slider. But if working in Mixing mode, you also get access
to spectral compression using the Dyn slider. While Mantra’s take on this process is handled through a very streamlined control set, it is essentially very similar in intention to plug-ins such as Oeksound’s Soothe and Baby Audio’s Smooth Operator. The Sculpt module is both easy to use and effective.
Harmonious Harmonies The Harmonies section can generate up to eight voices based on your input signal. You can configure the pitch (a fixed-scale step relative to the pitch of the input voice), volume and pan of each voice or voice pair. These settings are achieved by two control panels at the base of the GUI, and there’s an intuitive visual layout of the generated voices in the central part of the display. The latter contains a drop-down menu, with a range of harmony presets based on different chord types and voicings. They provide a good starting point, but it’s easy to configure your own options if you just want a simple harmony voice pair to support your lead vocal. Controls for the individual voices/ pairs are in the lower-left panel, while the lower-right panel provides global controls for all the harmonies. These allow you to humanise the pitch and timing, apply high- or low-cut EQ, offset the formants and adjust the overall balance relative to the input voice. You also get the option to turn off Scale Quantize, which I felt produced a more natural result. You can also control the harmony pitches that are generated by using MIDI note input, engaged using the mini keyboard icon in the lower-left panel. This activates a MIDI input
Mantra includes a very effective auto-tuning capability.
www.soundonsound.com / November 2025
107
ON TE ST
Audient ORIA Mini
Speaker Calibration Processor
Audient’s black box demonstrates that speaker calibration can be just as valuable in a stereo context as it is for immersive audio. SAM INGLIS
L
aunched last year, Audient’s ORIA is targeted at people looking to set up an immersive monitoring system on a budget. Acting either as a USB audio interface or as a standalone processor, it can address a surround monitor setup containing up to 16 speakers, plus additional headphone and stereo speaker outputs. Since it’s also a very capable surround monitor controller, the ORIA is an effective all-in-one solution for Atmos and other immersive formats, and has advantages over most alternatives. Loudspeaker calibration is an essential part of every immersive format, and involves the application of complex EQ curves and precise delay times to each individual speaker channel. The advantages of hosting calibration profiles in hardware, rather than relying on software plug-ins, are obvious, and this is fully supported in the ORIA. However, creating calibration profiles through a manual measurement process is tedious, slow, error-prone and demands a high level of technical knowledge (if not, perhaps, the PhD in acoustics that Audient claim). For the large majority of users in
110
November 2025 / www.soundonsound.com
the ORIA’s target market, the ability to automate this process is a major benefit, and this is provided through the integration of Sonarworks’ SoundID Reference. You can configure your own correction settings for each speaker if you really want to, but it’s infinitely quicker and easier to use the SoundID Reference Measure application. At its introduction, the ORIA was also more affordable than any comparable product. That gap has narrowed with recent launches such as the Apogee Symphony Studio and Universal Audio’s Apollo X Gen 2 range, which can also host SoundID profiles, but it remains perhaps the most competitive offering in its field. And now it’s joined by a little brother.
Mini Me The ORIA Mini has many things in common with the ORIA, but the differences are equally significant. Although it connects to a computer over USB, it is not an audio interface. It has no physical monitor control capabilities, though you can configure a Streamdeck or iPad to act as a remote control. It’s a desktop rather than a rackmounting device. It has no headphone outputs. And it’s aimed solely at stereo, rather than immersive applications. Put simply, in fact, the ORIA Mini is a direct rival to IK Multimedia’s ARC Studio system, which I reviewed in May 2024 (www.soundonsound.com/reviews/ ik-multimedia-arc-studio). And in that context, it’s an important product in its
own right, because it represents the first, and so far only, standalone hardware SoundID processor for stereo applications. Given that Sonarworks are indisputably the market leaders in this field, that’s a significant development. In physical terms, the ORIA Mini is similar to the ARC Studio. It’s a small, rectangular box designed to sit on a tabletop, with a fairly minimalist physical user interface. However, there are some important differences between the two. Whereas the ARC Studio requires its own wall-wart PSU to function, the ORIA Mini has a single USB-C port that is used both for power and for communication with an attached computer. Like the ARC Studio, the ORIA Mini has stereo analogue inputs and outputs, but here they are on quarter-inch jacks (aligned such that 0dBFS corresponds to +18dBu), and Audient have also outfitted it with an S/PDIF optical input. And whereas the ARC Studio defers bass management to downstream devices, the ORIA Mini has a separate subwoofer output. Audient also claim significantly better converter specs for the ORIA Mini, with an output dynamic range of 127dB. Finally, although both units have just a single button on the front panel, these have slightly different functions in the two products. Only a single correction profile can be loaded into the ARC Studio at any one time, and its button toggles the calibration on and off. The ORIA Mini can load up to 32 profiles, and its button cycles
through four favourites, with a white LED indicating which one is active at a given moment. (Holding the button for three seconds puts the unit into bypass mode.)
In The ’Works The ORIA Mini is available in several different bundles. Which one you need will depend on how many units you plan to use, and on whether you already own a Sonarworks licence or measurement mic. If you’re starting from scratch, you’ll want to opt for the review configuration, which includes the ORIA, the mic and licences for both SoundID Reference and the ORIA add-on. To perform any room measurements, you’ll also need an audio interface with a phantom-powered mic preamp. SoundID Reference and the accompanying SoundID Reference Measure utility have been reviewed numerous times in SOS, so I won’t describe their operation in detail here. In any case, once you’ve measured your space and transferred the profile to the ORIA Mini, you shouldn’t need to open SoundID Reference again unless you want to calibrate something else, such as another room, or a pair of headphones. More on this in a moment. SoundID Reference Measure is the direct counterpart of IK’s ARC 4 Analysis app.
Both hold your hand very tightly through the measurement process, making it pretty much idiot-proof, and the only significant difference I could detect is that ARC 4 Analysis instructs you to measure at three different height levels, whereas the mic positions SoundID Reference Measure asks for are all in the same horizontal plane. It’s a super-slick process, and as long as you have a steady hand and space to move around the sweet spot, you won’t even need a mic stand. Once you’ve created and named a profile, you can then export it to one of the ORIA’s 32 slots. At this point, you can close SoundID Reference and transfer your attention to Audient’s ORIA Control instead.
Audient ORIA Mini £379 pros • At last, a standalone hardware speaker calibration unit that can host Sonarworks SoundID profiles. • Easy to set up and use. • Can store multiple profiles locally. • Bus powered.
cons • I can’t think of any significant ways in which the ORIA Mini could be better that wouldn’t also make it a lot more expensive.
summary
Night Moves
The ORIA Mini is a simple, effective ‘set and forget’ solution for applying Sonarworks SoundID correction to any stereo monitoring setup.
ORIA Control is a fashionably dark-looking application by default, though it can be switched into a ‘light mode’ if you prefer large areas of pale grey to large areas of black. Thanks to the ORIA Mini’s relative simplicity, it’s largely self-explanatory unless you want to get into manually creating profiles. Similar monitor control features are available here as on many of Audient’s audio interfaces, with a global volume control, mute and mono buttons, plus another that inverts the polarity of the
left speaker and collapses the output to mono so you can audition the Sides signal. These controls and more can be accessed remotely by installing the ORIA Remote app on an iPad; I don’t own one, and iPhones aren’t supported, so I wasn’t able to test this. A central area labelled Room displays the listening position and each speaker as coloured circles. Clicking on one of the speaker circles either mutes it or, if the slide-in Setup pane is visible, selects it for editing. Profiles created using SoundID Although the ORIA Mini has no physical monitor controls, an iPad or Streamdeck can be used as a remote control to adjust volume and other parameters.
www.soundonsound.com / November 2025
111
ON TE ST
HUM Audio Devices N-STRIP Channel Strip
Looking for the ultimate analogue channel strip, cost no object? Then check this out, while the rest of us dream! BOB THOMAS
R
ecording engineer and studio equipment designer Krzysztof Tonn opened TONN Studio in Łódź, Poland, back in 1999. Since 2014 this busy studio has also served as the R&D test facility for HUM Audio Devices, a company that Tonn co-founded with Krzysztof Rudnicki. HUM design and hand-assemble a range of high-end boutique ribbon microphones and analogue hardware for recording, mixing and mastering. Tonn aims to deliver “the best possible sound quality together with exceptional creativity, musicality and practical functionality”. If you
114
November 2025 / www.soundonsound.com
read our SOS February 2024 review of HUM’s LAAL look‑ahead analogue limiter (https://sosm.ag/hum-audio-laal), you’ll appreciate precisely what he means by that: it’s a no-compromise, cost-no-object design approach.
Black & White Beauties Their N-TROPHY mixing console, first demonstrated at 2023’s Gearfest event at London’s Tileyard Studios, is probably an even better illustration of that philosophy. We’ve not yet had the opportunity to evaluate that console, but HUM recently released the N-STRIP, a standalone implementation of the N-TROPHY’s
input channel, minus the auxiliary sends and faders. It’s available in two forms: a horizontally mounted pair of channels sitting in a 4U 19-inch rackmount frame called the N-CLOSURE 2; and up to six channels vertically mounted in a six-slot, 11U, 19-inch rackmount chassis called the N-CLOSURE 6. I was sent an N-CLOSURE 2 for review but, other than the obvious size difference, the two black N-CLOSURE frames have the same functionality, with an internal linear power supply based around a fully encapsulated toroidal mains transformer. Along with the mains power inlet, all the audio I/O (of which more below) is found on their rear panels. All the I/O balanced, and is the same as on the console. The main inputs are an XLR input for mic signals, plus a combination XLR/quarter-inch jack that, with a 10kΩ input impedance, can accept balanced or unbalanced line signals. There’s also a dedicated XLR tape input, intended primarily for a DAW/tape machine playback signal, but if using the N-STRIP simply as a luxury ‘front end’ it could equally well serve as an alternative line input. Further balanced XLRs are used for the line-level insert send/return loop, and for the Key
1 and Key 2 inputs to the built-in optical compressor’s side-chain circuit. The main output, again on XLR, is marked Dir Out, and can be switched on the front panel to be immediately post preamp or after all of the processing. With just three exceptions — the mechanical VU meter at the top of the strip, the red preamp gain knob just below it, and the phantom power indicator — the colour scheme is entirely monochrome. The immense configurability of each 7cm-wide channel means that a huge amount of information has had to be accommodated around the various toggle switches and machined aluminium knobs. Thankfully, the precision, clarity and legibility of the white legending is of a quality I’ve not previously encountered on any console. There’s similar attention to detail throughout, in fact. For example, both frames are equipped with a locking on/off toggle switch — a simple and effective solution to the age-old problem of accidental on/off switching that I’ve not seen before.
Preamp & Processing The N-STRIP’s circuitry is fully discrete. It features only full-size, through-hole components and, to ensure the highest audio quality, an audio path that’s been designed to be as short as possible. The transformerless, Class‑A preamp is based on Deane Jensen’s JE-990 discrete op-amp. Jensen’s design took
full advantage of the low noise and matching characteristics of the National Semiconductor LM394 Supermatch NPN pair, but that’s been discontinued, so Tonn’s version replaces them with the even lower-noise Analog Devices SSM212 dual-matched NPN transistor. The preamp stage itself is transformerless and allows you to capture a very clean sound, but each channel also possesses a switchable, custom-made inter-stage transformer that means the N-STRIP can deliver analogue warmth and weight when that’s desirable. There’s also a separate two-part THD saturation stage that can be used to apply harmonic distortion. Yet another ‘coloration’ option is found in the compressor/limiter. It’s an optical compressor, but with a valve-based make‑up gain stage, and you can bypass the gain reduction if you wish — leaving you with the option of driving the valve circuitry to access its flavour of harmonic distortion. And in another example of HUM’s obsessive attention to detail, you’re able to switch off the valve when you’re not using it, so as to increase its life. The valve in question is a hand-selected and precision-measured NOS Soviet-era 6N23P (ECC88 equivalent) dual triode. One of the reasons that this model was chosen is that it can run well on a very low plate voltage — in the N-STRIP, it’s set at +48V — and I’m told that HUM keep a very large stock
Hum Audio Devices N-STRIP From £6398 pros • Absolutely stellar audio quality. • Incredibly versatile channel strip. • Intuitive workflow. • Inspiring functionality.
cons • Quality like this does not come cheap!
summary This channel strip is one of utterly stellar audio quality, and is priced accordingly. It’s hugely versatile too, featuring a superb optical compressor, a subtle and powerful passive EQ, various coloration options, and practical functionality that’s truly inspiring to work with.
of these valves, so sourcing replacements shouldn’t be a problem. Although based on a photocell, the N-STRIP compressor’s gain cell uses a voltage divider to control the level of the signal passing through it, and rather than act directly on the signal the photocell forms one of the legs of that divider. This gain-cell topology is designed to provide better high-frequency linearity across the gain-reduction range. In other words, it means there’s less loss of level in the high frequencies during heavy compression. The side-chain circuitry utilises a full-wave bridge rectifier to produce the control
Both N-STRIP enclosures (the N-STRIP 2 is pictured) feature an internal linear power supply.
www.soundonsound.com / November 2025
115
ON TE ST
JOHN WALDEN
Audiomodern’s Soundbox free engine allows you to blend up to four sample-based instruments, including those drawn from their own collection of inexpensive sound expansion packs.
A
udiomodern may be an unfamiliar name to some SOS readers, but over recent years the company have built up a compact catalogue of products that contains some very interesting creative tools such as Riffer, Playbeat, Chordjam and Filterstep. Their latest venture is Soundbox and, while it is not their first virtual instrument (check out the Opacity II review in the March 2021 issue of SOS), it is a somewhat more ambitious step into that world. Indeed, Soundbox is actually a virtual instrument engine and the sounds for use with that engine come in the form of expansion packs. In that sense, the broad approach has parallels with Kontakt and its many libraries, although at present, the Soundbox ecosystem is very much in its early stages. The Soundbox engine itself is a free-to-download product. It’s available as a standalone application, in standard plug-in formats for macOS and Windows, and is also available for iOS. The Mechanica and Spectra expansion packs are also free downloads and provide a collection of sounds built from various synth textures. You can, therefore, explore Soundbox – with a specific feature limitation I’ll say more about below — without any up‑front cost. There is a growing range of expansion packs starting at a very modest €29 and, stylistically, these are most likely to appeal to media composers or those working in more abstract/ambient musical styles. If you buy any one of the paid expansions, a licence key is provided that unlocks the full feature set of the engine. So, as a new virtual instrument platform, just what has Soundbox got to offer? Let’s find out...
What’s In The Box? Soundbox is, essentially, a platform for sample-based virtual instruments. That engine supports presets consisting of up to four individual layers, each of which can be built from a multisampled (including velocity layers) instrument. The expansion packs provide collections of these presets, presets for individual layers and, of course, the underlying sample base from which they are built. As well as browsing capabilities that allow you to explore the content at each level — pack, global preset and layer preset — the UI provides compact control sets for each layer. The selection of controls has been very carefully chosen. Yes, you get the obvious per-layer volume and pan options but, laid
120
November 2025 / www.soundonsound.com
Audiomodern Soundbox Virtual Instrument Platform
Audiomodern’s Soundbox is a virtual instrument engine that combines depth with ease of use — and it’s free!
out in a strip within the centre of the UI, are various tabs — Controls, Effects, Modulation, Arp, Vector and Master — each of which provides further sound‑design possibilities. For example, the Controls tab provides, among other things, full ADSR envelopes for each layer, while the Effects tab provides four per-layer effects slots, with a selection of the usual effect suspects available to choose from. The Modulation tab provides four LFOs, with a selection of waveshapes available including an (up to) 32-step pattern sequencer. The latter includes a very neat randomisation function, allowing its pattern to shift after a selected number of cycles. Multiple parameters can be linked to any of the four modulators and the usual modulation depth options (positive and negative) are included. You also get options for linking engine parameters to the mod wheel or other controllers. The Arp tab provides some typical up/down combinations and independent 32-step arpeggiators for each layer with lanes for
per-step control of volume, octave, pan and density (a stutter-like effect). These work very well but it would be useful if you could compress/expand the values within the volume and pan lanes as a single operation. Maybe that’s a feature for an update? The Vector tab provides an X/Y pad for either automated or real-time control over the blend between the four layers. There are preset shapes/patterns, options to sync to the host tempo and to control the overall magnitude of the blend changes. The X/Y pad’s node essentially automates the volume parameters of each layer. Finally, the Master tab provides an additional four-slot effects rack with an identical selection of effects choices to those found in the layer effects but (obviously!) applied at the global level. Positioned in various places around the UI are some randomise buttons (three dot icons) if you want to take potluck on preset, layer or parameter choices. If you have tweaked some settings to your liking, you can also save global presets
or layer presets. Equally, you can save patterns within the arpeggiator, although it’s a shame there aren’t (currently at least) any supplied presets to get you started. Finally, it’s worth noting that Soundbox supports MIDI Polyphonic Expression (MPE) and multi-touch via a suitable touchscreen.
Bigger On The Inside As with other sample player engines (Kontakt or Opus, for example), you need to add content to put the engine to good use. For Soundbox, content comes in the form of expansions and, if Audiomodern’s current offering are anything to go by, the format of these seems to opt for fairly compact, sonically focused, and accessibly priced. Audiomodern currently have seven expansions listed on their website. As mentioned earlier, Mechanica (a collection of electronic synth sounds) and Spectra (ambient electronic sounds) are free to download and deliver 15 global presets and around 1GB of sample content. The current paid-for offerings are Morphia (Modern Cinematic Toolkit), Cosmo (Keys & Beyond), Kromium (Contemporary Abstract Strings) Voxmotive (New Age & ambient; Cinematic Vocals), and Opacity (cinematic guitar sounds), with prices ranging from €29 to €39. As the titles and taglines suggest, all of these are aimed very much at media and/ or ambient/electronic composers. I had access to all of these expansions during the review period and, while each offers
a fairly compact set of underlying sounds, the quality is uniformly high, and the sound design very well done. These are easily sounds you could imagine using in a commercial film or TV score. Space precludes a full examination of all of these titles but, as it was seeing a trailer for Morphia that first put Soundbox on my own radar, it serves as a good example of what’s on offer. This expansion provides a collection of impacts, hits, bold sound effects and some atmospheric textures. With 1.4GB of samples, and some 21 full presets, this is a very impressive option at a pocket money price point. In this case, each preset occupies just a single layer within the engine, but each then provides a collection of related sounds mapped across a MIDI key range. Each MIDI note offers a different sound, and you can, of course, trigger multiple sounds at the same time to add further variety. Equally, you could then customise your own presets using multiple layers for additional combinations. Add in the effects and sound‑design tools and, in short, there is plenty of potential mileage from the supplied content and, most importantly, the quality of the sounds themselves is really very good. With all that the Soundbox engine has to offer, Morphia represents an absolute bargain as a collection of cinematic hits and impacts. Voxmotive provides a collection of presets that are dominated by a combination of vocal ‘phrase’ collections in various keys and sound‑designed,
Soundbox provides lots of user-friendly options for sound design including modulation, automated sound blending, arpeggiators, effects and – centre-front – per-layer mixing and ADSR envelopes.
Audiomodern Soundbox Free. Expansions from €29 pros • Brilliant balance between features and ease of use. • Existing Audiomodern expansions sound great. • Already attracting third-pary developers into expansion pack production. • Very capable toolset for DIY sound building.
cons • At this price, none.
summary With a no-fuss user interface, some quality expansion pack sounds available from the off and, once licensed, the option to build your own multisampled virtual instruments, Soundbox is a bit of a gem. Oh, and don’t forget the very modest price!
vowel-based vocal pads. The overall mood is ethereal, mysterious and beautifully atmospheric. Kromium’s string-based sounds deserve their ‘abstract’ product description. This has horror written all over it; scary, dark and suitably sinister, with a combination of playable sounds, textures and sound effects. Cosmo’s keys-based collection includes playable melodic instruments and various pads or textures and, while perhaps not quite as dark as Kromium, this is still a toolkit for tension and mystery moods with the occasional (slightly disturbing) childlike melody instrument included for good measure. Encouragingly (for Audiomodern at least), third-party developers are already
www.soundonsound.com / November 2025
121
SPOTLIGHT
Even the very best gear will only ever perform as well as its surroundings allow. Getting the best sound out of your setup means paying some attention to the room itself. LUKE WOOD
I
t’s all too tempting to start looking at a nice new pair of monitors when you’re looking to improve your mixing environment, but if the problems you’re experiencing are down to the room itself, no amount of money thrown at speakers will provide the solution. Acoustics is a complex topic, so getting the very best possible results from any given space will of course require the services of an experienced professional, but people are often surprised at how much of a difference can be made with just a few basic steps. The most obvious starting point is some absorption at the ‘mirror points’ — any surfaces that will reflect sound from the monitors directly towards the listening position. With a few strategically placed panels, all but the most challenging of rooms will usually benefit from an improved frequency response, more consistent reverb times and tighter stereo imaging. There’s a whole host of solutions aimed at studios of all shapes and sizes, but to begin with, let’s take a look at some general-purpose broadband absorbers.
Acoustical Solutions AlphaSorb Barrier
Acoustical Solutions
Acoustical Solutions’ AlphaSorb panels are available in a whole host of sizes and colours, and can be specified with square, bevelled or mitred edges. Their standard design combines a fibreglass filling material with a fabric finish, while the Polyester Core range employs a 60% recycled polyester-based material designed for projects that are aiming to minimise environmental impact. Further variants come in the form of the AlphaSorb High Impact, which is fitted with an impact-resistant front panel designed for high-traffic areas, and the AlphaSorb Barrier, a version that features a layer of mass-loaded vinyl. The range includes three room kits that bundle together a selection of panels designed to offer
128
November 2025 / www.soundonsound.com
Broadband Absorbers an all-in-one treatment solution for small, medium and large rooms, along with three Pro kit versions that also include bass traps. The company also offer panels with a paintable finish, and are able to supply panels finished with custom artwork. £ From $71.99 plus shipping and taxes. W www.acousticalsolutions.com
Auralex
Auralex manufacture a wide range of acoustic treatment solutions that cover everything from single foam panels to full, all-in-one kits designed for a variety
of room types and sizes. Their entry-level AuraPanel range offers a cost-effective entry into the world of broadband absorbers, and includes square and rectangular fabric-covered panels filled with a sustainable EcoCell material; they can be ordered in a range of colour finishes and are designed to be mounted on walls, ceilings or across corners. The ProPanel range steps things up a gear with a wider range of shapes and sizes, and can be fitted with the company’s Fusion24 faceplates to create hybrid diffusion/absorption panels. There’s also a selection of portable panels designed
DACS Full Range Absorber
Auralex ProPanel
for those working on location or looking for treatment that can be moved around to suit the needs of each session. Finally, Auralex also offer a range of DIY kits that bundle together a set of cut-to-size frames, fillings and fabric coverings for those who are handy with tools but don’t fancy tackling the design side of things themselves. £ From £139 including VAT. W www.auralex.com
DACS Acoustics
In addition to their studio design services, DACS Acoustics manufacture their own range of acoustic panels that have been developed based on nearly 40 years of industry experience. First up are their rectangular Full Range and Bass Absorber panels, which as their names suggest, are designed
EQ Acoustics
for broadband and low-end treatment respectively — the latter is effective down to below 40Hz. The Mid/HF Absorber series then includes thinner panels that are focused on midrange and high-frequency reflections, and includes both wall and ceiling ‘cloud’ options along with a tuned variant that can be used to tackle specific problematic frequency ranges. The company also have three full-room kits that bring together a selection of their panels designed to tame the acoustics of small, medium and large studio spaces, along with a selection of portable gobos that can be specified with or without windows. £ From £200.10 including VAT. W www.dacs-acoustics.com
EQ Acoustics All of the panels in the EQ Acoustics line-up contain the company’s Friendly Fibre material, a polyester-based filling that’s non-irritant, non-allergenic and odour-free — it’s also environmentally friendly, with up to 70% of its content made up of recycled plastic bottle waste. Their wall panels can be purchased in a variety of shapes, sizes and coloured fabric finishes (straight and rounded corner options are available on select panels), and EQ Acoustics will also make up custom sizes or bespoke shapes to order. The larger panels are joined by compact tile variants, which can be supplied with patterned wooden faceplates that provide a combination of reflection and absorption, while those in need of a portable solution can opt for the company’s freestanding gobos. £ From £64.99 including VAT. W www.eqacoustics.com
www.soundonsound.com / November 2025
129
SPOTLIGHT
BROADBAND ABSORBERS
GIK Acoustics
GIK Acoustics’ extensive product range has plenty on offer for studio users. Their 242 Acoustic Panels are available in three shapes (one square and two rectangular), and house a mineral-wool sheet within a sturdy frame that provides a built-in air gap to enhance the panel’s low-frequency performance. The thicker B4 then serves as a dual-purpose panel that strikes a balance between broadband absorber and bass trap, while the Impression/ Impression Pro and Alpha/ Alpha Pro Series offerings pair a broadband absorber panel with a selection of hard faceplates sporting a decorative pattern that helps to introduce some scattering and diffusion. There’s also the recently introduced SlatFusor range, a selection of flat and curved panels that are available in two thicknesses, and employ a wooden slat-fronted design to deliver a mixture of absorption and diffusion. GIK also
GIK Acoustics Alpha Pro
offer full room kits that include a tailored selection of their broadband absorbers
and bass traps, along with freestanding gobos aimed at those looking for a portable solution. £ From £82.80 including VAT. W www.gikacoustics.co.uk
HOFA-Akustik
HOFA Akustik
130
November 2025 / www.soundonsound.com
The acoustics division of Germany’s HOFA-Studios offers a huge range of acoustic treatment products than span many industries and applications, but their studio-focused line-up is refreshingly simple. Broadband absorption is taken care of by the aptly named HOFA Absorber, a square panel that houses a sustainable natural fibre material and is available in a single size and with a choice of seven coloured fabric finishes. Panels can be ordered either with or without an external wooden frame, and the company also manufacture separate double-panel frames that can be used to neatly combine a pair of HOFA Absorbers or HOFA Diffuser panels (or one of each) into a single unit. They also have a Mobile Wall system that’s available in four sizes and includes a set of castors, making it possible to configure sets of their modular absorption and diffusion panels as large rolling gobos. £ From €69. W www.hofa-akustik.de
Primacoustic Broadway
Primacoustic
Primacoustic’s extensive range features an array of solutions aimed at everything from corporate projects to stadiums, but there’s plenty on offer for the studio crowd too. Broadband absorption is taken care of by the Broadway range, which feature a glass-wool packing finished with either an acoustically transparent polyester fabric or a mesh sealed with a paintable latex coating. There are four sizes available — two rectangular and two square — three of which can be specified with either a square or bevelled front edge. As for ceiling-mounted options, Primacoustic’s studio-focused option comes in the form of the Stratus Cloud. Its design is based on that of the Broadway, and features a robust steel frame fitted with a crossbar that offers multiple mounting points along with link brackets that can be used to fix multiple units side by side. If you’re looking to kit out an entire studio, there are four full-room kits available, along with a handy online calculator that helps you work out which products will best suit your space. £ From £920.40 including VAT. W www.primacoustic.com
Vicoustic
The most basic broadband absorbers from Vicoustic fall into their Cinema range, which includes a selection of square panels that pair their VicPET filling material with either a flat or curved front face. One of the company’s most popular designs, though, is the VicPattern Ultra MKII, a square panel that houses a VicPET filling within an MDF/ high-pressure laminate frame assembly. The MkII version boasts increased low-frequency performance compared to its predecessor thanks to an additional layer of VicPET, and comes fitted with a patterned faceplate that allows the panel to offer a combination of reflection and absorption; a choice of five pattern finishes are available, along with seven colour options. Helpfully, Vicoustic offer an upgrade kit that allows owners of the previous-generation version of the Ultra to upgrade their panels to the new spec. There’s also the VicPattern Ultra XL, a larger rectangular version of the popular design, and the Ultra Lite, a shallower version that’s focused on midrange absorption. Another neat addition to the range is the VicDisplay Guitar, which
combines a midrange/high-frequency absorber panel with a guitar wall hanger! The company also offer a range of room kits that bring together a combination of their absorbers, diffusers and bass traps. £ From £289 including VAT. W www.vicoustic.com
Vicoustic VicPattern Ultra Wavewood MkII
www.soundonsound.com / November 2025
131
Studio One
TECHNIQUE
There’s more than one way to slice your beats in Studio One!
A tried and tested method of rearranging breakbeats is to simply chop them up and reassemble them in the timeline.
ROBIN VINCENT
L
ooking to chop up bits of audio to rework them into some other groove? Studio One offers a number of ways to approach this. You have two sample-based instruments, Impact XT and Sample One, which love nothing more than to chew on chunks of samples and spit them out in a different order. You can achieve similar results with both, but they each have their strengths and weaknesses. In this workshop, we’ll look at these instruments and rummage around in their breakbeat-chopping processes. First, though, I wanted to look at the old-fashioned way of chopping up loops and rearranging them by hand on the timeline, which should introduce us to a few tools and processes that are always useful to know about.
Sampling The Goods Studio One has all sorts of clever technology to ensure that loops brought into your project will automatically fit with your chosen tempo. The included content, and loops from the integrated Splice library, have tempo information baked in, and will stretch to fit your project. This is often true of audio loops wherever you get them from. But what if you wanted to sample from a piece of vinyl straight into Studio One, or you had recordings or tracks on your computer that had no stated tempo? The fundamental bedrock of looping, chopping, slicing and breakbeating in a DAW is the ability to work to a grid, and for that you need tempo information. The answer is really easy: right-click your sample or piece of recorded audio, go to Audio and then click Detect Tempo. Job done. Now, Studio One will probably be cleverer than you want it to be and will automatically time‑stretch your sample to fit your project tempo. You may want that, but you might want to work with the tempo
132
November 2025 / www.soundonsound.com
of the music you sampled. The time‑stretch information can be found in the Inspector on the left of the arrange page. Click the ‘i’ at the top of the track list to open it. Alongside the Tempo field are options for Timestretch, Follow and Don’t Follow. Timestretch will slow down or speed up your sample to match the project tempo; Follow will leave the sample unchanged but will ensure the start point of an event is in line with any tempo changes; and Don’t Follow just leaves the sample alone. What’s important in terms of chopping breakbeats is that our sample fits on the grid. So you can either leave it time-stretched to the project tempo, or set the project tempo to match the detected tempo of your sample. You’ll find the sample tempo under the channel strip at the bottom of the Inspector. If it’s in red, then it’s waiting for you to approve it. You can also see the tempo on the right-click menu. All you need to do is
Once you’ve identified a one-bar section of your sample, you can use the Split At Grid command to split it up into equal measures, according to your grid’s resolution.
stick the tempo into the transport bar and you’re good to go.
Chop Chop With the tempo set, you now need to find the loop you’re interested in from your recorded audio or pulled-in sample. I find the easiest way of doing this is to drag it about in a one-bar loop until it sounds right. With snap-to-grid on, set up a one-bar loop in the timeline. Then turn the snap off and drag your sample through the loop until you hit on what you’re after, or at least the first bar of it. By looking at the transient peaks of the audio file and using your ears you should have no trouble finding your loop. And once the start is right, you can extend the loop to as many bars as you want. Cut away the excess around the loop by using the scalpel Split tool, and you’ll just be left with your loop. The basic idea is to take the Split tool, slice your sample up, and then rearrange
bend markers and use those as the split points. To do this, right-click the sample, go to Audio and Detect Transients. If it’s a drum loop, Studio One should have no problem identifying the leading edges of all those hits without you having to mess around with threshold settings. Then simply right-click, go to Audio and click Split At Bend Markers.
Sample One
If your sample has a bit too much swing, or isn’t conforming to your grid, you can have Studio One identify transients and place bend markers, which you can then use to split your loops.
sample chunks into a new beat. If you want a shortcut, try the Split At Grid action under the right-click Event menu to chop everything up to your grid resolution. Sixteenths is a good grid resolution for capturing most events. Once split, you can set the grid to 64ths and easily create repeats and ratchets just by holding Alt (PC) or Option (Mac) and dragging copies of a slice to each new grid line.
Another tip is to use clip gain to achieve accents and ramp-ups, and to increase intensity over rolls and ratchets. From the right-click menu, you can transpose events to give pitch changes, too, and you’ll find other processes like Reverse under the Audio menu. What if your sample has a bit of swing or is not landing nicely on the grid? Well, in that case you can use the transients to set
Once you’ve exhausted yourself messing around with chopped samples in the timeline, let’s use something that makes this a whole lot easier. Get yourself a nice drum loop. Right-click it, go to Audio and Detect Transients. This time, we will concern ourselves with the threshold. Double-click the sample to open the sample editor. On the toolbar, click on the first of the second set of tools. It’s called Audio Bend, and looks like a tipped-over chess piece. This reveals the bend marker settings. Use the Threshold slider to set the level at which a transient is detected and a bend marker placed. It sort of works in reverse; as you reduce the threshold, fewer hits register, and as you increase it more and more ticks in the sample are marked as individual hits. This is a great way of isolating the important hits, rather than creating a slice on every single hi-hat and ghost note. Once you’re happy with the sorts of transients that are being detected, head
Once you’ve sliced your loop, you can automatically send it to a new instance of Sample One, where you can play the individual slices as MIDI notes. The Insert Matched Instrument Part command will even place MIDI notes to give you the original loop as a starting point.
www.soundonsound.com / November 2025
133
Pro Tools Live
TECHNIQUE
We dive into a new Performance Pack that could change the way you use Live. OLI FREKE
A
bleton Live was built from the ground up for the art of live electronic music performance — the clue’s in the name! Its defining innovation, Clip View, was a groundbreaking method of triggering audio and MIDI clips in real time. Arrangement View, whilst more conventional, could capture those live performances, or be used for straightforward composition and mixing. But even after two decades of development, there’s still room to improve Live’s performance abilities. Whilst plenty of innovation comes from Ableton themselves, the integration of the Max For Live (M4L) platform has enabled users themselves to extend Live’s functionality to meet their own needs, and often the wider community’s too. One such M4L developer is Itfah (of the techno duo Skinnerbox), who is the brains behind this Performance Pack. Comprising four devices, it comes bundled with Live 12 and whilst primarily aimed at live performance, they also offer features that can supercharge more conventional music production. As well as being a touring musician of long experience, Itfah has also previously designed Smile, an acid-line generator; and Microtuner, the official Ableton device that paved the way for Live’s current and extensive micro-tuning integration (covered in the SOS February 2025 column). The best devices solve real-world problems, and for Itfah, these devices work around some of the limitations he’s found frustrating in his many years
My Novation Launch Control XL recreated using the Performer device, with the mapping editor.
of performing with Live. For example, whilst MIDI mapping in Live is quick to set up, the mapping curves themselves are strictly linear. And whilst their range can be edited, fine-tuning them is fiddly in Live’s small ‘MIDI Mappings’ panel. Once several mappings have been created, finding and editing them quickly becomes complicated.
Performer: A Turbo Charged Mapper The first device, Performer, completely reimagines MIDI mapping. At its simplest, you can recreate your physical controller on-screen, complete with knobs, faders and buttons. Itfah considers this to be almost a ‘third view’ for Live, alongside the Clip and Arrangement screens, and
What Is NRPN? Most MIDI control is handled using Continuous Controllers (CCs): 128 different controllers, with 128 possible steps of resolution for each. For many uses — filter cutoff, volume, pan — that’s fine, but even 128 steps can be noticeable in some contexts. NRPN stands for Non-Registered Parameter Number. It’s a way of extending MIDI control beyond the 128 CCs by combining pairs of controller messages. This makes it possible to address far more parameters — and, crucially, with much higher resolution: up to 16,384 steps instead of 128. In practice, NRPN has been used by hardware synths and effects units to give deep access to parameters that weren’t available via ordinary CCs. It’s powerful, but the implementation varies between manufacturers, which is why it can seem a bit arcane.
136
November 2025 / www.soundonsound.com
which gives performers instant visual feedback on what’s mapped and their current state. That’s only the start, though. Curves can be exponential, stepped, quantised or completely custom-drawn. For example, you could design a knob that sweeps a low-pass filter in its left half and a high-pass filter in the right half. Or create a response curve that provides extra resolution around a sweet spot. Performer then allows up to eight parameters to be easily mapped from each control. Imagine a single knob controlling a filter sweep, a pitch-bend and a reverb send, all moving at different rates across its range. One simple use case could create those classic tension and release moments — the very essence of live electronic music. Mappings aren’t limited to simple device parameters either: it’s possible to send notes, CC data, NRPN data (with their 16,384 steps of resolution), and even tempo. Sending notes from a knob or fader might seem like a strange — or even mad — thing to want to do, but one online demonstration shows a fader divided into eight zones, each sending a note to a Drum Rack as the fader
The Variations device looks a lot like Macros but allows you to store multiple snapshots of Ableton’s complete state.
crosses it. This might also sound like a recipe for chaos, but in a stroke of design genius there is a quantise setting so each note is sent in time, meshing perfectly with the rest of the track.
Variations: Instant Recall If the Performer device is about sculpting sound with continuous control movements, Variations is about switching instantly between states. It allows the current state of Live and all of its parameters to be saved and then recalled immediately. And not just one state, but multiple states. In practice, this means you could be building tension during a track — muting drums, filtering synths and riding effects — then snap back to the original groove with a single click. There’s no need to be retriggering individual clips or scenes, or trying to manage the settings of a particular synth or effect rack manually. It’s an incredibly powerful feature, and intuitively implemented. Again, it’s not limited to live performance use; this could be used during mixdown. Take snapshots of a mix as you go and then quickly and easily switch between them. Instead of saving multiple versions of a mix with increasingly convoluted names like ‘Mix 2b v3 dry-vox-A’, you can simply store mix states as Variations and flip between them for comparison. You can even name them!
such as those in which no contact with Live during a performance is the goal. (Save the audience the spectacle of you prodding a laptop whilst you build up a looping track). The standard Live process is to record clips and arrange them into a piece of music. This turns that process upside down: pre-arrange your song and record audio and MIDI into the clips as the arrangement plays through. You pre-define (in Arrange View) where clips will record, setting their input source, length and loop behaviour. More than one channel can be set, and when ready you start the arrangement playing and simply do the performance — there’s no need to interact with Live from that point. For example: bar nine records four bars of audio from channel 1 and loops it. At bar 17, channel 2 records for a bar. At bar 21, a two-bar MIDI loop is captured from channel 4. Later, those loops reappear at bar 33 automatically, creating structure without further
intervention. It’s a radical rethinking of the song creation process.
Arrangement Looper: Quick Cycles Arrange Looper is perhaps the simplest of the four devices. It provides four loop slots for cycling within an Arrangement. Place it on any channel (though Main makes sense), and when engaged it will cycle the current Arrangement at that point according to the Cycle time set in the loop slot (minimum length a quarter bar). It’s great for buying more time at the end of a track or sequence, as Ableton themselves suggest. Note this only affects material playing from Arrangement View, not Session Clips; but within those limits it could be a handy safety net for transitions and not running out of music whilst an arrangement is playing!
Live Supercharged These four devices really emphasise the strengths of the Max For Live ecosystem, showing how it can extend functionality by anyone prepared to learn the platform. It’s great to see them bundled with Live 12 as a clever way to add functionality without having to commit them to the core feature set — a kind of ‘testing ground’ that ultimately benefits everyone. For performers, then, these devices could be essential tools. For producers and others, they’re a reminder that Max For Live is a powerful platform of extended functionality — and that there’s a large number more to be discovered.
“These four devices really emphasise the strengths of the Max For Live ecosystem, showing how it can extend functionality by anyone prepared to learn the platform.”
Prearranger: Writing Backwards Prearranger is quite a wild device and needs a bit more planning to use, but could meet some specific contexts,
The Arrangement Looper updates Ableton’s Cycle parameter for quick ‘in the moment’ arrangement loops.
www.soundonsound.com / November 2025
137
Pro Tools Cubase
TECHNIQUE
Use Cubase’s Shimmer and Studio Delay to create atmospheric guitar tones! Add a little Shimmer to your guitar for instant ambience.
JOHN WALDEN
I
n Cubase 14, Steinberg added two new creative effects plug-ins to the Pro and Artist versions: Shimmer, which is an unconventional reverb effect with some delay built in; and Studio Delay, a quirky stereo delay with, you guessed it, bit of reverb built in. Both have the potential to transform almost any source in some interesting ways, and in this workshop I’ll focus on one possible application: creating ambient guitar tones.
Target Practice A quick web search for ‘ambient guitar music’ will throw up diverse musical possibilities, ranging from the pioneering work of Brian Eno to more contemporary albums from Tycho, From Somewhere Quiet and Adam Dodson. Ambient music compositions don’t have to be guitar led, of course, but when guitar is featured, creative effects are often important to the sound — and unconventional use of both reverb and delay are often a big part of those effects. For instance, you might manipulate the harmonic content of the reverb and/ or delay, to create a pad-like sound. Or the reverb or delay might be processed to give it a very analogue or lo-fi nature, making the tonality very different from the main guitar sound itself. This sound design process obviously encourages experimentation with effects, and Shimmer and Studio Delay are ideal
140
November 2025 / www.soundonsound.com
candidates for this. So, starting with just a simple clean electric guitar tone, courtesy of Cubase’s stock VST Amp Rack plug-in, just how ambient can we get? Can we transform a guitar into a pad? Can we create delays from our guitar source that bring a new sonic texture to the overall sound? Sure we can! I’ll explain how below, and if you want to hear the results for yourself, you’ll find audio examples on the SOS website: https://sosm.ag/cubase-1125.
Visit My Pad Shimmer isn’t the most versatile creative effects plug-in that I’ve ever used, but
it’s great for adding a ‘shimmering’ pad-like effect to a guitar sound. It uses a combination of reverb and delay, while pitch-shift and filtering in the effect’s feedback loop influence the tonality of the ‘shimmer’. Start with settings of 40 percent for Feedback and Mix. Set the Pitch slider to zero (no pitch-shifting), and the Intensity and Speed controls to zero too. Then adjust the Reverb slider — this actually adds a delay to the signal, and doesn’t develop the merged multitude of short repeats that we generally think of as ‘reverb’ until you raise the Intensity and/or
It’s definitely a delay, but Studio Delay does delay in a very characterful fashion.
Speed sliders. But with the Reverb slider at or higher than 80, a large ambient reverb soon develops once you raise both the other sliders over 50. Then back off the Reverb slider, and you’ll be left with just a delay effect whose delay time (Speed) is adjusted by a percentage, rather than in time or note division units. It’s a quirky ‘reverb meets delay’ combination, but easy enough to dial by trial and error. A good starting point for the shimmery pad-like effect we want is to set the Reverb, Intensity and Speed controls in the 50-plus region. Modulation can then be added to taste — its influence is modest, but still worthwhile. The Pitch slider then provides a bit of magic. With this remaining at zero, the shimmer sits primarily in the same frequency range as the source, delivering a subtle end result, but move that to +12 semitones and the shimmer takes on a completely different character, with much more high-frequency content. Combined with a higher Mix setting (so that, eventually, the source signal is submerged by the effect) and it’s like your guitar just became a synth! The Filter Bank sliders at the top of the UI can be used to constrain the frequency range of the shimmer effect. Indeed, if you either go towards the top of the slider range for any combination of the Reverb, Intensity and Speed controls, or dial in a high Feedback setting, the delay loop can quickly build to put a lot of energy through your speakers (you have been warned!). Cutting that back, for instance by filtering out the frequencies below 150-200 Hz, can often clean things up considerably — just be sure to check that the effect still works in your musical context. Automating the Filter’s two frequency controls, whether manually or using a Modulator, is a further option for adding tonal variety to the shimmer effect. The audio examples include a couple of different shimmer effects. They differ mainly due to the Pitch settings, and they demonstrate the kinds of results that are possible. It’s a rather neat ‘guitar meets synth’ effect if I do say so myself! But, of course, it’s an effect that can also be used with sources other than guitar.
Using just its amp and cab modules, the stock VST Amp Rack plug‑in is all you need to run your DI’ed guitar through before applying Shimmer or Studio Delay.
treatments. Simply set the Age, Modulation, Distortion, Reverb and Pitch controls to zero. Then, having picked one of the preset delay patterns from the top of the GUI (I used the ping-pong option for my examples), you can dial in the Delay time (hooray for tempo sync!), Feedback, Spatial (stereo spread) and Mix controls to taste. So it’s a decent enough delay in its own right... But bring those Age, Modulation, Distortion, Reverb and Pitch sliders into play, and it can become much
In the Post position, each effect is applied after the delay. In Loop, it’s applied inside the delay’s feedback loop, so the effect multiplies with each pass through the delay line. At higher slider settings, this can generate some seriously radical changes. For example, adding a modest level of Overdrive in the Loop produces a wonderful, gradual degradation of the sound with each repeat. Used in the Loop, the Reverb does some cool things to each delay too but, moved to Post, higher Reverb settings transform the delays into an ethereal wash of pulsing reverb. On the right source, this can be very cool and, rather like Shimmer, can feel very pad-esque. Again, I’ve included in the audio examples a few demos of these sorts of Studio Delay shenanigans.
“Applied inside the delay’s feedback loop... the effect multiplies with each pass through the delay line.”
Follow The Lead… Lead... Lead…. Unlike Shimmer, Studio Delay can be configured for more conventional
more creative. A good, simple start for your experiments would be to use the Age slider and Filter Bank controls to introduce some very effective sonic downgrading to the delay repeats, with a darker or brighter tonality. The labels on the four remaining sliders are fairly self-explanatory, but the mini drop-down menu options below each slider access some interesting additional possibilities. The uppermost drop-down menu offers three flavours for each effect: for Distortion, you can choose between Overdrive, BitCrush or SampleDiv; for Pitch, you can choose Pitch, Pitch+Formant preservation or Formant (this shifts the formants without changing the pitch). Each of these can do some very interesting things to the tonality of the delay line. The lower drop-down menu lets you switch the location of all four of these effects between Post and Loop settings.
The Sound Of Space Cubase’s stock plug-in collection (for both the Artist and Pro editions) boasts a number of creative effects, such as FX Modulator and LoopMash FX, but these latest Shimmer and Studio Delay plug‑ins are very welcome additions to that toolkit. And while I’ve focused here on changing guitar sounds, they have plenty to offer other sources, including drums and vocals — experimenting is a huge amount of fun! The one bit of guidance I’ll leave you with is that, in terms of notes played, less is generally more. Keep your parts on the sparse side while you’re playing, and you’ll give these effects the space in which to shine.
www.soundonsound.com / November 2025
141
Logic Logic
TECHNIQUE
We go off‑grid with Logic’s powerful Smart Tempo feature. PAUL WHITE
W
hen Apple introduced Smart Tempo in Logic Pro back in 2018, it finally put the musician in charge of the feel of a track, and the facility has improved in the intervening years. Even so, it still appears to be somewhat underused. Rather than the musician following a click track, the click track can, in effect, follow the musician, which allows for in-flight tempo variations that give a ‘real performance’ feel. It can also do the opposite, allowing the user to import a freely recorded audio or MIDI performance and have that automatically conform to the project tempo using the time-stretching algorithms that underpin Flex Time. Working conventionally, you set a bpm for the project and Logic uses that to build its timing grid. This works well for EDM or anything else based on loops, but it can be less friendly when dealing with live performances, field recordings or, in my case, old band recordings made on tape before computer music was even contemplated! When working with rubato piano or acoustic guitar performances, editing and adding new parts with a fixed project tempo can be quite a challenge: either you have to ignore the grid entirely, or quantise everything to the grid and suck all the feel out of the performance. Smart
The three main Smart Tempo modes: Keep will apply the project’s tempo to any new recordings or imported audio/MIDI, Adapt conforms the project tempo to new recordings/imports, and Auto will decide which mode to use automatically.
Tempo, by contrast, effectively listens to a performance and follows its tempo, writing the changes into the tempo timeline. So how do you set this up?
Work Smarter There’s more to Smart Tempo than I’m able to cover here, but as regards the essentials, Smart Tempo has three operational modes: Keep, Adapt and Automatic. These can be accessed from File / Project Settings / Smart Tempo, or they can be selected in the bar/beat display beneath the current tempo readout. Logic’s default is Keep with no Smart Tempo settings, meaning that Logic follows the project tempo and any subsequent tempo changes that you might add manually. Apple Loops automatically conform to this tempo, but other imported
Further Smart Tempo options are available in the Project Settings window.
142
November 2025 / www.soundonsound.com
audio plays back as it was recorded. This is how we all worked until Smart Tempo came along. Note that creating a tempo map isn’t the same thing as quantising your audio. Smart Tempo checks the tempo for each bar, as shown in the ruler display at the top of the main screen, and adjusts either the tempo of the song or of the material being worked on, depending on which Smart Tempo mode you use. Any out-of-place notes within those bars may still need to be dealt with.
Tempo Fugit So, to use Smart Tempo, first visit the Smart Tempo tab in the Project Settings menu. Here you can change the Smart Tempo mode, and you’ll see a brief description of what each mode does. Set the New Recordings box and the Set Imported Files box to On or On + Align Bars. There’s also an Align Bars and Beats option, which will trim the start of new regions so that they start on the first beat of a bar. Whether the source material is a solo instrument or a complete mix, Logic will look for the beat and then create a tempo map. It’s important to set the appropriate Smart Tempo settings before you start adding files to the project or start recording. The click should be turned off and any imported audio should not include tempo information if you don’t want to use it. Many commercial audio files have tempo tags, so for Smart Tempo to reanalyse them, you must first strip out that info using the Remove Tempo Information command (Edit / Tempo / Remove Tempo Information). Note that Apple Loops will always conform to project tempo regardless. If Keep mode is on and you’ve entered the appropriate Smart Tempo settings (On or On + Align Bars), then newly recorded audio or imported audio will be adjusted
SUBSCRIBE & SAVE TABLET | WEB | REPLICA | PRINT PLUS BONUS PDF
SMARTPHONE COMPATIBLE
1 ICONIC MAGAZINE
6 GREAT WAYS TO READ IT
SCAN ME
TO SUBSCRIBE
TABLET - PHONE - WEB - PDF - REPLICA - PRINT All this for less than the price of a Coffee+Pastry each month!
www.soundonsound.com/subscribe • Go DIGITAL - get 12 monthly Tablet issues + all locked Web articles + monthly Full Issue PDF download the day the issue goes live. • Go PRINT+DIGITAL - get the best of both worlds and save over 50%.*
iOS / ANDROID
Every Digital sub includes a 5‑device licence to our App: mix and match across iOS/Android Tablet and Smartphone.
ONLY READING SOS IN PRINT?
Choose our full Print+Digital bundle for unlimited 24/7 access.
* The 50% discount offer is based on the UK retail price of the Print magazine, Tablet and Web subscription when sold separately. Subscriptions can be cancelled at any time and you will receive a pro-rata refund for all outstanding issues.
SOUND ON SOUND IAN GILBY
S
ome 40 years ago, as a bushy-tailed, bright-eyed Editor, I was upstairs at my rickety desk in SOS’s garret loft office — which was all we could afford in 1985 as a start-up business. It was late at night, and I was trying desperately to conjure up the perfect words for a leader column to express how I and my brother Paul felt as we were about to launch upon the unsupecting UK audience what I knew in my heart was going to be a revolutionary colour music magazine that fused recording content with music technology gear and software reviews. It featured an innovative Sound On Vision sound-for-picture section in the back pages, along with Kendall Wrightson’s exploration of SMPTE in a new series that nodded at the power of MIDI timecode and how it would
grow in relevance to the eager home musician in years to come. The amazing Roland SBX-80 had just launched and was reviewed in issue 1, along with MIDI-controlled effects and a superb synchroniser from Bokse. We understood their significance. Midge Ure of Ultravox and Band Aid fame graced our premier issue front cover. Yours truly interviewed him after Chrysalis, his record company, sent me a cassette tape which I devoured and loved to bits (I still do!) as I drove down to Midge’s then home in Chiswick, London. I was shown into his garden shed, where he’d installed a modest home studio — precisely what I wanted to portray as the groundswell of interest in home recording (which began with my time as Editor of Home Studio Recording magazine) was at fever pitch. So I asked
“I challenge anyone to show me a magazine that evokes such passion from its readership as Sound On Sound...” 146
November 2025 / www.soundonsound.com
the awkward questions and delved deeply into how his well-crafted songs were conceived, written and demo’ed on Midge’s Akai MG 12-track recorder and E-mu Emulator prior to big studio sessions and mixdown. Midge admitted candidly that “MIDI baffles me”. Over the years Midge has become very knowledgeable of MIDI and in-the-box recording in his Bath-based home studio. Somewhere on the SOS YouTube channel you can still watch our video of Paul White and Hugh Robjohns undertaking their Studio SOS optimisation of Midge’s studio space. SOS delivered material like this that was hard to find elsewhere, long before YouTube became a dominant force. Through this past 40 years, SOS has attracted talented team members across all departments, most of whom have been loyal and still work for the publication. I bless them all for their unswerving dedication to creating, month in and month out, the very best magazine in our sector, bar none. In fact, I challenge
anyone to show me a magazine that evokes such passion from its readership as Sound On Sound, remaining firmly at the top of the pile while music tech magazines from big publishers have died off. That’s why I love Sound On Sound. Ask our readers if they value their print subscription and they will tell you indefatigably that what we write each month matters immensely to them and influences every single purchasing decision. Over one million visitors to our website each month seek out our independent in-depth reviews and tutorial workshops. Why? Because we are committed to truthful, honest content that cannot be bought. Our readers know this fact and, whilst they enjoy YouTube influencer content like we all do when researching gear, they crave the guarantee from SOS that what we write about products holds true after they hand over their hard-earned cash or credit card and the gear/software later arrives at their home studio. Long live SOS.
LEGENDARY DRUM SOUNDS.
Drums recorded in some of the world’s best studios by iconic engineers like Bob Rock, Elliot Scheiner, Eddie Kramer and Hugh Padgham, to name a few. Start exploring our collection of expansions for Superior Drummer 3 today.
WWW.TOONTRACK.COM
FE ATURE
Our four-part series charts the most important technical breakthroughs in music history. THE SOS TEAM
A
lot has happened since the first issue of Sound On Sound appeared in October 1985. Music technology and the music industry have changed beyond all recognition. Today’s home computers can do things that would have seemed impossible in the mid-’80s. But how did we get here? To mark Sound On Sound’s 40th anniversary, we have put together a list of 40 milestone developments from the history of recording and production, which we’ll be counting down over the next four issues. Agree? Disagree? What have we missed? Get in touch on feedback@soundonsound.com to share your own thoughts. 40: Spectral editing Spectral editing is a digital-audio processing technique that allows users to view and manipulate sound using a spectrogram display that simultaneously shows time, frequency and amplitude, rather than just a waveform. First seen in CEDAR Audio’s Retouch process, launched in 2002, the display makes it possible to visually identify and isolate different sounds that occur simultaneously, thereby facilitating the removal of clicks, hums and other background noises often without affecting the surrounding audio. Retouch, along with Steinberg’s SpectraLayers (originally developed by Divide Frame and published by Sony) and iZotope’s RX software, has a signal-focused approach optimised for use in post-production and restoration, whereas a more music-based app like RipX uses a slightly different spectral analysis that is more note‑ and harmonics-based, with a focus on instrument separation. Melodyne, similarly, uses a form of spectral note extraction alongside polyphonic pitch detection to create its unique visual editing interface.
November 2025 / www.soundonsound.com
Producer Roger Nichols developed the first drum sample replacement system.
39: Drum sample replacement Steely Dan producer Roger Nichols bought his first computer in 1976. By 1978 he had developed the first version of Wendel, a drum machine that employed 12-bit, 125kHz sampling. It wasn’t the first digital drum machine but, uniquely, it had an envelope follower that allowed it to be triggered from a pre-recorded drum track. Existing kick and snare sounds could be replaced with factory samples, or you could sample and replay clean hits from your own multitrack. Wendel was first used in January 1979 on Steely Dan’s album Gaucho, and was superseded by the 16-bit MkII version in 1981. 38: Parallel compression Unlike standard compression, which reduces peak levels with the aim of controlling overall dynamic range, parallel compression blends a heavily compressed version of an audio signal with the original unprocessed signal. This has the effect of maintaining all the transients and dynamics of the peaks whilst still adding density through raising the level of quieter parts of the source via the compressed path. The most common setup is to route a track to a secondary channel or auxiliary bus, where heavy compression is applied,
before mixing that signal alongside the dry track. The audible effect is denser and more powerful, just like normal compression with some make-up gain applied, but without any loss of transient detail — a common side-effect of compression — because the dry, uncompressed track is always louder on the peaks. It’s commonly used on drums, sometimes vocals, and even full mixes to increase average loudness and perceived energy. The technique is sometimes referred to as ‘New York compression’ because of its frequent use on New York disco and pop recordings in the 1970s and 1980s. 37: Re-amping Re-amping, as used in the context of guitar recording, refers to recording a clean, direct signal via a DI box that can subsequently be replayed through a guitar amp and re-recorded. The player will usually be listening to a guitar amp at the time to help with the original performance, but the technique allows the sound to be altered or improved later without requiring the part to be played again. When re-amping it is important for the playback signal to match both the level and source impedance of a typical guitar signal to ensure that the amplifier will react normally in terms of distortion and tonality. A number of dedicated impedance-matching boxes are now available, notably Radial’s X-Amp. Re-amping is often cited as being ‘invented’ in the early ’90s, but was actually in regular use well before, using either custom‑made adaptors, or even passive DI boxes connected backwards, so the amp would see the high-impedance side of the box. 36: Noise reduction Dolby Laboratories developed their A-type process in 1965 to combat the high-frequency hiss inherent in analogue tape recording. In the following years, as multitrack tape recorders added more
a sung vocal in a remarkably transparent way. But what no-one had anticipated was that producers would use it without discretion. Cher’s 1999 mega-hit ‘Believe’ showcased the uncanny sound that could be achieved with fast retune speeds; at the time, it seemed like a novelty, but the effect has become part of the standard sound palette of hip-hop and R&B.
Sony’s pioneering real-time convolution reverb.
discrete tracks to the standard tape widths, the Dolby process became an essential component of many professional multitrack recording studios. The rival dbx system, using a full-bandwidth compander to compress the signal during recording and expand it on replay, was effective at suppressing noise, but could also produce audible noise modulation. The Dolby system avoided this by dividing the audio spectrum into four separate frequency ranges, applying compression and complementary expansion separately in each band, reducing noise by up to 10dB in the midrange and 15dB at high frequencies without significant side-effects. Dolby-based systems always had to be carefully calibrated to ensure that the record and replay levels matched, otherwise the encoded signal would not be properly ‘decoded’. By the late 1980s, higher fluxivity tape formulations and 30ips working were often preferred to using Dolbys for noise reduction. 35: Mixing in the box Ricky Martin’s 1998 global chart-topper ‘Livin’ La Vida Loca’ is notable for more than just its singer’s chiselled good looks, or its unusual success in bringing Latin music to a mainstream audience. It’s generally regarded as the first number one single to be mixed entirely in software, without the assistance of a hardware console or any outboard processing. The software in question was, of course, augmented by hardware DSP cards, but even so, ‘Livin’ La Vida Loca’ was a recognisable landmark along the path to the current situation where composers and producers can work anywhere, with only a laptop and a pair of headphones. 34: Convolution Convolution exploits the idea that every single sample in a digital recording can be considered, in its own right, an instantaneous impulse with a given amplitude. So if we
have another digital recording that actually represents the response of a room or other structure to an impulse, we can impose the sound of that room on the first recording by playing back the second one over and over again, with its amplitude adjusted to that of each sample in the first. This process was understood many years before it became practical to implement, with the first real-time convolution reverb being Sony’s DRE S777 from 1999. Not all of the claims made for convolution in its early days were fulfilled, because the realism of simple implementations is compromised by its inability to capture time-variant or non‑linear phenomena, but many of these shortcomings have now been addressed. As well as powering many reverb plugins, convolution is now also the standard technique behind loudspeaker emulation in amp simulators. 33: Pitch correction In 1996, physicist Andy Hildebrand was inspired to apply some of the insights he’d gained in the oil and gas industry, where he worked on improving the interpretation of radar images, to audio. The result was something previously thought impractical: a real-time algorithm that could analyse and automatically correct the pitch of monophonic audio. This algorithm formed the basis of what may be the single most influential plug-in of all time. Used with discretion, AutoTune could eliminate ‘pitchiness’ from
An early iteration of Antares’ Auto-Tune plug-in.
32: Time-stretching The ability to play back recorded audio faster or slower without changing its pitch might seem like a quintessentially digital phenomenon. Not so. German inventor Anton M Springer published a paper in 1957 describing his all-analogue, tapebased Acoustical Time Regulator, which he had demonstrated in operation four years earlier. Four playback heads were mounted on a cylinder which could be rotated independently of the tape speed. Switching between the heads allowed short segments of the audio to be repeated or omitted, depending on whether the tempo was to be reduced or increased. Springer claimed that tempo could be varied by ±30 percent with no loss of audio quality. 31: MIDI recording sync’ed to tape From the perspective of today’s ‘in-thebox’ DAW production techniques, it is easy to overlook the mid‑’80s technology revolution that came before. Early MIDI sequencers, whether in software or hardware, could start in sync with a multitrack tape machine and continue running in parallel using a rudimentary sync code, but they always had to start from the beginning. Clearly, this was of no practical use in an overdub session where you might shuttle about endlessly. Everything changed, however, with the development of the ability to lock sequencers to industry-standard SMPTE timecode. This meant that the sequencer would start playing in sync at whatever point you started the tape, effectively adding ‘virtual tracks’ to any size of multitrack setup. In the era before audio recording on computers, software sequencers such as Steinberg’s Pro 24 and C-Lab’s Notator became perfect companions to the narrow-gauge multitracks of the day, as fundamental elements like drums and bass parts never needed to be recorded to tape at all. It was also possible to edit the MIDI elements of a performance, or indeed change sounds, right up to printing a final mix.
www.soundonsound.com / November 2025
TM
ISSUE ONE FREE DOWNLOAD
CLICK HERE
First published on the 18th October 1985.
www.soundonsound.com