SOUND ON SOUND THE WORLD’S BEST RECORDING TECHNOLOGY MAGAZINE
THE WORLD’S BEST RECORDING TECHNOLOGY MAGAZINE
CELEBRATING 40+ YEARS 1985 — 2026 TM
MUSIC PRODUCTION TECHNIQUES / INDEPENDENT IN-DEPTH PRODUCT TESTS / ENGINEER & PRODUCER INTERVIEWS / LIVE SOUND
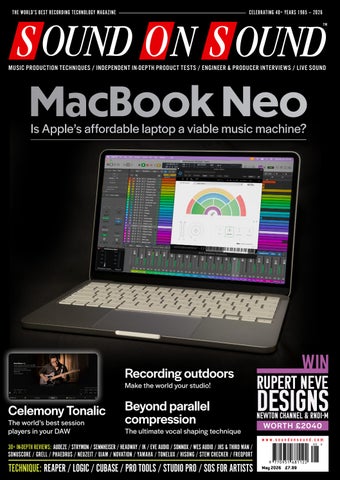
MacBook Neo Is Apple’s affordable laptop a viable music machine?
MAY 2026
www.soundonsound.com
Recording outdoors
Celemony Tonalic VOLUME 41 • ISSUE 7
The world’s best session players in your DAW
Make the world your studio!
RUPERT NEVE
Beyond parallel compression
NEWTON CHANNEL & RNDI-M
The ultimate vocal shaping technique
DESIGNS WORTH £2040
www.soundonsound.com
30+ IN-DEPTH REVIEWS: AUDEZE / STRYMON / SENNHEISER / HEADWAY / IK / EVE AUDIO / SONNOX / WES AUDIO / JHS & THIRD MAN / SONUSCORE / GRELL / PHAEDRUS / NEUZEIT / UJAM / NOVATION / YAMAHA / TONELUX / HISONG / STEM CHECKER / FREQPORT
TECHNIQUE: REAPER / LOGIC / CUBASE / PRO TOOLS / STUDIO PRO / SOS FOR ARTISTS
May 2026 £7.99
BANDBOX TRIO
BANDBOX SOLO
JBL BANDBOX SOLO and TRIO are portable practice amps with real-time AI that separates vocals and instruments, provides powerful JBL sound, and comes loaded with built-in guitar effects. No band? No problem.
FEATURING: Real-time AI stem separation
Built-in amp tones and pedal effects
Bold JBL sound
Portable with built-in battery
4-channel mixer* * TRIO only
JBL BandBox is exclusively distributed in the UK and ROI by Sound Technology. For more information please call 020 8962 5080 or visit soundtech.co.uk
LE ADER
MORE FOR LESS I
t might surprise some readers to learn that the beating heart of Studios Chateau Inglis is a 2018 Apple Mac Mini. As I’m not a big user of sample libraries, this is mostly employed for tracking and mixing audio. And I don’t think I have ever run out of resources. Its trusty Intel i7 CPU continues to chew up everything in its path. No multitrack project is too large for its 32GB RAM to swallow. I could do with more drive space, but then, couldn’t we all. Before you ask, yes I do also have a more recent laptop for testing in an Apple Silicon environment. But although I might look upon new machines with covetous eyes, there’s really no sense in which I feel the need to upgrade right now. Those blisteringly fast M5 CPUs no doubt make all the difference if you are working with uncompressed hi-res video, or running AI instances locally. But for knocking other people’s home recordings into shape, they’re overkill. The same goes for many other everyday applications, from graphic design to CAD modelling and coding. Armed with that knowledge, I’ve sometimes wondered whether to invest in a basic laptop for working outside the studio. But the MacBook Air is still a fairly serious investment, especially if you go for the higher-spec models with more storage and memory. The iPad is just too... different.
ALLIA BUSINESS CENTRE KING’S HEDGES ROAD CAMBRIDGE CB4 2HY T +44 (0)1223 851658 sos@soundonsound.com www.soundonsound.com
And although there are plenty of Windows and Chrome netbooks around, they are usually just hopeless in terms of features. So the new MacBook Neo is, for my money, the most intriguing product Apple have launched for years. For less than the price of most iPads, you’re getting a ‘proper’ Mac that can run the software we’re all familiar with. There are obvious compromises in terms of memory and drive space, but those are negotiable, especially if you don’t plan to use the Neo as your main studio machine. It has just about enough connectivity to handle serious audio recording, at least if you expand it with a USB hub. And, of course, it’s portable, silent, and capable of running all day on battery power. Wise heads have always told us to buy the most powerful computer we could afford, on the assumption that our needs would always outpace our resources. There’s something quite liberating about the idea of getting off that treadmill. The last few years have witnessed a trend away from making music entirely in the box. Electronic music makers, mastering engineers and project studio owners have all moved towards hybrid working. And every penny we don’t spend on a computer is a penny we can spend on synths, outboard, monitoring, software or even feeding the kids.
ADV ER T ISIN G
admin@soundonsound.com
sos.feedback@soundonsound.com
adsales@soundonsound.com
Managing Director/Chairman Ian Gilby
Editorial Director Dave Lockwood
UK Media Sales Manager Chris Cope
Editorial Director Dave Lockwood
Executive Editor Paul White
Marketing Director Paul Gilby
Editor In Chief Sam Inglis
Finance Manager Keith Werthmann
Technical Editor Hugh Robjohns Reviews Editor David Glasper Reviews Editor Matt Houghton
P R ODUC T I ON
Production Editor Chris Korff
graphics@soundonsound.com
News Editor Luke Wood
Nick Humbert
Printing Warners Midlands plc Newstrade Distribution Warners Group Distribution Ltd, The Maltings, Manor Lane, Bourne, Lincolnshire PE10 9PH, UK.
support@soundonsound.com
ISSN 0951‑6816
Digital Media Director Paul Gilby
A Member of the SOS Publications Group
www.soundonsound.com/subscribe Circulation Manager Luci Harper
May 2026 / www.soundonsound.com
International Business Development
Designer Andy Baldwin
subscribe@soundonsound.com
4
marketing@soundonsound.com
O N LIN E
S UB S CR I P T I ON S
NORTH AMERICA
M AR K E T IN G
Designer Mick Reilly
Design Andy Baldwin
UK/WORLD
“The new MacBook Neo is, for my money, the most intriguing product Apple have launched for years.”
EDI T O R I AL
Production Manager Michael Groves
WOR LDW I D E E D I T I O NS
Editor In Chief
A DM I N I S T R AT I O N
Reviews Editor Chris Korff
WWW.SOUNDONSOUND.COM/SUBSCRIBE
Sam Inglis
Administrator Nathalie Balzano
Web Content Editor Callum Hall Web Editor Adam Bull Digital Media Manager Atheen Spencer www.soundonsound.com twitter.com/soundonsoundmag facebook.com/soundonsoundmag instagram.com/soundonsoundmag
The contents of this publication are subject to worldwide copyright protection and reproduction in whole or part, whether mechanical or electronic, is expressly forbidden without the prior written consent of the Publisher. Great care is taken to ensure accuracy in the preparation of this publication but neither Sound On Sound Limited nor the Editor can be held responsible for its contents. The views expressed are those of the contributors and not necessarily those of the Publisher or Editor. The Publisher accepts no responsibility for the return of unsolicited manuscripts, photographs, or artwork. © Copyright 2026 Sound On Sound Limited. Incorporating Music Software magazine, Recording Musician magazine, Sound On Stage magazine, SPL magazine, Sound Pro magazine and Performing Musician magazine. All rights reserved. All prices include VAT unless otherwise stated. SOS recognises all trademarks.
Unlock Your Best Mixes If you can’t trust what you’re hearing, you can’t trust your mix. The truth is your room is likely holding you back. Introducing ORIA Mini, the room correction powerhouse that sits between your audio interface and speakers. Powered by Sonarworks, ORIA Mini is a dedicated hardware solution that analyses and corrects your room’s acoustic imperfections in minutes, transforming your studio monitoring.
Powered by
42 RECORDING MUSIC OUTDOORS
IN THIS ISSUE
www.soundonsound.com
May 2026 / issue 7 / volume 41
FEATURES 42 Recording Music Outdoors When the hills are alive with the sound of music, it’s up to us to record it.
54 Modular With just three modules to his name to date, Zlosynth founder Petr Horáček has already made his mark on Eurorack.
56 Buchla Touché Revisited
WIN
RUPERT NEVE DESIGNS NEWTON CHANNEL & RNDI-M
Just like all his other creations, Don Buchla’s polysynth was ambitious — and not quite like anything else.
78 Inside Track: Nicolas Rebscher Louis Tomlinson’s hit album How Did I Get Here? is a showcase for the many talents of Nicolas Rebscher.
92 Send/return Compression Combine the best qualities of multiple compressors, and you can make your lead vocal the star of the show.
96 Talkback: Melody’s Echo Chamber
WORTH £2040 PAGE 84
Psychedelic folk chanteuse Melody Prochet lays bare the thinking behind her “hi-fi but lo-fi” aesthetic.
102 How I Got That Sound Producer and engineer Mark Needham explains how an overdriven A-D converter shaped the sound of the Killers’ ‘Mr Brightside’.
6
136 Q&A Your studio and recording questions answered.
116 Spotlight: High-end Polysynths
138 Why I Love... Tubes
We head into the world of synthesizer megafauna to round up some of the best polysynths on the market today.
Frank Henville tells how an SOS review ignited his passion for the venerable vacuum tube.
May 2026 / www.soundonsound.com
108 NEUZEIT INSTRUMENTS DROP
C O V E R
ON TEST 86 Apple MacBook Neo
30 Hisong AirStudio S1 14 IK Multimedia Sunset Sound
Studio Reverb II
Laptop Computer
18
Audeze LCD-S20
Reverb Plug-in
26 JHS Pedals & Third Man
Hardware Troika
Closed-back Headphones
38
53 Bastl Instruments
Citadel Alchemist Eurorack Module
72
Mic/Instrument Preamp & Delay Pedal
Audio.Computer Beat Friend Drum Machine
Celemony Tonalic Virtual Session Musician Instrument
112 Dawsome Love 2 Granular Multi-effects Plug-in
68 Eve Audio EXO 27 Active Monitors
28 Freqport FT1-EMU Valve Emulation Plug-in
32 Grell OAE2
120 Klevgrand OneShot2 Sample Library
108 Neuzeit Instruments Drop MIDI Controller
24 Novation Launch Control XL 3 MIDI Control Surface
48
Headway EDB-2 VAP Acoustic Instrument Preamplifier
120 Heavyocity Convergence Sample Library
Phaedrus Audio SHUpHLER MkIV Stereo Correction Processor
112 PSP Tilt-Q Equaliser Plug-in
52 RYK Time Slice Eurorack Module
121 Sample Logic Arpology Strings
Open-back Headphones
12
98 Sonuscore LUX Orchestral Strings Sample Library
USB Microphone & Recorder
Sample Library
8
Sennheiser HD 480 Pro Closed-back Headphones
20 Sonnox Oxford Drum Gate 2 Dynamics Plug-in
113 Soundevice Digital Duoflux Modulation Plug-in
10
Stem Checker
Utility Software
16
Strymon Fairfax
Overdrive pedal
34
Tonelux Dynalux
Dual-channel Compressor
114 Tonerider Apex Plus
Hum-cancelling Pickups
22 UJAM Voxcraft
Vocal Processing Plug-in
104 Wes Audio ngTubeComp
Digitally Controlled Variable‑mu Compressor
121 Wrongtools Unsung Sample Library
62 Yamaha URX44
USB Audio Interface & Mixer
WORKSHOPS 122 SOS For Artists 124 Reaper 126 Studio Pro 130 Pro Tools 132 Cubase 134 Logic
www.soundonsound.com / May 2026
7
ON TE ST
Sennheiser’s latest headphones promise to deliver the goods, whether you’re tracking or mixing. PAUL WHITE
I
t is common to use open-backed headphones for mixing and closed-back headphones for tracking. However, Sennheiser’s closed-back HD 480 Pro is intended to provide sufficiently accurate monitoring to be used in both situations, with the added advantage of good isolation from external sounds. It’s a companion model to the HD 490 open-backed phones, which we reviewed in April 2024. Having owned and used a wide range of studio headphones, my own wish list of features includes long-term comfort, a removable/replaceable cable, and transducer covers that don’t turn to dust after a few years of use. I also avoid anything with a ‘comfortable, textured rubber’ element, as those finishes invariably turn into sticky goo after a couple of years. Of course studio headphones also have to sound accurate, especially when mixing, though this is arguably less important when tracking. The law of diminishing returns applies as much to headphones as other products, and many £150‑£200 models are perfectly adequate for both home studio and professional use. Move up to something costing £1000 or more and there will be a quality improvement, but it will be relatively small. That places the HD 480 Pro in a good position, as it offers benefits over what might be seen as typical studio headphones, while adding only around 50 percent to the cost. The HD 480 Pro is very solidly engineered, with an adjustable stainless-steel headband that has comfortable padding fixed to its underside. The drivers are protected by fabric rather than the dreaded ‘turns to dust’ foam, and the ear padding is deep and comfortable. A locking curly cable, specifically designed to minimise cable-borne vibration noise, plugs into the base of either earcup and terminates in a stereo mini-jack with a quarter-inch TRS adaptor already fitted. For this review we were sent the HD 480 Pro Plus package, which includes a semi-rigid, zip-up case, but a slightly cheaper non‑Plus version, which ships
8
May 2026 / www.soundonsound.com
Sennheiser HD 480 Pro Closed-back Headphones with a soft travel bag, is also offered. Replacement parts are available, which is vital for professional headphones. Unlike the HD 490 Pro’s perforated metal backs, the HD 480 Pro’s earcups are fully sealed, with solid plastic backs. Their nominal impedance is 160Ω, and the 38mm drivers utilise neodymium magnets in conjunction with ultra-light voice coils to optimise efficiency. The frequency response extends from 30Hz up to 28.7kHz (-10dB), sensitivity is specified as 107dB SPL (1kHz/1V RMS) or 98dB SPL (1kHz/1mW), with a maximum SPL of 130dB SPL (1kHz @ 5% THD). Power handling is rated at 300mW. The weight, excluding the cable, is 272g (about 10oz).
On The Head These headphones fit comfortably around the ears and provide a practical degree of isolation from external sounds. The headband slides into housings at either end for adjustment, and the soft earpads are comfortable for long periods of listening. Many closed-back headphones perform less accurately at the low end than their open-back counterparts, but my listening tests revealed a tight, solid low end with a real sense of weight. The highs are smooth and detailed, while vocals come across very naturally — something that can challenge loudspeakers, where the crossover frequency often sits in the critical vocal range. At the time of review, detailed frequency plots were not available, but overall I felt
that the comments made in the review of the HD 490 Pro could also be applied to the HD 480 Pro, inasmuch as I suspect the low end may have been given a small amount of lift. These variations are subtle and actually make the sound very comfortable to work with. Any deviations from a perfectly flat response are not significant enough to compromise mix decisions once you have spent a short time getting used to the headphones, and apparently the tuning of these phones was in response to feedback from studio engineers. While priced a little above some commonly used studio headphones, the HD 480 Pros are equally adept at tracking and mixing, and as they are designed for a long service life, they are not headphones you will be looking to replace any time soon. For the private studio operator, choosing the HD 480 Pro could save the cost of buying two different sets of headphones. I particularly appreciate the use of durable acoustic fabric instead of thin foam transducer covers, the detailed but non-fatiguing sound, the wide range of adjustment, and their comfort, even when worn over spectacles.
summary Well engineered, comfortable and with a clear, natural sound, the HD 480 Pros are excellent all‑rounder studio headphones.
£ £339 or £369 for Plus edition. Prices include VAT.
W www.sennheiser.com
STUDIO QUALITY SOUND ANYWERE YOU GO. THE BEST OF BOTH WORLDS Thanks to its 32-bit float recording technology and dedicated gain controls, the H5studio offers the best of both worlds. There is no risk of clipping and no need for post-processing. With its transparent sound quality, studio-grade preamps and smart synchronisation options, creative professionals can now record anywhere, anytime with the largest microphones of any handheld recorder to date.
ZoomUnitedKingdom
ZoomUnitedKingdom
ZoomEurope
Exclusive distribution in D, A, CH, DK, GB, PL, EE, LV, LT, BG, HU, BE, NL, L, GR, CZ, SK: Sound Service U.K. Limited | www.soundservice.uk | sales@soundservice.uk
ON TE ST
Stem Checker Utility Software
Stem Checker takes the leg work out of checking stems.
of the track timeline, and if you hit the info button at the top of the UI a key is provided for all detectable issues. Batch Rename was an unexpected bonus: a useful, simple tool for removing prefixes and suffixes, with a find and replace function and the option to add a prefix. This makes for speedy renaming of files to your own preferred convention. In this top row of buttons, you’ll also find a dedicated export window and built-in cloud support. So, for example, you can upload to Dropbox directly from within the application.
In Use
JULIAN RODGERS
S
tems, by which we mean multitrack elements that can be reconstructed to recreate the master recording, frequently have issues which mean that they don’t fulfil this basic purpose. And all too often, these issues are only discovered once they’re in a DAW session and being worked on. Of course, it would be better to discover these things before they hit your DAW, and that’s exactly what Stem Checker is for. Stem Checker is a lightweight standalone utility for macOS that is designed for music producers and engineers to verify stems without opening a DAW. It functions as a pre-session QC stage, and the promising thing about Stem Checker is precisely this focus. It’s there to solve one problem, and tools that do that are often the most useful.
Toolkit With stems dragged and dropped into the DAW-style timeline layout, which will be immediately familiar to users, navigation is nice and intuitive. Playback is ‘tape style’ and starts from where it was last stopped, but if you enable Anchor mode, you can start playback from the same point every time. You can use Option-drag to create looped sections. You can pin tracks to the top of the page and zoom horizontally
10
May 2026 / www.soundonsound.com
and vertically using Command-plus. So far, so good. Stem Checker can automatically identify if there is a print of the whole mix included in the stems, and will make it available in compare mode so you can A/B between the combined output of the stems versus the master. This will also be automatically level‑matched; a very efficient auditory check that all is well.
So how is it in use? I found it very intuitive. If you’re not sure about anything, just click the info button and you’ll probably find the answer. This isn’t the deepest of applications. It’s fast, it’s efficient and it does what it sets out to do efficiently and rather elegantly. I like it. So, should you spend money on a separate application to do something you can do within your DAW? I’d argue that if you use stems a lot, then yes. Checking the assets you’re using before importing to your DAW, so that you discover the issues before you start rather than while you’re building your session, or even while you’re mixing, is the correct point in the process to do these QC checks, and it avoids potential session clutter, fixing issues as you discover them. This is just as useful when you’re creating stems to send to somewhere
“It’s fast, it’s efficient and it does what it sets out to do efficiently and rather elegantly.” A variety of common technical issues, if present, will already have been identified: length mismatches, sample rate and bit depth mismatches, missing audio and level clipping are all flagged by the display of icons in the track headers. Content-based issues, such as duplicate stems and dual mono files, will also be detected. Dual mono is particularly useful as it’s so common for DAWs to output mono tracks as stereo prints. And from a housekeeping point of view, keeping mono content on mono tracks is, in my opinion, the way to go. The colour-coded icons in the track headers aren’t self-explanatory, but explanation is provided in the Issues panel on the right
else. If you’re sharing stems with other people it can save you from looking like you lack attention to detail. It seems to cover the important stuff and achieves exactly what it sets out to do. Considering I used to use a separate piece of software just to detect dual‑mono files on import, I’d say having an application that covers all bases so efficiently is very worthwhile.
summary If you send or receive stems regularly as part of your work this simple application will definitely earn its keep.
£ £29.99 per year including VAT. W www.stemchecker.io
RME PREMIUM USB AUDIO INTERFACES RME interfaces for studio and live recording offer a comprehensive feature set with sonic excellence and intuitive control for Mac and Windows, including TotalMix FX for flexible routing and mixing. Unrivalled ultra-low latency operation combined with the legendary RME driver stability and maintenance for users who don’t want to make compromises.
Worldwide Distribution: Audio AG, +49 8133 9181-0, www.audioag.com • UK Distribution: Synthax UK, +44 1727 821870, www.synthax.co.uk www.rme-audio.com
ON TE ST
Headway EDB-2 VAP Acoustic Instrument Preamplifier
If you play multiple instruments with acoustic pickups, you’ll need a preamp that not only performs well, but is also supremely versatile... BOB THOMAS
I
reviewed UK-based Headway’s EDB-2 acoustic preamp back in SOS October 2014 (https://sosm. ag/headway-edm1-edb2), and they’ve since developed it to bring us the EDB-2 HE in 2020 and, more recently, the ‘Equaliser Direct Blender — Valve Alchemy Professional’, or the EDB-2 VAP for short. Shorter still would be to call it the VAP, which is what I’ll do for the remainder of this review!
and 5- or 10-Volt phantom power can be sent to either. Channel 2’s jack has the same impedance switching, but no phantom power. Both
are TRS jacks, but will accept a TS jack too. They’re joined by switchable XLR inputs (both off, both on, or channel 2 on and channel 1 off), with switchable 10‑ or 48‑Volt phantom power. A stereo 3.5mm
Form & Features The VAP is a two-channel device built into a chunky metal box, with a profusion of audio-related controls on top, and inputs and outputs on its front, right and rear panels. Underneath are a removable valve cover, compartments for batteries that can replace the 18V, 1A external power supply when the valve isn’t in use, and a 5/8-inch mic-stand socket. There’s also a front-panel on/off/standby switch, an earth lift and a 5V, 0.5A USB‑A charging socket. The tip and ring of channel 1’s jack have switchable input impedances (1.2/6.8/20 MΩ) to suit active and passive piezo and magnetic pickups,
12
May 2026 / www.soundonsound.com
The various outputs are found on the rear panel, along with USB and external power options. But there’s also provision, when the valve isn’t in use, for battery power.
The inputs are on the front panel, with the jacks and XLRs supporting different phantom power options.
mini‑jack aux input feeds the master output directly (post-EQ), but also appears in mono on channel 1 when its XLR isn’t active and it has no jack plugged in. Finally, there are insert loops on each channel: a separate send and return on channel 1’s TS jacks, and a single TRS (tip-send, ring-return) for channel 2. On the EDB-1, Headway’s Range high-pass filter was a three-position switch, but here it’s a pot, to allow continuous frequency sweeps (<40 to 300 Hz) on both channels. Helpful printed waymarks around each knob include bass, baritone guitar, cello, acoustic guitar, bouzouki, mandolin/ violin, and, finally, Rock Acoustic. Each channel is also equipped with individual gain controls, output mute switches and Headway’s Baxandall Interactive five-band EQs (bass shelf, low mid, high mid, presence and treble shelf), while a single sweepable (50Hz to 6kHz), fixed‑gain, variable-Q notch filter can be assigned to either channel.
Exciting Enhancements The VAP borrows the High Harmonic Enhancer from the EDB-2 HE. This delivers simultaneous boosts of up
to 2dB at 1kHz and from 2.3 to 10 dB at 10kHz, to increase the sense of HF sparkle and definition. This is joined by a new Valve Blend circuit, whose high-quality 12AX7 dual-triode valve runs at a high plate voltage, and creates even-order harmonics. Increasing the Valve Blend’s gain/ drive creates a growing and attractive
“I find myself enamoured of the VAP’s sonic performance.” sense of valve-based warmth and weight, and can help reduce the dreaded piezo ‘quack’ by slowing the rise of fast transients. Normally, Channels 1 and 2 drive the 12AX7’s triodes separately, but in Doubler mode both triodes are driven by channel 1, to allow increased harmonic coloration, or even distortion. Both channels’ signals flow from a shared master level control, through a three-position polarity-inverter switch (off, channel 1 reversed, or both channels reversed) to a mono/stereo
unbalanced TRS line-level output jack, and to the balanced XLR DI A and B outputs. Both DI outputs can be switched pre/post EQ or split, with A post and B pre. Channel 1 is always routed to DI A, and DI B can carry either channel or both. The line out switches automatically between mono and stereo operation; for TS jack plugs, both channels are mixed onto its tip, while for a TRS jack one channel is delivered to the tip, the other to the ring.
Lasting Impressions There’s a bit of a learning curve — familiarising myself with the switched input, phantom power and output routing naturally took a bit of time. But I soon settled in, and then spent a considerable amount more time playing through the VAP with a variety of instruments. It proved every bit as comprehensive and flexible as I’d hoped it would, given my experience of preamps and blenders at this sort of price. Perhaps more importantly, though, I now find myself enamoured of the VAP’s sonic performance. With the valve switched out of the signal path, the VAP sounds just as clean, articulate and detailed as any similarly priced preamp I’ve heard. Switch in that 12AX7, though, and you’re greeted with a beguiling sense of warmth and body, that’s also intuitively controllable. The high-frequency enhancement can brighten up a dull set of strings in a way EQ just can’t, and is as effective as it is addictive. And at the other frequency extreme, the Range controls make clearing out unwanted clutter simple, and the knobs’ instrument ‘cheat codes’ really help speed things along. If you’re in need of such a preamp, then, Headway’s EDB-2 VAP is well worth your consideration.
summary If you’re searching for a good acoustic preamp/DI for multi-instrument stage or studio use, then Headway’s EDB-2 VAP really should be somewhere near the top of your shortlist.
£ £599.95.
On the left panel, you’ll find insert loops for each channel, including separate send and return jacks for channel 1.
Discounted to £499.95 when going to press. Prices includes VAT. T Headway +44 (0)1869 338404 E sales@headwaymusicaudio.com W www.headwaymusicaudio.com
www.soundonsound.com / May 2026
13
ON TE ST
IK bring one of the West Coast’s iconic studios to your DAW in new detail. SAM INGLIS
S
ome processors arrive in your plug-in folder with a flourish. Others creep in unnoticed, and gradually worm their way into your affections. I don’t even remember installing IK’s original Sunset Sound Reverb, but I’ve come to depend on it quite a bit in the last year or two. As the name suggests, it recreates all of the reverberation options on offer to clients at the eponymous Los Angeles studio, including three live rooms, multiple chambers, isolation booths, plates and even an AKG BX20 spring. The chambers in particular add instant magic to almost any vocal, whilst the plates and the live spaces likewise provide highly usable results with minimal tweaking. Short of firing impulses into the car park and accounts office, you might think this leaves little scope for a version 2, but IK have other ideas. Sunset Sound Studio Reverb II presents the same sources of reverberation as the original, but does a lot more with them.
Two Paths You Can Go By For a start, the plug-in is now a dual-engine processor combining two entirely independent reverb generators, each with its own pre-delay, decay time, size, width, panning and level options, as well as separate filters and three-band EQ. This makes a lot of sense. If you think about it, anything that’s actually recorded and mixed at Sunset Sound is likely to bear the acoustic imprint both of a live room and of a chamber or plate, so the ability to add both in one go to a dry source is very welcome. The first couple of times you use it, you can find yourself editing the ‘wrong’ set of parameters, but once you get used to it, it adds a lot to the versatility of the plug-in without really making it more complex to use. However, that’s not the biggest development IK have made in version 2. (Nor is the plug-in window remembering how large you want it to be, though that’s a very welcome improvement too.)
Grid Locked Although it had wet and dry level controls, the original Sunset Sound Studio Reverb
14
May 2026 / www.soundonsound.com
IK Multimedia Sunset Sound Studio Reverb II Reverb Plug-in was primarily designed as an auxiliary effect. It was possible to shape the response of the live rooms in various ways, but in each case there was a single core sound to work with. In version 2, IK have ‘multisampled’ each live room more than 20 times, with the loudspeaker in different positions. When a mono or stereo source is fed into the plug-in, you’ll now hear it as captured from a specific position by a pair of room mics at the front of the room. You can therefore use multiple instances of SSSR II as inserts across different sources to make them sound as though they are all located at different spots within the live room. The way this works in practice is simple and effective. Hover the mouse over the graphic of the studio and a grid appears, making it look slightly like the dance floor in Saturday Night Fever. You can select any cell within the grid. For Studios 1 and 2 the listening position is halfway along on the left-hand side, so cells towards the front appear towards the right in the plug-in output, and cells to the right of the screen appear further away. Studio 3 is the other way around.
To say that this feature adds an extra dimension to Sunset Sound Studio Reverb is an understatement. Whilst it’s neither as complex nor as sophisticated as, say, UA’s Ocean Way Studios Deluxe, it bridges the gap between applying a nice-sounding reverb to something, and making it sound like you’ve put up a pair of room mics in a great room. And although the other types of reverb are largely the same as in version 1, the new dual-channel architecture makes them all the more usable. Feed a snare track or even the entire drum mix into an instance of SSSR II, locate yourself somewhere in the middle of the grid, dial in a small amount of chamber on the second channel, and collect all the excitement and scale you’ll ever need at the checkout. I can tell that my dependence on Sunset Sound Studio Reverb is only going to get stronger…
summary Version 2 of IK’s reverb plug-in lets you place your audio right inside Sunset Sound’s live rooms, with highly effective results.
£ €149.99 including VAT. W www.ikmultimedia.com
ON TE ST
Strymon Fairfax Overdrive pedal
More than ‘just’ a distortion, this all-analogue overdrive boasts real amp-like character.
trymon have an enviable reputation in the effects pedal world, and they’ve earned it with a series of high-end digital pedals. The Fairfax, though, is an all-analogue creation. While that might appear a surprising move to guitarists, even digital pedals need high-end analogue circuitry either side of the converter chips, and Strymon already have engineers with the necessary expertise. They’re drawing on that talent to design a new ‘Series A’ range of analogue pedals, of which the Fairfax is the first.
for level, drive and Sag. The I/O is mono, and the footswitch operates a true bypass relay. As expected, the level control sets the output level (which, unusually, can’t be turned right down to zero), while drive determines the amount of preamp gain. Then there’s that adjustable Sag control. A Bright switch sets the high‑frequency profile: with Bright turned off, highs are tamed slightly for a smoother sound, while with Bright on, the original guitar tonality comes through more. There were occasions when I might have liked a tonality somewhere between the two but there’s no separate tone control here.
Fair Facts
Fair Play
PAUL WHITE
S
The first thing to say is that the Fairfax is more than a typical overdrive. It replicates a complete valve amplifier’s signal path, including an emulation of the output transformer, which is an important factor when recreating the sound and feel of a real amp. Apparently, the original inspiration was Garnet Amplifiers’ Herzog amp, but the final design owes more to the Fender Champ. FET circuitry is used to replicate the behaviour of valves, and Strymon have included a variable Sag circuit, to emulate the way the output of a valve amp power supply is affected by the dynamic load of the amplifier, creating a natural sense of compression that’s triggered by loud transients when a real valve amp is pushed hard. This circuity needs a high operating voltage to provide the necessary headroom, so the standard 9V (500mA) input feeds an internal transformer-based power supply that steps up to 40V. An internal jumper sets the power up state. The default state is bypass, but those using the Fairfax with a loop switcher can change it to be active, which is a considerate touch. Physical considerations include connections at the top end of the case to make fitting adjacent pedals easier, and a no-click footswitch. Despite the internal sophistication, the controls are straightforward, with knobs
16
May 2026 / www.soundonsound.com
At lower drive settings the Fairfax remains ‘polite’, just adding a natural, touch-sensitive harmonic richness. This is particularly effective for adding a little ‘hair’ to clean amps, and also works brilliantly to push an amp that’s just on the edge of break-up. The level control can also be used to push the front end
puzzled me a little: when using high drive levels, even when turning the level control down fully the output sounds noticeably louder than the bypass position. So if you need to kick it in just for solos where a lot of overdrive is needed, the increase in level may be more than you want, especially if driving a clean amp with no natural compression. In summary, then, the Fairfax is no ordinary drive pedal. It’s excellent for adding a natural edge to a clean amp,
“A small amount of Sag really does help to nail the real-amp feel.” of an amp harder when using lower gain settings, as there’s plenty of boost on hand. At higher drive levels the output becomes more obviously saturated and the control offers a large gain range, going from virtually clean to heavy saturation. So the Fairfax will work well with both single-coil and humbucker appointed guitars. It can be pushed to sound aggressive if that’s what you want, though personally I found gain settings in the first two thirds of the control’s travel the most useful. A small amount of Sag really does help to nail the real-amp feel, but the control has so much range that you can, should it be your thing, take it well past the sweet spot to sound like an amp that’s about to fail! I found settings in the first third of travel worked best with my Strat. There was just one design decision that
but also sounds extremely good when pushing an amp already on the edge of breaking up. It feels deliciously touch responsive, and the appeal to live performers just needing to add some edge to a clean or slightly driven amp is obvious. But the Fairfax has a lot to offer studio users too — when working with hardware or software amp modellers it may well help you achieve a more natural result when chasing those elusive edge-of-break‑up sounds.
summary More than a mere overdrive, the Fairfax emulates a real amp, complete with power-sag compression.
£ £199.99 including VAT. W www.strymon.net
ON TE ST
Already much more than a simple gate, the Oxford Drum Gate is back — with significant enhancements! JULIAN RODGERS
W
hen Sonnox first released Oxford Drum Gate, I wasn’t initially inspired by the idea of another noise gate, but it soon became clear that this was something different. By identifying different drum hits, regardless of their level, it solved a problem I encountered on almost every mix session simply and efficiently. Oxford Drum Gate 2 builds on that original version, adding a number of useful features that broaden what can be achieved and can make it much more useful in complex sessions. Happily, though, Sonnox haven’t sacrificed the clarity and efficiency that made it so effective. Neil Rogers reviewed version 1 in SOS March 2020 (https://sosm.ag/ sonnox-oxford-drum-gate), and covered the core concepts very well, so in this review I’ll focus mostly on the new features.
In Alignment The new Align page works across multiple instances, bringing all the sources together into a single pane. In most cases, the plug-in uses the DAW’s track names to group related channels and determine the detection type automatically. After a short audio capture, the polarity, timing (delay) and phase rotation can be optimised for all tracks simultaneously. You might think an ARA plug-in would have been best suited to alignment tasks, but it’s arguably less appropriate for gating and levelling, so Sonnox opted for real-time
The Detect page will look familiar to existing users of Drum Gate — but its Classify view now gives an assessment of the algorithm’s confidence that it has correctly identified each hit.
Sonnox Oxford Drum Gate 2 Dynamics Plug-in
processing. An alignment-only mode is provided, though, for situations where phase optimisation is desirable but gating generally isn’t (for example on ride cymbal tracks). Once the capture has been performed, the results are displayed in a list view and can be auditioned directly. Optimising the phase relationship between mics will often deliver a tighter, more focused sound. Still, it isn’t unusual to find that the original recording feels more natural, so being able to check the result quickly is important. One detail that I particularly
Drum Gate 2 introduces the ability to automatically optimise polarity, delay and phase rotation of multiple drum mic channels.
20
May 2026 / www.soundonsound.com
like, therefore, is the momentary bypass switch; this makes it incredibly quick and easy to compare the aligned and unaligned versions. You can also try running the alignment process more than once — it can produce slightly different results each time, since there are usually multiple possible solutions and several different settings may give equally good correlation.
The Detectorist The Detect page is similar to version 1’s Detection page, but most work will likely be done in the new Classify view. The scrolling, rectified waveform display is similar to that shown in Detect, but the threshold control no longer represents level. Instead, it shows the degree of confidence the detection engine has that each hit matches the selected drum type. This is an important distinction, because once the source input has been set, normally to Input (External, MIDI and Alignment-only options are now available) and the drum type has been chosen from the menu, the gate isn’t responding to amplitude, but rather to the tonal similarity of each hit to the selected drum type. It’s this that makes it possible to isolate lighter hits such as ghost notes that sit below spill from other kit pieces. (Anyone who has tried to gate a busy snare part using
a level-based threshold will know just how quickly that can become impractical!) The Add and Remove functions from the original version are still available if further refinement is needed. In practice, though, the more intelligent detection sometimes encourages slightly different approaches. When gating toms, for example, I found that spill between neighbouring drums could trigger the detector because of the similarity in tone. Rather than fighting this on individual tracks, it was quicker to route the toms to a subgroup and apply Drum Gate there. The new hi-hat option works well, though I had to look hard for a session with a hi‑hat track, as I don’t usually close-mic hats. Snare spill is inevitable on hats of course, but Drum Gate 2 proved far better at addressing this than a conventional gate.
Adaptive Decay The Decay page remains largely unchanged from the original version, and remains one of Drum Gate’s most powerful features. As before, it allows a global release time to be set, while also making it possible to extend the decay only within a chosen frequency range. This makes it easy to bracket the resonant band of a tom and allow that part of the sound to ring on while keeping the decay short elsewhere. The new Adaptive mode introduces an HF Damping control. This applies dynamic high-frequency reduction to the hit’s decay, and is particularly useful for controlling cymbal bleed on tom mics, as it preserves the brightness of the initial transient and then allows the natural low-frequency decay of the wanted drum to remain, while excluding high-frequency spill in the tail. I found that it could draw attention to itself if used too aggressively, but when applied more moderately it’s a very practical tool; I didn’t usually need to use more than the lower part of the HF Damping control’s range.
Level & Clip Version 1 of Drum Gate included a hit-based drum leveller, which allows the level of each whole hit to be adjusted clip-gain style, without the timbral side‑effects that conventional compression or limiting can introduce. This feature remains unchanged in Drum Gate 2, but a Hit Clip function has been added. Clipping has become a popular alternative to limiting in drum production, as it allows more aggressive peak control without the pumping or tonal change that limiters can produce. But here, as with the drum levelling function,
a consistent amount of clipping can be applied to each, regardless of its level. You just dial in a specified amount of clipping in decibels, and it will be applied to every detected hit. There’s an Auto Gain control, and the display shows An adaptive decay facility can reduce higher-frequency bleed while allowing the effect of the the wanted drum’s decay to ring out naturally. current settings, with a shaded halo extending below the dashed target line indicating how much clipping will be applied, but it’s important to note that this does not represent a conventional ‘ceiling’. Of course, this kind of You can now clip all hits by the same amount, regardless of their level, level-independent for tonal consistency, but you also have a split option to treat quieter hits processing has the differently from louder ones. potential to affect quieter notes in undesirable ways. To event-aware, it tends to preserve the natural counter that, Drum Gate 2 lets the user treat character of the recording, even when loud and soft hits differently — you define doing quite heavy work. the threshold that determines which hits are Of the new features, the HF Damping loud or soft. It allows, for example, strong control in the Decay page proved snare hits to be clipped while leaving ghost particularly useful for cleaning up tom notes untouched, and generally makes the and snare tracks without losing the body feature far more useful. In one mix session, of the drum, while the refinements to the the snare track contained a mixture of detection system make it easier to isolate side-stick and full hits, and the split control the desired hits without endless adjustment. made it easy to apply clipping only to the The expanded source options are also full hits without affecting the side‑stick. welcome, especially the ability to use external side-chains or MIDI when needed, Conclusions which makes the plug-in suitable not only for straightforward gating but also for sample Drum Gate 2 strikes a very effective augmentation and more complex workflows. balance between utility and feature creep For many mixing situations, it could easily — it provides a great deal more control, but handle everything from clean-up to level does so without cluttering the interface or control to alignment without the need for disrupting the clear, fast workflow of version additional processors. 1, even when using several instances across a full drum kit. Just as importantly, it sounds excellent. Anyone who spends time mixing summary live drums will recognise that moment More powerful and more effective, yet still when bypassing gates, compressors simple and quick to use, Oxford Drum Gate or limiters suddenly makes the kit feel 2 delivers results no conventional gate can, more open, revealing that you’ve taken and lets you preserve more of the natural the processing too far. That’s happened character in a drum recording. far less often for me with Drum Gate 2. Because it detects hits rather than tracking £ £149.99. Discounted to £99.99 when the instantaneous level, and because so going to press. Prices include VAT. much of the processing is frequency- and W https://sonnox.com
www.soundonsound.com / May 2026
21
ON TE ST
RORY DOW
M
ixer-style MIDI control surfaces occupy a middle ground in the modern studio. Too basic for those who want deep two-way integration with their DAW, too computer-dependent for those who want to control hardware directly. Novation’s Launch Control XL has lived in that space for over a decade, doing one thing — giving DAW users a bank of faders and knobs — reliably and affordably. The third generation has its sights set higher. The Launch Control XL 3 is a mixer-style MIDI control surface designed for anyone who wants hands-on control of their DAW, their hardware, or both at once. Like its predecessors, it offers eight MIDI ‘channel strips’, each consisting of three rotary controls, a fader and two buttons.
What’s New The original Launch Control XL arrived in 2014 and quickly became a go-to controller for Ableton users. Its familiar mixing desk layout made it a practical, affordable controller. The Mk2 followed a few years later with just one upgrade: RGB LEDs replacing the original’s three-colour buttons. Useful, certainly, but hardly revolutionary. Beyond that, the two versions were essentially the same. Both were USB-only, neither had a display, and both depended entirely on a connected computer to function. The XL 3 adds a slew of improvements. The potentiometers are gone, replaced by 24 endless encoders. On a traditional pot, moving a knob to a position that doesn’t match the current parameter value causes an unwanted jump. With endless encoders, that problem disappears. You can switch modes, change presets, come back to the same knob, and trust that nothing is going to lurch unexpectedly. The faders solve the same problem: firmware 1.1 introduced fader pickup in Custom modes, meaning the hardware value must first catch the software value before it takes control, eliminating the same kind of sudden jump from the faders. Aesthetically, the XL 3 has ditched the Mk2’s budget design for something far more classy. It looks great, though some of the legends on the front panel are quite small and hard to read in low
24
May 2026 / www.soundonsound.com
Novation Launch MIDI Control Control XL 3 Surface Novation’s popular MIDI controller gets a new lease of life. light. The build feels solid — no flex in the chassis, consistent resistance across the controls, nothing that rattles or wobbles. Novation have also moved to USB-C for power and data.
Hardware At 250 x 239 x 43mm, it’s a solid but manageable desk presence. Three rows of eight encoders occupy the upper half of the panel, each with its own RGB LED that shifts in brightness or colour to indicate current value. Below them sit eight 60mm faders, and below those, two rows of eight assignable buttons, again RGB-lit. Dedicated buttons for Shift, Mode, Solo/Arm, Mute/Select and DAW/Mixer switching are arranged down the left-hand side alongside the transport controls.
Occupying the top left is the new OLED display. It’s monochrome, and roughly the size of a postage stamp. Whenever you move an encoder, the display shows the parameter name and its current value. If you’re in DAW control mode, it will also show you the name of the currently selected track. Being able to glance up and immediately confirm what a particular knob controls and its precise value is a huge improvement over previous models.
DAW Integration For Live 12, Logic, Cubase, FL Studio and Bitwig users, dedicated integrations are available. Users still on Live 11 will need to fall back on manual MIDI mapping. Firmware version 1.1 added
£189
tempo. Bank switching lets you navigate across as many tracks as your session contains, and flipping between the two modes is a single button press.
pros
Custom Modes
Novation Launch Control XL 3 • Endless encoders are a nice improvement. • 5-pin DIN MIDI ports mean standalone hardware control. • Integration with Ableton Live, Logic Pro, Cubase, FL Studio and Bitwig Studio. • HUI support for everything else.
cons • The new standalone capability highlights the lack of SysEx support. • Full Ableton Live integration requires Live 12.
summary The Launch Control XL 3 is a solid generational upgrade. Endless encoders, a display, and 5-pin DIN MIDI ports make the XL 3 the most capable and versatile Launch Control yet.
Mackie HUI support, covering the remaining DAWs — Reaper, Pro Tools and Studio One among them. HUI is hardly a new technology, but it will do the job. The faders always control track volume, and the buttons can switch between solo, arm, mute and select. The encoder functions will change depending on whether you are in DAW Mixer or DAW Control mode. In DAW Mixer mode, the upper encoder rows control sends and panning. DAW Control mode swaps the upper encoders to device parameters — plug-ins in Ableton and Logic, Quick Controls and Channel EQ in Cubase, Channel Rack in FL Studio — with the third encoder row given over to transport: scrub position, zoom, loop start and end points, loop on/off, marker selection, and
The XL 3’s Custom mode lets you create your own templates. All of this is managed through Novation Components, a free browser-based or desktop editor that handles Custom mode configuration, firmware updates, and device settings. It’s straightforward to use and doubles as a Custom mode librarian. Novation and the community have published ready-made Custom modes for a small range of hardware — Elektron devices, Arturia synths and several of Novation’s own products, including the Peak and the Circuit range. For everything else, you can configure any encoder, fader or button to send a specific MIDI CC or NRPN on any channel, define minimum and maximum values, choose LED colours, name it, and save the whole thing as a named mode. Buttons go further than encoders and faders by supporting MIDI notes, Program Changes, and keystrokes — the last of which makes them useful for triggering keyboard shortcuts. Up to 15 custom modes can be stored directly on the hardware, recalled without touching a computer. For both NRPNs and MIDI CC, the XL 3 offers 14-bit resolution, giving you 16,384 steps of control rather than 128 (as long as the receiving device supports it) — a meaningful difference when sweeping a filter or dialling in a precise send level. Sadly, there is no support for SysEx. For equipment that
relies on SysEx for parameter control, the XL 3, at least right now, is not the solution you are looking for.
Standalone Operation The most significant new feature is the trio of 5-pin DIN MIDI ports on the rear panel: MIDI in, MIDI out and a second output that doubles as a thru. Previous models were, at their core, computer peripherals. The XL 3, however, can function as a standalone hardware controller. Send MIDI directly from the encoders and faders to your hardware — no computer in the loop at all. For anyone running a hardware-only live set or simply wanting a dedicated control surface for a particular piece of kit, this is a major upgrade from the previous models. And if music isn’t the only thing on the agenda, the XL 3 is equally at home controlling Resolume, DMX lighting software, or video editing applications — anything that accepts MIDI input.
Conclusion For its low price, the XL 3 makes an excellent MIDI mixer-style controller. Endless encoders, a display, USB-C and 5-pin DIN MIDI ports are welcome updates to previous models. The DAW Control and DAW Mixer modes remain excellent, and Custom mode is flexible enough to control many MIDI devices. The addition of 5-pin MIDI ports frees the Launch Control from the computer, allowing you to move it from the studio to the stage with ease. The Launch Control XL 3 is an easy recommendation. £ £189 including VAT. W www.novationmusic.com
Round The Back
USB-C handles power and data. There are three 5-pin DIN MIDI sockets — in, out and out 2/thru. Out 2/thru can be configured as either a second independent MIDI output (useful for addressing two separate devices across different Custom modes) or as a MIDI thru, forwarding a copy of whatever arrives at the in port. The latter also enables the daisy-chaining of XLs. Both DIN output ports support MIDI power, up to 3.3V at 10mA, which can power some smaller MIDI accessories. Lastly, the Kensington lock is a nice touch for those who need it.
www.soundonsound.com / May 2026
25
ON TE ST
Valve Emulation Plug-in As well as linking to their FT1 hardware, Freqport’s FT1 plug-in now also mimics it. SAM INGLIS
F
reqport are the Danish-Australian wizards behind two of the more innovative products I’ve reviewed in recent years. Their Freqtube FT1 allows you to enjoy real, analogue valve saturation within your DAW, with hands-on control, while the FreqInOut FO1 provides a plug-and-play solution for integrating hardware outboard into a software recording setup. The scaffolding that underpins both products is a piece of software called Analog Hub, which runs in the background and invisibly pipes audio over USB to and from Freqport’s hardware boxes.
Taking Flight The company’s latest innovation is a sort of companion piece to the FT1. Part of the point of this device is that, from an operational point of view, it presents itself to the user as a conventional plug-in, albeit one with its own hardware controller. There is no need to muck about with hardware inserts or patch cables; you simply load an instance of the Freqtube plug-in into an insert slot and away you go. As detailed in the original SOS review (www.soundonsound.com/reviews/ freqport-freqtube-ft-1), the FT1 hardware can process four mono channels simultaneously through its two E83CC and two 12AT7 valves, and the latest version of Analog Hub makes it possible to run up to two FT1 and two FO1 units at once. However, some might still feel that the total of eight valve channels available to them isn’t enough. Others will want to use the FT1 on the go, where its need for a dedicated mains PSU might prove problematic. And still others would love to find a more affordable way to access the same sound. For all of these groups and more, Freqport have developed a new version of the Freqtube plug-in. This features several minor improvements, such as a Tilt control to help restore balance anomalies on stereo tracks, and one very major new feature. As the name suggests, FT1-EMU is now capable not
28
May 2026 / www.soundonsound.com
Freqport FT1-EMU
only of accessing the Freqtube hardware, but of emulating it. To this end, the user interface now features a large toggle labelled Analog and Digital. Newly created instances of the plug-in default to Digital, meaning that they’re running in the emulated mode. Select Analog, and as long as the relevant path is not already in use, you’ll hear silence for a few seconds before it switches over to the analogue mode. Switching back to digital, by contrast, is almost instantaneous. On paper, there’s all sorts of potential for clashes and conflicts if you’re running multiple instances in a single mix, but this is mostly handled elegantly in practice. The exception is that if you load up a project that uses analogue mode without the FT1 connected, those instances don’t automatically switch to digital; instead, you’ll hear nothing until you open them up and switch them yourself. Hardware control
The new version of Freqport’s plug-in still offers routing to and from, and control by, the FT1 hardware in analogue mode.
by, you shouldn’t always expect the emulated channels to sound exactly like the analogue channels. The level of similarity depends on settings, especially that of the Harmonics dial. At relatively conservative Drive amounts, and with Harmonics towards the centre position, digital mode and analogue mode tend to sound pretty similar, though never completely identical
“If my review unit is anything to go by, you shouldn’t always expect the emulated channels to sound exactly like the analogue channels.” from an FT1 unit doesn’t work in digital mode, but I suppose that if you have an FT1, you’d typically use it in analogue mode anyway on any channels that you wanted to automate.
Companion Piece Freqport say that the emulation employs “component-level circuit modelling based on a SPICE model of the Freqtube FT1 analogue signal path”. However, valves are notoriously variable, and especially so in the FT1 hardware, which can push them quite far outside their intended roles. That is why the aforementioned Tilt control is so welcome, and it’s also why, if my review unit is anything to go
to my ears. The same broad character is evident in both, but you might find that the analogue version has more or less low end, for example. More aggressive Drive settings and more extreme Harmonics positions tend to accentuate differences in the sound, as well as leading to pronounced differences in output level. If my experience is representative, you’ll usually need to adjust the output trim slider every time you switch, and I think there would be a case for having separate trims for the two modes. Freqport told me that their ultimate aim is to add an auto-gain feature which will match input and output levels regardless of other settings, and that would be very welcome. It’s not, I hasten to add, that digital mode sounds bad, or that analogue mode is always better, just that they don’t sound the same. For me, the contrasts were more obvious on the E83CC channels, where analogue mode was typically louder, hairier and less controlled than digital mode. The extreme effects that can be obtained at either end of the Harmonics dial were quite different in the two modes, although I’ve yet to find a musical application for these anyway.
Given the inevitable variability of valves, the thought occurred to me that it might be desirable to be able to calibrate the FT1-EMU plug-in’s digital emulation to somewhat match the specific characteristics of a given FT1 hardware unit. I don’t know how difficult this would be from a technical point of view, but as things stand, this isn’t quite like, for example, seamlessly switching between native and DSP versions of the same plug-in. It’s more like swapping between two different examples of the same vintage guitar amp — or perhaps between a real amp, and an emulation of the same model of amp. When I first heard about FT1-EMU, I had expected that digital mode would be most useful as a sort of ‘placeholder’ for the real valve processing in the FT1. That may yet come to pass if Freqport implement automated gain matching or additional calibration options, but as it stands now, I think it’s better treated as an alternative flavour or colour of valve processing — and as an affordable toe in the water for anyone who’s curious about the FT1 and what it can do. It’s less a substitute, more a gateway drug!
summary Hybrid processing comes full circle, with a plug-in that can emulate the hardware it’s designed to control!
£ €99 including VAT. W www.freqport.com
www.soundonsound.com / May 2026
29
ON TE ST
This innovative open-back design aims to bridge the gap between headphone and speaker listening. SAM INGLIS
A
new manufacturer founded by veteran German designer Axel Grell, the Grell headphone company have arrived on the scene with a model named the OAE2. And, although their marketing efforts are directed at the hi-fi arena, they say a lot of things that should interest studio users. For example, they claim that the OAE2 “delivers stable imaging and natural spatial perception rather than exaggerated width, mimicking nearfield studio monitors”, and that it is “tuned to deliver music exactly as it would be heard in the studio where it was created, prioritising accuracy over preference.” To achieve this, the OAE2 incorporates an interesting and novel design concept.
Front Or Centre The Grell OAE2 is an open-back, passive, circumaural headphone that is outwardly conventional. It employs moving-coil transducers housed in large, circular, perforated earcups, with equally impressive velour-covered cushions on the inside. These are mounted on metal yokes with a dual hinge arrangement that allows them to pivot freely in both the up/down and the front/back planes. The adjustable headband sports another thick velour cushion to protect the top of the head, and despite weighing in at 378g (13oz) and clamping the ears a little harder than some models, the OAE2 remains comfortable for long wearing periods. At the base of each earcup you’ll find a 2.5mm TRRS mini-jack socket, giving users the choice as to which side to connect the cable. Two cloth-covered, silver-plated cables are included, both 1.8m in length. One terminates in a standard TRS mini-jack with screw-on 6.5mm adaptor, while the other is a ‘balanced’ cable that ends in a 4.4mm TRRRS plug. These, along with the headphones themselves, fit neatly inside a broad but thin padded carry case. Grell supply an unusually full range of specifications for the OAE2, which is laudable. I can therefore inform you
32
May 2026 / www.soundonsound.com
Grell OAE2 Open-back Headphones that the aforementioned clamping force is measured at 2.5N, the nominal impedance is 38Ω and that the OAE2 will produce 100dB SPL from a 1kHz sine wave at 1V RMS. I had no trouble driving them from standard audio interface headphone amps. Distortion is apparently well under control, reaching only 0.05% at 1kHz (though, as usual, a 100Hz figure would be more telling). Perhaps most welcome, though, is a quantifiable frequency response claim: the -3dB points are said to be at 12Hz and 34kHz, although there’s no mention of how far the response deviates above the line. Grell’s innovations are not apparent until you look inside the earcups. The
40mm drivers use a “bio-cellulose membrane”, with reflections controlled by “precision-manufactured stainless steel damping fabric”, but the most unusual feature is their location. Rather than being positioned in the centre of the earcups, pointing directly into the ear canal, the drivers are mounted at the front, and fire backwards at quite a sharp angle. Grell say that this allows them to “interact naturally with the outer ear”, and there is logic in this approach. If you think about it, the monitoring position in any normal control room orients the loudspeakers at a very similar angle with respect to the ear. One consequence of this is that even though the physical design of the
earcups and headband are symmetrical front-to-back, the sound is radically altered if you put the OAE2 on the wrong way around — much more so than with most headphones of similar proportions.
Get Used To It As well as sending me the headphones themselves, Grell supplied a “reviewer’s guide”, which stressed the need to “give your ears time to recalibrate”, and warned against switching back to other headphones during the “recalibration period”. That being the case, I was expecting the OAE2 to sound completely different from more normal designs. In practice, the differences are more subtle than Grell’s words would suggest, but they do seem to be real. In terms of frequency balance, the treble is extended and clear, but not exaggerated, and does not paint sibilance as a problem unless it actuallly is a problem. The low end, meanwhile, is deep and mostly accurate, though I thought I could detect a bump at around 100Hz (or whenever the bass player hits a G!). Inasmuch as the OAE2 displays a distinctive character, it’s most apparent in the upper midrange, where there’s something going on that I don’t recall hearing in other headphones. There is a noticeable presence lift in the 3kHz area, but I suspect this is also the region where the OAE2’s unusual driver placement has the biggest effect, because the quality of the sound is somehow different. This seems to be
quite dependent on the programme material. On rock and pop tracks with a very dense sound, the upper midrange sometimes took on a slightly processed character; on other material it sounded refreshingly natural, especially with orchestral recordings. I’m sure this is down to the interaction with the outer ear, and I think Grell are probably right to stress the need to compare
to lean fractionally left for me, just as they do on speakers. I also felt more aware of musical dynamics on the OAE2 than on the NDH 30. So, although it’s a subtle effect, and perhaps comes at a slight cost in terms of tonal neutrality, I am persuaded that Grell’s design innovations do indeed go some way towards making headphone listening more ‘speaker-like’.
“Rather than being positioned in the centre of the earcups, pointing directly into the ear canal, the drivers are mounted at the front, and fire backwards at quite a sharp angle.” with loudspeakers rather than other headphones here, because this is exactly the same region where two speakers that measure similarly can sound audibly different. However, the novel driver position is probably most apparent in the OAE2’s stereo presentation. Although Grell stress that they are not aiming for “exaggerated width”, I found that the OAE2 sounded noticeably more open, for want of a better word, than most open-backed headphones. In a direct comparison with the Neumann NDH 30, for example, the soundfield seemed more expansive, but it also showed up the slight difference in sensitivity between my left and right ears in a way that speakers do and most headphones don’t. Mono sources with lots of midrange content tended
What’s more, they do so at a pretty reasonable cost, sitting somewhere between the Sennheiser HD 490 and the Neumann NDH 30 in the wallet-punishing stakes. The fully modular design, which makes most key parts field-replaceable, and the sturdy case are also strong selling points. Monitoring is so critical that many people are understandably reluctant to embrace ‘alternative’ approaches, but there’s no snake oil here, just thoughtful design.
summary The OAE2’s unusual driver positioning aims to get closer to the experience of listening on loudspeakers. It’s not radically different, but it’s a real and positive effect.
£ £499 including VAT. W www.grellaudio.com
The ‘bumps’ inside each earcup mark the position of the drivers. In use, they fire backwards across the ear rather than directly into it.
www.soundonsound.com / May 2026
33
ON TE ST
Tonelux Dynalux Dual-channel Compressor
Brimming over with useful and interesting features, is the Dynalux the last compressor you’ll ever need? M AT T H O U G H TO N
T
onelux’s Dynalux is a high-quality two-channel VCA compressor that offers an almost bewildering array of hands-on controls, some of which access some very unusual and interesting features. Its designers tell me that their aim was to create “one of the most full-featured analogue compressors on the market”, and even the most cursory look at the front panel leaves you in little doubt what they mean by that: in total there are 17 black
Tonelux Dynalux $2499 pros • A supremely versatile compressor. • Lovely, detailed and open sound. • Any blend of feed-forward and feedback character. • Lots of unusual but useful features.
cons • You’ll want to invest some time in getting to know it!
summary With an original and thoughtful approach to so many controls, and proprietary transformers and op-amps contributing a little life and character, there’s a lot to like about the Dynalux.
34
May 2026 / www.soundonsound.com
knobs, each with a simple-but-effective white stripe to indicate its position, another 17 metal toggle switches, four moving‑coil VU meters, and various indicator LEDs. As well as modern but arguably now almost expected features, such as a wet/dry mix control, there are much rarer ones that I’ll describe below, not least particularly well‑featured side-chain equalisation. In short, then, the Dynalux promises to be supremely versatile. But Tonelux are also keen to emphasise the sonic and technical performance. It’s a fully discreet design, which includes Tonelux’s proprietary TX-240 op-amps, TX-260 output stage buffer, and TX-100 output transformer. The frequency response is quoted as <5 Hz to 70 KHz (-3dB), and the noise floor, with the dynamics section engaged, is stated as greater than -90dBu. It promises to sound good too then, so let’s find out if it delivers...
Overview A 2U 19-inch rackmounting device, the Dynalux is housed in a folded-steel chassis, of solid construction and with slotted side panels for ventilation. On the front is an attractive-looking panel hosting the absolute forest of controls. My first impression of those was that it has a touch
of ‘overwhelm’ about it, but in practice I found that the identical left-to-right layout of the two channels’ controls, which are arranged either side of a simpler-looking central section, meant it wasn’t so intimidating after all. I’ll get to the channel controls shortly, but in between them are the four moving-coil meters. These are set up so that you can always see for each channel the current amount of gain reduction being applied on one meter, and either the input or output level on the other. These are joined by a few controls to configure the unit for stereo operation (of which more later). And on the far right of the panel is the biggest of the toggles, an on/off switch that’s accompanied by a large jewel light to indicate its status. While I’m on the subject of status indication, there are so many controls here that, say Tonelux, they felt it impractical to use LEDs for everything; hence the extensive use of toggle switches. There are a few key facilities that have LEDs, but for the most part it’s simply a case of seeing whether the toggle switch is pointing up (on) or down (off). Perhaps not so good for a dimly lit live rack, but fine in most studios I think. On the rear, each channel is given an XLR for the transformer-balanced I/O, and each has an external side-chain input on quarter-inch jack. A switch on the front toggles between the internal and external control signals and, to prevent confusing accidents, the jack is normalled so that engaging the external side-chain when no jack is plugged in doesn’t interrupt standard operation. Ordinarily, I prefer side-chain insert points to key inputs alone
(the return doubles up as an input anyway), but that’s not really necessary here on account of their being such comprehensive built-in side-chain shaping. Completing the back-panel socketry is an IEC C14 power inlet, which accepts 50 or 60 Hz mains AC voltages from 100 to 240 V.
Channel Controls And so to those channel controls. Each set comprises two rows of four knobs, all of which turn stepped potentiometers. The matching between channels was nice and tight on the review model. The expected
VCA compressor controls are among these, but even some of these have been conceived with a touch of imagination about them. The threshold knob operates over a ±20dB range, and should work on pretty much any real-world signal levels from suitably configured professional audio equipment. A helpful red LED lights to indicate when the signal
level exceeds the threshold; get this blinking and you’ll be somewhere in the right ballpark to start dialling in your desired settings. In its default setting, the attack knob ranges from 0.05 to 30 milliseconds, but an associated toggle switch can multiply this by five. Not only does this mean there’s a very large range of possible attack times, but it also ensures that there’s always a useful amount of precision in the physical control. The release knob has no such switch, but spans a usefully large range: from an almost-instant 20 milliseconds right up to three seconds. That’s only half the story, because behind the scenes, the release is more sophisticated, being essentially a variable three-stage automatic release. Should you need an explanation of auto releases, there’s a good article on our website (https://sosm.ag/compressor-auto-release), but the main lesson is that faster sounds are released far more quickly than more sustained ones. The aim is to deliver a more natural-sounding result when processing complex source material, with a combination of transient‑rich sounds and more sustained ones — such as you’ll find, for example, on a stereo mix bus. Here it works very well, but its variable nature makes it more useful still, since it can be tuned to be equally effective on a very wide range of sources. Ratio and make‑up gain complete the usual set of VCA compressor controls, but the ratio one is anything but conventional! In the first half of its travel, it moves from the gentlest 1.5:1 setting right up to 20:1 (as near as damn it to limiting). That’s a lot to pack into a half-turn, but with 4:1 at the 9 o’clock position and around 20 detents, selecting the optimum ratio isn’t a challenge. The reason for the unusual configuration is to accommodate an unusual feature: ‘over-compression’...
Over-compression With the ration control in the right-hand half its travel, any signal exceeding the threshold will be turned down lower than that threshold. The more you turn the knob clockwise, the more it’s turned down. I’ve included a screenshot of Figure 1 from the PDF manual, which is a transfer plot showing what this means in practice. It should be obvious from this that one outcome is a quieter signal at the output than the input, and that could make judging the result by ear rather tricky, and could interact with any threshold-based or non-linear devices later in the signal chain. Now, you could obviously use the make‑up gain control to counter that, but Tonelux chose to treat us by putting a clever auto-gain feature on one of the toggle switches. This maintains the output level very well — impressively for an analogue circuit. It’s not quite perfect, so you may want to reach for the make‑up gain knob (0-15 dB, with 6dB at the top) to make fine adjustments, but it’s certainly good enough that you can listen and make judgements while dialling in the settings you want.
Side-chains & Stereo
This graph, taken from the Dynalux’s PDF manual, shows the effect of turning the ratio knob up into over‑compression territory.
The wet/dry mix control is useful but self-explanatory, and that leaves us two very interesting pots to consider. Top left on each channel is a control marked Tilt and, to the bottom right of that knob, an unassuming toggle switch labelled
www.soundonsound.com / May 2026
35
ON TE ST
TONELUX DYNALUX
As well as the balanced I/O on XLRs, there’s a dedicated external side-chain input for each channel.
IPN. One of Tonelux’s most well-known products is their Tilt EQ, of course, and it’s implemented here to allow quick shaping of the side-chain control signal, to make the compressor more or less sensitive to different frequencies. Think of it a bit like having linked high and low shelving EQs sharing the same corner frequency — turning one way boosts the top end by up to 6dB while attenuating the bottom by 6dB. I find this more useful than the usual high-pass filter. IPN can work in tandem with Tilt or, with Tilt in its neutral position, on its own (though, technically speaking, Tilt is always acting on the side-chain). Those letters stand for Inverse Pink Noise, which is an EQ curve that rises by 3dB per octave (the proper term for which is, I believe, Blue Noise!). The idea of this is to make the RMS detector respond approximately like human hearing, the effect of which is to virtually eliminate pumping for a much smoother, more natural compression. One similarity with API’s classic compressor designs (among others) is that the Dynalux supports both feedback and feed-forward modes. Feedback compression tends to sound smooth, stable and elegant, and the name is down to the side-chain control signal being taken from after the gain‑reduction (GR) element in the signal path. Feed-forward taps the signal from before the GR stage, and tends to come across as more brash, aggressive and snappy... It can be wonderful on drums but, depending on the nature of other sources, its behaviour can be harder to predict, so it can be trickier to set up for a good result. Tonelux have given us a facility that I’ve not encountered before: a knob that lets you dial in any desired blend of feedback and feed-forward compression. So simple, but incredibly useful in fine-tuning the compressor’s action. The channels each have three toggle switches that I’ve not yet covered: one
36
May 2026 / www.soundonsound.com
to bypass the channel entirely, routing the input signal straight to the output connector; one to bypass only the dynamics processing, so that the audio still flows through the circuitry, including the various op‑amps and transformers; and one to set the upper meter to display input or output level. And speaking of meters, nestling in between them are some global controls: two more switches
which is such a simple but effective means of dialling in a more or less punchy and aggressive sound; the variable three-stage automatic release; and the IPN side-chain filter. The latter two can combine to deliver some deliciously smooth, effortless and almost transparent compression; often great on mixes, but also superb in my experience for processing vocals and bass guitar, among other things.
“The feedback/feed-forward blend control is such a simple but effective means of dialling in a more or less punchy and aggressive sound.” and a knob that are used to configure the unit for use with mono or stereo material. The Dual Mono setting is obvious: the channels are operate independently. Switch to Mast/Slave Stereo, though, and channel 1’s controls operate both channels — turning channel 1’s threshold control for instance, sets the threshold for both channels simultaneously. A Varilink switch then brings the knob into play, which allows you to make the channels react to any mix you like of their side-chain control voltages.
Lasting Impressions Testing the Dynalux on a range of material over the course of several weeks, I was impressed by its overall sound: clean and quiet but also detailed and somehow ‘lively’, it can hold its head up high amongst the company at this asking price. But you can say the same about a lot of analogue gear today, of course, and what really stood out to me about the Dynalux was its sheer versatility. I’ve described all of its functionality above, so won’t repeat it here, but a few of the biggest highlights for me are: the feedback/feed-forward blend control,
The over‑compression feature is something I found interesting and effective, even if in my own studio it would likely see rarer use. To get your head around it, you need really to think in terms of how it interacts with the attack and release, not to mention the mix control. I found myself thinking in terms of using it to rework sounds that have already been compressed, drum samples and bass instrument loops being a great example. Once you get the hang of it, it’s pretty easy to dial in a shape that restores a drum’s sense of impact. Bring the mix control into play and the experience becomes somewhat like working with a transient shaper. On the whole then, the Dynalux is an intriguing processor. It’s well designed, sounds great, and offers features I’ve not seen elsewhere that furnish it with so many potential uses that it will almost certainly be able to earn its keep in a professional setting. £ $2499 excluding VAT. T PMI Audio Group +44 (0)1392 826 005 E sales@pmiaudio.com W https://pmiaudio.com W https://tonelux.com
Take it anywhere. Create whenever. Trust your instincts.
ableton.com/move
ON TE ST
WILLIAM STOKES
R
ight, stop playing with the thing and write the damn review. It’s not often I have to tell myself that, but the need arose more than once while stress-testing the Beat Friend from new British developers Audio.Computer (their web address is the very same). It’s simply too much fun to get much else done. A curious little box, the Beat Friend is a drum machine in all but the purest sense of the term, and in parallel to this is described by its creators as a “benevolent, semi-autonomous” machine; one that “will do its own thing, but is happy to take suggestions” but “can sometimes get carried away”. Indeed, its box carries the words “here to help”. Oo-err. In this age of AI demagogues, my reflex is to eschew anything that comes with such a caveat, but happily what goes on here couldn’t be further removed from any such creativity-killing dystopia, for reasons that will become clear.
Friendly Beats In both sound and style, the Beat Friend is based to a notable degree on the Roland CR-78; visually it takes more than a few cues from the 1970s school of design (the CompuRhythm CR-78 was named
38
May 2026 / www.soundonsound.com
Audio.Computer Beat Friend Drum Machine Much like a real drummer, the Beat Friend is a semi-autonomous rhythm machine that could bring a life of its own to your music. after its year of release), with a pleasantly nostalgic rounded typeface and more or less the same white-and-orange-on-black colour scheme as its inspiration. It even presents a pair of nostalgic white soft keys for buttons. Its analogue voice architecture also takes its cues from the CR-78’s twin-T drum circuits — which can be imbued with numerous different characteristics thanks to a clutch of other circuits — but at its root the Beat Friend’s six tracks of kick, snare, hi-hat, low and high toms and clave (which, despite its symbol, is curiously dubbed a woodblock in the manual) deliver all the smoothness and snap, the woody resonance and classy saturation that we love about the CR-78. (If you need an example, just watch the video of Thom Yorke and
Jonny Greenwood playing Radiohead’s ‘The Numbers’ with one. Just, mwah. And that’s not even the last you’ll hear of Radiohead this review). The similarities don’t stop there. At the core of the CR-78, like many classic drum boxes of its era, was of course a bank of preset drum patterns, from ‘Slow Rock’ to ‘Boogie’ to ‘Samba’. While variation within those parameters was certainly achievable (and notwithstanding the step programming functionality of the far rarer WS-1 Remote Programmer), you hardly need me to tell you that in the years since this workflow has been decisively superseded by infinitely more flexible transports. It’s in this vein that the Beat Friend operates. OK, you won’t find ‘Disco-2’
or ‘Waltz’, but you will find ‘Good Times’, ‘Zippy Jams’ and ‘Rockzilla’. I know what you’re thinking: who nowadays would want preset patterns? And, honestly, it’s what I thought too, until I switched the thing on. This is primarily because it quickly becomes clear that the patterns in question serve as little more than jumping‑off points for a near-limitless series of chance-based events, and these I’d imagine would only be compromised if shoehorned in alongside an apparently more flexible step-sequencing approach. As it is, far from repetitive, it’s actually quite a challenge to get the Beat Friend to do the same thing twice.
of course takes its cues from the unmistakeable pattern in Radiohead’s ‘Idioteque’ (told you), originally played on an Analogue Systems RS8000 system if I remember. There’s also the distinctly Aphex Twin-inspired, ratchet-generous ‘Exciter’. Any of these can be adapted into different time signatures, with 3/4, 4/4, 5/4, 5/8, 7/8 and 9/8 all on offer. As a fan of off-piste time signatures, this did not leave me wanting. The panel’s central row of six part-specific sliders don’t represent volumes as you might expect (though when at the bottom that slider’s respective part is effectively off) but complexity. With all part sliders set to around halfway, the pattern plays ‘normally’, but moving any slider in either direction will add or reduce the complexity of that part. This rewards careful tweaking in a studio environment to some degree. You can achieve that perfect hi-hat to high tom ratio if you desire (set and forget, if desired — with no other controls engaged the pattern will repeat according to its slider settings),
In Control, Sort Of Four main, interdependent control sections dictate the Beat Friend’s workflow. At the upper left of the Beat Friend’s panel is a small OLED display with knobs for patch, tempo and time signature. I mentioned a few of them above, but a second browse through the core presets yields some smile-inducing inclusions: there’s ‘Idiothead’, which
Audio.Computer Beat Friend £500 pros • Highly inventive, performative workflow. • Excellent‑sounding analogue drums. • Creative and high-quality effects section. • Robust build quality. • Excellent value for money.
cons • Doesn’t handle MIDI over USB. • Occasionally feels limited, for instance no adjustable delay time or drum pitch. • Mono audio output might feel limiting to some. • No pattern recall.
summary A fantastically inventive, light-footed CR-78-inspired drum machine that thrives on improvisation and performance.
though there is no way of saving a pattern at the time of writing. Skittering hi-hats or complex tom phrases, dropped kicks and percussion breakdowns; it was all at my fingertips to play with performative
JOSEPHSON ENGINEERING
C706
FULL ISSUE PDF THE WORLD’S BEST RECORDING TECHNOLOGY MAGAZINE
CELEBRATING 40+ YEARS 1985 — 2026
THE WORLD’S BEST RECORDING TECHNOLOGY MAGAZINE
THE WORLD’S BEST RECORDING TECHNOLOGY MAGAZINE
CELEBRATING 40+ YEARS 1985 — 2026
TM
TM
MUSIC PRODUCTION TECHNIQUES / INDEPENDENT IN-DEPTH PRODUCT TESTS / ENGINEER & PRODUCER INTERVIEWS / LIVE SOUND
MUSIC PRODUCTION TECHNIQUES / INDEPENDENT IN-DEPTH PRODUCT TESTS / ENGINEER & PRODUCER INTERVIEWS / LIVE SOUND
BANDBOX TRIO
DAW Bridge SoundMusicshcrouealdtioben!
JBL
The smart speaker with stem separation!
SSL autoSeries
The mega-hit made on headphones
Heritage 670N
TM
MPC LIVE III AKAI’S PORTABLE PRODUCTION POWERHOUSE
as it
Djo ‘End Of Beginning’
A Fairchild for the project studio
1985 — 2026
MUSIC PRODUCTION TECHNIQUES / INDEPENDENT IN-DEPTH PRODUCT TESTS / ENGINEER & PRODUCER INTERVIEWS / LIVE SOUND
Analogue modelling with AI assistance
DIY Helmholtz Resonator The tuned bass trap you can make at home!
IN-DEPTH REVIEWS: SONIC FARM / SOYUZ / NEURAL DSP / MODARTT / FABFILTER / STEINBERG / WALDORF / AUDIOSCAPE / ARTONIC MUSIC / FOCAL / AKAI / SONUSCORE / AKG / ASCILAB / STAGEBOX / METERPLUGS / NEXTMIDI / RT60 / VOVIOUS
TECHNIQUE: MIX RESCUE / MIXING ATMOS IN PRO TOOLS
WIN IK MULTIMEDIA
IMMERSIVE
MONITOR BUNDLE WORTH £ 3600
www.soundonsound.com
April 2026 £7.99
Logic Pro 12 & Fender Studio Pro 8 Major updates on test
Better vocals in the home studio Exploring today’s state-of-the-art tools
Base 4 Stands
A quiet revolution in studio tech
30+ IN-DEPTH REVIEWS INCLUDING: DRAWMER / FLEA / SPITFIRE / UA / SLATE DIGITAL / ACE STUDIO / TASCAM / SONARWORKS / SPL / GRM TOOLS / SPECTRASONICS / KALI / ELEKTRON / OXI / SOFTUBE / AUDIOSCAPE
TECHNIQUE: ANALOGUE OVER ETHERNET / CUBASE MIXING MACROS
LAUTEN AUDIO DRUM MIC BUNDLE WORTH £3036
www.soundonsound.com
March 2026 £7.99
Matt Schwartz: producing Yungblud
“I want another Bowie or Freddie Mercury”
SOS Awards
Readers choose the year’s best gear
AI: friend or foe? What producers really think
Phill Brown
Talk Talk’s one-mic drum sound
WIN
LEWITT MIC &
KALI MONITORS
28 IN-DEPTH REVIEWS: AEA / TOONTRACK / GIK / McDSP / IK / GOODHERTZ / UA / KALI / RUPERT NEVE DESIGNS AFK AUDIO / AGUILAR / SCALER / SPL / 1010MUSIC / JBL / WES AUDIO / QUANTUM ELECTRIC / FIEDLER AUDIO
TECHNIQUE: BINAURAL & DUMMY HEAD RECORDING / RECREATING VINTAGE FLANGING
WORTH £ 1844
www.soundonsound.com
February 2026 £7.99
This complete digital replica of the Print magazine includes all articles and adverts published in that edition. Buy and download instantly - no shipping costs!
josephson.com
THE WORLD’S BEST RECORDING TECHNOLOGY MAGAZINE
Only £3.99 each edition (or FREE with all Digital subscriptions).
dual-diaphragm side-address cardioid
Get your FREE PDF today! https://sosm.ag/FreePDF
transformerless active balanced condenser www.soundonsound.com / May 2026
quarter-stn-Full Issue PDF UK.indd 1
31/03/2026 12:26
39
TECHNIQUE
Recording Music Outdoors When the hills are alive with the sound of music, it’s up to us to record it. SAM INGLIS
Y
ou could argue that the great outdoors is the perfect recording environment. With no walls or ceiling to bounce things around, microphones pick up only the direct sound from the source. So, while there’s no good room sound to make your drums more impressive, there’s no bad room sound to corrupt the pure tones that the players are producing. Problems with spill where multiple musicians are being miked up are also much reduced. However, there are very good reasons not to record outdoors. Wind and rain can make playing uncomfortable and miking impossible. Temperature changes
42
May 2026 / www.soundonsound.com
play havoc with tuning. Ambient noise is inevitable, and nature does not provide mains power or heating. So, given the option, I’d hesitate to suggest working al fresco as a first choice to any artist. But when it was the artist’s own choice, I was happy to give it a go.
Running Up That Hill Singer-songwriter Tymisha’s reasons for recording outdoors were less to do with acoustic purism and more about capturing video content for Instagram and Facebook. This meant that not only would we be tracking en plein air, but that we would be doing so on top of a remote hill in search of striking scenery. Reluctantly abandoning the idea of using valve mics and a console, I raided the studio to see what sort of backpackable laptop-based rig I could assemble. Although there are bus-powered audio interfaces with more than two inputs, my MacBook Air is happier with smaller models, and battery life was going to be at a premium. My SSL 2+ has two mic/line/instrument inputs, and we would
be recording two sources: Tymisha’s voice and her acoustic guitar. This gave me several options. I could close-mic the voice and guitar separately, as you might do on a typical studio recording. I could set up a stereo array to capture the complete picture. Or I could put up a single mic focused mainly on Tymisha’s voice, and record the pickup in her guitar to fill it out as necessary. I ruled out the first option in advance as being visually intrusive, and as it turned out, Tymisha planned to perform sitting on the ground, which would have made it amost impossible to get meaningful separation by close miking anyway. On the day, I brought with me pairs of Sennheiser MKH 40 cardioid and MBHO 603/KA100 omni mics, plus two lightweight stands, a stereo bar, a DI box and an ancient Rycote blimp. Even in relatively still, dry weather, it was immediately obvious that simple foam windshields weren’t up to the task. The blimp was going to be the only practical choice for recording with microphones, and as I don’t own a suitable figure-8 mic or M‑S mount, it would have to
be mono. The most logical approach was to put one of the MKH 40s in the blimp and position it low down in front of Tymisha’s guitar, pointing up at her mouth.
Making The Best Of It All recording projects involve decision-making, but those decisions tend to be more final when you’re out of the studio, and the success of a normal location recording project often hinges on there being a separate room where the production team can monitor on loudspeakers. Even if the only usable space is a dank cellar, this makes all the difference when it comes to evaluating sounds and performances. However, it’s obviously not an option at the top of a hill. And when you’re forced to monitor on headphones, I think it’s important to accept their limitations. Endless fine-tuning of mic placement is as likely to be wrong as right in the cold light of day. You deviate from widely accepted stereo arrays at your peril. But you can, at least, get rough levels, and fair warning of problems such as clipping or incoming aircraft.
A good way to think about it is to ask yourself what problems would prevent you from delivering anything at all at the mix, and treat those as the highest priorities. In this case, I felt that the potential showstoppers would be excessive wind noise, and a failure to properly capture Tymisha’s vocals. And whilst I wouldn’t have trusted headphone monitoring to tell
good small-diaphragm mics, the MKH 40 has a benign off-axis response, so I wasn’t worried that the guitar tone would suffer unduly by being captured at 90 degrees. Meanwhile, the inevitable woolliness and high-frequency attenuation introduced by the blimp was apparent even on headphones, but was clearly a price worth paying for greatly reduced wind noise.
“One of the more surprising challenges about recording outdoors is to make the result sound like it was recorded outdoors.” me whether ORTF was a more suitable array than A‑B or X‑Y, it was enough to help navigate these issues. Wind noise was kept to a minimum by enabling the high-pass filter on the MKH 40 and ensuring that the Rycote was as sheltered as possible. And in terms of mic placement, I concentrated on the relatively humble goal of ensuring that the balance between guitar and vocal always delivered enough of the latter. Like all
With four songs captured overlooking England’s Best View (yes, really), it was decided that a change of scenery would add visual variety, so we packed up all the kit and trekked to the lake at the bottom of the hill. Here we tracked another five numbers with Tymisha and the mic poised precariously over open water. (Sennheiser’s RF mics have a well-deserved reputation for coping with humid environments, but there are limits.) Oddly, the wind was more
www.soundonsound.com / May 2026
43
TECHNIQUE
RECORDING OUTDOORS
problematic here than on the crest of the hill, but otherwise the process was much the same. One of the more surprising challenges about recording outdoors is to make the result sound like it was recorded outdoors. The absence of room sound isn’t heard as an instinctual auditory cue telling your brain “This was recorded in a forest!” It just comes across as, well, dry. And with a singer as powerful as Tymisha, it’d take a particularly perky songbird to make itself audible on close mics during a take. Not having spare inputs available for distant mics, therefore, I retreated to a sheltered part of the wood, set up my omnis as a spaced pair and recorded a few minutes of birdsong to be laid over the top as required.
Choose Wisely Back at home, listening on loudspeakers confirmed that both wind noise and minimum vocal level were under control. In fact, in the sections where Tymisha sang and played quietly, it sounded pretty good with minimal processing. However, when she switched to head voice and gave it both barrels, the volume difference was uncomfortable. As a result, I was left with three main challenges at the mix. One was to manage the vocal dynamics without undermining the consistency of the guitar sound. The second was to recover a natural tonality from a mic placed inside a blimp, and an under-saddle pickup. And the third was to make the overall sound fit in with what viewers would eventually see on their phone screens. With regard to the first of these, compressing the miked track as a whole would have meant imposing the same dynamic changes on the guitar as on the vocal. In other words, if a peak triggered 10dB of gain reduction on the mic track, that would be heard both as a levelling of the vocal and as an unnatural fluctuation in the level of the guitar. One way of tackling this would have been to send the vocal signal as a side-chain input to a plug-in on the guitar DI track. With modern plug-ins, it’s not too difficult to arrange things such that gain reduction on one track is mirrored as expansion on another, which would have allowed the level of the DI track to be ridden automatically to compensate for level changes on the mic track. But I was relectant to start down this road, for a couple of reasons. First of all, no amount of EQ was going to make the pickup signal sound
44
May 2026 / www.soundonsound.com
Another angle on the chosen mic placement, which kept the blimp from obscuring Tymisha’s face whilst capturing plenty of vocal.
exactly like the miked guitar. So even if this approach eliminated unwanted changes in the guitar level, it would still introduce unwanted changes in the guitar tone. And second, whilst it would have worked OK with a simple compressor, I knew that I was likely to want to use more complex, frequency-dependent dynamics processes to control both the level and the timbre of the voice. Consequently, I parked this idea while I tested a simpler one: using source separation software to derive independent guitar and vocal tracks from the mic recordings. The extent to which this is possible with Hit’n’Mix’s RipX never ceases to amaze me, and once I’d figured out that it didn’t like the clipped audio where Tymisha had clapped her hands for video sync, it delivered the goods once again. Artefacts were audible in the guitar split, but the vocal was astonishingly clean, and when the two were recombined at any
sensible level, the blend sounded tolerably natural to my ears. I was able not only to impose some pretty strict compression on the vocal split, but also to use tools like FabFilter’s Pro-MB and Oeksound’s Soothe 2 to boost the upper midrange in quiet passages whilst taming it in the loudest and most strident sections. Having a separate guitar split also allowed me to sneak some subtle stereo width into the picture by panning that and the DI track slightly left and right.
Flower Power I knew that I would need to adjust the timbre of all the tracks to compensate for mic placement, HF loss from the blimp, and the inherently unnatual sound of an under-saddle pickup. As always, your ears are the most important tools here, but I’ve also come to rely heavily on Oeksound’s Bloom plug-in, both as a tonal shaper and a guide. My approach here is as follows.
TECHNIQUE
RECORDING OUTDOORS
Bloom continally adjusts the timbre of the source to nudge it towards an internal target spectrum. Drop it on the master bus and you’ll often hear a noticeable change in the tonality of the mix. Assuming that feels like an improvement, I bypass Bloom and try to adjust EQ or multiband settings to achieve a similar frequency balance at source. I’ll then re-enable Bloom and listen again. Hopefully, with each iteration, the difference that Bloom makes should get progressively smaller, and eventually you either reach a point where it’s not needed any more, or where you can’t match what it’s doing in other ways. In this case, Bloom’s continuous dynamic frequency shaping made quite a difference over and above the best EQ settings I could muster, so I left it active in the final mixes. However, its default target response often sounds just a bit too ‘scooped’ to my ears. You can reshape the target using the faders, but I generally prefer to use its ‘window blinds’ to limit processing only to the midrange, especially in a situation like this where there is no real low end in the source signal. With Tymisha’s recordings, the satisfying overall frequency balance I ended up with was also undermined by exaggerated sibilance, and I had to add de-essing both on the vocal track and the mix bus to keep things under control. The final challenge was to make it sound believable as an outdoor location recording. As well as looping
my birdsong track at a low level throughout, this also meant confronting the question of reverb. Under normal circumstances, Tymisha’s dramatic singing would benefit from equally theatrical use of effects. Leaving it completely dry robbed it of power, but any obvious delays or plate reverbs felt jarring in the visual context. I settled for a low-key but pleasant hall reverb from the iamreverb convolution plug-in, fed only from the vocal split and kept at the level where it reinforced the vocal without being clearly audible in its own right.
FabFilter’s Pro-MB was used to control the tonality of the vocal part that Hit‘n’Mix’s RipX separated out. The bands were configured so that upper-mid and HF boosts became cuts in the louder vocal passages, as here.
Rising Above It always leads to mixed feelings when a recording made under compromised circumstances turns out better than carefully crafted studio productions, but the end result here really did surprise me. If anything, it sounds almost too polished, and I could imagine some viewers assuming that the video takes were mimed to studio recordings. But a lot of the credit for that must go to Tymisha, who delivered flawless takes of every song with no need for editing. And from my point of view, the experience reinforced a belief I’ve held for a long time. Acquiring more or better tools doesn’t make us better engineers. What makes the difference is really understanding the capabilities of the tools you already have — and that is equally true of cutting-edge post-processing software as it is of microphones.
The iamReverb plug-in provided an appropriately natural hall reverb that reinforced Tymisha’s voice without placing it in an acoustic that would have jarred with the visuals.
Sound Worlds You can hear some recordings from the session described in this article on this month’s media page at https://sosm.ag/recording-outdoors. Tymisha has shared the videos on social media and on her YouTube channel: www.youtube.com/@Tymisha_.
46
May 2026 / www.soundonsound.com
Oeksound’s Bloom plug-in can be an invaluable guide to EQ setting as well as being a useful tool in its own right.
DR510 500 Series System features: High-power 500 Series rack, USB/ADAT interface, Dante AoIP interface, and D510mx 10x2 analogue summing mixer.
32Classic MS Mix Strip features: High-performance transformer-balanced mic pre, 32Classic console EQ with HP/LP filters, and integrated mixbus.
ON TE ST
HUGH ROBJOHNS
T
he SHUpHLER is manufactured by small British company Phaedrus Audio, and I reviewed the original model back in SOS July 2017 (https:// sosm.ag/phaedrus-audio-shuphler). The product has continued to evolve in important ways over the last decade, and I thought the latest Mark IV model sufficiently improved that this device warranted a second look. I’ll concentrate mainly on the changes and updates here, so if you’d like more information on the background to the shuffling processes please refer to my original review (which is free to view).
Phaedrus Audio SHUpHLER MkIV Stereo Correction Processor
The imaging of stereo mic arrays and loudspeaker monitoring is not as accurate as it should be — and the SHUpHLER MkIV aims to address that.
Same... But Different! As you’d expect, the MkIV performs essentially the same job as the original — it provides a variety of shuffling configurations optimised for different stereo recording and listening scenarios. Importantly, though, two of its shuffling functions are completely new, and the audio connectivity has been enhanced too. Like the original, the SHUpHLER MkIV is housed in a deep extruded aluminium case. It measures 108 x 46 x 225mm (WHD), but instead of the hexagonal anodised metal front panel of the earlier design, the new model employs thick fibreglass panels. The original, anodised metal panels required additional processing to ensure they were grounding effectively against the case. Phaedrus subsequently discovered that this new double copper-clad PCB solution is a lot better in that respect. As the panels have relatively small dimensions and are quite thick, they are easily robust enough to support the control knob and I/O connectors, and I had no issues with interference despite heavy provocation! Originally, the pro version of the SHUpHLER used a valve gain stage, but the latest model is entirely solid-state, using a handful of Texas OPA2320 precision low-noise, low-power, CMOS op-amps. It’s designed to operate on a single-sided 5V power supply, a benefit of which is that it allows the SHUpHLER mkIV to be powered directly from any standard USB supply, via a USB-C socket on the rear panel (a USB-C to USB-A cable is included). As the unit only draws 100mA of current, it will work with all USB 1.1, 2.0 or 3.x outlets, but ideally
48
May 2026 / www.soundonsound.com
a good quality dedicated USB power supply should be used, to realise the unit’s impressively low noise-floor specifications of -100dBu (A-weighted). The MkIV SHUpHLER is available in two versions: a professional transformer-coupled balanced I/O model, and an unbalanced consumer version. Both have four quarter-inch jack sockets for line-level connections in and out. Being directly USB powered, the 5V power rail restricts the maximum internal signal level to just +7dBu or +5dBV, and so that’s also the maximum I/O level for the unbalanced version. The pro model’s balancing transformers not only provide galvanic isolation to avoid ground loops; they also step down/up the I/O levels with a maximum of +18dBu (giving a potential dynamic range of 118dB). The unbalanced transformerless model’s THD measurement is better than 0.001% at all frequencies, but the transformers in the pro model degrade that somewhat; I measured THD at 0.05% with a 0dBu input level. Naturally, the THD figure is also
frequency dependent and, at 40Hz, it reaches 1% rising to 3% with a +16dBu input level. I think that’s to be expected in a transformer-coupled device, and a fair compromise given the USB powering
Phaedrus Audio SHUpHLER MkIV From £880 pros • Very effective. • Updated and improved shuffling processes. • Transformer I/O option for balanced or unbalanced connections with pro signal levels. • Universal USB powering.
cons • Modest LF distortion at very low frequencies.
summary This all-analogue hardware processor offers five different shuffling processes, all aimed at improving the stereo imaging and/or spaciousness for stereo mic arrays and loudspeaker or headphone monitoring.
and flexibility of connection formats and I/O levels. And who doesn’t enjoy a little transformer warmth? I measured the frequency response in the no-processing mode to be within 1dB between 40Hz and 20kHz, and the roll-off below 40Hz is primarily there because the Blumlein shuffling mode has the potential to expose a lot of LF rumble.
Shuffling Modes As with the original model, five different shuffling modes are provided, selected with the only operational control: a six-way rotary switch on the front panel. All shuffling processes equalise the Mid and Sides components of the stereo signal in specific ways, adjusting the stereo width at different frequencies to compensate for the inherent errors of stereo mic arrays and loudspeaker listening. The first switch position disengages all processing circuits, but the signal path is still routed through the transformers and op-amps. The next clockwise position is labelled Elliptical, and this replaces the sum-and-difference matrix of the original SHUpHLER. This Elliptical mode progressively reduces the stereo width as the frequency reduces, such that the lowest frequencies are reproduced in dual-mono. Elliptical filters are commonly employed in vinyl mastering to avoid anti-phase LF signals from reducing the groove depth and causing tracking problems. But it’s included here because it’s also very useful when listening over headphones, creating a far more natural listening experience if the source features hard-panned sounds. I’ll group the second and fourth shuffler modes, Cardioid and Blumlein, together because both are intended primarily for correcting issues with different kinds of stereo mic array. They both widen the stereo image at low frequencies (the opposite of the Elliptical mode) and the Blumlein mode is the stronger of the two. That one is designed for near-spaced omni microphones, such as in binaural or Jecklin Disc setups. In essence, this shuffling mode converts small low-frequency phase‑shifts between the two channels into amplitude differences, thereby
ALTERNATIVES PSPatial Audio’s Stereo Lab replicates all of the SHUpHLER’s functionality, but in the digital domain, and adds many functions, too. But I’m unaware of any other analogue hardware unit that can match the SHUpHLER’s suite of shuffling processes.
enhancing the stereo imaging when heard over stereo loudspeakers. The Cardioid mode is designed to restore a sense of spaciousness in coincident mic arrays, while also increasing the forward focus (and reducing some of the rearward pickup). Stereosonic and WaRP, the third and fifth modes, are related shuffling processes designed to enhance the imaging accuracy of stereo loudspeakers. The Stereosonic mode was developed by EMI’s boffins back in the 1950s to do two things. First, it reduces the slight blurring of the stereo image when listening over stereo loudspeakers — something that’s caused
version of Stereosonic shuffling with less HF narrowing, and better suited to more modern recordings and pan-pot stereo material. WaRP is a further development of BOF. It incorporates academic research from the mid-1980s, which revealed that while conventional stereo speakers reconstruct accurate audio wavefronts below about 1kHz for virtual sound sources between the speakers, at high frequencies the required wavefronts effectively become sub-sampled — the result being unwanted spatial ‘alias’ sound sources that confuse and blur the stereo image in ways not previously appreciated. Richard Brice, who designed the SHUpHLER, developed a method to correct these unwanted spatial aliases called Francinstein T-Sym, using linear-phase filters. This solution is available in PSPatial Audio’s Mac-only Stereo Lab software, and the WaRP process is essentially an analogue simplification of that digital algorithm. Comparing the Stereosonic and
“The new Elliptical mode is a real bonus for headphone listening, making a lot of wide stereo material far more natural and pleasant.” by the stage width at high frequencies being inherently wider than at lower frequencies. Its secondary function was to compensate for the HF beaming effect of the large-diaphragm microphones that were popular at the time, which also exaggerated the HF stage width (particularly in EMI’s classical recordings). The new WaRP mode replaces the previous BOF (Bride of Francinstein) process, which itself was a ‘corrected’
WaRP modes, the former reduces the stereo width above 2kHz by about 4dB, with a gentle transition over nearly four octaves from 200Hz up. In contrast, the WaRP process applies slightly less HF narrowing and the transition occurs more sharply over an octave around 1kHz. This might strike you as an insignificant difference, but in practice it actually makes a big improvement, greatly increasing the
The rear panel, showing the TRS balanced/unbalanced audio socketry and USB-C power input.
www.soundonsound.com / May 2026
49
ON TE ST
PHAEDRUS AUDIO SHUPHLER MKIV
A view of the internal circuitry of the SHUpHLER showing the input and output transformers at the left next to the audio connectors, and the active shuffling circuitry to the right with the rotary selector switch on the vertical board.
sense of realism and solidity of the stereo image with most stereo material.
Impressions Phaedrus Audio’s SHUpHLER MkIV addresses stereo imaging issues that
no other analogue hardware processor tackles in such a versatile, effective or user-friendly way. Although the five shuffling modes were designed with specific applications in mind, the user manual includes a useful table
Audio Precision Plots
I thought it would be helpful to try and demonstrate visually what the SHUpHLER does, so I converted its output to the Mid-Sides format and used an Audio Precision analyser to plot the different modes’ Sides-channel frequency responses. The green trace shows how the Elliptic filter progressively removes low frequencies below 2kHz from the Sides channel (-3dB at around 380Hz, -12dB at 95Hz) thereby restricting the low bass to the Mid channel and thus centred in the left-right stereo signal. The orange trace is for the Blumlein mode, which is designed to optimise a near-spaced omni array for loudspeaker listening. It is active below 2kHz and reaches a peak of +13dB at around 40Hz. The correction applied in the Cardioid mode (red trace) is similar but less extreme, applying a +7dB boost around 50Hz, with the filtering starting below 800Hz. Both modes widen low‑frequency imaging relative to high frequencies. The light blue trace is the Stereosonic correction, which is designed to improve stereo loudspeaker imaging in general, while also compensating for the beaming effect of coincident figure-8 microphones with roughly 4dB of attenuation above 200Hz. The new WaRP mode (purple trace) is less extreme, applying just over 2dB of attenuation above 600Hz, but with a much sharper transition around 1kHz. Both modes narrow the high‑frequency imaging relative to low frequencies.
50
May 2026 / www.soundonsound.com
listing how each mode might enhance (or not) a wide range of different situations, too. I used the SHUpHLER MkIV with a wide variety of stereo mic arrays, and was always able to find a mode that elevated the sense of spaciousness and/or enhanced the stereo imaging precision, without exception. While I didn’t have the opportunity to compare the new WaRP process with the old BOF, it is noticeably more accurate than the Stereosonic mode at improving the realism and focus of most modern commercial recordings auditioned over stereo loudspeakers. I found the Stereosonic mode was marginally better for historical recordings (especially EMI recordings from the ’50s and ’60s, funnily enough!). I was concerned initially that I’d miss the sum-and-difference mode, but actually the new Elliptical mode is a real bonus for headphone listening, making a lot of wide stereo material far more natural and pleasant. Having used the SHUpHLER MkIV in post-producing several recording projects over recent weeks, with it hooked into my stereo monitoring setup the rest of the time, I’d be very reluctant to part with it. It’s highly recommended for anyone working with simple stereo mic arrays, or for optimising the stereo imaging of a monitoring system. £ Transformer-balanced model
£990. Unbalanced model £870. Prices include VAT. E sales@phaedrus-audio.com W www.phaedrus-audio.com
This BEAST is still the
“This interface is easily the best bang for the buck in the market. Not only the preamps are the real deal and sound excellent, it comes with all their plugins for free, and they’re no doubt the best emulations in their class. Plugins alone are worth the price.”
“This is by far the best desktop audio interface I've used in more than 20 years of music recording. Nothing comes close to the i73 PRO. Great preamps (not just good, GREAT) and a refreshingly good selection of plugins. I absolutely recommend it!”
BEST
“After thoroughly tested the renowned preamps and the converters with all kinds of people and musical styles in the studio, in my humble opinion, everything has been outstanding. Not only from my own subjective perspective, but also according to everyone who came through.”
“The sound impressed me immediately. Everything feels a bit more “glued together and warmer,”. If you’re looking for a high-quality interface at the upper end of the market and you appreciate analog sound, feel, and workflow, then you should definitely try this interface.“
Free for all owners
CONSOLE CHANNEL STRIP
DSP & Native TRY THEM FOR
FREE TODAY
FE ATURE
Buchla Touché S A R A H B E L L E R E I D & R YA N G A STO N
O
nce a relatively obscure figure, artist and inventor Donald Buchla (1937‑2016) is now more influential than ever. Buchla is perhaps best known for his pioneering work in the field of electronic instrument design. His instruments, geared toward experimentation and discovery, were borne from the musical avant garde and technofuturistic corners of the Bay Area counterculture. Focused primarily on his own art, Buchla was largely unconcerned with commercial success. As such, at first, his work was not as widely adopted as that of his contemporaries. However, the 21st Century growth of interest in modular synthesizers has brought Buchla’s work into popular focus. His early modular synthesizer designs (especially the mid-1960s Series 100 and 1970s Series 200 systems) have become foundational to modern instrument designers seeking models of musical interaction that break from mainstream musical traditions. Today, companies such as Buchla USA and Tiptop Audio produce reimagined, commercialised versions of several of Buchla’s original designs.
56
May 2026 / www.soundonsound.com
Just like all his other creations, Don Buchla’s polysynth was ambitious — and unique. Others, such as Make Noise, Verbos Electronics and Frap Tools have created their own complete Eurorack modular systems that extensively reference Buchla’s work. Thanks in part to these makers, instruments such as the 100, 200 and Music Easel are now well known, and their design ideologies more broadly embraced. Buchla’s original instruments, many of which were bespoke or custom designs, were never produced in large quantities. As a result, most musicians have never seen or played an original Buchla instrument, instead experiencing his design philosophies through secondhand sources. Because of these factors, Buchla’s later work — after the 1970s 200 Series — remains relatively obscure. He continued to design new instruments until his death, but many of them remain little-known. Focusing exclusively on his early modular systems paints an incomplete view of his creative and technical approach, and misses out on some of his most exciting, bewildering and unusual work. Today, many think of Buchla as having specifically created analogue modular synthesizers with unconventional playing interfaces. They might think of the music
made with his instruments as being atonal, noisy, chaotic or ‘alien’. Popular discourse commonly echoes that he hated black and white piano keyboards, and refused to use them in his designs. Yet, there is the Touché: a polyphonic, computer-based keyboard instrument and composition ecosystem developed by Buchla & Associates around 1980. So, how do we get from the 1960s Series 100 — notorious tool of the avant garde — to an instrument that seems to resemble commercial contemporaries such as the Synclavier or Fairlight? Are these comparisons valid, or is there something more peculiar behind the Touché’s design and intentions? To answer these questions, let’s revisit how the Touché came to be.
Buchla’s Computer Lutherie In their time, Buchla’s early creations — namely, the 100 and 200 modular systems — were well respected; dozens of these instruments were built in the latter half of the 1960s and throughout the 1970s. Most were commissioned by educational institutions who sought to develop cutting-edge programs in the emerging field of electronic music. Buchla’s
modular systems presented a tremendous leap in musical potential over prior purely tape-based workflows, making composition much more intuitive and expedient. Even by the late 1960s, however, musical applications of then-new digital computing technologies had begun to show promise, with early advances emerging from institutions such as Bell Labs, the Stanford Artificial Intelligence Laboratory and the University of Illinois. Buchla was well aware of these developments, and as early as 1969, he had begun plans to integrate computers into his instruments. In 1972, Buchla & Associates debuted the Series 500: an instrument which augmented Series 200 modular designs with a 16-bit mini-computer, used primarily for patch storage and recall, as well as control voltage generation. By 1975, this technology led to the 502 Electric Music Box, a self-contained instrument. Largely forgoing the patch cables of its predecessors, the 502 offered full software-based control of its audio and control signal routing and user interaction. However, it was over $60,000 at the time of its introduction — prohibitively expensive by most standards. Its largest material expense was the mini-computer itself; but in the mid-1970s, new microprocessor technologies began to appear on the public market. Realising that these much more affordable microprocessors held considerable technical promise, Buchla shifted his focus toward yet another new family of instruments: the Series 300, which paired 200‑series modules with new computer-controlled modules and digital interfaces. Around this time,
The Model 360 Programmable Octal Signal Source, an analogue/digital hybrid eight-voice polyphonic sound source for the Buchla 300 system.
Buchla developed a close friendship and collaborative partnership with composer David Rosenboom, who had independently been developing software and computer technologies for live performance. Rosenboom began to contribute to the conceptualisation of new Buchla designs, including the now famous Model 259 Programmable Complex Waveform Generator (the inspiration for most modern Eurorack ‘complex oscillators’). The 259 was an analogue sound generator for 300‑series systems, and all of its parameters could be dynamically controlled from the system’s computer. As Buchla developed the 300’s system infrastructure, though, he and Rosenboom realised that it could form the basis for a more streamlined, self-contained, non-modular instrument. Buchla saw the modular 300 system as a general-purpose platform through which composers could experiment and construct novel methods of musical interaction; but simultaneously, he and Rosenboom imagined a future in which more ‘legitimate’ electronic instruments could be embraced by a broader range of musicians. They imagined that, if an instrument were less open-ended, it might have a chance of developing repertoire and technique — and, by extension, have greater staying power. It was this thinking that ultimately led to the Touché.
A Buchla... With A Keyboard? The Touché, completed in 1980, is a hybrid polyphonic keyboard instrument. It features digital sound and control voltage generation along with an analogue signal processing back end, utilising an internal
general-purpose computer to create connections between the user interface and its sound generation hardware. Typically, these linkages are defined using a specialised software called FOIL (Far Out Instrument Language), written by David Rosenboom. The Touché repurposes other 300‑series hardware, most notably the 360 Programmable Octal Signal Source and the 364 Multiple Arbitrary Function Generator. The 360 was an eight-voice polyphonic synthesizer with a modular user interface, combining digital sound generation and waveshaping with analogue signal processing. The 364, on the other hand, was a 64-channel control voltage generator and processor. Within the context of a 300 system, these devices were programmed using a software language called PATCH-IV. Whereas the 300 and PATCH-IV prioritised open-endedness, the Touché aimed for immediacy and playability. PATCH-IV treated its hardware like a digital modular synthesizer, leaving it to the user to define signal interconnections and parameter values on a fairly granular level. FOIL, however, treated the same hardware like a more typical polyphonic synthesizer, with predefined modulation paths and macro parameter settings that applied to many simultaneous voices. As stated before, many claim that Buchla sought to avoid using mechanical black and white keyboards in his designs. It’s true that he did not see the keyboard as the only valid playing interface for electronic instruments, and resisted the idea that it should be the default mode of interaction, as it seemed to be for other makers. He was concerned that, if an instrument had a keyboard attached, the resulting music would tend to conform to existing traditions and habits; but he was more interested in building new artistic modalities around electronic instruments’ unique strengths. As such, many of his instruments eschewed traditional keyboards in favour of capacitive touch plates, joysticks and audio-responsive control methods. So, why did he deem the keyboard appropriate for the Touché, specifically? In his own words:
“I became acquainted with a number of keyboard players whose musical and technical skills I admired, and some of whom expressed an interest in a keyboard instrument that possessed some unusual degrees of freedom. Touché’s initial users, representing a minuscule fraction of the world’s keyboard players, might best be
www.soundonsound.com / May 2026
57
FE ATURE
BUCHLA TOUCHÉ REVISITED
Editing an Instrument Definition via terminal in FOIL-85 software, written by David Rosenboom.
described as performers of avant garde and experimental music. They share an interest in investigating and applying sounds that sometimes fail to conform to traditional concepts of what constitutes musically useful sonic material, and the structured aspects of their music have been known to deviate from norms established through centuries of encounters with real-world vibrations.” So, despite its ‘conventional’ input structure, Buchla saw the Touché as an instrument for exploring new and unusual approaches to music-making. He mentions that specific musicians had inspired him to pursue the design of a keyboard instrument. He is at very least referring to performer-composer JB Floyd, as well as Rosenboom — who, again, worked closely with Buchla on the Touché’s design. As with his prior work, the Touché was developed primarily to satisfy Buchla and his friends’ artistic curiosities, and was only one of their many answers to the question of how an electronic musical instrument could work.
How Does The Touché Work? At a glance, the Touché might seem to resemble other polyphonic, microprocessor- or computer-equipped instruments of its time, such as the Sequential Circuits Prophet-5, New England Digital Synclavier, or the Fairlight CMI. Unsurprisingly, though, the Touché’s signal path is unlike other contemporary commercial instruments, and is perhaps better seen as an extension of the synthesis approaches in prior Buchla instruments. It bears many similarities to the now-famous Music Easel and Model 259 oscillator, with some key differences.
58
May 2026 / www.soundonsound.com
As in the 360, each of the Touché’s eight voices contains three digital sine-wave oscillators, a digital waveshaper, and an analogue low-pass gate. Each of the three oscillators serves a specific purpose: only one is used as a sound generator, with the others dedicated to frequency and timbre modulation of the main oscillator, respectively. The two modulation oscillators have an extremely wide frequency range, and can be used similarly to conventional LFOs for vibrato or tremolo-like waveshaping applications. They can also be used for audio-rate modulation, resulting in complex and sometimes clangorous timbres — similar to those that we know and love from Buchla’s earlier modular systems. While devices like the Music Easel use analogue wavefolders to modify the oscillators’ core timbre, the Touché instead uses a technique called digital nonlinear waveshaping. Popular among 1970s computer music researchers, this technique employs a digital lookup process to dynamically distort an incoming sine wave, adding harmonic overtones in a continuously controllable fashion — somewhat like a precisely controllable, customisable wavefolder. In this process, the sine wave ‘scans’ a so-called ‘waveshaping table’, reading the contents of the table back and forth from the centre in a sinusoidal fashion, using the lookup values to define the instantaneous amplitude of the outgoing signal. In the Touché, the Timbre parameter controls the amplitude of the sine wave prior to this lookup process, effectively determining the ‘scanning width’. At low Timbre values, the sine wave scans only a small region at the centre of the table; conversely, at the maximum Timbre values, it scans the entire
table. By changing the Timbre value, or by changing the contents of the table, a variety of sounds can be achieved. Additionally, the timbre modulation oscillator can be used to continuously control the amount of waveshaping applied to the principal oscillator — in concept, modulating the amplitude of the sine wave prior to the waveshaper, and therefore altering the region of the table that is scanned. This can result in continuously evolving timbres and, if desired, brash inharmonic tones. After the waveshaping process, the digital sound sources are converted to analogue and passed through low-pass gates. These impart the familiar organic response found in Buchla’s other instruments, however, the overall sonic character of the Touché’s sound generation differs from more familiar ‘Buchla’ sounds. The digital oscillators introduce slight jitter and aliasing, which, when coupled with the low-pass gates, results in a strange and captivating intersection of hi-fi analogue and lo-fi digital characteristics (foreshadowing the character of Buchla’s later 200e system, still in production to this day). The outputs from all eight gates are summed and passed through an analogue phase-shifting network. The phaser has its own modulation oscillator with variable depth and frequency. It cannot be bypassed; the Touché’s final outputs are tapped from four points in the phase‑shifting network, resulting in a pseudo-quadraphonic spatialised output, where sounds continuously morph and shift around the sound field.
Controlling Sound In FOIL Each voice offers seven primary parameters: pitch, FM frequency and FM depth (or ‘index’), timbre modulation frequency and timbre modulation index, the timbre value itself, and the low-pass gate level control.
Waveshaping table display in FOIL-85.
Discover SOS For Artists : A Complete Platform for Modern Music Creators
Your end-to-end music production suite Designed to support independent artists, producers, and collaborators at every stage of the music-making journey, SOS For Artists brings together all the tools needed to take your music from idea to release.
Create 1. Sample Selection Made Simple Over 3 million royalty-free samples growing monthly. 2. Instruments & Synths Includes a curated collection of high-quality plug-in instruments from brands like Spitfire, UJAM, Arturia, GForce, Sonuscore, and more. 3. Stem Extraction with AudioShake An integrated stem-splitting plug-in allows you to isolate vocals, drums, bass, or instrumental parts. 4. Starter DAWs Included For newcomers, the subscription includes lite versions of Steinberg Cubase and Ableton Live.
Produce 1. Mix & Effects Tools The effects collection includes EQs, Compressors, Reverbs, Delays and Saturators from trusted names. Including Eventide, Arturia, Baby Audio, IK Multimedia, and Synchro Arts. 2. Mastering — Fast, Intelligent SOS For Artists includes access to the advanced AI mastering engine from LANDR.
Distribute 1. Global Digital Distribution Distribute your music to over 150 platforms including Spotify, Apple Music, Tidal, Amazon, and Deezer. Or, if you use these platforms transfer all tracks to SOS For Artists without losing data. 2. Monetization & Royalty Splits Retain 100% of your royalties or use the Royalty Split feature and divide the earnings with your collaborators.
FREE PLAN
ESSENTIALS
ign up and explore S the features Kickstart your creativity with 7,800 samples Preview the LANDR Mastering tool Preview Distribution
or £12.99** per year per month £ 1,000 worth of Tools inc 18 Plug-ins 1200 Sample Credits U nlimited MP3 + up to 36 WAV masters U nlimited Distribution
ONLY
99*
£
* Prices exclude VAT. Taxes will be applied at the UK / EU Country rate at checkout. ** Monthly price does not offer same number of Plug-ins or Sample Credits *** Also available in most countries worldwide in your local currency.
3. YouTube Integration Link your official YouTube artist channel to keep distributed content and subscriber base in one place. 4. Promotion & Reporting Promotion tools include Linktree-style landing pages and content creation tips to help boost visibility. Detailed royalty reporting shows trends, top countries, and top-performing platforms.
PRO
199*
£
or £19.99** per year per month £2,000 worth of Tools inc 64 Plug-ins 2400 Sample Credits Unlimited MP3, WAV + HD WAV masters Unlimited Distribution
ONLY
www.sosforartists.com
ON TE ST
SAM INGLIS
I
t’s now more than 20 years since Yamaha purchased Steinberg from Pinnacle Systems. This not only gave them ownership of software products such as Cubase, Nuendo and WaveLab: it also delivered expertise in hardware design. Starting with the highly successful MR816 in 2008, jointly developed USB interfaces and controllers have appeared under the Steinberg brand. Last year, however, the Japanese mega-corporation announced a change of direction. Steinberg will now focus exclusively on software, with the parent company being responsible for audio interfaces, controllers and other hardware. Existing products have been rebranded, so for example the Steinberg UR22C and UR44C audio interfaces are reborn as the Yamaha URX22C and URX44C. Meanwhile, Yamaha have introduced a separate range of three desktop USB audio interfaces dubbed the URX22, URX44 and URX44V.
62
May 2026 / www.soundonsound.com
Yamaha URX44 USB Audio Interface & Mixer
Yamaha’s new audio interface is not quite like anything else on the market. Given that these names are almost identical to those of the former Steinberg models, you might expect the products to be minor variations on the same theme. This is not so. The new range is radically different — not only from existing Yamaha interfaces but from practically everything else that’s out there.
Desk Jobs All three new URX models share the same wedge-shaped case design and are available in white or black. With the exception of the Avid MBox Studio, the URX44 is bigger than all of the other
desktop interfaces I’ve tested, measuring 22 x 18cm (9 x 7 inches) and standing 8cm high. It weighs almost 2kg (4lbs). Whereas the MBox Studio’s real estate is fully populated with controls, meters and sockets, however, the URX’s desktop case is quite Spartan. The top panel is home to a colour touchscreen, five rotary controls and a power button. To the front, you’ll find two conventional headphone outputs on quarter-inch jacks, plus three mini-jacks. Two of these are intended for connecting a headset and associated microphone, while the third is labelled Aux and offers an unbalanced stereo input for
keyboards, phones and other devices. The headset mic supplants input 1 if used, but the stereo Aux input is separate. Rear-panel I/O depends on the model, with the URX44 and URX44V each having four main audio inputs and outputs. The inputs are on combi XLR/jacks, with inputs 3 and 4 offering a high-impedance mode for DI guitar recording. You’ll also find two USB Type‑C sockets, one for attaching your computer and another for a secondary device, while the 44 and 44V feature a microSD card socket for a built-in recorder. The URX44V adds HDMI in and thru sockets, catering for a variety of video streaming and vlogging scenarios. However, none of the URX desktop interfaces provides conventional digital audio I/O such as ADAT Lightpipe or S/PDIF. The V’s video functionality is evidently quite power-hungry, as that unit draws over 38W and requires a dedicated 16V DC supply. By contrast, the URX22 and URX44 are theoretically capable of being bus-powered, but even they draw 15W, which is more than many laptops can supply, including mine. A third Type‑C socket therefore allows the connection of an external USB mains supply or power bank. I found it necessary to choose my USB power cable carefully, otherwise small movements would cause the entire unit to power cycle.
Tool Tips To get started, you need to install a driver package and a suite of tools. The latter includes some bundled effects plug-ins that you can use in your DAW of choice, as well as a utility that can update the URX firmware. This is, to say the least, a pretty leisurely process. Once up and running, you’ll see no fewer than four audio devices labelled Yamaha URX44 A,
B, C and DAW, plus a mass storage device containing nothing but a link to a Getting Started guide. This can be mildly annoying, because unless you remember to eject it, powering the URX down generates a warning that it wasn’t ejected properly. And, perversely, although the URX44 has a microSD card socket, SD cards are not mounted as mass storage devices on the attached computer, and can’t be read. Yamaha provide a lengthy online manual, which is a model of good HTML design, but unfortunately omits to explain the basic use case behind many of their design choices. For example, there’s no explanation as to why a USB interface with only six inputs and four outputs needs to appear to your computer as four separate audio devices. I also initially struggled to locate the promised block diagram of signal flow, which would have been very helpful in getting to grips with it. It thus took me a while to figure out that Yamaha’s own description of the URX44 as a USB audio interface is only part of the story. It’s actually a compact digital mixer — but one that is designed to work with USB audio sources as well as analogue signals. Consequently, although it has nothing in common with the URX44C and other ex-Steinberg products, it does inherit quite a few design conventions from Yamaha’s digital mixer range, and really needs to be viewed in this context to make sense. The point of its appearing as four USB audio devices, for example, is to allow audio from multiple applications running on the same computer to be mixed and routed outside the computer. The A, B and C audio devices are class-compliant and stereo-only, while the DAW device is fully multi-channel and presents
A Glance At The Numbers Even modestly priced audio interfaces today deliver specifications far beyond what most of us need for day-to-day recording tasks, and the Yamaha URX series is no exception. The digitally controlled mic preamps have a gain range of 78dB, an A-weighted Equivalent Input Noise figure of -128dBu, and Total Harmonic Distortion of 0.0008 percent. Dynamic range is 115dB on the mic inputs and 125dB on the main outputs. However, whereas the main outputs are fully differential, line outputs 3+4 are ‘impedance balanced’ and have noticeably inferior specs; 0dBFS on the main outs generates +16dBu, but only +10dBu on the secondary outputs, and their THD and dynamic range figures are quite a bit less good. All four of the URX44’s USB devices reported the same latency figures to my MacBook Air. At a 32-sample buffer size and 44.1kHz sample rate, the reported round-trip latency was 255 samples, which equates to 5.8ms. Oblique Audio’s RTL Utility confirmed that this was accurate to within a single sample for the URX44 DAW driver, with minor variations for the others.
Yamaha URX44 £429 pros • High-quality touchscreen. • Very powerful internal mixer with lots of built-in processing. • Simple Mode provides an effective and much-needed ‘setup wizard’. • Mostly good audio specifications, especially on the preamp side. • Some unique features targeting real-time streaming applications. • URX44 and 44V offer built-in recording to a microSD card. • Competitively priced.
cons • Configuring the mixer in Standard Mode can be hard work. • Immediacy of the interface is undermined by a lack of physical controls. • No ADAT or S/PDIF I/O. • Line outs 3+4 are oddly specified. • Won’t act as a card reader for attached computer. • Some SD cards don’t work even though they meet the official specs.
summary Not so much an audio interface as a digital mixer with multiple USB connectivity, the URX44 is a complex, powerful and unique device. Although the user interface presents a learning curve, there’s nothing else out there quite like it.
up to 12 inputs and outputs to a DAW. The URX44 will also happily work without a computer attached.
Touch Type Conventional audio interfaces with built-in DSP mixers are usually set up using control panel software on the host computer. However, the URX44 can be controlled only from its touchscreen. There is no control panel utility, and hence no way to adjust parameters from your computer. The touchscreen is a good one, which remains clearly visible at most angles and responds reliably to a gentle caress. Although there’s a maximum of six analogue audio inputs and four outputs, the mixer has 12 input channels and three stereo busses, along with two dedicated stereo effects channels. The mixer input channels are displayed in two banks, with four mono channels in the first and four stereo channels in the second. This makes sense, because the first four would typically be used to process and monitor physical inputs 1-4, whilst the remainder pick up stereo sources such
www.soundonsound.com / May 2026
63
ON TE ST
Eve Audio EXO 27
With advanced driver tech, comprehensive DSP and the promise of network control, Active Eve’s new EXO speakers aim for Monitors maximum installation flexibility.
JULIAN RODGERS
T
he role of the compact studio monitor has changed noticeably in recent years. What were once straightforward speakers for stereo work are now expected to handle a broader range of duties, with multi‑channel and immersive monitoring becoming a significant consideration for many users. Eve Audio have designed their new EXO series with these needs in mind, incorporating network capability and installation flexibility from the outset. The EXO series introduces a redesigned AMT tweeter, a mid/bass driver built from new materials, revised cabinet geometry, more capable amplification, and a more accessible DSP implementation. In other words, it isn’t simply a refresh of the existing SC line but a broader reworking of Eve’s core ideas, applying them to the monitoring expectations of 2026. For this review I’ve been working with the EXO 27, the second-largest model of four variants in the line and the one that to me offers the most natural balance between stereo and immersive suitability. The observations that follow focus on this speaker, but many apply across the entire EXO family, which differ chiefly in the size of their bass/mid drivers. They all share the same complement of amplifiers, but the bass extension increases with size, as does the max SPL, with the 27 turning in a more than adequate 116dB SPL measured in full space.
Hardware So, on to the EXO 27 itself. First impressions are of a generously proportioned two-way monitor, measuring
68
May 2026 / www.soundonsound.com
234 x 344 x 280mm and weighing 8.1kg. In person it is larger than the driver complement might suggest, and the cabinet woodwork is reassuringly solid.
The enclosure has radiused edges to help reduce diffraction. The ever-reliable tap test backs up the impression of cabinet solidity: the larger side panels
Eve Audio EXO 27 €1398 pros • Balanced, clean sound. • Solid cabinet construction with integrated mounting points. • Excellent low-frequency performance.
cons • Network control software is not yet available. • Small, rear-mounted OLED can be challenging to read when installed. • Wake on signal takes a long time.
summary A competitively priced and forward‑looking speaker that has to be worth a look if you’re in the market for a pair of quality two-way monitors for a little over £1000. I hope the control app is released as soon as possible, as its present unavailability is my only reservation about this product.
respond with a deader, higher-pitched note than the smaller top panel, suggesting effective internal bracing. I haven’t opened the enclosure, but I’m informed that the internal geometry has rounded internals and a lack of parallel surfaces to minimise cabinet resonances; Eve refer to this cabinet design as an ‘LDE’ or low-diffraction enclosure. The front baffle layout is straightforward. A 6.5-inch bass/mid driver sits below a sizeable waveguide housing the AMT tweeter. The styling doesn’t draw attention to itself, and while visually understated, it doesn’t feel anonymous, which is helped by the optional white illumination of the Eve Audio logo between the drivers. We’ll come to the engineering details shortly, but on paper the frequency response is quoted at 41Hz‑24kHz (±3dB), which positions the EXO 27 as a genuinely full-range option for its size. As always, specifications only tell part of the story, but it’s an encouraging starting point for a monitor in this category, particularly as Eve clearly qualify their frequency response figures in the literature.
Drivers I’ve heard a wide range of monitors built around AMT tweeters over the years. This technology is a key characteristic of Eve Audio’s designs. AMTs, or Air Motion Transformers, are sometimes described as folded ribbon drivers, but the underlying principle
is quite different from a ribbon and has some distinct advantages over conventional pistonic drivers. The tweeter’s diaphragm layout has been redesigned and the internal damping has also been revised. As a result the new AMT can handle higher SPLs with lower distortion across a wider frequency range. Eve claim this leads to improved midrange translation and a more seamless integration with the woofers of the EXO series. The bass/mid driver in the EXO series also represents a departure from earlier Eve designs, which used a glass‑fibre‑coated honeycomb material. Both the diaphragm and dust cap of this new driver use aluminium, chosen after a series of material tests. Aluminium offers advantages in terms of stiffness-to-weight ratio, but metal can ring and resonances have to be adequately controlled. To address this, Eve apply a specially developed coating that preserves the low moving mass of the assembly while suppressing those unwanted resonant modes.
Electronics The EXO 27 is a bi-amplified active design delivering a total of 280 Watts, with two Class-D amplifiers rated at 140 Watts each. On paper, that 50/50 power split looks generous for the tweeter, but the choice of amplifier has clearly been made in support of Eve’s broader design goal of minimising distortion. These modules deliver their 140W rating at 1% distortion, and they’re backed by a power supply optimised specifically to sustain that performance rather than sag under load. The result, according to Eve, is distortion remaining below 0.3% across the practical operating range, even when the monitors are driven to high SPLs. Eve implement their crossovers digitally. The filters used in the EXO series are simulations of analogue networks, combining Linkwitz-Riley and Butterworth designs to achieve the most coherent phase response through the midrange, where small differences in phase behaviour can have a noticeable influence on imaging and perceived clarity. The crossover frequency of all of the models in the EXO range is 2.2kHz. DSP inevitably introduces some latency, but in the EXO series it remains below 1.5 milliseconds, which is respectably low and unlikely to
present issues in typical studio use. It’s a pragmatic approach. Using DSP escapes the variability of analogue components and allows for flexibility of design where desirable.
Rear Panel Turning to the rear panel, the EXO 27 is a ported speaker with the port positioned at the top. It’s a full-width, narrow slot with bevelled edges to help reduce turbulence. In use I encountered no audible port noise, and while rear porting can limit how closely a monitor can sit against a wall, I’ve never found this to be an issue in practice. The panel itself is straightforward. A switched IEC inlet handles power, and a single rotary encoder provides access to the DSP setup. Eve’s previous SC-series monitors were configured using a smart knob with LED ring; despite its simplicity, this system was surprisingly effective, and because it was front-mounted, made solo set up of the monitors pretty easy. The EXO’s encoder is paired with a very small OLED display that offers considerably richer feedback, but both are mounted on the rear panel. This is understandable considering the possibility of remote control via a network connection, but undeniably less convenient. The OLED allows you to view numerical values and even filter slopes graphically, which is undeniably useful, but the display is extremely small. Even with decent eyesight I found it a challenge, and it’s not something I’d want to rely on for regular adjustments when crawling behind the meterbridge. In theory, this limitation is sidestepped once network control is available, but at the time of writing the control application is listed on the Eve website as “coming soon”. Audio connectivity is conventional: a balanced XLR input and an unbalanced RCA phono input are accompanied by S/PDIF digital input and output options. There’s no provision for quarter‑inch jacks or AES3 digital connections. At the top of the panel you’ll find an RJ45 network connector, intended only for remote control from the forthcoming Eve Audio application. There’s no Dante or other AoIP support via this connector.
Remote Control Returning to the control app for the EXO series, I contacted Eve Audio for clarification, because the software is
www.soundonsound.com / May 2026
69
ON TE ST
Tonalic’s is a new ‘virtual instrument meets session musician’ concept underpinned by Melodyne’s pitch-shifting technology.
Tonalic: a collection of session musicians captured by Celemony and available to perform virtually within your own DAW.
JOHN WALDEN
I
f you have used Melodyne, you will need no convincing about Celemony’s expertise in manipulating the pitch (and, indeed, timing) within audio recordings, including those containing polyphonic sound sources. However, their latest project Tonalic applies that expertise in a very different context — in Celemony’s own words, Tonalic provides “a musician by your side”. If Celemony’s audio processing technology forms one cornerstone of Tonalic, the other is a substantial collection of audio content. This is derived from recording sessions featuring an impressive list of musicians and recorded in some equally impressive studio environments. It’s this content that Tonalic’s engine lets you adapt to suit the tempo, key and chord structure of your song. So, just how good is Celemony’s team of on-call virtual session musicians?
Tonalic Concept Tonalic is available in two versions — Arranger and Studio — on either a monthly or annual subscription basis. Studio offers some additional features, but both versions give you access to the same collection of performance recordings. This audio content is built around ‘Sets’, with each Set containing a compact set of performances from a specific musician and themed around a particular musical style/idea. A Set might contain several main performance Patterns (alternative phrases/parts similar in performance style), Transitions (useful for moving between musical sections) and Endings. Currently, the Sets are focused on electric and acoustic guitar and bass, drums, percussion, and some other stringed instruments such as mandolin, ukulele, banjo and sitar. Celemony state that the collection will expand over time, and the subscription model is intended to ensure the musicians who supply the content can be properly remunerated for their efforts. Given Tonalic’s processing technology, it’s a pretty safe bet that the audio is in some sort of bespoke format that allows
72
May 2026 / www.soundonsound.com
Celemony Tonalic Virtual Session Musician Instrument the software’s algorithms to do their thing. Celemony are at pains to state that there is no AI-based technology at play here, but there are elements of musicality built into the engine to ensure that the natural human feel of the original performances are retained as the software does its thing. All the audio content is stored online with on-demand downloading when a specific Pattern, Transition or Ending is used. Yes, an Internet connection is therefore required but, in my own experience, the approach worked seamlessly and was very responsive. While the technology that delivers Tonalic’s virtual session musician
performances specifically leans into Celemony’s area of expertise, in broad terms, elements of the concept do bear comparison with other existing ‘virtual musician’ products. Obvious examples would be Toontrack’s EZkeys or EZbass, where MIDI-based performances (also supplied by highly skilled players) can be adapted to suit your own choice of chords, key and tempo. Other examples might be PG Music’s Band-in-a-Box or UJAM’s Virtual Guitarist series that can also provide both sound sources and performance options that can adapt to your project’s harmonic structure.
Celemony Tonalic From €15/Month pros • Integrates with your song projects beautifully. • Can generate mix-ready results with ease. • High quality of initial content. • Refine options in Studio version very impressive.
cons • Subscription model may deter some potential users.
summary Tonalic is a fascinating concept and can deliver mix-ready performances tailored to your song’s chords, key and tempo. DAW integration and UI make it very easy to use.
This underlying concept — a virtual instrument that can also deliver a convincing performance — is therefore a familiar one even if, under the hood, the technology used to achieve the resulting performances might be unique to each product. But, like the other products mentioned above, with Tonalic, it’s your chords and your song. You then direct the virtual instrument/performer to provide some suitably professional guitar, bass and drum performances for that song. And there’s no AI; there are no instrument-based performances generated from a text prompt.
DAW playback is stopped), as configured via the Preview options. The lower portion of the UI contains Tonalic’s Chord Track and the timeline-based track space onto which you drag, drop and arrange the performance clips, much like you might arrange audio or MIDI clips on the timeline of your DAW. Chords can be added to the Chord Track from the included Chord Panel, by dragging and dropping MIDI clips (Tonalic will extract the chords from the clip) or, after double-clicking on the Chord Track to create an empty chord slot, by playing a chord via your MIDI keyboard. Tonalic’s chord knowledge seems extensive so, whether you want simple power chords or something more harmonically complex, the software will support it. As we will see later, Tonalic rather cleverly handles chord inversions/voicings within the engine, so don’t expect to see slash chord labels within the Chord Track itself. Once placed on the timeline, the clips are termed Regions and if you want to repeat a pattern across multiple bars, you simply drag a Region’s right edge; it will extend and, if that spans a chord change (or changes), the harmonic form of the
performance will automatically adjust to fit. This is where Celemony’s remarkable pitch/tempo adjustment algorithms come to the fore as the results are completely transparent to the listener. By combining patterns along the timeline, you can build a complete performance. This is particularly easy if you do that by browsing a specific Set where the combination of main Patterns, Transitions and Endings are all derived from a single musical idea/session, but you can mix and match clips from different Sets/instruments if you wish. The whole process very is intuitive and, of course, easily edited and refined as your song’s arrangement evolves. Usefully, if you have multiple instances of Tonalic within your project, you can toggle on a multi-lane display showing all of the currently active lanes associated and edit any of them within any single instance of the plug-in.
Who’s Who? The line-up of musicians involved with the creation of the initial musical content for Tonalic is just as impressive as the technology. At the time of writing, there are
Tonalic Tour Tonalic can run as a standalone version (essentially intended just for auditioning the audio content), as a plug-in in the usual formats (VST3, AU and AAX), and via ARA (currently only compatible with Studio One/Fender Studio Pro but wider ARA support is in development). I did the bulk of my own testing within Cubase Pro 15 using the VST3 plug-in. This installs just like any other virtual instrument and, in use, it worked very smoothly. Tonalic’s stylish UI already makes it feel like a very polished product. On starting up, the upper portion of the display provides a flexible browse and search environment, including options based upon an initial selection of instrument type, broad performance style, or the musician involved. Depending upon your search criteria, you are then presented with either a list or a Set of performance clips, and these can be auditioned within your DAW project (if playback is running) or with a musical context provided by Tonalic instruments (if your
I’m not sure what the hourly session rates for any of these top-class musicians would be, but it would be considerably more than Tonalic’s monthly subscription price.
www.soundonsound.com / May 2026
73
ON TE ST
CELEMONY TONALIC
Tonalic features a very flexible browser/search environment to explore its impressive collection of performance content.
some 31 musicians whose sessions you can dip into to provide parts for your own compositions. There are some seriously impressive session/live performance CVs here and names such as Kenny Aronoff, Brent Mason, Tim Pierce, Ace (Martin Kent), Bryan Sutton, Corey Britz, Nate Mendel, Paul Kleber, Rob Harris and Randy Bowland — amongst others — will be well-known both within and beyond the inner circles of the high-end session musician world. Their collective skills span a huge range of musical styles; jazz, rock, blues, folk, country, classical, punk, funk, soul, R&B and more. While I’m sure the content coverage — in the hands of Tonalic’s musical director Uwe Bossert — will expand and diversify over time, the initial content platform is of a very high standard.
Making Arrangements If you toggle Note View on in the track area (the button is located at the bottom left), as you arrange your clips as Regions along the timeline, it is fascinating to watch as their notes (or, perhaps more technically correct, note instructions) start to interact with both the chord changes and the adjacent Regions on the same track. Tonalic attempts to construct a musically coherent performance guided by voice leading principles and also to ensure some level of performance variety. The result is some very realistic performances that might be difficult to achieve by just chaining audio (or even MIDI) loops together. The performances sound played rather than processed; it’s all very natural and with no obvious audio artefacts. When using multiple Tonalic instances, the impressive Groove Master feature
74
May 2026 / www.soundonsound.com
provides something that’s rather like a global quantise option. Once opened, the compact panel lets you choose a ‘master’ source for all the tracks to lock in to. By default, this is simply the click (a straight groove locked to the musical grid).
However, you can also choose one of your Tonalic tracks as the master source of the groove and all other tracks will be adjusted to follow this. Rather wonderfully, you can also import grooves. Tonalic provides a compact collection of presets for this based upon MID files and containing grooves taken from Logic and MPC sources. However, you can also create your own grooves to import, either as MIDI or audio files so, if your project already has a part whose feel you want Tonalic’s performers to follow, that’s possible to do. Finally, when viewing a specific Set in the upper panel — and from which you are going to select performance elements to drag to the timeline — at the bottom right of this panel, you have Swing, Timing and Nudge controls. If adjusted, these will apply globally to any of the performance clips from the Set placed upon the track. Equally, however, if this track is set as the Groove Master, Swing settings here can then also be applied to the other Tonalic tracks. Tonalic’s groove quantising is impressive, and the end results can have the very distinct feel of good musicians playing in a room together. It is also remarkably easy to use so encourages experimentation.
Studio Time If the above options meet your needs from Tonalic, then the Arranger version will suffice. However, the Studio version provides two key additional options to further finesse the performances. Each Set includes a collection of Patterns, Transitions and Endings that can be arranged along the timeline to create a complete performance.
prehensive
mics an
uide PLUS d
The Sou
Guide nd On Sound
tical A clear, prac eo r guide to ste the recording in real world! LEARN HOW
ary
EE
o e r e t S g n i k i M
etailed gloss
FR
Includes com
s buyers g d accessorie
Includ es comp re h e n sive mics a nd access ories buyer s guid e P LU S d e ta i l e d glos sar y
TO...
g s and recordin X Choose mic ith confidence techniques w e, in any space. rc — for any sou ble stereo able, controlla rror. st ve ie ch A X ut trial and e images witho ys really w stereo arra ation. o h d n ta rs e d lis X Un depth and loca create width, hone and h both headp . X Record wit ack in mind speaker playb plan. s don’t go to g in th if t o o X Troublesh
This FREE fully illustrated, 80-page eBook demystifies the physical and psychoacoustic principles behind stereo audio capture, busting longstanding myths and replacing guesswork with clear, measurable concepts. X It explains why different stereo microphone techniques behave the way they do — and how to choose and use them with confidence in real recording situations.
X Every concept is supported with real-world examples, combining clear explanations, detailed diagrams and audio demonstrations, to make complex ideas immediately usable.
X Designed for recording engineers, music-technology students, and technically minded musicians, this guide gives readers the tools to make deliberate, repeatable stereo recording decisions, leading to successful, predictable results.
Available FREE from sosm.ag/stereo-miking-ebook
INSIDE TRACK
Louis Tomlinson’s hit album How Did I Get Here? is a showcase for the many talents of Nicolas Rebscher. PAUL TINGEN
H
ow Did I Get Here? is the third solo album by Louis Tomlinson, and Nicolas Rebscher’s credits include keyboards, guitars, bass, backing vocals, percussion and drums, as well as songwriting, engineering, mixing and production. He co-produced five and was sole producer of seven of the 12 songs of the standard edition of the album. Rebscher and Tomlinson had previously collaborated on the One Direction star’s second solo album Faith In The Future. That album hit number one in the UK, so when it came to album number three, the idea was to build on this success. However, whereas the 14-track standard edition of Faith In The Future features 10 producers in total, this time around, “They were looking for one producer who is at the heart of everything, to make it more of a continuous story, so they asked me.”
House Music
78
May 2026 / www.soundonsound.com
Photos: Susann Bosslau
Nicolas Rebscher • Louis Tomlinson
By this point, several of the writers who had worked on Faith In The Future — Tomlinson himself, Theo Hutchcraft of synthpop duo Hurts, David Sneddon, Rob Harvey, Dave Gibson and Joe Cross — were already involved, along with Matthias Wang. “The team actually had already done two weeks of sessions before I joined, finding sounds and a new direction. Three songs on the album, ‘On Fire’, ‘Lucid’ and a bonus track called ‘The Observer’, came from those early sessions.” Work on the new album took place in multiple locations, with Rebscher holding it all together. “We started in April 2024 with writing sessions at Wendyhouse Studios in Shepherd’s Bush in West London, which has a beautiful small control room. It’s close to a railway, and you can hear the sounds in some places on the record, for example on the guitars on ‘Broken Bones’. I love that vibe. When I came into the project, I decided to continue the alternative independent rock sound of the second album, and in particular of ‘Out Of My System’, which
Nicolas Rebscher (left) with Louis Tomlinson and Matthias Wang (right), another of the central figures behind the How Did I Get Here? album.
was pretty intense and bass-riff heavy. I was like, ‘OK, let’s stay in this slightly dark vibe, with the low guitar.’ During the sessions at Wendyhouse, ‘Broken Bones’ and ‘Last Night’ were written. “Writing sessions usually involved three to four people. There’s the artist, the producer and one or two topliners. I came in with my Mac M1 laptop with Cubase and UA Apollo x4 interface. I’m on Cubase, because for me it’s the perfect combination of being precise and being creative. I like how they implemented MIDI, and how you can modulate every knob. You can just drag and drop into every bit of the DAW. During writing, I do the engineering myself. It’s all very simple. It’s not about equipment. It’s about creating a vibe. “Before doing writing sessions I tend to prepare some drum loops and synth sounds, mostly from Splice, and guitar sounds, so there’s an instant vibe. If needed, I can press a key and people go, ‘Oh, that’s a cool sound.’ With ‘Broken Bones’ I found the synth samples that open the track, and some loops for the beat. People in the room got excited and we built a song from these seeds, with
Louis’ lyrics referring to him breaking his shoulder when celebrating his last number one record. I played my electric guitar parts through the DI of the Apollo. I always crank it up to 11, or whatever the maximum is, and then I take off some highs to get this really roaring guitar sound. A couple of times during the sessions I tuned the guitar an octave down to make it sound like a bass.”
Away From It All The next stop took the team to the residential Angelic Studios, an hour north-west of London, to get away from the big city and write in a “safe space”. The same approach informed a week of writing at Peter Gabriel’s Real World Studios, for which Rebscher was not present. “One of the most important things for the album happened in Real World, with Mathi Wang writing and producing, and Theo and Jamie present. They wrote ‘Sunflowers’, ‘Lazy’ and ‘Sanity’, which are a little bit of a different to the other songs on the album. Mathi brought in this dreamy, trippy, more electronic sound. It was amazing to
me and at first I was puzzled, but then I understood: ‘OK, this is a very fresh side of Louis.’ I was really happy about that, and these tracks ended up being co-produced by Mathi and I. This merger of Mathi’s sonic vision and mine ended up influencing the whole album. “During these UK sessions, the idea was growing in Louis’ head of being far away to really write the album. He saw the UK sessions a bit like foreplay, though several of the songs ended up on the album. But he had this vision of going somewhere exotic and warm, to create
www.soundonsound.com / May 2026
79
INSIDE TRACK
NICOL AS REBSCHER • LOUIS TOMLINSON
Initial writing sessions took place at Wendyhouse Studio in London.
a new sound. In the end, we booked three weeks of sessions in May 2025 in elstudio in Santa Teresa, on the west coast of Costa Rica. It’s an amazing place, with views of the ocean and the jungle, an ocean bathtub, swimming pool, and cool areas to hang out, and so on. It was rainy season, and we had thunderstorms every night, with the power sometimes going, but we had beautiful sunshine during the days. “The studio has a very well-equipped recording room and a cool control room, and people were writing there. We wanted to have the choice of the professional setup in elstudio and a more homely, chill environment, so I also set up in a huge, 80 square metre room in the studio’s residential villa. I brought my Mac M1 and an Apollo Twin X interface and from elstudio a pair of Mackie HR824 monitors and a guitar and a small synthesizer. The Mackie monitors have a low-mid bump, and the villa room tons of reverb, so no way could we do a professional recording
80
May 2026 / www.soundonsound.com
there, but it was interesting how the different rooms affected the writing and the production styles. When I listened back later in my Berlin studio, I noticed
to my jazz education in Maastricht, where I learned about harmony and did a lot of ear training, which helps me hear how harmonies and melodies interact.
Nicolas Rebscher: “During writing, I do the engineering myself. It’s all very simple. It’s not about equipment. It’s about creating a vibe.” that I had subconsciously gone for different sounds and frequencies in the villa than in the studio. “The song ‘Imposter’ was written in the villa. I had cranked up the volume, so the low-mid bump of the Mackies and the space inspired this reverb-y and big-sounding bass line. I also noticed afterwards that I had placed the bass slightly higher than I would normally do. I also managed to sneak in some spicy chords into the arrangement, with harmonies you would not normally have in a pop song. This of course goes back
Improvising on the saxophone also helped me with writing melody lines.”
Both Directions In addition to ‘Imposter’, tracks like ‘Dark To Light’, ‘Jumped The Gun’ and ‘Lemonade’ were also written in Costa Rica. “‘Lemonade’ was written in the first couple of days, and it combines both the earlier and newer directions of Louis. It has the big indie guitar riff and the synth-based things. That song gave us a creative direction and it became the template for the album. At elstudio we
W E N recorded the instruments for the demos, and also Louis’ vocals. Normally I’m not obsessive about microphones and happy to use whatever is in the studio. But in this case we tried out the many microphones they have at elstudio, and we found that the Neumann U87 works really well on Louis. “Later on we re-recorded some of his vocals in Los Angeles at Nightbird Recording Studios. I wasn’t there in person, but insisted that they again used a U87. The chain included a [Universal Audio] 1176 going into a [Teletronix] LA‑2A, to take off rough edges, and I asked them to use compression gently. By contrast, the many gang vocals on the album were always recorded during the writing sessions with the writing team. We go into the writing room and just sing, sometimes with the sound blasting from the monitors. Not everyone’s on cans, because I don’t want to kill the vibe. We tend to be two metres away from the mic, so I capture a lot of room sound. I then distort the mids with the Cableguys ShaperBox and add Antares Vocal Verb, and the end result is a very midrange sound with lots of presence and room sound. I pan these vocals wide so they do not get in the way of Louis’ vocal.”
USB Solo mk2 from
Feel Factor With the writing phase of the project complete, Rebscher opted to replace and overdub many of Tomlinson’s vocals, as well as drums, bass and guitars. The latter were recorded at the Kinks’ Konk Studio in London, with drummer Jamie Houghton, bassist Alexander Grube and guitarist Michael Blackwell. “Konk has an amazing drum room. I’ve always wanted to record there. We had four days to do all 14 songs, so it was mental. They played live together in the studio most of the time, which is why you can hear some drums on some of the guitar parts sometimes. We sometimes overdubbed guitars or a bass if we felt it could be improved. I wanted to bring the energy and feel of live musicians, but I’d say that 50 percent of the guitars and some of the basses remained from the
High spec MIDI to CV converter with both USB and 5 pin DIN MIDI V/Oct & Hz/V – Gate & S-trig – 3 aux outputs – clock & DIN Sync Can be used as a USB MIDI Interface (while still converting to CV) All of the features of the Pro Solo mk3 but with the addition of USB See website for full information
SPLIT, MERGE, EXTEND OR CONVERT All the MIDI you need, right where you need it
The album’s musical direction was cemented during sessions at elstudio in Costa Rica.
Thru-5, 12 & 25
Merge-4 & 8
Split a single MIDI source into 5, 12 or 25 identical copies
Combine the data from 4 or 8 MIDI sources into a single output
LNDX & LNDR
MIDI USB Host mk3
Extend MIDI up to 1000 metres LNDX (shown) has etherCON connector
MIDI IN & OUT on DIN for your USB-only keyboards, controllers & synths – without using a computer
WE MAKE MIDI WORK FOR YOU Contact the MIDI Specialists www.soundonsound.com / May 2026
kenton.co.uk
81
ON TE ST
Laptop Computer
Apple MacBook Neo
The MacBook Neo is Apple’s most affordable notebook to date. But does the pursuit of a lower price tag sacrifice too much performance to be useful for musicians and audio engineers on a budget? MARK WHERRY
A
t a press conference in August 2007, just before the proliferation of the low-cost laptops that became known as netbooks, Steve Jobs was asked whether the premium price and design of Macs limited their adoption to a small elite rather than the mass market. He famously replied: “We can’t ship junk!”, explaining there were thresholds Apple couldn’t cross because of who they were. It wasn’t that Macs were more expensive per se — after all, in direct comparisons, Apple’s computers usually compare favourably with the competition — it was just the company didn’t compete at the cheaper end of the business.
86
May 2026 / www.soundonsound.com
However, nearly 20 years later, the circumstances are a little different — especially following the transition to Apple Silicon. With most of the Mac’s logic board components having been reduced to a single silicon package, Apple have arguably never been better positioned to product a less expensive MacBook. And so, during a three-day extravaganza of product announcements at the beginning of March, the company decided to introduce just that. Say hello to the MacBook Neo.
Wake Up, Neo! Not since the unveiling of the MacBook Air 18 years ago has Apple christened a MacBook with a new moniker, which, for a company known for being as meticulous
in its branding as it is conservative, isn’t a step undertaken lightly. Just as ‘Air’ was employed to denote a dramatically thin and light design, ‘Neo’ is a nod to the Greek word for new — rather than a reference to The Matrix or a Neapolitan sixth chord — representing something novel for the modern Apple: entry-level affordability. The enclosure is usually the first casualty of a budget design, but happily this isn’t the case here — literally. The Neo’s enclosure is made from aluminium and crafted with the same rounded edges and refined finish you’d expect from a MacBook. In fact, the Neo could easily be mistaken for a MacBook Air: the base models of both weigh the same 1.23kg, although the Neo is a whopping 1.4mm thicker! Perhaps harking back to the playful palette of the early iBook era, the Neo is offered in some vibrant finishes compared with the modern restraint of other MacBooks. Citrus is a striking mix of lemon and lime that leans more towards the latter
Apple MacBook Neo £599
Only Connect
pros • The most affordable notebook Apple have ever produced. • The A18 Pro is capable of impressive performance. • Retains the premium fit and finish you’d expect from Apple.
cons • Only available with 8GB memory. • Having two adjacent USB-C ports that support different speeds is annoying.
summary For those willing to accept a few compromises, Apple’s aggressive pricing for the MacBook Neo makes entry-level, Mac-based music production more accessible than ever before.
under studio lighting, making me wish Apple had named it Chartreuse instead. Blush is aptly named for the colour my face would turn if I was spotted with a Neo of this hue in public, whilst Indigo offers a sober alternative. However, as the key caps are colour‑matched to the enclosure, I opted for Silver with its classic white keys. The keyboard itself is similar to those found on Apple’s other notebooks, though it lacks backlighting and feels slightly spongier than the crisp, precise click of the MacBook Pro. The base model also omits the Touch ID sensor in favour of a standard Lock key, although if Touch ID is a must-have convenience, a second MacBook Neo model with the sensor is available for an extra £100. For the display, Apple have selected a 13-inch, LED-backlit Liquid Retina display with a native resolution of 2408 x 1506 pixels (at 219 pixels per inch) and it looks pretty good, despite lacking some of the premium features that often distinguish MacBook displays. For example, the
For external connectivity, the MacBook Neo offers two USB-C ports and a 3.5mm headphone jack. The absence of a MagSafe connector means charging is handled via USB, though the real frustration is that the USB ports provide different specifications. The rear-most port (closest to the hinge) supports USB 3.2 with data speeds up to 10Gb/s and DisplayPort, while the front-most port is limited to USB 2.0 and glacial 480Mb/s transmission speeds. This means it’s best to reserve the legacy port for devices requiring less power and bandwidth — such as MIDI controllers and copy protection dongles — leaving the faster port for a more functional dock capable of delivering pass-through power and an audio interface. Since the USB 3 port supports DisplayPort 1.4 (at HBR3 speeds), the MacBook Neo can drive a single external display at a maximum resolution of 4K at 60Hz. This means if you wanted to connect Apple’s own Studio Display, it will be forced to downscale its native 5K resolution to 4K, sacrificing its signature pixel density. And while few are likely to pair a £1499 display with a £599 notebook, it will at least work if you happen to have one available. However, since memory is a premium commodity on the MacBook Neo, there’s a small, hidden cost to connecting a second display. Because the 8GB of unified memory is shared between the CPU and GPU, driving an external display carries a tax of roughly 177MB. And while that only represents around two percent of the total available — not forgetting that Apple Silicon is incredibly efficient at optimising memory usage — in a larger project, 177MB might just be the amount required for that final, essential finger cymbals sample. Lastly, unlike every other Mac in Apple’s current line-up, the MacBook Neo’s headphone jack doesn’t offer the advanced support for high-impedance headphones. In practice, this means the audio output can sound a bit thin and significantly quieter when using a pair of headphones like Sennheiser’s HD600 (which have an impedance of 300Ω) without a separate headphone amplifier. Lower‑impedance studio staples like Sony’s MDR-7506 (with an impedance of 63Ω), however, will perform just fine.
MacBook Air’s slightly larger 13.6-inch display is 2560 x 1664 (at 224 ppi) and supports a 25 percent wider DCI-P3 colour space. However, since music and audio applications aren’t exactly known for their lush and vivid colour schemes, you’re not going to care about this unless you were planning to use a MacBook Neo to colour grade video. A more noticeable omission is True Tone support. This enables the display’s colour temperature and intensity to match the ambient light of your surroundings, resulting
Storage Wars The MacBook Neo is supplied with 256GB of storage, which used to be the minimum amount supplied with most baseline Apple Silicon-based Macs with 8GB memory — until these limits were increased to 512GB and 16GB. While 256GB is probably adequate for an entry-level Mac, a second MacBook Neo model is available offering 512GB storage — plus Touch ID — for an additional £100 should you need the space. Besides its limited capacity, the internal storage supplied with the Neo is slower when compared with other Macs. Blackmagic’s Disk Speed Test reported read and write rates of 1598 and 1830 MB/s respectively; whereas, the storage used in the latest M5-based MacBook Air is over four times faster with read and write speeds 6513 and 7719 MB/s. This means the Neo’s storage is more in line with the entry-level Mac mini, although the read speeds are still nearly double at 2879MB/s (with an usually lower write score of 2042MB/s). Still, while project load times will be appreciably slower on the Neo, it’s worth remembering that a read speed of 1598MB/s equates to a theoretical maximum of 11636 mono audio tracks (at 48kHz and 24-bit) — enough tracks to record Tubular Bells over 700 times!
in a warmer, more paper-like white balance. If I’m being honest, it’s probably a feature that falls into the ‘nice to have’ column and its absence is understandable at this price. Finally, although both the MacBook Neo and Air feature 500-nit displays — providing enough brightness to meaningfully support Dolby Vision or HDR10+ content — neither can match the high-peak dynamic range of the MacBook Pro’s XDR display. This flagship panel is capable of 1000 nits sustained and 1600 nits peak brightness. However, the Neo’s display remains satisfyingly luminescent for day-to-day studio work and — aside from lacking the full, cinematic HDR experience — the only time you might truly notice a difference is when working outdoors in direct sunlight, which is admittedly less of a concern in England than in California.
Take The ‘A’ Pill Unlike other Apple Silicon Macs, which feature M-series silicon, the Neo is powered by an A-series chip more commonly associated with the company’s mobile products. And while it might not be immediately obvious why Apple opted to use a chip like the A18 Pro rather than
www.soundonsound.com / May 2026
87
ON TE ST
APPLE MACBOOK NEO
Logic tracks counts.
Pro Tools tracks counts.
perhaps an older M-series variant, the choice is quite clever as it means the Neo benefits from Apple’s more recent CPU, GPU and Neural Engine architectures. When I first tested the iPhone 16 Pro (which introduced the A18 Pro to Apple’s devices in 2024), Geekbench 6 reported single- and multi-core scores of 3244 and 7625 respectively, with a Metal score of 30218. However, testing the A18 Pro in the MacBook Neo reveals slightly better results: 3497 and 8765 for the single and multi-core scores, and 31336 for Metal. This isn’t particularly surprising, since one would assume the MacBook Neo’s enclosure is more thermally forgiving than the iPhone’s smaller form factor. Although the multi-core score is relatively low, it’s worth remembering the A18 Pro is only a six-core chip, featuring two performance and four efficiency cores (alongside five GPU cores). And if you look at the single-core result, the A18 Pro actually outperforms some of the high-end offerings from AMD and Intel, which is why the MacBook Neo feels snappy in general use. Comparing Apples to Apples, the original M1 had single‑ and multi-core scores of 2347 and 8342 respectively, while the M5 (tested in the most recent MacBook Air) scores
Don’t fear the Reaper! Seen here with 35 instances of Neural Amp Modeler, one for each of the 35 stereo tracks being played back.
4195 and 17148. Therefore, even though the A18 Pro only outperforms the M1’s multi-core limit by around five percent (meaning it will offer slightly more headroom in terms of audio performance), the nearly 50 percent improvement in single-core performance enables the Neo to offer the responsiveness of a far more recent notebook than an M1-based MacBook. In fact, the choice to use an A18 Pro in the MacBook Pro isn’t the biggest limitation in terms of its performance — instead, it’s the decision to supply the system with just 8GB
of unified memory. This was the same amount Apple shipped as standard until the M4-based Macs were introduced at the end of 2024 when 16GB became the new baseline. And if the Neo had offered 16GB — perhaps even in the second model, which costs more but includes Touch ID and twice the storage (see the ‘Storage Wars’ box) — it would have been the perfect entry-level machine. However, with the costs of memory rising as I type these words, it’s not all that surprising Apple weren’t able to supply more than 8GB memory in a £599 notebook. And while having 8GB doesn’t prevent the MacBook Neo from running the usual applications like Logic Pro, Cubase Pro, Pro Tools, Reaper, and so on, it will limit both the size of projects you can undertake and the number of plug-ins — and especially those instruments with large sample libraries — you can realistically use.
Following The White Rabbit
Cubase tracks counts.
88
May 2026 / www.soundonsound.com
Beginning our musical exploration of the MacBook Neo with Logic Pro, it’s worth noting that this application has technically supported A-series silicon for the last three years, following the launch of Logic Pro for iPad in May 2023. Given the iPad version requires at least an A12 Bionic chip, which includes just 3GB memory in the iPad models, the Neo’s A18 Pro is a comparative
TECHNIQUE
Send/return Compression Combine the best qualities of multiple compressors, and you can make your lead vocal the star of the show. C H R I S T O P H E R ‘J S C H L O M O ’ H E I M E R
T
ypically, engineers use auxiliary sends for effects such as reverbs and delays. If an aux is sent to a dynamics processor, it’s usually as a way of setting up parallel compression. But it doesn’t have to be. In this article, I will explore the send-based compression technique Michael Brauer uses for processing lead vocals in his famous ‘Brauerize’ setup. Matt Houghton briefly touched on this in his October 2022 article about multi-stage compression (www. soundonsound.com/techniques/ multi-stage-compression), but here we’ll go into detail. Brauer himself credits fellow engineer David Kahne with developing and showing him this sophisticated send/return approach to compression. At first glance, it looks like your typical parallel compression setup, and in a way it is — but the key difference is: there’s no dry signal!
92
May 2026 / www.soundonsound.com
The idea is to send the lead vocal to multiple different compressors, using faders to balance their returns to craft the desired lead vocal tone. So, instead of using only one of your favorite vocal compressors, or two in series, you use them all, independently from each other. They are in parallel in the sense that they each process their own ‘mult’ of the vocal signal, but there’s no dry signal.
Float Like A Bus The best way to set this up, in any DAW, is to set up a group or bus that ‘collects’ all lead vocals and ‘floats’ them out to the different compressors. This is why I like to call it ‘LV float’, but feel free to use whatever name you like. What’s important is that the output of this group or bus is not routed anywhere. We want to ensure it does not pass (unprocessed) audio directly to the stereo bus. Next, we need to create mixer channels for the different compressors.
This diagram illustrates the basic signal flow involved in the author’s send/return compression setup.
In his original hybrid setup, Brauer used five. Now, in the box, he uses as many as seven different processing paths. In my setup, which I’ll describe here, I’m using four different processing paths. But first, let’s take a minute to understand the reasoning behind the concept. At its heart lies the fact that many compressors not only reduce dynamic range, but impart character to the sound in other ways. Some push the midrange, some put a sheen on top, some distort, and so on. Michael Brauer uses terms like “throaty” or “chesty” to describe what the compressors he uses sound like on vocals. I love this idea of attributing emotional and physical terms to gear and sound. So, when selecting your weapons of choice, try to think along those lines. I’m sure you have some favourite vocal compressors. What is it that you like about them? How would you describe their sound? What do they contribute to the emotional impact of a vocal? The idea is to find a collection of compressors that sound distinctly different from each other, where each brings something to the table that the others don’t. A good place to start, obviously, is with different compressor topologies. Sure, you could use two different 1176 clones from two different makers or a Rev A and a Rev D original. But the advantages are clearer with different types of compressors. In my studio, I settled on the following: Channel Device ProReplicas 1176 Rev A ‘blue stripe’ clone Audioscape LA-2A clone Locomotive Audio Weight Tank variable-mu Sebatron VMP4000e
Vocal 1 Vocal 2 Vocal 3 Vocal 4
Topology FET compressor valve opto ompressor valve compressor valve preamp with ‘air’ EQ
These four faders give me all I need to craft a great lead vocal tone in any genre or production. The 1176 brings midrange punch and tightness, and brings the voice right up front. The LA-2A delivers a smooth and big tone that makes the singer shine. The Weight Tank cuts through with a lot of character and fatness, making the singer “spit with muscle”, while the Sebatron is set to really crunch with its air EQ engaged, delivering a very saturated, aggressive tone.
Happy Returns Let’s look at the setup in detail. As well as the ‘LV float’ bus or group, you’ll need as many extra mixer channels as you want to use compressors. These might be aux, FX or group tracks, depending on the DAW you use. While making sure ‘LV float’ is set to no output, set up four unity gain sends from it to each of the four processing channels. Finally, route the outputs of all four processing channels to a single bus or group called ‘LV master’ or similar, to recombine your compressed sources on a single channel that can be automated, sent to effects and further processed. Although it can work fine without it, this technique works best after an initial calibration. You want to make sure each of your chosen processors is operating in its sweet spot, and especially, that they all put out the same level. The easiest way to do this is by inserting a sine tone generator on ‘LV float’ set to 1kHz at your preferred operating level (mine is 0VU = -18dBFS). With this test tone now sending to all of the processors, you can calibrate them for the desired amount of gain reduction or response and make sure that they maintain unity level at their individual and collective outputs.
The first stage in calibrating the setup is to set all the compressors to deliver the same amount of gain reduction and the same output level in response to a test tone.
I chose to calibrate the three compressors all to deliver 5dB of gain reduction with this test tone, but there’s no rules here. Due to their different topologies and ratios, the actual response in a mix is different, with the Weight Tank compressing the most on average and the 1176 the most on the highest peaks. My ‘LV float’ fader defaults to -3, though. That way, I initially start with
“The great thing about this approach is that you have different aspects of your vocal sound on different faders, which you can mute and automate.” less compression and leave myself some room to push. Come mix time, the process is simple: I have a quick listen to each of the four processors to get a feel for how they interact with the actual voice in question. Then I decide whether I want to run the Weight Tank in the cleaner ‘round’ or the more saturated ‘drive’ mode, and the Sebatron on my default -25dB gain setting or the more aggressive -15dB.
www.soundonsound.com / May 2026
93
TECHNIQUE
SEND/RETURN COMPRESSION
While listening to the mix, I play around with the faders to achieve the best vocal tone. This depends on the voice and instrumentation, but after using this setup for so long, it has become a very intuitive process. The great thing about this approach is that you have different aspects of your vocal sound on different faders, which you can mute and automate. Sometimes I run all four faders on a similar level all the way through. Sometimes I have them on wildly different fader levels and do lots of automation. Sometimes I use one of them just for the chorus. Sometimes I’ll heavily automate the ‘LV float’ channel to control the ‘push’ into the compression, sometimes I don’t touch it.
Tone Control One of the most surprising things about this technique is how it minimises the amount of EQ needed on the lead vocal track. Between the full-bodied low end of the Weight Tank, the midrange push of the 1176, the sexy sheen of the LA-2A and the aggressive high-end crunch of the Sebatron, there’s always a great sound to be found within a minute. Every time, the vocal easily gains authority and importance and will stand its ground in the mix even at a relatively low volume, which is especially important for rock music. Those of you who never heard about this technique before may have some questions. I’ll try to answer the obvious ones: Yes, I likely do EQ on the lead vocal tracks that feed the ‘LV float’ bus. Yes, I will use compression on those tracks if necessary. Yes, I do send to delays and reverbs from the lead vocal tracks. And yes, I often will have additional processing on the ‘LV float’ and ‘LV master’ channels; typically, it’s a either a de-esser or an instance of Oeksound’s Soothe 2 on the former, and sometimes a broad-stroke EQ like a Pultec on the latter. After you get the hang of it, it’s not hard to think of further options to explore. You can add more or different compressors, or a dry path on its own fader. And of course this send/return compression scheme isn’t limited to lead vocals. It also works very well on bass guitar, especially. Whatever you do, have fun experimenting and getting creative, and enjoy the feeling of manipulating emotion with faders. It’s a rewarding approach.
Complete the calibration by finding suitable default levels for the faders.
Audio Examples To illustrate the send/return compression technique on lead vocals, I prepared some audio examples, which you can find on this article’s web page at https:// sosm.ag/send‑return‑compression. The examples allow you to compare the same lead vocal sent through the send/return processing and directly to the stereo bus, both in context of the mix and in solo. Notice that they register at almost identical levels on the meter, but within the music, the processed version feels much louder and more upfront. Since the sends to reverb and delay are derived prior to the compression, the processed version also distinguishes the dry vocal more clearly from the washy effects. I kept the vocal level rather low on purpose, to show how send/return compression keeps it intelligible. By comparison, some words are rather lost in the version without the processing. All four return faders are at their calibrated default levels here, except the Sebatron which I pushed a bit in the loud bridge part. The dry lead vocal track already sounds pretty saturated, but rather dull. The Sebatron enhances the saturated character and adds the needed sheen and breathy intimacy (it also accentuates sibilance, but that’s manageable), making it the key player on this vocal. To illustrate that, I included versions with the Sebatron being at my default -25 gain setting as well as the more distorted -15 gain setting. Artist: Franzi Kruth Song: ‘Hair Longer Than My Skirt’
94
May 2026 / www.soundonsound.com
PODCASTS ELECTRONIC
PEOPLE &
MUSIC
MUSIC INDUSTRY
Warm Audio
Kerrie - Techno DJ
Bryce Young, founder and president of Warm Audio, joins Sam Inglis to discuss how the company began and how it quickly built a reputation for producing affordable studio gear inspired by classic vintage designs.
DJ and techno producer Kerrie joins Caro C to talk about her journey into DJing and production, the influences that shaped her sound and the live performance setup she now takes with her around the world.
Behind The Brand
Synth Hardware In Live DJing
ELECTRONIC
MUSIC Daphne Oram
Electronic Music Pioneer To commemorate the centenary of electronic music pioneer Daphne Oram, Caro C explores Oram’s lasting influence in a conversation with Sarah Angliss, Ian Stonehouse, Shiva Feshareki and James Bulley.
Hardware In A
RECORDING Modern Hybrid Studio
& MIXING The MixBus Interview
Producers Chevy One and Gareth Young talk about the advantages of a hybrid hardware and digital studio setup and how combining the two can streamline workflow and speed up modern music production.
Follow our channels by subscribing to the shows on Apple Podcasts, Spotify, Amazon Music or wherever you get your podcasts.
All shows are mastered to the highest quality the podcast channel will support and are in stereo.
Check out our website page for further details
www.soundonsound.com/podcasts
TALKBACK
Melody’s Echo Chamber WILLIAM STOKES
A
s Melody’s Echo Chamber, French chanteuse Melody Prochet has been making sepia-tinted psychedelic folk-rock for almost 15 years. Her latest album Unclouded is, she says, inspired by Studio Ghibli co-founder Hayao Miyazaki’s idea of “seeing with eyes unclouded”, and was mixed by revered analogue enthusiast Jens Jungkurth. At the moment I can’t stop listening to I have two in mind. There’s Water From Your Eyes, their song ‘Life Signs’, and there is Saya Gray, who’s an amazing female artist. Both are really interesting, in terms of sounds and production, like, super ‘fusion’. But they master the fusion: they travel through a song and they open lots of doors. There are a lot of common references, but somehow you don’t really hear it. The references are very digested, processed, so it’s really unique. I love them both for their amazing production skills and chameleon kind of style. The artist I’d most like to collaborate with I would love to work in the hip-hop scene. The alternative rap scene. Artists like Tyler, The Creator. That kind of insanely creative and futuristic artist. It’s really amazing, because he loves my work as well. But, I mean, he’s way too big. It will never happen. But it’s really crazy that we have these universal roots of groove and flow. Then just have amazing drum beats and these amazing ideas. I know I’m generalising, but the hip-hop I listen to is very much alternative, very avant garde in comparison to the indie music world. They don’t have, like, these ‘pop’ constraints, somehow. The production is crazy. It’s very diverse, in multiple ways: culturally speaking, there are lots of different roots from around the world. I find it very freeing.
96
May 2026 / www.soundonsound.com
The first thing I look for in a studio First, coffee! Recently we had this process where we actually went to the spaces of the musicians we wanted to record. We didn’t go into big professional studios. It’s like, you’re getting the sound of the person you want, who you know you want to work with. Nowadays, with the technology we have, you can do a lot of things yourself, kind of a ‘lo-fi but hi-fi’ style! And that was really a good move. We went to Malcolm Catto in Dalston, in his studio. It’s like entering this like crazy cabinet de curosités, with all his analogue gear and amazing machinery, and he really knows how everything works in his own studio. So it’s really cool to go there and get his sound. And, we did the same with Daniel Ögren for the guitar. We went to his studio, so everything was already set up. They get more comfortable going to that ‘treasure’ zone, you know, where you feel really cosy and confident to play at your best and give love — to tune in the key of love! So that was a really good move, I think. It was a refreshing process, for sure. And all of their studios had coffee! The person I would consider my mentor Ah! Well, I mean, the multiple places I get inspired for everything is like a mentorship. There’s a lot of philosophy in my life. I read a lot. Every producer I work with is a sort of mentor — and myself in exchange, as well, it’s like a shared mentorship, somehow. With Sven Wunder [producer of Unclouded] I wanted that consistency, his classic sound. He’s like an illusionist. He was very disciplined, somehow. And structured. I’m chaos! So it was just really good, complementary work. My go-to reference track or album I always go back to Broadcast’s Tender Buttons. It has everything, in terms of production, that I love. It has the drum sound. It has the groove. It has that
patchwork retro, futuristic, collaged kind of hip-hop aesthetic that I love. It has both modern and retro in it. It has these ethereal, witch-like vocals, a dreaminess. There’s this ‘dream logic’, where songs dissolve into each other, this fusion of a lot of styles. It’s very unique. I don’t think anything else sounds like them. It’s almost like that Kintsugi pottery, where all the pieces are broken and you reassemble them with gold. What’s strange is that they weren’t that popular when they were active. And now, a lot of people just love them so much. I mean, that’s what happens to great art sometimes. My secret weapon in the studio is I guess my ‘old trick’ is not really original, but the echo on my voice has always been really important to me, because my voice is pretty vulnerable. So it’s really important to have this little dreaminess and ‘rebound’ there, for me. So for that I’d say the Roland Space Echo. And then, you know, I really love any piece of gear that will distort reality and open doors to other worlds. So, I mean, I have a Diamond Vibrato pedal that goes very slow, so on the guitar it sounds nice. And after that, any delay! All these sorts of effects that distort or bend reality, are great. It’s like My Bloody Valentine’s [guitar string] bends; I’ll try something like that, but it always seems to come on a different instrument: for example, those bends resurfaced in the strings this time, like a memory from underground, different territories! The studio session I wish I’d witnessed Oh, yeah, [My Bloody Valentine’s] Loveless! Although, I’m not sure. I’m not sure it would be good to be around that, because it sounded like it was a hard one to get. I really wish I could see how they made their guitar walls of sound, because that’s incredibly hard to to create without
Photo: Diane Sagnier
Rotary Connection and the Electric Prunes, inspired by psych-rock and vintage music, but he modernises it and makes it something very new with the hip-hop and R&B style of vocals. It’s really interesting. I really love it. The studio experience that taught me the most Well, that would be my first record, for sure. That was, like, my ‘great escape’; finding who I was, sonically. I had made music since I was about 17. I started with my brother. We were always doing stuff in home studios, producing songs together, and then I did a first record, I went to Perth and did the Melody’s Echo Chamber record. And that was really the biggest epiphany. I found what I wanted to sound like, for sure. It was a mix of things. Realising that drums and guitar were so complementary to my vocals, because before that, I worked a lot with synthesizers — and that was great, but not very dynamic. It was a bit boring. It was about finding the right dynamic and the right ‘grit’ to complement my vocals, because they’re very ethereal. That’s what happened with Malcolm Catto drumming on this record, as well. It’s like, the perfect tension. Making sure you don’t float away with the vocals, and just vanish! So it’s about anchoring, grounding it. And I found my vocal style as well, with the echo. Also, having the home studio is a big find as well, because you can work when you want, when you feel inspired; and you can rework, and experiment a lot, explore. When you go to another studio and you have five days, I find it impossible to make great music. It’s very difficult. Or you have to practice with a real band, all the songs need to be written, and it’s a whole other process. I prefer the experimental thing. It’s chamber music! It’s, like, the inner space. The inner cave, like an invisible playground for me to let my ideas speak and be creative, let my ideas resonate and let echoes answer. It’s a very important, transmutation kind of space.
hurting people’s ears in headphones! Yeah. It’s really complex. It’s hard to get that, like, feeling; where it’s still soft, but there’s the right amount of grit. That’s really complex to achieve. There’s a lot of work behind it. There must be a lot of interesting tricks, a lot of exploring, for sure. And that bend! Really interesting. It is quite unique.
The producer I’d most like to work with Ah, so many! Inflo. He produced Cleo Sol and Little Simz — and Sault, obviously. He really has my dream sound, in terms of drums and bass, and orchestra. It’s so visionary; incredibly warm blankets and clouds of sound. Yeah, that would be amazing. I just listened to one of his last releases and I feel like he’s into bands like
The advice I’d give myself of 10 years ago Just, you know, follow where there’s a spark. Just follow the spark. The vibration. Have confidence. Trust your ear. Because my ear is the only quality that I’m sure of. I have no confidence whatsoever in so many aspects, but I have a sharp ear. And I know it brings me to solid places. So, trust your ear.
www.soundonsound.com / May 2026
97
ON TE ST
Sonuscore LUX Orchestral Strings
Sample Library Sonuscore’s latest instrument offers luxury in both sound and features.
NICK MAGNUS
R
enowned for their multi-faceted compositional tools The Orchestra, Elysion and The Score, LUX is Sonuscore’s first deeply sampled orchestral library dedicated exclusively to strings. LUX is very much a ‘no expense spared’ passion project for Sonuscore, its aim being to evoke the sound and experience of a grand Hollywood-style string orchestra playing right in front of you. There are no arpeggiators, sequencers or other generative compositional aids. Together with its sonic aspirations, LUX’s compelling attractions include performance‑enhancing features rarely, if at all, found in other string libraries.
Core Blimey All section instruments load by default, with the Main page showing a set of eight Core articulations that can be selected by keyswitches in the C0‑G0 range, or by clicking on the articulation buttons on screen. Just above these buttons is one labelled Core Articulations. This opens a drop-down menu of 12 preset collections of articulations (13 for Violins 1), each offering a selection of techniques appropriate to various musical applications such as Action Scoring, Special Textures, Shorts — you get the picture. You are not restricted to Sonuscore’s choice,
98
The Main page, showing the core articulation set. Choose from 12 preset articulation sets (13 for Violins 1), or you can create and save your own custom selections.
though; you’re free to create custom articulation sets and save them as snapshots. Just select an existing articulation on the Main page, open the Find tab and choose a different one from the extensive list. Repeat as required to replace other articulations. Completing the Main page are options to engage a simulated Con Sordino effect, a button labelled SAT (which we’ll come to later) and a +8va button to add a layer one octave above. If such doubling of players is the opposite concept to divisi, maybe it could be called raddoppiati?
Jamboree Bag To say ‘extensive’ is no exaggeration. The first violins alone offer 115 articulations! Other instruments are only slightly less detailed. If I’ve counted correctly, the second violins offer 87, violas 109, celli 108 and basses 106. Core articulations (legato, sustains, various shorts, tremolo, etc) are present for all instruments, with appropriate variations for particular instruments across the different sections. For example, only Violins 1 include tempo-sync’ed octave runs; Celli feature tempo-sync’ed triplet arpeggios. Violins 1 and Celli each provide eight types of legato; the others five or six. Fluid, natural-sounding legato is a pivotal aspect of any orchestral library; the full range of eight options are Full Legato, Whisper Legato, Legato, Adaptive Legato, Legato Acc Marc,
May 2026 / www.soundonsound.com
Portamento, Whisper Portamento and Harmonics Legato. Some are essentially variations on the Core legato, for example focusing on a particular timbral dynamic range, or by overlaying shorts that adapt to your playing for accented detaché notes. Harmonics Legato is a welcome texture not often seen in string libraries. This one is delightfully slithery, ideal for scoring scenes of insidious microbial infestation. LUX has an additional trick up its sleeve called Natural String Change Legato. When an interval would require players to change string, the ‘departing’ string resonates for a moment longer, creating a more naturalistic flow between notes, rather than immediately cutting off that previous note. It’s subtle, yet adds to the realism. As for the fluid aspect, legato transitions across all instruments feel clean, smooth and natural — subjectively on a par with the best legatos found in other libraries. Specialised performance articulations include Soft Interval Trills (any interval from a minor second to a perfect fourth),
Harmonics Tremolo, Soft Motion, Triplet Trill Figures (fixed speed, not tempo sync’ed), the very eerie Pendulum Gliss (up or down) and Slow Bends (sustains that droop threateningly by a semitone on key release). Essential articulations naturally include Sustains, Staccato, Spiccato, Pizzicato and Tremolo (although there’s no col legno) with Marcato, Sforzando, Bartok pizz, Trills, sul pont Tremolo, Flautando, Whisper Sustains and Harmonics all providing a diverse range of expressive gestures and textures.
Bridging The Gap Found in the bottom‑left corner of the GUI is a button labelled SAT. It stands for Seamless Articulation Transitioning, LUX’s solution to the problem of gradually changing from one articulation to another (typically sustaining sounds) without interrupting the flow. A common example would be changing from sustain to tremolo — normally you’d have to release the sustain notes, hit the tremolo keyswitch and start playing again. With LUX, you don’t have to interrupt the flow. Just press a keyswitch while still playing and it morphs smoothly from one articulation to the other. Light keyswitch presses morph slowly (up to four seconds) while harder presses morph more quickly — almost instantly if required. It’s certainly effortless compared to contriving crossfades between two different patches, and it sounds jolly convincing. Instruments load with SAT active by default; I’d be surprised
Sonuscore LUX Orchestral Strings £375 pros • It sounds superb. • Wide range of articulations. • Customisable articulation sets. • Seamless Articulation Transitioning. • Articulation Morphing and Combis. • Design your own Articulation Morphs and Combis.
if anyone would want to revert to classic keyswitch behaviour by turning it off!
Articulation Morphs & Combis Articulation Morphs (long or short) combine up to four sub‑articulations using the modulation wheel (CC1) to morph between them, allowing for the performance of crossfade timings with precise manual control. Slowly shifting from sustain to sul pont tremolo is a classic device for suggesting impending peril in horror movies, and sounds terrific here. The preset Articulation Combis are more straightforward, layering two sub‑articulations and playing them in tandem. For the Long Combis, modulation wheel movement controls overall volume, and timbral dynamics vary according to a layer’s set dynamic range. Dynamics for Short Combis are controlled by key velocity.
I Did It My Way Whilst the preset articulations cover many applications, sometimes you’ll need something to behave differently — the way volume responds to the mod wheel, or restricting an instrument to a specific timbral range, for example. You might need an Articulation Morph to transition right at the end of the mod wheel’s range, rather than sooner. All this and more can be customised on the Edit tab, where each layer that makes up an articulation can be edited individually. Volume response is adjusted via the graphic on the left, dynamic layer range and fade-in and fade-out slopes on the right. Volume sliders balance each layer’s level relative to the others. Short articulations include a tightness control and a choice of ordered or random round-robins. Legatos and Portamento include a transition volume control, best left in the middle 0dB position — too little results in a gappy
What Is LUX? LUX is a 70-piece string orchestra that runs in Kontakt and Kontakt Player v7.10.9 and above. It was recorded with multiple mics in a large concert hall, comprising individual patches for the five sections: Violins 1 (18 players), Violins 2 (16 players), Violas (14 players), Celli (12 players) and Basses (10 players), each section recorded in classical seated position. An Ensemble instrument is also included, discussed elsewhere in the text. An additional Singles folder contains individual articulations for each section — a handy RAM saver for when an instrument only needs to play one technique. Download size is a not inconsiderable 76GB, so cue up a favourite Netflix series to binge while the goodies arrive.
sound, too much becomes uncomfortably lumpy. Transition speed is also adjustable, with the option to let LUX vary the speed according to your playing. With all this flexibility it’s good to know that whatever changes are made can be saved as User articulations. This is powerful stuff! The caveat here is that custom articulations created for one instrument remain unique to that instrument. To make them available to others, they must be recreated instrument by instrument. Perhaps Sonuscore might consider adding the ability to copy/paste articulations’ settings between instruments in a future update.
Is It Live Or Is It Memorex LUX instruments operate in one of two modes, Live or Lookahead. For laying down tracks in a DAW, Live mode gives the most immediate response to your playing. Certain articulations understandably take time to ‘speak’ — notably shorts with soft starts (staccato and spiccato) and sustains at lower dynamics. Playing faster legato phrases accurately in time can be quite
cons • Relatively expensive. • Triplet figures not tempo sync’ed. • Ensemble instrument’s voicings somewhat unpredictable.
summary A superb-sounding ‘Hollywood’ style string orchestra with an extensive selection of articulations. Seamless keyswitched articulation transitions, manually controlled Articulation Morphing and comprehensive editing options make LUX a creative powerhouse that can be harnessed to fit your needs.
Customise your articulation sets on the Find page — shown here are 18 articulations from the first violins’ array of 115.
www.soundonsound.com / May 2026
99
ON TE ST
SONUSCORE LUX ORCHESTRAL STRINGS
tricky; a recent 1.0.1 update has improved the legato’s responsiveness, nevertheless be prepared to do some post-editing, or perhaps (shock horror) consider recording with step input for faster phrases. Lookahead mode unifies all sample start times and delays notes’ onset by 250ms, so by quantising parts and offsetting a track’s playback by -250ms, everything will play perfectly in time.
Magic Mics On the Mixer page are five microphone channels: a Full mix (curated by veteran mixer Peter Fuchs), plus Close, Decca Tree, Far and Bleed. Bleed adds that elusive element of ‘glue’ often missing from orchestral samples. In a full orchestral session, all the mics are open, with an inevitable spill from each section being picked up by the others. LUX’s Bleed samples were taken from 22 additional close mics set up in the positions brass, woodwind and percussion would occupy. Adding some of this signal to the other mics brings a sense of cohesiveness — not so much a reverb as a warm resonance bonding the orchestra together. The Full mix does not include Bleed, leaving you to add that yourself if desired. The Bleed mics also include the option to use the spill from the entire orchestra, or only that generated by the strings alone. Rounding out the Mixer page are an EQ with three fixed bands, a compressor with mix control for parallel compression, and a convolution reverb with three room sizes.
Tous Ensemble Maintenant Most libraries include an Ensemble patch, typically spreading all five sections across
The Edit page. Overall volume response, dynamic range, crossfade slopes and more can be edited for each layer of any Articulation Morph or Combi.
the keyboard, with positional crossfades from one section to the next. This is handy for quick sketching, but tonally unrealistic when sections double parts in the crossfade areas, with no choice of which instrument plays which note. LUX’s Ensemble patch attempts to mitigate this by adopting a feature employed in Sonuscore’s generative libraries (The Orchestra, The Score, etc) whereby notes of a chord are assigned to individual parts according to a specified low-to-high note order. As with the individual section instruments, there are 12 preset articulation sets, but with four keyswitchable articulations available rather than eight. You’re not restricted to the whole orchestra using the same articulation, however. You can assign different articulations to individual sections; these variations are unique to each of the four keyswitches. The GUI presents all five sections in classical seated positions, each with their own solo and mute buttons. Also present are
The five sections in the Ensemble instrument are set out in classical seated positions. Twelve preset voicings are selectable from the drop-down menu, or create your own voicings with each section’s Octave, Note and +8va settings.
100
May 2026 / www.soundonsound.com
octave dials to offset their pitch by up to minus and plus three octaves, with +8va buttons adding a layered higher octave to any section. The Note dials assign each section to a preferred position in a chord; 14 possible low-to-high options allow experimentation with different chord voicings. Twelve preset voicings are provided as starting points; you can edit these as you wish. It’s an interesting approach, although I found it to be hit-and-miss, with voicings being somewhat unpredictable, particularly if you happen to overlap notes or use the sustain pedal.
Conclusion Sonuscore join an ever-growing market for orchestral libraries focusing on realism, premium sound quality and plentiful articulations, and glamorous recording locations among their selling points. At £375 LUX might be out of reach for some, yet the price compares favourably with other similarly styled ‘A-list’ libraries. The developers’ objective was to “create something that felt as close as possible to standing on the scoring stage”. Whatever one’s preconception of what that should sound like, to these ears they have succeeded in creating something special. The sound of all five sections in full flow oozes gravitas — the word ‘noble’ comes to mind; big and warm with a moderate vibrato, bags of high-end ‘air’, clear stereo imaging and an impressive dynamic range. Add to that the creative possibilities of Articulation Morphing, the performance and workflow benefits of SAT and the innovative Bleed mic option, and it’s not surprising it has already been finding its way into top composers’ toolboxes. £ £375 including VAT. W www.sonuscore.com
Decapitator The Secret Weapon of Top Mix Engineers
From subtle to extreme, analog saturation is an integral part of great mixes. That’s why we studied all the analog classics, and painstakingly created a plug-in that brings the best of analog saturation to your studio. Choose from five different models to add analog character to every track and bus in your mix.
“Decapitator is instavibe-in-a-box.” – Fabrice “Fab” Dupont (André 3000, Shakira, Jennifer Lopez, Marc Ronson, Isaac Hayes)
Free 30-Day Trial at www.soundtoys.com
FE ATURE
Hear The Sound W https://open.spotify.com/
track/003vvx7Niy0yvhvHt4a68B
W www.youtube.com/
watch?v=gGdGFtwCNBE
Mark details how he generated the distinctive distortion on the Killers’ ‘Mr Brightside’.
Coming To The Crunch
Mark Needham • The Killers ‘Mr Brightside’ J O E M AT E R A
A
merican producer and recording and mix engineer Mark Needham has worked with many famous pop and rock artists, including Imagine Dragons, Moby, Chris Isaak, Pink, Fleetwood Mac, Blondie and Shakira. His body of work also spans movie soundtracks, television shows and commercials. Asked to dissect a notable sound from his remarkable catalogue,
“‘Mr Brightside’ by the Killers had around 24 tracks, most of which were done live, and the vocals were done live in front of the monitor speakers. In the reference mix, the tracks were summing back through eight channels on a Neve BCM10 with no EQ. I was trying to figure out ways to get saturation on the stereo bus by hitting the BCM10 really hard, and it still wasn’t doing what I had in my head. And also, I needed to have an A-D converter to get it back in to a digital format. “I borrowed a new converter from Leo’s Pro Audio, which was located in Oakland, California, made by Drawmer. I’ve never seen one before or since besides the one that I have — after borrowing it, I bought it. I don’t know if anybody else even has one still, but it was a Drawmer A2D2 converter
Mark Needham: “I was trying to figure out ways to get saturation on the stereo bus by hitting the BCM10 really hard, and it still wasn’t doing what I had in my head.” 102
May 2026 / www.soundonsound.com
that had a gain knob on it where you could really drive it into saturation and distortion. There was also some limiting compression going on from the simulated tape distortion, too. And I really saturated the crap out of it! I tried to go back and remix the song four or five times, and had told the band, ‘Maybe that’s just way too distorted and everybody’s going to hate it,’ and each time the band said ‘Actually, we like the reference mix.’ “Then another engineer that was working with the band spent three days mixing it through his console, and the band still said that the slammed bus really just kind of glued the whole track together in a very unique way. So, we came back to my original reference mix and that is what you hear on the record. After the recording was done, I retired this piece of gear.”
RECORDING & MUSIC TECHNOLOGY SHOW
Saturday 27th June 2026 Featuring all the popular pro-audio brands Come and get hands-on with Microphones, Monitors, Synthesizers, Audio Interfaces, Mixing Consoles, Outboard, Software and much more. University of Westminster Harrow Campus, London. 20 minutes out of central London between Wembley & Harrow on the Metropolitan tube line.
www.gearexpouk.com A
EVENT
ON TE ST
Digitally Controlled Variable‑mu Compressor
Wes Audio ngTubeComp M AT T H O U G H TO N
T
he last time I reviewed a Wes product (the Pandora multiband compressor, in SOS February 2026: https://sosm.ag/wes-audio-pandora) I concluded that “when it comes to plug‑in remote‑controlled analogue hardware, Wes Audio are currently the ones to beat.” The couple of months I’ve spent putting their ngTubeComp through its paces has done nothing to sway me from that view: this is a truly impressive dual-channel variable‑mu compressor, whose virtues are by no means limited to the sophisticated digital control. As with all Wes products, this one’s development clearly started with a focus on the sound and performance of the analogue circuitry that lies at its heart. In short, the ngTubeComp sounds every bit as smooth, polished and enticing as you’d hope any compressor costing the best part of £4k would, and the digital control is the icing on the cake. Or rather, the custard on the pudding (I can take or leave cake, but I hate icing!).
The Way Of Wes Most SOS readers will be aware of Wes Audio’s general approach: they’ve
104
May 2026 / www.soundonsound.com
Wes have brought a modern touch to bear on the most vintage of analogue compressor types — and it’s about far more than their celebrated system for plug-in remote control.
developed an impressive and extensive range of digitally controlled analogue hardware that can be used like ‘regular’ outboard, courtesy of a well thought‑out physical control set, but can also be operated remotely using a DAW plug-in — the control is bidirectional, with the hardware’s controls updating the plug-in’s and vice versa. All units can connect to a computer over USB but some, including this one, can be hooked up over Ethernet to a router, allowing you to place the unit further away from the computer. Parameters can be automated and recalled instantly with your DAW session, and while the earliest plug-ins were laid out to resemble the hardware as closely as possible, more recently Wes have looked more to software’s strengths, with dedicated controls for the hardware’s hidden/ secondary functions, and features like inverse input- and output-level linking, node-style EQ displays, and clear metering. More on that side of this particular product in the separate box.
The range includes 19-inch rackmount devices and 500-series modules, and all the hardware includes useful features not normally found on analogue gear. Switchable A/B/C settings and banks of user presets, for instance, facilitate extensive comparison/recall even without using the plug-in. Dual-channel devices can also be switched instantly between stereo/M-S and dual-mono configurations. But in some of the larger rackmount devices like the ngTubeComp and the ngTubeEQ I reviewed in SOS December 2024 (https://sosm.ag/ngTubeEQ), Wes take things still further, with touch-sensitive push-turn encoders providing access to secondary functions, and precise settings displayed on a small, yet crisp and clear context-sensitive colour LCD screen.
Connectivity & Components A 3U 19-inch rackmount device, the ngTubeComp’s case extends 25cm (a shade under 10 inches) behind the rack ears. Power is delivered to the internal
supply through a transformer whose inputs present to the outside world on a rear-panel IEC14 inlet, which is accompanied by a mains AC voltage selector and fuse compartment (a spare fuse is included). Also on the rear are four XLR sockets, arranged as separate I/O pairs for each channel, plus the aforementioned USB-B and RJ45 Ethernet sockets. Lifting the lid requires the removal of six screws, and when you do that your attention is inevitably drawn to the chunky pair of panel-mounted Carnhill output transformers, and the six valves on the main audio circuit board (a pair of Svetlana 6N1P dual triodes and others by JJ Tesla). The valves warm the air a fair bit, of course. Nothing excessive for a valve device, and the top and both side panels are ventilated, but I’d still suggest leaving a little space between this unit and any above it in the rack. Elsewhere, a combination of traditional through-hole and surface-mount components is used. Separate vertically mounted boards host each channel’s controls and the global controls, and horizontal ones cater for power and data connectivity. The layout and construction appear immaculate, inside and out.
Hardware Controls Turning our attention to the substantial control panel that protrudes from the front of the folded-steel case, the layout puts two
identical control sets for the channels either side of a central section. That central section has backlit buttons catering for the channel configuration (stereo, M-S or dual mono), parameter linking across both channels (which can preserve any offset you’ve dialled in between channels), mute/bypass, preset switching and an on/off switch. Some of these buttons have hidden secondary functions. The channel bypass button, for instance, can be pressed and held to mute that channel’s output, a status indicated by the two bypass buttons flashing red instead of their usual green/unlit state. Similarly, the Parameter Link button, which links the two channels’ control sets (usefully preserving any offset you’ve already dialled in), can be pressed and held to access the 100 onboard preset slots. Full details about that sort of thing are explained clearly in a well-written 66-page PDF user manual. Each channel is treated to a generous nine push-turn rotary encoders, along with two backlit buttons: one to engage a limiter, the other to toggle between feed-forward and feedback modes. Feed-forward compression is unusual in a variable‑mu compressor, since it can lead to unpredictable and often undesirable outcomes, but Wes say they’ve developed a custom compression curve to address that. There’s also a moving‑coil gain-reduction meter (0-16 dB) for each channel, flanked by dual 10-LED ladder
Wes Audio ngTubeComp £3999 pros • First and foremost, it sounds sublime. • Feed-forward mode is stable and genuinely useful. • Digital control is perfectly executed. • Total recall and plug-in automation support.
cons • None of note.
summary All analogue processing, with all-digital control. It’s a winning combination that results here in probably the most versatile variable‑mu compressor I’ve ever laid hands, eyes and ears on — it’s great as a compressor, but is as much a controllable colour box as it is a dynamics processor. Does it get any better?
meters, one for the input level and one for the output level (each scaled from 0-26 dBu). All of the encoder knob caps are touch‑sensitive: lay your fingers on one and not only does the surrounding LED ring light to show you the current setting, but the precise parameter value is displayed on the screen. That, along with the tiny steps for most parameters (eg. 0.25dB increments for the input gain), and the clever use of multi-LED lighting/dimming around the controls, helps hugely if you want to make very precise adjustments quickly.
A peep inside reveals the warm glow of six Svetlana and JJ Tesla valves used for compression and, along with the Carnhill transformers, a switchable valve output stage.
www.soundonsound.com / May 2026
105
ON TE ST
Neuzeit Instruments Drop MIDI Controller
108
May 2026 / www.soundonsound.com
It’s time to disregard any preconceived notions you may have about MIDI controllers... SIMON SHERBOURNE
T
he most common conversation-starter at gear shows is, ‘have you seen anything cool?’ and at Superbooth 2025, the response usually included the Neuzeit Drop. The Drop is a MIDI controller with a killer feature: it syncs to (and generates) clock and can fire off parameter snapshots in time with your performance. This is such a compelling idea, encapsulated in the name, that you could easily miss that the Drop is a phenomenally capable controller even without it. The most common controllers these days are USB-based peripherals that offer a set of encoders and faders for use with software instruments or DAWs. Many focus on Ableton Live control, with scripts for dynamic mapping and minimal setup steps. Then there are VI controller pairings like NI’s Komplete Kontrols and Arturia’s Labs. However, with renewed enthusiasm for hardware synth and drum machine rigs, we’re seeing standalone hardware control coming back in things like Novation’s Launch range and Akai’s APC64. The Drop is very much in the standalone camp, designed as a control hub for hardware and software alike, with a manual (but assisted) mapping workflow for creating custom layouts rather than prescribed templates or software intermediaries. This, along with the snapshot functionality, sync’ed operation and morphing suggest the Drop is focused on live performance, but I found it also brings new life to a studio setup or even a single paired instrument.
Surface Details The Drop is a low‑profile, all metal‑unit that looked at home next to the OXI One MkII sequencer that was sharing the review bench. It has a mixer-like layout with eight ‘channels’, though the endless encoders only relate to the faders if you map them that way. You’ll also see a circular screen and encoder, and a ring of buttons that aids in navigation and Drop timing. The button grid above — primarily used for snapshot management — is the only part of the build that feels slightly less than premium, with the wobble inherent in a single rubber mould design. It functions perfectly though and everything else feels absolutely top tier. All connectivity is along the back so the Drop takes an unintrusively slim strip of
desk real estate. There’s an AC adaptor, but you can also take power from a sufficiently assertive USB-C source like a laptop. There are two USB-C ports, both of which are available for MIDI as well as power, and can operate in host or device modes. Four pairs of TRS ports provide MIDI connections, and are blessed with A/B format switches. Having still not got around to labelling all my MIDI adaptors, I offered up a silent prayer to the Drop’s designer Thomas Hutman every time I flipped one of these. There are two CV inputs and outputs, whose main purpose is to connect various types of analogue clocks, triggers or resets. The outputs can be tied to panel controls to generate CV up to 5V with 12-bit resolution, but Neuzeit recommend using a MIDI CC to CV converter module if you want to integrate your modular in a more comprehensive fashion.
Blank Slate Projects are typically started from one of two initialised states: DAW Init or Clean Init. The former assigns all controls to a device called DAW via USB port 1, and gives each control a unique CC assignment. You’re then all set to use the MIDI Learn function
Neuzeit Instruments Drop £699 pros • Deep, sophisticated standalone MIDI control. • Merging and management for complex MIDI rigs. • Performance-centric snapshots.
cons • You need to be prepared to put in some pre-work to get the best results.
summary Deviously clever performance control centre that transforms improvisation on stage or in the studio.
slots, so can actually be a complex macro. My first move was to map encoders to the Performance controls on the RYTM, which are themselves macros — instant fun. Once mapped, you have an array of detailed behaviour options, such as defining the value range, direction, sensitivity and response curve. You can even set a curve option that starts at the mid-point to create a DJ-style crossfader or high-to-low filter. The multicolour encoder LED rings are highly configurable. They can show a linear value from the left, a centre-anchored value like a pan, a simple dot indicator or stepped discrete values between 1 to
“The snapshot functionality with its unique, live-savvy Jump and Drop tricks takes things to another level.” with software or a workstation like an MPC. Clean Init provides a blank canvas ready for you to define mappings directly on the Drop. Either way is just a starting point from which you can build your own config. Mappings and other settings are made using a scroll and click menu system, which is deep but surprisingly quick to get around. The first step is to declare the devices in your setup and how they’re connected. In my first explorations I just connected an Elektron Analog RYTM via TRS. The Drop arrives with the open‑source Pencil Research MIDI device database on the SD card, from which I chose the RYTM. This doesn’t assign any controls, but it means any assignments you make can be chosen from a descriptive parameter list, without having to look up CC settings in a manual. On entering mapping mode the Drop entreats you to ‘Push, Turn, Move’ a control to target it. Each control has eight mapping
25 steps — ideal for things like an octave control or waveform selector. There’s also a MIDI feedback option. Devices like the RYTM output control values when tweaking encoders on the device; the Drop can listen to these to keep its displays in sync. There’s a logical limit to this when mapping multiple parameters to one control, or when recalling presets on a device. While the encoders don’t have text displays, moving them brings up their name and value on the display. Touch‑sensitivity would have been really helpful here, but probably pushed the price up significantly. Next I assigned the Drop’s faders to the channel level controls on the RYTM by choosing the predefined parameter across multiple MIDI channels. The faders are not motorised but use the same visual indicator system found on some high-end mixing consoles: when the target’s value is different from the physical faders, up/down
www.soundonsound.com / May 2026
109
ON TE ST
NEUZEIT INSTRUMENTS DROP
lights show which way you need to go to pick up the value. After this I thought it would be cool if you could instantly reset the encoder — a trick I’d just found on the new MPCs. A quick look in the manual and it turns out you can use the push button function on the encoders to do exactly this. An encoder’s button can map to an independent parameter, or take the internal action of resetting its encoder’s value to the left, right or centre position. Perfect! With just these few mappings I’d transformed the experience of performing with the Analog RYTM, gaining permanent access to mixer controls, all eight performance macros and track filters, freeing the onboard pads to stay in Scene mode. It was like combining the best parts of using an Elektron and Roland TR drum machine.
We need to talk about the Drop’s Beat Cycle concept to make sense from this point. In Play mode the display and its ring of eight buttons represent a looping window of musical time that can be set between 1 and 32 bars. During playback this cycles away indefinitely. In Jump mode you can use the buttons to choose a Quantise amount that will affect the timing of Jumps to execute. A line running around the inner part of the Cycle display indicates the fade time set by the knob. In Drop mode, tapping a snapshot arms it to trigger the next time the beat cycle ends, which is at the 12 o’clock position on the display. You can nudge the cycle position manually by tapping any of the eight ring buttons, either advancing or delaying the point at which the Drop will happen. When using Drop, snapshots are executed instantly at the Drop point.
Jump & Drop
Performance Enhancer
The state of all controls on the Drop can be stored as a snapshot by tapping the Save button followed by any button on the 4x5 grid. There are 20 banks, giving you 400 snapshots slots in a project. Snapshot recall is performed in either Jump or Drop mode: Jumps are manual recalls, while Drops are cued to fire in time with your clock. Jumps can be instant or faded, set by the knob at the top left of the panel. Fully anticlockwise gives instant recall, turned to the right you get progressively longer parameter morphing. A third option is manual fading. If you hold the Jump button and choose a snapshot, then turn the knob fully left you pick up manual control of morphing between the current and snapshot states. Pretty amazing!
There’s a ton more depth and nuance to these features that we could get into, but the utility and scope is probably obvious to anyone interested in electronic music performance or arrangement. By consolidating all your key sound‑shaping tools into one place that has total recall, you can go mad with improvised changes and builds then flip back to a ‘stable’ position. You can use snapshots as song sections, including mutes and level changes if you’ve mapped them. Multiple things can change or reset at once, which is hard to coordinate manually. Snapshots don’t have to contain everything though. Between tapping Save and choosing a slot, you have the chance to exclude controls with an anticlockwise twist
For readers not in the Southern Hemisphere, the rear of the Drop is home to two USB‑C ports, an SD card slot and, on 3.5mm sockets, two channels of CV I/O and four channels of MIDI I/O, the latter with a switch to flip between the A and B TRS MIDI standards.
110
May 2026 / www.soundonsound.com
or downward movement on the faders. So you could just store the settings for a single instrument, your effects, or just faders. When you do this, the set of controls is automatically captured as a group into one of eight slots that you can then reuse. It makes sense then that you can trigger multiple Jumps together, or schedule multiple snapshots to Drop at the same time. In fact you can have Jumps happening at the same time as a Drop is counting down, so you can automate a build then drop. This is a level of complexity that you might never need, but it leaves the door open to develop some mad skills if you want to up your live game.
Traffic Control In a typical set up there’s more than one or two synths and the Drop. You probably have a sequencing source, a keyboard and clock to consider. I had the OXI One sequencer hooked up playing a MicroFreak and one melodic channel on the Analog RYTM, and was sending clock to the RYTM to sync its own internal sequencer for drums. At other times I added a DAW element, either my laptop or an MPC. The Drop is equipped for these scenarios, able to manage, route and merge MIDI between your devices. Everything connected to the Drop gets set up as a device in the project, even if it’s only a MIDI source. There’s then a Device Merger function that you can enable on each destination device, patching MIDI from up to four sources. Everything is actively merged and channelised where needed. For bonus points, you can mute/unmute MIDI to each device independently, and transpose notes, then link these functions to buttons and encoders on the Drop. You could be sequencing devices from multiple places and set up unified muting control for everything on the Drop. Or you
could have a master the Drop from keyboard in your rig another source. and use MIDI muting One of the main to select which things you can do synth(s) you’re playing with these is work at any one time, with another Drop without interrupting unit, either as an sequencer sources. extended surface For the clock, or a linked pair for the Drop can be the two performers. generator or chase More exciting for another device. Other my studio-based devices will then use case was clock from the Drop. sending the This was immediate Drop MIDI and solid when my notes to trigger laptop or MPC was Jump recalls. running the show, I experimented but took a couple with doing this of beats to stabilise both to link with the OXY. Most Jumps with Live likely the workstation scene launches, sources are and to automate generating stationary Jumps from the clock for quick starts, timeline in my The Drop measures 275mm x 220mm x 38mm and weighs a smidge over 1.5kg. which the Drop also DAW. In fact does if it’s the master. I leveraged the MIDI One thing I miss from my DAW when feedback system to record and play back mode for dipping into a layer. The screen working laptop-free is per-device sync control data (and manual Jumps) from the and screen buttons are also now used for adjustment. There are excellent dedicated Drop in a dedicated track in Pro Tools — direct layer selection. devices like E‑RM’s Multiclock, but the a bit of a hack but a fun proof of concept. Structure & Automation Drop can also do this for you. You can Wrapping Up nudge clock sync independently for each Beyond manual performance, you can USB, TRS and CV output, compensating hand over some organisation of a set or If it feels like I’ve barely paused for breath for response delays, audio path latencies, arrangement to the Drop using Chains describing the wealth of features on the or any other cause of sloppiness. or remote triggers. Chains are like using Drop you’re right. It has an unusual depth a drum machine’s song mode with and versatility for a 1.0 product — something Layers snapshots as the building blocks. A Chain is that normally comes with feedback and a playlist of Jumps and Drops assembled on iteration after launch. The beauty of this is The original concept of the Drop included the screen. For Drops you can choose what that the functionality feels intentional and two surface layers (A and B) selected the cycle length is set to after it’s performed. native to the hardware, compared to the with dedicated buttons. Layers have For Jumps you set the morph time. You can feature creep and increasingly esoteric independent sets of mappings, but you even link Chain loading with bank recall (or button combos you often end up with on can choose to keep a single set of faders. less well thought out products. Two layers seemed like a solid design vice versa) and organise views for songs But the real test of a performance decision: I figured if you’re mapping more or sections. controller is, do you actually use it? Does it than that for a live set you’re probably Program Changes can also be end up more trouble than it’s worth? Does overcomplicating things. However, once triggered by snapshot recalls. The Drop it actually add something or get in the way? I saw the power of mapping my entire RYTM is clever enough to let you set a variable The Drop passed all these tests. In the dim to the surface — and how useful the Drop pre-delay for Program Changes so that past when I was doing laptop gigs with was going to be in the studio — I started your gear has a chance to get its act Reason and an Oxygen 8 I dreamt of having thinking that I’d like more layers so I could together in time for the big moment. something like this, even just to control have a top performance layer (or two) with If Ableton Live or Bitwig Studio are software let alone a complex hybrid rig. more detailed pages to drill down to. part of your arsenal, the Drop even has The snapshot functionality with its unique, The most recent version of the Drop a clip launch mode that turns the button live-savvy Jump and Drop tricks takes firmware I had moved to an eight‑layer grid into a 4x4 launcher with clip stops things to another level, which, with a bit system, with several operating mode on the fifth row. A second view provides of groundwork, deliver huge fun for both options for the layer buttons. You can scene launching. Obviously this is quite you and an audience. stick to the original option of flipping limited but could be really useful if you just between two layers, or use the buttons need to launch stems or scenes. to page. Or you can keep one tied to one What I was more intrigued by were £ £699 including VAT. layer, or even choose a momentary ‘peek’ the modes for triggering and controlling W www.neuzeit-instruments.com
www.soundonsound.com / May 2026
111
SPOTLIGHT
LUKE WOOD
T
he resurgence of large, peformance-oriented synths shows no signs of slowing down, and along with the reissues and modernised classics from the usual suspects, there are plenty of newer companies throwing their hat in the ring, too. Whether you’re after a meticulous recreation of early greats or an imaginative new approach — or perhaps something that does a bit of both — there’s almost certainly a current product that will deliver the goods. So, lets take a look at some of the biggest and best keyboard-equipped polysynths that are on the market today.
Arturia PolyBrute 12
The latest iteration of Arturia’s flagship polysynth doubles the voice count of its predecessor from six to 12, and promises to deliver a level of playing expression that rivals acoustic instruments. The PolyBrute 12’s signal path begins with a pair of the company’s analogue Brute oscillators and a sub-oscillator, which are followed by a dual analogue filter section that houses a continuously variable 12dB/oct Steiner filter and a Moog-inspired 24dB/oct ladder; the filters can be arranged in series or parallel, and a master cutoff control makes it possible to control both simultaneously. VCF, VCA and mod envelopes are joined by three LFOs, and a stereo effects sections offers an array of built-in reverbs, delays, choruses, flangers, phasers and more. Like the original PolyBrute, the instrument’s mod matrix is presented on a grid of top-panel buttons, which also double up as an interface for the onboard sequencer. As for expressive control, a ribbon placed above the 61-note keybed offers touch control over any mod matrix destination, while a Morphée controller below the pitch and mod wheels combines an X/Y pad with a spring-loaded bed that offers Z-axis control, allowing for simultaneous control of up to three mod destinations. The instrument’s standout feature, though, is the FullTouch keybed. The patented design takes the concept of polyphonic aftertouch a step further, offering expression control
116
May 2026 / www.soundonsound.com
High-End Polysynths
We head into the world of synthesizer megafauna to round-up some of the best polysynths on the market today. throughout the entire movement range of every key, allowing a level of control that Arturia say is unmatched by any other synth. Regular channel and polyphonic aftertouch modes are still present. Those working in the studio benefit from PolyBrute Connect, a Mac/PC app and plug-in that replicates the instrument’s entire top panel and offers remote control and patch management. £ £3429 including VAT. W www.arturia.com
include everything from pitch-shifting and distortion to delays and reverbs. The more recently released Leviasynth picks up where the Hydrasynth left off, packing in eight oscillators, 13 envelopes, five LFOs, 18 digital filter modes, a four-pole analogue filter and an onboard three-track sequencer. In addition to their Polytouch keybeds, both the Hydrasynth Deluxe and Leviasynth feature a ribbon controller and a set of powerful macro controls. £ Hydrasynth Deluxe £1701, Leviasynth £2799. Prices include VAT.
W www.ashunsoundmachines.com
ASM Hydrasynth Deluxe / Leviasynth The Hydrasynth Deluxe essentially places two Hydrasynth’s into a single instrument, and pairs the dual engines with a 73-note polyphonic aftertouch keybed. It can be configured either as a single 16-voice instrument or run in split or layered modes, and each part features independent stereo outputs. Each engine is equipped with three oscillators, dual Wave Mutants (which allow the oscillators to be processed with FM, wave stacking, PWM and all manner of other trickery) and a pair of filters that can be arranged in series or parallel; each oscillator offers a choice of 219 single-cycle waveforms, and two of the three offer wave-morphing. Modulation is comprehensive to say the least, with no fewer than five LFOs and five DAHDSR envelopes joined by a 32-slot mod matrix that offers 35 sources and 191 destinations, while a collection of onboard effects
Clavia Nord Wave 2
Along with their acclaimed stage pianos and organs, Clavia Nord also have some all-out synths in their line-up. The current flagship is the Wave 2, a four-part multitimbral instrument that combines virtual analogue, wavetable and FM synthesis with sampling and boasts 48-voice polyphony. A Layer Control section on the top panel offers quick access to each of the synth’s four parts, and includes a dedicated set of faders for setting the balance between layers; it’s also possible to arrange them across the keyboard using up to three split points. Each layer benefits from its own EQ and effects processing, and it’s possible to group layers together so that they can share the likes of envelopes, filters, effects and the onboard arpeggiator. The Wave 2’s filter is a multi-mode affair that offers
low-, band- and high-pass modes along with a Moog-style ladder, and modulation is taken care of by an LFO that offers triangle, square, sample & hold, sawtooth and inverted sawtooth waveforms. As for effects, the instrument includes a selection of delays and reverbs with dedicated top-panel sections, along with a multi-effects section that offers tremolo, pan, ring modulation, chorus, ensemble and vibe processors. £ £2199 including VAT. W www.nordkeyboards.com
Expressive E Osmose 61
As well as functioning as a powerful MPE controller, the Expressive E Osmose is also a fully fledged standalone polysynth, and now comes in a larger 61-key size. Powered by Haken Audio’s EaganMatrix engine, the instrument offers up to 24-voice polyphony and is capable of creating a whole host of modern and vintage sounds. The engine features five oscillators/waveshapers along with noise sources, five multi-mode filters, a pair of filter banks that provide physical modelling, granular and additive synthesis capabilities, and a collection of effects that include delays, reverbs and modulation. The instrument itself features a set of six macro controls that govern key parameters for each preset, while in-depth tweaking and patch design can be carried out using a Mac/PC editor application. The standout feature of the Osmose is of course its keybed, which despite looking like you’re average piano-style action, features a side-to-side rocking motion on every key that generates additional control data. The system allows the instrument to offer the sort of expressive control that can be obtained from the likes of the ROLI Seaboard, but without the learning curve that comes with moving away from a traditional keyboard. £ £1899 including VAT. W www.expressivee.com
Frap Tools Magnolia
Described by Frap Tools as “an analogue FM synthesizer that’s actually fun to play”, the Magnolia aims to bring the sound and feel of the company’s Eurorack modules to the polysynth market. It brings together
Frap Tools Magnolia some of their most prized circuit designs, placing them in an eight-voice, bi-timbral instrument equipped with a high-quality 61-note Fatar keybed that boasts velocity sensitivity and polyphonic aftertouch. Its two oscillators feature distinct designs: the first takes an East Coast approach and offers PWM, while the second draws its inspiration from the West Coast and features linear through-zero FM, wavefolding and flip sync. As for filters, the Magnolia includes 18dB/oct high-pass and 24dB/oct low-pass offerings — both are resonant and offer linear FM, and benefit from a pre-filter saturation circuit. Three loopable DAHDSR digital envelopes are present, along with three digital LFOs with continuously variable waveforms, and a hands-on mod matrix includes 16 sources and 38 destinations. A key feature is Frap Tools’ Polymove function, which creates random control signals for every voice (and every destination within it), making quick work of creating everything from subtle variations to “complete chaos”! Some built-in effects are included, too, with two global effects slots offering a selection of choruses and delays. £ £3685 including VAT. W www.frap.tools
rear-panel outputs. Its three oscillators can each function as a PPG-era wavetable, a modern high-resolution wavetable, an analogue-modelled waveform or a sample. Thanks to a built-in Wavemaker tool, users can create up to 64 custom wavetables — it’s even possible to use the instrument’s audio input to generate a wavetable from any audio source. A Dave Rossum-designed 2140 analogue low-pass filter is joined by an SEM-style state-variable filter, and it’s possible to run both in series. The 3rd Wave’s mod matrix features 16 assignable slots, 12 fixed slots, 27 sources and 114 destinations, and assignments can be made on a per-part basis, meaning that each of the instrument’s four layers have access to their own mod matrix. There’s an onboard pattern-based sequencer that’s capable of governing notes, songs and parameter changes, and allows users to arrange up to 24 patterns, each containing up to 32 measures. As for effects, the 3rd Wave is kitted out with a healthy selection of reverbs, delays and modulation processors, and each of its four parts can be assigned with any two effects at one time. £ £4825 including VAT. W www.groovesynthesis.com
Melbourne Instruments Nina
Groove Synthesis 3rd Wave
The Groove Synthesis 3rd Wave brings the sound of the much-loved PPG Wave series into the modern age, and offers a combination of classic and modern wavetable synthesis along with analogue modelling and sampling. It’s a 24-voice instrument that boasts four-part multitimbrality, and allows users to layer the independent parts or split them across keyboard zones; sequencing and effects can be applied on a per-part basis, and all four parts are treated to their own level and pan controls, as well as dedicated
Just as we were going to press, we discovered that Melbourne Instruments’ keyboard-equipped Delia is no longer in production, leaving the Nina as the sole polysynth in their line-up. Featuring 12 voices and four-part multitimbrality, the Nina pairs two analogue VCOs with a digital wavetable oscillator, and includes a Moog‑inspired four-pole ladder filter. An A/B Morph function makes it possible to create two variations of a patch and seamlessly blend between them — or find a completely new state that sits somewhere between the two. The star of the show for many will be Melbourne’s motorised pot system, which allows all of the Delia’s rotary controls to jump to the appropriate position with patch changes. Along with the obvious recall benefits, the system’s magnetic‑field‑based design means that pots can be endless, stepped or detented depending on their assignments. Since
www.soundonsound.com / May 2026
117
SPOTLIGHT
H I G H - E N D P O LY S Y N T H S
launch, the synth has been updated with a powerful sequencer that boasts four independent polyrhythmic and polyphonic tracks with up to 64 steps, and offers per-step parameter locking. Melbourne Instruments have also informed us of another upcoming update that will introduce the Macro Oscillator found on the Delia, kitting the Nina’s oscillator section out with 45 waveform models created using the code that powers Mutable Instruments’ Braids Eurorack module. £ £3650 including VAT. W www.melbourneinstruments.com
Moog Muse
Moog describe their latest polysynth as “a melting pot of classic Moog analogue circuit designs paired with forward-thinking digital controls”. True to that statement, the Muse draws on a number of the company’s iconic instruments, combining two Voyager-derived oscillators with a saturating mixer, dual transistor ladder filters and discrete stereo VCAs inspired by their early modular systems. In addition to the usual array of waveforms, both oscillators feature FM and hard sync, and are joined by a dedicated modulation oscillator that can function as a per-voice modulation source that’s independent of the mod matrix, or be pushed into audio rates and act as a third oscillator. Two envelopes and two assignable LFOs are present, along with a dedicated per-voice pitch LFO that’s been optimised for creating vibrato effects. The Muse boasts a knob-per-function layout, and includes a fully featured arpeggiator and a powerful 64-step sequencer that’s capable of storing 16 banks of 16 sequences. £ £2999 including VAT. W www.moogmusic.com
Novation Summit
Novation’s flagship polysynth brings together a pair of the company’s praised Peak desktop modules and pairs them with a 61-note keybed and an extended set of hands-on controls and some handy extras such as new filter modes. The Summit features 16 voices and offers bi-timbral operation, which can be configured in layered, split or dual modes — the
118
May 2026 / www.soundonsound.com
Novation Summit
second part can be made available on its own pair of rear-panel outputs. Three FPGA-based New Oxford oscillators deliver analogue-style waveforms along with FM and wavetable synthesis, and users can ‘draw in’ their own oscillator shapes using the Novation Components software. The digital oscillators are followed by a pair of analogue filters that offer low-, band- and high-pass operation, along with a dual mode that makes it possible to combine both filters and have them governed by the same cutoff control; the section is also equipped with pre- and post-filter analogue distortion. The Summit’s VCAs are also analogue, and there’s a third analogue distortion circuit that sits between the VCAs and digital effects. As for modulation, there are four LFOs (two per-voice and two global), and the synth’s mod matrix offers 16 slots per patch, with each slot supporting two sources per destination. The Summit also includes onboard chorus, delay and reverb effects, which are all accessible via dedicated top-panel controls. £ £2469.99 including VAT. W www.novationmusic.com
Oberheim OB-X8 / OB-6
The Oberheim name carries a lot of weight in the synth world, and the brand made an official return in 2022 after founder Tom Oberheim regained the rights to the name. Their first release, the OB-X8, is an ambitious instrument that recreates and builds upon the sounds of the company’s celebrated OB-X, OB-Xa and OB-8. A pair of discrete oscillators based on the SEM and OB-X deliver a classic Oberheim sound, while the filter section offers a number of configurations: a two-pole low-pass SEM-style filter found on the OB-X; a two- or -four-pole CEM3320‑based design from the OB‑Xa and OB‑8; and high-pass, band-pass and notch modes from the original SEM. The company say they have meticulously matched the envelope
responses so that they match each original OB model, and the synth’s factory preset collection includes a full set of sounds from the OB-X, OB-SX, OB-Xa and OB-8. Thanks to a recent firmware update, the OB-X8 now boasts a binaural mode that pans voices hard left and right for true stereo operation, simultaneously selectable waveshapes for each oscillator, independent VCO 1 and 2 level modulation and full support for MPE. Since the revival of the Oberheim brand, the OB-6 that was originally released by Dave Smith Instruments (and later became part of the Sequential line-up) has now officially returned home, and can once again be purchased sporting an Oberheim badge! £ OB-X8 £4799, OB-6 £3279. Prices include VAT.
W www.oberheim.com
Roland Jupiter X
There are few synths that have achieved the status of the Roland Jupiter-8, and you’ll have to part with an eye-watering amount of cash to get hold of an original example. Thankfully, Roland’s current flagship promises to faithfully recreate the sought-after classic, as well as reproducing sounds from the likes of the Juno-106, SH-201 and XV-5080, along with a selection of the company’s vintage drum machines and modern RD pianos. The Jupiter X is powered by Roland’s ZEN-Core engine, which combines virtual analogue and PCM synthesis and offers up to 256 voices. Up to five parts can be layered — four are dedicated to synths while one is reserved for drums — making it possible to create complex patches that blend the sounds of the company’s classics, or split them across different keyboard zones. A Jupiter‑8‑inspired top panel offers a wealth of hands-on control in a familiar layout, while more involved sound design can be carried out using a software editor. There’s also an AI-powered I-Arpeggio system that’s capable of creating drum parts, bass lines, chords and arpeggios based on the user’s playing — it works across all five parts simultaneously, and the results can be exported to a DAW session. £ £2179 including VAT. W www.roland.com
Sequential Prophet-6 / Trigon-6
The latest iteration of Sequential’s classic promises to combine classic tone with modern design, pairing a discrete analogue signal path with digital control. The Prophet-6 features a pair of oscillators and a sub-oscillator per voice, with both offering continuously variable waveshapes that move from triangle through sawtooth to pulse, while a dual filter section houses a four-pole resonant low-pass and a two-pole resonant high-pass filter. Amp and filter ADSR envelopes are joined by an LFO with five waveshapes: sine, sawtooth, reverse sawtooth, square and random (sample & hold). A more recent addition to the Sequential family is the Trigon-6, which was the last of the company’s instruments to be designed by their late founder Dave Smith. Key distinctions from the Prophet-6 include its three-oscillator architecture and a ladder filter than can be switched between two- and four-pole modes. Both the Prophet-6 and Trigon-6 feature Sequential’s Poly Mod system, which allows for some complex per-voice modulation trickery, and a Vintage knob designed to introduce instabilities and mimic the tone of older instruments. There’s also the Prophet Rev2, a hybrid bi-timbral synth that comes in eight- and 16-voice versions and combines the sound of Sequential’s older instruments with a more modern modulation system that’ll be welcomed by keen sound designers. If it’s purely the vintage Sequential sound you’re after, then the reissues of the Prophet-5 and Prophet-10 offer faithful recreations of the company’s early instruments, but with some modern bells and whistles such as velocity sensitivity, aftertouch and MIDI support. £ £2199 including VAT. W www.sequential.com
UDO Audio Super Gemini
UDO Audio’s Super Gemini essentially packs two of their Super 6 instruments into a much larger bi-timbral instrument, and gives each of them their own set of dedicated top-panel controls. It employs FPGA-based digital oscillators that produce an array of analogue-style waveforms and are capable of cross and ring modulation;
the first includes a Super mode that offers either seven-voice unison analogue waveforms or one of 16 single-cycle waveforms, while the second features a pair of sub-oscillator options and hard sync. The filters are an analogue affair (there’s a resonant low-pass and a high-pass), as are the VCAs, and each layer is kitted out with two LFOs, two envelope generators and an 8x8 mod matrix. There’s also two 24-bit stereo effects engines offering chorus
UDO Audio Super Gemini
and delay, along with two arpeggiators and 64-step sequencers, which, again, are available on a per-layer basis. The Super Gemini features the company’s acclaimed Binaural mode, where the left and right channels throughout the entire signal path are each fed by their own independent voice. As such, the synth can operate either with 20 voices, or 10 ‘super’ voices — when opting for the latter, it’s possible to control each channel separately to create all manner of stereo imaging effects. A 61-key, semi-weighted Fatar keybed boasts velocity sensitivity and polyphonic aftertouch, and some additional hands-on control is provided by a custom ribbon controller placed above the keys. And if the onboard expressive capabilities still aren’t enough, the instrument boasts full support for MPE controllers. £ £3595 including VAT. W www.udo-audio.com
programmable synths with a choice of 18 filters, nine LFOs, three envelopes (amp, pitch and filter), a three-band EQ and an insert effect slot. A 128-note FM-X engine then provides an eight-operator FM synth that expands on Yamaha’s legendary DX7, and offers everything from classic 1980s sounds to cutting-edge EDM patches — it’s even possible to import DX7, DX7II, TX802 and TX816 patches using a free web application. Lastly, a 16-note AN-X engine offers yet more analogue emulation, and includes PWM, ring modulation, FM, waveshaping and wavefolding. Polyphony has been increased compared to the previous Montage series, with the latest flagship boasting up to 400 notes across its three engines. A generous selection of onboard effects includes everything from reverbs to bit-crushers, along with a number of analogue-inspired offerings powered by the company’s Virtual Circuit Modeling technology. A set of top-panel controls provide hands-on access to key parameters, while Yamaha’s Super Knob control makes it possible to assign up to 128 parameters to a single physical dial. The Montage M8X also features a built-in 4-in/10-out USB audio interface. £ £4140 including VAT. W www.yamaha.com
Yamaha Montage M8X
Yamaha Montage M8X
Sitting at the top of Yamaha’s synth range is the Montage M8X, a powerhouse of an instrument that combines three synth engines with an 88-note hammer-action keybed that features polyphonic aftertouch. Its 128-note AWM2 (Advanced Wave Memory 2) engine uses a mixture of sampling and synthesis to deliver everything from realistic-sounding acoustic instruments and drums to analogue synth tones; each of the engine’s 16 parts contains eight
www.soundonsound.com / May 2026
119
TECHNIQUE
Is plug-in overload stifling your creative output? Here’s a way to take back control!
SOS For Artists tags both effect and instrument plug-ins by category — this can help find suitable options when you want to prepare a restricted ‘tool palette’ for a new project, as described in the main text. THE SOS TEAM
B
ack in the days when analogue recording ruled the roost, an artist might release a new project like an album only once every year or two, to much fanfare and with a real sense of occasion. By today’s standards, they worked with limited sets of tools too, and it meant that artists and engineers could learn the nuances of the kit they had on the job. That way, they acquired a depth of understanding about their tools that translated into confidence in their decision making, as well as skill and speed of operation. They knew instinctively which instruments or tools to reach for if results were needed quickly, and which held interesting potential for those times when workarounds or creative experimentation were required. Today, we face a different set of pros and cons. There are many more tools accessible to us, and the positives are obvious: we have access for relatively little cost to pretty much whatever capability we can dream of. But there are also drawbacks. We live in a world where social media and streaming culture mean we feel under constant pressure to create and release new content. And the sheer number of plug-ins in our DAWs means we can easily become distracted from our creative goals by an overwhelming number of choices. We might start a new session feeling energised, with a crystal-clear creative intention. But we soon become stuck in an endless cycle of auditioning sounds, comparing countless underused plug-ins, and tweaking every available parameter just to see what it does. Our
122
May 2026 / www.soundonsound.com
time melts away, and we soon realise we’ve failed to make real progress — having nothing to show for our efforts but another unfinished project...
Limits Of Creativity! One of the most effective tactics to counter this is to impose similar limitations to those we endured in days gone by. This might seem an odd point to be making in an SOS For Artists workshop — after all, half the point of our service is to provide you with lots of useful tools, and access to one of the world’s biggest sample libraries! But you don’t have to throw out the baby with the bathwater. Specifically, it can be a good plan to restrict the number of sounds and samples you use each time you embark on a new project. The point of this dose of self-discipline isn’t to stop you acquiring and exploring new toys and sounds altogether. Exploring them can be fun and rewarding. Rather, it’s to help you take control of the tools you have, so they don’t end up controlling you. In slashing the number of decisions you need to make, you can keep a razor-sharp focus on achieving your creative goals and finishing your projects. You spend more time on the most important things — composition, arrangement or sound design, say — and less obsessing over which is the best-sounding distortion plug‑in!
Theory Into Practice What might this look like in practice? Let’s take as an example a writing session for a new track. You’d first define a small, focused selection of instruments, processors and effects. These form your
core sound palette. You could choose an entirely new sound palette, or stick with a tried-and-tested set you know well, just adding in one or two less familiar tools to give you a safe, defined space to satisfy your urge to explore and tweak. Once you’ve made your selection, though, commit to using only those tools for the duration of the project. You can always set different limitations for the next one. For instance, you might choose to use just one or two primary virtual instruments, along with a core keyboard or piano sound, a limited set of effects (reverb, delay, compression, EQ, saturation) and a set of essential utility plug-ins. You might decide on the effects and processors by thinking in terms of functions such as: • C orrective tools (eg. EQ, de-essing, noise reduction, pitch correction); • Tools specifically for processing vocals or live instruments; • Any spatial effects your idea might require; • Creative processing, to add character.
Mother Of Invention Yes, it will inevitably feel a bit restrictive at first. But it’s important to understand that the idea isn’t to bind you in a creative straitjacket. Rather, it’s to ensure your tools help rather than hinder the pursuit of your creative goals. In fact, stick at it, and as well as finding that you work quicker and finish more tracks, you’ll almost certainly discover that it actively sparks creativity. It’s often said that “necessity is the mother of invention”, and when we had fewer instruments and less gear at our disposal that was definitely the case. We
were often forced to invent new ways of using the tools we had to achieve our goals — and since we tended to dive so deeply into each one, we often had a good feel for what they might be capable of. Similarly, if we limit ourselves to a pre-defined set of tools today, we’re far more likely to explore them properly and understand their full potential. You can learn things by testing tools ‘offline’ of course, but real, in-depth understanding of tends to come to us over time, through using them in real-world contexts. Using a compressor when you’re mixing a track, for example, forces practical decisions about how to dial in the desired tone and gain reduction, using the controls on offer. The same goes for tailoring synth sounds to meet the needs of a particular track. And with that deeper understanding comes the potential to discover unconventional uses that can lead us to distinctive ideas — and perhaps, ultimately, a stronger personal signature sound. Another trick that can keep you on your creative toes is to deliberately choose some tools/sounds that are less familiar to you, or aren’t commonly associated with your genre. That can often lead you to a fresh, interesting result.
Mixing It Up A similar approach can work well in other scenarios too, and not least when you’re mixing: using the same core effects and processors across multiple tracks naturally leads you to an in-depth understanding of the tools, introduces some sonic consistency and ultimately simplifies the job. Historically, for example, we’d work
with multitrack tape, a mixing desk with a standard channel strip, and a select few outboard processors and effects units. This meant there’d be a limited number of tracks to contend with at mixdown, and since we’d have a good feel for the console EQ The site also contains videos to help you learn more about individual plug-ins on a range of before deciding to use them in your project. material, we’d only bother the questions of balance, depth, energy and clarity. It investigating alternatives can also help you avoid problems caused by excessive if we’d reached its limits. processing — it encourages you not to stack effects Likewise, we’d send tracks to on top of each other in search of ‘something more’, reverbs and delays set up on and instead develop a tendency to refine your existing aux busses, rather than put choices so they deliver what you want them to deliver. different ones on every sound, Conclusion and we’d learn to program the reverbs and delays to get The modern music production world offers us an the desired result out of them, unprecedented range of tools, and building our rather than scrolling through collections can be fun. But if your approach to using endless presets. them lacks structure and self-discipline, it can be all Working with a familiar set too easy for this abundance to hinder your progress of processors/effects like this towards what matters most. Ultimately, the goal is not reduces second-guessing and to use as many tools as possible, but to use the right speeds up decision-making. tools effectively — and to finish the music you start. You develop an instinctive Because, at the end of the day, that’s the only way understanding of how your we can create a meaningful body of work. tools respond, and spend By limiting your toolkit on a per-project basis, you less time auditioning multiple reduce decision fatigue and increase your chances of options for the same task, ending up with some tangible musical output. At the leaving you free to focus on same time, rotating that tool selection will encourage the musical decisions in mixing: continued exploration and development.
Taming The SOS For Artists Collection! In SOS For Artists, there are now over 60 plug-ins available for download and there’s much more yet to come. While the platform’s offerings are updated regularly, we deliberately curate the collection to keep it focused. You shouldn’t need to use all the tools on any given project, so categorising them by task and selecting a focused set of tools for each project can be very useful. Handily, the platform already divides them into Effects, Instruments and Production Tools, and they can be filtered further by selecting preferred plug-in manufacturers, or the primary function from the drop-down lists. New plug-ins are added often in SOSFA — but to help keep you focused on the music, we’d suggest only using one or two new ones at a time in any given project.
With a great piano from Spitfire Audio, Rhodes emulation from AAS and orchestral strings from Sonuscore, plus a collection of synths and samplers from Arturia, UJAM, GForce and more, there are plenty of options for getting started. Some of our favourite processing tools are emulations of classic compressors, EQ’s and lo-fi effects. But again, rather than wade through them all at once, we recommend throwing just one or two new ones into the mix for any given project. This way, you’ll have a chance to really discover what each one has to offer relative to other tools. You can take a deeper look at each plug-in directly on the platform before making your selection and downloading it, of course: just check out the spec page and watch the overview videos in the Plug-ins area.
www.soundonsound.com / May 2026
123
Studio Pro
TECHNIQUE
The Channel Overview is a powerful and efficient new way to access key parameters. ROBIN VINCENT
O
ne of the most shocking new features in Fender Studio Pro 8 is the Channel Overview. Shocking, because of the dramatic way it asserts itself across the front of your DAW. Once you get over the shock of this unbending window, however, you’ll find that it’s actually very useful. It’s superb for giving you a clear overview of what plug-ins are processing the chosen channel, and it’s also brilliant for giving you immediate access to the most important plug-in controls without you having to open the whole plug-in GUI. What’s perhaps less obvious is that it can be tailored to show whatever it is you want to see...
Channel Overview Overview The Channel Overview window can be accessed in a number of ways. You can double-click a track header in the arrangement window, or a channel strip in the mixer console. There’s a dedicated button for it on the bottom right of the screen, next to where you find the Console, Browser and Editor buttons. Oddly, you can’t open it from the main View menu, which lists absolutely everything else that can be opened in the entire DAW. I should also note that the precursor of the Channel Overview, the Channel
126
May 2026 / www.soundonsound.com
Editor, is still available from the little icon that looks like a hand of playing cards on a channel strip. While the Channel Overview does a better job of giving you access to the loaded plug-ins, the Channel Editor is still the only place where you can edit the signal routing between plug-ins and create Macro controls over parameters. The Channel Overview window appears as a tall strip across the bottom of the screen in the same position as the Console and Editor. As with the other windows, it doesn’t have to stay there. If you click the little diagonal up arrow in the top left corner of the window, the Overview will detach and become a floating window. As a floater, it can be resized horizontally, but shows no interest in any vertical changes. You can return the floating window to its original position by clicking the diagonal down arrow on the top right of the detached window. On the left, you have a friendly arrangement of the channel strip. This includes the level fader with metering, mute and solo buttons, input gain and polarity, panning settings, input/output routing, track notes and a track icon. There’s also an icon next to the fader that looks like two playing cards, which brings up the insert, send and cue mix sections like you’d find in the Channel Editor.
The Channel Overview can be opened using a dedicated button at the bottom right of the screen, or by double-clicking a track header in the arrangement window, or a channel strip in the mixer console. By default, it appears along the bottom of your screen. For ‘native’ Studio Pro plug-ins (like Pro EQ and Compressor), you get all the key controls plus graphical elements, so you can edit EQ and compression graphs directly within the Channel Overview.
Along the bottom, you get what looks like the very bottom part of the mixer console. The channel identifiers are clickable and work a bit like tabs, giving you quick navigation to the Channel Overview for each channel. To the left of the tabs are a couple of options. You can expand the bottom section to show the channel icons. You can add a little level meter to that if you wish. There are buttons to reveal the input and output channels, and you can bring up the Audio Setup window by clicking on the I/O button.
Main Window The main section of the Channel Overview displays compact versions of the inserted plug-ins. You can add plug-ins in a number of ways. At the top left is an Inserts selection menu button. The little down arrow opens a list of channel presets covering all sorts of instrument and mixing scenarios. These will load up combinations of native Fender plug-ins as effects chains. You can create and save your own preset effects chains using native and third‑party plug-ins.
the main window from the Browser. If you do drag them in, you get the opportunity to decide where they go. You can drop them before or after existing plug-ins, or they can replace what’s already there. With any other method, they will appear at the end of the effects chain. If you’d like to rearrange them after you’ve dropped them in, you can do so by clicking and dragging the name tags that appear in little bubbles along the top of the main window. When you load a Fender native plug-in, the Channel Overview presents it in a sort of simplified way. It pulls in any kind of helpful graphical part and a few key parameters. So, for instance, with the Pro EQ you get the graphical display where you can use your mouse to place the nodes. With the Compressor you get the visual display and nearly all the parameters on knobs. It varies depending on the plug-in, but more often than not, you get what you need without having to open the full plug‑in editor window. However, it gets really interesting when you load a third‑party plug-in.
Third Party
If you’d like to load plug-ins individually, or access your library of third-party plug-ins, click the ‘+’ next to the down arrow to open a list of all the plug-ins in your system. You may notice there’s a larger ‘+’ symbol in the middle of the main window. This does exactly the same thing; click on it to bring up a list of plug-ins. Alternatively, you can drag plug-ins into
For their own plug-ins, Fender have curated exactly what they want you to see, and it is fixed and unchangeable. With third‑party plug-ins, Fender take the first eight parameters and throw them up onto a generic control panel. These are likely to be useful controls, but they’re not always going to be the right choices. Fortunately, we have a way to change this. Plug-ins in the Channel Overview have a little menu that lets you do a few things. You can access it by right-clicking the plug-in panel or by clicking the little down arrow that appears
You can also undock the Channel Overview and have it as a floating window, where it can be resized horizontally (but not vertically).
www.soundonsound.com / May 2026
127
Studio Pro
TECHNIQUE
CHANNEL OVERVIEW
Unfortunately, the Edit Parameters customisation is not shared between the Channel Overview and Micro Controls, so you have to add them and edit them separately.
Routing & Splits
You can change which parameters are available in the Channel Overview by going into the Setup Edit Parameters menu.
when you click the plug-in’s tag bubble at the top of the Channel Overview. There are a number of options common to both native and third-party plug-ins. These include Edit, which brings up the main GUI; Rename, which lets you rename the plug-in; Favourite, which adds a star to the plug-in in the browser and lets you find it under the Favourites tag; Store Preset, which lets you create an effects chain preset; and finally Disable and Remove, which seem obvious enough. Third-party plug-ins have another option, curiously called Setup Edit Parameters. This opens a window, similar to the Macro Control Editor, where you can choose which parameters to include in the compact plug-in editor from a list of available parameters. You can add and remove whatever you like, and also drag them to rearrange their order. You can add more than eight controls, but only the first eight will be accessible, so there’s no reason to do that. The changes stick around, and so the neat thing to realise is that by setting up your Edit Parameters you
128
May 2026 / www.soundonsound.com
are creating a custom interface for your plug-ins that will be there every time you load them up. This saves you clicks, GUI load times, and possibly even processing power.
Micro Edit Parameters There’s another version of these custom parameters that already existed in Studio One, and that’s the Micro controls. These are found in the effects sections of the console channel strips, the Channel Editor, and the Inspector.
There are a couple of parameters that are only available in the Channel Editor but which also have an impact on the Channel Overview. We’re talking about the signal routing between plug-ins. In the Channel Editor window, you can click on the little alien tripod icon at the top left to open the routing editor. In here, you can arrange your plug-ins and create splits for parallel processing and explore new avenues of creative processing. The splits are reflected in the Channel Overview, but there’s no indication of how that’s actually working, or which plug-ins are acting on which branch of a split, let alone a nested split. However, if you double-click any of the Splitter panels, it will bring up the Channel Editor routing window and you can work it all out from there.
Going Forward The Channel Overview came as quite a shock to the old Studio One workflow, but I’ve found it a really
“More often than not, you get what you need without having to open the full plug‑in editor window.” It’s where your plug-ins appear as a little stack of names. In previous versions, you could expand the native plug-ins to show a stack of editable plug-in parameters, known as Micro Controls. In Fender Studio Pro 8, the Micro Controls have been extended to third-party plug-ins and, as with the Channel Overview, the visible controls are editable in exactly the same way.
useful space to work with. It feels like there’s more development to come: deeper ways to connect it to the Channel Editor, and maybe the two windows can be merged into one Overview/Editor. It might also be useful to pull in a custom control panel for virtual instruments, or be able to show the Macro control panel. It could become a lot more versatile yet...
SUBSCRIBE & SAVE TABLET | WEB | REPLICA | PRINT PLUS BONUS PDF
SMARTPHONE COMPATIBLE
1 ICONIC MAGAZINE
6 GREAT WAYS TO READ IT
SCAN ME
TO SUBSCRIBE
TABLET - PHONE - WEB - PDF - REPLICA - PRINT All this for less than the price of a Coffee+Pastry each month!
www.soundonsound.com/subscribe • Go DIGITAL - get 12 monthly Tablet issues + all locked Web articles + monthly Full Issue PDF download the day the issue goes live. • Go PRINT+DIGITAL - get the best of both worlds and save over 50%.*
iOS / ANDROID
Every Digital sub includes a 5‑device licence to our App: mix and match across iOS/Android Tablet and Smartphone.
ONLY READING SOS IN PRINT?
Choose our full Print+Digital bundle for unlimited 24/7 access.
* The 50% discount offer is based on the UK retail price of the Print magazine, Tablet and Web subscription when sold separately. Subscriptions can be cancelled at any time and you will receive a pro-rata refund for all outstanding issues.
Pro Tools
TECHNIQUE
Pro Tools’ time-stretching options enjoy both corrective and creative uses. JULIAN RODGERS
T
he ability to chage the playback speed of audio has always been a powerful tool for corrective work as well as for more creative applications. To use these options confidently, it helps to understand how Pro Tools handles time internally, as different tools respond to session tempo in different ways. This article looks at the basic principles involved before exploring some practical and creative uses of time‑stretching. Pro Tools works with two different types of time reference: absolute and relative. In Pro Tools terminology these are known as sample-based and tick-based time. Sample time is absolute: a second is always a second, regardless of tempo, whereas ticks (beats) are relative, meaning that the duration of a beat depends on the current tempo. You can see this reflected in the rulers at the top of the Edit window. Rulers such as Samples, Timecode and Minutes:Seconds are absolute, while the Bars|Beats ruler is tempo-based and therefore relative. As the session tempo changes, the bars and beats move, but the absolute rulers do not. In the Edit page you’ll see tracks display either a blue clock or a green metronome symbol, for sample‑ or tick-based modes, respectively. This distinction becomes important when using time-stretching or tempo-based tools, as some operations follow tempo changes while others remain fixed. It’s worth keeping this behaviour in mind as we look at the different ways Pro Tools can change playback speed.
Offline Versus Real Time The simplest way to experiment with time-stretching is to use a rendered, offline process. If you want to make a clip longer or shorter directly on the timeline, the Time Compression/ Expansion Trim tool is the quickest option. You’ll find it by clicking and holding on the standard Trim tool and selecting the TCE variant from the pop-up. This uses whichever time-stretch algorithm is currently selected in Pro Tools’ preferences, and allows you to lengthen or shorten a clip simply by trimming it. Elastic Audio, on the other hand, doesn’t render a new file; rather, it applies time-stretching in real time at the track level, allowing clips to conform to session tempo changes. It can be enabled for an
130
May 2026 / www.soundonsound.com
The Time Shift AudioSuite plug‑in lets you experiment with playback speed. It uses an older algorithm, but the artefacts have a certain charm!
entire track, and individual clips can then be adjusted using warp markers. This makes it particularly useful while writing or arranging, when the tempo of the session may still be evolving.
Session Tempo In Pro Tools, the session tempo can be controlled in two different ways. In Manual Tempo mode the entire session runs at a single fixed tempo, while enabling the Conductor track allows the tempo to follow events in the Tempo ruler, making it possible to create tempo changes throughout the session. This distinction becomes important when working with Elastic Audio or any tick-based material, as tempo changes in the ruler will affect playback speed whenever the Conductor track is active. If you need to set a tempo quickly, a useful shortcut is to tap it in manually.
With the session in Manual Tempo mode, click in the numeric tempo display in the transport window and tap the T key in time with the music. Pro Tools will calculate the tempo from your taps and set the session accordingly, which can be a fast way to match an imported loop or guide track. Switching between Manual Tempo and the Conductor track can also affect how external material is previewed. For example, when auditioning sounds from the Splice sidebar, previews follow the current session tempo if the Conductor track is enabled. If you have been experimenting with very fast or very slow tempo changes, this can make previews sound unrealistic or unusable. In this situation, temporarily switching back to Manual Tempo mode will allow you to hear previews at the fixed session tempo instead, making auditioning much easier. Understanding how tempo is being controlled, and whether tracks are following
it, makes it much easier to predict the results when using time-stretching tools, especially when working with Elastic Audio.
Need For Speed Another useful way to experiment with playback speed is with the Time Shift AudioSuite plug-in. It uses a very old algorithm, which makes it easy to create characterful half-time and double-time variations, something which works particularly well on drum loops, where even the fairly crude time-stretching in Time Shift can produce interesting results. For more pristine results, use X-Form or zplane Elastique. Select a drum loop on the timeline and open AudioSuite / Pitch Shift / Time Shift. Set the mode to Rhythmic, which is designed for percussive material, and change the speed to 50 percent before rendering. Because the clip is now being played back in half the time, the result will sound like a double-tempo version of the original loop. Using the Time Shift algorithm rather than one of the higher-quality Elastic Audio modes often introduces noticeable stretching artefacts, but with the right material these can sound pleasantly raw or retro. Now try the opposite. Undo the change, reopen Time Shift, and set the speed to 200 percent before rendering. This produces a half-time version of the loop, stretching the audio to twice its original length. With this more extreme setting the artefacts become much more obvious, but that can be part of the appeal, especially with lo-fi or electronic material. Time Shift also includes a Varispeed mode, which behaves differently
from normal time-stretching. Instead of keeping the pitch constant during time‑stretching, Varispeed links pitch and speed together in the same way as analogue tape or vinyl would. Switch the mode to Varispeed and try the same 50 and 200 percent settings again. The faster version will play back at a higher pitch, often giving a character reminiscent of early jungle or sped-up breakbeats, while the slower version drops in pitch and can sound heavy and atmospheric. Varispeed mode is easy to overlook, but it can produce results free from the gritty time‑strech artefacts of other algorithms, and it becomes even more flexible when combined with tempo-based stretching, which we’ll look at next.
Ch-Ch-Ch-Ch-Changes Varispeed becomes even more interesting when you use it with tempo changes. Because tick-based tracks follow the session tempo, you can use the Tempo ruler itself as a kind of processing tool, creating extreme pitch and timing effects that would be difficult to achieve any other way. To try this, place a sample — a vocal works particularly well — onto a tick-based track with Elastic Audio set to Varispeed. Make sure the Conductor track is enabled, then expand the Tempo ruler by clicking the disclosure triangle next to the word Tempo. This reveals the tempo graph, which can be edited using the Line tool. With the Line tool set to either straight or freehand mode, draw in some exaggerated tempo changes. For example, you might ramp the tempo sharply down, then back up
Elastic Audio works in real time, forcing clips to conform to the session’s Tempo track. Here, Elastic Audio is set to Varispeed mode, in which the pitch and duration of the audio are inextricably linked.
again, or create sudden jumps between very slow and very fast values. Because the track is tick-based, the clip will move with the tempo, and with Varispeed enabled, the pitch will change along with the playback speed. The result can be anything from subtle tape-style slow-downs to extremely warped, almost granular-sounding effects. This technique will affect the whole session, so it’s often safer to experiment away from your main arrangement. One approach is to work further along the timeline, or even in a separate session, so that drastic tempo changes don’t disrupt other tracks. Once you have the sound you want, you can render or bounce the result and bring it back into your main session as a normal audio clip. If you find the tempo graph hard to control, the ‘+’ and ‘-’ zoom buttons to the right of the Tempo ruler make it much easier to scale the display so you can draw precise changes. With extreme tempo moves, small adjustments can make a big difference, so it’s worth zooming before editing. Used carefully, this method allows you to manipulate multiple tick-based elements at once, making it a powerful tool for both sound design and creative transitions, even if the results can sometimes be unpredictable. There is a lot more that could be explored here, and the brief discussion of tempo, timebases and stretching modes was only intended to provide enough background to make these techniques predictable. Once you understand how Pro Tools treats absolute and relative time, you can start to use time-stretching and pitch‑manipulation tools in more creative ways rather than just for correction. Elastic Audio is often thought of purely as a timing-fixing tool, but as the last example shows, it can also be pushed much further. Extreme tempo changes, Varispeed processing, and even the artefacts produced by lower-quality algorithms can all add character when used deliberately. What might normally be considered a problem can just as easily become part of the sound. Experimenting with these approaches, especially away from your main arrangement, can lead to results that would be difficult to create any other way, and is a good reminder that in Pro Tools, changing playback speed is not just a repair technique, but a creative one as well.
www.soundonsound.com / May 2026
131
Logic Logic
TECHNIQUE
We check out Logic’s new Synth Bass Session Player.
Sequenced Bass offers 303-style bass lines, with the LFO defaulting to Alchemy’s Filter 1 cutoff. S I M O N PAT E R S O N
L
ast month we explored Logic Pro 12’s new Synth Keyboard Session Player. This time, we’re looking at its companion, the Synth Bass Session Player. Being part of Logic’s Session Player ecosystem, they share similar workflows, so we’ll focus more on where they differ. At its core, the Synth Bass Session Player is a virtual performer designed to automatically generate bass lines using synthesizer sounds. It integrates well with Electronic Drummer and, like the Synth Keyboard Player, defaults to using Alchemy, though of course you can swap this for any Logic or Audio Unit synth. As with all Session Players, the best starting point is to populate the Chord Track to allow Synth Bass Session Player to generate musically appropriate bass lines that follow your chord sequences. It can also lock to the rhythm of a chosen track or adapt to arrangement markers, allowing patterns to develop dynamically across your song. From there, you can refine the performance by adjusting complexity, changing rhythmic styles, and selecting alternative patterns from the player’s library. One major advantage of Session Players is the speed with which they produce context-aware patterns, but when you need more control you can easily dive into the piano roll to add all the nuance you desire. To get started, create a Session Player track and choose Session Player
134
May 2026 / www.soundonsound.com
/ Bass Player. Then, in the Details pane, select one of the three styles: Pump Bass, 808 Bass, or Sequenced Bass. Each offers distinct rhythmic behaviour and character, but they share a common control set. In the Session Player editor, Complexity, Intensity and Articulation shape the feel of the bass line. Complexity determines how busy the pattern is, from simple root notes to more elaborate rhythmic figures, whilst Intensity controls velocity and note density, adjusting the overall energy. The Main tab’s X/Y pad shifts tonal behaviour: move beyond root notes and add more tonal choices by moving the puck left to right, whilst up/down changes octave range. Once you’re happy with the feel, you can dig deeper into parameters affecting range, filters, LFOs, articulation, glide and slide.
Pump It Up Pump Bass produces a driving, pulsing bass line that locks in with the downbeat, whilst emphasising offbeats in a side-chain-like swell. Normally, this effect would require routing a kick drum track to a compressor’s side-chain input. Here, it is handled through a dedicated Pumping parameter which, under the hood, uses real-time region-based automation that controls MIDI CC11 (Expression) to ramp the loudness of each note, as if reacting to a four-on-the-floor kick. You can adjust the effect’s shape and amount, and even
re-target the modulation to other CCs such as filter cutoff. And, as noted last month, you can now view and edit notes and automation directly without converting to MIDI: open the piano roll (P), show automation (A), then switch the lane from Velocity to Expression. By contrast, 808 Bass aims for the deep, sustained sub-bass style associated with the Roland TR‑808 and commonly used in hip-hop and adjacent genres, where kicks and bass blur into a single low‑frequency voice. As such, you can expect long notes, occasional slides and pitch changes, and an emphasis on weight rather than rhythmic detail: bass that’s more felt than heard. In place of Pumping, we have Repeats, Triplets, Slide and LFO controls, helping shape the expressive glides and subtle movement typical of 808 lines.
Everybody Needs A 303 Sequenced Bass takes inspiration from classic step-based patterns, and is more akin to the Roland TB-303. It’s the most melodic and rhythmically varied of the three styles, with syncopated patterns that can evolve over time. It’s a brighter sound, richer in harmonic content than the 808 and thus giving the bass more prominence in your track. After choosing a rhythm from the Patterns menu and tweaking the X/Y pad, you can explore a wide range of articulation by balancing note length with slide amount/time. A short note length of around 10 creates a punchy staccato; push to the right for a more fluid, legato movement. In the LFO tab, the default modulation target is Alchemy’s Filter 1 cutoff. Lowering the cutoff and boosting the resonance immediately pushes the sound toward classic 303-style squelch. Combining this with Filter 2 introduces even more possibilities, from clean sub-heavy shapes to gritty, overdriven textures, depending on filter type. As well as the usual processors and effects Alchemy offers for compression, reverb, delays and so on, there’s fun to be had by engaging with the Transform Pad, for wild, morphing timbres. Overall, the Synth Bass Session Player functions well as an artificially intelligent collaborator within Logic Pro, allowing you to quickly create and tailor synth bass lines to your project.
THE WORLD’S BEST RECORDING TECHNOLOGY MAGAZINE
“I admire Sound On Sound as the survivor amongst the professional media. I knew the people that founded it, I read technical articles and have even lifted some of the articles and applied them to a few of my own designs! Long may you last!” The Late, Great Rupert Neve Electrical engineer, founder of Rupert Neve Designs.
W W W.S OUNDONS OUND.COM
Q
Does the slope of a shelving EQ matter?
When processing a stereo drum bus, does it matter what slope I set a low shelf EQ too? I have both 6 and 12 dB/octave options available. Mike P via email
Matt Houghton, Reviews Editor Well, obviously the different slope will have a different sonic effect, since it means you’re boosting or cutting different amounts at different frequencies. For high‑/low‑pass filters in particular, a steeper slope can result in an audible ‘bump’ — a resonant peak (think of it like the Q or bandwidth setting of a regular bell EQ band) that may or may not be helpful. For example, it can be used to add weight to a kick drum. In some EQs you can adjust the bandwidth of a shelf for a similar effect. But other than its direct effect on the source, the choice of slope for any shelving EQ or low‑/high‑pass filter shouldn’t have a huge impact unless you have bleed from other instruments on the recording, such as when working with a multi‑miked drum kit. Let’s assume we’re talking analogue‑style minimum phase EQ (linear‑phase ones present a different set of pros and cons). The steeper the slope, the greater the phase‑shift the EQ introduces, although the amount of boost/cut will cause greater differences to the phase. Whatever the cause, if you change the phase of the bleed relative to the same source captured in other mics, the multiple tracks involved can interact differently when they’re mixed. For instance, if you have dedicated spot mics for individual cymbals as well as a more general overhead pair of mics, then EQ’ing the spot mics or overheads can change how the cymbals sound when the signals are all summed. However, any issues you encounter are more likely to be problematic when EQ’ing the low end, because of the longer wavelengths (slight misalignments can cause more prolonged interference); a low‑shelf EQ or high‑pass filter on the overheads can easily cause a noticeable change in the kick’s tonality. EQ’ing a stereo drum bus is rarely problematic, as you’re applying an identical phase‑shift to all the mics. That said, if you’ve captured a full band in a single‑take recording, with vocals, bass, guitar etc leaking onto the drum mics, it could impact on those instruments’ tonality. It’s hugely important, then, that you audition your EQ moves in the context of all the sounds involved — don’t just solo the kick and EQ that, but EQ it while also listening to the rest of the kit. In short, there’s no inherent right or wrong choice. Gentler slopes are less likely to cause significant
Reaper’s bundled ReaEQ has a tick box to display the phase‑shift resulting from the frequency boosts/ cuts you dial in. Here, two instances are used to apply a low shelving cut of the same amount at the same frequency. But they have a different slope (the bandwidth setting is different). The resulting phase shifts are displayed as orange curves.
“Don’t just solo the kick and EQ that, but EQ it while also listening to the rest of the kit.” 136
May 2026 / www.soundonsound.com
problems, and are thus worth trying if you encounter a problem. So too is changing the corner frequency of the filter — in the overhead example, rolling the overheads filter up just a touch more might well restore the desired tonality. If you can no longer hear a problem, it doesn’t exist! Finally, since I mentioned linear‑phase EQs above, these can also be worth trying when you encounter problems — their whole raison d’être is to boost or cut frequencies without changing the phase. There is a trade off, though, which is known as ‘pre-ringing’. It’s a short echo that happens before the wanted sound. It’s only rarely an audible problem in my experience, but when it is, you’ll often perceive it as a slight smearing of transients that can rob, say, a snare drum of a little of its snap and impact.
NEXT MONTH IN
Recording For Atmos
We hear a lot about immersive mixing, but what about immersive recording? We explore some practical techniques to ensure you capture a great spatial sound on location.
June issue on sale Thursday 21st May. Available at TG Jones, WH Smith Travel and all good newsagents.
Subscribe at www.soundonsound.com/subscribe
Digital version (no WH Smith reference)
The Advertisers Index Sound On Sound NEXT MONTH IN
please contact: chris.cope@soundonsound.com
To Advertise in Ableton
www.ableton.com
37
LEWITT Audio
www.lewitt-audio.com
67
AMS Neve
✆ 01282 457011
45
RAD Distribution
www.raddist.com
85
API Audio
www.apiaudio.com
89
Rupert Neve Designs
www.rupertneve.com
65
Audient
✆ 01256 381944
5
SOS For Artists
www.sosforartists.com
59
DPA Microphones
www.dpamicrophones.com
15
Sound Service UK
www.soundservice.uk
9
Expressive E
www.expressivee.com
77
Soundtoys
www.soundtoys.com
101
Fabfilter Software Instruments
www.fabfilter.com
17
Sound Technology
www.soundtech.co.uk
3
Gear Expo UK
www.gearexpouk.com
103
SPL
www.spl.audio
91
Genelec
www.genelec.com
23
Steinberg Media Technologies
✆ 0049 402 103 50
35
GIK Acoustics Europe
www.gikacoustics.com
41
Synthax Audio UK
www.synthax.co.uk
11
Harrison Audio
www.harrisonaudio.com
47
Toontrack
www.toontrack.com
IBC
Heritage Audio
www.heritageaudio.com
51
Trinnov UK
www.trinnov.com
55
Recording For Atmos
We hear a lot about immersive mixing, but what about immersive recording? Josephson Engineeringsome practical www.josephson.com 39 you Universal Audioa great spatialwww.uaudio.com We explore techniques to ensure capture sound on location.
OBC
Kenton Electronics
IFC
✆ 020 8544 9200
81
Warm Audio
www.warmaudio.com
w w w . s o u n d o n s o u n d . c o m / November 2016
www.soundonsound.com June issue on sale Thursday 21st May.
137
TUBES FRANK HENVILLE
A
lmost 20 years ago, I read a review in Sound On Sound of a truly unique instrument. That instrument was the Metasonix S1000 Wretch Machine, a synthesizer that uses tubes (also called valves) in every stage of the signal path. I never got a chance to acquire a Wretch Machine, which was only ever produced in small numbers. But I had to get my hands on tube-based technology and try it for myself. First I got a small, affordable tube preamp. At lower volume levels, I couldn’t hear much of a difference. But when I increased the input volume to near the maximum and ran a Korg Monotribe through it, it compressed and distorted the signal like
nothing I’d ever heard before. The monophonic sequence and the drum pattern were squeezed into a molten mass where each took turns struggling to the surface. The Monotribe sounded livid. I’d used many distortion pedals, from cheapies to classics, but this was new. Eventually I bought a Eurorack modular case that was designed to satisfy the larger power demands of tube modules, which I began to collect. After five years with this system, the sound of tubes still fascinate me. A tube ‘filter’ is a long way from a standard low- or band-pass filter: it’s better to think of it as a processor and just let it affect the sound the way it wants. Rather than precision, tubes deliver unpredictability, adding trills, squawks, squeals and growls.
“The depth and variety found in tube distortion is an endless well.” 138
May 2026 / www.soundonsound.com
Once, when I contacted the manufacturer of a tube distortion and told him I wasn’t getting the expected results, he replied: “Try sending an oscillator to the CV input, and a CV signal to the oscillator input.” I wasn’t expecting that to work, but somehow it did. (I’d be shocked to hear this advice for a solid‑state or digital module.) But it reminded me that the strong point of using tubes for synthesis is the mystery and the unpredictability of the circuits and their operation. It’s the Sun Ra school of synth programming: it doesn’t matter if you don’t know what the knob does. Just turn it until things sound interesting. And the depth and variety found in tube distortion is an endless well. You probably won’t be able to duplicate some of the sounds you find the next day, or reliably dial in a classic Hendrix tone on demand. You will find an
almost inexhaustible source of strangeness. Of course, you also have to make compromises. Tubes heat up, requiring air circulation. Tube oscillators drift out of tune easily, have difficulty tracking more than an octave, and generally fail to deliver a lot of stock synth sounds that most players need, such as FM pianos or realistic drums. If I want to create traditional tonal music, I tend to sequence an analogue or digital oscillator that I feed through tube processors to add character. Near the end of Paul Nagle’s Wretch Machine review, he concluded: “I’ve been able to dust off a fresh batch of adjectives for this review, but more importantly I’ve been challenged to think again about what constitutes synthesis and electronic music.” I agree, but the adjectives aren’t really the point. Forget why I love tubes: listen to them for yourself and decide how you feel about them.
DRUM SOUNDS. ON YOUR TERMS. Superior Drummer 3 gives you total control over every detail of your drum mix. Don’t settle – make it sound exactly how you hear it. Start shaping drum sounds without compromise today. 230+ GB of meticulously sampled drums | Engineered by George Massenburg | Immersive sound playback | Audio-to-MIDI conversion | 7 kits, 25 snares, 16 kicks | Electronic kicks, snares and percussion sounds | 35 built-in effects | Mix-ready presets | Import your own samples | Comprehensive MIDI library
WWW.TOONTRACK.COM
Meet legend�ry �n�log sound for the whole b�nd.
Volt 876 USB Audio Interf�ce Get classic studio sound on every mic or instrument you connect with our new Volt 876 USB Audio Interface. The Volt 876 starts with next-generation 32-bit audio conversion, adds eight Vintage preamps and ��76-style analog compression on every channel, and rounds it all out with full hardware session recall in your DAW. When it's time to mix, things get even better, thanks to UAD plug-ins and LUNA, our smart, award-winning workstation that lets you sound like the records you love. Le�rn more �t u�udio.com/volt-876
FREE eBook RECORDING TECHNOLOGY
BASICS &BEYOND SECOND EDITION
Get your FREE digital publication from Sound On Sound This FREE illustration-rich eBook is aimed primarily at newcomers to the subject, but will prove equally valuable to anyone struggling with the complexities of today’s sophisticated recording technology. The purpose of this 170-page guide is to introduce readers to the essential components of a modern recording system and to explain the recording process in an easy-to-follow way, demystifying the inevitable jargon, both as it crops up, and with a comprehensive glossary. Written in the accessible, no-nonsense style of the Sound On Sound team of authors and editors, Recording Technology: Basics & Beyond covers: ■ What to buy ■ Studio setup ■ Computers for audio ■ Audio interfaces ■ Monitoring ■ Acoustic treatment ■ Mic techniques ■ How digital audio works ■ Understanding your DAW software ■ Upgrading your system
■ Software instruments ■ Wiring your studio ■ Plug-ins ■ Recording audio ■ Understanding MIDI ■ Recording vocals ■ Mixing ■ Compressors ■ Equalisation ■ Mastering ■ A.I. - in Music
Don’t miss out! Sign up and share the link with friends and colleagues on social media.
https://sosm.ag/recording-ebook