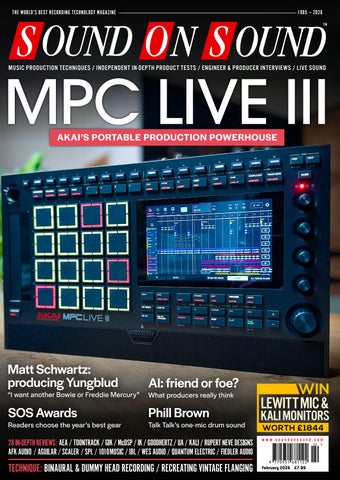
SOUND ON SOUND THE WORLD’S BEST RECORDING TECHNOLOGY MAGAZINE
THE WORLD’S BEST RECORDING TECHNOLOGY MAGAZINE
1985 — 2026 TM
MPC LIVE III MUSIC PRODUCTION TECHNIQUES / INDEPENDENT IN-DEPTH PRODUCT TESTS / ENGINEER & PRODUCER INTERVIEWS / LIVE SOUND
AKAI’S PORTABLE PRODUCTION POWERHOUSE
FEBRUARY 2026
www.soundonsound.com
Matt Schwartz: producing Yungblud
“I want another Bowie or Freddie Mercury”
SOS Awards VOLUME 41 • ISSUE 4
Readers choose the year’s best gear
AI: friend or foe? What producers really think
Phill Brown
Talk Talk’s one-mic drum sound
28 IN-DEPTH REVIEWS: AEA / TOONTRACK / GIK / McDSP / IK / GOODHERTZ / UA / KALI / RUPERT NEVE DESIGNS AFK AUDIO / AGUILAR / SCALER / SPL / 1010MUSIC / JBL / WES AUDIO / QUANTUM ELECTRIC / FIEDLER AUDIO
TECHNIQUE: BINAURAL & DUMMY HEAD RECORDING / RECREATING VINTAGE FLANGING
WIN
LEWITT MIC &
KALI MONITORS WORTH £ 1844
www.soundonsound.com
February 2026 £7.99
Capture with Clarity Capture sound with precision and artistry. The AKG C-Series condenser microphones deliver studio-grade clarity for speech, music, and ambient environments—engineered from decades of acoustic expertise to elevate every recording. Discover the difference at akg.com.
INTRODUCING
MODERN ACOUSTICS
LOW NOISE FLOOR
WIDE DYNAMIC RANGE
ECO-FRIENDLY DESIGN
AKG Professional is exclusively distributed in the UK and ROI by Sound Technology. For more information please call 020 8962 5080 or visit soundtech.co.uk
C-Series
C104 | C114 | C151
© HARMAN 2026. All rights reserved.
LE ADER
SOUL SEARCHING R
ock & roll changed everything. Not least, the music industry. Before the mid-’50s, sheet music outsold records. But no-one needed a printed score to learn a 12-bar blues, and no score could capture what made Chuck Berry recordings compelling. Record sales overtook those of printed music, and musicians learned songs by ear, not by reading. Then, in the mid-’80s, MIDI took music in another new direction. Sequencing lent itself to repetition and precision rather than more traditional forms of musical expression, while sampled instruments captured one-dimensional snapshots of the real thing. Which brings us to today’s technological revolution. Sound On Sound and Sonarworks have carried out a major survey of musicians’ attitudes to artificial intelligence. We’ve taken a deep dive into the results in this issue, and they make for interesting reading. Unsurprisingly, AI is viewed as a threat to creativity; but there’s also a perception that this threat is genre-specific. It’s widely felt that styles such as jazz and blues, which resist easy MIDI-fication, will also be least susceptible to AI. I’m not so sure. To my ears, the ways in which generative AI currently falls short of the mark mostly relate to audio quality. I don’t hear it as robotic or mechanical, or lacking expressivity. And I think that’s because AI is not reductive in the same way that sheet music or MIDI or sampling are.
ALLIA BUSINESS CENTRE KING’S HEDGES ROAD CAMBRIDGE CB4 2HY T +44 (0)1223 851658 sos@soundonsound.com www.soundonsound.com
Like rock & roll fans of the ’50s, AI has been trained on music in all its richness, not a dehydrated version of it. Instead of condensing music to its essentials, AI analyses the recordings themselves, identifying patterns on a very deep level. Train it on genres where subtle tempo variations are crucial, and it’ll faithfully replicate that. If a singer has a particular inflection at the end of a long vowel, AI will notice. Consequently, it turns out that AI is actually very good at, for example, playing dirty electric blues. (If you don’t believe me, spend a few minutes with AI music channels on YouTube.) At the same time, it also feels as though AI currently isn’t doing anything more than rehashing existing musical styles. It’s a truism that AI is limited by its training material, and thus can’t be original because it can only draw on what it already ‘knows’. However, when sequencing became mainstream, human musicians turned its limitations into virtues. Precision and repetition became the hallmarks of new genres. Does AI music not have similar attributes that humans can abuse in imaginative ways? Are there no glitches in the matrix that can be chiselled open? If it can’t do more than pastiche rock & roll, maybe AI is not such a threat to creativity after all.
ADV ER T ISIN G
admin@soundonsound.com
sos.feedback@soundonsound.com
adsales@soundonsound.com
Managing Director/Chairman Ian Gilby
Editorial Director Dave Lockwood
UK Media Sales Manager Chris Cope
Editorial Director Dave Lockwood
Executive Editor Paul White
Marketing Director Paul Gilby
Editor In Chief Sam Inglis
Finance Manager Keith Werthmann
Technical Editor Hugh Robjohns Reviews Editor David Glasper Reviews Editor Matt Houghton
P R ODUC T I ON
Production Editor Chris Korff
graphics@soundonsound.com
News Editor Luke Wood
support@soundonsound.com
ISSN 0951‑6816
Digital Media Director Paul Gilby
A Member of the SOS Publications Group
www.soundonsound.com/subscribe Circulation Manager Luci Harper
February 2026 / www.soundonsound.com
Printing Warners Midlands plc Newstrade Distribution Warners Group Distribution Ltd, The Maltings, Manor Lane, Bourne, Lincolnshire PE10 9PH, UK.
Designer Andy Baldwin
subscribe@soundonsound.com
4
International Business Development Nick Humbert
O N LIN E
S UB S CR I P T I ON S
NORTH AMERICA
M AR K E T IN G marketing@soundonsound.com
Designer Mick Reilly
Design Andy Baldwin
UK/WORLD
“It’s a truism that AI is limited by its training material, and thus can’t be original.”
EDI T O R I AL
Production Manager Michael Groves
WOR LDW I D E E D I T I O NS
Editor In Chief
A DM I N I S T R AT I O N
Reviews Editor Chris Korff
WWW.SOUNDONSOUND.COM/SUBSCRIBE
Sam Inglis
Administrator Nathalie Balzano
Web Content Editor Callum Hall Web Editor Adam Bull Digital Media Manager Atheen Spencer www.soundonsound.com twitter.com/soundonsoundmag facebook.com/soundonsoundmag instagram.com/soundonsoundmag
The contents of this publication are subject to worldwide copyright protection and reproduction in whole or part, whether mechanical or electronic, is expressly forbidden without the prior written consent of the Publisher. Great care is taken to ensure accuracy in the preparation of this publication but neither Sound On Sound Limited nor the Editor can be held responsible for its contents. The views expressed are those of the contributors and not necessarily those of the Publisher or Editor. The Publisher accepts no responsibility for the return of unsolicited manuscripts, photographs, or artwork. © Copyright 2026 Sound On Sound Limited. Incorporating Music Software magazine, Recording Musician magazine, Sound On Stage magazine, SPL magazine, Sound Pro magazine and Performing Musician magazine. All rights reserved. All prices include VAT unless otherwise stated. SOS recognises all trademarks.
Unlock Your Best Mixes If you can’t trust what you’re hearing, you can’t trust your mix. The truth is your room is likely holding you back. Introducing ORIA Mini, the room correction powerhouse that sits between your audio interface and speakers. Powered by Sonarworks, ORIA Mini is a dedicated hardware solution that analyses and corrects your room’s acoustic imperfections in minutes, transforming your studio monitoring.
Powered by
108 AM/PM LIVE
IN THIS ISSUE
www.soundonsound.com
February 2026 / issue 4 / volume 41
WIN
FEATURES 32 40 Ideas That Changed Music: Part 3 Our four-part series on the biggest technological breakthroughs in music technology counts backwards from 20...
46 AI & Music Tech In 2026 We asked music professionals how AI is changing their world.
62 Binaural Recording The final instalment in our series on stereo recording explores the likes of the dummy head, the Jecklin Disc, and more.
68 Inside Track: Yungblud Producer Matt Schwartz once told Yungblud his songs were stupid. Then he started producing them...
78 SOS Awards
LEWITT & KALI AUDIO BUNDLE WORTH £1844 PAGE 92
We reveal this year’s winning products, as voted for by you!
90 Vintage Flanging In Your DAW Proper tape flanging has an instantly recognisable sound, but sometimes plug‑ins just don’t cut it.
6
108 AM/PM Live
96 Modular
When former Roxy Music members Phil Manzanera and Andy Mackay recorded an experimental improv album, they had no intention of performing it live — let alone in Dolby Atmos!
Tobinski’s Danny Tobert talks about building his own system and embracing the creativity of modular.
118 Spotlight: MPE Desktop Synths
98 How I Got That Sound
MIDI Polyphonic Expression (MPE) grows ever more prevalent, and plenty of hardware synths are getting in on the action.
Legendary engineer Phill Brown explains how he captured the drums on Talk Talk’s classic ‘After The Flood’ using just one microphone.
136 Q&A
100 Akai MPC60 Revisited
138 Why I Love... Sound On Sound
We travel back in time to see how the story of one of the most important machines in modern music began.
The legendary Ethan Winer on why there’s only one music technology magazine worth reading!
February 2026 / www.soundonsound.com
Your studio and recording questions answered.
84 WES AUDIO PANDORA
ON TEST 74
1010music Bento
12 16
Goodhertz VCME 3
Sampling Workstation
Compressor Plug-in
114 Acustica Audio Cadet
122 Heavyocity Dystropia
8
AEA Nuvo N28 Active Stereo Ribbon Microphone
28 AFK Audio Drumbeam MIDI Percussion Pad
40 Aguilar Plugin Suite Bass Rig Modelling Software
56 Akai MPC Live III Sampling Workstation
115 Becos FX CompIQ Yuna VCA Compressor Pedal
94 Black Corporation ISE-NIN Eurorack Module
117 Electro-Harmonix Pico Swello Envelope Shaping Pedal
104 Fiedler Audio Mastering
Console 2 Dolby Atmos Production Software
44
95 Shakmat Bishop’s Miscellany MkII Eurorack Module
122 Song Athletics Inside-Out Piano Sample Library
Sample Library
18
IK Multimedia ReSing
50 SPL P8 Eight-channel Microphone Preamplifier
Vocal Resynthesis Software
123 Indiginus Electric Blue
10
Sample Library
52 JBL PRX925 & PRX935
24 Universal Audio
Paradise Guitar Studio
Amp & Effects Modelling Plug-in
26 Kali Audio SM-8 22 McDSP FutzVerb
Toontrack The Drum Factory SDX Superior Drummer Expansion
Active PA Speakers
Three-way Monitors
Scaler Music Scaler 3 Compositional Software
Portable Vocal Booth
Reverb Plug-in
C O V E R
GIK Acoustics PIB Pack
84
Wes Audio Pandora Digitally Controlled Multiband Analogue Compressor
Audio Mangling Plug-in
123 Orchestral Tools
James Newton Howard Piano Sample Library
88 Quantum Electric Q24 Valve Capacitor Microphone
36 Rupert Neve Designs OptoFET Dual-stage Compressor
WORKSHOPS 124 SOS For Artists 128 Studio One 130 Pro Tools 132 Cubase 134 Logic
www.soundonsound.com / February 2026
7
ON TE ST
AEA NUVO N28
AEA aim for the middle ground with an intriguing new stereo ribbon mic. SAM INGLIS
I
t’s hard to describe the sonic character of a microphone without resorting to cliché. In the case of ribbon microphones, those clichés often involve adjectives like ‘smooth’, ‘warm’ or ‘dark’. But are those really fundamental aspects of ribbon mic ‘tone’? Or do they arise because of the way the mics are being used? If you swap out a typical capacitor mic for a ribbon in a close mic placement, the chances are you will notice that the sound is indeed thicker and richer at the low end. But that is partly because nearly all ribbon mics have a native figure-8 polar pattern, and consequently exhibit lots of proximity effect. In terms of true low-end response, a pure velocity mic such as a ribbon struggles to go as low as an omni capacitor mic — so if you carried out the same swap in a distant mic placement, it might well be the capacitor mics that sound deeper. At the same time, most ribbons have less high-frequency extension and presence than their capacitor brethren. Consequently, if a ribbon mic is ‘voiced’ so as to sound balanced in close‑mic placements — perhaps by deliberately attenuating the low end to compensate for proximity effect — it may well sound middly and boxy in distant applications, lacking both air at the top end and weight at the low end. That’s a phenomenon AEA have tried to counter in their well‑established R88, which is described as a “far-field stereo ribbon mic”, and offers greater than usual high- and low-frequency extension. The R88 is available in active and passive versions, and has also spawned a mono derivative called the N8. But now AEA have introduced a second stereo model, with slightly different applications in mind.
Active Service The Nuvo N28 is available only in an active version, and is significantly more compact than the R88. Its two ribbon motors are likewise mounted one above the other in a fixed Blumlein configuration. Below this, a bulge in the body of the mic houses a pair
8
February 2026 / www.soundonsound.com
AEA Nuvo N28
Active Stereo Ribbon Microphone of Lehle transformers with a 1:89 step-up ratio, and a newly developed buffer/line‑driver circuit that delivers a comfortable sensitivity of 6.1mV/Pa. Finished in satin black, the N28 is very attractive in a self-effacing sort of way, with a helpful white circle identifying the front. It ships with a compact, allegedly shock-absorbing clip and a 15-foot cable that attaches to the mic using a five-pin XLR, with a conventional pair
of three-pin male XLRs at the preamp end. Both of these need to be fed with 48V phantom power. All in all, it’s a classy package, let down only by a cheap and nasty plastic case. Whereas the R88 is designed for distant miking scenarios, the N28 has a different raison d’être. It’s described as being “ideal for medium distances” — which, AEA clarify, means distances from eight inches to three feet. That’s
an interesting and relatively unusual concept for a stereo mic. A Blumlein array has a 90-degree acceptance angle; at three feet from the source, that means the entire stereo field will be filled by an instrument measuring a little over four feet across. Most drum kits are bigger than that, never mind a grand piano or brass section. Conversely, placing the mic eight inches from a source is likely to deliver a stereo picture much wider than the way the same source would ever be perceived in real life. A less rigid interpretation of AEA’s design goal might be that the N28 is a stereo mic intended for capturing individual instruments rather than ensembles. Which, in my experience, makes it pretty much unique. What it means in practice is that the N28 has a “mid-field low-end response tuning” designed to deliver a balanced low end at the kind of intermediate distances AEA are talking about: within the range where proximity effect is a factor, but not close miking as such. AEA also say that the mic has more obvious presence in the upper midrange than the R88. Naturally, the N28 also inherits many characteristics typical of ribbon mics in general. Its two motors both have a very clean and well defined figure-8 polar pattern in the horizontal plane. In the vertical plane, high-frequency response tends to fall away as you move off axis owing to the shadowing effect of the body and the other ribbon motor. The published plot suggests that the frequency response (of, presumably, one N28 motor measured on-axis) is broadly flat up to about 5kHz, and thereafter falls away in a fairly smooth manner, being about 8dB down at 10kHz and 11dB down at 20kHz.
Heavy Metal During the review period, I had the chance to try out the N28
“There’s plenty of heft and weight in the 100-300 Hz zone, so the fundamental resonances of snares and toms really pop out.” on drum overheads as well as on vocals, acoustic guitar, electric guitar amps, mandolin, hand percussion and the like. Lots of engineers I know and respect love ribbon mics as drum overheads, but personally I find it can be a struggle to make them work at the mix. When you’re expecting the body of the drum sound to come from close mics, you can have too much body in the overheads! If that’s your thing, though, the N28 delivers it in abundance. In line with AEA’s description, the very low end is indeed curtailed compared with some other ribbon mics I tried, but we’re really talking only about the 50Hz region here. At all normal distances, there’s plenty of heft and weight in the 100-300 Hz zone, so the fundamental resonances of snares and toms really pop out. At the top end, meanwhile, cymbals come across as polished and, in a subdued sort of way, airy. In the world of compact stereo ribbons, obvious competitors to the N28 might include models like the Royer SF‑12 and Extinct Audio Valkyr Stereo. I didn’t have either available for this review, but I do have a pair of mono Extinct BM9s, which are to all intents and purposes one half of a Valkyr, and have used the SF‑12 a fair bit in the past. Both the BM9s and the SF‑12 are quite forward in the upper midrange in comparison to many ribbon mics, with the SF‑12’s presence lift perhaps tending slightly further up the spectrum than that of the BM9. The same phenomenon is not so apparent with the N28; put it up alongside the BM9 (and, by extension, the Valkyr) and you’ll typically get less 50Hz and 3kHz, and more low midrange. Which is preferable obviously depends both on the source and on your tastes, but I found
myself liking the sound of the N28 on a lot of things. As I said at the start of this review, it’s probably a cliché to describe a ribbon mic as sounding ‘smooth’. Nevertheless, it’s an apt term for the N28. That relatively unhyped midrange means that it doesn’t emphasise gritty hash or harsh resonances in the way that brighter mics sometimes can, yet at the same time, it doesn’t lack definition, and nor does it sound soft. And, as is often the case with coincident stereo mics, the results can be startlingly lifelike. One of the best sounds I got with the N28 was by placing it parallel to the fingerboard of an acoustic guitar. This really did make it sound as though the player was sitting inbetween the speakers, giving a private performance to the listener. Ultimately, it would be a shame if anyone was put off buying the N28 by AEA’s description of its intended role. It’s certainly not a mic that suddenly starts to sound bad when you get an inch further than three feet from the source! Its deliberately controlled low end would only really be an issue if, for example, you were to use it as the only mic on an orchestra or a large brass ensemble. In most real-world applications, that area of the frequency spectrum is likely to be either irrelevant, or covered by other mics. In practice, given the N28’s richness in the ‘upper bass’ and low midrange, any EQ you deploy is far more likely to be cutting than boosting at the bottom end. And with its compact dimensions, stylish yet unobtrusive appearance, healthy sensitivity and ability to drive long cable runs into any preamp, it’s practical as well as euphonic. Although it’s complementary to AEA’s R88 in some ways, there’s a very large area of overlap where both mics will do a fine, fine job.
summary The Nuvo N28 is a high-quality stereo ribbon mic with a wide range of possible applications.
The N28’s clip is decoupled from the stand by a soft plastic loop that adds a degree of shock protection.
£ £2499 including VAT. W www.aearibbonmics.com
www.soundonsound.com / February 2026
9
ON TE ST
JOHN WALDEN
W
hether from the core library, or the wide range of add-on SDX expansions that are available, Superior Drummer users really can’t complain about either the quantity or quality of the drums sounds SD3 can put at their disposal. That’s not going to stop Toontrack putting temptation into your path though, and the latest SDX release — The Drum Factory — is a prime example. Created with Sylvia Massy (whose recording credits span artists as diverse as Tool, Prince, Johnny Cash and Jason Isbell), and recorded in four different acoustic spaces at La Fabrique, SW France (a regular stop for the Mix With The Masters seminars), The Drum Foundry promises to be something special.
All The Right Kit Let’s deal with the basics. A total of seven full kits (Sonor, Brady, DW, Tama, Ayotte and two from Trixon), alongside a goodly collection of additional snares, toms and cymbals, were recorded using a comprehensive array of close and room mics. The individual kits were each recorded in one of the studio’s four different spaces; the massive stone-built Dark Room (it has no windows), the wood-lined Library (big but warm), the huge Arcades and the Mill (the studio is built in a converted silk mill and this room is also stone, but with a darker ambience). The SDX is divided into four sub-sections based on these different rooms and, if you pull up any of the presets and focus on the overhead and ambience mics, the different characters are clear, obvious and... well, just plain fabulous. The core drum sound could grace any recording and would work across multiple musical genres.
Sonic Experiments For many potential users, that might be more than enough, but the SDX also gives you a peek inside the creative mind of Sylvia Massy. Sitting alongside the more conventional close/room mic options are a number of more experimental microphone choices. These include a microphone attached to a garden hose, another held within a large plastic (and partly filled) water container, a mic built from an old telephone and a mic integrated with an old children’s cassette recorder. Various combinations of these alternative sound sources are integrated into the preset collection and available within the SD3 mixer to blend with the
10
February 2026 / www.soundonsound.com
Toontrack The Drum Factory SDX Superior Drummer Expansion
Industry legend Sylvia Massy brings her expertise and creativity to Tootrack’s latest Superior Drummer expansion. more usual mic options. If you want to dial in some lo-fi vibes, or just add some unique character to your drum mix, these options let you do it. It’s weird but wonderful, and it undoubtedly lets you take these beautifully recorded acoustic kits into some more experimental/ alternative musical directions. There is a brilliant video on Toontrack’s website that walks through both the conventional and less-than-conventional mic choices; it’s well worth a watch.
Kind Of A Chameleon As ever, the SDX includes an excellent crop of MIDI grooves to explore and these span a range of tempos, both 4/4 and 6/8 time and straight and swung feels. They could work in a wide range of musical contexts and, as such, they are a perfect foil for the sound library itself. Whether mixing, producing or engineering, Sylvia’s credits span an amazingly diverse range of musical artists and styles.
That diversity is reflected in The Drum Factory SDX and, as a result, the user gets options that could work in almost any musical genre, be that extreme and experimental rock/metal, modern pop or electronic music, lo-fi indie or the most delicate singer/ songwriter styles. Sonically, this is a real chameleon of a drum library and, no matter how many drum options you currently have access to, I’ll hazard a guess they don’t include drums recorded by gaffer‑taping a mic into the end of a garden hose. The Drum Factory sounds outstanding and is well worth auditioning.
summary A brilliant source of high-quality acoustic drum sounds but, thanks to Sylvia Massy’s experimental approach to miking a drum kit, The Drum Factory also offers some truly creative possibilities.
£ €179 including VAT. W www.toontrack.com
U T O P I A M A I N | STUDIO MONITORS OF EXCELLENCE The Utopia Mains range employs the full breadth of Focal’s technical expertise and professional audio industry knowledge to deliver an unparalleled recording, mixing or mastering experience. Comprising a 3-way Main 112 and 3.5-way Main 212 model, each Utopia Main monitor features newly patented drivers paired with Class-H Current Mode amplifiers for ultimate power and sonic precision.
The apex of monitoring
Exclusive Distribution: Sound Service UK | www.soundservice.uk
ON TE ST
GIK Acoustics PIB Pack If you need to record dry-sounding vocals in a less than ideal room, GIK’s generously sized portable booth could be just the ticket.
Portable Vocal Booth NEIL ROGERS
A
s a studio owner with intermediate DIY skills, I’ve built dozens of acoustic panels, and have reached the point where they look quite good, if I do say so myself. To get to that stage, however, has required a fair bit of trial and error and, most importantly, many hours of my
precious time. For those who don’t have the time or inclination, off-the-shelf products may be a better fit, and GIK Acoustics have established themselves as arguably the most prominent alternative source of acoustic treatment to studio professionals and home recordists. As well as taking away the hassle and providing a better-looking result, their products have been objectively tested to measure their performance, so you can ensure you’re using the right tools for the job. This review focuses on the latest addition to GIK’s range of portable vocal booths, which is intended as a complete solution for recordists wanting a professional-sounding recording environment that can be moved or repurposed with ease. The PIB Pack is essentially two of GIK’s Portable Isolation Booths, supplied with sturdy clips and fixings to enable them to be clipped together to form a small rectangular booth, plus a panel that sits on top. Altogether, this forms a fairly solid freestanding structure, the interior of which provides a controlled acoustic space. Who would benefit from such a product? For a studio owner like myself, the PIB offers the ability to create a controlled area within a larger live room for dry-sounding vocal or instrument recording, which can easily be packed away or transported to a different space. For home recordists, voiceover artists, podcasters and others not working in a studio environment, the potential is more dramatic. Whilst the PIB Pack won’t eliminate extraneous noise such as traffic or housemates, you should benefit from a substantially more controlled sound entering your microphone, thanks to the elimination of unwanted room reflections.
Putting It All Together The PIB Pack comes in three large, well-packaged boxes that, whilst cumbersome, ensure your panels will survive the worst that courier services can throw at them. The two bifold screens that make up the booth are a breeze to move if you have a willing assistant, but they are quite weighty if you’re on your own, and I think a sturdy carry handle on each section might have been a good addition. Once you have them in the right vicinity, it’s just a case of unfolding the panels, moving them into position and clicking the fastener in place on the top of the two screens. Once you’ve fine-tuned the placement of the booth, the roof panel adds the last bit of stability and creates a more enclosed acoustic space. My only minor niggle here was that due to the positioning of the clips on the side of the panels, you can’t completely butt the two screens together for a flush connection. This isn’t going to affect the performance, but it felt a little frustrating from an aesthetic perspective. Once unpacked, I was able to assemble the booth for the first time in a little under two minutes.
12
February 2026 / www.soundonsound.com
ON TE ST
GIK ACOUSTICS PIB PACK
“It’s a very dry, dead-sounding space, but impressively, it still feels tonally balanced and not suffocating.” The acoustic panels that make up the PIB Pack are wrapped in crisp and professional fashion, but the element that really elevates it beyond the DIY sphere is the addition of the decorative scatter panels on the rear of the booth. My review model had the ‘Gatsby’-style panels, which gave it the air of a kind of Gothic-looking wardrobe — it looks really nice — and with
plenty of aesthetic options to choose from, you should be able to achieve that blend of art and function that good acoustic treatment can deliver. Another thing I like is that the booth is nice and tall. I’m six foot five, and I can stand in the booth without feeling the urge to stoop. Once assembled, the booth is 112cm wide, 54cm deep and 200cm tall, which is plenty for vocal and voice recording and would also allow an acoustic guitar or similar to be recorded.
The PIB Pack comprises two Portable Isolation Booths, plus a ‘roof’ and clips to hold everything together.
Dry Goods Even in my treated live room at my studio, the PIB booth presented a noticeably different acoustic. It’s a very dry, dead-sounding space, but impressively, it still feels tonally balanced and not suffocating. I used it on a few sung vocal sessions where it worked very well indeed, helping me capture a ‘blank canvas’ vocal recording ready to be mixed into the track to taste. I also used the PIB Pack for a spoken-word recording session, for which it delivered that dry voiceover sound with ease, whilst also adding a more professional aesthetic to proceedings. The two parts that make up the full booth can also be used individually, and I think this could be especially useful for instrumental recording, or for podcast producers who need to work with two speakers in an untreated space. They could also be placed either side of your speakers, to reduce first reflections in a makeshift control room. In my studio’s treated live room, the PIB proved effective as a means of creating a dry acoustic sub‑space that can be moved or packed away with ease. In a standard home setting where there is no acoustic treatment, I think it would offer a more obvious improvement to vocal recordings, and would make more of a difference than upgrading other parts of the recording chain. You would want to bear in mind the considerable space it takes up if you’re thinking about having it in your home, but the range of decorative options means you can make an aesthetic statement as well as a practical one. For more serious home recordists, content creators, or podcasters looking to up their game, this could be a sound investment.
summary
The PIB portable vocal booth is available in a variety of decorative finishes.
14
February 2026 / www.soundonsound.com
The GIK Acoustics PIB Pack provides an elegant solution for studios, home recordists and content creators looking to create a more controlled, enclosed acoustic space for voice and instrument recordings.
£ £899 including VAT. W www.gikacoustics.net
Fireface UFX III
Award-Winning Power Perfectly Expanded
The SOS Award-winning Fireface UFX III is the heart of a powerful, modular system ready for any environment, from the precision of the studio to the demands of live sound and the reliability required in broadcast. Paired with the 12Mic and M-1620 Pro — both featuring pristine conversion, remote control, and AVB/Dante connectivity — this trio delivers scalable I/O and total routing freedom via TotalMix FX. Whether you’re tracking in the studio, mixing a live show, or managing complex broadcast workflows, RME gives you the flexibility to adapt and the confidence to perform.
Worldwide Distribution: Audio AG, +49 8133 9181-0, www.audioag.com • UK Distribution: Synthax UK, +44 1727 821870, www.synthax.co.uk www.rme-audio.com
ON TE ST
JOHN WALDEN
V
ocal synthesis, whether for sung vocals or spoken-word dialogue, is undoubtedly a process that has made massive leaps forward in recent years, underpinned by advances in AI-based processing. From the perspective of music/ audio production, these products broadly fall into one of two categories: virtual singers (virtual instruments that can generate sung vocals) and voice changers (processors that transform a source voice/vocal into a different voice/vocal). The subject of this review — IK Multimedia’s ReSing — sits within this ‘voice changer’ category. So, if you have a single voice source for sung or spoken vocals, and want to change the character or gender of that voice, or even transform it into a musical instrument, just what can ReSing offer?
IK Multimedia ReSing Vocal Resynthesis Software
Give your vocals a completely new personality with IK’s ReSing.
The Small Print Having already implied that ReSing leans into AI, let’s head off the most obvious (and perfectly legitimate) elephant that might be in your room. IKM make it very clear within their description of ReSing that any training materials used within the product — in this case, the voices of specific singers or voiceover artists — have been used with suitable permission from (and compensation for) those individuals. Assuming you have the rights to use the original source recording you are transforming, any use of ReSing’s voice‑changing technology should not, therefore, get you into any ethical or legal hot water. A second important initial observation is worth making. Sitting within the ‘voice changer’ category, ReSing can transform your sung vocals so that they sound like they were sung by somebody else. As a result, while it can change the character of the vocal delivery in some useful and interesting ways, any dubious pitching within the original source vocal is faithfully recreated in the transformed version. ReSing should not really be considered as a magic button to turn a bad singing performance into a great one.
The Voice ReSing is available as a single-purchase perpetual product (no subscription required) and once installed, all processing is done locally. The standard version includes 10 different voice models, 10 instrument sounds and 10 ‘model generations’ while the Max version ups all three numbers to 25. Yes, voice-to-voice transformations
18
February 2026 / www.soundonsound.com
aside, ReSing can transform your vocal source material into the sound of selected instruments. Equally, if you want to train your own voice models, ReSing supports that. There is an additional ‘unlimited model generation’ add-on you can purchase if you need to train more voice models beyond the included 10 or 25. Once installed, ReSing itself can run as a standalone application, a conventional VST, AU or AAX plug-in or, DAW permitting, via ARA. The latter provides a more streamlined workflow, but both of the other options are perfectly workable; you just drag and drop the source audio into ReSing and processed versions are simply rendered to your drive system.
Personality Permutations ReSing’s operation is very straightforward. A model browser lets you load up to two models (voices or instruments)
into the Model A and Model B slots. Once your source audio has been imported, three circular control sections — Character, Accent and Dynamic — allow you to adjust how either one of these models (or a blend of both of them using the Fusion sliders) are applied when you hit the Process button. If you make subsequent adjustments to these controls, you have to re-render the modelling. Thankfully, on any recent computer system, processing is actually quite speedy, and much faster than real time. The degree of control offered by the various Character, Accent and Dynamic settings is somewhat source and model dependent and you perhaps shouldn’t expect to transform a whispered original into a raging rock monster by simply choosing the ‘Energetic’ Character flavour, but you can subtly nudge the original performance in the required direction by experimenting with these options. The fourth circular control section provides compact takes on dynamics, EQ, reverb and automatic pitch correction. Applied after the transformation process, these are neat to have, particularly if you are just working in the standalone version of ReSing. However, you can easily bypass them when working within your DAW if you have preferred plug-in options for these tasks. I have to say that the results of the voice transformation process itself are very impressive. For example, when starting with well-recorded sung vocals, even when the source was entirely different from the model (different gender, different vocal range, different
ON TE ST
I K M U LT I M E D I A R E S I N G
The Max edition ships with 25 voice models spanning a wide range of characters, as well as 25 different instrument models.
The ReSing Modeler app lets you train your own voice models for use within ReSing.
vocal character), more often than not, the transformed vocal could easily be dropped into a mix without its synthetic origins being obvious. It’s worth noting that I did manage to get some decent results from vocals that were originally sung into my phone, and ReSing generally added a bit of a polish to that recording once the fledgeling idea was inside my DAW. That said, the cleaner the original, the less likely you are to experience processing artefacts. Max’s 25 voice models provide a broad palette of very useful vocal styles, from the gruffness of Spencer or Neil to the polished pop-friendly flavours of Clara or Gabriella (the latter with a rather nice hint of a Spanish accent). Equally, there are models that could work very well with rap-style vocals or for voiceover transformation. There are even a few special character options including the cartoonish Emily, Chipmunk and Synth Choir. It’s not difficult to see how sound designers might find a tool like ReSing useful for creating voice-based special effects. The various instrument models are also quite interesting. Yes, they do require a little more careful handling in operation if your intention is to achieve a ‘natural’ result, but if you vocalise an appropriate melodic line in your best impression of the target instrument, the transformed results can be rather good. For example, I had some success with the two saxophone and the trumpet models, transforming short vocal phrases into instrumental parts. And, of course, there are some weird — and sometimes wonderful — creative options to explore here. This AI-based approach to virtual instrument sound creation is perhaps still in its infancy, but the potential is both obvious and very interesting. Watch this space.
take a considerable amount of time depending upon your computer hardware. I did have a stab at this process, albeit with a sub-optimal source data set, and the results were interesting if a long way from the quality of the included models. Again, the potential is clear to see, and I can easily imagine film/TV dialogue replacement suites experimenting with ReSing models trained on lead actors within a project to complement (or even replace?) the traditional studio sessions often required for on-set dialogue replacement. Incidentally, ReSing does allow you to import models created by others in both ReSing and RVC (Retrieval-based Voice Conversion) formats.
Model Construction ReSing also lets you build your own voice models. Done via a separate application, the principle is simple; you just drop audio recordings from your model target into the engine, and it then analyses these to ‘train’ the model. The PDF documentation provides guidance of the type and quality of source material required but if you wanted to do this to the standard of IKM’s included models, I suspect it would require a fairly rigorous approach to compiling the source material, spanning expressive singing covering the full pitch range and energy levels within the singer’s vocal repertoire, sustained vowel sounds, syllable-based scales and examples that emphasise sibilants and fricatives. Bearing in mind the limited model generation counts offered by the standard and Max editions, it’s perhaps something you would be wise to plan carefully. Equally, the analysis of the training data can
20
February 2026 / www.soundonsound.com
Is ReSing The Thing? In terms of competing products, Sonarworks’ SoundID VoiceAI is the most obvious alternative to ReSing. This is also available as a one-time purchase perpetual licence, and offers both voice and instrument transformation options. It doesn’t provide model training capabilities, but it does include a rather neat ‘unison mode’ for generating double‑tracked voices. Having run both side-by-side, they produce comparable results so a personal choice might need to be based on the broader feature sets and pricing of the two products. I’ll finish with a reminder that ReSing (and, indeed, VoiceAI) is a tool for voice character transformation and not a software solution for rescuing technically poor singing by magically resynthesizing it into technically great singing. That said, it can certainly add some delivery polish to a well sung but scratch recorded vocal and, equally, can provide you with endless voice identity options if your lead vocal, backing vocals or dialogue need to be delivered in a different vocal timbre. Is swapping out the character of one voice for the character of another voice any different from picking a different virtual drum kit or orchestral string preset (things many of us accept doing without question) to better suit the needs of a production? I’ll leave you with your own ponderings on that front but, if it’s a concept you are comfortable embracing, IK Multimedia’s ReSing provides the technology required to do just that.
summary With the caveat that it cannot rescue a poor vocal performance, as a tool for voice transformation — swapping out the original vocal character for that of a different singer or speaker — ReSing provides an impressive technical solution.
£ ReSing €129.99, ReSing Max €199.99. Prices include VAT. W www.ikmultimedia.com
MONUMENTAL BASS.
Low end should move air and listeners—not distort your work. We designed CLA-Sub to deliver clean, articulate low frequency energy at shockingly high volume. It delivers seismic bass with clarity and honesty, ideal for everything from cinematic sound design to bass-forward music of any modern genre. At its core is an exclusive, custom-designed dual-magnet driver engineered to do what most subwoofers won’t: produce massive output without relying on distortion or artificial hype. CLA-Sub delivers exactly what your mix needs, and nothing it doesn’t. Designed to pair perfectly with CLA-Series monitors, yet flexible enough for any studio or home theater, CLA-Sub adapts to your room via switchable front- or
downward-firing configurations, vibration-damping feet, and comprehensive crossover, phase, and gain controls. Locking combo inputs, footswitchable bypass for instant A/B comparisons, and intelligent power-saving standby complete the package. Hear your low end with authority, accuracy, and absolute confidence. CLA-Sub delivers bass that isn’t just big—it’s monumental. Of course, you’ve got to hear it to believe it. Contact your local dealer to get a demo today, and learn more at www.avantonepro.com.
©2026 All Rights Reserved, Avantone Pro. Gauss, Mixcubes, and ‘‘The sound of hits’’ are trademarks of Avantone Pro.All other trademarks are property of their respective owners.
The sound of hits.™
ON TE ST
McDSP FutzVerb
Audio Mangling Plug-in
McDSP’s new distortion-cum-reverb promises to put your audio through the wringer.
SAM INGLIS
S
ome plug-in names capture what the plug-in does so perfectly that it almost seems redundant to write a review. Available in all the usual native formats and authorised using an iLok licence, McDSP’s FutzVerb is a case in point. It adds reverb; and it futzes with your sound. Its core futzing mechanism is a technique, previously used in McDSP’s FutzBox plug-in, which they call Synthetic Impulse Modelling. This, it’s claimed, offers the realism of convolution, but with a much lower CPU overhead and the ability to adjust parameters in real time. The supplied library includes around 100 SIMs, recreating devices such as portable radios, cellphones, electronic toys, metal buckets and vacuum-cleaner pipes. Each of these has a Tune parameter that seems to scale the spectral characteristics of the device up and down the frequency range. Additional futzing power is provided through a filter module, with resonant low- and high-pass bands that can be set to 12 or 24 dB/octave response, and an innocuous-looking module labelled Distortion. As well as the expected choice of saturation types and an Amount dial, this has numerous more obscure controls. Some of these are relatively ‘normal’, like Intensity, which somewhat resembles a tone control for the added harmonics. Others are anything but,
22
February 2026 / www.soundonsound.com
such as Chop, through which “audio waveform inter-cycle signal level ranges are eliminated (chopped) to create a new kind of distortion,” and Wobble, which uses low-frequency content in the signal to modulate the distortion characteristics. There’s probably some further futz potential in the Pre-verb module, which features simple high and low tone controls, a pre-delay knob and, more unusually, a variable subharmonic generator. The pre-delay can be negative as well as positive, which opens up some interesting sonic possibilities. And finally on the futzing side of things, the SIM module has a switchable lo-fi section that allows you to reduce the word length and sample rate. Both the SIM itself and the lo-fi processor can independently be switched to different positions
in the signal chain, processing the whole signal either pre- or post-reverb, or ‘within’ the reverb. Whilst not technically an agent of futz, moreover, the reverb itself certainly isn’t your run-of-the-mill room simulator. It’s algorithmic rather than convolution-based, and offers a choice of 22 algorithms and 12 “reflection types”. You won’t find comfortingly familiar plates or ambiences among the former list, which instead includes ‘canyon’, ‘abyss’ and multiple caves, waves and silos. It’s paired with a relatively conventional dynamics section offering variable gating or ducking.
Playing In The Dirt I’ve come across reverbs that offer distortion and other unconventional sound-shaping possibilities before, notably Overloud’s Rematrix and HOFA’s IQ-Reverb. However, those plug-ins are primarily reverbs that allow you to dirty up the sound a little if you want. It doesn’t take much experimentation with FutzVerb to see that the emphasis is the other way around here. This is a plug-in that is primarily designed to screw with the sound, but which also allows you to
“If you want to create the effect of a computer announcing ‘Self-destruct in 30 seconds’ over a broken PA system on a burning spaceship, this plug-in makes it almost too easy.” add reverb if you want. So if your goal is to lend a little bit of character to your vocal sound by introducing some valve distortion to a vintage plate emulation, this probably isn’t the reverb for you. If, on the other hand, fearless sonic experimentation is your thing, FutzVerb comes highly recommended. It’s possible, though not always easy, to get a ‘normal’ reverb from it; but its strengths lie far from the normal. Whereas you’d usually use a reverb plug-in as an auxiliary effect and send to it from multiple sources, this is very much the sort of plug-in you’d use on an insert to transform a single source. (I’d still like it to have the ability to lock the wet/dry mix when loading new presets, though, and it’s also a little surprising there’s no mono-to-stereo version.) Only
about half of the presets feature reverb as the most prominent effect, and even there, it’s almost always churned-up, metallic, gritty or downright nasty. Elsewhere, distortion and filtering come to the fore.
Having A Futzball FutzVerb is a plug-in that has at least as many applications in post-production and sound design as it does in music. If you want to create the effect of a computer announcing “Self-destruct in 30 seconds” over a broken PA system on a burning spaceship, this plug-in makes it almost too easy. In a music context, I found it particularly rewarding on background sounds such as pads, where it can turn a cheesy synth drone into something ominous, wobbly and less demanding of
space in the mix. At the other end of the scale, there is also endless fun to be had on drums and drum machines, particularly if you want to stop them from sounding like drums and drum machines! Like all the best plug-ins, FutzVerb packages its enormous potential within a relatively simple user interface. Each of its individual processing modules is a powerful effects generator in its own right, so the sum of the parts is extremely versatile. It takes some self-restraint to acknowledge that you don’t have to use more than one or two of them on a given source, and it helps if your tastes lean towards the characterful rather than the pretty, but in a world where we all have eleventy million distortion and reverb plug-ins already, FutzVerb does offer something new.
summary FutzVerb does exactly what the name suggests!
£ $179 W www.mcdsp.com
out now Compression shaped by intention • Intelligent parametrization & spectral compression • Semantic approach to dynamic control • Group mode, zero-latency mode, spectral ducking
sonible.com
www.soundonsound.com / February 2026
23
ON TE ST
BOB THOMAS
F
ull disclosure: I already own two of Universal Audio’s UAFX amplifier emulator pedals, the Dream ’65 and the Enigmatic ’82. And I use them constantly! By sheer coincidence, the very day that I was considering buying their Dream ’65 plug-in, in came an invitation to review the Paradise Guitar Studio plug-in. I’ve been exploring it — playing in Paradise, as it were — obsessively ever since. The usual plug-in formats are supported for macOS and Windows. Note that, to obtain and install the plug-in, you must sign up for free Universal Audio and iLok accounts (if you haven’t got them already) and download the UA connect app.
Overview Paradise Guitar Studio has a single signal path, consisting of five pre-amp effects slots, an amp and miked-cabinet slot, and five post-amp effects slots. Mono, stereo and mono-to-stereo operation are supported, so the plug-in can be used on any source in a stereo DAW session. The pre-effects section can process effects in mono or stereo, as you prefer; opting for stereo means an incoming stereo signal remains in stereo after being processed by a mono effect, but this requires more processing power than the default mono setting. The post-effects section always maintains the stereo signal, even if a specific effect is set to process in mono. A Paradise preset can be configured with up to five pre-amp effects, one amplifier with one miked cabinet, an independently adjustable cabinet room sound, and up to five post-amp effects. In addition, there’s an input noise gate and an output limiter that don’t take up slots. Any effect can be used simultaneously and independently in the pre- and the post-amp effects sections.
24
Universal Audio Paradise Guitar Studio
Guitar/Bass Amp & Effects Modelling Plug-in Their UAFX pedals have consistently impressed, and now UA have packed those algorithms and more into a single DAW plug-in. Paradise has a clean, uncluttered layout, with various panes and a toolbar above for functions including bypass, MIDI Learn function, and copying and pasting effects to/from the pre-amp and post-amp effects slots. The uppermost pane offers access to a tuner and preset library, and is where you configure the pre-amp effects for mono or stereo operation. Beneath this, a Level & Navigation bar carries a graphical display of each section and its contents. This also hosts controls and meters for the input level, a noise gate, the pre-amp effects section’s output level, the amp and miked cab output level, and the post-amp effects output level. The individual effects and amps have level controls too of course, so there’s plenty of scope to optimise signal levels — you can keep them in the sweet spot throughout the signal chain. A switchable brickwall limiter, placed after the post-amp effects output meter, can ensure the main output level never exceeds 0dBFS. Clicking on a section in the Level & Navigation bar determines the Main panel’s contents. In this panel, you can import, delete, replace and adjust the controls of the effects you’ve placed in the pre- and post-amp effects slots, as well as audition, select, replace and customise Paradise’s six amps — two of which contain multiple
February 2026 / www.soundonsound.com
models, to give you a total of 11 separate amps to play through and customise. The Main panel also provides access to a library of 35 cabinets, with a selection of 1x12, 2x12, 4x10 and 4x12 models featuring a range of different speakers. To inform the modelling, recordings were made with mic setups UA deemed best for the specific cab. The sound and position of the mics can’t be changed, then, but you can choose different cabs, and the Room control allows you to dial in room ambience to taste. The final pane displays the front‑panel controls of the selected amp. The virtual knobs and switches work exactly as you’d expect, and there are buttons for functions that would be footswitched in the real world. On models with a choice of which inputs to plug into (or jumper), you can unplug and replug virtual cables.
Exploring To give you an idea of what Paradise can do, it comes loaded with 300 presets that
deliver vintage-leaning tones based around amplifiers from the mid-1950s (Woodrow ’55) through the early to mid‑1960s (Ruby ’63, Showtime ’64 and Dream ’65), late ’60s into the ’70s (Lion ’68), and the early 1980s, with the Enigmatic ’82. It’s similar for the speaker cabs: there are 10 1x12, 15 2x12, two 4x10 and seven 4x12 cabs in the list, and the cabinet graphics suggest they’re mainly vintage too, with just a few of more modern construction. The speaker drivers themselves seem to be mostly Celestion, Electro‑Voice and Jensen models, but there’s an Oxford listed in a 1x12, and my best guess (I’m not certain!) for one of the 4x12 cabs is Goodmans Audiom ’60s. The mics used to record the cabinets were AKG C414 and Neumann U67 capacitor types, beyerdynamic M160 and Royer 121 ribbons, and a Sennheiser MD 421 and a couple of Shure SM57 moving-coil dynamics. The effects again lean in a vintage direction. In the Drive/Distortion section, the inspirations for TS, Gold, Big Fuzz, RAW Distortion and Vintage Fuzz are obvious from their graphics, but I needed Google’s help to identify the Nashville overdrive! The Modulation section’s Brigade Chorus, Orange Phaser, Blue Flanger, Trem 65 and Microshift again betray their origins pretty quickly if you know your pedals, and a certain blue-fronted 1970s rackmount effects unit from upstate New York. I was stumped by the Vintage Vibrato (searching for
DAW Automation & MIDI
Paradise Guitar Studio supports not just DAW automation but also MIDI Learn. If your DAW supports automation, right-clicking on an effect or amplifier control will open up the preset’s 24-slot assignment screen. You can assign any control to any slot so you could, for example, keep all the distortion pedals’ drive and output level controls in separate groups. If you want to use an external MIDI controller, Paradise’s MIDI Learn feature makes that a breeze. Once you’ve mapped your external controller to a preset’s on-screen controls, you can then save that MIDI mapping as a preset which you can recall, use, edit, re‑save or delete in any DAW project.
As with the amps and cabs, there’s a good range of modelled vintage effects. Most are instantly identifiable, though a few might prompt a bit of Googling!
“true vibrato” revealed it to be a Magnatone), and the Multi-Chorus is, to my mind, probably UA’s own algorithm. The genesis of the two Dynamics models, Red Comp and 1176 compressor, are easily identifiable — MXR made the only famous single-knob, red compressor pedal, and UA don’t even need to be cryptic about the 1176! In Delays, the Analogue Memory Delay and the EP-III Tape Echo are easy to identify, especially as the latter already exists as a UAFX pedal. The Digital Delay and Pitch Shift Delay are probably UA-original modelling algorithms. As for the reverbs, the Spring ’65 Reverb obviously comes from a 1965 Fender Deluxe Reverb, the Digital Reverb could well be a UA algorithm, and the Plate 140 Reverb and Reverb 224 have roots in UA’s Apollo and UAD ecosystem. Lastly there’s the Tone/Filter section, which contains a 10-band graphic, a four-band sweep EQ with high- and low-pass filters, and a volume fader that thinks it’s a pedal. In short, there’s plenty of ground covered here!
The Sound Of Paradise? My first few days in Paradise were spent exploring the many presets just to see what was on offer, and my first impressions
were very good. Later, I started exploring the presets more slowly, and in more detail. I’ve not found a bad sound yet! Any preset that hasn’t worked for single coils has done so for humbuckers, and vice versa. There are some that I’ll never use, and others that I could (and often did) spend a very long time with. I found many of them genuinely very inspiring, and others less so — but that simply reflects the vagaries of my own musical muse. There’s plenty here for everyone, and the quality is universally high. Building your own chains in Paradise is conceptually just like putting together a real pedalboard: pick an amp and cab, decide what you want to put before it and after it, and then change your mind as much as you like until you find the sound that you want! You can save your chain as a preset, of course, then make music and keep on tweaking until everything sounds exactly right. Yes, there are other guitar rig plug-ins that offer greater functionality — more models, clever routing, amp capture, IR loading and more besides. The reason Paradise Guitar Studio doesn’t offer all those bells and whistles is that UA have instead kept a laser-like focus on the quality of their emulations, and that’s why I love the real-world restrictions that this plug-in imposes. They ensure that everything feels as immediate to use as a real rig, which I think is what most guitarists want. I’ve reviewed lots of guitar, amp, cab and effects modelling platforms, in hardware and software, and none impressed me on its debut as much as Paradise has done. The sense of realism in the modelled pedals, valve amps and cabs that I happen to know well is hugely impressive. Clearly, UA’s Chief Scientist Dr Dave Berners and Senior Product Designer James Santiago went into forensic detail when developing their models. Whether you’re a guitarist who works with DAW software and values classic amp tones, or you’re more into mixing and simply want a greater range of convincing emulations, Paradise Guitar Studio delivers superb value for money. I’d urge you all to check it out.
summary A very impressive DAW plug-in from one of the major names in modelling, Paradise Guitar Studio offers stellar, vintage-leaning emulations of guitar amps, cabs and effects.
£ $199. Discounted to $149 when going to press.
W www.uaudio.com
www.soundonsound.com / February 2026
25
ON TE ST
Kali Audio SM-8 Three-way Monitors
Kali’s new Santa Monica speakers are their most advanced yet. PAUL WHITE
K
ali Audio’s SM (Santa Monica) series monitors are arguably their most ambitious design so far, boasting advanced features like user-editable DSP that can be controlled through software. This enables the user to adjust delays, levels and eight bands of parametric EQ. Available in five- and eight-inch versions and priced per speaker rather than in pairs, the SM monitors follow an active three-way format but, unusually, the mid driver and tweeter are coaxial, which helps stabilise imaging and also allows for a more compact cabinet. For those who don’t need the control software and who already have high-quality power amplifiers, passive versions are also available to order. This review covers the SM-8, which is driven by a total of 300 Watts of Class-D power and has an LF reach of 37Hz (-10dB), with its -3dB points at 43Hz and 21kHz (-10dB at 35kHz). It can cruise at a level of 94dB SPL at one metre but can handle peaks of up to 119dB. A one-inch metal-domed tweeter is set in the centre of a four-inch, paper-coned midrange driver; the woofer also uses a paper cone. Kali describe both cone drivers as having an ‘optimised’ profile, but they don’t elaborate on that! The woofer crosses over to the
Kali Audio SM-8 £3998 pros • Well-balanced sound with tight bass and clear detail. • Comprehensive onboard EQ that may also be used for room correction in conjunction with suitable room measurement tools.
cons • It would have been useful if a full room correction process had been built in.
summary A highly capable three-way active monitor with useful DSP tuning, allowing you to upload correction curves obtained through third‑party measurement systems.
26
February 2026 / www.soundonsound.com
mids at 280Hz, while the mid/high crossover point is at 2.8kHz. The THD at 90dB (at one metre) is specified as around 0.5%. The front-ported cabinets weigh 14.5kg each, and measure 48.26 x 25.4 x 30.5cm (HWD). They are compact enough to use in medium-sized studios, though the SM-5 might be a more appropriate choice for the smaller studio. While most studio users working in stereo will mount the speakers on platforms or stands, those setting up immersive sound systems may need to use wall mounts, to which end the speakers have threaded mounting points on both the top and bottom of the cabinet, designed for a 4.25 x 2-inch bolt pattern. On the front of the cabinet is a Kali Audio logo, which engages standby mode when double-tapped. Audio may be fed into the speakers either as traditional analogue via a balanced combi XLR/jack, or as a digital signal encoded as AES3 via a BNC socket. Ethernet (RJ45) and USB-A are available for the DSP control. A set of DIP switches on the rear panel allows for the usual upper and lower shelving EQ settings, as well as compensation for boundary proximity, but there’s also a setting (switch four) for accessing control over the DSP EQ. Other than that, there’s a large recessed rotary control on the rear panel that can be used for setting the input level, with a range of -12 to +6 dB.
Remote Control The Kali Control Panel software runs on macOS and Windows, and gives the user access to eight parametric EQ bands, each of which can be set to peaking, high/low shelving, or high‑/low‑pass filtering (first- or
second‑order). It is possible to delay the output by up to 10ms, as well as applying a level trim. For stereo use, the delays will not be needed, but they can be very useful in a multi-speaker setup such as surround or Atmos. These parameters are handled by the same DSP module that looks after crossover duties, so there’s no additional latency penalty on top of the system’s 3ms processing time. Kali Control Panel is not in itself a room-correction package, but it can load KEQ files or be used in conjunction with the free Room EQ Wizard software to generate the necessary EQ curves. Working this way avoids the need for a separate room-correction product and also avoids the hassle of using a plug-in-based correction system, where operator error can lead to the monitor processing also affecting the mixed song file. It might have been easier for the user if the system could automate the room-correction process using a flat-response microphone, but the DSP-hosted feature set does
provide the necessary tools, and there’s information on doing your own room correction on the Kali website. Kali’s recommended room-calibration procedures are outlined there, and in situations where the user wishes to perform their own room measurements, Kali say they can provide room-tuning files for a small fee per speaker. The control software works in both Online Mode, where each speaker is connected to a network via an Ethernet switcher (but not connected directly to the computer) and Ethernet cables, or in Offline Mode, where a USB stick can be used to transfer the necessary correction files onto the speakers. If used online, the speakers can be switched between different tuning presets stored in the software. Offline, a USB stick can be used to transfer one speaker’s settings at a time via a USB port in the front of the speaker cabinet. The built-in DSP is powerful enough to implement useful room correction as long as you’re well enough versed in the tech to be able to figure out what is needed. In online mode, EQ changes can be heard in real time, allowing the user to tweak the response to, for example, match more closely a known pair of speakers or headphones. I checked out the online mode by hooking the SM-8s up to my studio’s Ethernet switcher;
Kali Control Panel can work in Online mode, where monitors are networked to the computer and changes can be auditioned instantly, or in Offline mode, where profiles are saved onto a USB drive and manually loaded into each speaker.
once the speakers are connected, LEDs flash on each speaker’s rear panel next to the Ethernet port. Once the software is running, it asks to search for connected speakers, after which each speaker can be muted or soloed individually as well as having its own EQ settings applied. Several sets of EQ settings can be saved as presets. The resultant EQ curve is shown on screen. In offline mode, the USB stick used to transfer EQ curves needs to be formatted for FAT32, and to hold only the data for one speaker at a time. The USB port is hidden behind a shaped, rubbery cover on the speaker’s front panel, and transfer of settings is initiated when the USB stick is plugged in.
to get very close indeed, and while I’ve always thought my Opals gave the driest, tightest kick sound I’ve heard from a ported speaker, the SM-8s were if anything slightly better damped. Once set up in the room, the sound comes over as clear, three-dimensional and with a strong sense of stereo width. There’s real depth in the lows but without the obvious overhang heard from some ported designs of this size, while the coaxial drivers share the mids and highs in a transparent and effortless way. Clearly, a speaker of this quality will only give of its best in a room that has reasonably effective acoustic treatment, even if you use a room-correction program. Untreated or badly treated rooms may still have significant resonances caused by undamped room modes, especially at the lower end of the audio spectrum, and the nature of a room mode is that once the sound that excites the mode has gone, the sound energy in the room at the mode’s resonant frequency takes time to die away. In other words, resonances are a time-domain issue and, if significant, can’t be fixed by a frequency-domain band-aid. Conversely, if the room is treated to minimise resonances, then an EQ-based system can bring about a useful improvement in monitoring accuracy. It would also be worthwhile treating speakers of this calibre to a really good speaker platform such as one of the IsoAcoustics range.
Performance
Summary
In my room the speakers worked perfectly well without the EQ, though it was informative to try adjusting the EQ settings to see how close I could get the sound to match that of my Event Opals. Only the smallest adjustments were needed
The SM-8 is a very capable studio monitor, suitable for serious stereo mixing or immersive audio work. While priced at the upper end of even a serious home-studio budget, the cost is not excessive given the performance on offer, and I can see this speaker appealing to audio professionals working in mid-sized studios. Its coaxial mid/tweeter architecture provides precise stereo imaging with clear detail, and the eight-inch woofer handles low frequencies effectively and cleanly. The DSP tuning capabilities can be used for room correction through appropriate calibration procedures, with the caveats already explained, and for smaller rooms the SM-5 would be a sensible alternative.
The SM-8 can accept analogue audio via a balanced combi jack/ XLR socket, or digital AES3 via BNC connectors. The Ethernet port allows for connection to a computer running the Kali Control Panel software.
£ £3998 per pair (£1999 each). Prices include VAT. E sales@kaliaudio.com W www.kaliaudio.com
www.soundonsound.com / February 2026
27
ON TE ST
AFK Audio Drumbeam MIDI Percussion Pad
AFK Audio’s Drumbeam is a percussion pad with a difference. MARK GORDON
M
IDI percussion pads come in a whole range of shapes and sizes... except they don’t, really! Almost all follow the tried and trusted layout of nine or more square pads, in a grid format, with a central LCD screen and a selection of rear-panel connections. That’s why your first sight of the Drumbeam, from German start-up company AFK Audio, is genuinely a surprise. At around 21 inches in length and one inch square, this unusual-looking multi-touch MIDI controller is designed to be played primarily with drumsticks and can be configured with up to 12 individual zones along its length. Each zone, when struck, can either send out MIDI notes or Continuous Controller messages.
AFK Audio Drumbeam €429 pros • Unique design. • Rugged and roadworthy. • Good mounting options. • Additional trigger input. • Easy-to-use app. • Endlessly configurable.
cons • A little less dynamic than other drum pads. • Comparatively expensive, as it has no built-in sounds.
summary A well-made, highly configurable performance tool that offers a different slant on the ‘percussion pad’ concept.
28
February 2026 / www.soundonsound.com
Bucking the trend is often commendable, but are looks deceptive — is this really something new, innovative and, most importantly, usable?
Beam Me Up The Drumbeam is constructed from milled aluminium, giving it a professional, weighty feel that belies its compact form. The top ‘striking’ surface is covered with a thick silicon pad, and a series of 72 individual LEDs run the length of the unit on both the back and front, indicating the individual playing zones. The underside of the device features an integrated mounting bracket that, along with the included multi-mount adaptor, enables you to attach the Drumbeam to a standard M8 threaded cymbal stand or clamp. To the left of the mounting bracket are the connections to the outside world: a USB-C socket that provides both power and MIDI connectivity to your computer, and two 3.5mm TRS sockets. By way of the included TRS-to-MIDI cable, they offer a standard five-pin MIDI in/out connection. A further 3.5mm jack socket provides a trigger input that can be connected to an external drum pad or trigger. To the right of the mounting bracket are two raised buttons that enable you to scroll back and forth through the eight presets that can be stored in the Drumbeam itself.
Make Light Work When you first power up the Drumbeam, the LED strips spark into life with a colourful rainbow animation, before settling to display a default preset, in this
case three distinct yellow zones, each separated by two blank LEDs. Each Drumbeam preset can be configured with up to 12 individual zones along its length, each with its own LED colour. As I mentioned, each zone can send out MIDI notes and Continuous Controller messages. The unique and somewhat minimalist form factor of the Drumbeam precludes the inclusion of a display so any configuration is done within the Drumbeam app. Let’s dive in. Although the Drumbeam connects to a Mac or PC via USB-C for its MIDI connectivity (and power), it utilises a built-in Wi-Fi connection to communicate with its web-based editing app. With your computer, tablet or phone connected to the Drumbeam Wi-Fi hotspot, typing ‘drumbeam.local’ into any browser launches the editing app, which opens in Preset view. Both sets of LEDs, front and rear, can be configured independently, potentially giving the audience a completely different viewing experience during a live performance. The front-facing LEDs can be configured to Highlight, Flash, Sparkle or Beam via the Animation drop-down menu, with the user-facing LEDs simply flashing more brightly when struck. You also have the option of inserting zero, one, two or three blank LEDs of spacing, to help you differentiate between zones. Within the Preset view, you can toggle whether the preset will globally send MIDI notes or MIDI CC information, and activate the trigger input. You can also configure the musical scale and
From Hollywood blockbuster composers and Billboard Hot 100 producers right through to keen beginners, the world of music production trusts in Cubase.
steinberg.net/cubase All specifications are subject to change without notice. Copyright © 2025 Steinberg Media Technologies GmbH. All rights reserved.
FE ATURE
Our countdown of the most influential music tech breakthroughs reaches the Top 20. THE SOS TEAM
T
o mark the 40th anniversary of your favourite music recording magazine, we’ve put together our own league table of the 40 most important technical achievements in the history of recorded music. We begin the third instalment in the dark days of World War II... 20: AC bias Early in the history of magnetic recording, it was discovered that impressing a strong, fixed bias signal onto the medium ensured that it operated within its linear zone, reducing noise and distortion. In early wire recorders and tape machines, a simple DC signal was used, but in the late ’30s and early ’40s, various researchers more or less independently discovered that employing
an AC signal instead resulted in dramatic performance improvements. The effect was first exploited commercially by AEG during WWII, reducing noise to the point where it was no longer possible for the Allies to discern whether a radio broadcast was live or pre-recorded. After the war, two of these AC-biased Magnetophon machines were taken back to the USA, where they inspired the creation of the first Ampex tape recorders.
frequencies. Studio engineers were quick to realise that these filters could be used to ‘improve’ signals as well as to restore them, but they remained relatively inflexible until the invention of the parametric equaliser. The term seems to have been coined by George Massenburg, working with Burgess Macneal and Bob Meushaw, but Daniel Flickinger patented the first practical implementation in 1971. Suddenly, it was possible not only to sweep an equaliser through the frequency range to locate the region of interest, but to determine how focused the cut or boost needed to be. Parametric EQ quickly became a standard tool in the audio engineer’s armoury.
19: Parametric equalisation In telephony and other early audio technologies, the frequency content of a signal could become skewed in unwanted ways, for example by high-frequency loss in long cable runs. The earliest equalisers were simple filters that could correct this loss to restore an ‘equal’ balance of Photo: George Shuklin
As well as inspiring the tape recording revolution in the USA, AEG Magnetophon recorders also ended up behind the Iron Curtain, like this one from a Russian military museum.
32
February 2026 / www.soundonsound.com
18: Lossy data compression In the ’80s, file sizes and bandwidth limits presented serious obstacles to the distribution of digital audio. Yet it was widely understood that many of the ones and zeroes in a digital bitstream represented content that was imperceptible. Could the size of the bitstream be reduced by, in effect, including only the information that was audible? Indeed it could, and numerous different technical solutions had been developed by the end of the decade. The direct effect on music recording and production was minimal, but the indirect effect was devastating. When the MPEG Audio Layer 3 standard was adopted in the early ’90s, it was envisaged that end users would only ever access MP3 decoders; encoding would remain a tightly controlled, proprietary process. Instead, both encoders and decoders became ubiquitous and free, and file-sharing services such as Napster wiped out music industry revenues almost overnight. 17: The Portastudio In 1979, Tascam kicked off a revolution in recording when they released the first Portastudio, a compact (for then!) four-track cassette recorder with a simple built-in mixer
that made low-cost multitrack recording accessible to the bedroom musician, and let professionals make demos pretty much anywhere — and, as in the famous case of Bruce Springsteen’s Nebraska, even more than just demos! As well as the machines themselves being more affordable than the open-reel tape recorders that had previously been a necessity, so too was the medium, and cassettes were readily available on every high street. Various models followed from Tascam and others before, in 1995, Fostex kicked things up a notch with the DMT8, the first digital eight‑track hard‑disk recorder/mixer, which brought us innovations like basic cut and paste editing and instant locate functionality. 16: The click track The single project responsible for the greatest number of innovations in the history of recorded music is surely Disney’s Fantasia. Released in 1940, this animated masterpiece is credited with the first use of surround sound, the first simultaneous multitrack recording, the invention of the pan pot, and possibly the first use of overdubbing. It also pioneered an all-analogue form of mix automation. Leopold Stokowski’s orchestra was tracked using more than 30 mics at once, with eight optical recorders capturing the audio and a ninth yet another first: a track containing regular pulses that could later be used to time overdubs and synchronise the animators’ work. Needless to say, it would be many years before the click track began to shape the sound of rock and pop music. 15: The MIDI+Audio DAW Whilst Digidesign’s 1989 Pro Tools software is often credited as the ‘first computer DAW’ in that it offered four-track digital audio recording/editing running on a Mac, it was Studio Vision from Opcode Systems, launched in the following year, that was the first program to offer integrated audio and MIDI recording to a common timeline, pioneering the model for all today’s software DAWs. Being first doesn’t always get you the win, however, and the limited power of the computers of the day, as well as limited hard‑drive capacity and expensive RAM, meant that Studio Vision failed to expand its
user base beyond the professional arena. A subsequent, ill-fated acquisition by the Gibson guitar company led to Opcode’s rapid demise, and they never capitalised on their pioneering work. A number of the key developers at Opcode went on to work with Digidesign/Avid (Pro Tools), Apple (Logic, and Core Audio), MOTU (Digital Performer) and other prominent DAW companies. 14: Artificial reverb As Jason O’Bryan explained in last September’s SOS, the use of reverberation as an effect has its origins outside the music industry. Large radio broadcasters had their own echo chambers as far back as the early ’20s, at a time when records were made entirely acoustically. Music studios followed suit in the 1940s, and the Harmonicats’ ‘Peg O’ My Heart’, recorded by Bill Putnam Sr and released in 1947, was hailed for its innovative sound. As is so often the case, however, Hollywood was years ahead. The first commercially released movie soundtrack album, Songs From Disney’s Snow White And The Seven Dwarfs, was released in January 1938, and makes clever use of artificial reverb on ‘I’m Wishing’.
12: The drum machine Musicians have been plotting to get rid of drummers for a surprisingly long time. Léon Theremin, inventor of the instrument that bears his name, produced a device called the Rhythmicon way back in 1932. From the ’50s onwards, drum machines that could play back a selection of preset rhythms became common add-ons to home organs, and by the late ’60s some pop artists were experimenting with them on record. However, it was the advent of the microprocessor-controlled, programmable drum machine towards the end of the ’70s that moved synthesized rhythms out of the realms of novelty. The Roland CR-78 and TR-808, which generated their drum sounds using analogue circuitry, vied with sample-based units like the Linn LM-1 and Oberheim DMX; and music was the winner.
13: Remixing The dancehalls of Jamaica and the nightclubs of New York provided record producers with very direct feedback. A three-minute single might be over too soon, or might contain one short section that drove the crowd wild. Producers like King Tubby and Lee Scratch Perry began creating alternative interpretations of the reggae records they were making, de-emphasising the vocals and incorporating varied effects. Soon, dub mixing became an artform in its own right. Then, in ’70s New York, DJs began to work with tape, chopping up and looping segments of disco records. Artists and producers started to be involved in remixing their own work, with the 12-inch single becoming the format of choice. By the time house music took off, remixing was a specialist career for some, and in the hands of producers like Aphex Twin, would eventually reach the point where a ‘remix’ might be a completely different track in all but name.
11: Stage monitoring One of the reasons why the Beatles retired from live performance in 1966 was that sound reinforcement technology couldn’t keep up with their popularity. The PA systems of the time were no match for stadiums full of screaming teenagers. Over the next 10 years, live sound would undergo a complete revolution, from simple column speakers designed only to amplify the vocal microphone to complex arrays through which the entire band would be presented, sometimes in stereo or even quadraphonic sound. Perhaps the most revolutionary step in this process was the introduction of additional speakers on stage to direct these amplified signals back at the artists. Stage monitors first appeared around 1969 and were likely developed independently by several different FOH engineers, among them Bob Pridden with the Who.
The Roland CR-78 was the first programmable drum machine that could store and replay user-created rhythms — as long as you also had the super-rare WS-1 ‘write switch’.
www.soundonsound.com / February 2026
33
Discover SOS For Artists : A Complete Platform for Modern Music Creators
Your end-to-end music production suite
Designed to support independent artists, producers, and collaborators at every stage of the music-making journey, SOS For Artists is a new subscription service that brings together all the tools needed to take your music from idea to release.
Create 1. Sample Selection Made Simple
Over 3 million royalty-free samples — with new packs added every week. Up to 2,400 samples per year included in your subscription plus an advanced preview tool that lets you tempo-match.
2. Instruments & Synths
Included with SOS For Artists is a curated collection of high-quality plug-in instruments from respected brands like Spitfire, UJAM, Arturia, GForce, Sonuscore, and more.
www.sosforartists.com
“Efficient, DAW-integrated tools to streamline sample selection and composition.” 3. Stem Extraction with AudioShake
An integrated stem-splitting plug-in allows you to isolate vocals, drums, bass, or instrumental parts from full mixes — right inside your DAW or via the web platform.
4. Starter DAWs Included
For newcomers, the subscription includes lite versions of Steinberg Cubase and Ableton Live.
ESSENTIALS
FREE PLAN ign up and explore S the features Upgrade at any time Kickstart your creativity with 7,800 samples Preview the Mastering tool Preview the Distribution service
ONLY
99*
£
PRO
or £12.99** per year per month £1,000 worth of Tools inc 18 Plug-ins 1200 Sample Credits Unlimited MP3 + up to 36 WAV masters per month Unlimited Distribution
ONLY
199*
£
or £19.99** per year per month £2,000 worth of Tools inc 45 Plug-ins 2400 Sample Credits Unlimited MP3, WAV + HD WAV masters Unlimited Distribution
* Prices exclude VAT. Taxes will be applied at the UK / EU Country rate at checkout. ** Monthly price does not offer same number of Plug-ins or Sample Credits
*** Also available in most countries worldwide in your local currency.
Produce “Refined tools for mixing and mastering, suitable for both quick demos and professional releases.” 1. Mix & Effects Tools
The effects collection includes EQs, Compressors, Reverbs, Delays, Saturators, and creative FX from trusted names. Highlights include Eventide’s CrushStation, Arturia’s Rev PLATE-140, TAIP by Baby Audio, and MixBox SE from IK Multimedia, plus Synchro Arts’ powerful VocAlign and RePitch plug-ins.
2. Mastering — Fast, Intelligent
SOS For Artists includes access to the advanced AI mastering engine from LANDR — available both online and as a plug-in. It analyses your track’s dynamics, frequency spectrum, tempo, and stereo image to deliver a tailored master.
Distribute 1. Global Digital Distribution
Distribute your music to over 150 platforms including Spotify, Apple Music, Tidal, Amazon, and Deezer. Just upload your tracks, artwork, and metadata, set a release date, and go live within 2–7 days. Migrating from another distributor? Bring your existing catalogue and retain play stats and followers.
2. Royalty Splits & Monetization
The Royalty Split feature allows you to divide earnings with collaborators. Just enter percentages. Payments are processed with low thresholds — starting at just $1 via PayPal — and you retain 100% of your royalties.
3. YouTube Integration
Link your official YouTube artist channel to keep distributed content and subscriber base in one place.
4. Cover Song Licensing
Mechanical licenses for cover songs are handled automatically with a simple one-time fee. A direct link to the Harry Fox database helps you verify original composers and credit them properly.
5. Promotion & Reporting
Promotion tools include Linktree-style landing pages and content creation tips to help boost visibility. Detailed royalty reporting shows trends, top countries, and top-performing platforms.
“Release your music across 150 major platforms including Spotify, Apple Music, Tidal, Amazon and Deezer while maintaining catalogue integrity and metadata continuity.” www.sosforartists.com
ON TE ST
Rupert Neve Designs OptoFET Dual-stage Compressor
With two separate compressors on board and various ways to deploy them, RND’s new OptoFET is an intriguing prospect. M AT T H O U G H TO N
D
espite the physical resemblance to its stablemates, the new OptoFET is a pretty bold move for Rupert Neve Designs (RND). Rupert Neve’s classic diode-bridge and VCA compressor designs are well known, of course, but this one is based around two other compressor types: one FET and the other optical. That’s a tried-and-tested a combination in music production — for years, many engineers have partnered an 1176 with an LA-2A, for vocal processing in particular. But the OptoFET isn’t simply a case of nicking that idea. I’m told their R&D team have been toying with different FET compressor designs for years (even if this is the first they’ve released), and they’ve included multiple routing options here, as well as implementing two new ‘character’ options, called Grit and Bloom.
Controls & Construction As you’d hope of gear at this price (very much in ‘professional’ territory, though a keener one than some others in RND’s range), the 1U 19-inch rackmount OptoFET’s build quality is flawless. The case and controls are reassuringly solid, with plenty of finger space around the knobs (all turning 31-position detented pots) and buttons. Visual feedback is
36
February 2026 / www.soundonsound.com
instantly informative, and the painted finish oozes class. None of which will be a surprise if you’ve used RND gear previously! On the rear, there’s an IEC C14 mains inlet (100-240 Volts AC, 50 or 60 Hz) with an integral power on/off switch. There’s a power indicator LED on the front too, but no switch; ideally, I’d like a second switch there to allow powering off when my studio rack is powered up. Back on the rear, as well as a ground-lift slide switch, you’ll find a single Neutrik Combo XLR to route line-level sources to the electronically balanced input stage, and a male Neutrik XLR to deliver the custom-transformer balanced output. That arrangement is perfectly normal for mono processors like this, but it does mean you can’t simultaneously deploy each compressor on different sources. Such a facility would have added to the unit’s versatility, but the additional I/O would also have increased the asking price, particularly with a second transformer-balanced output. There’s no external side-chain input, and no provision for stereo linking either, which RND say is because matching the optical cells to the precision they’d want is nigh on impossible! On the front, working from the outside in, there’s a ±12dB input gain knob with
signal-present LED on the left (green, turning red when approaching clipping), and a ±12dB master output level control on the right, whose eight-LED output level meter ranges from -10 to +22 dBU. Inside those I/O controls, visually separated by white lines, are the FET compressor controls on the left, those for the opto compressor on the right and, between, them a central section with the routing controls. Those routing options need explaining before we can explore the performance of, and potential applications for, this processor. At the top-left corner of this central section, a backlit hard-wired bypass button takes everything, including the input and output stages, out of the signal path. Alongside this, another button labelled X-Over In determines whether the OptoFET’s compression stages are configured to act in series on the whole signal, or independently on low and high frequency bands. In the latter scenario,
Rupert Neve Designs OptoFET £1859 pros • Great technical performance. • Subjectively appealing compression. • Versatile routing and band splitting. • Grit and Bloom increase the appeal.
cons • Can’t deploy the two compressors on separate sources.
summary Two high-quality compressors in one, with versatile routing and character options to boot. What’s not to like?
a knob immediately below sets the crossover filter frequency (50 to 500 Hz). A third top-row button, labelled Flip, swaps where the compressors are deployed. If in series mode, engaging this puts the opto compressor first in the chain, while in X-Over mode it determines which compressor is assigned to the low band and which to the high. Two quartets of LEDs below, one either side of the frequency knob, indicate the current assignment for each compressor: there’s an LED each for stages A and B in series mode, and for HF and LF in X-Over mode; the current selection lights green. It’s a neat, intuitive system that’s also quick, since there’s no manual patching involved. Each compressor’s control set is almost identical. To the right of their green backlit in/bypass button is a dark-blue threshold knob, though the two have different ranges: -15 to +20 dBu for the FET, with -5dBu at the top position; and -10 to +20 dBu for the opto, with -8dBu at the top. Silver-coloured knobs
govern the attack (0.1 to 50 ms for the FET, 5-50 ms for the opto) and release (50ms to 1.5s for both) times, and each processor has a wet/dry blend knob too. A button toggles between two ratio options (4:1 and 8:1 for the FET; 2:1 and 5:1 for the opto, though the opto’s ratio actually varies somewhat with the signal level). These ones are the only buttons on this device that don’t light — usually, you can see easily enough when these buttons are depressed, but my ‘moody’ studio lighting sometimes made it trickier. A further (green backlit) button switches in a 125Hz, first-order high-pass filter for the side-chain signal, while another (yellow) one engages the Grit function for the FET compressor, or Bloom for the opto. Finally, we have an eight-LED bar meter above each compressor’s controls to indicate gain reduction (1-22 dB).
True Grit So what does this thing sound like? Why have RND put two compressors in one box, and what applications do all those routing and character options open up? To answer such questions, I spent a few weeks auditioning a pair of OptoFETs on several active projects. But first, even before dialling in any compression, I should spell out very clearly that it sounds great: full, clear, and with all the details in the source being conveyed with precision. Patching in just the FET compressor, I began by experimenting with some vocal compression, before turning my attention to bass guitar, acoustic and electric
guitar, and acoustic and electronic drums. This compressor, which has a soft knee, served admirably in the vocal smoothing role. With a 4:1 ratio and a long-ish attack and release, it delivered elegant control of male and female voices, and evened out the dynamics of guitar and bass parts nicely too, without suffocating note onsets. Switching to 8:1, I found more scope to shape the envelope of bass guitar notes and individual drums. It can be really fast too, such that you can clamp right down on transients — a tactic that can be really useful when you bring the mix control into play. While you have only two ratio choices, not the four of the 1176 (never mind its ‘all buttons in’ trick), this isn’t really trying to be an 1176, and there are further factors to consider in any case. First, there’s that mix control, for parallel compression. Second, there’s still a whole other compression stage to play with, should you wish to get more assertive. And third, there’s Grit... Before I looked too deeply into this unit, I’d imagined that Grit might be a dedicated saturation circuit, but it’s more sophisticated than that. When not engaged, there is (for both compressors) some smoothing of the side-chain signal going on behind the scenes. Switch in Grit, though, and this is removed, leading the FET compressor to act faster and more assertively, introducing some upper-mid and high-frequency harmonics in the process. This can lend energy and urgency to proceedings, and usually without making things sound overcooked. But push the compression harder and it becomes more obvious, and again, I particularly enjoyed doing that and using the mix knob to blend this in as an effect.
The central control section: this is where you decide where the two compressors will act on your signal; one before the other, or each on a different frequency band.
www.soundonsound.com / February 2026
37
ON TE ST
Aguilar Plugin Suite
Bass Rig Modelling Software
Screen 1: The main amp/cab home screen.
For this plug‑in, boutique New York bass specialists Aguilar teamed up with modelling experts Korg — and the results are impressive... PHIL WARD
D
espite being an enthusiastic and busy bass player, I have to admit that when it comes to recording my basses I’ve never really been all that sophisticated or adventurous in my methods. I’ve played with a few amp-and-cab modelling plug-ins but never been entirely convinced or particularly inspired by them. Instead, I’ve stuck to a tried and trusted technique that involves DI via an old hardware valve compressor (configured to provide valve‑based colour more than actual compression), followed by plug-in based EQ, compression, optional dirt, and sometimes a taste of very short
40
February 2026 / www.soundonsound.com
reverb to add some air and room sound. Being asked to review the Aguilar Plugin Suite, however, had an element of ‘kid in a sweet shop’ about it. Where to start? What will I like? If you wanted to pick a brand to embody the idea of a boutique backline manufacturer, you’d not be too far away with Aguilar. Founded in 1995 in New York, they began as specialist manufacturers of bass amps and cabs, but have since expanded their product range to include bass effects pedals, pickups, and internal guitar preamps (used by a good number of boutique bass luthiers) — and now, obviously, plug-ins. You don’t see many Aguilar backline rigs at, say, metal or indie guitar gigs, but at
jazz gigs or down in a musical theatre pit, Aguilar have secured a significant niche. And while their hardware is definitely
Aguilar Plugin Suite £156 pros • Easily accessible great bass sounds. • Huge creative possibilities. • Intuitive and easy to use.
cons • None.
summary The Aguilar Plugin Suite offers a wide range of high‑quality and inspiring bass tracking options. Very much recommended.
not priced at the entry-level point, it’s also not soooo expensive that it’s completely out of reach. As I write that, I’m glancing at my venerable old Gallien‑Krueger combo, wondering how much an Aguilar amp and cab would cost me... but I digress!
Suite Backline The intent behind the Aguilar Plugin Suite is to model a range of Aguilar amps, cabs and pedals. Despite being billed as a plug‑in, it can actually also be used as a standalone application, and in that mode it offers MIDI for patch selection and, I guess, the possibility to be used in a live environment, assuming you have a sufficiently low-latency computer and audio interface setup. The core modelling technology of the plug-in is licensed from Korg, and it’s used to render 13 different Aguilar cabinets, ranging from a 1x10 to an 8x10-inch and including various 12- and 15-inch designs. There are also three different Aguilar amps, and nine Aguilar stompbox emulations. The library of pedals includes two compressors, a twin filter envelope, an octaver, a chorus, a phaser and three different overdrive/fuzz options. There’s a wide range of presets, some created by Aguilar-endorsing bass players of note such as Blu DeTiger, Derek Frank, Keithlen Foster and Lex Sadler. Some patches comprise amp and cab combinations, while others offer amps alone for DI modelling. Some also include various chains of virtual effects pedals. Along with being useful in their own right, factory patches also work well as launch pads on which custom patches can be created and saved because everything can be mixed,
STOP GUESSING START HEARING
Meet the Angry Box A True Point Source Studio Monitor With DSP & Mid-Focus Modes
THE lighthouse when your mix is lost at sea Scan here to unlock free Room Correction Software (Beta) with your purchase
Screens 2 and 3: Pop‑up selector windows allow you to browse the available amps and cabs.
DISTRIBUTED BY
Software available with Angry Box purchase, only via sign-up: tantrumaudio.co.uk/ad/sos2026
www.soundonsound.com / February 2026
41
ON TE ST
Scaler Music Scaler 3 €99 pros • A brilliant update packed full of new features.
cons • It’s deep; expect to spend some time to grasp all it has to offer.
summary This is a fabulous update to the Scaler concept, with some powerful new features presented in a slick UI. Scaler 3 lets songwriters and composers explore chords and harmony in all sorts of interesting and inspiring ways.
Scaler Music Scaler 3
Compositional Software
Scaler has evolved into a fully-fledged compositional toolkit. JOHN WALDEN
I
f your compositional process often starts with chords, and you are open to the concept of a software-based writing assistant, then Scaler may well be a product you are familiar with. However, five years after Scaler 2 was released, Scaler Music have now released Scaler 3 and, without wishing to issue a spoiler alert, I do think it’s been worth the wait. So, what’s new in Scaler 3?
The Scale Of The Project From a practical perspective, Scaler operates as both a standalone application and as a plug-in. At its heart, Scaler — in both its v1 and v2 iterations (see the December 2018 and September 2020 reviews) — is perhaps best thought of as a chord sequence explorer, allowing you to experiment with chord choices, guiding you on chord selection, suggesting chord alternatives/substitutions (including more harmonically complex choices), chord voicings, and letting you venture into chords that might lie outside your chosen key/scale. Those chord sequences could be easily auditioned and, when
44
February 2026 / www.soundonsound.com
you settled on a chord sequence you thought was promising, MIDI could be dragged and dropped to your DAW for further work. Scaler 3 is still all of the above. However, there are two very significant changes. First, an impressive redesign of the UI organises all this core ‘creating chord progressions’ functionality in a much clearer fashion. Second, and just as impressive, Scaler 3 now goes way beyond chord sequence exploration and into the realms of ‘compositional tool meets MIDI sequencer’.
Three For Three In terms of the UI, Scaler 3’s functionality is now arranged across three main pages — Browse, Create and Arrange — accessed via the tab buttons located top left. The Browse page, which itself is divided into three sections, will be familiar to longstanding Scaler users. The Chord Set and Current Scale panels provide alternative ways to kickstart your chord selections, and provide a very impressive collection of genre/mood/artist chord sets that could keep your songwriting inspired for a considerable time. Chords from these panels can then be dropped into
the Main Track panel to build your own chord sequence. Auditioning chords within each panel is made easy as each features a ‘bind’ button letting you link that panel to your MIDI keyboard and mapping each full chord to a single key for instant triggering. Switching to the Create page keeps the Current Scale and Main Track options visible but the central body of the UI then provides five sub-panels offering alternative chord exploration approaches. Circle of Fifths gives you an interactive way of exploring that music theory concept to find chords that work together, while Modulation provides a very clever toolset to explore modulation pathways between your Main Track chord sequence and a target destination scale. If your Music Theory 101 grade was a bit shaky, this is a brilliant environment to explore some sophisticated key/scale changes within your compositions. The Explore panel offers a further circular chord finding environment, but this time the chord selections are based upon genre (for example, ambient, synthwave, cinematic and many others) and mood (bright, dark and neutral). The arrangement and colour coding of the chord display provides a helpful steer, letting you pick chords that are either harmonically similar or contrasting, or ‘lighter’ or ‘darker’ in sound. The Colors panel provides multiple lanes of alternative chords to those within your current scale, letting you pick from either harmonically different options or chord inversions. Finally, the Sketch panel provides a sketchpad-style environment letting you build up to seven alternative chord sequences. You can drag and drop chords from the Current Scale or Main Track selections, audition the sequences, and bind your MIDI keyboard to a particular sequence for easy chord triggering. Playback uses the sound selected for the Main Track but, for
each lane, you can select a different Motion. Motions are, essentially, short performance phrases/styles that adapt to the currently selected chord or chord sequence. I’ll come back to these in a minute, but Scaler 3 includes a huge selection of such Motions, spanning rhythmic chords, standard arpeggios, ostinatos, various expressions and styles suitable for melodic or bass performances. Used here, they let you audition your chord sequences in a more realistic ‘performance’ style. The other element of note (and it appears elsewhere within the Scaler UI) is the ‘lightbulb’ icon that appears within the various chord lanes. Click on one of these and Scaler will automatically generate a chord sequence for you (or complete an existing one). No, you won’t perhaps love every option it creates but it’s a useful writing assistant to have handy when your inspiration needs a kickstart.
Scaler Feng Shui It’s Scaler’s new Arrange page — which represents a very ambitious upgrade to concepts previously found in the Perform panel — that is home to that second leap forward I mentioned earlier. With the Main Track chord sequence providing the timeline along the top, you can now add further instrument tracks beneath this in a DAW-like fashion, and whatever MIDI content is placed on these tracks (more on this in a minute), it will follow the chords (and adapt to changes in those chords) on the Main Track. Each of these additional tracks can use its own sound and Motion. In terms of sounds, these can either be one of Scaler 3’s expanded collection of internal sounds or, rather wonderfully, any third-party VST or AU virtual instruments you have installed. Oh, and for added fun, the Mixer now provides three VST/AU effects slots per instrument track and on the Master Output channel. MIDI playback data for these tracks can be added via the huge collection of Motions mentioned earlier and, if you divide the MIDI regions up within a single track, you can add a different Motion (performance pattern/ style) to each MIDI region. And, once you have set up any Motion on a track, you can fine tune its performance style with a combination of options (Octave, Inversion, Transpose, Density, Voicing, etc), all located on the left-hand edge of the lower half of the screen. Open the MIDI Editor sub-panel and you can see exactly what’s happening as you make changes.
Incidentally, you can make manual changes to notes but, if you do that, notes within that clip appear in red to indicate that, for that clip at least, you have broken the link between the clip and the Main Track chords. A Re-attach button lets you re-establish that link if required. Even in this first iteration, the potential of the Arrange page concept is very obvious. You can now go a long way beyond just creating your song’s chord progression and well into the territory of its musical arrangement. And, when you are ready, all the MIDI can be exported into your DAW for further work. It’s impressive stuff.
Scaling Great Heights? It’s not possible to cover all of Scaler 3’s extensive ‘new and improved’ list here, but I’ll close by mentioning a couple of other personal highlights located within the Keyboard display controls at the base of the UI. First, the Voice Grouping setting provides all sorts of interesting options that can control note selections as you transition between chords, allowing you to make chord changes seem smoother (or not, as required). Second, amongst other options, when you bind your MIDI keyboard to the Chord Set, Current Scale or the Main Track chords, and activate the Key Lock feature in Chord Scales mode, this lets you trigger your Chord Set from the black keys, while automatically adjusting the note mapping to the white keys — upon which you can play a melodic line — to follow the scale of the currently triggered chord. From a theory perspective this occasionally went
well above my musical paygrade, but it’s fascinating to use. Oh, and just as we were going to press, Scaler Music dropped Scaler 3.2, which, alongside a host of other improvements, adds a very impressive ‘Scenes’ capability. Scenes can contain chord ‘clips’ (sequences) and motions and can then be used to build out your song’s structure along Scaler’s own timeline. It further enhances Scaler’s ability as a song arrangement tool. The bottom line here is that Scaler 3 is a bit of a triumph. There is new functionality throughout but, because some very careful thought has obviously gone into the design and organisation of the UI, it also provides a much more logical and coherent workflow through that functionality. Finally, it’s worth noting that while there is instant gratification to be had via the preset collection of Chord Sets and Templates, Scaler 3 has considerable depth. Don’t expect to fully master it in a single sitting but, spend some time with it, and you will gradually uncover some of the gems it has to offer. If you use and love Scaler 2, the upgrade is compelling. If you want a music theory expert to assist with your compositional and songwriting ideas — with the new Arrange page giving you some virtual performer elements to help you realise that idea in a very musical form — then Scaler 3 provides a heck of a toolkit. Highly recommended. £ Scaler 3 €99, upgrades from €29. Prices include VAT.
W www.scalermusic.com
The new Arrange page allows you to transform chord sequences into multitrack performances.
www.soundonsound.com / February 2026
45
FE ATURE
AI & Music Tech In 2026 We asked music professionals how AI is changing their world. SAM INGLIS
S
o-called artificial intelligence is the hottest topic in music tech. Generative AI services such as Suno and Udio allow users to create entire songs from simple prompts. Will they make conventional music production redundant? Or will producers take advantage of a wave of innovative, assistive AI tools to do their work faster, better and smarter?
Sonarworks are well known to SOS readers for their SoundID speaker and headphone correction tools. They too have recently branched out into AI, with the launch of their VoiceAI virtual vocalist. With new AI products seemingly appearing every week, Sonarworks decided it was a good time to take stock. Are musicians and producers embracing these tools? How are they using them, and what for? What opportunities and challenges does the rise of AI open up? To answer these questions and more, Sonarworks commissioned Sound On Sound to carry out a comprehensive survey. Almost 1200 music creators responded, and we can be confident that the results are representative: over 70 percent are working professionals with more than a decade’s experience in production and
The respondent base for our survey represents a true cross-section of the music production world.
46
February 2026 / www.soundonsound.com
engineering. This is one of the first comprehensive surveys of attitudes towards AI in music production, and as such, provides a unique snapshot of the current situation. You can read Sonarworks’ full analysis on their website; in this article, I’ll try to draw out some of the most important conclusions.
The Only Way Is Ethics In any technological revolution, there will be early adopters, and a larger body of people who are more cautious. That pattern is clearly evident in this survey. Around one in five respondents self-describe as early adopters of new tech in general, and the same proportion claim to be regular users of AI products or services. By far the largest group, around half of the total, describe their use of AI as being in the occasional or
Our data shows that one in five producers is a regular AI user already, while almost half have used it experimentally.
experimental stage, whilst less than 20 percent express no interest in learning or using AI tools. When producers were asked what factors limit their use of AI, the most widespread concern that emerges is around creativity. More than a third of respondents worry that relying on AI tools would compromise their creative intent, or undermine the individuality of their work. Nearly as many express unease about the ethics of artificial intelligence. With many issues surrounding copyright and training still unresolved, some feel it’s too risky to depend on tools that have an uncertain legal basis, and that the use of AI tools is exploitative of the other musicians on whose work they may have been trained. More than a quarter of respondents also report that the AI tools they’ve tried simply aren’t yet of sufficient quality to be useful in a professional context. In many cases, this links back to the concern about creativity, with the output of AI often described as generic or bland. Whether or not participants are actually limiting their use of AI on ethical grounds,
Loss of creativity and ethical doubts top respondents’ list of concerns about AI.
it is almost universally felt that attention to the ethical basis of AI products is non-negotiable. Asked to evaluate the importance of ‘ethical sourcing’, two-thirds of respondents rate it very important, and fewer than one in 10 rate it unimportant or relatively unimportant. Survey respondents are also alive to the ethical implications of their own use of AI, which principally centre around disclosure and transparency. A large majority advocate either full transparency
over the use of AI, or ‘situational disclosure’, meaning they would acknowledge their use of AI if asked. Only 6 percent say they would prefer to deliberately conceal their use of AI.
Levelling Up Concerns about creativity and the ethics of AI are reflected in assessments of its most fruitful use cases. Just under a third see it as a source of inspiration, while
www.soundonsound.com / February 2026
47
FE ATURE
AI AND MUSIC TECH IN 2026
a similar proportion see it as enabling new forms of collaboration, or a route to saving money. However, almost three-fifths of the survey participants recognise the potential for AI to speed up or automate tedious tasks such as vocal tuning, drum editing and file management. In other words, the applications to which respondents are most open are the most utilitarian ones. Producers are most willing to use AI for tasks they see as technical rather than creative. This attitude ties in with the answers to wider questions about the skill sets that modern professionals need. There is a widespread perception that once-essential technical skills such as notating and transcribing musical scores, manual audio editing and noise reduction are increasingly becoming redundant, and that this process is being accelerated by AI. Interestingly, a significant number of respondents also feel that basic ‘bread and butter’ mixing skills such as balancing, corrective EQ and dynamic control are becoming optional, with AI tools picking up the slack. By contrast, the skills that are perceived as essential for modern producers and musicians are primarily the creative ones — musicality, instrumental ability, understanding of music theory, critical listening and compositional ability — alongside the ‘soft skills’ that foster collaboration and enable producers to get the most from people. It is also widely felt that engineers who specialise in old-school analogue recording will continue to flourish, and that their skills will prove resistant to AI replacement. Half of participants agree that the most important differentiator for human producers in the AI era is the ability to find and pursue an original creative direction. Respondents are also alive to the need to develop new skills, with around two-fifths including the need to master AI tools as one example. Almost the same proportion point to the increasing importance of networking and marketing, and the same again to the need to look beyond music and acquire expertise in multimedia, video, virtual reality and other intersecting technologies. Perhaps most remarkably, almost a third of participants view coding and scripting as important for music production. As Sonarworks point out, these results may have implications for educational institutions offering music tech programmes. Potential students will seek out courses offering what they perceive to be the skills needed to succeed in today’s
48
February 2026 / www.soundonsound.com
Efficiency is seen as the most likely benefit of AI, but many also perceive it as being a valuable creative partner.
The most popular AI tool categories are currently those with relatively utilitarian functions.
Jazz/blues and classical music are the genres seen as most resistant to AI.
landscape — and they may not be the ones that are favoured on existing curriculums.
Across The Board Participants were asked to name up to three main genres in which they work. Around 45 percent specify rock and pop, with electronic music not far behind at 38 percent. The next most popular genres are ambient/new age and film or game scores, both polling around 24 percent. Only 13
percent cite metal as a primary genre, perhaps reflecting its longstanding status as a niche subculture. It is widely anticipated that the impact of AI will vary with musical genre. Two-thirds of respondents feel that EDM and mainstream pop will prove amenable to AI generation and replication, whilst ambient and ‘functional’ music are also expected to do so by half of the people answering the question. Interestingly, both game/film
scores and hip-hop/rap are seen as much less vulnerable to AI, for rather different reasons. Bespoke soundtracks are relatively long-form and require a clearly identifiable compositional voice, whilst rap centres the human performer in a way that’s perceived as hard to replace. At the other end of the scale, the genres viewed as most resistant to AI generation are jazz, blues and classical music. It is felt that the subtlety and nuance of human interaction in these genres will prove hard to replicate.
Aim…Ready... RECORD! 5/5
“…the INSPIRE and the ESSENCE have arrived fully formed and ready to disrupt one of the most competitive markets there is...”
“Cons: None”
Not All Doom & Gloom Overall, participants express predominantly sceptical or negative judgements about AI in music technology. Only a fifth describe their feelings about AI as positive or very positive, whilst the remaining 80 percent are divided about equally between neutral, and negative or very negative. However, given the emphasis placed by most on creativity, it may be that this negativity relates less to assistive AI tools targeted at music production, and more to generative AI services that threaten to bypass the role of the music producer altogether.
“AI is here to stay. Although a significant number feel it’s over-hyped, only 3.6 percent believe it to be a passing fad, and nearly a third see it as revolutionising the music industry.” At the same time, the large majority of survey participants acknowledge that AI is here to stay. Although a significant number feel it’s over-hyped, only 3.6 percent believe it to be a passing fad, and nearly a third see it as revolutionising the music industry. Going deeper, a small majority of respondents (58 percent) see the eventual role of AI in music production as primarily a supportive one. In this vision, human producers and musicians will retain firm control of the creative reins, but assistive AI tools will help them to realise their vision faster and more effectively. A further 21 percent selected “major automation with human oversight” as the most likely future for AI in music, with only 9 percent expecting “full automation” and human producers becoming largely redundant. In short, the attitude of a majority of participants towards AI can probably be summed up as grudging acceptance of the inevitable. Consequently, developers of AI tools still have a lot of work to do in order to win hearts and minds in the music production community. AI products are most likely to gain acceptance if they can demonstrate their ethical credentials, and offer genuine assistance with jobs that human producers and engineers find tedious. Above all, they need to ensure that their users feel in control of the creative direction at all times. Artificial intelligence is both a novel challenge and a unique opportunity — but if it ends up sidelining human creativity, there will be no winners.
Distributed worldwide by:
Transformer
Electronic
Based in Berlin, Aim Audio’s highly experienced team has brought back volume production to the original home of some of the world’s most famous Studio Condenser Microphones, with products that are not only groundbreaking and exquisite, they also have what we call Useful INNOVATIONS in Audio DESIGN. Both our new INSPIRE and ESSENCE mics were conceived entirely from the ground up and feature our patented switchable Transformer or FET output stages, a host of other genuinely useful innovations and a sound that’s been meticulously tuned by a tribe of leading musicians, audio engineers and experts from all around the world.
aimaudio.com
www.soundonsound.com / February 2026
49
ON TE ST
SPL P8
Eight-channel Microphone Preamplifier
You don’t always want ‘colour’ in a mic preamp. In fact, there’s a strong argument for making them sound as transparent as possible... PAUL WHITE
T
he market for microphone preamps is an interesting one. Some designers aim to add character and warmth by deliberately colouring the signal with valves, audio transformers and/or other circuitry in the signal path, while others strive to produce the cleanest, most transparent signal path possible — the proverbial ‘wire with gain’ that adds nothing and takes nothing away from your precious signal. SPL’s new P8 preamp falls into the latter category, utilising a discrete transistor preamp circuit (rather than the more usual op‑amp hybrid topography) to offer a flat and wide frequency response, very low noise and minimal distortion. Its circuitry is designed to provide plenty of headroom, and there’s enough gain range here to allow the preamps to handle anything from hot active microphones to low-output passive ribbons.
Pieces Of Eight The P8 is a 1U rack module containing eight identical microphone preamps. SPL have a long track record of designing high-quality microphone preamps, of course. I owned their excellent GoldMike dual-channel mic pre and Channel One single‑channel unit many years ago, both of which included valve circuitry to add a little flavour, and I rated them highly. Since then, the company have explored a number of different approaches to mic preamp design, including the high-voltage Crescendo 8. With the P8, SPL have taken what might be described as a more audiophile approach, with a design that, while not close to being at what I’d consider the budget end of the market, is
50
February 2026 / www.soundonsound.com
more affordable than — yet arguably just as highly specified as — lots of single-channel boutique mic preamps. SPL’s fully discrete preamp circuit was designed for wide bandwidth (fast slew rates) and low distortion. Importantly, it maintains a musical character when it’s pushed close to clipping, but essentially the circuit’s function is simply to make the mic signal bigger, rather than to change it. SPL’s designers explained that the preamp consists of a total of eight transistors for signal processing, and five transistors in the current mirror circuit. An FMB2222A dual bipolar NPN transistor package handles the differential input stage, and the thermal coupling helps optimise common mode rejection. BCP56 and BCP53 transistors are employed in the output stage to deliver the wide frequency response necessary to handle fast transients. The rear panel hosts eight Neutrik XLR connectors for the mic inputs, along with two DB25 D-Sub connectors (wired to the AES59/Tascam spec) for the line outputs. There’s also an optional ADAT interface that allows you to use the P8 as an audio interface expander, and this has dual ADAT ports for S/MUX support of higher sample rates. As standard, the DB25 output is linked to a second DB25 connector allowing the signal to be split without the need for an external splitter, but this has to be removed in order to accommodate the ADAT card. The unit sent to me for review model came with the ADAT interface already fitted.
Panel Games On the front, the styling is unfussy and workmanlike, with the eight identical
preamp control sets arrayed across the front panel. Each channel has a gain control, plus four illuminated push buttons and a three-LED level meter. Located toward the right of the panel are a sample-rate selection button with status LEDs, and another LED for word clock sync. The gain knob covers the range +8 to +62 dB, and there’s a switchable -20dB pad to deal with particularly hot signals such as close-miked drums, brass or electric guitar amps. The switchable 80Hz high-pass filter has a gentle first-order (6dB/octave) slope. Phantom power conforms to the standard 48V and is available separately for each channel, as is polarity inversion. Operating the switches doesn’t produce the clicks and pops that you hear from some less sophisticated designs, and in this design transistor circuits are used to turn the phantom on and off. Given the 1U format, large-scale meters would be impractical with so many channels and controls to accommodate, but the three-LED system used here is sufficient to let you know what’s happening, and most of us will have more accurate metering available on the receiving device or in our DAW software. Since there are no insert points to consider, connecting the P8 up is straightforward. The design also deliberately omits DI jack inputs — ideally I would have liked to have had one or more, but it could be argued that fewer connections helps to maintain the cleanest signal path. Some users may also bemoan the fact that the XLR inputs are on the rear panel, since that might require using a patchbay or stagebox to access them in a studio, but really it’s the best way of fitting eight preamps of this quality into a 1U rack space and there are obvious
sync signal is present. There’s also a USB port for handling firmware updates and other maintenance functions (not for use as an audio interface).
Performance
SPL P8 From £1799 pros • Extremely transparent, quiet circuitry with very wide bandwidth. • Optional ADAT card. • Takes only 1U of rack space.
cons • No USB interface capability. • No line/instrument inputs.
summary A superbly clean and detailed eight-channel preamp that delivers transparency rather than adding character.
advantages in keeping the cables out of the way of the controls too. The optional ADC8 ADAT board has dual ADAT outputs plus BNC connectors for word clock in and out. It uses AKM’s AK5538 converter chip, providing a well-specified ADAT optical output capable of up to 192kHz using S/MUX, which makes it possible to carry four channels at 96kHz or two at 192kHz over a single Toslink cable, or twice as many if using dual ADAT connections (so the maximum sample rate for running all eight channels over two cables is 96kHz). Many audio interfaces are S/MUX compatible, so a P8 fitted with the ADC8 board could be a very practical addition to a DAW-based setup, and setting it up as an expander for my PreSonus interface was plug-and-play simple — other than a mains cable, I just needed two optical cables to get set up. Precision quartz oscillators provide a low-jitter master clock but are automatically disabled when an external
The specified frequency response extends from 15Hz to 200kHz, and although obviously nobody needs anything like that range to be able to hear the detail in hi-hats and acoustic guitars, having a wide, flat response ensures phase linearity is preserved across the audible spectrum. Crosstalk is specified as being below -90dB at 1kHz, with a -30dB input signal and 30dB gain. Equivalent input noise is quoted around -124dBu — that’s very close to the theoretical minimum. THD (total harmonic distortion) plus noise is negligible at low to medium gain settings, and distortion doesn’t increase excessively unless the preamps are pushed to the verge of clipping. The quoted figures are THD+N: 0.0025% at 1kHz with a -30dB input signal and 30dB gain. Common mode rejection is quoted as 78 to 80 dB at 1 kHz, which means that balanced mic cables of the lengths used in typical studio installations will be effective in rejecting unwanted interference. As those specifications would suggest, these preamps have an open, transparent character — or rather lack of character! — that allows transient detail to come across cleanly, with a very strong sense of focus. That bodes well not only for drum tracking but also for recording instruments such as acoustic guitar, which can generate very strong and harmonically complex transients. Extended bandwidth and phase integrity are also beneficial when handling arrays, such as Decca Trees. Testing the preamps with a selection of my acoustic stringed and percussive instruments confirmed the sense of transparency — it’s almost like the mic preamp wasn’t there at all! If you’re longing for a preamp that sounds warm and cuddly, then the P8 probably isn’t for you. But my take on preamps is that while you can always add ‘dirt’ to a clean signal, you can’t add
The ADAT card is optional — when not fitted, the P8 instead carries a duplicate set of eight line outs on a DB25 connector, allowing it to function as a splitter.
‘clean’ to a dirty one. The P8 endeavours to make itself invisible so that whatever comes out of the microphone reaches its destination without being changed, and my experience is that it succeeds in that: it captures the character of the connected microphone accurately, without adding any further colour. And even a relatively quiet sound source subjected to compression didn’t bring up any significant noise; in a typical studio situation, the microphone is likely to contribute rather more noise than this preamp. If you’re looking for preamps to use on location, this unit weighs just over four kilograms, and if using a flight case where both the front and back are removable, the rear-facing inputs will be easily accessible and helpfully out of your way. The optional ADAT card is probably the most straightforward option for mobile recording to a computer/interface setup, so you should probably budget for that. It would have added flexibility if SPL had included audio over USB for recording, since that would allow any existing interface to be bypassed, but using the ADAT output with a compatible interface works perfectly well.
Verdict To summarise, the P8 is not about character or warmth: this is a mic preamp built to last and to deliver optimal transparency, combined with high headroom and very low noise. Yes, it’s a little more costly than some of the eight-channel mic preamps by companies such as Focusrite, PreSonus and Audient, but even though ADAT connectivity is a cost option it’s more keenly priced than SPL’s own Crescendo 8, which runs on 120V power rails, and I think the price is very reasonable given the quality of what’s on offer: you get eight seriously clean, capable mic preamps that can do justice to any type of microphone, including passive ribbons. £ Standard version £1799. With ADAT card £2099. Prices include VAT.
T Sound Service UK +44 (0)3301 222 500 E sales@soundservice.uk W www.soundservice.uk W https://spl.audio
www.soundonsound.com / February 2026
51
ON TE ST
JBL PRX925 & PRX935
Active PA Speakers
MIKE CROFTS
B
ack in SOS July 2023 I reviewed the first models in JBL’s then‑new PRX900 series of self-powered speakers. I liked very much what I saw and heard and, assuming they would continue to update the range as they had for the PRX800s, was looking forward to trying out the larger models. Well, the PRX925 and PRX935 were recently announced and are now available for purchase, and I have had a pair of the PRX935 units on loan for long enough to put them to good use in a number of different live scenarios. The nice people at JBL’s UK distributors Sound Technology were kind enough to put on an extensive demonstration at their facility, where I also got to hear some of the mighty top-end JBL rigs which were all set up and ready to go (it would have been rude not to, really...).
Family Values The PRX925 and PRX935 are the larger members of the PRX family, and follow the form factor of their predecessors in
52
February 2026 / www.soundonsound.com
The two big beasts of JBL’s PRX900 family are similarly sized and identically priced — but they’re very different speakers! We put them to the test. the PRX800 line-up, in that the 825/925 model is a two-way speaker with two 15-inch woofers, and the 835/935 is a three-way, with a single 15-inch woofer and a six-inch midrange driver (both sport 1.5-inch compression‑driver tweeters). I know that this family grouping goes back at least to the PRX600 series, as I still own and regularly use a powered system comprising a pair of PRX635 three-way tops over a pair of PRX618XLF subwoofers. I use this combination (or sometimes just the PRX635s on their own) for community theatre shows, larger school
productions, church services and other events where I have lots of acoustic instruments and different voices to work with, as I have always found that the three-way design works really well — and therefore makes my life easier — when clarity and smoothness are needed above all else. As I had a particularly challenging gig on the horizon that would require exactly these qualities, I chose to take away a pair of PRX935s, but not until both of the new models had been given a thorough going-over in the demo room! I covered most of the technical details in my first review of the PRX900 series (you can read that at https://sosm.ag/ jbl-prx900), but it’s worth noting that the power modules fitted to all PRX900-series tops are essentially the same (the subwoofers have their own variant), in that they all provide exactly the same functionality and power amp capability, but tuned to the particular model in which they installed. This suggests an efficiency and cost-saving in design and manufacture, which should benefit users down the line in making repairs more straightforward if they are needed. On that subject, it’s also worth pointing put that JBL have such confidence in the product line that all PRX900-series models come with a seven-year warranty (yes, seven years!).
I for one would be pretty reassured by that, even if I hadn’t personally owned and operated various JBL Eon, JRX, PRX, SRX and VRX speakers over many years without a single failure in all that time.
Working 925 Before taking a pair of PRX935s away to review, I had a bit of a play with the slightly larger PRX925 in the demo room too. I was able to try both models in various configurations with different DSP settings, both with and without paired subwoofers. I listened to the same programme while A/B switching between them and with all the rear‑panel controls set exactly the same. I was expecting them to sound different, but I didn’t think there would be so much difference in sound character between the two models. The PRX925 delivers an astonishing amount of impact for a two-way twin‑15‑inch box, and it’s voiced to provide a big, thumping, solid output that would sit very well in DJ territory and suit your more ‘forward’ rock bands. Of course in a demo room you have the ability to run things quite loud if you feel so inclined and, as I felt so inclined, we gave the speakers a serious hammering with all sorts of test material from dance and rock, to tight thumpy ’70s, some very full-bodied Berlioz, and anything else that came to mind. We ran the PRX935s right up to limiting and then played around some with the limiter settings themselves just to see if we could cause any problems. The man from Harman just waved his hands encouragingly and said ‘do what you like, it’s what we do’, and I was impressed with how clean and clear the output remained well into the zone of discomfort. In their natural state with the DSP at factory settings, you should be able to produce full output from the cabinets, and the onboard protection cleverness will kick in if it needs to but without affecting the material
The PRX925 and PRX935 are both 45cm wide and 43cm deep, but the former is 106cm tall and the latter slightly shorter, at 939cm. Despite their similar sizes, they have very different driver configurations, with the 925 being a two‑way speaker with twin 15‑inch woofers, and the 935 a three‑way with a dedicated midrange driver.
unduly unless any kind of fault condition is detected. As I understand it, the drivers and power stages are both fully monitored and protected against accidental or deliberate mismanagement, and the DSP will handle anything you can throw at it so long as it’s connected up properly to start with.
Three & Easy The PRX935 is not intended simply to be a smaller, more polite version of the PRX925. As well as the obvious three-way speaker configuration, it uses a completely different 15‑inch driver (JBL 275G versus the 925’s dual 915H drivers), which is designed to work more like a sub driver and provide a more rounded, fuller low end, working in conjunction with the dedicated mid driver to give an overall smooth output for contexts where clarity and especially vocal balance and projection are the top priorities. That’s not to say that the PRX935 is in any way lacking in volume, because it still produces a hefty 136.1dB SPL output (the two SPL figures are not that far apart), but maybe it does it with different listeners in mind! One of the PRX900 series’ coolest new features is the adoption of the JBL Pro Connect Bluetooth LE remote control function, which allows remote user control of the full DSP suite built into the speakers, plus muting, grouping and identification. Detailed equalisation is fully controllable using either the back panel LED screen or with a compatible BLE device, and the PRX935 has limiting, delay and automatic feedback suppression processing
JBL PRX925 & PRX935 £1915 each pros • PRX925 offers a huge amount of impact and ‘thump’, and would suit DJs and rock bands very well. • Three-way PRX935 model excels at smooth midrange and vocal delivery. • Unified JBL Pro Control app makes remotely configuring speakers easy. • dbx Driverack processing on board.
cons • None.
summary The PRX925 and 935 sound surprisingly different but both are excellent performers, with the former offering perhaps more attitude and the latter better suited to live acoustic instruments and vocals. With their extensive DSP and improved remote control functionality, they are both useful updates to their PRX800 series equivalents.
taken from the dbx Driverack, all built in and ready to go. After the speaker is paired with the Android/iOS control device (which I found to be a straightforward, quick and bug-free process), running the JBL Pro Connect app can put you in control of up to 10 individual speakers from any compatible JBL range, including Eon One Mk2, PRX One and Eon 700 loudspeakers. In contrast, while the previous PRX800 models also offered remote control, they did so over Wi-Fi and required a PRX‑specific app. Pro Connect provides full access to the whole DSP set, and individual speakers can be muted and given names for easy identification within a system. If you forget which speaker you’re working on, there’s a useful ‘here I am’ function that flashes the LED on that particular speaker. Using the app it’s also possible to store snapshots of speaker settings and group setups. For direct hands-on management, all the usual controls and connections are on the rear panel, and should offer enough flexibility for most setups; there are two combo XLR/TRS inputs, an aux 3.5mm stereo input, two XLR thru outputs, and a balanced XLR mix out. The controls are simple and intuitive to operate, and the bright, clear LED screen displays the parameters under adjustment at any one time.
On The Outside The external styling of the PRX range has stayed fairly similar as new upgraded versions have been introduced, and the familiar black Duraflex finish is still looking
www.soundonsound.com / February 2026
53
ON TE ST
Akai MPC Live III
Sampling Workstation
56
February 2026 / www.soundonsound.com
The Live III is the most powerful and flexible MPC yet... SIMON SHERBOURNE
A
kai have reclaimed their position in the sampling workstation game over the last few years, with the portable MPC Live, the classic‑format X, the affordable One and two keyboard models all hits, not to mention a steady stream of feature updates and plug-ins. The competition has struggled to answer these in terms of horsepower (Maschine+) and functionality (Push 3). Now, the Live III appears to pull comfortably ahead of the pack with significantly upgraded internals and connectivity. But it’s not all about hardware. The recent version 3 OS, and now the Live III, bring big changes to the way MPCs work. Could this put off long-time users and make the MPC overly complex, or is it a much needed refresh that propels the platform forward for a new generation?
Live Rundown There’s so much new stuff to cover here, but let’s recap quickly. The modern MPCs are versatile production stations with an open, DAW-like track structure hosting drum and one-shot kits, multisampled instruments, plug-in instruments, effects, MIDI and CV tracks. They are unique in the category in offering open-ended linear audio tracks. You can create or perform with an MPC on its own, but they are also great as hubs for other MIDI, USB, CV and audio devices. You can even connect audio and MIDI interfaces to extend their I/O. Today’s MPCs are capable standalone devices, but they can also work as control interfaces for the MPC app/plug-in.
The MPC has its own terminology and ways of working that connect back to the original units, with Tracks, Programs (kits/instruments) and Sequences (song sections) and lots of pad and screen modes for doing myriad things. These concepts are still part of the MPC, but there have been many developments in the last year. Now, back to the Live III...
Function Over Form The new MPC has sprouted a host of additional buttons, and is slightly wider to accommodate a touch strip like the MPC Studio. I’ve seen some body-shaming around its busy appearance, but would you prefer fewer controls so it looks slicker? More dedicated mode buttons like on the X and One is good news. A 16-button strip adds (among other things) a step sequencer array to the MPC for the first time. Here I’ve read opinions insisting this should be along the bottom like on a traditional drum machine. Think again: an instrument that’s primarily going to be finger-drummed has no business having buttons in front of its pads. The Live has always been chunky. It’s not really backpackable, but you can pick it up, move it about and play with it on your lap. The internal battery makes all the difference, and it’s a great safety net in a live situation. The speaker array is perfectly usable for jamming and there’s now a built-in mic, so you really could show up in many situations and create tracks and demos with just the Live III. Even better, my top wish for the I and II has been granted: a combi input with mic pres and phantom power, so you can plug ‘proper’ mics in as well as line sources.
Powerful Connections MPCs were always well connected, and the Live III pushes this to new heights. Expanding on the previous model’s dual MIDI I/O, six audio outputs, USB host ports and turntable inputs, the MkIII gains two combi inputs with preamps and phantom power, and a USB-C port that can connect 24 channels of audio both ways with your computer or iOS devices. The eight CV channels have been given new powers with the ‘CV Playground’: a set of sequencing and modulation modules available on CV tracks. The only things still unique to the MPCX are dedicated Hi-Z instrument inputs.
Akai MPC Live III £1399 pros • Massive hardware spec boost. • Clip Matrix and step‑sequencing workflows. • Articulations. • Mic inputs. • 24x24 USB I/O.
cons • Matrix mode has some gaps. • The UI is still quite fragmented. • On‑screen note editing still feels clumsy.
summary The MPC Live III is an incredible upgrade in power and functionality; it’s hard to think of any other dedicated, standalone device this capable for end-to-end music production.
Otherwise the panel has the same display, indented data wheel, and four touch‑sensitive encoders. The buttons are the clicky rubberised designs that I like. Most buttons have a primary and secondary function, the latter of which can be reached with the Shift button, or more easily with a double-tap. Internally, the Live has had a phenomenal power-up. It’s now built around an eight-core ARM processor with 8GB RAM, compared to the II’s quad-core and 2GB. Everything is significantly snappier, like you’re working in controller mode with a computer. The horsepower raises the limit on audio tracks from eight to 16, and plug-in instrument tracks from eight to an incredible 32. Total polyphony jumps from 64 to 256 stereo voices. The largest 22‑track demo session hovers just over the 20 percent CPU mark. Internal storage is 128GB compared to the II’s 16GB. You can still install an additional SATA drive in a bay underneath. This seems mostly unnecessary now with so much standard capacity, but I popped my 160GB SSD in mainly as an instant way to bring in my existing samples and expansions.
Corner Kicks The Live III debuts new trigger pads with distinctive, segmented corner lights. These
www.soundonsound.com / February 2026
57
ON TE ST
AK AI MPC LIVE III
pitch ramps and tons more. Expect to hear these spicing up the hi-hats and snares on beats over the next year.
and simple way to input dynamics. All other per-step settings are tweaked in a dedicated Step Edit mode. Tapping a step here brings up a set of available step parameters with the basic options — velocity, ratchet, probability and timing — set from the encoders. A second set of ‘modifiers’ include envelope adjustment, filter control, and sample slice selection for quickly tweaking sequenced chops. There’s also tuning, which brings a fast way to program melodic sequences in drum programs without converting the channel to a Keygroup track. Maybe unique is the choice over whether step automation affects parameters in absolute or relative fashion. While step edit offers a new way to quickly write a limited set of key parameters, it’s still possible to use the legacy step sequencer view to enable and set automation for any other track or mix parameter. This is one of the examples of how the MPC has layers of overlapping functionality that have built up over generations. Note Seq mode uses the SH-101 convention of advancing the step position as you tap in each note, except it’s polyphonic and ideal for entering chords. A cool feature of this mode is that with Timing Correct off, the exact timing of each note in a chord will be captured, offset from the first played note. I was less enthusiastic about how Step Edit and Note Length modes work for note sequences. It feels a bit unintuitive and non-visual how to find and adjust individual notes. I found using a combination of the step sequence buttons and regular grid mode helpful. It’s easy to see what’s going on in the grid and make adjustments, but selecting notes is still the weakest area of the touch UI, and the buttons help here. I still wish we had a select mode for the wheel as on Maschine, or even Bluetooth mouse support.
Radical Steps
What Is The Matrix?
The other big story of this release is an embracing of drum machine and production workflows not typically associated with the MPC. Step sequencing was available before via a screen/pad mode, but now you can work in classic TR style using the 16‑button strip. Tap a pad to target a sound/ note and drop in gates from the buttons. You can also hold active steps and use the touch strip to set velocity: a fast
The other big lean into modern production and performance workflows is Matrix mode, aka the clip launcher. This represents the final unification of the Force and MPC OSes, with both devices now incorporating the other’s previously contrasting workflows. The Matrix uses Ableton’s clip grid convention to capture, organise and play multiple MIDI and audio clips per track. You can load loops and audio files into clip slots, record and overdub directly into
The Matrix page is central to Live III’s new clip-based workflow.
are dubbed ‘MPCe’, presumably a play on MPE and with the ‘e’ also standing for ‘expressive’. These feel quite different to the previous generation. They have the familiar grippy texture, but are slimmer and more sensitive. The key new feature is that they know where on the pad they are being pushed or struck, an ability that’s been exploited in a number of clever ways in MPC drum programs, but not in any other areas of the workstation so far. You can trigger different samples from the corners of the pad, so you could treat the 4x4 layout like an 8x8. You can also trigger a different sample from the centre of a pad to the corners. And drum programs support eight samples per pad, which you can layer among the zones as you wish. The zones don’t have to be discrete — you can crossfade samples in various ways across the pads. You could set up a varied response that simulates hitting a drum head in different places — like a snare moving to a rim shot. You can also treat the pads like X/Y modulation generators, mapping the coordinates to any parameters in the drum channel as two expression inputs in addition to pressure. A multi-page mod matrix in the program editor lets you configure this in detail. Absolute X/Y positions are just one option, you can also track the distance from the pad centre, or from the point where you hit the pad. Position can scale other mods as well as performing them directly. The potential of the new pads is showcased in the demo patches in the dedicated MPCe Expansion. It is distinct
from MPE as we know it, and it’s not currently possible to access the modulation outside of drum programs. However, Akai plan to extend the functionality to plug-ins and keygroups later on, and the pads have the potential to do MPE if implemented in the future. Another innovation that takes advantage of the new pads, but which is still available on older models, is Articulations. This is just brilliant. Pads, or corners, can be assigned articulations, which trigger different playing techniques or accents like rolls, flams and ratchets. There are scores of these to choose from. Every flavour and timing of note repeat you can think of can be dropped in as well as paradiddles, flams,
“If you want a deep, one-stop-shop for writing, recording and performing it’s right here.”
58
February 2026 / www.soundonsound.com
88R LBC PRECISION. POWER. PURE NEVE DNA. 88RS CONSOLE DYNAMICS IN 500-SERIES FORMAT
www.neve.com
FE ATURE
Part 8: Replicating Human Hearing
Concluding our series on advanced stereo mic techniques, we explore binaural recording, disc-shaped baffles and dummy heads, as well as a clever process called ‘Stereo Shuffling’. HUGH ROBJOHNS
T
he preceding parts of this series took us on a journey from the fundamental concepts of stereo sound recording and reproduction to the theory and practical aspects of a wide range of stereo microphone techniques. We’ve explored Blumlein’s coincident arrays, including Mid-Sides, that focus on capturing and reproducing only amplitude differences between channels; and the wide-spaced omni-mic arrays that capture mainly time-of-arrival differences between channels. We went on to consider a number of popular near-spaced arrays that were designed to combine both amplitude and timing differences between channels — the best of both worlds — before also contemplating some of the more complex stereo mic arrays that combine both spaced omnis and near-spaced arrays, including a brief look at the famous Decca Tree. By this point, then, you’d be forgiven for thinking that there couldn’t possibly be any more stereo mic arrays to examine! But there are — and if you’ve been working through the audio example files associated with this series, you’ll
62
February 2026 / www.soundonsound.com
already be aware of one example: the Schneider Disc. This, with variations upon it, is the last stereo mic array that I want to discuss in this series, as it represents a final class of stereo microphone techniques that aim to replicate the human hearing physiology — to a greater or lesser extent.
Dummy Head If the idea of stereo recording is to replicate the human experience of listening to performers on a stage, arguably the most obvious approach is to imitate the human listening apparatus. Basically, that means using a head-shaped construction with microphones in place of the ears. This concept, popularly known as the ‘dummy head’, has been explored in depth for decades, and there are several commercial examples, including Neumann’s original KU80 and current KU100, and Sennheiser’s now discontinues MZK2002, amongst various others. These dummy head systems produce a stereo signal in a format generally referred to as ‘binaural’, and intended exclusively for headphone listening. However, the success of these dummy
head recordings, in terms of imaging stability and source location realism, depends very heavily on how closely the listener’s anatomy matches that of the dummy head, particularly in terms of head size and ear spacing (early dummy heads don’t attempt to replicate the folds and curves of the pinnae which, as we know, play an important role in vertical and front/back source location). The physiological parameters of the listener’s head/ears determine what is now known as the ‘Head Related Transfer Function’ or HRTF, which is unique to each individual listener, and it is these parameters that define how we individually perceive sound locations within a binaural signal. As it happens, I own a Sennheiser MZK2002 dummy head. The recordings I’ve made with it certainly sound spacious and are interesting, but I don’t find them consistent, stable or precise. That’s probably in large part because the dummy head is physically smaller than my own. If I attach the same Sennheiser microphones to my own ears for recording, then playing back the audio files gives me remarkably precise and stable imaging information. But it’s important to note
two things... First, if you move your head at all, you change the perspective of the mics. And second, this approach benefits me alone — others who’ve listened to recordings I’ve captured that way usually find the imaging to be imprecise and unstable again. This highlights the critical importance of personal HRTFs for accurate spatial imaging in binaural listening. Today, of course, there’s a huge academic and commercial interest in binaural stereo, not least because of the vast numbers of people who now listen over headphones habitually. And while personalised binaural recordings might not transfer well from one listener to another, binaural reproduction is an ideal format for low-cost immersive-audio playback. Indeed, with the benefit of sophisticated digital signal processing, and the ability to create and implement personal HRTFs for playback over headphones, binaural stereo is making significant headway in popularity, and many manufacturers are now incorporating this technology in smartphones, tablets, laptops and more. One down side of binaural stereo and dummy-head recordings, though, is that the format is specifically intended for use with headphones, and the stereo imaging is usually very poor when auditioned over loudspeakers. That wouldn’t be a problem if the entire audience were known to use headphones, but in most cases a significant proportion of the audience for commercial music is likely to be listening over loudspeakers. So is there an alternative technique that could offer better compatibility between headphone and loudspeaker listening?
pressure (omnidirectional) mic capsules separated by an acoustic baffle. He described the setup in his famous patent, along with sophisticated signal processing to make it work better for loudspeaker listening, which is something I’ll come back to shortly. It wasn’t a line of enquiry Blumlein pursued at the time, though, as he chose instead to focus his work on coincident velocity (directional) microphones, which, to his mind, gave better results with loudspeaker auditioning. But good ideas have a habit of resurfacing sooner or later, and it was the work of Jürg Jecklin in the early 1980s, at the University of Music and the Performing Arts in Vienna, that resurrected the interest and popularity of Blumlein’s idea. He called the technique the Optimal Stereo Signal or OSS — but it became far better known for its physical appearance, and is usually referred to simply as the Jecklin Disc.
Jecklin Disc Jecklin’s earliest design employed a flat, 30cm diameter disc, covered in a thin layer of foam (or fleece) to reduce the baffle’s acoustic reflectivity. A pair of omnidirectional microphones were then mounted on either side of the disc, their capsules being aligned with the centre of the disc, spaced 16.5cm apart (so roughly
8cm above the disc’s surface) and pointed outwards by 20 degrees. In essence, the disc baffle broadly replicates the primary acoustic effects of the human head, with the baffle diameter and mic spacing combining to introduce similar frequency response, time and amplitude differences between the two microphone signals as are experienced at the ears of a listener. Those differences increase as a sound source moves further off axis from the front of the disc, much like it does with human hearing. Most commercially made OSS discs follow Jecklin’s original specifications for the baffle size and mic spacing, but in the mid-1980s Jecklin himself revisited the design, and concluded that it performed better with a larger baffle diameter and greater mic spacing. Consequently, he issued revised specifications, with a disc diameter of 35cm, and mic spacing increased to 36cm (so roughly 17cm above the disc surface). Commercial Jecklin Discs are not inexpensive, but anyone handy at basic DIY can construct their own experimental Jecklin Disc relatively easily, using something like a piece of plywood or Perspex cut into a disc. While the size/ diameter is fairly important, you don’t even need to be able to cut a perfect circle (the human head is broadly ellipsoid
Optimal Stereo Signal (OSS) Take away the physical differences between individuals’ heads and ears, and the main significance of the replica head in dummy head recordings is that it acts as an acoustic baffle, reducing the strength of high frequencies from a source on one side reaching the ear on the opposite side, as well as introducing a time delay to the further ear. So why not just reduce the ‘dummy head’ to its simplest form: a flat baffle, with microphones placed on either side? Needless to say, it’s been done... and as you might already have guessed, the first person to do it was Alan Blumlein, back in the early 1930s. One of his earliest experiments involved a pair of
A range of mics intended to replicate the human listening experience. Clockwise from top right: the Neumann KU100 dummy head; Bruel & Kjaer’s HATS system; the 3DIO FS Pro II; and some ear-worn mics. The last of these could potentially be the most convincing — but only for the person who wore the mics!
www.soundonsound.com / February 2026
63
FE ATURE
R E PLI C ATING H U M A N H E A RING
rather than spherical, after all). A handle or mic stand mounting thread can be attached to the disc, along with a pair of threaded studs or tubes mounted near the back to support standard mic clips. Their positioning needs to accommodate the length of the intended omni mics such that their capsules end up near the centre of the disc when angled outwards by 20 degrees. The plywood or Perspex disc casts an acoustic shadow, but as it also reflects sound, it can then be covered with some acoustic foam and/or fleece on each side. Then your Jecklin Disc is ready for use!
church, making the Dc distance relatively short) around 2.5 metres in front of the choir. I have enjoyed good results using the Schneider Disc on small ensembles, particularly if the main audience is likely to be headphone users. However, the OSS system also works nicely as a main stereo array for larger ensembles, with excellent bass extension and a nice spaciousness that still works reasonably well on loudspeakers. The recording setup always attracts attention at public concerts, too (not because it’s particularly obtrusive; it’s more that people don’t see it used very often so are curious).
Schneider Disc
Stereo Shuffling
As always when it comes to stereo mic techniques, there are several variations on this theme, and the example (track 10) audio recording included in the audio files associated with this series (https://sosm. ag/this-is-stereo-media) was captured using what’s known as a Schneider Disc, a version of the OSS technique that’s very similar to the standard Jecklin Disc. The baffle diameter is the same as the original Jecklin specs, and the mic spacing is the same too. However, in addition to the flat layer of foam on each side of the baffle, a hemisphere of foam is added at the centre of the baffle on each side. The idea of this extra foam is to better replicate the acoustic absorption effects of the human head. To be honest, the audible difference between a Schneider Disc and a Jecklin Disc is very subtle. My own view is that the Schneider version performs slightly better, particularly for headphone listening, but there’s really not a lot in it! (If going down the DIY route suggested above, you could always conduct your own experiments with different absorptive material...) Jecklin recommends that the ideal placement of the (Jecklin or Schneider)
One of the reasons Blumlein didn’t pursue his baffled-omni-mics idea was In the foreground is the Schneider Disc because it didn’t generate array (a variation on Jecklin’s original OSS technique) used for example 10 in the audio purely level differences recordings that accompany this series. between the two channels at all frequencies — you’ll recall from earlier articles in Disc is at the room’s ‘critical distance’ (Dc) this series that accurate stereo imaging from loudspeakers primarily relies on away from the source — where its direct reproducing only amplitude differences sound and diffuse (reflected) sound are between the two channels. equal in strength. Personally, I prefer For off-axis sound sources, the baffle a slightly closer placement in most cases, placed between the omni mics naturally but that’s an aesthetic choice, and one introduces amplitude differences that depends on the nature of the music between channels at mid and high frequencies (where the wavelength approaches the baffle diameter). However, at lower frequencies the soundwaves simply diffract around the baffle, resulting in negligible amplitude differences between the two omnidirectional mics. Thus, low‑frequency sources appear to come from the centre of the stereo image, with negligible stereo width. Nevertheless, the mics capture and source, and the sound perspective some low-frequency directional required. For the Schneider Disc information because their physical demonstration in the associated audio spacing generates small phase files, I mounted a pair of Sennheiser differences at low frequencies, due to MKH20 omnidirectional mics on the disc, the different time-of-arrival of sound spaced roughly 17cm apart with the disc wavefronts at each mic. In an attempt to positioned just above head height, and improve low-frequency stereo imaging (because it was a particularly reverberant
“One down side of binaural stereo and dummy-head recordings is that the format is specifically intended for use with headphones, and the stereo imaging is usually very poor when heard over loudspeakers.”
64
February 2026 / www.soundonsound.com
At last, the 670 for the
NEXT GENERATION of Studios
MSRP 2.999 € (inc VAT)
The sound of yesterday, built for tomorrow.
Learn more by scanning the QR
INSIDE TRACK
Matt Schwartz • Yungblud Yungblud capped a triumphant 2025 with a hit collaboration with Aerosmith. Long-term producer Matt Schwartz was behind the desk. PAUL TINGEN
P
68
February 2026 / www.soundonsound.com
Photo: Kyle Hoffmann
Matt Schwartz at NRG Studios, one of many studios used for the making of One More Time.
roducer Matt Schwartz vividly recalls his first meeting with a teenage Dominic Harrison. “I met Dom in 2016, when he was 19. Labels sometimes send me artists for a chat to see if they’re the real deal or not, because I’m pretty harsh. I dig into someone’s soul. So my manager and friend Tommas [Arnby] asked me to check out this kid he’d found. Dom came in, and played me some songs, and I stopped him, and said, ‘What is this? It sounds like bad Ed Sheeran. We already have Ed Sheeran. And do you think teenagers are stupid? If not, why are you writing stupid lyrics? If you want to work with me, I want another Bowie or Freddie Mercury. If you want to be an artist, figure out what you want to say, and what culture you want to build.’ “Eight months later, Tommas calls me again, and says, ‘You got to meet the kid again.’ I’m like, ‘Why?’ And he says, ‘Because you don’t realise what that meeting has done to him. He locked himself in a bedroom for eight months and figured out who he wants to be as an artist.’ So Dom came in, and had this crazy look in his eyes, and his whole mannerism had changed. The first song he played me was ‘King Charles’, and I was blown away. We recorded that song there and then, in four hours, including mixing and mastering. Yungblud was born. We also did the next five records really quickly. I was thinking to myself, ‘He’s so young, and to write those lyrics with that vocabulary is amazing.’ Over time I also became a much better writer myself through working with him. His ability has pushed me to places I never thought I could go.” ‘King Charles’ was released as Yungblud’s first single in 2017. The artist’s first album, 21st Century Liability, produced by Schwartz, Martin Terefe, Sluggo and Patrick Russel, was released in 2018. Aided by hit singles like ‘11 Minutes’ (2018, with Halsey and Travis Barker), which Schwartz
your crazy ideas. Starting with a backing track limits what you can do with the song.”
Going Slow
Matt Schwartz (at the console) with Aerosmith and Yungblud at Baysound Studios, Sarasota.
Matt Schwartz: “If you’re an artist, never let anyone else start your ideas for you. Ever. If you work with somebody else, you need to start the idea.” co-wrote and produced, and ‘I Think I’m Okay’ (2019, with Machine Gun Kelly and Travis Barker), Yungblud’s star continued to rise, culminating in 2025 in the number one album Idols and the EP One More Time (with Aerosmith) and his momentous performance at the Black Sabbath Back To The Beginning concert.
Idol Moments “Generally, it’s just Dom and I, in an enclosed environment, without outside interference. I’ll usually sit at the computer and record. He plays everything, I play everything, we’re good. We’re not virtuosos, but with the computer we’re the best. We’ll grab guitars, or are on a piano, or sometimes a bass line triggers something, and we’ll sing some ideas. Once we have a rough idea, we’ll jump on a microphone and develop it. Sometimes we start with
a concept or a lyric. A melody inspires you to do another melody or another lyric, and suddenly it morphs into a story. It’s an amazing process. “The one thing that is crucial is that I insist that Dom starts the idea, every time. If you’re an artist, never let anyone else start your ideas for you. Ever. If you work with somebody else, you need to start the idea. They need to be inspired by your ideas, not you by their ideas. That’s the rule. That’s what real artists who write their own songs do. You cannot be in the shackles of a record label. You cannot be in the shackles of a producer or another writer, or whatever. The greatest artists always inspire the people around them. Whether it’s in music, whether it’s in style and fashion, whether it’s in ideas of how to promote things and marketing — you have to inspire, you have to get everybody to go with all
The opener of Idols and also the album’s first single, a nine-minute epic called ‘Hello Heaven, Hello’, was co-written by the two of them, plus guitarist Adam Warrington, and composer and producer Bob Bradley, known for his work with Jeff Beck. “We went up to Bob’s studio in north England, and Dom had the idea for the first section, which was good. He went to bed and I said to Adam, ‘Let’s try something.’ We came up with the basis for what became the middle section, and I thought, ‘This is effing sick, let’s connect it to the first section. Dom must have heard what we had done while asleep, because when he woke up, he thought it was part of a dream. He said, ‘I have some ideas, let me go on the mic,’ and I was like, ‘Go go go.’ He went in and immediately came up with what’s on the record. It was insane. Dom found a real and natural persona on that track that really inspired the rest of what we were doing. “Then I was like, ‘You know what? It’s missing a third part.’ Everybody thought I was crazy, but we got this great other idea. I started orchestrating it, and tried to fit the three sections together. However, the problem was that the new section was in a different bpm. How do we go from 83 bpm to 94, or the other way round? I decided to automate the tempo change in Logic, but because of a slip of the mouse, or whatever, the tempo dropped to 5bpm. It went all the way to 5bpm and then back up to 94, and it sounded incredible. Everybody on the sofa looked at me with their mouths wide open. “When we went to live performance, the guy who was doing FOH was using Ableton, and I sent him the parts he had to play from his computer, with a MIDI file, so he could do the tempo change. However, it was not working in Ableton, though it worked fine in Pro Tools and Logic. We found that Ableton only goes down to 20 bpm. I contacted Ableton, and told them. They were like ‘What? We’ve never heard anybody go to 5bpm. Why?’ I’m like, ‘Well, there’s always one, isn’t there?’ I hope they’re sorting it out.”
Time Travel Although the arrival of One More Time half a year after the release of Idols and Yungblud’s Birmingham performance appears like a natural progression, the collaborative EP was a long time in the
www.soundonsound.com / February 2026
69
ON TE ST
Sampling Workstation
1010music Bento 1010music’s portable groovebox is the company’s most ambitious product yet.
RORY DOW
1010
music’s Bento aims to deliver a complete sample-based groovebox, with everything you need to create a finished track. They’ve taken elements from their Blackbox, some of the granular and wavetable features from their other products, written a completely new operating system and packaged it in a very compelling portable unit with 16 velocity- and pressure-sensitive pads, soft-click buttons for navigation and transport control, eight endless encoders and a multi-touch colour LCD screen. The competition for sample-based grooveboxes is fierce. Will the Bento be able to compete with mature products
74
February 2026 / www.soundonsound.com
like the Akai MPC range, Elektron’s many offerings, Polyend’s Tracker and Play and others? Let’s find out.
Bento Box The Bento measures 204 x 218 x 51mm and weighs just under a kilogram. The enclosure is made from rugged plastic; it feels solid and well made. The encoders, buttons, pads and screen are all excellent quality. There is even a handy VESA mount on the rear, which is a nice touch. Power is supplied via USB-C or the internal battery, which should provide approximately three hours of life, with a full recharge taking around an hour. There’s no internal speaker, so you’ll need headphones if you’re out and about. There is no built-in microphone either. Storage is on microSD card, and 1010music claim there’s no limit to the
size of the card you can use. The Bento can stream samples from disk, so there are no RAM limitations, but there is a maximum of 576 samples per project, and samples loaded into the granular engine are truncated to 30 seconds. The colour LCD touchscreen looks good, although there is a large border, so it’s actually smaller than it might appear. This means that the labels on the screen, which show the soft-encoder functions, do not align with their corresponding encoder. The screen is multi-touch, allowing you to use familiar smartphone gestures, such as pinching to zoom and two-finger scrolling. Navigation and transport controls are accessed via soft-touch buttons, with dedicated buttons for various editing modes, like the track mixer, clip launcher, song mode, and effects.
at this time. The pads light up in whatever colour is assigned to the current track.
Connectivity The Bento’s slightly recessed rear panel features two USB-C ports, one for MIDI devices and the other for host connections. Either one can be used as a power source. MIDI and audio connections are all 3.5mm mini-jack sockets, but there is a generous number of them: two MIDI inputs and outputs, and three audio inputs and outputs. The Bento is clearly designed to be the centre of a modest desktop setup, where you can connect up to three other devices to use the Bento as a mixer or looper, utilise the extra outputs for hardware effects, and synchronise it all via MIDI. A word of warning, however. If you are using the Bento on stage, make sure you connect your setup in a brightly lit room beforehand. The labels on the rear are almost unreadable. They are etched onto the case in a tiny font, with no colouring; black writing on a black surface. Even in a brightly lit room, I had to squint and angle the unit to find the correct port for any given cable.
Projects
Finally, the 16 velocity‑ and pressure-sensitive pads offer note input. They feel good, maybe not as ‘natural’ as Akai MPC pads, but more than good enough for the job. Pads in this grid-like layout are great for drums, but less suited to melodic input. To help, each project can have a root note and scale setting to which the pads will adhere. I would have also liked a keyboard-style option where the lower eight pads were white keys and the upper pads were black keys, but this isn’t possible
A Bento project can have eight tracks. A track can be either a multisample (for melodic samples), one-shot (for drum kits), loop (for tempo-sync’ed clips), slicer (for chopping), granular (sample-based synthesis), wavetable, or external (for integrating external instruments). You can mix and match track types, except for granular tracks, which are limited to one per project. In the Mixer screen, tracks can be mixed and assigned to one of the three audio outputs. There are also three effects busses (modulation, delay and reverb) plus a master compressor. Each track can have up to eight sequences, and you can launch them from an Ableton-like clip launcher. Scenes can launch a selection of sequences together, and Song mode can chain Scenes together to form a song. Sequences can be any length up to 256 steps, with step lengths ranging from eight bars to 64th notes, which provides ample scope for interesting polymeters and rhythmic experimentation. You can record into a sequence from the pads, or from an external MIDI device, and then edit each note’s pitch, start time, length, velocity and probability afterwards. With the current firmware (version 1.3.4 at the time of this review), it is not possible to record any automation or MIDI data beyond basic note information. Basic copy and paste functions exist for entire sequences, but you cannot copy and paste individual notes or note selections. The sequencer launcher screen is a simple affair, featuring an 8x8 grid that represents eight sequences for each of the eight tracks. You can start and stop sequences individually by tapping on the relevant pad. If there is a particular combination of sequences you like, you can hit the hamburger menu and ‘Snap Scene’ to create a new Scene that will automatically launch all the current clips together. Up to 32 Scenes can be defined this way. Scenes can be edited afterwards. They contain a reference to whichever sequences are selected to
1010music Bento £749 pros • A great new form factor for sample-based fun. • Solid build. • The looping and granular engines are a highlight.
cons • At the time of this review, many areas feel underdeveloped or buggy.
summary 1010music’s new sample-based flagship standalone groovebox represents a bold leap into a world dominated by industry stalwarts like Akai, Elektron and Polyend. All the correct elements are in place: 16 pads, sampling, sequencing, slicing, multisample support, clip launching, internal effects, and wavetable and granular synthesis engines. It may not be as fully developed as the competition, but it’s a promising start.
be played for any given track. Beyond functions to clear, copy and paste scenes, there isn’t much more to it.
Instruments & Sound Design Let’s take a brief tour of the various instrument types that are available for each track, starting with multisample instruments. Multisample instruments, as you might expect, are composed of multiple WAV files, typically used to create melodic instruments. The Bento comes pre-installed with a decent selection of pre-made examples, which is just as well, because creating your own is a laborious task. There aren’t the tools on board to make it feasible. You must meticulously prepare your multisamples on a computer, including root notes and velocity data in the metadata or in the filenames. Then import them into a new multisample instrument. After this, you can edit instrument-wide parameters like pitch, level, filtering, looping, polyphony, envelope and LFO, but these apply to all zones, so there’s no keymap editing baked in. One of the post-launch OS updates introduced a multisample recorder, which can help you create multisample instruments by automatically recording and generating the data for you. With your external MIDI instrument ready, you set the high and low MIDI notes, the number of velocity layers, and the MIDI channel and output to which the instrument is connected, and Bento does the rest.
www.soundonsound.com / February 2026
75
FE ATURE
Chosen By The Readers Of Sound On Sound The SOS Awards celebrate innovation and contemporary design, with nominations being limited to products launched in the 12 months prior to the voting period. These results celebrate the ‘best in class’ products launched or reviewed in the 12 months from September 2024 through to the end of August 2025. Congratulations to all the winners, as well as the very worthy close contenders in each category who have been awarded our Highly Commended accolade.
WINNER
BEST AUDIO INTERFACE
UNIVERSAL AUDIO APOLLO X GEN 2 www.uaudio.com
WINNER
WINNER
BEST EFFECTS & PROCESSING HARDWARE
BEST DAW
www.warmaudio.com
www.apple.com
WARM AUDIO WA76 SERIES
78
February 2026 / www.soundonsound.com
APPLE LOGIC PRO
WINNER
BEST GUITAR & BASS TECHNOLOGY
UNIVERSAL AUDIO UAFX ENIGMATIC ’82 www.uaudio.com
WINNER
BEST SOFTWARE PLUG-IN
FABFILTER PRO-Q 4 www.fabfilter.com
WINNER
BEST MUSIC SOFTWARE
STEINBERG SPECTRALAYERS PRO 12 www.steinberg.net
www.soundonsound.com / February 2026
79
FE ATURE
SOS AWARDS 2026
WINNER
WINNER
BEST PERFORMANCE CONTROLLER
BEST KEYBOARD/SYNTH
www.arturia.com
www.moogmusic.com
MOOG MESSENGER
ARTURIA KEYLAB MKIII
WINNER
BEST STUDIO MONITOR
ADAM AUDIO D3V www.adam-audio.com
WINNER
BEST MIXING CONTROLLER
SSL UC1
www.solidstatelogic.com
WINNER
BEST MICROPHONE
SHURE SM4 www.shure.com
WINNER
BEST DRUM MACHINE
ROLAND P-6 www.roland.com
80
February 2026 / www.soundonsound.com
WINNER
BEST MICROPHONE PREAMP
SSL REVIVAL 4000 www.solidstatelogic.com
WINNER
BEST HARDWARE AUDIO RECORDER
ZOOM H5STUDIO www.zoomcorp.com
WINNER
BEST SOFTWARE INSTRUMENT
NATIVE INSTRUMENTS KONTAKT 8 www.native-instruments.com
WINNER
BEST HEADPHONES
BEYERDYNAMIC DT 1990 PRO MKII www.beyerdynamic.com
WINNER
BEST LIVE SOUND PRODUCT
ALLEN & HEATH QU SERIES www.allen-heath.com
www.soundonsound.com / February 2026
81
FE ATURE
SOS AWARDS 2026
AUDIO INTERFACE
SSL 18 www.solidstatelogic.com
HIGHLY COMMENDED SOS AWARDS 2026
EFFECTS & PROCESSING HARDWARE
NEVE 88C www.ams-neve.com
GUITAR & BASS TECHNOLOGY
NEURAL DSP NANO CORTEX www.neuraldsp.com
DAW
SOFTWARE PLUG-IN
AVID PRO TOOLS
NATIVE INSTRUMENTS KOMPLETE 15
www.avid.com
www.native-instruments.com
PERFORMANCE CONTROLLER
NOVATION LAUNCH CONTROL XL 3 www.novationmusic.com
MUSIC SOFTWARE
STEINBERG DORICO 6 www.steinberg.net
KEYBOARD/SYNTH
ROLAND V‑STAGE www.roland.com
82
February 2026 / www.soundonsound.com
DRUM MACHINE
TEENAGE ENGINEERING OP‑XY
MIXER & MIXING CONTROLLER
teenage.engineering
SSL ORACLE www.solidstatelogic.com
MICROPHONE
SENNHEISER MD 421 KOMPAKT www.sennheiser.com
SOFTWARE INSTRUMENT
ARTURIA V COLLECTION 11 www.arturia.com
STUDIO MONITOR
IK MULTIMEDIA ILOUD MICRO MONITOR PRO www.ikmultimedia.com
HARDWARE AUDIO RECORDER
ZOOM LIVETRAK L6 www.zoomcorp.com
LIVE SOUND PRODUCT
UNIVERSAL AUDIO APOLLO E2M www.uaudio.com
HEADPHONES
BEYERDYNAMIC DT 70 SERIES www.beyerdynamic.com
MICROPHONE PREAMP
HARRISON AUDIO 32CLASSIC MS www.harrisonconsoles.com
www.soundonsound.com / February 2026
83
ON TE ST
M AT T H O U G H TO N
A
nalogue multiband compressors remain rare: they’re relatively expensive to implement, and the necessary user controls can take up a lot of space. Unsurprisingly, then, they’re rarer still in the 500-series format, and Wes Audio’s Pandora is the first I’ve seen that delivers anything like ‘conventional’ analogue three-band compression in this format. But it offers way more besides. As well as boasting other processing options that I’ll explore below, it can be remotely controlled by a DAW plug-in to facilitate recall, automation and preset management. Yet, while the plug-in is rightly a headline feature, pretty much everything can still be done using the touch-sensitive front-panel hardware controls too. In fact, you can use the hardware to control the plug-in and record automation as well. Importantly, this arrangement reduces the risk of the Pandora ever being rendered obsolete by OS or DAW developments, and (for whatever reason) a lack of software support in the future.
Hands On So let’s start with the hardware. The Pandora is W I D E! Though a stereo device, it occupies three module slots in the host 500-series rack: it uses only the leftmost pair for power and I/O but physically
84
February 2026 / www.soundonsound.com
Wes Audio Pandora Digitally Controlled Multiband Analogue Compressor
Already leading the way when it comes to plug-in remote control of analogue hardware, Wes are now bringing their expertise to bear on a wider range of processors. extends across the third, such that slot 3 can’t be used for other modules. There’s a lot of information on the front panel, but it’s all sensibly laid out. While the A and B preset storage/recall buttons (you can also copy settings from one to the other) are arguably harder to use when a USB cable is plugged into the front panel, you’ll likely be using the plug-in’s greater options for that function, and if it really bothers you then Wes’ Titan ng500-series rack can provide the necessary USB communication through the card-edge connector. The main hardware controls are either touch-sensitive digital push-turn encoders or buttons, with various tiny green or red LEDs indicating the status. Nicely visible without being over-bright, these are particularly effective at indicating the position of the rotary encoders: multiple
LEDs of different brightnesses combine to give really precise feedback, and I’ve not seen anyone do this better. Thin black lines group the controls visually, into one of the three frequency bands or for global functions. Each band, running from left to right, has a threshold encoder with a nine-LED gain‑reduction meter above (again, elegantly implemented). The threshold control is a push-turn encoder: turn to set the threshold, or push to bypass compression for that band. This is one of the touch-sensitive ones, and putting your fingers on it will highlight the corresponding controls on the plug-in when in use. The same goes for the output level control, for which a push solos that band. The remaining per-band controls are buttons that step through their different parameters’ settings. One sets the ratio
(10, 4, 2 or 1.5:1 for all bands), and another adds harmonic distortion (High, Med or off), which you can think of as a saturation effect. Further down, the attack (0.1, 0.3, 1, 3, 10 or 30 ms) and release (0.1, 0.3, 0.6, 0.9 or 1.2 seconds, or an automatic release) each have a pair of buttons, one to scroll up through the options, the other down. Below are various global controls. Between each pair of bands is a knob to set the frequency of the crossover filter. While these are also push-turn encoders, there doesn’t appear, at the time of writing, to be any action mapped to the push function. The filters range from 40Hz to 2kHz and 2-15 kHz, respectively, both with gentle 6dB/octave slopes. There are also side-chain high-pass (off, and 60, 90 or 150 Hz) and low-pass (off, and 3, 6 or 9 kHz) filters. A final pair of encoders, at the bottom, set the overall wet/dry mix and the output level, and in between them are the A and B preset save/recall and master bypass buttons.
Remote Possibilities The mini USB socket allows connection to a computer when the Pandora is used in a standard 500-series chassis, and its purpose is to connect with the control plug-in (communication is bidirectional — adjust a hardware control, and that’s reflected on the plug-in; adjust a plug-in parameter and the hardware follows suit). There’s no Ethernet, as on some manufacturers’ devices, and one potential drawback with USB is that (unless using active or optical USB, where cable runs of 10m are feasible), the cables can’t be longer than 2-3 metres. That won’t be an issue for most people, but could be a consideration if, for example, your main studio DAW computer is tucked out of the way in a machine room. Installation of the GControl software and associated plug-in is straightforward. It’s a fairly large download, since it contains plug-ins for all the remote-controllable Wes Wes’ control plug-ins no longer slavishly adhere to the hardware layout, and offer modern features such as node-on-curve adjustments, drag‑handles to set the crossover points, and direct selection of parameters that, on the hardware, you must scroll through to select...
gear, along with firmware updates, but you can choose which plug-ins to install, and the firmware updates are performed automatically for any units that are connected when you install the software. That happened for me, and it was a stress‑free experience. Both GControl and the plug-in can run on Mac or Windows DAWs, and you can install VST2, VST3 or AAX formats. There’s still a part of me that misses Wes’ old skeuomorphic plug-ins, whose GUIs very closely resembled the hardware, making operation completely intuitive. But, on balance, the greater functionality and use of screen real estate of the newer GUIs is winning me over. This particular one has lots to commend it: it’s very slick, and puts me in mind of the FabFilter plug-ins, with a visual representation of the frequency response, and your choice of nodes and drag handles, or floating virtual knobs, to manipulate the band levels, crossover points and compression thresholds. Sensibly, parameter settings that on the hardware are accessed by multiple
Wes Audio Pandora £1066 pros • First and foremost, it sounds good! • Touch-sensitive hardware control. • Very slick remote-control plug-in. • More than a compressor!
cons • Uses up three 500-series rack slots.
summary The _Pandora is a superb three-band compressor and saturation processor that has more potential applications than you might expect.
button presses can here be selected directly, and each is given its own virtual LED (plus a scroll button if you really want one!). Each band also has a vertical gain-reduction meter that’s much easier to read than the hardware meter, as well as dedicated bypass and solo buttons. At the top, you’ll find global controls: not just knobs for the crossovers, the wet/dry mix and the output level, but also a master threshold control that allows you to ‘scale’ the settings of the bands’ individual ones without losing their relationship. Also at the top is a full preset management system, so you can store and recall many more settings than on the hardware, and a useful array of starting points (you’ll obviously need, as a minimum, to change the thresholds to suit the material being processed), as well as the usual plug-in functions such as undo/redo and the global bypass. And at the bottom, as well as details of the connected hardware (which you have to select on first initiating the plug-in, but will be remembered next time you load the project), you’ll find that in place of the hardware A/B compare buttons, you have
...but the control set adapts as you resize the GUI, and if you prefer a more compact hardware-like control set, that’s available too.
www.soundonsound.com / February 2026
85
TECHNIQUE
Sometimes, nothing beats the unpredictable swoosh and whoosh of the classic tape flanging effect. And you can recreate it in your DAW... CRAIG ANDERTON
Y
ou may recognise ‘flanging’ from plug-ins or guitar pedals, but it was originally created with either two turntables or two tape recorders, each playing the same audio, and their signals then being mixed together. Importantly, one playback device had variable playback speed, and changing that speed caused phase additions and cancellations — it’s these that created the famous ‘jet aeroplane’ sound of the psychedelic ’60s. Over the years, flangers became modulation effects in their own right, but they lost the vintage flanger vibe along the way. Specifically, classic flanging’s climax occurred at the ‘through-zero’ point — that’s where the variable-speed unit was polarity‑inverted, so that when
it was sped up or slowed down to re‑sync up with the other device, the combined sound of the two devices briefly cancelled out. Digital delays can’t go into the future, of course, so unless designers specifically set out to emulate the through-zero effect, their flanger’s sweep almost makes it to the climactic top of the flanging cycle — but always falls short. Also worth noting is that tape flanging didn’t use LFOs: the physical motors had inertia, and that made the flanger sweep somewhat unpredictable. This in turn created excitement: you never knew when the sweep would hit the through-zero point. Today, there are a couple of DAW plug-ins that can emulate the through-zero effect — Apogee’s Clearmountain’s Phases, for instance (reviewed in SOS March 2022: https:// sosm.ag/apogee-clearmountain-phases) — and model some of the other features of vintage flanging, though most plug‑ins don’t do it all. Thankfully, if you have a DAW with built-in parameter modulation, you can replicate the sound and excitement for yourself.
True Confessions: I Burned Out The Hendrix Tape Machine! The sound of true tape flanging was burned into my brain from sessions in 1968 at the Record Plant, which followed the sessions for Hendrix’s Electric Ladyland. The flanging setup was complex, so engineer Tony Bongiovi (who worked night sessions for Hendrix and engineered our album) left it set up for us to use. Yes, of course we used it — and to Record Plant co-founder Gary Kellgren, wherever you are now, I’m still sorry that I burned out the tape recorder’s capstan motor by being too aggressive with the variable speed control!
90
February 2026 / www.soundonsound.com
The classic ’60s flanging effect employed two tape machines, one with varying speed to pull it ahead and push it behind the other during playback.
Below, I’ll do just that, using Cubase 14’s Modulators and Multi Track Presets, and this time as well as providing an audio example on the SOS site (https://sosm.ag/vintage-flanging) I’ve made available a Cubase Multi Track Preset, so those who use the same DAW as me can dig in a bit deeper.
Basic Track Setup To create the flanger effect, the Multi Track Preset requires two Cubase FX tracks to emulate different playback devices, one of which is variable in speed.
In the first screenshot, you can see that the audio track on the left, with its channel fader pulled right down, feeds the two FX tracks with separate pre-fader sends (note that these must be added manually if you download the Vintage Flanger.trackpreset file). The Pre section’s Phase button sets the signal polarity. You can see that the second FX track has this inverted (orange button, top-right), and that will deliver the ‘hollow-sounding’ negative flanging effect. For positive flanging (a more ‘zinging’ sound), switch that back. For classic, through-zero flanging, we require inverted polarity. The FX track panning is offset somewhat, simply because analogue machines never had perfect cancellation at the through-zero point. This slight panning shift is a simple way to prevent 100 percent cancellation.
The Flangers The main flanger track (FX Track 01A) includes Cubase’s stock Flanger effect, but this is controlled by a Modulator that varies the delay time. The Flanger in Track 01B has identical settings, but this one is not under Modulator control — it has a fixed delay time of 2ms. Note that both flangers are in Manual
My vintage flanger setup in the Cubase MixConsole. If you use Cubase, you can download this setup from the online version of this article as a Multi Track Preset.
“Unless designers emulate the through-zero effect, their flanger’s sweep almost makes it to the climactic top of the flanging cycle — but always falls short.”
mode — so if you’re trying to recreate the settings from the screens manually, the Sync, LFO Rate, Lo Range and Hi Range controls are all irrelevant. Both Mix controls need to be 100 percent (all effect, no dry sound). Increasing the Spatial parameter creates a different type of sound, but this dilutes the flanging effect somewhat. The Modulator is the key to vintage flanging. Here, it sets an initial delay time of 1.5ms, which is ahead of the Flanger with the fixed delay (2ms). The random waveform, and long sweep time, are characteristic of vintage flanging. Setting Shape to 100 produces a smooth, continuous flanging effect. As the Modulator varies the Flanger’s delay time, though, it occasionally overtakes the 2ms fixed delay, then crosses over it again on its way down to a longer time, producing the through-zero flanging effect. Like real flanging, you’re never quite sure when that through-zero is going to happen, which just adds to the sense of drama — which you can hear for yourself in the audio example. Finally, note that there is an inherent 2ms delay in this effect. In most cases, you won’t notice this. But if you find that it’s an issue, simply move the track being processed 2ms earlier on the timeline. And now you have the sound of ‘Itchycoo Park’, ‘Bold as Love’, ‘Life In The Fast Lane’, ‘Head Over Heels’, and so many more! Grab your bell‑bottom pants, Nehru jacket and love beads, and head back in time to when flanging was a mechanical — not an electronic or digital — effect.
The Flanger plug-in settings for the variable-speed flanger inserted in FX Track 01A.
www.soundonsound.com / February 2026
91
ON TE ST
Black Corporation ISE-NIN Voice Eurorack Module
“If
you’re spending half your life hunting for obscure reasons to decry modern recreations of vintage synths, you’re not spending enough time making music.” Those were the words of Gordon Reid in his SOS review of Black Corporation’s ISE-NIN synth last year, and to that I say: quite right. Gordon was of course writing up Black Corporation’s eight-voice recreation of the Roland Jupiter-8; a polyphonic analogue powerhouse promising nostalgia and exploration in equal measure. Or, perhaps, more of a 70/30 balance. That standalone synth offered a clutch of mod-cons but suffice to say its faithful recreation of the Jupe’s analogue architecture was its raison d’être, and this it did extremely well, as stringently demonstrated by Gordon alongside the real thing. Now comes the ISE-NIN Voice; a single-voice version of the ISE-NIN with every single slider and switch found on its older sibling, presenting a complete
94
February 2026 / www.soundonsound.com
Jupiter-style semi-modular synth voice in Eurorack form that happily makes up for the deficit in that aforementioned 70/30 balance. Rejoice! I should point out at this stage that the ISE-NIN Voice is a truly excellent recreation of the Jupiter’s architecture and sound. But have I long dreamed of being able to install a Roland Jupiter voice into my Eurorack system? Honestly, no. Am I glad it’s now there? Resoundingly, yes. Indeed, faithfulness to a predecessor for its own sake is — or, at least, should be — just one of many criteria one looks for when it comes to any synth of this type, and if I’m honest for me it often amounts to little more than a footnote unless I’m disappointedly buying it because I genuinely can’t access or afford the real thing. To quote Gordon one last time, “If you were to record the same track four times with contributions from a Jupiter‑8 or Arturia’s Jup‑8 V4 or the appropriate model in a Jupiter‑X or an ISE‑NIN, I doubt that your audience would be able to tell the difference. And even if they could, would it matter?” Again, well said. I should say that before even switching it on, this module is just a lovely thing to behold. Immaculately built and finished, its diminutive sliders are solidly mounted and firm to the touch, its panel is impeccably designed
with sections demarcated by trademark Jupiter-esque orange bars on matte black, and it also has a back panel to protect the PCB, which is always welcome. I won’t waste column space listing functions, which have both already been outlined by Gordon in his ISE-NIN review and well documented as components of the actual Jupiter-8, but it’s worth taking a minute to remind ourselves of the fundamentals. The ISE-NIN Voice constitutes two oscillators with selectable waveforms (triangle, ramp, pulse and square on VCO 1, and the same but with sine and noise in place of triangle and square on VCO 2). The low-pass filter is selectable between 12 and 24 dB/octave slopes and can be modulated by either of the onboard envelopes or by the single onboard dedicated LFO (VCO 2 can dive to sub-audio frequencies if desired). There’s also a high-pass filter. The LFO is pleasantly manipulable, with selectable waveforms (including random) and a Delay control for dialling in some latent movement across a held note. Finally, there’s an input for pitch and gate and a single output, beneath knobs for tuning, glide and volume. In terms of a standalone synth voice, it’s excellent. Its sliders are a pleasure to use, it’s nicely laid out and I honestly can’t really fault its sound.
Rock‑solid oscillators, a beautifully responsive, smooth pair of filters, the list goes on. With no jacks for patching to speak of, in this respect it’s not so much a Eurorack module as it is a standalone synth that happens to be Eurorack mountable. As far as complete analogue voices go, you won’t easily find one as powerful as this in so small a form factor. But as you might have seen coming, with the ISE-NIN Breakout in the picture, the ISE-NIN Voice doesn’t just offer patchability, it offers maximum patchability. Which is to say, voltage control over literally every single control on the panel and outputs for, well, pretty much anything that outputs voltage or audio. Crikey. It’s a no-compromise approach, albeit one that will test your wallet as a £379 investment on top of the £1022 price of the main module. But it’s one I happen to like; almost a transverse workflow between two sides of a brain: fairly traditional and linear on the one side and then almost completely open-ended on the other. It’s also highly gratifying blending these two poles. I was not only able to straightforwardly patch an external modulation source into the filter cutoff, I could also compound its signal with that of the internal LFO, and multing the external CV to also modulate the cross-modulation input made for even more dynamic movement. I was also able to do some internal patching to reroute certain aspects of the architecture if I wanted to, for instance sending either envelope any which way, truly stretching the bounds of what an apparent Jupiter clone can really do. Aside from the usual suspects the expander also offers jacks for more complex things, like inputs for the individual stages of both envelopes, outputs for two pitches of noise, and even a headphone output. My favourite fact about Black Corporation is that the director JJ Abrams is a big fan of the company; so much so that he decided to name one of the planets in Star Wars: The Rise Of Skywalker after their Kijimi synth. Apparently the name ISE-NIN could mean many things in Japanese, or not a lot (it’s “just from us being weirdos” according to BC’s Bob Rogue), but to my mind it is synonymous with utterly premium quality, both in build and in sound. Amid an increasingly digital Eurorack industry, The ISE-NIN Voice is a welcome dose of iconic analogue goodness, whose price might make you think twice (particularly alongside the likes of the Rides In The Storm SED-CSM), but whose sound and functionality will serve your system for years to come. William Stokes £
ISE-NIN Voice £1022, Breakout £379.
W
www.black-corporation.com
Shakmat Bishop’s Miscellany MkII Eurorack Module
T
he Bishop’s Miscellany was Shakmat’s first entry into the Eurorack scene back in 2014. It was a dual-channel stepped CV recorder and looper that had plenty of things to keep a Bishop busy. The MkII builds on the concepts of quick note capture and turns it from an instant riff maker into a sequence-generating, CV-manipulating, pattern-chaining song machine. The original Bishop’s Misc was very instant and playful; you could patch it up, lean on the Record toggle switch to record some notes, loop it and mess with it. The MkII feels a lot more complicated. Your focus is inevitably drawn to the screen and endless encoder; there are twice as many buttons, the knobs are generically labelled, meaning that they are not going to be dedicated to one function, and the module seems busy before you’ve done anything. Once you understand that it’s going to take a bit of learning and a bit of screen/encoder patience, the liveliness that made the original so much fun begins to return, along with a whole load more miscellany. The basic idea is that the BM MkII can record CV and gate signals into two channels and output them as stepped, scaled notes in up to 64 steps. It has two manipulation engines. One side is generative and regenerative, and can improvise off those notes, shift, slice and delay them, or generate its own sequences through randomisation or arpeggiation. The other side processes CV through augmentation. This could be adding slides, ratchets, gate length, vibrato or noise. These can be done in real time, turning the BM MkII into a sort of multi-effect for any control voltage passing through. So, there’s loads of functionality here, it’s just that you have to lean quite heavily on the screen to access it. However, Shakmat have worked up an interface that’s fast and fluid enough to keep you creatively in the moment of capture rather than scrolling through menus. So, let’s record something. Plug in a CV/gate keyboard, or a CV‑generating knob or touchstrip, have the BM MkII clocked and give yourself a beat to play along to, as it will aggressively quantise to the step count. When you’re ready, hold the Rec Ext button to record your notes or knob twists. Release the button when you’re done, as it will keep overwriting on every loop. You can press the Hold button with Rec and it will record continuously, letting you find your best take before releasing the button to let it loop. You can also throw notes in with little taps of the Rec button to build up a sequence over
multiple cycles. Switch to channel 2 and you can do the same with the same input connections if you wish. It’s really easy, really fun, and you quickly get into a rhythm of grabbing notes, adding more, erasing and doing it all again, but better. Once you have your notes, you can then start applying some interesting transformations. The big button on the left handles generation and regeneration, so it can create sequences or mess with existing ones. Hold the big button to throw the algorithm onto the notes while the X and Y knobs handle a couple of parameters. You could be shifting notes, increasing the pitch range, skipping steps or looping four-note slices from your sequence. The right-side big button does the augmentation ‘Process’ and so scatters in ratchets, slides and so on, with a single knob controlling a key parameter. Holding Rec Int as you play with the big buttons and their controls will print the processing and regeneration to the sequence. There’s a lot of great live-action processing going on, which would make for a button-mashing live performance, but that’s only half the story. The BM MkII has an SD card on which you can store thousands of sequences. Through the little screen, you can build playlists of any number of stored sequences for both channels. You
www.soundonsound.com / February 2026
95
ON TE ST MODULAR
can then launch each pair manually when the right moment for the change occurs, or have them stepped through as a complete work of music. The train of thought involved in chaining sequences changes the way you approach the module, and makes you far more forgiving of some of the screen shenanigans. It also brings the Rec Int button more into play. In live performance, you’re
likely to be throwing on effects temporarily with the big buttons, whereas if you are crafting a song or constructing a set, then you’re going to want to be printing those effects onto the sequence and saving them as a different pattern. It’s a more studied approach that’s perhaps less instant but puts the BM MkII right in the middle of where you’re making music.
The Bishop’s Miscellany MkII is fun on the fly for wild live variations on a grabbed instance of melody. But it can also be a great companion for thoughtful sequence generation and song building. The versatility will cost you some time and practice, but I think it’s worth it. Robin Vincent £
£355.
W
www.shakmat.com
Modular Profile: Danny Tobert
I
f the name Tobinski isn’t familiar to you, the name Dannysound might be — founded by one Danny Tobert, the company have gone from strength to strength since their comparatively humble beginnings as a personal passion project. They now boast a gorgeous folio of modules, from Buchla-inspired wavefolders to Eurorack-mountable VU meters and most recently the excellent — and unabashedly named — Tobinski Sequencer. On his entry into modular I’m a guitarist, really, and I spent a long time trying to understand how to get the sound I wanted! I used to tinker with effects and things to try and improve my performance or produce interesting new effects, and this became more of an obsession after I got interested in electronic music. Then I decided to go back into education and get a degree in electronics, so I could really understand how to design my own products and how I could tailor the sound to something that I wanted. This in turn led to the first amps and effects I made, and eventually into synths. Then I got hooked on synth design and spent about 10 years making standalone synths, until someone suggested I do Eurorack kits with Thonk. That was a great way to get into the modular market and it’s the thing that has helped build my company. On his go-to modules The main modules I use are the Mordax DATA and Joranalogue Test 3, because I’m always testing stuff these days rather than making music! However, if I need to create a quick patch then I have an all-Tobinski voice I almost always use, because it just has a really pleasing acoustic timbre if it’s set right and it’s quick and easy to set up. It’s a Cali [oscillator] sine wave into a Timbre [wavefolder], with an EN129 [oscillator] patched to the Cali’s FM input, and a Dual LPG/ VCA set to LPG Combo Mode and controlled with an envelope from the Looping VC-ADSR. I really like the sound of linear FM using sine or triangle waves with the Timbre wavefolder and LPG as it has a lot of room for acoustic tones.
96
February 2026 / www.soundonsound.com
On the journey from Dannysound to Tobinski The name change was a practical decision. ‘Dannysound’ was fine when it was just me and a bunch of DIY kits, but as I moved into making fully assembled modules, it started to feel a bit too much like just my personal project. I wanted a name that felt more like a proper brand. ‘Tobinski’ is a family name, so it still has a personal connection but it gives the modules their own identity. It was just the right time for a fresh start. On the Tobinski Sequencer The sequencer was designed as I wanted something fun, quick and easy to use when testing modules, but I also wanted something flexible enough to make complex, evolving patterns. As the design progressed, I realised there were more and more options that could be incorporated; so the challenge became how to make everything available while trying to maintain a clean and simple panel layout. I’m really happy with how it turned out. My preference is for more experimental melodies and rhythms and it’s easy to explore these territories, especially when it’s linked to the [Tobinski] Harmonic Timing Generator for clocking each of the sequencers at different rates. It can get a little confusing the more patched it gets as following things like the timing
and the switching can become fairly impossible... but that’s also the fun of it — it produces some completely unexpected results! On the culture of modular What I love about modular culture is the creativity and sound that various users achieve. There are some really interesting approaches, especially when it comes to self-generating patches and feedback patching techniques. I also really like the fact that the whole scene seems very inclusive and welcoming, and I hope that it continues to expand and be embraced by more cultures; since the musical content that the machines are programmed to play is very inspirational in terms of timbre, rhythm and melody. I really love it when people can create so much variation out of just a few modules, and that’s inspiring for others to realise that perhaps a new way to patch their own gear can lead to a whole different way of using those same modules. William Stokes
OFFICIAL MERCHANDISE STORE
T-SHIRTS
SWEATSHIRTS
HOODIES
MUGS
www.soundonsound.com/merch SOS Merchandise HP advert-UK.indd 1
07/01/2026 10:56
THE WORLD’S BEST RECORDING TECHNOLOGY MAGAZINE
FULL ISSUE PDF THE WORLD’S BEST RECORDING TECHNOLOGY MAGAZINE
1985 — 2026
THE WORLD’S BEST RECORDING TECHNOLOGY MAGAZINE
1985 — 2025
THE WORLD’S BEST RECORDING TECHNOLOGY MAGAZINE
TM
TM
MUSIC PRODUCTION TECHNIQUES / INDEPENDENT IN-DEPTH PRODUCT TESTS / ENGINEER & PRODUCER INTERVIEWS / LIVE SOUND
MUSIC PRODUCTION TECHNIQUES / INDEPENDENT IN-DEPTH PRODUCT TESTS / ENGINEER & PRODUCER INTERVIEWS / LIVE SOUND
VOLT 876
TM
MUSIC PRODUCTION TECHNIQUES / INDEPENDENT IN-DEPTH PRODUCT TESTS / ENGINEER & PRODUCER INTERVIEWS / LIVE SOUND
Sequential Fourm A F F O R D A B L E A N A L O G U E P O LY S Y N T H
“The best drum machine Roland have ever made”
UNIVERSAL AUDIO’S USB RECORDING POWERHOUSE
Olivia Dean
Producing a modern soul classic
Dave Stewart & Eurythmics “I don’t make demos, and never have”
Create your own plug-ins ...without learning to code!
EXPRESSIVE E
Sony 360VME
OSMOSE 61 MPE SYNTH
Immersive headphone tech that actually works?
WORTH €1999
30+ IN-DEPTH REVIEWS: SCHOEPS / NEVE / ANTARES / WARM AUDIO / HEDD / HAMSTEAD / HLABS / ACS / EHX / LAUTEN AUDIO IK MULTIMEDIA / AEA / EVENTIDE / INNERCLOCK SYSTEMS / DPA / NORD / ERICA / ARTURIA / FUTURE SOUND SYSTEMS
TECHNIQUE: MIXING ON IN-EARS / ADVANCED STEREO MIKING THE WORLD’S BEST RECORDING TECHNOLOGY MAGAZINE
www.soundonsound.com
WIN
£20,000 STUDIO IN OUR
2025’s stand-out studio kit
Exclusive: Steinberg Cubase 15 Maximum expression, minimum fuss
40TH ANNIVERSARY
SoundFlow 6
COMPETITION
The virtual Pro Tools operator!
TECHNIQUE: PODCASTING IN STUDIO ONE / SOS FOR ARTISTS
1985 — 2025
THE WORLD’S BEST RECORDING TECHNOLOGY MAGAZINE
Exclusive: SSL Super 9000 Feature-packed channel strip
Aim Audio Inspire
Reinventing the studio mic?
TECHNIQUE: RECORDING WITH SPACED PAIRS / TEMPO MAPPING IN LOGIC
1985 — 2025
OUR AMAZING STUDIO BUNDLE WORTH OVER £20,000!
MUSIC PRODUCTION TECHNIQUES / INDEPENDENT IN-DEPTH PRODUCT TESTS / ENGINEER & PRODUCER INTERVIEWS / LIVE SOUND
MUSIC PRODUCTION TECHNIQUES / INDEPENDENT IN-DEPTH PRODUCT TESTS / ENGINEER & PRODUCER INTERVIEWS / LIVE SOUND
CRANBORNE AUDIO
Powerful. Flexible. Affordable. Is this the future for Moog?
1985 — 2025 TM
MUSIC PRODUCTION TECHNIQUES / INDEPENDENT IN-DEPTH PRODUCT TESTS / ENGINEER & PRODUCER INTERVIEWS / LIVE SOUND
The epic production behind the hits
Expressive E Soliste
Hybrid mixing without the compromises
The evolution of echo chambers How the great studios created magical reverb
Revolutionary radio miking
The ‘squash mic’ trick
Your drum tracks will never be the same again!
Musically modelled strings
Apogee Symphony Studio Affordable entry to immersive monitoring
SSL Revival 4000
E-series channel in a 1U rack
WIN
NEVE 88C
ALLEN & HEATH
WORTH £ 1074
WORTH £ 2280
www.soundonsound.com
www.soundonsound.com
ON TEST: BUCHLA / STEINBERG / POLYEND / VALETON / NORDIC / NOISEWORKS / LYNX / NI / BRAINGASM / BITWIG / HH / HOTONE
TECHNIQUE: MID-SIDES RECORDING / PLOSIVE CONTROL / DAW WORKSHOPS
QU-6 MIXER
COMPRESSOR
TECHNIQUE: WHAT MASTERING CAN AND CAN’T DO / STEREO RECORDING
gets physical!
music onto every platform
WORTH £1472
www.soundonsound.com
ON TEST: DREADBOX / APPLE / STEINBERG / MACKIE / HIFIMAN / TWO NOTES / ROYER / ELYSIA / NEUMANN / POLYEND / HEDD
ON TEST: CLAVIA / WARM AUDIO / GROOVE SYNTHESIS / OUTPUT / SPITFIRE / ACON DIGITAL / MERIS / HAZELRIGG / AIAIAI / GS MUSIC October 2025 £7.99
WIN
Alex Warren Erica Synths FOCUSRITE ‘Ordinary’ Steampipe SOS For Artists NOVATION & ADAM STUDIO BUNDLE How the biggest hit Physical modelling The easy way to get your of 2025 was created
September 2025 £7.99
TECHNIQUE: HOW STEREO WORKS / COMPOSING WITH CHANCE
• Only £3.99 each edition (or FREE with all Digital subscriptions). • PDF can be viewed on your desktop, smartphone or tablet. • FI-PDFs remain in your MY ACCOUNT > DOWNLOADS library after purchase and can be re-downloaded at any time in the future.
SSL Oracle
Sound Devices Astral KPop Demon Hunters
• Buy and download instantly - no shipping costs!
www.soundonsound.com
November 2025 £7.99
THE WORLD’S BEST RECORDING TECHNOLOGY MAGAZINE TM
One module, seven compressors!
Essential tips for pop perfection
ON TEST: AUDIENT / SPITFIRE / T-REX / KRK / RODEC / DYNAUDIO / NUGEN / INSTRUO / AUDIOSCAPE / SOURCE / HUM December 2025 £7.99
TM
BRICK LANE
Bumper anniversary issue
www.soundonsound.com
ON TEST: FOCAL / ZERO-G / SPITFIRE / HIFIMAN / GRACE / FORS / AUSTRIAN AUDIO / AMPHION / IZOTOPE / ZOOM / ATOMIC ANALOG January 2026 £7.99
40 years of SOS!
Mixing vocals
Sound On Sound now offers our Full Issue PDF. This complete digital replica of the Print magazine includes all articles and adverts published in that edition.
August 2025 £7.99
Get your FREE PDF today at the link below! https://sosm.ag/FreePDF
FE ATURE
Hear The Sound W https://open.spotify.com/
track/3brJgq1ZCpwsczQr4m2DG5
W www.youtube.com/
watch?v=-YQBC5EkDJw
Phill Brown • Talk Talk ‘After The Flood’ J O E M AT E R A
L
egendary engineer Phill Brown has worked with the biggest names in music, from Led Zeppelin and David Bowie to Cat Stevens and the Rolling Stones. Asked to choose a favourite sound from his vast catalogue, he nominates the drum sound on ‘After The Flood’, from Talk Talk’s 1991 album Laughing Stock. “Mark Hollis hated repeating himself and people repeating themselves. When we did the Spirit Of Eden album, it was a completely different setup. We used one of these Neumann three-dimensional heads and a bass drum mic and snare, and it was in a kind of booth — an old microphone cupboard. So, when we came in to do Laughing Stock and this track, ‘After The Flood’, the first thing Mark said was, ‘I don’t want you to use any of the mics or the setup that you used
98
February 2026 / www.soundonsound.com
on the previous album.’ So, we took the drum kit out of the booth and set it up in different places in the live room, just to see how it sounded. And we found a spot where it sounded really good — but the mic was 28 feet away from the drums! “Because Wessex was a very dead studio, it didn’t sound like you were in a kind of gymnasium. We put up a Neumann U47, an old valve mic from the ’50s, and neither the producer Tim Friese-Greene or myself realised that there’d be a delay from what Lee [Harris] was playing on the drums to what we were picking up on the mic. That became apparent very quickly because Lee couldn’t hear the drums in his cans; it was delayed. We then closed-miked all the drums so that we could feed either Lee or other people that were playing with him, but we weren’t actually recording any of those mics. We just recorded the U47. And then because of the delay, we had to then delay everybody else to be in time with what we were actually recording.”
Check The Weather “What turned out to be kind of a simple idea with just one mic actually became quite involved, because the delay changed depending on the temperature of the room, and the humidity. We had to constantly check the temperature of the air. If the air conditioning had been left on
all night, the room was cold and dry, so it would be a kind of 26 millisecond delay. But if it had been turned off, the room was very hot and humid, and it would be more like 30 milliseconds. So, we had to check this through the day to make sure that everything was kind of in time. The drums on ‘After The Flood’ are just this one Neumann 47 mic. “We did in the end use a little bit of the bass drum mic, an AKG D12, because when you have a kit that far away, the bass drum sounds too far away. All the cymbals, all the top end travel faster and are very clear, and the bass drum tends to sound like it’s a long away. So, we had probably 30 percent of the drum sound was the bass drum mic, everything else was just off the U47. There was no EQ. It was just the way that Lee played, as he was very good at balancing internally the volumes and sounds. His drum kit was not just a regular drum kit, too; it was made up of about three or four different drum sets. He made sure that the toms were the right kind of sounding toms, along with the cymbals. When you listen to the drum sound on ‘After The Flood’ it doesn’t sound like it’s 28 feet away and in a dead room.”
Decapitator The Secret Weapon of Top Mix Engineers
From subtle to extreme, analog saturation is an integral part of great mixes. That’s why we studied all the analog classics, and painstakingly created a plug-in that brings the best of analog saturation to your studio. Choose from five different models to add analog character to every track and bus in your mix.
“Decapitator is instavibe-in-a-box.” – Fabrice “Fab” Dupont (André 3000, Shakira, Jennifer Lopez, Marc Ronson, Isaac Hayes)
Free 30-Day Trial at www.soundtoys.com
FE ATURE
Akai MPC60
Join us as we travel back in time to see how the story of one of the most important machines in modern music began. ALEX BALL
M
ost of us would be happy enough to have one famous musical invention to our name, but some people have produced so many that they almost seem run-of-the-mill. Roger Linn is a case in point. Products he’s created have helped define the sounds of genres and, arguably, even entire periods in popular music. And none has been more influential than the original grid-based sampling beatbox, the Akai MPC60.
The LM-1 Roger Linn was born in California in the 1950s. Unlike many of his later peers, Linn didn’t have any formal training with electronics or engineering, and instead was a musician who taught
100
February 2026 / www.soundonsound.com
himself what he needed to know in order to satisfy his sonic curiosities. In the early days, he’d open guitar pedals and tweak and modify them to produce different flavours of effect. A keen instrumentalist and songwriter, at only 21 Linn landed a gig as a touring guitarist for Leon Russell. Linn subsequently managed to persuade Russell to use the fruits of his career to buy a synthesizer for use in the studio, and Russell wound up purchasing a modular system from a fledgling company called E-mu Systems. Experimenting with this new technology, the ability to use the E-mu’s sequencer to modulate its filter as external audio ran through it was particularly compelling to Linn. Whilst working with Russell, Linn also first experienced a musician using a rhythm machine to lay down a beat that
the band would record to. This was done partly for timing, but also because it meant that if Russell then wanted to re-record the drums or something else rhythmic, there would be a rock-solid timing reference to work from. This ability to create drums artificially was interesting to Linn as it was an ingredient he struggled to produce for his own demo recordings, having never learned to play them himself. However, there were two problems: firstly, the machines were all based around preset, factory rhythms and couldn’t be programmed, (with a couple of exceptions — see the ‘Outliers’ box), and secondly, the analogue drum emulations of the day weren’t known for their realistic sound. Setting out to solve the first problem, in 1977 Linn became competent with computing and built a programmable
drum machine and sequencer using a COMPAL-80 and a Frankensteined sound board from a Roland rhythm unit. The sequencer could then control a synthesizer via CV and gate to boot. This custom machine was used on Leon Russell’s album Life & Love, which Linn co-produced, engineered and provided guitar for. Next came the second problem. Analogue drum machines that employed oscillators, noise generators and envelopes sounded like alien interpretations of acoustic drums, rather than the real thing. Whilst the sounds are steeped in nostalgia, charm and history nowadays, at the time manufacturers were looking for a more realistic solution. Fatefully, it was Linn who got there first because, fortuitously, around this time, it was becoming possible to record digital audio at a price that might just be within the realms of practicality from a commercial perspective. Whilst RAM was highly expensive, drum sounds were inherently short and were therefore a perfect, skinny contender for a product that was loaded with digital recordings of real instruments (although longer cymbal sounds would have to wait on the sidelines for the time being). Linn booked session drummer Art Wood into a studio and captured the sounds he’d need for his new machine. At 28kHz and 8-bit, the resulting lo-fi recordings were raw and crunchy, but, crucially, they were a huge breakthrough for the time. Nestled into a sleek chassis with hands-on controls and extremely useful new features such as tap recording, auto-correct, adjustable swing, pattern chaining and more, the resulting LM-1 was an instant hit, despite having a $5000 price tag upon its release in 1979. Once the LM-1 was out, it’s not an exaggeration to say that the drum palette of popular music was changed forever, and despite there only being around 500 units produced, the LM-1 was heard on the hits of the Human League, Fleetwood Mac, Michael Jackson, Queen, Prince and Vangelis amongst many, many others, and remains a prized possession to those who own them. With the success of the LM-1 in the bag competitors were working hard to try to catch up. With the technology improving and coming down in price, it was clear there needed to be a successor, and that came in 1982. The first instrument had used the initials ‘LM’ because the company
had been founded by Roger Linn and Alex Moffet. However, Moffet departed in the early ’80s and so the successor was simply titled the LinnDrum, rather than LM2. With a smaller profile, better fidelity, and more features and sounds, the LinnDrum went on to become one of the most famous drum machines of all time. With the LinnDrum outselling the LM-1 at almost 10:1, if a song was in the charts in the ’80s, the chances are that there was a LinnDrum on it. It would take so long to list all the artists that used the LinnDrum that it would dominate this article, so probably the best way to sum it up is by mentioning the fact that there is an archive on the Internet that lists songs that contain confirmed use of the LinnDrum, and at the time of writing, it has nearly 1900 entries!
Near Misses Following the accomplishments of the LM-1 and LinnDrum, you’d be forgiven for thinking that Linn Electronics rode the success happily into the sunset but, alas, history is littered with cruel twists of fate for inventors, and Linn’s story is no exception. Had it not gone wrong, however, we probably would have never wound up with the star of our story, the Akai MPC60. But before we get there, we’ve got to roll back to 1984 when Linn unveiled their third drum machine, the Linn-9000. The 9000 was a bold attempt to move forward and significantly, the unit was able to sample, had programmable hi-hat decay, doubled as a MIDI sequencer and contained a grid of square, touch-sensitive rubber pads and a liquid crystal display. All seemingly quite familiar... Whilst it was a powerful box that, like its predecessors, appeared in hit records, the 9000 was riddled with technical problems. As well as costly power supply issues on early units, the firmware was buggy and prone to crashes. In fact, on a personal note, I once had a conversation with the late Bob Heatlie who recalled his unit losing an album’s worth of work for a Neoton Família album he was producing the day before he flew to Hungary for the sessions. His Linn-9000 found itself in landfill! There was also a sister MIDI sequencer called the LinnSequencer that was unfortunately endowed with the same buggy operating system of the Linn-9000, and the two products, combined with fierce competition from other manufacturers, made the outlook
rather grim for Linn Electronics as 1985 drew to a close. In 1986, Linn arrived at the Winter NAMM show with a prototype of a new product, the LinnDrum Midistudio, but this never saw the light of day as the company went out of business only a few weeks later. The photos of this never-released product show a clear evolution from the Linn-9000 with sampling, MIDI sequencing and a hi-hat decay slider on the left of the rubber pads, now arranged in a 4x4 grid...
Seeing Red The demise of Linn Electronics proved to be something of a blessing disguise, because it opened the door for a new opportunity; Japanese company Akai (originally founded back in the 1920s) had established themselves with reel-to-reels and hi-fi equipment in the preceding 20 years and had branched out and founded a music division, Akai Professional, in 1984. By 1986, they’d tested the waters with a few synthesizers, such as the AX80 and AX60, and had begun developing samplers like the S612 and VX7000. Whilst they were good at the production, sales, finances and logistics, Linn had a track record with innovation and product design and his availability was an opportunity too good to miss. With Akai now backing him, Linn picked up where he’d left off at his own company and began working on a more refined and complete version of the Linn-9000, Sequencer and Midistudio that would ultimately hit the stores in 1988. The team at Akai who worked with Linn included Dave Cockerell of EMS fame, who had already created the S612 sampler and who would later work on the classic S1000 with two other famous engineers, Tim Orr and Chris Huggett. Initially the new product was titled the ADR-15, with the letters being an abbreviation of Akai DRum machine, but this title belied what was to be the full functionality of this new device. The concept was to make a multitrack digital sequencer and, indeed, the final production name MPC stands for ‘MIDI Production Center’. However, the MPC was still a drum machine if the user wished, as it was able to play back its own sounds too. These could be loaded from floppy disks, but crucially, the MPC had an input on the rear and 13.1 seconds of mono audio (or 26.2 seconds with the memory expansion) could be sampled into the unit and then be edited and saved onto floppy to be recalled later. This feature was one
www.soundonsound.com / February 2026
101
ON TE ST
Fiedler Audio Mastering Console 2
Screen 1: The main Timeline window. Note the support for working on multiple files, and for Atmos-capable plug-ins.
Dolby Atmos Production Software This major update to Fiedler’s immersive audio mastering suite could revolutionise your Atmos workflow. PHIL WARD
M
y review of Fiedler Mastering Console version 1 was published as recently as SOS December 2024, and the fact that I’m already writing about a version 2 indicates both that Fiedler Audio seem able to move very quickly, and that this new version is a very significant advance. In fact, Fiedler describe it as an entirely new product — and I wouldn’t argue with that. Fiedler Audio Mastering Console (or FMC, as I’ll refer to it from here) is a Dolby Atmos production tool that aims to provide an all-in-one fix for a workflow quirk that’s inherent in Atmos signal routing: within, say, a Pro Tools Atmos mix session, it’s not possible to apply global EQ, loudness adjustment, compression or limiting, or anything else, to an entire Atmos mix. This arises because an Atmos session
104
February 2026 / www.soundonsound.com
typically comprises beds and objects. Beds are conventionally panned elements spread, typically, over a 7.1.2 channel width, and objects are discrete elements that are panned according to dynamic metadata that defines their intended position in space. Notwithstanding that multi‑channel EQ, compressor or limiter plug‑ins that can be inserted on a 7.1.2 bus are somewhat niche,
such a plug‑in wouldn’t ‘see’ the object channels, because they’re separately routed to the Dolby Atmos Renderer (there can also be up to 128 of them!). This isn’t simply an inconvenience, though; it’s a significant issue because, for example, it makes aiming for a specific mastered loudness level or an overall tonal balance decidedly tricky. It makes fade-ins and fades-outs complicated too because they potentially need to be applied to beds and each object individually. FMC aims to fix all this, and more.
Orientation On launch, FMC 2 presents its Timeline window, which is where most of the fundamental mastering functions live. To begin a mastering session, the first step is to import an Atmos ADM (Audio Definition Model) file, a multi-channel BWF WAV package that carries the Atmos metadata, and is the Atmos format output of the Dolby Atmos Rendererer that hangs off the end of the DAW Atmos mix session. Screen 1 shows six ADM files imported, because FMC 2 can master multiple files
in one project. Despite the imported Atmos audio shown comprising a 7.1.2 bed with multiple objects, the display in the timeline shows ‘only’ a 5.1 channel width. While this may seem strange, it’s not remotely an issue in practice, and there’s sense in it: the convention is that loudness measurement of Atmos ADM files is determined on a 5.1 downmix. Along with the Atmos ADM shown in Screen 1’s Timeline window, I’ve also imported six stereo files (shown in green) that were rendered and output by the Dolby Atmos renderer at the same time as the ADM files. Mastering for Atmos often means creating stereo companion files and FMC 2 can handle both. This makes sense, as it will help ensure consistency across mastered stereo and ADM exports. There’s an option to consider here, though, because an alternative workflow is to import only the Atmos ADM and then, if stereo companion files are required, have FMC 2 render and export them. That was my preference initially, but I can see that the extra flexibility offered by importing separate stereo files, in particular the possibility of applying different processing (EQ, compression, loudness, limiting, etc) to stereo renders, is often likely to win the day. Still, importing separate ADM and stereo files, as in Screen 1, does enable me to illustrate the trim features and in/ out fades that can be applied. The ADMs in the screenshot have been trimmed at both beginning and end, and had in/out fades applied
(nonlinear fade curves are available), while the stereo files are untouched. Trims and fades are applied simply by grabbing the handles that appear automatically at the start and end of the timeline once a file has been imported. While I’m writing about the Timeline window, I should mention the functions to which it provides access. Living at the top left are the session import and save functions, and access to a Settings page that I’ll cover below. Next are transport controls and a switch that toggles the playback output between the ADM and stereo files (if one has been imported). Alongside this is a stereo file playback level control. Below the transport controls is a toggle switch for Batch and Album modes, the latter then offering Ripple and Snap options. Some explanation is in order... As I mentioned, FMC 2 is designed to enable multiple files to be imported, so that batches of tracks can be mastered in one project — so you can use FMC2 to master an entire album, not just individual tracks. In Batch mode, each imported track is processed separately by FMC 2 with no regard to the track before or after it. In Album mode, however, FMC treats multiple tracks as if they’re an album, with silence, gapless transitions and/or crossfades instigated between them. In Album Ripple mode, a clip and all subsequent clips can be moved in the timeline together, with further options that offer Atmos or stereo only, and both. When Album Snap mode is on, files will snap to features such as file boundaries, fade starts or the playback pointer.
Spatial Awareness Moving to the right in the Timeline window, you find Speakers and Phones (headphones) drop‑down menus to specify the speaker monitoring available or required, and the headphone format preferred. I wrote “available or required” because there’s a subtle distinction between the two. My Dynaudio BM5-based Atmos monitoring is
Fiedler Audio Mastering Console 2 €399 pros • Provides a comprehensive Atmos and stereo mastering solution. • Huge array of features and functions. • OBAM format brings plug-ins fully into the Atmos landscape.
cons • None.
summary Fiedler Audio Mastering Console 2 is a major advance on version 1, and offers a genuinely gamechanging set of features.
a 7.1.4 system, and I’d specify that channel format in the Speakers menu because that’s what is available. But if I want to hear what my mastered ADM will sound like downmixed to a lesser system, all the way down to stereo, I can select that from the drop‑down and FMC 2 will render the ADM appropriately. There are some similar options (Stereo, Binaural and Spatial Audio) in the Phones drop‑down. The first two probably don’t need any explanation, but the third, Spatial Audio, is Fiedler Audio’s implementation of the previously mysterious processing that Apple Music applies to Atmos ADMs to create the Apple Spatial format. Apple Spatial is generally a binaural render of an ADM, but for the first few
Screen 2: Offline loudness measurements can be carried out on 5.1 or stereo mixes.
www.soundonsound.com / February 2026
105
ON TE ST
FIEDLER AUDIO MASTERING CONSOLE 2
buttons and sliders that provide gain and dim functions, mute (entire mix, beds or objects), and both horizontal and vertical timeline display zoom.
Chain Gang
Screen 3: The 3D window, with options to selectively hide channels and/or objects.
years following its introduction to Apple Music streaming, Apple released scant details of what it actually did to an Atmos ADM; it just sounded very obviously different to the binaural render built into the Dolby Atmos Renderer. This resulted in some unhappy Atmos mix engineers who, on hearing their work streamed as Apple Spatial, found it bore only an approximate relation to what they expected. Apple have since provided developers with details of the Apple Spatial render process, and this is what FMC 2 uses. Switching between Binaural and Spatial Audio output from the FMC 2 is fascinating. Not only does Spatial Audio sound very different to Binaural in spatial terms, its tonal balance is significantly different also. It is an incredibly useful feature to be able to hear what an Atmos mix will sound like when rendered to Apple Spatial — because that’s how much Atmos music is consumed. Beneath the Speaker and Phones drop‑downs are settings to engage head tracking on compatible headphones. Apple- and Supperware-equipped headphones fall into the compatible category, but having neither available I wasn’t able to evaluate the head-tracking feature. Moving along, top right in the Timeline window is a pretty self-explanatory set of speaker and headphone level indicators (with mute and solo buttons). Above them is the Additional Render Headroom button, and Fiedler explain that a limiter is built into the Dolby Atmos Renderer output that emulates the limiting applied during its own ADM export process. The FMC 2 Additional Render Headroom function
106
February 2026 / www.soundonsound.com
provides a method to avoid triggering this limiter within FMC, by attenuating the input by 60dB and subsequently recovering 60dB at the output. This is of benefit, Fiedler say, because the output limiter can change the sound of the rendered Dolby Atmos mix if its level is above the usual loudness norms. The Additional Render Headroom ensures the renderer behaves linearly, so that loudness adjustment within FMC 2 is valid. Finally along the top line of Timeline window functions is a bunch of
Bottom left of the Timeline window is one of FMC 2’s most significant features: this is where mastering chain plug-ins can be instigated and applied on a file/ track basis. Fiedler have developed an ADM-compatible plug-in format called OBAM (Object Based Audio Module) and their first OBAM plug-in is the Gravitas multi‑channel mastering compressor. I wrote about Gravitas back in my original review of FMC, so I won’t regurgitate that here, except to repeat that Gravitas is a fully featured mastering compressor with everything we’ve come to expect of such a beast. Gravitas is Fiedler Audio’s only current OBAM plug-in, but mastering EQ is available via the OBAM Equalizer Pro from Toneboosters, and in Screen 1 you’ll notice that I’ve instantiated this along with Gravitas. (This isn’t a review of Equalizer Pro, but it’s an extremely well-equipped EQ plug-in that does everything required and quite a bit more!) Alongside the FMC 2 plug-in slot is a master gain slider and then further along the lower portion of the Timeline window there’s limiting and loudness
“It is an incredibly useful feature to be able to hear what an Atmos mix will sound like when rendered to Apple Spatial — because that’s how much Atmos music is consumed.”
Screen 4: The Editor window, in which alternative binaural perspective settings can be applied to bed and object channels, and parameters for rendering ADM data for lower‑channel-count playback systems can be tweaked.
Room Optimisation?
I mentioned in the main text that alongside the file icon in the Timeline window there’s a settings icon, and Screen 6 illustrates that it opens a further major element of FMC 2 functionality: a room/monitor EQ window, where EQs can be applied to monitor outputs on an individual channel basis. To be clear, FMC 2 is not a room/monitor optimisation solution — it includes no analysis or correction functionality. But in combination with a measurement mic and (for example) Room EQ Wizard, it would be possible to analyse an Atmos
functionality. Loudness measurements can be made on 5.1 or stereo data and clicking on the Measure button opens the window shown in Screen 2, where the offline measurements are instigated and reported. Finally on the Timeline window of Screen 1 are matrix and 3D displays showing active bed and object channels. Clicking on the ‘expand’ icon of the 3D display opens the 3D window (see Screen 3) that provides an expanded view along with options to selectively hide channels and/or objects. In Screen
Screen 6: EQ can be applied individually to any monitor output channel. monitoring system and configure the EQ parameters required to optimise the listening-position frequency response. Having said that, I should offer the health warning that room analysis and correction is a complex undertaking, and without a reasonable understanding of acoustics and psychoacoustics, it would be easy to make things worse rather than better with the EQ horsepower available from FMC 2!
4 I’ve illustrated the Editor window, where alternative binaural perspective settings can be applied to bed and object channels, and where parameters that define how ADM data is rendered to lower‑channel‑count playback systems can be modified. Once trims and fades have been applied, loudness targets have been hit and things are sounding as required, it’s time to export files from FMC 2 so that masters can be set free to become worldwide hits, disappear into obscurity
or, most likely, do something between the two. Screen 5 is of the FMC 2 export window, where each file in the timeline (or a complete album) can be simultaneously exported. Export formats on offer comprise ‘native’ ADM, alternative X.X.X channel widths, or stereo, binaural and Spatial Audio renders.
Impressed? I’ve written over 2000 words on FMC 2, and it’s time to draw this review to a close. But while I hope I’ve given you a sense of what this software makes possible, I still don’t really feel that I’ve fully done it justice! FMC 2 seems to me to be hugely significant in the Atmos music mix business, because it offers a superbly capable fix to one of the major Atmos workflow bottlenecks. It deserves to become very popular. £ €399. Discounted to €299 when going to
Screen 5: The Export Window.
press. Prices include VAT. Upgrade and crossgrade discounts also apply. W https://fiedler-audio.com
www.soundonsound.com / February 2026
107
FE ATURE
AM/PM
LIVE
Phil Manzanera: Performing In Atmos When Phil Manzanera and Andy Mackay recorded an instrumental improv album in 2023, they had no intention of performing it live — let alone in a cinema, through an immersive Dolby Atmos sound system...
J O E M AT E R A
I
n late 1971, nascent art-rock group Roxy Music placed an ad in Melody Maker seeking “the perfect guitarist for avant-rock group: original, creative, adaptable, melodic, fast, slow, elegant, witty, scary, stable, tricky. Quality musicians only.” When a young Phil Manzanera applied, he fitted the description so well that, half a century later, the same qualities still drive his creative endeavours. “What we’re doing as AM/PM really does describe the kind of music that Roxy was trying to do,” affirms Manzanera today. “It goes back to that original mission statement for Roxy, which was to do interesting music and perform it in a visually entertaining way.” AM/PM is the instrumental and improvisational outfit Manzanera formed with Roxy Music saxophonist Andy Mackay, the first fruit of which was a self-titled album, issued in 2023. March
108
February 2026 / www.soundonsound.com
2024 saw AM/PM, along with another Roxy stalwart, drummer Paul Thompson, perform three sold-out shows at All Is Joy, a venue located in the old Warner Brothers’ De Lane Lea building in Soho, London. “How we ended up doing those shows all happened by chance,” explains Manzanera. “The AM/PM album was mainly done by a series of improvisations, which I did in my studio, and then sent to Andy asking him if he could put something on top of it. I had no thought of ever playing it live. I thought there’s no way I could learn what I did because it was so random, it would take me forever to learn, so there was no chance of doing any live performances. Then Andy suggested doing these gigs, and I thought that it would be a terrible idea,
because how the hell could we do it because a lot of it was meant to be sort of improvised and just on the spur of the moment. I was concerned it was going to be a disaster, but Andy insisted.”
Just Like In The Movies The venue’s intimacy and sound system allowed the pair to perform concerts that were totally immersive in every sense of the word. “So, we decided to do it in a very small space, a 75-seater screening theatre in Soho, which had a 7.1 Dolby Atmos speaker system, and a huge screen,” says Manzanera. “I took advantage of that, making special videos that were going to be projected onto us. And then the whole sort of thing started developing into what Andy used to do at the end of the ’60s in the arts labs with
AM/PM performing live at the All Is Joy screening theatre in Soho, London.
Brian Eno and stuff before he joined Roxy, and before they became Roxy. So, it was a bit like going back to that time period, but with modern tech.” The performances were also to be recorded, and later mixed in Dolby Atmos. But with the original AM/PM album very much an improvised affair, showcasing the interaction between Manzanera and Mackay, one of the early challenges the project faced was finding a strategy that would keep true to the album’s improvisational spirit and inherent electronic elements without becoming a static backing track. “To solve this, we made small loops of elements from the multitracks that were then loaded into Ableton, using an Akai APC Mini,” explains Mike Boddy, AM/PM engineer, mixer and co-producer.
“I was then able to trigger loops live and create evolving electronic arrangements for the show. Rehearsals started at Phil’s Gallery Studio with Phil, Andy, Lucas, [vocalist] Sonia Bernardo and myself ironing out technical issues and getting a feel for the set. Paul Thompson didn’t join any of the rehearsals until the day before the first live show, due to him living over three hours away in Newcastle, so realistically he probably had only two hours of rehearsals before having to perform. This really highlighted what an incredibly talented drummer he is. Despite the lack of rehearsing and having to play to a click sent to him from the Ableton rig, along with having improvised electronic elements going on around him and no structure to follow, he never missed a beat.”
Any initial concerns Manzanera may have had quickly dissipated upon completion of the first song on the inaugural night’s performance. “After we played the first number, we looked to each other and went, ‘This is pretty good!’, exclaims Manzanera. “I then told the audience I had no idea what we were doing, but hope that it was going to work. And it seemed to work, and they seemed to enjoy it. Luckily, we recorded it because the thing with live performances, especially if you’re improvising material, is that it could all go horribly wrong as it depends on the moment, the atmosphere, and the audience. “The shows were a very collaborative effort with Mike Boddy as part of the band up at the mixing desk with his Ableton, and moving stuff around the
www.soundonsound.com / February 2026
109
FE ATURE
A M / PM LI V E IN ATMOS
Guitarist and tech Lucas Polo at the pedalboard station (left). Behind Phil Manzanera you can see Paul Thompson’s hybrid V-Drum and cymbals setup. All live instruments were sent from the front-of-house desk to Lucas’ pedalboards, and from there to an Ableton Live rig to be panned in Atmos.
immersive speaker systems, and [guitar tech/guitarist] Lucas Polo fulfilling the sort of role Eno used to do for me in Roxy Music, by treating my guitar using my pedalboard. So, the combination of that, along with Mike treating it again, and sending it around, influenced the way I played and the way I left spaces, in turn leading to Andy and I being able to have a musical conversation with sound.”
On Stage Boddy was tasked with engineering the sound for the live performances and recording each night’s set. “As the original album had a very electronic nature to it, it was helpful to keep the stage quieter,” explains Boddy. “Paul used a Roland V‑Drum setup for the kick, snare and toms but had a real hi-hat and some real cymbals. Keeping the stage quieter massively helped with Sonia’s vocals for the recordings and meant we could get away with a Shure SM7 on the sax. We had AKG C414s on the drum overheads, AKG C451 on the hat. Phil had his amp in a box, also, helping keep the stage nice and quiet; inside the box was an SM57. For the recordings the audience were captured with a pair of KM184s and a pair of Audio‑Technica AT4051s. “Rehearsals were in stereo, but as the venue had a d&b Soundscape Dolby Atmos system, along with a cinema screen, the plan was always to try and make the experience as immersive as possible for the audience. Phil made videos/visual treatments for each song, which for the shows were projected onto the stage, musicians and screen. For the shows themselves, these were loaded into [AV playback software] QLab and triggered via a Stream Deck from there.
110
February 2026 / www.soundonsound.com
Phil Manzanera: “We didn’t quite know what we were doing. Yet it combined so many technical innovations that have happened in the last 52 years to enable us to do this kind of gig.”
In order to keep the stage sound as quiet as possible, Phil’s guitar amp was connected to an isolation cabinet, which was miked up with a Shure SM57.
“On the original album I had used guitar pedals to create ambient textures within the tracks, so to help with creating a soundscape for the Dolby Atmos setup I was taking sends from the Yamaha CL5 front‑of‑house desk and sending them to an Old Blood Noise Endeavors Sunlight reverb pedal, a Chase Bliss Habit, and a Chase Bliss Mood. I’d either have vocals or the saxophone and violin as well, going into the pedals, and they would create soundscapes that would then end up going into the sides and rears of the room.” “It was all about sound textures and silence and listening to the space and to each other,” adds Manzanera. “Because Andy and Paul and I have played together for 52 years, we have an intuitive sort of understanding of tone and space and groove. So, in effect, the technical side of the gig was something totally new for all of us. We didn’t quite know what we were doing. Yet it combined so many technical innovations that have happened in the last 52 years to enable us to do this kind of gig. “We also had a particular challenge, in that for the people who had the AM/PM album, it had to sound vaguely like the tracks on that album. So, we triggered off certain minimal bits from the original: not the toplines, but the groove and some key elements so that we could improvise on top of them. And it was different every night, so we had three goes at it. It was almost like recording a live album with an audience there, as if you had written some stuff and then went in and performed it in front of a live audience, which people have done historically. That would be the equivalent
Reverb. With a side of audio destruction. McDSP’s latest plug-in builds on the legendary, incredibly popular inc and downright amazing FutzBox plug-in. Harnessing the power of McDSP SIMs (Synthetic Impulse Models), filters, saturation, and a compact yet powerful reverb engine, FutzVerb combines two of the most common audio effects used since the invention of the DAW - distortion and reverb. What’s not to like? Learn Lea more about FutzVerb and all the too cool to believe McDSP v7 plug-ins at www.mcdsp.com. Free 14-day demos available.
P R O F E S S I O N A L
A U D I O
H A R D W A R E
A N D
S O F T W A R E
SPOTLIGHT
LUKE WOOD
I
n the September 2025 issue, we rounded up some of the currently available options in the MPE controller market. They range from keyboard-based units like the Expressive E Osmose and ROLI Seaboard 2 to more experimental offerings that can be considered instruments in their own right — Roger Linn Design’s LinnStrument and the Embodme Erae 2, for example. Whichever approach you decide to take, your controller of choice will need to be paired up with an MPE-compatible instrument to fulfil its potential. As well as an abundance of software options, there’s now a healthy selection of hardware synths that boast MPE support, some of which have been built from the ground up to make the most of the protocol, and others which were already well-established instruments that have gained new expressive capabilities through firmware updates.
Sequential Trigon-6 Desktop Module
ASM Hydrasynth Desktop
Packing in the same wavetable engine as its keyboard-equipped counterpart, ASM’s Hydrasynth Desktop offers all the power of the standard instrument in a compact, rackmountable desktop enclosure. Its three oscillators offer a choice of 219 waveforms — two of them feed the company’s renowned Mutant processors — and are joined by a pair of filters (one multi-mode, one SEM-style state-variable) and no fewer than five LFOs and five envelopes. The instrument’s modulation matrix comprises 35 sources and 191 destinations, and its effects section houses a versatile collection of processors that range from EQs and distortion to reverbs and delays. A set of assignable macro controls make it possible to control up to eight parameters from a single encoder or button. As of firmware version 1.3 the Hydrasynth Desktop boasts full
ASM Hydrasynth Desktop
118
February 2026 / www.soundonsound.com
MPE-Capable Desktop Synths
MPE is becoming ever-more prevalent, and plenty of hardware synths are getting in on the action. MPE support, allowing for individual pitch-bend, timbre and pressure control over each of its voices. As the instrument already supported polyphonic aftertouch, switching to MPE mode will result in MPE pressure automatically being mapped to aftertouch, while a selection of MPE options (MPE-X, MPE-Y absolute, MPE-Y relative) have been added to the instrument’s Modulation Sources menu. £ £749 including VAT. W www.ashunsoundmachines.com
Black Corporation
There are a few MPE-capable options to choose from in the Black Corporation range. First up is the Kijimi Mk2, an eight-voice instrument which the company say was designed to be one of the most powerful polysynths ever built! Its oscillators continually morph through sine, triangle, sawtooth and pulse-width waveforms, while its two envelopes offer some interesting features including a cycling trapezoidal mode similar to
Black Corporation Kijimi Mk2
Dreadbox Artemis
that of the EMS Synthi. The ISE-NIN then offers the company’s take on the Roland Jupiter-8, while the Deckard’s Dream draws inspiration from the much-loved Yamaha CS‑80. Finally, there’s the Xerxes Mk2, an eight-voice polysynth that aims to combine the iconic sound of an Elka Synthex with modern expressive control. There are two digitally controlled analogue oscillators, a multi-mode filter, white and pink noise generators, and an analogue BBD chorus effect with three operating modes. The Xerxes MkII boasts a comprehensive set of envelope and modulation controls, and also supports micro-tuning. £ From £4200 including VAT. W www.black-corporation.com
Dreadbox Artemis / Nymphes
The Artemis is the most recent addition to Dreadbox’s range, and combines the company’s signature analogue sound with a collection of digital stereo effects designed by DSP experts Sinevibes. It’s a six-voice design that features a pair of waveshaping oscillators with hard sync and through-zero FM, along with a resonant low-/high-pass filter, two ADSR envelopes, a pair of LFOs and an onboard sequencer and arpeggiator. As you might have guessed from its inclusion here, the Artemis offers MPE support straight out of the box. There’s also the Nymphes, another compact six-voice polysynth that combines a single oscillator with low- and high-pass filters, a pair of ADSR envelopes, one LFO per voice and
Groove Synthesis 3rd Wave Desktop
Erica Synths Steampipe
a built-in reverb. Despite its apparent simplicity, the Nymphes fully supports MPE and many of its parameters feature a polyphonic response. £ Artemis £1089, Nymphes £449. Prices include VAT.
W www.dreadbox-fx.com
Erica Synths Steampipe
Designed in collaboration with Dutch plug-in developers 112dB, Erica Synths’ Steampipe brings something a little different to the table. It’s a physical modelling synthesizer that has no oscillators, opting instead for an envelope and noise generator that have been designed to mimic the behaviour of wind and string instruments. It’s probably no surprise that it’s been optimised for use with wind-based MIDI controllers, but it will also happily pair up with any MPE (or standard MIDI) controller. Precise control of the instrument’s physical modelling parameters means that it’s capable of producing organic emulations of acoustic instruments, but it goes well beyond their conventional pitch and dynamic ranges and, of course, can be pushed into far more experimental territory. £ £977 including VAT. W www.ericasynths.lv
Groove Synthesis 3rd Wave Desktop / 8M Groove Synthesis were met with significant praise when they launched their PPG Wave-inspired synth, and since its initial release its been treated to a series of updates and gained some powerful
new features. It’s also now available in the form of the 3rd Wave Desktop, a module version that packs in all the power of the flagship synth, and with the exception of a handful of top-panel controls, delivers exactly the same programming experience. Each of the instrument’s three oscillators can function as a wavetable (classic PPG and modern modes are provided) or an analogue-modelled waveform, while filter duties fall to a Dave Rossum-designed 2140 analogue low-pass and an SEM-style state-variable option. As well as offering a generous 24 voices, the synth is four-part multitimbral, with each of the four layers treated to their own independent modulation matrix. The more recent 3rd Wave 8M then offers a similar experience, but comes in at a lower cost thanks to a reduction in voice count (eight instead of 24), and a simplified front‑panel design that offers fewer physical controls. Much like their keyboard-equipped sibling, both modules now fully support MPE. £ 3rd Wave Desktop £3449, 3rd Wave 8M £1779. Prices include VAT.
W www.groovesynthesis.com
GS Music Bree6 / e7
The Bree6 is the second synth to be launched by Argentina-based GS Music, and manages to pack some serious functionality into a sleek, compact enclosure. It’s a six-voice analogue polysynth, and features a single oscillator that includes sawtooth and pulse waveforms along with a modulatable pulse-width modulation control; there’s also a square-wave sub-oscillator. Its filter employs a resonant four-pole low-pass design, and a pair of ADSR envelopes
GS Music Bree6
www.soundonsound.com / February 2026
119
SPOTLIGHT
MPE-C APABLE DESKTOP SYNTHS
Oberheim OB-X8 Desktop
Melbourne Instruments Nina
are joined by a single LFO, while some stereo effects are provided in the form of chorus and delay. Importantly, the Bree6 supports the use of MPE controllers, and GS Music say they have carefully tested its implementation with the Expressive E Osmose, Roger Linn Designs LinnStrument and moForte’s GeoShred software. MPE support is also present in the company’s debut release, the e7 — a larger seven-voice polysynth that features a ladder-type low-pass filter. £ Bree6 £989, e7 £1799. Prices include VAT. W www.gsmusic.com
Melbourne Instruments Nina
Melbourne Instruments’ Nina combines a trio of oscillators (two analogue and one digital wavetable) with a Moog-inspired ladder filter, allowing it to cover a wide variety of classic sounds as well as stepping into more modern territory. It’s a 12-voice instrument that boasts four-part multitimbrality, and includes an innovative Morph function that makes it possible to blend seamlessly between entire patches. There are two ADSR envelopes and a powerful modulation matrix, and thanks to the motorised pots, the instrument offers instant recall of settings and is capable of displaying automation and modulation directly on the top-panel controls in real time. The Nina has always been equipped with a powerful sequencer, but thanks to a series of firmware updates it now offers four independent, polyrhythmic, polyphonic tracks that benefit from per-step automation. There’s a dedicated mode that offers full MPE control across the instrument’s multitimbral layers, and also adds a decay envelope for expressive sound control on MPE aftertouch and CC74. What’s more, Melbourne Instruments have teamed up with Expressive E and sound designer James Terris to create an exclusive MPE preset pack specifically for users pairing the Nina with an Osmose. £ £3650 including VAT. W www.melbourneinstruments.com
120
February 2026 / www.soundonsound.com
Oberheim OB-X8 Desktop / OB-6
Introduced in 2022, the OB-X8 aims to deliver the ultimate Oberheim experience by bringing together three of the legendary designer’s renowned designs: the OB-X, OB-Xa and OB-8. Key elements of each design, including the all-important filters, were faithfully reproduced in order to capture the sound of the original instruments, and the new flagship synth also makes it possible to ‘mix and match’ elements to create sounds that weren’t obtainable on the originals. The newer OB-X8 Desktop features an identical engine to its keyboard-equipped counterpart, with its discrete VCOs, VCAs and filters complemented by knob-per-function panel design — despite the lack of a keyboard, the module retains the arpeggiator and keyboard split functions, keeping its abilities consistent with the OB‑X8 when connected to the user’s choice of controller. Although there was no support for MPE when the instrument launched, it has since been added with the free OS v2.0 update, making the OB-X8 Desktop fully compatible with MPE controllers. The OB-6 module, which was developed in a collaboration between Tom Oberheim and Dave Smith — and originally released under the DSI/ Sequential brands — is now officially a part of the current Oberheim line-up, too. The module features a broadly similar architecture and layout to the Sequential Prophet-6 (more of which later), but employs a two‑pole state‑variable resonant filter based on the Oberheim SEM.
Sequential Prophet-6 / Trigon‑6 Desktop Modules
There’s plenty to choose from in the Sequential line-up, with the desktop module versions of the Prophet-6 and more recent Trigon-6 both boasting MPE support. As their names suggest, both are six-voice instruments, with the former offering a modern take on the company’s vintage designs and the latter delivering the last synth designed by founder Dave Smith. The Prophet-6 combines a pair of discrete VCOs with a two-pole resonant high-pass filter and a Prophet‑5-inspired four-pole resonant low-pass filter. The Trigon-6 then boasts a three-oscillator design — with triangle, sawtooth, reverse sawtooth and variable-width pulse waves — and features a switchable two‑/ four-pole resonant low-pass ladder filter. If you’re after more voices, the Trigon-6 is equipped with a Poly Chain feature that allows two units to behave as a single 12-voice instrument. Both modules will happily respond to MPE controllers. £ Prophet-6 £2111, Trigon-6 £2399. Prices include VAT.
W www.sequential.com
Supercritical Redshift 6
The Supercritical Redshift 6 has been treated to an array of new features since it launched in 2024 — with yet more already planned for introduction in 2026 — and as of October 2025 it supports MPE. There are no fewer than 16 analogue oscillators per
£ OB-X8 £3109,
OB-6 £2249. Prices include VAT. W www.oberheim.com
Sequential Prophet-6 Desktop Module
voice, and thanks to a set of Character Profiles, the tuning, gain staging, filter, amp and envelope behaviour of each of the instrument’s six voices can be adjusted to deliver everything from clean, modern tones to “distorted misbehaviour and beyond”. The four-pole, state-variable analogue filter is equally versatile, and is said to be capable of emulating just about any classic vintage design. There are four envelopes and four LFOs, and a generous selection of DSP-based reverb, delay and modulation effects. £ £1099 including VAT. W www.supercriticalsynthesizers.com
Supercritical Redshift 6 Twisted Electrons TWISTfm
Twisted Electrons TWISTfm
Aimed at those looking to “push the boundaries of sonic creativity”, Twisted Electrons’ TWISTfm offers a combination of FM synthesis with analogue filtering and modern control. The instrument employs a pair of Yamaha OPL-3 YMF262 FM chips, delivering eight voices that are each complemented by their own multi-mode filter. A total of 15 filter modes cover low-, high- and band-pass behaviours Synclavier say along with phasing, that the Regen notch and more, brings together while Liquid and all of the sounds MS20 resonance from their rich modes provide both legacy, as well as subtle and aggressive introducing an array filter characters. There’s of modern synthesis a built-in 128-step sequencer with types and expressive Synclavier Regen MIDI sync and looping options, control. Its DSP engine offers and as well as supporting MPE, the additive, subtractive and FM synthesis instrument is equipped with an onboard as well as sampling, all of which can be ribbon controller. mixed together (a patch can contain up £ €979 including VAT. to 12 partials) with the ability to assign W www.twistedelectrons.com crossfades to the likes of velocity,
Synclavier Regen
pressure, mod wheel and keyboard inputs. MPE and polyphonic aftertouch are both fully supported, and thanks to a comprehensive Modulators menu, it’s possible to adjust the response curves of the parameters that are linked to control inputs. There’s an onboard arpeggiator, and the instrument also comes loaded with a wealth of effects including chorus, reverb, vibrato, tremolo and bit-crushing. £ £2335 including VAT. W www.synclavier.com
UDO Audio Super 6 Desktop
UDO Audio Super 6 Desktop
The module version of UDO Audio’s Super 6 packs all of the features found in the keyboard version into a compact enclosure that can be used as a desktop instrument, rackmounted with the optional ear attachments, or held in place just about anywhere else thanks to a built-in VESA mount. Despite its name, the instrument actually has 12 voices, but features a binaural mode that combines them into six ‘Super’ voices — left/ right pairs of voices that are routed and processed separately by the synth’s true stereo signal path, allowing for everything from subtle stereo movement to more extreme creative effects. There are two FPGA-based oscillators, a four-pole low-pass filter and simple high-pass filter (which can be used together to mimic a band-pass), two envelopes and two LFOs; there’s a powerful onboard
sequencer and arpeggiator, too, along with built-in high-quality stereo chorus and delay effects. And of course, its inclusion here means that the Super 6 Desktop is capable of responding to MPE. $ £1949 including VAT. W www.udo-audio.com
Waldorf Iridium Desktop
Described as a “direct descendant of the PPG Wave”, the Waldorf Iridium Desktop makes the engine that powers their renowned Quantum synth available in a more compact form. Its three oscillators offer a choice of five modes: wavetable, virtual analogue, particle (sampling and granular), resonator and kernel, the last of which allows each oscillator to be divided into six oscillators. There are three filters per voice (12 or 24 dB/octave low-, high- and band-pass), six envelopes, six LFOs and a 40-slot modulation matrix. Despite its complex nature, the synth promises an intuitive programming experience, with a wealth of physical controls joined by a powerful touchscreen system. MPE is supported via both DIN and USB MIDI inputs, and by default, a controller’s X, Y and Z axes are mapped to the pitch-bend, modulation source and channel aftertouch parameters in the Iridium’s engine. Waldorf also offer the Iridium Core, a scaled-back version of the instrument that features the same sound engine but with 12 voices and fewer physical controls. £ Iridium Desktop £1699, Iridium Core £1355. Prices include VAT.
W www.waldorfmusic.com
Waldorf Iridium Desktop
www.soundonsound.com / February 2026
121
TECHNIQUE
THE SOS TEAM
I
t’s great that there’s so much to explore in SOS For Artists — but when you first sign up, this can also make it easy to overlook some things. So we’d like to shine the spotlight on some hidden gems, and this month our focus will be on the six Audified plug-ins included in your subscription: U73b Compressor, U78 Saturator, 1A Equalizer, RZ062a Equalizer, RZ062b Equalizer and MixChecker Ultra. Together, they form a useful toolkit that can add something to your DAW’s built-in tools, and you can call on them at pretty much any stage of a mix. In this article, we’ll provide a quick overview of each plug-in, along with some notes on how you might go about getting the most out of them — and we’ve also created a few audio examples (https://sosm-ag/sosfa-workshop-0226), which we’ve based on samples you can find in the SOSFA library. Before we get started, though, note that lots of these plug-ins feature level calibration controls, which can help you ensure that you’re hitting the sweet spot in the modelled processing. There’s no ‘right’ setting — it’s similar to analogue gain staging, but when you’re searching for character through modelled saturation, you should feel free to experiment for the best sound.
U73b: Vintage Compression The U73b Compressor (now on version 3) is a great-sounding emulation of a vintage variable-mu compressor-limiter made by Telefunken. Variable‑mu types are famous for sounding classy — smooth and musical — but the Telefunken device has a reputation for being a bit more colourful, with a slightly forward character in the midrange, and this plug-in does a good job of replicating that. So it’s a useful alternative flavour to the options you’ll typically already have in your DAW. This plug-in offers both compressor and limiter modes, selectable release times, side-chain high-pass filter options (the original had a 100Hz filter built in, but you can disable that) and the ability to link or unlink the left and right channels when used on stereo material. Additional benefits include being able to inversely link the input and output controls, plus a virtual moving-coil meter, with the option to view the amount of gain reduction, or the input or output levels. As with the U78 (more of which below) there’s an oversampling option, which can
124
February 2026 / www.soundonsound.com
Your SOSFA subscription gives you access to some super plug-ins by Audified. Let’s see what they can do...
Audified’s U73b variable-mu compressor plug-in.
give you higher‑quality results, especially when adding lots of character, but as this comes at the cost of using more of your computer’s CPU power you could, if needed, disable this feature until your final render. For our audio examples, we used U73b in both its limiter
U78: vintage-flavoured saturation.
and compressor modes, on a drum loop and a bass line. For the drums, we switched to the limiter mode and aimed for a combination of loudness and vintage character, just to get the beat driving the track a little more. The release is quite fast, which is typically what you want for drums (so that the compressor recovers before the next hit), and the amount of compression fairly high, with a slight boost given to the output level to compensate for that. Here, we used a loop, but you
and then restored some of the brightness using the Tone control. For the bass track, some of the lower frequencies were again rolled off to clean up the sound, and then we used the Tone control to compensate by darkening the overall tonality.
Pultec-ish
The 1A equaliser is based on a Pultec design, but adds some useful touches.
could equally well apply these sorts of settings to the drum bus when processing live drums. For the bass, we switched to the compressor mode and set the attack to 2.5, again keeping the compressor settings quite high. In this instance we activated the high-pass filter to prevent the really energetic low-end frequencies from triggering overcompression — this really helped to retain a sense of clarity in the bass line; it’s pretty easy to switch it in/out and judge this setting by ear. Finally, note that you can try this compressor wherever you’re looking to add a bit of vintage character, including dropping the plug-in onto your mix bus. The mid-forward character will likely work wonderfully for some material and less well for others, but it’s well worth a try; we’d suggest aiming for only a very subtle amount of gain reduction, with a fairly slow release.
U78: Saturation The U78 draws on the sonic character of U73b to give you a dedicated saturator, with tools to help you focus the resulting energy where it’s needed. There are high- and low-pass filters, a Tone control that operates rather like a tilt EQ, and a wet/dry mix
control that means you can be as heavy‑handed or subtle as you like with the resulting colour. An Auto Output facility ensures the overall level remains broadly consistent. To demonstrate the sort of thing you can do with this plug-in, we applied it to synth and fretless bass parts, but you can try it on any source that you think will benefit from greater harmonic richness, warmth, grit or presence, be that individual tracks, groups or even, with a suitably subtle mix setting, the main mix bus. On the first demo, we’ve used U78 to apply some valve brightness to a synth, to give the part just a little more bite and edge. To do this, we rolled off some of the lower frequencies, cut some high‑frequency harshness,
As you can tell immediately from the GUI, the 1A equaliser emulates the classic Pultec EQP-1A, a valve-amplified passive EQ famous for the unusual curves created when boosting and cutting around the same frequency. That’s possible here, and it can be especially useful for shaping the low end — often effective when you need to rework kick drums and
“1A’s M-S option means you have more scope than on many emulations for sculpting stereo signals, such as synths...” bass instruments. Two other standout features are the Calibration knob — again, this allows you to dial in analogue-ish saturation to taste — and a Mid-Sides mode. Pultec-style EQs can be useful on any number of instrument tracks, and vocals, but 1A’s M-S option means you have more scope than on many emulations for sculpting stereo signals, such as synths, drum and mix busses or even in mastering. An output level control lets you compensate for any overall level change resulting from your EQ moves. For our demos, we applied 1A to both guitar and choral vocal tracks. For the
The RZ062 suite, comprising ‘a’ and ‘b’ versions of a plug-in that emulates a valve EQ developed for film production in the 1950s.
www.soundonsound.com / February 2026
125
TECHNIQUE
EXPLORING THE AUDIFIED PLUG-INS
Mix Checker is a really handy tool for checking how your mix will translate on other playback systems. There are lots of options, and there’s some handy metering thrown in for good measure.
guitar, the lower frequencies were pulled down, while the higher frequencies were boosted to give a sense of air, resulting in a much cleaner, clearer sound. On the vocals, we set 1A to its Mid-Sides mode, to ensure depth and solidity at the centre and on mono playback, while emphasising the width in higher frequencies for a more dramatic stereo presentation.
RZ062 Suite The RZ062 suite, comprising RZ062a and RZ062b, offers you emulations of two different vintage EQs, this time rare Siemens valve EQ modules that were originally used in the Klangfilm system in European film studios in the 1950s. Although these were designed and built to the highest standards of the day, they have since become known for imparting an engaging warmth and density and have naturally found favour in music production circles. The ‘a’ version features a tilt-style slope with a centre frequency of 650Hz, and a central knob moving the slope up or down, while also imparting an enticing valve character — you might call it ‘warmth’! This makes it an ideal tool for gently enhancing vocals, strings, pianos or the overall mix. There are separate control sets for the left and right channels and, again, there’s a Mid-Sides option, which makes it particularly versatile. We used this version of the plug-in on string and piano samples downloaded from the SOSFA library. For the string sample, we opted for the Mid-Sides setting, and unlinked the two channels before giving the lower and upper frequencies slight boosts. The input levels were raised to give a little more saturation, and the output levels dropped to compensate — and note that you have the option of driving the two channels into different amounts of saturation, by setting their input/output levels differently. For the piano, our aim was to add some warmth and presence to the part. This was once again achieved by switching to Mid-Sides mode and
126
February 2026 / www.soundonsound.com
de-linking the two channels, before boosting the upper and lower frequencies on each channel to taste, until we felt we had a nice tonal balance and stereo image. RZ062b has a similar heritage, but in place of the simple tilt point the middle EQ control offers four selectable frequencies for adding presence, with six boost settings for each. These controls make it a great option for use on guitars, snares and other instruments with a lot of information in the mids, as well as any tracks that you feel might benefit from a boost in presence or attitude. For our audio examples, we applied the plug-in to a drum loop and guitar. In the first, the plug-in was left on linked mode and the snare enhanced by boosting the high frequencies and adding extra presence in the 2kHz area. Again, the input level was boosted for a little extra colour, and this was counterbalanced by pulling down the output level. For the guitar, we increased the presence and unlinked the left and right channels so we could boost different frequencies on each side (2kHz on one
side, 4kHz on the other), to widen the stereo image, making the resulting sound more dramatic.
MixChecker Ultra Finally, we come to MixChecker Ultra. This one isn’t intended as a processor, but it can be used as one, as well as being a handy mix referencing tool. The idea is that it mimics how your track will sound on a range of real-world playback devices in different listening environments. With over 90 device simulations (phones, laptops, car systems, small bluetooth speakers, club PA, etc), plus impulse-response support, you can test how your mix will translate outside your studio. The built-in meters help you to compare loudness, phase, dynamics and more. You can insert MixChecker Ultra either as the final plug-in on your master bus (in which case remember to turn it off before you bounce your mix!) or, if your DAW allows it, a dedicated monitoring or control-room output. Then it’s easy to toggle through different device simulations to check for critical mix issues. It’s perhaps not a complete replacement for checking your final mix in a different room or in your car, but the metering is useful, and it can be a very effective way to discover if the bass end or dialogue come across OK on smaller speakers. Of course, you could choose to print the processed sound as an effect — for example, for an authentic voice-on-phone sound in video post production or as a spot effect in a track. In our audio demo, you can hear the track dry, followed by the desktop monitors, 22-inch TV, White Cone Vintage 7-inch (based on Yamaha NS-10s) and Classic Pods emulations.
SUBSCRIBE & SAVE TABLET | WEB | REPLICA | PRINT PLUS BONUS PDF
SMARTPHONE COMPATIBLE
1 ICONIC MAGAZINE
6 GREAT WAYS TO READ IT
SCAN ME
TO SUBSCRIBE
TABLET - PHONE - WEB - PDF - REPLICA - PRINT All this for less than the price of a Coffee+Pastry each month!
www.soundonsound.com/subscribe • Go DIGITAL - get 12 monthly Tablet issues + all locked Web articles + monthly Full Issue PDF download the day the issue goes live. • Go PRINT+DIGITAL - get the best of both worlds and save over 50%.*
iOS / ANDROID
Every Digital sub includes a 5‑device licence to our App: mix and match across iOS/Android Tablet and Smartphone.
ONLY READING SOS IN PRINT?
Choose our full Print+Digital bundle for unlimited 24/7 access.
* The 50% discount offer is based on the UK retail price of the Print magazine, Tablet and Web subscription when sold separately. Subscriptions can be cancelled at any time and you will receive a pro-rata refund for all outstanding issues.
Studio One
TECHNIQUE
ROBIN VINCENT
T
Spice up your MIDI data with Studio One’s Note FX.
here comes a time in every musician’s life when they get sick and tired of what they’re playing. The creative juices are simply not flowing, and you’re stuck in a loop of the same worn-out chords and hackneyed melodies. Or, maybe, you’re not that accomplished and need just a little something to elevate your one-finger meanderings to another level. Perhaps what you need is a little pick-me-up: a sweet line of possibilities that will make your head spin and return your sense of self to its rightful place at the top of the heap. What you need is Note FX. Note FX have always been there, and in many ways, they’re Studio One’s secret weapons against banality. In this workshop, we’re going to remind ourselves of their awesomeness and start making the most of their largely forgotten set of very particular skills.
Take Note Note FX are real-time effects processors that act on MIDI notes, so not in an audio effect way of messing with signals, but in a way that reinterprets incoming note data from your MIDI controller keyboard or instrument track. All the action happens before the notes reach your virtual or external MIDI instrument, which makes them recordable, manipulable and reworkable. Studio One 7.2 currently has four Note FX: Arpeggiator, Chorder, Repeater and Input Filter. Each one brings something interesting to the table, and they can also have a lot of fun working together. You’ll find them towards the top of the Instrument Browser, where you can drag them directly onto a track. Alternatively, you’ll find they have their own section in the Inspector where we can load them and have some control over how they work. Let’s dig in.
Arpeggiator Everyone loves a good arpeggiator, and this is a great one that starts off very familiar and then gets increasingly funky as you get into it. The idea is that it takes any number of held notes and turns them into a run or pattern of single notes. So you could hold a chord and have the arpeggiator play the notes in series, either running up, running down, up and then down, down and then up, in the order your played them, or completely randomly. When you load it up, the default preset is precisely as you’d expect. It’s set to 16th
128
February 2026 / www.soundonsound.com
The Arpeggiator and Chorder Note FX are powerful on their own, but can also be put to work together to create arpeggiations from the automatically generated chords.
notes over one octave, running up and down. The basic controls are on the left. You can push it up to four octaves and change the rate with the large knob, to anything from a 64th triplet to a bar and a half per note. You can introduce a bit of swing to give the arpeggiations some lilt, and change the gate length from short and sharp to sustained and overlapping. Along the top, you have the choice of note flow modes previously mentioned. The last one is a chord mode, which plays the notes you’re holding as a chord in the rhythm of the arpeggiator. If you’ve set a larger octave range, it will play the same chord in different octaves. The Hold button is very useful. It lets you take your hands off the keyboard by holding the notes for you so the arpeggiations keep playing. The Velocity knob enables you to set a velocity for the notes.
It’s set to Input by default so the notes are arpeggiated at the velocity you played them, but if you switch it to Fix you can have them all played the same. Those are the basics, and it’s pretty fun just like that. But there’s another side to the arpeggiator called Pattern. Click the button at the top right and see what happens. The middle display lights up with bars of orange. If you run your mouse over them, you’ll notice that you can resize the height and the width of the bars. The bars set the velocity and gate length of each note along a set pattern duration, turning the arpeggiator into something approaching a pattern sequencer. I find this particularly effective in Play Order mode, where I put it in Hold and grab two handfuls of my keyboard in a chord of around eight notes. I tend to move the Pattern Length up to at least 16; you can switch to another page and up to 32 notes if you wish, but I prefer to focus on a single page. And then just experiment with the velocity and gate on each note. You can even turn notes off completely by clicking their number. If you have a look in the preset drop-down menu, you’ll find some interesting examples of pattern sequences. You might also notice that you can pull the gate across other notes to create overlaps of up to 200 percent if you want, which gives it an interestingly polyphonic feel. Don’t forget to save your own presets of patterns that you make. A quick tip: many of the basic controls are available as simple menus in the Inspector, so you don’t even
The Repeater can work like a simple ratchet effect... or you can use the Scale controls to generate mutating repeats.
have to open the GUI. Another tip is that a quick way to bring up the GUI is to click the tiny little icon, like two piano-roll notes, that’s appeared next to the track name, before the Instrument Editor button.
Chorder The basic idea behind the Chorder is that you ask it to memorise one chord, and then you can play that same chord with one finger, transposed to whatever key you press. If you load up the Chorder, that’s exactly what the default preset does. If you’d like to change the chord, click on Learn Mode, then click on Clear All so that it has no chords in its memory. Play your chord, and you’ll see it appear in the top half of the keyboard. You can add more notes, either with key presses or with your mouse. When you’re happy, turn off Learn Mode, and you can play your chord on every note. However, playing the same chord transposed on different notes only has so many uses, and the Chorder would like to be more useful than that. If you turn off the Auto Fill button, you’ll find that you can only play your chord on the original note it was set to. What this means is that if you go back into Learn Mode, you can actually set a different chord on every single note. Chorder becomes a super-powerful place for chord progressions. If you dig around in the presets, you’ll find all sorts of chord progressions for you to play with, and you can set your own up and save them as presets for later use. Other things of note are that you can set a key range in which the chords are active. With the Filter Outside button off you can play single regular notes outside the range; with it on, nothing plays outside the range. The great thing about that is that you can play one-finger chord progressions with one hand and then a bass or lead part outside the range with the other. The Arpeggiator and the Chorder work brilliantly together. You can build your chords in the Chorder and then turn them into arpeggiations or sequences in the Arpeggiator. You can load as many instances of any of the Note FX plug‑ins as you like onto the same track, although I’m not sure how helpful that would be. However, if you put the Arpeggiator under the Chorder you have quite a fabulous combination going on.
but one that feels somehow unnatural because the repeats don’t fade away. Well, we can fix that, and in fact, Repeater is much more interesting than an echo effect. You have a large knob to set the resolution or timing of the repeats, and next to that you’ll find a Sync button. With Sync enabled, the knob sets time divisions based on the tempo of your project. With sync disabled, you can set any timing you want based on frequency. The Steps knob can increase the number of repeats up to 32. Then we get to the interesting stuff. There are Scale knobs for gate, velocity and pitch. If you turn these knobs, you’ll see the display scaling the steps in interesting ways. The gate’s Scale knob gets that more natural fade going on. Pitch is slightly different because it throws in pitch changes to each step,
Input Filter This one isn’t quite as impressive as the others, but it’s a useful utility. It lets you set a keyboard and velocity range for any incoming MIDI. Yes, that’s it.
which quickly turns it into anything other than a simple echo. The pitch is set to semitones, and if you click the Pitch button at the top right next to Individual you can set the pitch change of every step by itself. The Repeater becomes a fascinating sequence of events that’s triggered by a single note press. It could be melody or bass lines that transpose with the notes you play, or it could be something very experimental. Check out the presets for some great examples.
Recording Input Or Output? One question remains when making music with the Note FX. Should you record the notes you are playing, or the ones generated by the effect? It depends largely on whether you’ve finished fiddling with the Note FX parameters, or if you’d prefer to start editing the result. By default, when you go into Record and start playing, Studio One will record the notes from your keyboard. These are then routed to the Note FX for processing, and you hear the effect. When you play back the track the same thing happens, and you can change the Note FX settings to your heart’s content. However, there’s a tiny little icon in the Inspector alongside the loaded Note FX that sets the input mode. If you enable it, the Note FX are rerouted before the track rather than after it. Now, when you start recording the track, it captures the output of the Note FX. The Note FX are a lot of fun and can be used in all sorts of surprisingly creative ways beyond what you’d normally expect from arps, auto‑chorders or ratchets.
Repeater The Repeater, also known as a ratchet, simply repeats the note played for a set number of times and at a set timing and resolution. The default is eight times in 16ths. It can be quite a weird effect, a bit like a delay or echo,
By default, Studio One will record your MIDI notes as played, so that when you play back a recording, the Note FX will process your notes again in real time. However, you can record the output from the Note FX by changing the input mode.
www.soundonsound.com / February 2026
129
Pro Tools Cubase
TECHNIQUE
Find out just what’s possible — and what’s not — with Cubase’s new virtual vocalist. JOHN WALDEN
S
teinberg dropped something of a leftfield surprise with Cubase 15: the inclusion of Yamaha’s Omnivocal. Supplied initially in a beta form but available to Pro, Artist and Elements users, Omnivocal is a virtual vocalist instrument plug-in. Of course, Yamaha have a longstanding history in vocal synthesis — for example, it was way back in March 2004 that we first reviewed their Vocaloid software, whose synthetic vocals have spawned something of their own genre online, particularly within the anime/manga world. But in recent years, developers such as Dreamtonics and ACE Studio have used AI techniques to push vocal synthesis technology forwards, allowing users to craft remarkably natural-sounding and expressive vocal lines from a virtual instrument in much the same way as they might for a virtual string or wind instrument. On the surface, it would appear that Omnivocal aims to do something similar — in essence, you just instantiate it on an instrument track, record (or program) a standard MIDI clip with the desired melody, and Omnivocal will then synthesize a human vocal to ‘sing’ those notes. So for those who’ve upgraded to Cubase 15 or are considering it, let’s find out exactly what can you expect from your new virtual session singer...
Singing Lessons As with other virtual instruments, you can choose between different sounding presets. In its current beta form Omnivocal lets you choose between a male or a female singer, but I gather more options featuring different singing characters are planned for the future. You also get a number of parameters that can adjust the sound character of each singer. For example, you can pick between Straight (more subdued) and Dynamic (more expressive) singing styles. There are also automatable parameters, such as Formant, Attack, Air, Power and Vibrato, all of which can change the character of the vocal delivery. You can automate these parameters, but they require the synthesis engine to re-render the sung vocal to reflect your changes. While this happens automatically and very quickly in the background, it does mean that you can’t actually adjust these controls in real time like you might with, for example,
132
February 2026 / www.soundonsound.com
The initial beta release of Omnivocal ships with two voice characters.
a synth’s filter cutoff. That said, pitch‑bend data and the Presence (a tonal control) and Output dials operate outside the vocal synthesis engine, so they can be adjusted in real time. Initially, your melodic line will be sung with an ‘ah’ vowel sound for each note, but you can enter your own lyrics in the Text box on the MIDI Editor’s Info line. It has to be said that, in its current beta form, this aspect of Omnivocal feels a little cumbersome in operation. You can enter lyrics one note at a time, but you can also enter multiple words. For example, entering ‘broken heart’ into the Text box of the first note of a three-note phrase would spread the words on a one-syllable-per-note basis. So, the syllables of ‘broken’ would be placed into the first two notes (with the ‘oh’ sound being sustained across the two notes) and ‘heart’ into the third note. Helpfully, once Omnivocal has analysed your lyrics, the phonetic form is also shown in the Text box and superimposed on the MIDI notes. In addition,
you can enter some special characters, the most important being a hyphen (‘-’), which forces the engine to extend a vowel sound across multiple MIDI notes. You can also customise the phonemes used in the Text box (the Omnivocal PDF manual has useful information on this) but learning how to finesse the pronunciation of your lyrics is something that will require a little trial-and-error experimentation. That caveat aside, with your notes and lyrics added, Omnivocal will apply its AI-assisted engine (all the processing is done locally and based on a voicebank of data for each virtual vocalist) to render the vocal part and, on playback, it is then performed with the rest of your project. And, of course, as with any virtual instrument, you can then change the performance by editing the MIDI note pitch, timing and lengths, changing the lyrics, or adjusting the vocal character as required.
Getting Hooked Whether it’s in the writing/composing phase, or as a key production element in a top-tier final mix, we’re now all very accustomed to the concept of virtual instruments being an integral part of the music that we hear. So, in that context, where can this initial Omnivocal beta release get us? Is it useful only as a writing tool (a less ambitious bar to jump) or can it deliver a final performance (a much higher bar)? To answer that question, I’ve worked through a few examples, and you can find some audio clips to accompany them on the SOS website (https://sosm. ag/cubase-0226). I started with a simple target in my sights: creating a vocal hook or two that might be used in an electronic music project. The screenshot with the MIDI clip shows an example of what’s required for this
The Text box allows you to add lyrics for Omnivocal to sing.
sort of thing. I played the melody in from my MIDI keyboard (Omnivocal provides a simple synth sound for auditioning purposes as you play), over the top of a suitable backing track. I then entered the lyrical content in the Text box, one phrase at a time, and Omnivocal mapped each phrase across the appropriate number of notes based on the syllable count. This simple vocal hook idea was more rhythmic than melodic, and once the lyrics were rendered by the engine I did some tweaking of note timings and lengths to improve the flow of the vocal delivery. I also picked the Dynamic delivery mode, and set both Attack and Power quite high to provide a more forceful performance style. But while there was some tweaking involved, the initial process was remarkably quick: just a few minutes’ work. As demonstrated in the audio example, I then generated a number of different variants with some ear-candy processing applied to spice things up. I’ll make no great claims for the composition(!) but in sonic terms at least I feel that Omnivocal is a perfectly capable tool for experimenting with these kinds of vocal ideas.
was then imported into my initial Omnivocal track for preparatory editing and the addition of the lyrical data. It’s at this point that the ‘utility’ nature of Omnivocal comes to the fore, because whatever type of backing vocal part you want to experiment with (double, octave, third-above or counter-melody, say), it’s now easily explored with MIDI edits. And if you want multiple backing lines, then just duplicate the first and edit the notes. I explored precisely this workflow to create the second audio example, going from some simple doubles to a pair of basic third-above harmonies, and then finally to something closer to a counter melody... and all with the ease of MIDI editing, which included some subtle randomisation of the note start positions for each harmony part. Whether Omnivocal’s backing lines make it to your final mix or not is another matter, but it certainly makes it easy to explore ideas for backing-vocal parts in the absence of an actual singer.
Take My Lead By this stage, it shouldn’t take much of a leap for you to start wondering if Omnivocal could be used to generate lead vocal demos as a guide for an actual human vocalist. Well, it can, and the basic process remains the same. As with the backing vocal example, once you have an initial Omnivocal performance, the simplicity with which you can edit the timing, pitch,
lyrics and, to a certain degree, the performance style, make it a really useful songwriting tool. That just leaves one obvious and very big question: can Omnivocal deliver lead vocals that are good enough to use in a final mix? Well, context is everything here, of course, and Omnivocal is still in beta, so expecting it to jump over the highest of realism bars at this point is perhaps unrealistic. Right now, I think the answer is ‘probably not’! For fun, though, my final audio example is a comparison between an Omnivocal lead vocal and the same vocal part created using Dreamtonics’ Synth V. Currently, the most obvious challenges when using Omnivocal are in crafting notes where words flow across multiple pitches. There are also limitations when it comes to adjusting the length of and emphasis placed upon particular syllables to influence pronunciation and delivery style. But fingers crossed, there is more to come, and in any case don’t let any of that stop you exploiting Ominvocal’s considerable potential as a vocal sketching tool. Hats off to Yamaha/ Steinberg for bundling this fledgling virtual singer instrument with every main edition of Cubase 15: whether you’re a Pro, Artist or Elements user, if you can hum it (or rather, play it on a MIDI keyboard), Omnivocal can sing it.
Back Me Up If you already have a human lead vocal in your project, a second possible use case for Omnivocal would be to experiment with potential harmony and/or backing vocal parts. Again, you can create the required Omnivocal MIDI by playing along to the lead vocal part using your MIDI keyboard. But I adopted a different approach for this example, instead applying Cubase Pro’s VariAudio to my lead vocal, then exporting the extracted MIDI note data. This MIDI data
As seen for our backing vocal example, once you have created one Omnivocal part, as with any MIDI-based virtual instrument, it’s easy to then create – and edit — multiple variations.
www.soundonsound.com / February 2026
133
Q
How can I sync my Zoom F6 and Sound Devices 702 recorders?
I’ve been using a Zoom F6 [multitrack digital recorder] to record our band sessions, and with good results, but we’re finding its six tracks to be limiting, and want to add more. I tried a Zoom H8 with the capsule extender but it didn’t work, and being accustomed to the sturdiness of the F6 (and the 32-bit float recording) I found it a bit flimsy by comparison. Plus, the touchscreen didn’t seem to like my fat fingers, which makes setting levels a challenge for me. So I returned the H8, and have now thought of another route... I see that you can ‘jam sync’ two F6 recorders with the proper cable (tip to ring 3.5mm). But I already own an old Sound Devices 702. I bought a 3.5mm to BNC timecode cable, and messed with it for a while but couldn’t get them to talk. The 702 doesn’t have any settings for timecode, just the word clock in and out
Q
ports. I matched the bit depth and sample frequency. I set the Zoom as the master to feed the word clock in on the 702, and then reversed that. Still no luck. The only thing I didn’t know is how to match the fps setting on the 702 to that of the F6. Anyway, I don’t know if anyone has ever tried this and succeeded — I’m trying to avoid the expense of another F6! SOS Forum post Hugh Robjohns, Technical Editor The F6 can only send and receive timecode (LTC), whereas the 702 can only send and receive word clock (though note that the 702T variant model did have timecode facilities). While word clock and timecode synchronisation signals are wholly incompatible, there is
a possible solution: use a separate master device like the Betso SBox-1N (www.betso. eu/sbox-1n) to generate synchronised master timecode and word clock outputs, which can be sent to each recorder to synchronise them. However, the Betso costs pretty much the same as an F6! Plus, with this solution, you’d only be gaining two tracks, and you’d have to manually align the start of each recording from both machines in the DAW. Whereas if you were to get a second F6, you’d have 12 tracks rather than eight, recordings from both machines would have the same time stamps for instant alignment in the DAW, and you’d have 32-bit float files to avoid the need for gain optimisation. Since the Betso SBox-1N can act as both word clock and timecode master, it can be used to sync otherwise incompatible devices like the Zoom F6 and Sound Devices 702.
Why does my HX Stomp pedal hum if connected to a computer running its editing software?
I’ve introduced a Line 6 HX Stomp into my pedalboard (it’s really good!). For editing with the Helix Edit software (preferable) you must be connected via USB. Trouble is, the USB connection is introducing a noticeable ground hum when connected. I’m outputting to a Fender Twin Reverb. How do I solve this? DI box or isolator on the HX output to the amp? Something else? SOS Forum post Hugh Robjohns The first step is to identify the real problem. An obvious implication of your description is the creation of a ground loop via the USB connection — but that requires a second ground path, usually through the mains wiring earths. Hopefully the Fender Twin is grounded via the mains, and if the computer is also grounded to the mains that’s probably completing the loop. Desktop computers are normally grounded through the mains, but laptops usually aren’t, so some confirmation regarding the computer grounding would be helpful. If that is the source of the loop then your two options are: a USB isolator; or an audio line isolator. I’ve had success in similar situations with both, but you need to pick the isolation devices carefully. USB isolators are available at 1.1 and 2.0 speeds, and some brands seem better than others so I’d advise checking for user feedback before buying. For audio line isolators I’m a big fan of the ART Pro Audio DTI box. I reviewed it back in SOS February 2012 (https://sosm.ag/art-dti) and it’s still my go-to problem solver. ART also make the CleanBox II (SOS August 2005: https://sosm. ag/art-cleanbox-ii), which is also good, but not as versatile. Other
136
February 2026 / www.soundonsound.com
Laptop computers are often not grounded via the mains power connection, so attaching multiple USB audio devices to them can easily lead to the formation of a ground loop. Thankfully, it’s usually easily solved!
manufacturers offer similar devices, of course, with better or worse sounding transformers, but the ART boxes strike a great balance between price and performance. Both the USB and audio isolators use transformers to provide the galvanic isolation needed to break a ground path, and thus prevent a ground loop. But remember to keep the audio isolation transformer well away from any mains transformers — otherwise you’ll kill the ground loop hum but create an induced magnetic hum! Hopefully this will solve the problem, though it’s worth mentioning that there might be ground loops elsewhere via the USB connection. For example something else on the pedalboard might be connected to the computer. So do check for anything else that might be grounded.
NEXT MONTH IN
Better Vocals In The Home Studio
The vocal is the most important element in any track — yet so many tracks are let down by weak vocal recordings. From acoustic treatment to noise reduction to virtual vocalists, we survey the options that help you get professional results outside professional studios.
Photo: Brett Sayles
March issue on sale Thursday 19th February. Available at TG Jones, WH Smith Travel and all good newsagents.
Subscribe at www.soundonsound.com/subscribe
Digital version (no WH Smith reference)
The Advertisers Index NEXT MONTH INSound On Sound
please contact: chris.cope@soundonsound.com
Aim Audio
www.aimaudio.com
49
McDSP
www.mcdsp.com
111
AMS Neve
✆ 01282 457011
59
Nugen Audio
www.nugenaudio.com
115
API Audio
www.apiaudio.com
93
Rupert Neve Designs
www.rupertneve.com
13
Audient
✆ 01256 381944
5
Sonarworks
www.sonarworks.com
55
Avantone Pro (RAD Distribution)
www.avantonepro.com
21
Sonible
www.sonible.com
23
DPA Microphones
www.dpamicrophones.com
43
Sony Europe
www.pro.sony.eu
39
Fabfilter Software Instruments
www.fabfilter.com
31
SOS For Artists
www.sosforartists.com
34-35
Sound Service UK
www.soundservice.uk
11
Soundtoys
www.soundtoys.com
99
Source Distribution
✆ 020 8962 5080
3
Steinberg Media Technologies
✆ 0049 402 103 50
29
Better Vocals In The Home Studio
The vocal is the most important element Genelec www.genelec.com in any track — yet so many tracks are GIK Acoustics Europe www.gikacoustics.com let down by weak vocal recordings. Groovebox From acoustic treatment towww.thegroovebox.co.uk noise reduction to Groove virtualSynthesis vocalists, we survey the options www.groovesynthesis.com that help you get professional results Heritage Audio www.heritageaudio.com outside professional studios.
OBC 47 41 19 65
Hifiman
www.hifiman.com
71
Synthax Audio UK
www.synthax.co.uk
15
iamReverb
www.iamreverb.com
117
Toontrack
www.toontrack.com
IBC
Kenton Electronics
✆ 020 8544 9200
73
Warm Audio
www.warmaudio.com
IFC
w w w . s o u n d o n s o u n d . c o m / November 2016
March issue on sale Thursday 19th February. www.soundonsound.com
137
hoto: Brett Sayles
To Advertise in
SOUND ON SOUND ETHAN WINER
I
’ve been a professional audio engineer and musician since the early 1970s, and I’ve read pretty much every recording magazine ever published. Back then the main magazines for recording engineers and amateur enthusiasts were Recording Engineer/ Producer and db. Both of those magazines featured technical articles to explain theory and explore best practices. Of course, new product announcements and product reviews have always been a staple too, but the content was often technical, and always accurate. Walt Jung contributed many articles to db with schematics for DIY projects, and I wrote similarly technical articles for R E/P. Audio magic and ‘new physics’ were noticeably absent in those days, and most product advertisements included full details if not complete performance specs. In the 1970s, if you wanted a professional quality vocal microphone you had to spend a fair amount of money for a Neumann U87 or AKG C414. I remember paying $7000 for an EMT 140 plate reverb because the only alternative was the crappy spring units found in guitar amplifiers. Magazines back then catered to recording professionals who had both the funds to
buy the necessary gear, and the technical knowledge to align analogue tape machine transports and their electronics. But then things started to change. In 1972 TEAC introduced a four-channel tape recorder at a price that was (just barely) affordable for consumers. Now aspiring home recordists could record and bounce basic tracks, and add overdubs, just like the pros using Ampex and Scully machines. When Tascam came out with their cassette-based Portastudio in 1979 the price of admission dropped even further, though so did the fidelity! But still, with care and practice, decent-quality recordings were possible. In 1992 the Alesis ADAT solved the quality problem, then digital recording finally took hold with the release of Windows 95. Even with those early 16-bit soundcards, the fidelity of the recording medium was no longer the limiting factor. As more and more amateurs eagerly bought affordable recording equipment, a new generation of recording magazines sprung up to serve this fast-growing new audience. But this audience was less sophisticated, basically self-taught by what they read. Worse, the writers and editors of this new generation of home recording magazine were just as ignorant as their
“It’s the only magazine I trust to give me useful facts...” 138
February 2026 / www.soundonsound.com
readers. Phase and polarity were (and still are) regularly confused, and magical solutions to muddy mixes were routinely suggested via analogue summing boxes, ultra-high sample rates, and of course famous revered tube microphones and equalisers. Rarely was the obvious problem of typical bedroom acoustics acknowledged. Further, equipment reviews became increasingly dumbed down. A loudspeaker’s woofer size might be stated, but not its low‑frequency cutoff, which obviously is what really matters. Worse, equipment reviews started to read more like ad copy than critical assessments, with wording such as “incredible smoothness” and “colour that goes on for days”. But — and you knew I’d get here eventually — one magazine has stood out among all the others. Only one magazine has a technical editor with the depth of knowledge we see in Hugh Robjohns. Hugh’s reviews, articles, and answers to reader questions are always factual, accurate, and complete. Only one magazine has a loudspeaker expert as capable as Phil Ward. Phil’s detailed reviews include in-depth explanations about speaker driver and enclosure theory, crossovers, and more. The Leader section in every issue, previously by Paul White and now Sam Inglis, invites readers to consider varied and interesting aspects
of recording and music production. For many years Hugh and Paul visited studio owners in person to help them with their acoustics — a hugely important part of home recording that other recording magazines often ignore in favour of yet more gear praise. Every Sound On Sound product review lists both pros and cons, and the past articles comparing mic preamps and external clocks set new standards for audio journal honesty: advertisers be damned. In a recent product review, Matt Houghton shared more generally useful information about using compression than the dedicated ‘tutorials’ I see in other magazines. Then a fabulous article by Neil Rogers explored techniques for quickly getting a good sound from toms. John Walden’s review of the Komplete 15 soft synth was thorough and highly informative, much more so than we typically see in the US magazines. Likewise for Mark Wherry’s in-depth review of Cubase. And please don’t let me forget to mention Dave Stewart’s ongoing series of sample library reviews that are always informative, way beyond explaining the features in the current product du jour. I won’t mention the other great writers for this fine publication, but know that they are all appreciated. Long live Sound On Sound magazine! It’s the only magazine I trust to give me useful facts — real facts — instead of bullshit.
A virtual drum studio, in your computer. 230+ GB of sampled drums | Engineered by George Massenburg | Immersive sound playback | Audio to MIDI conversion | 7 kits, 25 snares, 16 kicks | 350+ electronic kicks, snares and percussive sounds | 35 sound processing effects | Mix-ready presets for different styles | Import your own samples | Comprehensive MIDI library
WWW.TOONTRACK.COM
Introducing Our Latest
8380A
Transparency Created by Power, Performance and Precision With its pinpoint-precise coaxial driver, powerful 15-inch woofer and high SPL capability, the 8380A delivers exceptionally accurate imaging and neutral sound reproduction for professional studios and demanding high-fidelity listening environments. genelec.com/8380a
DISCOVER
FREE eBook RECORDING TECHNOLOGY
BASICS &BEYOND SECOND EDITION
Get your FREE digital publication from Sound On Sound This FREE illustration-rich eBook is aimed primarily at newcomers to the subject, but will prove equally valuable to anyone struggling with the complexities of today’s sophisticated recording technology. The purpose of this 170-page guide is to introduce readers to the essential components of a modern recording system and to explain the recording process in an easy-to-follow way, demystifying the inevitable jargon, both as it crops up, and with a comprehensive glossary. Written in the accessible, no-nonsense style of the Sound On Sound team of authors and editors, Recording Technology: Basics & Beyond covers: ■ What to buy ■ Studio setup ■ Computers for audio ■ Audio interfaces ■ Monitoring ■ Acoustic treatment ■ Mic techniques ■ How digital audio works ■ Understanding your DAW software ■ Upgrading your system
■ Software instruments ■ Wiring your studio ■ Plug-ins ■ Recording audio ■ Understanding MIDI ■ Recording vocals ■ Mixing ■ Compressors ■ Equalisation ■ Mastering ■ A.I. - in Music
Don’t miss out! Sign up and share the link with friends and colleagues on social media.
https://sosm.ag/recording-ebook