SOUND ON SOUND THE WORLD’S BEST RECORDING TECHNOLOGY MAGAZINE
THE WORLD’S BEST RECORDING TECHNOLOGY MAGAZINE
CELEBRATING 40+ YEARS 1985 — 2026 TM
MUSIC PRODUCTION TECHNIQUES / INDEPENDENT IN-DEPTH PRODUCT TESTS / ENGINEER & PRODUCER INTERVIEWS / LIVE SOUND
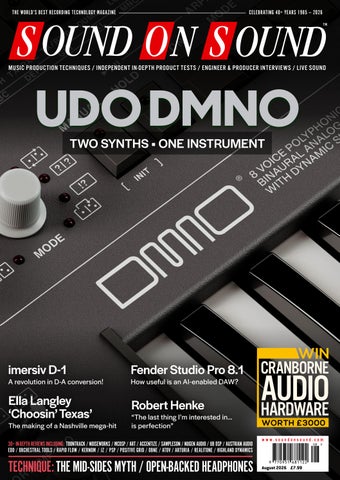
UDO DMNO TWO SYNTHS • ONE INSTRUMENT
AUGUST 2026
www.soundonsound.com
imersiv D-1
Fender Studio Pro 8.1
Ella Langley ‘Choosin’ Texas’
Robert Henke
A revolution in D-A conversion!
VOLUME 41 • ISSUE 10
The making of a Nashville mega-hit
How useful is an AI-enabled DAW?
“The last thing I’m interested in… is perfection”
30+ IN-DEPTH REVIEWS INCLUDING: TOONTRACK / NOISEWORKS / MCDSP / ART / ACCENTIZE / SAMPLESON / NUGEN AUDIO / UB DSP / AUSTRIAN AUDIO EDD / ORCHESTRAL TOOLS / RAPID FLOW / KERNOM / JZ / PSP / POSITIVE GRID / OBNE / ATOV / ARTURIA / REALITONE / HIGHLAND DYNAMICS
TECHNIQUE: THE MID-SIDES MYTH / OPEN-BACKED HEADPHONES
WIN
CRANBORNE
AUDIO HARDWARE WORTH £ 3000 www.soundonsound.com
August 2026 £7.99
NEUTRIK CONNECTORS
LIFETIME WARRANTY
CABLE MADE IN JAPAN
HAND WIRED IN UK
CABLE FOR LIFE
„It was like a blanket had been lifted from over my amplifier – there was a clarity, detail and presence that I didn’t know my rig was capable of! Remarkable.“ CHRIS BUCK on the
CABLE FOR LIFE
ULTIMATE GUITAR CABLE
FIND YOUR LOCAL RETAILER AT MOGAMI.CO.UK/BUY
LE ADER
GO SLOWER New music tech products often aim to democratise music-making. They remove barriers to entry and smooth the path from idea to finished track. And sometimes the benefits are uncontroversial. Orchestral sample libraries, for example, open doors on a world that was once inaccessible. But there’s a fine line between democratisation and dumbing down. When quicker and easier take priority over better, we sell ourselves short. When skills that were once essential become optional, mediocrity ensues. And instant gratification isn’t lasting gratification. Modern technology has made it simple to turn an idea into a finished-sounding track. ChatGPT will help you finish the lyrics. Plug-ins will tell you what chords work in the right key. Logic’s Session Players will lay down plausible rhythm parts. AI singers will replace your guide vocal. But could you really take pride in something created this way? Would it even feel like your own creation? Suno CEO Mark Shulman is quoted as saying “I think the majority of people don’t enjoy the majority of the time they spend making music.” If he means that making music can be frustrating and difficult, sure. But he draws entirely the wrong conclusion. Satisfaction in music-making comes from overcoming challenges, not from avoiding them. The journey is what makes reaching the destination fulfilling.
ALLIA BUSINESS CENTRE KING’S HEDGES ROAD CAMBRIDGE CB4 2HY T +44 (0)1223 851658 sos@soundonsound.com www.soundonsound.com
Which leads me to make a modest proposal. Other creative fields have seen the rise of ‘slow’ movements. Slow food is the best known, but slow sewing, for example, is also hugely popular. Is there a place for something similar in music creation? Slow music as a philosophy will mean different things to different people, but has nothing to do with tempo. It’s about valuing the craft of music‑making for its own sake, and recognising that time spent in the studio isn’t wasted just because it doesn’t produce immediate results. Losing yourself in the possibilities of modular synthesis is pleasurable in its own right, whether or not a finished track emerges at the end. And, crucially, slow music is not a Luddite idea. The point is not to reject new technology. It’s to emphasise the role of care, intent and skill in music creation. K-pop and extreme metal are at the cutting edge of contemporary production, but they exemplify the values of slow music just as much as rehearsing a band and cutting an album to tape. To sum up the idea of slow music in one sentence, the process of making music matters as much as the results. I hope to develop the idea of slow music further in the months and years to come, so watch this space. But, well, don’t hold your breath.
THE WORLD’S BEST RECORDING TECHNOLOGY MAGAZINE
ADV ER T ISIN G
admin@soundonsound.com
sos.feedback@soundonsound.com
adsales@soundonsound.com
Managing Director/Chairman Ian Gilby
Editorial Director Dave Lockwood
UK Media Sales Manager Chris Cope
Editorial Director Dave Lockwood
Executive Editor Paul White
Marketing Director Paul Gilby
Editor In Chief Sam Inglis
Finance Manager Keith Werthmann
Technical Editor Hugh Robjohns Reviews Editor David Glasper Reviews Editor Matt Houghton
P R ODUC T I ON
Production Editor Chris Korff
graphics@soundonsound.com
News Editor Luke Wood
Fender Studio Pro 8.1 How useful is an AI-enabled DAW?
ISSN 0951‑6816 A Member of the SOS Publications Group
S UB S CR I P T I ON S
Ella Langley ‘Choosin’ Texas’
Robert Henke
The making of a Nashville mega-hit
“The last thing I’m interested in… is perfection”
30+ IN-DEPTH REVIEWS INCLUDING: TOONTRACK / NOISEWORKS / MCDSP / ART / ACCENTIZE / SAMPLESON / NUGEN AUDIO / UB DSP / AUSTRIAN AUDIO EDD / ORCHESTRAL TOOLS / RAPID FLOW / KERNOM / JZ / PSP / POSITIVE GRID / OBNE / ATOV / ARTURIA / REALITONE / HIGHLAND DYNAMICS
TECHNIQUE: THE MID-SIDES MYTH / OPEN-BACKED HEADPHONES
UK/WORLD
4
www.soundonsound.com/subscribe
WIN
AUDIO HARDWARE
Circulation Manager Luci Harper
WORTH £ 3000 www.soundonsound.com
August 2026 £7.99
NORTH AMERICA
August 2026 / www.soundonsound.com
Printing Warners Midlands plc Newstrade Distribution Warners Group Distribution Ltd, The Maltings, Manor Lane, Bourne, Lincolnshire PE10 9PH, UK.
Digital Media Director Paul Gilby Design Andy Baldwin
CRANBORNE
Nick Humbert
support@soundonsound.com
subscribe@soundonsound.com imersiv D-1
International Business Development
Designer Andy Baldwin
MUSIC PRODUCTION TECHNIQUES / INDEPENDENT IN-DEPTH PRODUCT TESTS / ENGINEER & PRODUCER INTERVIEWS / LIVE SOUND
A revolution in D-A conversion!
marketing@soundonsound.com
O N LIN E
TM
TWO SYNTHS • ONE INSTRUMENT
M AR K E T IN G
Designer Mick Reilly
CELEBRATING 40+ YEARS 1985 — 2026
UDO DMNO
“To sum up the idea of slow music in one sentence, the process of making music matters as much as the results.”
EDI T O R I AL
Production Manager Michael Groves
WOR LDW I D E E D I T I O NS
Editor In Chief
A DM I N I S T R AT I O N
Reviews Editor Chris Korff
WWW.SOUNDONSOUND.COM/SUBSCRIBE
Sam Inglis
Administrator Nathalie Balzano
Web Content Editor Callum Hall Web Editor Adam Bull Digital Media Manager Atheen Spencer www.soundonsound.com twitter.com/soundonsoundmag facebook.com/soundonsoundmag instagram.com/soundonsoundmag
The contents of this publication are subject to worldwide copyright protection and reproduction in whole or part, whether mechanical or electronic, is expressly forbidden without the prior written consent of the Publisher. Great care is taken to ensure accuracy in the preparation of this publication but neither Sound On Sound Limited nor the Editor can be held responsible for its contents. The views expressed are those of the contributors and not necessarily those of the Publisher or Editor. The Publisher accepts no responsibility for the return of unsolicited manuscripts, photographs, or artwork. © Copyright 2026 Sound On Sound Limited. Incorporating Music Software magazine, Recording Musician magazine, Sound On Stage magazine, SPL magazine, Sound Pro magazine and Performing Musician magazine. All rights reserved. All prices include VAT unless otherwise stated. SOS recognises all trademarks.
U T O P I A M A I N | STUDIO MONITORS OF EXCELLENCE The Utopia Mains range employs the full breadth of Focal’s technical expertise and professional audio industry knowledge to deliver an unparalleled recording, mixing or mastering experience. Comprising a 3-way Main 112 and 3.5-way Main 212 model, each Utopia Main monitor features newly patented drivers paired with Class-H Current Mode amplifiers for ultimate power and sonic precision.
The apex of monitoring
Exclusive Distribution: Sound Service UK | www.soundservice.uk
68 ROBERT HENKE
IN THIS ISSUE
www.soundonsound.com
August 2026 / issue 10 / volume 41
FEATURES 28 How I Got That Sound Sylvia Massy recalls the memorable day on which she and Tool destroyed not one but two pianos, and recorded the results.
42 Inside Track: Ben West & Dave Clauss The colossal success of Ella Langley’s ‘Choosin’ Texas’ and parent album Dandelion shows that traditional Nashville record-making still works in the 21st Century.
54 The Mid-Sides Myth While M-S miking does offer you some flexibility at mixdown in terms of stereo width, it can’t perform miracles!
68 Robert Henke As a musician, software developer, engineer and audiovisual artist Robert Henke’s career has been defined by his ability not only to make things his own, but to make his own things.
79 Modular Producer and musician Gareth Jones explains why working with modular is like recording Depeche Mode at Hansa Tonstudio.
90 How The Pros Handle Harshness Edgy, aggressive midrange can make for uncomfortable listening. Four top engineers explain how they get harshness under control — and how to get the best from Oeksound’s Soothe plug-in.
6
WIN CRANBORNE 500 R8 BUNDLE
WORTH £3000 PAGE 128 116 Using Open-backed
Headphones For Tracking
Conventional wisdom tells us to use closed-back headphones for tracking. But might there be advantages to going open?
122 Spotlight: 500 Series
100 Talkback
The modular format for preamps and studio processors continues to expand. We take you through some of the best recent releases.
As he releases his first solo album in over a decade, guitarist David Torn talks back about Miles Davies, the Mattel Optigan and why the studio coffee machine is second only to the space itself.
136 Q&A
106 E-mu Systems SP1200 Revisited
138 Why I Love... In-ear Monitors
E-mu Systems’ products changed popular music, and perhaps none more so than their SP-1200 sampling drum machine.
As a drummer, in-ear monitors have changed Mark Gordon’s life. And he’s rather pleased about it.
August 2026 / www.soundonsound.com
Your studio and recording questions answered.
82 IMERSIV D-1
24 Accentize dxSplit Dialogue Isolation Plug-in
26 ART Pro Audio Pro VLA III Dual-channel Optical Compressor
104 Arturia Memory V Software Synthesizer
74
22 Austrian Audio OC-B6 Bass Drum Microphone
118 EHX Effects Interface Audio Interface Pedal
30 Fender Studio Pro 8.1 DAW Software
119 Final DX4000CL Closed-back Headphones
14
HEDD Audio CTRL Monitor Calibration Software
102 Highland Dynamics
Dual Delta 4-7 Mk 2 Mic Preamp & Saturation Processor
82 imersiv D-1 D-A Converter
126 Sample Logic HeartBeat Guitars
Kernom Elipse, Ridge & Moho
Sample Library
Hybrid Effects Pedals
18
16
McDSP DC-2
Dual Compressor Plug-in For APB System
79
120 Strymon Canoga
Guitar Amp Emulation Plug-in
Fuzz Pedal
NoiseWorks Audio VoiceAssist
126 SRM Sounds ASMR Choir
Vocal & Dialogue Processor
Sample Library
Nugen Audio MasterCheck 2 Metering & Codec Auditioning Plug-in
8
20 UB DSP Vowel Blender
Endeavors Parting
Multi-effects Pedal
Orchestra
Sample Library
62 Positive Grid Reactor Modelling Guitar Amp
66 PSP Levelizer Automatic Gain-riding Plug-in
40 Rapid Flow Omniclock Clock Plug-in
112 Realitone Sunset Choir Sample Library
Toontrack Transistor Organ EKX EZkeys Expansion Library
98 Old Blood Noise
36 Orchestral Tools Low End
Shakmat Ballista Blast Eurorack Module
Bloomfield Drive
12
Sampleson Funkastic Performance Generator Plug-in
119 MixWave Two-Rock
10
Runic Labs Passive DI Eurorack Module
Hybrid Ribbon & Capacitor Microphone
94 ATOV Faderpunk Controller & Modulator
78
58 JZ Microphones MU-1
Filer Plug-in C O V E R
ON TEST
50 UDO Audio DMNO Polyphonic Synthesizer
127 Wrongtools Pianesque Sample Library
WORKSHOPS 130 Pro Tools 132 Cubase 134 Logic
www.soundonsound.com / August 2026
7
ON TE ST
Toontrack Transistor Organ EKX Toontrack turn EZkeys 2 into a musical time machine with their latest EKX expansion.
EZkeys Expansion Library JOHN WALDEN
T
here are some instruments that can instantly evoke an era and, as soon as you hear a few notes from Toontrack’s Transistor Organ EKX, you will be taken back in time. And, while these instruments have been playing their musical part since the 1950s, it’s within the pop songs and film scores of the 1960s that the sound became iconic. That classic sound is beautifully recreated here and, with all the usual benefits of the EZkeys feature set, is easy to add into your own productions.
Synthesis Meets Samples Under the hood, this particular EZkeys 2 expansion is based upon both synthesis and sampling of some original classic hardware. The impressive collection of supplied presets goes from the cleanest of cleans through some suitably gritty tones (amps, tremolo and rotary speakers included) and into some ‘special’ sound‑designed options (for example, pads to plucks). So, whether you want authentic retro or something that hints at a more modern twist, there are plenty of possibilities. Whatever the technology behind the scenes, Transistor Organ sounds great. Yes, like the original hardware instruments, it’s quirky and, depending on how it’s played, somewhat whimsical, but the sound is full of character.
8
Drop some suitably chosen parts into your vintage pop, garage rock, psychedelic rock, reggae or ska project, and this EKX will fit right in. It’s a sound we associate with classic songs by the Doors or the Beatles but also found its place in punk and two‑tone. Toontrack have captured the essence of it beautifully here.
Play Authentic Skilled keyboard players will have a lot of fun but, if the piano is not your primary instrument, then the EKX will get you off to a flying start with a suitably retro set of performance options within the supplied MIDI Groove presets. As in all the EZ expansions — drums, bass or keys — don’t underestimate the values of the supplied MIDI. The performances here are excellent and provide great options for chord-based performances, melodic lines and combined options. There are some obvious musical influences amongst these that capture the classic vibe to perfection and, given just how powerful the EZkeys Song Track feature set is, there is plenty of potential to adapt these performance styles to your own songs and compositions. Oh, and if you want to expand on those performance possibilities, Toontrack also have three additional EZkeys MIDI
August 2026 / www.soundonsound.com
expansion packs available aimed at the Transistor Organ EKZ. Garage Rock Organ, Indie Rock Organ and Ska Reggae Organ are each packed with additional MIDI Groove presets suitable for their respective musical styles, and these are well worth considering if you like the EKX sound expansion itself.
Retro Modern Unsurprisingly, Toontrack offer some excellent acoustic and electric piano expansions for EZkeys 2 but, for my money, the two EKXs that I think are most impressive are the Session Organ and, now, the Transistor Organ. These work beautifully within the EZkeys environment and deliver both sound and performances (via the supplied MIDI) that make them a joy to use. In both cases, their sounds are intimately associated with some classic vintage songs and musical styles but, equally, they are sounds that will add instant character to any musical production, be that retro or modern. Toontrack have a hit with their Transistor Organ EKX. Audition the demos on their website and be prepared to travel back in time. This is a tempting and very tasty addition to anyone’s EZkeys sound collection.
summary The Transistor Organ EKX gives you a slice of sonic nostalgia that will bring character to any musical context, retro or modern.
£ €89 including VAT. W www.toontrack.com
NEW
ADI-2 Pro EX
Ultra-Fidelity Reference Class Converter
Experience the new benchmark for audiophile precision and professional sound quality. The combination of transparent, highly detailed audio recording and playback makes the ADI-2 series an excellent choice for studio reference playback, mastering and audiophile listening environments.
Worldwide Distribution: Audio AG, +49 8133 9181-0, www.audioag.com • UK Distribution: Synthax UK, +44 1727 821870, www.synthax.co.uk www.rme-audio.com
ON TE ST
NOISEWORKS VOICEASSIST
Building on their wonderful DynAssist, Noiseworks’ latest tool aims to do even more of the prep work for your vocal and dialogue recordings. JOHN WALDEN
W
hen Matt Houghton reviewed NoiseWorks’ DynAssist in SOS October 2025 (https://sosm. ag/noiseworks-dynassist) he was clearly impressed, and VoiceAssist builds on that significantly. It’s available in three tiers: Basic, Standard and Advanced. These offer different processing options at different prices, the idea being that you can now pay only for what you need. VoiceAssist Basic provides only the detailed level riding of DynAssist, but for a keen price. VoiceAssist Standard essentially replaces DynAssist, and existing DynAssist owners get a free VoiceAssist Standard licence. Note, though, that DynAssist’s dedicated Instrument mode isn’t present (VoiceAssist focuses exclusively on vocals and dialogue), and if running DynAssist on an older macOS version (eg. Matt used Monterrey for his DynAssist evaluation), you might need to update; DynAssist will continue to run on your older system though. VoiceAssist Advanced adds de-noise and de-reverb processing, low- and high-end restoration/enhancement and low-frequency resonance reduction, along with simple spectral editing capabilities. Advanced can also run standalone, while all versions can be used as conventional VST, AU or AAX plug-ins, or as an ARA extension in a suitable DAW. There’s also AudioSuite support for Pro
10
NoiseWorks Audio Vocal & Dialogue VoiceAssist Processor Tools. Obviously, there are workflow implications for the different formats, and I’ll discuss that below.
Advance To Advanced Matt’s review provides plenty of detail that translates directly to VoiceAssist Standard’s core dynamics, loudness, sibilance and breath control facilities. But all versions of VoiceAssist benefit from a refreshed GUI. The central area still includes a visual representation of the signal, but the processing modules are now activated and selected on the left. You see only your version’s modules: for Basic there’s just the Dynamics; Standard has Gate, Dynamics, Breath and Sibilance modules; and to that, Advanced adds Clean and Lowend modules. The selected module’s key controls sit above the audio display, and colour-coded graphical elements overlaid on the audio indicate sections where the Gate, Breath and Sibilance modules are doing their thing. Overall, it feels slicker and more polished than DynAssist, especially the Dynamics module. I can only agree with Matt’s verdict on DynAssist’s level-riding capabilities: it’s really effective. Whether running VoiceAssist standalone or as an insert or ARA plug-in, it’s always an offline process, and that gives VoiceAssist an edge over, say, a real-time compressor. The Speed and Smoothing controls let you fine-tune precisely how gentle or aggressive VoiceAssist is with your audio. It’s very elegant and very effective, and you can still reach for tools to edit the resulting automation curve manually. For instance, you can define a time selection (Shift+mouse‑wheel scroll) and drag up or down to apply gain to that section: quick, easy, intuitive. And the ability to set a target loudness (LUFS-I) means you can ensure you’re never fooled by simple level increases, and that you can be sure your vocal is at an appropriate level for other processing — a real time-saver if you want to hit a go-to chain with preset thresholds.
August 2026 / www.soundonsound.com
The Gate, Breath and Sibilance modules also work much as in DynAssist, and again they’re equally effective. Again, the offline approach means these always have the luxury of being able to identify precisely where and how each process should be applied. The compact control options let you dial in exactly how much attenuation is applied automatically, and it’s trivially easy to make manual adjustments to the result. The Advanced version’s Lowend module includes a Lowcut control to select a fixed, a user-defined (between 20 and 500Hz) or a variable cutoff frequency. In the latter case, VoiceAssist adjusts the frequency to suit the changing pitch of the voice. There’s also a Recover Lowend control that will attempt to fill out the bottom end where it’s low or missing, based on the rest of the content in the voice. And Resonance Reduction finds and attenuates excessive resonances in the low and low-mid frequencies, which helps to tame any tendency towards mud in the recording. Advanced’s biggest highlight for me, though, is its Clean module. This AI-based tool removes noise and reverb from your audio. It can serve, for instance, to add clarity to a noisy voice recording, or make a home-studio or location recording sound drier. It’s very effective too, even if (as with all automated signal-separation processes I’ve used) the quality of the result varies somewhat with the source material and the extent of the problem you’re addressing. A Recover Highs control adds a subtle dash of crispness where that might be lacking, and can be useful for speech/lyrical
processing, their presence might help you avoid such inconveniences in your workflow. Also worth noting is that ARA isn’t yet supported by any of the major video-editing platforms. For use with them, you’ll need to use it either as an insert plug-in, or standalone. None of that’s within NoiseWorks’ control, of course!
Competition Time?
The Clean module of VoiceAssist Advanced provides de-noise, de-reverb and high-frequency restoration processing, as well as simple spectral editing capabilities.
intelligibility. Usefully, the Recover Up To function allows you to limit the upper end of the frequency range to which this process is applied. By the way, Clean also provides a spectral view and includes a flexible selection tool with which you can target gain cuts/boosts in very specific frequency ranges. Don’t expect to find full-on RX or SpectraLayers-style editing here, but it’s still useful for occasional manual ‘cleaning’ edits (particularly if you used to do such things in a separate ARA plug-in!).
Go With The Flow The facilities are impressive, then, but any purchase decision will also hinge on how VoiceAssist fits your established workflow, or if its benefits are such that you’re willing to adapt. For me, the ability to use the ARA version is important, and Pro Tools users may feel similarly about the AudioSuite support. That’s not to say the VST/AU/AAX insert plug-in formats don’t work well... It’s just that they require an initial, real-time transfer of audio into the plug-in in. Not
a huge deal for a three-minute sung vocal, but something to run over your lunch break when working on a 45-minute podcast or lots of video dialogue! In such scenarios, ARA and standalone Advanced offer a distinct advantage: on a vaguely modern computer the initial loading and processing happens much faster. ARA is not without its limitations, though. You can’t stack ARA extensions to build a processing chain — there can be only one — and if you wanted to use, say, Melodyne, RX or Revoice Pro too, you’d need to render each before using the next. There’s a decision to be made about what sequence to apply them in too. Perhaps this is why NoiseWorks decided to add features like noise and reverb reduction? Natural bedfellows of the DynAssist’s
VoiceAssist isn’t the only solution for cleaning and refining vocals or dialogue. Several all-purpose restoration packages are built around spectral editing, including iZotope RX, Steinberg SpectraLayers and Acon Digital Acoustica, and offer various processing modules designed for similar tasks (but also plenty of functionality you might not require if vocal clean-up/ prep is your main goal). If you prefer a real-time processor solution, products such as Waves Clarity Vx, iZotope’s VEA or, my personal favourite for cleaning room/ambience, Accentize deRevive would be worth exploring: they may each tick different boxes for specific user needs, but are worth checking out. It strikes me, though, that VoiceAssist’s most direct competitor is sonible’s prime:vocal, which I reviewed in SOS August 2025 (https://sosm.ag/ sonible-prime-vocal). This offers standalone, ARA and VST/AU formats, and includes voice cleaning, dynamics and tonal balancing functions. I’d say prime:vocal probably offers more control over the cleaning side of things, with individual options for Noise Reduction and Room Reduction, but I prefer VoiceAssist’s control set for the level-riding and breath/ sibilance processing. Both are very capable, though, and your specific needs and budget will ultimately inform any purchase decision.
Software Assistant Whether you’re level riding or cleaning, manually editing sung or spoken vocals can be time-consuming and tedious. Many tools designed to automate these tasks fall short because the user can’t tweak to account for occasional spots of under/overprocessing or other artefacts. VoiceAssist is in that better category of software that saves you time and labour, but leaves you firmly in control of the result. For precise and editable volume automation, generated with a distinct absence of mind-numbing, time-consuming, eyesight-damaging and RSI-inducing manual editing, it really is very impressive indeed! Anyone working professionally with vocal/dialogue recordings could find that VoiceAssist covers its costs in very short order. The trial versions are well worth exploring...
summary NoiseWorks VoiceAssist takes all the hard work out of pre-mix editing for sung or spoken vocal recordings, with three versions to suit different user needs and budgets.
£ Basic edition £42;
If you have too much or too little low end in your vocal recordings, there’s a VoiceAssist Advanced module for that!
Standard £129 (free crossgrade from DynAssist); Advanced £259 (€150 upgrade from DynAssist). W www.noiseworksaudio.com
www.soundonsound.com / August 2026
11
ON TE ST
SAM INGLIS
I
t’s now more than a decade since Hugh Robjohns reviewed the original incarnation of Nugen Audio’s MasterCheck. Back in 2015, the music production world was still adjusting to the new landscape of streaming services with loudness normalisation. MasterCheck’s primary purpose was to measure the loudness of programme material and inform the user of the extent to which a given streamer might turn it down on playback. Such is the pace of change that many of the playback standards to which Hugh’s review refers are no longer relevant. Nugen have of course updated MasterCheck to be compatible with newer platforms, and in 2017, they released an enhanced version with a major new feature. MasterCheck Pro didn’t just show you how the loudness of your track would be affected by streaming. It also let you hear what the codecs used by streaming services would do to it.
Check One Two Earlier this year, Nugen delivered MasterCheck 2. Behind the scenes, the plug-in has been completely rewritten for compatibility with modern operating systems. It features a new, fully resizeable interface which can be operated in landscape or portrait formats, and which responds intelligently to the dimensions you impose on it by clicking and dragging. In terms of features, both the metering and the codec monitoring elements of MasterCheck Pro are fully present and correct, and the preset list has been updated to include a couple of additional services. The full complement is now eight — Apple Music, Bandcamp, Pandora, Qobuz, Soundcloud, Spotify, Tidal and
12
Nugen Audio MasterCheck 2
Metering & Codec Auditioning Plug-in If you want to know exactly what streaming services will do to your masters, MasterCheck 2 will give you the harsh truth — in immersive formats as well as stereo. YouTube — although Nugen acknowledge that the first of these is a ‘best guess’ as Apple don’t publish all the relevant specifications. Many of these use several different codecs depending on the context, so you’ll often have a choice of ‘streams’ to audition. Just be careful not to have this feature active in the bounce path when you eventually render your mix!
Channel Tunnel The biggest new feature in MasterCheck 2 is support for multi-channel playback formats up to 7.1.4. However, since there’s no master bus in object-based formats, it’s not always obvious how MasterCheck should be used in an immersive context. In Atmos specifically, Dolby say that the mandated -18dB LKFS measurement should be taken from “a dedicated 5.1 loudness re-render”. This is unlikely to be what you’re listening to in the studio, so if you want to use MasterCheck 2 to measure it, you’ll need to insert the plug-in on a 5.1 aux channel and route the loudness re-render to that. If you also want to use MasterCheck 2 to audition the impact of lossy codecs on the audio, you’d then need to use a separate instance in the monitor path. Nugen aren’t to blame for any of this complexity, but the otherwise good PDF manual is completely mute
August 2026 / www.soundonsound.com
on the topic at present. I would urge them to add some worked‑through examples as to how MasterCheck 2 should be used in typical immersive mixing setups, as I have no doubt that it will be valuable in a multi‑channel environment. If you only work in stereo, there perhaps isn’t a killer new feature that would justify the upgrade, but the new GUI is very adaptable — and who doesn’t want to know what Soundcloud, or Bandcamp’s web streaming player, will do to your audio? Actually, having heard what they did to my audio, I’m not sure I do want to know...
summary The version 2 update keeps MasterCheck up to date with modern streaming services and operating systems, greatly improves the UI, and opens it up for use in immersive mixing — though better documentation on this last feature would be welcome.
£ £208.80 including VAT. W www.nugenaudio.com
ON TE ST
HEDD AUDIO CTRL
CTRL provides access to an unusually comprehensive 10-band parametric EQ, which offers a wide range of filter types.
HEDD Audio CTRL
Monitor Calibration Software
HEDD’s Mk2 monitors and BASS subs now benefit from comprehensive remote control. BOB THOMAS
A
s 2025 drew to a close, Berlin-based HEDD Audio launched the CTRL Network Remote System Control and Calibration software for the company’s Mk2 monitors and BASS subwoofers. The Mk2 range are seriously high-performance nearfield monitors (see our October 2021 review of the Type 07 Mk2, and last year’s review of the Type 05 Mk2), and the compact three-way Type 20 Mk2 supplied for this review are no exception! The Mk2’s DSP functionality allows the user to adapt the monitors’ response to suit the room and their positioning within it. In addition to source-selection switching (balanced analogue or AES digital) and a ±12dB input sensitivity control, the Mk2 rear panel also carries controls for ±4dB high- and low‑frequency shelving EQs at 3kHz and 200Hz respectively; a three-position (-1,-2 or -4dB) Desk EQ
14
August 2026 / www.soundonsound.com
at 180Hz; normal and extended bass responses (-3dB at 32Hz and 26Hz on the Type 20 Mk2); and a 80Hz high-pass filter that can be activated when using a HEDD BASS subwoofer. The Mk2 DSP also powers HEDD’s proprietary Lineariser, a switchable high-resolution, zero-phase FIR filter that compensates for frequency-dependent latencies within the monitor in order to improve transient resolution, source separation and imaging accuracy. Mk2 monitors also feature HEDD’s CoP (Closed or Ported) option, which offers two distinctly different bass responses. In Closed mode, precisely shaped plugs are used to block the monitor’s reflex port, producing (in general terms) a tighter, more controlled low-frequency response than that of an open port. In contrast, an open reflex port will (again in general terms) deliver a looser, louder, and more extended low-frequency response than a closed port. A rear panel CoP switch selects different time-domain compensation
profiles for each mode, since opening or closing a port not only affects the monitor’s frequency response, but also changes its group delay (frequency-dependent latency).
The CTRL Environment HEDD’s new CTRL software gives Mk2 users real-time, manual control of the monitor’s DSP system, from the listening position. The CTRL user interface opens up on its main screen, which is divided into three panels: Device Management, Device Settings and Control. The Device Management panel has three sections: Devices, Groups and Presets. In CTRL, a Device is HEDD’s blanket term for a Mk2 loudspeaker or BASS subwoofer. The Devices section displays a list of all detected devices and allows you to select, identify, solo and mute them. The Groups section displays saved groups of some or all of those Devices. The Create and Manage icons at the foot of the Group section allow you to freely create and manage multiple monitor/
sub groups for stereo, 2.1, 5.1, 7.1, Atmos or immersive audio environments of up to 250 subs and satellites. In the Presets section you can save the contents and settings of a group as a preset, recall it, and upload its settings to all its devices. The Device Settings panel also has three sections: Device/Group Settings, Lineariser and Standby. The Device Settings menu appears when a device is selected, giving you remote access to the rear‑panel controls of a selected device — with the exception (in the case of a monitor) of the output volume level and the shelving filters, which sit in the Control panel. A PEQ icon switches the entire screen to display the 10-band parametric graphic EQ, which will affect only the selected device. Similarly, the Lineariser and Standby sections act only on the selected device. When a group is selected, the Device Settings menu gives way to that of the Group Settings. The differences between the two menus are that the Group Settings menu does not have access to the rear‑panel Bass Mode (CoP) and input select functions. At the top of both the Device and Group Settings menus sits a Latency control with a range of 0-50 ms with 0.1ms resolution; this allows you to time-align groups or individual loudspeakers to a listening position.
In Use The CTRL software runs on Windows (7, and 10 or newer) and on macOS (12 and above). Downloading and installation on Windows 7 and macOS 13 went smoothly. Connection between computer and the Type 20 Mk2 can be made by either Wi-Fi or Ethernet; I used the latter. Clicking on the Connect icon in the Devices section of the main screen causes the program to scan the network for available devices, which are then listed in that section. A click on the Update menu brings up a list of the connected devices and their firmware versions. Red or green dots identify devices requiring (or not requiring) an update. To set up the Type 20 Mk2 as a stereo pair, I found the simplest way is to create a stereo group and add them to it. The next step is to go to the monitors’ rear panels and set their input source and CoP switches to match your choices. The Group Settings and Control panels, augmented by the 10-band parametric EQ, then act as remote controls for
both monitors’ DSP. Adjusting DSP parameters remotely in real time from the mix position is much faster than having to keep getting up to access the physical rear‑panel controls. The fully parametric 10-band PEQ has a filter selection that’s more comprehensive than any that I’ve come across before. The available types of filter include resonant low-pass and high-pass; low-pass and high-pass at 6 and 12dB/oct; low and high shelves at 6 and 12dB/oct; low and high VariQ shelves; a 6dB/oct band‑pass; and a dedicated notch filter. The filters’ corner frequencies can be set anywhere between 10Hz and 20kHz, deliver ±12dB of cut or boost, and have a Q that is
subtracted from, those of all the devices in that group. So, for example, if you have set 5ms latency in a device and set a 1ms latency for its group, the device will switch to a 1ms latency. Should you set a 5dB boost at 100Hz in the PEQ of both a group and a device within that group, that device will deliver an overall +10dB at 100Hz. Similarly, setting a 5dB cut at 100Hz in the group will result in 0dB of boost/cut overall from the device. Once you get your head round these, operation is a breeze. From a user standpoint, running CTRL is pretty much intuitive, once you’ve got your head around its operation. Personally, I’d like to see HEDD add an EQ bypass so that I don’t have to turn
“Adjusting DSP parameters remotely in real time from the mix position is much faster than having to keep getting up to access the physical rear‑panel controls.” continuously variable between 0.1 and 25. My room has quite benign acoustics, so I couldn’t find a use for the rather esoteric resonant and VariQ filters, but the remainder are very effective. Since each band can mount any filter at any frequency, having 10 bands to play with allows easy A/B comparisons between filter types and/or settings. When the parametric EQ is active on a group, the EQ curve generated is displayed in green, replacing the straight red line that is displayed when the EQ is inactive. The same holds if the PEQ is active on a device. For those amongst us whose monitoring systems incorporate subwoofers, CTRL allows you to set those up as a stereo or multi‑channel group, rather than as individual speakers. If I’d had a HEDD BASS sub to integrate, I’d have set up a 2.1 Sub-Sat group and made the necessary settings adjustments. A Sub-Sat group can be switched between sub plus sattelite and full-range (no sub) operation as and when you wish, so there’s no need to create a separate full-range group. A couple of operational points to bear in mind are, firstly, that group‑level rear‑panel settings override those of its member devices, and secondly that group EQ, volume and high‑ and low‑shelf settings are added to, or
filter bands on and off to make an A/B comparison. Also, if I were ever to be in the position of having to optimise a HEDD Mk2 immersive system for a client, I’d like to be able to copy and paste device and group EQ settings freely between both devices and groups. Having become used to using an automatic room correction program with my own compact three-way monitors, I did enjoy setting up HEDD’s Type 20 Mk2 manually (or should that be aurally) using CTRL. Although I didn’t replicate exactly the in-room response created by the automatic room correction, I got close enough to be happy. Admittedly, I know the problem frequencies in my room, so I had a bit of a head start. CTRL’s remote-control capabilities and its 10-band EQ offer a flexibility, precision and ease of use that should have owners of HEDD Mk2 monitors and subs rushing to download it immediately if they haven’t already done so. One final thought: the HEDD Type 20 Mk2 monitors are seriously good!
summary A powerful and flexible monitor/room calibration system for HEDD’s Mk2 monitors that should make them even more appealing.
£ Free. W hedd.audio
www.soundonsound.com / August 2026
15
ON TE ST
JOHN WALDEN
T
he role of AI technology within music production is something that can trigger a wide range of opinions. I suspect pretty much everyone can agree that any AI that involves unlicensed scrapping of the Internet for training materials for the generation of complete tracks from a text prompt is highly undesirable. However, AI applications can be both more ethically built and more tightly focused. Sampleson’s Funkastic plug-in strikes me as just such a thing. It also fits very neatly into the Sampleson mould; it’s quirky, cool, fun to use and accessibly priced. So, if your funk needs a little inspiration, is Funkastic for you?
Funky Little Thing Running as either a standalone app or as a plug-in within your DAW, Funkastic is designed with one specific task in mind: it generates short funk-style MIDI phrases/riffs based upon a specific user-defined chord. These are designed to suit a keyboard; think Clavi, but any piano, electric piano, organ, synth or even bass sound could be the target. Indeed, the app/plug-in includes a suitable Clavi (with optional wah) sound for auditioning purposes. Funkastic’s underlying algorithms are AI-based but, to meet the focused aim, require an equally focused training dataset, which Sampleson have achieved by collaborating with a suite of experienced funk and soul keyboard players. The user simply configures a number of musical options within the straightforward UI and the AI-based engine then generates a suitable one-bar phrase based upon what it has learned from the carefully curated training data. In terms of those musical options, you can choose a Variation Style and Mode (both of which define the harmonic choices the engine can work with), the Root Note (of the chord), the Feel (straight or swung), the Notes Amount (how busy the performance might be) and Velocity Strength (essentially influencing the overall MIDI velocity dynamics). With this done, you hit Generate, and up pops a one-bar phrase — rather nicely visualised within the main display — that matches those criteria. If it doesn’t inspire, hit Generate again or, if you like what you hear, you can hit Variate to generate a variation on the phrase that’s rhythmically similar. As clearly described in the PDF manual, you can easily route the MIDI output from the plug-in to another virtual instrument but, once you have a phrase you like, the
16
August 2026 / www.soundonsound.com
Sampleson Funkastic
Performance Generator Plug-in
Generate endless funky keyboard part ideas with Sampleson’s lightweight AI-powered plug-in. most straightforward workflow is to simply drag and drop the MIDI on to another suitably virtual instrument track of your choice within your DAW. And that’s kind of it.
Bite-sized Inspiration In use, you simply repeat this Generate and Variate process one bar at a time, adjusting the other settings based upon your project’s chord sequence. It’s easy and quick to do and, I have to say, the results are really rather good. The Variate feature, in particular, makes it very easy to build a sequence of one‑bar patterns that feel like a coherent whole and, of course, once you have constructed a multi-bar phrase, you can always edit the MIDI to customise things further. Obviously, the engine is intended to target keyboard-based playing, and it does this really well. However, I also found it great for generating ideals suitable for bass lines if I started with the ‘Sparse’ Note Amount setting or thinned out some of the notes in a more densely populated pattern.
AI Done Right? For anyone whose funk and soul keyboard skills are limited, Funkastic is a lot of fun to use, and the output can be genuinely
inspiring. It doesn’t do all the work for you; it’s your chord progression and you define many of the aspects of the performance style. It’s kind of like having a mate made of software who is a decent funk and soul keyboard player, and you are able to say ‘give me a riff for C7 with these characteristics...’ and off Funkastic goes. Your mileage may vary, but this strikes me as a perfectly acceptable way to lean into AI technology as part of a music production workflow. Here’s hoping Sampleson are already working on flavours of Funkastic suitably trained on equally focused (and ethically sourced) training materials for guitar, bass and drums. Small, but beautifully formed. Focused but nicely finessed, it does one thing, but does it very well and, because of that, Funkastic is fantastic.
summary Funkastic is a brilliant example of how AI can be done right within a music production context. Fun, inexpensive, and capable of truly musical results.
£ $49 including VAT. W www.sampleson.com
ON TE ST
SAM INGLIS
T
he last few years have seen a number of attempts to integrate analogue processing into a software-based recording and mixing environment. I’ve been impressed by Freqport’s FreqInOut FO-1 and the Access Analog online subscription system, but McDSP’s Analog Processing Box remains the most elegant all-in-one solution I know of. To the user, an APB processor is no different from any other plug-in. Behind the scenes, though, audio is being routed over Thunderbolt to and from an array of analogue components within the APB hardware, and digital control signals from the plug-in tell it how this audio should be manipulated. APB plug-ins thus offer true analogue processing that can be automated, recalled and controlled within your DAW sessions. Seven years after its launch, the cohort of plug-ins available for the APB system continues to grow. All are free to owners of an eight-channel APB8 or 16-channel APB16, and the focus is on dynamics and saturation, which are the main processor types where McDSP believe that analogue processing still has something unique
18
August 2026 / www.soundonsound.com
McDSP DC-2 Dual Compressor Plug-in For APB System
McDSP continue to find new ways to harness their configurable analogue plug-in co-processor. to offer. The latest guest at the APB party is a monster plug-in called DC-2, which its makers aptly describe as a dual compressor.
Choose Your Path Each mono instance of DC-2 uses two channels of APB processing, although in common with some of the other APB plug-ins, you’ll see a stereo interface even when you load it on a single channel. Unlike the existing MC-3, it’s not a multiband device. Instead, it presents two fully featured, full-range compressors, which can be operated either in series or in parallel. Each path also has two two-band equalisers, one a conventional design and the other controlling the tone of
the saturation that takes place when the output is driven hard. One of the distinctive features of APB technology is the use of analogue circuitry to emulate analogue circuitry. There are, for example, APB plug-ins that recreate the sound of tape and valve saturation, even though the APB hardware contains neither tape nor valves. That theme continues in DC-2, where each compressor can take on the characteristics of an optical, VCA or FET design. Regardless of which you choose, you still get full control over threshold, ratio and attack and release times, plus the option to switch between peak and a choice of 11 different RMS detector circuits. There’s also an auto release setting,
an enormously configurable side-chain high-pass filter, and a choice of hard or soft knee, with several different flavours of the latter available. Detailed compression settings such as the RMS detection type, high-pass filter slope and softness of the soft knee are adjusted in what McDSP call the centre section. This is also where the EQ and the output saturation are configured. Its four tabs provide helpful visual feedback, including representations of the compression and EQ curves.
Checks & Balances Like many people, I suspect, my first thought on hearing about DC-2 was “Great! Now I can do that thing of putting an LA-2A and an 1176 in series on vocals.” And you probably can set up the two compressor stages to sound like an LA-2A and an 1176, but DC-2 is a much deeper and more open-ended processor than that. Some playing around with the controls is necessary to fully understand the implementation, especially in regard to the Balance knob. In Split (parallel) mode, this does what you’d expect, adjusting the relative levels of two entirely separate signal paths. But it’s also fully operational
in series mode, which you might not expect. The manual states, slightly cryptically, that in this mode it controls the “blend of processing from Comp 1 and Comp 2”. In practice, this seems to mean that if you turn it all the way to the left, in effect to solo Comp 1, the settings on Comp 2 make no difference; turn it all the way to the right, though, and settings from Comp 1 still affect the behaviour of Comp 2 even though they’re not heard directly. Another thing that takes a little getting used to is the output saturation. When I first experimented with this, I thought I was hearing things — or, rather, not hearing them. There’s a choice of saturation modes which runs from Soft A and B through to Stun and Ouch, but even in the last of these, I wasn’t detecting any obvious distortion, and moving the nodes on the saturation EQ curve around didn’t seem to make any difference to the tone. It turns out that saturation happens only when you crank the make-up gain: rather than getting louder, after a point, the sound starts to grow hair. And if you have saturation EQ enabled, the colour of that hair is indeed controllable. The
bulk of the output is coming from the gentle settings on Comp 1, then dial in extreme settings on Comp 2 to overlay a thin layer of heavily brutalised sound. Alternatively, Split mode offers an easy way to achieve what is sometimes described as “multi-bus” compression. Feed individual sources, groups or even the entire mix into it and use the Balance control to blend together two different styles of dynamics processing, complete with different EQ and saturation settings. I particularly liked this approach on a drum submix, where you can set up an aggressive FET-style sound with fast time constants and some upper-mid push, and offset it with a slower, squishier, darker timbre from the second compressor. Whatever approach you take, DC-2 is another plug-in that really showcases the strengths of the APB platform. It’s a sonic chameleon, but whatever colour the leaf it’s resting on, it remains supremely classy. Most of all, it brings home with fresh force something that struck me when I first reviewed the APB16 back in 2019: real analogue compression and saturation, at least as implemented here, seems to deliver levels of subjective loudness before
“You can easily set up a scenario where two compressors with very different characteristics are ordered in series, creating a hybrid dynamics processor to suit a source such as vocals with complex dynamic behaviour.” conventional EQ, meanwhile, can be switched pre- or post-compression, and provides two bands that can be switched between parametric or shelving modes. If this makes it sound like DC-2 is an unusually versatile dynamics plug-in, that’s undoubtedly true. As previously noted, you can easily set up a scenario where two compressors with very different characteristics are ordered in series, creating a hybrid dynamics processor to suit a source such as vocals with complex dynamic behaviour. The saturation circuit makes it easy to add a pinch of colour focused wherever in the midrange helps that source to cut through. But you can easily take things further. For example, you can tilt the Balance control to the left so that the
clipping that are very hard to achieve using conventional digital plug-ins. DC-2 is a much deeper plug-in than most of the other APB compressors, and consequently presents a bit more of a learning curve, but it shares the same ‘in your face’ quality. Both its sound and its immense versatility mark it out as being a really valuable tool for mixing and mastering engineers alike.
summary DC-2 is perhaps the most sophisticated plug-in yet created for McDSP’s Analog Processing Box platform. Once you’ve mastered its relatively large control set, the possibilities are truly endless.
£ Free to APB owners. W www.mcdsp.com
www.soundonsound.com / August 2026
19
ON TE ST
This versatile vowel filter packs some powerful and creative modulation options. JOHN WALDEN
I
mpressed by UB DSP’s debut release, Grit Blender (SOS July 2026) I was keen to check out their follow-up, called Vowel Blender. Essentially, it’s a vowel-based filter that allows you to inject a sense of ‘vocalisation’ into almost any sound — and while that in itself isn’t a new concept, UB DSP have applied their ‘blender’ idea to it to create an effect that’s brimming with creative potential.
Vowel Movement Vowel Blender’s 10 phonetic vowel filters are arranged within the X/Y pad, with their locations being based on their phonetic ‘positions’ (front/back on the X axis, and open/closed on the Y axis). As you move the cursor, it provides a blend of the four closest vowel nodes, based on their relative distance to the cursor. The knobs below the X/Y pad provide control (manual or automatable) over the X/Y position, and a Snap knob determines how ‘magnetic’ each vowel node is, as the cursor moves within the 2D space. The frequency display shows your audio signal and the currently applied filter shapes, which update in real time. You can change the width of the filters (Q), offset their pitch (Shift) and add some soft saturation (Drive), while the Mix knob controls the wet/dry balance. This one is important: higher values are the way to go for obvious spot effects, but with very low values Vowel Blender can add just a little subtle movement to almost any sound. A niche effect? Perhaps. But I loved it, and found a lot of creative applications for it.
Control & Character You can, of course, move the node manually during playback. But you can also record your own path through the X/Y space, with the replay speed manually adjustable or set to sync to your project tempo. That’s pretty neat, and a selection of useful path presets are included to get you started. There’s also a very powerful modulation system. This offers, among other modulator types, standard LFOs, a step sequencer, a multi-segment envelope, an envelope follower, a macro
20
August 2026 / www.soundonsound.com
UB DSP Vowel Blender
Filter Plug-in
knob and, of course, MIDI CC control. You can build all sorts of weird and wonderful modulation combinations here to drive how the filters are applied. Amongst the range of other useful features (for example, the ability to bypass processing below a user-defined frequency, and different stereo modes), a Voice Model feature lets you pick between seven different vowel sets (three female, three male and one labelled ‘kids’), each of which changes the character of the filters. Clicking on the Character button (top right) opens a further control panel, through which you can tweak each Voice Model further. As well as Human, Breath, Size and Transpose, these include the intriguing Alien control: so if sci-fi sound design is your thing, there’s a knob for that!
into rhythmic sounds using more extreme settings. And, yes, talkbox and vocoder-style effects, or using modulation to create filter-based risers or drops, are all on offer. But just how easily I could blend a subtle touch of Vowel Shaper into almost any kind of sound source and to ratchet the sonic interest up a notch was a pleasant surprise. As with Grit Blender, UB DSP have taken a very specific existing processing concept, and build around it an impressive suite of options that lets you realise its full sonic potential. But don’t take my word for it... There’s a free trial, so you can explore the joys of blending vowels with your own sounds — and I assure you, you’ll have a lot of fun in the process!
I’ll Take A Vowel Please...
Vowel Blender is both creative and fun to use. While it may seem like something of a niche effect, used subtly, it can bring a unique sense of movement to almost any sound source.
I wasn’t quite sure what to expect when I first installed Vowel Shaper. But I have to say that I ended up very impressed. Yes, it’s obviously great for adding movement to synth pad sounds, or turning these
summary
£ $68 W https://ubdsp.com
“ They’re trustworthy. They’re accurate. When I turn them on, they’re there every time. Greg Penny knows what sounds good. He should do: he’s been producing, mixing and mastering award-winning albums for decades. That’s why he trusts Dynaudio speakers to help him do his job. He might be mixing in stereo, or he might be creating an immersive world with 18 speakers pointing at his head... if he’s sitting in front of a Core set-up, he knows it’ll sound great wherever it’s played back. And so will you.
Core series Discover the full range at www.dynaudio.com/core
ON TE ST
Are you ready to try something a little different inside your bass drum? SAM INGLIS
A
ustrian Audio describe their OC-B6 as the “world’s first purpose-built large-diaphragm condenser kick mic”. Such mics are certainly unusual, although I think Sontronics would point out that their DM-1B has been around for some years now. The Neumann U47 FET has also long been a popular choice on bass drums and speaker cabs, though it wasn’t designed specially for the purpose. Folk physics might suggest a link between diaphragm size and low-frequency response, but this is illusory. Wavelengths of frequencies below 300Hz are measured in metres, so a difference of half an inch or so in diaphragm width is unlikely to make much difference. And any classical engineer will tell you that the most faithful capture of deep bass is achieved with small-diaphragm omni mics, rather than large-diaphragm cardioid models. However, we’re not dealing here with organ recitals or Mahler symphonies, and normal rules don’t necessarily apply to a mic designed to be positioned inside the source it’s capturing. In the immortal words of Joe Meek: if it sounds good, it is good. So, does it?
Adaptations The core technology that underpins much of Austrian Audio’s mic range is their CKR-12 capsule. Its design is derived from that of the legendary AKG CK12, but Austrian Audio’s version employs a ceramic surround in place of the original’s brass ring, allowing it to be manufactured more consistently. To create the CKR6-B capsule in the OC-B6, they’ve adapted this design in a couple of ways. The spacing between the diaphragm and the backplate has been doubled, reducing the sensitivity and increasing the headroom to ensure that loud transients don’t cause the diaphragm to bottom out; and the diaphragm tension has been altered, to lower the resonant frequency and “shape” the low-frequency response. The transformerless electronics are likewise optimised to maximise headroom, but also incorporate a “precisely tuned”
22
August 2026 / www.soundonsound.com
Austrian Audio OC-B6
Bass Drum Microphone
high-pass filter at 25Hz to tune out rumble and stand-borne noise. The result is a mic with a fixed, nominally cardioid pattern, a deliberately low sensitivity of 0.8mV/Pa, and enormous SPL handling capabilities: the OC-B6 can cope with levels of up to 170dB, which I sincerely hope never to encounter. For the most part, both the polar and the frequency response look fairly normal for a large-diaphragm capacitor mic, with a flat response through the midrange and a series of gentle peaks above 3kHz or so. Where it departs from standard fare is at the low end, with
a proximity-dependent bump at 50Hz followed by a steep roll-off. The measurements back up Austrian Audio’s claim that this is essentially a mic designed to deliver a natural, unprocessed sound, rather than a ‘sculpted’ response. Much of the work that has gone into fitting the OC-B6 for its intended role has to do with the physical design. A standard side-address studio mic doesn’t fit well into your average bass drum, so Austrian Audio have chosen instead to place the capsule inside a swivelling headbasket, not unlike that fitted to their OC7 drum mic. This is mounted to a short and stubby housing that incorporates the XLR socket and threaded socket for a mic stand side by side. It’s an arrangement that makes it very easy to rotate the capsule to any angle you prefer, although feeding the mic through a small port in the bass drum resonant head can be harder than it is with a conventional end-address mic like the Earthworks DM6, beyerdynamic M88 or DPA 4055. The OC-B6 comes with a smart semi-rigid padded case which is, thankfully, much more compact than
those supplied with some of Austrian Audio’s mics.
Different Drums When I reviewed the DM6 a couple of years ago, I became a complete convert to the idea of using capacitor mics for bass drum capture. It’s remained my first choice ever since, although I still have a soft spot for the M88, especially when you’re not looking for such a ‘modern’ sound. Having managed to fit both mics alongside the OC-B6, I was surprised at how different they all sounded. What’s immediately apparent in such a comparison is that both capacitor mics have a much fuller low end. It’s not that the M88 omits this altogether, but you have to add at least 6dB at 50Hz to match the heft of the OC-B6 or DM6. Moreover, in the DM6, this rich low end is offset by a noticeably sculpted frequency response through the midrange and treble. Its presence lift tends to emphasise the click and attack of the beater, especially around 5-6 kHz, while its midrange response is recessed
in precisely the areas you were probably going to cut with EQ anyway. The M88 has a degree of presence boost too, but it’s lower in the spectrum, around 3kHz. In comparison, the OC-B6 sounds a lot more rounded. Those response peaks in
midrange than a ‘pre-EQ’ed’ bass drum mic, that midrange actually sounds nice. If there’s a down side to ‘mix-ready’ mics like the DM6, it’s that they come with built-in assumptions about how you want the bass drum to fit into your mix. By
“The measurements back up Austrian Audio’s claim that this is essentially a mic designed to deliver a natural, unprocessed sound.” the upper part of the frequency spectrum are too high up to affect the meat of the drum sound, so the overall timbre is smoother. Beater attack is much more subdued than on the DM6, and a little more so than on the M88, but with a more pleasing and less nasal sound than the latter. Consequently, whereas the DM6 is designed to be positioned level with the resonant head, the OC-B6 worked better for me further into the drum, closer to the beater impact point. If you need to further accentuate the attack, it takes EQ beautifully, and although it gives you more
contrast, the OC-B6 allows you to identify the individual strengths of the bass drum you’re faced with, and make your own decisions. It’s not the cheapest option on the market, but it’s built like a tank and always delivers the goods.
summary The OC-B6 offers classy, natural capture of bass drums and all things loud and low.
£ £449 including VAT. W www.austrian.audio
www.soundonsound.com / August 2026
23
ON TE ST
ART Pro Audio Pro VLA III Dual-channel Optical Compressor
ART have a reputation for delivering great bang for buck, and this ‘Multivoice’ compressor is no exception!
BOB THOMAS
F
ounded in 1984, ART Pro Audio have forged a reputation for offering original, often innovative studio equipment at cost-effective prices. Regular readers will know I sometimes spend handsomely for the best gear, but I still rate ART highly. Indeed, I’ve amassed a large collection of their ‘problem solvers’ (patchbays, DI boxes, splitters, isolators) and they’re very much part of my studio’s spine. I also enjoyed ownership of their Pro VLA II compressor — so I’ve been looking forward to this review!
Outer Impressions The Pro VLA III bears a strong resemblance to its predecessor: the on/off switch, rotary controls, button switches and both moving coil and LED ladder meters sit exactly where they did on its predecessor’s 2U faceplate. The rear appears similarly similar, but the VLA III’s IEC C14 100-240 Volt AC power inlet and fuse holder have moved
26
August 2026 / www.soundonsound.com
further from the channels’ balanced XLR and TRS I/O connectors, and their shared -10dBV/+4dBu operating level selector. The Pro VLA III has no dedicated input level control, but there’s generous metering. The idea is that the previous unit in the chain is used to set the ART’s input level, and you meter this on the twin eightsegment LED meter. This has VU ballistics but also a peak hold function. Each channel’s output level is shown on its large backlit moving-coil VU. These each have a trim for calibration. Finally, a horizontal 10-segment LED ladder displays its channel’s gain reduction from 0-30 dB. There’s a full complement of traditional compressor controls, all 31-position, detented pots: threshold (-30 to +20 dB); ratio (1.25:1 to 20:1); attack (0.25 to 50 ms); release (0.15 to 3 seconds); and the aforementioned output level/make‑up gain (full attenuation to +20dB). A small but welcome difference from the previous version is that the ratio control puts 3:1 at the 12 o’clock position — this gives the
user slightly more precise control over the lower ratios. Each channel has two button switches, both with an integral orange status LED. The first toggles between Tube (valve) and Solid-State output amplification, which is a feature we’ve seen before on ART’s Multivoice range. The LED illuminates when Tube is selected (button depressed). The second button puts the compressor in the signal path (labelled Active) or into bypass, with the LED turning on to indicate the latter. A fifth button selects Dual Channel (independent) or Link (stereo) operation. When linked, channel 2’s gain cell is operated by channel 1’s controls; channel 1’s Output knob sets the master output level, while channel 2’s acts as a channel balance.
Inner Space Internally, everything is very neatly laid out on two printed circuit boards. The smaller one is mounted vertically on the rear of the case and carries the I/O connectors and level switching. A much larger board occupies almost the entire width and half the depth of the unit, and carries everything else. Other than the chunky twin VU meters, the largest object is the
The Pro VLA III offers generous metering, with independent indication for each channel of the input level, the output level and gain reduction.
single 12AT7 valve, a twin-triode type. Each triode caters for a different channel, and can be switched independently into the signal path. These are placed post compression but pre output gain, so that you can add colour to the compressed audio signal, and then adjust the output level for the next unit in the chain, without further altering the character. On the subject of character, that of a Vactrol-based optical compressor like this is determined by the specific Vactrol that’s used. In the Pro VLA III, ART have opted for Advanced Photonix’s NSL‑37V5C2, which is the equivalent of the discontinued Excelitas VTL5C2 they used in its two predecessors. In fact, Advanced Photonix were previously a part of Excelitas, so I suspect the biggest difference here is likely in the printing on the outer casing! I’ll discuss what this sounds like in more subjective terms below.
In Operation The Pro VLA III is a feedback compressor with a soft knee. By default, then, it sounds pretty transparent as it applies gain reduction up to about -12dB. At lower compression levels, the Pro VLA III adds a subtle sense of enhancement to the audio signal, but switching the 12AT7 into the otherwise solid-state signal path brings a more noticeable sense of weight and warmth, especially if you push the input level slightly higher. Pull back to lower input levels and lower ratios and you’ll find that the Pro VLA II is capable of everything from very natural and musical-sounding subtlety and transparency at 1.25:1 to in-your-face limiting at 20:1, and all points in between. The Pro VLA III has a +20dBu maximum input level and can achieve more than 100dB of dynamic range, so can cleanly accommodate most signals. But with higher ratios, shorter release times and a suitable source, you can still travel deep
into gain-pumping should you want. As you get more heavy-handed with the gain reduction, you’ll increasingly notice a high-frequency drop-off, which isn’t a bad thing, and can often be helpful for parallel compression effects. It’s nice to have such effects within reach, of course, but like all good optical compressors, the Pro VLA III is particularly effective for more conventional vocal treatments, and works well for both male and female vocals — it has an ability to deliver a seemingly ‘natural’ sense of tonality and dynamics, whilst clamping down very effectively on excessive excursions in level. The same applies for acoustic instruments: the Pro VLA III’s performance with my acoustic guitars, banjos and mandolins was impressive, and reminded me of exactly what I’ve been missing sonically in some of my recent in-the-box productions. With electric bass guitar, I found it quick and easy to create a more even, full-bodied sound that didn’t come across as obviously compressed. I don’t record full drum kits in my home studio where I tested this compressor, but I do track the occasional stereo-miked bodhran, and I can report that the Pro VLA III proved very effective at taming and bringing that particular hand drum into focus. In stereo mode, the Pro VLA III proved very effective as a bus compressor, whether used on subgroups or the main stereo mix bus. In fact, at low gain‑reduction levels (-1 to -6 dB) I couldn’t hear any significant changes in tonality between the compressed and bypassed mixes, just that pleasing hint of glue and fullness, which is exactly as it should be. Of course, being a dual-channel device with two independent control sets, the Pro VLA III’s channels also can also be used in series on mono sources, one set up fast to react to transient peaks, and
the other to deliver a slower, more gentle compression. Again, that worked well, and it’s a trick that can be particularly effective in controlling vocals. What the Pro VLA III offers is impressive, then, but there are a couple of things it doesn’t, and some of those surprised me. For instance, there’s no provision for side-chain filtering, and an HPF would be welcome. There’s also no wet/dry mix control, which would make parallel compression more immediate and convenient. I’d also anticipated that this updated model might borrow features from recent Multivoice units, like the switchable Optical and FET compression modes of the Pro Channel III and Solo VLA I reviewed in SOS November 2024 (https://sosm.ag/ art-pro-solo-mpa-solo-vla). Still, these few caveats won’t be important factors for every user.
Final Thoughts The bottom line is that the Pro VLA III put in a strong overall performance. Its optical gain control and soft-knee compression combine to deliver transparent, natural‑sounding compression, and when that’s too natural, you can add a touch of valve character. With plenty of range in the controls and two channels to play with, it covers a wide range of compression duties whether recording or mixing. And I can’t think of any other two-channel compressor in this price bracket that can match it.
summary A great-sounding optical compressor that, in the ART tradition, delivers a very strong overall performance and superb value for money.
£ £646.99 including VAT. T AudioLogic +44 (0)1279 635681 E sales@audiologic.co.uk W www.audiologic.co.uk W https://artproaudio.com
www.soundonsound.com / August 2026
27
FE ATURE
Hear The Sound W https://open.spotify.com/
track/4rEMNX61UlQInnHB8f3SX1
W www.youtube.com/watch?v=b2BKK eiYH24&list=RDb2BKKeiYH24
Sylvia Massy • Tool ‘Disgustipated’ J O E M AT E R A
A
merican record producer, mixer and engineer Sylvia Massy started her career in the San Francisco punk rock scene. She later progressed to working with artists such as Tool, Red Hot Chili Peppers, Prince and Smashing Pumpkins, to name but a few. Massy is well known for her experimental approach to sound recording, and her work on Tool’s ‘Disgustipated’, from the Undertow album, is a prime example. “For Undertow, I wanted to create a truly outrageous sound, like a big, disgusting explosion with notes spilling out onto the floor. I wanted something that hadn’t been heard before. Seemed like a piano might be a good place to start. Upright pianos were once home entertainment centres, back before houses were wired for electricity. There are plenty of wrecked pianos out there in the classifieds, easily
28
August 2026 / www.soundonsound.com
obtained for nothing — or next to nothing — if you can haul them. My first idea was to go big: hire a crane, lift a few pianos several storeys up, and drop them while recording the impact. That didn’t happen. No crane company wanted anything to do with it. So, we kept it indoors.”
The Pianocalypse “My friend Marko Fox worked at Owen Piano in LA. I paid him $100 to haul two old uprights to Grandmaster Studios in Hollywood on Cahuenga. We set the pianos up on the stage in the back warehouse and I built a multi-layered mic rig to capture every aspect of the performance: direct contact mics, close mics and distant room mics. I used a pair of wooden puck Dean Markley contact mics and stuck them — using gum — directly onto the back soundboard of the first piano, one on the low side and one on the high. Next, I opened the front panel and placed a pair of Shure SM57s close to the hammers to capture the piano’s percussive attack. Finally, I set up a pair of vintage Neumann U67s on tall stands in the back corners of the room. “I purchased safety goggles, gloves, sledgehammers, axes and a pickaxe. Headphones were dialled in and ready to go. I ran a click track to keep everyone in time. The mics were routed through tie lines to the vintage 1972 Neve 8028 console
with 1084 EQs. I sent the U67s through the studio’s Fairchild 670 compressor to a pair of tracks. My assistant waited in the control room for my signal to start the 24-track Studer A827 reel-to-reel recorder. “Headphones on, levels set, tape rolling. We began with the sawed-off shotgun. The band took turns blasting holes into the front of the piano using Danny Carey’s shotgun. It created a huge, reverberant roar in the room. One of the Shure SM57s was lost during the initial shotgun pass — it had been directly in the line of fire. We lost that track, but the rest recorded well. “Then we took the axes and sledgehammers and choreographed a kind of beautiful destruction, sending shards of wood, ivory, and wire into the air. Oh, and the beautiful noise! The second piano was tipped off the stage, where it fell onto its back with a heavy wham, and was then dismantled piece by piece. We listened to every excruciating plink and spring as the strings lost tension. The pianos cried and groaned as they were torn apart. They felt alive. After the recording, I gave the tapes to my friend Eric ‘Static’ Anest, who assembled the chaos into a terrifying piece of music, finally adding Maynard’s voice ranting about sheep and carrots and yelling, ‘This is necessary!’ The band called the song ‘Disgustipated’ and placed it as the final track on the album.”
Timeless3 From vintage echos to lush modulation
FabFilter Timeless3 is a versatile, vintage-sounding tape delay, which will fully satisfy your everyday delay needs. And with its unique effects, filters, tap patterns and unlimited modulation options, you can just as easily turn it into the ultimate sound-mangling machine! Try it now:
fabfilter.com
ON TE ST
Fender Studio Pro 8.1 DAW Software The latest version of Studio Pro introduces some serious AI firepower thanks to a collaboration with Moises.
ROBIN VINCENT
I
don’t think anyone will be that surprised to see AI turning up as an integrated feature in a DAW. There’s been a looming inevitability about it. The power to aid you in completing a task, to separate music into component parts, and to fill in the gaps in your own music
30
August 2026 / www.soundonsound.com
production skills seems to be the kind of power we’d like to wield within our projects, and AI is here to enable that. RipX DAW and ACE Studio already market themselves as AI-enabled DAWs, and now Fender have confidently named and claimed AI as a welcome partner in your music-making, on the assumption that this is what Studio Pro users want. It would be remiss of me not to mention that this assumption is very much up for debate, and is causing much concern in the creative industries. There’s also a very real environmental impact. But for this review I’m going to put these
factors aside and assume that Fender are right. So, let’s see what Studio Pro 8.1 has to offer.
Studio Assistant AI has been woven into Studio Pro in a couple of different ways. Firstly, there’s now a natural-language Studio Assistant, designed to scour all the Studio Pro documentation and online resources to answer any query you may have about using Studio Pro with friendly confidence. Secondly, Fender have teamed up with AI music platform Moises to integrate a Moises panel into the Browser, in a very
Need some inspiration? Studio Pro’s Moises AI integration means you can now generate tracks in your DAW using a text prompt.
similar way to what they did with Splice in version 7, and Tonalic in version 8. Moises offers AI-powered stem separation, voice conversion and stem generation. I’ve been writing workshops for Sound On Sound on Studio Pro/Studio One for many years, and I always keep the documentation close to hand to ensure I’m not talking nonsense. The manual is comprehensive, but has a frustratingly poor search function and can dominate the screen. So, having the AI equivalent of Microsoft Word’s Clippy asking me if I appear to be making some music sounds very promising.
The Studio Assistant is stirred into action via a little sparkly plectrum icon up in the top right and opens a panel alongside the Browser by giving it a shove to the left. In the empty chat box, I made the mistake of initially asking “How does this work?” and got a quite curt reply about the metaphysical nature of the word “this”. What’s important, it seems, is that you keep your questions specific to Studio Pro and don’t try to engage it in a conversation about the best lasagne recipe. Give it a reasonable request, and it rewards you with a good amount of detail about the thing you are trying to do. You can pop it into a floating window and ask it questions while you’re working on the task at hand, and it will calmly feed you helpful information. This is really rather brilliant. The Studio Assistant does more than regurgitate documentation; it’s also ready to help you make better music. You can ask it about mixing technique, how to alter the tone, how to add further processing to an instrument, the purpose of compression, and really whatever you can think of. However, there doesn’t appear to be any meaningful connection to your project. When I ask it to make suggestions on how I can improve my mix, it gives me tips on EQ, compression, and reverb without anything more than general guidance on where I could use them. It would also insist that the selected track’s volume was at negative infinity, which it wasn’t, and keep going on about how I needed to turn it up to hear anything, which it already was. But quirks aside, the more specific you are, the more it drills down to showing how to use a plug‑in or part of Studio Pro to do what you need. Its effectiveness, as we’ve come to understand with AI, is all down to how you ask your question. Currently, the AI Studio Assistant is in beta, does occasionally utter garbled nonsense, and is bizarrely only available to Studio Pro+ subscribers. This feels like a universally positive use of AI in a music production context and should, surely, be a standard feature for every user.
Loud Moises The marketing blurb says that the partnership between Moises and Fender marks a new era in music-making by bringing Moises’ online AI Studio into Studio One. From the point of view of Fender’s Chief Product Officer, Max
Fender Studio Pro 8.1 £169 or £19.99/month pros • Integrated AI tools from Moises. • Voice conversion is very convincing. • Moises Hi-Fi AI stem separation is the best I’ve heard. • Excellent Vocal Tune plug-in. • Modulators added to CV Instrument. • AI Studio Assistant has a lot of potential.
cons • Stem generation is uninspiring. • Fewer useful generation tools than Moises.ai online. • High Moises subscription cost for the most worthwhile tools.
summary Moises integration adds controversial generative AI, convincing voice conversion and astonishingly good stem separation, while improvements elsewhere are solid and welcome.
Gutnik: “Our integration with Moises gives musicians powerful new ways to learn songs, practice, experiment and create. AI isn’t the destination. Making music is. When technology gets out of the way and helps musicians accomplish more, it’s serving the art. That’s what we aspire to do.” Moises are keen to stress that they disagree with the indiscriminate training of AI on materials scraped from the Internet without permission. All of their models, they claim, are trained only on licensed material, and artists get paid for their work. Moises is available in three different tiers. These are a ‘free’ tier (or ‘not having to pay extra’ tier), a Premium tier for £2.91 a month (paid annually), and a Pro tier for £14.58 a month (paid annually). You start off on a 14-day trial of the Pro tier so they can get you hooked on all the bells and whistles. It should be noted that the Moises integration only brings over part of what Moises can offer; if what you want isn’t part of this “novel suite of modern tools”, you may still need to pop online to make use of certain features, which does undermine the integration factor rather.
Stem Separation AI-powered stem separation first appeared in Studio Pro with version 7. In my 2024 review, I found it to be on a par with other stem-separation processes, and that it suffered from the same sort of artefacts that we’d come to expect from competing processors. This stem-separation process still exists in version 8.1 and has been tweaked to
www.soundonsound.com / August 2026
31
ON TE ST
FE N DE R S T U DIO PRO 8.1
The new Studio Assistant can answer your questions about using Studio Pro, as well as about music production tools in general.
make it more efficient. It works entirely locally on your computer and never uploads anything to anywhere. Moises stem separation is a different kettle of fish. With Studio Pro’s native separation you get four stems: vocals, drums, bass and ‘other’ (ie. everything else). With Moises, you get 20 options. You can separate out lead and backing vocals, electric and acoustic guitars, pianos, strings, wind instruments and individual drum parts. Some things are mutually exclusive, but even so, you could easily end up with a dozen different stems.
guitars, bass line, drums and electric piano onto separate tracks. Elwood’s harmonica was rolled in with the horns, but otherwise I have an eight-track mix to play with, and I could have gone further to split the drums. The quality and the isolation is superb; I’ve never heard anything like it. Hearing Jake and Elwood jam with just voice and harmonica is quite something. The point being that I could sample that harmonica line, steal those horns or clip Steve Cropper’s guitar licks very, very cleanly. I tried getting granular on the first pass, but found horns in my cymbals,
“Moises stem separation is a different kettle of fish... The quality and the isolation is superb; I’ve never heard anything like it.” Any interaction with Moises involves uploading your tracks to their servers for analysis and downloading the results into your project: this is all handled automatically. Using ‘She Caught The Katy’ from the Blues Brothers soundtrack, I was able to pull out Jake’s vocal, the
32
August 2026 / www.soundonsound.com
a muffled mix in the toms, and a lot of harmonica in the solo guitar. I got much better results by doing it in stages, for example by pulling out the drums as one track before separating them into individual tracks by just processing the mixed drum track.
The 14-day Pro level trial includes unlimited separations into up to 20 stems using Hi-Fi AI Separation Models, which is what sets it apart from the native stem separation. The Free tier drops to ‘standard quality’ levels and, according to the Fender press release, gives you 10 stem separations a month. The Moises website says you have to settle for vocals, bass, drums, and then everything else as one stem. The Premium tier gives you unlimited separations to 13 stems, but still at standard quality. So, the free version has much less of an advantage over the native stem separation.
Voice Conversion Now it’s time to sample a bit of AI’s uncanny cleverness. Moises’ Voice Conversion tool is designed to replace your vocals with the tone and timbre of one of their 50 good-looking singers. The line‑up looks like it covers all genres, genders and nationalities, and alongside the singers’ names you also get their vocal ranges. Select your vocal track, it gets uploaded, and then you can check out what it would sound like with different voices. The results are impressive, and slightly strange. Everything about your
The Moises-powered stem separation is much more advanced than the existing local separation process. You get up to 20 instrument options (compared to four), and the quality of the Hi-Fi algorithm is remarkable.
original vocal performance is there, just in a different voice. Any reverb or processing has been stripped away, leaving you with a quite dead sound, which is perhaps why it feels strange, but once you’ve beefed it up again and set it into your space, it sounds very convincing. What I am finding in testing this with various vocal extractions is that
the converted performances lack a bit of energy. It’s sung right, but you feel like you want to burst into the vocal booth and shout “Come on, give it some welly!” With each conversion, you can also add a pitch‑shift, perhaps to create harmonies or to go an octave up or down when switching between vocal ranges. I ran into some difficulties when trying to combine vocals, either in unison or in pitch-shifted harmonies. The performances were so identical that it never sounded like a bunch of people singing; it always sounded weird. I think the way to get the best results here is to record a vocal, apply Voice Conversion, record a harmony, convert that one too, and so on. And for that, creating different voices around your voice, based on your voice, it does a marvellous if slightly safe job. The free tier gives you only five conversions a month, so you don’t really have the space to experiment or mix and match different voices. In the online version, Moises’ AI suggests four suitable voice replacements based on the original track, which is really helpful, but unfortunately, this feature is not available in the Studio Pro integration.
Stem Generation So, you’re fleshing out your track, you’ve got your vocals and piano down, but you’re not sure where to go from here. You’ve spent a couple of hours fiddling with Splice but can’t quite piece together the backing your song deserves. Well, Moises can help with that by producing a whole load of other tracks based on
your efforts so far — or, perhaps more interestingly, in response to a prompt. You get six generative categories; Drums, Bass, Guitars, Keys, Strings and Others, and then you get a handful of presets within each category. So, you can have strummed or picked, chords or solo guitar, different bass vibes, and lots of drum styles. You can also click a button which gives the AI free rein to make something along the lines of the existing audio, with usually hilarious results. The Others option opens a text box where you can attempt to describe what it is you’re after. To put it plainly, the Stem Generation was the least impressive thing about the whole Moises experience. I’ve spent the best part of a day trying to pull something useful out of the AI, and it’s a real struggle. There are occasional moments of clarity when there’s a pretty good fill or a nice bass line but, more often than not, the drums are inappropriate, the keys are manic, the guitars fight with everything else, and, on the whole, the renderings sound ropey. It’s the AI equivalent of inviting your mate over who plays a bit of bass to play along to a track they’ve never heard before, and recording one take on your phone and deciding you’re done. I tried whole songs and got some good bits and some bad bits. It’s particularly good at finding transitions between song sections and throwing in fills or interesting changes. I tried narrowing down to a few bars of a techno beat, and I couldn’t get it to play in time, let alone give me an Amen break. It’s
Among other things, Moises stem separation can isolate individual drum tracks, rather than a simple stereo drum kit stem. On full songs, best results are often achieved by extracting a stereo drum stem and then separating that again for the individual kit elements.
www.soundonsound.com / August 2026
33
ON TE ST
FE N DE R S T U DIO PRO 8.1
Moises Voice Conversion lets you change the character of a vocal recording.
almost like there’s so much humanisation in the output that you can’t isolate a couple of useful loops without a lot of audio bending. I had most success starting with a verse and chorus of piano and voice, then adding drums, bass and guitar to it, but every generated track
was full-on, without breath or thought of arrangement. If your aim is to produce dodgy-sounding band demos, then this is perfect; for serious use I find it difficult to make a case for it. I asked the AI Studio Assistant for advice on using Moises, but it only had information on Studio Pro, not Moises, and in fact there’s nothing in the manual about it at all. It also doesn’t tell you that there’s a one-minute limit to stem generation in the free tier, but you do get 120 goes per month. The online AI Studio lets you regenerate small sections of a generated track, giving you the chance to iron out missteps. You can also add a reference track so it can generate something along the same lines. These aspects are not available in Studio Pro. I guess you could use Stem Separation to extract the individual drum parts from the generated drums, then convert them to MIDI and run them through Impact or another drum sound source. I wonder, in a music production context, whether it would be altogether more helpful if Moises could generate MIDI. One generative option that seems conspicuous by its absence is vocals. Other platforms such as Suno or ACE The AI stem generation comes in six flavours — Drums, Bass, Guitars, Keys, Strings and Others — and can produce content based on your existing project or in response to a prompt.
34
August 2026 / www.soundonsound.com
Studio can generate vocals from lyrics. IK Multimedia’s ReSing can generate backing vocals by adding pitch and timing variations to your original performance, something that Moises’ Voice Conversion cannot do.
Moises Thoughts There’s no doubt that Moises is doing some very clever stuff. The stem separation is excellent if you are happy to pay almost £15 a month for the Hi-Fi version. The voice conversion has a lot of great potential for giving your performances an alternative timbre, but it doesn’t really go far enough. The stem generation does have an initial wow factor and can be impressive in parts, but I feel it would take a lot of work to tease out something that sounds good enough, both musically and in rendered quality, to be anything more than a rough demo. Put that together with the knowledge that the Moises available here is only a ‘lite’ version of what’s online, and it doesn’t feels quite so integral. I think, perhaps, if you use Moises as an app on your phone to mute the vocals of a famous song so you can sing along, or to extract the guitar part to make it easier to learn and practice, then it’s probably brilliant. But those are not really things you are aiming to do when you open a DAW.
Other Updates Incorporating AI is not the only thing Fender have been doing since version
it’s a really useful connection for people running modular alongside their DAW and MIDI instruments. The 8.1 update adds four modulation sources in the shape of a pair of ADSR envelopes and a pair of LFOs. You have different waveshapes for the LFOs, free or sync’ed cycles, keyboard scaling, rate and delay controls, and you can set the range in which they operate. The envelopes give you full visual control over each stage, and mid-point nodes for adjusting the response curves. Each can be routed to its own physical output. These are great little modulators that could potentially turn Studio Pro into a useful source of modulation.
Other Improvements
The CV Instrument has gained some very useful modulators — which Studio Assistant will be happy to talk you through!
8.0. We have several other features worth mentioning, including Shared Virtual Instruments. This is a useful space where you can create an Instrument Set of your commonly used virtual instruments, which are loaded together and stay loaded while Studio Pro is open. You can then use them in different projects without reloading them. That’s a decent time-saving and organisational feature. There’s nothing like a good, solid ‘drop it in and it works’ type of plug‑in, and Vocal Tune is exactly that. It’s a simple, real-time pitch-correction plug‑in that
gently guides your vocals into line with the chosen scale. You can define the scale, or choose from a bunch of presets, add a bit of vibrato and push the formants around for some tonal modulation. Alternatively, you can play with the extremes and enjoy all sorts of Auto-Tune-style effects. Vocal Tune is simple, effective, and always useful. Next up are the CV Instrument modulators. The often-overlooked CV Instrument lets you route MIDI tracks to hardware modular synths by converting MIDI to CV and gate signals. It needs some DC-coupled outputs on your audio interface, but once you’ve sorted that out,
There are plenty of other improvements and tweaks in the update. The Score page has receved a lot of attention, with features like using articulations to swap in sound variations, repeats and codas now being reflected in playback, and a lot more besides. The Channel Overview strip, which first appeared in version 8.0, is now available in the Show Page. The Dolby Renderer now has Dolby’s Headphone Personalization. You can add pitch curves to audio events. So, there’s plenty still going on with Studio Pro as a whole, but it’s really difficult to see anything other than Moises integration as the major story. Moises brings in some fun tools to play around with, and for people who have made peace with our AI overlords, the integration makes it easy to work with. The Hi-Fi stem separation that you get in the Pro+ subscription is highly impressive, while the vocal conversion is clever and effective, if a little limited. The stem generation mainly brings novelty and curiosity, which I suspect most people will probably get over during the 14-day trial period. That may be no bad thing, given that the most valuable of the Moises tools are only available in the premium Pro+ tier. One question raised by Joshua Stewart’s article in July’s SOS concerns AI detection. If you use Moises stem generation or even voice conversion in your music, would it trigger AI detection algorithms and get your music banned from streaming services? £ Perpetual licence £169.99, monthly
Vocal Tune is a new vocal tuning plug‑in, and it works very well indeed.
subscription £19.99, Pro+ annual subscription £159.99. Prices include VAT. W www.fender.com
www.soundonsound.com / August 2026
35
ON TE ST
Sample Library
Orchestral Tools Low End Orchestra The well-travelled Berlin sample hunters go off the deep end with a collection of bass-heavy ensembles. DAV E ST E WA RT
O
rchestral Tools have literally come a long way since the 22-year-old composer Hendrik Schwarzer flew to the former Soviet city of Minsk to record 50 string players for his inaugural Orchestral String Runs library (see SOS September 2011). 15 years on, this independent German company continue to rack up the air miles, dispatching a team to LA to sample a Steinway piano, hopping over to Estonia to nab a chamber choir and setting up camp in London’s AIR Studios to record their excellent Beaufort cinematic brass collection. OT’s latest adventure sees them return to AIR’s Lyndhurst Hall to capture the sumptuous low-pitched sounds that enrich orchestral scores, including two instruments which as far as I know have never been sampled. Requiring 165GB of disk space once installed, Low End Orchestra works exclusively with Orchestral Tools’ Sine Player, a free, 64-bit plug-in and standalone application for macOS and Windows.
Bass Intentions Working from the initial concept of an orchestra consisting only of bass-heavy
36
August 2026 / www.soundonsound.com
instruments, OT’s creative team of Marc-Till Till, Philipp von Hören and Alex Lamy developed a blueprint for a new orchestral seating plan and experimental articulations incorporating real-life spatial motion. The library draws inspiration from unorthodox scores such as Jonny Greenwood’s Norwegian Wood and Hans Zimmer’s Interstellar, The Da Vinci Code and The Dark Knight. So, the die was cast. Low‑end instrumentation: no violins, violas, trumpets, French horns, Bb clarinets, oboes, concert flutes or piccolos. New layout: strings arranged symmetrically, brass lined up across the whole room, low woodwinds seated in instrument families. Movement: performances that shift from side to side, forwards and backwards. How’s all that going to work? Pull on your wetsuits, strap on your breathing apparatus and join me as we plumb the bottomless depths of Orchestral Tools’ Low End Orchestra.
Low Strings Right off the bat, LEO smashes traditional norms with 22‑ and 16-player cello sections and a heavyweight ensemble of six cellos and 12 basses playing in octaves. A programmed Full Strings ensemble layers 16 cellos over the latter
section, generating enough low‑end power to stir your heartstrings and rattle your subwoofers. Such large sections provide ample scope for spatial sound performances (identified by X, Y or XY prefixes in their names). Split into two widely spaced sections, the 16 cellos ‘X sul tasto — con sordino wave’ long notes shift restlessly from side to side like a drowsy giant bee in search of a flower, while the subtly overlapped crescendos of their ‘Y gravity sustains’ are a beautiful hovering stereo presence. In a less soothing vein, the nervy tremolos in the cellos’ ‘XY sul pont trem swells’ introduce a hint of menace. Seated in a wide semicircle, the 22 cellists serve up more heady atmospheres: the sensitively played ‘XY desert shimmer’ conjures visions of mirages and heat hazes, ‘X glissando wave slow’ is a glacial layering of sustains and ghostly pitch swoops, and the lush, surging ‘X crescendo wave’ artics increase the drama. The action hots up with the cellos/basses ‘Y gravity waves’, featuring a tempo-sync’ed 16th‑note pulse passed back and forth across the section in a musical Mexican wave. OT also recorded a healthy contingent of standard string articulations: the 16 cellos and cellos/basses sections turn in great, attacking spiccatos and marcatos, floaty harmonics and powerful, richly expressive legato sustains, while the 16
Orchestral Tools Low End Orchestra
Instrumentation String Sections • 16 cellos • 22 cellos • 6 cellos + 12 double basses • Full strings (programmed ensemble) Flute Ensembles • Low flute ensemble a8 (two alto flutes, two bass flutes, two contra-alto flutes, two contrabass flutes) • Two alto flutes + two bass flutes • Two contra-alto flutes + two contrabass flutes Clarinet & Contrabassoon Ensembles • Low clarinet ensemble a8 (two basset horns, two bass clarinets, two contra-alto clarinets, two contrabass clarinets) • Two basset horns + two bass clarinets • Two contra-alto clarinets + two contrabass clarinets • Four contrabassoons
Brass Ensembles • Low brass ensemble a10 (four bass trombones, two cimbassos, two sousaphones, two tubas) • Four bass trombones + two cimbassos • Two sousaphones + two tubas Synth • Saw, saw filter • Two‑oscillator saw • Three‑oscillator saw, three‑oscillator saw filter • PWM, PWM filter • Square, square filter • Sync • Triangle Processed Patches • Moving soundscapes & drones (13) • Pads (12) • Plucks & pulses (16) • Swells (13)
€549 pros • A superb collection of powerful low-pitched strings, brass and woodwinds recorded in a world-famous orchestral hall. • The supersized string sections sound sensational and the 10-piece brass ensemble is absolutely superb. • The contra-alto flutes and clarinets are collectible gems. • Offers limitless possibilities for mixing in immersive, surround or any other spatial audio system.
cons • Expensive, though you can buy single ensembles at reasonable prices. • Too specialised and eclectic for orchestral newbies. • No solo instruments.
summary cellos add sul ponticello and col legno tratto (a quiet, hypnotic pad-friendly texture). For maximum bass power, load the Full Strings spiccatos, crank up the Decca Tree, play ff in the bottom octave and prepare to be blasted into orbit.
Low Woodwind Ensembles Orchestral sample completists will be delighted to discover two ultra-rarities, the contra-alto clarinet and contra-alto flute. Feared to be extinct in the UK and never previously sampled, the latter appears courtesy of low flutes specialist Carla Rees, who arranged the hire of a pair from the Carluke Primrose Orchestral Flutes ensemble and embarked on her own epic journey to bring them back to London. These outsize vertical-standing flutes play in unison with two even larger contrabass flutes, creating a deep, solid, luxuriously breathy and tuneful sound which is a highlight of the library. Diving deeper, a full-toned ensemble of contra-alto and contrabass clarinets and a four-piece contrabassoon section descend to the orchestra’s ocean floor of Bb0, while higher-pitched flute and clarinet quartets offer more melodic and textural opportunities. United in live eight-player full-range ensembles and voiced in octaves, the two woodwind families’ pulsing ‘gravity waves’ and two-dynamic ‘gravity sustains’ incorporate subtle octave shifts. The flutes’ version of these dovetailed sustains suffers from imperfect tuning,
but the players redeem themselves with some propulsive, precisely played tempo-sync’ed eighth-note looping pulses. Though the artic names ‘fast attraction’ and ‘slow repulsion’ evoke visions of speed dating leading to failed marriages, the reality is more akin to a game of Pass the Parcel where successive notes an octave apart whizz backwards and forwards on the Y axis. Similarly, ‘timbral ricochet’ artics toss a fast note repetition around the section like a hot potato. Things get weirder with the scary fluctuations of ‘Y sustains long breath random swells’ and the flutes’ spooky irregular trills, a classic tension-building texture you’ll want to play in atonal cluster chords.
Comprising hugely powerful string and brass sections and a unique collection of rare woodwinds, Low End Orchestra explores the deep reaches of orchestral sound. Specially designed spatial performances make the library a great proposition for both immersive and stereo mixes — all in all, a great asset for cinematic composers which you can buy one section at a time.
All the flute and clarinet sections perform legato sustains and whispery ‘air sustains’, marcato, staccato, short crescendo and diminuendo styles and a palpitating ‘vibrato trill swell’ effect. The flutes have a switchable vibrato option, while the clarinets’ ‘expressive’ sustains feature built-in cresc-dim swells. I liked the low flutes’ ‘singing multiphonics 5th’
As ever, the OT Sine Player interface takes a non-nonsense approach.
www.soundonsound.com / August 2026
37
ON TE ST
Rapid Flow Omniclock
Clock Plug-in
Rapid Flow’s Omniclock promises to fix sync and add groove for external instruments. Rapid Flow Omniclock £54 pros • Clock shift and shuffle are instantly accessible from inside the DAW. • 0.25ms shift resolution makes it easy to align external sequencers. • No iLok required.
cons • Not categorically more accurate than your DAW’s own clock. • Your MIDI interface may still add its own internal jitter. • Shuffle profiles add character but won’t reproduce the timing rigour of legendary hardware.
summary A convenient MIDI clock-shift and groove plug-in. The shift is precise, the shuffle profiles are likeable enough, and the workflow is excellent. For many people, Omniclock will be a godsend, but it isn’t necessarily the answer to all MIDI clocking problems.
40
August 2026 / www.soundonsound.com
RORY DOW
M
IDI Clock has long been the proverbial pain in the backside. Your DAW says one thing, your drum machine plays a handful of milliseconds behind it, and the gap is enough to spoil a good groove. Rapid Flow’s Omniclock is a software solution to this very problem: a VST3/AU/AAX plug-in that handles MIDI Clock generation instead of your DAW. It boasts sub-millisecond clock shift and a set of groove presets. It costs €49 at launch (€69 thereafter), runs natively on Apple Silicon and Windows, and, bless them, needs no iLok.
Easy Does It As the manual insists, Omniclock is a clock plug-in, not a MIDI plug-in. It doesn’t process notes, doesn’t affect audio, and won’t shuffle your
software instruments. It is purely for clocking external instruments. You drop one instance on any track type in your DAW, select any MIDI output port that your operating system exposes (5-pin DIN via an interface, USB direct to hardware, or a virtual port), and it will send clock directly to that port, bypassing your DAW altogether. Each piece of sync’ed gear gets its own instance, with its own shift and shuffle values stored in the session so that every sync’ed machine is aligned with your host project. The user interface couldn’t be simpler. The Shift control moves the clock pulse earlier or later in 0.25ms increments over a ±64ms range. A 2x or 4x multiplier widens that to ±128ms or ±256ms at the cost of coarser steps. Unfortunately, the correct Shift value is tied to your audio buffer size, so changing the buffer size requires recalibration. The Shuffle parameter adds swing to the clock from a small selection of groove templates made from groove legends like the Akai MPC60 and MPC3000, and E‑mu SP‑1200. Each setting shapes the swing differently, and a ‘curve’ sub-menu tunes the response. The manual is a little hazy on exactly how this works, but my guess is that the curve is a device-compensation mapping between the swing amount you ask for and the timing offsets that Omniclock actually sends, because different bits of hardware respond to clock variations differently.
Clockwork The real question, though, is whether Omniclock is more accurate than what you already have. I ran a timing test against a favourite drum machine, comparing my DAW’s clock (Bitwig Studio) to Omniclock, and, for good measure, the Innerclock Systems GridLock II (the gold standard in MIDI Clock generation). I generated a simple 16th hi-hat pattern on the drum machine, recorded the audio output whilst clocked from the various sources, and analysed the recordings for timing accuracy and jitter. The tests covered both 5-pin DIN and USB interfaces. The results were interesting.
W E N Over 5-pin DIN, Omniclock is excellent: sub-microsecond beat-to-beat jitter, dead-on tempo. Excellent. This proves that Omniclock’s clock generation is solid. Over USB, however, Omniclock was the loosest source in the test, with a continuous ±1.3ms deviation on more than half of the beats measured. Curiously, Bitwig clocking over the same USB connection didn’t show the same deviations, so the problem — at least in my limited tests — appears specific to the Omniclock-USB combination. A different set of tests might yield different results (this wasn’t meant to be exhaustive),
USB Solo mk2 from
“What you’re really paying for is convenience: clock shift and shuffle, recallable per device, accessible without leaving the DAW.” but it does show that not everything is within Omniclock’s control. More telling, though, is that Bitwig’s internal clock was already within microseconds of the GridLock II’s near-perfect results. For raw accuracy, Omniclock isn’t necessarily giving you anything your DAW can’t already deliver. DAWs will vary, but don’t assume that Omniclock automatically beats what’s in the box. The groove profiles do sound different from each other. There is real timing variation. As a quick-access ‘feel’ knob, it does its job. The myth that classic machines like the Akai MPC3000 carried some unique swing sauce needs putting to bed, however. The MPC’s appeal was its rock-solid internal clock and consistent audio delivery; the swing offset itself was just a number — a fact Roger Linn himself (designer of the early MPCs) has confirmed. Omniclock can apply a similar number, but it can’t give your gear the MPC3000’s absolute clocking under the hood, and not every piece of equipment will respond to swung clock in the same way.
Conclusion What you’re really paying for with Omniclock, then, is convenience: clock shift and shuffle, recallable per device, accessible without leaving the DAW. If you regularly fight to line up drum machines or sequencers, that workflow might be worth the asking price on its own. Just don’t expect it to outdo your DAW’s own clock in terms of accuracy. Treat it as the convenience plug-in it is, and you’ll get your money’s worth.
High spec MIDI to CV converter with both USB and 5 pin DIN MIDI V/Oct & Hz/V – Gate & S-trig – 3 aux outputs – clock & DIN Sync Can be used as a USB MIDI Interface (while still converting to CV) All of the features of the Pro Solo mk3 but with the addition of USB See website for full information
SPLIT, MERGE, EXTEND OR CONVERT All the MIDI you need, right where you need it
Thru-5, 12 & 25
Merge-4 & 8
Split a single MIDI source into 5, 12 or 25 identical copies
Combine the data from 4 or 8 MIDI sources into a single output
LNDX & LNDR
MIDI USB Host mk3
Extend MIDI up to 1000 metres LNDX (shown) has etherCON connector
MIDI IN & OUT on DIN for your USB-only keyboards, controllers & synths – without using a computer
£ £54 including VAT. W www.rapidflow.shop
WE MAKE MIDI WORK FOR YOU Contactwww.soundonsound.com the MIDI Specialists / August 2026
kenton.co.uk
41
INSIDE TRACK
The colossal success of Ella Langley’s ‘Choosin’ Texas’ and parent album Dandelion shows that traditional Nashville record-making still works in the 21st Century. PAUL TINGEN
E
Ben West & Dave Clauss • Ella Langley Dandelion
42
August 2026 / www.soundonsound.com
Photo: Spencer Combs
Ben West
lla Langley is the latest country star to top the mainstream charts, and she is breaking records along the way. ‘Choosin’ Texas’ has spent 10 weeks atop the Billboard singles chart, while her second album Dandelion reached number one on both the US mainstream and country charts. Dandelion was co-produced by Langley, fellow country star Miranda Lambert, and Ben West, and largely engineered and wholly mixed by Dave Clauss. As West and Clauss explain, the album was made in textbook Nashville fashion, with emphasis on songs and speed. “I grew up making a lot of indie rock music, which is often obsessed with aesthetics,” says West. “You found a cool guitar line or you distorted the drums a certain way — some of my favourite records are like that, and I definitely nerd out on these sonics. But since I’m a songwriter as well, the most important adjustment I had to make to making music in Nashville was the realisation: Wait a minute, the number one priority here is communicating the lyric and making sure the music enhances the story. “Ella is a perfect example. She’s a really honest writer, and when she sings, you believe her. Of course, the production around her vocal has to
ensure that the lyric and story comes through. During the recording sessions everyone is really sensitive to that. The session musicians are not going to step on a melody. They’re not going to do something that would take attention away from that. And they know how to find the moments when they can briefly be a little more dramatic. “During tracking sessions, we move so quickly. Dave [Clauss] is set up for speed. The thing that bums everybody out during a session is when it doesn’t sound great right away in your headphones, or the playback vibe isn’t in the ballpark, and the engineer in the control room says, ‘Give me 20 minutes.’ That’s not the way Dave works. He’s balancing as he goes, and it immediately sounds like a record.” Clauss picks up the story: “The good thing about the studios that I often use in Nashville is that everything’s working, and the assistants are ninjas. They know the rooms, and are familiar with how I like to work. I send them an input list for my gear and the studio’s gear, and they set everything up before I come in. Because I know the rooms, I know where I want things placed. “For a session start at 10am, I’ll get there 8:30am. The drummer may arrive at 9:30am. I then have 20 minutes to get drum sounds for any number of vibes. I often have no idea what songs will be recorded, so I need to have different drum sounds ready for any eventuality. If you would see me in that moment, just before the session, you’d think I am a lunatic, sprinting back and forth like crazy. It looks like I’m on crack, because I’m tweaking things so quickly. Everything has to work. If I don’t get everything ready by 10am, and people have to wait, it’s money wasted.”
Work In Progress Since he started working in Nashville back in 2012, Ben West has co-written and/or produced songs for country artists like Lori McKenna, Brett Eldredge, Parker McCollum, Blake Shelton, Carly Pearce, Stephen Wilson Jr, Patrick Droney, Hailey Whitters, Ashley Monroe, Laci Kaye Booth — and Ella Langley. “My publishers and managers at Creative Nation set up a day for me in the fall of 2024 to write with Ella and Joybeth Taylor. Writing sessions are a good way for an artist to audition a potential producer. We had a great time, and wrote the song ‘We Know Us’, which ended up on the album, and another
Dave Clauss.
Ben West: “When the performance is great, who cares if there’s bleed? Who cares if her vocal shows up in the drum mics?” song that may end up on the deluxe version. I loved how Ella’s production brain worked, and it resonated with mine. She played me a bunch of great sonic references, like Ronnie Milsap, and some other records I hadn’t heard. It really set the tone. Her sensibilities are
unique; I was like, ‘Nobody’s referencing Ronnie Milsap!’ “It typically falls to someone to record a ‘demo’ in the writing session. I’m usually tasked with making them, but at times I don’t switch the computer on, because I’m sick of looking at a screen. We’re all sick of screens. One of my buddies has been taking an old cassette recorder to writing sessions, and at the end of the day, he records whatever they wrote with that. Sometimes people simply record an iPhone Voice Memo at the end of a writing session, which is called a ‘work tape’. That’s enough proof of concept for a song. Other times, they will take the time in the writing session to properly record a vocal and later finish out a more fully realised version. That’s what Ella,
www.soundonsound.com / August 2026
43
INSIDE TRACK
BE N W E S T & DAV E CL AUS S • E LL A L A NGLE Y
Most of Dandelion was recorded at Sound Emporium in Nashville, using the API Legacy AXS console.
Dave Clauss brought numerous items of outboard gear to the tracking sessions, including his Undertone Audio Unfairchild compressors (lower left).
Joybeth and I did for the songs we wrote together. I’m terrible with MIDI and programming, so I played everything live into Pro Tools, and gave the result to Ella, saying, ‘This is what I imagine the Ronnie Milsap vibe we’re going for sounds like.’ Sometime after that I was excited to be asked to co-produce six songs with Ella and Miranda. “There were so many great writers and producers involved in the various writing sessions for Dandelion. For example, Ella works really well with Austin Goodloe, who was involved in writing the title track, together with Ella, Joybeth and Brett Tyler. Miranda and Joybeth were also involved in writing ‘Choosin’ Texas’ with producer-writer Luke Dick. Austin was a lifesaver, he recorded a fair amount of Ella’s vocals on the rest of the album too.”
It’s About The Song According to West, it’s typical in Nashville that the songs are selected first, followed by the producer, and then the band. “Ella and Miranda had done a lot of prep work for the project before I came
44
August 2026 / www.soundonsound.com
in, and they picked the songs. When they asked me to help produce those songs, my one request was to have Dave [Clauss] involved, because I can’t do anything without him. He’s an incredible collaborator. Then we talked about the band. Miranda suggested bassist Rachel Loy and her pedal steel player Spencer Cullum, Ella wanted her band leader Ben Flanders, and Tom Bukovac, both on electric guitars. I suggested the acoustic guitarist, Charlie Worsham, keyboardist Dave Cohen, and drummer Aksel Coe. That was the band for those first sessions we did, including ‘Choosin’ Texas’. “Once the band was picked, Kelsey Granda, the production coordinator, booked the studio, Sound Emporium, and the musicians, for three days of sessions, in April 2025. The sessions are in three-hour blocks, the first is 10am to 1pm, and the second 2pm to 5pm, with a 1-2pm lunch break. Dave prepares the tech side beforehand, and brings in a pile of gear, compressors and microphones and whatnot. I’m a gear nerd as well, so we’ll have conversations about what to
bring. No-one’s heard the songs before the sessions, except for Ella, Miranda and I. Once the musicians have set up, we’ll introduce the first song to them, playing them a work tape or more fully formed demo, depending on how closely we want to stick to a preconceived approach. “It’s easy to get locked into one idea of what a song can sound like, forgetting that ‘the right way’ can be so broad. You fall in love with a particular incarnation of a song, but it may not be the best representation. Hearing a song for the first time from a simple work tape allows the players more possibilities, and to imagine the sonic world. Personally, I don’t mind hearing more built-out demos, because it gives me a direction, and it’s easy for me to deconstruct it if there are things that need to be adapted. All of the demos I heard for this project were incredible, and the producers involved were credited for any stems or tracks we kept.”
Leading Roles “Another hallmark of the Nashville recording process is to designate a band
Ben West Ben West’s formative years were during the ’90s in Detroit, when there was a rich gospel scene and grunge was exploding. West played organ and drums in churches and studied in the jazz programme at Wayne State University. His older brother introduced him to four-track recording and MIDI sequencers. He recorded local bands and wrote sync music before he was introduced by mutual friend Kris Pooley (American Idol, Sabrina Carpenter) to the famous producer Michael Busbee (Maren Morris, Kelly Clarkson), who would have a formative influence on both West’s and Clauss’ careers. “Busbee and I wrote a song called ‘Try’ hoping to get some sync placements. Pink’s manager ended up hearing it and her version became a hit [double platinum in the UK and the US in 2012]. This opened the publishing world to me. I realised LA wasn’t for me, so Busbee suggested I do a week of writing with friends of his in Nashville. I was reluctant because I felt like a fraud, having only written quirky indie songs and knowing gospel better than country. I first went in 2012, and Busbee and his publishers set me up with an embarrassingly top-tier list of songwriters. They call Nashville a ‘10-year town’, which is a reference to the time it takes to establish yourself. I skipped the line massively, and am still grateful for that to him. “I fell in love with Nashville immediately, and started making writing trips roughly one week a month. I am still doing this today. From the first week it struck me how different Nashville is. At least for songwriters, it’s more like a nine‑to‑five job — writing sessions are during business hours, because people have families, take their kids to baseball afterwards, and so on.”
leader for that session. They write out a chord chart and help resolve any musical questions. On the initial sessions Tom Bukovac, Charlie Worsham and Dave Cohen shared these duties. With ‘Choosin’ Texas’, Tom sat down with an acoustic guitar in the
control room and started to play what became the signature lick. Ella said, ‘Yes, that’s perfect!’, and then someone had the idea to play that sig lick on a DI’ed electric, which Dave and I loved because we got to nerd out on the sonics of that.
“Ella has a great production mindset. She hears background vocals and other parts, and in general is very part-driven, and comments a lot on the drum feel. Miranda also was involved in arrangement and production decisions, and was great at managing the overall energy of the performances. That freed me up to be more of a detailed ‘look at the trees instead of the forest’ guy. Once the musicians had heard the song, I’d immediately go out and start talking to them. We’d be picking snare drums and cymbals, and I may suggest a keyboard sound. ‘What if you start on the B3 rather than on a piano? Do we use dead strings or zippy, bright new strings on the acoustic?’ The answer is always dead strings, by the way. Or ‘What if we leave the third out of that V chord?’ Between Ella, Miranda, Dave, myself and the band it was a collaborative team effort. “For the most part, the band played to a click. The first take, or even before it, something genius always happens so Dave records everything, even soundchecks. Once you’re into the
OFFICIAL MERCHANDISE STORE
T-SHIRTS
SWEATSHIRTS
HOODIES
MUGS
www.soundonsound.com/merch
www.soundonsound.com / August 2026
45
ON TE ST
UDO Audio DMNO
RORY DOW
U
DO’s latest flagship synthesizer combines familiar elements from classic synths (the Oberheim Two Voice, if you haven’t spotted it already) with modern upgrades like binaural FPGA oscillators and impeccable industrial design. But does it really offer anything we haven’t seen before? UDO are still a relatively new company in the synthesizer world. They came flying out of the gate in 2020 with their Jupiter-inspired Super 6, which has proven to be a very popular instrument. A desktop version and the dual-engine Super Gemini followed on. The DMNO is the first non-Super synth from UDO. It follows their design philosophy of honouring a particular vintage synth as a starting point, then taking it much further. In this case, UDO have borrowed the basic design from the Oberheim Two Voice. You can see the familiar layout in the two identical modules on the front panel (known as DMNO 1 and DMNO 2). You’d be forgiven for thinking that
50
August 2026 / www.soundonsound.com
Polyphonic Synthesizer
Good looks and an original approach to synthesis are quickly becoming UDO’s hallmarks, and their latest instrument, the DMNO, is no exception. the DMNO is a two-voice analogue synthesizer, then, but you’d be wrong. In fact — deep breath — the DMNO is an eight-voice, bi-timbral, analogue hybrid comprising two four-voice modules with a binaural (stereo to you and me) signal path. Enabling binaural mode halves the polyphony from four per DMNO to two ‘super voices’. So you get four voices in total, since half are used for the extra channel. The oscillators and effects are digital, and everything in between — filters, drive and VCA — is analogue. There is also an arpeggiator and even a built-in stereo in/out USB audio interface.
The DMNO Effect The DMNO comes in two colour choices, white or black. The white offers the classic Oberheim cream colour, whilst the black is more of a sleek modern dark grey. There’s a 44-note Fatar keyboard with
channel aftertouch (no poly aftertouch). The combined modulation wheel and pitch bender are the same Juno-inspired stick combo found on the Super 6. The build quality, you can tell just by looking, is exemplary. Zero wobble on anything, consistent ‘feel’ to all the controls, satisfying clicks on buttons and encoders. The whole package is premium. Unlike the Supers before it, the DMNO adds a screen. UDO didn’t just throw in an OLED or LCD screen like
everyone else. This is a rather beautiful electroluminescent vacuum fluorescent display (VFD for short), and it looks rather sexy. Fret not, because this doesn’t mean there is endless menu-diving. UDO have retained their commitment to hands-on, old-school sound‑design programming wherever possible. The screen updates to show more info on the parameter you’re editing, and often shows related parameters too. One thing I particularly appreciated is the marker that shows you the currently saved value of that parameter, so that you always know what the parameter was set to when you last loaded a preset. It makes it much easier to deal with the fact that the front panel doesn’t always match the current state of things. For the true purists, there’s a Manual mode that uses the current state of every front-panel control, like an old-school, no-preset synthesizer.
Voice Count If you are wondering how two four-voice units stack together to make one synth, UDO’s response would be ‘any way you like’. Play mode means you can spend the DMNO’s eight voices in different ways: a four-note unison stack with four oscillators per voice, two four-voice bi-timbral synths sharing the keyboard, a serial four-voice with both modules cascaded into each other, or a generative instrument where voices and notes can be randomised.
Within each DMNO module, the voices can be configured to work in poly, mono, mono legato and unison modes. The unison modes have some handy shortcuts for octave stacking, fifths, and even a major chord (but strangely no corresponding minor). A sound created for a single unit is called a Patch, whilst the two together (plus performance section, arp, mixer and effects) is a Performance. There are 128 rewritable preset slots for each, and the factory patches do an excellent job of showcasing the synth. The factory presets are adorned with convincing overdriven organs, deep supersaws, brassy polysynths, heat-warped pads, sciency arpeggios, magnificent strings and juicy basses. I would have liked to see more preset slots, purely because this synth is so versatile.
Oscillators Each DMNO module has two FPGA-based DDS oscillators per voice. Inherited from the Super 6, they produce a clean, alias-free signal. UDO’s Super Waveform core brings six sister oscillators that can be dynamically phase-shifted and detuned across the stereo field. It’s the same trick that gives the Super 6 and Super Gemini their stereo signature, and it works just as well here. Waveform-wise, you get the standard set — sine, sawtooth, square, pulse, triangle and white noise — plus a library of 32 user-configurable single-cycle waveforms, six of which can be loaded into Osc 1’s front-panel slots and three into Osc 2’s at any one time. Osc 2 also offers three non-keyboard-tracked
UDO Audio DMNO £2599 pros • Hugely flexible routing of the two four-voice DMNO modules. • The interface is beautifully engineered. • It sounds big, and it sounds expensive.
cons • It can feel complicated even when attempting simple sounds. • Not many preset slots.
summary UDO set a high bar for themselves with the Super 6. The DMNO is a continuation of the binaural synthesis concept they pioneered there. Dual bi-timbral four-voice DMNO modules with highly flexible routing, generous filtering options and a beautifully designed front panel (with that gorgeous screen) make this a unique offering in the synth market.
waveforms, drones, sync and cross-mod tricks. A switch between the two handles hard sync in either direction (something you don’t often see!). From the front panel, the oscillators can be modulated in basic ways: envelope 1 or LFO 1 can be assigned to waveshape (either as pulse-width modulation or as a crossfade between adjacent shapes) and pitch. If you want more, you can employ the seven-slot modulation matrix. Variable cross‑modulation is also possible here. You can set the cross-mod to work both ways, so the two oscillators modulate each other recursively, which sounds rather wonderful. Each DMNO module has a simple mixer that lets you balance the two oscillators (and overdrive them nicely when the knob
Round The Back Power is via IEC, with an on/off switch alongside. MIDI is on standard 5-pin DIN (in, out and thru) and on a USB port that also serves as a 2-in/2-out class-compliant audio interface and a way to mount the DMNO as a USB drive for firmware updates, patch and waveform transfers. Pedal inputs occupy three TRS jacks: dedicated volume, an assignable expression pedal, and a single or dual footswitch with auto polarity detection. Modular interfacing comes from two 3.5mm CV outputs (0‑8 V) and two 3.5mm gate outputs (0‑5
V). A pair of quarter-inch audio inputs feed an onboard preamp, gate detector and envelope follower. Stereo mix outputs, assignable aux outputs and a headphone jack (all on quarter-inch sockets) complete the line-up. Together, these open up plenty of routing options: drive a Eurorack rig from the keyboard via the CV/gate outs; send each DMNO module to its own mixer channel through the aux outs; or process external audio (and side-chain its envelope) through the DMNO’s filter and effects.
www.soundonsound.com / August 2026
51
TECHNIQUE
THE MID-SIDES MYTH MIKE SENIOR
T
he most common way of setting up two microphones to capture stereo involves using one mic for the left channel and the other for the right channel, a scenario often called L-R stereo. As many readers will know, though, there’s another way of capturing stereo with only two mics: the Mid-Sides format, where one forward-facing ‘Middle’ microphone captures the centre of the stereo picture, and a second sideways-oriented figure-8 ‘Sides’ microphone provides the stereo spread. The technical details of how M-S stereo miking works, as well as how you can convert back and forth losslessly between M-S and L-R signal formats, were explained in great detail by Hugh Robjohns in SOS October 2025’s instalment of his excellent This Is Stereo series (now also available as a free eBook: https://sosm.ag/ stereo-miking-guide), so I won’t go back over all of that here. What I would like to do, though, is tackle what I think is a common misconception amongst project-studio operators (and perhaps even some more seasoned engineers) regarding the M-S mic technique: namely, that you don’t have to worry about the Stereo Recording Angle (SRA,
54
August 2026 / www.soundonsound.com
While M-S miking does offer you some flexibility at mixdown in terms of stereo width, it can’t perform miracles! ie. the physical angle of capture in the recording room) of an M-S array while tracking, because you can freely adjust the Middle and Sides levels of the stereo recording to set the desired image width at mixdown. In reality, M-S rebalancing of any stereo recording is fraught with compromise, and I’ve lost count of the number of times I’ve heard stereo recordings that have been impaired simply because the engineer treated M-S as some kind of ‘Get Out Of Jail Free’ card! Below, with the help of some audio examples that I created specially for the purpose (https://sosm.ag/the-ms-myth), I’m going to demonstrate some of the important limitations of M-S rebalancing.
The Myth The first thing to realise is that you can freely convert any stereo file between M-S and L-R formats using a simple M-S encoder/decoder without any change to the eventual mixed result. So, as far as your stereo mixdown is concerned, raising the level of the Sides mic in an M-S stereo mic rig will cause exactly the same kinds of audible changes as encoding an X-Y stereo mic rig into M-S format and increasing the Sides signal level there.
With this in mind, have a listen to my first audio example (msm_01_ FullWidthPickup), which was recorded with a crossed pair of Shure KSM 141 small-diaphragm cardioid capacitor microphones, set up at a mutual angle (the angle between the two mics) of 110 degrees. The sound source for this recording was a stand-mounted single-driver loudspeaker that I physically moved to different positions around the mic rig, and which played an identical short spoken phrase in each position. On account of careful positioning of the loudspeaker in the recording room, keeping it equidistant from the microphones at all times, this audio file should present you with the following stereo experience if you’re auditioning from the sweet spot of a stereo loudspeaker system: • Phrase 1 will be at the centre of the stereo image. • Phrase 2 will be at the far left of the stereo image. • Phrase 3 will be at the centre of the stereo image again. • Phrase 4 will be at the far right of the stereo image. • Phrase 5 will be at the centre of the stereo image again.
Furthermore, notice that the perceived level of the spoken phrase remains pretty much the same as it moves around the stereo image, and that it also maintains roughly the same subjective distance from the listener. Next, check out my second audio example (msm_02_NarrowPickup), which was made with the identical recording setup, but with the sound-source loudspeaker positions adjusted so as to deliver much less extreme stereo positions for Phrase 2 and Phrase 4, while still maintaining a fairly consistent relative balance and perceived distance for all five phrases. I’d like to stress that these changes were created solely by moving the source loudspeaker in the recording room. I didn’t change the microphone setup at all. I didn’t adjust anything in the mix. Both audio examples comprise just the raw signals from the microphones, panned hard left and hard right, respectively.
M-S Widening Now, listen to my third audio example (msm_03_NarrowPickupWidened), in which I used simple M-S rebalancing to widen my second audio example, so that the image positions of its spoken phrases match those in my first audio example — to put it another way, I tried to adapt the mic rig’s Stereo Recording Angle after the fact, to match the narrowed positions of the sound-source loudspeaker in the recording room. You’ll hear that, yes, I have managed to ‘correct’ the stereo image as planned. Crucially, though, that’s not all that the process changed. Firstly, you’ll notice that the balance between the left/right sources and the central source has substantially altered: the left/right sources in the widened
“You simply can’t increase the Sides mic’s level without making sound sources at the edges of your sound stage feel louder, and making centrally located sources appear wetter.” audio file are significantly louder. To make this clearer to hear, I’ve created a fourth audio example (msm_04_ FullWidthVsWidenedNarrow_Left), which compares just the left-hand sound sources from my first and third audio examples, in the following order:
the level of its Sides mic. You simply can’t increase the Sides mic’s level without making sound sources at the edges of your sound stage feel louder, and making centrally located sources (and often your whole pickup too) appear wetter.
• Phrase 2 from msm_01_ FullWidthPickup. • Phrase 2 from msm_03_ NarrowPickupWidened. • Phrase 2 from msm_01_FullWidthPickup. • Phrase 2 from msm_03_ NarrowPickupWidened.
But what about the other way round? What if you want to narrow the stereo image of an over‑wide recorded pickup instead? There’s no free lunch there either, and you can hear why in my sixth audio example (msm_06_ FullWidthPickupNarrowed). This time I’ve used M-S rebalancing to narrow the first audio example (msm_01_FullWidthPickup) to try and make it sound like my second audio example (msm_02_NarrowPickup). n other words, I’ve tried to adapt the mic rig’s Stereo Recording Angle to stretch the narrowly spread physical loudspeaker positions in the recording room across the full stereo playback panorama. Again, you can hear that I’ve managed to achieve the desired stereo image with my M-S rebalancing, but this time it’s at the cost of making the left and right sources significantly quieter and more distant-sounding. You can hear this more clearly in my seventh audio example (msm_07_NarrowVsNarrowedFullWidth_ Left), which alternates just the left-hand sound sources from my second and sixth audio examples, in the following order:
Furthermore, the central source in my third audio example is also more reverberant. Again, to make this more clearly audible, my fifth audio example (msm_04_FullWidthVsWidenedNarrow_ Centre) provides a direct comparison between the central sources of my first and third audio examples in the following order: • Phrase 1 from msm_01_FullWidthPickup. • Phrase 1 from msm_03_ NarrowPickupWidened. • Phrase 1 from msm_01_FullWidthPickup. • Phrase 1 from msm_03_ NarrowPickupWidened. There’s one other thing going on in the widened file that’s perhaps less immediately easy to hear: the room reverb has been over‑widened, so that it’s concentrated more at the edges of the stereo image than in the centre. You’ll also get exactly these same side-effects if you try to widen an M-S mic rig by pushing up One of the advantages of the M-S stereo miking approach is that you can use unmatched mics (such as the Superlux R102 ribbon and Avantone CK1 small-diaphragm capacitor shown here) without creating a lopsided stereo image.
M-S Narrowing
• Phrase 2 from msm_02_NarrowPickup. • Phrase 2 from msm_06_ FullWidthPickupNarrowed. • Phrase 2 from msm_02_NarrowPickup. • Phrase 2 from msm_06_ FullWidthPickupNarrowed. Moreover, the central sound source not only sounds slightly drier, its room reverb also sounds narrower, as if the room is longer and thinner. You can hear that more clearly in my eighth audio example (msm_08_NarrowVsNarrowedFullWidth_ Centre), which directly compares the
www.soundonsound.com / August 2026
55
ON TE ST
JZ MU-1
Hybrid Ribbon & Capacitor Microphone
58
August 2026 / www.soundonsound.com
JZ’s innovative MU-1 gives you two microphones in one — and more besides. SAM INGLIS
R
eview mics that come my way often get lent to other engineers during the testing period. This helps ensure they get put in front of the widest possible variety of sources, and can provide a useful sanity check. Back in 2021, I did exactly this with JZ Microphones’ BB29 capacitor mic. The engineer in question reported that he, like me, had found it to be on the bright side — but really liked the sound he got from putting up the BB29 next to a ribbon mic
JZ MU-1 €2499 pros • Combining capacitor and ribbon elements in the same mic opens up many new sound-shaping possibilities. • Very nicely built. • Much easier to set up and use than two separate mics, and the design mostly eliminates the risk of phase issues.
cons • The ribbon element in the review mic was noisier than expected.
summary The JZ MU-1 is a genuinely original design, and one of the most versatile studio mics around.
and blending the two together. My reaction was probably to smile and mentally file this under “ways to make recording unnecessarily complicated”, but it turns out my friend was ahead of the curve. Grammy-winning engineer and producer Marc Urselli is a passionate advocate of this technique (see box), and has a longstanding relationship with JZ Microphones. And he has now worked with JZ to create the MU-1, described as “the first studio microphone to house a ribbon element and a large-diaphragm condenser capsule side-by-side in a single, level-matched and phase-coherent body”.
Yin & Yang Dual-element mics are unusual, but not unknown. Before the invention of the cardioid capsule, one of the few ways of generating a unidirectional pickup pattern was to combine a ribbon motor, which is natively figure-8, with an omnidirectional moving-coil cartridge. This principle was used in the Western Electric / Altec 639 ‘birdcage’ mic and the STC 4033, and has recently been revived by Samar Audio, whose MF08 pairs a ribbon element and a small-diaphragm capacitor capsule. Manufacturers such as AKG, Sony and Sanken have also experimented with dual-capsule designs for other purposes such as extending the frequency response, minimising proximity effect and making the polar pattern more consistent. However, there is no precedent I know of for the specific combination of a large-diaphragm, cardioid capacitor mic
Venos Stereo Bus Compressor
capsule and a figure-8 ribbon capsule. The logic behind JZ’s pairing is also novel. The primary goal is not to synthesize other polar patterns or permit capture of ultrasonic frequencies, but to allow the tonality of the on-axis capture to be varied. The intention is that the signals from the two elements will be recorded separately and blended to taste after the fact; consequently, they have entirely separate signal paths and independent outputs.
Get The Drop The capacitor capsule used in the MU-1 is one of JZ’s Golden Drop designs, and is the same capsule employed in their Black Hole microphones. As JZ don’t make ribbon microphones, they’ve licensed the ribbon element from another Eastern European manufacturer. The two are positioned side-by-side within what is necessarily a rather wide headbasket. The shell as a whole is made of sturdy metal and is pretty heavy. Thankfully, given the size and weight of the MU-1, JZ have developed a proprietary shockmount, which is included. The outputs from the two elements emerge on a single 5-pin XLR socket. A splitter cable is supplied, but it’s very short, so you will always need two XLR cables of your own. Mic, mount and cable are all supplied in a smart wooden box, and build quality throughout seems flawless. JZ describe the two outputs as being “level-matched”. This is a moving target given the different properties of the capacitor and ribbon elements, but in
NEW!
Adding size, depth and impact to a stereo signal has never been easier. With SPL 120V technology this sound is crowned to king of dynamics.
www.soundonsound.com / August 2026
59
ON TE ST JZ MU-1
Marc Urselli & The MU-1 “I started recording with ribbons and condensers [together] 15 years ago,” recalls Marc Urselli. “I have used this technique on drum overheads, upright bass, bass amps, guitar amps, acoustic guitar, piano, Hammond B3 Leslie speakers, sax, clarinet, brass and winds in general, and last but not least vocals... and room mics too!” Prior to the creation of the JZ MU-1, Marc experimented extensively with different combinations of ribbon and capacitor mics. “Being the chief engineer at EastSide Sound in New York gave me access to a few amazing mics, notably the RCA KU-3A, which is how my love for ribbons started. I started putting a JZ Black Hole next to the RCA KU-3A and loved the ability to blend the two tones seamlessly, but phase was always a concern, and with more low-end stuff, it was an issue. “I’ve done a lot of testing with RCAs plus JZ mics, RCAs plus Neumanns, RCAs plus Braingasm on horn. On guitars I often used a Royer R‑121 with an SM57 or a Neumann U87. On drums I often used AKG C414 and/or Coles 4038, and sometimes two AKG C414s with two HUM Audio ARM-1s. The combination was great but required four mic stands! “I got tired of setting up the stands and phase-aligning manually, or with a plug-in, and no mic existed that gave me the entire history — sonically speaking — of microphone sounds and range of a ribbon and a condenser, so I started thinking about this concept. I dragged my feet for a few years ’cause I was too busy, until I decided to take matters into my own hands and look for somebody to develop this with. “I’ve had a longstanding relationship with JZ, and always loved and used their products. I wanted to work with a company that had good credibility, good reach and good products. JZ not only make great microphones handcrafted in Latvia, but they have their own factory, so you don’t have to wait for some guy in a far-off corner of the world to do the machine work for you and then wait to send it back, pay custom duties, and then make comments and send it back again. Everything is in-house at JZ and was a lot more immediate, and I loved that. “I first approached my friend Edijs Ruiz from Latvia at NAMM about two years ago, and told him I had an idea. He said the company would be interested and they could manufacture a prototype in-house, and then proceed to put me in touch with CEO Andris Zemmers. I was very worried
60
August 2026 / www.soundonsound.com
about confidentiality, since nobody had done this before, so I told Andris that I wanted to discuss an idea after we signed an NDA, which we did. I already had a working prototype by this point, so we just had one Zoom call, and Andris loved the idea and was immediately on board! “It’s great to work with a company that feels so human, so direct, and so real: no board meetings, no approval process, no reviewing process, no endless meetings... pure action that turns ideas into products in record time. They loved the idea, and I sent them the prototype, and we made it happen! I loved the JZ Black Hole gold-sputtered condenser capsule, so I specifically asked JZ to use that particular capsule for the condenser. JZ had never made a ribbon, so they looked into where to source one and used my working prototype as a benchmark to follow and improve upon. “I use it the same way I would use any condenser, but if I have multiple sources in the same room, I think about the null point of the figure-8 polar pattern of the ribbon to achieve best cancellation. For example, I did a few records with a guitar player and a vocalist in the same room, and rather than have them face each other, I had them stand side-by-side, slightly angled for eye contact, so they were both in the null of the ribbon’s figure-8 pattern, which mean almost no leakage. “Really, the MU-1 works well on everything. I have yet to find something where I wasn’t happy with the results. The point is: you record two sources, and you can choose later whether you want to use only one or the other, or whether you want to blend them and in what amount or what ranges. You can use only the low end of the ribbon and the high end of the condenser to make a really full and rich sound, or you can do the opposite to tame sibilants on a vocal or fret noise on an acoustic guitar. You could add a de-esser or multiband compressor to the condenser but leave the ribbon unaffected, so that you never hear the ducking of the compression. Or when using it on vocals, you can record one of the two outputs at a lower level on your preamp in order to have a backup mic for when the singer screams or belts. If you have a very dynamic singer you can make sure you never have a distorted or unusable take. When recording drums, you could compress the ribbon with a fast attack and fast release so that you get more roominess out of the ribbon mic. The possibilities are endless. I look forward to hearing how people use this mic and what other creative ways they will find to use the MU-1!”
order to bring the sensitivity of the ribbon component up to that of the capacitor side, JZ have implemented a phantom-powered active circuit employing a custom toroidal transformer. By contrast, the capacitor circuit is transformerless. In practice, the levels of the signals derived from the two elements vary depending on the spectral content of the source and its placement relative to the mic. With close-miked vocals, I typically found that the signal from the capacitor element was slightly hotter than that of the ribbon. Sensibly, JZ provide separate specifications for the capacitor and ribbon elements within the MU-1; real-world performance will of course depend on how these are combined in use. The capacitor side boasts an impressively low self-noise figure of 6.5dBA and a sensitivity of 21mV/Pa. For the ribbon side, JZ quote an Equivalent Input Noise figure of -130dBu for the active circuitry. Output impedance is given as 50Ω for the capacitor and 250Ω for the ribbon, while maximum SPL for 0.5% THD is 134.5 and 125 dB respectively. On paper, this might be an issue when recording very loud guitar amps, though you’re unlikely to notice THD creeping above 0.5% when a Marshall stack is blaring away.
Blended Families As well as carrying out my own tests with the review mic, I naturally lent it to the same engineer who helped me test the BB29 half a decade ago. Between us we tried it on quite a few sources including drums, male and female vocals, amplifier cabinets and acoustic instruments. I quickly decided that he’d been right and I’d been wrong: the MU-1 is much more than just a way to make recording more complicated! In fact, the whole point is that it opens up new tonal possibilities without making recording very much more complicated at all. Used on its own, the capacitor capsule in the MU-1 matches my memory of the JZ BB29, in that it displays quite a prominent presence lift and a correspondingly ‘tucked in’ lower midrange. That works very nicely for some sources, including my own voice, but by its nature it’s a little bit hit and miss. Normally, when my initial mic choice proves a miss, my instinctive reaction as an engineer is not to put up another mic next to it and crossfade between them; it’s simply to dig out another mic with a different character and try that instead. Assuming you have both
The ribbon and capacitor elements in the MU-1 are positioned as close together as possible, to try to make them coincident and avoid phase problems.
outputs plugged in, the MU-1 gives you both options without having to do anything at all. In a typical on-axis, close-miking scenario, the output from the ribbon motor is as you’d expect much darker and smoother than that of the capacitor capsule. However, the combination of both has its own distinctive sound. It’s not really like swapping one of the MU-1’s elements out for a darker capacitor mic or a brighter ribbon. With the capacitor element dominant in the blend, you retain that bite at the top end whilst filling out the lows in a characteristically ribbon-y way, with tons of proximity effect and a slightly woolly warmth in the midrange. Flip the balance so that the ribbon mic dominates, and you can dial in just enough crispness to help the source cut through without things getting harsh. And, of course, that’s only the start of it. Since you have two entirely separate signals to play with, you’re free to record and process them through different signal chains. Filter all the top off the ribbon signal and all of the low end from the capacitor capsule, and shove them through different compressors with different characteristics. Use the ribbon signal to feed a reverb, while the capacitor signal supplies the dry component of the vocal sound. And so on.
I encountered only one real limitation when playing around in this way. I can absolutely see why JZ have chosen to make the ribbon element active, to avoid a huge sensitivity difference compared to the capacitor element, but the review mic backed up my experience that active ribbons are more prone to noise problems than passive designs. My benchmark for low noise in an active ribbon mic is the Rode NT-R, and I’d say the ribbon system within the MU-1 I tested was a good 10dB less quiet. It was not so noisy as to be a nuisance in most contexts, but some harsh-sounding hiss was apparent on quieter sources, or when I compressed things heavily. JZ told me that no noise problems had been reported with other examples, so perhaps I was just unlucky; certainly, the capacitor element was whisper-quiet. A problem I anticipated that did not materialise, meanwhile, was phase‑y weirdness with sources that move or are off-axis. The two capsules are close enough together to be considered coincident for most intents and purposes; sound arriving at 90 degrees is picked up off-axis by the capacitor capsule and rejected almost entirely by the figure-8 ribbon, whilst sound incident from behind is mainly picked up by the ribbon alone, so has a much darker character. With the two capsules combined at an equal level, therefore, the MU-1 doesn’t have a classically pure polar pattern, but in practice it’s fairly benign and doesn’t require singers to remain rooted to the spot.
Swiss Army Knife When I first heard about the MU-1, I’ll confess to a certain degree of scepticism. I wondered whether it might turn out to be a solution in search of a problem, or yet another excuse to avoid committing to a sound at source. It’s not. It’s a genuinely useful studio tool that addresses real-world needs. In the large majority of sessions that I do, there isn’t time to spend hours trying out different mics. The two elements in the MU-1 are sufficiently different that if one doesn’t work well, the other very likely will; and more often than not, the sweet spot is to be found by combining them. What’s more, this combination has a character all of its own. The MU-1 isn’t just two mics in one: it’s a whole spectrum. £ €2499 including VAT. W www.jzmic.com
www.soundonsound.com / August 2026
61
ON TE ST
CHRIS KORFF
“I
want AI to do my laundry and dishes so that I can do art and writing, not for AI to do my art and writing so that I can do my laundry and dishes.” So said author Joanna Maciejewska, and it’s a sentiment most musicians would agree with. But is the line between ‘laundry’ and ‘art’ so clear-cut? Many musicians (myself included) are wary of generative AI that promises to create entire songs with minimal human intervention. But every month we see more and more AI tools designed to aid, rather than replace, creativity. Is it still a betrayal of humanity to ask AI to reduce hi-hat bleed on your snare track, or colour-code your backing vocals? Similarly, and to inch slightly closer to the point, no guitarist wants AI to play their guitar for them. But what about your tone? Could you live with AI replacing your amp and pedalboard while you get on with the business of playing? Because that’s what Positive Grid’s new Reactor amp does. In addition to offering ordinary, human-steered amp and effects modelling, the Reactor’s USP is that it can take a prompt — text, image or audio — and generate your tone from it. If you’re ready to delegate your tone to AI, read on...
The Reactor The Reactor comes in two flavours — the 50W version supplied for review, and a 100W one — both of which are fitted with a 12‑inch speaker. They weigh around 11 and 14 kilos respectively, and look outwardly like ordinary modelling combos, with a familiar hardware control set. Deeper control (including the AI tone creation) is available from a dedicated app, but you can also use it as a fairly normal amp sans mobile device, which is where I’ll start. If you just want to find out what it’s like to WhatsApp your sentient guitar amp and ask it to make you sound like Steve Vai, skip ahead to the ‘Rise Of The Machines’ section. Almost all the controls sit along the top panel, on the far left of which is the input jack. The first dial is a large Amp selector, with six options ranging from Clean to Extreme. To the right of it are two ‘AI’ (‘Amp Intelligence’, in Positive Grid-speak) switches, which subtly adjust the amp model. The top one offers Push and Smooth modes, which primarily affect the frequency response; the lower switch is named Heat, and can increase or decrease the amount of saturation, independently of level. Next come five entirely self-explanatory knobs
62
August 2026 / www.soundonsound.com
Positive Grid Reactor Modelling Guitar Amp
Positive Grid’s newest guitar amp uses AI to sculpt your tone. We test its limits... (gain, bass, middle, treble, master), and then there’s an effects section. A rotary Level encoder is surrounded by buttons marked Drive, Comp, Gate, Mod, Delay and Revb, and each of these effects can be increased or decreased in level by pushing the relevant button and turning the knob, or bypassed with a long button press. Over on the right-hand side there’s a volume knob and a power toggle switch, and finally, above the tone controls are two buttons and four LEDs that let you save and recall your own patches (whether made using the hardware controls or the app), or engage a rudimentary tuner. There are two further controls round the back: a slide switch for selecting between three power ratings (1W, 25W or full power, ie. 50W or 100W depending on the model), and a Pair button for Bluetoothing your phone to the amp (both for control
purposes and audio streaming). There’s a host of additional socketry on the rear too, allowing for MIDI control, connection to the optional Reactor Control footswitch, bypassing the modelling and going straight into the power amp, taking a line or headphone out, and hooking up your own pedals via an effects loop. Finally, a USB‑C port lets you use the Reactor as a 1-in/2-out audio interface.
Phone Home The Reactor app runs on iOS and Android devices, and in common with Positive Grid’s Spark range, there’s no desktop control option. This I find slightly frustrating, because as slick as their mobile apps are, I much prefer using a proper computer for creative stuff; having to operate my phone tends to take me out of the zone somewhat. That said, it does work very well.
Functionality is split between three tabs, accessed at the bottom of the screen and named Tone, Creator Hub and ToneCloud. The Tone section is dominated by whichever of the 10 processing modules has focus. These modules are shown in a side‑scrolling list along the top of the UI, in the order the current patch places them in. Typical they’d be ordered something like Gate, Comp, Drive, Mod, Wah, EQ (seven-band graphic), Amp, Delay, Reverb and Loop (that’s the external effects loop, not a looper). Happily, these can be rearranged in any order by tap‑holding a module’s icon and dragging it between any other two modules — and this includes the Loop module, so you can place your own wah in front of the Reactor’s amp model, or use your own chorus after the modelled overdrive. Modules can be brought in and out of play by swiping them up (off, greyed out) or down (on, coloured). Tapping on a module opens its edit page, where you get access to parameters like Threshold and Decay (for Gate), Rate and Depth (for Mod), LFO shape and speed (Wah), and so on. Many of these modules offer a choice of processors, with GUIs inspired by real hardware. For example, Comp can be set to Sustain, Studio, Dyna or Opto; there are eight different Drive models (with names like Green Drive, Rat Dist and Muff Fuzz); the Mod menu includes two choruses, a flanger, a tremolo and a phaser; and there are four different flavours of Delay. The Amp module shows controls for Gain, Bass, Mid, Treble and Master, and these will reflect any changes to the same controls you make on the hardware. It’s all very intuitive; if you’ve ever used guitar rig modelling software before, you’ll be right at home.
The amp can largely be operated using the hardware controls, though for the AI tone generation you’ll need to use the mobile app.
At the bottom right of the app is the ToneCloud button, where you can access a huge library of complete rigs created by other Reactor users. The bottom middle button, though, is where the fun’s at, as this accesses the Reactor’s Creator Hub...
Rise Of The Machines Documentation was pretty thin on the ground when I first received the Reactor, although the AI-powered guitar tone generation was well trailed, so the first thing I did was install the app and start generating. Like ChatGPT et al, you can prompt the Creator Hub using natural language. On prompting, the app will think for a minute or so, before sending a text reply (see screenshot) and presenting a handful of tone options, which you can immediately audition by tapping a Preview button. I tried asking it to reproduce various guitar tones that I know well — starting with the obvious and getting progressively more obscure — and in no time at all I was shredding in the style of Dimebag, Frusciante, Hendrix and more. Whatever ‘tone database’ it draws from is clearly very extensive indeed. The first option the app presented was almost always the closest match, but the others often provided a useful variant. And even when I tried to catch it out (an obscure Monster The Reactor features an external effects loop, which can be placed at any point in the modelled signal path.
Positive Grid Reactor £299/£379 pros • Familiar, stage-friendly combo format. • Sounds great. • Extremely versatile. • Flexible processing with re-orderable signal chain, including effects loop. • AI tone generation works!
cons • No desktop control app.
summary A guitar amp that lets you use natural language to build a complete guitar rig. It sounds great, and it’s entirely intuitive to use.
Magnet B-side if you must know), it got the vibe right, if not the exact effects. Given a well-known song, though, the results were remarkably good — easily ‘professional cover band’ quality — and arrived at much, much faster than if I’d tried to build the same sort of sound from scratch. The Reactor can do more than just mimic famous guitar tones: it can also mimic specific pieces of equipment. And this is where I first encountered its limits. As I didn’t have access to a manual, I perhaps naively assumed that AI was governing the entire process, and that it was therefore capable of generating sounds outside of what you’d expect from a typical guitar rig. So when I asked it to “give me the sound of six Boss Metal Zones in series, all at maximum gain”, I was slightly disappointed to be told by the app that “Reactor only allows one Drive slot in the signal chain and doesn’t offer the Metal Zone specifically.” It did, however, give it a good go: all four options it presented me with were distorted and compressed in extremis, and while I’ve only ever been in a room with two Metal Zones, the results were not a million miles away from what I’d hoped for. Having loaded the first preset it offered, I returned to the Tone section of the app, and saw that the Creator Hub AI had
www.soundonsound.com / August 2026
63
ON TE ST
POSITIVE GRID REACTOR
actually built my ‘six Metal Zones’ patch by sending parameters to the various modules (in this case it had decided that the Rat Dist drive pedal would deliver the best results, placed before a ‘tight aggressive modern’ amp model with the gain wound up). So if you’re wondering how it works, it seems that when you send a prompt, Positive Grid’s servers analyse it, determine which of the Reactor’s processing modules would achieve the closest results, decide on the settings for them, and then send all those parameters back to your phone and thence to the amp itself. It’s not quite the boundless AI tone generation I first thought it was, but it is bloody clever. I wasn’t quite done conjuring tasteless guitar tones though, and I also wanted to test its gear repertoire a bit more, so as one final experiment I asked it to recreate the ‘Insane’ setting from an original Line 6 Pod. Reader, it excelled itself; from the fizzy distortion and ear‑splitting frequency profile to the overzealous noise gate, I was back in 1998 again and about to get kicked out of the guitar shop.
Sounds & Pictures Sound and image prompting was more of a mixed bag. The Reactor app’s ability to divine the content of an image is impressive; it correctly identified (and built some very usable ‘glassy’ tones from) a photo of a Roland Jazz Chorus I found on the Internet, and when I uploaded a photo of Zakk Wylde I found on Wikipedia its response was uncanny: “You requested a Zakk Wylde ‘Berserker’ tone inspired by his Bullseye Les Paul and wall of Marshall stacks.” So far, so literal... but in the spirit of experimentation, I also uploaded a couple of selfies, one of which the app decided represented ‘Midwest emo’, the other resulting in a “melancholic, lo-fi bedroom pop guitar preset inspired by a somber, weary portrait”. Thanks, I guess. Feeding the AI images of Balrogs was also quite entertaining, and invariably yielded atmospheric and doomy metal tones, usually drenched in reverb and delay. I chalked those experiments up as a win. As far as using audio goes, you can do this in two ways: either upload an audio file, or (more usefully) you can share your screen (and system audio) with the Reactor app. This makes it easy to play it a YouTube or Spotify snippet. Unfortunately, the results here were often wide of the mark, and the AI seemed to struggle to identify/mimic a guitar tone from a complete mix. Isolated guitar sounds worked better, but were still pretty hit and miss.
The Reactor app’s Tone page lets you view and edit any of the processing modules. The modules are listed along the top of the UI; tapping on one opens it for detailed tweaking.
Intelligent Design?
The Creator Hub lets you issue prompts to build your tone, and will usually offer a small selection of rigs based on your request.
So there is an element of novelty to the whole AI tone-creation thing. But provided you stick to text prompts, and stay within the realm of ‘normal’ guitar tones, it works remarkably well, and builds very usable rigs very quickly. Moreover, those rigs are editable, so if the Reactor AI gets you part of but not all the way there, you can intervene — either by going into and editing the individual modules, or by refining your prompt. For example, it did a pretty good job at
64
August 2026 / www.soundonsound.com
A simple “No chorus please, and a bit more saturation and weight in the lower mids” remedied it entirely. And, as well as being entirely intuitive to use, it sounds great too. Positive Grid’s amp modelling technology is well established and of excellent quality, and that’s very much on display here. The amp models sound organic and responsive, whether you’re asking for solid-state cleanliness, edge-of-breakup blues or high-gain mayhem. That familiar combo format also guarantees the Reactor will work as expected in both live and recording situations: it’ll fill a rehearsal room like a combo should, you can point an SM57 at it and get entirely predictable results, and you can take a line-level feed from it where that’s more convenient. I do understand why some modelling setups go the FRFR route, but using an extended-bandwidth speaker (with a tweeter) to play a digitally band-limited (via speaker emulation) signal strikes me as using a sledgehammer to crack a nut. The Reactor’s speaker sounds like a guitar speaker, and it sounds good. I don’t require more of a cabinet; your mileage may vary.
Laundry Service
generating the ‘Under The Bridge’ intro tone, but added some chorus that wasn’t entirely faithful to the original, and the sound was lacking a little grit on the lower notes.
To take things back to the beginning: does the Reactor only deal with laundry, or does it encroach on the art as well? Personally, I think it stays in its lane. While there is definitely something creative about assembling a hardware pedalboard, or selecting the right amp for a recording project, in the digital world those things often feel more like chores. Choosing effects emulations from a drop-down menu certainly doesn’t get my creative juices flowing, and trying to figure out what ‘MkIV Scooped’ or ‘AC Chime’ mean in a list of virtual amps can be infuriating. With the Reactor, you can simply use whatever descriptors you feel most comfortable with — whether that’s ‘American ’90s metal tone’ or ‘Randall Warhead with an MXR Distortion+ in front’ — and it’ll usually get you exactly what you want. Rather than trying to supplant you as the artist, in the case of the Reactor, the AI simply removes obstacles between the conception and the creation of your tone. Which is exactly as it should be. £ 50W version £299, 100W version £379,
Reactor Control pedal £129. Prices include VAT. W www.positivegrid.com
”Heritage Audio’s most ambitious piece of outboard gear to date.”
Learn more
The sound of yesterday, built for tomorrow.
FE ATURE
Robert Henke DIY Plus Ultra
As a musician, software developer, engineer and audiovisual artist, Robert Henke’s career has been defined by his ability to not only make things his own, but to make his own things. ROBIN RIMBAUD
F
ew figures have shaped the landscape of electronic music technology as profoundly as Robert Henke. Equally at home designing and building software instruments and creating immersive audiovisual performances, Henke has spent more than three decades exploring the creative possibilities that emerge when engineering and artistic curiosity collide.
68
August 2026 / www.soundonsound.com
Best known as the co-founder of the influential electronic music project Monolake and one of the key figures behind the birth of Ableton Live, Henke has not only redefined the sound of contemporary electronic music but, more significantly, how it is made and performed. Throughout his career he has consistently blurred the boundaries between musician, inventor and researcher. The reissue of his seminal album Interstate (1999) offered a chance to
explore the evolving relationship between technology and creativity, the philosophy behind instrument design, and how a lifelong obsession with sound continues to inspire him towards new artistic directions. Like all good superhero tales, we need to start at the beginning... “I come from a family of engineers. No artistic involvement whatsoever, but when I was young, I was interested in abstract and minimalist art and stuff like that. I discovered electronic music when I was a teenager, with the usual figures like Jean-Michel Jarre, Tangerine Dream, and everything that was on the edge between pop and electronic, like Yello, Depeche Mode, these kinds of things. “I decided to buy my own synthesizer, a Juno‑6, which got stolen at some point, which is really a pity. I moved to Berlin after finishing high school, and then things really took off because I was suddenly surrounded by everyone who was involved in this new upcoming electronic music centred club culture. “I never, ever thought I would be an artist and always considered it an essential hobby. I worked in video post-production companies, as a theatre sound guy, a mastering engineer, those kinds of things. I always did jobs that were very, very much related to music or to sound at least, but always gave me a back door just in case whatever I was doing artistically turned out to be nonsense. “The positive aspect, I believe, is that I was never forced to consider making a living and making compromises. I witnessed a lot of people who, in my opinion, were compromised by the fact that they had to create music that is successful, you know, as a DJ playing the stuff people like, as a music producer, doing something a bit more rhythmical because that sells, those kinds of things. “I never felt that urge because I could always pay my bills with my other work. The negative side I think, in retrospect, is of course that a full commitment to the arts is also beautiful in itself. So, step by step, I moved from considering it as a hobby to considering it as the most important thing to do in my life. This became especially evident when Ableton was founded, and I had to make the decision between dedicating my life, my career, whatever, to the company or to find a different way. “And this is why I can also clear up an urban myth. I’m not a founder. I declined that offer because I said, if I start founding this company together with Gerhard
[Behles] and Bernd [Roggendorf], I will not make music any more. And I don’t think this is a good idea.”
Do It Yourself For Henke, however, software has never been merely a tool for producing music. It has become a creative medium in its own right. While Ableton provided an extraordinarily successful platform, his own artistic practice increasingly led him toward bespoke systems, including custom-built instruments and self-developed applications. In a commercial world his approach is appealingly positive and encouraging. “I make these things for myself. They inspire me and it’s fun to do. They provide me with new ideas and those kinds of things. I need to make a living, sure, but I owe so much to all the people who were generous in my life — people who shared ideas with me, who let me borrow their equipment, who listened to me. I could only become who I am due to the generosity of other people. “And if I build something, turning it into something that generates income would at first mean more effort, you know, setting up a web shop, etc, and I’d rather give it away for free because it’s there anyway, and
Henke’s studio is a combination of minimal workstation...
what I get back is that people are happy. And to me, this is sufficient. “It was not my career decision to become a software developer for my own little things. In general, I would separate, of course, my work at Ableton from that, because my work at Ableton means I need to do something that is appealing to a lot of users. And there is, of course, a lot of interaction with other stakeholders and discussions and stuff like this. So that is in many ways decoupled from what I would do only for myself.
“The stuff that I do for myself indeed is part of my creative process, and the reason is that I have a specific artistic idea, and I have a vague idea how to get this done technically. And then I build it and the process of building takes time. I have lots of ideas, but I make a conscious decision to say, OK, I invest a day or two into this specific idea, and afterwards the result is something that became for me valuable because I invested time, and that means I got to explore that.
... and “a small, but carefully curated collection of machines”, many of which reflect his enthusiasm for classic digital effects and instruments.
www.soundonsound.com / August 2026
69
FE ATURE
ROBERT HENKE
The CBM 8032 AV project uses five vintage Commodore computers to create music and visuals, which is not nearly as easy as you might imagine — even if you imagine it’s quite difficult!
“Recently, I built a little reverb. There’s nothing special about it apart from the fact that it’s a very old technical infrastructure. It’s inspired by the very early digital reverbs from the 1970s and it sounds deliberately bad by nowadays standards, but it has wild modulation capabilities, and it creates this beautiful big, lush, low-density chorusing effect. Since I made this thing I use it a lot, and it becomes part of my artistic colour, so to say. And for me, this is satisfying and is a justification for doing it. In a way, I extended my palette. You know, it’s similar to buying a new instrument or to learning a new playing technique or something.” For someone whose career has been defined as much by software as by sound, Henke maintains a surprisingly nuanced relationship with technology. Though he is often associated with the dematerialised world of digital production, his creative practice reveals a deep appreciation for the tactile and emotional qualities of physical instruments as well. While he is quick to acknowledge that modern software can replicate much of what vintage hardware achieves sonically, he remains fascinated by the unique sense of presence that electronic instruments possess. For him,
70
August 2026 / www.soundonsound.com
the appeal of a synthesizer extends beyond its functionality; it lies in the rituals and sensations as well as the intangible and surprising connections that emerge when a musician interacts with a physical object. “My relationship with equipment is interesting. In theory, and often enough in practice, I am completely fine with having my laptop with MaxMSP and Live, which allows me to do everything I want. Practically, I’m very happy that I have a small, but carefully curated collection of machines that I really love. And it’s not that these machines can do something that I could not achieve from a musical perspective with software alone. If I use an analogue synthesizer or if I use a plug-in emulating a synthesizer, if I listen to the result, honestly, it comes down to the same thing. The question is more: Do I get some specific inspiration from the physical presence of this object in front of me? For me, a huge part of what makes electronic music enjoyable is the fact that here is this machine and if I turn it on it becomes alive. It might have a transformer that makes some mechanical noise, it has knobs, LEDs that glow in the dark, there is just a very strong physical presence. Then you hit
a key or turn a knob or patch a cable and something happens. There is something a bit metaphysical about it, that goes beyond the functionality.”
CBM 8032 AV Among Robert Henke’s most distinctive recent works is CBM 8032 AV, an audiovisual performance that transforms a network of vintage Commodore CBM 8032 computers into a sophisticated instrument for sound and image. Developed between 2016 and 2023, the project embraces the severe limitations of early 1980s computing technology, using five restored machines with monochrome green CRT displays, custom software, and bespoke hardware modifications to generate both music and graphics in real time. It’s an excavation of almost obsolete technology combined with a strong artistic statement, and also reveals how creativity can flourish within extreme limitations while questioning our relationship with increasingly complex digital tools. I was curious to learn what inspired him to work with a computer that has less processing power than a domestic washing machine. “I learned programming at school in the ’80s on these types of computers.
ON TE ST
Kernom Elipse, Ridge & Moho
Hybrid Effects Pedals
The Moho: a versatile fuzz pedal, capable of various vintage-inspired tones.
Adding digital control to analogue guitar pedal circuits can be particularly tricky, but Kernom have come up with a fresh approach... SAM INGLIS
F
rench manufacturer Kernom have created an intriguing range of effects pedals, which are based around a novel technology they have dubbed the Analog Morphing Core. Most of us will now be familiar with digitally controlled analogue circuits. For example, many audio interface mic preamps now place their gain settings under digital control, allowing them to be precisely adjusted, recalled, and remotely configured. However, these designs are usually based around complex integrated circuits, whereas many guitar pedals are very basic circuits that use only a handful of components. In their original form, these circuits don’t lend themselves to conventional digital control, but modifying the circuit to make it possible risks changing the sound. Kernom’s innovation is to apply digital control to the bias point of diodes and transistors, allowing their transfer curves to be modified and to recreate the way those components are used in different pedal circuits. The intention is that each Kernom device can cover a range of sonic territory that would normally require half
74
August 2026 / www.soundonsound.com
a dozen traditional pedals. And on top of that, it’s possible to morph between different effects in real time, and to store and recall preset settings over MIDI.
Core Strength The range currently comprises three pedals, all using the same stout metal case. The audio I/O is on jacks, as you’d expect, but the Elipse and Moho can accept line-level signals as well as guitar inputs, whilst the Ridge can be switched from the default high-impedance mode to a line-level mode, accepting signal levels up to +24dBu for studio use. A further full-size jack accommodates an expression pedal, while MIDI in and out are on 3.5mm sockets. The pedals require a centre-negative 9V DC power supply that can deliver at least 150mA (Elipse) or 250mA (Ridge and Moho); no supply is included. The Elipse, Ridge and Moho are, respectively, billed as modulation, overdrive and fuzz pedals. The foot-operated Preset and On/Off switches are identical on all three, the latter toggling a relay-switched true bypass. All three pedals feature a Mood dial, which sweeps between different
circuit types with different properties. On the Elipse, for example, there are six positions labelled Harmonic Tremolo, Rotary, Chorus & Vibrato, Flanger, Phaser and Vibe, but since the Mood control is continuous, it can be parked either on one of these settings or between two adjacent ones. In this case, the other five controls are Speed, Shape, Depth, Mix and Swirl, of which all but the last are self-explanatory. It should be pointed out that all three pedals are in fact hybrid devices rather than ‘pure’ digitally controlled analogue. The exact division of labour between the analogue and digital processing stages varies, but Kernom say everything that affects the tone of the output happens in the analogue domain. So, again using the Elipse as an example, the modulated delay line is digital, but the Analog Morphing Core recreates “the tonal characteristics of a bucket-brigade device”. In each case, the digital conversion and processing introduces a total latency of 1.2 milliseconds. Kernom’s preset handling system is implemented on two levels. If you use the pedals standalone, a single preset can be stored and recalled, by a long and
short press on the button respectively. Connecting an expression pedal permits you to morph continuously between the stored preset and the ‘live’ settings. With a preset active, the controls operate in a ‘catch and turn’ mode, whereby the LEDs above the two switches flash purple to show in which direction the stored value lies. Connecting a MIDI controller opens up a lot more possibilities; up to 128 presets can be stored and recalled using Program Change messages, and it’s possible to assign separate presets to the two extremes of the expression pedal’s travel. Parameters and presets can also be changed using MIDI Continuous Controller messages. With no onboard display, software editor or preset naming scheme, though, you’ll need to be on top of things at the controller end to avoid confusion.
Total Elipse The Elipse stands out from the other two pedals in that it doesn’t just offer multiple flavours of a single effect: it presents multiple distinct effects. What’s more, the implementation of each is impressively comprehensive. For example, it might seem redundant to have both a Depth and a Mix control for rotary speaker or
tremolo, but Kernom have deployed them with considerable imagination. Set Depth and Shape to the halfway position and the mix fully wet, and the rotary speaker emulation sounds convincingly like the real thing. Store it as a preset with a slow Speed setting, then turn the Speed up and you can use an expression pedal to rock back and forth between slow and fast Leslie sounds. But other positions on the Depth and Shape knob deliver new and unfamiliar takes on the same effect, many of which are still musically useful. The same goes for the other effects. The harmonic tremolo is a particular highlight, sounding fantastic as it is and morphing into a more aggressive chopping effect once the Depth control goes beyond halfway. The chorus/vibrato recreates the classic tri-chorus effect as well as the basic sounds you’d expect, while the phaser and flanger are rich and smooth. All are nicely augmented by the Swirl control, which adds an additional layer of slow phasing, plus subtle overdrive depending on position. It is possible to create hybrid effects by setting the Mood dial to intermediate positions, and an expression pedal can be used to morph between two entirely different settings. In practice, I largely preferred the individual effects
Kernom Elipse, Ridge & Moho From £239 pros • Kernom’s Analog Morphing Core technology makes all three pedals uniquely versatile. • Capable of recreating many classic effects and sounds, but also of going well beyond them. • Well thought-out use of presets, MIDI control and expression pedal.
cons • The Elipse would be even better in stereo.
summary Kernom’s chameleon range of effects pedals combines digital versatility with analogue tone-shaping.
in their pure form, not blended, while sweeping morphs tend to sound messy rather than dramatic. I found the morphing more useful for single parameters such as modulation rate or depth. But at the end of the day, you’re getting six very high-quality modulation and delay-based effects in a single box, each of them surprisingly versatile in its own right. If there’s a down side, it’s that they’re all mono; I would have loved a stereo output for effects like
The mono Elipse is capable of various modulation effects, from tremolo and chopper to rotary speaker or chorus.
www.soundonsound.com / August 2026
75
ON TE ST
KERNOM ELIPSE, RIDGE & MOHO
the rotary speaker and chorus/vibrato, especially in a studio context.
Tone Machines On both the Ridge and the Moho, the two central Tone knobs filter the sound going into and emerging from the distortion circuits. They’re not limited to rolling off the top end, either; settings beyond halfway make the sound brighter. Both pedals also feature self-explanatory Volume and Drive controls. On the Ridge overdrive, the top left control is labelled Mid, and provides further tone-shaping, with low settings delivering a ‘scooped’ sound whilst positions above halfway push the upper midrange. On the Moho fuzz, this control is labelled Electricity, and engages an octaver. The added sound is an octave down in positions below halfway and an octave above in positions above halfway. The Ridge offers five Moods, ranging from clean boost through to high-gain pedal distortion, and if you really want to overload your amp, its output can be optionally toggled to a Punishing Voltage mode with a ±15V swing. Its three tone controls are well thought-out and complement each other nicely, although it’s perhaps unlikely to expand your sonic horizons to the same extent as the Elipse, given that overdrive and gain pedals with extensive tone-shaping options are not particularly unusual. To my ears, there’s also a characteristic hard edge to the more distorted settings that is great for helping your lead tones cut through, but
The Ridge overdrive can be switched to accept signals up to +24dBu, so is as suitable for general studio duties as it is for guitar.
the in-between positions are worthwhile, although variations in output level as you rotate the Mood dial can occasionally catch you out. If the sound of an octave
“If you are a connoisseur of overdrive, the Ridge will keep you busy for days.’ difficult to tame using the tone controls if that’s not what you want. Even so, if you are a connoisseur of overdrive, the Ridge will keep you busy for days. There are likewise five Mood settings on the Moho, described as “early fuzz sounds”, “vintage psychedelic era”, “grunge tones”, “early modern high gain territory” and “ring modulator zone”. Once again, the expression pedal input is useful for making relatively straightforward changes, such as fading the octaver in and out, but I was less successful at finding musical uses for full-on morphing. Even so, this pedal is enormous fun. The various flavours of fuzz are different enough to be distinctive and useful, the ring mod is appropriately clangorous, and
76
August 2026 / www.soundonsound.com
fuzz doesn’t bring a smile to your face then I’d suggest electric guitar is not the instrument for you!
Colourways It’s become fairly standard for pedal manufacturers to exploit a single platform in multiple ways. Some even produce digital pedals that are internally identical, and just run different code depending on whether they’re sold as a reverb or an amp simulator. There are certainly design elements that are common to all three of these pedals, but the key difference is that Kernom’s code isn’t just processing the sound. It’s modifying the behaviour of the same analogue components you’d
find in a typical overdrive or fuzz. As a result, they’ve managed to marry digital versatility with true analogue signal processing. It’s perhaps ironic, then, that my favourite of the pedals is the Elipse, which is arguably the ‘least analogue’ of the three. But I think that just goes to show that Kernom are good at DSP too. The Elipse certainly has the potential to replace five or six conventional pedals, and if you’re obsessive about overdrive and fuzz, so do the others. For live use, you’ll get more out of them with a MIDI controller to recall multiple presets, but for studio tinkering, the control set is compact enough to make them immediate and engaging right out of the box. At prices that compare favourably with buying a single boutique overdrive, each of these Kernom pedals could replace an entire section of your pedalboard. £ Ridge £239, Moho £279, Elipse £289. Prices exclude UK duty and VAT.
W https://kernom.com
BANDBOX TRIO
BANDBOX SOLO
JBL BANDBOX SOLO and TRIO are portable practice amps with real-time AI that separates vocals and instruments, provides powerful JBL sound, and comes loaded with built-in guitar effects. No band? No problem.
FEATURING: Real-time AI stem separation
Built-in amp tones and pedal effects
Bold JBL sound
Portable with built-in battery
4-channel mixer* * TRIO only
JBL BandBox is exclusively distributed in the UK and ROI by Sound Technology. For more information please call 020 8962 5080 or visit soundtech.co.uk
ON TE ST
Runic Labs Passive DI Eurorack Module
D
I boxes might not solicit the most excitement as a prospective Eurorack investment, but in an ecosystem that is by now as much about holistic electronic production as it is about synthesis in the purest sense, it has never been more important to make sure that what’s coming out is worthy of the work you’re putting in. Extracting the best possible signal out of a modular system can sometimes be rather a headache, with ground-related issues, analogue noise floors and the rest. That’s also before you get to the obvious fact that modular level is incredibly hot, more often than not precluding the meaningful use of any preamps on the way into the box and consequently limiting the scope of their
78
August 2026 / www.soundonsound.com
relationship with the rest of your outboard gear. Enter Runic Labs, a new developer from Glasgow whose debut design is the aptly-named Passive DI. Needless to say, to open proceedings with such a fundamental utility is a bold move, but as a devoted user of such units as the Golden Master Pedal from Endorphin.es and a proponent of the ‘high‑pressure audio’, I can say with some certainty that when a design comes along to add that extra something to your end‑of‑chain signal, it’s well worth paying attention. There are, in fact, surprisingly few Eurorack designs in this category worth writing home about. The closest thing to the Runic Labs design is probably the also-transformer-based XFMR Euro DI Output Module from Turkish developer Vaemi; beyond this are a handful of other variations on the theme, but I daresay Runic Labs are here offering something rather pure; a genuinely no-compromise DI that stands tall next to anything by the likes of Radial, Telefunken or Rupert Neve Designs. We’re told that this particular module began life as a regular DI box taped into
a Eurorack performance case, with custom panels designed to bring the I/O into a patch-friendly format; Runic Labs even sent me the original breakout panels with my review units to illustrate the story. Indeed, based around a weighty, British-made Carnhill OEP mu-metal shielded transformer, it’s clear from the outset that this is nothing less than a piece of high-end studio gear in modular form. To my ear the transformers in question are as detailed and subtly warm as you could want them to be for such a multi-faceted purpose as funnelling a Eurorack system, and the addition of 10dB and 20dB pads (plus the option for the two to work together as a 30dB pad) also gave my studio’s mic preamps an opportunity to flex with some nice harmonic saturation. As is often the case with these things, it’s difficult to quantify the impact of every stage of the signal chain down to a granular level without truly forensic testing, but listening to, for instance, a single saw wave hitting my DAW at exactly the same peak level both with and without the Passive DIs in the chain, there was a noticeable enough difference in signal smoothness and harmonic content. Runic have paid good attention to ensuring these can work well in pairs and just as well in fours, with high‑precision metal-film resistors promising negligible signal variance of 0.1%. Although they’re just 6HP apiece (though with faceplates happily offering four screw holes to keep things secure when plugging in hefty XLR cables), mounting four of these in your system, a total of 24HP, might start to feel like quite a concession on rack space; but to this end I might recommend something along the lines of an unpowered 4MS pod (being passive, of course, they don’t need any power), rendering the Runic PDs a very smart — and compact — standalone DI rack. After all, impressively, each is just 36mm deep. With a ground-lift switch and, usefully, a jack for thru completing the picture (as someone who
routinely sends signals to amps and into the console concurrently, this was welcome), Runic Labs’ debut DI is a robust, quality piece of gear that will unequivocally improve the sound of your system. Fair to say the price is, for a DI box, considerable. But — to play the devil on your shoulder — once plumbed in, would you ever regret it? William Stokes £
£279.
W
www.runic-labs.co.uk
Shakmat Ballista Blast Eurorack Module
C
arving out a lot of functionality in a 12HP module is the Ballista Blast from Shakmat. It’s a hybrid synthesizer voice that lets you play with three synthesis engines, four analogue filter types and an analogue processing chain through an overdriven VCA or LPG. It has a built-in envelope that can control four things at once, some interesting parameter randomisation, and you can store up to 256 of your favourite sounds and configurations. The three oscillator engines are Classic (subtractive), Wavetable and FM. They all have a decent level of detail you can drill down into via the very small screen and accompanying buttons. There are dedicated knobs for Pitch, envelope Attack and Decay, while Harmonics and Emphasis knobs control the filter in the Classic and Wavetable engines, and Modulation Depth and Feedback in the FM engine. The most powerful knob is the Parameter control in the middle, and that does different things depending on where you are. In the Classic engine, you have a choice of sawtooth or square wave, and seven modes, all of which redefine the Parameter control. Sub mode adds a sub-oscillator, and Parameter acts as a crossfade. In Dual mode, we get relative tuning; in Unison we get detuning of supersaws or supersquares. Sync mode gives us tuning, Width mode gives us PWM and sawtooth variable shaping, and Noise adds noise. Chord mode gives us four notes and the Parameter knob dials through predefined harmonic structures. It’s great for little stabs, but once you employ some of the modulation, it can really soar as pads and drones. The Wavetable engine has 32 tables of eight waveforms covering a nicely diverse range of sounds, and you can add your own via the SD card. The mode buttons step through the wavetables while the Parameter knob lets you scan the waveforms.
The FM engine is particularly lively, offering an interesting range of algorithms that only give you a couple of controls, and it feels all the more fun for it. In most cases, the Harmonics knob is piling on the FM depth, while Emphasis folds and shapes, and the Parameter knob pushes into the tuning. It’s really easy to find sounds that punch through the rest of your modular and add a splash of metallic, twinkly, harmonic colour. The screen is bright and very clear. The writing and graphics are well chosen to express what you’re currently working on. It is, however, very fiddly, and once you’ve chosen your oscillator, there are two more screen-based aspects to wade through. The Analog menu lets you choose filter types, tracking, VCA mode, distortion type and amount, and output level. The Modulation menu lets you choose between several useful envelope types. These are all mode and feature choices that tend to fall away once you’re using the front‑panel knobs. There’s a dedicated modulation Depth knob with the option to direct the envelope to up to four destinations. This uses LEDs rather than the screen, and you can set the depth individually for each destination and cycle through them. This gets very powerful in making sounds animate away from their usual, familiar territory. You also have a Randomiser that can influence most of the parameters on a gate signal, and a Velocity control that will scale whatever you patch it to in response to incoming CV. You can add further modulation with up to two Ballista Blast Expansion modules, which inject a very shapeable LFO into the fray. Sadly, none of the internal modulation can be routed to the preset selection — that would have been fun, but you can do that externally. This much functionality in a compact module is always going to be a challenge for the interface. Crafting sounds on that screen and buttons is a bit fiddly; there’s no way around it. However, the sounds you find in here are really fabulous. As an analogue-sounding voice, it’s really thick and gooey, with unison modes giving you something tasty for the filter to bite down
Modular Profile: Gareth Jones
G
areth Jones is by now one of the most eminent synthesists in the UK. A veteran producer and mixer with records by John Foxx, Interpol, Mogwai and many more to his name, he spent his formative years at the legendary Hansa Studios in Berlin, where he created groundbreaking albums with the likes of
upon. The wavetables are fine, but not the most interesting thing in here, whereas the FM is great fun with minimal but lively control. The biggest reward for patiently working through the screen and menu system is that you can save the preset and come back to it without having to touch the buttons ever again. In performance, it sounds great, the controls feel brilliant, and the front‑panel action is very playful and intuitive. Through the CV scannable preset system, the Ballista Blast has the ability to bring instant tonal changes, and once you’ve made a selection, it becomes a hotbed of variation that will have you playing and fiddling endlessly. Robin Vincent £
£369.
W
www.shakmat.com
Depeche Mode and Nick Cave & the Bad Seeds. Jones creates intricate and experimental electronic compositions, both as one half of Sunroof with Mute founder Daniel Miller and solo as Electrogenetic. His latest album Electrogenetic 2: Nos Da is out now on Mortality Tables. On his entry into modular My entry into modular synthesis
www.soundonsound.com / August 2026
79
ON TE ST MODULAR
wasn’t a sudden conversion so much as a gradual return. My first real encounter goes back to the 1980s, when I purchased a Roland System‑100M. It introduced me to the idea of building sound from first principles; patching signal paths, shaping voltages, and discovering relationships rather than relying on presets. Years later, when I decided to dive into Eurorack, I found myself unexpectedly overwhelmed. Even with a clear budget, I had no idea what to spend it on. I made several visits to SchneidersLaden in Berlin, and each time I was completely disoriented by the sheer range of possibilities. It was Andreas Schneider who gently guided me through that moment. His advice was beautifully simple: buy a small case, choose just a couple of modules, and begin. That approach changed everything. Coming back to modular in this way felt less like learning something new and more like reconnecting with a language I’d once spoken. It reawakened a beginner’s mindset — where curiosity leads and where not knowing becomes the most valuable starting point. On his go-to modules My go-to modules tend to be those that blur the line between utility and instrument. I’ve always been drawn to modules like [Make Noise] Maths, Mimeophon, Wogglebug and QPAS, not necessarily for what they are on paper, but for how they behave in context. Maths, for example, is endlessly revealing. It can be envelope, LFO, logic or something more abstract depending on how it’s patched. Mimeophon brings a sense of space that feels almost performative — it’s not just delay, but a shifting environment. Wogglebug introduces a kind of animated unpredictability that keeps the system alive, while QPAS offers a sculptural approach to filtering that feels very musical.
80
August 2026 / www.soundonsound.com
Alongside these, I’ve had a very positive experience working with the Music Thing Modular Workshop System. Its relative limitation is actually its strength. With a smaller, more defined set of tools, you’re encouraged to go deeper rather than wider, and that can lead to a much more intimate relationship with the instrument. Within that, the little computer section has a vast and surprising potential — it opens a door to programmability and variation that can transform even the simplest patch into something evolving and alive. What interests me most is how modules interact. Often, I’m less concerned with individual functions and more with the ecosystem they create together. On Electrogenetic 2: Nos Da Electrogenetic 2: Nos Da is deeply personal for me. The title itself comes from something my father used to say to me each night — ‘Nos Da’, which means ‘good night’ in Welsh. As a child, I misheard it as ‘no star’, and that misunderstanding stayed with me in a strangely poetic way. The record is built around memory, inheritance and listening across time. Many of the sounds originate from my father’s record collection — small fragments, textures, and atmospheres that I’ve recontextualised within a modular framework. It’s a kind of dialogue between past and present. A significant part of the album was created outside the studio, in places like an English countryside hotel and on a terrace overlooking the Aegean Sea. Working in those environments influenced the pacing and openness of the music. For the core of several pieces, audio was conjured from modules not usually considered primary sound sources, like Maths and Wogglebug. Treating these as generators rather than processors opened up unexpected sonic territories, where the material felt discovered rather than designed. Ultimately, this album is a gesture of gratitude. A way of saying good night, and thank you. On Berlin and Hansa Studios When I first worked there, the city itself carried a very particular energy — divided, intense, and creatively charged. That atmosphere inevitably found its way into the music. Hansa offered a unique combination of precision and possibility. The technology — especially the early digital systems and the SSL console — was cutting-edge, but there was also a strong sense of experimentation. At that time, I very much felt that I was playing the studio as an instrument. The entire environment — tape machines, outboard, routing, the console — became part of a modular system in its own right.
Working with artists like Depeche Mode in that context was about shaping signal flow as much as it was about capturing performance. Sound wasn’t fixed; it was something you navigated, patched, and discovered in real time. What stayed with me is the idea that a studio can be more than a technical space. It can be a living system. In many ways, my work with modular now feels like a direct continuation of that approach: an open, exploratory dialogue with the architecture of sound itself. On the culture of modular The culture around modular synthesis is something I find deeply encouraging. There’s a strong sense of community, curiosity and shared exploration. People are often as interested in how something was discovered as they are in the result itself. What feels particularly vital at the moment is the culture around open-source and open‑access digital modules. There’s an incredible generosity in the way knowledge and tools are shared. A beautiful example is the community surrounding the Music Thing Modular Workshop System computer cards, where people are constantly developing and exchanging new ideas, extending the instrument in unexpected directions. Similarly, the ecosystem around the Expert Sleepers Disting EX and NT is remarkable. The module itself is already extraordinarily capable, but what makes it truly special is the wider community — developers and users creating add-ons and new ways of thinking about its potential. What I appreciate most is that this culture resists fixed hierarchies. There’s no single correct approach. Modular becomes a shared language, shaped collectively, yet expressed individually. In that sense, it’s not just a technology. It’s a living, evolving practice. William Stokes
ON TE ST
imersiv D-1 D-A Converter
Imersiv’s claims to have delivered a revolution in D-A conversion technology aren’t mere snake oil: the D-1 outperforms every other current DAC by a huge margin. And, importantly, the differences are audible... HUGH ROBJOHNS
I
mersiv is a new name, but it’s a spin-off from a very familiar company: Millennia Music & Media Systems. Founded by John La Grou in 1990, Millennia have been impressing SOS and many others with their high-end gear ever since. John decided to create the new imersiv marque because their products will be based on a radically different technological concept from Millennia’s. In fact, as you’ll see below, it’s a radical departure from everyone’s products! Their first release is the D-1, a stereo digital-to-analogue converter (DAC). That might sound ‘ordinary’ to you, but I assure you this converter isn’t! It outperforms every converter that I’ve tested previously, and by a considerable margin. It’s not just about tech-spec bragging rights either: there are clear, audible benefits to imersiv’s innovative approach. Yes, it’s eye-wateringly expensive, but don’t let that put you off just yet: this is
82
August 2026 / www.soundonsound.com
the sort of technological breakthrough worth being aware of, and which should in time filter through to products that we’ll all use.
Technology Before I dive into the details, it’s probably helpful to put imersiv’s achievement into context. Back in 1887, Edison’s original cylinder recorder had a usable dynamic range of just 15dB. The first electrical sound recording and replay systems (to 78rpm disc) raised the benchmark to about 40dB, and magnetic tape, widely adopted in the early 1950s, was another big step up in quality, increasing it to around 65dB. In the early 1980s, the industry adopted 16-bit digital audio, which raised the potential dynamic range to about 90dB (soon to be largely wasted in the ‘loudness wars’!). Each of those major technological leaps increased the dynamic range capability of both recording and playback systems by roughly 25dB.
But while we’ve recently seen 32-bit floating-point converters appear on the recording side (more on that parallel later), when it comes to D-A conversion there’s been only a continual stream of small, incremental improvements. In fact, averaged over the last 45 years or so, the dynamic range of D-A converters has improved by just 0.8dB per year — that’s roughly the same as the continuous average rate of dynamic range increase since 1887! Don’t get me wrong. Those improvements result in a modern crop of high-end D-A converters that is good. Very, very good, in fact! The best I’d measured before now achieves a dynamic range of around 125dB, which is the equivalent of 21.5 bits of ‘resolution’. Looking across the
imersiv D-1 £12,000 pros • A genuine step-change in DAC technology. • Groundbreaking technical specs. • Lower distortion clearly audible. • Easy to configure.
cons • I can’t afford one!
summary The imersiv D-1 is the first product to employ a revolutionary approach to D-A converter design, and it shows. The D-1 achieves a dynamic range that’s two orders of magnitude (40dB) greater than even the very best of its contemporaries, and a noise floor so low that it’s unmeasurable. This really is the new state of the art!
league table of D-A converters that I’ve personally tested, the top seven all achieve AES17 dynamic range figures of over 124.5dB, and they all sound superb. Nonetheless, the development of DACs with more than 22 bits of real dynamic range has proven a stubborn technological challenge. It’s a challenge to which imersiv have risen — it’s also a ceiling they’ve shattered! They claim that the D-1 DAC’s ‘HDR-A’ technology delivers 28 bits of real dynamic range, which equates to an extraordinary 168dB. That’s an astonishing increase in dynamic range of around 40dB, and genuinely a step change. But that headline-grabbing dynamic range figure isn’t even the main benefit! After all, who can realistically listen to anything with more than about 130dB dynamic range without causing damage? The real, practical benefit for those listening is a natural side-effect of that vast dynamic range: a substantial improvement in distortion levels for mid- and low-level signals, over even the very best conventional D-A converters. In a conventional converter, as the digital signal level reduces, so too does the signal-to-noise ratio; the wanted signal becomes closer to the dithered noise floor. Equally important is that the total harmonic distortion (THD) rises as a proportion of the wanted audio signal (hence, manufacturers always specify converter THD at 0dBFS, where they obtain the smallest possible figure!). This matters, because a lot of recorded music spends much of the time in those mid- and low-level regions — and substantially lower distortion there is experienced as the proverbial “removing of a veil between the source and the listener”. Put simply, it brings more vivid clarity and naturalness to the recorded sound. It’s fair to say, then, that the D-1 is a revolutionary, rather than an evolutionary, technology, and that imersiv are fully justified in calling it a ‘paradigm shift’. So let’s now look more closely at how they’ve achieved this...
The Photography Analogy Imersiv’s new technology is called HDR-A, which stands for High Dynamic Range Audio. The terminology is borrowed from high dynamic-range photography and, while not quite a perfect analogy, there are useful similarities. HDR photography typically blends high-, medium- and
This diagram, provided by imersiv, illustrates the digital gain-mapping concept that lies at the heart of this technology. Effectively, the aim is to ensure that the signal is always in the optimum operating range of the converter chips, whatever the actual signal level.
low-exposure images in a clever way, to capture the enormous dynamic range of real life when using camera sensors that have insufficient dynamic range capability to cope unaided. In this way, details are preserved from both the darkest and brightest areas, as well as in the mid tones. Now, photographic HDR is, technically, a form of dynamic range compression — so before anyone starts panicking, I want to stress that there’s no dynamic audio compression involved here. HDR-A is simply borrowing the idea of using multiple sensors, each optimised for different parts of the dynamic range. In essence, HDR-A employs multiple independent D-A signal paths, each for a different sector of the source’s dynamic range. In theory, any number of paths could be combined, but to keep the explanation clear let’s consider just two: a high-level path and a low-level path. The analogue output is derived by combining the signals from the separate D-A converters used in each path, to deliver an overall dynamic range that’s far greater than any conventional single
D-A stage could ever achieve. More importantly, this configuration also achieves much lower (like 40dB lower!) noise and THD than ever before. Now, as I explained, the THD always rises as the digital input level falls. The idea behind the multiple paths tactic is that, before the THD rises too far in the high-level path’s converter, the HDR-A technology switches the digital input across to the second (low-level) converter path. To optimise the performance of this second converter, this lower-level portion of the digital input is bit-shifted upwards, so that it feeds the second converter at the top of its own dynamic range window — there, the THD is again extremely low. Consequently, the THD across the mid and low range of this HDR-A converter is much lower overall. This concept might remind you of the multiple A-D converter configurations I mentioned above, which have become de rigeur in portable floating-point digital recorders in recent years. Yet, while the concept is similar, it is also different in significant ways, and there’s
www.soundonsound.com / August 2026
83
ON TE ST
IMERSIV D-1
one particularly important distinction. Although multi-path A-D converters currently deliver 32-bit floating-point outputs, a floating-point signal has only 24 bits of absolute signal resolution; the rest of the floating-point data is used to scale those 24 bits up or down within a vast dynamic window, to provide almost unlimited headroom and an incredibly low processing noise floor. That’s not technically the same thing as a contiguously expanded dynamic range. In contrast, the D-1 can accept fixed-point audio with up to a 32-bit word length — and in that case, it provides a contiguous 190dB of dynamic range (assuming the presence of dither noise).
Devil In The Details While the broad concept behind the HDR-A technology might seem fairly straightforward (indeed, its origins can be traced as far back as 1981), the devil is, as always, in the most intricate of engineering details. Hence, it took Millennia a full decade of R&D, huge investment, and the acquisition of three patents before they reached the stage where a commercial product was viable. So, let’s look at some of those intricate details...
First, a DSP processes the 32-bit fixed-point digital input signal, to create two separate digital streams. In that initial digital processing, the bottom six bits, (32-27) are effectively discarded because they will be well below the noise floor of the low-level converter (and of all analogue circuitry). The top seven bits (1 to 7) cover the highest 42dB of the signal’s dynamic range, and are routed to the high-level converter, so use its region of best THD performance. The analogue output from the high-level converter is passed through an amplifier to boost it by 8dB, and raise the peak output level to +16dBu (as per the AES paper; in the D-1, the peak output level is a more professionally acceptable +22dBu). The remaining 19 bits of the digital input (bits 8-26) are all shifted upwards by seven bits (ie. 42dB of digital gain) before being dispatched to the low-level converter’s path, once again optimising the THD performance through that converter. Obviously, in theory, the specific break point where the digital signal is split between the two converter paths could be set at any desired level, to fully optimise the performance of whatever converter chips are used. So too can the
“The real practical benefit is a natural side-effect of that vast dynamic range: a substantial improvement in distortion levels for mid- and low-level signals.” The example I’ll use is derived from La Grou’s 2021 AES paper (https://aes2.org/ publications/elibrary-page/?id=21106#), in which he describes an early prototype of the D-A converter. At the time, it was achieving a total dynamic range of 156dB (26 bits) and a -140dBu noise floor. The current D-1 improves on that, with 168dB of dynamic range (28 bits) and a -146dB noise floor — this is due to the more advanced converters used in the two signal paths, and tweaks to the signal-path topology. To help you understand what’s going on, I’ll refer to the MSB (most significant bit: ‘the loud end’, if you like!) as bit 1, and the LSB (least significant bit/quiet end) as bit 32. Some might consider this to be ‘backwards’, but it makes it easier to relate to the word lengths being fed into the 24-bit converter chips in each signal path.
84
August 2026 / www.soundonsound.com
amount of gain added to the high-level path; it’s all part of optimising the signal-to-noise and THD performance of the complete system. Also worth noting is that, although I’ve suggested the digital input is hard-switched at a set level, the signal is actually crossfaded between the two paths over a small range, to avoid undesirable level jumps, and a self-calibration process allows the DSP to monitor the two signal paths and adjust the crossfade algorithm to minimise any level offset. There’s yet more complexity there, too, because the DSP must know in advance how the signal level will vary, if it’s to ensure that the crossfade avoids overloading the low-level path, and if it’s to prevent the signal remaining on the
ALTERNATIVES The imersiv D-1 is genuinely in a class of its own: there is absolutely nothing on the market at the time of writing that comes anywhere close to matching its dynamic range and low-distortion capability.
high-level converter path too long, which would degrade the performance. So the DSP also delays the input signal, to allow a look-ahead facility. The AES paper states that a 1ms look-ahead delay is sufficient but, while the D-1 can match that if required, its default setting is 20ms.
Mixing Highs & Lows The engineering challenges don’t end there, though, and the next one is how best to combine the outputs from the high and low converter paths, to form the single analogue output signal. Since the digital signal was shifted upwards to feed the low-level path, the analogue output from that converter must be attenuated by the same amount (42dB in the example), to restore the correct amplitude relative to the high-level path. Part of that level shift was effectively achieved by the 8dB boost of the high-level path, leaving -34dB to be applied using a passive (resistance) attenuator. That’s not as trivial as it seems, because the attenuation must be incredibly precise (to within one LSB), plus stable with temperature, if the linearity of the whole converter is to be maintained. In attenuating the low-level path’s analogue output, the converter’s residual noise floor is also attenuated, of course, and that’s why the system noise floor is so incredibly low. The passive attenuator does inherently generate some thermal noise of its own but if its resistance values are kept relatively low, this is insignificant in practice. The AES paper quotes a residual noise floor in the prototype dual-path converter of just 77 nano-Volts, which translates to -140dBu. That’s already a spectacular result that’s well below the noise floor of most conventional line-level analogue electronics. But as discussed above, the D-1 exceeds even this, with a noise floor that’s claimed to be 6dB lower at 40nV (-146dBu). A small snag is that while the low-level path’s noise floor is incredibly low, thanks to 34dB of passive attenuation, the high-level path’s converter output
The D-1 caters for 32 to 384 kHz digital input signals with any fixed-point word length up to 32 bits, over USB and S/PDIF, both coaxial (BNC) and optical (Toslink). DSD playback is also supported, but the signal is converted internally.
isn’t attenuated. On the contrary, it’s being amplified by 8dB to achieve the required peak output level. So, if the high- and low-path outputs were simply mixed, the noise floor of the high-level converter would swamp that of the low-level one, destroying the whole aim of this dual-path topology. The only way to overcome that is to switch off the high-level path’s contribution whenever the digital signal is routed to the low-level path. Imersiv achieve this through a muting gate on the high path’s analogue output, controlled by the DSP. In the AES paper prototype, the high-level path is muted when the audio signal falls below -42dBFS (when it is routed to the low-level path), to maintain the amazingly low residual noise floor for mid- and low-level signals. Of course, when the input signal is higher than -42dBFS (so the high-level path is used), the system noise floor is determined by the high-level converter. So it jumps from -146dBu to about -104dBu, depending on the amplitude of the input signal. That’s obviously not ideal, but thankfully there’s a ‘Get Out Of Jail Free’ card: psychoacoustics! Viewed on its own, the high path is a conventional 24-bit converter, calibrated to provide a professional line-level output, with a noise floor around -104dBu. That’s much the same as the best current converters, and this noise floor is always going to be at least 80dB below the quietest audio signal passing through that converter. The
human auditory system suffers from what, in this case, is a very handy characteristic called ‘noise masking’: in the presence of a much louder signal, we simply cannot perceive broadband noise, which means the jumping system noise floor level isn’t at all noticeable! Looking at it another way, the absolute worst-case signal-to‑noise ratio with this technology occurs for transitional mid-level signals, where the noise floor is the same as in the best conventional single-path DAC. But quieter signals, below the transition level, benefit from substantially better signal-to‑noise and THD performance. OK, I’m aware that I’ve offered a lot of numbers above! The practical upshot of this innovative technology is this... If you were to generate a digital sine wave at -100dBFS and feed it into a conventional D-A converter, the analogue output would look pretty noisy and distorted. Feed that same signal into the D-1 and it comes out looking impressively undistorted and pretty much noise-free. And it translates to a cleaner, more accurate, more faithful reproduction, particularly of mid‑ and low-level sounds, that is most definitely audible.
In The Flesh Happily, while the underlying technology may be complicated, the D-1 isn’t so from a user point of view: in fact, it’s very straightforward to connect and operate. It’s housed in a compact standalone chassis, with a white case and your
choice of silver or black front panel. It measures 218 x 81 x 414mm (WHD). It weighs a modest 3.4kg (7.5lbs), and optional rack ears are available for mounting one or two D-1s in a 2U 19-inch rack space. Power is provided from an external line-lump SMPS unit that accepts 90-240 Volts AC mains, at 50-60 Hz, outputs 12V DC for the D-1’s circuitry, and connects using a mini-DIN plug. A miniature toggle switch on the rear powers the unit on or off, and it draws a nominal 15W of power. On the right-hand side of the rear panel are pairs of balanced analogue audio outputs (male XLRs) and unbalanced analogue outputs (RCA phono), but at the time of writing the latter are described as being for ‘utility only’ and their technical performance remains unspecified. Moreover, the RCA phonos can’t be used when the XLRs are in use. The manual states that the published specifications are only valid for the balanced outputs, which must be connected to a true differential destination (a transformer or electronically balanced input) to ensure the D-1’s output topology performs correctly. Because the summing of the high and low paths is affected by the impedance of the cabling and destination, once you’ve connected the outputs to a suitable destination, you must run a calibration sequence (more on that below). The maximum output level from the balanced XLRs is +22dBu, from an output impedance of just 1.8Ω. The digital audio inputs, on the left-hand side, sit behind a thick,
www.soundonsound.com / August 2026
85
ON TE ST
IMERSIV D-1
protruding metal fin that extends through the unit to shield the digital electronics from the analogue circuitry (an important consideration, given the extremely low analogue noise floor). The digital inputs comprise three 75Ω BNCs for coaxial S/PDIF and a Toslink port for optical S/PDIF. (Most S/PDIF sources use RCA phono connectors, so a trio of suitable adaptors is included.) There’s also a female XLR for AES3, and a USB-B port for connection to a computer, for class-compliant audio replay as well as firmware updates. Dante networking is available too, as a factory-fitted cost option, with both primary and secondary RJ45 sockets. All standard digital sample rates from 32 to 384 kHz are supported, with any fixed-point word length up to 32 bits. DSD64 to DSD256 are also supported in the DoP format, and all DSD sources are converted to PCM at 192kHz to facilitate the multi-path DSP processing. The elegant front panel hosts a standard quarter-inch headphone socket, a large rotary encoder, a central 256x64 pixel OLED screen in the centre, and five illuminated buttons. These choose the input source, access the setup menu, select a menu value, access the output filter menu and engage an output mute. A fully balanced headphone output (on a Pentaconn connector rather than the usual TRS socket) is available as another factory-fitted cost-option.
Operation & Calibration When not used to access menu options, the encoder wheel also adjusts the output volume in 1dB increments (or 0.1dB steps by holding the Select button while rotating the knob) over a 154dB range (scaled -130 to +24). The volume control is performed on the digital input signal by the DSP, and 0dB on the volume scale actually equates to +21.7dBu for a 0dBFS input. In other words, there is up to 24dB of gain available for monitoring low-level recordings, but any positive volume setting over 0dB risks overloading the high-level converter if the input hits 0dBFS. The default display shows the selected input source and sample rate in the bottom centre of the two-line display. The current output volume is given above, and around the sides various code letters indicate other active functions: H for Headphone Exclusive, M for Mute, P for inverted Polarity, R for Resampling mode,
86
August 2026 / www.soundonsound.com
and Fn for the various reconstruction Filter options. Pressing the Input button opens the input source menu, and the encoder wheel selects the desired option. The Filter menu works the same way with the standard filter mode, F0, applying a linear-phase reconstruction filter with a fast roll-off. Other options comprise linear-phase with a slow roll-off (F1), linear-phase apodising (F2), and three minimum-phase variants: fast (F3), slow (F4) and hybrid roll-off (F5). The Setup menu contains various sub-menus, the first option being the Calibrate process I mentioned in passing above. This is used once the D-1 is connected to a suitable differential (balanced) destination, minimising the amplitude error that could potentially occur as the signal is crossfaded between the high- and low-level signal paths, because of the susceptibility of the passive summing to output load impedance variations. Separate calibrations are performed (and stored) for the headphone and balanced line outputs. During a calibration cycle, which lasts up to 30 seconds, the D-1 emits various digitally generated ‘pilot tones’ through both internal paths, measuring the voltage offset between them. Based on the measured error, the DSP adjusts the crossfade algorithm to reduce the error, and repeats the process to make ever finer path-matching adjustments. The process completes when the error is below 0.005dB: the display then returns ‘Successful’ or ‘Failed’ messages. In the latter case, it will revert to the last successful DSP values. Obviously, if the D-1’s outputs are connected to a different destination or via different cables, the calibration process should be repeated. A Polarity menu option simply inverts the output signal polarity, while Power Off puts the unit into standby mode, from which it’s awoken by pressing any button or turning the encoder. The Firmware menu displays the installed firmware, while the Main Menu page allows the display to be customised between Normal, Logo, or None options. Normal is as described above, while None turns the display off completely. The Logo option simply displays imersiv’s logo. Low Latency is a yes/no choice, with the default No incurring a 20ms latency. In applications where half a video frame of audio delay might cause problems, Yes reduces latency to under 1ms, but there’s
no audible difference in quality. Resample is another yes/no menu: choosing Yes automatically converts 32 to 176.4 kHz digital inputs up to 192kHz for all further processing and conversion; select No, and processing and conversion are performed at the native sample rate. The yes/no Headphone Exclusive menu item does exactly what you’d expect. There’s also a hidden ‘Pro Menu’ page, accessed by pressing and holding Setup and Select. It contains options to adjust the left-right Balance (±6dB in 0.01dB increments) and the Mid balance (±12dB in 0.1dB increments) — this being the Mid component of a Mid-Sides conversion so, essentially, it’s a stereo width control. There’s also a Level Lock mode which disables the adjustable output volume. You might think the final option unusual, given that imersiv have invented a whole new way of minimising harmonic distortion in a D-A converter, and I’d agree: it intentionally adds different blends of (mostly even) harmonic distortion, to add ‘richness and warmth’. Apparently this function, which can be used to personalise the sound character with (subtle) musically enhancing coloration or completely disabled as you prefer, was added during the beta testing at the behest of a mastering engineer who enjoyed the musically enhancing character of his previous DAC. The included infra-red remote controller’s large +/- buttons adjust the volume, and all seven input sources can be selected using their own buttons, as can all six filter modes. Additional buttons select mute, polarity-normal/ polarity-invert, headphone and line out, and display on/off. Four buttons labelled R1-4 are apparently reserved for future use.
Listening Finally, I should let you know how the D-1 actually sounds! Well, having hooked up the D-1 in my studio, I was initially somewhat underwhelmed (and I stress: initially!). It sounded neither quieter than my Crookwood or Benchmark converters, nor any more dynamic at my listening levels. So I took it into my living room and connected it into my Bryston/PMC hi-fi, replacing the DAC in my Bryston BP173 preamp and... still no real difference. But as I drank my Masala Chai and worked through my standard test tracks — material that I know in intimate detail — I started noticing things that I simply
THE UK’S PREMIER SYNTHESIZER SHOW EXHIBITION \\ RETAILERS \\ EDUCATION MODULAR MEET \\ SEMINARS & DEMOS The Octagon, Sheffield, Saturday 24th October 2026
The biggest exhibition of its kind with over 60 manufacturers showing Eurorack Modules, Synthesizers, Keyboards and Software Synths. Try them out and buy them on the day!
FREE PERFORMANCES AND SEMINARS Electronic Music Open Mic (EMOM) Artist Showcase History Of Synthesizers Cabaret Voltaire In Conversation
Tickets Available Now! www.synthfest.co.uk SynthFest UK has been created by Sound On Sound magazine to showcase Analogue, Digital, Modular and Software Synthesizers. In partnership with the Sensoria Festival of Music / Film / Digital Media
ON TE ST
IMERSIV D-1
Tech Specs: Beyond Measurement! The published technical specifications are exemplary, with THD+N given as 0.0002% at +22dBu (22kHz bandwidth), and self noise at -146dBu unweighted (that’s a calculated figure, but purely because there’s currently no audio test set that can measure that low!). Crosstalk is better than -120dB at 1kHz, and the headphone output can provide up to 2.8W into headphones of 32-600 Ω. My standard AES17 dynamic range test returned a value of 140.8dB A-weighted, which is by far and away the best figure I’ve ever seen. The signal-to-noise ratio measured -138dB (relative to 0dBFS). But, again, these figures are really reporting my Audio Precision test set’s performance, rather than that of the converter, which outperforms my measurement capabilities!
hadn’t before: low-level details became more precise, more real, and less blurred or veiled. The more I listened, the more obvious this became. Well-recorded tracks gained a vivid realism and, often, individual instruments sounded like they were genuinely in the room rather than on a recording. The difference was mainly in the starting transients and decays, particularly in stringed instruments, both bowed and plucked. It was also there in the attack and decay of cymbals and hand drums — and, especially, in the realism of vocals. When listening to good recordings made with simple stereo mic arrays, the room acoustics demonstrate significantly more realistic depth and width, too: each instrument occupies a far more clearly defined position within that space. I also heard so many tiny details on some of my own recordings that previously I hadn’t even realised existed. It’s a cliché, I know, but it really was like someone had cleaned
88
August 2026 / www.soundonsound.com
The Audio Precision set still has its uses here, though: because it’s so unusual, I’ve included a plot showing the THD ratio against input signal level. At the right-hand side of the plot, the THD is below 0.0002% for a 0dBFS input and, as the signal level reduces, the THD level slowly builds, just as I described earlier. Note, though, that when the input falls to around -30dBFS the THD levels off, and at -45dBFS, where the signal is crossfaded into the low-level path, there’s a distinct reduction in the THD. Consequently, in the region from -30 down to -70 dBFS, the THD approaches two magnitudes (40dB) lower than any previous converter. The D-1’s THD ratio, plotted against the input signal level.
the audio window and I was making out some fine details for the first time! Moving the unit back into the studio (and recalibrating it), I could now hear that same vivid realism and precision. It transpired that the lack of noticeably reduced noise floor had been because the D-1 was routed through the Crookwood mastering console’s monitoring path — and the console entirely defined the system’s noise floor!
What Price Progress? Groundbreaking products never come cheap, and the imersiv D-1 is no exception: it costs an eye-watering £12,000, and the Dante and balanced headphone output options each add around $1000. Clearly, this is not a D-A converter for the average project studio or back-bedroom beats creator, but it will be within the reach of high-end studios and mastering rooms. The important point, though, isn’t the price. Rather, it’s
that the D-1 proves that this concept actually works, and that there are practical, real-world benefits. It is a technical tour de force that raises the audio benchmark dramatically. I have no doubt — with imersiv exploiting their IP, other manufacturing approaches (integrating everything into a single chip?) becoming viable, and other manufacturers, in time, developing their own equivalent solutions — that, a decade from now, this kind of technology will be the standard way of converting digital audio to analogue, and we will all be able to enjoy the associated sound quality benefits. John La Grou and his boffins really have moved the goalposts, and they fully deserve all the professional accolades that I’m sure they’ll receive! £ £12,000 including VAT. W https://sound-service.eu W https://imersiv.com/the-d-1-dac
FE ATURE
How The Pros Handle Harshness Edgy, aggressive midrange can make for uncomfortable listening. Four top engineers explain how they get harshness under control — and how to get the best from Oeksound’s Soothe plug-in. SAM INGLIS
T
en years ago, a Finnish start-up launched a plug-in designed to treat harshness in recorded audio. Word spread, and Oeksound’s Soothe has become a core part of many pro engineers’ toolkits. Version 3, reviewed in last month’s SOS, improves the sound still further and adds some new features that
make it a creative as well as a corrective tool. I spoke to four well-known producers, engineers and Soothe users, to understand why harshness is an issue and how it can be dealt with.
What’s The Problem? There’s no strict definition of harshness, but it’s mainly associated with a brittle, strident or scratchy quality in the
upper midrange. Some feel that it’s become more of a problem in the last 30 years or so, thanks to changes in the way records are made. “Having used 24-track analogue tape machines a bunch in the ’80s, I would say DAWs do not soften music recordings in the same way,” says John Rodd. “In addition, some people occasionally use certain condenser microphones that can be a bit harsh, and I also find that some virtual instruments can be quite harsh and need to be smoother-sounding to fit into well-balanced music or a hybrid score mix.” F Reid Shippen has a slightly different take: “People like to talk about how digital audio is harsher, but I don’t really think that’s the case. I think that certain things can be less forgiving, and people who have less experience working in digital can tend to push things into the red when you’re working in certain file formats that can cause some clipping and stuff like that. There’s a ton of creators out there making music in all kinds of environments. When you’re recording in a dry-walled bedroom on a cheap mic, there’s going to be some inherent problems that carry along with that kind of stuff. And I’m not passing any judgment on any music; you can make killer music like that.”
Cut It Out
John Rodd.
90
August 2026 / www.soundonsound.com
There is universal agreement that the best way to address harshness is at source, through mic choice and placement. “When the budget and schedule allows, I go wherever in the world the orchestra, ensemble or soloists are to be recorded, and I make mic choices and lay out the musicians in ways that reduce harshness,” says John Rodd. “For example, certain ribbon mics are great choices for spot mics on trumpets, trombones and cimbasso. I don’t place them right up to the instrument, but back a little way to allow the sound to develop naturally, be more balanced, and less harsh. When the schedule or budget does not allow me to record, I tend to lean more on Soothe to smooth out harshness from spot mics.” “On the recording side of things, mic choice and placement is pretty crucial,” agrees F Reid Shippen. “You can change a sound entirely by moving the mic an inch. So yeah, if you’ve got problems in the recording and you’ve got the time to do it, then that’s probably the easiest way
to go. If you want really smooth guitar tones, you probably don’t want an SM57 buried in the middle of the speaker cone. The wrong mic on a vocalist can mean the difference between something gorgeous sounding, something fun and aggressive and cool, and something that’s painful. And a lot of times, you can’t unscramble that omelette. I can’t tell you how many times I get a vocal that’s cut on an SM7 because someone saw a video or thought they were cool or loved that Michael Jackson used one, and that singer should absolutely never be singing into an SM7. And sometimes I get people saying, ‘Hey, that vocal sounds kind of midrange‑y and a little bit harsh. What can you do about it?’ My answer is, ‘That’s what an SM7 does sometimes.’ Yes, the recording side of things can have a huge effect.” “Also,” adds Darrell Thorp, “the room that the programme is being recorded in can add harshness. Or the room you are using to monitor could be adding harshness — or the opposite, removing harshness so you are not clearly hearing the source.” This is a point on which John Rodd agrees: “In terms of room mics, such as the Decca Tree mics, occasionally, mid-sized recording studios can benefit from subtle use of Soothe to improve the sound, especially when a big brass section is blasting! Speaking of room mics: notably, when I record at some of the best-sounding, massive recording spaces such as Abbey Road Studio One, the Newman Scoring Stage on the Fox Studio Lot, and the Barbra Streisand Scoring Stage at Sony Pictures Studios, I never need to use Soothe on the room mics.”
Dealing With Harshness Whether or not it’s a new issue, all four of the interviewees I talked to had developed techniques for addressing harshness before Soothe existed. Jason LaRocca, for example, employed “various tape emulations, compressor models or manual EQ rides within Pro
F Reid Shippen.
Tools”, while Darrell Thorp explains that “I first learned to use a de-esser to combat harshness: find the range, then compress it,” and John Rodd recalls: “Before the first Soothe in 2016, I would sometimes use one band of a dynamic EQ — primarily the McDSP AE400 — to intermittently smack down an upper‑midrange or high-end harshness on certain orchestral brass or choir spot mics, or when a solo singer got really loud in the choruses.” “I don’t particularly want to remember a time when Soothe wasn’t around,” says F Reid Shippen, “because it’s such an insanely crucial tool. But there’s other ways to deal with harshness, starting with decent recording technique, multiband compression and so on. I think one of the reasons people loved
About The Interviewees F Reid Shippen is one of Nashville’s best-known mix engineers, with 12 Grammy-winning projects to his name and a catalogue that spans country, indie, pop and rock. Engineer and producer Jason LaRocca is perhaps best known for recording and mixing movie, TV and game soundtracks, but has also worked with pop stars such as Jay-Z, Meghan Trainor and Fiona Apple. John Rodd is a music recording, mixing and mastering engineer whose credits include Get Out, Nope, Star Wars: The Acolyte, Breaking Bad, Sirens, Call Of Duty, Beyoncé, Michael Jackson, and numerous Oscar‑, Grammy‑ and Emmy-winning projects. Darrell Thorp has won nine Grammy Awards for his work as an engineer and producer, and has worked on celebrated albums by Beck, Foo Fighters, Radiohead and Paul McCartney amongst many others.
analogue tape back in the day was that it was essentially an infinite multiband compressor, which is exactly how Soothe can work with certain settings.” Although the four engineers I talked to operate in different musical worlds, their approaches to using Soothe are surprisingly similar. Most are happy to use the default preset as a starting point, adjusting parameters only if it doesn’t quite do what they want. All four interviewees also say that they use Soothe primarily on individual mixer channels, rather than groups or busses. Jason LaRocca, for example, states: “I do not often use it across a final mix bus. I find it is far more helpful if I can be more selective with its point of attack on individual sounds. I almost always use it on lead vocals, hi-hats, solo string and brass instruments etc.” John Rodd explains that “I generally use Soothe on the actual spot mics that benefit from it, and not any of the stem mix groups. I have far better control for surgical, stealthy corrections when Soothe is on the individual mics or VIs that need it. When I mixed Michael Abel’s amazing score for Star Wars: The Acolyte I used subtle amounts of Soothe on some of the spot mics, especially in loud,
www.soundonsound.com / August 2026
91
ON TE ST
ATOV Faderpunk Controller & Modulator
The Faderpunk is much more than just a control surface... ROBIN VINCENT
A
TOV’s relationship with fader banks started in 2019 when they took on the open source 16n-faderbank, devised by Sean Hellfritsch and Brian Crabtree. It was a simple idea of having a box of 16 faders that could output MIDI CC, CV and I2C controller data for controlling modular, synths and software. Following tweaks and suggestions from the Berlin Modular community, Arthur Gilbert created the AtoVproject and set about redesigning the faderbank into the ‘16n AtoVproject Rework’. The beauty of the faderbank was that it pulled controls that were scattered across front panels, and brought them together in a unified, simple and accessible controller. However, it was very static and in an environment that loves modulation, the faderbank could only turn things up and turn things down. What if each of these faders could also generate modulation?
94
August 2026 / www.soundonsound.com
What if they could be configured to be any number of modular or musical controllers? Those are the questions the newly named ATOV decided to tackle. The answer is the Faderpunk. The Faderpunk follows the same idea as the original faderbank with its 16 faders, single per-fader patch socket and the ability to control things over CV, MIDI and I2C. But then it builds in a whole ecosystem of modulation and controllability. Each fader or combination of faders can be configured as all sorts of useful things like an LFO, trigger generator, envelope, randomiser, quantiser, sequencer or, of course, just a controller. So it’s evolved from offering a central place of control into being a modulation hub, toolbox and creative companion. Let’s check it out.
Hardware The Faderpunk is a 56HP Eurorack module set into a folded metal sheet of a box. It’s not particularly heavy but sits nicely on its rubber feet and resists movement when you play with the faders. On the front, there are 16 faders, 16 patch sockets at the top, and 16 satisfyingly
mechanical backlit buttons at the bottom. The faders feel good; they are 60mm, have a bit of play, but there’s no scraping along the edges, and all give off very similar resistance. On the right, we have three extra patch sockets and two extra buttons. On the back, we find a USB-C port for power and USB MIDI, four 3.5mm sockets for the two MIDI outputs, MIDI in and the I2C port, and a special port for future Faderport shenanigans. The MIDI ports are type-agnostic, which is amazing news for people like me who have to attend
ATOV Faderpunk £579 pros • Brilliantly colourful interface. • Large selection of functions. • CV and MIDI control. • Easy to use Configurator. • Brings a lot to your workflow.
cons • You don’t know what anything is until you learn it. • Faders not always pointing to the current value. • Lots of room for confusion until you learn it.
summary The Faderpunk is a smart and exciting modulation hub with 16 channels of almost anything, which could revolutionise your workflow if you can remember what you loaded into it.
anger-management courses after trying to connect a mini-jack MIDI port to something. Plug it in and you are treated to a bedazzlement of dancing lights: all the switches light up in different colours and you have pinprick LEDs scattered about the place, making it feel very fun and alive. So let’s get it to do stuff.
Configurator Initially, you’ll have no idea what’s going on, and you need to dig into the web browser-based configurator to find out. Connecting was remarkably easy, and I’m on Windows, which can sometimes be a challenge. Plug in your Faderpunk via USB, go to faderpunk.io, click on ‘Connect Device’, it finds the Faderpunk, and you’re off. The Configurator provides a colourful overview of the functions running on your Faderpunk. ATOV call these functions ‘apps’ and they cover a range of musical and modular happenings. So you could stick an LFO app on a fader, and then the fader controls the rate, which is reflected in the top/bottom pinprick LEDs, and the button controls the LFO shape, stepping through sine, triangle, ramp and square. Single-channel apps include a clock divider, a simple control fader, a note generator, random gates or values, a Turing machine, and even apps that convert CV to MIDI and MIDI to CV. Some things require an input and an output, and so we have two-channel apps. An AD envelope needs a trigger input and an envelope output, with the two faders giving attack and decay. Or the quantiser needs an input for the raw CV and an output for the quantised notes, and then lets the faders shift the pitch in semitones or octaves. Other two-channel apps include a Euclidean generator, a CV-controllable LFO, a panner, a slew limiter and more. At the time of writing, there are 20 apps, of which nine are single channel, 10 use two channels and one, the sequencer, spreads itself across eight channels. More will be coming, and the whole sytem is open source, so there’s plenty of scope for a growing library of user apps to emerge. I’ve encountered a lot of software configurators over the years, and this one stands out as refreshingly easy to use, beautifully laid out, and very friendly. With a few clicks, you can rearrange apps, delete and add new ones, and access further settings. The changes are more or less instantaneous, so you can drop apps
into your patch and have them working without rebooting. Once you have your selection of apps and all your settings set, you can ditch the computer because it’s all saved on the hardware.
CV Modulation The first thing I realised when sitting the Faderpunk in front of a case of modular is that I’d gained a whole new row, in the one device. And it’s not like many other multifunctional modules where you can only load one algorithm at a time, or you have layers of functionality behind shared controls; no, I have up to 16 different things, all on their own controls, all at once. In no time at all, I was modulating things, sending out random voltages, enveloping and sequencing. There’s a phenomenal amount of intentional power in this box, giving tools and functions from a place of easily accessible control. It’s immediately impressive, pumping new life into my modular with colourful abandon.
In Use The Faderpunk is intensely useful. It has a wow factor that remains with you even
as you become more familiar with it. It’s teeming with functionality to the point of being slightly overwhelming. With that versatility comes a certain amount of complexity, and I think the biggest challenge is my poor level of recall. Every time I turned it on was very much like the first time, and I was staring at it with a complete lack of comprehension. There’s nothing to tell you what anything is without plugging it back into a computer and opening the Configurator. It’s all colour-coded, which is great, but many of those colours are very similar, and once unplugged I can’t always remember what they represented anyway. You also have to contend with the wayward faders within a multifunctional digital interface. While the fader may control the main parameter, there’s also another control available if you hold the button, and another if you hold the Shift button on the far right. So the fader is not always telling you something useful, and it uses the latching method of value recovery, in that it won’t change anything until you move the fader through the current value. This is great for smooth movements and not having values
Faderpunk apps listed in the Configurator software.
www.soundonsound.com / August 2026
95
ON TE ST
Made in collaboration with YouTube artist Emily Hopkins, this unique pedal can do weird and wonderful things — and it’s by no means limited to guitars! ROBIN VINCENT
C
lassically trained harpist and composer Emily Hopkins has built a huge YouTube following. Her videos fuse harp with guitar pedals and other electronic music devices, and her unique blend of competence, experimentation and playful discovery makes them fascinating and fun to watch. Emily has demo’ed and reviewed countless guitar pedals so it’s not surprising that she’s decided to release her own. Called the Parting, this pedal is a collaboration with Old Blood Noise Endeavors, and aims to bring all of Emily’s favourite effect themes and textures into one simple and illuminating pedal, designed for harp, guitar or anything else you’d like to plug into it. For the purposes of this review, I’m going to approach it from a desktop synthesizer perspective...
Overview & First Impressions The Parting is probably best described as an ambient glitch delay, but that’s not the half of it. In this ice cream sundae of a pedal, you get a scoop of pitch and amplitude modulation, two scoops of probability-based delay and smeared reverb, some filter sprinkles, a squirt of reverse delay sauce, and a dollop of whipped bit-crushing
Old Blood Noise Endeavours Parting £329 pros • Sounds tremendous. • Unpredictability is a virtue. • Both beautiful and lo‑fi. • Macro control through expression input. • Makes anything sound interesting.
cons • Sometimes too abrupt. • Can’t handle Eurorack signals directly. • Some aliasing noise.
summary The Harp Lady Emily Hopkins has brought together everything she loves about pedals into one ambient playground of whimsy, probability, and a surprising amount of glitch.
98
August 2026 / www.soundonsound.com
Multi-effects Pedal
Old Blood Noise Endeavors Parting cream, all driven through with a chocolate flake of glitchy pitch‑shifting and beat repeats. It’s a delicious mix of sweetness and unexpected texture that tickles your taste buds before flickering into chaos and degrading into gooiness. So, spoons at the ready: let’s dig in! The Parting’s format and connectivity is similar to many Old Blood pedals. Physically, it’s a nicely robust chunk of pedal, with two soft-touch footswitches, 10 knobs, and a few buttons. On the back are quarter-inch stereo in and out sockets, MIDI in/out on TRS, an expression pedal input, and a USB port that, currently, is unused. Power comes from a standard pedal 9V DC supply, and there’s no battery compartment. It’s available in three colours and features artwork by James Roo that leans into the pedal’s chaotic and dismantling vibe. Very cool, but a bit busy for my tastes — Emily recently addressed this by releasing a much calmer, minimalist version! I find the best way to start evaluating any new effects box is simply to plug in
and start playing. The results from this one are tremendous. Just slapping some synth lines through, you get unexpected repeats, ratchets, and lots of wobbles. Echoes seem to come from nowhere, then leap haphazardly in pitch, only to be smeared out of existence. With more extreme knob twists, the sound descends into bit-farts and crinkles, but these can quickly be pulled back into something approaching clarity. I patched the Parting into my modular rig for a couple of casual gigs, and it made a fascinating contribution without me having to do very much. It’s wonderfully playful, intuitive, eager to affect change, and even has three presets. Imagine what it could do with a bit of practice and study! The effects can be seen as occupying four or five sections, but as they interact it’s not so straightforward. You’ve got modulation, a delay/reverb, a knob labelled Dissolve (which brings in sample-rate reduction, reversing and general deterioration), and the all-powerful Glitch knob, bringer of chaos and unpredictability.
There’s also a switchable high-/low-pass filter on a trimmer-style knob that I sometimes forget about, but which can be really useful for taming a gathering feedback storm. Time plays an important role, and you’ll find unexpected connections between modulation rate, delay times and glitch events, and some interesting ways to play with it.
Modulation, Delay & Reverb The modulation section can be a vibrato or a tremolo — if you can find the tiny button hidden in the artwork, by the Mod/ Time trimmer-style knob! There are six waveshapes, including smooth and stepped random, a Rate knob and a Depth control. Rate sets the modulation speed and also feeds the Glitch, Chance, and Dissolve knobs, with triggers for their contributions. There’s also an envelope follower mode, in which the event triggering is determined by the input’s strength; the modulation follows a sine wave. This vibrato/tremolo is nice. The range and depth are useful, and it’s easy to dial in a good chorus feel or organ vibrato. The Rate starts with a perfectly good range, from slow to disco fever, but holding the Aux footswitch can double or halve the timing up to three times (the manual says four, but it did seem to max out at three). The Modulation section also makes use of the dual-personality Mix knob. In standard mode it acts a bit like a wet/dry mix, but the modulation is only applied to the delayed signal, so you can’t just hear the vibrato alone. For that, you’d need Modified mode, where the signal routing is trickier to discern — suffice it to say that the modulation effect is fully anticlockwise, the delay is fully clockwise, and in between you get a mix of everything. The character of this pedal starts to emerge when you bring in the delay and
reverb. The curious Chance knob controls when the signal enters the delay buffer and how likely it is to feedback. The manual suggests that in the ‘noon’ position you’ll get regular, predictable delay taps, with timing set by the Mod/Time knob. That wasn’t my experience: I found delightful weirdness and unexpected feedback regardless of where I set it! But that’s no bad thing, because it’s precisely the sort of thing I’m here for, and there was plenty to find. The left side of the knob dictates how often random bits of signal enter the delay, and makes a decision every cycle of the modulation LFO. Turning clockwise from noon fully opens the input and then decides on the likelihood of the delay repeating the new signal or the current buffer. Every repeat sounds degraded and doesn’t seem to fade, so it quickly builds into a nicely lo-fi and abrupt ratchet. That’s where the Smear control comes in. Smear introduces diffusion and feedback, pulling the repeats into a rather lush reverb, where they’re eventually lost entirely.
Glitch & Dissolve Introducing some Glitch, which messes with time divisions, really gets the party started. To the left (anticlockwise) it halves or doubles the LFO rate and delay time. To the right, it feels more random, but increases the probability of doing either of those things. It also does the same to the Dissolve section’s sample rate (we’ll get to that). The result is a marvellous leaping and lurching in timing and pitch. An unexpected octave shift and shimmer of notes, followed by an abrupt fall and long repeats. It can be beautifully disarming or alarmingly aggressive, depending on the source material and how hard you push it. The final contribution comes from the duality of Dissolve. Turn left, and you destroy the sample rate; turn right and you reverse the signal. The further you turn, the more stretched that reverse becomes, until it’s a mess of unrecognisable digital noise. I was taken aback by the depth of degradation: it goes far further than you’d expect an ambient-styled effect to go. It’s also the only knob with an indent at ‘noon’ — a secure safety position that suggests Emily was very aware Dissolve might be too much for some users!
The rear panel labels may be hard to read on this image, but upside‑down text makes a lot more sense when you’re positioned in front of the pedal and looking down at the back!
Having now got the hang of it, I’m struck by how just much it animates your signal, and how much I enjoy moving and adjusting those knobs. It feels somewhat like it’s wasted on the floor, where these are out of reach and much of the pedal’s playfulness is easily lost. Thankfully, then, there are things you can do about that. MIDI is one option: every control is accessible via MIDI CC, and you can plug in a MIDI pedalboard or other controller, or automate it from your DAW. The other option is to use the expression pedal input as a macro controller. By holding the on/off (bypass) switch and turning knobs, you can assign any/all of the controls to the expression pedal, in the range that you turned them. This enables you to radically transform the effects with your feet. With the shrewd use of a floating ring cable and careful attenuation, you can use the expression input as a CV control and get your modular in there. That suggests the Parting could make for a very enjoyable and creative Eurorack module. It handled instruments and line-level synths without any bother, but I’m surprised they didn’t build in a pad for Eurorack signals, considering that Emily uses some modular in her videos — my modular system’s audio signals were a bit too hot, and I’d recommend using a pedal module to shift the level down and up 18dB.
Parting Shots Emily has made really interesting choices that work together well, to create a pedal capable of fascinating and often unexpected outcomes. It’s at times beautifully expressive, and at others rude and obnoxious. Between those extremes is a sense of whimsical suddenness that keeps things edgy, lively and full of surprises. Sometimes it’s a bit too abrupt — when changing the delay time, it can seem to kill the taps and any diffusion, and restart on the new time division, leaving a slightly awkward gap. There’s also some aliasing noise that creeps in around the edges, but the filter can help with that. For me, though, it’s the chance and probability aspects of the Parting that really bring it alive, letting it sprinkle trips of fancy onto dreary bass lines, pour movement onto pads, and transform plucked resonators into warbling glitched-out soundscapes. It’s a characterful ambient glitch machine that can’t help but sound fascinating! £ £329 including VAT. E contact@oldbloodnoise.com W https://oldbloodnoise.com
www.soundonsound.com / August 2026
99
TALKBACK
David Torn WILLIAM STOKES
G
uitarist David Torn has collaborated with greats such as Ryuichi Sakamoto, David Sylvian, Tori Amos and David Bowie, and has contributed to many iconic film soundtracks. His new album now i imagine a place not the same is his first standalone solo long-player in over a decade — produced and mixed by former Talkback guest Randall Dunn, no less. “As a practising musician, I still have goals. And I am going to die without having achieved any of them, and I’m fucking good with that!” Torn says. “I play more every day now than I ever have in my life.” At the moment I can’t stop listening to I’m particularly fond of listening to Persian and Turkish music, North African music, and flamenco. And there’s a singer from New Zealand, Aldous Harding: anything that she does is automatically on my radar. I’ve really been smitten with her as a singer-songwriter, and I don’t play with that many singer-songwriters any more. The artist I’d most like to collaborate with Well, I actually just wrote something for Sussan Deyhim, who was one of the first — and I don’t use this word negatively — Persian diva singers to use electronics in her work. Sussan was married to the electronic artist Richard Horowitz [who passed away in 2024], and they did an immense amount of work together, and Sussan and I and Richard talked about doing things together, and now I’ve written something for her that I hope she likes. The first thing I look for in a studio I certainly look at the actual space. Is there a need for separation? Can we record as if we were a live band, all facing in the same direction? I ask these kinds of major questions. I would say “Look at all the microphones,” but I’ll have done that
100
August 2026 / www.soundonsound.com
already, in advance! And after that, it’s the control room and the monitoring. Because I don’t like my monitoring to be super loud. I really want to know that we’re recording with enough detail and headroom so that anything can happen in the mixing and mastering. Rather than the old-school approach, you know, recording everything as hot as possible to tape, because it’s not the same now. Oh, and I’ll always ask: what coffee machine do they have? Usually, we usually go straight to the coffee machine.
only percussion; where they’re looking at transients, looking at the attack and release, seeing if there’s too much bass when the needle is at the outside edge, or not enough — all that. All those records with test material were huge for me. Aside from that, there was a period of time where I thought [Talk Talk’s] Spirit Of Eden was just the greatest thing ever. If I really wanted a reference for something that utilised dynamics in a real way, in a dramatic and very emotional way, then it was that.
The person I would consider my mentor Oh, so many mentors. I have an immense amount of respect for the mentoring that Don Cherry did with me, in real time. And beyond that, my teachers, especially John Abercrombie, who was so supportive of me. As a youth, I was not very socially fluent. I had a hard time communicating things like feelings to people, a really hard time. And John was just so gregarious and easy-going, and he was one of my favourite guitar players. And he introduced me to everybody! People would walk in on our lessons, like Al Foster, the incredible fucking drummer, came into a session one day. Richie Beirach walked in. And we were just in a lesson, and John says “Hey, this is David!” He wouldn’t say, “This is my student.” Being a musician, the whole thing is that we’re in a continuum. You have teachers, you have mentors, even if you don’t recognise them until 10 years later.
My secret weapon in the studio is I’ve only used it on a couple of records, maybe back in ’98 through 2000 or so, but I have an Optigan. It was the first home sampler made by Mattel toys, in the United States. The sampling is not on vinyl, but it’s on something that looks like vinyl until you touch it! It’s really thin plastic, and you put it into the machine and then play the sounds on the keyboards. And then it has got an amazing chording effect for every key signature, that you can play along with. A fucking incredible instrument! But very, very hard to maintain, because it’s like a Rube Goldberg-esque machine. It’s an incredible machine. Mine is broken. I broke it by accident while I had it playing the best sample I ever made with it. I bumped it, and these two springs flew across the room, and I never found either of them.
My go-to reference track or album This is a hard question for me, because you know, when my dad was designing power supplies and power amps for Harman Kardon hi-fi stereos, we listened to so many records that were just test recordings. The music that I became most familiar with early on, besides Broadway and flamenco, was from my dad’s test percussion records. It was
The studio session I wish I’d witnessed I would like to have witnessed the entire session of [Miles Davis’ A Tribute To] Jack Johnson, including Teo [Macero] doing the cutting. Or Spirit Of Eden. That was so influential in so many ways, and it’s not just the recording, it’s also the recording as an arrangement. Them asking, when was it perfect for Paul Webb to come in on upright bass? How spacious did it need to be for the guitar player? That record that influenced so many of my
Photo: Peter Gannushkin
friends at the time. There’s something there — about space, distance, density — that related directly to the ECM ethos, even though the ECM ethos was rooted around improvs and jazz and somewhat formalised compositions. The producer I’d most like to work with God; well I’m so happy working with Randall! I mean, it’s just the moment you go, “OK, well, this is, like, my family now! These are my people now! These are warm people, who are smart in really different ways to me.” But also, I don’t think much about producers. This is a new thing for me, having somebody in the room who is simply supportive and knows how to edit and knows what to edit. He took all of the material we recorded, and I’m so accustomed to doing all the editing. But I said, “No: you’re going to
mix it, so do you want to do the editing? I trust you!” and afterwards I listened, and I was ready to be critical about it, listening hard, but I was going, “No, I like all of this! I like the way this sounds!” I wouldn’t have done it in the same way, but it shows the difference in the music that I’m making right now compared to what I was doing a year ago. The studio experience that taught me the most Maybe the first session I ever did. I believe I was 13, maybe 14 years old. I was a pit player in the recording of a play that my mother’s friend’s son had written and was being performed. My mother was a copywriter; she wrote copy for the classical music station in New York, WQXR. She did all the little ads and stuff. And they loaned her the studio for
a day. That session really taught me a lot, because it was the first time I had ever been recorded. I think what I took away was the seriousness of playing like that, the way that everybody changed every time the conductor’s baton went up. You were so pressurised to do the right thing — and not the wrong thing. Not what you feel like doing, but what’s on the page. I don’t know, I think somehow that might have been a big influence. The other most important experience is when the guys in the Recording Musicians Association out in Los Angeles kind of ‘allowed’ me into the union. Some musicians cornered me one day saying, “You can get paid today. Or you can get paid through the union, and you will also get royalties on playback of the film.” And I said, “What does that mean? This is bullshit. They’re just trying to trick me out of cash, or something.” But I’m sitting with these really skilled studio players, [bassist] Neil Stubenhaus, [drummer] Steve Schaeffer, [pianist] Mike Lang... They just nailed me to the wall and said, “You’re an idiot, we’re going to show you the numbers!” They actually were teaching me a lesson, and I took it seriously, and I joined, and they were right. For more than 20 years, I made a living from my royalties for the films I’d played on, like No Country For Old Men. That was a total shock. I worked really hard on that, and then I actually got paid for it. I made what felt like a decent living for quite a few years! That was big, because suddenly you realise, “Oh! This is not just about having fun, playing. This really is a business,” and these people knew the business. And then, you know, the sad thing is that in 2009 the union was completely broken by Hollywood. The advice I’d give my younger self I was so confused up until the time I was around 24, 25. I wish that I had been socially ‘clearer’, that I could actually want to have conversations — like this one — with people, and not be frightened by other people. I really had a great fear, a phobia about saying too much around people, and I really turned very inwards. That wasn’t a ‘bad thing’ to happen, but I kind of wish that I had enjoyed that period of time a little bit more, you know. It’s just odd to look back and see that there was this huge personality shift. And yet, I’m the same person.
www.soundonsound.com / August 2026
101
ON TE ST
Highland Dynamics Dual Delta 4-7 Mk2 Mic Preamp & Saturation Processor
Much more than ‘just’ a preamp, the Dual Delta from Highland Dynamics is also a versatile and creative tone-shaping tool. JULIAN RODGERS
T
he Highland Dynamics Dual Delta 4-7 Mk2 is a boutique, vintage-inspired dual-channel valve preamp, whose price makes it clear that it’s aimed at discerning users who know what they want and are prepared to pay for it. Over the weeks I’ve had the review unit, I’ve been impressed, by its sound and flexibility. It’s proven to be considerably more versatile than I’d expected — and a lot more fun! Highland say it’s based on “designs from the early ’60s in England,” and the product’s name strongly hints at that inspiration lying in the EMI REDD.47. But the Dual Delta (as I’ll call it from here) feels very much its own thing, very much a modern interpretation rather than a clone.
Overview Worth noting up front is that describing this device simply as a ‘mic preamp’ really undersells it. It most definitely has character, it doubles as a well-specified DI box and line-level processor — one that’s capable of anything from subtle harmonic enhancement to aggressive distortion. It can be used for parallel processing too, so it’s equally attractive as a colour box or saturation tool. This all comes in a solidly constructed 2U rack unit that features white legending
102
August 2026 / www.soundonsound.com
on an all-black faceplate, which is clear and easy to read. The two identical channels arrange suitably vintage-looking chicken-head and knurled knobs, metal toggle switches and the instrument in/ thru jack sockets in a layout that’s both distinctive and practical. Around the back, the Dual Delta keeps things simple, with just two pairs of XLR connectors, an IEC mains inlet, and a bright blue externally-mounted transformer that protrudes a few inches from the panel. The input gain stage features EF86 pentode valves, while output amplification is handled by a 6DJ8 dual triode. The microphone and instrument input levels are set using continuously variable pads and, when fully padded, the mic preamp functions as the line input. The balanced microphone input’s impedance is switchable between 600Ω and 150Ω, while the DI presents a fixed 1MΩ input impedance, making it suitable for passive instruments. There’s also a four-position high-pass filter for each channel.
Feedback: The Big Idea! There’s one control that really demands specific and detailed explanation, since it operates the defining feature of the Dual Delta’s design: the large Gain knob. This is not a conventional gain control but selects the amount of negative feedback applied
in-circuit, and can introduce a remarkable amount of tonal and dynamic variation. Guitar-amp users may be more familiar than most with the concept: some classic valve designs, such as the Vox AC30 and certain Fender amplifiers, are known in part for their open, lightly damped feel compared with more tightly controlled designs using heavier negative feedback. The comparison is obviously not a direct one — this is a microphone preamplifier, not a guitar amp — but the principle feels familiar. There are four switched positions: Low, Medium, High and Open. Low applies the greatest amount of negative feedback, while Open applies none at all. The sonic differences are not subtle! Open is the most immediately exciting and characterful setting, bringing a sense of energy and animation that can be either hugely appealing or, depending on the context, too much. Moving towards Low progressively reins things in, for a cleaner, tighter, smoother and more controlled presentation. Because this is negative feedback, the tonal changes are accompanied by significant changes in gain. I didn’t measure this, and Highland Dynamics publish no gain figures either. So what follows is purely observational, but the Open setting offers something in the region of 60dB of available gain, which is roughly comparable to what one might expect from a typical interface preamp. Low’s negative feedback sacrifices more than 20dB of that gain. The continuously variable output attenuation makes it possible to compensate for these level differences somewhat, but quick like-for-like A/B settings comparisons aren’t straightforward. Compared with my Neve 1073 (a very different preamp, but a useful benchmark
Nothing to see here on the rear... well, apart form that mahoosive blue mains transformer!
simply because its so well known), the Dual Delta generally came across as brighter, more open, and less congested through the midrange, while still retaining a satisfyingly full low end and a clear, articulate top. I found myself choosing to spend most of my time with the preamp fully Open. The sense of immediacy and liveliness reminded me of a two-stroke motorbike: energetic, unruly, and undeniably fun! Transients are very well represented and there’s a definite sense of excitement in the top end. I wouldn’t quite say it sizzles, but it certainly leans in that direction. As the negative feedback increases, this preamp becomes progressively smoother and more controlled. The noise performance improves too, the presentation becomes more damped, and the more exuberant qualities of this preamp are reined in. That can initially make the lower-feedback modes feel less attractive — they don’t grab your attention. But there are actually plenty of situations in which such qualities make considerably more sense. Paired with ribbon microphones, the Dual Delta is stellar. The switchable input impedance makes obvious sense here, but more importantly, the interaction between the circuit’s tonal behaviour and the valve character works beautifully, bringing out low-level detail while retaining a sense of weight and texture. Of course, users of insensitive mics such as passive ribbons or some moving-coil dynamics may find that the cleaner modes are impractical for quieter material.
Going Direct DI boxes may not be glamorous, but a good one absolutely earns its keep, and the Delta’s DI performance should not be overlooked: it is very good indeed. On bass guitar, it sounded markedly better than the instrument inputs of my audio interface (as one would hope at this price!).
In particular, the low end sounded notably richer and fuller. There are useful facilities too, including a proper DI thru socket, which means the Dual Delta can be placed in-line between an instrument and amp. This is true for conventional standalone boxes too, but isn’t possible with instrument inputs on most interfaces or standalone preamps. A toggle switch between the two channels, marked ‘Link!’, routes channel 1 into channel 2, opening up some useful processing options, and a particularly effective ploy is to use channel 1 as a clean DI for bass, and feed that signal into channel 2 for a more aggressively driven, high-pass-filtered version. You can record both outputs simultaneously, each to separate tracks. When blended together, this delivers an impressively full, driven bass sound, with a great deal of flexibility at mixdown.
Tone Questing I further explored the DI inputs with direct-injected electric guitar, using the Delta as an overdrive source. The distortion character created by the circuit is highly usable — much more so than one might expect from a dry overdriven DI. Run through cabinet modelling, it produced genuinely convincing guitar tones, but even heard raw, the overdrive never became harsh, congested or unpleasantly fizzy. And that moves us neatly on to the Dual Delta’s role as a ‘tone box’... Used as a hardware insert in Pro Tools, I found the Dual Delta extremely useful when mixing: it can add anything from subtle harmonic colour through to outright filth, with ease. Another particularly effective application was placing it on the drum bus of a funky soul track: a fairly aggressive dose of valve saturation brought to the track exactly the kind of dusty vintage character it needed. Stereo use does require care, because accurately matching the channels using the
output pads alone can be fiddly for precise stereo balancing. In practice, though, routing a signal generator through both channels, flipping the polarity on one and summing them to mono made precise matching quick and straightforward. You could use the Dual Delta across an entire mix too, but for my taste, that would probably be a little too much of a good thing.
The Bottom Line However much fun the Dual Delta is, the price tag delivers a dose of reality — it wouldn’t be an obvious choice for someone’s first serious preamp. It’s simply too specialised. The ideal buyer, then, is more likely someone who has more conventional options in place, and who is looking for something genuinely distinctive: a preamp, DI and creative processing tool that brings a very particular flavour to the studio. If that’s what you’re looking for, the Dual Delta absolutely delivers, because for all the discussion of microphone preamplification, this is much more than a mic pre. Its usefulness as a DI, its genuinely creative Link! mode, and its effectiveness as a line-level colour processor mean it would earns its keep in more situations than its niche positioning might initially suggest. It’s excellent. It’s expensive. It’s specialised. And it’s undeniably creative. For the right buyer, it could be exactly the sort of inspiring piece of hardware that makes their studio.
summary This versatile, REDD-inspired mic preamp might not come cheap, but it offers a lovely, authentic, vintage valve sound and doubles as a great DI.
£ £3499 including VAT. T KMR Audio +44 (0)20 8445 2446 E sales@kmraudio.com W https://kmraudio.com W www.highlanddynamics.com
www.soundonsound.com / August 2026
103
ON TE ST
Arturia’s software version of the Memorymoog may be better than the original... GORDON REID
A
h, the Memorymoog. Simultaneously a wonderful synthesizer and a pile of poo. The former because, on a good day, it can sound glorious. The latter because, if you haven’t switched one on for a while, you’ll probably have to open it up and spend an afternoon poking around inside to perform an arcane hardware tuning routine, just to be able to play the bloody thing. Sure, all Memorymoogs are now more than 40 years old, so it’s a miracle that they work at all, but I never have these problems with a Jupiter‑8, an OB-8 or even a Prophet 5 Rev 3 (let’s not talk about my Rev 1) so I can love and hate the Memorymoog simultaneously. There has to be a simpler way to obtain the sounds of the original without all of the farting around... which brings us to Arturia’s latest offering.
The Technology Memory V is a 12-note polyphonic, velocity- and aftertouch‑sensitive emulation and enhancement of the Memorymoog that you can run as a standalone application or as a VST, AU or AAX plug-in. As you would expect, it follows Arturia’s tried and tested pattern, with the original synth’s voicing married to an Advanced section that offers extra modulators, macros and a powerful four-part polyrhythmic arpeggiator, together with settings for MIDI, sync and MPE. Starting with the on-screen synthesizer itself, the oscillators are laid out in the same fashion as before, albeit with the octave
104
Arturia Memory V buttons replaced by rotary selectors. The only extra facility here is a button to hard-sync osc 1 to osc 3, which may not be something that you’ll use a lot, but is welcome nonetheless. The mixer layout is identical, and seeks to emulate what is, perhaps, the most notable characteristic of the Memorymoog; at any value above 5 or thereabouts, the input into the filter is overdriven with a mild, soft-clipping distortion. If you set up Memory V appropriately, you can see this in the oscilloscope display toward the left of the panel. The signal now passes through the filter and amplifier sections. Here, the functional differences from the original are more marked. For example, a button alongside the cutoff frequency knob switches between the model of the Memorymoog’s 24dB/oct response and a new 12dB/oct mode, while a second button alongside the Emphasis (more commonly called Resonance or ‘Q’) knob engages what Arturia call ‘bass compensation’, emulating a different type of architecture in which the filter doesn’t attenuate the signal below the cutoff frequency when you increase the Emphasis. In addition, the Memorymoog’s four keyboard tracking amounts have been replaced by a knob offering a smooth range from zero to 100 percent. All of these are valuable additions. At a glance (and notwithstanding different legends for the contour times and name changes for the buttons that determine how they work) the ADSR contour generators for the filter and amplifier appear to be the same as before. But there are two significant differences. Firstly, the A, D and R ranges have been extended. Secondly, the button that enabled the release stage on the original has been replaced by one called Velocity Env Times, which links the contour times to velocity — hit a note harder, and its A, D and R stages are longer. This is in addition to sending velocity to the amplifier gain and filter cutoff frequency in the pane on the left of the synth.
August 2026 / www.soundonsound.com
Software Synthesizer At the end of the visible signal path, the three volume controls of the original (master, patch and headphones) have been replaced by a master volume, pan/ unison spread, and drive, the last of which would more logically appear between the oscillator and filter sections because it determines the overall level into the latter of these. But this isn’t the end of the real signal path because, tucked away in the Advanced panel, there’s a four-slot effects section that draws upon 18 major types of effect, some of which can sound excellent. Modulation is provided by an enhanced, global LFO Modulation panel (now with sync and retriggering) and a per-voice Voice Modulation panel, but again with the use of space-saving rotary selectors. Both sections offer two additional destinations: volume and pan. Three slots in the Advanced panel provide access to the additional contouring, a function generator, a random generator, a voice modulator and a modulation sequencer, all of which are ridiculously flexible and can control great swathes of the voice generation and effects parameters. Then there are Arturia’s usual macros, which allow you to group multiple parameter changes under a single controller. If you want to use (for example) a knob on your MIDI controller to alter the pitch of one of the oscillators, the filter cutoff frequency and the feedback of a flanger simultaneously, each with a different response, this is where you do it.
Behind a discrete panel, you’ll find seven knobs that allow you to determine how much various aspects of the sound differ from one voice to the next. (Arturia call this ‘dispersion’.) If you turn all of these to zero, you obtain a slightly sterile ideal of the Memorymoog sound. But if you turn all of them — and the Vintage knob in the Global panel — to their maxima, you’ll get some idea of the vagaries of the original. I suspect that a Memorymoog Plus or a Linntronics Memorymoog would behave in a more gentlemanly fashion than my early model, but I still found that dispersion could capture much of its character without making it so undisciplined as to be unplayable.
waveforms against those generated by my Memorymoog. In every case, they were all but indistinguishable, although there’s an ongoing phase issue when you mix multiple oscillators in perfect tune. I then created some filter sweeps using various waveforms and different amounts of resonance. Again, the results were excellent, although I could tell which synth was which by the variations in the voices. So I adjusted the dispersion and increased the value of the Vintage knob even further. At around 75 percent of maximum, I found myself within a gnat’s wotsit of the original. I then created some useful sounds, concentrating on the Memorymoog’s
“Imagine what an enhanced Memorymoog might have been like had the original Moog Music not gone out of business. It might have sounded much like this.” Despite its myriad additional capabilities, I would venture that Memory V is simpler and more intuitive to use than the Memorymoog itself. In large part, this is because the original’s System Controller was neither simple nor intuitive. Replacing the Moog’s 100 memories (identified merely as 00 to 99) with Arturia’s advanced patch storage and selection system is a no-brainer, and Arturia’s undo/redo when programming is always welcome.
In Use It was now time to see whether the sound of Memory V could live up to Arturia’s claims. I started by comparing all of the initial
strengths of synth strings, polybrass, pads, basses and unison leads. In all cases, I was able to recreate its sound on Memory V or achieve something so close as to make no difference. Inevitably, there are cases where the hard synth and the soft synth diverge from one another but, as I’ve said before, if you spend your time looking for these, you’re not making music. Having satisfied myself that I could emulate the Memorymoog, I proceeded to create patches that took advantage of velocity and pressure sensitivity. You may feel that this isn’t in the spirit of the original, but I loved the results. Then I unleashed the full capabilities of the soft synth, adding
A factory patch making full use of the arpeggiator (shown here), effects and other Advanced facilities.
Arturia Memory V €149 pros • A high-quality emulation of the original Memorymoog. • Hugely enhanced modulation and effects capabilities. • You don’t have to service it when you want to use it.
cons • It’s nowhere near as sexy as a Memorymoog.
summary A fine soft synth that captures the character of the Memorymoog at a tiny fraction of the cost and hassle.
all manner of additional modulation paths and effects. The results were impressive. Imagine what an enhanced Memorymoog might have been like had the original Moog Music not gone out of business. It might have sounded much like this.
Conclusions Memory V echoes many other modern soft synths. When programmed sympathetically it can sound like its inspiration, but it offers far more than the original, and I can only scratch the surface of the enhancements in a review of this length. Of course, it doesn’t feel like standing behind a Memorymoog, and nobody is going to come up to you after a gig and beg to see your laptop. But if it’s the sound that matters, that shouldn’t be an issue. Inevitably, some will claim that it’s nothing like the real thing but, if you calibrate and tune a Memorymoog as best you can and then set up the dispersion within Memory V to emulate the remaining inconsistencies, you’ll find that their characters can be remarkably similar. When I liberated my Memorymoog from storage to perform these tests, it tuned two voices and sounded awful. After a few days it tuned five, but Voice 1 was so far out that the software tuning algorithm was never able to make it useable. I couldn’t be bothered to spend an afternoon calibrating the damn thing, so I just defeated the recalcitrant voice and conducted this review using a 5-voice Memorymoog. In contrast, Memory V fired up instantly, offered me 12-note polyphony and could sound pretty much the same. Oh yes... and it costs around one percent of the price of a second-hand original. Which would you choose? £ €149 including VAT. W www.arturia.com
www.soundonsound.com / August 2026
105
FE ATURE
E-mu Systems SP-1200 E-Mu Systems’ products changed popular music, perhaps none more so than the SP-1200 sampling drum machine. ALEX BALL
T
he origins of E-mu Systems go back to California in the late 1970 when three young student friends, Dave Rossum, Steve Gabriel and Jim Ketcham, having experienced a Moog Model 12 in the flesh, decided to try to build a synthesizer. Whilst ordering parts for this endeavour, they were asked for a company name for the paperwork and made up ‘E-mu Systems’, despite not officially being a business. The following summer, an old school friend of Rossum, Scott Wedge, needed some less adventurous pursuits whilst recovering from a skydiving injury and, as he was also interested in technology and synthesizers, joined the cohort. By the end of the summer they had their first synthesizer, which they called the ‘E-mu 25’. This project served as a prototype and experiment rather than a commercial product, but in 1972 Rossum and Wedge filed papers to make E-mu an official
106
August 2026 / www.soundonsound.com
company and by 1973 they’d developed a sophisticated modular synthesizer called ‘The E-mu Modular System’ that could rival the Moogs and ARPs of the day. Whilst analogue was the dominating technology at that time, E-mu were already aware of the potential for digital; for example, by 1974 they had a polyphonic, digital-scanning keyboard that was licensed for use in the Oberheim polyphonic synthesizers of the mid-’70s, and as part of the development of the E-mu modular, they’d also created an early digital sequencer. In the mid-’70s, E-mu began two fateful business partnerships. Firstly, Rossum worked with Ron Dowe of Solid State Music to create a set of analogue chips that reduced the footprint of oscillators, filters, amplifiers and envelope generators significantly. These integrated circuits became known in the industry as ‘SSM chips’. Secondly, E-mu decided to help a customer, Dave Smith of Sequential
Circuits, who’d previously used their services for parts for his own creations, such as an oscillator that clocked his Model 600 sequencer. Smith had an idea for a polyphonic synthesizer with global panel control, patch memory and a digital tuning system. This ambitious project required resources that E-mu were able to provide and they agreed to do that without upfront cost in return for a $75 royalty on the sale of each of the production units. E-mu gave Smith access to their hand-built development system, which he used to design the software, and Rossum did the analogue design, provided the digital scanning keyboard and, via SSM, the integrated circuits. Initially a 10-voice synthesizer, the instrument overheated badly and so the upper board of circuits was removed making it a five-voice. Launched in 1978, the Prophet-5 was an enormous success for the time and has had a permanent impact on the music industry ever since.
For a couple of years, all was well and E-mu received a steady flow of payments for the Prophet-5, but in 1980 they received a letter from Sequential Circuits saying that they’d redesigned the Prophet-5 around rival Curtis Electro Music integrated circuits for supply and reliability reasons and that, as competitors were using digital scanning keyboards in their products and not paying royalties to E-mu, they were ceasing payments entirely. Whilst a resolution was sought, E-mu had the double issue of losing an income stream and having to pay legal costs. They needed a product of their own and they needed it quickly. Somewhat ironically, they’d been developing a sophisticated multitimbral, digitally-controlled polyphonic synthesizer called the Audity and had shown it at the AES convention that same year, but this was the wrong sort of product to dig them out of a financial hole as it was going to cost around $60,000 per unit (around $240,000 today) and it would likely take time to sell the first unit as it was so specialist. E-mu dropped the Audity project, with only a prototype having been produced, and changed tack.
Emulation In the late ’70s, Rossum and Wedge had seen two products that caught their eye, firstly the Fairlight CMI and secondly the Publison DHM89 B2. Amongst their respective features, these two units had something in common; they could capture audio signals into digital memory and then the sample could be replayed at different pitches by the keyboard.
E-mu decided this was to be the central concept of their next design. A breakthrough was when they realised that by using direct memory access it was possible to achieve polyphony from a single memory chip, which kept the cost reasonable whilst giving the open-ended sonic benefits of using digital audio as the tone source. The product was developed throughout 1980 and wound up as an eight-voice sampling keyboard that could
In 1983 E-mu released their next sample-based product, but rather than the open ended Emulator paradigm, this unit focused on one specific task; drums. Dubbed the Drumulator, the machine was designed as an affordable alternative to the top-end Linn and Oberheim offerings of the time. The Drumulator notably cost under $1000 and was probably the first programmable, digital drum machine to carry a mere three-digit price tag.
“The distinctive aliasing, ringing and fizzing that came from the SP-12 became a popular and desirable effect.” play back two different samples either side of a keyboard split. Sounds could be sampled directly into the instrument itself via the mic or instrument jacks on the rear and saved on to floppy disks. As the instrument could effectively emulate other instruments it was called the Emulator, and the initial print ad contained the strapline ‘Play a turkey’, and jokingly highlighted that it was indeed possible to record and play back your favourite poultry noises. Serial number 001 went to Stevie Wonder and serial 002 went to Daryl Dragon of Captain & Tennille fame, who primarily used it for musical sound effects. Whilst successfully navigating disputes over the instrument’s legality by music unions, E-mu sold enough Emulators to stay in business and they also now had a solid framework to build upon.
The Drumulator sold well enough to keep E-mu afloat and was used by some big names on some big records by Depeche Mode, Cocteau Twins, Tears For Fears, Howard Jones and others. As the machine played back fixed sounds from EPROMs, a small industry set up around the creation of alternative sounds for the Drumulator, just as it had with the LinnDrum and Oberheim DMX, but it wouldn’t be too long before that was no longer necessary. In 1984 E-mu released one of the most recognisable keyboards of the 1980s, the Emulator II. Building upon the original Emulator and with investment from Syco Systems in the UK, the successor was a much more sophisticated affair and had eight voices with SSM filters, amplifiers, envelopes and LFOs. There was also MIDI, multi-part sequencing, multisampling,
The Emulator was launched in 1981...
www.soundonsound.com / August 2026
107
ON TE ST
Realitone Sunset Choir
Sample Library Realitone’s Sunset Choir is an absolute tour de force. S O N A L D ’S I LVA
C
alifornia-based Realitone have expanded their catalogue of vocal libraries with Sunset Choir, their largest choral ensemble yet. Recorded at United Recording’s Studio A, on Sunset Boulevard, Hollywood, the library captures the sound of 10 male and 10 female ensembles (recorded separately), along with up to six soloists performing vowels and consonants across a wide range of articulations. The library is available in two editions: Ultimate and the more condensed Lite, both built around Realitone’s Sunset Engine, seen previously in their Sunset Strings offering.
Layer & Blend The powerful engine allows fuss-free blending of two sample layers, with the
112
August 2026 / www.soundonsound.com
option to add independent attack and release variations, leading to multitudes of combinations made possible by changing any one single element. The Top and Bottom Layers contain the same list of articulations, ready to be used individually or paired in any combination of your choice. There’s not much by way of restriction except that you can’t load two identical samples in the two layers at the same time. The articulations cover choir staples like sustains and legatos — for expressive swells and smooth connected passages — and elements that add movement and texture like repetitions and atonal soundscapes. The sustains are divided into four subcategories: Standard, Extended, Evolves and Atonal. Standard contains dynamic and vibrato variations; Extended features trills, tremolo, murmurs and pitch drift; Evolves transitions between vowel sounds; and Atonal taps into the potential of the human voice as an instrument of disquiet with sirens and three flavours of chatter.
The Mix setting lets you control spread and pan. The Reverb control allows you to go from absolutely dry to full cathedral.
Legato comes in three categories: True, Scripted and Polyphonic, all customisable using a vowel sound of your choice. True Legato features real interval samples and is triggered by playing overlapping notes. Polyphonic also uses real transition samples, triggered when you release notes and play new notes within the time set by the Release Window knob. I imagine this legato will get a lot of use because it instantly delivers that lush choral sound at the press of a key: you play a chord, release a few (or all) notes, and play multiple new notes; it’s immediately smooth, rich and emotional. The legatos are clean and play without glitching, so you can write harmonies with ease and create a full sound without too much under-the-hood programming. Both True and Polyphonic Legato allow adjustment of the transition length in the mp and forte patches with a Legato Offset knob, speeding up or
Realitone Sunset Choir $599 pros • Beautiful voices recorded exquisitely. • Excellent default vocal blend with controls to modify further. • Large variety of attack and release samples add creative possibilities to main layers. • Smooth transitions between vowel sounds. • Expressive, fluid legato. • Multiple mic positions that can be customised for sound and/or to conserve hard disk space. • Easy to use, making it perfect for sketches and mock-ups.
cons • None.
summary Expressive, versatile and quick, the library handles swells for cinematic pieces, rhythmic attacks for pop compositions, pitch drifts for horror, bouncy bebop shorts, and atonal vocalisations with aplomb, making it suitable for both film and media composers seeking texture and richness, and for music producers looking to inject emotion as rocket fuel to a punchy pop song. Easy playability, impeccable recordings, and detailed control of the sound of the samples makes Sunset Choir a worthy addition to your collection.
slowing down the transition to your taste. For much slower legatos, just choose the dedicated Slow/Very Slow Legato patch. Scripted Legato, according to the literature, “fakes the transitions between notes [to] allow for legato-style playing on articulations that don’t include real transitions”. Layer blends can be controlled in three ways by the mod wheel: Crossfade, where the Bottom Layer fades into the Top Layer; option two, where the Top Layer fades in and out while the Bottom Layer stays consistent; and a third setting where both the Top and Bottom Layers remain at equal volume.
— Standard, Quick Bends, Slow Bends, Consonants (common to both attack and release), plus Converge (for attack), and Scatter (for release). It may seem obvious, but it’s still striking to hear how simply modifying the attack and/or release sample alters the feel of the main sample layers significantly. Explosive attacks like the evocatively-named Jungle Accent instantly make things feel percussive; Grace Note Up adds motion and colour; a scattered release takes a beautiful, unified choral sound and scatters the voices as they fade, adding movement and, depending on your arrangement, a sense of unease to the piece — perfect for horror scores.
Rhythm & Repetition While soaring, emotional passages are what choirs naturally lend themselves to, Sunset Choir also offers tools for rhythmic vocal support in the Shorts, Rhythmic and Repetition categories. Vocables like the ensemble and solo Bop, Dum, Dee, Doot; whispered Tickitahs and Chickitahs; and sequences of Nananahs, Wananahs and Dabadahs add texture, rhythm and, if you so desire, a playfulness, expanding the scope of the library to styles like bebop and contemporary a capella pop. In the Rhythmic section, you can modify existing rhythms or create entirely new patterns instantly using the 16-step sequencer style grid found below the sample name. Combine sounds from this section with Consonants from the Attack and Release
menus and you could almost build words, even though Sunset Choir doesn’t expressly offer word‑building features. Again, there’s a playfulness to this that the library excels at. It was incredibly easy to create the word ‘booze’, for example, by layering the following — Attack: Consonant B on an Oo sound; Top Layer: Short Swell; Release: Consonant S, again on an Oo sound. Where could this possibly fit? In a country song, of course! A glorious harmony of voices for a song about the genre’s oft-referenced main character — whiskey. Also on offer are operatic bursts, plaintive wails, stomp clap hits, and, of all things, phrases from Shakespeare, which could be great fun when layered into the background, giving your piece a sense of mystery or an Easter egg quality to it, if you like that sort of thing. There are other, less unserious combinations you can put together to create fresh sonic textures: for example, an ‘Eaow’ from the Repetition section combined with a natural breathy release evokes a drone-like string instrument of some sort. The library provides you with tools to be as serious or whimsical as you like, which may not be technically relevant but certainly feeds the creative spirit.
Range Finder The playable ranges for the male and female ensembles are more compact than some other libraries but for modern film and pop compositions, it should do just fine. The natural recorded range for
Attack & Release While the articulations listed above are expressive and versatile, the fun really starts when you begin incorporating the library’s myriad attack and release samples into the mix. The architecture of the attack and release samples features more than just basic envelope shaping. Sunset Choir features 95 variations for attack samples and 105 variations for release samples across five categories
Expression control can be assigned either to CC11 or the mod wheel by clicking on the button next to the Expression parameter. When set to mod wheel, adjust the strength knob on the right to set the range of expression, with middle placement working best for a smooth soft‑to‑loud dynamic.
www.soundonsound.com / August 2026
113
ON TE ST
REALITONE SUNSET CHOIR
You can create up to six user presets that are then automatically mapped to corresponding keyswitches indicated by yellow keys on the keyboard, allowing you to switch between articulations with ease as you play.
when installed, but if you have no need for individual mic positions, you can just as easily delete the NKX/NKC files to save on disk space. Right out of the box, the library works wonderfully with arrangements across a variety of musical genres. While testing, I created vocal parts to fit existing orchestral, rock, pop, country and even electronica pieces. Aside from minor volume adjustments, the sounds from Sunset Choir fit right in with all the songs in terms of texture and tone. I tried a variety of patches under several tracks and the difference in feel with the choir parts versus without was staggering. Keep in mind, these are songs mastered for commercial release with arrangements that are already locked in, and yet the choir parts fit right in and enhanced the song in every instance. I’m afraid there could be a danger of wanting to add choir parts from this library to all your music when you hear how much of a lift even a single held chord gives. Playing along to existing pieces really shaped my understanding of how this library could be used. When testing the library standalone, I built elaborate layers and created passages with multiple melodic and rhythmic movements. When playing along to an existing song, however, I ended up doing very little to accompany the track. In both cases, the library added value to the piece, which leads me to surmise that it’s definitely not a one-trick pony and can be a useful tool for composers working in varied genres and at various skill levels as well.
Conclusion
Volume, Pitch, Attack and/or Release for each layer can be independently controlled.
men is C1-G3, and for women, F2-A4, both of which can be extended, giving you stretched ranges of C1-C4 for men, and C2-C5 for the female ensemble. There are no dedicated SATB patches but you could create your own using multiple instances of the instrument. A useful setting is the Range Crossfade parameter, found to the right of the keyboard that displays the playable ranges of the male and female ensembles. When enabled, it sets up a subtle crossfade in the section where the two ensembles overlap, making for a smoother transition as you play across the range. It’s one more feature that
114
August 2026 / www.soundonsound.com
ensures that there are fewer elements to tackle at the mixing stage. Also useful are the separate volume controls for men and women, allowing you to custom blend the voices for your arrangement.
Sound & Playability A word about mic positions: the default is a Mixed mic position, combining the various mics used during the recording. The mix is good enough that this will work perfectly for most users. If you do want more control, you’ll find it in the Sunset Choir Ultimate — Mics NKI, where you can adjust the Close and Far mics to your liking. This version takes up 113GB
Sunset Choir is an impeccably-crafted library that is a delight to play. The sound is gorgeous out of the box, it blends well with other instruments even in complex arrangements, and is suitable for a variety of genres. The learning curve is simple and the well-designed UI has all the controls on the main page itself, letting you quickly and easily shape your sound, audition samples, and make adjustments without losing creative momentum. The variety of the samples on offer lets you create grounded, real-world choral pieces and experimental otherworldly arrangements through creative sample selection and layering within the library itself. £ $599 including VAT. W www.realitone.com
SUBSCRIBE & SAVE TABLET | WEB | REPLICA | PRINT PLUS BONUS PDF
SMARTPHONE COMPATIBLE
1 ICONIC MAGAZINE
6 GREAT WAYS TO READ IT
SCAN ME
TO SUBSCRIBE
TABLET - PHONE - WEB - PDF - REPLICA - PRINT All this for less than the price of a Coffee+Pastry each month!
www.soundonsound.com/subscribe • Go DIGITAL - get 12 monthly Tablet issues + all locked Web articles + monthly Full Issue PDF download the day the issue goes live. • Go PRINT+DIGITAL - get the best of both worlds and save over 50%.*
iOS / ANDROID
Every Digital sub includes a 5‑device licence to our App: mix and match across iOS/Android Tablet and Smartphone.
ONLY READING SOS IN PRINT?
Choose our full Print+Digital bundle for unlimited 24/7 access.
* The 50% discount offer is based on the UK retail price of the Print magazine, Tablet and Web subscription when sold separately. Subscriptions can be cancelled at any time and you will receive a pro-rata refund for all outstanding issues.
TECHNIQUE
Open Sources Using Open-backed Headphones For Tracking
Conventional wisdom tells us to use closed-back headphones for tracking. But might there be advantages to going open? SAM INGLIS
H
eadphone drivers radiate sound from both sides. In an open earcup, sound from the rear can escape into free air. In a closed-back design, it has nowhere to go. If it can’t be absorbed, it will bounce around inside the earcup, interacting in unwanted ways with the sound from the front of the driver. For this reason, open-backed headphones generally sound truer to the source than closed-back headphones. But, for exactly the same reason, applications for open-backed headphones are more limited. If you’re overdubbing to a previously recorded track, you probably don’t want that track escaping out of the headphones to spill into the microphone. Hence we tend to use open-backed headphones mainly for editing and mixing. For tracking duties, we opt for closed-back phones. At least, that’s the conventional wisdom. But I’ve long thought that, in
A quick snap of the rather busy live room at Half Ton Studios, taken during a break in the session described in the text. Jem Doulton’s drum kit is in the foreground, with some Hifiman open-backed cans visible on the floor tom. Behind him you can see Ted Morcaldi’s guitars and pedalboard, and Tom Rogerson’s keyboard rig. Ted’s amps were in a different room in order to achieve better isolation.
116
August 2026 / www.soundonsound.com
theory, there is a good case for using open-backed headphones in some recording situations. And I recently got the chance to put that theory into practice.
Canned Heat To my mind, the most rewarding recording sessions involve musicians playing together in a room. Whether it’s a classical ensemble, a heavy rock band or a jazz trio, nothing matches the magic of live performance in the studio. The best studio musicians can generate this magic regardless of how they’re monitoring — but how they’re monitoring makes a big difference. Not using headphones at all can work very well for acoustic music, or instrumental styles. But it’s a commitment. The musicians and amps all need to be in the same space, and spill will ensure there’s limited scope for isolating and fixing individual instruments, or altering the arrangement after the fact. It’s particularly difficult with line-ups that don’t naturally balance themselves. Singers and acoustic guitarists struggle to hear themselves acoustically when a drummer is pounding away in the same room. Very often, we also want more separation. We move the amps to an
well if they weren’t wearing headphones. But it often happens. I’ve often wondered whether open-backed headphones might present a solution to this problem. Since they don’t block sound from outside, they should allow musicians to hear sources that are actually in the live room directly, with only instruments that need reinforcement sent to the cue mix. And since the sound that escapes from the back is much, much quieter than most of those sources, there shouldn’t be significant spill into mics that are in the room.
In Practice I had the opportunity to put this to the test late last year with an instrumental group led by former Three Trapped Tigers synth player Tom Rogerson, who had recruited guitarist Ted Morcaldi and drummer Jem Doulton to play entirely improvised music. The trio planned to record live, but Tom wanted good separation to give him freedom to edit and process the results. Ted’s amps thus went into another room, and Tom’s Ableton rig was DI’ed. And as luck would have it, quite a few open-backed headphones had been sent in for review at the time, so I had enough available for all three players to get a pair.
“I am confident that the use of open-backed headphones helped to make this a more productive and enjoyable session.” iso booth so that we can get a cleaner guitar sound. We bring the singer into the control room. We DI the bass, rather than have the bass amp spill into the drum mics. And in doing so, we make it impossible for everyone to hear themselves without some sort of monitoring system. So we give the musicians headphones, and make extra work for ourselves. As well as getting a good recorded sound from every instrument, we now need to generate good cue mixes for everyone as well. And it’s all too easy to get locked into a spiral whereby people are constantly asking for something to be turned up, and no-one is hearing anything resembling a natural sound. To me, it always seems particularly perverse to put drums into a cue mix for a drummer who would be able to hear the drums perfectly
We were working in the large live space at Half Ton Studios near Cambridge, where a personal monitor system gives every musician their own simple mixer. I made the electronics and the guitars available on separate feeds, everyone dialled in as much or as little of them as they needed, and away we went. Tom, Ted and Jem are all outstanding musicians, and I’ve no doubt they’d have made stellar music anyway. But I am confident that the use of open-backed headphones helped to make this a more productive and enjoyable session. At no point did anyone ask for drums in the cue mix, and absolutely no time was wasted fiddling with levels. On a session where there were no vocal mics up, it also meant that band members could talk to each other between takes without removing their headphones.
Compared with using closed-back headphones, there was no meaningful loss of separation. I couldn’t detect any spill at all from Tom’s electronics onto the drums or the room mics, and any spill from Ted’s amps was down to imperfect isolation rather than headphone leakage. All of the band members commented on how natural and comfortable the arrangement felt, and although I can’t prove it, I am fairly convinced that it was less fatiguing for them than closed-back headphones would have been. At any rate, there was no drop-off in imagination or performance towards the end of the session — quite the reverse, in fact.
Open Minds On this session, at least, the experiment with open-backed headphones seemed to me a success. It allowed the session to run smoothly, helped the musicians to feel connected, probably kept headphone levels sensible, and there was no real down side in terms of spill or sound quality. So why isn’t this done more often? One reason may be that open-backed phones have historically been quite expensive. Few of us are likely to own multiple pairs, and we might not be thrilled at the idea of having a drummer sweat into our main mixing headphones. In recent years, however, they’ve become a lot more affordable, and there are now models that you can buy new for not much more than £100. I can also see that there are tracking contexts where open-backed headphones might not work so well. If you’re overdubbing close-miked vocals, for example, spill onto the mic is likely to be noticeable, and will tend to sound phasey if the singer moves their head. And if you’re using a click track, you’d need to be very careful about the click sound and its level to avoid distracting bleed onto the mics. Finally, although I haven’t seen open-backed headphones used for tracking before, there are other approaches that arguably achieve similar benefits. For example, it’s quite common for musicians to slide one earpiece off their ear, and some studios even have single-sided headphones for orchestral players. But this is hardly a natural way to hear yourself, especially for long periods. In future, I’ll certainly be bringing open-backed headphones to any session where foldback is likely to be needed and musicians are playing together in a room.
www.soundonsound.com / August 2026
117
SPOTLIGHT
LUKE WOOD
Originally developed by API to populate and expand their large-format consoles, the 500-series format is hugely popular today, in home and professional studios as well as on location. Today, many manufacturers offer 500-series modules and host racks, and the format can be a convenient and often cost-effective way to get your hands on gear designs that were once reserved for big-budget, high-end facilities. Its modular nature means you can ‘mix and match’ to your heart’s content: fancy a channel strip that combines a Neve preamp, a Motown-style equaliser and an optical compressor? Not a problem! Whether you’re looking to make the leap into the 500-series world, or simply want to fill empty slots in your rack, you can explore the format in detail in our SOS November 2020 articles that take you through what to look for in a rack (https://sosm.ag/500-series-chassis), and factors to consider when choosing modules (https://sosm. ag/500-series-modules). But there’ve been many new products since, and this month we’re shining our Spotlight on some of the key releases of the last year or two.
500-Series: What’s New?
The modular format for preamps and studio processors continues to expand. Here’s our pick of recent releases.
AEA RPQ503 & Snaqbox V2
As its name suggests, the RPQ503 is a 500-series version of AEA’s praised RPQ3 standalone preamp. With a 68kΩ input impedance and a healthy 85dB of gain on tap, it’s optimised for ribbon mics, but as AEA are keen to point out, the RPQ503 makes an excellent partner for all other types of mic, too. The gain and output level controls are joined by a trio of buttons that handle mic/line switching, polarity and 48V phantom power. Much like its rackmount sibling, the RPQ503 also includes AEA’s CurveShaper EQ, which comprises low and high bands that each offer ±20dB of gain and sweepable frequencies. Earlier in 2026, AEA also launched the Snaqbox V2, a new and improved version of their two-slot 500-series chassis, and thanks to upgrades to the power supply, the unit is now capable of delivering a chunky 500mA per slot, ensuring compatibility with the vast majority of 500-series modules. £ RPQ503 £799, Snaqbox V2 £399. Prices include VAT.
W www.aearibbonmics.com
122
August 2026 / www.soundonsound.com
AEA RPQ503 & Snaqbox V2
API 525A
Having invented the format, API have continued to support it. Their consoles can host modules, they make host racks, and their product range includes a healthy selection of modules. The most recent addition is the 525A, a FET compressor that builds on the 525 that was introduced in the 1970s. The new version maintains the discrete signal path, employs API’s own proprietary transformers and 2510/2520 op-amps, and retains the sonic characteristics of the original unit. It also features an aesthetically pleasing 1970’s-style analogue gain-reduction meter. Ratios range from 2:1 to 20:1, and the module includes a Ceiling parameter that combines the 525A’s threshold and make-up gain controls. Updates to the classic design include variable attack times (15μs-15ms) and a choice of seven release modes (50ms-2 seconds). £ £1195 including VAT. W www.apiaudio.com
API 525A
Atomic Analog Tonograf EQ Atomic Analog’s Tonograf EQ faithfully recreates the signal path of the TAB W95, a transistor-based EQ module that was originally developed in the early 1960s. With the germanium transistors used in the original design now unavailable, the company set about trialling components that could replicate its sound and behaviour. They Atomic Analog settled on Lundahl Tonograf EQ input and output transformers, along with custom-wound inductors and other high-quality components from the likes of Panasonic and AVX. The resulting module pairs capacitive high- and low-shelf bands with an inductor‑based proportional‑Q mid band. There are also a few additions to the design that inspired it. Firstly, the original’s fixed 10kHz high shelf has been expanded, with 7 and 16 kHz options, while the boost-only mid band now offers ±9dB of gain and an extended range of centre frequencies (500 and 700 Hz, and 1, 1.4, 2 and 3 kHz). £ £1025 including VAT. W www.atomicanalog.com
Cloud Microphones TRUE BLUE CL-520 Revealed at NAMM 2026, Cloud’s new CL-520 module is built around an updated version of an acclaimed TRUE Systems preamp design. Aiming for neutrality rather than character, the module boasts ultra-low distortion and noise measurements, along with high resistance to
Cloud CL-520
interference from neighbouring modules and power supplies. Its frequency response is quoted as ±0.25dB from 10Hz right up to 250kHz! Up to 76dB of gain is controlled by a detented pot, while functions such as gain range, polarity, phantom power, a dedicated ribbon/ dynamic mode and the unit’s high-pass filter (25-420 Hz) are handled by relays and controlled by the company’s Touch-Control interface. The mic input is joined by a front-panel instrument input, which sits below a Thru connection that allows the signal to be passed on to an amp or other gear. £ £899 including VAT. W www.cloudmicrophones.com
Cranborne Audio Brick Lane 500 Cranborne Audio like to do things differently, and their first compressor is unlike any other — but at the same time, like lots of them! While the signal path is all-analogue, it’s one of the few modules to employ a PWM-based process (that’s Pulse Width Modulation) for gain reduction, rather than one of the usual suspects (FET, VCA, optical and so on). The approach delivers an incredibly fast response and Cranborne Audio ultra-low distortion, Brick Lane 500 but although this translates to an exceptionally transparent, neutral sound character (often useful in itself), Cranborne have painted this ‘blank canvas’ with a range of more colourful options for those who prefer more ‘vibe’. With seven different operating modes (Velvet, Float, Smash, Tame, Glue and two versions of Polish), the Brick Lane can emulate the key characteristics of a range of traditional compression topologies. A mode-dependent Stress control also lets you dial in up to a filthy 20% distortion! Furthermore, an Enigma mode lets advanced users access all manner of parameters not obvious on the front panel. £ £679 including VAT. W www.cranborne-audio.com
Dangerous Music BAX500 The Baxandall EQ, which dates back to 1950, remains as useful today as it was then. In their BAX EQ, Dangerous Music brought it up to date, delivering hugely impressive technical specs and useful additional features. It’s been with us now for a couple of decades, so was an obvious candidate to port to the 500-series — but Dangerous Music BAX500 the company didn’t want do that until they could do so without compromise. Now, they’ve achieved that: the single-channel BAX500 EQ benefits from the same design and components as its rackmount sibling, and is hand-assembled at the company’s US facility. It’s equipped with high- and low-pass filters, plus the broad Baxandall-style low and high shelves so famed for their smooth, musical response. With a ±5dB gain range, it’s obviously not a surgical tool, but the broad, multi-octave sweeps can have a more dramatic musical effect that you might think, and the filters can further shape those curves or counter unwanted side-effects, such as lifting subsonic rumble. Dangerous say it’s equally well suited to tracking, mixing and mastering duties, and tight component tolerances and stepped controls make it easy to match multiple modules for stereo or other multi-channel material. £ £1299 including VAT. W www.dangerousmusic.com
Drawmer MQ-1 / MQ-2
Inspired by the legendary Motown EQ units, Drawmer’s MQ-1 and MQ-2 modules promise to capture the sound and feel of the iconic 1960s studios. Both feature the same EQ facilities, with seven proportional-Q bands at 50, 130, 320 and 800 Hz, and 2, 5 and 12.5 kHz. Each band offers a ±10dB gain range, and a master gain control offers a further ±10dB of level adjustment. The MQ1’s EQ bands are complemented by Drawmer’s Crush circuitry, which delivers additional harmonic ‘warmth’ at the push
www.soundonsound.com / August 2026
123
SPOTLIGHT
50 0 -S E RIE S : W H AT ’ S N E W ?
Drawmer MQ-2
of a button. The double-width MQ2 is intended for stereo processing, but as well as giving you two channels of the same EQ, it features a handy one-knob compressor. (On the subject of Drawmer compressors, also check out the On The Horizon section at the end of this article.) £ MQ-1 £299 MQ-2 £430. Prices include VAT.
W www.drawmer.com
Gainlab Audio Auditor
Gainlab Audio have delivered some impressive rack gear in recent years, and have now launched the first in a forthcoming range of 500-series modules. Called the Auditor, it’s a ‘double wide’ Class-A headphone amplifier that aims to provide high-quality monitoring in a compact format. It boasts impressive specs: the published frequency response is within ±0.005dB between 10Hz and 20kHz, while THD sits at <0.005% (measured at 200mW). The headphone output offers protection from DC offset, overcurrent and power-on transients and, helpfully, the incoming line-level signal is also passed on to the host rack’s outputs for connecting additional monitoring or recording gear. Along with its volume control, the Auditor is equipped with mute and mono-sum switches. £ £349 including VAT. W www.gainlabaudio.com
124
August 2026 / www.soundonsound.com
Gainlab Audio Auditor
Neve 88R LBC
Neve 88R LBEQ
Neve 88R LBC / LBEQ
Sound Skulptor LA502T
The 500-series format can be a cost-effective way to get your hands on a slice of high-end large-format console tech, and Neve’s 88R preamp has been available in module form for some time. More recently, they introduced the 88R LBC and LBEQ, which recreate the channel compressor and EQ from the same console in module form. The VCA-based LBC is perhaps more ‘forgiving’ than the company’s famous diode-bridge compressors. Its variable ratio control ranges all the way from 1:1 to brick-wall limiting. A clever dual-circuit adaptive attack allows it handle fast transients or more sustained sounds appropriately, while the release can be controlled manually (30ms-3 seconds) or set to auto. Unusually for an analogue compressor, the 88R LBC also offers automatic make-up gain. Setup, then, can be super quick and easy, making it particularly useful on tracking sessions. The LBEQ features four overlapping bands with ±20dB gain ranges. The high and low bands can be switched between two shelf modes (standard/resonant) and two bell modes (narrow/wide), while the fully parametric low- and high-mid bands feature a Q control with a 0.3 to 7 range. £ £954 each including VAT. W www.ams-neve.com
Sound Skulptor’s wide range of modules revives classic designs and aims to make them more accessible, not least by offering them in both DIY kit and fully assembled form. Their latest offering is the LA502T, an optical compressor inspired by the much-loved Teletronix LA-2A. It expands on their earlier LA502 by pairing the same optical cell and transformer-based input/output stages with a valve-drive make-up gain. The control set has also been expanded, with a new ratio option sitting between the default LA2A and limiter settings, two side-chain high-pass filter options, and additional 10 and 20 ms attack times. While the fully assembled price isn’t bad, the DIY version could prove a bargain for someone who’s confident in their Sound Skulptor soldering skills! LA502T £ Assembled £549, Kit £299. Prices include VAT.
W www.soundskulptor.com
Wolff Audio W1
Trident Audio SC2
Trident Audio SC2
Trident Audio’s new SC2 aims to faithfully recreate another classic design: the Joemeek SC2 optical compressor. Renowned for its ability to apply some ‘glue’ to vocals, individual instruments and full mixes, the module’s photo-optical circuitry is said to react ‘naturally’ to incoming signals, applying musical-sounding levelling that helps to maintain a track’s emotion. Trident say that thanks to its ‘forgiving’ nature, the SC2 excels at subtle dynamic control, but will still deliver pleasing results even when being pushed harder for effect. We’ve yet to review it, but if it does sound like an SC2 it should make a lot of people happy! £ £525 including VAT. W www.tridentaudiodevelopments.com
Launched at NAMM 2026, the W1 brings the preamp section of Wolff Audio’s flagship console to the 500-series format. It fully replicates the console’s signal path, including the custom Cinemag input and outputs transformers, and boasts a socketed op-amp design so users can install alternative op-amps that offer a slightly different tonal character. The main, stepped, 0-50 dB gain switch is joined by a ±6dB Wolff Audio W1 trim control for fine adjustments, and the company say the low minimum gain makes it possible to place a mic extremely close to loud sources without sacrificing clarity. Along with a handy front-panel mic/instrument input, the W1 is equipped with an output level control and a set of switches to toggle phantom power, signal polarity and a -20dB pad, and to select a high-impedance instrument input option. £ £785 including VAT. W www.wolffaudio.com
On The Horizon...
Finally, there are always more 500-series releases on the horizon, and we’ll keep you up to date as news arrives. But, just before we went to press, SOS welcomed over 150 brands to our GearExpo UK show in London, where French company H-Labs showed us their brand-new CL089 PWM compressor, the launch of which was imminent. Like their other recent hardware, this draws inspiration from a vintage Studer processor. We also enjoyed a sneak preview of two upcoming compressors from Drawmer (one a FET type, the other optical) that we hope to review very soon. But arguably the biggest talking point was Make Noise Pro Audio’s tongue-in-cheek AI Slop Machine — a joke that started life as a humble novelty sticker but evolved into a fully mocked-up 3D ‘module’. Make Noise say more than a few people fell for that one! W https://hlabs.audio W www.drawmer.com W https://makenoiseproaudio.com
www.soundonsound.com / August 2026
125
ON TE ST
SRM Sounds ASMR Choir
Kontakt Instrument
HHHH
If seeing ‘ASMR’ takes you back to the pandemic when the phenomenon — excuse the pun — became an Internet sensation, you needn’t worry. This new release from award-winning composer Max Richter’s SRM Sounds is a far cry from the heavy‑whispering, lip-smacking, tingle‑triggering trend that exploded on social media, dividing listeners strongly into one group that found it incredibly relaxing and another that furiously hit the dislike button. Things were tricky in that era. In the context of this library, it simply refers to vocals and strings that get the close mic treatment, resulting in a collection described by the creators as “the musical equivalent of someone whispering in your ear”. The library consists of four instruments: Choir (sopranos who specialise in Renaissance music); Strings (solo violin and cello); Choir + Strings (recorded together in the same space for added texture); Vocoder (selection of choir and string recordings put through hardware and software effects — with a focus on analogue vocoders — and re-amped back into the live room at Studio Richter Mahr). The result is the exact opposite of a general-purpose choir library. Instead, across articulations like soft hums, operatic sirens, vibrato swells, flautando and more, you have choral and instrument textures well suited for layering into compositions. The voices are absolutely exquisite, with clear delivery and minimal vibrato, perfect for melodic colour and smooth blends with other instruments. What’s interesting is that they’re not restricted to pure, delicate sounds. A healthy dose of quirk runs free among the articulations, demonstrating just how multi-faceted and complex the human voice can be. While the sounds themselves are distinctive and not exactly what you would
126
August 2026 / www.soundonsound.com
consider basic raw material, the library does offer a set of tools to manipulate the samples. A Dynamics knob linked to CC1 gives “a gentle boost with a wide Q to 3.5kHz”; a CC11-linked Expression slider controls volume; and a basic ADSR envelope, along with filter, saturation, and reverb effects, rounds things out. From the user’s point of view, the library supports a workflow built around creative constraints. Phrases and movement are often baked in, playable range varies across patches, sounds come layered with other sounds... you get the idea. You can control colour, tone, shape and dynamics with the ADSR envelope and effects, but you’re working within a very specific box that leans away from an all-purpose sound and towards a more distinctive, statement piece. It’s an exciting toolbox to explore, especially to flex your more experimental muscles. One minor quibble — having descriptors for the Mix knobs would have been useful. Currently all the UI has are knobs labelled Mix 1, Mix 2 and Mix 3, which stand for Close, Mid and Far for the first three instruments, and Direct, Room 1 and Room 2 for the Vocoder patches. These terms mean different things for different instruments: for the Choir instrument, Close refers to ‘small diaphragm condensers and vintage ribbon’; for Strings, it’s ‘large diaphragm condensers and vintage ribbon’; for Vocoder, Mix 1 is the direct sound from the control room. Once you learn the instrument, it will become second nature, of course, but in the beginning, a simple description that appears upon mouseover would be helpful. I guess the idea is to use your ears and go with ‘feel’ as opposed to choosing by label. Also, from what I can tell, there isn’t a trial/demo version available, which is a pity because for a library that has such a strong character, it would be useful to get to know it better to help understand how it could work with your composing style. Overall, ASMR Choir is a distinctive library of beautiful sounds, recorded and processed with a specific artistic point of view. If you’re trying to break through the
clutter, a sound from this collection would be a good tool to reach for. Sonal D’Silva £199 www.srmsounds.com
Sample Logic HeartBeat Guitars Kontakt Instrument
HHHHH
If you are looking for some instantly inspiring modern rock guitar and bass riffs and grooves to drop into a song or soundtrack project, Sample Logic’s HeartBeat Guitars might have you covered. HeartBeat Guitars is designed for the full version of Kontakt (but also provides all the sample content as REX loop files), and includes nearly 3300 individual performance samples that are organised into 209 construction‑kit-style Kontakt presets. The library format is very straightforward. Each of those 209 presets contains a set of related guitar or bass performances, each initially mapped to an individual MIDI key for triggering. The performances themselves are generally several bars in length. As you trigger a specific sample, its naming information indicates useful performance, key and chord details. In use, you can simply trigger individual loops from a construction kit to build an extended performance —this is mix-ready modern rock guitar made about as easy as it gets. The sound‑design options are equally simple in use. The row of rotary controls under the main waveform display provide pitch-shifting, attack/release adjustment, low cut and high cut (with modulation if
required), three user-selectable FX slots, plus Driver and Sweetener FX (the latter two are multi-effects providing saturation and polish to the sound). The Edit All Samples switch (located top right) lets you apply these controls globally to all samples within the loaded preset or, for extra flexibility, to configure different settings for each individual sample. Finally, via the mini keyboard graphic located on the right beneath the waveform display, you can take the last played sample and map it chromatically across the full MIDI note range. If you want more options with a specific sample such as the option to slice the loops then you can, of course, simply import the REX files into your DAW and get creative. With such a straightforward approach, HeartBeat Guitars is incredibly easy to use and, once you find a combination of performances that work together to inspire an initial idea, it’s easy to then build other arrangement elements around them. The streamlined UI does mean that the library’s value to a potential purchaser lies very firmly with the sampled performances. To my ears at least, these are very well done — modern, plenty of attitude, but not (thankfully) too much by way of pyrotechnics; good as song building blocks or hooks but without getting in the way if you wanted to layer a lead or vocal part over them. There are useful examples to audition on Sample Logic’s website. Simple in both concept and use, if you need some cool modern rock and bass guitar performances to kickstart a song or scoring project, but don’t have a suitable guitarist to hand, Sample Logic’s HeartBeat Guitars might have just the loop-based ammunition you need. John Walden $199 www.samplelogic.com
Wrongtools Pianesque
Kontakt Instrument
HHHHH Does the world need another piano library? A fair question, but in this case I’d say yes, because although this library takes the vibrating piano string as its source, few of Pianesque’s patches sound anything like a piano. The focus of this library, which requires the full version of Kontakt 6.4.2 or later, is based on the sonic manipulation of the sound coming from the piano strings after the hammer impact. Given the modest price of this library and the sounds it is
able to conjure up, I have to concede that Wrongtools have come up with something very musical and evocative that is rather different from what you might expect. The ethos is similar to that of the company’s Pianotron instrument but with a gentler focus. Apparently an Ebow, regular bow and other techniques were applied to a prepared piano, so although some of the sounds have soft, percussive decays, others sound like drifting pads, floaty harmonics or bowed instruments. The result is a set of sounds well suited to creating a sense of atmosphere, emotional calm, ambience or for use as cinematic backdrops. Pianesque is a 4.4GB library with 90 patches built from 1131 samples. Its straightforward control set allows adjustment over Volume, Reverb, Delay, LFO, Vibrato, Dynamics and Low-pass
Access, you have to locate the samples via Kontakt’s Load function. Once loaded you can scroll through the sounds for that instrument using the arrows to the right of the patch name. Master controls allow for mono or stereo playback along with tuning, pan and volume adjustment. While the range of sounds available varies from gentle and drifting to glassy, they all have in common that they sound organic rather than electronically generated, though some take on pad‑like attributes that suggest just about anything other than a piano. The most percussive sounds are more reminiscent of resonant bowls, muted wind chimes and experimental lo-fi electric pianos, while others, with slow-fade-ins, blur the line between synth, organ and string timbres. The ability to bring in effects adds further variation, especially if you choose those of a more granular nature and to add more movement (the X/Y pad cursor can be automated). A nice touch is that the attack of some of the more percussive sounds changes each time you hit a note, adding interest and enhancing the sense that the sound comes from a physical instrument. While the default for some instruments is not to have the X/Y pad effects active, they can be brought into play if needed and these can really change the character of a sound in abstract and atmospheric ways. Everything sounds musical, with many patches being good candidates to
“Overall, ASMR Choir is a distinctive library of beautiful sounds, recorded and processed with a specific artistic point of view.” Filter via faders to the left of the window. To the right are further sliders that relate to the balance between layers in the current preset. The number of faders varies from patch to patch. Various effect combinations can be added with control via a central X/Y pad as used in previous Wrongtools instruments. The 10 effect combinations are named, but to hear what effects they actually produce you just have to try them. The effect name assigned to the pad is shown to the right of the cog settings icon. Click on the effect name or down arrow to open up the effects options. The library is arranged as seven Kontakt instrument folders (one is called ‘iano’ to signify the start is missing), and as the library is not installed via Native
use as beds behind melodies. There’s a lot of scope for moulding the factory offerings into something new without getting bogged down in complicated menus and parameter lists. If you are looking for something that’s both evocative and organic and that hints at the characteristics of real instruments without actually being them, then Pianesque has much to commend it. There are some truly lovely sounds to be had, most with a misty, diffuse character, and seeing what changes you can bring about simply by swapping out the effects is a lot of fun. Paul White €54 www.wrongtools.com Audio examples of this month’s libraries are available at www.soundonsound.com.
www.soundonsound.com / August 2026
127
Pro Tools
TECHNIQUE
The new Track Pinning feature could change the way you edit audio in Pro Tools. JULIAN RODGERS
P
ro Tools 2026.4 introduced a variety of new features, but for many music-production users the headline addition was Track Pinning. This feature allows an alias of one or more tracks to be pinned to the top of the Edit window, where it remains visible, while the rest of the session scrolls beneath it. Pinned tracks are aliases rather than duplicates. The original track isn’t moved to a new location; it remains in its normal position within the session, and any edits made to either the pinned version or the source track are reflected immediately in the other. A pinned track can therefore be edited exactly like the original, while always remaining visible as a reference. Another useful aspect of Track Pinning is that pinned tracks and their source tracks can have different display settings. Track height, view type and automation lane selections can all be configured separately, opening up a number of workflow possibilities that go beyond simple navigation.
Pin’s Labyrinth Pinning a track is straightforward. Right-clicking on a track reveals the Pin Track command, while the same menu on a pinned track offers the option to unpin it. It’s also possible to pin entire Edit Groups directly from the Groups List by right-clicking on a group name and selecting the appropriate command. Before looking at some practical applications, it’s worth understanding what Track Pinning is, and what it isn’t. Track Pinning only exists in the Edit window and has no equivalent in the Mix window. It isn’t intended as a way of keeping particular faders permanently accessible in the mixer, in the same way that you might lock a channel to one end of an Avid S1 control surface. If that’s your goal, a floating fader window is a simple solution for keeping a fader accessible on screen. The ease with which tracks can be pinned and unpinned encourages a fluid, task-oriented approach to navigation. Pinned tracks are saved with the session and recalled with Window Configurations, though not with Memory Locations.
Mightier Than The Sword The task I’ve used Track Pinning for most since its introduction is as a convenient way
130
August 2026 / www.soundonsound.com
Track Pinning lets you pin a track to the top of your Edit window so that it’s always visible — useful if you want to use your kick drum track as a timing reference.
to keep a timing reference visible while editing another track. A common example would be tightening up the relationship between a bass guitar and a kick drum in a multitrack band recording. Before Track Pinning was available, I’d move the bass guitar track so it sat directly beneath the kick drum track in the Edit window. I could then use Tab to Transient to navigate between kick drum hits and use the P and ; shortcuts to move the insertion point vertically between tracks whilst remaining at exactly the same timeline position. Once an errant bass note had been separated into its own clip, it could quickly be moved to match the corresponding kick drum hit. Track Pinning changes the mechanics of this workflow slightly. Because the pinned track is an alias displayed in the dedicated Pinned Tracks pane, it isn’t actually adjacent to the tracks in the main Edit window. As a result, the familiar P and ; navigation shortcuts can’t be used to move directly between the pinned track and the track you’re editing. Fortunately, the workflow remains almost as quick. With the kick drum pinned at the top of the Edit window and the bass track visible beneath, use Tab to Transient to locate the desired kick drum hit and position the insertion point accordingly. Once you’ve identified and separated the bass note that needs correcting, select the Grabber tool and Control-click (Mac) or Start-click (Windows) on the clip. This moves the start of the clip directly to the insertion point, aligning the bass note with the kick drum hit you’ve chosen as the reference.
The degree of timing precision that’s appropriate will depend on both the musical style and the intent of the production. These decisions should usually be made by ear rather than by eye. Visual editing can encourage you to chase perfect waveform alignment even when the performance already sounds convincing. If a note doesn’t draw attention to itself as being late or early during playback, it may not need correcting at all. A related application involves another technique I’ve previously recommended in Sound On Sound: editing a clean DI feed alongside heavily distorted guitar parts. While the DI may never be heard in the final mix, it can become invaluable during editing. Distortion, amp simulation and saturation tend to obscure transient information, making it difficult to identify note starts accurately from the waveform alone. When significant editing is required, the clean DI often provides a much clearer visual reference. By grouping the DI and miked-up guitar tracks together, edits performed using the DI waveform are automatically reflected across the audible guitar tracks. Track Pinning makes this even more convenient. Rather than moving the DI amongst a collection of related guitar tracks, it can be pinned at the top of the Edit window and used as a fixed timing reference while editing.
The Place Beyond The Pins One of the more interesting aspects of Track Pinning is that pinned tracks can have different display settings from their source tracks. In effect, this creates a second view of the same material.
As with so many things in Pro Tools, there are already several ways to achieve similar results. The Show/Hide Automation Lanes button at the bottom of a track header allows you to display any enabled automation lane, while MIDI tracks can additionally display MIDI controller and performance data. Multiple lanes can be shown simultaneously beneath a track, and this remains a powerful and flexible way of working. Track Pinning doesn’t necessarily allow you to do anything that wasn’t already possible. What it does offer is an alternative workflow which, for some tasks, can be more convenient. For example, I often find myself wanting to see both volume automation and Clip Gain at the same time. Track Pinning provides an elegant solution. The source track can display one view while the pinned alias displays another, allowing both to remain visible simultaneously without constantly changing track views. The right-click menu offers both Pin and Pin And Replace commands. The former adds tracks to the existing pinned collection while the latter replaces the current pinned track(s) with the selected track. It’s also worth spending a few moments exploring the Track Pinning preferences where options for control over the pinned tracks pane are included.
Pins & Noodles I also found Track Pinning useful when working with MIDI arrangements. The MIDI Editor remains the best tool for analysing voicings, harmony and voice leading, thanks to its ability to display multiple colour-coded
In dense MIDI arrangements, Track Pinning can help you analyse parts in context.
tracks simultaneously. However, Track Pinning can provide a useful alternative perspective when working on string, brass or synth arrangements, particularly when call-and-response or contrapuntal parts are spread across multiple tracks. In dense arrangements, it can sometimes be easier to pin one part and scroll through the others in the Edit window than to continually hide and show tracks in the MIDI Editor. While we’re discussing MIDI editing, there’s a keyboard shortcut that’s worth remembering: Vertical Zoom To Show All MIDI. Press Command+Control+Shift+[ on Mac, or Start+Control+Shift+[ on Windows, and Pro Tools automatically scales the Notes view vertically to show all MIDI. No more scrolling up and down. The common theme running through all these examples is that Track Pinning isn’t simply keeping tracks visible. It’s providing
Pinned tracks can show different views to their parent tracks, allowing you to view multiple data types on a track at once.
alternative perspectives on the same material and allowing you to choose whichever view best suits the task at hand.
One Pin To Rule Them All Although, as discussed, Track Pinning can be extremely useful when editing, I think it’s fair to say that it is principally a navigation tool, and the larger the session, the more valuable it becomes. There are a couple of additional features worth knowing about when managing large numbers of tracks. The first is that, as previously mentioned, it’s possible to pin entire Edit Groups directly from the Groups List. Right-click on a group name and you’ll find the same pinning options available there too. In large sessions, this can be a much faster way of keeping an entire section of the arrangement visible than pinning tracks individually. Folder tracks can also be pinned, although there is an important distinction. A pinned Folder track appears as a single flattened track in the Pinned Tracks area. The individual member tracks within the folder can only be viewed and edited from the source Folder track in its original position within the session. Depending on what you’re trying to achieve, this may make Edit Groups a more useful candidate for pinning than Folder tracks. Track Pinning goes much further than simply keeping a lead vocal visible at the top of the Edit window. Whether used as a timing reference, an alternative view of the same material, or a navigation aid in larger sessions, it’s a feature that quickly becomes second nature once incorporated into your workflow. Spend a little time experimenting with it and you’ll almost certainly find situations where it earns a place in your everyday Pro Tools toolkit.
www.soundonsound.com / August 2026
131
Pro Tools Cubase
TECHNIQUE
Cubase Pro 15’s new stem separation tool can breathe new life into old projects!
Your newly created stems are neatly organised within a Folder with the full functionality of their respective audio tracks available for level adjustment or other processing.
JOHN WALDEN
I
f recording is a long-standing passion, the odds are that you have an extensive collection of older musical projects on tape, vinyl, CD/DVD or old hard drives — or maybe just in stereo audio files ‘somewhere’. However carefully we might have tried to archive those projects, returning to the multitracks isn’t always possible. We may have lost them, or lost touch with whoever looked after them, or maybe we no longer have the machines or software to get what we need from them. So there will be many occasions when all we have access to is the old stereo mix and a feeling of ‘if only I could change X, Y or Z...’
Stem Where once all we could hope for was a simple remaster, with perhaps a bit of judicious EQ, compression/limiting and maybe a touch of stereo widening to improve the result in such circumstances, the arrival of stem separation a few years ago opened more doors to us. This technology still feels like magic to me, though there are now so many options that it’s easy to take for granted. Importantly, there have been rapid advances in the quality of stem separation in recent years, and Steinberg, the makers of Cubase, have been a key player with their SpectraLayers Pro software. Cubase Pro/Artist users have had access to the bundled streamlined version, SpectraLayers One/Go, for some time but Cubase Pro 15 took things a further step forward by directly integrating stem separation into the Cubase feature set. So, if you want to breathe a bit of new life into a stereo mix
132
August 2026 / www.soundonsound.com
where you have no means of revisiting the original multitrack project, how far can you now go with Cubase Pro 15? The Separate Stems command is in the main Audio menu. You don’t get as many options as you might in the full version of SpectraLayers Pro (SLP) or, for example, iZotope’s RX, but you can generate up to four stems: vocals, drums, bass and the catch-all ‘other’. Once executed on a selected audio clip, the process runs quickly and, to me at least, the results are closer to SLP’s Fast mode than its upmarket High mode. When completed, the stems are placed on individual tracks in a new Folder, directly beneath the original clip.
Get Clean So, what’s the quality of the stem separation like? Well, I’ve supplied some short audio examples for you to audition (https:sosm.ag/cubase-0826). These are based on an extract from a stereo mix of an electronic pop project. This might be quite a common type of target for ‘unmixing’ but, equally, with ambience effects on the vocals, and a combination of both lead and backing vocals, it’s also not an easy one for stem separation tools to cope with, particularly if your aim is a clean a capella vocal extraction. Of course, all stem separation processing is very much dependent on the musical nature of the source material, with denser mixes providing a greater challenge than more minimalist ones. As can be heard in the first audio example, Cubase Pro 15’s stem separation has made a good stab at the task. The vocal
stem is not pristine, sure, but in this case I think the bass seemed to be the most problematic instrument to isolate, with the attack of some notes not clearly defined (perhaps it was masked by the kick at those points?). For comparison purposes, I created more audio examples generated using SpectraLayers Pro 12 and iZotope RX 12. I used the highest‑quality modes in each case. I’ll let you judge their relative merits but, interestingly, both struggled in the same way to separate out the bass. Despite that, it’s not surprising that the overall quality of the separation seems superior in both cases, particularly when it comes to the vocals and the drums (better transients?).
Balanced View If you’re revisiting a track simply to adjust the overall instrument balance of the original mix, I think you are in luck. Providing the extracted stems sum back to the original mix (that is, no data is discarded along the way), then even where the stem separation is not perfect this is generally one of the less problematic use cases. Cubase Pro 15 certainly makes it easy to experiment with this sort of thing, and one of the audio examples demonstrates the possibilities. With your new stems automatically organised into their own Folder, you can audition, edit, or apply additional track/channel-based processing to each stem, should you wish. That includes the ability to adjust and automate the respective channel faders for quick and easy mix rebalancing. For example,
if you just need to improve the clarity of an individual vocal word or phrase that’s relatively easy to achieve. For a dB or two of adjustment of any stem, there will be many cases where Cubase Pro 15’s new stem separation will let you rebalance your mix with a minimum of both fuss and audio artefacts. You might also find that you can do things like add a touch of reverb or delays to a voice, guitar or synth part, even if the separated stem has some rough edges.
Voice In, Voice Out Two further common applications of stem separation depend upon how cleanly the vocal separation can be achieved. Remarkably, the first of these (removing the vocal to leave an instrumental bed) can often be done very well, given the current state of this technology. As demonstrated in the audio examples, Cubase Pro 15’s stem separation generally did a good job with my test clip — even if you can spot one snippet of vocal that escaped into the ‘other’ stem! What’s ‘good enough’ will ultimately depend upon your use case but, for a karaoke instrumental, as guide track for recording a new vocal, or maybe even for a short instrumental cue to drop into a video edit with other audio components, you may well be able to cross the quality bar required. The second application is using the isolated vocal stem as part of a remixing project, and that’s more challenging. Clearly, the cleaner the vocal extraction the better, and as noted above the nature of the source mix is a crucial factor. But using Cubase Pro’s standard audio processing options on your extracted vocal stem allows you to do a certain amount of ‘cleaning’ using instances of Gate,
DeEsser and Frequency 2 before dropping the vocal into any new musical context. I did just this for the next of the audio examples, blending the original vocal with a new instrumental backing featuring electronic drums, synth bass and a couple of synth-based keyboard sounds. This new arrangement is similar in intensity to the original and, again, while the results might not get you nominated for any ‘pristine mix’ awards, there may be plenty of use cases where you could achieve acceptable results. Obviously, you won’t win in every case, and any audio artefacts in the isolated vocal stem will be more apparent if a sparser remix arrangement leaves the vocal more exposed. I’ve attempted this within the audio examples, placing my extracted vocal into a simple acoustic piano backing and, just for fun, also dropped the tempo from 135 to 120 bpm (so the extracted vocal had to be time-stretched). That’s clearly a more challenging ‘ask’ and, in particular, the breathy elements within the vocal become much more noticeable (not in a good way). That said, even used solely in a proof-of-concept context with the intention of re-recording the vocals later, it’s cool to have the flexibility to experiment as you consider some alternative arrangement options for your song idea. Cubase Pro 15’s integrated stem separation encourages that kind of experimentation.
Bass Replace A further application of your newly extracted stems is resampling. Vocals, drum hits and bass are probably the most obvious candidates (isolating a single sound might be more difficult in the ‘other’ stem). Of course, you can get as adventurous and creative with your resampling as you wish but, given my earlier comments about the bass stem extraction in our audio example, I’ve gone for a bass replacement option in the final audio example. To achieve this, I simply dropped the bass stem into a Sampler Track, and then isolated one of the better individual bass notes. With a few minor tweaks to the Sampler Track’s Amp and Filter settings, and an instance of the EnvelopeShaper plug-in just to make it
Having stem separation directly within Cubase Pro 15 makes for a very easy workflow.
easier to emphasise the initial transient of the bass notes that was missing from the original bass stem, it was possible to generate a perfectly playable bass sound. I then just recreated a suitable performance and dropped it alongside the other stems from the original mix.
Good, Better, Best The integrated stem separation feature is a great addition to the Cubase Pro 15 feature set. The results are good but, even if they never reach ‘best’ status (I guess Steinberg have to keep something in reserve for SLP?), inevitably, they will improve over time. Yes, in a commercial mission-critical situation (when asked to revisit a well-known recording in a commercial context, for example), tools such as SpectraLayers Pro 12 or RX 12 will provide an edge. However, if you’re just looking to enhance some of your older ‘stereo mix only’ projects or give them a new life, the fast and efficient workflow provided by Cubase Pro’s stem separation makes a great place to begin exploring.
With a little tweaking within the Sampler Track, resampling my bass stem made it easy to experiment with a replacement bass part within my original stereo mix.
www.soundonsound.com / August 2026
133
Logic Logic
TECHNIQUE
We put Logic’s new Studio Piano instrument through its paces.
S I M O N PAT E R S O N
W
hilst keyboard instruments have a history stretching back thousands of years, the piano as we know it emerged in the early 1700s. Since then, it’s fair to say that pianos have been perennially in fashion, and perhaps even more so today. Pianos are among the most beautiful and versatile instruments in any music production palette, capable of providing rhythm, harmony and melody across virtually any genre from classical and jazz through to rock, pop and electronica. Logic Pro has long catered to this demand by offering a decent range of multisampled pianos, courtesy of the Sampler (formerly EXS24) instrument, and more recently the dedicated Studio Piano. Introduced with Logic Pro 11, this user-friendly instrument provides access to three distinct pianos: a concert grand, a studio grand and a vintage upright. Studio Piano is “optimised for use with” the Keyboard Session Player, and as such, it’s a genuinely valuable addition to the Session Player ecosystem. But on its own, it’s an eminently playable MIDI instrument. Forget the plethora of parameters in the Sampler; this accessible instrument offers a far simpler interface, while still providing useful options for sound configuration. It’s
134
August 2026 / www.soundonsound.com
While Studio Piano was designed to work with Logic’s Session Player, you can of course play it yourself. It includes a number of sound-shaping features, such as adjustable pedal, key and release noise.
inherently straightforward: select a piano type, adjust the volume and microphone balance (where available), and finally tweak just four additional parameters to tailor your piano aesthetic.
The Three Pianos Whilst previous incarnations of multisampled pianos in Logic Pro were named after manufacturers like Steinway and Yamaha, Apple keep the provenance of these new pianos a secret. However, what is clear is that these samples are derived from fresh recordings that allow users to benefit from a range of microphone types and explore more of the sonic characteristics of the pianos. To my ears, the Studio Grand is similar to the original Steinway samples, but with a slightly richer texture and greater depth. Personally, I favour these richer, darker pianos, though I found that adding a small EQ boost in the upper-mid frequency range provides enough brightness to enhance presence and cut through a mix. The Concert Grand is brighter, crisper and more refined, with perhaps a more pronounced stereo width, whilst the Vintage Upright is particularly
characterful, delivering the sound of a gnarly old European piano that feels slightly overdue for a tune-up. All three pianos have been recorded with three mic arrays: a pair of capacitor mics, a pair of ribbons (which, as you’d expect, offer a darker timbre), and a single ribbon mic. You can either select one array, or blend them to achieve a range of textures. There are no details in the manual about the mic placement, but these are relatively dry recordings that allow you to shape the sense of space around them by adding an appropriate reverb to suit your mix. In terms of width, these pianos make full use of the stereo spectrum. Interestingly, this includes the ‘one mic’ version of the Studio Grand, so either Apple’s engineers have implemented some sound-design trickery to create a quasi-stereo image from a single mic, or the ‘one mic’ naming may actually refer to a stereo microphone.
In Use To get to know the instrument and its parameters, create a new software instrument track, then click and hold on the Instrument slot in the channel strip
to locate the Studio Piano in the Studio Instruments sub-menu. The default preset is the one-mic version of the Studio Grand. It’s very straightforward. Simply adjust the volume and you’re good to go. That said, don’t overlook the four additional parameters, starting with Pedal Noise.
Next is Key Noise, which adds the mechanical sounds of pressing and releasing keys. This effect can get a bit clunky, but at the right level it will add some realism. When you press a key on a piano, the corresponding damper moves away to allow that string to resonate. Release
“The Studio Grand is similar to the original Steinway samples, but with a slightly richer texture and greater depth.” If you have a sustain pedal connected (as well you should!), pressing it on its own produces the convincing sound of the felt dampers lifting from the strings. You might find a sweet spot at around 50-60 percent, but you can remove this noise entirely, or else dramatically exaggerate it for a more intimate effect. If you don’t have a sustain pedal, nor do you fancy writing CC64 into the Piano Roll, you can press Command+K to access Musical Typing then use Tab to press the sustain pedal.
the key and the damper returns. The Release Samples parameter ostensibly controls the sound of the damper returning, but you’ll find that at zero, notes will stop abruptly, and increasing the value introduces a more natural decay, adding the subtle realism of resonating strings into your sonic realm. With the sustain pedal down and the dampers lifted, Sympathetic Resonance governs how much the undamped strings vibrate in response to played
notes. Try single notes or simple chords to hear additional harmonic richness resonating in the body of the piano. A nice touch is that, once you’re happy with these parameters, they stay locked when switching between piano types. Having nailed your basic piano sound, you’re free to add effects as desired. I particularly enjoyed pairing all three pianos with the Countryside Church preset in Quantec Room Simulator, routed via an aux send.
Conclusion More extensive piano plug‑ins exist, offering a broader range of instruments (there’s no Blüthner or Bösendorfer here), and additional pianos remain available within Logic’s sound library. But when you’re all in the mood for a melody, Studio Pianos provides an easy-to-use and relatively convincing collection. And since the Studio Instruments come as part of Logic, there are no file management and archiving issues to worry about, unlike with third-party sample libraries.
THE WORLD’S BEST RECORDING TECHNOLOGY MAGAZINE
FULL ISSUE PDF THE WORLD’S BEST RECORDING TECHNOLOGY MAGAZINE
CELEBRATING 40+ YEARS 1985 — 2026
THE WORLD’S BEST RECORDING TECHNOLOGY MAGAZINE
CELEBRATING 40+ YEARS 1985 — 2026
THE WORLD’S BEST RECORDING TECHNOLOGY MAGAZINE
CELEBRATING 40+ YEARS 1985 — 2026
TM
TM
TM
MUSIC PRODUCTION TECHNIQUES / INDEPENDENT IN-DEPTH PRODUCT TESTS / ENGINEER & PRODUCER INTERVIEWS / LIVE SOUND
MUSIC PRODUCTION TECHNIQUES / INDEPENDENT IN-DEPTH PRODUCT TESTS / ENGINEER & PRODUCER INTERVIEWS / LIVE SOUND
MUSIC PRODUCTION TECHNIQUES / INDEPENDENT IN-DEPTH PRODUCT TESTS / ENGINEER & PRODUCER INTERVIEWS / LIVE SOUND
SOFTUBE
FOCUSRITE
ISA C8X
FLOW STUDIO THE CONTROLLER FOR THE BIGGER PICTURE
MacBook Neo Is Apple’s affordable laptop a viable music machine?
A N A LO G U E H E R I TA G E , D I G I TA L T E C H !
Sound On Sound now offers our Full Issue PDF. This complete digital replica of the Print magazine includes all articles and adverts published in that edition. • Buy and download instantly - no shipping costs!
Oeksound Soothe 3
Resonance control becomes creative
ASM Leviasynth
ARTURIA MEGA-BUNDLE
How AI music works
“Immense, powerful, deep, confusing and astounding”
WORTH €1330
And how to protect your own music
30+ IN-DEPTH REVIEWS INCLUDING: MQA / BALCONY LEFT / BAT / ZERO-G / IZOTOPE / VINTAGE TOOLS / NI / SOURCE ELEMENTS / AKAI / SHURE / JOSEPHSON / MACKIE / BAREFOOT / TEMECULA DSP / SONIBLE / UB DSP / CHERRY AUDIO / GINTRONIC / HAMMOCK HILL
TECHNIQUE: MAKING YOUR MIXES WORK ON MOBILE DEVICES THE WORLD’S BEST RECORDING TECHNOLOGY MAGAZINE
Producing Bruno Mars Expressive E Osmose CE Powerhouse MPE controller
Bitwig Studio 6
How far can amp modelling go?
28 IN-DEPTH REVIEWS INCLUDING: AUDEZE / CRUMAR / KENTON / FRYETTE / OVERLOUD / ACON DIGITAL / TOONTRACK / CLOUD / MUSIK HACK / NEUMANN / STEINBERG / SSL / GS MUSIC / EVENTIDE / UST / ROLAND
www.soundonsound.com
TECHNIQUE: RECORDING A CHOIR FOR ATMOS / DAW WORKSHOPS
July 2026 £7.99
CELEBRATING 40+ YEARS 1985 — 2026
THE WORLD’S BEST RECORDING TECHNOLOGY MAGAZINE
Recording outdoors
WIN
MACKIE
“We cut three songs in a day”
Line 6 Helix Stadium
PA SYSTEM WORTH £ 2000
Celemony Tonalic The world’s best session players in your DAW
Make the world your studio!
RUPERT NEVE
Beyond parallel compression
NEWTON CHANNEL & RNDI-M
The ultimate vocal shaping technique
www.soundonsound.com
DESIGNS WORTH £2040
www.soundonsound.com
30+ IN-DEPTH REVIEWS: AUDEZE / STRYMON / SENNHEISER / HEADWAY / IK / EVE AUDIO / SONNOX / WES AUDIO / JHS & THIRD MAN / SONUSCORE / GRELL / PHAEDRUS / NEUZEIT / UJAM / NOVATION / YAMAHA / TONELUX / HISONG / STEM CHECKER / FREQPORT
TECHNIQUE: REAPER / LOGIC / CUBASE / PRO TOOLS / STUDIO PRO / SOS FOR ARTISTS
June 2026 £7.99
CELEBRATING 40+ YEARS 1985 — 2026
May 2026 £7.99
THE WORLD’S BEST RECORDING TECHNOLOGY MAGAZINE
1985 — 2026
TM
TM
TM
MUSIC PRODUCTION TECHNIQUES / INDEPENDENT IN-DEPTH PRODUCT TESTS / ENGINEER & PRODUCER INTERVIEWS / LIVE SOUND
MUSIC PRODUCTION TECHNIQUES / INDEPENDENT IN-DEPTH PRODUCT TESTS / ENGINEER & PRODUCER INTERVIEWS / LIVE SOUND
MPC LIVE III
JBL BANDBOX
DAW Bridge SoundMusicshcrouealdtioben!
TRIO
The smart speaker with stem separation!
SSL autoSeries
The mega-hit made on headphones
Heritage 670N
A Fairchild for the project studio
MUSIC PRODUCTION TECHNIQUES / INDEPENDENT IN-DEPTH PRODUCT TESTS / ENGINEER & PRODUCER INTERVIEWS / LIVE SOUND
AKAI’S PORTABLE PRODUCTION POWERHOUSE
as it
Djo ‘End Of Beginning’
Analogue modelling with AI assistance
DIY Helmholtz Resonator The tuned bass trap you can make at home!
IN-DEPTH REVIEWS: SONIC FARM / SOYUZ / NEURAL DSP / MODARTT / FABFILTER / STEINBERG / WALDORF / AUDIOSCAPE / ARTONIC MUSIC / FOCAL / AKAI / SONUSCORE / AKG / ASCILAB / STAGEBOX / METERPLUGS / NEXTMIDI / RT60 / VOVIOUS
TECHNIQUE: MIX RESCUE / MIXING ATMOS IN PRO TOOLS
Logic Pro 12 & Fender Studio Pro 8
WIN IK MULTIMEDIA
Major updates on test
MONITOR BUNDLE
Exploring today’s state-of-the-art tools
IMMERSIVE WORTH £ 3600
www.soundonsound.com
April 2026 £7.99
Better vocals in the home studio
Base 4 Stands
A quiet revolution in studio tech
30+ IN-DEPTH REVIEWS INCLUDING: DRAWMER / FLEA / SPITFIRE / UA / SLATE DIGITAL / ACE STUDIO / TASCAM / SONARWORKS / SPL / GRM TOOLS / SPECTRASONICS / KALI / ELEKTRON / OXI / SOFTUBE / AUDIOSCAPE
TECHNIQUE: ANALOGUE OVER ETHERNET / CUBASE MIXING MACROS
LAUTEN AUDIO DRUM MIC BUNDLE WORTH £3036
www.soundonsound.com
March 2026 £7.99
• Only £3.99 each edition (or FREE with all Digital subscriptions).
Matt Schwartz: producing Yungblud
AI: friend or foe?
SOS Awards
Phill Brown
“I want another Bowie or Freddie Mercury”
Readers choose the year’s best gear
What producers really think
Talk Talk’s one-mic drum sound
28 IN-DEPTH REVIEWS: AEA / TOONTRACK / GIK / McDSP / IK / GOODHERTZ / UA / KALI / RUPERT NEVE DESIGNS AFK AUDIO / AGUILAR / SCALER / SPL / 1010MUSIC / JBL / WES AUDIO / QUANTUM ELECTRIC / FIEDLER AUDIO
TECHNIQUE: BINAURAL & DUMMY HEAD RECORDING / RECREATING VINTAGE FLANGING
WIN
LEWITT MIC &
• PDF can be viewed on your desktop, smartphone or tablet. • FI-PDFs remain in your MY ACCOUNT > DOWNLOADS library after purchase and can be re-downloaded at any time in the future.
Get your FREE PDF today at the link below! https://sosm.ag/FreePDF
KALI MONITORS WORTH £ 1844
www.soundonsound.com
February 2026 £7.99
www.soundonsound.com / August 2026
135
Q
What are the high-frequency sounds that I keep noticing in location audio recordings?
More and more, I see super-highfrequency information in recordings from clients (I do post-production audio for very diverse projects). You can see the sort of thing I mean at the top of this iZotope RX screenshot. Do you know what kind of information this is? Is there some HVAC or alarm system that puts high switching notes above human hearing? It’s probably not added by the recorder, because I sometimes see it switched on when there is a recording in another building by the same recordist and machine. If anything, it looks like it is more common in larger corporate buildings. SOS Forum Post Hugh Robjohns, Technical Editor It’s an increasingly common problem, with many potential causes. But, given that you’re talking about modern public and corporate spaces, it’s probably the continuity checking system for the PAVA (public address and voice announcement) system. There are different ways of doing it, but one common system sends a very high-frequency signal (20-25 kHz) through
Q
What’s the point of a polarity inverter on a monitor controller?
Some monitor controllers have facilities that others don’t, and I can see why you’d want separate mutes for the left and right, and even a ‘left-right swap’. But why do some have a ‘polarity’ button? If one channel is ‘upside down’ surely it needs sorting before the signal hits the monitors. What am I missing? Anonymous, via email Matt Houghton, Reviews Editor Yes, if a signal had an inverted channel you’d want to correct that earlier, but this facility is primarily there to solo the Sides signal. Most models have a Mono or Sum button, and that ‘sum’ of Left + Right leaves you with the Mid component of Mid-Sides encoded stereo. Apply polarity inversion to the right channel first, before summing to mono, and you get Left - Right instead: in other words, the Sides. Hearing the Mid lets you check
136
August 2026 / www.soundonsound.com
Cyclical signals in the very high frequencies, above most humans’ hearing, are often continuity test signals rather than a sign your recording chain is at fault.
the whole signal path, out through each speaker in a 100V line chain. At the end of the chain there’s a frequency doubler that sends the doubled signal back down the chain to a detector at the amp. If the doubled signal comes back, the system is working. If not, it raises a fault alarm.
Sometimes the test signal is continuous and sometimes it’s intermittent. At 20-25 kHz, few people will hear it — but small-diaphragm mics are usually able to pick it up. These kinds of tone are, thankfully, easy to notch out without affecting the wanted audio.
“At 20-25 kHz, few people will hear it — but small-diaphragm mics are usually able to pick it up.” how a mix sounds on mono playback devices. But why might you want to hear only the Sides? Actually, there are various possible reasons... For instance, you can hear what’s lost on mono playback: musically important information in the Sides can help you figure out exactly why a mono mix sounds ‘wrong’. It can also shine a light on the damage caused by lossy data-compression formats such as MP3. If you need to match the channel gains in a stereo signal chain, you can run identical signals through both channels, and adjust until they null in the Sides. And when recording with a stereo mic array, too much direct sound from a central source in the Sides is a sign that your aim is slightly off to one side. Finally, some really wide recordings, mixes, or effects can naturally sound a bit out-of-phase. A polarity invert facility on your monitor controller allows you to check very quickly whether the stereo image becomes more or less focused when flipped, so you can confirm that
Drawmer’s CMC2 is one of the more affordable monitor controllers to offer both mono-sum and right-channel-invert buttons. The former on its own delivers the Mid signal to your speakers, while pressing both at once gives you the Sides.
there isn’t (or perhaps is!) a polarity fault somewhere else. Plenty of monitor controllers, even expensive ones boasting great technical specs, don’t have this feature. But while the dedicated buttons are convenient, if you’re working in your DAW, you can achieve the same thing by using plug-ins in the monitor path.
NEXT MONTH IN
Making Tape
There’s only one manufacturer of magnetic tape left in the whole of Europe — but business is booming. We visit the RTM factory in Avranches, France to find out how it’s made.
September issue on sale Thursday 20th August. Available at TG Jones, WH Smith Travel and all good newsagents.
Subscribe at www.soundonsound.com/subscribe
Digital version (no WH Smith reference)
The Advertisers Index
To Advertise in Sound On Sound please contact: chris.cope@soundonsound.com AMS Neve
✆ 01282 457011
13
Rupert Neve Designs
www.rupertneve.com
17
Black Lion Audio
www.raddist.com
39
Solid State Logic
www.solidstatelogic.com
81
DPA Microphones
www.dpamicrophones.com
71
SOS For Artists
www.sosforartists.com
121
Dynaudio
www.dynaudio.com
21
Sound Service UK
www.soundservice.uk
5
Fabfilter Software Instruments
www.fabfilter.com
29
Soundtoys
www.soundtoys.com
97
Genelec
www.genelec.com
89
Sound Technology (JBL)
✆ 020 8962 5080
77
GIK Acoustics Europe
www.gikacoustics.com
23
Source Distribution (Mogami)
✆ 020 8962 5080
3
65
SPL
www.spl.audio
59
Synthax Audio UK
www.synthax.co.uk
9
NEXT MONTH IN Heritage Audio
www.heritageaudio.com
iamReverb
www.iamreverb.com
OBC
Kenton Electronics
✆ 020 8544 9200
41
Synthfest UK
www.synthfest.co.uk
87
Mono
www.monomusic.co
109
Toontrack
www.toontrack.com
IBC
Oeksound
www.oeksound.com
25
Warm Audio
www.warmaudio.com
IFC
Making Tape
There’s only one manufacturer of magnetic w w w . s o u n d o n s o u n d . c o m / November 2016 137 tape left in the whole of Europe — but September issue on sale Thursday 20th August. business is booming. We visit thewww.soundonsound.com RTM factory
IN-EAR MONITORS MARK GORDON
I
can still remember a time when playing live meant accepting a certain amount of uncertainty. You’d arrive at a venue, set up your gear, and then spend the next few hours hoping you’d be able to hear what you needed to hear. Some nights the monitor mix would be excellent. Other nights it felt like a compromise from the very first song. For me, in-ear monitors changed all of that. The obvious benefit is sound quality. Instead of relying on a wedge monitor battling against the acoustics of the room, the volume of the band and the (occasional) enthusiasm of the audience, a good pair of IEMs delivers a clear and consistent mix directly to your
ears. Every instrument can be exactly where you want it, at exactly the level you need. As a drummer, being able to hear every nuance of my performance without fighting against excessive stage volume makes an enormous difference. What I particularly enjoy is the control they provide. Thanks to compact digital mixers, creating a personalised monitor mix is easier than ever. Rather than depending on somebody else’s interpretation of what I need to hear, I can build a mix that works perfectly for me. That’s not a criticism of monitor engineers — I’ve worked with some excellent ones over the years — but unless you’re fortunate enough to work with the same engineer regularly, there’s always a degree
“A good pair of IEMs delivers a clear and consistent mix directly to your ears.” 138
August 2026 / www.soundonsound.com
of guesswork involved. Nobody knows exactly what helps me perform at my best quite like I do. In-ear monitoring has become even more important as my live setup has evolved. Many bands increasingly rely on backing tracks, click tracks and cue tracks to deliver polished performances. Once these elements become part of the show, IEMs stop being a luxury and start becoming essential. The click needs to remain private, the cues need to be heard clearly, and everything needs to stay locked together. A good in-ear system makes all of this feel effortless. There is another benefit that perhaps doesn’t receive enough attention: hearing protection. Musicians spend years exposing themselves to high sound pressure levels, often several nights a week.
IEMs allow me to hear more detail at significantly lower volumes than I would need with a traditional wedge monitor. The result is less fatigue, greater clarity and, hopefully, better long-term protection for the ears that I rely on both professionally and recreationally. Perhaps that’s why I find it so difficult to return to traditional stage monitoring. Every now and then I encounter a wedge-based setup and I’m reminded how much concentration it takes simply to hear what is going on. With IEMs, the performance feels more controlled, more comfortable and ultimately more enjoyable. I can focus entirely on the performance, secure in the knowledge that everything I need is right there. For me, that’s the real magic of in-ear monitors. They don’t just help me hear the gig — they help me enjoy it.
WHICH ONE FITS YOUR WORKFLOW? Mix-ready sounds and tools for quick and easy songwriting – or absolute control down to the tiniest detail. Picking between EZdrummer 3 and Superior Drummer 3 isn’t a question of which one is better. It’s a question of how you work and what you want the software to do for you. Explore them both on our site and find out which one fits your workflow best.
WWW.TOONTRACK.COM
Experience a new level of authenticity.
iamReverb’s distance controllers put you right where you wanna be. Experience a new definition of naturally authentic reverb and become one with the music.
Starting from $ 99,iamreverb.com
The size of sound is the size of space: Enter rooms, halls and cathedrals – or create the room of your dreams.
iamReverb
FREE eBook RECORDING TECHNOLOGY
BASICS &BEYOND SECOND EDITION
Get your FREE digital publication from Sound On Sound This FREE illustration-rich eBook is aimed primarily at newcomers to the subject, but will prove equally valuable to anyone struggling with the complexities of today’s sophisticated recording technology. The purpose of this 170-page guide is to introduce readers to the essential components of a modern recording system and to explain the recording process in an easy-to-follow way, demystifying the inevitable jargon, both as it crops up, and with a comprehensive glossary. Written in the accessible, no-nonsense style of the Sound On Sound team of authors and editors, Recording Technology: Basics & Beyond covers: ■ What to buy ■ Studio setup ■ Computers for audio ■ Audio interfaces ■ Monitoring ■ Acoustic treatment ■ Mic techniques ■ How digital audio works ■ Understanding your DAW software ■ Upgrading your system
■ Software instruments ■ Wiring your studio ■ Plug-ins ■ Recording audio ■ Understanding MIDI ■ Recording vocals ■ Mixing ■ Compressors ■ Equalisation ■ Mastering ■ A.I. - in Music
Don’t miss out! Sign up and share the link with friends and colleagues on social media.
https://sosm.ag/recording-ebook