THE WORLD’S BEST RECORDING TECHNOLOGY MAGAZINE
CELEBRATING 40+ YEARS 1985 — 2026 TM
MUSIC PRODUCTION TECHNIQUES / INDEPENDENT IN-DEPTH PRODUCT TESTS / ENGINEER & PRODUCER INTERVIEWS / LIVE SOUND
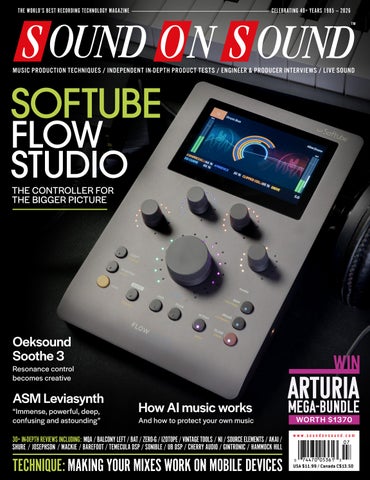
SOFTUBE FLOW STUDIO THE CONTROLLER FOR THE BIGGER PICTURE
Oeksound Soothe 3
Resonance control becomes creative
ASM Leviasynth “Immense, powerful, deep, confusing and astounding”
How AI music works
And how to protect your own music
30+ IN-DEPTH REVIEWS INCLUDING: MQA / BALCONY LEFT / BAT / ZERO-G / IZOTOPE / VINTAGE TOOLS / NI / SOURCE ELEMENTS / AKAI / SHURE / JOSEPHSON / MACKIE / BAREFOOT / TEMECULA DSP / SONIBLE / UB DSP / CHERRY AUDIO / GINTRONIC / HAMMOCK HILL
TECHNIQUE: MAKING YOUR MIXES WORK ON MOBILE DEVICES
ARTURIA MEGA-BUNDLE WORTH $1370
www.soundonsound.com
USA $11.99 / Canada C$13.50
“Its sound quality, new synthesis features and internal effects are second to none.” —Dave Stewart, Sound On Sound
www.ilio.com
800.747.4546
LE ADER
MACRO ECONOMICS A
s music production environments become more complex, the challenge of making those environments accessible grows. Learning a modern DAW is very different from operating a four-track cassette recorder. Luckily, there are now vastly more resources available to learners. Where once we had printed manuals, we have YouTube tutorials, Discord servers, Subreddits and Facebook groups. We can even ask an AI chatbot. And developers themselves are putting ever greater resources into smoothing out learning curves. From a design perspective, macros are an excellent tool for this purpose. An experienced synth programmer might simultaneously adjust pulse width, filter cutoff modulation depth and resonance in order to achieve a specific effect. A skilled user interface designer can assign all of those to a single physical control. The result: immediate hands-on gratification for all users, and an opportunity for the inexperienced to get results without needing to understand the underlying structure. This approach is not new, but this month’s cover product takes it to another level. Literally so, in fact. The Omni knob on Softube’s Flow Studio is a macro to rule all macros, allowing users to move seamlessly between multiple layers of interaction. When you’re diving in for the first time, you can get close to what you want with a single hand movement. When it’s time to apply the finishing
SOUND ON SOUND LTD (HEAD OFFICE) ALLIA BUSINESS CENTRE KING’S HEDGES ROAD CAMBRIDGE, CB4 2HY, UK T +44 (0)1223 851658 sos@soundonsound.com www.soundonsound.com
touches, you can dive in and tweak individual parameters. New users need not be intimidated; old hands need not feel patronised. The kicker, perhaps, is that this is possible only because Flow Studio is a closed system. This level of integration is possible only where a single developer has complete control, and that makes some people uneasy. It’s surely a price worth paying in this case, but I do wonder whether it’s part of wider trend. Forty years ago, synth manufacturers could agree on what MIDI needed to do. Today, the idea that DAW developers might commit to a universal session interchange format seems far-fetched. The AES72 ‘standard’ for analogue audio over Ethernet isn’t really a standard at all. HUI and MCU are dated and limited, but EuCon remains proprietary. And how many audio-over-IP formats, or immersive audio configurations, do we really need? In today’s world, successful formats and platforms are valuable assets. Companies like Dolby, Audinate and XMOS have thrived not by selling things to consumers, but by persuading manufacturers to license their technology. In fact, Atmos and Dante have succeeded despite the existence of open alternatives. Does this mean that market forces are proving their superiority? Is it even possible that adhering to open standards can be a brake on innovation? I don’t know, but I don’t think we should automatically view proprietary systems as bad.
“This level of integration is possible only where a single developer has complete control, and that makes some people uneasy.”
ADMIN IS T R AT IO N
ADV ER T ISIN G
sos.feedback@soundonsound.com
admin@soundonsound.com
usadsales@soundonsound.com
Editorial Director Dave Lockwood Executive Editor Paul White Editor In Chief Sam Inglis Technical Editor Hugh Robjohns Reviews Editor David Glasper Reviews Editor Matt Houghton Reviews Editor Chris Korff Production Editor Chris Korff News Editor Luke Wood
Managing Director/Chairman Ian Gilby Editorial Director Dave Lockwood Marketing Director Paul Gilby Finance Manager Keith Werthmann
North America Sales Manager Dan Brown Regional Sales Manager David Carson UK Media Sales Manager Chris Cope
S UB S CR I P T I ON S subscribe@soundonsound.com www.soundonsound.com/subscribe
WOR L DW I D E E D I T I O N S
Circulation Manager Luci Harper Administrator Nathalie Balzano
UK/WORLD
Editor In Chief
E DI T OR I A L
WWW.SOUNDONSOUND.COM/SUBSCRIBE
NORTH AMERICA
Sam Inglis
M AR K E T IN G O N LIN E
marketing@soundonsound.com
support@soundonsound.com
International Business Development Nick Humbert
Digital Media Director Paul Gilby Design Andy Baldwin Web Content Editor Callum Hall Web Editor Adam Bull Digital Media Manager Atheen Spencer www.soundonsound.com twitter.com/soundonsoundmag facebook.com/soundonsoundmag instagram.com/soundonsoundmag
P R ODUC T I ON
DIS T R IB U T IO N
graphics@soundonsound.com
distribution@soundonsound.com
Production Manager Michael Groves Designer Mick Reilly Designer Andy Baldwin
International Distribution Magazine Heaven Direct www.magazineheavendirect.com
Printed in the USA Not for re‑sale outside North America
ISSN 1473‑5326 A Member of the SOS Publications Group The contents of this publication are subject to worldwide copyright protection and reproduction in whole or part, whether mechanical or electronic, is expressly forbidden without the prior written consent of the Publisher. Great care is taken to ensure accuracy in the preparation of this publication but neither Sound On Sound Limited nor the Editor can be held responsible for its contents. The views expressed are those of the contributors and not necessarily those of the Publisher or Editor. The Publisher accepts no responsibility for the return of unsolicited manuscripts, photographs, or artwork. © Copyright 2026 Sound On Sound Limited. Incorporating Music Software magazine, Recording Musician magazine, Sound On Stage magazine, SPL magazine, Sound Pro magazine and Performing Musician magazine. All rights reserved. All prices include VAT unless otherwise stated. SOS recognises all trademarks.
July 2026 / www.soundonsound.com
3
124 INSIDE TRACK
IN THIS ISSUE
www.soundonsound.com
July 2026 / issue 9 / volume 41
FEATURES 72 Modular Ferry Island Modular’s Justin Goney wanted some synth sounds to go with his drums; now the company he founded make a four-dimensional wavetable oscillator...
94 Mixing For Mobile
WIN
ARTURIA MEGA BUNDLE WOR TH $1 370
Most listeners discover music on phones, where attention spans are short. Should that affect how we approach mixing?
108 Spotlight: Expandable
Eight-channel Interfaces
ADAT-equipped audio interfaces are a blessing if you need more channels, but the choice can be overwhelming. We round up some of the best eight-channel offerings.
112 How I Got That Sound Massive Attack producer and collaborator Neil Davidge chooses the band’s own ‘Teardrop’ as a career standout.
PAGE 84
114 How AI Music Works AI music generation services are trained on a vast library of existing music. We explain how the process works, and what you can do to keep your own tracks from being assimilated.
120 Peter Tägtgren: Producing Metal Peter Tägtgren’s Abyss Studio has recorded some of the most influential metal music of the last 30 years — including his own projects Pain and Hypocrisy.
4
July 2026 / www.soundonsound.com
124 Inside Track: Gabe Simon Rediscovering the human has helped producer Gabe Simon to enjoy colossal hit albums with Noah Kahan and Dermot Kennedy.
138 Why I Love... Shoegaze In an age of pristine audio, Sam Mortley finds joy in the washed-out sound of dream pop.
32 OEKSOUND SOOTHE 3
ON TEST
8
52 Akai MPC Sample
62 iZotope RX12 Advanced
Sampling Workstation
70 ALM/Busy Circuits
Quaid Gigaslope Eurorack Module
86 ASM Leviasynth Polyphonic Synthesizer
90 Bad Cat Purepath Passive Analogue Speaker Simulator
68 Balcony Left Little Sir Rekko FET Compressor Plug-in
Dual-channel Microphone Preamplifier & EQ
Audio Restoration & Repair Software
16 91
500-series Microphone Preamplifier
22 Cherry Audio DS-2 Software Synthesizer
132 Edu Prado Sounds Zither Sample Library
Karanyi Cloudmax 3 Granular Reverb Plug-in
26 Mackie Thump Go & ThumpSub Go Portable PA System
74
MQA Labs Inspira & Endura Impulse Response Correction Plug-ins
48
Native Instruments Absynth 6 Software Synthesizer
32 Oeksound Soothe 3 71
Otter Mods OTTeR Eurorack Module
134 Quiet Music SacredTones Sample Library
Sample Library
Capacitor Microphones
ginTronic transparentSea Desktop Multi-effects Unit
& KSM32C
6
SSL 1 USB Audio Interface
Sonible pure:level Level Riding Plug-in
40 Source Elements
Source-Connect 4.1 Remote Recording Software
20 Temecula DSP DEEP/4 Multi-effects Plug-in
93 The Struggling Musician’s Guide
To Earning Money Book
18
UB DSP Grit Blender Harmonic Distortion Plug-in
36 Vintagetools VT N95 PE Analogue Equaliser
134 VSL Big Bang Orchestra 2.0 Sample Library
Resonance Suppression Plug-in
44 Shure KSM44MP, KSM40C
10
14
Guitar Effects Plug-ins
132 Fracture Sounds
Lighthouse Piano
Control Surface
92 MixWave EHX Classics Bundle
30 British Audio Technologies
BAT 1588
Josephson C706
56 Softube Flow Studio
Capacitor Microphone
80 Barefoot Footprint 02 Gen2 Three-way Monitors
Hammock Hill Audio PreQ-2R
C O V E R
30 BRITISH AUDIO TECHNOLOGIES BAT 1588
78
Zero-G Morphology Evolved Virtual Instrument
WORKSHOPS 100 Cubase 102 Logic 104 Studio Pro 106 Pro Tools www.soundonsound.com / July 2026
5
ON TE ST
so Mac users won’t need to install a driver. SSL have enhanced the loopback functionality of their desktop interfaces since I reviewed the 2 and 2+; both those models and the 1 now appears to your computer as eight-in, six-out devices. Outputs 3+4 loop back to inputs 5+6, whilst outputs 5+6 loop to inputs 7+8. In terms of audio specifications, the design of the 1 closely follows that of the 2 MkII. Consequently, the mic preamp is super-clean, at least unless you engage 4K Legacy mode, and the headphone amp is pleasingly loud.
The 1 & Only?
SSL 1
USB Audio Interface SSL boil down the USB interface to its bare essentials!
SAM INGLIS
M
any companies offer both affordable and premium products, but few span the same range as Solid State Logic. At one end of the market, they’ll happily sell you an analogue console costing six figures. And at the other, they make audio interfaces costing less than the monthly electricity usage of that console. The latest, and most affordable yet, is the 1.
2s Become 1 The 2 and 2+ desktop USB interfaces have been mainstays of SSL’s line-up for more than six years now, and received a thoughtful overhaul back in 2024. The 1 is at heart a cut-down version of the 2 MkII, housed in a very similar but marginally smaller wedge-shaped box. Despite the name, the 1 does offer stereo output, with a large volume control that goes to 11, and also has two mono inputs that can be recorded independently. However, whereas the 2 and 2+ both accept mic, line and instrument signals on each input, the 1 adopts a ‘divide and conquer’ approach. Input 1 has a female XLR rather than a combi socket, and is designed primarily for plugging a microphone in. If you want it to accommodate another source, you’ll need a DI box, or perhaps just a funky cable and
6
July 2026 / www.soundonsound.com
an enquiring mind. Input 2, meanwhile, presents only a quarter-inch jack socket, and loses the phantom power, ‘4K’ and high-pass filter options. Instead, a single button toggles between instrument and line modes, shifting both the gain range and the impedance to suit different source types. Output signals emerge on a pair of line-level quarter-inch jacks, and a single front-panel headphone socket. SSL have also further simplified the 2’s already simple direct monitoring arrangements, reducing user control in the 1 to a single Mix button. When active, this feeds both inputs into the monitor path at a predetermined level. Both are centrally panned, and are routed to both the headphones and the main outputs. However, there is one 1 feature not available on the 2 or 2+: a second USB-C port. In a laptop recording context, it would be bus-powered as normal, but the ability to use a separate USB supply might prove valuable with phones and tablets. Like the 2 and 2+, the 1 is designed to be plug and play. There’s no software control panel, and it’s class compliant,
SSL’s desktop interfaces have always been convenient problem-solvers for me. I can’t begin to count the number of last-minute overdubs, podcasts and impromptu performances my 2+ has captured when I’m out of the studio and all I have to hand is a laptop. When I first heard about the 1 I wondered if it would be a bit too limited to fulfil the same role, but looking back, there’s actually very little I’ve done with my 2+ that would be beyond the scope of the 1. In these situations I rarely need to drive two sets of headphones, record two mics, capture a stereo line out from something, or mess about with the monitor balance. What I need is the simple ability to record a mic and/or a guitar in a reliable, noise-free fashion, whilst hearing what I’m doing on cans. If anything, the 1 actually simplifies that process, and it’s even more affordable. What’s not to like?
summary SSL’s streamlined desktop interface is surprisingly capable.
$ $160 W www.solidstatelogic.com
With up to 64 analog and 212 digital channels of modular I/O, this is the interface level-up for you’ve been waiting for. Our AD/DA converters provide exceptional depth and clarity and will immediately improve everything you do in tracking, mixing or mastering. I/O cards include Dante, Digilink, USB, Ravenna and MADI (coming soon). Setup and control is elegantly simple with our GraceNet web-based UI. With stunning audio performance and flexible integration, the m701 is a highly capable centerpiece for any studio.
“The transparency of the signal and ease of the interface really allow me to make the sonic manipulations that are necessary to make great records. The m701 is the linchpin of my system and allows me to do what I do without any hindrance.”
“The sound of my jaw hitting the floor is still reverberating in my studio… My previous converters were excellent, but the Grace really blew me away. The phantom center feels more solid and stable, the lowest frequencies feel like they never stop
Anna Frick Mastering Engineer, Ally Sound
Don Gunn Atmos Mix Engineer, TapeOp Magazine
going deeper, and the highs are like silk.”
“When I heard the announcement of the m701 I thought it was a logical addition to the Grace Design portfolio, and it was bound to be an impressive performer. However, it has surpassed even my expectations in terms of configurability, ease of use, and technical performance. This is one heck of a big-boy’s interface!”
www.gracedesign.com • Lyons, CO USA
Hugh Robjohns Technical Editor, Sound On Sound Magazine
ON TE ST
BOB THOMAS
M
any pro-audio product manufacturers today take their inspiration from the second half of the 20th Century and, while that can be wonderful, I always find it refreshing when I come across someone whose products march to the beat of a different drum. One such company is Hammock Hill Audio, a boutique manufacturer based in Austin, Texas. Owner Indri Schaelicke declares his passion for music proudly, along with a design philosophy of “capturing the full frequency profile of an incoming signal and allowing the user to shape the tonality of the result”. This aims to offer, he says, “unique combinations of features and sound characteristics to provide engineers and artists with new tools that help them turn their creative vision into reality”. Hammock Hill’s first product, the PreQ22 microphone preamp and EQ, appeared in 2022. A single-slot, 500-series unit, it features a discrete op-amp and output transformer topology, a switchable two-band sweep EQ, a fully variable high-pass filter, and a post-transformer output fader. The PreQ22 was followed by another 500-series mic preamp called the LOG (short for Lots Of Gain!), which offers up to a chunky 86dB boost, a high-pass filter, two input impedance choices, and a twin-tap, air-gapped output transformer. Their latest offering, reviewed here, is the PreQ-2R, and for this Hammock Hill have taken two PreQ22s, added a couple of additional features, and housed the result in a 1U 19-inch rackmount enclosure. As with all Hammock Hill products, the PreQ22 is designed and hand-built in Austin, using only full-size, through-hole components.
Silvered Star With a silver-coloured front panel, and logos that fade horizontally from left to right, the PreQ-2R is a stylish unit that will stand out in any rack. Its two sets of channel controls are identical, and lie on either side of a small central on/off toggle switch. This effectively acts as a standby switch, as the integrated
8
July 2026 / www.soundonsound.com
Hammock Hill Audio PreQ-2R Dual-channel Microphone Preamplifier & EQ
With two channels, ample gain, character on tap, and an EQ section thrown in for good measure, there’s plenty to commend this capable preamp. mains on/off switch and IEC socket with fuse sit on the rear panel, on the opposite end to the balanced audio input and output XLR connectors. Each channel also features a front-panel XLR/quarter-inch (6.25mm) jack combo connector, allowing you to connect a balanced, low-impedance microphone to the XLR, or to use the jack as a DI input for unbalanced, high-impedance instruments, such as guitars and keyboards. Inserting a jack plug bypasses the microphone preamplifier, and routes the signal to a JFET-based preamp. Next to the XLR/jack combination sits a thru (loop out) from the DI input, and this allows you to connect to an external amp, effects unit or other device, or even to feed the output to the PreQ-2R’s other channel, should you wish to record a parallel instrument track with a different EQ and/or gain profile. Next to the thru jack sits the switching triumvirate found on virtually every professional‑grade mic preamp in the known universe: 48V phantom power on/off (with indicator LED), a -20dB pad, and (correctly-labelled this time round) polarity reverse. The sole occupant of a channel’s gain section is a 12-position, sealed gold-contact switch by Grayhill, which selects up to 40dB of gain (between 26dB and 66dB) in steps of approximately 3dB. A bi-colour LED
illuminates green when the pre-fader output signal exceeds a level of -28dBu, and red at -3dBu to warn of the risk of clipping. Each channel’s equaliser comprises a continuously variable 18dB/octave 20-200 Hz high-pass filter (HPF); and a three-band semi-parametric sweep EQ, and both are equipped with in/out switches that allow you to make quick and easy A/B comparisons to judge the effects of your efforts. The EQ provides ±10dB of gain in continuously variable, overlapping bands of 40-400 Hz, 300Hz-3kHz, and 2-20 kHz. The final channel control is a post-transformer fader that attenuates the output signal from unity gain to minus infinity. The idea, of course, is that this allows you to drive the transformer as hard as you wish, while ensuring that the input to the next link in your signal chain isn’t overloaded by the PreQ-2R’s resulting output level.
Insider Information Internally, the PreQ-2R carries high-quality components that have been meticulously hand-soldered to the two beautifully laid-out channel PCBs. An indication of the care taken in assembling the PreQ-2R is that the shielded cables connecting the rear‑panel XLR balanced connectors to the channel PCBs are carefully spaced not only to avoid crosstalk along the cable run, but
also to steer clear of any interference from the output transformers. Power to the boards comes courtesy of an internal, in-house‑designed analogue power supply that’s fed by a custom-made toroidal mains transformer. Given the highly regarded sonic performance of the ancestral 500-series PreQ22, it should be of little surprise that Hammock Hill have adopted an “if it ain’t broke, don’t fix it” approach to the design of the PreQ-2R. Consequently, this rackmounted newcomer’s audio path retains not only the integrated front end, discrete op-amp and output transformer of its ancestor, but also operates at the 500-series voltage of ±16V DC. Similarly, the PreQ22’s high-pass filter and two-band semi-parametric sweep EQ have been carried over unchanged. The 300Hz-3kHz corner frequency range of the PreQ-2R’s mid band has an approximate half-octave overlap with the bands at either end. The PreQ-2R’s technical specifications are impressive. An overall gain range of +66dB (+6 at 26dB minimum gain with the -20dB pad engaged, +66dB at maximum gain) will cover most modern microphones. Its frequency response of 15Hz to 75kHz (±0.5dB); EIN (Equivalent Input Noise) of -129dBu; THD+N of 0.03% (1kHz, +20dBu output level, no load); and clipping level of +30dBu hold out the welcome prospect of a clean, precise and dynamic audio performance that can also deliver both edge and transformer-related warmth and weight at higher input and/or gain levels.
Hammock Vibes Once I’d started working with the PreQ-2R, I began to appreciate just how well it delivers on all the promises implied by its specifications. With every microphone I auditioned, this preamp delivered a clear, open sound
Inside the box, each channel, including its output transformer, is laid out on its own circuit board (top), and the internal power supply board (bottom) is fed from a custom toroidal transformer.
that never felt sterile. At lower gain/signal levels, to my ears there’s an inherent touch of colour and warmth that means the PreQ-2R always sounds organic, rather than overly clinical. As the levels increase, though, the PreQ-2R’s clarity starts to develop a harder, more
rather than attempting more radical surgery. When it comes to stereo operation, the PreQ-2R provides superb channel-to-channel balance. The accuracy of the 12-position Grayhill switches obviously lies at the heart of this. I was impressed with the positivity of their action, though I wouldn’t complain if the knobs themselves were slightly larger, to give
“As the levels increase, the PreQ-2R’s clarity starts to develop a harder, more potent edge — that’s something I couldn’t get enough of.” potent edge — that’s something I really couldn’t get enough of. This slightly forward edge means this preamp is in many ways ideal for bringing focus and presence to vocals, but it also brought a lovely definition and body to acoustic instruments, as well as electric guitars and basses. Similarly, I found that stereo drum stems also benefited from being run through the PreQ-2R, with this sense of ‘edge’ combining with the output transformer’s harmonic distortion to add both weight and definition. If you’re into more creative use of distortion, you also can wind up the input signal and/or the gain control to drive the PreQ-2R into delivering exactly the level that you require. You can then use the post-transformer rotary fader to manage the level of output signal reaching the next unit in your signal chain. I habitually high-pass-filter sources when I’m recording, as I prefer to record the low frequencies that the instrument in front of the mic or DI can produce, rather than those that it can’t. The PreQ-2R’s high-pass filter 20Hz-200Hz range is perfect for my needs as it covers the lower frequency ranges of the bowed and fretted stringed instrument families. The three-band sweep EQ’s smooth and relatively gentle 10dB cut and boost is best suited to tailoring the overall sound of the source,
my big fingers that bit more purchase! As boutique manufacturers, Hammock Hill are well-versed in custom builds for clients, so it won’t come as any great surprise that they also offer a range of customisation options for the PreQ-2R. These include modifying the EQ band frequency ranges, changing their curves from peak to shelving, and altering the slope of the high-pass filter to 12dB/octave. I found the defaults pretty well thought through, though.
King Of The Hill? The Hammock Hill Audio PreQ-2R is truly a high-quality, great-sounding microphone preamplifier, whose overall performance is up there with the best available in its price bracket. To me, the PreQ-2R’s greatest strength is that is has a sonic character that doesn’t owe anything obvious to the iconic giants of yesteryear — while being at least their equal, and some might argue better. This unique character makes the PreQ-2R an attractive value proposition for the first-time purchaser, for those looking to upgrade their current mic preamp, and perhaps also for those who have all the vintage bases covered and are looking to the horizon for something new. If you sit in any one of those categories, the Hammock Hill Audio PreQ-2R should be high up on your audition list. Looking around, it seems I have a 1U rack space available — so it seems unlikely that the review unit will be leaving me any time soon!
summary A truly great-sounding microphone preamplifier with a sonic character that distinguishes it from the pack.
$ $1600. E audiotools@hammockhillstudio.com W www.hammockhillaudio.com www.soundonsound.com / July 2026
9
ON TE ST
GINTRONIC TRANSPARENTSE A
through the first delay, and then let that play while you noodle some lead through the second one. Alternatively, you can build up two loops, disengage both delays, and play along. With another Shift+button combo, you can put the delays in series, so that one becomes the input for the other, for some more complex delay-on-delay action. Next, we have the chorus and tremolo. These are uncomplicated, doing exactly what you’d expect. The Shape control on the tremolo takes it from a regular sine wave to something sharper. You can pull your wobbles into sync (if you’re not using MIDI Clock) using a tap-tempo option: hold the Clock button and tap the Tremolo button. This also works for the delay lines, although they’re all independently geared (trying to get them all in sync can be a lot of fun!). A global, non-MIDI clock might have been nice, although the inaccuracies in my tempo tapping do produce some rather lovely inconsistencies. The filter is of the state-variable variety: turn left for low-pass and right for high-pass, via a little bit of band‑passing. Pile on the resonance, and it will just about self-oscillate if you give it something to bite on. If you could just borrow the LFO from the tremolo, over on the left, it could make for a rather nice wah effect — a missed opportunity, perhaps? Or maybe the DJ-style cutting and drops are more interesting in this context. Just beneath the filter is the Heat knob, and that adds some soft‑clipping overdrive. It’s nice. Slightly underplayed, but it does bring something to your waveforms. The reverb is vast. The website says it’s an algorithmic room/plate hybrid, with diffusion, decay and tone‑shaping. I’m not sure where all that is on the one knob, but it certainly takes you from gentle reflections to deep space adventures in less than a turn. In the context of just wanting to push out into space rather than control every aspect of a reverb, this is a very beautiful thing. At the end of the chain, we have the stutter. This is a little out of character for an otherwise sensible box of effects, but it makes you feel like you could get away with being an exciting and dynamic performer! Hold the button, and it grabs and repeats whatever is in the buffer to create a ratcheting, stutter effect. It has a Rate control knob, and if you hold Shift, it will do it backwards. When the tranparentSea is receiving MIDI Clock, the stutter will automatically sync to it, and then the Rate knob provides time divisions. It won’t respond to tap tempo, though, which seems an odd decision.
12
July 2026 / www.soundonsound.com
It’s not just the MIDI that’s on mini‑jacks — the stereo audio I/O is too.
When it comes to MIDI, the marketing says that it’s fully fleshed out in both directions — meaning everything can be controlled by MIDI, and the front panel can be used as a MIDI controller. MIDI out had not yet been implemented on the late pre-production model I was sent for review, so I couldn’t test that side of it, but the MIDI implementation does add an interesting level of control and automation that goes some way to counterbalance the lack of CV control.
Getting Hands-on In use, the transparentSea lends itself comfortably to all sorts of ambient noodling. The looping potential and interaction of the two delay lines sets you off on some very gratifying adventures. You can lose lots of time as you drift off into the arms of that lush reverb, before dropping in the gentle throb of the tremolo. The buttons and illuminations give you a certainty about your choices, as do the knobs that are almost always pointing to what they’re doing. The chorus and tremolo are brilliant on pads and organs, while the filter and Heat can liven up many a drum loop. The stutter effect is fun, and encourages you to see the transparentSea as a performance device rather than a setand-forget box. The interface definitely pulls you in to play. The lights, buttons and controls are all inviting you into their playful arena of sound processing. What’s arguably missing is modulation: there’s no internal LFO available to mess with things, and there are no CV inputs to push parameters around in interesting ways. You can use MIDI, of course, but to me, at least, that always feels less transparent and more complicated to manage than analogue. Really, this box relies on hands-on interaction, and it does that very well, but while the bubblegum colour palette suggests fun and playfulness, the overwhelming flavour
here is vanilla. Not a crappy, supermarket own-brand two-litre tub, though! This is an exquisite serving, made with the finest Madagascan pods. What I mean to say is that the transparentSea isn’t edgy or oozing with character, but is solid, beautiful, clean and unruffled. That’s not to say it’s boring, either; rather, it has a clarity and versatility that will make it useful in any situation, and it doesn’t make it all about itself by overpowering your sound with flavour and eccentricity. I’m still slightly disappointed by the mini‑jack audio connections. If it were a Eurorack module, I wouldn’t have batted an eyelid, but as a desktop unit designed with versatility in mind, they feel out of place. Most of my synths have regular jack outputs, and if I were looking to use the MIDI control, I would tend to plug it into a computer that probably also has regular jacks on the audio interface. That said, with the right adaptors I have had no problem getting the full use out of transparentSea.
Verdict Setting those connectors aside, the transparentSea has more than lived up to its billing as a clear, concise, hands-on, interactive multi-effect processor. It looks beautiful. It stays calm under pressure. And it never fails to make other things sound amazing. When something works this well, it doesn’t need to be bursting with quirkiness.
summary The transparentSea is a refreshing raspberry ripple of a multi-effects box that combines beauty and clarity with sensible and elegant versatility.
$ US price not yet available when going to
press. Expected to be around $650 based on European pricing. T Perfect Circuit +1 877 909 0303 W www.perfectcircuit.com W https://gintronic.io
Experience a new level of authenticity.
iamReverbʼs distance controllers put you right where you wanna be. Experience a new definition of naturally authentic reverb and become one with the music.
Starting from $ 99,iamreverb.com
The size of sound is the size of space: Enter rooms, halls and cathedrals – or create the room of your dreams.
iamReverb
ON TE ST
Sonible’s latest ‘pure’ plug-in aims to take the pain out of level riding. JOHN WALDEN
T
here’s a lot to commend about Sonible’s ‘pure’ plug-in concept. The series, which now includes seven plug-ins, offers a streamlined take on the features found in the company’s ‘smart’ plug-ins, giving you power over various functions (EQ, compression, limiting, unmasking, etc) but in a format that makes all of these tasks incredibly simple for the end user. The latest addition, reviewed here, is pure:level, which is their take on labour-saving level riding.
On The Level Level riding does what it says on the tin: detailed volume adjustments (‘fader riding’) are used to achieve a more even signal level throughout a performance. Arguably, this results in a more natural handling of the dynamics than with typical compressors, but given that creating manual automation of level across multiple tracks in a mix is undoubtedly a tedious task, it’s perhaps not surprising that compressors are often employed instead. Of course, pure:level is not the first automatic level riding solution — Wave’s Vocal Rider is something of a classic and others have followed in those footsteps — but with Sonible’s keen pricing, it’s possibly one of the most affordable. For use on a single track such as a vocal (it can be used on any type of source), operation is very simple. Placed as an insert, you simply trigger the Re-Analyze Level button, play back a portion of your track, and pure:level will apply its AI-based ‘smarts’ to analyse the level variation. The central display provides real-time graphical feedback on the level adjustments being applied, and you can adjust both the Intensity (how strongly the plug-in constrains the average level) and the Speed with which adjustments are applied (slow, medium, fast or static). Rather neatly, the Target dB then allows you to adjust the overall level of the signal without any further change to the dynamics, letting you quickly bring a series of tracks back into relative volume balance without needing to adjust or disturb any existing automation data for your mixer’s faders.
14
July 2026 / www.soundonsound.com
Sonible pure:level Level Riding Plug-in Interestingly, pure:level also offers a Group feature. Individual instances of pure:level can be allocated to one of four groups via a simple Matrix View. You can then set a Group Target dB level to which all members of that group will be adjusted. This can be helpful with things like multiple sets of backing vocals, or stereo panned instruments that need to sit at a similar level to balance across the stereo image. And usefully, if you make changes elsewhere to a track (upstream of where pure:level is inserted in your signal chain) and need to re‑analyse the level in pure:level, the Matrix view lets you do that as a single operation for all tracks within a group.
Mixing Made Easy? Like other members of the pure series, pure:level is designed to do one key task in as straightforward a fashion as possible. I found that it worked really well with vocals (probably the most common application) but I obtained good results using it with dynamic bass and guitar parts also. Cubase reported about a 20ms latency added by an instance of pure:level, so I suspect there may be a little ‘look‑ahead’ going on, and
that obviously limits the applications for live use while tracking, but in a mixing stage of a project that would be a non-issue. I’ve found some other members of the pure series (pure:EQ would be an example) to be great tools when you’re just starting a new mix, and need to quickly get the sources into workable shape. The ease of use makes getting your basic EQ, de‑essing and compression moves off to a flying start and, if more control is eventually required, you might then turn to more fully featured options to finesse the details. Sonible’s pure:limit fits into that same mould and, as with all the pure series plug-ins, it performs tasks that can otherwise be complex or time‑consuming very effectively, very quickly, and super easily. Worth checking out!
summary Sonible’s pure:level makes routine level riding very easy, reducing the need for often tedious manual level automation work with dynamic sound sources.
$ $39. Also included in pure:bundle (seven plug-ins) $159.
W www.sonible.com
_MiniLab 37 Universal MIDI controller MiniLab 37 gives you more room to create, with an extended 37-note slim-key keybed for expressive playing and a smoother two handed workflow. From sketching melodies and building beats to controlling instruments, launching clips and shaping your mix, it brings every essential part of your setup within reach - complete with 500 curated sounds and world class creative software in a compact format that fits any creative space.
ON TE ST
Capacitor Microphone
Josephson
C706 The C706 aims to shine a new light on one of the great capsule designs. SAM INGLIS
M
anufacturers of capacitor microphones fall into two categories: those who make their own capsules, and those who don’t. You could argue that buying in capsules is like bottling someone else’s wine, but capsule design and manufacture is a highly specialised art, and few people have the skill, experience and facilities to do it well. David Josephson is among those few, and his capsules are employed in quite a few highly regarded ‘boutique’ mics from other manufacturers. Naturally, they are also central to the Josephson Engineering range, where they are typically paired with strikingly original bodywork and innovative electronics.
C Suite The C706 is a fixed-cardioid, externally polarised microphone with a one-inch, edge-terminated capsule. Dubbed the J12 by the manufacturer, this is a painstaking recreation of the ‘brass ring’ AKG CK12. More than 70 years after it was designed, the CK12 is still regarded as the pinnacle of capsule design by many, and its reputation for sound quality is matched only by its reputation for being difficult to manufacture. AKG gave up on it about 50 years ago, and today the flame is kept alive mainly by Josephson and a handful of other skilled operators building CK12-alikes by hand. In fact, Josephson have been making their J12 since 1990, meaning that it has enjoyed a longer
16
July 2026 / www.soundonsound.com
production run than the original; and during that time, they’ve taken numerous opportunities to refine the design and the production process. The AKG and Telefunken mics that used the CK12 were all transformer-balanced, and many of them had valve-based electronics. By contrast, the C706 uses the same “discrete FET cascode input circuit and active balanced transformerless output circuit” developed for Josephson’s existing C716 model. This delivers a self-noise level of less than 15dBA, a comparatively hot sensitivity figure of 26mV/Pa, and enough headroom to accommodate sound pressure levels up to 130dB. There are no pads, filters or other controls, and the C706 is powered over a standard ±48V phantom supply, from which it draws 6mA. Mics in this price bracket usually come with cosmetically appealing accessories, such as an oversized attaché case, or a smart wooden box that holds the mic just a little too tightly for easy retrieval. Not so the C706, which ships in a foam-lined cardboard box. It is, however, supplied with tough fabric covers that can be placed over the mic when not in use, which are possibly more useful than the aforementioned pretty cases. In any case, if I was lucky enough to own a C706, I would want to keep it on display as much as possible, because this is an absolutely stunning microphone to look at. Measuring 261 x 60mm (about 10 x 3 inches) and weighing 1.2kg (2.5lbs), it’s an imposing beast, and also a fascinating one, because the headbasket is unusually transparent. Structural rigidity is imparted by a broad hexagonal grid, which is lined with a layer of gauze so fine as to be nearly invisible. Looking inside reveals the extensive measures that have been taken to optimise the acoustic properties of the microphone. The detriment made by internal reflections and headbasket resonances to the performance of a mic is sometimes under‑appreciated, but not here. The aforementioned dual-layer structure provides a very open acoustic environment, and Josephson’s attention to detail extends to offsetting the narrow bars that run up either side so that they don’t reflect sound towards each other. Meanwhile, the capsule sits atop a dome-shaped mount which disperses sound in all directions. This arrangement also incorporates effective internal
shockmounting, meaning there’s no need for a separate elastic suspension. Instead, the C706 is mounted using an old-school yoke, with thumbwheels at either side to fix it at your chosen angle. This mounting scheme would make having the XLR connector in the base of the mic problematic, since the cable and connector would tend to foul the yoke. Consequently, Josephson have positioned the socket on the back of the body. Any standard XLR can be used, but Josephson offer a special cable with a low-profile 90-degree XLR plug as a cost option, and this definitely helps to keep things neat.
Capsule Capers Some classic capsule types have a built-in high-frequency emphasis that needs to be tamed in the mic’s electronics. Others seem to benefit from the audible
mics. (I would love to compare the 706 to Nordic Audio Labs’ superb NU-24K, as well.) As a vocal mic, the C706 is also remarkably immune to plosive blasts, even when used without a pop filter. And, of course, it isn’t just a vocal mic. I loved it on acoustic guitar, and a pair would offer high-class capture of a drum kit or grand piano. Josephson don’t publish frequency response plots, and I don’t doubt that the C706 would measure as a ‘bright’ mic. But such is the quality of the capsule and its acoustic environment that it comes across as relaxed and true to life, rather than tizzy or artificial. What would probably be recorded as a broad presence boost in a test chamber in practice manifests itself as a subtle enhancement to the clarity of an otherwise delightfully balanced sound. This is particularly apparent
“What would probably be recorded as a broad presence boost in a test chamber in practice manifests itself as a subtle enhancement to the clarity of an otherwise delightfully balanced sound.” contribution of valves, transformers and other components with a slightly non-linear response. But the consensus among some of the world’s best mic designers is that a good CK12-type capsule shines in the most transparent possible context. For example, the Austrian Audio OC-S10 exemplifies a somewhat similar ‘purist’ approach to designing the mic around the capsule, albeit that Austrian Audio’s CKR-12 is a modern evolution of the CK12 design rather than an exact copy. Interestingly, the OC-S10 and C706 are almost exactly the same size and shape, although the latter is a much simpler affair, with no switchable polar patterns, filters, pads, or dual outputs for after-the-fact manipulation. But with the Austrian Audio mic set to cardioid, the sonic similarities between the two are obvious. On-axis, my comparisons suggested that the C706 and OC-S10 are closely matched through the upper midrange, with the Austrian Audio model exhibiting a small peak at 10kHz that is absent from the former, and a marginally thicker low midrange. On my own voice, I found the C706 somehow more natural, but both are extremely good
in its presentation of vocal sibilants, which are represented in a calm, matter-of-fact fashion, without smearing or added resonances. You’d never think twice about putting a C706 up on a breathy vocalist, or a jangly item of hand percussion. Being a fixed-pattern mic with no frills, the C706 represents an attempt by Josephson to make their designs more accessible to a wider market. However, these things are relative, and it remains one of the more costly solid-state mics on the market right now. Such is the level of engineering on offer that I don’t think anyone who tries it will feel that it’s overpriced — but I would recommend making sure that you have the funds available before you try it, because you’re not going to want to give it back. I certainly don’t.
summary A beuatifully constructed mic with a natural, articulate sound.
$ $3690 T Josephson Engineering +1 831 420 0888 E info@josephson.com W www.josephson.com www.soundonsound.com / July 2026
17
ON TE ST
JOHN WALDEN
G
rit Blender is the first plug-in from developers UB DSP, and it’s an interesting take on the saturation theme. With support for VST3, AU, AAX and CLAP formats, not to mention macOS, Window and Linux, it should be compatible with all major DAWs and more besides. Of course, we’re not exactly short of impressive saturation options today, but Grit Blender covers a broad spectrum of saturation styles, and what’s more lets you blend them in a whole range of different ways. So, is this the Swiss Army knife of saturation plug-ins? Let’s find out...
Saturation Smoothie Quirky blender graphic aside, Grit Blender’s GUI accommodates a considerable amount of functionality. On the right, you can choose between three blend modes. The 3 Way mode offers a triangular display: you pick which saturation type is associated with each corner of the triangle, and adjust the blend using a moveable node. Dual Stage provides two such triangles (six saturation types), with the processing performed in series. Finally, 12 Way mode simply gives you 12 rotary knobs: Tape, Transistor, Diode, Wavefolder, Tube, Digital, Fuzz, Aysemetric, Desk, Pentode, Ribbon and Rectifier. So you can blend the different algorithms in any combination. The central section shows the transfer curve as the blend of saturation applies to your input signal. You can also apply an overall EQ based on a selection from five preset curve types. This curve is also shown if the Tone EQ control is shifted from its zero position. Beneath is a display showing in real time the frequencies where the saturation processing is adding or subtracting energy to/from the signal. The large rotary knobs are Drive, Tone and Mix controls, but the control layout changes with the selected blend mode. Additional controls along the base include a very useful Loudness Match option, Analog (a gentle high‑frequency roll‑off), Punch (a system for preserving transients) and Smooth (dynamic control of any harsh frequencies). In addition, you get a Mid‑Sides mode, and a clever Key Track option — MIDI note pitch can be used to control a crossover point below which saturation isn’t applied. The ADV buttons open a further panel where you can set low/high‑frequency filter points and adjust the intensity of Analog, Punch and Smooth.
18
July 2026 / www.soundonsound.com
Grit Blender lets you create your perfect saturation smoothie blend.
UB DSP Grit Blender
Harmonic Distortion Plug-in
Why choose between different saturation plug-ins when you can blend between different sounds to taste? There’s more to explore, though, and the PDF manual is well worth reading; it makes it abundantly clear that Grit Blender has some serious ‘smarts’ on the inside!
Saturation Satisfaction Grit Blender comes with a well organised collection of starter presets, including options for common sources such as vocals, drums, bass, guitars and your master bus. These are sensibly subtle — less is often more for routine saturation processing — but the preset collection can also help you get started with the more technical options (Mid‑Sides applications, for example) and the more extreme/ creative possibilities of the plug-in. Exploring these options with a range of sound sources was loads of fun, and when used with restraint Grit Blender does a great job, letting you dial in almost any style of saturation and blending in just enough to add useful character. To misuse a well-known phrase, with great power comes great responsibility, but thankfully, the combination of Grit Blender’s Bypass and Loudness Matching functions make it easy to A/B what you are doing, and
thus avoid overcooking things. Of course, that might be exactly what you want to do, and in that case Grit Blender can let you overcook any combination of 12 different ingredients. So, if creatively broken audio effects are your thing, Grit Blender does it with ease. Hats off to UB DSP. As a first release, I have to say that Grit Blender is hugely impressive. There seem to be some seriously clever algorithms under the hood, the GUI is easy to navigate, and the processing ranges from subtle to extreme, in all sorts of wonderful ways. Oh, and it’s very accessibly priced too. If a smorgasbord of saturation is your thing, Grit Blender is well worth exploring — there’s a free trial and a 30-day money back guarantee!
summary With 12 styles of blendable saturation and a GUI that gives you plenty of control, Grit Blender is an impressive debut plug-in from UB DSP.
$ $58. W https://ubdsp.com
So advanced, test equipment can't measure it. Someday, all audio gear will be designed like this.
D-1 28-bit DAC It’s a new listening standard which has reset all my expectations. The D-1 somehow captures the dynamics, ambience, impact, transients and three-dimensionality of real life.
Depth and separation is breathtakingly 3D. Once you experience the D-1 DAC, going back to whatever you are currently using, no matter how much you paid for it, is going to be difficult.
Bob Katz, countless hit records, Digital Domain
John Cuniberti, Recording Engineer / Producer, countless gold + platinum records
What you have done is incredible. Simply stunning. Depth and detail that pulls me into the music.
In a word, outstanding — truly in a league of its own. Space, depth, and width are all immediately stunning. Clarity is terrific, very natural. It has rightfully earned its place in my arsenal.
Michael Romanowski, 5-time Grammy winning Immersive Mastering Engineer
Emily Lazar, Grammy winner, 10x nominated Mastering Engineer
The [D-1] sound is elegant and beautiful. The ambient information is clearer. I love what you’ve done here. You can’t have it back!
This DAC is astonishing. The difference is truly amazing. Your DAC is like switching from 35mm to IMAX. The color, depth, and low-level detail is breathtaking.
John Greenham, 4-time Grammy winning Mastering Engineer (Billie Eilish, Lady Gaga)
Paul Blakemore, 5x Grammy nominated, Chief Mastering Engineer, Concord Music
imersiv.com by Millennia
In-depth pro comments
ON TE ST
Temecula DSP DEEP/4
Multi-effects Plug-in A classic effects unit is reborn in plug-in form. SAM INGLIS
E
nsoniq were innovators in the worlds of sampling and digital synthesis. Their ‘transwave’ synths like the Fizmo have a cult following among musicians, whilst in the world of mixing, it’s their multi-effects processors that attract fond reminiscences. Released in 1992, the DP/4 featured four independent digital processors that could be operated in a number of different series and parallel configurations. Each of these engines could run a wide range of algorithms including reverb, delays, modulation, pitch-shift and even amp and cabinet simulation. Recreating digital processors from this period in software is a serious challenge. Since they use specialised DSP chips rather than embedded PCs, the code can’t easily be ported across, but at the same time, it’s too sophisticated and complex to be easily reverse-engineered. John Wheeler of Temecula DSP has thus carved out a niche in plug-in world by developing new techniques for emulating complex legacy digital code in software. These involve the use of AI coding assistants to verify the output of his recreated algorithms, but this is definitely not ‘vibe coding’! Temecula have already used these techniques to recreate the Alesis Midiverb and Microverb, plus three Ursa Major products, and their latest release focuses on the aforementioned DP/4. This is by far John’s most ambitious project to date, as the DP/4 contains no fewer than 43 algorithms, many of which are quite complex. DEEP/4 is available in all common native formats on macOS and Windows, and is authorised using a licence key file.
Deep Learning I’ve never had the good fortune to own or use a DP/4, so can’t confirm whether DEEP/4 really does sound identical, but it certainly makes clear why the originals are still so cherished by many mix engineers. Like so many classic digital algorithms, its reverbs don’t exactly sound like real rooms or plates, but they have a character of their own that somehow just works — perhaps because they are so familiar from ’90s mixes. But unlike, say, your average Lexicon multi-effects unit, reverb isn’t necessarily the star of the show. The modulation, pitch-shifting and, perhaps surprisingly, the distortion and amp simulation algorithms all have a strikingly fresh and appealing sound of their own. It won’t take the place of your Kemper Profiler or Helix Stadium, but as a source of distinctive, ear-catching effects, it still has a huge amount to give.
20
July 2026 / www.soundonsound.com
This potential for creativity stems partly from the architecture. The routing of the four engines can be toggled at the touch of a button, and it’s easy to set up parallel, series and feedback routings. There are also four separate global LFOs that can be assigned to parameters of your choice. All this makes possible some pretty wild combination effects, as is ably demonstrated by the factory preset library. The hardware DP/4 provided a fairly typical editing interface for the time, with a handful of encoders and buttons. Temecula DSP have sensibly avoided skeuomorphism in favour of a visually restrained but effective mouse-based interface that does a good job of making things more accessible. The plug-in screen can display all the parameters relating to one effects engine and one LFO at a time, and there are some nice additional touches. For example, if you want to place a parameter under LFO 1 control, you simply
click on ‘LFO 1’ at top left and drag to the parameter you want to manipulate. The range of LFO control is then displayed by an orange band around the destination control, with an animated white dot moving to indicate the current position. Host tempo sync is implemented as an option wherever it makes sense to do so, and in the latest version, there’s a subtle but worthwhile improvement to the preset structure whereby presets that use only one engine can be loaded into whichever engine is in focus, rather than always into engine A. If you’ve ever used something like Eventide’s H3000 plug-in, I’d say this is probably a fair bit easier to get your head round, which perhaps speaks to the influence the DP/4 has had on the design of subsequent effects units. Can a 35-year-old multi-effects design hold its own sonically in 2026? Absolutely. And does Temecula DSP’s emulation make it easy to exploit that creative potential? Also yes!
summary Temecula’s painstaking plug-in replica of the Ensoniq DP/4 will delight existing fans and make plenty of new converts.
$ $100 W www.temeculadsp.com
ONE COMPLETE SOLUTION To take your monitoring to the next level
www.trinnov.com
ON TE ST
Cherry Audio DS-2 Cherry Audio’s take on the Crumar DS-2 could be better than the original...
GORDON REID
I
don’t view Gordon’s Rules Of Synthesizer Design as particularly onerous. One of these is, ‘No integrated monosynth shall cause me to puff when I carry it up two flights of steps.’ Another is, ‘No synthesizer shall greet me with a cloud of mildew when I take the lid off after an extended period of storage.’ A third is, ‘No synthesizer shall have an immovable knob, even if it hasn’t been twiddled in a while.’ On all three counts, my Crumar DS-2 failed miserably when I liberated it for this review. It occurred to me that there must be a better way to obtain its sounds and the experience of playing it. Let’s get one thing clear; the Cherry Audio DS-2 is not a slavish recreation of the strange combination of a dual-oscillator monosynth and a basic paraphonic synth that is the Crumar DS-2. In keeping with almost all modern soft synths, it offers far more than its inspiration. So, while Cherry’s engineers have modelled the unusual waveform generation and filtering that gave the Crumar its character, their version offers things such as an additional audio waveform, oscillator sync and the pitch contouring
22
July 2026 / www.soundonsound.com
of osc 2 that makes it useful, a 12dB/oct filter mode, filter cutoff key follow (a big improvement), hugely enhanced contouring and modulation, programmable split/layer for the Synth and Poly sections, an arpeggiator, and a powerful effects section. Oh yes... and the main synthesizer voicing is now (up to) 16-voice polyphonic when desired. If, in 1978, Crumar had tried to build in hardware what this offers in software, the result would have needed a shed for storage, a forklift truck to move it, and it would likely have had a mean time between failures shorter than an episode of Blake’s Seven. Nonetheless, many early synths thrived on their limitations. So a good question to ask (in addition to ‘does it sound any good?’) is whether the numerous enhancements have turned the Cherry DS-2 into just another all-singing, all‑dancing polysynth that overlaps the myriad Prophet-y, Oberheim-y, Roland-y, Korg-y and even Moog-y soft synths you already have. Alternatively, does it bring something new or special to your synthesizer party?
Comparisons The first place to look is in the oscillator section because, on the original, the oscillators generated stepped waveforms rather than shapes with smooth slopes. I set up my DS-2 and listened for the
Software Synthesizer high-frequency pollution generated by the stepping and, sure enough, there it was. The artefacts are most noticeable when using the triangle wave at low audio frequencies, but also exist when selecting the sawtooth and square waves, although they are lower in apparent level. Cherry’s engineers have captured the triangle and sawtooth waves correctly, but the soft synth’s square
Cherry Audio DS-2 $59 pros • There’s no mildew, and it’s vastly more usable than the original. • Its architecture might lead you to sounds that you wouldn’t otherwise discover. • To an extent, basing the GUI upon the original’s control panel hides the power within.
cons • It’s less raw than my 48-year-old original — which you may or may not view as an improvement.
summary Cherry have both extended and tamed the beast. It’s now a surprisingly powerful synthesizer, and reaches so far beyond the original that, in use, there’s little comparison between the two. I started out a bit ambivalent but, after a few days, I really liked it.
With the Lynx Aurora(n), you don’t need to sacrifice the very best audio quality to enjoy the very best immersive Dolby Atmos® audio interface
Lynx Aurora(n) Atmos® Features • Support for speaker configurations up to 9.1.6 • 320 total room correction filters • Up to 16 filters per channel (including parametric, low-pass, high-pass, and shelving) • Channel level and delay compensation
• Direct import of speaker calibration parameters into Aurora(n) with no manual entry required
Immersive audio opens a world of possibilities in creative music mixing, game audio design, and — of course — sound for picture. But building a studio for immersive audio is a lot more than just adding a bunch of speakers. Choosing the Lynx Aurora(n) means that you not only want the most flexible digital conversion and interfacing for immersive mixes, but also the transparency needed for space, definition, and a level of detail that is simply unattainable with converters that add color and distortion.
• Seamless integration into Lynx NControl software
Dolby and the double-D symbol are registered trademarks of Dolby Laboratories Licensing Corporation.
• Comprehensive bass management with LFE channel and satellite LPF summing • 64-bit floating-point accuracy • Perfect integration between Aurora(n) and Sonarworks sound calibration software as well as Room EQ Wizard (REW)
Get complete specs & info at lynxstudio.com Lynx Studio Technology • Costa Mesa, CA • 714-545-4700 • lynxstudio.com
ON TE ST
With the launch of their new ThumpSub Go, Mackie’s off-grid PA goes full‑range! PAUL WHITE
T
oday we have a huge choice of ‘box’ or column‑style compact PA systems, but when it comes to battery operation, the choice is rather more limited — and all the more so if you also need a decent amount of power. The Mackie Thump Go and its companion subwoofer, the ThumpSub Go, form a robust but portable PA system for small to medium-sized venues such as pubs, bars and smaller outdoor events. Both units can run on mains power or removable lithium batteries and, when paired with the also battery-powerable Mackie ProFX 10 Go mixer, form a complete PA setup that’s just as usable off-grid as it is indoors. We reviewed the ProFX 10 Go separately in June 2025 (www.soundonsound.com/ reviews/mackie-profx10-go), so please refer to that for more detail on the mixer side. In addition to the speakers and mixer, Mackie offer their SPM400 speaker poles for mounting the tops above the
Portable PA System
Mackie Thump Go & ThumpSub Go subs, plus rechargeable batteries for each speaker (these are an optional extra when buying the speakers individually). Additional spare batteries and custom cases are also available. The system is suitable for mobile DJs, live events, corporate presentations, outdoor ceremonies and garden parties — with or without mains power.
Thump Day Battery operation inevitably means the maximum SPL may be slightly lower than a similarly priced mains-only system, but the Thump Go top and
The Thump Go and ThumpSub Go can both run for several hours on batteries. The subwoofer can even house two batteries, and supports hot-swapping.
26
July 2026 / www.soundonsound.com
sub combination still delivers a solid performance. A single Thump Go can be used alone as a compact full-range speaker with a frequency response of 57Hz to 20kHz (-3dB), or paired with the ThumpSub Go for extended low reach (-3dB at 39Hz). It is powered by a 200W (peak) Class-D amplifier driving an eight-inch woofer and a one-inch compression driver in a ported, moulded cabinet that includes a pole-mount socket. Its drivers are protected by a perforated metal grille, while the cabinet’s angled side allows it to be used as a floor wedge. The cabinet measures 457 x 230 x 285mm and weighs 8kg. Maximum SPL is quoted at around 115dB — which, while lower than some similarly sized speakers, is still subjectively loud. Battery life is impressive at up to 12 hours, though this is reduced at higher output levels. Connecting to the mains via the IEC inlet charges the batteries. Four voicing options (Music, Speech, Monitor and Sub) are selectable with a push-button, though the setting isn’t retained after power-down — it defaults to Music. An Outdoor mode optimises performance where there are no reflective boundaries. There’s also effective automatic feedback suppression
To find a dealer visit www.musicmarketing.ca
ON TE ST
British Audio Technologies BAT 1588
500-series Microphone Preamplifier
Clean gain isn’t exactly a problem for us these days, so we often look to dedicated preamps more for their tonal character and ease of control. The new 1588 offers both. NEIL ROGERS
N
ew company British Audio Technologies (BAT) are, as you’d expect, based in the UK, and they are just one string to recording and technical engineer Matt Sartori’s bow. In fact, this isn’t our first encounter with Matt’s work: he’s the brains behind the Periscope mic we reviewed in SOS February 2021 (https://sosm.ag/scope-labs-periscope), a design that’s as distinctive as it looks, since as well as the mic itself there’s an aggressive-sounding compressor built in. Matt has also been a friendly face at some of the UK’s leading pro-audio repair services for over 20 years, as well as looking after the technical and service needs of several commercial studios on both sides of the Atlantic. Like many boutique designers, he explains that he tends to develop his products when he feels he needs something that other people haven’t quite managed to offer. It’s an approach that leads us neatly to this review: Matt tells me that he has long been a fan of a particular 1960s solid-state preamp made by Altec, and that this project came about because he was keen to have one to hand in a convenient, reliable format, to take with him
30
July 2026 / www.soundonsound.com
to different studios or use for location recordings. So it comes as no surprise that he chose to build this new preamp as a 500-series module. It’s priced in line with the top end of preamps in this format, but is intended to deliver more than gain alone — it promises us the unique sonic properties of a classic but perhaps lesser-known vintage studio tool. So let’s find out if it delivers the goods...
From Muse To Modernity The Altec 1588C was introduced in the 1960s as a compact, modular ‘octal’ preamp — meaning it used the same eight-pin base as some of the valve-based modules that preceded it. This was a period in audio electronics that saw rapid change, with many designers and engineers moving away from the more complicated tube-based products, in favour of solid-state, transistor-based designs. At the time, the 1588C was respected as a good, practical option, but in the years that followed it came to be recognised as a device whose
British Audio Technologies 1588 $885 pros • Great, characterful-sounding preamp. • Capable of subtle or more obvious saturation. • Trim and Fader controls make this a multi-trick pony! • Can be used as a line processor while mixing.
cons • None!
summary Inspired by the 1960s Altec 1588C preamp, British Audio Technologies’ debut release is an excellent, flavourful addition to the 500-series preamp menu.
transformer-coupled input stage could impart a pleasing character and, when deliberately driven, could take on the role of a saturating, tone-shaping device where that was desirable. The 1588C had its pros, then, but its core circuitry was relatively simple — the design features no op-amps or ICs in the signal path — and it was never really conceived as a fully featured preamp. The original modules offered only a modest 34dB of gain, and they were very much intended to be part of a wider recording chain. Of course, those modules are now very old, too. So from the point of view of today’s recording practices, there are clearly also cons. And that, of course, explains why Matt decided to develop a modern, more reliable version.
Hitting The Metal Essentially, what Sartori has done is to add to the original module design (which, understandably, featured a transformer only on the input stage — the output stage was handled by the device into which it was plugged), to create a more complete preamp module. As well as the input transformer, in this case made by Cinemag, his 1588 features a transformer‑balanced output (also Cinemag), which means that, unlike the original, it can be used on its own or with other processing stages, as you require. In keeping with the original version, the gain structure is somewhat different from that of some more famous solid-state preamp designs like the Neve 1073 or API 312, but with a +25 to +55 dB gain range this version is much more versatile than the Altec. There are just three main controls, but Matt has clearly paid careful attention to the
Every BAT 1588 is individually hand-built, and carefully assembled using premium components.
control layout, which ensures that you can easily hit those different transformer stages to taste, in search of saturation. The top knob, Gain, sets the amplification of the input signal, so determines the signal level fed into a discrete amplifier stage, and thence the output transformer. But it’s not the only means of controlling those levels. Next comes a knob labelled Trim, which is a variable attenuator (0 to -20 dB). A simple control, but one that means you have ample control over the ‘analogue magic’ — you can drive the input stage hard while dialling back the output transformer saturation. Finally, we have an ‘Output Fader’ knob. A post-transformer attenuator, this one lets you optimise the level being fed to the next device in your recording chain, no matter how hard you drive the output transformer. Naturally, the BAT 1588 also offers the typical features you expect of any preamp today: switchable 48V phantom power, a polarity inverter, and a -20dB input pad to accommodate particularly loud sources.
Sat Tests The aesthetic styling of the BAT 1588 very much aligns with my personal tastes, clearly resembling a vintage device but without sacrificing convenience for purism. A pair or more of these in a 500‑series rack would look very inviting indeed! The more important thing, though, is how it sounds, and Sartori deliberately bills this device as a ‘character preamp’, yet while its controllable colour is very
much its USP, the quoted frequency response is within ±0.5dB from 20Hz to 25KHz — so it can also sound reasonably clean if you want it to. In my first recording session, for example, it worked superbly for capturing an acoustic guitar that wasn’t crying out for any additional saturation. With the single input LED only rarely turning red, the 1588 produced a lovely, ever-so-slightly ‘rounded off’ sound when the musician dug into his strumming on the chorus sections. I did notice, however, that I had to leave both the Trim and Fader controls fully up, to get enough level out of the preamp when used this way — ideally, I’d have had a little more final output level at my disposal to keep a cleaner tone. That’s perhaps less of an issue with passive ribbon and dynamic mics, for which you can use an in‑line preamp such as a Cloudlifter before the 1588. And on the subject of dynamic mics, my next test was pairing the 1588 with a beyerdynamic M 201, a hypercardioid mic, used as the top snare mic in a fairly minimal Glyn Johns-inspired drum recording setup. I knew this was a session where vintage-style saturation would be appropriate, and the thick, slightly overdriven sound that the 1588 helped coax out of the low-tuned snare drum was very satisfying indeed. In this application, the input LED was nearly always in the red, and I was able to play with the Trim and Fader controls to find the sweet spot both level- and saturation-wise.
Vocals were another source on which this preamp impressed. On a couple of sessions, I paired it with my old Neumann U87 capacitor mic to record vocals that I felt would benefit from a little thickening coloration. I do find that you have to be careful in such scenarios — it’s not always appropriate to have audible saturation or distortion on a vocal, and you really have to be sure that you’ll like how a more coloured preamp sounds if the singer suddenly decides to gets louder; something to bear in mind when the singer’s warming up. On one particular session, I was recording more of a scratch vocal using an RE-20 dynamic mic, with the singer alongside me in the control room. This time, I felt comfortable just letting the preamp go very ‘hot’, and we loved the more obviously overdriven, compressed vocal sound this presented. So much so, in fact, that I recreated that very same signal chain when it came time to cut the final vocal. Lastly, I also made a point of using the 1588 as a line-level insert when mixing. While the character is appealing, you might find it a bit too much if used on its own like this, but it sounded great when used as a kind of ‘parallel dirt’ channel to enhance a bass guitar and some of the drum mics.
Summing Up Most of us already have technically good preamps at our disposal in our interfaces, and when that’s not enough we’re fortunate to have a lot of mic/line preamps to choose from today, including lots of very tasty options at around the price of this new boutique release. In the 500-series format in particular, we’re really spoiled for choice! As both an engineer and a pro-audio gear reviewer, what I’m really looking for in a new preamp, then, is either an option that nails its sonic colours very firmly to the mast, or one that can do a few different things very well. In a recording session, ideally you want a nice zone where you can hear that colour being introduced, but with enough range in the controls that you can make adjustments easily, before it becomes too much — while knowing that if it does get a bit too much, it’s still going to sound good. BAT’s new preamp achieves all of that, which I find really impressive. This is one preamp that’s well worth checking out. $ $662.50 (about $885) plus tax and shipping. T Studiocare (UK) +44 (0) 151 707 4545 E sales@studiocare.com W https://studiocare.com W https://britishaudiotech.com www.soundonsound.com / July 2026
31
ON TE ST
Oeksound Soothe 3 Resonance Suppression Plug-in
How much more soothing can Oeksound’s Soothe get? Quite a lot, as it turns out... SAM INGLIS
S
ince plug-ins started to become popular, some 30 years ago, many new types of processor have been introduced. A few have become universally successful, the most obvious example being real-time automated pitch correction. But many of these new ways of modifying recorded sound have remained niche products. Plug-ins that have become universal ‘must haves’ don’t often do something fundamentally new or original: rather, they offer a faster or better-sounding or more versatile way to implement existing concepts. Think, for example, of Soundtoys’ EchoBoy, or FabFilter’s Pro-Q.
32
July 2026 / www.soundonsound.com
Then, back in the mid-2010s, a group of Finnish developers identified a problem that hadn’t previously been solved and developed a tool to address it. Ten years later, that tool is well on the way to the ubiquity enjoyed by plug-ins like Antares’ Auto-Tune. Other companies have since released alternative implementations of the same idea, and it was arguably anticipated in some respects by products like Paul Frindle’s Dynamic Spectrum Mapper, but Oeksound’s Soothe is by far the most widely used processor of its kind.
Mellow Gold The original raison d’être of the plug-in is summed up well by its name.
Soothe was initially launched as a tool for addressing harshness in recorded audio, and much of its success is down to the fact that the default preset worked remarkably well at doing exactly that, across a wide range of material. Like many subjective qualities, harshness is hard to define clearly, or even to agree on, but Oeksound’s insight was to identify it with an excess of temporary resonances. For instance, when a vocalist belts out a high note, overtones of that note can become too strong, an issue which is only made worse by inappropriate mic choice or a compromised signal chain. But the key point is that these overtones are specific to the note in question.
Oeksound Soothe 3 $259 pros • Improved algorithms and new features mean Soothe 3 is both a more effective corrective tool, and now a creative tool too. • Simplified EQ-style interface and new Detail control make it easier to use than previous versions, yet more powerful. • Comprehensive multi-channel linking and weighting.
cons • Not backwards compatible with Soothe 2.
summary An imaginative and very well thought-out upgrade to an already impressive processor.
Other notes will produce different overtones, and quieter passages may well be completely problem-free. Consequently, straightforward EQ is not usually a satisfactory solution. The overtones are too narrow to target effectively, they aren’t always present, and they aren’t always at the same frequencies. So, although it presents an EQ-like interface, Soothe is not an equaliser. The filter, bell and shelving curves set up by the user don’t affect the sound directly; rather, they weight the plug-in’s algorithm to focus more or less on different frequency regions in its hunt for annoying resonances. The algorithm acts dynamically, so it’s continually identifying the resonances as they come and go, and automatically applies attenuation only when they occur. Soothe’s Depth control determines how aggressively this is done, while the Selectivity and Sharpness settings let you choose whether the attenuation should be broad and smooth, or surgically targeted. Released in 2020, version 2 of Soothe greatly expanded the feature set. The original ‘hard’ algorithm was joined by a new ‘soft’ variant, which is typically more transparent in use. Compressor-style attack and release controls were added, along with the option to use an external side-chain input to trigger the processing. Soothe 2 added new powers to handle mud and congestion in low frequencies. And, in the background, the entire
codebase had been rewritten, reducing latency by around 50 percent and making possible the development of a Live version targeted at front-of-house mixing.
Attention To Detail Soothe 2 felt like a pretty complete tool, and you could be forgiven for wondering whether Oeksound had left much room for further improvement. Following its release, they went away and developed the superb Bloom, another dynamic tone-altering plug-in that complements Soothe without encroaching on the same applications. But now, in time for the 10th anniversary of Soothe’s launch, they’ve introduced another major update to their flagship product. Like version 2, Soothe 3 is not backwards-compatible, so any existing projects that you load will open with Soothe 2 active unless you manually replace it. The interface is now fully scalable, rather than just offering a choice of fixed sizes, and is rendered in a warmer and more friendly palette of blues. Everything is pretty much
where it was before, but nothing is exactly the same! In use, perhaps the most immediately obvious change is that the Selectivity and Sharpness controls have disappeared. In their place is a single knob labelled Detail. The division of labour between the two was never very clear, and the new arrangement is both quicker and more intuitive to use. In fact, I’d actually forgotten that there used to be two controls until I opened up an old project with Soothe 2 active; and if there’s anything you could do with both that can’t be done with the new Detail control, I haven’t found it yet. There are also major improvements to the EQ-style interface. Soothe 2 presented six bands, all active by default, and although these were colour-coded, they were otherwise not easily differentiated visually. Soothe 3’s default preset includes only high‑ and low-pass filters, now immediately identifiable by their lozenge-shaped icons, and a single bell band. Additional bands can be added by double-clicking, up to a total of eight, and there are several new types
TELEFUNKEN Elektroakustik Celebrates 25 Years of Sonic Excellence.
www.soundonsound.com / July 2026
33
ON TE ST
Vintagetools VT N95 PE Analogue Equaliser N I C K M AV R I D I S
F
or decades, an equaliser was seen less as a creative tool and more as a means of technical control: if you desired a different sound, you’d either alter the source itself, or put your microphone somewhere else. For the best audio quality, though, a crucial stage in the chain from the microphone to the consumer’s ear was the vinyl cutting process — carving the perfect groove helped record companies compete for the highest market share, and when it came to cutting equipment,
Vintagetools VT N95 PE $4890 pros • Doesn’t sound like ‘an EQ’! • Superb build quality. • Stellar technical specifications. • Convenient to use. • Quickly recallable.
cons • None, bar the price.
summary Vintagetools have adapted the classic concept of Neumann’s famous vinyl cutter EQs, and adapted it to meet today’s production realities and technical possibilities. The result is, frankly, astoundingly good.
36
July 2026 / www.soundonsound.com
What if someone were to lavish money, time and considerable engineering know-how on improving Neumann’s highly revered cutting-lathe EQs — could they really be improved? The answer is a resounding “yes!” there was one company that stood head and shoulders above all others: Neumann. And this brings us back to the subject of equalisation, because an integral part of Neumann’s VMS cutting machines was an ultra-precise equaliser, the W495 (and its predecessors PEa and OEV). Needless to say that cost was not really a consideration when those machines and their equalisers were being developed...
More Than A Clone Today, there’s a small company in South Hesse, Germany, called Vintagetools, who have decades of experience in racking, servicing and repairing notoriously well-built old German recording and broadcast equipment, and now make their own recreations. Amongst those products are the famous V72 and V76 preamps but also, you guessed it, Neumann equalisers. Vintagetools are not simply a ‘cloning’ business, though. They set out to create the definitive German precision equaliser, with no compromise whatsoever. Yes, “no compromise” is one of those overused marketing terms, but when it comes to Vintagetools’ VT N95 PE, its use is entirely justified. This EQ contains over 800 components, most of which, due
to the tight tolerances needed, cannot be bought off the shelf — so testing and selecting involves lots of labour, long before the company’s soldering irons are warmed up! The design employs input and output transformers made by Haufe, and even the manufacture of the front plate involves a time-consuming and expensive dye-sublimation printing process, with several different colours in use (it looks really classy and three-dimensional!). The control knobs are from the original manufacturer, although they are bigger than the original models; Neumann’s cassettes were fairly small, and so too were the knobs. Nowadays, it’s possible to obtain much better technical figures than when those cutting machine EQs were built, and Vintagetools’ aim in designing the N95 was to surpass the original specifications and bring them to the absolute cutting edge. Accordingly, the frequency response is 20Hz to 120kHz (±1dB), which helps transients to pass through the EQ unaltered. THD+N is less than 0.004% — so there’s almost zero distortion. A left-right channel separation of greater than 96dB means crosstalk is vanishingly low, and so too is the
noise level, which, at -99dBA (without the A-weighting, the figure would look even better), allows for high boosts even of highly dynamic material. Vintagetools have also widened the usability of Neumann’s RC design not only by adding frequencies, but also a second mid band. This makes the VT N95 PE a two-channel, four-band EQ. The ±15dB shelving filters have three additional frequencies, and can now be set at 27, 40, 50, 60, 80 or 100 Hz for the low shelf and 7, 8.5, 10, 12.5, 14 or 22 kHz for the high shelf. Both ±10dB mid bands offer 11 selectable frequencies (from 100 to 800 Hz and 1 to 8 kHz) with three bandwidth settings (Q values of 1, 0.5 or 0.25). Because 2dB steps are considered too coarse for
when I put my glasses back on! So, having the EQ inserted is really nice for single signals, but it is also an instant upgrade to any stereo sum. EQ’ing with this unit really is a piece of cake. The frequencies you can select are those you’d need in most cases. You cannot super narrowly notch out resonances or high-pass filter, of course, but that kind of correction is really a job for a ‘to-tape’ channel EQ. This VT device is better viewed as a stereo bus or mastering equaliser. By the way, since I mentioned high-passing, cutting 15dB with the low shelf very often does just what you’d want from a pass filter — for example, too much bass in the guitar bus can easily make the mix sound muddy, and cutting
“Every mix gets ‘more highs’, of course, but it’s more than that — like the first sunbeams of the day illuminating all the details in a landscape.” mastering, a mastering version (VT N95 ME) is also available, with ±1dB steps up to 7dB, though omitting 6dB in both boost and cut. The mastering version comes with a creamy eggshell-coloured front plate, with all-black knobs and labels. It’s possible to order mixed versions of the standard and the mastering version if you like, both in terms of the aesthetics and the technical aspects. You can also specify 0.5dB steps, if you like. I know some engineers find meaningful colours helpful, but personally I’d probably opt for a black fascia and black knobs...
EQ Of The Utmost Quality Of course, SOS didn’t hire me to discuss my views about colour schemes! So, how does the N95 perform sonically? Just what is it that sets it apart from other equalisers? It is, of course, a very transparent-sounding processor — yet, it isn’t quite crystal clear and neither is it intended to be. The signal always passes through the Haufe transformers, even in bypass mode. These don’t thicken the sound much and don’t add a whole lot of harmonics to the signal, even when driven with hot signals. But they do serve to tame harsh elements in the signal; to round spikes and make them appear less ‘glassy’, less ‘spiky’. They add just a touch of ‘graininess’ and ‘grip’ to the signal, so that while the N95 never seems to lower detail, it seems to give everything more ‘contour’. To draw an analogy, working with this Vintagetools EQ feels like
the bass band of course pushes everything down to the very sub-bass, without ever letting the signal get ‘washy’. Both mid bands make it hard for me to believe there is an EQ in the signal path! Usually, I can quickly tell which is the cut or boosted signal and which is the unprocessed original one. With moderate gain settings, this isn’t easy at all when using the Vintagetools N95, so transparently does it work. Even with relatively narrow cuts or boosts, you don’t notice those typical ‘hollow-sounding’ artefacts at the edges of the EQ curve. Yet, the VT doesn’t sound ‘boring’, like the
linear-phase EQ you might use in your DAW. So carefully balancing between snare drum, guitars and vocals in a mix by adding a couple of dB here and removing a touch there is a job for which the VT N95 is the perfect tool. The absolute highlight for me, though, is the treble band. Please excuse the hi-fi-esque description that follows, but it really is nothing short of phenomenal. When boosted, yes, every signal and every mix gets ‘more highs’, of course, but it’s more than that — like the first sunbeams of the day illuminating all the details in a landscape, and bringing to life the rich tapestry of colours within. I’ve heard many EQs praised for such qualities and enjoyed using them — but the VT is simply breathtaking. For example, I’d even consider the Millennia STT-1’s famous treble band (that has garnered such a strong reputation that it’s been made available as a separate product, the NSEQ HT 500) less suitable for adding air to a very modern pop vocal chain than the N95’s high band. What’s also great is how a mix livens up with boosts starting as low as 7kHz with 2dB of gain. I really miss the smaller steps the ME version or bespoke N95s offer, though. Reducing gain in the high band simply makes all material darker, but never duller: it remains lively and agile. The rotary switches allow for simple and quick recalls, of course. Switching between different projects and altering the parameter settings takes mere seconds, and when actively EQ’ing, I could dial in what I desired much faster than with my beloved three-band Roger Schult mastering EQ, which consists of
Unlike the Neumann originals, the Vintagetools VT N95 PE features a four-band design (instead of three) with six selectable frequencies (instead of three) in the shelving filters.
www.soundonsound.com / July 2026
37
ON TE ST
V IN TAGE TO OLS V T N 95 PE
The positions of the front-panel switches are easily recognisable — even the blue-on-black, thanks to the superb dye-sublimation printing.
six Neumann-based W2377 modules. I noticed something strange too: I always seemed to need less gain when cutting or boosting with the VT than with any other equaliser — and when applying more gain, the N95 still sounded more natural. The Roger Schult is, overall, a great EQ, but by comparison it got a little more ‘raspy’ when boosting the trebles, while the H2 5011 Helios EQ you’ll find in the audio samples that accompany this review (https://sosm. ag/vintagetools-vt-95-pe) is, of course, a far more colourful-sounding unit. I was stunned to discover that the left and right channel are absolutely identical: when I swap left and right used on the same material in a blind test, I am completely unable to tell which is which. As you might expect, then, the VT N95 PE never has any negative audible effect
on the stereo image or the depth when the settings are identical on both channels — it’s a good ear-training exercise to listen for such subtleties with other EQs. It’s the job of a reviewer not just to gush, but also to point out the cons of any product. Yet I’ve had a genuinely hard time trying to find any for the VT 95 PE. I’m not overly enthusiastic about the look, the name and the logo, but that’s only me and it shouldn’t be a major consideration for anybody, especially in the professional context for which this EQ is designed. You might, perhaps, expect me to criticise blue labels on a black front panel, but thanks to the premium dye-sublimation printing this actually reads really well, even when in rather dim light. I wouldn’t say no to bigger bandwidth switches. And then, of course, there is the asking price, which is a considerable amount of money. But for a small-batch analogue processor,
The controls are all stepped, of course, and inside you can clearly see the resistors that are connected to the switches — and their the values can be customised to the customer’s specifications.
38
July 2026 / www.soundonsound.com
designed and crafted by people with utmost experience and skill, in a high-wage economy and without any bean-counters attempting to ‘cost-engineer’ the design, this is not only what a product like this costs: it’s what it’s worth.
Verdict I’m fully aware this article reads less like a review and more like an anthem; a celebration. But I mean every word of it: the Vintagetools NT 95 PE is absolutely phenomenal. It’s an equaliser that’s capable of improving literally any signal, and apparently without any drawback. That’s something only a select few EQs can claim. It’s an ultra-precise tool, but one with neither a clinical nor dull character, nor a short-term hit of excitement that wears thin over time. The VT N95 is just ‘right’. The price seems hefty at first, and yes, it’s a shame that many of us can only dream. But this is the type of gear you can pass on to your children and grandchildren. So if you’re looking for the EQ you will work with for decades, without ever looking back, get one. But watch out: If you leave the VT N95 PE unattended in the studio overnight, your other equalisers might well murder it out of sheer envy! $ €4200 (about $4890) plus shipping. T Vintagetools (Germany) +49 6105 2713915 E equipment@vintagetools.de W www.vintagetools.de
We only update these four times a century. Now’s the time
The M-series MkII: a serious upgrade for serious professionals.
M-series Discover the new M-series at www.dynaudio.com
ON TE ST
SAM INGLIS
T
he KSM32 and KSM44 have been mainstays of Shure’s studio microphone range for a quarter of a century. And in that time, the world of affordable studio microphones has changed beyond all recognition. At launch, the Shure models faced limited competition from a handful of European and US manufacturers, with Chinese-made mics just beginning to penetrate Western markets. Today, pressure on prices is far more intense, and the majority of mics in this price bracket are wholly or partly manufactured in the Far East, nearly always using some variant on the ubiquitous Neumann K67 capsule design. This intense competition has, however, highlighted Shure’s unique selling point: their KSM-series mics are wholly designed and manufactured in North America, and the capsules are original Shure designs rather than copies. These are made in a clean-room environment, and tolerances are tight enough that any two examples of the same model can be considered matched. If anything has dated the KSM32 and 44, it has been their styling rather than their performance; there’s an unmistakable whiff of ‘ADAT project studio’ about their
44
July 2026 / www.soundonsound.com
Shure KSM44MP, KSM40C & KSM32C Capacitor Microphones
Shure’s popular family of studio mics gets a dark reboot — and a new sibling. curved shells and shiny silver finish. From a cosmetic point of view, therefore, a refresh was perhaps timely. And in the process, Shure’s engineers have found ways to improve both mics, leading to the release of the KSM32C and the KSM44MP. Although the uniform styling of the two mics means that the KSM32 is often thought of as a fixed-cardioid version of the multi-pattern KSM44, there are actually deeper differences between the two models. The KSM44 is an externally polarised or ‘true’ capacitor microphone with a one-inch, dual-diaphragm capsule, operating on the standard Braunmühl-Weber principle. By contrast, although the KSM32 is also a side-address mic with a very similar look and feel, it uses
a permanently polarised or back-electret capsule that is intermediate in size between typical ‘large’ and ‘small’ designs. It is consequently more comparable to models like the Neumann U89 and Sony C-80 than to more traditional studio mics. So, with this reinvention, Shure have also introduced a new model called the KSM40C — which really is the fixed-cardioid version of the KSM44 design that some expected the KSM32 to be.
Clean Lines Once again, the models look almost identical, the only obvious differences being that the 32’s body is slightly shorter than that of the other two, and the 44 bears an extra switch for selecting the polar pattern.
All three mics retain the 15dB pad and high-pass filter options that were featured in earlier iterations. However, the metallic sheen and bulbous curves are gone, replaced by a very smart and businesslike black cylindrical body. The robust headbasket is formed from a single piece of metal, into which a pattern of circular holes is cut; behind these is visible a finer mesh that protects the capsule from air blasts, stray particles and other foreign objects. It’s an attractive, no-nonsense design in its own right, and also brings the mics much closer in appearance to existing Shure classics like the SM7B. The XLR socket is, as usual, located at the base of the body, and surrounded by a threaded ring. This can be used to attach either an elastic shockmount or a simple standmount, both of conventional design. The KSM44MP and KSM40C ship with both as standard, along with a pop shield that fixes magnetically to the upper ring on the shockmount; this is a new accessory, which was not available for the older models. The KSM32C is available in either a ‘studio kit’ which includes the shockmount and pop shield, but not the hard mount, or as a slightly cheaper ‘stage kit’ with the standmount and a foam windshield, but no shockmount or pop filter. All three models ship in the same, good-quality padded case, which is large enough to hold the mic without removing it from its shockmount. All in
all, it’s a comprehensive package that ensures almost all recording scenarios are covered.
The Quiet Life Shure publish refreshingly comprehensive specifications and diagrams for all of their mics, and it’s interesting to compare these latest releases with the earlier variants. The previous KSM44A, for example, boasted some astonishing measurements, of which the most eye-catching was a self-noise figure of 4dBA in cardioid. The KSM44MP matches its performance in this respect, but a change in Shure’s measurement process now means the self-noise figure is reported as 5dBA. This is still state of the art, and I know of no other production mic that outperforms it on this front. In other respects, the 44MP measures pretty much exactly like you’d expect a well-designed large-diaphragm studio mic to do. At the low end, its frequency response is not curtailed in any way, and it’s largely flat through the midrange. Above 3kHz or so, it exhibits a presence lift that varies with polar pattern in a way that is typical of dual-diaphragm mics. A 10kHz peak is apparent in cardioid, more prominent in omni, and almost disappears in figure-8, while a broader boost from 3-8 kHz is most apparent in figure-8 and almost absent in omni. The polar pattern is well behaved at all frequencies in
Shure Shure KSM44MP, KSM40C & KSM32C $1099/$879/$729 pros • A well thought-out update that retains the many good qualities of the original KSM44 and KSM32. • The new KSM40C will hit a sweet spot for many studio owners looking for an affordable, high-quality large-diaphragm mic. • Practical cases, mounts and pop shields make for an attractive overall package.
cons • None.
summary Shure’s new KSM family is a suite of high-quality studio mics, with excellent accessories, at a tempting price. What’s not to like?
figure-8, whilst the cardioid setting tends to hypercardioid from about 2kHz upwards. The 44MP is marginally more sensitive than the preceding 44A, generating 32mV/Pa in cardioid and 18mV/Pa in the other patterns. Depending on the load presented by the mic preamp, the 44MP can accept sound pressure levels up to 150dB with the pad engaged for a 1% distortion level. The KSM40C uses a single-sided version of the same capsule. Shure told me that it should sound very similar to the KSM44MP in cardioid mode, but with slightly greater proximity effect. Specifications are similar, All three of these Shure models can cope with huge sound pressure levels.
www.soundonsound.com / July 2026
45
ON TE ST
Native Instruments Absynth 6
years is a long time in software, but NI’s Absynth Software Synthesizer Twenty‑five is still with us, still green and still a force to be reckoned with.
Native Instruments Absynth 6 $199 pros • The browser. • The sound. • The large variety of oscillators on offer. • The startling capability of the envelopes.
cons • No undo function in the wave editor. • User presets don’t appear in the visual browser yet.
summary Absynth 6 is a worthy successor to Absynth 5 and a logical evolution to what was already a very powerful and great‑sounding synth. I would highly recommend trying the demo at least. I suspect you won’t be disappointed.
48
July 2026 / www.soundonsound.com
The patch page is where the towers of power all come together. JEM GODFREY
I
’ve had a version of Absynth lurking in my plug-in folder since about 2001, when software synths were still largely a novelty act (anyone remember Plugsounds 1-6? Samplecell?). However, I found it intimidating and too spiky sonically to use in the squeaky-clean pop productions I was making at the time. Also, like the lethal drink it was wittily named after, it was rather offputting visually. As a result, we didn’t hit it off and so there it sat, unloved, at the top of the pull‑down list for years until it eventually got moved to the ‘unused plug-ins’ folder where it languished miserably ever after. The end.
Twenty‑five years later, however, unlike my pop career, Absynth lives on, and any bit of software that can claim a near uninterrupted lifecycle of over a quarter of a century has to have something about it. So when news of Absynth 6 started doing the rounds, my interest was piqued anew. Redesigned from the ground up by a team lead by original creator Brian Clevinger, Absynth 6 takes all that was undeniably great about its ancestral lineage and smacks you round the chops with a thoroughly modern reboot of what is now regarded by many as a soft synth classic. The basic principles of what made Absynth so sonically versatile are still there — three oscillators,
or source modules in Absynth-speak, arranged into three channels with a top-to-bottom semi-modular signal flow modulated by two further insert modules per channel. These modules process the sound coming from the oscillator module above it and can variously be filters, modulators or waveshapers. These channels are then mixed into the Main Channel at the bottom of the UI, which has space for three further modules, two of which give you the ability to add more filters, modulators or waveshapers, with the third module reserved for effects and to which you can add the six heritage Absynth classics: the Aetherizer granular processor, a multi‑comb filter, a three-voice independently programmable resonator, a pipe effect (which is an exciter that enables you to position modulatable virtual pickups along the ‘length’ of the input to create flanging, pitch-shifting or rotary type effects), a multi-tap delay and a three-voice delay. As if that wasn’t enough there’s also a surround section with a multi‑channel panner for mixing in spatial audio. It’s also worth pointing out that Absynth has had surround capability since its third iteration way back in 2005. Future-facing stuff indeed in this increasingly binaural world.
(Not) Lost In Space When the synth fires up it presents you with a very visually appealing browser page, which shows what appears to be a pointillist version of an Anglo-Saxon battle helmet viewed from above. Each dot in the ‘galaxy’ is one of the 2000+ presets that now come as standard, and they’re grouped together in colour‑coded areas of related sonic genre. As you hover over a dot, the name of the preset and a description of its sonic character are helpfully displayed above it. Clicking on the dot previews the sound and a double‑click will load it. There are also search filters to the left of the browser display that thin out the dots as you home in on what you’re looking for, including a nice set of sliders that let you slide and select from choices like dark to bright, clean to noisy and so on. All combined, it’s a brilliantly creative way of quickly finding sounds in what would otherwise be a life‑sapping scroll down a seemingly never-ending list of presets. At the bottom of the browser page resides the Mutator, which is a user‑definable randomiser. There’s also a Mutation History list that populates itself as you descend into mutantry. It’s another one of those bits
of common-sense genius to save your blushes if you’ve been a bit click‑happy.
Oscillators Let’s return to the oscillators, which is where Absynth really starts to bare its teeth. As was the case with Absynth 5, you can choose from a wide variety of signal generators starting with a single oscillator, loaded with (but not limited to) all the usual suspects. In fact, there are 43 preset waveforms to choose from, of varying complexity. As with previous versions of Absynth, you can also draw your own waveforms and hear the effects rendered in real time, which is very useful for better understanding what your doodles are doing to the sound. A spectral mode is also available, which shows 512 bars of the waveform harmonics in amplitude and phase axes. One thing I found myself doing was hitting Command+Z on my QWERTY trying to undo my edits when things went awry. As far as I can tell there is no undo function on Absynth currently. A workaround I developed was to select Copy from the Edit pull-down menu in the wave editor, and if I went down a rabbit hole I didn’t like, I’d select Paste to restore the waveform to where it was before I ruined it. But it seems odd that a born sound-design machine like this doesn’t give you an undo option, even if it was just a single undo. Especially when the Mutator provides a super‑handy history list of your mutations.
There are also 56 morphing waveforms to play with. With the morphing waveforms, aside from the in‑built wavetable-like morphs that you can control by clicking and dragging the waveform in the patch editor page (or by LFO or envelope), you can also create your own by sending your chosen waveforms over to the wave editor page where they appear in a list. You can then set up to four anchor points across the two individual waveforms, around which the morph takes place, controlled by the morph transition bar. The resultant sound is more than just a simple crossfade and can produce some very interesting wavetable-like tones as it changes from one to the other. I did notice that sometimes when changing quickly between waveforms the note would hang and the only thing that would stop it was changing to a different patch and back again, which, if you’re halfway through editing the patch of your life, might be a bit of a thing if you hadn’t saved anything at that point. Oscillator pitch can be set over a rather extravagant near-16‑octave range, 128 semitones down and 64 up. Additionally, you can set the resolution of the transposition to be greater or lesser than one semitone; so entering in a ratio of 1.500, for example, will increase the tracking to a tone plus a half tone across each semitone in an octave. The resolution can be fine-tuned all the way down to increments of a thousandth of
The preset explorer in the browser page is inspired and fun to use.
www.soundonsound.com / July 2026
49
ON TE ST
Akai MPC Sample
Sampling Workstation Akai recapture the magic of MPC with a powerful, portable groovebox. SIMON SHERBOURNE
W
hen I first saw the MPC Sample I laughed out loud... in a good way. Rumours of a ‘mini MPC’ were going around, which I’d assumed would be like an MPC One but even smaller. The new MPC has that rare design property of showing you exactly what it is at a glance. My laugh of delight was realising Akai had channelled the spirit of the original MPC60 at an adorable scale, and that it was going to be very much its own thing rather than a new incarnation of the modern MPC OS. The question was: would it be a novelty collectors’ item, or a useful, entry-level beat machine?
52
July 2026 / www.soundonsound.com
The Sample is much smaller than it looks on YouTube. While it is, in fact, solid and quite hefty, it has an ’80s handheld game vibe, like a massive old MPC shrunk to dimensions somewhere between a Teenage Engineering KO2 and Roland SP‑404 — references we’ll come back to later. The whole pad grid would fit comfortably inside a 3x3 section of a regular MPC’s grid. The deep pads feel and respond much like the previous generation of MPC’s pads before the new MPCe design, which is to say fantastically. Another clue that the Sample means business is the screen. While only about three fingers wide, it’s high-res and multicoloured, supporting detailed views
with small fonts and waveforms. It’s far superior to what the machines we already mentioned offer, especially the KO2, and it’s even better than the display on Roland’s TR-1000.
Sample-centric The MPC Sample doesn’t have a track-based structure like its bigger siblings, and it’s a purely sample-based instrument. More akin to the SP-404, you have one sample per pad to work with, which you sequence via multiple patterns. There are eight banks of 16 pads. In the default Sample mode you can play the pads and record patterns in real time. Settings, controls and waveforms
Akai MPC Sample $399 pros • Straightforward. • Massive sampling time for a portable. • Synchronised sampling. • Fun and effective performance effects options. • Project interchange with other MPCs and MPC Desktop.
cons • Limited melodic sequencing. • Locked-out while sampling or playing a Song. • Limited step sequencing.
summary A super-mobile MPC with simple and direct access to classic sample and chop beat‑making.
for the most recently tapped pad are displayed on the screen. Three buttons above the screen move through various control sets, such as sample trimming, tuning and filter controls. Editing is done with the three knobs below the screen. As you move around, the knobs are rarely in sync with the parameters they control. Spec’ing knobs instead of encoders may have been a budgetary consideration, but it also feels like a nod to the 404. In the initial release, constantly having to twist the knobs to pick up the control position was my least favourite thing about the Sample. Thankfully the 1.3 update added other options, with the default being a scaled takeover. I’ve got mine set to instant takeover. The general layout is really easy to grasp. A mode section jumps you between the regular sample triggering mode, sequence launching and the two different styles of effects. The blue buttons provide pad modes that we’ll dive into. Sample Select opens the sound browser. Then there’s a transport section with separate Record buttons for audio
sampling and sequence recording. All other operations and menus are accessed via the pads with Shift.
Getting Stuff In A new project presents a blank slate of empty pads to populate. A whole set of ‘kits’ come pre‑loaded, which are themselves simply pre-configured projects, as a project is essentially a single drum program in the MPC way of thinking. To load a sample to a pad, you simply tap the Sample Select button and browse the internal drive or an external SD card (up to 1TB) using the push encoder. There’s a load of good stuff already on board — I didn’t add any of my own drums, just some loops and melodic samples. However, the Sample really is built to sample. Press Sample Record and the screen tells you to tap a pad to record, and provides options for source, monitoring, length and trigger threshold. Sources are the built-in mic, the rear quarter-inch inputs (individually or stereo), USB (direct iOS device connection is supported), or resampling of the mix bus. In Free mode you can record up to 20 minutes thanks to disk streaming! Tapping different pads redirects recording on the fly. Whether loaded or sampled, once a sound gets into a pad you can adjust start, end and loop points, a simple attack/ decay envelope and velocity sensitivity. You can shift pitch, and even time‑stretch samples from half to double speed, or match the tempo to your sequence. The multi‑mode filter has a really nice, sticky resonance character. Again the envelope is attack/decay, with a depth control. The stage lengths on both envelopes are relative to the length of the sample and anchored to the start and end points, so they interact strongly with the trim controls. A massive plus is Seq sampling mode, which synchronises sampling to playback to capture a perfect loop matching the
current sequence’s length/tempo. This is so often missing in the release feature set of samplers. What is on the wishlist, however, is a way to have a captured loop autoplay after record. You can do the Octatrack hack of placing a trigger on the first step ahead of time, but this currently doesn’t trigger on the first pass after record. (The TR-1000 had a similar issue). If this could be automated, the Sample would become a decent looper and quick layering machine. Lastly, the Sample has a really cool always-on resampling buffer that keeps a rolling record of the last 25 seconds of sound coming from the machine. At any time you can hit Recall and it will drop this onto an empty pad.
Pad Modes Of the four pad modes two are straightforward: Mute turns the pads into a mute grid; Loop toggles looping on/off for the selected pad. Chop and 16 Levels deserve a deeper look. Chop puts you into sample‑slicing mode for the selected pad, and will be familiar to users of other MPCs and most other devices that have adopted the same conventions. Chopping schemes available are Threshold (transient detection), four, eight or 16 even regions, or Manual. Manual mode is the classic ‘lazy chop’: pad 1 triggers playback, and subsequent taps in the empty pad area instantly create new slices by ear. Editing is easy after the fact, and you can zoom in on the waveform to neaten things up. And that’s it, no further steps are required unlike the other MPCs. You can access your chops any time just by selecting the parent pad and hitting Chop. I expected the compromise would be that all the chops would share a voice but nope, pads can be set to Poly mode and act like a kit. Time‑stretching is possible post-chopping — great for
On the back panel are 3.5mm jacks for headphones, sync out (TRS CV and gate) and MIDI I/O, quarter-inch jacks for audio I/O, a record gain knob and a USB‑C port.
www.soundonsound.com / July 2026
53
ON TE ST
Softube Flow Studio Control Surface
Softube bring hands-on control to their Flow mixing and mastering concept. JOHN WALDEN
S
oftube’s impressive Flow Mixing Suite was the subject of an SOS review in the March 2026 issue. The subscribe-to-own plug-in collection provides the user with a sophisticated collection of high-end plug-ins spanning EQ, dynamics, saturation, ambience, modulation, guitar‑amp modelling and more, capable of handling pretty much any type of mixing task. And, while you can deep-dive into any of the individual plug-ins, a mothership plug-in lets you load preconfigured plug-in signal chains — a Flow preset — and, via an elegant macro control system, quickly adjust the key parameters within the signal-chain without getting distracted by the deeper control options. Softube have now released the Flow Studio hardware controller, designed to give the user hands-on control of these Flows, making what is already a streamlined workflow even more intuitive. The Flow Studio will work with either the Flow Mixing Suite or Flow Mastering Suite plug-in collections but, as it also includes perpetual licences for 25 of the plug-ins from the Mixing Suite, you can make full use of the Flow Studio hardware without needing a subscription. So, if you like to keep moving when mixing and, initially at least, avoid getting lost in
56
July 2026 / www.soundonsound.com
too many details, might Softube’s Flow Studio keep your mix workflow flowing?
It’s Flow Time Softube’s Flow Mixing Suite and Flow Mastering Suite provide some serious plug-in firepower and the plug-ins within these collections can be used individually within your DAW. However, both suites also share a concept; Flow presets. These are essentially preconfigured signal-chains build by combining individual plug-ins and aimed at a specific mixing or mastering task. These Flow presets are loaded into a dedicated ‘mothership’ plug-in — either the Flow Mixing Suite plug-in or the Flow Mastering Suite plug-in — allowing the user to access all of the individual plug-ins within the Flow’s signal chain from within a single plug-in UI. It should also be noted that, currently at least, the mothership plug-in is a Softube-only environment; any favourite plug-ins from other developers can’t be used within the Flow concept. However, the additional (and, in use, rather impressive) twist is that the mothership plug-in features a set of eight macro controls. Each macro control is preconfigured to target one (or more) key parameters within the loaded signal chain. With just the twist of a macro control or two, you can therefore adjust the most important parameters within the Flow to quickly shape the sound of your source audio. As a means
of getting your key mix elements from zero to hero, this can be a very effective and efficient process.
Multi-level Macros In essence, the Flow Studio’s main purpose is to serve as a dedicated hardware controller for that macro-based Flow concept. Most obviously, it does this by providing the user with hands-on control over the macro elements contained within the Flow plug-in via four high-quality rotary encoders (with the Shift button letting you toggle between macros 1-4 and 5-8). However, it also brings a further twist of its own via the larger rotary control — the Omni knob — as this serves as a master macro control for all the other macro controls. As you rotate this, whatever the processing intention built into a specific Flow preset might be, one control lets you quickly dial in as much, or as little, of it as your audio needs. Under the hood, these two levels of macro control are configured much like any sophisticated parameter modulation system, defining the direction, depth and range of parameter change that the full travel of a Macro might exert on the target parameter(s). And, while the Flow Studio ships with a collection of Flow presets to get you started, a Designer view within the Flow Mixing Suite or Flow Master
Softube Flow Studio $399 pros • Hardware access to the Flow macro control system for fast and efficient mixing. • Quality hardware and bundled plug-ins provide good value. • Subscription to Flow Mixing Suite not required (but very tempting).
cons • Softube-only environment; third-party plug-ins not currently supported. • Perhaps not an obvious choice for those that like to deep-dive all the details of their plug-in signal-chain.
summary The Flow Studio provides hands-on access to Softube’s macro-based track processing concept, delivering sophisticated tonal shaping to any audio source with considerable style and a minimum of fuss.
Suite plug-in lets you build your own presets based around any of the Softube plug-ins you have access to.
What’s In The Box? On first impression, Flow Studio maintains the high standard Softube have set with their Console 1 Fader and Channel controllers. Measuring a compact 144 x 217 x 43mm, it contains an impressive high-resolution screen dominating the upper area, five touch-sensitive rotary knobs — each with a ring of LED lights around it to provide positional feedback for the current control setting — arranged in the centre, and an array of nine buttons, many of which offer dual functions, laid out in the lower part of the surface. It feels well built and the rotary controls are very smooth in use. A high-quality 2m USB-C cable is included for connection to your host computer. Optional mounting stands available for the Console 1 Fader and Channel hardware also fit the Flow Studio if you prefer a somewhat steeper pitch to the control surface. As mentioned earlier, the Flow Studio also includes perpetual licences for a collection of plug-ins and the Flow Mixing Suite ‘mothership’ plug-in. As shown in the ‘Provided Plug-ins’ box, they include compressors, EQs, reverb, delay, tape, saturation, guitar/bass amp/effects and vocal tuning options. No additional plug-in subscription is therefore required. During the review period, I initially uninstalled other Softube plug-ins I normally have on my system so I could spend time with just this selection of plug-ins. I did, however,
subsequently reinstall the full complement of Flow Mixing Suite plug-ins to see how the two products — Flow Studio and Flow Mixing Suite — work together.
Modus Operandi Flow Studio offers three modes of operation; DAW Mode, Flow Mode and Detail Mode, and you can move between these via the three buttons located bottom-right. Each of these brings up mode-specific options on the hardware’s internal display. In DAW Mode, Flow Studio lets you access a compact selection of controls within the currently selected track of your DAW project. These include the track’s fader (with the Omni knob), pan, up to three send levels, and solo and mute buttons. The display provides both VU and stereo LED input/output level meters for the selected track and, usefully, at the bottom of the display, compact text labels indicate what track parameter is linked to each of the rotary knobs. This functionality is DAW‑dependent but, in Cubase, for example, it required no configuration and did not require an instance of the Flow Mixing Suite mothership plug-in to be installed on the selected track; it just worked. Softube have details on their website explaining the exact steps required for a number of the more popular DAWs. OK, so Flow Studio’s DAW Mode is perhaps not going to compete with a dedicated DAW control surface, but if this is your first hardware controller, for the sake of a quick press of the DAW Mode button, it’s a nice additional option to have, especially as all the rotary controls provide such a smooth and accurate response. Once you have inserted an instance of the Flow Mixing Suite mothership plug-in
onto your selected track and loaded a suitable Flow preset into it (or created your own), both Flow Mode and Detail Mode let you control settings used within the Flow preset’s plug-in signal-chain. I’ll get to the macro-based options provided by Flow Mode — which is the Flow Studio’s primary reason for being — in a minute. However, if you also want to use the hardware controls to dig deeper into the parameters offered by a specific plug-in within your signal-chain, then Detail Mode is where it’s at. Tapping the Detail Mode button once gives you control over the first plug-in within the signal-chain. However, tapping for a second time brings up a list of all the plug-ins included within the current Flow preset and you can use the Omni knob to scroll through these. As you do, for each plug-in entry, your see up to eight parameters (shown in two rows of four; the Shift button toggles between the two rows) beneath the plug-in name and, from this display, you can then use the four rotary controls to adjust any of these eight parameters. Tapping the Action button brings up any additional parameter rows for those plug-ins within the list and you can then use the Omni knob to move between these. Finally, tapping the Detail button again brings a focused view for the currently selected plug-in and provides you with additional visual feedback as you use the rotary controls to adjust parameters. There are some additional elements to the Detail Mode workflow such as being able to bypass a specific plug-in or mark specific controls as favourites. Inevitably, it does take some time for the various button navigation options to lock themselves into your muscle memory but, once done, if you do need to get hands-on with finer details of a specific plug-in, Flow Studio does provide
The Flow Mixing Suite plug-in acts as a host within your DAW for the Flow presets containing the individual Softube plug-ins within your signal chain.
www.soundonsound.com / July 2026
57
ON TE ST
SOF TUBE FLOW STUDIO
the means to do it and the built-in display provides plenty of useful visual feedback.
In The Flow (Mode) Of course, the star of the Flow Studio’s show is Flow Mode. It’s here that the macro control concept of the Flow Mixing Suite mothership plug-in meets the hands-on control offered by the Flow Studio hardware. The plug-in needs to be inserted on any track or bus within your DAW project upon which you want to apply some Flow-based processing. Once done, however, everything else — selecting a track, loading a Flow preset, and adjusting that preset to shape your track’s audio — can be done entirely via the Flow Studio hardware. Yes, you can open the plug-in window within your DAW and interact with settings via your mouse. Equally, you can press the OSD button (located on the left side of the hardware) and show the On Screen Display. This provides an additional ‘always-on-top’ floating window on your computer display that mirrors the hardware
Provided Plug-ins At launch, alongside the Flow Mixing Suite mothership plug-in, Flow Studio includes perpetual licences for the following 25 plug-ins from Softube’s catalogue. Guitar/Bass Amps • 30W Top Boost • American Mainstayer 100W • Bass Standard Line V8 • Pacific Dual Tremolo 100W Black • Pacific Dual Tremolo 100W Silver EQ/Compressors/Dynamics • British Class A Equalizer • Equalizers • FET Compressor Mk II • OPTO Compressor • Deesser • Clipper Reverb/Delay • Core Dimensions Reverb • Stereo Delay Other Effects • Bad Speaker • British Class A Drive • Dirty Tape • Kraft • Layers • Lion Head • Model 72 Envelope Filter • Model 84 Chorus • Tinner 6 • Tube • Vocal Tuner • Widener
58
July 2026 / www.soundonsound.com
display content. You don’t get mouse control within this display, but the visuals can be useful if required. Once in Flow Mode, pressing the Flow button again opens the Flow preset browser within the hardware’s display. The first two rotary knobs let you filter the preset list (for example, by instrument or application type), while the Omni knob lets you scroll up/down through the list. Once you find the preset you want, the Solo button selects and loads it into the track’s instance of the Flow Mixing (or Mastering) Suite plug-in. With a suitable Flow preset loaded, the real fun — and the real potential — of the Flow Studio comes to the fore. Whether you are targeting specific elements of the signal chain by controlling individual macro controls, or using the Omni knob to adjust all the macro controls at the same time to simply scale more (or less) of the Flow’s overall processing flavour, the Flow Studio hardware makes these track-level mix moves super-easy to perform. As you make these adjustments, while your ears will undoubtedly be your primary guide, the Flow Studio’s colourful display gives you plenty of visual support. Twist an individual rotary control, and the display changes to give you specific feedback on the property you are adjusting. Twist the Omni knob and you can then see how all the individual macro controls are being scaled. It’s cool and colourful but, above all, helpful visual feedback. And, if you happen to have the mothership plug-in open on your computer screen, then its display also reflects the moves you are making on the hardware. The various buttons provide access to a number of other options. For example, the Track button allows you to use the Omni knob to scroll through, and then select, a track within your DAW to work on. The Bypass button (Track+Shift) bypasses the Flow’s processing on the selected track for easy A/B auditioning. Tapping the Action button lets you toggle the Omni knob through three modes of operation; Omni Mode (the default where it adjusts all the macros simultaneously), Output Volume (it controls the channel fader of the selected DAW track) or Input Volume (it controls the input gain into the Flow’s signal chain). In short, you can navigate the entire Flow-based processing system entirely from the Flow Studio hardware.
Hands-on Mixing I discussed the workflow merits of Softube’s Flow concept in some detail
The Flow Studio’s screen provides excellent visual feedback. From the top, in DAW Mode, Detail Mode, and a selection of Flow Mode examples starting with use of the Omni knob.
Take it anywhere. Create whenever. Trust your instincts.
ableton.com/move
ON TE ST
SOF TUBE FLOW STUDIO
Don’t get me wrong, though; given the choice, I’d happily pair a full Flow Mixing or Mastering Suite subscription with the Flow Studio. The additional Flow presets and plug-ins it provides would not leave many obvious gaps in your processing arsenal for which you might need to look elsewhere.
Who’s It For?
The Flow Studio measures 144 x 217 x 42mm and weighs 660g.
when reviewing the Flow Mixing Suite itself in the March 2026 issue. I’ll not repeat that same discussion here except to underline that (a) Softube’s plug-ins are excellent in their own right and (b) the macro-based control system built into the Flow Mixing Suite’s mothership plug-in is very elegantly executed; it allows you to make lots of corrective and creative mix moves very rapidly. The Flow Studio hardware adds three obvious elements to an already an impressive workflow. First, whatever the mixing task might be, a little bit of hardware control goes a long way to making the process a more comfortable and more efficient experience compared to using a mouse. Second, once you embrace the macro-based approach to applying signal-chain adjustments, Flow Studio’s rotary controls take what the Flow Mixing Suite mothership plug-in already offers and simply makes it much easier to exploit. And, third, via the Omni knob, it adds an even more streamlined ‘master macro’ approach to the process that means one control might be all you need to start shaping the sound of an individual track. In practice, these elements combine to let you make some very powerful processing moves very quickly. For that first-pass mixing stage where you are simply attempting to get all your tracks and busses into some
60
July 2026 / www.soundonsound.com
sort of shape, the Flow Studio and some suitable Flow presets can easily get you 80 percent of the way there with considerably less than 20 percent of the effort. You might then need to dig into the details on some tracks, either via the Flow Studio’s Detail Mode or with your mouse, but as a means of getting your mix off to a flying start, the Flow Studio system can put in quite a shift. The assimilation time is minimal, but the mixing time saved can be considerable.
Studio Vs Suite An obvious question for potential purchasers is whether the plug-in bundle included with the Flow Studio hardware — and the associated Flow presets built using just those plug-ins — provide enough options, or whether additional Softube plug-ins (and perhaps a Flow Mixing or Mastering Suite subscription) are required to fully capitalise on the benefits the hardware can bring. I was pleasantly surprised at how much I could get done based upon just the 25 plug-ins supplied within the Flow Studio bundle. The Flow presets built upon just this collection provide plenty of options while also letting you to start building your own custom Flow presets tailored to your specific needs, whether that’s for tonal balance, dynamics, saturation or ambience, or for handling your basic amp and effects requirements with any DI guitar/bass tracks.
So, who will the Flow Studio suit? And, on the flip side, who might it not? There are three obvious tick boxes to consider here. First, are you willing to embrace (or have you already) the Softube plug-in ecosystem for your core mixing tasks? Second, is a more hands-on approach to mixing an attractive prospect? Third, is a macro-focused approach to controlling your core mixing moves something that appeals? I think the last of these is particularly significant and will, essentially, determine the real appeal of the Flow Studio to any potential purchaser. Given the high quality of the hardware, and the broad coverage provided by the included plug-in bundle, there is very little to criticise here in terms of product value. Personally, I see the attraction of the multi-level macro control that Flow Studio can bring to my initial mixing workflow. It’s fast, efficient, very tactile and very effective, and it would absolutely suit the way I like to make my first pass of a mix. But, if you are the kind of mix engineer who prefers to deep-dive into the specific settings of each plug-in within your signal-chain, and particularly if you like to do that with plug-ins drawn from a number of different developers, then that’s a perfectly valid position and, if so, Flow Studio is perhaps not such a compelling choice. Softube’s documentation describes ‘flow’ as a ‘mental state of immersion’ and I think that concept underpins what the Flow Studio is about. It’s an impressive combination of hardware and software that attempts to get you into the creative zone with your mix and let you move swiftly — and without distraction — through the bulk of the work. The three tick boxes above all duly noted, I think the Flow Studio achieves that underlying aim with some considerable style and finesse. This is perhaps not a product that will suit everyone but, if you like to get immersed in the flow of your mix and not get distracted by the technicalities of every processing choice, the Flow Studio delivers an elegant means to facilitate exactly that approach. $ $399 W www.softube.com
ON TE ST
Balcony Left Little Sir Rekko FET Compressor Plug-in
We check out a new FET compressor emulation based on producer Greg Wells’ favourite vintage unit. M AT T H O U G H TO N
Y
ou might not have heard of Balcony Left or Little Sir Rekko before, but you’ve almost certainly heard of some of the names behind this plug-in: A-list producer, engineer, musician and... (well, a lot of things!) Greg Wells is behind the project, and invited me to review it, and the presets have been created by Greg and a handful of other reputable and respected engineers. Little Sir Rekko runs on Mac and Windows machines in VST3, AU or AAX plug-in hosts, and is activated on your machine using your Balcony Left online account: you get three ‘seats’ per licence, and seats can be deactivated to allow transfer to different machines.
Overview Plainly, this plug-in sets out to model one of the world’s best-known compressors but, specifically, this is an emulation of Wells’ own vintage hardware unit. Perhaps inevitably in 2026, its creation involved machine-learning techniques but, as I understand it, these were used as part of a hybrid process to measure and analyse the hardware’s behaviour, largely to identify aspects of the specific unit that might be overlooked with traditional component-level modelling, and the resulting plug-in was carefully tweaked until extensive listening tests confirmed that Wells was happy with the sound and behaviour. I have to say: what a result it is! I’ve used countless 1176 and 1178 emulations over the years, and this has to be up there with the best I’ve heard. A statement that, by the way, applies equally to the sound, the compression action, and the ease of operation.
68
July 2026 / www.soundonsound.com
In terms of controls, it’s pretty conventional. A skeuomorphic GUI facilitates the usual 1176/1178 operational approach: an input gain knob sets the signal level relative to an internal fixed threshold, while an output level knob determines the level feeding whatever’s next in the chain. Smaller attack and release knobs adhere to the UREI/Universal Audio paradigm of clockwise for faster/more aggressive, rather than ‘more milliseconds’. The expected four-button stack selects the ratio (4, 8, 12 and 20:1), while a dedicated button engages the famous ‘all buttons in’ mode, and another simulates pressing in just the 4 and 8:1 buttons. Nearby, another nice touch is the Off button, which bypasses the gain reduction, turning the plug-in into a line amp, or ‘saturator’ if you like, though there’s also an actual bypass on the right. The drag-to-scale GUI is dominated by a virtual moving-coil meter that can display average input or output levels or, of course, gain reduction. It has a more generous range than most (-24 to +12 dB), reflecting the reality of how engineers often actually use these devices. To its right are a couple more features that nod in the direction of modernity: a Mix knob to dial in parallel compression is joined by a ±12dB Headroom control. Acting rather like a dedicated threshold control, I found this really handy for quickly fine-tuning presets, or when using Little Sir Rekko in line-amp mode. Other modern features behind the scenes include oversampling and an anti-aliasing process that, together, might explain why this plug-in seems to sound so smooth and effortless — hardware-like, if you like — even when you’re spanking the bejeezus out of things. Despite that, and the
fact that there’s very little latency, this plug-in didn’t seem particularly CPU-hungry. For all the knobs, a Cmd- or Ctrl-drag facilitates finer control, while an Opt/Alt-click or double-click resets them to the 12 o’clock position, with the exception of the Mix knob, which resets to 100 percent wet. All good, though I occasionally wished for a modifier key to return individual controls to the initial settings of a preset, rather than ‘12 o’clock’.
Sound & Action The first thing to say about this plug-in is that if you’ve ever used an 1176-inspired compressor, there’s zero learning curve: you can cut straight to evaluating what it does to your audio. Or perhaps I should say ‘appreciating’ what it does, because there are a couple of things about this plug-in that set it apart from similar tools. First, and most important, is the sound. Yes, in broad terms, it’s similar to other decent FET compressor emulations. During my tests, I substituted it into projects where I’d used the Universal Audio or Pulsar Audio equivalents, and there’s a definite family resemblance. But it’s not the same. There’s a depth and richness to the sound from Little Sir Rekko that I found enticing, and notably
Balcony Left Little Sir Rekko $98 pros • First and foremost, a good-sounding analogue modelling compressor • Classy, hardware-like performance, even at ‘abuse’ settings • Great collection of presets.
cons • Side-chain filter might be nice?
summary A superb analogue-modelling compressor that sounds right, with an uncomplicated controls set that gives you just enough ‘extra’ compared with the hardware.
a lovely, full-sounding bottom end and flattering smoothness in the highs; not a softening one that compromises definition, but rather a pleasing sheen that just sounds classy. There’s plenty of range in the attack and release too, and the curves feel ‘right’; very easy to dial in. Whether all that’s down to the hardware muse or the modelling approach, I don’t know — and if I’m honest, as an end user, I don’t really care because either way it does nice things. Speaking of which, the other thing that really impressed was the preset collection. Now, I don’t need presets to operate this thing and neither, I imagine, do you. But taken together, these offerings form a great learning resource for those just embarking on their engineering journey. Each one has a meaningful name (eg. “Cymbal Sustainer” or “Bring The VocalForward”), and they’re all categorised by the artist (Wells himself, Joe Chiccarelli, Josh Gudwin, Chris Tabron, Mike Avenaim and Sage Skolfield), sometimes with sub‑categories for instrument/source material type. It’s easy to get a feel for why these engineers might reach for this style of compressor, or the different things you can achieve on the same material using compression alone. You might need to tweak the time constants to suit different material and tempos, of course, but I often I found that the Headroom knob was all I needed to get a feel for what the preset was designed to deliver. Was there anything lacking? Not really. That said, I felt that a few more ‘mod cons’ might be nice, and top of my list would be some sort of side-chain HPF or EQ facility. You don’t need that to replicate the hardware, of course, but it should be trivially easy to add this sort of thing in a plug-in, to extend the versatility without intruding on ease of use.
Major Mojo? There are some other very usable FET compressor emulations out there that cost rather less, so the full asking price means that Little Sir Rekko may not be an impulse buy for every hobbyist. But you can ‘rent to own’ monthly for a pocket-change figure, and there’s a free 15-day demo too — so you have the opportunity before purchasing to hear for yourself what earned Little Rekko his knighthood. I can’t vouch for the precision of the emulation or the ‘mojo’ the marketing material claims the modelling processes identified as unique in Wells’ particular unit, simply because I’ve never used it. But what I can tell you is that this is an utterly delightful‑sounding plug-in, and one that conveys what I think are the most important aspects of analogue hardware: you’ll find ‘warmth’ here when you want it, but also an effortless, aristocratic sort of class when you don’t. Importantly, although the sound and action of this compressor are musically satisfying in the sort of applications a gear designer might have in mind, lots of plug-ins do ‘warmth’ and ‘musical’ in those circumstances. Yet very few seem to exhibit this hardware-like ‘grace under fire’ — a performance that seemingly isn’t compromised, even as you push the gain reduction or saturation well into ‘abuse’ territory. It means you tend to think less about how you’re operating Little Sir Rekko than about all the creative and musical decisions that are what recording and mixing is all about! $ $98. W www.littlesirrekko.com
W E N USB Solo mk2 from
High spec MIDI to CV converter with both USB and 5 pin DIN MIDI V/Oct & Hz/V – Gate & S-trig – 3 aux outputs – clock & DIN Sync Can be used as a USB MIDI Interface (while still converting to CV) All of the features of the Pro Solo mk3 but with the addition of USB See website for full information
SPLIT, MERGE, EXTEND OR CONVERT All the MIDI you need, right where you need it
Thru-5, 12 & 25
Merge-4 & 8
Split a single MIDI source into 5, 12 or 25 identical copies
Combine the data from 4 or 8 MIDI sources into a single output
LNDX & LNDR
MIDI USB Host mk3
Extend MIDI up to 1000 metres LNDX (shown) has etherCON connector
MIDI IN & OUT on DIN for your USB-only keyboards, controllers & synths – without using a computer
WE MAKE MIDI WORK FOR YOU Contact the MIDI Specialists
kentonuk.com J#233 - Product Ad V17 - US.indd 1
www.soundonsound.com / July 2026
69
22/01/2026 16:33
ON TE ST
ALM/Busy Circuits Quaid Gigaslope Eurorack Module
‘A
hands-on, menu-free, jam-friendly complex modulator’ is how ALM/Busy Circuits chalk up the Quaid Gigaslope, which takes the design principles of the preceding Quaid Megaslope and runs with it, well, a very long way. The Megaslope offered an elegant five-stage function generator that nodded toward the West Coast and could be used as a complex envelope, a very editable LFO or a diminutive step sequencer. The Gigaslope is similarly visually intuitive and tactile, only it takes the number of stages to a formidable 13 and moreover is endowed with four separate output channels to use any which way, separate or convergent. Don’t worry, all will become clear. Now, to state the obvious: the Quaid Gigaslope is massive. At 52HP wide it’s definitely up there among the largest modules of its — or any — type you’re likely to find; most in this size category are all-in-one modules of some sort, but the Gigaslope is not offering an all-in-one module: it is, so to speak, a one-for-all module, since it caters to more or less anything you can imagine
70
July 2026 / www.soundonsound.com
a multi‑stage function generator catering to. And in many ways this justifies its size, since it can all but assume the role of several modules at once. At the Quaid Gigaslope’s foundational level are sliders for adjusting its 13 stages’ voltage values, along with a Time and Curve knob for each. The Time knobs are essentially slew limiters to adjust how long any given stage takes to reach its maximum value; while Curve adjusts the shape of that movement through logarithmic, linear and exponential shapes. There are three primary slope modes that dictate how any sequence of stages behaves: Envelope mode, Loop mode and Step mode. Envelope mode expects a single trigger or gate to set a voltage function in motion, which will run from start to finish. Next is the free-running Loop mode, which does exactly that, and lastly Step mode advances the sequence by one stage with each trigger and automatically restarts after the last step, just like a traditional sequencer. There are four trigger inputs and four outputs for the four slopes. You might notice that these are not referred to as ‘tracks’, and this points toward something rather unique that I very much like about the Quaid Gigaslope. If you’re an owner of a module like the Intellijel Metropolix, you’ll be familiar with the workflow of a single row of sliders offering different variants
of a transport that all operate in parallel. The Quaid Gigaslope, meanwhile, offers a single track of sliders to essentially be cut up and used in sections. It’s a rather brilliant workflow, and incredibly intuitive. In practice, I quickly created a patch with Slope 1 occupying the first six steps as a sequence for an oscillator; Slope 2 acting as a three-stage envelope across steps 7, 8 and 9, working the filter; and Slope 3 creating a fairly complex LFO courtesy of steps 10, 11, 12 and 13. Sections can also overlap if desired, or even be placed directly on top of each other. It’s possible to derive quite a range of responses from a single set of voltage values, since the different modes elicit different behaviours. In Step mode, for instance, a stage will progress to the next step with a new trigger regardless of whether or not its Time value has reached its full duration, whereas in other modes the stage will wait to reach this before progressing. Some slopes can be stuttering and sliding around irregularly, while others, convergent or not, might be driving forward with regimented consistency. It’s also worth mentioning that the Sustain button allows any given stage to sustain indefinitely while a gate remains high; in other words if you’re of the type who favours ADSR or ASR envelopes, you’re more than looked after here. There’s a Quantiser button alongside a neat little set of chromatic keyboard-esque LEDs to indicate which scale (of the many on offer) is currently selected, and once again different settings can be applied to different slopes operating across the same voltage values. As such, in this particular patch I had Slope 4 as another four-stage cycling modulation source, using the voltage values of steps 8, 9, 10 and 11 — that is, straddling the values of two other slopes. Brilliant stuff. Thirteen sliders might seem a curious number since many such circuits in synthesis operate
in multiples of four, of course. But I like it, mainly because it encourages multiple uses of the Quaid Gigaslope’s stages; if you’re in a 4/4 time signature, you might default to four‑ or eight-stage patterns, which as a minimum leaves a remainder of five stages begging to be allocated elsewhere. Either ALM simply wanted to avoid the Quaid Gigaslope clearing 60HP, or it’s an intentional move to resist the more comfortable 16-step layout; whichever it is, in my opinion it works. Aside from a slew of useful additions — for instance end-of-cycle and end-of-slope trigger outputs, a manual
Otter Mods OTTeR Eurorack Module
T
he first time you play with the Oscillating Temporal Tessellation Repeater (OTTeR), it feels comfortingly intuitive. It has eight sliders that you can quickly flick into a sequence, a clock input, and a CV output. Set it running and you’ve got a range of voltages that you can use for modulation, or if you have a quantiser to hand, turn them into notes. It’s simple, easy, and the LEDs are a nicely subversive shade of green. However, there’s something odd going on. The steps are not necessarily running in a regular sequence; instead, they seem to dance about the place, shuffling here and there, repeating before setting off on another twisted cycle. As you adjust the three knobs, A, B and C, those green LEDs chase each other into all sorts of repeating patterns. I would love to say that I know what’s going to happen with a specific combination of A, B and C, but for the life of me, I can’t. On one turn, you get steps 1 and 2 alternating with 7 and 8, on another, it wanders through steps 1-4 a couple of times before doing the same to 5-8. Another turn halves the speed, another doubles it, and every now and again, you hit upon a classic
Reset button and a button to toggle the output range between a 0-5 V unipolar and bipolar ±5V — the Quaid Gigaslope’s final flourish comes in the form of four assignable CV inputs. Simply hold an input’s corresponding button and move one or more parameters to map it. It adds a wondrous dose of complexity and keeps things moving very nicely, and of course it can receive CV from one of the module’s own envelopes, loops or sequences if desired. It’s also compatible with ALM’s AXON-1 or AXON-2 expanders if you need even more CV inputs.
sequence of eight different steps in a row. It’s disconcerting but also brilliant in how it’s reworking the eight chosen pitches into different versions of itself. Having no idea what’s going to happen next doesn’t seem to take anything away from the enjoyment of the melodies and remixes that pour out of it. I made the mistake of asking Otter Mods about the purpose and intention of the knobs. What you don’t really have to understand (I think) is that the three knobs control the clock division of three bit-counters. The bit-counters are fed into a multiplexer where the binary sum dictates the order of the steps. For example, set A to 1, B to 2 and C to 3, and you get all eight steps in sequence because A is running at the clock/2, B is clock/4, and C is clock/8. Easy right? Well, no, not exactly, but if you understand a bit about binary, it all starts to add up. All you really need to know is that through different combinations, you get different patterns. It reminds me of the Triadex Muse, which generates patterns in a similarly baffling way. However, with the OTTeR, you have complete control over the pitch of those steps, which is something the Muse would never allow. There are other subtle moments of brilliance in the OTTeR that make it feel even more elaborate. You have a ‘Half CV’ output that gives you a scaled-down version of the ‘Full CV’ output, meaning you could be running two related sequences or use one for notes and another for modulation. A Transpose input lets you push the sequence up in pitch, while an Inhibit input makes it skip or trip into steps in response to a gate input. This produces some rather lovely rhythms. The three knobs have CV inputs that, when fully clockwise, allow external clocks to mess with the binary multiplexing. Once you start getting into unrelated clock divisions, the patterns become far less predictable. If blitzing things with audio rate modulation is your thing, then the OTTeR
As the creators of the iconic Pamela’s Workout module series, it almost goes without saying that ALM/Busy Circuits know what they’re doing when it comes to multi‑purpose voltage generators. In some ways, you might even say the Quaid Gigaslope feels like a kind of exploded, menu-less variant of Pam. It’s big, sure, with a price tag to match. But make no mistake: from its build quality to its excellent functionality and flexibility, this is premium hardware. Expect devotees. William Stokes $
$849
W
www.busycircuits.com
will reward you with some rather great textures that you can shape with the step sliders. What I’m really enjoying about the OTTeR is how it starts off in a familiar place, and then, as you play, it runs off in all sorts of interesting directions. I like how the notes are mine, but the patterns are the OTTeR’s, and I’m just there making suggestions rather than being in charge. So, while the OTTeR may seem on first glance like a regular slider-based sequencer, it’s so much more interesting, more playful, and unexpected. Paired with the right quantiser, it’s a superbly musical experience. Robin Vincent $
$275
W
www.ottermods.com
www.soundonsound.com / July 2026
71
ON TE ST MODULAR
Modular Profile: Justin Goney
I
f you read my recent review of the Four Seas, the debut module from Helsinki-based trio Ferry Island Modular, you’ll know that this new kid on the block means business. This month we grill company founder and engineer Justin Goney on his modular journey, his favourite modules and his thoughts on the scene at large. On his entry into modular I was playing drums in a band and we wanted to bring in some synth sounds. So I got this MIDI controller and started dialling up sounds in Logic. Just preset-surfing felt pretty lame, so I bought an Arturia MicroBrute to learn how synthesizers actually work. While I was waiting for it to arrive, I stumbled on a Mylar Melodies video where he was interfacing it with something I’d never seen before: a small Eurorack system with a [Industrial Music Electronics] Piston Honda in it. Having grown up on Nintendo games, I got the reference but I had no idea what this thing was beyond the fact that it looked cool and I wanted to know more about it! Eurorack is super expensive of course, so I started looking into the DIY modular scene. The lightbulb moment was discovering that the Mutable Instruments designs were open source. I built a handful of modules myself and never really looked back. On his to-to modules For oscillators — aside from Four Seas, of course — I like [Joranalogue] Generate 3 for analogue and [Noise Engineering] Loquelic Iteritas for digital. They’re very well conceived; deep, flexible, and great-sounding. For modulation, [Frap Tools] Falistri is a great take on the dual function generator, and as far as I can tell, nothing else really does what [Malekko] Voltage Block does. For effects, I have this little WMD/SSF DPLR delay module, which is small, modulatable and almost always sounds great. Erica Synths’ Black Joystick2 and Intellijel’s Planar 2 are two great recordable joysticks; I have what feels like about a billion filters, but one I always come back to is the old Analogue Systems RS-100. It just does that Moog thing so well. Finally, a special shout‑out to Xaoc Devices’ Leibniz system. It’s super fun
72
July 2026 / www.soundonsound.com
and innovative, enough so that the first prototypes of Four Seas were Leibniz compatible — we just couldn’t get the UI to make sense without having the panel be, like, 50 feet wide! On the story of Ferry Island Modular Ferry Island Modular is named after our home island in Helsinki, Lauttasaari, which means Ferry Island in Finnish. Several years ago I made some DIY modules for myself and some friends, and almost as a joke I came up with the name Ferry Island Modular and it stuck. I had been wanting to build my own oscillator for a while and I finally had the time and headspace to actually do it. I worked early on with a few friends from the Helsinki synth scene who helped with the design and interface of Four Seas. Then Jukka joined the team and my wife Aurélie turned this project into a real product. I went to Superbooth 2024 with a prototype of Four Seas in my backpack and showed it to a few people, including Thomas from SchneidersLaden and DivKid, who were really encouraging. That felt like a turning point, it made the project feel real and pushed us to think about how to actually produce and release it. Four Seas launched in October 2025 and we haven’t slowed down since. On the Four Seas I wanted a wavetable oscillator that felt less like a little computer and more like an instrument. I really liked the Erica Synths Black Wavetable oscillator for that reason; even though it’s digital, it still feels like something you play. I was also
inspired by [Mannequins] Just Friends, which was practically unobtainable at the time. I loved the idea of taking that kind of multi‑dimensional, harmonic thinking and applying it to wavetables instead of basic waveforms. That was the jumping-off point. We call Four Seas a four-dimensional wavetable oscillator. It is designed around a wavetable cube that you navigate using the X, Y and Z position controls. The fourth dimension comes in through the interplay of the four related outputs, which gives you a ton of freedom without the burden of managing polyphony in Eurorack. It inspired our unofficial company motto: ‘no half measures’. It’s expressive and powerful while also knob-per-function and full of possibilities. It doesn’t hold your hand, it rewards experimentation, and it’s very patch-programmable. On the culture of modular We feel very lucky to have been welcomed into it. People use modular synths in so many interesting and creative ways, and they’re all valid. It’s a very accepting, friendly culture that way — full of bright, creative people. What has struck us most is how generous people have been with us. When we were starting out, other manufacturers freely shared supplier contacts, component sourcing advice, things you might expect people to keep close to their chest. There’s a spirit of collaboration that you don’t always find in other industries. It doesn’t matter if you’re a one-person DIY operation or an established brand: people are genuinely interested in what you’re making. William Stokes
"Wow, yes, honestly, great sounding DI boxes. Everything I put through them sounds fantastic. This are now my go-to DIs on every session.”
Brian Scheuble
(Elton John, Stevie Nicks, John Mayer, Tom Petty, Ringo Starr....)
Learn more
The sound of yesterday, built for tomorrow.
ON TE ST
MQA Labs Inspira & Endura Impulse Response Correction Plug-ins Digital audio can sound wonderful today, and while it’s not quite technically possible to achieve ‘perfection’, this clever pair of plug-ins gets us that much closer! HUGH ROBJOHNS
W
e live in an imperfect world, and that applies to audio recording and reproduction technologies just as much as anything else. Of course, modern digital audio formats are immeasurably better across myriad technical parameters than all preceding analogue systems, but some critical listeners remain adamant that “even the best digital recordings fail to measure up to our best analogue experiences”. I’m not entirely convinced of that claim, personally, but agree nonetheless that current digital audio systems are not perfect — and probably never can be. Perhaps a better question is whether any of digital audio’s remaining imperfections are actually audible or practically significant. The words I quoted above come from MQA Labs’ white paper on the technology employed in their pair of closely related plug-ins that, as far as I’m aware, are unique in addressing a very specific artefact of digital recording that is never present in analogue recordings. Before looking at the plug-ins in detail, then, I think it would be helpful if we first consider the issue they are designed to correct...
Pre-ringing A noted imperfection of most current digital audio systems involves their time-domain response and, in particular, the pre-ringing artefacts typically introduced by the linear-phase anti-alias and reconstruction filtering employed in pretty much all A-D and D-A converters. Imagine a brief signal transient or audio impulse passing through a regular
74
July 2026 / www.soundonsound.com
Inspira on its ‘zero’ (top) and extended pre-ring (bottom) settings.
analogue filter. What comes out of the filter is the original impulse followed by a decaying resonance or ‘ringing’ that’s caused by the way energy is stored and released in all filtering circuits. (This natural phenomenon can be found in all forms of filtering, whether electronic, mechanical, acoustic or biological.) In the real world, an effect (the filter resonance or ringing) follows an event
(the transient impulse). The effect cannot pre-empt the event as that would go against the progressive unidirectional nature of time. Professor Hawking wrote a very good book about that! However, things can be different in the realm of digital signal processing, and the design of linear-phase digital filters inherently results in pre-ringing before the impulse, along with post-ringing after. I don’t have
space here to explain why that happens, so I’ll ask you to just accept it on trust. I explored this topic in some depth within an article about the MQA music format back in 2016 (https://sosm.ag/ mqa-format) and if you’d like to know more about pre-ringing and how it can be corrected, I’d suggest reading that. Although clearly an ‘unnatural’ artefact in the purest sense of the term, filter pre-ringing is, I’d argue, inaudible to average listeners in typical listening situations. Digital audio has been mainstream for over 30 years now, on radio and TV, the streaming music player, or in the cinema or nightclub, and I’m willing to bet you’ve never once heard your friends, siblings, parents or grandparents complaining about audible pre-ringing artefacts! Yet, there are some good academic arguments that the ear/brain is sensitive to the timing information of audio signals, and that these pre-ringing artefacts interfere with that timing information in a negative way, degrading some aspects of audio recordings, including stereo imaging precision and the perceived realism of acoustic spaces — things that experienced critical listeners are,
inconvenience, aliasing distortion can be a problem with minimum-phase filters because they’re not as steep as typical linear-phase designs.
Apodisation So, how can pre-ringing be corrected? Using a well-established mathematical technique called ‘apodisation’, which needs to be applied only once to correct all pre-ringing caused by any number of linear-phase filters from A-D and D-A converters in the entire signal path. Again, if you’d like to know more, this is a concept I explained in detail in the 2016 article I mentioned above. Suffice it to say here that the technique is used in a wide range of engineering disciplines besides digital audio, including radio-astronomy, optical photography, digital image processing, mass spectrometry, NMR spectroscopy... and many more besides. In fact, since apodisation is relatively easy to implement I’m at something of a loss as to why so few manufacturers seem willing to implement it... and that’s why I’m so pleased that MQA Labs have built it into their Inspira and Endura plug-ins — the subjects of this review
“There are some good academic arguments that the ear/brain is sensitive to the timing information of audio signals, and that pre-ringing artefacts interfere with that timing information in a negative way.” perhaps, more likely to notice. It makes sense, then, that if pre-ringing can be corrected it is probably worth doing so, to remove a potentially deleterious digital-only artefact and make the digital signal path sound more like that of an analogue system. Interestingly, the extent of FIR filter (pre- and post-) ringing is related to the sample rate, with higher sample rates having substantially shorter pre-ringing artefacts. This may be why some critical listeners prefer higher-sample‑rate recordings. Similarly, some prefer the sound of minimum-phase filtering — which has no pre-ringing artefacts but has a non-linear phase response — that many current converters offer as a user-selected option. Unfortunately, very high sample rates generate huge amounts of data to be stored and processed. Along with that
— with simple controls to allow users to optimise the processing parameters. In essence, Inspira is intended to correct digital audio pre-ringing artefacts during tracking of individual sources, as well as to optimise the low-level resolution and audible noise floor through a bespoke noise-shaped dithering process. Multiple plug-in instances can be used on any number of input sources. Endura does much the same thing but is optimised for use at the end of the mixing or mastering process, sitting across a stereo master output bus when mixing or mastering. (The plug-in does not yet support multi‑channel busses beyond stereo). Both plug-ins are available in VST3, AU and AAX formats, and are compatible with DAWs running on Windows 10 upwards and macOS
MQA Labs Inspira & Endura From $99 pros • Successfully removes pre-ringing artefacts. • Unique implementation of apodisation in the plug-in format. • Simple and elegant user controls and interface. • Noise-shaped dithering options. • Endura includes output file validation and independent file storage options.
cons • None.
summary A unique implementation of apodisation to remove pre-ringing artefacts from A-D and D-A conversion in the digital signal path, supplemented with well-designed noise-shaped dithering options.
10.13 upwards (Intel or Apple Silicon). Authorisation is only via an iLok USB key (iLok 2 or later). The plug-ins have been tested with Cubase 14, Pro Tools 2024, FL Studio 24, Ableton Live 12, Studio One 7, Reaper 7, Pyramix 14, and Logic Pro 11... and I also used it within Adobe Audition 2026 without issue.
Inspira The Inspira plug-in’s user interface is divided into two primary areas. The left section concerns the apodisation correction with an Align control to adjust the amount of correction being applied. Settings are numbered from -6 to +10, and a graphic above the control indicates the intended amount of pre- and post-ringing correction being applied. A control value of zero applies no correction, while moving clockwise to +4 represents the theoretical ideal correction for most modern A-D converters — removing all pre-ringing without extending the post-ringing. Moving the Align control while music is playing through the plug-in has an audible effect, and the optimal setting is found only by ear. I can best describe finding the optimal setting as the position where the most natural and realistic sound character of the source is found, as if the instrument and its acoustic environment suddenly snap into focus! However, the changes can be very subtle, and I found it easier to hear the effect on solo instruments www.soundonsound.com / July 2026
75
ON TE ST
Zero-G Morphology Evolved Virtual Instrument Zero-G have reimagined their Morphology library as an instrument for ‘Evolving Soundscapes and Dream Synths’. DAV E G A L E
A
s the name might suggest, Morphology Evolved is the next generation of Zero-G’s highly successful Morphology series. While it could also be described as v2, Morphology Evolved introduces new features, making this synth an ideal choice for creating soundscapes, sonic backdrops, cinematic textures, drones and lots more besides.
Zero-G Morphology Evolved $59 pros • Three layers of superb sampled content, created by Ian Boddy. • The new wavetable synth layer is impressively useful for centring tonality. • The Movement page allows quick and impressive morphing to be applied across layers. • It’s incredibly good value for money!
cons • You sometimes feel like you’re playing hide and seek with some of the parameter controls. • The sample selection menu always goes back to the top when using the drop down. • Lack of NI library compliance makes installation more complicated.
summary This is a synth that is designed to effortlessly create beautiful dreamy textures or aggressive and gnarly drones, and just about everything in between. It requires exploration and familiarity, if you want to push your sonics, although the interface might present occasional head scratching. Stick with it though, because the results speak for themselves.
78
July 2026 / www.soundonsound.com
At the heart of the instrument, and indeed the new makeover, is the Orbita engine, developed by Loot Audio. It offers three separate partial layers, which are reliant upon samples, and a fourth layer that provides a real-time wavetable synthesizer.
Origins The sample layers are built upon previous Morphology content, which was originally created by electronic music pioneer Ian Boddy. For anyone familiar with his work, the trademarks are all there: rich textural sounds and drones that evolve over time. This content adds up to a sizable 3.11GB of sampled audio. The three sample layers are clearly defined and accessed from the ‘Sounds’ page at the bottom of the instrument window. Each layer is equipped with its own set of parameters: ADSR amplitude envelope, tuning and panning, basic LFO and envelope modulation, and of course resonant filtering, through a collection of 12 filter options ranging from low- and high-pass up to peak and notch filtering. Each layer also provides effects routing, to both global and individual effects modules. There is an impressive battery of 100 curated Kontakt Snapshots (aka presets), but it’s always helpful to strip away the texture to the raw samples and hear the initial building blocks. There is no doubt that the included sonic content is very much a cut above, and that’s without any additional modulation
The pop-out instrument panels reveal controls for each partial, which you can tidy away when you’re finished editing... or not!
or processing. It did, however, reveal a couple of small annoyances relating to individual sample layers and selection. Firstly (and presumably because of the Kontakt construct), accessing the sampled content reveals a long list. The samples are all helpfully categorised, with descriptions such as Atmos, Drones and Voices, but regardless of your sample selection, any return visit to the drop-down menu takes you back to the very top. There are arrows available to nudge backwards and forwards incrementally, but if you want to view sample descriptions in menu order the continual switch back to the top (rather than where you left off) is a tad annoying. On a couple of occasions I found myself wondering why I could hear no sound. The answer was purely that the volume level of the sample layer was turned all the way down. There is no indication of this, other than the lack of a bar-graph-style graphic, which will appear once you drag the level up. Soloing the partial doesn’t change the audio output either if the volume is down, as I eventually discovered.
Further Adventures In Morphing Placing these niggles to one side, the blending of the three sampled elements can literally keep you amused all day, particularly once you bring the Movement layer into play. Upon
selection in the upper menu, an X/Y morph pad allows manual or automated movement between each sample layer. You can set parameters for vertical and horizontal movement, as well as with the superb orbital function, which allows an anchor point to be specified before initiating the speed and amplitude of the orbit. Unsurprisingly, this can also be sync’ed to your DAW, and while there is nothing incredibly new about this as a concept it still manages to capture my attention for hours on end. To my mind, it is the synthesis equivalent of placing a microphone in the right place, so that you don’t have to apply EQ; with the right selection of samples, and subtle morphing between them, the world quickly becomes your sonic oyster!
The Fourth Dimension The final and fourth Morphology Evolved layer makes its debut here, in the form of a wavetable synth. As Zero-G point out, the presence of this layer can be exceptionally useful and beneficial as it can help to harmonically ground any sound design where the sampled elements might be more tonally ambiguous. Accessed via the Synth menu, parameters are clearly defined within their sections, allowing access to all the usual elements you would expect when dealing with wavetables. There are 30 custom-designed wavetables included, all of which are fairly complex and sonically rich. Despite the inherent digital rawness (which is largely part and parcel of wavetable synthesis), the addition of saturation can bizarrely assist in a slight softening of the texture. The ‘inharmonic’
control stretches the partials away from the harmonic series, yielding some particularly impressive cross-modulation style results. Within the wavetable’s morphing section, you can select one of 34 different types of waveshaping, which can be used to fundamentally warp the wavetable’s shape. The wavetable display offers clues, so it’s easy to take a guess at the complexity of the wavetable you may have selected, through the density of the graphic. The same 12 filters are available here, in tune with the sample layers, along with a dedicated ADSR envelope and back‑end equaliser. Having already expressed my love of the Movement page, the addition of a wavetable synth to the construct creates a fairly formidable output. Given the nature of wavetable, it’s almost as though the movement morphing introduces a further level of wavetable to the wavetable synth.
Control By Design
Moving back to the curated presets, there are some ingenious moments of complexity. With a little careful deconstruction, you get a fairly good idea of how to get the most out of the instrument, but it does require a fair degree of familiarity with the interface, as some parameters appear and disappear dependent upon where you click. When the instrument opens, a large graphic with the name of the synth emblazoned across the Create beautiful crossfades from one partial to another with the Movement page.
The new wavetable synth page provides a comprehensive and immediate set of parameters, with helpful graphical illustration.
middle is central. From the sound layer you have to additionally click each partial, to reveal the envelope or access the effects and modulation controls. Located in the top right of the window, a small bar‑graph graphic reveals a mixer for blending the four layers together. The product graphic remains in view at all times, taking up about 50 percent of the instrument’s real estate, which makes me wish that more of the parameters were permanently on display. It’s also imperative to note that along with other Zero-G products, Morphology Evolved is not Native Instruments library compliant, requiring the use of the full version of Kontakt 8.3 or higher. This makes the initial installation a little bit fiddly and time-consuming, which is a process that would be removed with library compliance. While the sampled content is ported across from the previous version of Morphology, Zero-G have announced a new Evolved series, which explores many previous Zero-G libraries within the new Morphology framework. This could turn Morphology Evolved into an enormously extensive suite that extends beyond its current ‘Soundscapes and Dream Synths’ remit. Undeniably though, the quality of samples and flexibility of instrument that you get for your money affirms Morphology Evolved’s credentials. Much like flat-packed furniture, you have to do a little bit more yourself, but the results are well worth it! $ $59.95 W www.zero-g.co.uk www.soundonsound.com / July 2026
79
ON TE ST
PHIL WARD
T
he intention behind Barefoot Sound’s Footprint active monitor range, from which I have previously reviewed the 01 and 03 models, is to integrate many of the electro-acoustic philosophies and principles found in the company’s high-end models within more compact and cost‑effective offerings. It’s a strategy that has taken Barefoot from being a relatively niche aspirational brand to a prominent position in the more ‘mass market’ monitoring sector. Where once Barefoot were up against the likes of PMC and ATC, for example, the Footprint range competes head-on with models from ADAM Audio, Neumann, Dynaudio, HEDD and Focal. The recently launched Footprint 02 Gen2 is an improved and upgraded version of the original Footprint 02. The list of improvements and upgrades is so extensive, though, that I’d be very tempted to put it in the ‘new product’ category. The Footprint 02 Gen2 comprises a closed-box, active three-way nearfield system, carrying horizontally opposed 6.5‑inch (165mm) bass drivers in the side panels. The softened edge and gently radiused front panel is home to a nominally five‑inch (127mm) midrange driver and one‑inch (25mm) tweeter.
Motor Skills The bass and midrange drivers incorporate pressed‑aluminium diaphragms, while the tweeter diaphragm is a fabric component configured in a ‘ring radiator’ format (like a dome but with its apex fixed). All three drivers incorporate elements within their motor systems aimed at enhancing linearity and reducing distortion. These elements generally take the form of shorting rings and copper caps on the pole pieces to reduce the flux and inductance-modulation phenomena that are inherent to a moving‑coil driver architecture. Such things are, I think, fast becoming obligatory in any speaker that aspires to genuinely high performance. The cabinet feels extremely rigid and is far heavier than its compact dimensions would suggest. I was not a fan of lifting the Footprint 02 Gen2 onto the monitor shelf. Barefoot’s specs claim -3dB bandwidth limits of 38Hz and 40kHz for the lows and highs, respectively; response linearity of ±1dB between 42Hz and 30kHz; and maximum sound pressure level (SPL) of ‘≥111dB’. The SPL spec doesn’t define
80
July 2026 / www.soundonsound.com
Barefoot Footprint 02 Gen2 Three-way Monitors
Barefoot’s latest compact three-way represents a significant step up from its predecessor. a measuring distance or space (half or quarter), so it’s somewhat meaningless. In contrast, the low‑frequency bandwidth spec includes some interesting further information; the system Q is 0.56, which means the low‑frequency resonance is slightly overdamped (as the bass driver’s voice coil warms in use the Q will increase and the system will become less damped), and the high-pass slope is 18dB/octave. Now, the inherent high-pass slope of a closed‑box system is 12dB/octave, so clearly the Footprint 02 Gen2 includes a 6dB/octave high-pass filter in its signal chain. This is almost certainly included to offer some reduction of the bass
drivers’ diaphragm excursion at very low frequencies. It will increase low‑frequency group delay somewhat, but probably not very significantly.
Ins & Outs Around the back of the Footprint 02 can be found a mains input socket and switch, a balanced analogue input socket, a stepped input sensitivity knob, and 3.5mm jack sockets for Barefoot Sound’s proprietary MEME (Multi Emphasis Monitor Emulation) technology. Downstream of the input socket and digital signal processing (more on that later), Footprint 02 amplification comprises low‑, mid‑ and
high‑frequency Class‑D amplifiers rated respectively at 200, 150 and 60 Watts. The LF/MF and MF/HF crossover frequencies are 180Hz and 3700Hz respectively. One of the consequences of employing opposed side‑mounted bass drivers is that doing so demands a relatively low LF/MF crossover frequency, in order that midrange output isn’t radiated sideways where it could potentially cause all sorts of havoc with dispersion and integration with studio acoustics. The 180Hz crossover frequency of the Footprint 02 is low, but I might have expected it to be even lower, say nearer 150Hz. The trade-off here, however, is that the lower the crossover frequency, the harder the midrange driver has to work, and the more its engineering must take on some of the characteristics of a bass driver (larger excursion, longer voice coil, more generous surround...). And if there is one advantage of a three-way scheme over the two-way, it’s that midrange drivers can be optimised for that role rather than also having to play bass. Now, while the opposed side‑mounted LF driver principle does introduce a crossover frequency conundrum, it also, as Barefoot make much of in their marketing, offers the advantage of driving minimal low‑frequency
mechanical energy into the structure the monitor is standing on or attached too.
Knowing MEME Barefoot Sound’s MEME technology provides switched options (from a compact box with a rotary switch) that alter the bandwidth and frequency response of the Footprint 02 in order to ape the response characteristics of three alternative monitor types. The options are christened Hi-Fi, OldScl and Cube and are intended to represent an imagined generic ‘hi-fi’ speaker and, presumably, a Yamaha NS10 and an Auratone 5C. However, in appearing not to emulate the dispersion, distortion, dynamic compression or delayed resonance characteristics of the alternative monitors, MEME (and other manufacturers’ similar technologies) can’t really hope to do anything but hint at what a mix might sound like when played on them. For this reason — and the more philosophical one that, to my mind, we engineers ought to understand our monitoring well enough to know how it translates without relying on approximate emulations — I’m not convinced of the genuine value of technologies such as MEME. Your mileage may vary, of course, so feel free to ignore my stick‑in‑the‑mud tendencies. During my time with the Footprint 02 Gen2 I made some acoustic measurements to analyse how each of the MEME options changes the monitor frequency response. You’ll find the resulting response curves further down the page.
Knowing New Now to cover the revisions in this new Gen2 model. Firstly, Barefoot Sound introduced Alongside the balanced analogue input and sensitivity control are a pair of mini-jacks for connecting the MEME controller.
Barefoot Footprint 02 Gen2 $3495 pros • Fabulous extended bass. • Great detail resolving power and imaging. • Plays loud.
cons • Tonal balance quirks.
summary The Footprint 02 Gen2 displays some tonal quirks, but beneath them is a well engineered monitor of genuine performance and quality.
a signal routing technique christened SPOC (Spectrally Optimised Conversion) in their Footprint03 model, and the same feature has now been incorporated in the Footprint 02 Gen2. SPOC is a patented technology that rejigs the usual order of things in terms of signal flow and crossovers. In DSP‑based active monitors the crossover functions are usually all implemented in the digital domain; however, this means that the typical spectral balance of music (with high frequencies usually at a lower level than bass and mid frequencies) results in lost digital resolution in the high end because the full 24‑bit conversion range must be reserved for low and mid frequencies. With their SPOC technology, Barefoot implement the high‑frequency high‑pass crossover filter in the analogue domain before the digital conversion, so that the full 24‑bit conversion range is available. The result is said to be an up to 15dB improvement in high‑frequency signal‑to‑noise ratio. It’s a simple but neat idea, I think. I’ve already introduced the drivers, but they’ve all taken a step up compared to those of the original Footprint 02. The bass driver’s aluminium diaphragm replaces the original model’s paper item, the midrange driver has grown in diameter by 25mm (with a corresponding increase in voice-coil diameter) and gained a new high-flux magnet system, and the tweeter has gained an aluminium phase plug and, like the midrange driver, a high-flux magnet system. Perhaps the most significant change associated with the Gen2 drivers, though, is that the Footprint 02 Gen2 has become a fully active system, where the original model was an active/passive hybrid in which the midrange driver and tweeter were driven www.soundonsound.com / July 2026
81
ON TE ST
ASM Leviasynth Polyphonic Synthesizer
The name Leviasynth suggests an enormous beast of tremendous depth... which isn’t too wide of the mark. GORDON REID
A
shun Sound Machines (ASM) are a brand of the Chinese manufacturers Medeli. This isn’t an unusual arrangement; many companies create brands to address different markets, often to minimise the impact of affordable products on existing, higher-priced ones. But on this occasion, the concept has been flipped on its head. Known (or rather, not very well known in the West) for their budget arranger keyboards and digital pianos, it’s unlikely that a top-end synthesizer would have made a significant splash had it carried the Medeli name. I don’t know whether this was the only reason that the ASM
86
July 2026 / www.soundonsound.com
brand was established but, either way, it proved to be an astute move because, almost as soon as it was released, the ASM Hydrasynth became a respected and successful instrument. Now, seven years later, I have in front of me the evocatively named ASM Leviasynth. Is this a replacement for the earlier model, or something altogether new? Without wanting to give the game away, it’s the latter, and it’s rather exciting.
The Software Astute they may be, but the people at ASM/Medeli still have the ability to confuse. When I first read about their eight-oscillator, 16-voice polysynth, I wondered how they had implemented
half an oscillator per voice. Of course, they meant eight oscillators per voice. Well... sort of. The Leviasynth is, at heart, an extension of an FM synthesizer, so they really meant eight operators per voice. Mind you, all of the operators in an FM synth can act as carriers (ie. sound generators) if the appropriate algorithm is available, which it is. With each operator offering 323 single-cycle waveforms and a six-stage DAHDSR amplitude contour generator, you can construct sounds of great complexity on the Leviasynth without invoking any additional facilities. Of course, this would restrict the Leviasynth to a minuscule fraction of its potential because it offers 144 factory algorithms, plus an editor that allows you to create any other feasible 8-op algorithms. What’s more, the Leviasynth allows you to morph between up to eight of these as a sound develops, sliding smoothly between them (well, 100 steps per transition, but that’s pretty smooth) or even jumping backward and forward if you apply a suitable modulator. You can
even save the sounds created between discrete algorithms! The possibilities are mind-boggling. The ridiculous flexibility of the initial sound generation doesn’t stop there because each operator offers seven modes. Yes... individually! In addition to FM, there’s phase modulation synthesis, three models of phase distortion synthesis, a form of width modulation that you can apply to all of the waveforms, plus something called HTE Sync, which is an extension of hard sync. Once generated, each voice passes through two filter sections. The first comprises a digital filter with 18 modes including two SEM-inspired, morphing state-variable filters; a 48dB/octave low-pass filter; and a morphing formant filter. The second is an analogue 24dB/octave low-pass filter bank. Both filter sections offer overdrive, are resonant, and will self-oscillate. After the audio amplifiers (which offer all of the usual sound-shaping facilities) the signal reaches four effects sections in series: pre-FX, Delay, Reverb and post-FX. The pre- and post- sections offer the same set of nine effects types, but this can possibly be justified because (for example) the sound of a signal passing through a rotary speaker effect before reverberation is quite different from what you obtain if you apply the reverb first. The effects algorithms are quite suitable for sound design and live work, but I might still be tempted to use external units or software in the studio. Outside of the signal path, you’ll find five additional six-stage, loopable, sync’able contour generators, with maximum stage times of 15 minutes! In addition, there are five sync’able LFOs that will oscillate as slowly as 100 seconds per cycle, and can be smooth or quantised to as few as three amplitude steps, as you choose. And, in addition to the preset destinations on the panel, there’s a 32-slot modulation matrix within which you can apply these, the operator
contours, and all manner of internal and external sources to a huge list of possible destinations. The other main elements in the architecture are a multi-mode arpeggiator with 64 factory and 64 user-programmable phrases, and a three-track sequencer that offers two Note Tracks and a Macro Track with eight lanes for recording your twiddling. These do everything that you might expect, but one facility deserves special mention. This is called Entropy, and it takes the fashionable concept of random playback variations and then force-feeds it steroids. Currently, this is only available within the arpeggiator but, by the time you read this, it may also be incorporated into the sequencer. I suspect that there are many owners who are going to love it. Oh yes... and, in addition to the Single mode, there’s also a Multi mode. This is misnamed; it’s a Duo mode that, in large part, turns the 16-voice Leviasynth into two eight-voice Leviasynths. You can layer these, split and crossfade them across the keyboard, and transition between them using velocity splits and fades. Numerous parameters then control how things such as the ribbon, arpeggiator and macros work on the two sounds.
The Hardware
With its solid construction, 4.3-inch touchscreen, numerous buttons and friendly knobs, the Leviasynth isn’t as hard to use as the description above might lead you to fear. Mind you, given the number of parameters and the amount of visual feedback, it would benefit from the 15-inch screen found on my Korg OASYS. But maybe I’m just being greedy. On the top panel, you’ll also find two 3.5mm analogue CV inputs that you can assign as sources in the modulation matrix. Next to these lie pitch, gate, clock and dual CV outputs that you can also Round the back we find quarter-inch sockets for audio output and expression and sustain pedal input; in, out and thru MIDI ports; a USB‑B port; and a socket for the external 12V power supply.
ASM Leviasynth $2499 pros • A synthesizer of immense flexibility and potential. • It’s easier to navigate than you might imagine. • It’s nice to have a long ribbon controller, polyphonic aftertouch and MPE. • It feels reassuringly solid.
cons • It may be too complex for some users. • The rear‑panel I/O is awkward, particularly on the desktop module. • It only offers a single stereo pair of audio outputs. • Wall-warts. Bloody wall-warts.
summary This is a hugely deep synthesizer. The name suggests that it may be potent enough to eat the souls of the damned, and the imagery is not inappropriate. If you’re in the market for a serious polysynth, you cannot ignore it.
assign in the matrix, allowing you to drive external synths and effects. You’ll also find quarter-inch and 3.5mm headphone sockets together with a dedicated volume control on the front of the synth, which is good. In contrast, the rear panel offers just one stereo pair of quarter-inch audio outputs, two pedal control inputs (sustain and expression), MIDI in/out/ thru sockects and a USB‑B port. The Leviasynth would benefit from having two stereo pairs for the Multi mode, so this is a missed opportunity. What’s more, all of the rear-panel sockets are recessed and, in true Douglas Adams fashion, their legends are written in black on a black background. That’s annoying! On the Leviasynth desktop module, the sockets are so far recessed as to be inaccessible unless you pick the thing up and turn it over. Perhaps this could be to accommodate the cables if you mount the unit in a rack using the supplied rack ears. Oh yes... and while I’m on the subject of connectors, both the Leviasynth keyboard and its desktop sibling are powered by wall-warts. Oh, come on!
www.soundonsound.com / July 2026
87
ON TE ST
MINI REVIEWS
button, the two skin options and a Zoom option, ranging from 80 to 200 percent. In use, the Cloud type is selected just above the visualiser, with the categorised presets available from the top‑centre menus that, when clicked, open up the preset browser. Despite the lack of a conventional manual, it doesn’t take long at all to find your way around Cloudmax 3, and once I’d set up a suitable effect type I found that the Cloud Editor provided a very easy way to make changes — I could just
drag and listen. The way that reverb and granular processing are combined gives Cloudmax 3 a quite different character from most granular delays, and though it can generate glitchy and atonal effects when needed, it seems particularly well-suited to generating ethereal reverbs, resplendent with shimmery octaves and pulsing modulation. The Colour controls are very effective in taming the brightness of the octave-up shifts, and the eight different granular Cloud modes
MixWave EHX Classics Bundle Guitar Effects Plug-ins Electro-Harmonix have been building pedals for around half a century, and many of their original pedals have become collectable classics. MixWave’s EHX Classics Bundle comprises names most of us will recognise: the Big Muff, Deluxe Memory Man, Electric Mistress and Small Clone. The plug-ins were engineered using detailed component-level modelling, but with an additional framework to help them integrate with today’s DAW software. This provides input and output high- and low-pass filters, input and output level adjustment and (other than for the Deluxe Memory Man which has the facility built-in) the ability to mix in some of the dry sound. There’s also an intuitive preset handling facility. The plug-ins (64-bit VST3, AU and AAX formats) are mono, just like the original pedals, but if your DAW supports dual mono instantiation it’s possible to coax some useful stereo effects out of them by using different settings for the left and right channels. Conveniently, and unlike in the hardware originals, DAW tempo sync is included for the delay and modulation effects. The EHX Big Muff is one of the most famous fuzz pedals around, but in reality there have been several different versions, each with its own distinctive tonal character. This plug-in offers a choice of the Big Muff Pi, Ram’s Head and Russian variants, so it’s really three pedals in one. The circuity varies between each type, and even within the same type at different times. To my ears, the so-called Ram’s Head model has the most focused sound, while the other two sound fatter. With straightforward Volume, Tone and Sustain knobs it’s easy to dial in. A switch at the lower right of the GUI is used to switch between versions.
92
July 2026 / www.soundonsound.com
The Small Clone chorus pedal used charge-coupled delay lines, sometimes known as bucket brigade chips, along with LFO modulation of the delay time and a fixed wet/dry mix. This was essentially a simplified version of the Clone Theory pedal, which I used as part of my own setup back in the day. In fact, I rather wish MixWave had recreated the Clone Theory instead of the Small Clone, as it has more adjustment! Here, you get a single Rate control and a switch for two different Depth settings. Nevertheless, the Small Clone produces a lush chorus effect, and the original’s analogue nature introduced subtle variations — modelled here — that contributed towards its musicality. The Deluxe Memory Man delay pedal also used charge‑coupled delay lines, and that helps the delay repeats to become progressively less distinct, in a natural-sounding way. EHX also added modulation capability so the pedal can combine echo with chorus, vibrato or subtle pitch drifts. There are
produce very different characters. Routing the modulation to the various controls can also add a lot of movement to the effects, with the useful option of sync’ing to DAW tempo. While there are obvious applications in cinematic and ambient music creation, the range of effects on hand extends to more mainstream pop productions too. Paul White $ $79 (discounted to $59 when going to press).
W https://karanyisounds.com
the expected controls for Delay time, Feedback, Blend (wet/dry mix) and Level, with a further knob controlling the Chorus/Vibrato effect, as selected by a switch at the top of the case. The bypass LED is augmented by a second LED that indicates Overload, and an Ext Delay switch in the GUI allows for up to 3000ms of delay time instead of the basic 550ms maximum. At the shortest delay times the modulation can be used to create chorus and vibrato-style effects without obvious echoes. I recall the Electric Mistress flanger with great affection, probably because, after distortion and a wah‑wah pedal, it was probably the first effect pedal I bought. Its flanging sounds still stacks up with the best of today’s pedals, though its analogue circuitry, again based on a charge-coupled delay line, was notoriously noisy. The pedal was used by some to create chorus-like effects, but turn up the feedback knob (Colour) and it could deliver a screaming jet flange. At faster modulation rates and lower Colour and Range settings it could emulate a rotary speaker, making it another very flexible pedal. In summary, I applaud the sonic accuracy of these virtual pedals. MixWave have managed to recreate the original effects very convincingly while, I’m happy to say, choosing not to replicate the excessive background noise of those early pedals! The three flavours of Big Muff all sound suitably analogue, and if you like your distortion as pristine as possible there’s an option for upsampling too. Available individually or as part of a bundle, these plug-ins are also sensibly priced. Paul White $ $149 (discounted to 109 when going to
press). Indiv idual plug-ins also available separately from $69 ($39) each. W https://mixwave.com
The Struggling Musician’s Guide To Earning Money by Adonis Aletras Book Making a living as a musician has never really been a secure or stable career choice. For all the creative or emotional satisfaction it can bring, it’s not always a guarantee that bills are going to get paid, the roof stays over your head, or that there will be food on the table. In a compact 83 pages, author Adonis Aletras’ book aims to get you thinking about squaring that particular circle, distilling some core ideas from his many years of experience of doing just that in his own musical journey. Part 1 starts with a pretty stark but undeniably accurate discussion of why, in isolation, streaming numbers don’t make a good business model. With that reality acknowledged, Part 2 succinctly encourages an exploration of how your skills and areas of expertise drawn from your musicianship can be transferable,
and therefore used to develop alternative or multiple income streams. These may well have music at their heart but, just as importantly, they can offer sources of income that then provide the freedom and security to pursue your personal music ambitions. Amongst other things, these include things like sync licensing, remote work for hire as a musician, providing technical audio services, or teaching either in person or online. Part 3 focuses on basic strategies for staying afloat financially given the many uncertainties of working within the music industry, while Part 4 outlines some initial strategies that help you take the required action and move towards a more stable pattern of income without losing sight of your musical ambitions. Here, as elsewhere, there is common-sense advice and encouragement to think strategically about how you build a sustainable path; there’s no waffle, just clear, simple and sensible advice written in a succinct fashion.
If your idea of a musical career is built on the possibility of a hit single opening all the subsequent doors, then good luck and fingers crossed for you. However, that’s not really the route to success you’ll learn about here. Nor is this a comprehensive textbook on the more realistic approaches it introduces. What it is, however, is an efficient reality check for anyone — young or old — who is just beginning to work out how they make their musical dream into a pragmatic, sustainable pattern of work. This is simple advice clearly articulated and intended to put some sensible strategy into your musician lifestyle. You could easily consume the entire book in a single extended sitting and, if you are just starting to build a career for yourself centred on your skills as a musician, that would be a couple of hours very well spent. John Walden $ Paperback $13.99, Kindle $4.99. W www.amazon.com
www.soundonsound.com / July 2026
93
TECHNIQUE
Most listeners discover music on phones, where attention spans are short! JUSTIN SHERIFF
L
istening habits have changed considerably over the last decade or so, and in a couple of important ways. First, perhaps most obviously, a great deal of music is now first encountered not through studio monitors, nice hi-fi systems, or even car stereos, but rather through a pair of consumer earbuds (whether wired or wireless), or perhaps even a phone’s tiny built-in speaker. Some estimates put headphone/earbud listening as high as 80 percent, maybe more. Second, and maybe more importantly, whatever the playback system we’re listening on, many of us now encounter new music more passively — for example through short-form videos or preview clips, or in a scroll-based feed. These are all contexts in which our attention span is limited, and very easily diverted. For a significant portion of listeners, then, their first impression of our music is formed within a few seconds, often in a fragmented context, and often when listening on devices with limited low-frequency extension and reduced dynamic range. While none of this should change the main goals of mixing (plenty of people still enjoy listening on full-range systems, at home, on good headphones, in cars or in the cinema, and they won’t appreciate compromises), it does change the conditions under which our mixes are most often judged. Consequently, some of the mix decisions that might, in traditional listening environments, have felt secondary — questions of midrange balance, transient clarity, or arrangement density, for instance — could now be far more important in determining whether a mix will be perceived by most listeners as clear and engaging, or unfocused and lacking impact.
Consider Your Priorities Obviously, of those two outcomes, ‘clear and engaging’ is our goal! So what, exactly, might we consider changing about how we approach our mixes, to make that the more likely first impression? Well, the aim certainly isn’t to optimise mixes exclusively for phones or consumer earbuds, and what I said just above bears repeating: if we simply cater for the lowest common denominator, we lose the opportunity to impress more discerning listeners.
94
July 2026 / www.soundonsound.com
Mixing for Mobile Practical Strategies For Short-form & Small-speaker Listening
Rather, we need to aim to achieve two things: 1 . Ensure our mixes translate consistently across a wider range of playback systems, including those with a restricted bandwidth and limited headroom; and 2. Address the problem of passive listening and short attention spans. In order to achieve (1) we must understand how different playback systems reshape what the listener actually hears, and how we can shape our mixes to take account of that. For example, small speakers and many compact earbuds tend to emphasise the midrange, and limit both sub-bass reproduction and spatial depth. To achieve (2) we have to be very deliberate about how we choose to present the core elements in the mix. Ear-grabbing
intros have always been a thing, but for listeners with shorter attention windows the initial presentation of a mix now carries more weight than ever; if the core elements are not immediately clear, listeners are more likely to casually scroll on. Remember, they’re probably not actively trying to listen; they’re encountering your music while doing something else. So it pays to adopt a more intentional approach to prioritisation. Which elements must be clearly understood within the first few seconds? Which parts of the arrangement are essential? Which simply contribute density or texture, without improving clarity?
Midrange: The Main Event Let’s now dive a little deeper into how we might cater for the most common playback systems. On small speakers and many earbuds, the midrange effectively carries
Photo: cottonbro (Creative Commons)
the mix. To put some numbers on that, a frequency range of approximately 500Hz to 4kHz dominates our perception, and for vocals the 1-4 kHz region is particularly important for intelligibility; it’s where the sounds that allow us to distinguish between consonants tend to lie. Too little energy in these regions, and the mix feels distant or muddy, and will lack clarity. Too much, and it becomes harsh and exhausting, especially on earbuds that may be ‘voiced’ to put that range ‘forward’. The challenge, though, is not simply to boost the midrange content, or even judge the right overall level, but rather to manage the overlap between the various sources that sit in this part of the spectrum. Vocals,
that feels present and intelligible without becoming abrasive. (For more detailed advice on how you might approach that side of things, check out Matt Houghton’s SOS September 2022 article on achieving better separation when mixing: https://sosm.ag/ mixing-for-better-separation). Of course, not every instrument naturally sits in the midrange. If the airy highs of a mix can’t be conveyed very well on a phone or earbuds, that’s probably not a problem — nice to hear but not essential to the music. But what about the low end? Small speakers can’t reproduce true sub-bass and even where they can deliver low frequencies, if there’s lots of energy in that region it will very quickly eat up the headroom and result
“Ear-grabbing intros have always been a thing, but listeners’ shorter attention windows mean that the initial presentation of a mix now carries more weight than ever.” guitars, synths, pianos, snare presence and more already jostle for space here, in just a few octaves, and simply panning them for better separation won’t work, as the playback system may well be mono or at least have little by way of stereo imaging (a phone speaker, common kitchen or bathroom radios, and many portable Bluetooth speakers, for example). Careful EQ and level balancing and conscious arrangement decisions to ensure good separation tend to be more effective than aggressive boosting and cutting, or even more sophisticated mix techniques like ducking with side-chain compression. When all this is done well, the result is a mix
in distortion at normal listening volumes — which, of course, reduces clarity and impact. This doesn’t mean the low end becomes irrelevant. Far from it, in fact. But it does make it more important that we cater for listeners’ perception of low-end power than aim for its direct reproduction. Naturally, this requires tight control of low frequencies, such as through filtering, balance decisions and dynamics processing. But it also means considering how best we might reinforce the low-frequency elements so they’re noticeable on a range of small playback systems. For example, we might use distortion or a dedicated processor to add harmonics to the sound, to shift some
For a mix to have clarity and impact, it’s important not to squeeze the life out of every signal’s transients. Parallel compression can often be an effective means of increasing average levels without too much collateral damage.
of its energy higher up the spectrum. Or we might make creative artistic decisions when mixing, such as choosing to lean more on the beater click of a kick drum than its extreme low end, so that it makes the desired rhythmic contribution while giving bass instruments more space lower down the spectrum. Such tactics can allow the listener to perceive bass energy and groove, even when the fundamental frequency is not fully reproduced.
Reality Checks: Secondary Monitoring Reference-quality nearfield monitoring remains essential for mixing. Yet, such speakers no longer represent the majority of people’s listening experience: a mix that feels balanced in a treated room
Most of your audience will first encounter your music while scrolling through social media, where attention spans are short — so you have very little time to persuade them to listen.
www.soundonsound.com / July 2026
95
TECHNIQUE
MIXING FOR MOBILE
can behave very differently much of the transients/note when played back on a phone onsets are allowed through, speaker or consumer earbuds. for example. Or, for more It might seem tempting to assertive processing, perhaps overcompensate for this, look to parallel compression, or to ignore the problem. to allow some of the transient But constantly checking details ‘back through’. Either mixes on a phone can lead way, consciously working to to reactive decisions that maintain a sense of movement degrade the overall balance, and contrast as you compress while relying exclusively on will often translate better than a full‑range system won’t tell simply maximising the density you what you need to know in of a sound. terms of translation. Arrangement decisions An effective tactic is to have always played a major use small-speaker playback role in how well a mix only as a secondary, periodic translates, but I believe they’re reference — one that you now even more critical. turn to only at certain key Dense arrangements that feel stages of the mix, such as after exciting on full-range systems establishing an initial rough can often sound congested balance, perhaps when you’re when reproduced on smaller doing any radical reshaping of speakers. This is largely due the relationship between the to ‘masking’: as bandwidth instruments that occupy the and dynamic range are low end of the mix with EQ, reduced, elements compete and again before you finalise more in the parts of the the mix. In other words, you’re Masking problems can become more evident on smaller playback systems, where spectrum where they overlap the midrange takes on even greater importance. Some tools, such as this FabFilter EQ, using it to check for problems in the frequency and time can display a multi-channel ‘heat map’ that makes it more obvious where sounds are you may not immediately domains. The loudest sound competing in the same sonic territory. notice on a good, full-range dominates while the quieter system, but your nearfield monitors remain ones retreat, but it’s not just that some reduces punch and intelligibility. In most your primary mix reference. sounds get ‘buried’: the balance becomes cases, you’ll find that clarity will help Another thing you can use your inconsistent, as different instruments your mixes translate far better over such secondary small-speaker system for is come in and out of the mix. What felt rich devices than sheer average levels will. to assess loudness and dynamics. Small and layered in the studio can quickly Hook Me Now! playback systems naturally compress and collapse into something much less well distort, and pushing a mix too hard often defined in real-world playback. Cleaner In the sort of short-form contexts arrangements — not simpler music, but I discussed at the start of this article, more focused music — often translate the opening moments of a track carry more effectively because they side-step disproportionate weight. Some of that’s this problem. about the music itself, and about the So, to recap, leaving space, both arrangement (as I’ll discuss later), but there frequency-wise and arrangement-wise, is are also some important considerations a practical and powerful tool for improving when recording and mixing. clarity. If instruments seem to overlap, Transient information plays a key then, ask yourself why. Could you maybe role in perceived impact and clarity. separate them by putting them in different Overzealous compression and limiting octaves? Or by muting one of them at can smooth and soften these elements certain points, to leave the other the to the point where a mix comes across space it needs? Or by separating them in as ‘flat’, particularly on smaller playback time somehow? systems, and over streaming services that employ data compression. It follows The Mobile Loudness Myth that working to preserve or shape the transients can help elements come Small speakers often struggle for volume, across more clearly, without you having so it’s understandable that some people Limiting for loudness is often to rely on excessive level. assume that louder mixes will perform counterproductive, but it can also be problematic if This doesn’t mean you should avoid better on them. In practice, though, the your master is too quiet. Most streaming services won’t turn the music up past the point at which the compression. It simply means using opposite tends to be true. Yes, limiting highest peak hits 0dB TP, no matter their ‘LUFS it in a deliberate way: paying closer the peaks does buy you the headroom target’, while those that offer ‘loud modes’ may attention to the attack time and how to apply gain and increase the average apply limiting that robs the mix of clarity and impact.
96
July 2026 / www.soundonsound.com
Introducing ISA C8X ISA’s forty-year legacy evolves with a new 2U, USB audio interface. ISA C8X combines Focusrite’s most respected analog designs with modern control, connectivity, and recall. At the heart of ISA C8X are eight microphone preamps. The two ISA transformer-based mic preamps feature Lundahl transformers, stepped and fine gain, switchable impedance, dedicated inserts, and 430 Air lifted directly from the ISA 430 MkII. Console mode introduces warm analog saturation and low-end punch. Alongside the two ISA preamps are six ultra-low-noise Focusrite mic preamps that deliver clean, detailed gain with optional Air and Drive for added character.
Flagship Focusrite RedNet-grade AD/DA conversion ensures uncompromising audio quality for tracking, mixing, and monitoring. With 26 inputs and 28 outputs, including fixed +24dBu line ins and outs, ISA C8X is patch-bay ready and the natural anchor for serious outboard-focused studios. ISA C8X is the next evolution of ISA: built to stay, built to scale, and built to be the center of your professional studio for years to come.
Discover ISA C8X
Pro Tools Cubase
TECHNIQUE
Could the new Folder Track features in Cubase help you better organise your projects? JOHN WALDEN
O
nce a Cubase project’s track count starts to grow, two of its track types can be really helpful in keeping things organised, efficient and under control: Folder Tracks and Group Channels (or, as labelled in the Operation Manual PDF, ‘Group Channel Tracks’!). The former are essentially just containers that let you organise tracks in the Project window, and quickly control their visibility. The latter provide all the features of a standard audio-carrying channel (inserts, sends, EQ, the Channel Strip etc) but also help you organise the audio routing in more complex projects, allowing Cubase’s MixConsole to emulate the audio subgroup concept of a traditional hardware mixer. Putting both to full use makes managing more complex projects a whole lot easier, but both have been around for quite some time now...
Groups Meet Folders, Folders Meet Groups In the recent Cubase 15.0.20 update of Cubase Pro, Artist and Elements, though, Steinberg sprang a bit of a surprise: it’s now possible to merge the functionality of Folders and Groups into what you might think of as a ‘super-Folder’. It’s optional, so the tried and trusted options are still available, but now, when adding a Folder Track to your project (as shown in the screenshots), you have the option to enable Group Track-like capabilities for any Folder you create. You can also add this capability to existing Folders, of course. This combined Folder/Group Track option is a feature some users have been requesting for years, probably because a number of other DAWs already facilitate such an approach, so it’s great to see it in Cubase. So, with ‘Folders As Groups’ now official A Thing, let’s consider what it can do for your project management and workflow — and whether there are any catches.
Convenience (In) Store As soon as your track count requires vertical scrolling of the Project window’s Track List, the convenience of using Folders is abundantly apparent. Whether the new Folder type or the old ones, probably the most obvious strategy is to add one for each subset of your tracks (drums, bass, guitars, keys, vocals...). With the appropriate tracks placed in each of your (sensibly named) Folders, you
100
July 2026 / www.soundonsound.com
The new combined Folder/Group tracks/channels now appear within the MixConsole and can be opened (as the Bass Folder is here) or closed, providing genuinely useful additional channel visibility options as track/ channel counts rise.
can use them in the Project window for the Folder’s long-standing primary function — toggling a Folder open or closed in the Track List, to expand or collapse the display of the individual tracks in the Folder. It’s a super-simple way to focus your screen real estate at any given stage of your project’s development. Equally, you have solo/mute button options that can toggle the solo/mute status of all the tracks contained in the Folder. However, in their optional new mode, Folders now offer several additional conveniences. For example, automatic colour-coding of tracks now occurs when a track is placed within a Folder. More significantly, Folder Tracks now have all the audio attributes of a Group Channel Track (or standard audio track), such as inserts, sends, EQ, channel strip and pan. Even more welcome is that tracks placed within the Folder are now automatically routed to the Folder Track’s new audio capabilities; no manual re-routing is required. In turn, the new Folder’s audio is routed to your main stereo output (but you can customise this destination in the Folder Track’s Routing panel should you wish).
So, while you don’t have to choose this new ‘super-Folder’ option, if you do so then you’ll have a single track to handle functions that used to require two different track types. And it does that with some additional streamlining thrown in for good measure.
Now You See It... Of course, the new audio features of Folder Tracks are available in the MixConsole too. You can, therefore, apply all the audio processing options you used to (and still can) when using a Group Channel Track. Also new is that Folder opening/closing is now available in the MixConsole, accessed via the new Folder track-type icon at the base of each Folder channel (just above the channel name where you’d see the audio and mini keyboard icons for audio and virtual instrument tracks, respectively). When open in the MixConsole, all the tracks contained in a Folder are laid out as MixConsole channels to the right of the new Folder. When closed, the tracks are tidied away ‘into the Folder’. Playback of the tracks in the Folder isn’t affected by the open/ closed status, but any standard track-level or Folder-level mute/solo status is maintained.
channel count starts to require regular left-right scrolling within the MixConsole, keeping channel navigation efficient and project clutter to a minimum!
Don’t Bank On It? Group Channel Tracks have always been a core element of Cubase’s audio routing capabilities and, as such, they support all sorts of essential If you have an old-school Folder within your project, the Enable mixing tasks. As mentioned above, Group Channel option lets you easily convert it to the new format. their most fundamental role is to emulate a hardware mixing console’s audio do broad-brush mixing work, adjusting (and busses, with a Group Channel allocated perhaps automating) level changes through to each of your main instrument groups your project based upon your instrument When adding a new Folder, you can now toggle (drums, bass, guitars, keys and vocals, groups (audio busses) represented by the on the Group Channel functionality within the Add Track dialogue. for example). You then simply route the Group Channels. individual audio or instrument channels/ Unfortunately, unless I’ve missed Note that the open/close status of the tracks to the appropriate Group Channel something (answers on a postcard please!), new Folder Tracks isn’t linked between the (audio bus), and the Group Channel controls you can’t easily do that using the new Project window and MixConsole, so you (particularly the faders) can be used to make Folder-meets-Group Channel track type, can open/close different Folders in the top-level mix adjustments at the ‘instrument because even with all the Folders closed, two windows as required. The MixConsole group’ level — something that can give you and seemingly sitting side by side with each already has tremendous flexibility for more control and save a lot of processing other within the MixConsole, the ‘eight-fader channel display customisation (for example, decisions! That same functionality is bank’ selection still follows the underlying the Channel Visibility configuration feature) available in the new ‘super-Folder’ tracks, track layout, even when those tracks are but these new Folders add a very useful including the ability to write automation data hidden from view in a closed Folder. This visibility option. A definite plus when your for any settings (such as fader position) or can be seen within the first screenshot; processing. At the level of an some of the tracks that are part of the individual Folder channel, this current ‘bank’ are hidden within the closed works identically to how it did Guitars Folder. (and still does) with the old-school There’s a simple workaround: all the Group Channel Tracks. established Group Channel functionality remains, so you can set up an old-school Control Surface Group Channel Track for each new Support ‘super-Folder’ and route audio from those Folders to their own Group. This works fine, There’s one minor ‘gotcha’ to be though it does add another step as well as aware of. If you have a hardware more MixConsole channels, so it kind of controller connected to your negates some of the convenience of the Cubase system (for example, upgraded Folder Track/Channel system. via MIDI Remote) and use it for So I’m crossing my fingers that Steinberg hands-on control when mixing might add an option to toggle the behaviour or automating your mix, then of how channel banks are allocated when the bank of channels that your Folders are opened/closed, so that when control surface is currently closed, only the new Folder track is included linked to (usually eight channels, in any ‘eight‑fader bank’ selection. You but it can vary) is indicated by could then close all your Folders, and you’d a highlighted white line located have a bank of up to eight faders that you just above the channel name at could control from your hardware surface, the base of the channels. With just as you might do with conventional old-school Group Channels, Group Channel Tracks. it’s easy to manually position We’ll have to ‘watch this space’ on that your Groups side by side in the front, but don’t let it stop you capitalising on MixConsole (just drag and drop all the new functionality and track/channel in the Project window’s Track management capabilities delivered by the List or in the MixConsole itself) new Folder Track/Channel feature. Is it so they all sit within a single The new Folders can be opened/closed as before within the a Folder Track? Is it a Group Track? No, in ‘bank’. This arrangement makes Project window’s Track List but, as shown within the Inspector Cubase 15.0.20, it’s a super-Folder! it easy to use just a few faders to panel, they now also have full audio capabilities. www.soundonsound.com / July 2026
101
Studio Pro
TECHNIQUE
There’s more than one way to comp the perfect take in Studio Pro... ROBIN VINCENT
C
omping is probably the reason why God created the DAW. She was so fed up with all that tedious tape splicing just to nail a vocal within the allotted studio time that the great creation refineries were stoked up and put to work crafting the binaries to enable digital audio editing. In these enlightened times, comping is so embedded in the modern workflow that it’s hard to believe anyone could get frustrated with it. So, what is comping and how does Fender Studio Pro handle it? Comping, or compiling, is the process of stitching together a fantastic performance from the best parts of several other performances. It’s building a single perfect take out of a number of takes, to create the illusion that the artist performed the entire part perfectly. It can be used lightly to correct a bum note, or wildly to dissect every take into syllables and rebuild the whole track piece by piece. What’s for sure is that it’s made finding that perfect performance so much easier, and you can worry about being authentic on the live tour. It’s most commonly used with vocals, where you might loop a section of a song and record multiple takes from which you can choose the best, or choose parts of several takes to form the final take. It can also be used for guitar, piano, or any instrument that you’re recording as audio, and Studio Pro makes it dead easy to work with. Studio Pro always has more than one way to accomplish something, and when it comes to comping there are two systems in play: Takes and Layers. Comping always
Screen 1: By default, if you record multiple takes on the same track, Studio Pro stores them as Takes and lets you choose which one to play.
happens in the Layers, but recording Takes is usually how you end up in Layers in the first place. You can skip straight to Layers if you prefer to do your Takes in Layers rather than taking Takes into Layers later. Confused? Let me explain.
Takes Recording Takes in Studio Pro is a natural consequence of how recording works in this DAW. Left to your own devices, you’d probably do this without thinking and may not even know it’s happening. Whenever you record a segment of audio in Studio Pro, it is called a Take. However, that’s never important until you record another one over the top. Recording on a track over the top of audio that’s already there will generate another Take. While you’re doing it, it looks like the audio underneath is being overwritten. And if that’s your intention, then you can consider it so. However, each time you overwrite audio on a track, Studio Pro is saving the original audio as a Take and calling the new recording Take 2. Do it again and you get Take 3, Take 4, and so on. Nothing is overwritten, nothing is destroyed, it’s all kept as Takes. The great thing is that you
can go back and swap the earlier Takes back in place of the latest one. This is like the first level of comping, where you can choose the take you want to use in a section of your song. You are not bound to the final performance; you have options. The easiest way to record multiple Takes is to set up a loop and let Studio Pro continue recording as it loops. You can drag in the timeline to set loop points, and press the / (forward slash) key to enable the loop. Ideally, give yourself a bit of space before you start playing, so set the loop a bar or two before you actually want to start recording. Turn on the click if you need it. Hit Record and your song will loop between the markers, and you can keep recording until you feel you’ve done what you need. Your track will look like it’s just recorded the last pass, but if you click on one of the tiniest buttons you can find in the bottom left of the recorded clip, you will be able to select which take you want in the track (Screen 1). You can, theoretically, cobble together a comped Take from all the other Takes, but you’d have to copy tracks, switch Takes, slice out parts, mute parts, and put it all back together. We have tools that make this a lot easier. But first, let’s look at the more common way to do comping.
Layers
Screen 2: A more sophisticated alternative to the Takes system is to record each take to a new Layer.
104
July 2026 / www.soundonsound.com
Studio Pro does its comping through the power of Layers. They differ from Takes in that they are somewhat more intentional. You do get the feeling that Layers and Takes will get rolled together into the same feature set at some point, but at present they are separate things. I’ll show you how they can work together in a moment, but first, let’s do comping properly with Layers. This time, we’re not setting up a loop; we’re just focusing on the section of our
Screen 3: The Expand Layers button will display all of your Layers, allowing you to build the best take from all of them. Highlighting a section in any layer promotes it to the main track for playback.
song where we want to put together a performance. The way this works is in a more record/rewind/re-record kind of way. So, set up your track for recording and record your first take. I appreciate it can be confusing to call it a take considering we’re not doing a Take as such, but that is also what it’s called — bear with me. Your first recording was fine, but you think you could have done better. You could do that by creating a new track and recording into that; however, Layers are much more interesting and are the key to comping in Studio Pro. So, in the track header, click on the Layers drop-down menu and select Add Layer (Screen 2). The Layers menu can be found beneath the Record Input and Group settings. A box pops up for you to name your Layer if you wish. Click OK and your recorded clip vanishes. Don’t worry, it’s hidden in another Layer. For the moment, we’ll do another take or two, and each time repeat the process of creating a new Layer, and then we’ll go and find them. Now, there’s another very similarly tiny button you can find in the bottom left corner of the track header. The bottom one expands automation lanes, but the one above it expands the Layers. Under the track, you should now be able to see
the other takes you recorded on individual Layer tracks (Screen 3). This is where we can do the comping. Only clips in the main track play back. To place clips in the main track, we need to highlight them in the Layers. As you highlight bits of your takes, those sections are automatically mirrored up on the main track. You can swap and try different bits out just by highlighting them. You can also swap between Layer parts using the little button in the bottom‑left corner of the clip, and it will replace it with a same-sized piece of another clip. Studio Pro automatically crossfades the clips together and lets you adjust the transitions to ensure it’s all as smooth as possible. You can audition a Layer without promoting it by using the S (solo) button on its header. Or you can place the entire Layer up into the main track by clicking the little up arrow. You keep testing and trying various
aspects and parts of each performance until you have the perfect combination to fit what you need for the track. Hide the Layers away again, and the track is there with the perfect take, right in your project.
Takes To Layers So, wouldn’t it make perfect sense for looped takes to be generating Layers rather than more Takes that you have to manually switch between? Yes, it would, and this is already possible in two ways. The first way is a button hidden away in Studio Pro that turns on a feature called Takes to Layers. And it does exactly what we’re talking about. To find that button, you need to look down at the transport bar and find a little panel that has some sync options and pre‑roll settings, and you’ll find a little up arrow that pops up with the words Record Panel. Click the arrow, and a row of buttons that you’ve never seen before appears above the transport. One of those buttons, under Record Mode, is called Takes to Layers (Screen 4). Enable it, and now every time you record Takes with a loop record, every new take creates and occupies a new Layer. Open that up, and you have a history of every performance you gave, ready for you to choose the best bits from. Why this is not enabled by default is anyone’s guess. The second way to do this, and this is particularly useful if you can’t find the Takes to Layers button, is to right-click the current Take and choose ‘Unpack Takes — Unpack Takes to New Layers’. It will instantly throw the Takes across Layer tracks under your main track, ready for comping.
Finishing Off Once you have your perfect comped take, you might want to turn it into a single clip to make it easier to deal with. This is easily done by selecting all the clips in the main track and pressing Ctrl/Cmd+B to bounce the clips into a single clip. It’s also available in the right-click Event menu. But here’s a tip: before you do that, duplicate the Layer and then hide them all away, so if you change your mind, you have the original comp to come back to.
Screen 4: The Takes to Layers button in the transport bar changes Studio Pro’s default behaviour, so that new Layers are automatically created for each take.
www.soundonsound.com / July 2026
105
SPOTLIGHT
Focusrite ISA C8X
Expandable Eight-channel Interfaces ADAT-equipped audio interfaces are a blessing if you need more channels, but the choice can be overwhelming. We round up some of the best eight-channel offerings. LUKE WOOD
C
hoosing the right audio interface is one of the most crucial decisions for any studio, and the amount of options that are available mean it can be an overwhelming task. Deciding how many inputs you require is an important step, and many people recommend opting for slightly more than you think you need! Studios tend to grow over the years, and you may find yourself needing to record larger ensembles, add some line-level connections for synths and drum machines, or have some additional preamp ‘flavours’ ready for action without any patching in. Thankfully, most interfaces now include digital I/O options that make it simple to add additional inputs as your needs increase, and by far the most common is the humble ADAT format. Originally introduced by Alesis to carry digital audio into their multitrack tape recorders, the protocol has long outlived
the machines it was designed for and remains a common fixture in the pro-audio world. A key consideration is the sample rate at which you want to work — a single ADAT connection is capable of transferring eight channels at 44.1/48 kHz, four channels at 88.2/96 kHz and two channels at 176.4/192 kHz. Many devices support the S/MUX protocol, which allows multiple ADAT ports to be combined to maintain the channel count at higher sample rates. If you only ever want to work at 44.1/48 kHz, then you’ll always have eight channels available via ADAT; if you need to run at 96kHz, you’ll need two ADAT ports per eight channels rather than one, and running at 192kHz without sacrificing any channels would require four connections. A common starting point for many setups is an eight-channel interface, so in this month’s Spotlight, we’ll take a look at devices that come loaded with eight of their own preamps, and support an additional eight or 16 channels via ADAT.
Antelope Audio Discrete 8 Oryx
108
July 2026 / www.soundonsound.com
Antelope Audio Discrete 8 Oryx Antelope Audio’s Discrete 8 Oryx supports 26 inputs and 38 outputs, and features eight built-in mic preamps that offer up to 75dB of gain — all eight will accept line-level sources too, and instruments can be connected to the first two via front-panel TS sockets. As for local outputs, dedicated monitor and re-amp outputs are provided alongside eight analogue line-level outputs (they’re DC-coupled, and so can be used to control modular synth gear) and four independent headphone mixes that offer adjustable crossfeed. Antelope are renowned for their clocking expertise, and they’ve equipped the Discrete 8 Oryx with three word clock outputs that can be used to sync other digital gear. The interface includes onboard DSP that hosts Antelope’s range of analogue-modelling effects, and comes with companion software that provides control over routing, low-latency monitoring and the DSP plug-ins. In terms of expansion, there are two ADAT inputs and outputs, meaning the unit will accept up to another 16 channels of I/O at base sample rates. $ $1495 W www.antelopeaudio.com
Audient EVO 16
Fender Quantum HD 8
Audient iD48
Audient EVO 16/iD48
Designed to make recording as quick and simple as possible, Audient’s EVO range introduced a new Smartgain system that automatically sets preamp gain based on the incoming signal level. It’s available simultaneously across all inputs, and promises to get users up and running in less than 20 seconds. The eight onboard preamps offer 58dB of gain, and will happily accept line-level signals too — the first two are also equipped with JFET instrument inputs. Eight line-level outputs are provided on rear-panel TRS sockets while front-panel TRS sockets offer two independent headphone outputs, and the unit also includes a word clock output. Helpfully, the EVO 16 offers some built-in monitoring control, including speaker switching, mono summing and talkback, all of which can be controlled directly from the front panel. Two sets of ADAT I/O allow users to add up to 16 additional channels in both directions, and Audient have some potential companions in their own range: the ASP 880 and 800 each deliver eight preamps based on the company’s console circuitry, while the EVO SP8 houses another eight Smartgain-capable preamps. There’s also the flagship model of the iD range, the iD48, which is built around eight of Audient’s praised console preamps. It too offers 16 additional channels via ADAT, and one of its headline features is the inclusion of per-channel switchable insert points that can be used to easily integrate outboard gear during both tracking and mixing. $ EVO 16 $674.99, iD48 $1299.99. W www.audient.com
Avid Pro Tools Carbon
Described by Avid as “the closest thing to zero latency”, the Pro Tools Carbon aims to bring the performance of the company’s flagship systems to project and home-studio users. It’s based on the same technology as HDX systems, and employs a Hybrid Engine architecture that makes it possible to switch Pro Tools tracks over to DSP Mode, where their signal path is transferred to the Carbon’s DSP and can be monitored with just 1ms of latency — plug-ins that are available as both AAX DSP and AAX Native will be moved seamlessly between the Carbon and Pro Tools’ own audio engine. Along with its eight mic preamps, the unit features eight line inputs that bypass the preamps, and offers four independent headphone outputs along with a dedicated stereo monitor output. The first two input channels will also accept instrument signals. Four Toslink sockets then provide 16 channels of additional inputs and outputs over ADAT. $ $4199 W www.avid.com
Recently rebranded from PreSonus to Fender, the Quantum HD 8 has been designed to provide users with a convenient solution for full-band recording sessions. Its eight built-in mic pres are kitted out with an automatic gain function, deliver 75dB of gain and will also accept line-level signals, while a set of 10 line-level outputs include a dedicated main monitor path — those working with CV-equipped gear will be pleased to know that the outputs are DC-coupled, and in an increasingly rare move, the unit’s audio connectivity is complemented by MIDI I/O. Around on the front panel you’ll find a pair of instrument inputs, each of which is joined by a dedicated re-amp output, as well as a pair of headphone outputs. Along with the local controls, the Quantum HD 8’s preamp gain, phantom power and output routing can be controlled using the company’s free Universal Control app or Fender Studio Pro — the interface is supplied with a perpetual licence for the latter. Two pairs of ADAT I/O are present, meaning the Quantum HD 8 can be expanded with an additional 16 inputs and outputs. $ $1099.99. W www.fender.com
Avid Pro Tools Carbon
Fender Quantum HD 8
www.soundonsound.com / July 2026
109
SPOTLIGHT
E X PA N D A BL E E IGH T- C H A N N E L IN T E R FA C E S
Focusrite Scarlett 18i20
MOTU 10pre
Focusrite Scarlett 18i20 / ISA C8X Sitting atop Focusrite’s hugely popular Scarlett range is the 18i20, which employs the same converters that power the flagship RedNet series. Its eight preamps include analogue Air Presence and DSP-based Harmonic Drive modes inspired by vintage studio consoles, and are joined by 10 line-level outputs (four of which can be used as Main and Alt monitor outputs for built-in A/B switching between two playback systems) and a pair of independent headphone outputs. There’s an Auto Gain function that makes quick work of setting input levels: hit the button, play for 10 seconds and the interface will adjust the gain accordingly across all eight preamps; the signal level is continually monitored, and a Clip Safe function can be engaged to automatically back the level off during takes to avoid distortion. All of the inputs also accept line-level sources, and the first two are equipped with Hi-Z instrument inputs. Up to 16 extra inputs and outputs can be added via ADAT. The recently released ISA C8X also features eight built-in mic pres, two of which are Focusrite’s praised ISA design. Equipped with Lundahl LL1538 transformers, they deliver the classic tone for which the ISA range is renowned while offering some additional character thanks to new, all-analogue Console and 430 Air modes. The C8X offers insert points for the two ISA channels as well as 12 line-level outputs, and will accept up to 16 additional inputs and outputs via ADAT. Both interfaces can be controlled
110
July 2026 / www.soundonsound.com
remotely using the Focusrite Control 2 app, which handles everything from routing configuration and monitor mixes to preset saving and recall. $ Scarlett 18i20 $749.99,
ADAT, and also includes 128 channels of AVB-based network I/O. $ $1595 W www.motu.com
W www.focusrite.com
While best known for their large, modular converter systems, Prism Sound also offer a range of high-end audio interfaces. The Atlas employs the latest generation of the company’s A-D and D-A converters, combining them with a set of eight mic preamps that each feature the company’s Overkiller soft-clip limiter circuitry and eight line-level analogue outputs. Two instrument inputs are then provided on the front panel along with a pair of independent headphone outputs. Local control is provided for the Atlas’ most commonly used features, with more in-depth control over the likes of routing and low-latency monitoring carried out via a companion desktop software application. As well as functioning as a USB interface, the Atlas can be fitted with Prism’s Dante or MDIO-HDX expansion cards, allowing it to be integrated with Dante networks or Avid’s Pro Tools HDX and HD Native rigs. As for I/O expansion, the unit offers an additional eight inputs and outputs via ADAT. $ $5149 W www.prismsound.io
ISA C8X $2299.99.
MOTU 10pre
Seeing as the 8pre is no longer in production, it seems only fair to include the 10pre, which bends the rules here slightly with 10 onboard mic pres. MOTU opted for placing eight channels on the rear panel so that they’re easily accessible for rack-based setups, with two more on the front panel for ‘on the fly’ access during sessions — all 10 inputs also accept line or instrument signals. The first two channels feature insert points for integrating external gear into their signal path, and the unit offers eight DC-coupled line outputs as well as two dedicated headphone outputs. An onboard 64-channel DSP mixer handles routing duties, with all input and output busses boasting four-band EQ and compression, while input channels are treated to a high-pass filter and gate. Helpfully, a set of front-panel switches offer switching between up to three pairs of monitors along with mute, mono and talkback functions. The 10pre can be augmented with 16 additional channels of I/O via
Prism Sound Atlas
Prism Sound Atlas
SSL 18
SSL are famous for their large-format consoles, but they’ve steadily introduced a whole host of new studio gear in recent years, including a family of audio interfaces. The largest, the 18, includes eight preamps that will accept mic and line-level sources — the preamp circuitry is completely bypassed when selecting a line input — while the first two can be switched to Hi-Z instrument mode. The preamps are designed to be clean-sounding by default, but those who want some ‘grit’ can take advantage of a 4K mode that introduces some analogue saturation inspired by SSL’s 4000‑series consoles. Thoughtfully, there’s also a dedicated talkback mic input that avoids the need to sacrifice any of the main inputs. There are 10 line-level outputs, four of which can be switched between +9 and +24 dBu alignment levels, and outputs 9‑10 can be repurposed as insert sends for the first two input channels. All of the line-level outputs are DC-coupled, and the 18 also includes MIDI and word clock I/O. Two headphone outputs are provided on the front panel, and as well as offering three modes that optimise them for different headphone sensitivities, they can also be configured as additional line-level outputs. A front-panel monitor level control is joined by Cut, Alt and Talk buttons, with more in-depth control and routing taken care of by the SSL 360 software application. As for expansion, the 18 is equipped with two ADAT inputs and outputs, allowing users to add up to 16 additional channels in each direction. $ $1199.99 W www.solidstatelogic.com
SSL 18
Universal Audio Apollo x8p / Volt 876
Universal Audio have a couple of options in their range. The first is the Apollo x8p, which packs in eight of their Unison preamps — an innovative design that modifies the input circuitry and is capable of emulating preamps and channel strips from the likes of Neve, Manley, API and others. Onboard DSP makes it possible to track through and monitor the company’s UAD analogue-emulation plug-ins in real time, and the unit can be purchased alongside various plug-in bundles. All eight channels accept mic or line-level inputs, and the first two feature front-panel Hi-Z instrument inputs; dedicated main monitor outputs are joined by eight line-level outputs,
and the unit offers a pair of independent headphone outputs. Dual ADAT I/O then allows for up to 16 additional channels. A newer addition to the UA range is the Volt 876, which offers a broadly similar I/O count, but without Unison preamps or onboard DSP. Its eight preamps feature a Vintage mode that’s inspired by UA’s 610 valve console, and are each joined by a compressor that’s based on the 1176. Once again, up to 16 additional inputs and outputs can be hooked up via ADAT. Routing, configuration and low-latency monitoring for both interfaces can be carried out using the company’s UAD Console software. $ Apollo x8p $3299, Volt 876 $999. W www.uaudio.com
Universal Audio Apollo x8p
Universal Audio Volt 876
www.soundonsound.com / July 2026
111
FE ATURE
Hear The Sounds W https://open.spotify.com/
track/67Hna13dNDkZvBpTXRIaOJ
W www.youtube.com/
watch?v=u7K72X4eo_s
Neil Davidge • Massive Attack ‘Teardrop’ J O E M AT E R A
B
ritish producer, composer and musician Neil Davidge has worked with David Bowie, Snoop Dogg, UNKLE and Damon Albarn, as well as composing music for TV and film and releasing a 2014 solo album, Slo Light. Asked to recall a sonic highlight from his career, he nominates Massive Attack’s 1998 classic ‘Teardrop’. “The writing of any Massive Attack track can be a fairly chaotic affair, in a good way. A lot of mistakes and unusual spontaneous things will happen in the studio and from there, something unique emerges. The song ‘Teardrop’ originally started out as two completely separate pieces, ideas that we later combined, ditching the original backing for the song, keeping only the harpsichord part and the original demo vocal idea Liz had put down.”
Key Keys “The harpsichord was the first part of the song. That came about from me doodling around in the studio in the morning before the rest of guys came in. Andrew ‘Mushroom’ Vowles, often the first one in, said, ‘What’s that? It’s great.’ I recorded it in and he found some beats which we sampled into my Akai MPC60, we added
112
July 2026 / www.soundonsound.com
a simple piano part and pulled together a rough arrangement which we later gave to Liz so that she could come up with melody and lyric ideas. “We’d decided to ditch the original backing for the song and combine it with this other track I’d always liked; I rewrote the chordal/piano arrangement for the song with keyboardist David Jenkins. The piano part would eventually be pared down by Robert Del Naja and I, pulling notes out until it still formed a strong foundation but kept the sound ‘open’, leaving more to the imagination. Robert is a very visual artist, in both senses of the word. I’m much the same, I often think of making music as painting with sound. I think ‘Teardrop’ is a perfect example of that. “The harpsichord was from a Kurzweil weighted master keyboard, I think it was a PC88. The core of the piano was also the Kurzweil, although the chord roots were augmented by a sample I’d made via my Roland S770 sampler of an upright piano at the studio we rented space in. All the low notes were recorded in octaves. And we ran the piano sample through a Leslie cabinet in the studio which can mainly be heard right at the end of the song. The choir sound was a Mellotron choir sample from a Roland JV‑1080. “The drum loop of ‘Teardrop’ formed the basis for the other track, along with some of the other sonics that would end up used. There’s a double‑time version of the loop that comes in later in the song, put through the MPC’s onboard delay. The bass sound came from my Moog Prodigy.
“The guitar sustain and ‘clack’ sound I’d sampled and pitched around from a jam we did with Massive Attack guitarist Angelo Bruschini. There’s a Hammond stab which was the only sound that remained from a full Hammond session we’d recorded with the touring band keyboardist. We kept paring that part down till it was all that was left! Elizabeth Fraser’s vocals were re-recorded on my Neumann U87, through an Avalon VT-737, via a DDA AMR24 desk onto an Otari 24-track, which was then transferred into Cubase Audio where I pulled together the final comp.”
Evolving Mixing “Mark ‘Spike’ Stent mixed the track at Olympic Studios in London, Studio 3, on an SSL G-series with a host of outboard gear. He left the mix up overnight so I could tweak it whilst everyone one else had gone home. I stayed up all night fine-tuning, mainly balances, vocal rides etc, but I would have likely been tweaking the original sounds because I had all my gear running live: the Roland S770 Sampler, the MPC60, the Moog Prodigy, Juno‑60, the JV‑1080 and Cubase Audio. It was great to have the flexibility of not running from tape back then. As Spike would evolve the mix, we could tweak the arrangement and sounds at source, although the ‘multitrack’ was actually printed after we’d mixed the album, so wasn’t arguably fully representative of that final mix. “It was mastered from DAT at Metropolis Studios in London. We had also printed it to a Studer A800, but mastering engineer Tim Young favoured the DAT.”
Little AlterBoy More Choices for Your Voices
Unlock a new realm of audio exploration and discover a palette of effects for expressive tonal control that go way beyond pitch-shifting. Little AlterBoy also includes a powerful combination of formant-shifting and tube saturation (and more!) to dramatically alter the texture and character of your vocals and instruments.
“If anything is just too pure and not exciting enough, reach for Little AlterBoy ASAP.” – Andrew Sarlo (Big Thief, Nick Hakim, Bon Iver)
Free 30-Day Trial at www.soundtoys.com
FE ATURE
How AI Music Works And How To Protect Your Music
AI music generation services are trained on a vast library of existing music. We explain how the process works, and what you can do to keep your own tracks from being assimilated.
JOSHUA STEWART
W
hen you hear an AI-generated song for the first time — a convincing one, not the uncanny-valley output of a few years ago — the reaction is usually somewhere between fascination and dread. The technology is moving fast. Services like Suno and Udio can now produce broadcast-quality tracks in under a minute, complete with vocals, instrumentation and arrangement. But how does any of this actually work? How is our own music exploited in order to
make these systems work? And is there anything we can do about it? These are questions I’ve been grappling with for the past two years, both as a musician and as a researcher. The answers turn out to be more nuanced — and more hopeful — than most of the headlines suggest.
How AI Generates Music To understand how AI music generation works, you first need to understand that these systems don’t ‘compose’ in any meaningful sense. They don’t understand harmony, melody or rhythm
the way a musician does. Instead, they learn statistical patterns from enormous quantities of existing music, and generate new audio that follows similar patterns. The process begins long before anyone types a prompt. It starts with training. A raw audio file is, at its most basic level, a sequence of numbers: amplitude values sampled tens of thousands of times per second. At CD quality (44.1kHz), that’s 44,100 data points for every second of mono audio. Processing this directly would be enormously expensive in computational terms, so AI systems compress the audio into more manageable representations. The most common approach is to convert audio into a mel spectrogram — essentially a visual map of how the energy in a piece of audio is distributed across frequencies over time, weighted to approximate how humans perceive pitch. If you’ve ever seen a coloured heatmap of a song’s frequency content in a DAW or spectrum analyser, you’ve seen something similar. These spectrograms condense the raw waveform into a format that’s far more efficient for a neural network to process, while preserving the information that matters most. More recently, systems like Meta’s EnCodec have taken this a step further. EnCodec uses a neural encoder to compress audio into discrete tokens — short numerical codes, each representing a tiny fragment of sound. Think of it as converting audio into a kind of vocabulary, where each ‘word’ represents a particular combination of timbral and tonal characteristics. The encoder breaks the audio down; a decoder reconstructs it later. The compression is remarkably efficient:
The AI music pipeline starts with training from thousands of real-world examples.
114
July 2026 / www.soundonsound.com
use latent diffusion, where this denoising process happens in a compressed representation of the audio rather than on the raw waveform itself, making it far more computationally efficient. In practice, many systems combine elements of both. Suno, for example, appears to use autoregressive generation combined with diffusion-based upscaling for high-fidelity output. The details of these commercial architectures are proprietary, but the general principles are well established in published research.
The Sample Rate Question
At present, the most prominent commercial AI music generation services are Suno and Udio.
a few seconds of audio can be represented by a handful of tokens. EnCodec uses a technique called Residual Vector Quantisation, which employs multiple ‘codebooks’ that are essentially lookup tables of sound fragments. Rather than trying to capture everything in a single pass, each codebook refines the representation left behind by the previous one, progressively filling in detail. It’s not unlike how a painter might block in broad shapes first, then add finer and finer detail with each successive pass.
Two Approaches To Generation Once we have a system of representing audio using tokens or spectrograms, the actual generation can happen. There are two major approaches in use today, and most commercial services use some combination of both. Autoregressive models work much like the predictive text on your phone. Given
a sequence of audio tokens, the model predicts what comes next, one token at a time. Meta’s MusicGen is the most well‑known example. It uses a transformer — the same type of architecture that powers large language models like ChatGPT — to predict the next audio token based on everything that came before it. The conditioning can come from a text description (“upbeat jazz piano with brushed drums”) or even a melodic reference. The model doesn’t understand jazz or piano; it has learned the statistical relationships between millions of audio tokens that were labelled with similar descriptions. Diffusion models take a different approach. Instead of building audio token by token, they start with pure noise and gradually refine it into coherent audio, guided by the text prompt. At each step, the model removes a small amount of noise, nudging the output closer to something that matches the requested description. Many systems
One important technical detail that affects both the quality and the detectability of AI-generated music is sample rate. Most AI models operate internally at lower sample rates than we use in music production — typically between 16kHz and 24kHz. This is a pragmatic choice: lower sample rates mean fewer data points per second, which means smaller models, faster training and lower computational costs. But music production works at 44.1kHz as a minimum, and increasingly at 48kHz or higher. To bridge this gap, AI systems use neural vocoders — specialised networks that reconstruct a full-bandwidth waveform from the model’s lower-resolution output. HiFi-GAN is one of the most widely used, and it works using a generative adversarial network (GAN): one network generates the audio while another critiques it, and they iteratively improve each other. The result can be impressively convincing, but the high-frequency content above the model’s native sample rate is synthesized rather than generated by the core model. This is one reason many users of these platforms report a characteristic ‘shimmering’ or metallic quality in the output; the vocoder is interpolating detail that the model never actually produced.
How Our Music Feeds The Machine All of this generation capability depends on one thing: training data. And the training data is music — our music. Training a music generation model requires vast quantities of audio. Suno reportedly trained on over 50 million hours of music. Each track in the training set is processed through the feature extraction pipeline described above: raw audio is converted to spectrograms or tokens, and any available metadata (genre tags, tempo, mood descriptors, lyrics) is aligned with the audio representations. www.soundonsound.com / July 2026
115
FE ATURE
HOW AI MUSIC WORKS
The phenomenon of psychoacoustic masking allows us to conceal imperceptible artefacts within an audio file that significantly disrupt the AI training process.
The ethical questions around how this training data is sourced remain contentious. Several major lawsuits are ongoing (the RIAA filed suits against both Suno and Udio in 2024), and while some companies now claim to use only licensed material, the reality is difficult to verify. What is clear is that the scale of data required is enormous, and the Internet’s vast catalogue of streaming audio and uploaded content has been the primary source.
What The Model Actually Learns When a neural network trains on this data, it doesn’t store copies of songs. Instead, it learns patterns — the statistical relationships between audio features. After processing millions of tracks, the model develops an internal representation of what ‘music’ sounds like: how certain chord progressions tend to follow others, how vocals sit in a mix relative to instrumentation, how a kick drum’s spectral profile differs from a snare’s. This is an important distinction, because it means the output isn’t a collage of existing recordings. It’s newly generated audio that follows the same statistical patterns. But the patterns were learned from real artists’ work without their consent, and the generated output can sometimes reproduce stylistic elements with uncomfortable specificity. The question of whether learning statistical patterns from copyrighted
116
July 2026 / www.soundonsound.com
material constitutes infringement is one that courts are still working through.
Feature Extraction: The Vulnerability Here’s where things get interesting for anyone wondering whether they can stop their music from being used to train AI models. The feature extraction stage — where raw audio is converted into the representations that the model trains on — is the critical vulnerability in this pipeline. If you can disrupt what the model ‘sees’ at this stage, you can disrupt what it learns. This is the principle behind a class of techniques known as unlearnable examples. The concept of unlearnable examples was first demonstrated in the image domain by Huang et al in 2021. The researchers showed that imperceptible perturbations added to training images could prevent deep neural networks from learning useful features from them. The data looked normal to humans but was effectively invisible to the model — it couldn’t extract the patterns it needed. It turns out that this principle works even better in audio, because we can take advantage of psychoacoustic masking. Anyone who has worked with audio compression will be familiar with the basic idea. MP3 and AAC codecs exploit psychoacoustic masking to discard audio information that humans can’t perceive — for example, a quiet sound that occurs at the same time and frequency as a louder one. Our auditory system has well-documented
limitations: a loud signal renders nearby time-frequency components inaudible, and sounds just before or after a loud transient are harder to perceive. These same principles can be used to shape adversarial perturbations. Rather than adding generic noise to an audio file, a psychoacoustic model analyses the specific content of a track — its spectral profile, its dynamics, its transient structure — and computes exactly where perturbation energy can be placed without being heard. A dense rock mix with heavy distorted guitars provides far more masking opportunity than a solo acoustic performance, so a dense mix would receive a different perturbation profile to a sparse one. Every protected track is unique. This is fundamentally different from adding filtered noise. The perturbation is adversarially crafted — mathematically optimised to target the specific representations that AI models rely on. Tape hiss, vinyl crackle and other natural noise sources would have no comparable effect, because AI models are generally quite robust to random noise. They’re trained on noisy data all the time. What makes adversarial perturbation effective is that it exploits specific vulnerabilities in how neural networks extract features from audio.
iCloak: A Working Implementation iCloak is a system I developed that applies this approach. It’s built upon
The CB10 is the ultimate compact loudspeaker system, offering unrivaled audio performance, unmatched versatility and battery-powered portability. • 127 dB peak SPL • 10-inch high-output woofer • 1-inch compression driver • Bluetooth® audio and control (w/Loudspeaker Control app) • User-swappable battery with up to 12 hours of runtime • 200 ms room delay • 6-Year Warranty* (1 year on battery)
*With product registration within 30 days of purchase. ©2026 QSC, LLC. All Rights Reserved. QSC, LLC’s trademarks include but are not limited to QSC and all trademarks are listed at qsc.com/trademarks, some of which are registered in the U.S. and/or other countries. Patents may apply or be pending.
COMPACT BATTERY-POWERED LOUDSPEAKER
FE ATURE
HOW AI MUSIC WORKS
HarmonyDagger, an open-source psychoacoustic perturbation engine released under the MIT licence. The system processes audio files — masters, stems or individual tracks — and applies perturbations tailored to each file’s content. To validate the approach, I conducted formal tests at both 22,050Hz (the standard sample rate in machine learning audio research) and 44,100Hz (the industry standard for music production). The tests evaluated protection against three categories of AI model: • S peaker verification (Resemblyzer): used in voice cloning pipelines to capture vocal identity. • Audio feature extraction (Microsoft CLAP): a general-purpose model that learns audio-language representations. • Neural audio compression (Meta EnCodec): the tokenisation system used by music generation models like MusicGen. The results showed statistically significant disruption across all three model types. At 44.1kHz, EnCodec token divergence reached 43.9%, meaning nearly half of all tokens produced from a protected file differed from those produced from the unprotected original. CLAP embedding distance for music improved by 425% at 44.1kHz compared to 22kHz, suggesting that the protection becomes more effective at production sample rates due to the additional high-frequency bandwidth available for perturbation placement. Critically, perceptual quality remained extremely high. PESQ scores exceeded 4.5 (on a 1–5 scale where 4.5 represents imperceptible degradation), STOI (Short-Time Objective Intelligibility) measured above 0.999, and signal-to-distortion ratio exceeded 25dB for both speech and music. Listening tests across a range of studio monitors and studio headphones confirmed that the perturbation was inaudible. No protection system is perfect, and there are important caveats to acknowledge. The formal tests used synthetic audio corpora rather than commercial recordings, though the methodology (standardised metrics, statistical significance testing) is well established. Testing against a wider range of AI models, including diffusion-based synthesis and retrieval-based voice conversion, is an active area of research. Robustness against
118
July 2026 / www.soundonsound.com
Perturbation in action on a music file. The spectrograms of the raw and protected files are visually indistinguishable, and the added noise is completely masked by the wanted content.
lossy compression such as MP3 and AAC is another important question: anecdotal testing through commercial AI platforms using MP3 files suggests the protection holds up, but formal codec-specific testing is ongoing. And while psychoacoustic modelling provides strong theoretical guarantees about inaudibility, formal listening tests in high-SPL environments (such as large PA systems) have not yet been conducted.
From Protection To Detection Protection aims to stop AI from learning our music. A parallel challenge is detection: identifying music that AI has already generated. These are complementary problems, not competing ones. There are numerous reasons why we might want a reliable way to detect AI music, for example to stop streaming platforms being flooded with content, and to ensure fair distribution of royalties to human artists. However, the detection challenge is significant. As generation models improve, the spectral and temporal characteristics of their output increasingly resemble real recordings. But there are still telltale signs. AI-generated audio often exhibits subtle spectral artefacts, particularly in high-frequency regions where vocoders are synthesizing content above the model’s native sample rate. Unnatural periodicity,
inconsistent harmonic decay, and characteristic patterns in the noise floor can all serve as forensic markers. Recent research has made promising progress. The SONICS project (Rahman et al, 2025), accepted at the prestigious ICLR 2025 conference, developed a dataset of over 97,000 songs — including 49,000 synthetic tracks from Suno and Udio — alongside a novel detection architecture called SpecTTTra. The system analyses both temporal and spectral patterns in mel spectrograms, using a transformer to model long-range dependencies across entire songs. This is important because many authenticity cues only become apparent over longer timescales. The way a human performance develops and varies over the course of a song is difficult for current generation models to replicate convincingly. Detection is vital work. But part of the reason I believe protecting audio at source is so important is that it’s the only way to ensure these models don’t eventually become so good that detection becomes impossible. Prevention and detection are two sides of the same coin — but if we wait until the models are indistinguishable from real recordings, we’ve already lost that race.
Where Do We Go From Here? The music industry’s response to AI has so far been overwhelmingly reactive:
lawsuits, opt-out registries, lobbying for legislative protection. These are all necessary, but they address the problem after the fact. By the time a lawsuit is settled, the model has already been trained. What’s emerging now is a proactive approach that acknowledges the need to protect audio at the source, before it ever enters a training pipeline. This shifts the power dynamic. Instead of asking AI companies to respect opt-out requests (which relies on their compliance), artists can take direct action on their own masters and stems. The technology is still young. Applying protection in real time, as in a DAW plug-in or a broadcast workflow, remains a significant engineering challenge, because the psychoacoustic model needs to analyse the full audio content to optimally shape the perturbation. But the fundamental approach is sound, and it’s improving. For the first time, artists and producers have a tool that doesn’t rely on legislation, litigation or the goodwill of technology companies. It’s not a complete solution — nothing is — but it represents a meaningful
SoS Magazine – PSI Michael James 2026_PRINT.pdf
1
If it’s possible to successfully protect music from being used as AI training material, it’s likely to be more effective than retrospectively opting out or taking legal action after the fact.
shift in how we think about protecting creative work in an age of generative AI. Joshua Stewart is a musician, researcher and the developer of iCloak. He is currently completing a Masters
4/29/26
1:31 PM
degree with research focused on the intersection of music and artificial intelligence. His iCloak app can be found at https://icloak.app, or see it in action at www.instagram.com/melodiq.io/reels/.
www.soundonsound.com / July 2026
119
INTER VIE W
Peter Tägtgren Producing Metal
JILLIAN DRACHMAN
P
eter Tägtgren is one of metal’s foremost producers, engineers, musicians and innovators. As a recording artist, he is best known for his role in death metal duo Hypocrisy and the genre-defying solo project Pain, formed in 1991 and 1996 respectively, but Tägtgren has also been involved in other endeavours like the supergroup Bloodbath, Lock Up and the Abyss. As the original composer and multi-instrumentalist, he defined the sound of Lindemann, the eponymous project fronted by Rammstein’s lead vocalist. Tägtgren’s credits as producer and engineer are extensive, including Immortal, Celtic Frost, Children Of Bodom, Sabaton, Enslaved, Dimmu Borgir, Amon
120
July 2026 / www.soundonsound.com
Peter Tägtgren’s Abyss Studio has recorded some of the most influential metal music of the last 30 years — including his own projects Pain and Hypocrisy. Amarth, Amorphis, Possessed, Rotting Christ, Candlemass, Carach Angren, Borknagar, Dark Funeral, Marduk, Kampfar, Belphegor, Gorgoroth, Joe Lynn Turner and many others. Most were recorded at his own Abyss Studio in Pärlby, Sweden, where Tägtgren’s brother Tommy also produced highlights such as Shining’s Within Deep Dark Chambers (2000), Livets Ändhållplats (2001) and III: Angst — Självdestruktivitetens Emissarie (2002). These days, Tommy Tägtgren is no longer active as a producer, and Peter Tägtgren prefers to focus on his work with Pain and Hypocrisy. “I actually stopped doing bands because there wasn’t enough
time. I had three bands going at that time. So, I kind of closed Abyss down for the public, and I’m just doing my own stuff in there. But actually, a couple of months ago, a friend of mine, who has a blues band, asked me to record his album. So, that’s a little bit different because it’s not the stuff I normally do. It just felt refreshing to do that. I learn a lot by producing other kinds of music. And you always bring that with you when you do your own stuff, or if you’re producing other bands. “Nowadays, you can always go out on YouTube and get some pointers here and there on how to put a microphone in front of a cabinet or something like that. In the
past, there was nothing like that. You just did it. Especially if you were living away from all the other people, you couldn’t go and spy on people when they were recording or anything. So, it took a lot longer than if you would start today.”
Into The Abyss The technological shortcuts we rely on today were also absent when Tägtgren started out. “In the past, when you didn’t have a computer, you really relied on the musicians to play as good as possible, because there was no way you could edit in the ’90s. I pushed the musicians to play as good as possible to get the best sound, because if you play the drums badly, it’s going to sound bad no matter what you do. The same goes for guitars as well. So, that was my main focus — just to get people to perform better and better all the time.” Through the years, he has accumulated quite a bit of equipment at Abyss. “It’s not all computerised for me because I really like to use the outboard stuff that I bought over the time of my studio’s existence. So, there’s a lot of cool stuff that I need to run through just to get a good sound, a good character. My favourite would probably be some preamps: Neve 1081s. And also, I have some UREI 1176s and 78s — older stuff. It really does
something to the sound when you run through these things. And the same thing with microphones. I got this Goodfly microphone now for vocals. It’s a tube microphone. It’s really good. It’s based on a U47. That’s what I put my vocals on for the album [Pain’s I Am], actually. “What I use for guitars is either hot-rodded Marshall 800s, or I have another one that’s really cool that I really like. It’s based on the 5150 Block Letter. It’s also hot-rodded, which I use frequently. And I bought the new Meshuggah amp and also the signature amp from Vogg from Decapitated. But I haven’t had time yet to check them because I was still working with the Pain stuff, and I already had the sounds done for that. So, that’s going to be cool to check out for maybe the next Hypocrisy album. With drums, we have a Pearl set, like the crème de la crème. You can tune it any bad way you want, but it still sounds very good. And for those, I use Sennheiser 441s on the toms and also on snare. With the kick, I do [Sennheiser] 421s sometimes. It all depends on what it is. “With bass, either I run a line signal and use a plug-in amp just for distortion, or I run it through either the Marshall or the PeeWee. Same there. It depends on what kind of bass it is. What I use for the bass now is actually a five-string Music
Man. It really has a good punch in it and good body in it. I really like it.”
The Dark Side By the time a band arrives at Abyss, they are usually ready to record. “The only time I ever did a pre-production for a band was Amon Amarth, not the last album, but the album before that. They came in, and they wanted me to help them structure the songs and things like that, which is really fun. You turn all the songs inside out and upside down. We did like eight or 10 songs. Then, they went somewhere after that to record the actual album. When bands do pre-productions and send them to me before they come to the studio, I can understand what they’re doing. I usually listen once, and then I don’t listen any more. And then, when it’s time to do a certain song, we listen to it on the pre-production and then do the changes and stuff, because if you listen too much to a pre-production, you get kind of comfortable with things that you thought were wrong the first time you heard it. So, I really only listen to it once and then together when we’re going to record the song itself. Otherwise, you get influenced by what you hear while you’re supposed to have an open mind. So, pre-productions are good because then you can tell the
Photo: Irina Panova
The control room at Abyss Studio, showing some of the many options available for guitarists!
www.soundonsound.com / July 2026
121
INTER VIE W
PE T E R T Ä G TGR E N : PRODUCING M E TA L
you want to go all the way to a demo sound. You approach things together with whoever is in the band. They have a vision of things, and you make it come true for them. So, sometimes, it’s not about the sound. It’s about the feeling of the whole production... You take the band that comes in, and you create for what they are and nothing else.”
A drum kit set up for recording in the Abyss live room. Note the pair of Coles 4038 ribbon mics close to the floor in front of the kit (left).
Immortal Story
Photo: Irina Panova
band right away: ‘Oh, this maybe is not so good. Let’s try to do it like this.’ Or: ‘Oh, you played it four times. Let’s cut it down to two times instead.’ So, it all depends.” Many of Tägtgren’s productions have been polished and radio-friendly, but he’s not afraid to embrace the harsher and more lo-fi side of metal too. A good example is the 2019 album Revelations Of Oblivion by death metal stalwarts Possessed: “When I did the Possessed album, I wanted to keep the sound very old-school. I wanted to keep, let’s say, not sloppiness, but I wanted to avoid tightening everything up too much
because I don’t think that would sound good with their style — to have a real laptop production, where everything is cut up into pieces and tightened up like a drum machine type of thing. “With black metal, I don’t think you should do too much editing. It should just flow with you, I would say. I would probably try to get as good a sound as possible right away. And then, in the mix, you can make it a little bit more dirty. That way, you have the opportunity to change things. But if you record it really shitty, then you’re fucked. You can’t really do anything with it unless
Tägtgren’s black metal credits include producing and mixing five albums by Immortal, beginning with 1999’s classic At The Heart Of Winter (1999). “When they came in, and we were going to do At The Heart Of Winter, we didn’t think about what we were going to make, I think. The focus was mainly just to get a really good sound. I just tried to form the sound together with the band and tried to get this ambience, a feeling of coldness. The songs were a little bit different. They were a little bit slower than the previous stuff. We’re all big Bathory fans, and Bathory was using a lot of reverb and stuff. So, we added a lot of reverb to get the old ’80s feeling of black metal. And that was totally the opposite of Immortal’s previous album. That was really dry. I guess they didn’t want to stay with what they did in the past. They wanted to move on. So, how we did it came naturally. We were just working until we got what we thought was really cool and unique.” Immortal’s Northern Chaos Gods (2018), on which Tägtgren played bass as well as producing and mixing, came nine years
Abyss is a hybrid studio, with an impressive selection of outboard equipment.
Photo: Irina Panova
122
July 2026 / www.soundonsound.com
The New Generation Starting with Hypocrisy’s End Of Disclosure (2013), Tägtgren has often enlisted the creative support of his son Sebastian. Sebastian not only played drums on Pain’s I Am and Coming Home, for instance, but he co-produced the album and entirely composed and performed two of the tracks. “He started writing music himself. Me and Till bought him a really nice Powerbook for Christmas so he could sit and fuck around because he did ‘Matematik’. So, he’s been sitting with that thing and making some songs and things like that. And I don’t see that he has any problem with it, to be honest. It sounds really good. He came up with the sounds for ‘Don’t Wake The Dead’ and also ‘Revolution’, and I didn’t really have to change anything. I just had to mix everything together.” The songs on I Am span many years of writing and production. ‘My Angel’ which features France’s Cécile Siméone, was released as a single in 2011. The second oldest number, ‘Party In My Head’, became a hit single in 2021, whereafter the rest of the album was written in between tours and other commitments. “It’s always hard to mix an album that you recorded the songs for in different stages, because it’s never the same drum sound,
Photo: Irina Panova
after the group’s previous full-length, All Shall Fall (2009), during which period the line-up shrank from four to two, and co-founding member Demonaz stepped into the role of frontman formerly occupied by Abbath. Did Tägtgren have to alter his approach? “Well, both yes and no. You try to do new things all the time. The album sounded really cool, and the songs were great... We had different sounds and so on. It was kind of hard, but you have to try everything you got. But in the end, it’s the band who decides, because it’s their money. Since I’m a musician myself and work with labels, I know how important it is. You can’t piss away the band’s money, because they will have to recoup it anyhow. It’s not the label’s money. It’s the band’s. So, you always keep in mind what the band wants, or at least I do. I know a lot of producers that just go with their own feeling, but you have to be careful so that you don’t mess up a whole production. I’ve heard a lot of bad things about that. I always try to play it a little bit safe when I work with other bands. You shouldn’t go totally nuts trying things.”
Additional outboard includes a fully loaded SSL XLogic system and two Neve 4081 preamps (right).
it’s never the same overhead, it’s never the same bass, it’s never the same of this and that. Every song that you do is like starting from the beginning. There’s no map that you can follow or anything like that. So, it was kind of challenging to get all 11 songs to sound like they were on the same album. But when you record an album all the way through with bands, it’s so much easier. You set a good sound on one song, and it usually works on the rest. You have to go a little up and down on snare and guitars or whatever. But in general, you can keep it similar and then go plus or minus 1dB or 2dB for some instruments. But when you have totally different sounds on every song, it’s a nightmare. “When you’re going to start recording an album, it’s good to have a goal that you keep on following while you’re recording it. I think, to make the process easier, you should definitely know what you want before you record, because then you can adapt to that all the time that you’re recording. And then, at the end, it should be close to what you had in mind. I think the best thing to do when you’re done recording everything is to just leave it alone for a while and then come back and start mixing it, because when you do all these things at the same time, you start focusing on the wrong thing that really doesn’t matter in the long run, so to speak. So, I think it’s good to have a little break and then go crazy. “Sometimes, when you’re mixing a song, you go: ‘Oh, it would be cool if you put this right here.’ So, you try that,
and then you listen to it a couple of times to see if it works or doesn’t work. You just try a bunch of ideas when you get the feeling that something should be here. And sometimes, you can’t really find what the something is. So, you really pull your hair out. And in the end, hopefully, you find what you have in mind, because what you have in mind and what works can sometimes be two totally separate things. I like challenges. That’s why I’ve been doing this crazy shit myself for 30 years — you know, trying to produce myself, record and mix.”
It’s Who You Know No matter how dark and intense the music, Peter Tägtgren feels that the process of recording it should, above all, be enjoyable. And one of the things he values most about the metal scene is the attitude of the people he gets to work with. “All of these bands are like your kids, you can’t choose which band you love best. But I have great memories with Celtic Frost, Dimmu Borgir, Marduk, and all the bands I recorded. I was very lucky to record bands that don’t have big egos or anything like that. So, 99.9 percent of the time, I was walking into the studio with a smile every morning. There was never really anything like: ‘Oh my God, I can’t work with these guys for another three weeks. I’m going to kill myself.’ I never really had that feeling. Which is good!” www.soundonsound.com / July 2026
123
INSIDE TRACK
Gabe Simon • Noah Kahan The Great Divide Rediscovering the human has helped producer Gabe Simon to enjoy colossal hit albums with Noah Kahan and Dermot Kennedy. PAUL TINGEN
G
abe Simon’s production and writing career began in EDM and pop. In 2015, he co-wrote Dua Lipa’s song ‘Begging’; this was followed by writing credits for Maroon 5, Hailee Steinfeld, Anderson.Paak, Rag’n’Bone Man and Lana Del Rey. However, Simon’s big breakthrough came with Noah Kahan’s third solo album, the largely acoustic Stick Season (2022). Kahan’s first two albums had not been particularly successful, but TikTok and a performance of the title track by Olivia Rodrigo on BBC Radio 1 propelled ‘Stick Season’ and its parent album to the top of charts around the world. This success also gave Simon’s career a big push, and his writing, multi-instrumentalist and production credits since then include Koe Wetzel, James Bay, Halsey, Jonas Brothers and more. He also enjoyed another huge hit album with Dermot Kennedy, The Weight Of The Woods.
Going Without The Flow Photos: David O’Donohue
124
July 2026 / www.soundonsound.com
Raised in Simpsonville, South Carolina, Gabe Simon began his musical career as an 11-year old, playing brass. “I did that all the way up to high school. I also did a lot of choral work, and had resigned
The Great Divide was a much more collaborative affair than Noah Kahan’s previous album Stick Season. This photo shows, left to right, Kahan, Simon, Carrie K and Noah Levine, outside at Guildford Sound.
myself to the idea that I was never going to be a cool kid. Then during high school my buddies and I would sit around playing crappy little guitars on crappy guitar amps, and we had a lot of fun. We jammed in our garage, where we learned to play Radiohead, Chili Peppers and Weezer songs. I started exploring other instruments as well, and taught myself bass and piano. Then I went to Nashville for college and started a group called Kopecky Family Band.” The Kopecky Family Band released two albums for ATO Records, Kids Raising Kids (2010) and Drugs For The Modern Age (2012). Simon meanwhile obtained degrees in music business and entrepreneurship at Nashville’s Belmont University in 2011, where he developed an aversion to the raison d’être of SOS. “I took a class in audio engineering, and was like, ‘This is the worst! I do not want to follow signal flow!’ I liked creating music and guiding people’s musical visions, but I didn’t want anything to do with the technical side of recording music.” The birth of Simon’s oldest daughter in 2016 changed his perspective. “When I had my first daughter, I decided that I did not want to be on the road
any more. I wanted to be home. I’m a curious person, and I think it’s fun to explore new sounds, so I started playing unfamiliar instruments and I went more deeply into producing. My other daughter was born in 2019, and having kids made me the producer that I am today. Before, I had the luxury of having the time to try everything. But when you have kids, you don’t, so you get really good at being discerning and understanding what’s a waste of time and a meaningful use of time. I went from second guessing myself all the time, to being more efficient and confident. “I remain very grateful for my early experiences, because for example my choral work made me appreciate the voice as the most powerful and most unique instrument that we have. As a result, both the Dermot and Noah albums have tons of backing vocals. And there’s a lot of choir on Dermot’s record. We brought in the community choir that he grew up with in college, and recorded it with them walking around a SoundField MkV Ambisonic microphone, creating chords. We did that for every song on his record, to create human dynamics, which adds a whole new layer of emotion.
“I feel that the human aspect gets downplayed in popular music lately, with people opting for Splice effects and sonic perfection, instead of, for example, going into the chorus using a choral bed that goes ‘ooaaahh’. It does not only create some unique sonics, but also provides this immense humanity that listeners don’t even consciously know is there, but that gives them a euphoric feeling that makes them throw back their heads and sing along. It harks back to learning to play guitar in that garage with my friends. All I want is to be free as a kid to make music, and particularly when I produce, I want others to have that same experience.”
Pedal Power As a songwriter, Simon was regularly working with “producers staring at a laptop the whole time”, and being a guitar player in a band involved knowing his way around pedals. Slowly, but surely, music tech was creeping up on him. “By the time of the pandemic something in my brain clicked. I was at home a lot, and thought, ‘I don’t have any outboard, but I have all these bizarre www.soundonsound.com / July 2026
125
INSIDE TRACK
GABE SIMON • NOAH K AHAN
Electric guitars feature more prominently on The Great Divide than on Stick Season. Most were tracked either through the rare Fender Super Six 6x10 (right) or a Fender Princeton (left, miked with a Neumann KM86).
126
July 2026 / www.soundonsound.com
guitar pedals,’ and I found this really cool way of creating unique sounds, whether through using guitars, synths, or my voice. I started with some cheap mics, and also found Logic, and loved it because of the way it looked. I’m big on aesthetics, and found Pro Tools hard to stare at. It made my head hurt. And the layout of Ableton made no sense to my brain. But with Logic things just flowed very simply and aesthetically pleasingly for the way I work. I was making all this music, and there were no rules for what I could accomplish.” In 2022, with Simon finally getting into music technology, he received a request to produce an album for a relatively unknown folk artist. “Noah had started making his third album with another producer, but it wasn’t working out. They called me because they were running out of time, and I was like, ‘I’ve never made a folk record before!’ But again, I’m a curious person, and I was instantly captivated by Noah’s storytelling, which I found really compelling. The visual images in his words are so palpable, I resonated with them immediately. “I purposefully underproduced that record, so that people would fall in love with Noah, his voice, his lyrics, and his guitar playing. I asked him who usually played guitars on his records, and he said, ‘The producer.’ I was like, ‘That’s odd, because you play guitar really weird. You have a style. We should start by you playing guitar on everything, because nobody plays like you. What makes you unique is not just your voice and your storytelling, it’s also your guitar playing.’ To me, the defining difference between his previous work and Stick Season was that Stick Season was completely Noah, and all I did was try not to get in the way. “For example, I tried a huge production on the song ‘Stick Season’, with Mellotron and tons of backing vocals and other things. But it just felt too big and thick. It kept distracting from the story and the lyric, which is just so compelling. I dialled it back and dialled it back, until all we had left was Noah’s acoustic guitar, and me thumping a four-to-the-floor rhythm on another acoustic and playing the banjo. I hadn’t really played the banjo before, and was suddenly having a blast watching videos on how to do the four-finger or claw-style. “Noah had most of the initial 14 songs already written. When I came in we co-wrote ‘Northern Attitude’ and
‘Halloween’ and two more songs on the deluxe edition, but the fact that the other songs were ready allowed us to make the album in just 14 days, at Guilford Sound in Vermont. We had a great engineer in Konrad Snyder who truly helped make it all possible. I did put up some barriers to keep the process contained and the album focused. It needed to sound like New England. It needed to be Vermont, with an entirely American vibe. I didn’t want it to sound British in any way. So no eighth‑note delays or triplet delays on guitars, for example. We also couldn’t go heavy on reverb. It had to sound organic and close.”
Going Large When it came to making The Great Divide, it was all change. “When we started on the new record, Noah had nothing. He’d been touring for three years! We were starting from zero. The first song we did, in April 2024 at my house, was ‘The Great Divide’. It became a blueprint for the album, with electric guitars, leading to this emo-Americana rock with Black Crows, Tom Petty and Springsteen vibes. We felt that we could drive things harder. But it’s an evolution. I had suggested an electric guitar for the song ‘Homesick’ on Stick Season. For Noah it was a big moment. He thought it was too intense, and asked, ‘Are people going to like this?’ I said to him, ‘You’re going to play this live, and it’s going to become your favourite thing
to do on the face of the whole planet.’ When he started playing ‘Homesick’ live he did indeed fall in love with playing electric guitar and a whole new side of him was unlocked. “With Stick Season being such a huge success, we felt like we could grow things by 20 percent. The Great Divide is a wash of electric guitar tones, drive and energy. It has the same spirit as ‘Homesick’ — it’s just up 20 percent. It led to other big songs like ‘American Cars’, ‘Doors’ and ‘Dashboard’. It allowed us more freedom. All of a sudden we’re introducing big reverbs. At the same time, we had the freedom to do the complete opposite, so we also have some very intimate, back-porchy, acoustic, storytelling performances like ‘Headed North’ and ‘Paid Time Off’. “We had no limits at all, other than that The Great Divide had to be about people. Every song had to be about connections between family, friends, people from the past, the relationship with his wife, or himself. If a song didn’t have that, it didn’t make the cut. ‘American Cars’ is about his sister, and there are songs about his brother and about his dad. One of my favourite tracks on the record is ‘We Go Way Back’, about his wife. He was getting married, and he had never written a song that’s so beautifully loving and intimate. But musically we could open doors to everything, like ‘Let’s try this Oasis kind of thing.’ Or ‘Let’s try this Stone Roses kind of vibe,’ or ‘Let’s try this Seu Jorge
Venos Stereo Bus Compressor
The Great Divide is Noah Kahan’s fourth album.
Portuguese style,’ with a song like ‘Paid Time Off’, which also pays homage to his love for Paul Simon.”
Rebel Music While five of the songs on the album’s deluxe version were written by Kahan alone, he co-wrote the other 16 with the likes of Simon (10), Aaron Dessner (six), Carrie K (six), Sam Westhoff (three) and Noah Levine (two). The latter three are regular Gabe Simon collaborators, as part of a team he calles Abide By The Vibe. “Sometimes it’s the two of us sitting with guitars,” explains Simon. “Noah may come up with a lyric and a melody. I may have some input on the lyric or I’m often encouraging his melodies, like: ‘That was so cool what you just did, try it again.’ With ‘The Great Divide’ he sang the melody and then I came up with the
NEW!
Adding size, depth and impact to a stereo signal has never been easier. www.soundonsound.com / July 2026 With SPL 120V technology this sound is crowned to king of dynamics.
127
ON TE ST
Fracture Sounds Lighthouse Piano Kontakt Instrument
HHHHH Lighthouse Piano by Fracture Sounds is an exquisite Kontakt instrument, seemingly designed to shake the resolve of anyone considering limiting the number of piano libraries they might add to their collection in 2026. At the heart of the library is composer Marcus Warner’s restored 1907 Blüthner Style VII grand piano, recorded in situ at his home studio, a converted cotton mill with “high ceilings and warm, exposed brickwork”. The default sound is so rich and evocative, I spent my first week exploring the library without touching even one of the additional controls provided. At 24GB in size, the intricately sampled instrument features up to six dynamic layers; four to 10 round robins per note; and adjustable key, pedal and player noise. Three microphone mixes present the sound of the piano from different perspectives: Hammers, an extreme-close up sound as captured by a pair of Soyuz 013s; a wider Body mic to include some room ambience; and Player, for the performer’s perspective. Additional controls include sample start time; a Clarity Filter to control low-frequency thumps or knocks often heard in the upper registers of a piano; and Force Pedal Down, which activates only the samples recorded with the pedal down. Control of the instrument’s dynamics is helpfully split into two independent parameters: Timbre and Volume Scaling. Together, they control how Lighthouse Piano responds to your touch, letting you shape the tone of the instrument to suit your composition, and enabling control of how note volume responds to velocity. Timbre Scaling was particularly impressive, smoothly triggering the appropriate dynamic sample layers as per your settings. The differences in timbre are properly audible with even small adjustments to the range and curve of the parameter, plus the clean GUI makes it very easy and quick to make your adjustments. A further indicator that this is a meticulously sampled library is that the volume of the notes across the range of the instrument is consistent, which is especially appreciated when playing softly, eliminating the annoying task of manually editing random, errant loud notes. Besides being a one-stop shop that offers tones of both an intimate, warm felt piano and a clear, bright concert grand,
132
July 2026 / www.soundonsound.com
Lighthouse Piano also brings a few bonuses to the mix (pun intended), the first being 10 sound-designed Atmosphere Layers, a great tool to add the all-important ‘vibe’ to your piece. Each patch allows the use of three Atmosphere Layers simultaneously, with the option to mute or solo them, dial in levels, and control the decay of the atmospheres. Along with the instrument’s generous built-in reverb, this makes for a very fertile playground for composers with a love for all things ambient. The second bonus is not a feature but a whole other instrument — a vintage Harmonium, modified to include a Drone Mode setting, which is the perfect backdrop for long and leisurely improvisation sessions. The creators describe the core idea of Lighthouse Piano as “a felt piano, without the drawbacks”, a rather humble description for a breathtakingly beautiful library. As promised in the literature, the dynamic range and tonal versatility of the piano is where this library truly shines. Warmth and clarity are partners across the instrument’s range, with no need to sacrifice one for the other in your quest for expressivity. Everything about Lighthouse Piano is a pleasure to interact with — the instrument, the interface, the user manual, and even the walkthrough video are all detailed, functional, and aesthetically pleasing. Highly recommended. Sonal D’Silva $149 www.fracturesounds.com
Edu Prado Sounds Zither Kontakt Instrument
HHHH The zither is perhaps forever immortalised by Anton Karas’ theme for the 1948 film The Third Man. You’ve almost certainly heard it, despite the piece’s distinctively whimsical folk style not being in high demand for contemporary film music. It’s perhaps just as well, then, that a new zither library from Edu Prado Sounds for Kontakt 8 and Kontakt Player hasn’t been created with the Karas aficionado in mind. EPS Zither comprises nine instruments aiming to blend the zither’s Eastern European folk roots with more sophisticated textures and sound design elements.
With a zither typically comprising 30 to 40 strings stretched across a thin wooden body, Edu Prado and Jan Pfitzer have meticulously sampled the plucking of these strings with both fingers and a pick as separate instruments. Each pitch offers 12 variations — four velocity layers multiplied by three round robins — and an instrument containing pure harmonics is also provided, which is a nice touch. An SFX instrument contains a selection of very usable percussive taps, knocks and atonal scratches, great for both added realism and rhythmic loops. And the only comparatively weak offering supplies an octave’s worth of ‘strummed’ major chords, with the next octave employing the same samples, only reversed. It’s a surprisingly limited inclusion, especially since similar content can be created with more flexibility using the picked instrument. The pristine sound quality perfectly captures the sparkling, high-frequency veneer one associates with such an instrument, similar to a hammered dulcimer, and makes it a joy to play. And if you’re unsure how to best wrangle a zither, the inclusion of a simple sequencer (which is more of an arpeggiator) makes it easy to create convincingly idiomatic performances. You just need to watch out for the top velocity layer poking out too much, although such triggers can easily be dialled back. A technical omission is the lack of support for MIDI Expression (CC 11). And, to take this a step further, including a control to set fixed or relative velocity values for incoming notes would have been the cherry on the icing on the cake. Although, to be fair, this trick is easily implemented with Kontakt’s Multi Script feature. As you’d expect from a modern Kontakt offering, the zither’s traditional sound can be mangled beyond conventional expectation thanks to several parameters exposing internal effects. The ‘crystals’ section is the most pleasing, while the ‘heat’ controls are the least interesting — distortion, especially when applied to plucked stings, always runs the risk of sounding like a naff electric guitar. When it comes to sound design, while snapshots usefully demonstrate
Discover SOS For Artists : A Complete Platform for Modern Music Creators
Your end-to-end music production suite Designed to support independent artists, producers, and collaborators at every stage of the music-making journey, SOS For Artists brings together all the tools needed to take your music from idea to release.
Create
Produce
1. Sample Selection Made Simple Over 3 million royalty-free samples growing monthly.
1. Mix & Effects Tools The effects collection includes EQs, Compressors, Reverbs, Delays and Saturators from trusted names. Including Eventide, Arturia, Baby Audio, IK Multimedia, and Synchro Arts.
2. Instruments & Synths Includes a curated collection of high-quality plug-in instruments from brands like Spitfire, UJAM, Arturia, GForce, Sonuscore, and more.
2. Mastering — Fast, Intelligent SOS For Artists includes access to the advanced AI mastering engine from LANDR.
3. Stem Extraction with AudioShake An integrated stem-splitting plug-in allows you to isolate vocals, drums, bass, or instrumental parts. 4. Starter DAWs Included For newcomers, the subscription includes lite versions of Steinberg Cubase and Ableton Live.
Distribute 1. Global Digital Distribution Distribute your music to over 150 platforms including Spotify, Apple Music, Tidal, Amazon, and Deezer. Or, if you use these platforms transfer all tracks to SOS For Artists without losing data. 2. Monetization & Royalty Splits Retain 100% of your royalties or use the Royalty Split feature and divide the earnings with your collaborators.
FREE PLAN
ESSENTIALS
ign up and explore S the features Kickstart your creativity with 7,800 samples Preview the LANDR Mastering tool Preview Distribution
or $12.99* per year per month $ 1,000 worth of Tools inc 18 Plug-ins 1200 Sample Credits U nlimited MP3 + up to 36 WAV masters U nlimited Distribution
ONLY
99
$
* Monthly price does not offer same number of Plug-ins or Sample Credits ** Also available in most countries worldwide in your local currency.
3. YouTube Integration Link your official YouTube artist channel to keep distributed content and subscriber base in one place. 4. Promotion & Reporting Promotion tools include Linktree-style landing pages and content creation tips to help boost visibility. Detailed royalty reporting shows trends, top countries, and top-performing platforms.
PRO
$
199
or $19.99* per year per month $2,000 worth of Tools inc 64 Plug-ins 2400 Sample Credits Unlimited MP3, WAV + HD WAV masters Unlimited Distribution
ONLY
www.sosforartists.com
ON TE ST
SAMPLE SHOP
the effects parameters, the real potential is undoubtedly in using the standard techniques as a springboard to create unique and more imaginative content. The final few instruments exemplify this perfectly, especially ‘Low Wobble Drone’, even though its nomenclature doesn’t do justice to the evocatively foreboding rumble that might convince your neighbours they’re experiencing an earthquake when the mod wheel is all the way up. If you’re a TV composer who buys EPS Zither and fails to write a cue deploying this drone, you’ve definitely got bigger problems! Mark Wherry $46.18 sounds.eduprado.com
Quiet Music SacredTones Plug-in Instrument
HHHH Quiet Music already offer a range of sample-based instruments, but SacredTones is more like a platform for meditation or contemplative sound design. Based on a small number of resonant sound sources comprising Tibetan bowl, crystal bowl, gong, temple bell, tuning fork and tanpura, SacredTones eschews the standard A=440 tuning system, instead using so-called healing frequencies, ambient sound textures, and binaural beat drones. If you compose music for mindfulness, sound therapy, yoga or relaxation, then prepare to be intrigued. While healing frequencies might sound a bit like New Age mystique, SacredTones puts scepticism aside and provides a practical approach where all the different frequencies are listed alongside their names. The core instruments are designed to generate evolving harmonic textures rather than conventional melodic performances. SacredTones defaults to A=432Hz and includes multiple tuning systems such as Solfeggio, Chakra Solar, Hans Cousto-inspired planetary tunings, and OM Vedic scales, but whether you subscribe to such things or not doesn’t impact on the relaxing and atmospheric nature of the sounds generated. Harmonics drone forever in the background punctuated by the struck sound sources when triggered. A key feature is the binaural beats engine covering Delta, Theta, Alpha, Beta and Gamma brainwave frequencies purported to enable users to encourage mental states associated with sleep, meditation, relaxation, focus or alertness.
134
July 2026 / www.soundonsound.com
Beat frequency and intensity can both be adjusted directly within the interface, though headphones are required for the binaural effect to be experienced properly as binaural beats rely on each ear receiving slightly different pitches. This binaural processing is integrated into musically-generated sounds rather than simplistic sine waves, so the effect is like hearing harmonic pads based on resonant sounds combined with added reverb and environmental textures such as ocean, forest, wind, rain and fire. For pure relaxation use, there’s a Session Play mode with a choice of timers that drones away indefinitely, ringing the chosen sound source once each time period. For composition, the sound sources may be played from a keyboard. While the appeal of SacredTones is likely to be limited to those working on relaxation or meditative music, it certainly succeeds for its intended purpose. If you just want easily playable resonant bowls, then Quiet Music’s Healing instruments are probably a better choice, but for anyone creating calming, immersive musical environments, SacredTones is remarkably effective. Paul White €30 www.quietmusic.eu
Vienna Symphonic Library Big Bang Orchestra 2.0 VSL Synchron Player Instruments
HHHHH VSL have re-entered the Space Race with a major upgrade of Big Bang Orchestra. First launched in autumn 2019, BBO’s 27 themed libraries featured a 70-piece orchestra, six percussionists and 48 singers recorded in VSL’s Synchron Stage. The original BBO packs have now been replaced by seven focused collections organised by instrument family, which include all mic positions and benefit from VSL’s simpler, more intuitive Flow interface. BBO Tutti (17.5GB) contains all the sample content and expansions of the old BBO packs Andromeda, Black Eye and Altair, featuring the entire orchestra playing together and individual strings, brass and woodwind sections. The articulations comprise essential basic styles, hits, rips, fast repetitions, octave runs, tension effects, atonal horror noises and the recently added full‑orchestra long chords, spanning the dynamic spectrum from soft con sordino
clusters to high-impact sforzando braams. Combining the Capricorn and Eridanus packs, BBO Riffs brings you 43GB of loop-based four-bar patterns orchestrated in contemporary film scoring style. Symphonic riffs are performed by the entire orchestra, while a set of percussion riffs feature taikos, bass drum, concert toms, snare drum and cymbals in a thunderous low drums mix. Select a percussion pattern then add one of the library’s newly minted deranged cluster riffs — instant Hollywood action film cue. The 29GB BBO Strings’ secret weapon is the massive 112-piece string ensemble taken from the Zodiac BBO series finale. Its octave cellos and basses’ sforzatissimo deliveries are formidably powerful and the 56 violins’ sweetly singing legatos are a thing of beauty. Also included are the pre-orchestrated high and low strings from the 2020 Lyra and Musca packs, classic string combinations for soaring melodies and dramatic bass lines. BBO Brass (7.2GB) inherits Zodiac’s super-loud 12 horns and nine trombones and its heroic ‘Epic Legato Combo’ mix of horns, strings and clarinets. The included Hercules and Izar packs’ stentorian low brass sections also contribute great performances played in a choice of regular or dissonant cluster versions. Combining the contents of former BBO packs Neptune and Solaris, the 9.7GB BBO Woodwinds features a 13-player tutti woodwind ensemble performing standard artics and note repetitions, menacing low woodwind clusters and brilliantly played high woodwind octave runs and arpeggios. Rounding off this space mission are BBO Percussion (10GB) and BBO Choirs (6.1GB), based respectively on the BBO Dorado, Fornax, Ganymede and Ymir libraries. The percussion’s battling ‘Monster Drums’ ticks the ‘cinematic’ box, while blended low drums and three grand pianos offer unique tuned percussion flavours. Epic music requires a choral overlay, and you can’t do any better than BBO’s 48-voice SATB choir and the heart-touching purity of its Ymir children’s choir. For more details, read my September 2020, October 2020, September 2021 and May 2022 BBO reviews on the SOS website. Dave Stewart BBO 2.0 Bundle $499. www.vsl.co.at Audio examples of this month’s libraries are available at www.soundonsound.com.
NEXT MONTH IN
E-mu Systems SP-1200
E-mu’s sampling drum machine defined the golden age of hip-hop. In the next issue of Sound On Sound we look at its history and the remarkable story of the company behind it. Subscribe at www.soundonsound.com/subscribe
AD INDEX To Advertise in Sound On Sound please contact: usadsales@soundonsound.com Ableton.................................................................................................... 59
IsoAcoustics............................................................................................. 51
Allen & Heath...............................................................................................35
Kenton Electronics.......................................................................................69
AMS Neve....................................................................................................85
Lynx Studio Technology........................................................................... 23
ART Pro Audio..............................................................................................43
Millennia Media....................................................................................... 19
Arturia Software & Hardware.......................................................................15 Cranborne Audio.......................................................................................OBC DPA Microphones......................................................................................129
Oeksound.............................................................................................. IBC PSI Audio................................................................................................... 119
Dynaudio Pro........................................................................................... 39
QSC Audio Products............................................................................... 117
FabFilter......................................................................................................27
RAD Distribution..........................................................................................25
Focusrite.................................................................................................. 97
Radial Engineering.......................................................................................65
Fryette......................................................................................................................... 93
Solid State Logic...................................................................................... 29
Garbage Ideas.............................................................................................91 Genelec.......................................................................................................61 GIK Acoustics...............................................................................................41 Grace Design.................................................................................................7
SOS For Artists...........................................................................................137 Soundtoys.................................................................................................113 SPL USA....................................................................................................127
GS Music................................................................................................. 77
Sweetwater.................................................................................................11
Heritage Audio.............................................................................................63
Telefunken..................................................................................................33
iamReverb...................................................................................................13
Toontrack Music..........................................................................................67
Ilio..............................................................................................................IFC
Trinnov........................................................................................................21
SHOWCASE
David Carson (Regional Sales Manager): david.carson@soundonsound.com Piano Organ Synth
Note-for-Note Sheet Music - MIDI Files
TRANSCRIPTIONS Learn Your Favorite Keyboard Parts Exactly As They Were Recorded
Visit ManyMIDI.com Free Sample
Experience acoustic perfection anywhere with the only studio trailer designed specifically for recording artists, composers, musicians, podcasters, and video personalities. De s i g n yo u r d rea m stu d i o at : m o b i l e s o u n d stu d i o s .c o m
Find the BEST acoustic fabrics from top brands at the LOWEST prices… Guilford Of Maine
Maharam
Luum
Knoll Textiles
DesignTex
…and more!
…up to 95% OFF retail bstockfabric.com 136
July 2026 / w w w. s o u n d o n s o u n d . c o m
Money Back Guarantee
NEW
!
AUDIO & VIDEO CABLES, PANELS, CONNECTORS, ACCESSORIES. What you need, when you need it.
REDCO AUDIO
1-203-502-7600
w w w. s o u n d o n s o u n d . c o m / July 2026
137
SHOEGAZE SAM MORTLEY
I
t was 2015. I was just 21 years old. I was in my university dorm room, delving deep into new and old music, as a typical student does. Being a guitar‑centric dude who was initially into 2000s bands such as Kasabian, Kings Of Leon, Editors, Muse and Feeder, I found the 2010s tough going. Ultra-polished, sexual‑innuendo‑obsessed pop and stripped‑back bland singer-songwriters swept the airwaves. Fortunately, my generation had the Internet at our fingertips. And looking back into history led me to a musical genre that had indie-rock familiarity, whilst opening up a world of blissed‑out ethereal soundscapes that I never knew were possible! Enter shoegaze and dream-pop. My first listens included Ride’s Nowhere, whereupon Internet recommendations led me to Whirlpool by Chapterhouse.
Both of these albums are at the commercial end of the shoegaze spectrum, and were therefore ideal starting points to draw me in. Then came the more challenging and genre‑defining Souvlaki by Slowdive and the legendary Loveless by My Bloody Valentine. Both of these took a little while to absorb and digest, but once they clicked, they really clicked! I then discovered Kitchens Of Distinction, Medicine, Curve, Seefeel and many others. I started to realise that these albums had the common theme of dreamy and otherworldly guitar sounds, and that the vocals were treated differently to how they are in most mainstream music. Mixed low and heavily effected, the singing was not always fully defined or distinguishable. This, in turn, forces the listener to use their imagination and/or to simply feel the vibe of the sounds blended and mashed together. The sonics of the guitars were
“It makes perfect sense that the genre continues to grow and morph in the current day, as the sonic possibilities are now endless.” 138
July 2026 / www.soundonsound.com
being pushed to the point where the resulting noise didn’t sound like a guitar. It was like impressionism and surrealism combined. And Alan Moulder instantly became my production hero. These factors single‑handedly got me interested in the production not just of this style of music, but of all forms of music, and led me to embarking on a Music Production & Sound Engineering BA Hons degree with dBs Institute in Plymouth, where I graduated in 2025. I bought myself a Fender Jaguar and Jazzmaster, and grew my hair out into ’90s curtains whilst sporting a baggy Breton T-shirt to make myself feel the part. My pedalboard filled up with stompboxes, and I even bought myself some old rack gear such as the Roland GP-16 with its FC100 foot controller, an Alesis Quadraverb and a Yamaha FX500, which I discovered were common for the original shoegeezers to record and perform with.
The 2010s was a great time for the revival of the shoegaze genre because, having encountered the classic early ’90s artists, I then discovered bands of my generation such as Airiel, Ringo Deathstarr, Pinkshinyultrablast, Blankenberge, Miniatures, Deserta, Flyying Colours, Malory, Exit Calm and countless others. I was amazed to see how international the sound had become, from Pia Fraus in Estonia all the way to Resplandor in Peru! It makes perfect sense that the genre continues to grow and morph in the current day, as the sonic possibilities are now endless. A style that thrives on new and extreme effects embraces plug-ins, virtual pedalboards, IR processors for reverb and amp sims. And now, with the advent of immersive audio, the ethereal, atmospheric nature of this genre has the potential to be fully realised. Keep on gazing at yer shoes!
Tell Us What You Love! What makes your audio world tick? Tell us, in around 500 words, and we’ll consider it for publication. Please send your submissions for a ‘Why I Love’ column to whyilove@soundonsound.com.
the next evolution of soothe
Since releasing Soothe in 2016, our goal has been to create original and useful tools that help audio engineers focus on what matters. With each plug-in and iteration, we’ve deepened our understanding in DSP and UX. Soothe3 continues that evolution with our most transparent processing and refined user experience yet. Learn more at oeksound.com
Imagine a single compressor that isn't just a compressor— but an entire compression arsenal compressed into one revolutionary module. The Brick Lane 500's Modal PWM Compression is like having six legendary hardware compressors at your fingertips, each with its own distinct personality, sonic signature, and dynamic DNA. Each mode isn't merely a setting; it's an entirely different compression philosophy.
FREE eBook RECORDING TECHNOLOGY
BASICS &BEYOND SECOND EDITION
Get your FREE digital publication from Sound On Sound This FREE illustration-rich eBook is aimed primarily at newcomers to the subject, but will prove equally valuable to anyone struggling with the complexities of today’s sophisticated recording technology. The purpose of this 170-page guide is to introduce readers to the essential components of a modern recording system and to explain the recording process in an easy-to-follow way, demystifying the inevitable jargon, both as it crops up, and with a comprehensive glossary. Written in the accessible, no-nonsense style of the Sound On Sound team of authors and editors, Recording Technology: Basics & Beyond covers: ■ What to buy ■ Studio setup ■ Computers for audio ■ Audio interfaces ■ Monitoring ■ Acoustic treatment ■ Mic techniques ■ How digital audio works ■ Understanding your DAW software ■ Upgrading your system
■ Software instruments ■ Wiring your studio ■ Plug-ins ■ Recording audio ■ Understanding MIDI ■ Recording vocals ■ Mixing ■ Compressors ■ Equalisation ■ Mastering ■ A.I. - in Music
Don’t miss out! Sign up and share the link with friends and colleagues on social media.
https://sosm.ag/recording-ebook