THE WORLD’S BEST RECORDING TECHNOLOGY MAGAZINE
CELEBRATING 40+ YEARS 1985 — 2026 TM
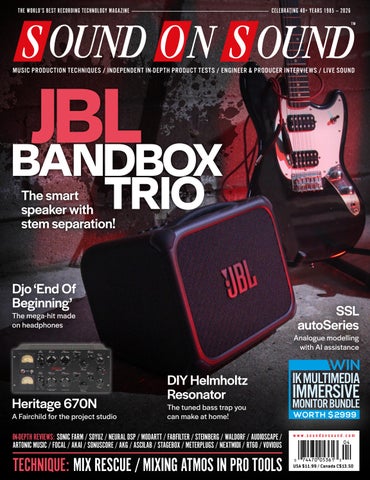
JBL BANDBOX
MUSIC PRODUCTION TECHNIQUES / INDEPENDENT IN-DEPTH PRODUCT TESTS / ENGINEER & PRODUCER INTERVIEWS / LIVE SOUND
TRIO
The smart speaker with stem separation!
Djo ‘End Of Beginning’
SSL autoSeries
The mega-hit made on headphones
Analogue modelling with AI assistance
Heritage 670N
A Fairchild for the project studio
DIY Helmholtz Resonator The tuned bass trap you can make at home!
IN-DEPTH REVIEWS: SONIC FARM / SOYUZ / NEURAL DSP / MODARTT / FABFILTER / STEINBERG / WALDORF / AUDIOSCAPE / ARTONIC MUSIC / FOCAL / AKAI / SONUSCORE / AKG / ASCILAB / STAGEBOX / METERPLUGS / NEXTMIDI / RT60 / VOVIOUS
TECHNIQUE: MIX RESCUE / MIXING ATMOS IN PRO TOOLS
WIN IK MULTIMEDIA
IMMERSIVE
MONITOR BUNDLE WORTH $2999
www.soundonsound.com
USA $11.99 / Canada C$13.50
www.ilio.com
800.747.4546
LE ADER
OUT OF THE BOX N
ot so long ago, it seemed as though studios would become entirely virtual. Instead, hardware has had a resurgence. DAWless synth setups are a thing. Producers are integrating outboard into computer-based studios. Sales of reel-to-reel tape are up year on year. Even in live sound, there’s a growing trend to incorporate analogue rackmount kit into front-of-house rigs. AI seems likely to accelerate these trends. The smouldering perception that using computers to make music is somehow inauthentic is being fanned to a flame by the rise of generative music creation services and virtual session musicians. But AI has also opened up a gap in capabilities between computers and dedicated hardware. Even the most DAWless of setups often incorporate multiple pieces of digital kit. Some are based around DSP chips or FPGAs. Many are essentially embedded computers. Yet few are remotely as powerful as the average Mac or PC. A machine running code that is tightly optimised for a single task simply doesn’t need the same raw processing capability as a general-purpose computer. A consequence of this is that it’s difficult to retrospectively add AI capabilities to existing music hardware. There is no spare computing capacity available to execute machine-learning models, even if it’s practical to code them for the platform.
SOUND ON SOUND LTD (HEAD OFFICE) ALLIA BUSINESS CENTRE KING’S HEDGES ROAD CAMBRIDGE, CB4 2HY, UK T +44 (0)1223 851658 sos@soundonsound.com www.soundonsound.com
This doesn’t just mean that we can’t generate AI backing tracks or synthesize voices. It also limits the use of AI for more mundane but arguably more useful jobs, such as navigating huge preset libraries, or real-time interactive help. And whereas we’re now used to accessing cloud-based services on our computers, that seems like a less attractive option on a workstation keyboard. Which is why I think this month’s cover product is so significant. The JBL BandBox is the first standalone device I know of in our sector to be designed around AI. Stem separation is no longer groundbreaking in itself, but its implementation in a Bluetooth amplifier very much is. This is a grounded, practical application for AI that makes obvious sense, solves a real-world problem and helps to differentiate the BandBox from its competition. It’s also one that plays to the traditional strengths of hardware, being portable, simple and direct. As I understand it, the BandBox has been developed from the ground up as an entirely original design. In general, I suspect this approach will prove easier and more productive than to try to bolt machine learning onto existing platforms. Is it the first in a wave of disruptive products? Will we see new manufacturers entering this space? How will the existing giants adapt? And will the perception that hardware is more authentic than software survive such a paradigm shift?
“The JBL BandBox is the first standalone device I know of in our sector to be designed around AI.”
ADMIN IS T R AT IO N
ADV ER T ISIN G
sos.feedback@soundonsound.com
admin@soundonsound.com
usadsales@soundonsound.com
Editorial Director Dave Lockwood Executive Editor Paul White Editor In Chief Sam Inglis Technical Editor Hugh Robjohns Reviews Editor David Glasper Reviews Editor Matt Houghton Reviews Editor Chris Korff Production Editor Chris Korff News Editor Luke Wood
Managing Director/Chairman Ian Gilby Editorial Director Dave Lockwood Marketing Director Paul Gilby Finance Manager Keith Werthmann
North America Sales Manager Dan Brown Regional Sales Manager David Carson UK Media Sales Manager Chris Cope
S UB S CR I P T I ON S subscribe@soundonsound.com www.soundonsound.com/subscribe
WOR L DW I D E E D I T I O N S
Circulation Manager Luci Harper Administrator Nathalie Balzano
UK/WORLD
Editor In Chief
E DI T OR I A L
WWW.SOUNDONSOUND.COM/SUBSCRIBE
NORTH AMERICA
Sam Inglis
M AR K E T IN G O N LIN E
marketing@soundonsound.com
support@soundonsound.com
International Business Development Nick Humbert
Digital Media Director Paul Gilby Design Andy Baldwin Web Content Editor Callum Hall Web Editor Adam Bull Digital Media Manager Atheen Spencer www.soundonsound.com twitter.com/soundonsoundmag facebook.com/soundonsoundmag instagram.com/soundonsoundmag
P R ODUC T I ON
DIS T R IB U T IO N
graphics@soundonsound.com
distribution@soundonsound.com
Production Manager Michael Groves Designer Mick Reilly Designer Andy Baldwin
International Distribution Magazine Heaven Direct www.magazineheavendirect.com
Printed in the USA Not for re‑sale outside North America
ISSN 1473‑5326 A Member of the SOS Publications Group The contents of this publication are subject to worldwide copyright protection and reproduction in whole or part, whether mechanical or electronic, is expressly forbidden without the prior written consent of the Publisher. Great care is taken to ensure accuracy in the preparation of this publication but neither Sound On Sound Limited nor the Editor can be held responsible for its contents. The views expressed are those of the contributors and not necessarily those of the Publisher or Editor. The Publisher accepts no responsibility for the return of unsolicited manuscripts, photographs, or artwork. © Copyright 2026 Sound On Sound Limited. Incorporating Music Software magazine, Recording Musician magazine, Sound On Stage magazine, SPL magazine, Sound Pro magazine and Performing Musician magazine. All rights reserved. All prices include VAT unless otherwise stated. SOS recognises all trademarks.
April 2026 / www.soundonsound.com
3
134 INSIDE TRACK
IN THIS ISSUE
www.soundonsound.com
April 2026 / issue 6 / volume 41
WIN
FEATURES 102 Building A DIY Helmholtz Resonator Affordable and effective, broadband absorbers are the first port of call for acoustic treatment, with good reason. But sometimes you’ll hit on an acoustics challenge that requires greater precision...
106 Mix Rescue: Ember Rev New arrangements, new mixes and new masters present an album in a fresh light — and offer an escape route from a sonic trap.
124 Spotlight: Column PA Systems Bigger isn’t always better in the world of live sound!
128 Classic Tracks:
IK MULTIMEDIA IMMERSIVE MONITOR BUNDLE WORTH $2999 PAGE 74
The United States Of America
The United States Of America released a single album of uniquely experimental music in 1968. Decades later, the rest of the world began to catch up to what was almost a lost classic of the psychedelic era.
132 How I Got That Sound
Musician and producer Emmally Parsons, aka e.m.arson, discusses eclectic listening, discarded instruments and why her go-to reference track is a painting.
Danton Supple explains how a fire extinguisher and a chair contributed to a memorable percussion loop on Coldplay’s ‘Low’.
142 Q&A
134 Inside Track: ‘End Of Beginning’
Your studio and recording questions answered.
Adam Thein mixed Djo’s second album entirely on headphones — including a hit that went viral twice and topped charts five years after its release.
4
138 Talkback
April 2026 / www.soundonsound.com
146 Why I Love... Improvisation Simon Paterson explains how there’s more than one kind of improvisation in music.
58 AKAI MPC XL
ON TEST
98 FRCTL Audio GRN
Dual-channel Variable-mu Compressor
Capacitor Microphones
91
Ali Modular Esu’s Trifecta Eurorack Module
C O V E R
Sampling Workstation
AKG C104, C114 & C151
42 JBL BandBox Trio Portable Guitar Amp & PA System
10
84
AsciLab A6B Passive Monitors
48
AudioScape XL-305R
36 Meterplugs Dynameter 2 Metering Plug-in
82 Midifex Lujin MIDI Controller
Stereo Spring Reverb
92 DPW SW3 Splice
12
Music Business by Louis Austin Book
34
John Mayer X Guitar Rig Modelling Plug-in
StageBox Plug-in Host Software
30 Steinberg Cubasis 3.8 DAW Software For iOS & Android
100 Strymon NightSky Reverb Plug-in
141 Sub51 & Soundtrax Drop Pad 3 Sample Library
22 Vovious Vocal Tuning Plug-in
140 VSL Synchron Duality Strings
52 Waldorf Protein Wavetable Synthesizer
Arrangement Software
18
RT60 Songzap 3 Songwriting & Recording App For iOS
26 Solid State Logic autoSeries DAW Plug-ins
Eurorack Module
Main Monitors
76
28 Nextmidi Divisimate Core
Compressor Plug-in
66 Focal Utopia Main 112
Dynamic Microphone
6 Neural DSP Archetype:
FabFilter Pro-C 3
90 Ferry Island Modular Four Seas
Soyuz V1
Ostinato + FX
Pico Atomic Cluster
38
Modartt Pianoteq 9
14
Sample Libraries
Sample Library
Resonant Oscillator Pedal
Sample Library
Modelled Virtual Piano
140 e-instruments Velvet Guitars 98 Electro‑Harmonix
Minimal Audio Poly Flanger Modulation Plug-in
Eurorack Module
99 Ducking & Diving: A Life in the
Olympia Noise Co Patterning 3 Virtual Drum Machine For iOS & macOS
80 ARTonic Music ChordAXE MIDI Plug-in
Complete 4
62 Heritage Audio Herchild 670N
58 Akai MPC XL 72
94 Sonuscore The Orchestra
Granular Effects Plug-in
16
Sonic Farm 2DI4 MkII Valve DI Box
WORKSHOPS 114 SOS For Artists 116 Cubase 118 Logic 120 Studio Pro 122 Pro Tools www.soundonsound.com / April 2026
5
ON TE ST
Neural DSP Archetype: John Mayer X Guitar Rig Modelling Plug-in
Can you really capture the essence of John Mayer’s finely-honed guitar tones in software? JOHN WALDEN
G
iven John Mayer’s profile as both an artist and guitar player, Neural DSP’s latest plug-in collaboration — Archetype: John Mayer X — is both a mouthwatering prospect and, I suspect, something of a coup for the company. Mr Mayer’s studio and live rig is something of legend and, honed over 25 years and featuring some iconic vintage gear, replicating it would cost you an eyewatering amount of money. So, if you hanker after John Mayer’s tones but are unwilling to sell a vital organ or two to access them, might Neural DSP’s virtual emulation be a capable, more affordable alternative? I’ll answer that question below... We’ve explored the core features of the Archetype plug-ins in a number of previous reviews and, sensibly, that well-designed workflow wheel has not been re-invented here. So, for instance, the stylish GUI includes the familiar global controls, including access to presets, the excellent Doubler, Tuner and MIDI configuration options, as well as multiple tabs to access the separate sections of the rig’s signal
6
April 2026 / www.soundonsound.com
flow. In this case, those sections are Pre FX, Amp, Cab, EQ & Comp and Post FX, and you can access the tabs using six icons at the top of the display.
The John Mayer Trio Mayer’s blues trio, in which he plays with Steve Jordan and Pino Palladino, isn’t the only trio of interest — his studio and live rig generally blend a trio of vintage valve amps. Neural have recreated that setup in this plug-in. The amps here are called the Smooth Operator, Headroom Hero and Signature ’83, and they are based on extensive sampling of Mayer’s 1964 Fender Vibroverb, Dumble Steel-String Singer (serial number 002 and renowned for its epic clean headroom), and an early prototype of his signature Two-Rock, along with the respective speakers/cabs he uses with them. Neural were given full access to these amps in John’s studio in Los Angeles and, if you want an insight into how they collect data from the amps they model, then watch the interview with Doug Castro (Neural DSP’s CEO) on Rick Beato’s YouTube channel, and look out for
something that resembles an ‘amp miking machine’; it really is fascinating stuff. The cabs comprise a single 15-inch speaker for Smooth Operator, with plenty of low-end character should you want it; an emulation of a 12-inch in Mayer’s original Dumble cabinet; while the Two-Rock emulation is paired with a 2x12-inch cab. Dual microphone modelling is provided for all cabs, with options for selecting the mic types and positions relative to the speaker, all handled within a very intuitive graphic interface. You can link the cabs to their respective amp or, if you prefer, mix and match them. That’s maybe not something you’d achieve quickly and easily with the actual Vibroverb (being a combo), but the additional tonal flexibility this feature brings is welcome. And if you weren’t already aware, a little experimentation on this front will soon bring you to appreciate just how important the speaker choice is to your tone. Naturally, you can use each amp individually — this is the case for all the Archetype plug-ins — and in doing that you get access to the full front-panel control set for each amp. But in a first for Neural DSP, you also get the option to use all three amps together, exactly as Mayer does on stage and in the studio. This ‘blended’ mode features fixed preset configurations for each amp and cab, but it does include a compact macro-style control set that allows you to adjust the overall input gain, the blend between the three amps, the output, and the amount of room ambience added. If you want instant access to some classic Mayer tones, this gives you a very easy route in.
Board Surfing The effects menu is stocked with equally iconic options, and rather than bore you by listing each and every one, I’ll take you through what I feel are some highlights. The Pre FX section includes emulations of John’s ‘always on’ boost, based on a Keeley Katana (but labelled Justa Boost here) and used to just add a little bit of extra level into the front of the amps. You also get the Antelope Filter, based upon the
With up to 64 analog and 212 digital channels of modular I/O, this is the interface level-up for you’ve been waiting for. Our AD/DA converters provide exceptional depth and clarity and will immediately improve everything you do in tracking, mixing or mastering. I/O cards include Dante, Digilink, USB, Ravenna and MADI (coming soon). Setup and control is elegantly simple with our GraceNet web-based UI. With stunning audio performance and flexible integration, the m701 is a highly capable centerpiece for any studio.
“The transparency of the signal and ease of the interface really allow me to make the sonic manipulations that are necessary to make great records. The m701 is the linchpin of my system and allows me to do what I do without any hindrance.”
“The sound of my jaw hitting the floor is still reverberating in my studio… My previous converters were excellent, but the Grace really blew me away. The phantom center feels more solid and stable, the lowest frequencies feel like they never stop
Anna Frick Mastering Engineer, Ally Sound
Don Gunn Atmos Mix Engineer, TapeOp Magazine
going deeper, and the highs are like silk.”
“When I heard the announcement of the m701 I thought it was a logical addition to the Grace Design portfolio, and it was bound to be an impressive performer. However, it has surpassed even my expectations in terms of configurability, ease of use, and technical performance. This is one heck of a big-boy’s interface!”
www.gracedesign.com • Lyons, CO USA
Hugh Robjohns Technical Editor, Sound On Sound Magazine
ON TE ST
N E U R A L D S P A R C H E T Y P E : J OH N M AY E R X
when trying to hear (and feel) the difference, as his engineer switches between the real rig and the plug-in. I guess Neural have nailed it then! Oh, and by the way, that ‘feel’ is an important element of what makes the plug-in so much fun to use; it doesn’t just sound right, but it’s really touch-responsive when you play. That might not matter as a listener, but it can make a huge difference as a player, and makes this plug-in really inspiring to actually use.
Remarkably Mayer
The virtual pedalboard includes a clone of John’s Klon.
Electro-Harmonix Q-Tron Plus auto-filter, and instantly recognisable from tracks such as ‘I Don’t Trust Myself’. For me, the star of the Pre FX show is probably the Halfman OD, modelled on Mayer’s Klon Centaur. (The Klon is a pedal that has spawned countless more affordable hardware clones, of course, but if you wanted to buy a genuine Klon, used prices on eBay start at around $4000...). Elsewhere, there are emulations of a wonderful vibrato and spring reverb in the Gravity Tank tab. Unsurprisingly, these effects form a core part of the guitar sound on the classic track ‘Gravity’. It sounds very ‘analogue’ and it’s absolutely full of character. There’s also an Empirical Labs Distressor-style compressor, a flexible four-band EQ, and studio-grade delay and reverb options — those latter two are in the Post FX section.
classic-rock tones through driving the amps a little harder with boost and overdrive, Archetype: John Mayer X can cover plenty of sonic ground. Not everything — metal for instance, though Neural already have that genre well catered for by other plug-ins. But this plug-in should definitely appeal to an audience that goes way beyond the hardcore John Mayer fanbase. The supplied preset collection is huge, with contributions not just from Mayer himself but also from a large number of Neural’s regular guitarist collaborators, and ably proves the point. And if you consider yourself a fan, does it sound like the real thing? I’d say so. If in doubt, there’s video footage online of Mayer blind testing the plug-in in his studio control room, and he looks genuinely bewildered
If you’re a dedicated, guitar-playing John Mayer fan, you can now play exactly the same guitar as he does — his signature PRS Silver Sky is available to buy — and play it through a virtual recreation of his signature rig that it seems even John can’t reliably distinguish from the original hardware. So, we’re now just waiting for John Mayer to collaborate with a biomechanics firm to create signature bionic John Mayer hands... In the meantime, Neural DSP have absolutely smashed this plug-in out the park. I’d be surprised if it doesn’t become their biggest selling software release to date, and by a considerable margin. Archetype: John Mayer X is truly impressive technology.
summary A virtual recreation of John Mayer’s iconic triple amp rig that even the man himself can’t distinguish from the real thing. It sounds and feels fantastic.
$ €199 (about $236). W www.neuraldsp.com
Clean To Mean Across his musical catalogue, John Mayer’s tones range from the most pristine of cleans to the meanest of blues rock. There’s a sense of perfectionism in the way he approaches his sound and, as a consequence, there are some sounds that have reached iconic status amongst his fans. Can the plug-in get you there? Well, even a quick trawl through the presets, including some supplied by the artist himself (the preset names point you right at the original song inspiration) quickly makes it clear that it can do just that. But it can also do plenty more... Whether it’s some ambient soundscapes or sound design (thanks to the immaculate clean tones and the impressive reverb and delay options), or some aggressive
8
April 2026 / www.soundonsound.com
As ever, Neural DSP’s cab modelling provides plenty of ways to customise the sound.
Expert advice, award-winning service, and the world’s best brands.
For nearly 50 years, Sweetwater has helped millions of customers find the perfect gear. Give us a call and discover how our deep product knowledge, legendary customer support, and superior selection can transform your shopping experience.
Sweetwater.com/recording (800) 222-4700
Personalized Advice & Support
Free 2-year Warranty
Fast, Free Shipping
Payment Options for Every Budget
Highly trained Sales Engineers and on-site support team.
Buy with confidence, knowing we have your back.
Most orders leave the same day.
Flexible payments and up to 48-month financing.
ON TE ST
Olympia’s annular drum sequencer is going from strength to strength. JOHN WALDEN
I
’m a self-confessed fan of iOS as a music creation platform. In part, this is because of the tactile touchscreen interface, and the fact that the platform allows indie developers to more readily compete for attention with development teams familiar from the desktop world. As a result, iOS has offered up some truly innovative and creative music app options. One of those is Olympia Noise Co’s Patterning Drum Machine, which has been reviewed in SOS on a couple of different occasions (most recently v2 in the October 2018 issue). Indeed, with its distinct circular pattern‑editing grid, a huge collection of community-created downloadable drum kits, and the step-count flexibility offered for each instrument lane within a pattern (making for all sorts of polymetric and polyrhythmic options), it’s become something of an iOS classic. Alongside a few others I could mention, Patterning has always been (a) an app I think it’s worth owning a iPad for and (b) an app I wished existed in a desktop format.
Swing Theory Olympia Noise Co’s main man Ben Kamen has always kept Patterning moving forwards, and Patterning 3 was released in mid-2024 bringing all sorts of new features and refinements. This included new options for parameter automation, audio export options, an upgraded timeline editor for arranging patterns, a dedicated effects track and improved modulation options.
10
Olympia Noise Co Virtual Drum Machine Patterning 3 For iOS & macOS However, it was a YouTube video Ben posted on the v3.2 update that caught my eye, as it introduced what I think is a completely novel take on the concept of swing that Ben terms ‘parametric swing’. It takes the conventional form of swing generally applied over quarter‑note resolutions and allows you to apply (‘bound’) swing at different resolutions (such as half notes). The UI’s Swing/Quantise section (shown on the right side in the screenshot) lets you explore this concept in a hands-on, graphical fashion. This includes the genuinely mind-bending Curve control and, while things can get rhythmically challenging very quickly, once you begin to grasp the concept, there are all sorts of cool musical feels you can explore. Again, this is the first drum machine on any platform that I’ve seen offer this approach to adjusting swing; if you like to get experimental with your rhythms, Ben’s video explaining what Patterning 3 is doing is well worth a watch.
Desk Work Having downloaded the 3.2 update in response to the new swing feature, I then slapped myself on the head as I realised I’d missed the fact that v3.1 allowed Patterning 3 to run both as a standalone desktop app on macOS and as an AU virtual instrument plug-in within a suitable DAW. Both standalone and plug-in (within Logic) worked beautifully on my test system. The only gotcha is
April 2026 / www.soundonsound.com
that, as yet, I haven’t been able to make it function within one of the more popular AU-to-VST wrappers so that I can use it within my usual DAW of choice, (Cubase). Answers on a postcard to SOS HQ if you manage to make that work. Patterning is undoubtedly one of my favourite virtual drum machine instruments, regardless of the OS or platform we might be talking about. The circular pattern‑editing interface, while cool to look at, is also very intuitive and I do wonder whether Native Instruments’ (also excellent) Circular didn’t draw a little inspiration from the concept. The new ‘parametric swing’ feature is as bonkers as it is interesting, and to finally see the app working on my macOS desktop is a real treat. Whether for iOS or macOS, Patterning 3 is well worth exploring and an absolute bargain to boot.
summary Patterning 3 just improves on an already brilliant take on the virtual drum machine concept.
$ $29.99 W www.olympianoiseco.com
ON TE ST
PAUL WHITE
M
ost musicians will know what to expect from flanging, which is one of the oldest time-based modulation effects — think resonant whooshes with a psychedelic undertone. Traditionally, flanging is created by mixing the dry sound with a slightly delayed copy, whose delay time is modulated, either manually, as with the original tape flanging, or by use of a modulation source such as an LFO. But Minimal Audio’s new Poly Flanger is a bit different...
Flanging, But Scaled-up! Poly Flanger supports the usual plug-in formats for macOS and Windows, and exploits the idea that at different delay times and with added feedback, a flanger can be made to emphasise specific frequencies. By snapping its resonances to musical pitches, it can create a harmony-like effect comprising up to eight voices. Selecting Scale mode, which includes the key and scale/mode type, allows for the creation of a surprisingly wide range of effects that go from subtle harmonic backdrops to choppy rhythms that stay in key. Of course, it can also do freely sweeping, more conventional flanging effects should you wish. On the left of the GUI is a modulation section, with LFO shapes ranging from smooth sine via sawtooth to square wave, and a Snap button allows the Shape control to jump from one shape to another, or morph through them. The expected tempo sync options included dotted notes. In addition to rate and depth controls, there’s a Randomize knob for the wave shape, and an Offset control adjusts the relative phase of the left and right channels’ modulation waveforms. A Stereo button linked to the Randomize knob allows separate randomisation to be applied to the LFO for each stereo channel, for added complexity. In the centre, a Pitch/Tune control can be used to offset (in semitone steps or freely) the pitched effects relative to the selected scale. Span spreads the voices across musical intervals, such that when set at zero all the voices follow the same pitch. Set it higher and chord notes appear and start to spread out at higher settings. Stereo spreads the voices left and right while Feedback and Damping adjust the degree and timbre of the resonances. Above this section, a virtual keyboard displays the flanger pitches or sweeps dynamically. To the right of the display, the Style box offers a choice of three flanger modes: Classic, Hollow (which inverts the delayed signal) or Vapor (which has a more diffuse character). Below, the Scale section presents extensive options for extended chord voicing and chord structure, and sets the rate at which the notes change pitch in scale mode relative to the project tempo. At the bottom, input and output controls are joined by a switchable output limiter offering soft or harder modes. There’s also a Wet/Dry balance fader, which I’d leave centred for most flanger-style effects, unless the effect’s intensity needs dialing down.
12
April 2026 / www.soundonsound.com
Minimal Audio Modulation Poly Flanger Plug-in Who’d have thought the humble flanger effect could be made to sound so musical? When a sweep effect has been set up and a scale type selected, the flanger sweep shows up as a pale blue band moving across the keyboard display, while the resonant notes are shown as more intense vertical lines above the keyboard notes being picked out. Scale mode suppresses the conventional flanger sweep, and instead, as the flanger sweeps, you hear harmonically related sets of resonances pulsing in and out. There’s no tracking of the incoming audio involved by the way — everything follows the rules you set in the Scale section. Turn off the Scale section and that familiar flanging sweep returns.
music, rather than adding fixed tones, and at faster rates the effects are almost arpeggio-like, while low sweeps deliver an evolving sonic character, and the square LFO makes possible various rhythmic effects, from tremolo to chordal stabs. In fact, it’s not overstating things to say that Poly Flanger has redefined the range of possible flanging effects, in much the same way as granular delays extended what could you could expect of echoes and delays. Categorised factory presets show off the full scope of this plug-in, and experimental musicians will love it. But Poly Flanger offers treatments that would fit easily into various genres from EDM to pop, and the simple user interface makes dialling in your own treatments easy. Highly recommended.
Pretty Poly?
A fresh, inspiring and genuinely useful take on the classic flanging effect, Poly Flanger is also really easy to configure.
There’ve been resonant chord effects before but, again, Poly Flanger is different. It allows the effect to reinforce the key and rhythm of the
summary
$ $49 (discounted to $29 when going to press).
W www.minimal.audio
The CB10 is the ultimate compact loudspeaker system, offering unrivaled audio performance, unmatched versatility and battery-powered portability. • 127 dB peak SPL • 10-inch high-output woofer • 1-inch compression driver • Bluetooth® audio and control (w/Loudspeaker Control app) • User-swappable battery with up to 12 hours of runtime • 200 ms room delay • 6-Year Warranty* (1 year on battery)
*With product registration within 30 days of purchase. ©2026 QSC, LLC. All Rights Reserved. QSC, LLC’s trademarks include but are not limited to QSC and all trademarks are listed at qsc.com/trademarks, some of which are registered in the U.S. and/or other countries. Patents may apply or be pending.
COMPACT BATTERY-POWERED LOUDSPEAKER
ON TE ST
Soyuz get ready to hit the road with their first dynamic microphone. SAM INGLIS
S
oyuz Microphones were founded in 2013 as a Russian-American joint project, with manufacturing taking place in Tula, near Moscow. The invasion of Ukraine in 2022 made this arrangement difficult to sustain, although unlike the older Russian mic company Oktava, Soyuz have no connection to the country’s military-industrial complex, and have issued statements in opposition to the war. Their eventual solution was to open a plant in the Czech Republic, where all new Soyuz mics available in the West are now manufactured. This unwanted disruption hasn’t stopped Soyuz building up a broad range of studio products. Their line-up now includes large- and small-diaphragm capacitor mics in both solid-state and valve flavours, plus mic preamps, inline boosters and even an Ambisonic microphone. All of them embody a distinctive design ethos, which takes inspiration from vintage studio tools without slavishly copying them, and a refreshingly different visual aesthetic. And with the new V1 microphone, Soyuz are extending this approach to the live-sound market.
Flying V The V1 is Soyuz’s first ever dynamic mic. Available in silver and black finishes, it’s a conventional passive moving-coil model designed primarily for vocals, although of course there’s nothing to stop you using it on other sources. Like all Soyuz products, the V1 makes a striking visual statement, with its truncated cone-shaped body recalling that of the Earthworks SR314. This is solidly made from a substantial piece of metal, with no switches to spoil its clean lines. The V1 comes with a clip and an attractive canvas case. The V1 has a cardioid polar pattern, and its sensitivity of 1.5mV/Pa is fairly typical of moving-coil mics. Soyuz claim that it combines “condenser-like clarity and natural top-end air with the punch, clarity and forgiveness that make dynamic mics essential”, and the published frequency response chart displays several notable features. It’s obvious that this is a mic intended for close-up use: the low end begins to roll off at 200Hz and is 10dB down at 80Hz. It’s also obvious that the V1
14
April 2026 / www.soundonsound.com
Soyuz V1 Dynamic Microphone
is meant to cut through on a busy stage, with a broad peak extending from 2kHz to 6kHz. This is followed by a sharp dip around 7kHz, before the usual high-end roll-off begins at around 10kHz.
Magic & Sparkle In use, this rather sculpted frequency response is readily apparent. Subjectively, in fact, this is one of the brightest dynamic mics I’ve ever tested. From the Sennheiser MD441 to the beyerdynamic M69, all of the established classics I put it up against sounded positively dull in comparison. Out of the mics in my collection, the closest by far in terms of on-axis response was the Shure Nexadyne 8/S, another model with a very forward upper midrange. (Not sharing the Nexadyne’s unique Revonic dual-capsule element, the V1 behaves significantly differently off-axis.) The low-end roll-off is also obvious in real-world use; on the plus side, you can work it close up without boominess or popping becoming a problem, and there’s minimal handling noise, but on the down side, you wouldn’t want to use this mic on a bass amp. The V1 certainly delivers when it comes to cutting through, offering a tonality that should require minimal desk EQ in a live context. That tonality can also work well on many singers in a studio environment, although I can’t say I agree with Soyuz that the top end seems entirely natural. Perhaps because of the 7kHz dip, sibilance is fairly
well controlled despite the overall brightness, but along with articulation and detail, the mic’s presence lift also seems to deliver a slightly ‘wispy’ quality, and I wouldn’t say the top end on this mic struck me as being noticeably “condenser-like”, whatever that means. Ultimately, like any mic that has a deliberately tailored frequency response, the V1 will be a better match for some voices than others, but if yours is among them, its cocktail of attractive styling, bulletproof construction and clear, present sound will make it a winner.
summary The V1 is a confident entry into the market for live-oriented dynamic mics from Soyuz, with bold styling and an up-front sound.
$ $279 W www.soyuzmicrophones.com
So advanced, test equipment can't measure it. Someday, all audio gear will be designed like this.
D-1 28-bit DAC It’s a new listening standard which has reset all my expectations. The D-1 somehow captures the dynamics, ambience, impact, transients and three-dimensionality of real life.
Depth and separation is breathtakingly 3D. Once you experience the D-1 DAC, going back to whatever you are currently using, no matter how much you paid for it, is going to be difficult.
Bob Katz, countless hit records, Digital Domain
John Cuniberti, Recording Engineer / Producer, countless gold + platinum records
What you have done is incredible. Simply stunning. Depth and detail that pulls me into the music.
In a word, outstanding — truly in a league of its own. Space, depth, and width are all immediately stunning. Clarity is terrific, very natural. It has rightfully earned its place in my arsenal.
Michael Romanowski, 5-time Grammy winning Immersive Mastering Engineer
Emily Lazar, Grammy winner, 10x nominated Mastering Engineer
The [D-1] sound is elegant and beautiful. The ambient information is clearer. I love what you’ve done here. You can’t have it back!
This DAC is astonishing. The difference is truly amazing. Your DAC is like switching from 35mm to IMAX. The color, depth, and low-level detail is breathtaking.
John Greenham, 4-time Grammy winning Mastering Engineer (Billie Eilish, Lady Gaga)
Paul Blakemore, 5x Grammy nominated, Chief Mastering Engineer, Concord Music
imersiv.com by Millennia
In-depth pro comments
ON TE ST
If you plan on splashing the cash on a DI box of the highest quality, this versatile red box should definitely be on your audition list! BOB THOMAS
F
ounded in Vancouver, Canada, in 2009, Sonic Farm design and manufacture an impressive range of original, high-quality audio hardware. Uniquely, as far as I can tell, all of their valve-based products are hybrid designs, featuring EF86 pentode-based input gain stages and solid-state outputs. The original version of the company’s 2DI4 Pentode Direct Box was released way back in 2014, and it was already lovely, but now, over a decade on, they’ve decided to expand its feature set. The result is the new 2DI4 MkII reviewed here.
Controls & Features As with every Sonic Farm product I’ve encountered to date, the workmanship, component quality and construction of the MkII are of the highest quality. The chunky, blood-red, all-metal enclosure is similar in outline to that of the original version, but the latter’s solid metal handle has now been replaced by a rubberised strap — a simple but thoughtful change that means it’s now possible to stack multiple units. The inside is different though, with new features and a redesigned circuit board. And it’s not often that I single out a power supply for special praise, but the 2DI4 MkII’s chunky internal toroidal mains transformer and associated filter board were a welcome sight. The fact that this power supply shares an enclosure with unscreened audio circuits, without any detectable impact on its sonic performance, is a testament to Sonic Farm’s engineering skills. In terms of facilities, the 2DI4 MkII offers the I/O that you’d expect of any DI box, but also a lot more besides. On the left of the front panel is a quarter-inch jack for the unbalanced 2.2MΩ input, but you’ll also find both an auxiliary input and a headphone output. The aux input can accept the output of a computer, mobile device, media player or Bluetooth receiver, the idea being that it makes it possible to use the device for practice; the aux signal is routed directly to the headphone output, where it can be mixed with the DI signal to taste using the large chicken-head output
16
April 2026 / www.soundonsound.com
Sonic Farm 2DI4 MkII Valve DI Box
level knob (of which more later). The rear panel carries XLR connectors for both that main transformer-balanced microphone-level output, as well as an electronically balanced line-level output. Underneath sit two quarter-inch jack sockets to carry the buffered instrument-level thru signal and an unbalanced line-level output. Note that the aux signal isn’t present on any of these outputs — it’s only auditioned on the dedicated headphone out. Finally, there are a ground-lift switch, a mains voltage selector and a fused IEC mains connector. Returning to the front, a blue LED lights to confirm the presence of the EF86’s heater voltage, thus serving as a power-present indicator, and a Triode/Pentode mode switch (with dual-colour LED: green for signal-present, red for overload) selects the valve operating mode, of which more in the separate ‘Pentode & Triode Modes’ box.
You’ll also find four three-position switches. The leftmost applies a M, L or H (mid, low or high-gain) boost. Measuring a 400Hz sine wave on my DAW’s VU meters showed that the M (mid) boost added +7dB in pentode mode and +3dB in triode, while H (high) added +16.5 and 6 dB for the pentode and triode modes, respectively. (The boosts were the same for 1 and 10 kHz sine waves). The next two switches activate low- and high-frequency shelf boosts, and select their corner frequencies. There are twin recessed trim pots to set the level of these 6dB/octave shelving boosts (up to +9dB in pentode mode and +4.5dB in triode mode), which can be set to 300 or 500 Hz for the low shelf, and 2 or 4 kHz for the high one. (When no filters are engaged, the 2DI4 MkII’s frequency response is quoted as ±3dB from 10Hz to 50kHz.) A final switch can engage a -12dB pad or mute the output. As in a guitar or bass amplifier, the instrument input is connected directly to the control grid of the EF86 pentode, which operates in Class A at a plate voltage of 285V. This valve is the MkII’s only gain stage, in fact, and the high voltage (in the normal range for preamp stages of valve guitar amps) gives the MkII a significantly higher headroom than the many valve preamps that operate on starved plate voltages. The EF86’s output signal is routed to the Cinemag transformer that provides the usual balanced DI output and, in parallel, both the balanced and unbalanced line-level outputs. Above, I mentioned in passing the large output level knob found on the front panel. This has no effect on the valve stage at all, but as well as allowing you to set
the balance of the aux and DI signals in the headphones output, this sets the overall level for the various other outputs. Since it affects the level before the signal hits the DI output’s balancing transformer, it also serves (in conjunction with the level of the incoming instrument signal and your chosen settings for the pentode/triode mode, boost, and low and high shelf) to determine the amount of transformer-related harmonic distortion at this output.
In Use Just as I’d hoped, the 2DI4 proved to be extremely flexible and a great-sounding DI: in both the pentode and triode modes, there’s something extremely attractive about the way that it adds warmth while still bringing out the details in a sound. The performance with electric guitars was an instant delight, and the characteristics of instruments fitted with single-coil and humbucking pickups were conveyed with impressive detail. It’s well worth exploring and exploiting the pentode/triode switching and various gain and EQ boost permutations to sculpt a great guitar sound, and I’d say that’s particularly the case if you’re into re-amping or seeking a source to drive the pedal, amp, cab and effects models within your DAW. In general, my personal preference overall has been for triode mode, but there were times when only the pentode profile would do it for me. Do note that switching between the triode and pentode modes involves switching off the EF86’s screen
Pentode & Triode Modes The 2DI4 MkII’s EF86 valve can be switched between triode and pentode modes, and due to the differences in gain, harmonic distortion and bias configuration, each has its own sonic signature. A pentode offers higher gain (about 7dB more in this case) than a triode, and there’s ample evidence that an EF86 pentode is well suited to guitar amplification — it features in the normal channels of Vox’s 1960s AC10, 15 and 30 amps. The pentode mode’s greater gain comes at the cost of headroom, meaning that harmonic distortion begins at lower levels than in triode mode, but that’s not necessarily a bad thing from a guitarist’s point of view. Triode mode might offer less gain, and be less ‘effective’ at higher frequencies, but it delivers the warmer-sounding, more linear performance that’s characteristic of the 12AX7 triodes found in the preamp stages of so many guitar amps.
and bias configurations — this creates loud transients, so you should take care to mute the MkII before doing this. The distortions are relatively subtle until the levels are pushed fairly assertively. With my early Heritage H-150’s humbuckers on 11, pentode mode engaged, gain boost set to high and output control fully open, I heard a pleasant crunch coming from the DI output. Backing the output control off until that crunch vanished left me with a big, warm, clean sound full of harmonic colour. Switching to triode mode revealed a clean sound that gave those humbuckers a more defined, articulate character that I really liked. Repeating the experiment with my Strat and its custom‑shop single-coil pickups yielded similar results, with its performance in triode mode being my absolute favourite overall. The results I obtained when pairing the MkII with acoustic guitars fitted with magnetic or piezo pickup systems were also impressive. Personally, I think that valve-based preamps tend
to produce more natural and musical results with pickup-equipped acoustics than with their solid-state equivalents, and the MkII did nothing to prove me wrong. With basses (both electric and acoustic), it delivered further outstanding performances. For a bass that delivers articulation, tonal balance and detail across its register, the MkII will showcase its abilities, and allow you to explore further possibilities within them. Keyboardists, especially those who record or gig with vintage Fender Rhodes and Wurlitzer electric pianos, should also consider auditioning this red box. I could also see the 2DI4 MkII doing nice things to the outputs of analogue and digital synths.
Final Thoughts High-quality valve DI boxes naturally tend to be relatively high-ticket items but, to my mind, the performance of Sonic Farm’s 2DI4 MkII more than justifies the asking price. Of particular note is the EF86 pentode/ triode switching — it’s something I’ve not encountered in any DI box before now, and it expands the 2DI4 MkII’s versatility and appeal significantly. For over a decade, my go-to DI for acoustic and electric guitar and bass has been a now-discontinued valve-based device whose performance has seen off several challengers in that time. But the Sonic Farm 2DI4 MkII has qualities that complement and sometimes exceed my ageing favourite’s capabilities, particularly when I’m re‑amping. It is that special. The thought of having both available to me is extremely tempting...
summary A flexible, valve-based DI box with a versatility and a performance level that more than justifies its price.
In addition to the transformer-balanced mic-level output, there are both balanced and unbalanced line-level outs on the rear and, round the front, an aux input and stereo headphone output.
$ $684.72. T Sonic Farm +1 778 863 1613 E proaudio@sonicfarm.com W https://sonicfarm.com www.soundonsound.com / April 2026
17
ON TE ST
RT60 SONGZAP 3
loop you want to use; Songzap doesn’t yet perform any tempo-matching), this works very smoothly. In the Groove page, as with any audio loops you record yourself, you can easily adjust the start/end points of an imported loop. That’s great if, for example, you only want to use a selected set of bars from within the whole loop. This might strike you as a simple feature addition, but it’s one that makes a big difference in practice. Indeed, it could even prompt you to drop a collection of audio loop content onto your iPhone, for inspiration ammunition when you’re out and about with time to kill. I think it’s also a pretty shrewd addition on RT60’s part, since the ability to work with pre-recorded audio loops could well expand Songzap’s appeal to a wider audience. The second headline, and the one RT60 are rightly making the most noise about, is what I mentioned at the outset: Songzap 3 promises “headphone-free” recording and playback. The idea is to make it possible to record new audio material into a project on your iPhone or iPad, while monitoring the backing track straight over its speaker — no need for headphones to prevent bleed from your cue mix being captured by the mic. So... why not just use headphones to avoid the spill in the first place? Well, you can still do that should you wish, of course, but the whole point of the app is to enable you to capture your initial ideas as soon as inspiration strikes, no matter where you are, no matter whether you happen to have headphones with you or not. What’s more, it also makes it super-simple to work with collaborators — it’s easy for two (or more) folks to gather around the iPhone mic and jam vocal harmony parts, for example, and check the musical result on the iOS device’s speakers. So, in the context of Songzap’s design intention, this new feature actually makes a lot of sense! There are a few clever aspects to this facility. First, the AI-based clean-up process takes place while you’re recording, so the results are ready as soon as you’ve finished recording — you can play back your headphone-free recording in the Groove (loop) or Track (linear timeline) modes right away. Second, it’s non-destructive, and you have access to a slider that lets you adjust the amount of ‘bleed’ reduction, with a two-colour visual representation of the waveform making it easy to see what’s going on. Finally, this isn’t limited to use on voice — you can take advantage of this while capturing any sound.
20
April 2026 / www.soundonsound.com
There are also dedicated pages where song structures can be created and edited, basic mix moves can be performed, and of course, new tracks can be recorded — the last of those is where you’ll find control over the new headphone-free recording feature.
Technically, it works very well indeed. As a user experience it’s also refreshingly immediate. No need to think about bringing headphones with you wherever you go. It can also be really liberating not to have to wear headphones or deal with additional gadgets while trying to play an instrument, and to hear the natural sound of the room you’re in as you perform. The only issue you might encounter is that if the sound source you’re recording happens to be quite a loud one, you may struggle to get enough level from your iPhone/iPad speakers for monitoring. But for quickly sketching out an idea with most vocals and instruments, it’s quick, intuitive and convenient.
Zaptastic? As a compact, portable tool for capturing your song ideas and developing them into fully-fledged demo arrangements, then, Songzap 3 works very well indeed. Like the earlier versions, it definitely fulfils its design brief. The combination of loop-based recording in the different song sections, the compact trio of virtual instruments with auto-accompaniment capability, and further four‑track linear/timeline audio recording means you have plenty of scope for shaping your ideas and exploring their form. And the headphone-free recording — which really does work very well — is icing on that cake. Songzap 3 offers songwriters so much more than a simple memo-style audio recording app can hope to offer. Yes, there are some impressive DAW apps available under iOS too, with Cubasis and Logic Pro both getting you very close to
a desktop-style recording, editing, arranging and mixing experience. But most such apps tend to come into their own only when used on a tablet-sized screen. In contrast, Songzap 3 offers a nicely focused feature set, and arguably a more efficient workflow for capturing inspiration as it strikes. And, unlike those DAWs, although it can be used with an iPad if you wish, it’s been designed very much with iPhone users in mind. Much more than an audio recorder, then, yet without the complexity of a full-on DAW, Songzap 3 makes for a very capable ‘songwriting studio’. Sat with just your acoustic guitar or piano, or maybe even just your voice and some beatboxing, its features make it about as easy as possible to capture and develop a song idea. It’s well worth exploring. There’s a free version with some feature limitations, but a month’s subscription to the premium version doesn’t cost much. You’ll probably want to factor in a familiarisation period if you’re to fully appreciate how to best use what the app has to offer, but to support you in that, RT60 have plenty of good tutorials on their website.
summary With an impressive new option for headphone-free recording, as well as better support for working with imported loops, Songzap 3 is a quick and capable means for iPhone and iPad users to catch and develop their song ideas.
$ Basic version is free. Premium subscription ($19.99 per year) unlocks all features.
W https://songzap.app
Introducing Our Latest
8380A
Transparency Created by Power, Performance and Precision With its pinpoint-precise coaxial driver, powerful 15-inch woofer and high SPL capability, the 8380A delivers exceptionally accurate imaging and neutral sound reproduction for professional studios and demanding high-fidelity listening environments. genelec.com/8380a
DISCOVER
ON TE ST
Vovious
JOHN WALDEN
A
longside well-established market leaders like Auto-Tune and Melodyne, there are now various creditable vocal-tuning software alternatives, including some excellent tools built into different DAWs. On the face of it, that makes launching Vovious — which its developers describe as a “natural” vocal‑tuning plug-in — a pretty courageous move. But they clearly believe Vovious offers something different from the crowd, so let’s see if it might tempt you away from your current tool of choice...
Graphs & Models Perhaps the first thing to note is that Vovious doesn’t offer real-time automatic pitch correction. Rather, it’s based around an offline graphical pitch-editing environment that’s similar in principle to Auto‑Tune Pro’s graphical mode, and offers both simple tools for nudging notes towards a target and much more detailed control in a sophisticated graphical editing environment. Vovious can run as a standalone app, as a conventional VST3/ AU/AAX insert plug-in or, if your DAW supports it, as an ARA2 plug-in. For the bulk of my review tests, I ran Vovious as an ARA plug-in in Cubase Pro 15, but I tried the other options too, and they also provided a very smooth experience. Vovious have created an ‘explainer’ video that hints at their software doing something a little different under the hood in terms of how the pitch-shifting is
22
April 2026 / www.soundonsound.com
Vovious claims to do things differently
Vocal Tuning from the vocal-tuning establishment. Plug-in Can it go toe-to-toe with the best?
achieved — it’s on their website and well worth watching if this review piques your interest. It implies some fairly sophisticated analysis of the audio material that dictates how both the harmonics and formants are processed. Understandably they don’t give the whole game away, but essentially it seems that, in order to achieve a more transparent result, the software uses a mathematical model of the human vocal tract. The sophistication is all behind the scenes, though, and the user experience should feel very familiar to anyone who’s used other graphical tuning tools.
Smooth Operator The first screenshot shows the key elements of the GUI. On the main editing panel, you can see your audio waveform underneath the note segments and pitch curve that are derived from Vovious’ analysis. The toolbar at the top provides access to Vovious’ various editing modes, plus a Settings panel that can be popped open, and a well-designed edit history system. Optional panels at the bottom and right can also be opened, to give you an additional overview display that can be used for navigation and zooming, and further detailed control and settings options, as shown in the second screenshot. If you have MIDI for your melody line, you can also import that, and see it within the note display as a reference while you’re editing. The five modes are Pitch/Amplitude, Timing, Pitch Drawing, Temporary Note and Harmony Voices. Pitch/Amplitude mode is perhaps the most heavily used
for routine tuning duties. Vovious includes scale detection from your audio and lets you explore which key provides the best fit. Once you select a specific key, both the note blocks themselves, and the grey background note lanes, are colour-coded to identify those notes within the key. When using the automatic tuning options, you can choose between nudging towards the nearest note, or to the nearest ‘in key’ note. I quite like Cubase’s VariAudio because of its Smart Controls, so I was pleased to see that in Vovious’ Pitch/Amplitude mode you get something similar: multiple editing controls appear around a note (or notes) as you hover over or select it. These give instant access to adjustment of the central pitch, pitch fine-tuning, and the pitch curve slope into and out of the note, as well as the ability to scale the note’s pitch variation (vibrato), change the note amplitude, or change the amplitude of any sibilant (shown as dark areas within the background waveform). You can do an amazing amount of detailed work very quickly with this toolset, but there’s still more to it. A clever Temporary Note mode lets you use the cursor to select a temporary time range — for example, just the beginning portion of a note. You can then use the same control set on just that portion of the note! And if you do want to split a note block, or join two note blocks together, the Note Assignment mode gives you full control and a neat visual preview before you make the change. Pitch Drawing mode lets you focus in on the pitch curve itself, and you can add (and
ON TE ST VOVIOUS
then edit) anchor points to fully customise the curve. This makes it easy to create vibrato on sustained notes or customise the pitch transition between legato notes. You can preview playback as you edit and, once you have a result you like, a small ‘tick’ icon at the top of the display lets you apply the edits before you change modes or move on to the next editing task. And if you want to put lots of straight lines into your pitch curve for a specific vocal pitching cliché, you can do that too. Harmony mode lets you create multiple harmonies from a single vocal part. The volume, pan, formants and phase for each harmony can be adjusted. Cleverly, you can define ‘harmony segments’ along the timeline, so that the generated harmonies need only be present for certain words or phrases. In this first iteration, perhaps the only catch is that each harmony is set at a fixed pitch (in semitones or parts of semitones) above or below the original, rather than using a scale-based shift. The addition of scale-based harmonies in a future version would be brilliant to see. Still, you can always duplicate your main vocal track and use Vovious to tune whatever harmony you like. Finally, at the top right of the note display you’ll find the Auto Pitch Correction button. This pops open a panel for some speedy correction options that can be applied either to a selection of notes or, if none are selected, to all notes within the clip. Key-based correction is an option here, and the whole process is super simple for the user. It’s not just about pitch tuning, though. Timing mode provides two different approaches to adjusting the note timing, and for modest timing adjustments, lets you stretch or contract note lengths with ease. Vertical bars appear at each note block transition with a short white line dividing them vertically. Dragging right/left above the white line shifts all notes positioned to the right as you resize the selected note. Perhaps more usefully, dragging below the white line simply time-stretches the area between the adjacent vertical dividing lines. It’s very effective for adjusting the timing of words within a performance if you want the vocal tight to the musical grid.
Perfect Pitch? The slick toolset makes for a great editing experience, but this plug-in isn’t just about excellent workflow — it is matched by the quality of the results you can achieve with it. With any well‑sung source, your ability
24
April 2026 / www.soundonsound.com
to nudge a few notes, or even sections of individual notes, that little bit tighter to the pitch grid in a natural, transparent fashion is a given. But when you want to explore somewhat larger pitch‑shifts, perhaps to experiment with rewriting a melodic line or creating a harmony, Vovious’ algorithms seem able to handle that without breaking a sweat. And, if you manage to generate an unwanted artefact or two when moving a note block, a little bit of surgical editing work, either to adjust how your note blocks are divided, or at the pitch-curve level, it’s remarkable just how often you can massage those artefacts away. All of which means that, finally, with some time and patience, if you’re trying to tune a part sung by someone who really cannot hold a pitch to save their life, you actually stand a chance of massaging it into a respectable performance! No, I’m not saying that’s necessarily a good thing from a musical perspective, but from a technical standpoint it’s genuinely impressive. Having processed a number of short vocal examples side-by-side through Vovious, Melodyne, Auto‑Tune Pro and, for good measure, Cubase’s VariAudio, the results I got with Vovious are right up there, and even as a new user I found the editing experience smooth and very accessible.
In With The New? Vovious is a mightily impressive new arrival in the vocal tuning space, and even in this first iteration I think it competes strongly with the best of the established options. As with all new software environments, you’ll need a little time to familiarise yourself with its toolset — but not that much time, as Vovious is really easy to use ‘out of the box’. It’s also capable of remarkably transparent tuning/pitch correction/re-melody work, and offers tools both for working rapidly with broad strokes and for digging in and finessing the details The results are great, and the workflow is slick. If you’re willing to stray beyond the established options, then, Vovious is well worth exploring — there’s a free 30-day trial version if you want to do that. Highly recommended. The right side panel provides options for scale selection and the display of a MIDI reference track.
$ £209 (about $288). W www.vovious.com
summary Vovious makes a hugely impressive debut with a toolset and performance that’s competitive with the best of the established vocal tuning competition.
Vovious can be used for pitch adjustments and, as shown here, for time-stretching — and either way, it can produce very natural-sounding results.
EVOLVE PORTABLE COLUMN SYSTEMS
DJ SHEA K
EVOLVE 90 USER
PUSH THE BOUNDARIES OF PORTABLE SOUND Each model in the EVOLVE lineup combines state-of-the-art industrial design, superior Electro-Voice-engineered components and premium materials to deliver best-in-class sound quality, power and reliability. True professional performance in a super-compact package. Sound for every stage.
EVOLVE
EVOLVE
EVOLVE
EVOLVE
EVOLVE
Learn more at electrovoice.com ©2026 Electro-Voice Dynacord LLC
ON TE ST
These new plug‑ins combine classic SSL sound with Sonible’s AI assistance. JOHN WALDEN
S
SL’s 4000- and 9000-series analogue mixing consoles have a special place in recording history. Amongst the reasons for that are the channel EQ and dynamics processing, as well as that famous ‘glue’ bus compressor. Inevitably they’ve been popular targets for software emulations — not least by SSL themselves, who now offer a range of plug-ins, including various software takes on those famous circuits. The latest version of their console-inspired plug-ins, though, comes with a twist: SSL have partnered with audio machine-learning pioneers Sonible, to create the autoSeries plug-ins. Sonible were among the earliest developers to exploit machine-learning in audio plug-ins, and it’s now a decade since they released smart:EQ+, proximity:EQ+ and entropy:EQ+. Over the years, their tech has matured, and they’ve assembled an impressive range of EQ and dynamics options, as well as various ambience effects. What they all have in common is that they use ‘AI’ to audition your audio signal and then set an initial configuration for the plug-in controls. But since the plug-ins themselves are algorithmic (in other words, they work much like conventional plug-ins), the user has full control over the results. For the less experienced engineer, or anyone simply needing to work quickly, and wanting a sensible EQ or compression starting point that’s better tailored to the source than a conventional preset, these ‘smart’ tools can make life considerably easier.
26
autoEQ — a marriage of SSL’s excellent modelling EQ and Sonible’s smart assistance technology.
Solid State Logic autoSeries DAW Plug-ins
Now, SSL have embedded Sonible’s ‘smart assistant’ approach in three new plug-ins inspired, like various others in their range, by their analogue consoles. Called autoEQ, autoDYN and autoBUS, they’re available individually or as a bundle, and they support all the major plug-in types for Windows and macOS hosts.
Console-ation Three specific components of the console feature sets are covered, each represented by a familiar, graphically faithful representation: one is for the stereo bus compressor, of course, and we also get individual plug-ins for the channel EQ and dynamics. This makes sense, since these processors are the natural targets for Sonible’s smart assistance, though some aspects of the channel strip aren’t covered — there’s no mic preamp emulation, for instance. Sound-wise, we’re in familiar (which is to say good) territory, but since we’ve covered SSL’s plug-ins in these pages before, I won’t dwell long on that side of things here. Suffice it to say that when I tested these side-by-side against SSL’s full channel strip and Bus Compressor 2 plug-ins, manually configuring identical settings, I couldn’t detect any obvious sonic differences. Each plug-in features all the key controls of its original hardware counterpoint and, for that matter, SSL’s channel-strip plug-in. So if you ever prefer to set things up manually rather than use the assistant, you can and, likewise, you can tweak the results offered up by the assistant. Compared with SSL’s full channel-strip plug-in, there are a few differences in the finer details.
April 2026 / www.soundonsound.com
For instance, while autoDYN does replicate the automatic make‑up gain of the channel-strip plug-in (as you lower the threshold, more make‑up gain is applied), there’s no option on autoDYN to disable that feature. Obviously, with the sections being in different plug-ins you can’t switch the order of the channel EQ and compression either, but that’s easy enough to do using your DAW. A nice bonus is that for autoEQ, you get a BLK (Black) button, which toggles between the two main design iterations of the original SSL EQ filters. And, naturally, you get a decent collection of presets, along with facilities like A/B switching for easy auditioning of two different settings.
Listen & Learn The controls in the upper half of each plug-in’s display let you configure the smart ‘listen and learn’ process. You simply pick a playback spot for your track or mix (for the dynamics plug-ins, it makes sense to pick the loudest section), initiate playback, and then press the large green Learn button, found on the right of the GUI. After a 10-second audition, the plug-in performs its analysis, and then configures the plug-in with a suggested combination of settings. You can influence its decision
can adjust any of the controls manually, and I loved that when you do so, you get graphical feedback around that control to indicate how far you’ve moved it from the suggested starting point.
Get Smart?
autoDYN — the dynamics section also gets the ‘smart’ treatment.
by selecting a specific profile (based on typical instrument or bus targets), and you can also pick between three different styles of processing. For the two dynamics plug-ins, the options are Soft, Medium and Strong, while for autoEQ, they’re Warm, Neutral and Bright. Rather like with Sonible’s Pure plug-in range, the analysis is based on the specific track or bus on which the plug-in is inserted — it’s not influenced by what’s happening with other tracks in the same project. The intention, then, is clearly to suggest settings that can form a sensible starting point for processing that source. Perhaps a good way to think of the Learn process, in terms of your workflow, is as an initial step once you are ready to start the mixing process. But you can repeat the Learn process as many times as you wish, and you might well wish to do that from time to time for autoBUS in particular, since both the nature and level of the signal at the mix bus can naturally evolve over the course of a project. But, of course, you’re also free to intervene manually. To my mind, all three plug-ins seem to suggest very sensible, pragmatic EQ or dynamics moves, of the sort that are genuinely helpful when mixing. I never encountered anything that sounded too drastic or ‘weirdly creative’. Again, if you want that, after the initial suggestions, you can twist the controls as much as you like, and note that both autoDYN and autoBUS include Mix controls — if the suggested dynamics control is a bit too much, you can quickly and easily make it more subtle that way. And on autoEQ, the upper panel includes an Intensity control, which defaults to 100 percent. You can change this to exaggerate or subdue the applied EQ
“All three plug-ins seem to suggest very sensible, pragmatic EQ or dynamics moves.” moves (the gain controls for all four main EQ bands adjust accordingly), so it’s super easy to dial in more or less of the suggested EQ changes to taste. A Reset button simply resets each plug-in to its default settings. An Auto button, when engaged, means that the AI-guided settings will be automatically applied after the Learn process is complete. And if you make manual adjustments, you can return to the suggested settings by pressing the SET button, or can toggle between your manual settings and the suggested ones by holding the Audition button (headphone icon), which is very neat. Finally, I’ve mentioned a few times that you
In use, all three plug-ins do exactly what you would expect: you get the essence of the SSL console EQ and dynamics in a plug-in format. Is it quite as cool as sitting in front of a real 4000-series console? I hardly need answer that! But, like the real hardware, the processing does feel very forgiving, and it is way more convenient for most of us, not to mention considerably less expensive! I’ve long enjoyed Sonible’s clever plug-ins, and I like how their assistance has been integrated so seamlessly into this SSL experience. Importantly, the AI side of things is not intrusive, it’s very easy to use, and it can be bypassed completely whenever you wish. So if you want the essence of the SSL experience, and like the idea of Sonible’s smart assistance, the autoSeries is well worth exploring — and SSL’s Download Manager provides a 14-day free trail for these (and other) plug-ins, allowing you to do just that.
summary The autoSeries plug-ins deliver the familiar SSL console EQ and dynamics options but with the added — and optional — benefit of Sonible’s AI assistance. It’s all neatly implemented and really easy to use.
$ autoSeries Bundle $149 (discounted to $99
when going to press).All plug-ins $99 each (discounted to $49 when going to press). W https://solidstatelogic.com
SSL’s popular bus compressor is now easier than ever to configure.
www.soundonsound.com / April 2026
27
ON TE ST
Nextmidi Divisimate Core Arrangement Software
instrument groups. DM Core offers a more manageable workflow, each instance having its own set of performance presets tailor-made for its particular instruments. It’s also easy to make changes to one instance’s parts without affecting those of any other instance, either by editing DM Core’s source MIDI track and re-recording its output, or making changes to any parts that have already been ‘bounced out’ to individual MIDI tracks. All DM Core instances’ current states are saved along with the project, just like any other virtual instrument, guaranteeing they’ll reload just as you last left them.
DM Core Vs DM2
Divisimate Core is a welcome extension of Nextmidi’s orchestration software. NICK MAGNUS
N
extmidi have responded to popular demand with a new incarnation of their groundbreaking Divisimate orchestration software in the form of Divisimate Core. For those unfamiliar with the Divisimate concept, the fully detailed review of Divisimate 2 can be found here: www.soundonsound.com/reviews/ nextmidi-divisimate-2, but briefly, Divisimate splits incoming chord data to different instruments in real time, making arrangements a far less laborious process.
Independence Day DM Core runs as a VST3 plug-in (no standalone version), inserted as an instrument with its associated MIDI track. Whereas Divisimate 2 (DM2) can only run one instance hosting an entire instrumental template in that one instance, DM Core takes a modular approach. An unlimited number of instances can run simultaneously in a project; each instance can be dedicated to a specific category of instruments — eg. one for strings, one for brass, one for woodwinds — separating your template out into smaller manageable groups. Each instance addresses 16 different instruments across 16 MIDI channels, each channel routed to its own virtual port unique to that instance, making it totally independent from other instances. The target instruments ‘listen’ to the MIDI output from their particular instance of DM Core, each on their own channel. This requires that the DAW allows MIDI output from instrument plug-ins, and that the MIDI tracks of target instruments can ‘see’ that output as a MIDI input source. Some DAWs can’t do this, in which case DM Core can only run two instances, using the ‘normal’ 32 Divisimate virtual ports; ports 1 to 16 for the first instance, ports 17 to 32 for the second. This constraint negates the unlimited modular potential of DM Core, so it’s worth checking your DAW’s capabilities before taking the plunge.
Modular Benefits Whilst DM2 excels at controlling a large template from a single MIDI performance, it can sometimes feel unwieldy, if not a tad overwhelming when programming independent parts for different
28
April 2026 / www.soundonsound.com
Anyone familiar with DM2 will feel at home with DM Core, as they share much of the same functionality. There are differences, however. Modifier plug-ins for DM Core are Transposer with optional scale lock; Trigger for sending articulation keyswitches, MIDI CC messages and Program Changes when new performance presets are selected; and Arpeggiator, which although forgoing the advanced mode of DM2’s Arpeggiator, remains a versatile rhythmic pattern and MIDI CC texture generator in its basic mode. DM2’s Transformer plug-in is omitted, as is the Repeater plug-in, the latter made redundant by the more sophisticated Arpeggiator. Gone too are DM2’s Multipads, as well as the Merge, Overlap and Retrigger orchestration transition modes. Wireless remote control (via iPad or mobile phone app) has been replaced by MIDI remote options: CC31 and/or Program Change messages for changing presets, and an eminently useful custom Global keyswitch area (separate from the Global articulation keyswitches) configurable for a variety of per-key functions such as preset selection, Global scale, root note, bypass, divisi mode or quick-loading a whole new performance bank. The best location for these keyswitches is at the opposite end of the keyboard from the Global articulation keyswitches, for obvious reasons! DM Core comes with three dedicated Performance banks for Brass, Strings and Woodwinds giving over 200 presets ranging from numerous ‘traditional’ voicings to fixed chord voicings, and Arpeggiated rhythms.
Conclusion Which version is right for you? If performing live with Divisimate, the standalone DM2 app offers in-depth control of a large orchestral template comprising a theoretical maximum of 512 instruments, making it the obvious choice. It also performs admirably when programming/recording, although working individually on smaller summary groups of instruments can require some reconfiguration. DM Core is a welcome addition If you work exclusively in a DAW to the Divisimate universe. Its open-ended modular approach and need to orchestrate and is ideal for those who prefer arrange instrument groups to orchestrate and program independently, DM Core’s different instrument groups modular plug-in approach independently, offering literally limitless possibilities. is ideal, allowing unlimited instances for custom subgrouping of instruments. Whichever way $ $149. you lean, Divisimate will quickly Upgrade pricing available. become an indispensable tool. W www.divisimate.com
To find a dealer visit www.musicmarketing.ca
ON TE ST
JOHN WALDEN
Cubasis 3.8’s impressive feature list now includes a full virtual guitar rig plug-in in Amp Sim.
T
he possibilities for music production on mobile devices have come a heck of a long way since the first music apps started appearing on Apple’s App Store around 2008. While the app development environment — whether for iOS or Android — has encouraged lots of indie software teams (and generated lots of original software ideas), some established developers from the desktop music software world also saw the potential. Steinberg were (and still are) one such developer and Cubasis — a compact adaptation of the Cubase workflow for mobile music‑making — has built a significant user base since it first launched in 2013 (see the SOS review in the March 2013 issue). And, impressively, they have maintained that development commitment. As a consequence, we have now reached Cubasis 3.8. So, just how capable is Steinberg’s flagship mobile DAW and what’s new in this release?
Real DAW Deal? Before digging into what’s new in 3.8, for those who have never used Cubasis, some context might be useful. At its heart, the Cubasis experience — particularly under iOS — is something that any Cubase user will find familiar. That starts with the visual design but, more importantly, means that you get a slick and well-featured audio+MIDI recording and editing platform, a very solid mixing environment with group channels and automation, an impressive collection of virtual instrument sounds, and a suite of stock corrective and creative effects plug-ins. Both instruments and effects are drawn from familiar desktop versions, while you can also access a number of in-app purchase options that can expand the effects
30
Steinberg Cubasis 3.8 DAW Software For iOS & Android
Steinberg’s mobile DAW gets ever closer to the desktop experience. and virtual instrument capabilities if you wish. Those working under iOS are perhaps better served here compared to Android because of support for third-party virtual instruments and effects via AU and IAA. As a result, don’t be in any doubt; paired with a suitable audio interface and/or MIDI keyboard/ controller, which could be selected for their compact format, Cubasis on your iPad, iPhone or Android device lets you get some seriously good recording, editing, arranging and mixing work done on a highly mobile system.
The Sims Cubasis already included stock Amp Sim and Overdrive effects but an obvious highlight of the v3.8 release — and a welcome sight to the guitar player within me — is the inclusion of the new Amp Rack and Bass Amp plug-ins. As with many of Cubasis’ other stock effects, these draw on the similar plug-ins found in the desktop versions of Cubase and, while the cosmetics have been adjusted somewhat to best accommodate the Cubasis UI, the essential concept — and the core options available — are very much in the same ballpark. In essence, that means you get a full modelled guitar‑rig simulation with options for pre-effects, amp and cabinet options (including mic choice/placement), post-effects, a three-band master EQ for additional tone-shaping, and a built-in tuner. For the Amp Rack, the amp/cab options cover a broad range of styles, from the
April 2026 / www.soundonsound.com
super-cleans of the Fender-esq Blackface model, through more clean-to-crunch options such as the Tweed and Plexi models, and off into hard rock/metal with the Diamond model. The effects span all the typical guitar-friendly stompbox options such as overdrive, fuzz, modulation and tremolo as well as various delays and reverbs. The UI makes editing your signal chain very easy, especially as you have touchscreen access to the full control set. Bass Amp provides a very similar configuration and, indeed, shares some of the stompbox effects options. However, the amp and cab models do, of course, provide a more bass-centric selection. The coverage is also suitably broad, going from pristine cleans through to various stages of overdriven, rock-friendly tones. I particularly liked the GreenT, although I’m not sure your average mobile device’s speakers can do it full justice; best appreciated with studio headphones. While there are high-end guitar‑rig sims on the desktop that perhaps offer a more responsive experience for the player (on the desktop at least), in terms of the actual sound within a mix, both Amp Rack and Bass Amp do a very impressive job. Given
A legacy mic — minus the legacy price. The UT Vintage87 brings the sound and essence of one of the most indemand microphone designs of all time to everyone. Streamlined from our UT Twin87, it features that same must-have vintage sound, fixed to our true cardioid pattern for instant gratification that works every time. The UT Vintage87 features our own large-core, custom-wound, US-made
output transformer (with nearly four times the metal mass found in any “87-style” microphones), our own custom made 24k gold sputtered dual diaphragm/dual backplate K87 style capsule, and a whole assortment of hand-selected, premium components such as polystyrene, tantalum, multilayer ceramic, WIMA film capacitors, metal and carbon film resistors, and hand-selected transistors. It all works
together to deliver a very pure and uncompromising sound quality. The legendary sound of your favorite records and films are now yours — minus the legendary price tag. It’s not just another mic — it’s a United. www.unitedstudiotech.com
Centralize your MIDI studio.
Introducing the MIDI Eight. With the Black Lion Audio MIDI Eight, your entire MIDI rig will be ready to go at a moment’s notice, and you won’t lose time re-connecting all of your MIDI gear if you want to use a different workflow — just choose the desired mode from the front panel and get to making music.
traffic. It’s also got a powered 5-port USB hub built-in for connecting modern USB MIDI devices, mobile devices, or computer peripherals. A Panic button quickly mutes any stuck notes. Visit www.blacklionaudio.com to learn more.
Control your entire collection of synthesizers, controllers, sequencers, and drum machines from a single device: you get eight MIDI input and output ports; three practical standalone routing modes; and bold activity indicators for instant visibility on your MIDI
ON TE ST
STEINBERG CUBASIS 3.8
the additional convenience of having them ‘built in’, they represent a welcome step forward in making Cubasis’ feature set all you might need for a guitar-based project.
Bassists are also catered for with the new Bass Amp plug-in.
Keep Time Steinberg added the Global Track feature in Cubasis 3.7 (see the review in the March 2025 issue) and this provided support for both tempo and time signature lanes within your projects. For a DAW on a mobile platform, this was, in itself, a pretty big deal from a technical perspective. However, amongst some other MIDI refinements in 3.8, support has now been added for both import and export of tempo and time signature data within MIDI files. This will be particularly useful for those that regularly move between mobile and desktop environments and, in exchanging projects between my iPad and macOS desktop system via the DAWProject file format, tempo and time signature data from my Cubasis project was perfectly restored within Cubase.
Ported Pianos The other obvious highlights of this release are Etude and Verve, two new piano instruments that are available either as in-app-purchases or as standalone instruments (a single purchase of either provides both formats). Both of these are ports from their desktop equivalents. Etude provides a grand piano sampled from a Yamaha C3X grand. I’ve not used the desktop version but this mobile version, albeit somewhat more compact in terms of its sample base, is rather impressive. Played via a suitable MIDI keyboard, it responds to performance dynamics smoothly but, equally, it is still a very satisfactory experience played with Cubasis’ internal virtual keyboard or the Chord Pads. The UI includes plenty of options for customising the sound of the piano, with options for controlling the performance dynamics, key release and pedal noise, EQ, compression and reverb. Etude sounds great even when fully exposed within a mix. As on the desktop, Verve blends the sound of a felt piano with a textural sound layer, while also adding some creative reverb and delay options. Verve is a personal favourite in its desktop form, and the mobile version doesn’t disappoint. The collection of supplied textures is pretty extensive, spanning various types of strings, a range of different synth-based sounds, and all sorts of sustain-friendly soundscapes.
32
April 2026 / www.soundonsound.com
With versions of both Verve (shown here) and Etude available as IAPs, Cubasis can now provide some seriously good piano‑based sound options.
These make a great way to add an additional element to your piano parts and work especially well with sustained chords or long melodic notes. You can easily adjust (and automate) the blend between the piano and the selected texture to add a sense of sonic movement. Whether it’s for a pop ballad, an ambient soundscape or a cinematic/scoring application, Verve is a great addition. Both IAPs are also sensibly priced given what they offer.
years and the evolution of Cubasis over that time is a clear example of that. iOS Hats off to Steinberg for Cubasis $59.99 staying the course. The Verve $19.99 results speak for themselves; Etude $19.99 Cubasis 3.8 provides a slick and powerful platform for Android Cubasis $29.99 recording your musical ideas Verve IAP $19.99 and, via a broad selection of instrument and effects Etude IAP $19.99 IAPs that you can add to the impressive core features, it can be a ‘pinch me!’ experience every time you open the app. Cubasis 3.8 is a great solution for anyone wanting Pinch Me a desktop‑style DAW experience but in a mobile format. While the above represent the highlights of the Cubasis 3.8 update, there are summary a number of other improvements including, for example, support for portrait Cubasis 3.8 continues Steinberg’s impressive mode operation. Yes, the new instrument commitment to providing a comprehensive options are paid-for IAPs, but the app DAW experience for a mobile music production environment. update itself is free to all Cubasis 3 owners, so it is a no-brainer download. Music production on a mobile platform $ See ‘Pricing ‘ box. has come a long way over the last 10 W www.steinberg.net
Pricing
You’re only limited by the weakest link in your audio chain. Step up to Mesa, the only desktop interface with legendary Lynx quality.
You work hard to get the perfect sounds and performances on your recordings... carefully selecting the right mics, preamps, instruments, and effects processing. Why throw it all away by using a digital converter/interface that doesn’t meet your own high standards? The Lynx Mesa delivers the identical level of superb audio quality found in the highly-acclaimed Lynx Aurora(n), in a convenient desktop format. “It’s an extremely flexible mixing and routing system, with virtually no limitations as to what can be sent where. Even the outputs have their own dedicated faders.”
- SAM INGLIS, SOUND ON SOUND
“The converters in the Mesa are the same as those found in the Aurora(n) series. This makes them some of the cleanest, most transparent converters on the market.”
- PAUL VNUK, RECORDING
Get complete specs & info at lynxstudio.com Lynx Studio Technology • Costa Mesa, CA • 714-545-4700 • lynxstudio.com
ON TE ST
Meterplugs Dynameter 2 Audio Metering Plug-in
Want your mixes and masters to have power and impact on streaming services? Then you might want to pay more attention to density and dynamics... M AT T H O U G H TO N
W
hile they might not do anything to your audio, metering plug-ins can certainly help you improve it. They may simply give us confidence that what our ears are telling us is correct, but they can also signpost potential problems and prompt us to investigate. Such tools are the stock in trade of Ian Kerr, whose Meterplugs company have forged a productive
partnership with mastering engineer Ian Shepherd, and in recent years the pair have developed a number of interesting, innovative software tools. Meterplugs’ latest release is billed as a major update to Dynameter, the original version of which was reviewed by Hugh Robjohns in SOS August 2017 (https://sosm. ag/meterplugs-dynameter). Dynameter 2 is available for VST2.4, VST3, AU and AAX plug-in hosts on Mac and Windows, and authorisation is by serial number; I tested it predominantly using the VST3 version in Cockos Reaper.
Dynameter Primer
Classic mode: a good, quick guide to the density and dynamics of your track, along with preset guide lanes for popular streaming services.
36
April 2026 / www.soundonsound.com
For many, Ian Shepherd’s name will be inextricably linked with the ‘loudness wars’ debate. As he made clear in our interview a few years ago, though (SOS April 2023: https://sosm.ag/ian-shepherd-loudnessdynamics), his position is not ‘anti-loud’ per se. Rather, he believes that LUFS loudness is for use in playback systems, and that it’s not particularly useful for engineers to adopt LUFS targets, whatever the figure. I agree. For one thing, if it’s going to be turned up or down anyway, what does the LUFS matter? For another, where loudness normalisation isn’t used, people naturally tend to set the playback volume accordingly. Instead, Ian advocates that any engineers wanting to work to reference figures, to ensure their mixes and masters have punch and impact, should focus instead on ‘dynamics’ or ‘density’ (flip sides of the same coin). To that end, the main focus of Dynameter’s display is the PSR, or peak to short-term loudness ratio. A refinement of the ‘crest factor’ (the difference between the peak of a signal and its RMS average), PSR substitutes RMS with the ITU-R BS.1770-3 short-term loudness (LUFS-S) measurement. In both cases, the higher the number the greater the signal dynamics, and the lower it is the denser the material. Other things being equal (ie. any gain doesn’t result in processing changes), the figure should remain consistent no matter
how much gain or attenuation is applied, for example when dialling in headroom when mastering. Ian’s suggestion is that the loudest sections of tracks in any genre, after all mastering processing has been applied, should have a minimum PSR of around 8. You could choose a different number, though, and Dynameter would still help you to mix and master consistently; it has always had presets to assist in that. But certainly ‘potting the 8’ always seems to guide me toward good, impactful results. Before I explore the new features, I should mention that my incessant poking and prodding during testing revealed one means of ‘tricking the algorithm’. I’m told it’s a known consequence of the way the averaging calculations are implemented, and that both Shepherd and Kerr decided it was acceptable because it wouldn’t occur in normal use. That’s a fair judgement, but still, it’s worth describing. I was analysing some very dense material: a looped section of a busy, heavily limited pop track whose PSR hovered around 7. I’d clip gained it down by 15dB during playback, just to test the Peak Aware function, of which more later. It transpired that, after this sudden and significant change in the level going into Dynameter, it took several seconds more than usual for the meter to ‘resettle’ and provide an accurate reading. Importantly, though, try as I did repeatedly, I didn’t manage to provoke such a response with anything close to the sort of real-world decisions I’d make when mixing or mastering music.
Different Views Dynameter 2’s default view has a PSR readout near the top, and adjacent to that is a cumulative PLR figure (peak to long-term loudness ratio). Above those is a new PSR overview histogram: a stacked bar chart, which adheres to the colour scheme for the meters below and updates over time to build a picture of a track’s average dynamics. Beneath the current PSR number is a PSR scale, marked from zero in the centre to 16 either side. Below that, a colourful bar widens from the centre to indicate the current PSR with precision against that scale, while its colours give a broader-brush indication that’s easier to take in at a glance. From this flows a vertical history plot, in
The default layout for Stereo mode — without needing to know the figures, you can clearly see that the red regions indicate high density!
which the colours become more informative, and on which timecode is displayed for the cursor position, to make it easier to explore ‘flagged’ issues. In this default view, called Classic mode, a pair of dotted lines on the history plot indicate the reference PSR. Where the trace is outside the lines, the PSR is greater than that reference, indicating more dynamic material. Where it sits on or inside it, the signal is dense. Different preset guides can be selected in a settings window, including options for broadcast and major streaming services, along with four density sub-options for each. Finally, at the bottom of the main display is a drop-down menu to select different modes: Classic (the default), Stereo, M-S or Multiband. For most people, the Classic view may well still see the most use, but the others can provide different insights. Stereo and M-S have the same layout, with one channel on the left and the other laid out in mirror-image fashion on the right. These work well, though where the channels have very similar dynamics the bright continuous block of colour that results can become a little distracting. I’m told options to improve that are being explored, but arguably if the channels are so similar you might as well use Classic mode! Multiband splits the signal into three bands, but although the layout looks different the same principles apply, with each (summed) band having the same meter types as channels in other modes. All the new modes (not Classic) also have a Peak Aware function that offsets the history display to indicate the peak levels throughout; the numbered scale thus reflects peak not PSR, while the colours and bar-width continue to do their normal job.
In Use You’d usually put Dynameter at the end of a mastering chain or on your stereo mix bus; it doesn’t affect the sound, so there’s no need to create a dedicated track. There’s a good, clear 29-page PDF manual to help you get your bearings, but once you know
what’s being displayed, it’s mostly very intuitive. Users of v1 should find Classic mode pleasingly familiar, and I found I still gravitated to this view — testament to how much was got right the first time around. Here, you soon get a feel for where your track might be suffering from overzealous limiting, or where a track might be a tad too dynamic, indicating, for example, a risk that it won’t translate so well to car stereos or other noisy environments. Encouragingly, all my own tracks that I felt already sounded spot‑on measured well! Even in this view, there are plenty of improvements. The GUI can be rescaled freely, by dragging its corner to make it taller, wider or both. That’s good in any plug-in, but particularly handy for meters, not least if you dedicate a screen to metering. You can also Shift-drag to widen or narrow the scale, and click-drag to zoom the history view in/out, or Control-click to scroll through it. So you can zone in on problem areas, or see an entire track’s overview. A high-speed offline render can populate the history display quickly, and I gather Pro Tools’ AudioSuite approach does too. There’s also the PSR overview. I’ve not used this much, but do see potential in it. For example, it could be useful for comparative analysis of tracks, and it can also tell you instantly just how much of a track or album you might be ‘overcooking’. The new modes are not just for decoration; I found that they helped me to pinpoint or rule Multiband mode might at first look like information overload, but in Peak Aware mode it can be really useful in figuring out why a track might be registering as too dense or too dynamic.
ALTERNATIVES MAAT’s DR Meter, based on the TT Dynamic Range Meter, and Brainworx’s bx_meter offer a simpler overview of dynamics. They’re based on the RMS crest factor, so are oversensitive to bass, and they can’t match Dynameter 2’s more extensive functionality.
out possible problems. For instance, in M-S mode, I could quickly see where a track’s sense of dynamics might be lost on mono playback. It took longer before I could appreciate what the Multiband mode was telling me in real time but, particularly in Peak Aware mode, it soon helped me decipher whether high-density areas might be due to peak limiting or something inherent in the mix (eg. a long, sustained organ note or a pad during a breakdown). Essentially, when you zoom in on a red/brown region with Peak Aware engaged, dense sections with peaks below your limiter threshold are typically not things you’ll need to worry about.
Final Thoughts In conclusion, then, this is a very worthwhile update to Dynameter, and while there remains a tiny bit of room for improvement that’s mostly just wish-list stuff. Top of that list for me would be an option to have all modes calculated in the background, so the history view can be retained when switching between modes; to work that way at present you must use multiple instances. I’d sometimes like to be able to tone down the colours a touch too. I understand such things are under consideration already, though, and as it stands, Dynameter 2 already works very well indeed. So I have zero hesitation in recommending that existing users upgrade or, to mangle Madonna, that Dynameter virgins should touch it for the very first time! $ $99. W www.meterplugs.com www.soundonsound.com / April 2026
37
ON TE ST
SAM INGLIS
T
errifyingly, it’s now 15 years since FabFilter’s Pro-C compressor was released. Back then it was aimed mainly at mastering applications, and had two major selling points. One was its unique graphical interface, which left behind the clichés of skeuomorphic design in favour of actually being pleasant to operate with a mouse. The other was its incredibly smooth sound. With a lot of programme dependence built in under the hood, it was pretty much impossible to make Pro-C distort or even deliver mildly uncomfortable results, no matter how fast you made the attack and release times. In 2015, the version 2 update introduced several new ‘styles’ of compression, plus major graphical improvements, a Range control that allowed the user to specify a maximum amount of gain reduction, greater control over the knee shape, intelligent auto-gain for level-matched A/B’ing with the bypassed signal, powerful side-chain EQ options and more. Now, a decade on, FabFilter have unleashed version 3.
Character Acting The additional styles added in Pro-C 2 included a Pumping algorithm, which did what it said on the tin, but in other respects, it still wasn’t a compressor designed to be noticed. Pro-C 3 changes that, in a couple of different ways. FabFilter have added no fewer than six new compression algorithms, of which at least four definitely fall into the ‘listen to this!’ category. And a discreet pop-up invites you to apply one of three types of saturation. The particular qualities of vintage hardware compressors aren’t only due to saturation from valves or transformers. The major source of character is often the gain-reduction circuit itself, and the distinctive sound of, say, an LA-2A is mostly to do with the extremely complex dynamic behaviour of the opto‑cell used as a detector. So the two new algorithms that are vintage in intent each have quite a strong sonic identity even when used without the saturation. Op-El is intended to mimic the behaviour of a valve-based optical compressor such as the LA-2A, while Vari-Mu brings a bit of Fairchild goodness to the party. (As on an actual Fairchild, varying the side-chain level delivers rather different effects from varying the threshold control.)
38
April 2026 / www.soundonsound.com
FabFilter Pro-C 3 Compressor Plug-in
FabFilter take compression to the max. All of Pro-C 3’s many parameters remain fully accessible in these compression modes, so if you wanted to accurately emulate a particular vintage device, you’d need to research how to set the attack and release times, side-chain EQ and knee settings and so on. Doing so from scratch might require quite a bit of trial and error, but fortunately FabFilter have included a lot of excellent presets using the new modes. None of these is named after a specific hardware unit, and there’s no real visual indication of how the different algorithms affect things like the knee behaviour, but many of the presets target classic applications for LA-2As, Fairchilds and their ilk. Close your eyes and A/B them with plug-ins that have virtual Bakelite knobs and VU meters, and you may be surprised by which you prefer.
The three types of saturation are named Tube, Diode and Bright, and can be applied either pre or post compression. None sounds obviously distorted even at full Drive settings, but they can add a welcome touch of hair to a soft-sounding or tame source. Unless you’re a devotee of the Shure Level-Loc, the saturation combined with the Op-El and Vari-Mu modes will provide as much sonic character as you’re likely to need from a compressor. And if you are a devotee of the Level-Loc...
Going Up Of the other new compression algorithms, Versatile and Smooth are pretty much self-explanatory; Pro-C has always been versatile and smooth, but these still have something extra to offer, especially on the
mix bus where you sometimes can’t have too much smoothness. More unusual are the Upward and TTM algorithms. Upward compression is like expansion in reverse: signals above the threshold are unmolested, but the compressor applies positive rather than negative gain to quieter signals. So, with a 2:1 ratio, a signal 6dB below the threshold would be raised up by another 3dB to push it closer to the threshold. In other words, upward compression reduces the dynamic range of signals from the bottom up rather than from the top down. On its own, upward compression can easily get out of hand, so it’s often best used in parallel, and Pro-C 3’s design makes this easy to implement. Blending some upwardly compressed signal into the dry sound provides a very nice, controlled way to bring out low-level detail in drum tracks for example. Pro-C’s Range control is another useful tool for taming upward compression. Finally, TTM is short for To The Max, and apparently “combines upwards and downwards compression
in multiple bands, making the input signal louder when it’s quiet and quieter when it’s loud”. In the abstract, it’s like a more refined version of Eventide’s Omnipressor, whereby the level of the signal is constantly being pushed towards the threshold level from both sides, At extreme settings it’s possibly to completely eliminate dynamic range, or reverse it so that cymbal hits sound backwards, but you don’t have to use it like that. Again, it is perhaps most useful in a parallel context, where it’s surprisingly versatile. For example, on a drum bus, setting a short attack will bring up cymbals and ambience, but using a longer attack sounds completely different, delivering a super-fat, compressed dry sound. Classical recording specialists and mastering engineers should probably pass on by, though. Pro-C 3 also adds an intriguing ‘auto’ option to the threshold control. This makes the threshold level-independent, which sounds like a contradiction in terms, but the basic idea is that you
FabFilter Pro-C 3 $199 pros • Now offers convincing vintage-style compression thanks to new algorithms and saturation options. • Upward compression and TTM modes open up many creative options. • Superb range of presets that are both usable and helpful for understanding the controls. • Full surround support.
cons • It’s not always easy to relate what you’re hearing to what you’re seeing in TTM mode, or with the new auto threshold setting.
summary Pro-C 3 is an immensely powerful and flexible compressor plug-in that can tackle everything from delicate mastering to destructive mangling.
can achieve consistent compression behaviour throughout a very dynamic recording without resorting to extreme settings. So, for example, on a vocal that goes from whisper to roar, selecting
www.soundonsound.com / April 2026
39
ON TE ST
F A B F I LT E R P R O - C 3
the auto setting will ensure that you get similar amounts of gain reduction in both sections. To put it another way, it allows you to control the micro-dynamics of a source independently of the macro-dynamics.
Sides Splitting Pro-C has always offered plenty of scope for shaping the side-chain signal, but version 3 takes this to a new level with the addition of what is basically a version of FabFilter’s Pro-Q equaliser. Along with other side-chain-related controls, this occupies a fold-down window at the bottom of the main page. You can have up to six bands, with a multitude of shapes available, and it’s even possible to apply individual side-chain filter bands to specific channels within a stereo or surround signal. You won’t need this level of detail often, but it can be valuable for problem-solving, and really comes into its own in TTM mode, where you can radically alter the tonal balance of the signal by equalising the side-chain. Another new feature in this pane is Host Sync. In effect, this disables the conventional side-chain paths and
substitutes an internally generated pulse, set anywhere between whole notes and 16th notes, with dotted and triplet options. There’s user control over both the duration of the pulse and its timing offset from the beat. The aim, obviously, is instant French house, and this it delivers in a neat and controllable fashion. Surround capability is also new in Pro-C 3. It can operate in up to 9.1.6 configurations, host permitting, with customisable channel linking including the ability to link channels in opposing pairs (left surround and right surround, for example). Multi-channel compression in surround is a different kettle of fish from stereo bus compression, and I can’t imagine too many people wanting to apply TTM madness across an entire Atmos bed. But Pro-C’s trademark transparency and smoothness might well be an asset with music that has an innately high dynamic range, such as orchestral or jazz recordings.
C Is For Comprehensive As you might expect given that it’s been 10 years in the making, Pro-C 3 is a huge update that introduces a welter of new
The new Host Sync mode allows the side-chain signal to be replaced by a tempo-sync’ed pulse, with — literally — predictable results.
40
April 2026 / www.soundonsound.com
features. Some, like the saturation and the El-Op and Vari-Mu modes, are broadly familiar from other products. Others, such as TTM mode and auto threshold setting, are much more unusual. As always, FabFilter have implemented everything in supremely elegant fashion, and you never feel overwhelmed by parameters or confused as to why something isn’t doing what you expect. I do think there’s scope for a couple of small ergonomic improvements — it doesn’t seem to be possible to bypass the entire side-chain EQ section, for example, only individual bands, and it would be nice to have more visual information about what the auto threshold and TTM settings are actually doing — but this is only one step above nit-picking. Something that has always been a strength of FabFilter, and of Pro-C in particular, is preset design. Many old-school engineers pour scorn on the idea of compressor presets, saying — correctly enough — that settings need to be tailored to the individual source. But FabFilter’s developers have found a way to generate banks of presets that are genuinely adaptable and useful. In most cases, an intended gain reduction range is specified, so you load the preset and tweak the threshold until you see the right amount of attenuation on peaks. And then you can inspect the settings to find out how they’ve achieved the particular sound in question. As well as being genuinely useful in their own right, the presets are a great introduction to less familiar features such as TTM mode. Pro-C 3 is a supremely versatile plug-in. It can do everything from invisible gain reduction to slamming vintage pumping and breathing, but it also opens up creative and correctional possibilities that most of us have never yet explored. TTM offers special effects galore, while the detailed side-chain EQ allows tweakers to match the processing to the source with unprecedented detail. If there was only room for one compressor plug-in on my desert island, I know which one I’d take. $ $199. Upgrade and bundle deals available. T Music Marketing +1 416 789 7100 W www.musicmarketing.ca W www.fabfilter.com
ON TE ST
JBL BandBox Trio Portable Guitar Amp & PA System
42
April 2026 / www.soundonsound.com
With AI-powered stem separation on board, JBL’s new portable speaker gives performers the freedom to replace vocals and instruments in any backing track. PAUL WHITE
J
BL were pioneers of highly efficient, high-power-handling loudspeaker designs, so it is not entirely surprising to see them offering a powered speaker capable of delivering 135 Watts from an enclosure measuring just 320 x 260 x 240mm! However, the BandBox Trio (and its even smaller sibling the BandBox Solo; see box) is far more than just a compact speaker. Designed to cover roles ranging from portable small-venue sound reinforcement to home practice and songwriting, it combines a four-channel digital mixer with DSP effects, recording capability and an unusually ambitious suite of tools. Perhaps its most notable feature is AI-powered stem separation, which allows users to extract customised play-along tracks from their favourite recordings by removing the vocals, guitar parts or both in near real time. Physically, the BandBox Trio is solidly constructed in a robust polymer enclosure with comfortably rounded corners and a tough grille cloth sporting a large JBL logo. A soft-touch carry handle sits flush in a recess on the top panel, while the base has rubbery feet and is angled to allow stable placement on the floor or a desktop. Power for the speaker can be drawn either from the mains or from an internal rechargeable battery, which is user-swappable for extended sessions and offers up to 10 hours of operation on a full charge. Despite its compact appearance, the unit feels reassuringly substantial but is still an easy carry at just under 8kg including the battery. The 135W (RMS) Class‑D amplification drives a single 6.5-inch woofer alongside two 25mm tweeters. With a quoted frequency range of 50Hz‑20kHz, the Trio is able to reproduce not only vocals and guitars but also backing tracks with a surprisingly solid low-frequency foundation given the cabinet’s diminutive size. Handling the inputs is a built-in four-channel digital mixer designed to accommodate microphones, instruments
The BandBox Trio boasts a four‑channel mixer, with mic/line/instrument preamps on channels 1 and 2, a guitar-optimised jack for channel 3, and a stereo input (analogue mini‑jack or Bluetooth) on channel 4. There’s also a pass-through output, as well as a headphone jack.
JBL BandBox Trio $599 pros
and line-level sources without the need for external hardware. Channels 1 and 2 use combination XLR/jack inputs and can be switched between microphone and line or high-impedance instrument operation, making them suitable for dynamic microphones, battery-powered capacitor mics (there’s no phantom power available) or direct guitar and bass connections. Channel 3 is optimised for guitar, while channel 4 accommodates either a stereo analogue source on mini-jack or a Bluetooth stream, with support for Bluetooth 5.x with standard audio profiles (A2DP and AVRCP), for stable wireless connection from phones, tablets and laptops. Multiple devices can be paired simultaneously, allowing for quick and easy switching. In terms of outputs, there’s a quarter‑inch ‘pass-through’ jack for sending the mix on to another speaker, and a mini‑jack headphone output, which mutes the Trio’s built‑in speaker.
Each channel can be independently controlled within the DSP, with access to EQ and effects, and with amp modelling available on the instrument input and vocal processing available when needed. In practical terms, this allows a singer-guitarist or acoustic duo to work comfortably from a single box. It is also possible to pair multiple Bluetooth devices for switching on the fly. Finally, in terms of features, there’s a tuner mode that mutes the output while tuning.
Trio Grande Navigation and parameter adjustment are handled from a central large colour LCD screen and a large rotary encoder with an integral push-switch. Beneath the screen sit five additional rotary encoders, used to adjust the parameters displayed on the screen, with the first also incorporating a push‑switch. Five buttons switch the
• Compact and light. • Very capable guitar amp/pedal and vocal effects modelling. • Can function as an audio interface. • Integral stem splitting that works on Bluetooth audio in real time. • Easy‑to‑use app expands operational possibilities but is not essential for basic use. • Clean, clear sound with plenty of volume. • Long battery run time.
cons • Neither unit has a footswitch facility to control the looper. • No pole mount for the BandBox Trio.
summary I hesitate to call the BandBox a Swiss Army knife as that is such a cliché, but if I did say it, I’d have to report that all the blades are well chosen and very sharp — and there are some unexpected extra tools in there too! Both these BandBox products outperform expectations, and the stem splitting is a real winner for those who use backing tracks.
www.soundonsound.com / April 2026
43
ON TE ST
JBL BANDBOX TRIO
Most of the mixer’s functions can be accessed from the top panel, using the colour screen and rotary encoders.
default screen display between showing the whole mixer overview and focusing on the individual mixer channels, while a further large button powers up the speaker, which takes a few seconds. This layout allows control over all the essentials without the clutter of a traditional mixing console, and proves particularly effective in low-light environments, where a screen-based interface is often preferable to rows of mixer-style knobs. Connectivity includes Bluetooth 5, which, as well as supporting audio streaming, facilitaties connection to the control app (see below), while a USB-C port allows the BandBox Trio to function as a four-input USB audio interface when connected to a computer, tablet or compatible phone running DAW software, allowing the various sources to be recorded separately. For guitarists, JBL have included a selection of amp models covering familiar tonal territory, ranging from clean and articulate sounds through to more driven tones suited to rock and blues playing styles. These models can be combined with onboard effects and cover all the main types: drive, compression, auto-filtering, phaser, delay, reverb and so on. The effects are actually rather good and are certainly
44
April 2026 / www.soundonsound.com
more than adequate for practice, rehearsal and many live situations too. Of course the BandBox Trio remains perfectly happy to accept an external pedalboard if required. Vocalists are provided with straightforward delay and reverb effects that will meet the needs of most small-scale live performances. Practice tools are also well catered for, with an onboard tuner, a metronome and a basic drum machine. This offers a choice of styles in 4/4 or 12/8 time signatures and adjustable tempo. A looper function is also built in, potentially removing the need for a separate looping pedal as long as you don’t need more than
documentation makes no mention of support for a Bluetooth footswitch.
Powers Of Separation Even with this extensive feature set, the Trio has a couple more tricks up its digital sleeve: backing tracks can be shifted in key or fine‑tuned to suit the performer, and more impressively, the unit’s stem-separation system — a feature more commonly associated with DAWs and online services — only delays the start of the music playback by around three seconds, which is seriously impressive. And unlike with many software stem
“Rather than attempting to replace any single category of equipment, JBL have created a hybrid solution that spans multiple roles, and they have done so very effectively without sacrificing quality along the way.” 60 seconds of loop length. Note that there is no footswitch jack, so loop recording has to be started and stopped by pressing physical controls — you might need the help of a second pair of hands if you need to play on the first beat of the loop. The
separation systems, the processing takes place entirely within the unit itself, without the need for an Internet connection. As with other stem separation systems I’ve tried, this is extremely good at taking out vocals or guitar but occasionally confuses
Experience a new level of authenticity.
iamReverbʼs distance controllers put you right where you wanna be. Experience a new definition of naturally authentic reverb and become one with the music.
Starting from $ 99,iamreverb.com
The size of sound is the size of space: Enter rooms, halls and cathedrals – or create the room of your dreams.
iamReverb
ON TE ST
JBL BANDBOX TRIO
lower guitar notes with higher bass notes. In most cases this won’t be a problem but is something to be aware of. The levels of the three separated parts (Vocals, Guitar and Other) can be adjusted from the panel controls, though as is now common with digital audio devices, deeper control is available via the JBL One app.
It Starts With One Available for phones and tablets (but not laptops), the JBL One app provides access to channel EQs, amp models and effect chains, as well as the various practice tools such as the metronome and drum machine. Guitar rig or vocal chain setups can be created and stored in the app, with the option to replace and
rename the factory presets. It can also control the stem-separation features. When the AI stem technology is used, the Vocals, Guitar and Other stems each have faders in the app controlling their respective levels. In practice, this allows a guitarist to remove the guitar part from a commercial recording and play their own version, or a singer to mute the lead vocal and perform against what effectively becomes a karaoke backing track (I’ll leave you to navigate the licensing implications!). Until now, I’ve only ever encountered stem-splitting tools in software form, so the inclusion of this feature in a standalone hardware unit where it can be used during performance feels genuinely significant.
It will be especially welcomed by the many performers who routinely use backing tracks in their shows. In use, the app feels like a natural extension of the hardware rather than a requirement for basic use, and I found it very intuitive with no real need to resort to a manual. Increasing control values involves swiping down on the phone screen rather than up, but that doesn’t take much getting used to. Factory presets can be accessed from the BandBox control panel, so you don’t need to run the app all the time. The app only allows access to parameters for a channel that has an input, so if nothing is plugged into an input, its controls are dimmed and can’t be adjusted. Note that
BandBox Solo At approximately 150 x 80 x 50mm and weighing just 0.53kg, the JBL BandBox Solo looks at first glance like any consumer portable Bluetooth speaker. In reality, however, it incorporates almost all of the key features of the much larger BandBox Trio, including the same stem splitting and guitar modelling, and can go far louder than its size would suggest. It has only one physical input: a TRS jack that can accept a line-level source, a guitar or a microphone (with the appropriate adaptor cable). Like its bigger sibling, it can also stream audio over Bluetooth and be controlled using the JBL One app. A mini-jack output on the rear panel allows connection to headphones or a larger sound system if required. Almost unbelievably, all the sound comes from a single 2.5‑inch, full-range driver, but this compact amplifier is rated at up to 30W RMS, with a quoted frequency response of approximately 73Hz to 20kHz (-10dB). The result is a sound with far more depth, volume and clarity than you might reasonably expect, while background noise is impressively low. It isn’t going to outpace a Vox AC30 on full throttle, but you will be surprised at what it can do. One practical tip is that you may gain even more level and low end by placing the Solo against a wall or in a corner, where the boundary effect will help bolster the sound. A built-in microphone lurks behind a small hole in the top panel, which can be used for practice and recording. The headphone output is optimised for low-impedance (16-32 Ω) models but will also work with higher-impedance designs.
46
April 2026 / www.soundonsound.com
There’s no LCD screen this time around, but behind the seemingly blank top panel there hides a matrix of white LEDs that spell out text or outline icons as required. Control over master volume or preset selection is handled by the familiar press-and-turn rotary encoder, with a press of the Bluetooth button toggling between the two. Other than the large encoder there are just four buttons; the first two control power and Bluetooth pairing, while the third displays the currently active guitar preset name. Turning the encoder scrolls through presets or adjusts the master volume, and the fourth button activates stem splitting, exactly as on the Trio model. Like the Trio, the Solo features both Bluetooth support and a USB-C port, which again is used for charging
and audio interfacing. When selected as an audio interface, the device likewise appears as a four-input source with channel 1 carrying guitar/ mic from the jack input and channel 2 carrying the internal mic signal. Headphones must be connected for monitoring when using the mic. Direct source monitoring is possible with either version of the BandBox, and any added effects are recorded. If not connected to a DAW the internal mic along with its effects can be used for vocal practice with backing tracks, and I must say that the mic gives unexpectedly good results. Power comes from the internal battery, providing up to six hours of continuous use, with a recharge time of around 3.5 hours via its USB‑C port. Unlike the larger Trio, though, you
can’t swap out to a second battery pack during a gig. By now you can probably gather that I’m rather impressed by these two sound systems, and having tried and tweaked some of the guitar presets, I’ve decided to buy a BandBox Solo for use on holidays and for sofa noodling. It’s genuinely loud enough, and tonally convincing enough, to serve as a compact guitar amp for jam sessions, as I confirmed at the local pub jam night where it held its own against percussion, sax, bass and acoustic guitar. At one point I was even asked to turn it down! This may be the first serious guitar amp that you could lose down the back of the sofa, and like its big brother it is useful in many different situations.
to stream audio from a phone and to also run the app on the same device, it seems to be necessary to pair the phone with the BandBox Trio in the usual way for sending music before you start using the app. If you get the sequence wrong, the app works but audio playback doesn’t. Another feature of the app is Party mode, where several BandBox devices can be linked to work together as a single system. When setting up a guitar chain, the pedal, amp and speaker models appear as graphics, and each can be selected in the app for more detailed editing. The layout of the guitar chain is not dissimilar to the way many plug-ins work, and here you’ll find separate slots for the amp model and speaker cabinet, with three slots for effects before the amp and three after it. The pedals are activated by swiping down on them or bypassed by swiping up. Select one and a larger version becomes visible so that you can access the individual controls. The six slots are occupied by a noise gate, a compressor and an auto-wah before the amp with a phaser/ chorus, echo and reverb after the amp. These all have simple pedal‑style controls with no more than four knobs each, and they sound very much like typical pedals. There’s a wide-ranging drive pedal among the pedal emulations, and the 11 amp models run from country style clean via bluesy breakup to heavier rock and high‑gain metal tones. More variation can had by swapping out the default speaker cabinet for one of the 12 available models, which include 1x12s, 2x12s, 4x12s, 8x10s and 4x10s, with names and graphics providing a strong clue as to what they are based on.
Box Clever Under battle conditions the BandBox Trio delivers on its promise, delivering more satisfying electric guitar tones than I’d anticipated and with plenty of volume. It also handles vocals very clearly, with plenty of level, and seemingly with less inclination to feedback than many powered speakers I’ve tried. Used at a pub jam night, it proved more than capable of carrying vocals and acoustic instruments with ease, while maintaining clarity and tonal depth at higher levels than you might imagine given the speaker’s modest size. Electric guitar also sounds satisfying though the internal modelling chain, which covers most stylistic choices (and, interestingly, I found it easier and faster to get a decent recorded guitar sound from the BandBox than from some
The JBL One app lets you control a BandBox remotely from your phone via Bluetooth. Pictured are the mixer, guitar rig and stem separation pages.
of the big‑gun amp modelling packages). The twin-tweeter design helps preserve intelligibility off-axis, which is particularly useful in small rooms where audience placement is unpredictable. Noise levels are low (though there is a noise gate pedal in the guitar armoury which you might want to use with high‑gain sounds), and the DSP seems happy juggling all its various tasks without grumbling. When used as a USB audio interface, the sound quality of both the recorded sound and the headphone output leaves nothing to complain about. Battery-powered operation will be an obvious attraction for buskers seeking portable, high-quality sound with the ability to mix voice and instruments, but the Trio is equally well suited to solo and duo pub gigs, rehearsal spaces, garden parties and home practice. Songwriters will appreciate its mixing, looping and recording-friendly features, while its stem separation opens up creative possibilities for both practice and performance using existing recordings. In Summary then, the BandBox Trio feels equally at home as a rehearsal companion, a portable performance rig or even as a compact creative workstation. Versatility is its superpower: almost everything you need is built in, yet nothing prevents guitarists from using their own pedalboards or vocalists from integrating external processors if they wish. For larger gigs the BandBox Trio could get pressed into service
as a personal monitor, and the only omissions I could find were that there’s no stand socket (presumably because the internal architecture doesn’t leave room for one), and no provision to use a footswitch to control the looper. Viewed alongside competing products, the BandBox Trio occupies a distinctive but impressively wide niche. Portable battery-powered PA systems from companies such as Bose, Yamaha and Mackie may offer comparable output power, but don’t include the practice tools, amp modelling and AI-based stem separation found here. Few are this compact, either. Dedicated practice amplifiers from manufacturers like Boss, Fender or Positive Grid may provide deeper modelling where guitar tone is the priority, and some will also double up as audio interfaces, but then they can’t match the BandBox Trio’s ability to mix microphones, instruments and an audio feed while using stem splitting to turn full recordings into backing tracks. Rather than attempting to replace any single category of equipment, JBL have created a hybrid solution that spans multiple roles, and they have done so very effectively without sacrificing quality along the way. Given the flexibility and sound quality on offer, the cost seems more than reasonable. $ BandBox Trio $599.95,
BandBox Solo $249.95.
W www.jbl.com
www.soundonsound.com / April 2026
47
ON TE ST
AudioScape XL-305R Stereo Spring Reverb We all love a good spring reverb, but this one offers a much wider range of sounds than most. M AT T H O U G H TO N
A
udioScape’s outboard gear has graced our pages a few times now, but their XL-305R stands out as a much more creative toy than most devices in their range, most of which tend to replicate things like vintage preamps, EQs and compressors. Housed in a 2U steel 19-inch rackmounting chassis, it is a recreation of a vintage device, but this time it’s a stereo spring reverb unit. The resulting creation fits a whopping 12 springs inside, plus an EQ section, and it’s very different from your average guitar-amp reverb, in a good way: it’s not overstating things to say that it’s capable of a huge range of effects, including a plate-like smooth and dense reverb.
Mimicking MicMix? Its muse is a pretty quirky device that was, reportedly, invented almost by accident: the MicMix XL-305 Master Room Reverb, which was released in the USA in 1979, not long before affordable digital reverbs started to displace such mechanical gadgets in studios around the world. Now, I love a good spring reverb, and like to think I have a good grasp on what they can do for a sound. As well as those in my various guitar amps and Hammond organ,
48
April 2026 / www.soundonsound.com
I’ve used vintage studio models including the AKG BX20 and the Great British Spring, along with more esoteric modern units such as IGS Audio’s wonderful four-channel Springtime. But I’ve never actually laid hands or ears on an original XL-305. I know it very much by reputation, though, and was particularly keen to hear what AudioScape’s interpretation might offer. What really made the XL-305 stand out from the crowd is that its spring assembly’s 12 individual springs were tuned to mimic musical intervals, and the result is a sort of musical sustaining effect — one that its designer suggests sounds rather like “opening the lid of a piano, holding the damper open and singing into the strings”. Furthermore, it’s a two-channel device, in which, by design, the channels aren’t the same. Notably, the ‘odd’ delay times are placed in the left side channel, and the ‘even’ ones are on the right, so as to create a full stereo image even when fed a mono source. Those two outputs can also be summed to mono, to create a much denser mono reverb effect if desired. So, as I say, it’s a very different proposition from most spring reverbs’ more random wash of reflections. AudioScape say they started by replicating the original device, but “reimagined the rest of the design from the
ground up”, a process that involved four years of R&D, working with the designer of the original MicMix unit Wayne Kirkwood, and performing extensive listening tests before settling on their preferred spring decay times. It seems to me, then, that this isn’t simply a case of cloning old hardware for commercial reasons, but rather it’s a labour of love. That’s an impression that is underscored by the fact that these units, which are built by hand in small production runs, are rationed to a maximum of two per customer... and, crucially, by the sound as well.
Springing Off The glossy, black-painted steel front panel hosts a pretty intuitive control set, with two rows of six knobs for each channel to give you 12 knobs in total. The leftmost one is a rotary pot to set the input gain, and this is joined by an LED to indicate overloads. Adjacent is a dry/wet mix knob, and the remainder are one-knob EQ bands, each with a fixed frequency (150, 600, 2000 and 6000 Hz, respectively) and bandwidth (a fairly broad Q of around 1.3), a ±10dB range and a centre detent. The EQ stages are arranged in series. A pair of switches, one for each channel, toggles between Parallel and Wet settings: this is a new feature, not found on the original units. In the Wet position, you have a fully wet signal and the mix knob effectively becomes an output level control. Set to Parallel and put the mix controls at their maximum wet position, and you’ll get a 50‑percent wet signal, so the mix control operates over a much more
AudioScape XL-305R $2099 pros • Unique, enticing and musical‑sounding reverb. • Way more versatile than typical springs. • Good quality of construction. • Intuitive control.
cons • Nothing obvious to me!
summary
useful range if used as an insert effect. After the toggle switches are two backlit buttons, one labelled Mono Drive and the other Mono Return. When lit, the former links the channels together for stereo use, while the latter sums the two signal paths to give that denser mono reverb effect that I mentioned above. Finally, we have output level metering, with one horizontal eight-LED bar meter for each channel, and a larger toggle switch to power the unit on/off. Having not read the manual when I first tried this thing out, the meter threw me a little... As I said above, the two channels are different by design. Consequently, feeding the same input signal to both inputs and setting all controls identically results in different meter readings on each channel. If you plan on using this as two separate mono reverbs (which is perfectly possible), you might want to take time to audition which channel sounds best on which source. On the rear, there’s little to see. Just two XLR pairs for the balanced audio I/O and a locking connector for the external universal (120/240 V) switch-mode PSU. Screws on either side of the case provide grounding points. Lifting the lid mercifully requires the removal of only seven screws, and
reveals another glossy black box that houses the springs and pickups. The pickups are really sensitive, so they and the ends of the springs are shielding by mu-metal covers, and the whole, delicate assembly is suspended on four springs, which attach it to the outer case. For good measure, there’s foam packing to ensure unwanted movement is minimised when the case lid is screwed in place. The external controls and the I/O each sit on daughterboards behind the front/rear
Based on the MicMix XL-305 but with new features, this sophisticated spring reverb is capable of musical results ranging from ambience and traditional springs to smooth, plate-like washes. It’s lovely to see such things being built!
vocals, various acoustic and electric guitar parts, bass, drums, a Hammond B3 organ patch, and various delays, reverbs and modulation effects that I’d thrown into the mix already. I set the XL-305 up as a stereo send effect, and then spent several hours putting it through its paces on the various different parts, just to see if it might bring anything useful to the party. Later, I tried it ‘offline’ on a wider range of material to test my first impressions.
“You can use it on vocals for a sound you wouldn’t normally dream of coaxing out of a spring reverb...” panels, and these connect via ribbon cables to a main PCB on the base of the unit, populated entirely with traditional through-hole components — which should make servicing easy in years to come. Overall, the quality of construction, inside and out, seems good.
Sound Impressions When the XL-305R review unit arrived, I was working on a mix that lent itself to more creative reverb. Among other things, it featured male vocals, falsetto backing
Sound Design: Taps & Boings! Despite the mounting arrangement I discussed in the main text, you can still get that characteristic ‘boing’ effect by tapping or striking this unit. Some might see that as an issue: the pickups are pretty sensitive, and with the gain turned up and the device sitting next to my MacBook as I type, I can hear it echoing in sympathy! But when fastened safely in your rack, that shouldn’t be problematic and, for me, ‘making it boing’ is half the fun of having a spring reverb, and means it has potential applications in sound design. Tapping on different parts of the panel or case gives a different sound. For instance, I got a brighter character when tapping on the right-hand side of the front panel than elsewhere, and I found I could use my fingernail or finger tip to different effect. Of course, you can also tweak the various tone controls. I burned much more of my time than I really should have done playing in this way, and created some pretty cool-sounding, old-school, sinister horror-film footstep effects!
Spring reverbs might not always ‘wow’ you, but there’s no denying that they have a distinctive charm, and there’s definitely just as much a place for them in modern productions as in vintage ones. But while there’s no mistaking the fact that this thing is a spring reverb, it’s completely unlike others I’ve used. Nothing like the ones in my Fender ‘The Twin’ or Blues Deville amps, for instance. You can certainly dial in a familiar-sounding metallic wash, should you wish, and you get more of that character with hotter input levels. But even then, it all sounds much smoother, more coherent, more elegant... more musical. Nicer all round, really, as it generally sounds much more sympathetic to the source. If you choose to dial back the input levels a bit, though, you’ll find that it can also deliver effects ranging from a thickening ambience, through more of a reverb chamber character, to longer, smoother, almost plate-like decays. You can, for example, use it on vocals for a sound you wouldn’t normally dream of www.soundonsound.com / April 2026
49
ON TE ST
Waldorf Protein Wavetable Synthesizer
Waldorf’s tiny wavetable wonder packs classic DNA into a portable package. RORY DOW
W
aldorf Music have been synonymous with wavetable synthesis since the late 1980s. The Microwave, released in 1989 and derived from the PPG Wave, launched a long series of wavetable-based instruments. Over the decades,
Waldorf Protein $399 pros • Classic Waldorf wavetable synthesis in a portable package. • Multitimbral, multi-layer, and MPE support. • Good‑quality effects. • Chord mode and scale quantisation for instant inspiration. • A useful little sequencer.
cons • Only eight voices shared across four layers. • Single stereo output means no external layer processing. • The interface can be fiddly.
summary The Protein packs classic wavetable synthesis, dual oscillators and quality effects into a portable package. Despite some limitations, it’s a powerful and inspiring instrument that delivers the Waldorf sound at an accessible price.
52
April 2026 / www.soundonsound.com
they’ve refined this formula across numerous products, from the Wave and Blofeld to the modern flagships, the Quantum and Iridium. The Protein takes the essence of Waldorf’s wavetable history and distils it into a small, affordable synthesizer that can still produce those classic crunchy digital sounds. At just 252 x 170 x 48mm and weighing under a kilogram, the Protein sits roughly with the Waldorf Blofeld, Rocket and Streichfett in terms of size. It’s bus-powered via USB-C (battery power isn’t an option), and there’s no keyboard. The build is plastic but feels substantial, and the buttons and knobs feel sturdy.
Microwave, but you can deactivate these to avoid any glitches when sweeping through tables. You cannot add your own wavtables. If that’s important to you, you’ll need to upgrade to the Waldorf M. The synthesis architecture is straightforward and close to the original Microwave. Two wavetable oscillators, a noise source, a CEM-modelled multi-mode filter (everything is digital here), three ADSR envelopes (wave, filter and amp), two LFOs and an eight-slot modulation matrix. Rounding things off are dual effect slots with chorus, flanger, phaser, tremolo, drive, EQ, compressor, delay and reverb.
The Protein Philosophy
Hands-on Experience
The Protein is an eight-voice desktop sound module with a Multi mode allowing up to four sounds to be layered and split. It is built around dual wavetable oscillators derived from the original Microwave ASIC chip, featuring the classic 64 factory wavetables, drawn from the PPG Wave and Microwave lineages. Each oscillator can load a different wavetable (something the original Microwave couldn’t do), and you can morph through 64 waveforms per table. The last three waveforms in each table are reserved for basic analogue shapes — triangle, square and sawtooth — a quirk inherited directly from the
The front‑panel design retains as much of a ‘big synth’ feel as you can reasonably expect from something of this size. There are plenty of knobs and buttons. The parameters that do have dedicated knobs are logically grouped, with more available via the Shift button. The display is small, but easy to read. I want to say that the Protein avoids menu-diving, but the workflow can be disjointed at times because you’ll be combining dedicated controls with Shift functions, and other parameters can only be accessed through the screen. Also, I wish manufacturers
would stop using dark fonts on a dark background. The blue-on-black labelling of the Shift parameters is impossible to read in low light. The screen is small, but nice and clear. When accessing parameters on screen, the data encoder can be clicked to select a value for editing. The 10 buttons are used for layer management and general navigation.
Synthesis The Protein’s 64 wavetables have become an industry standard and are identical to those found in the Microwave, Microwave II and Microwave XT, which in turn were an extension of the original 8-bit PPG Wave wavetables. They cover many timbres: classic hollow, evolving pads,
aggressive sync-style sweeps, metallic FM timbres and classic PPG fare. You can modulate through the wavetable using the dedicated ADSR envelope, which has been downgraded from the original Microwave’s more flexible four-stage envelope. You can also modulate from any of the available sources in the eight-slot modulation matrix. The filter is a digital model of an analogue CEM design, capable of low- and high-pass modes at 12 or 24 dB/ oct. It doesn’t self-oscillate, but it does a nice job of emulating the analogue filters found in the Microwave I. Alternatively, you can bypass the filters entirely and use the Drive section instead (why not both, Waldorf?). Drive offers five different saturation types — PNP (transistor), Tube, PickUp, Diode and Crunch — with an
Amount control. The Crunch setting, in particular, can produce some wild, distorted FM-like tones. It’s just a shame you can’t use it alongside the filter. The noise generator, which Waldorf call Dirt, has several modes that offer different flavours of noise, including white noise, vinyl crackle, transient clicks and bursts, and ring modulation (which is not mentioned at all in the manual, but I assume is based on the inter-oscillator ring modulation found in the Microwave II/XT).
Modulation The Protein’s modulation matrix offers limited but useful modulation options. The eight-slot modulation matrix allows you to route LFOs, envelopes, MIDI
Round the Back The Protein is powered by 5V USB‑C. There’s an on/off switch, MIDI in and out on 3.5mm jacks, headphone output also on 3.5mm, and left and right audio outputs on quarter-inch unbalanced TS sockets. There’s no card slot. Firmware updates are via the USB-C connection and booting into a bootloader mode.
Venos Stereo Bus Compressor
NEW!
Adding size, depth and impact to a stereo signal has never been easier. www.soundonsound.com / April 2026 With SPL 120V technology this sound is crowned to king of dynamics.
53
ON TE ST
Akai MPC XL Sampling Workstation
Akai go large with the super heavyweight MPC XL. SIMON SHERBOURNE
T
he MPC Live III was first on stage when Akai unveiled their next generation workstation platform late last year. My review in the February 2026 issue of SOS detailed the massively upgraded specs, new MPCe pads and a unified Force/MPC OS that integrates linear and clip-based beatmaking. I concluded it is unique among its peers as a standalone DAW. Now Akai’s flagship X-series MPC has had the same treatment, including a redesigned layout to incorporate the new step‑sequencing features. I’ll cover
58
April 2026 / www.soundonsound.com
everything that’s new and unique on the appropriately named XL, explore the latest software features and consider which model is best for individual needs.
Music Production Console The MPC Live III now has most of the capabilities of the larger model (eg. mic pres), so if portability and space are important you’re probably going to lean in that direction. This leaves a niche where the XL can really spread out and be the centrepiece in a studio or serious live show setting. The XL is big; even more so than the already imposing X or, say,
Roland’s TR-1000. It’s about two inches deeper than the X as the touch-sensitive Q-Link encoders have re‑formed behind the pads along with their displays and the new chunky step buttons. Although this layout breaks the MPC’s long-standing 4x4 encoder convention,
effects, which I used constantly. The top-right mixer panel, which provides control of the various physical inputs, has gained extra metering. The 10-inch adjustable-tilt display is much the same as before, and is one of the key advantages of this larger format MPC. Touch editing tasks that can be awkward on the other MPCs feel easier here, and the plug-in and instrument UIs come alive. The screen is further away in this layout, but feels comfortable when you’re at the MPC with your arms on the front rest. With a MIDI keyboard in front of the unit it’s a bit more of a stretch. The new panel is a huge win, but there’s a puzzling omission. One thing I was sure Akai would fix on a MkII X was the lack of a push function on the main encoder. On the other MPCs you can click the encoder to confirm selections; here you have to hunt for the Enter buttons in the cursor cluster or the numeric pad. In fairness, many encoder changes are instant and don’t need a confirmation, but for list selection and file operations it’s a shame.
Desktop Power
for my money it’s a huge improvement. All key function buttons can now be sensibly grouped to the left and right of the pads, and there are even Shift buttons on both sides for one-handed operation. Many functions that are buried in the OS or require two-steps to reach on the Live have dedicated buttons. For example there’s a Chop button to take you straight to sample slicing, with a secondary Convert function: an essential operation normally hidden in a Shift layer on screen. In the space freed up to the left of the screen there’s now a channel command cluster, with controls like mute, solo and level for the selected track, and buttons for banking. This also provides shortcuts to channel and mixer views like the track
Commonly we talk about the trade-off between the hands-on, focused experience of a standalone production workstation versus the power and versatility of an off-the-shelf computer. These new MPCs disrupt this line of thinking with internal computing specs that read like a decent laptop, along with flexible workflow choices that include linear multitracking and a DAW-grade internal mixer. Like the Live III, the X has an 8-core ARM processor, but the XL has double the RAM at 16GB. Likewise the internal NVMe drive is 256GB where the Live has 128. Even so, the internal user SATA bay is still there if you want it. The project performance ceiling is set the same on both devices: 32 internal instruments, 16 audio tracks and 256 total stereo voices. Everything responds and loads fast, and you simply don’t think about CPU and memory load during any typical usage. With two phantom‑powered combo inputs on the Live III the connectivity gap has closed a bit, but there are still differentiators. The XL has an additional pair of line inputs and outputs for a total of four in and eight out. There are also four MIDI out ports, and twice as many CV outputs: a total of 16 available across eight TRS connectors.
Akai MPC XL $2899 pros • Much improved layout. • The amazing pads. • 24‑channel USB streaming. • Dedicated track mix controls. • Extensive CV support.
cons • The main data dial is still not a push encoder.
summary The XL is the pinnacle of the MPC experience, offering direct, hands-on access to all key working areas, and a wealth of customisable performance control.
As on the Live you get a pair of regular USB ports at the back to host USB MIDI devices or drives (not to mention audio interfaces up to 32 I/O), and the XL has an extra one at the front for easy access. The new USB-C port is purely for connection to a computer or phone. Not only can you sample directly from a phone or tablet, you can stream 24 channels of audio back and forth to your computer. This is a much simpler way to integrate the MPC into your desktop DAW than using the MPC plug-in and switching to controller mode. Controller mode is still useful if you want to work with VST plug-ins in the MPC environment, but the software has fallen behind the hardware and things like the Arrangement are yet to be implemented. Still unique to the X tier are the instrument inputs on the front, which take guitar‑ and bass‑level inputs. I love having these available and with a bit of work you can even get some usable tones with the built in plug-ins. This is especially true for bass, which works nicely through the amp sim and Flavor plug-ins. Guitars work pretty well for cleaner sounds, especially paired with the lovely new AIR Reverb Pro. Overdriven sounds are not so good, and you can’t get anything close to a satisfying metal chug even with careful input level adjustment. I’m not sure if the impedance is not quite right, or if we just need a new high-gain plug-in option.
Encoders & Sequencer We covered the new step sequencer in the Live III review, but there are some significant advantages to the implementation on the XL. A subtle but meaningful difference is that the step button mode labels are backlit, and the www.soundonsound.com / April 2026
59
ON TE ST
Heritage Audio Herchild 670N BOB THOMAS
A
shade over three years ago, I reviewed Heritage Audio’s impressive Herchild 670 (SOS February 2023: https://sosm.ag/ heritage-herchild). It was a ‘reassuringly expensive’ 22-valve take on the legendary Fairchild 670 variable‑mu compressor. The company didn’t stop their Fairchildish endeavours there, though, and in late 2023 released the 500-series Grandchild 670/500. Then, toward the end of 2025, they invited me to review their Herchild Next Gen 670N. Another rackmount offering, this time it harnesses the Grandchild’s four-valve compressor engines, and while it’s still very much a professional piece of kit with a price to match, it is reassuringly less expensive!
Controls & Connections Like other units in Heritage’s 670 series, the Herchild Next Gen 670N — let’s just call it the 670N from here — has a black panel with white and red legends, and the dual channel names (Left/Lat and Right/ Vert) remain too, pointing to the Fairchild 670’s role in vinyl mastering. The 670N’s 19-inch rackmount chassis is 5U high,
62
April 2026 / www.soundonsound.com
Dual-channel Variable-mu Compressor The original Herchild impressed us hugely, and this new, alternative version costs a fraction of the price — can it really deliver a similar sound and performance? which is 1U shorter than the Herchild 670, yet it carries an additional control per channel. There are also some important operational differences in the controls. On the back are XLR connectors to carry the two channels’ transformer‑balanced inputs and outputs, together with the five-pin XLR connector for the external ±17.5V switch-mode power supply. The two channels have identical controls, a combination of rotary switches and 40-position, lightly detented potentiometers. First in line on each channel is a two-position on/ bypass switch, outfitted with the same large chicken-head knobs used in the Herchild 670. In the on position, the channel VU meter illuminates to give you instant visual confirmation that the compressor is active. Next come two potentiometers with large, circular knobs. The first is Input Gain, though technically speaking it’s an input level attenuator.
The second, as its AC Threshold legend implies, determines the signal level required to trigger compression. Following these is a trio of controls, each equipped with a smaller chicken-head knob. The upper left of these, a pot, is labelled DC Threshold. Combining the functionality of a conventional compressor’s ratio and knee setting, this allows you to move seamlessly backwards and forwards through the compression curve from hard-knee, high-ratio limiting, to a light, transparent, soft-knee, low-ratio compression. Top right of the trio is a six-position Time Constant switch that selects fixed combinations of attack and release times that, on paper at least, are identical to those of the Fairchild and Herchild 670. Beneath and between them is the SC Filter selector switch. In addition to its off position, this side-chain filter offers high-pass options at 80Hz,
160Hz and 5kHz, as well as peaking (bell) filters centred on 1 and 3 kHz. This is a pretty radical departure from the Herchild 670 (which has 50, 100, 200 and 350 Hz side-chain high-pass options). The last channel-specific control sets the post-compression make‑up gain. Fitted with a smaller version of the knobs used for the Input Gain and AC Threshold, this control is not present on the Herchild 670. The 670N’s final front-panel control is the AGC (Automatic Gain Control) mode switch, which configures the 670N’s two channels. The four options are Ind and Link, for dual‑mono or linked-stereo operation, and unlinked and linked Lat Vert. This Lat Vert terminology has its roots in vinyl mastering and today we generally know it as M-S, or Mid-Sides. When a Lat Vert mode is selected, the L-R signals are fed into a passive M-S encoder, placed before the gain reduction stage, and a decoder after the make‑up gain converts them back to L-R. The 670N follows the convention of routing the Mid signal through channel 1 at the top, and the Sides signal through channel 2 below.
Inner Space Internally, there’s a single, hand-assembled internal PCB that’s populated with the highest‑quality components, including the four, centrally-positioned 6BA6 valves and the two custom-designed input transformers that flank them. Each channel’s audio and side-chain output
transformers are also custom-designed, and these are mounted directly on the chassis. As in the Grandchild 670/500, the 670N’s gain-reduction stages each employ two 6BA6 valves, configured as two triodes per channel. The valves are run at a plate voltage of “slightly under” 250V, which is comfortably within their specified 300V maximum. Two 6BA6 ‘triode halves’ make up the channel compressors’ gain cells, each of which is driven in push-pull by the input transformer. The compressor output flows to a +10dB make‑up gain stage, based on Heritage Audio’s proprietary, transformer-coupled HA-880 op-amp. This highly-regarded, transparent op-amp then drives the channel’s transformer-balanced output. In contrast to the Herchild 670, the 670N’s side-chain control voltage is generated by solid-state circuitry, but the side-chains nonetheless retain the feedback characteristic of their predecessor, and they’re equipped with newly designed custom output transformers, to deliver the control voltages to the gain cells. Side-chain linkage through the AGC control functions as you’d expect: the Ind (independent) setting separates the left and right control voltages; the Link position derives a common control voltage from whichever channel (left or right) is triggering the most compression, and delivers the result to both channels.
Heritage Audio Herchild 670N $2999 pros • Doesn’t stray far from the Fairchild character. • Beautifully constructed. • Useful side-chain options. • Much cheaper than a slavish emulation!
cons • None.
summary As ‘lite’ versions go, this clever adaptation of the Fairchild 670 design has to be one of the best, delivering a similar sonic character, but boasting some useful enhanced functionality, not least in the side-chain.
The first Lat Vert setting, which you’d use for independent level control and compression of the Mid and Sides, again keeps the control voltages separate, while the Lat Vert Link position uses the same methodology as the stereo position to derive and deliver a common control voltage for both the Mid and the Sides.
Child’s Play As with the original Fairchild and other Herchild units (indeed, most valve devices), the 670N requires a significant warm-up period to reach its full, stable operating temperature. The manual recommends 20 minutes — that’s about
Though still very large, this Next Gen version of the Herchild 670 occupies 1U less rack space than the ‘full fat’ original.
www.soundonsound.com / April 2026
63
ON TE ST
H E R I TA G E A U D I O H E R C H I L D 67 0 N
Inside, almost all the components, including the four valves, sit on a single circuit board, though the output transformers are attached to the chassis independently.
filters help prevent low‑frequency energy from triggering unwanted compression ‘pumping’. But, by effectively increasing the side-chain’s sensitivity to their frequencies, those 1 and 3 kHz bell boosts let you tame nasty transients in the midrange and upper midrange. 5kHz might sound very high for a high-pass filter, but it comes into its own should you need to target vocal sibilants and other high‑frequency transients (for example in drum overheads) without changing the dynamics of the underlying track.
Vari Good?
the time it takes me to turn on my studio, set up a few mics, make a cup of tea and get the computers and interfaces to wake up! At switch-on, the 670N’s VU meter needles remain at full negative deflection and start to climb towards 0VU over the next 15-20 seconds, as the valves heat up.
work best for the material, and go from there. Talking of time constants, the paper specifications of the preset attack and release time combinations are exactly the same as on the Fairchild and Herchild 670 compressors. However, it feels to me that the 670N’s solid-state side-chain
“It’s certainly in the same sonic ballpark as the original Herchild, and delivers a similar subjective sense of cohesion and tangible presence.” At switch off, the needles slowly sink back to their rest position. During the review period I ran the 670N for a good number of 12‑hour days. The needles never failed to come up to precisely 0VU, and didn’t drift at all as the hours passed. Although the Herchild 670 remains the best ‘glue’ compressor I’ve ever had the pleasure of using, the 670N possesses an impressive ability to bring mixes and stereo stems together. It’s certainly in the same sonic ballpark as the original Herchild, and delivers a similar subjective sense of cohesion and tangible presence between the loudspeakers. As with the Herchild 670, I found that (for my preferred way of working, at least) the simplest route to success was to think of the Input Gain, AC Threshold, DC Threshold and Time Constant as an interactive control group. All that’s needed is a starting point, and I tend to use one of the programme-dependent settings and the Time Constant that I suspect will
64
April 2026 / www.soundonsound.com
delivers a faster, somewhat more agile response overall compared with my memories of the 670. I also found the 670N’s different side-chain filter options very useful. As you’d expect, the 80 and 160 Hz high-pass
The Herchild Next Gen 670N is undoubtedly a very, very good variable‑mu compressor. It delivers the warm, smooth, natural-sounding compression that, given its combination of transformer-balanced I/O and valve-based gain reduction, you’d expect. Yes, there are fewer valves than in the ‘full fat’ 670, but as well as coming in at about a third of the price, this new version offers enhanced functionality that’s genuinely useful, while delivering a sonic performance that’s much closer to that of its ancestor than you might anticipate. The dual-mono, stereo and Mid-Sides capabilities make it an attractive all-rounder, even if its fixed attack and release times mean it probably won’t be the only compressor in your studio. So, if you’re lusting after a Fairchild 670-style compressor, and don’t require total ‘authenticity’, I highly recommend that you audition the Herchild Next Gen 670N. $ $2999. T Heritage Audio +1 800 605 3127. E support@heritageaudio.com W https://heritageaudio.com
The rear panel hosts the transformer-balanced XLR I/O, as well as a socket to connect to the external switch‑mode power supply.
ON TE ST
66
April 2026 / www.soundonsound.com
Main Monitors
Focal Utopia Main 112 Focal’s new Utopia speakers are their biggest and most ambitious yet. PHIL WARD
W
e’ve reviewed numerous Focal monitors over the decades, but they have always fallen into the nearfield or midfield category — until now. With the launch of the Utopia Main 112 and Utopia Main 212, Focal have ventured into fully fledged ‘main monitor’ territory. The 112 is a substantial three-way reflex‑loaded active system comprising a 13‑inch bass driver, a 3‑inch dome midrange driver and a 1.5‑inch dome tweeter. The 212 adds a second 13‑inch bass driver and a second midrange driver to create a 3.5-way system that builds on the 112’s substantial dimensions and weight to become genuinely imposing and ambitious. The Utopia Main 112 reviewed here is too big and heavy for my modest studio space, but I was able to spend a few hours listening and generally getting to know the monitors in the
listening room at Focal’s professional retailer in London, KMR Audio. Both the Utopia Main monitors are fully active, but rather than containing the necessary electronics within their speaker cabinets, each monitor of a pair is driven from a separate active crossover and power amplifier unit. The entirely analogue unit comprises a 4U rackmountable case with a top‑panel heatsink. It provides 500 Watts of Class‑D power for the low‑frequency band and 180/90 Watts of Class-H power for the midrange and high‑frequency bands respectively. Connection facilities on the rack’s rear panel comprise mains power, balanced XLR analogue audio and two multi-pole Speakon socket outputs. Also on the rear panel, behind a removable sub-panel, is a variety of trim pots and DIP switches. These provide some configuration options (adjusting the input sensitivity and turning auto-standby mode on or off) and EQ facilities (see box).
Mid Journey The design and technology of the Utopia Main 112 fully reflect the distinctive approach Focal have traditionally
taken to electro-acoustics. I’ll start with its midrange driver. In removing the requirement for a midrange driver to play bass, a three-way speaker like the 112 enables special emphasis on midrange driver design. It’s pretty obvious just from glancing at the 112’s midrange driver that it’s had some serious attention. It looks like few midrange drivers that have gone before and appears to be a genuinely innovative and impressive example of contemporary transducer design. Conceptually, it’s a dome rather than a cone-diaphragm driver, although in this case the dome, rather than being fully convex, has a concave section in the middle. Focal describe this as an ‘M-shaped’ cone and hold a patent, first granted in 2020, that protects elements of its design — particularly the way it provides benefits in terms of manufacturing consistency, and in helping stop the diaphragm/voice-coil assembly from rocking laterally (because the centre of gravity of the voice coil and diaphragm are closer together than would be the case with a conventional dome).
Focal Utopia Main 112 $29,999 pros • Exceptional wide‑band performance. • Truly glorious midrange character. • Reflex or closed-box option. • Serious commitment to electro-acoustic engineering really delivers the goods.
cons • Hint of vertical listening axis sensitivity. • Nothing else.
summary With the Utopia Main 112 Focal have well and truly arrived in the main monitor sector.
www.soundonsound.com / April 2026
67
ON TE ST
F O C A L U T O P I A M A I N 1 12
Although the Utopia speakers are active, their electronics reside in a separate 4U rack, which also houses a setof configuration DIP switches.
The concave section of the M-shaped dome also helps, say Focal, to reduce a form of time‑domain distortion that’s inherent to any non-flat radiating surface. To explain: a fully convex dome results in acoustic radiation from the periphery being slightly delayed in comparison with radiation from the apex, which, at higher frequencies, can produce a comb filtering effect. Pushing the centre of a convex dome back to create a concave section reduces this effect. Around the periphery of the diaphragm, the compact surround/ suspension component incorporates a tuned mass damper (TMD), a feature I also encountered in my review of the Focal Shape Twin (SOS September 2018). The TMD technique involves adding a localised circumferential thickening of the surround material to increase mass at a specific location. The combination of the localised mass and the compliance of the surround introduces a targeted resonance that serves to dissipate vibrational energy that might otherwise be reflected back into the diaphragm. Behind its M‑shaped diaphragm, the midrange driver features a motor system arrangement incorporating
a radial neodymium-iron-boron magnet that leaves an unusually large open space directly behind the diaphragm. This means that energy radiating from the rear of the diaphragm is able to be dissipated backwards rather than being reflected forwards and interfering with the forward radiation.
Big W The material from which the midrange diaphragm is made also has a single-letter designation. The ‘W’ diaphragm material is a Focal‑developed solution to the unending challenge of speaker design: hunting diaphragm materials that are unfeasibly light, remarkably rigid and appropriately damped. Focal’s W material is a composite sandwich comprising a sheet of resin‑impregnated glass fibre either side of a structural thermoplastic foam core. The glass fibre provides the necessary rigidity and the foam provides damping, while the low density of both materials means the construction is inherently light. The W material is not new (it has been previously employed on numerous higher-end Focal hi-fi speakers and
EQ Options Being implemented entirely in the analogue domain, the Utopia Main 112 EQ facilities are not as generous as we’ve all perhaps come to expect from DSP-based EQ, but honestly, who ever uses more than two or three parametric bands to implement broad‑brush room or personal preference equalisation of a monitor? So, the amplifier unit’s EQ comprises high‑ and low‑frequency shelf functions offering up to ±3dB at 120Hz and 7kHz, a single 100Hz‑1kHz band offering +2.5dB/-6dB with a fixed Q, and two variable‑Q low and low‑mid band intended primarily for the compensation of room modes. The power amplifier unit also includes some preset EQ options for the closed-box low‑frequency option and for soffit‑mounted monitor installation.
68
April 2026 / www.soundonsound.com
pro-audio monitors). It has proved its effectiveness many times over. The W diaphragm material also finds employment in the bass driver (‘light and rigid’ is equally important in bass driver diaphragms). While the bass driver looks relatively conventional from the front, behind its diaphragm and surround is a motor system designed to remain linear in its response to input signals over an unusually large, ±15mm excursion capability. Linear excursion for similarly dimensioned bass drivers typically maxes out at between 10mm and 12mm, so the Utopia Main 112 driver is clearly engineered to offer ‘main monitor’ worthy levels of low‑frequency bandwidth and volume.
Ports Direct Perhaps as interesting as the bass driver is the reflex port. The 112’s port has possibly the largest and most generously flared exit I’ve ever seen on a monitor. One implication of such a large port cross-sectional area is that to achieve the necessarily low tuning frequency (the port is tuned to around 30Hz), the interior port length required is too long to fit in the Utopia Main 112 cabinet depth. So the port tube bends upwards within the cabinet to a flared entrance behind the bass driver magnet. Focal say that the port profile and entrance/exit flares were optimised for maximum linearity using FEA (Finite Element Analysis) airflow modelling. Perhaps surprisingly, after all that, the reflex port is optional. It can be sealed using an accessory foam plug to convert the Utopia Main 112 into a closed-box
Stereo Studio-Grade Tone, No Matter the Distance
SGI Stereo Stereo Instrument Line Driver The Radial SGI Stereo lets you place your amps anywhere - onstage or in an iso room, while preserving the tone and feel of a short instrument cable. By converting your stereo signal to balanced audio, you can run up to 300 feet over a single CAT5 line with no noise or loss of clarity. Manage volume, maintain your stereo effects, and design your setup around sound, not cable constraints.
ON TE ST
AKG C104, C114 & C151 Capacitor Microphones
AKG’s trio of affordable studio mics have more in common than just the letter C. SAM INGLIS
F
or many years now, AKG’s lineup of capacitor microphones has been divided into two ranges. Mics targeted at professional applications have a model designation beginning with the letter C, whilst the company’s more wallet-friendly designs have appeared under the Perception brand. But the gulf between the two has been eroded by
72
April 2026 / www.soundonsound.com
the appearance of more affordable mics in the C-series range, where classics like the C414 and C12 VR are now joined by the much more accessible C214 and C314. That trend continues with the release of three new C-series mics that are aggressively priced, and which explicitly replace models from the Perception line. The multi-pattern C114 is an externally polarised large-diaphragm capacitor mic that supersedes the
older Perception P420, while the C151 is a fixed-cardioid, small-diaphragm ‘pencil’ mic with an electret capsule. Once again, this displaces a Perception model, in this case the P170. Finally, the fixed-cardioid C104 is an interesting half‑way house. Although it’s described as a large-diaphragm mic, and shares the same shell as the C114, it actually uses a 22mm electret capsule intermediate in size between those of
AKG C104, C114 & C151 $129/$229 pros • Excellent build quality and sustainable manufacturing. • Remarkable tonal similarity between different models. • Very good value for money.
cons • At the price, I have no real criticisms.
summary Versatile, well made and impressively consistent, AKG’s new C-series models will make a considerable impact in the market for affordable capacitor mics.
the 114 and 151. The C104 is the successor model to the P120. In each case, AKG have done much more than simply repackage existing designs, and consequently, the specs of the new models are significantly different. For example, the C151 is actually a little noisier than the P170, at 21dBA against 19dBA, and is also slightly less sensitive. However, the C151 can handle sound pressure levels of up to 145dB without the need for the P170’s switchable pad. By contrast, the C114 is 3dB quieter than the P420, and some 6dB less hot. It offers the same three standard polar patterns, but without the P420’s switchable low-cut filter. Likewise, the C104 is quieter in both senses than the P120, and also omits the filter. One improvement that everyone should welcome concerns the way in which these new models are manufactured and delivered. The bodies are made from recycled metal, and the packaging is fully recyclable. The shell of the C104 and C114 bears an obvious visual resemblance to current C414 models, which slightly round off the brutalist square lines of the earlier 414s. However, in place of the ‘stalk’ that houses the XLR connector, these new C-series mics have a much longer body. At its base, the connector is surrounded by a recessed thread. This is the same on both models, so if you own both, you can freely swap the C114’s supplied shockmount for the C104’s simple standmount. The C151 comes with a fitted clip. Despite the extremely competitive pricing, build quality for both mics and fixtures appears top-notch.
Family Resemblances My first impression on testing these mics was that AKG’s designers have put a lot of effort into giving them a ‘family
sound’. Having put all three up together as close as possible, my initial reaction to a speech test was to wonder whether I had somehow recorded the same mic to three different tracks. Not only are they almost perfectly matched for sensitivity (assuming the C114 is in cardioid), but the on-axis tone is remarkably similar, given that they use three entirely different capsule designs. This is reflected in the published frequency-response charts, which in each case show a broadly flat response through the midrange, rising above 5kHz to dual peaks that top out perhaps 5dB above the nominal zero. The charts also make the mics look a little lean in the bass department, but on the C104 and C114 this is probably a function of measurement distance, as the latter mic boasts a very healthy low end in omni. However, the C151 does seem to roll off to a noticeable extent below 100Hz. As is usually the case with smalldiaphragm mics, the C151 is susceptible to popping from plosives when used as a vocal mic. This reflects typical polar pattern behaviour for mics of these types. Pencil cardioid mics like the C151 tend towards figure-8 at low frequencies, so in a close-miking scenario, its low-frequency roll-off is compensated for by proximity effect, and it is naturally vulnerable to air blasts, since it’s predominantly measuring air velocity rather than pressure. By contrast, the C114 becomes somewhat omnidirectional at low frequencies, making it a more benign choice for close-miked vocals and allowing its low-frequency response to be more consistent with distance. In this respect, the C104 seems to behave in much the same way as the C114.
Axis Powers The ideal cardioid mic doesn’t exist, but if it did, you wouldn’t notice a timbral change as the source moved off-axis, just a change in the amplitude of the recorded signal. Small-diaphragm models usually approach this ideal rather more closely than their large-diaphragm brethren, but that isn’t quite the case with the C151. Off-axis capture is rather dark and, as you move towards the rear of the mic, becomes noticeably hollow-sounding. In real-world situations where sound is incident from all directions, I think this probably goes some way towards offsetting the on-axis high-frequency emphasis that’s displayed in the frequency plot. Or to put it another way, although it measures bright, it often doesn’t sound particularly bright, because
ALTERNATIVES This is a highly competitive market, and the new C-series mics face off against models from Rode, Lewitt, sE Electronics, Sontronics, Shure, Audio-Technica and more.
there’s quite a lot of high-frequency attenuation for sound arriving from the sides and the rear. In this respect at least, the C151 doesn’t really challenge more high-end models like AKG’s own C451B, but at the price, you’d hardly expect it to. And although I was initially concerned by its rather high self-noise measurement, in practice this was not an issue. The C114’s on-axis tonality varies quite a bit with polar pattern, as is typical of large-diaphragm capacitor mics. In omni mode, the high-frequency emphasis gets greater, but also shifts up the frequency spectrum. It’s bright, but good bright. In figure-8 mode, the major presence peak is in the 3-5 kHz region, and it all begins to sound a bit like a mic voiced for stage use: plenty of ‘cut’, but not a particularly natural sound. Finally, the C104’s published polar pattern suggests a noticeable narrowing at 4kHz, becoming fully hypercardioid at 8kHz. This was borne out by my tests, but unless you accidentally put the mic back to front, doesn’t cause issues in normal use.
Triple C Despite these differences, my first impression of the new C-series mics turned out to be a lasting one. For on-axis, close-miked sources, I think you could happily drop in with the C104 on a track recorded with the C114 in cardioid, or vice versa, without anyone noticing. Differences are slightly more apparent with the C151, but there remains more similarity than I’d have expected. These mics don’t just belong to the same family in name: they really do share a sonic DNA. They’re the sort of mics that largely stay out of the way, offering a clear and detailed window on the source with a hint of high-frequency emphasis; unless you switch the C114 to figure-8, there’s no obvious push in the midrange or other characterful quality. If you want your mics to deliver magic, you’ll have to spend more money, but the ratio of utility to price on offer here is compelling, especially with the C114. $ C104 & C151 $129; C114 $229 W www.akg.com www.soundonsound.com / April 2026
73
ON TE ST
StageBox Want to use your macOS or Windows computer as a plug-in host for live performance? StageBox aims to let you do just that, with minimal fuss. ROBIN BIGWOOD
S
tageBox is a cross-platform macOS and Windows plug-in host application, a collaboration between the Grammy-nominated composer and musical director Matt Robertson and music software developer extraordinaire Julian Storer. It’s available from tracktion.com but actually is a completely separate, independently developed product. StageBox’s raison d’être is to support the use of software instruments and effects in live performance.
76
April 2026 / www.soundonsound.com
Plug-in Host Software
In that, it also stands as a purposely simpler, leaner alternative to the likes of Gig Performer and the macOS-only MainStage: its feature set is unquestionably smaller, but it’s also potentially quicker and easier to use.
Principles The window you’re presented with, on starting StageBox, is the heart of the user interface. There are very few additional elements to discover: there’s no mixer, for example, and just a single file menu with a handful of familiar open and save options, and undo/redo. Elsewhere there are just a few additional drop-down menus and overlays for general settings and MIDI mappings. StageBox’s essential internal structures, then, are these: single instrument plug-ins, with potentially many effects, are instantiated to form what is called a ‘sound’ (that’s done in the central, slightly lighter grey section of the user interface, in plug-in slots), and if you’ve
The cool, clear environment of StageBox in its Edit mode. Songs are ordered in a Setlist at far left, and individual plug-in‑based sounds and processing configured in the main part of the window.
used any DAW it’ll feel like second nature. You can have as many of these sound layers running concurrently as you wish (supporting keyboard splits or textural stacks, for example), and to view and edit one you click on its tab to the left. The
StageBox $129 pros • Robust (and, in my testing, unbreakable) hosting of virtual instruments and effects. • Seamless sound changes between songs and sections. • Many niceties in the feature set reflect real-world experience.
cons • No support for audio inputs or hardware MIDI outputs. • Sound layers have no built-in pan or stereo width controls.
summary A friendly, efficient, easy-to-use plug-in host that could support your next pub gig or world tour alike.
tabs are provided with mute and solo buttons for the audio output, a level meter, and also a MIDI input mute. One or more sound layers are what constitute a Song, and multiple Songs can be assembled into a Setlist. A single StageBox window can thus take care of the sound hosting and running order for an entire musical set or show, with the whole shebang saved as a Project. As you might expect, there’s considerably more nuance along the way. For one thing, it’s possible to break a single Song down into multiple sections, to support differing sound requirements for verse and chorus, say. Audio processing is highly configurable too, with plug-in slots offered in both insert and send/return structures, per layer, and with further slots at the Song level (so to speak) that all layers feed into. Layers can be transposed (up to four octaves up or down!), limited to specific pitch ranges and hardware MIDI controllers (in case you have more than one), and their MIDI input filtered by channel and event type. You can also direct individual layers to use separate outputs of a multi-channel audio interface, perhaps to drive a different amp, or for on-stage guide/cue feeds.
“I tested StageBox over a period of a month or so, and threw everything I could at it: big piano and orchestral sample libraries, dozens of soft synths, and many effects plug-ins. I couldn’t catch it out.” There’s also good potential for controlling StageBox knobs and plug-in parameters from a hardware MIDI controller. Every Song has its own MIDI map for this, and setup is a cinch: working in the dedicated editor overlay, just move your hardware control, click on a software parameter, and the link is established. Global-level MIDI mappings are available to step backwards and forwards through Songs in a Setlist, and for tap tempo (which can sync synth arpeggiators, effect delay times and so on). What StageBox notably doesn’t do is handle audio inputs. It’s purely an instrument and effects host, to which you direct MIDI. Equally, it doesn’t by itself address any hardware or USB MIDI outputs on your system, so you can’t use it to integrate a hardware synth rig. I understand these abilities, which would of course be very desirable, have at least been considered for a development road map, but they’re not part of StageBox yet.
Showtime In use, with one or many Songs in a Setlist, all instruments and effects are instantiated at the same time. Switching songs is then effectively instantaneous, and pulls off the ‘seamless transition’ trick coveted in high-end stage keyboards, letting you start playing a new song while sounds from the previous one are still decaying, or even
W E N USB Solo mk2 from
High spec MIDI to CV converter with both USB and 5 pin DIN MIDI V/Oct & Hz/V – Gate & S-trig – 3 aux outputs – clock & DIN Sync Can be used as a USB MIDI Interface (while still converting to CV) All of the features of the Pro Solo mk3 but with the addition of USB See website for full information
SPLIT, MERGE, EXTEND OR CONVERT All the MIDI you need, right where you need it
Thru-5, 12 & 25
Merge-4 & 8
Split a single MIDI source into 5, 12 or 25 identical copies
Combine the data from 4 or 8 MIDI sources into a single output
LNDX & LNDR
MIDI USB Host mk3
Extend MIDI up to 1000 metres LNDX (shown) has etherCON connector
MIDI IN & OUT on DIN for your USB-only keyboards, controllers & synths – without using a computer
WE MAKE MIDI WORK FOR YOU Contact the MIDI Specialists
kentonuk.com J#233 - Product Ad V17 - US.indd 1
www.soundonsound.com / April 2026
77
22/01/2026 16:33
ON TE ST S TAGE BOX
sustaining. Memory usage is potentially an issue here — you’ll ideally want a lot of physical RAM for ambitious sets — although StageBox will in fact start to use disk-based virtual memory if required. CPU use accrues as well of course, confirmed by the numerical CPU indicator at top right of the main window. Instruments and effects seem to be hosted very efficiently, but you’ll still need a potent computer to allow low‑latency responsiveness. StageBox offers a dedicated Perform Mode for live use, which hides the sound/layer infrastructure, and gives the option of displaying some editable text notes for each Song. There’s a nice touch as you enter this performance-specific mode: a pop-up overlay appears that suggests some basic pre-performance checks such as disabling Wi-Fi and notifications, checking power supplies and so on. You can turn this off, or edit the text to adapt it to your own needs. Where it’s obvious that StageBox has been developed really thoughtfully, with a practical mindset, is in concepts like Shared Instances. This allows you to create Song duplicates that do not require their own independent RAM and CPU resources. They’re ideal if you have a Setlist of 20 Songs, say, of which 10 use the same piano sound. Make those shared instances and you can still name them independently, and put them in the right Setlist order, but the piano they use only gets loaded once. Another neat concept is virtual MIDI inputs. They provide a symbolic alternative to directly specifying
78
April 2026 / www.soundonsound.com
though neat and sensible, is cumbersome with really long lists. And whilst I didn’t miss a vertical-format mixer, I could see the value of duplicating the layer volume knob setting as a small fader in Sound layer tabs, near the mute and solo buttons, for rapid balance changes. Layers don’t currently have stereo pan/width controls either. That functionality can be duplicated with certain third-party plug-ins, but it’d be better if it was built in. Even as it stands, though, Every sound layer is equipped with this StageBox is a super app MIDI filter overlay, letting you set up keyboard that has the potential to do splits, transpositions and more. some really heavy lifting in a live situation. It can’t match Gig Performer or MainStage feature for feature, but it makes up for the hardware MIDI controller used that in speed of deployment and ease of to control a sound layer; the idea use. If you’re on the look-out for this type being that if you ever need to swap of software, you might just find it already your controller for a different model, ticks all your boxes. mid-tour perhaps, a single click in the main Settings overlay makes the change, saving you from laboriously $ $129 doing it for every layer of every Song. W www.stageboxsoftware.com
Robustness I tested StageBox over a period of a month or so, and threw everything I could at it: big piano and orchestral sample libraries, dozens of soft synths, and many effects plug-ins. I couldn’t catch it out. It proved rock solid, and I wouldn’t hesitate to use it on stage. Actually, I ended up using it in my studio quite a bit too, when I wanted a quick hit or to do some programming with favourite software synths: it’s a lot quicker and more responsive than using a DAW for the same thing. Both conventional and MPE controllers (and MPE-enabled plug-ins) seemed to work straight off, with no configuration. Really hefty sample-heavy Projects would sometimes take 15-20 seconds to open from scratch, as everything loaded up, but they always did so reliably. I have no serious criticisms of StageBox at all — I love it when that happens — but there are a handful of additions that I think would enhance the already strong feature set. Text-based filtering and searching in plug-in pop-up menus would be really welcome: the two-column Developer/Name hierarchy in pop-up menus used currently,
Like many other aspects of StageBox, MIDI controller mapping is quick to set up and surprisingly flexible.
This BEAST is still the
“This interface is easily the best bang for the buck in the market. Not only the preamps are the real deal and sound excellent, but it comes with all their plugins for free, and they´re no doubt the best emulations in their class. Plugins alone are worth the price.”
“This is by far the best desktop audio interface I've used in more than 20 years of music recording. Nothing comes close to the i73 PRO. Great preamps (not just good, GREAT) and a refreshingly good selection of plugins. I absolutely recommend it!”
BEST
“After thoroughly tested the renowned preamps and the converters with all kinds of people and musical styles in the studio, in my humble opinion, everything has been outstanding. Not only from my own subjective perspective, but also according to everyone who came through.”
“The sound impressed me immediately. Everything feels a bit more “glued together and warmer,”. If you’re looking for a high-quality interface at the upper end of the market and you appreciate analog sound, feel, and workflow, then you should definitely try this interface.“
Free for all owners
CONSOLE CHANNEL STRIP
DSP & Native TRY THEM FOR
FREE TODAY
ON TE ST
Midifex’s Lujin controller could be just what you need for adding expression to orchestral samples. BOB BICKERTON
M
idifex are a relatively new company who have a stated goal of bridging the gap between a musician’s hands and their technology. Based in Christchurch, New Zealand and led by Oliver Huggins, who is himself a composer and producer, they’ve certainly achieved that goal with the Lujin controller, as far as this musician is concerned. The Lujin is a General MIDI device and so can pretty much talk to any MIDI‑compatible device over USB or through a standard MIDI connection, but it’s very much designed for composers and producers. Whether you’re a professional composer or just someone who dabbles with orchestral sample libraries, you will more than likely be aware of the benefits of using a dedicated MIDI controller to send dynamics, expression and vibrato messages to your samples so as to achieve a higher sense of realism in your work. In recent years we’ve seen the introduction of bespoke three‑fader MIDI controllers specifically for this purpose. The Lujin is a new kid on this block, but it’s probably about to become an industry leader. The face of the unit features three 100mm faders as well as three endless rotary encoders, which also have momentary push‑button facility. Above each fader is a red LED display that provides the value of the CC number being sent, and there’s also a neat meter display under the faders that can give feedback of MIDI data from your DAW. All the controls are programmable with custom CC numbers, and the unit can store 16 presets. The back of the unit includes a standard 5-pin DIN MIDI output, a button for programming the unit, and a USB-C socket, which as well as sending MIDI over USB also provides power. The livery is a rather pleasant warm grey with
82
April 2026 / www.soundonsound.com
MIDI Controller
Midifex Lujin orange legend, and the steel case, which has wooden cheeks and sticky rubber feet, has good heft, so you won’t be chasing this one around your desk.
Programming Other MIDI controllers I’ve used have had a variety of methods for programming, from clunky web-based solutions to complex apps. The Lujin is simple, as all programming is done within the unit. A short press of the rear Program button throws the displays into flashing mode indicating the current CC number. Just alter the fader or rotary encoder to select a new CC number and press the Program button to exit. To program the
push buttons, short-press the Program button twice whilst in Program mode, then exit as above. Any changes made stay current until the unit is powered off, but you can save your changes to one of the 16 preset slots. Saving and loading presets is achieved with a long press of the Program button, selecting the preset channel with the middle fader, then pressing the Load or Save encoder. I’d imagine common presets might include operating your DAW, controlling the selected sample library or plug-in, or controlling an external synth over MIDI. Other programming options include selecting the unit’s MIDI channel and
screensaver time. On power up the unit remembers the last preset used.
In Use So far, so good. The Lujin is easy to program, is nicely finished and is built like a tank, but how does it feel and why is that important? When playing a sampled orchestral instrument using a keyboard I use my right hand to play the notes and the left hand to change dynamics, expression and vibrato with the controller. In a sense my right hand plays the score whilst my left hand plays the instrument! My left hand is the connection between the notes played and the recorded instrument and as such is the key to achieving a sense of realism. This is why feel, a sense of connection and fluidity are so important. This process becomes particularly apparent in long or legato patches.
“You would be forgiven for assuming the Lujin is just a simple MIDI controller, and in many respects that’s exactly what it is, but the designers have done well to maximise its usefulness.”
The Lujin is 185mm deep by 135mm wide, is 28mm high, weighs in at 760g and ships with a nice braided USB-C cable.
what it is, but the designers have done well to maximise its usefulness by having onboard presets and by making programming a breeze. More than that, this device oozes ‘analogue’ feel. It’s digital, of course, but if you’re of an age where having a fader under your finger is more natural than drawing in automation, it will feel very familiar. It’s solid, looks great and, to use a motoring metaphor, would be closer to driving a Bentley than a Suzuki Swift. With the recent release of their Midivex MIDI
routing and real‑time effects software, this new company are on a creative trajectory which will be well worth following.
summary The MIDIFEX Lujin is a best-in-class MIDI controller ideally suited to controlling orchestral sample libraries, but generally useful for a wide range of applications in your MIDI studio.
$ $259 W www.midifex.com
The three faders on the Lujin are as smooth as a hot knife cutting through butter and are perfectly spaced. I very quickly adapted to the 100mm throw, which obviously gives more control than 60mm faders, and whilst it’s good to have feedback on the meters, for me it’s more a question of riding the faders to dig in and ‘play’ the instrument whilst using the meters I have either side of my head! The Lujin is the best MIDI controller I’ve used in this respect. I also hooked it up via its MIDI out port to a Roland JU-06A synthesizer and quickly set up the faders to control aspects of that synth, so no problems in that department.
Conclusion You would be forgiven for assuming the Lujin is just a simple MIDI controller, and in many respects that’s exactly www.soundonsound.com / April 2026
83
ON TE ST
AsciLab A6B With their debut speakers, South Korean company AsciLab
Passive Monitors have raised the bar for nearfield monitoring. PHIL WARD
L
ocated in South Korea, AsciLab are relatively new entrants to the high‑performance loudspeaker sector. The company have their roots in two decades of architectural acoustic consultancy, and while one might justifiably argue that the world needs no more speaker manufacturers, AsciLab arrived with an unusually focused approach to design and engineering — one that’s rooted very firmly in high-end speaker technology and a commitment to rational, science-based electro- and psychoacoustics. Although AsciLab’s initial offerings are aimed at domestic hi-fi applications as well as professional monitoring, there’s a complete absence of the imaginary engineering and snake-oil that infests the hi-fi business and this, to my mind, is to be enthusiastically applauded. There are currently three products in the AsciLab range: the F6B, the C6B and the A6B. All are relatively compact, two-way, passive monitors. For this review I was loaned a pair of A6Bs, the largest and most ambitious model in the current range. I say ‘current’ because AsciLab
AsciLab A6B $3300 pros • Near-faultless measured performance. • It sounds as good as it measures.
cons • Demands significant power amplifier muscle. • Otherwise, none.
summary The A6B is a remarkable product that’s arrived from nowhere. It gives monitor design and performance a significant nudge down the road, and it proves that you don’t need snake oil to build brilliant loudspeakers.
84
April 2026 / www.soundonsound.com
say there are more products on the way, including an active version of the A6B. While the A6B is presently the largest product in the AsciLab range, its 40.5 x 22 x 30cm dimensions still fall into the ‘nearfield’ category (only just, though; much larger and I might be deploying the ‘midfield’
term). The cabinet is a braced MDF construction, which on my review sample was finished with a fine-textured black paint. One white and two grey options
are also available. The cabinet edges are generously rounded, which both softens the aesthetic appearance and helps suppress edge-diffraction effects. An aluminium panel let into the back of the cabinet carries the connection sockets externally and the passive crossover board internally. The sockets can handle 4mm plugs, bare wires or spade connectors. The front panel is populated by a nominally 165mm bass/mid driver and a 25mm waveguide-loaded tweeter, and its side panels are each home to a 165mm auxiliary bass radiator (ABR). The bass/mid and tweeter drivers are integrated by the passive crossover at an unusually low 1kHz. The crossover combines third‑ and fourth‑order filters and is implemented using air-cored inductors and predominantly plastic-film capacitors. If you read my recent review of the Amphion One18X monitor, you might be struck by its conceptual similarity to the A6B, and you’d not be wrong. Amphion and AsciLab both seem to have concluded that the combination of a waveguide tweeter with a low crossover frequency and an ABR‑based low‑frequency system is the way to go for a passive nearfield monitor (for the record, it’s probably what I’d do too). However, the A6B takes the concept a step further in its waveguide dimensions, its crossover frequency and its driver technology. It also goes even further in attempting to minimise non-linearities and the various distortion phenomena that result.
Purification Ritual I’ll begin with the drivers. Firstly, AsciLab, like a great many other monitor manufacturers, don’t make their own drivers but buy OEM units. Apart from eliminating the need to develop drivers from scratch, thereby massively reducing the time (and cost) to market, using OEM drivers enables monitor manufacturers to pick and choose from a huge range of options. AsciLab have chosen Purifi units for the bass/mid and ABR roles and an SB Acoustics unit for high‑frequency duties. The Purifi drivers have aluminium diaphragms, while the SB Acoustics tweeter has an aluminium/ceramic dome. We’ve come across Purifi drivers before, in my reviews of the Jones-Scanlon Baby Red and PresentDayProduction’s MUM‑8 monitors. Purifi is the brainchild of electro-acoustic engineers Lars Risbo and Bruno Putzeys, and if the second of those names rings a bell, that’s because it is also attached to the brains behind the the Kii Three and Kii Seven monitors (and numerous commercial Class‑D amplification products). Lars and Bruno’s guiding principle with their Purifi drivers is, in one word, distortion. They argue that driver design over the decades has tended to put too little emphasis on the various mechanisms within the motor system (the magnet, metal parts and voice coil) and diaphragm restraint (surround and suspension) that inherently generate distortion. And they’re not wrong, I think. The driver design emphasis on diaphragm material that’s continued ever since BBC research engineers Shorter and Hughes happened upon Bextrene (a type of polystyrene) rather than paper in the early 1970s has, I think, been something of a distraction from more
Being a passive monitor, there’s not much going on on the back panel. However, AsciLab plan to release an active version of the A6B in the future.
significant problems with moving coil drivers. And it’s those more significant problems that Bruno and Lars set out to fix. The most visually obvious result of their efforts to eradicate distortion from drivers is the characteristic (and crazy-looking) surround. While perhaps appearing
as though it might have been drawn by a visually challenged chimpanzee, the surround is actually of a very cleverly conceived 3D geometry that offers effective wide‑band diaphragm energy termination, while also remaining consistent in terms of its radiating area regardless of whether it’s moving inwards or outwards (something that conventional roll surrounds tend not to do). This is important because, especially in the case of relatively small diaphragms that www.soundonsound.com / April 2026
85
ON TE ST
ASCIL AB A6B
The A6B’s waveguide is unusual in that, as well as affecting the tweeter’s sensitivity and dispersion, it has been designed to mitigate cabinet-edge diffraction.
are required to move significantly, the surround constitutes a significant portion of the overall radiating area, and if that varies on in and out stroke, distortion will result. While the Purifi surround grabs the headlines, the engineering complexity hidden down in the driver motor system is, I think, more significant. The basic electro-mechanics of a conventional driver motor system — the voice coil, magnet and pole piece/top plate metalwork — are hamstrung by numerous non-linear
phenomena that, if left unattended, result in distortion the instant a signal at the terminals demands that the voice coil moves. I don’t have space to explain all the non-linearities here, or Purifi’s approach to suppressing them (try this if you’re interested: https://purifi-audio.com/blog), but if there’s another driver manufacturer out there that takes a more deliberate and innovative approach to fixing non-linearity and distortion, I’m not aware of them.
The High End The Purifi project is a product of Northern European audio engineering and so, despite its Indonesian manufacture, is the A6B’s SB Acoustics tweeter. Although SB (Sinar Baja Electric) are an Indonesian company, their design office is in Denmark, a country with an unparalleled tradition of driver design
Diagram 1: The A6B’s on‑axis frequency response (red trace), and its second and third harmonic distortion products (green and blue, respectively). The distortion performance in particular is remarkable.
Diagram 2: Comparing the on‑axis response (red) with measurements taken 20 and 40 degrees off‑axis horizontally (blue and green, respectively).
86
April 2026 / www.soundonsound.com
ICONIC DESIGN, REBORN.
MEET THE NEXT GENERATION OF QU SERIES: Reengineered with the latest FPGA processing technology and versatile connectivity for today's sound engineers.
ON TE ST
Ferry Island Modular Four Seas Eurorack Module
W
avetable synthesis. I can’t think of another synthesis type that has given way to quite so many different ideas and approaches. From where I’m standing, when it comes to wavetable synthesis it’s all about workflow. The Four Seas is nascent Finnish developer Ferry Island Modular’s contribution to this discussion: their debut module, it’s a bold statement of intent, joining a litany of synths and modules from companies large and small that each present their own thesis on how to best access this strangest means of synthesising sounds. A ‘four-dimensional’ wavetable oscillator, the Four Seas can, in its creators’ words, “transform sound exploration into a tactile, intuitive experience” by allowing you to explore wavetables as a ‘three-dimensional cube’. The idea is this: three primary controls, X, Y and Z, represent three axes across which you can choose a position within one of 12 8x8x8 cuboid wavetables. From this fundamental position, three additional controls for X Spread, Y Spread and Z Spread allow you to incorporate subtly — or not so subtly — deviant positions, with the resulting four signals sent out via the four outputs. I should also say that this 26HP module is really a lovely thing, physically speaking. Its matte-black textured faceplate belies the nautical theme with gold, plant-like graphics with LED leaves (or are they petals?). Its panel is on the large side, for sure, but I cannot fault the interface, which is both spacious and economical. The Four Seas’ factory wavetables range from basic waveshapes to samples of machinery to vintage arcade sounds (it is also possible to load custom wavetables). These are well selected, I must say: from warm and mellow chiming tones to reedy, razor-sharp sounds, things can switch from gentle to abrasive very quickly. Indeed, what really makes the whole thing come alive is the fact that it gives four lots of opportunities for movement, which is of course critical when it comes to using wavetables. More often than not, a static position doesn’t make for the most
90
April 2026 / www.soundonsound.com
interesting sound, but involve even a little movement and a trove of dynamism can present itself. Here, one wavetable can provide four different distinct versions of itself simultaneously; and since all three Position controls and all three Spread controls have their own CV inputs (the former with attenuverters), if you have the modulation capacity in your system you can generate some seriously dynamic morphing sounds. I will say that naming the outputs 1, 2, 3 and 4 but everything else X, Y and Z doesn’t make for the most intuitive relationship, but it gets the job done. The four outputs’ efficacy extends beyond wavetable position: there’s another type of Spread — Frequency Spread — which means the oscillator can be spread into four individual pitches, which are then sent to the four different outputs. This can look like subtle, chorus-like detuning or fully chordal results. Once again, I can’t help but
wonder if the semantics could have been different here to help with the workflow, but hey ho. The Spread Mode knob presents eight different quantisations to choose from; these range from just intonation to Pythagorean fifths to tuning based on the Fibonacci sequence. The Spread amount is also CV-controllable, as is wavetable bank selection, so once again movement is encouraged — I found dialling in subtly undulating chorus to be intriguing, but patching a random stepped voltage to the Bank CV input was positively brilliant, spitting out all manner of off-kilter harmonics. This is of course beyond the primary Volt-per-octave input and accompanying FM CV input. I don’t think I’ve come across an oscillator with quite so much inherent potential for adventures in frequency — melodically quantised or no. One thoughtful touch in this department is a Lock button next to the tuning knob, to prevent accidental
“Modulating even two thirds of the Four Seas’ parameters at once, I’ve no doubt I could centre an entire ambient set around this one module.”
changes in master pitch. Maybe it’s my clumsy fingers or baggy sleeves, but I appreciated this greatly. As if the whole ‘movement’ thing couldn’t be hammered home any more by the Four Seas, on the other side of the panel there’s more. Just above the outputs are a brace of inputs for modulating the oscillators, along with attenuators and buttons for choosing one of three modulation modes. LFO mode drops things to sub-audio rates to become a very complex but usable modulation source to send elsewhere (or internally, of course). It’s also possible to add sync into the mix for outputs 1 and 3 — hard sync,
Ali Modular Esu’s Trifecta Eurorack Module
I
’ve often pondered the usefulness of multi-effect modules that only let you run one effect at a time. It seems criminally mean to have all these possibilities built into the module but not be able to run a delay with a reverb, or a chorus with a vibrato. Esu’s Trifecta from Ali Modular is a multi-effects module that offers three effects in series, so if you must have
soft sync or ‘flip sync’ waveshape reversal. Modulating even two thirds of the Four Seas’ parameters at once, I’ve no doubt I could centre an entire ambient set around this one module. The list of designers offering their various takes on wavetable synthesis is growing apace; but if (as I believe it is) wavetable synthesis is indeed about workflow and movement, the Four Seas does both better than most. Keep an eye on Helsinki: there are exciting things afoot. William Stokes $
$699
W
www.ferryislandmodular.com
granular into ring mod into reverse delay in the one device then you can. Along with a striking front panel, you get stereo in and out, eight CV inputs, an envelope follower, a clock input, a ducking input, four knobs, eight buttons and a very small screen. You get the sense this last will determine whether you enjoy using this module or not. The effects roster is impressive. At the time of writing, you’ve got four types of distortion, a couple of filters, EQ, there are seven forms of modulation effects, seven delays, four reverbs and one fascinating granular effect. You can load any effect into any of the three slots, reorder
them, edit them and store the whole setup in one of 20 presets. The CPU isn’t infinite, and so you can’t quite run three instances of some of the deeper effects, but there’s plenty of processing to do most of the things you can think of. Each effect can have up to eight parameters, accessible via the four knobs. The Alt button switches between the Main and Alt parameter pages, and as you turn a knob, the parameter appears nice and large on the screen.
www.soundonsound.com / April 2026
91
ON TE ST
S O N A L D ’S I LVA
W
hen it comes to orchestral sample libraries we can safely say that we are well and truly spoilt for choice. There’s a flavour of virtual orchestra out there for everyone, from full-sized ensembles recorded in the world’s best rooms, to individual instruments captured intimately; physically modelled instruments, for those who value performance above all, and pre-recorded orchestral phrases for those whose ideas exceed their ability to put them down. Sonuscore’s flagship The Orchestra Complete series has been a steady presence in this crowded playing field, and, with its latest version, aims to provide even more tools to make orchestral composition faster and more flexible.
Sonuscore The Orchestra Complete 4 Sample Library
Easy and quick orchestral arrangements are very much the order of the day as Sonuscore’s The Orchestra Complete reaches its fourth incarnation.
Overview For the newcomers in the room, here’s a quick primer on what The Orchestra Complete (TOC) is all about: an 80-player orchestral library powered by the Ensemble Engine that makes use of arpeggiators, velocity envelopes and instrument layering to help quickly sketch out musical ideas or craft complex orchestral arrangements. While TOC allows you to generate an entire arrangement from playing just a single note or chord, it’s worth noting that there are no pre-recorded phrases in the library, thus ensuring that you have full control of your arrangement at all times. It is this flexibility that makes the orchestra well suited to established composers who might appreciate the speed of an arrangement
94
The playable range for each preset/instrument is marked in blue on the keyboard. Animated Orchestra presets, “optimised to sound best in the two octaves around middle C”, according to Sonuscore, are marked in green.
generated with minimal manual programming, while also wanting control over individual patterns and sounds. SOS carried an excellent in-depth review of TOC’s ancestor The Orchestra (www.soundonsound.com/reviews/ best-service-orchestra-sonuscore), which you might want to check out to get up to speed if you haven’t used it before. In this review, we’ll focus on what’s new and exciting and how it all plays together.
The Sound & The Fury The fourth edition of TOC runs in Native Instruments’ Kontakt or Kontakt Player (versions 7.10.7 or higher) and, in its 27.6GB package, contains The Orchestra (the foundation of it all), subsequent expansions Strings Of Winter, Woods Of The Wild, Horns Of Hell and the newest — and equally dramatically named — Forces Of Fury, which, as the name suggests, is designed for writing power-packed action cues; the more dramatic, the better. With over 150 new presets, expanded articulations, and new single instruments, ‘cinematic’ is the keyword here and to that end, Forces Of
April 2026 / www.soundonsound.com
Fury brings with it a brand new collection of full string ensembles, and massive percussion samples recorded in London (somewhere unspecified). So what does Forces Of Fury add to the existing library? It offers an immediately bigger sound (what is often referred to as ‘epic’ in movie circles), and has an in-your-face quality that is characteristic of contemporary blockbusters. The core Orchestra pack also has big strings, but they somehow feel stately. Forces Of Fury, on the other hand, is buzzing with energy. These are the strings you bring out for the epic battles, dizzying action sequences and breathless chases. They’re the young guns, first on the field, ready to fire things up. And while Sonuscore have reached for the heights, sonically, the usability of the library remains firmly grounded
in practicality. The clean, easy-to-use GUI, lightning‑quick preset load times and well-labelled functions ensure the composer’s workflow is uninterrupted. The search function is especially well organised, which is important when you’re dealing with thousands of presets. You can search the complete collection by library, category, presets, instrument, section, (rhythmic) feel, and character. The last one is very much appreciated; sometimes you just want to know what is Majestic and what is Peaceful without worrying about the deeper, more technical aspects of a preset.
Bigger, Better, Faster, More TOC4 takes Big Percussion, which already came with previous versions (Taikos, Tom Ensemble, Gran Cassa, Tam Tam, Snare Drum, Piatti, Suspended Cymbals), and supersizes it with the addition of powerful individual instrument and ensemble drum hits. Large Bass, Concert Tom, Metal Drum, Percussion Ensemble, Group Stomps, Snare, Kodo Drum and Log Drum Hits ensure that your impactful trailer moment, rousing battle scene or tense climax won’t land weakly. Performing the individual percussion instruments is a treat, simply because they respond well to velocity. Playing something like Mammoth Drums, for example, is very exciting because you can feel the tension and excitement build as you pound on the keyboard. I firmly believe it makes for a better composition when you get feedback from a virtual instrument. The other plus point is that the drum sounds are big enough right out of the box that you don’t have to put them through parallel compression, layering, or
any other sort of processing to achieve cinematic scale. The string sections have also been boosted in terms of size and intensity while maintaining the speed and efficiency the library prides itself on, so bigger strings doesn’t have to mean more time spent selecting and arranging. Titled simply High Strings Ensemble and Low Strings Ensemble, the performance-ready cinematic strings are a drag-and-drop affair. The Low String Ensemble features six articulations: Staccatissimo, Sustain, Marcato, Marcato Flams, 16th Figures and FX Shorts, available all together in a multi-articulation NKI, as well as individually. Each articulation in the multi-articulation preset is easily triggered by simple (and well-labelled) keyswitches, keeping with the spirit of the library. The High String Ensemble All Articulations patch contains four more articulations in addition to the above: Tremolo, 16th Doubles, 16th Falls, and Sustain Extreme. In the High Strings standalone articulations list, you’ll also find a Stravinsky Staccato preset, oddly not featured in the All Articulations patch.
Keyswitch Cues In another nod to practicality, the new presets contain sections that are structured like real cues with Intro, Main A, Main B and Outro parts. Switching between them is easy thanks to the powerful new keyswitch system. Within each new preset (look for the ones with a ‘KS’ suffix), simply trigger your section of choice using one of four keyswitches, automatically assigned as Intro (C0), Main A (D0), Main B (E0), Outro (F0). This not only speeds things up, because you’re spared the hassle of loading
Sonuscore The Orchestra Complete 4 $479 pros • Perfect for quickly putting down or A/B testing musical ideas. • Vast range of orchestral instruments, essential articulations and textural effects all in one place. • High level of flexibility allows customisation of individual instruments even within an ensemble patch. • Ensembles come mix-ready out of the box. • Bonus effects like risers, crescendi and snare rolls eliminate the need for manual programming of orchestral staples.
cons • Immediately useful for early career composers who may have limited experience with orchestration. However, the price may place it out of reach for that same target audience.
summary The Orchestra Complete 4 takes the already generous offerings of the previous iterations and adds grander ensemble strings and more robust percussion for maximum dramatic impact.
a separate patch for each part, but also helps work out your musical ideas. Going back and forth between the Intro/Outro and the Mains let me hear the evolution of the piece I was working on in a way that made it easy to make quick adjustments and test out musical ideas in real time. It’s also fun to ‘perform’ the piece and go through sections with rapid and uncomplicated keyswitching. A quick aside for those working with a less-than-full-sized keyboard. It’s difficult enough to navigate the entire playable range of an instrument on a small MIDI keyboard, more so when it comes to a full orchestra. Add keyswitches to the mix, in the lowest range of the scale, and it feels even more like programming and less like playing. You can solve this in several ways, documented well on the Internet: acquire a separate small MIDI device solely for keyswitching; remap keyswitches within your DAW; use an app like TouchOSC; or, quite simply, just click with your mouse on the Kontakt keyboard display. It’s clunky, but it works well in TOC4 and the only lag I experienced while testing it out was of my own doing when I didn’t hit the keyswitch on time.
Add Octave Use the Arpeggiator (Arp) and Sequence Customizer (Seq) together to create rhythmic patterns and customise the pitch of each step within a sequence.
Another interesting addition to TOC4 is Add8va, a feature that enables you to double the octave for each instrument at www.soundonsound.com / April 2026
95
ON TE ST
SONUSCORE THE ORCHESTRA COMPLETE 4
those big stabs and have the instrument react to your playing. The piano patch also deserves a shoutout in this regard. Another shoutout goes to the effects presets, which feature Crescendi, Falls, Rises, Hits and Textures and are very useful indeed. If you remember the early days of sample libraries, you had to painstakingly draw in things like snare rolls and risers. I am very grateful for the ready-made snare rolls found in the Forces Of Fury Percussion Ensemble preset, because let’s face it, a snare roll is a snare roll — there is no personal touch getting lost here.
Conclusion
Individual instruments in an ensemble preset can be controlled using the mixer, with most parameters easily assignable to MIDI CC.
the press of a button. This ties in neatly with the goal of making parts sound bigger and more dynamic. If you study the pre-assigned arrangements that come with each ensemble preset, the doubled octave is sometimes the only major difference between the Intro and a Main section, illustrating how you can make a part more powerful with a simple textural addition. Beginner composers sometimes tend to do too much with their arrangements (often out of fear that they’re not doing enough), and this simple technique of doubling the octave has such an outsized effect on making a part seem grander that it’s immediately obvious why the Add8va feature is such a great addition to the library. You could, of course, go overboard and lose all sense of realism in terms of what is possible with an orchestra, but that’s another lesson for another day.
window, but be careful with tweaking these settings because there isn’t a quick reset button to go back to the default mix levels that come with the preset. So, if you lose the delicate balance of the mix, your only solution is reloading the preset. Ctrl/ Cmd‑click resets the faders but only to 0dB, not to the level they were at when the preset loaded. If you would like to control when an instrument comes in during a part, just right-click and assign its fader via MIDI CC to your keyboard and you have full control. Marcato, Staccato and Tremolo patches respond wonderfully to dynamics, which is great because it is very satisfying to go for
The Orchestra Complete 4 is very much a working composer’s tool where the goal isn’t to endlessly chase the perfect composition, but to get the best composition you can before the deadline arrives. For those used to libraries with more control, you will miss not being able to fine tune things like legato settings, or being able to control the dynamics to a greater degree, but once you start playing to the library’s strengths, you will find you have a powerful, practical tool with which to put down your musical ideas in a fast and efficient way. Combined with the sounds of the previous three expansions that are also included in this latest release, TOC4 is a versatile one-stop shop for composers working across different mediums. $ $479. Upgrade pricing available. W www.sonuscore.com
Dynamics, Playability, Mix Dynamics are everything when it comes to making realistic-sounding orchestral pieces and in TOC4, by default, the mod wheel does the heavy lifting, with velocity sensitivity showing up to play in some presets. From the global settings menu, dynamics control can be assigned to CC1, CC2, or CC11. The up side to having presets that come with pre‑selected and arranged instruments is that the mix is all but done for you. The mod wheel then acts as a sort of VCA fader, which is good if you’re happy with the relative volumes of all your instruments. You can adjust individual instrument levels in the Mixer
96
April 2026 / www.soundonsound.com
The Settings wheel on the top right of the main window allows you to change the skin of your user interface and access the Humanize feature to add subtle imperfections to your arrangements for a more human feel.
Decapitator The Secret Weapon of Top Mix Engineers
From subtle to extreme, analog saturation is an integral part of great mixes. That’s why we studied all the analog classics, and painstakingly created a plug-in that brings the best of analog saturation to your studio. Choose from five different models to add analog character to every track and bus in your mix.
“Decapitator is instavibe-in-a-box.” – Fabrice “Fab” Dupont (André 3000, Shakira, Jennifer Lopez, Marc Ronson, Isaac Hayes)
Free 30-Day Trial at www.soundtoys.com
ON TE ST
Strymon NightSky Reverb Plug-in We looked at Strymon’s digital NightSky pedal back in SOS April 2021 (https:// sosm.ag/strymon-nightsky), and reviewer Simon Small rightly described it as “no ordinary reverb unit”. The pedal is all about special reverb effects, rather than conventional room and plate emulations, and it has since won lots of devotees. And now, those who prefer to stay in the box can get NightSky as a DAW plug-in. The NightSky plug-in supports all the mainstream formats for macOS and Windows hosts. It’s protected via iLok and you get two authorisations— you can choose a physical iLok or to register it to your computer, as you prefer. The plug-in is set out a little differently from the pedal version, with seven vertical rows for the various sections (Decay, Core, Tone, Mod, Shimmer, Glimmer and Drive), and separate controls for the wet and dry levels. This layout makes good sense, as it means no searching is required to access what, on the hardware, are secondary control functions — all you might need to access is in plain sight. However, the sequencer feature Simon discussed in his review has been omitted from the plug-in — obviously, within a DAW environment, you can use automation instead. The Decay section offers three reverb density settings, decay time and pre-delay and, below, options for the Infinite or Freeze modes that are triggered by the Hold button. Freeze sustains the current state of the reverb tail, allowing you to play over it, while Infinite adds to the held reverb as you play. Decay can go from a short ambience to a hugely long ambient wash, where the decay time is affected both by the Decay control and the Size/Pitch knob in the next section. Size/Pitch increases the size of the reverb core, essentially by controlling the speed of the process, and if adjusted during play it also affects the pitch, which can be quantised to a choice of musical scales or set to Smooth or Half Step. Tone includes low- and high-pass filters in the feedback path — switch to low-pass, and you’re given a resonance control for creating more synth-style filtering. The simple-looking Mod section is actually an important and powerful part of NightSky: it adds movement to the reverb tail. There’s a choice of six waveform shapes that can be used to target Verb,
100
April 2026 / www.soundonsound.com
Pitch or Filter, with controls for Speed and Depth. The Envelope option responds to the input dynamics, with Depth essentially controlling the sensitivity. The last three sections add more ‘flavour’ to the reverb, with Shimmer being selectable to process either the input to the reverb engine or its feedback path. Pitch-shift may be selected as musical intervals within ±1 octave (in most cases, I’d suggest that octave and fifth are the safest if you wish to avoid clashes). Glimmer enhances the input signal’s harmonics, and enhancement can be based on low or high frequencies. This isn’t the same thing as the orchestral-style enhancement of Strymon’s CloudBurst, but it does add a pleasing texture when switched to High, and some interesting low-end reinforcement when switched to Low. Drive can be set pre or post the reverb engine, and is used to add warmth and saturation. We have so many options for reverb now, but they’re not all of equal quality, and a hallmark of a really good reverb is that the effected sound seems to blend with the dry sound, rather than sounding like something separate. NightSky definitely passes this test. I tried setting up a long reverb with Shimmer and Glimmer to enhance a sparse piano part, and although my own keyboard chops are more Eric Morecambe than
Eric Satie, I have to say that the result sounded wonderful. NightSky demands relatively little of your CPU compared with some reverbs, and its clear layout feels even more immediate than that of its hardware counterpart — there are no hidden layers, so operation is very intuitive. All relevant functions can be automated, and clicking the eye icon helpfully adds numeric values to all the rotary controls. There’s also control over input and output levels with metering. The Mod, Shimmer, Glimmer and Drive sections all have on/off power buttons, and where there are options, such as for Mod Waveforms or Quantise Scales, these menus are always visible. When it comes to the effects on offer, I have to agree with Simon that NightSky is all about less-usual reverb effects, and while it can do ‘conventional’, that isn’t really its strength. If you’re a fan of ambient washes, glittery shimmers and shifting textures, this plug-in is most definitely worth considering, and to ensure that you know what you are buying, it can be downloaded as a seven-day demo, so be prepared to be convinced! As with the hardware the effects are seriously top-tier, but unlike the pedal you can use it on multiple tracks should you wish. Paul White $ $99. W https://www.strymon.net
prehensive
mics an
uide PLUS d
n So The Sound O
und Guide
tical A clear, prac eo r guide to ste the recording in real world! LEARN HOW
y
EE
o e r e t S g n i k i M
ar etailed gloss
FR
Includes com
s buyers g d accessorie
Includ es comp re h e n sive mics a nd access ories buyer s guid e P LU S d e ta i l e d glos sar y
TO...
g s and recordin X Choose mic ith confidence techniques w e, in any space. rc — for any sou le stereo le, controllab r. ab st ve ie ch o XA ut trial and err images witho ys really ow stereo arra lisation. h d n ta rs e d n XU depth and loca create width, and th headphone o b h it w rd co X Re ack in mind. speaker playb o to plan. things don’t g if t o o sh le b u X Tro
This FREE fully illustrated, 80-page eBook demystifies the physical and psychoacoustic principles behind stereo audio capture, busting longstanding myths and replacing guesswork with clear, measurable concepts. X It explains why different stereo microphone techniques behave the way they do — and how to choose and use them with confidence in real recording situations.
X Every concept is supported with real-world examples, combining clear explanations, detailed diagrams and audio demonstrations, to make complex ideas immediately usable.
X Designed for recording engineers, music-technology students, and technically minded musicians, this guide gives readers the tools to make deliberate, repeatable stereo recording decisions, leading to successful, predictable results.
Available FREE from sosm.ag/stereo-miking-ebook
TECHNIQUE
Mike’s £40 perforated-panel Helmholtz resonator. All it needs now is a lick of paint...
BUILDING A HELMHOLTZ PANEL A DIY Guide For Project Studios Affordable and effective, broadband absorbers are the first port of call for acoustic treatment with good reason. But sometimes you’ll hit on an acoustics challenge that requires greater precision... 102
April 2026 / www.soundonsound.com
MIKE SENIOR
W
hen you’re acoustically treating a project studio for mixing purposes, there are lots of straightforward acoustics fixes you can try. It doesn’t take more than a few strategically placed patches of acoustic foam, for instance, to scotch flutter echoes at high frequencies or to stop early reflections off nearby hard surfaces from comb-filtering your midrange monitoring. And judicious broadband bass trapping, typically in the form of large fabric-covered mineral-fibre slabs near the room boundaries, is usually pretty effective at damping most low-frequency room resonances.
Furthermore, all these tactics can be very cost-effective, since acoustic foam is fairly inexpensive and you can build broadband bass traps for yourself at a fraction of the cost of off-the-shelf products. Occasionally, though, there may be an acoustics problem that’s just too challenging for general-purpose absorptive treatments, especially if inconvenient realities such as doors, windows, and furniture restrict your placement options. In smaller mix rooms in particular, it’s not uncommon for one or two troublesome low-frequency room resonances to survive even quite a lot of broadband bass trapping. That’s when it’s useful to have a bass trap that can be ‘tuned’ to target more specific frequency
ranges. One of the simplest such designs is the perforated-panel Helmholtz absorber, and in this article I’d like to explain how you can build one of these for yourself.
I won’t bore you with the details of that equation, though, because there’s actually no need to tangle with it directly — there’s a little Excel calculator spreadsheet at https://docs.cambridge-mt.com/MSFTSS/ HelmholtzCalculator_260207.xls that’ll do all the maths for you, so you can easily experiment with different construction parameters to see how they affect the resultant resonant frequency. There are a couple of important general principles you can draw from the equation, however:
Ready To DIY Everyone’s heard someone blowing over the top of an empty bottle to create a musical note — a note that results from the inherent resonance of the bottle’s contained body of air. If you placed that bottle in your mix room while playing back music, it would also resonate in sympathy with the soundwaves hitting it and, crucially, would therefore remove some of that frequency energy from the room. It’s this fundamental principle that Helmholtz absorbers take advantage of, the idea being that you tune them to match your troublesome room mode, and they then absorb some of that frequency — or, to be more accurate, a narrow band of frequencies centred on the absorber’s resonant frequency. In practice, though, a Helmholtz trap is usually a lot larger than a bottle, so that it absorbs more energy, and it usually has some damping material added to its resonant cavity to make its resonant peak broader, and therefore widen the band of frequencies it absorbs. You can build Helmholtz absorbers in several different ways, but the perforated-panel variant is tempting for the DIY-minded home-studio owner, simply because it’s so easy and cheap to construct. Basically, it’s just a large, sealed wooden box with holes drilled in the front, the box typically being half-filled with low-density mineral-wool loft insulation. For example, I put together the one pictured in this article in a single morning, with just a cordless drill, a staple gun, and maybe $50 worth of materials from my local hardware shop. (For detailed instructions, see the ‘Building The Trap: Step By Step’ box.) The biggest potential pitfall, in fact, isn’t the construction itself: it’s making sure that you’ve tuned the trap to the correct resonant frequency. I say this because, as I discovered while researching my own build, there appears to be a flaw in the widespread received wisdom on this subject amongst online home-studio pundits. Let me explain...
One of the best-known reference works on acoustics, F Alton Everest’s Master Handbook Of Acoustics has a dedicated section on perforated-panel Helmholtz resonators, including an equation for calculating their resonant frequency based on their dimensions.
from it when designing their own acoustic treatment. Conveniently, there’s also a two-page section specifically dedicated to perforated-panel Helmholtz absorbers, complete with a handy equation you can use to predict the resonant frequency of the empty box, based on its depth, the front-panel thickness, the diameter of the drilled holes, and the percentage of the front panel’s area you’ve drilled out (the ‘perforation percentage’).
• T he greater the number of holes you drill in the front panel, and the bigger they are, the higher the resonant frequency. • The deeper the box (ie. the greater the distance between front and rear panels), the lower the resonant frequency. There’s one more basic concept too of course: larger traps absorb more energy. Beyond that, though, one of the great things about this design is that you can build useful perforated-panel absorbers of pretty much whatever size you want, and that allows you to design them specifically to fill otherwise unused spaces in your studio — behind your desk, perhaps, or under a bench, or up at ceiling level. I’ve even heard of some people using these kinds of traps as speaker stands! But here’s the hitch: unfortunately, most project-studio owners using F Alton Everest’s equation overlook one crucial bit of small print that’s tucked away in a graph
Lies, Damn Lies & Equations One of the best-known academic texts on acoustics is F Alton Everest’s Master Handbook Of Acoustics, which is now in its seventh edition. So it’s understandable that a lot of recording musicians draw inspiration
The crucial sentence in F Alton Everest’s Master Handbook Of Acoustics that most project-studio DIY enthusiasts overlook: “The presence of the mineral wool shifts the frequency of resonance considerably from the theoretical values.”
www.soundonsound.com / April 2026
103
MI X RE S C UE
Ember Rev are, from left, Chris Peckham (accordion), Dan Ecclestone (vocals and guitar), David Youngs (drums and electronics) and Dom Hall-Smith (bass guitar).
Ember Rev New arrangements, new mixes and new masters present an album in a fresh light — and offer an escape route from a sonic trap. SAM INGLIS
T
o stand out in a saturated music scene, you need a point of difference. Cambridge four-piece Ember Rev have several, starting with their unusual line-up of vocals, guitar, drums, bass and accordion. Under the benevolent dictatorship of singer and songwriter Dan Ecclestone, the Rev have released
106
April 2026 / www.soundonsound.com
five albums, evolving and expanding their horizons every time. I’ve been involved with several, and greatly enjoyed mixing their recently released fifth album That Night I Dreamt A Forest Grew. After the dust had settled on that project, Dan came to me with an interesting suggestion. Back in 2019, I had engineered the basic recordings for Ember Rev’s third album, From The Country To The City To
The Sea. These recordings were made on location, with the band playing all together in a room, before replacement accordion and vocal parts were overdubbed. This approach showcased the band’s excellent musicianship, and captured all the energy and drive you could hope for. But it also had its down sides. Since the core tracks were laid down in a single weekend, there hadn’t been time to develop different
sounds for individual songs, and we had struggled to get satisfying recordings from Dan’s guitar. Casting a look in the rear view mirror, Dan felt there was scope to revisit the album to unlock some of its untapped potential. From his point of view, this meant overdubbing extra guitar parts on all of the songs, and reworking some of the arrangements with electronic elements and other instruments. And from mine, this meant getting the chance to take it in a slightly different direction sonically.
Stone Soup The room in which the band was tracked is very ‘live’, with stone walls, minimal absorption and no separation. It’s a space that makes its presence felt on anything you record there, and on drums in particular, presents a sound that is exciting but also quite ragged and uncontrolled. The original mixes, by Simone Silvestroni, had enthusiastically embraced this, with the room mic to the fore, and lots of compression bringing up the ambience.
Listen Good You can hear ‘before and after’ audio examples from this article on this month’s media page at https://sosm.ag/mix-rescue-0426.
Nothing about them needed ‘rescuing’, but in its original form, the album made a pretty uncompromising sonic statement. So, when Dan asked if I’d be willing to remix the album to incorporate his additional parts, I was keen to see if I could give it a different slant, and perhaps wriggle free from some of the limitations my raw recordings had imposed. The remixed album can be found in full on Ember Rev’s Bandcamp page at emberrev.bandcamp.com, but in this article I’m going to focus on the epic ‘Ultramarine’. A standout track that has since become a live favourite, this is also the song that changed the least between 2019 and now. For the 2026 version, Dan undid a mistaken
The original recording sessions for From The Country To The City To The Sea took place over a single weekend in 2019, on location.
www.soundonsound.com / April 2026
107
MI X RE S C UE EMBER REV
vocal edit and added an acoustic guitar part, but otherwise I was working from the same multitrack that was used for the original mix.
Light & Shade David Youngs’ drum parts are more complex and varied than is typical of rock music, incorporating everything from delicate jazz rudiments to Bonhamesque hard rock. Several of the album tracks, including ‘Ultramarine’, featured multiple styles within one song. At the mix, this creates some interesting challenges, because the settings that are appropriate to one section may not work for the next section. As I see it, there are two ways of dealing with this. One is to create a duplicate set of drum tracks for every section that requires different settings. The other is to use automation to adapt the settings to the section. The first option makes the DAW project unwieldy and can throw up issues at the transitions between sections, so I prefer the second approach where possible. As an example, I generally use Sound Radix’s Drum Leveler both
108
April 2026 / www.soundonsound.com
The generally midrange‑y, aggressive sound of the raw drum tracks necessitated extensive use of dynamic EQ, mostly from FabFilter’s Pro-MB. In this case the attack time for the centre band is set to its fastest and look‑ahead to its longest setting, allowing it to act instantly when tom transients occur.
as a gate and for transparent dynamics control on close mics. By automating the Lo Threshold and Target parameters, it’s possible to ensure that the gate triggers reliably throughout the song, and that the compressor doesn’t attempt to push things up too far in quietly played sections. Another way of managing this sort of very dynamic drum performance without splitting it out into duplicate tracks is to use dynamic EQ or multiband compression rather than conventional EQ. That way, for example, you can set things up so that a midrange cut is applied only to the louder sections, or a high-frequency boost only in the quieter parts. Most of my drum mixes thus contain a few instances of FabFilter’s invaluable Pro-MB, but this was an extreme case.
Pointy Sticks There is a chapter in Lord Of The Rings where the hobbits attempt to find their way
through a malevolent forest, which subtly forces them in the direction it wants to take them instead of where they want to go. Something of the sort was true of the drum recordings here. All of the individual tracks sounded decent in isolation, and once the necessary automation was in place, they responded well to standard processing such as gating and filtering. But when they were faded up together, they always seemed to coalesce into a sound that was unforgivingly hard and midrange-y. Even muting the room mic, gating the close mics and applying different snare reverbs couldn’t hide the fundamental abrasive character of the recording. I was beginning to see why Simone had taken the approach he did! Bringing things under control required using both static and dynamic EQ, and across 10 drum tracks and a handful of busses, I ended up with probably 15 to 20 different cuts at various points between
Discover SOS For Artists : A Complete Platform for Modern Music Creators
Your end-to-end music production suite Designed to support independent artists, producers, and collaborators at every stage of the music-making journey, SOS For Artists brings together all the tools needed to take your music from idea to release.
Create
Produce
1. Sample Selection Made Simple Over 3 million royalty-free samples growing monthly.
1. Mix & Effects Tools The effects collection includes EQs, Compressors, Reverbs, Delays and Saturators from trusted names. Including Eventide, Arturia, Baby Audio, IK Multimedia, and Synchro Arts.
2. Instruments & Synths Includes a curated collection of high-quality plug-in instruments from brands like Spitfire, UJAM, Arturia, GForce, Sonuscore, and more.
2. Mastering — Fast, Intelligent SOS For Artists includes access to the advanced AI mastering engine from LANDR.
3. Stem Extraction with AudioShake An integrated stem-splitting plug-in allows you to isolate vocals, drums, bass, or instrumental parts. 4. Starter DAWs Included For newcomers, the subscription includes lite versions of Steinberg Cubase and Ableton Live.
Distribute 1. Global Digital Distribution Distribute your music to over 150 platforms including Spotify, Apple Music, Tidal, Amazon, and Deezer. Or, if you use these platforms transfer all tracks to SOS For Artists without losing data. 2. Monetization & Royalty Splits Retain 100% of your royalties or use the Royalty Split feature and divide the earnings with your collaborators.
FREE PLAN
ESSENTIALS
ign up and explore S the features Kickstart your creativity with 7,800 samples Preview the LANDR Mastering tool Preview Distribution
or $12.99* per year per month $ 1,000 worth of Tools inc 18 Plug-ins 1200 Sample Credits U nlimited MP3 + up to 36 WAV masters U nlimited Distribution
ONLY
99
$
* Monthly price does not offer same number of Plug-ins or Sample Credits ** Also available in most countries worldwide in your local currency.
3. YouTube Integration Link your official YouTube artist channel to keep distributed content and subscriber base in one place. 4. Promotion & Reporting Promotion tools include Linktree-style landing pages and content creation tips to help boost visibility. Detailed royalty reporting shows trends, top countries, and top-performing platforms.
PRO
199
$
or $19.99* per year per month $2,000 worth of Tools inc 64 Plug-ins 2400 Sample Credits Unlimited MP3, WAV + HD WAV masters Unlimited Distribution
ONLY
www.sosforartists.com
MI X RE S C UE EMBER REV
To add some weight to the bass guitar, I created a parallel track and applied some extreme settings in Soundtoys’ FilterFreak to isolate the very low end.
‘Ultramarine’ was the last one I mixed, I spent a lot of time on this. In fact, it’s all too easy to become fixated on this sort of ‘problem’, to the point of going too far and creating a cure that’s worse than the disease. Initially, that’s exactly what I did. I was pleased with the clarity and balance of the first mix I sent in, but Dan rightly pointed out that it had the wrong feel: it was tight and snappy rather than expansive and epic. I was already using more compression than I normally would on the drums, but in my initial mix, I’d had the room mic muted. It was clear that I needed to incorporate some of its brattish midrange energy after all, and since the exciting drum sound on the original mix seemed to involve heavy compression, I experimented
with numerous dynamics plug-ins. It’s surprising how differently they respond when pushed hard on this sort of source. Some unnaturally accentuate the bass drum transient, others distort or become grainy, and yet others just sound flat and uninteresting. My two favourites in this case were both analogue ‘plug-ins’ running on the McDSP APB platform. Chickenhead was the more thrilling, but in the end I went with the Moo Tube valve-style limiter, which zapped the transients and brought up the ambience in a more controlled yet still exciting way. Dan wanted more drive from the electric guitars, so I duplicated the DI part yet again and applied FabFilter’s Saturn 2 to create a thoroughly nasty buzzsaw fuzz tone for the second half of
the song. Dan also came up with another interesting perspective on the use of reverb and delay. Several of the songs on the album are meant to evoke the ocean, in an oblique sort of way, and he heard delay-based effects as being key to this. So I created another special-effect reverb for the extended drum roll in the song’s central section by feeding the signal first into Arturia’s Spring-636 and then into IK’s The Farm Stone Room, and used Baby Audio’s Spaced Out to create a trippy vocal delay/reverb combo that could be faded in and out. One other piece of band feedback necessitated a revision. On most of Ember Rev’s songs, the bass is doing much more than merely supporting the chords, and Dom felt it needed more bite to make the parts clearer. Achieving this without choking up the midrange proved hard; I changed the settings in the Helix plug-in, but also discovered that reintroducing some of the miked bass cab into the mix helped to bring out the articulation in Dom’s playing.
Mastering
The iamreverb plug-in was one of several reverbs used for different sources, in this case the accordion.
112
April 2026 / www.soundonsound.com
With everyone satisfied — or possibly just too tired to request further changes — it was time to get the album mastered. This presented a unique opportunity as far as Mix Rescue articles go, because mastering engineer (and sometime SOS author) Ian Shepherd had also overseen the original version of From The Country To The City To The Sea. Ian kindly agreed to dig out his notes and offer some thoughts, which you can read in the boxout.
Ian Shepherd: Mastering & Remastering extra variety in long-term (macro) dynamics of Sam’s new mixes, even though the Getting revised mixes to master is fairly common, but remastering an entire album micro-dynamics (short-term transients) were similar. Generally the gaps between from new mixes is much rarer, especially years after the original release! It was songs were shorter on the new master as well. This was partly because many of an enjoyable challenge, though. Dan is an old friend, and I’ve hugely enjoyed the original mixes included longer fades of delays and processing texture, partly mastering all Ember Rev’s albums, and watching their sound evolve from quirky because Dan has said recently that he typically prefers short gaps, but perhaps indie progressive folk-pop (or something) through to quirky epic progressive also because the extra dynamic variety makes the album overall feel less intense, synth-folk-pop (or something else!). and needs less ‘space to breathe’ between songs. I decided to start completely fresh with this new version, and didn’t refer Comparing the different mixes and masters in this way gives back to the original until the new master was approved. I knew that a really interesting perspective on the limits and remit of Dan had approached the reworking mainly for musical reasons, mastering, for me. The sound of the original mixes constrained but I also knew how much the band’s sound has evolved, and how far I could move the sound of the master, but also raises felt it was important to go in and react entirely by instinct, as if the question of how much I should have moved them. The it were a brand new album. I also didn’t realise at that stage that Sam had recorded the album originally, which makes original vision was for a dense, band-in-a-room vibe, and the very different final result even more interesting. that’s what Simone achieved. These new mixes and masters The mixes were already in great shape, so I was give us a different take on the same recordings, and the able to use simple, straightforward moves — subtle EQ new mixes are closer to my own personal taste — but they’d tweaks, gentle multiband compression and light limiting also been approved by Dan, the artist. Knowing he was happy — to achieve a satisfying, musical result. I was really pleased with the original mixes at the time, and even requested the way with how it turned out and Dan described the final result as they sounded to an extent, means it wouldn’t have been right Ian Shepherd mastered both “extraordinarily satisfying”, which is the kind of feedback for me to make them sound more like the newer mixes than editions of From The Country To The I like to hear! And so the time came to listen back to the I did back then, even if that had been possible. City To The Sea, six years apart! original and offer some comments for SOS. The comparison Mastering engineers have great power, which comes with great responsibility! Yet, despite this power, there are proved to be even more interesting than I’d anticipated. plenty of things we can’t control without stems — but at the point where the client When I first listened back to the original release, I was surprised by the overall agrees this might be necessary, we should really be going back to the mix, in my sound, especially in comparison to the band’s more recent albums. I didn’t opinion. Recent stem-separation technology makes it more tempting than ever remember having any particular problems with the original mastering process for mastering engineers to overstep the bounds of their responsibility, and I really — although, looking back at emails, I had requested that Simone remove the think we should be cautious about this. Partly because it will never sound as good under-snare mic, as it added a brittle, harsh quality that prevented me opening out as a mix adjustment, but also because it’s our responsibility to respect the creative the high frequencies of the overall mixes as much as I wanted to. I’d also queried wishes of the artist, and have empathy to support and enhance their vision of the the generally crunchy, distorted drum sound, but this was something Simone said way the music should sound. Ian Shepherd Dan liked and wanted him to lean into, so I followed their intention in that respect. As Sam has described, the original mixes were very dense in the midrange. Head to www.productionadvice.co.uk/ember-rev for Ian’s video analysis. My masters worked to enhance the lows and open out the highs, but even so, when I listened anew, I found myself wondering why I hadn’t gone even further in that direction. I decided to open up the original project and take a look. What I found was that, as expected, I’d worked to address the heavy mids in the original masters, generally boosting the highs and lows more, but also shaping the contours of the higher frequencies differently for several songs. I’d also used a three-band compressor with the crossovers at 160Hz and 3150Hz and each band having the same settings. This helped to smooth out aggressive moments in the midrange, while still allowing the highs and lows to come through better without adding extra density. But when I tried experimenting with more dramatic moves, I quickly remembered why I hadn’t gone further originally. In a nutshell, the gritty drums and edgier guitars and vocals prevented more dramatic EQ changes — especially since Dan had said he liked them. Sam’s new mixes had much more air and space generally, but also bigger and warmer drum sounds, reflecting the different Ian Shepherd’s EQ settings for the original mixing decisions he describes in the main article. Dan’s original idea had been mix of ‘Ultramarine’ and the remix (below). to present a “band playing together in a room”. The new mixes move away from this and have much more of a traditional studio-recorded feel, which provides an interesting contrasting perspective on the recordings, and forms a transition to the band’s later sound, to my ears. I also noticed that Simone’s original mixes were more heavily compressed and full of complex delays and reverbs, which fill up the textures, whereas Sam’s are simpler and have much more space. I mentioned this to Dan recently and he thinks this is also something he encouraged from Simone for the original release, along with the more aggressive sound. This meant that with the new mixes I was generally working to optimise and manage the dynamics — most people know what a fan of balanced dynamics I am, but these benefited from some extra glue and consistency — whereas with the original mixes my process was much more about preserving and in some cases increasing the contrast between sections of songs, sometimes using automation moves before the dynamics processing. Looking at the bigger picture, overall my new master is about 1dB louder. What’s interesting, though, is how this plays out over the whole album. The integrated loudness of the loudest songs from both were similar, but the loudest short-term moments within songs were higher in the new version, reflecting the
www.soundonsound.com / April 2026
113
TECHNIQUE
How often should you release music — and what should you release when? THE SOS TEAM
O
ne of SOS For Artists’ key strengths is that it can help you streamline the process of releasing your music. Obviously, though, it’s down to you to decide what you want to release when, and the apparently relentless demands of artists in the streaming era can mean those decisions aren’t as straightforward as you might like! To start, let’s rewind a few years, to a time before the Internet and streaming dominated the record industry. Artists typically expected to release one album per year, along with maybe three or four singles — at least one (a ‘lead single’) would be released in the run-up to the album, to build excitement and momentum for the main release. Sometimes there’d be more in advance of the album, and others might follow, to keep the larger project in people’s minds and on the airwaves. The songs that were chosen as singles would also appear on the album, but different edits or mixes would be used, and the singles would have a B-side or, for CD singles, maybe multiple remix versions not found on the album. This approach avoided the release of exact duplicate content (something that might not go down so well with fans), meant that singles could be made more compact and ‘radio friendly’ without compromising the artist’s vision for the album, and, importantly, felt realistically manageable. Today, things feel very different. We’re bombarded with messages designed to keep us ‘feeding the algorithm’, and it’s all too easy for those aspiring to commercial success to assume that we must release a new track each and every month, and still spend a chunk of every day engaging with our audience. It doesn’t leave much room for the writing, recording, rehearsing and gigging, never mind having to earn a living outside of music. So what can we do to break free from this never-ending slog?
What’s The Frequency? The first two things to note are that there’s no universal rule about how often music should be released, and that you don’t have to bow to platform pressure. Sure, streaming has changed how music is discovered and consumed, with platforms like Spotify and Apple Music relying on engagement signals; saves, playlist adds, repeat listens
114
April 2026 / www.soundonsound.com
and skips all feed into recommendation systems that determine which songs are presented to new listeners. But your release frequency is a strategic decision and one for you alone. There’s nothing to stop you establishing a release rhythm that puts your needs, your style of working and your artistic integrity first and, importantly, is sustainable in the The Waterfall Release tactic: an iterative approach to releasing an album that longer term. aims to keep your tracks ‘visible’. So... what might to benefit from more frequent releases, that actually look like? Well, the ideal simply because the audiences for these release frequency for any given artist will styles often expect more activity, and be informed by several factors, including DJs and playlists regularly look for fresh your career stage, the genre in which you tracks to play. Fans of rock, indie, folk, work and your production workflow, as well jazz and classical — genres that are still as your long-term goals. very much about traditional instruments, For instance, artists with established bands and ensembles — on the other audiences, touring schedules and physical hand, are usually willing to wait longer releases often operate within longer album for a well-crafted album. cycles. A few pre-release singles may be enough, and still preserve the impact of Release Strategies the full release and supporting formats such as vinyl, ticketed performances or If you’re only interested in releasing singles, commissioned work. But such artists are dropping one every 4-8 weeks is probably also often in a strong enough position fine, especially if you offer remixes in to drop a new album without any prior between the main releases. But if your aim warning, since they have the support is to record an album every year, there are of press coverage, label marketing and a few release strategies used by labels that a dedicated fan base. you might look to for inspiration... In contrast, less visible artists may benefit Waterfall Releases: We talked earlier from more frequent releases, precisely to about the idea of an annual album release make them visible. Listeners are exposed being preceded by singles, to warm up to thousands of new tracks every day, and the fan base and build momentum, and attention can shift quickly. Without regular a similar tactic has evolved in the streaming work to build a fan base, even strong world. Many independent artists had taken songs can quickly fade from listeners’ to releasing a single on streaming platforms consciousness. Such artists might rely more every month, and then bundling those on singles to build familiarity and establish tracks into an EP or album once they’d consistency. However, their release strategy all been released. The ‘waterfall strategy’ still needs to be designed to build and takes this idea a step further. A track is sustain momentum, without causing fatigue. initially released as a single. Then, a few The musical genre can also impact weeks later, a second single is released, on how an artist approaches their but the first track is also bundled into release schedule. Styles that are rooted that release. And when the third single is in DAW-centric workflows (for example, released, both the first and second singles pop, hip-hop, R&B, lo-fi and dance) tend are bundled with that... and so on. You’re
Your releases can be scheduled to come out on different dates/times in different territories — something that can facilitate a more targeted approach to promotion.
still only promoting one album, but staggering the releases to extend your visibility: you build the EP or album one brick at a time, and use the traction gained by each new release to ensure the preceding tracks remain ‘visible’ for longer. From a platform perspective, it offers repeated opportunities for pitching, editorial consideration and audience re-engagement. From an artist’s perspective, it presents opportunities to re-present your earlier work. The strategy won’t suit everyone — the biggest risk is that it dilutes a carefully crafted album, but it can be very effective. For that to be the case, it’s important that you use identical metadata and the same ISRC code each time you add an existing track to a new release bundle. That way, existing stream stats will be displayed for your newly bundled duplicate tracks. If using SOS For Artists, this is really easy to set up: you can duplicate existing releases and copy metadata across to save time. Deluxe Edition: Another popular tactic is to wait a few weeks after an initial album release, and then release a deluxe version of it, containing additional tracks, collaborations or remixes that are designed to spark a second wave of attention. Again, make sure to retain the exact same metadata and ISRC codes for the duplicate tracks, so that streaming numbers for those tracks are boosted. Focus Track Strategy: Instead of promoting the entire album as a whole, consider selecting a different track from it every few weeks, and focus your marketing effort around each one. Pitching these to new playlists, and recording performances for your video channels, can help to keep your album project ‘alive’ for longer. Staggered Territory Rollouts: Some labels sequence releases so that they come out at different times in different territories. Now, we realise that not every artist has a global tour planned, but if you think your music would work well in a particular territory, or you want to raise your profile in a particular area ahead of
some performance dates, this approach can help you find the time to contact local radio stations, set up interviews and run a more targeted social media campaign. It can be easier for a solo artist or band to manage things in stages like this, and can spread the cost of promotion over time, as well as extending the life of a release. In SOS For Artists you can plan ahead by creating duplicates of your release, and selecting in which territories you want each to appear and when, under the Release Setting tab. Pre-save Campaigns: Because the first 24 to 72 hours are particularly important on streaming platforms, labels try to build momentum before their releases through aggressive ‘pre-save’ campaigns. These can be a great way to
accumulate early engagement, and trigger strong day-one numbers. All you need to do is share a link and encourage your fans to pre-save your release. If they do that, it will show up in their music collection on the day of release, boosting your launch day plays, which in turn boosts the algorithm and results in more visibility for you across streaming platforms. SOS For Artists creates these links automatically for you: once your release has been processed, they can be found on the Promolinks tab. Strategic Collaborations: Even solo artists don’t have to go it alone! Consider teaming up with another band or artist whose material complements yours in some way. The idea is to encourage cross-pollination of your fan bases, and to increase playlist opportunities. Collaborations can also be great one-off projects that help to maintain visibility between album releases — and they can be a lot of fun too.
A Schedule You Can Sustain! Of course, not all of the above tactics are mutually exclusive, and they can be supported by other activity and content: adding video clips to your social channels, booking mini promotional tours in different regions, setting up interviews, and more. But overcommitment is a genuine problem — it’s one of the most common pitfalls in release planning. Generally, while the streaming era has undeniably changed expectations amongst listeners, the most effective release schedule is always going to be the one that supports your work and that you can sustain year after year. Better, then, to adopt a modest plan that you know you can maintain for six to 12 months, rather than draw up an aggressive schedule that consumes all your energy and quickly becomes unworkable. We’d suggest giving yourself at least 3-4 weeks ahead of each release to allow time for playlist submission, video recording, setting up interviews and so on.
SOS For Artists automatically creates promo links that can be used in your ‘pre-save’ campaigns ahead of release day.
www.soundonsound.com / April 2026
115
Pro Tools Cubase
TECHNIQUE
A combination of subtle VariAudio pitch correction and equally gentle AudioWarp Quantize can create a believable vocal double from a duplicate of the original lead vocal.
Need to fake a double from a single vocal? Cubase has plenty of options... JOHN WALDEN
W
hen it comes to vocal doubles, if you want to keep things sounding ‘natural’ then nothing beats a well-sung second pass. There are plenty of circumstances where that might not be possible, but thankfully, if you have only a single lead line and need a double on the double, Cubase has a number of tools that can fake one. And if you already have the Artist or Pro version of Cubase 15, you now have yet another option at your disposal: the new PitchShifter plug-in. In this article, I’ll explore a range of options. I’ve also created some audio demonstrations that you can find on the SOS website, at https://sosm.ag/cubase-0426.
Something Old When vocals are authentically doubled-tracked by a singer, the differences in both pitch and timing of the performances lend the part a sense of additional ‘weight’ and, with suitable
panning, width. Generally, it works best when those pitch and timing differences are pretty small, and being sufficiently consistent across two or more vocal performances can require considerable control on the part of a singer — but, of course, some after-the-fact audio editing can help to a degree. Assuming, though, that you need to fake such a double, Artist and Pro users have a particularly powerful option that exploits VariAudio and AudioWarp. We considered exactly this combination in SOS October 2022 (https://sosm.ag/ cubase-1022-doubling), including the possibility of generating harmony parts. That approach still works well, so I’ll reiterate the key steps here as they pertain to creating a vocal double, but do dip into that article if you want more detail. The first step is simply to duplicate the lead vocal track. Open this duplicate in the Sample Editor, and in the Sample Editor’s VariAudio panel activate VariAudio. This will populate the Sample Editor display with If you demand more instant satisfaction, Cubase 15’s new PitchShifter plug-in can also produce a tight vocal double.
note objects, and if you select these and then trigger playback, you can (back in the VariAudio panel) make minor adjustments to the Correct Pitch, Straighten Curve and Shift Formant sliders. As you do, you’ll start to hear the original and ‘double’ vocals deviate from each other. For the same clip, a next step is to move to the Hitpoints panel, and ensure Edit Hitpoints is activated (Hitpoints might appear automatically anyway; there’s a Preferences setting for this). You can adjust the Threshold or Intensity sliders to change the number of hitpoints, and for this particular task a few extra Hitpoints will probably be no bad thing. Then pop open the Quantize Panel from the Edit menu — the main screenshot shows a suitable configuration starting point, and the key points to note are that both AudioWarp Quantize and Soft Quantize are activated, and the latter is set to 10 percent. When you hit Apply Quantize, there will be only a very modest movement of the Hitpoints, and you can simply repeat the quantise process to adjust the tightness between the original and the double to taste. Finally, simply pan your double slightly away from the original and, if required, repeat the process a second time, then pan the two doubles left and right, leaving the original in the centre. Balance the respective faders as required, and your thickened vocal should be good to go.
Something New Cubase Artist and Pro 15 come with a new and considerably easier option: the PitchShifter plug-in. It’s an insert effect
116
April 2026 / www.soundonsound.com
to the left and right channels. The result is bigger, bolder and can certainly add impact when you want a line or three of your chorus to hit a little harder — even if you might not want it as an ‘always on’ effect. If you want something with a little more of a creative slant, look no further than the Lead Thickener preset. This applies +12st and -12st pitch-shifting to the left and right doubles, respectively, and adds a little tape drive to each double. For the lower double, it applies a formant adjustment that keeps the sound a little more natural too. With suitable tweaks to the Mix controls to suit the musical context, it’s very effective for vocal reinforcement and stereo widening.
Forget Being Blue! PitchShifter can be even more effective when you use different settings on its left and right channels.
that you can place on your lead vocal track. There are some usable presets that I’ll get to in a moment, but for now look to the settings in the second screenshot as a good starting point. There are two key things to note. First, the ST button is disabled, which means you’re not limited to setting whole semitone pitch‑shifts — anything in the 0.1 to 0.3 st range can work here. Second, the Mix knob allows you to blend the levels of the original and the pitch-shifted signals. Start at zero, and gradually increase the value until you hear the double at a suitable level. For more control, enable the Unlink button — you then get individual control panels for the left and right signal paths. Usefully, this allows you to apply different amounts of pitch-shift to the left and right doubles (making one ‘+ve’ and one ‘-ve’ is a good strategy). Again, the two Mix controls let you blend these doubles with the original to taste. PitchShifter doesn’t provide time-based shifts like AudioWarp Quantize but, as demonstrated in the audio examples, the results can still be surprisingly effective. It’s definitely a ‘tight’ doubling, but the process is super-simple, and you’ll often find that it does all you need. By the way, if you want to apply the double only to certain phrases, you can easily automate the PitchShifter’s bypass control.
Something Borrowed So, PitchShifter provides us with a very easy means to achieve a clean, conventional vocal double effect. However, with the
options for ±2 octaves of pitch-shifting, three different Drive types, and Formant adjustment, this plug-in is also capable of more creative vocal (or other instrument) processing. And if you want to explore these, you could do a lot worse than simply borrowing some ideas from the compact preset collection Steinberg have provided. I’ve included some of these effects in the audio examples, and there are plenty more really cool vocal-processing options here. They might more obviously suit certain modern pop or electronic music production styles, but the Mix control(s) lets you dial them in pretty subtly, and if you do that I reckon they could do good service in plenty of other musical contexts. For example, The Tape Manipulator preset takes the principles used above, and adds a somewhat larger-than-life edge by applying different amounts of formant shift and a healthy dollop of tape-based drive
Whether it’s something old, or something new, Cubase 15 Artist and Pro users have some excellent options for automatically generating vocal doubles. But does that leave Elements users feeling somewhat blue? Not necessarily! Elements includes the compact Pitch Correct plug-in, which performs simple Auto‑Tune-style automatic pitch correction, but the control set also lets you apply a fixed level of Transpose (0.2 semitones is a good starting point) and some formant shifting. If you apply just enough pitch correction, transpose and formant adjustment, you can easily make a duplicate sufficiently distinct from the original. Repeat the whole process on a second duplicate track, pan the two pitch‑corrected tracks left and right, and then set the three channel faders to taste to achieve the required balance. No, you can’t dial things in with the speed and control available to Artist and Pro users — but it can sound very effective. So, when your singer has long since left the studio, and you feel the lead vocal needs more thickness and spread, there are vocal doubling options for everyone.
The humble PitchCorrect plug-in might take a little more configuration, but for Elements users it’s a good route to decent-sounding vocal doubling.
www.soundonsound.com / April 2026
117
Logic Logic
TECHNIQUE
Logic’s new Synth Players add yet more keyboardists to your virtual band. S I M O N PAT E R S O N
S
oftware companies are developing more and more tools that mean conventional training in composition, sound design or instrumental technique is no longer a prerequisite for bringing musical ideas to life. This is, of course, a story as old as technology itself. But whatever your feelings about technological determinism, it’s legitimate to ask whether the absence of a formal musical education should prevent anyone from realising their creative vision. Perhaps this is the philosophy underpinning Logic Pro’s growing suite of Session Players, which offer a compelling way for producers to rapidly build ideas. With Apple’s introduction of Synth Players in Logic Pro 12, the concept has expanded again, bringing new sonic and workflow enhancements. You may baulk at the idea using AI to play musical parts in your
118
April 2026 / www.soundonsound.com
Loading up a Synth Player will create a new MIDI clip full of MIDI notes and data, as well as auto-loading an instance of Alchemy with an appropriate preset ready to go.
productions but, as a quick tool to flesh out instrumentation whilst you concentrate on, say, writing a melody, this technology is undeniably useful.
Like A Player If you’ve previously worked with Logic’s Drummer, Keyboard Player or Bass Player, you’ll already be familiar with the fundamental structure of Session Players, which consist of two components: a software instrument and a dynamic, editable pattern generator, which sends MIDI to that instrument. Whilst the output of these tools includes chance elements, such as fill variations, they’re not generative AI in the same way services like Suno are. Rather than using genuine machine learning, their patterns are generated from predominantly preset-based phrases that can be modified. Still, the appeal is real. Even seasoned producers use Logic’s Session Players to establish the foundations of an arrangement before refining parts manually. Whilst there are limitations, I regularly use Logic’s Drummer as a starting point for production, precisely
because I can dynamically change the intensity and feel, as well as take control of the individual sounds, unlike with static loops or samples. Their ability to adapt is, indeed, the benefit of all Session Players in Logic Pro. They generate musical material that can change depending on the context and adapt to cues to suit different parts of your arrangement. Moreover, unlike standard loop-based workflows (and some humans), Session Players do have the ability to listen: once you’ve pointed it towards the rhythmic content of another track in your arrangement, it does a decent job of reacting to and working around that source material in a musical way. The arrival of the Synth Players — Simple Pad, Modulated Pad and Rhythmic Chords — is enticing because they should, in theory, play to the strengths of Logic’s sound‑design capabilities and workflow, without needing to sound like authentic acoustic instruments.
Simple Pad To explore these tools, begin by creating a new Logic project and adding a new software instrument track. The Session
Player panel still shows Drummer, Bass Player and Keyboard Player — the new Synth Players are sub‑sections of Bass Player and Keyboard Player respectively. Expand the Details disclosure triangle and you can choose between one of the three new Synth Player types. We’ll start with the simplest, Simple Pad. We can then take a look at how it works and how we edit both sound and pattern. Upon loading Simple Pad, Logic generates a region containing MIDI notes that drive an instance of Alchemy, Logic’s powerful hybrid synthesizer. To truly unlock the potential of Synth Players you need to use the Chord track, which tightly integrates with all Session Players. In September 2024, Paul White covered the (then) new iterations of Session Players, describing the integration between Session Players and Logic’s Global Chord and Arrangement tracks. In short, press Option+G to show and configure your Global tracks, and zoom in (Control+Option‑drag) so you can clearly see the chord markers. Adding or editing chords is straightforward, once you get the hang of it. Move the playhead to the bar, beat, or division where you’d like a chord, then either double-click the existing chord or press ‘+’ to create a new one. Spell out each chord by picking the root note, chord qualities, and extensions/suspensions. Choosing an alternative bass note can help with voice leading or to create inversions/suspensions. Helpfully, there’s now a MIDI input button; you can play notes for Logic to analyse, so you needn’t stress about how to spell your chords. Once input, you’ll have a chord block that behaves like any other region, so it can be copied across the arrangement using Option-drag.
Editing The Synth The Simple Pad interface offers a limited but useful set of controls. Just like the Session Keyboard Player, you can edit Intensity (velocity shaping), left/right hand mute (taking away the left hand can be useful to stay out of the way of the bass, for example), left/right hand voicing (determines how the virtual player voices the left hand within combinations of root, fifth and octave; and the range of the right, from single voices, through ‘Full Chord’, to ‘Stacked’, which adds notes on top); and Inversion (either helpfully auto‑adjusts chord inversions, keeping them within a similar tonal range, or keeps chord
inversions intact with ‘Fixed Inversion’ to create more dramatic tonal shifts). Other than parameters for swing value, note length and pushing/pulling the timing, the only other parameter of note is the very handy (pun intended) RH and LH sliders, which move the range of each hand higher or lower, helping to avoid clashes with other instruments. Since Simple Pad is designed to create broad, warm textures, it offers little in terms of modulation or timbral complexity. If you want more expressive movement, you’ll need to adjust Alchemy directly; create subtle filter sweeps using the filter and LFOs or engage the Transform Pad for wilder options. Otherwise, you’ll need a more elaborate Synth Player. Such as...
Modulated Pad The Modulated Pad Synth Player introduces substantially more depth. When selected, Logic loads instances of both Alchemy and Phat FX. The latter is not doing much to start with, but is primed to add plenty of dynamic and textural movement when engaged. We’re now presented with plenty of potential to dive deep into a pool of parameters. To start with, we have a bunch of presets that radically change the timbre and, crucially, the rhythm of the modulations. This is achieved primarily through the interaction between an LFO and an envelope. As an example, the modulation for the default ‘The Feels’ preset reveals a steadily rising cutoff (MIDI CC74) throughout each bar, controlled by the LFO tab, with extra rhythmic pulses that give the pad a syncopated feel, controlled by the Envelope tab. Interestingly, these textural rhythms are embedded into the region in the form of region-based automation: enter the piano roll (press P), click Show Automation (or press A) and, in the drop-down menu, you’ll see pre-programmed region-based automation. You can then switch between this view (P) and the regular editing window (E) to see the interaction between LFO and envelope. Indeed, the ability to not just view, but actually edit the MIDI data without having to convert it to a conventional MIDI region is exceptionally helpful. Want to change the pattern or even the MIDI CC target? No problem. Open the Envelope tab to change the shape of each rhythmic pulse. Then either choose from one of eight preset rhythms, tap out your
own on the Manual tab, or point it towards the rhythmic content of any other track. Easily move the envelope shape to the left or right in increments (Shift Start) or invert the envelope shape (Invert). The LFO offers triangle, sine, square and random waves that can all be offset, sped up, and sync’ed to regions, chords, beats, or kept free or even randomised. Strum will spread out the chords, either subtly or dramatically, adding extra rhythmic and textural flavour. And speaking of rhythms, head to Tempo to change the rhythms from standard to half and double time. Personally, I found half time most effective with this Session Player. If any of those options becomes too repetitive or predictable for your taste, Phrase Variation, in the Details tab, allows you to set a probability, from 0-100, of rhythmic variations over time. And, as with previous Session Players, you can click on Regenerate to quickly create a variation without adjusting any other parameter. Remember you can copy regions and change each one up as you see fit.
Rhythmic Chords Finally, the Rhythmic Chords Synth Player is where producers will turn for more distinctive, rhythmically engaging keyboard parts. I don’t think Greg Phillinganes will be losing any sleep, but there are some very on-trend parts being generated by the Chord track, with some decent attempts at comping. It’s also fair to say I had the most fun with this one. In terms of parameters, we lose the envelope, but gain a bundle of new ones. With controls for note lengths, probability of rhythmic variation, and even humanising, there’s huge scope for nuance. Even modest presets, such as ‘Lost Hours’, become richly sophisticated and syncopated when Complexity is increased and left-hand voicing is set to Complex. Although I found the sound to be somewhat static, remember you can head into Alchemy, change the sound, change the preset, or even replace it with another synth. I even tried using the Clavinet from Logic’s Vintage Keys to great effect, using the same generated performance. In all, the new Synth Players represent another well-implemented addition to Logic’s creator-friendly functionality. They’re fun to play with and, with the right approach, may yield eminently usable results. www.soundonsound.com / April 2026
119
Studio Pro
TECHNIQUE
We put Studio Pro’s new AI-powered note extraction to the test. ROBIN VINCENT
F
or our first plunge into the freshly painted Fender Studio Pro 8, we’re going to swim around in the AI-assisted note and drum extraction tool. It’s unclear exactly what role AI is taking in this process, but the results are impressive. For any chunk of melodic audio, Studio Pro can reliably detect and then extract note data. It will take the data and throw it up onto an instrument track for you to use as MIDI. It can do the same for a drum track, reliably identifying the individual drum sounds and extracting the hits as MIDI notes. The basic idea is that you can change the sound or instrument used in the piece of music while maintaining the original performance. Some of this we’ve seen before with the Melodyne integration, but what Fender have done to wrap it up into a workflow of a couple of clicks is quite remarkable. There are many ways this could be useful. I think the one that strikes me as fascinating is how it releases us from having to be tied to a MIDI controller keyboard or computer when inspiration strikes. I could sit down at an upright piano in a pub, or at my Grandma’s house, and record myself on my phone. It doesn’t have to be a piano. It could be a guitar, a flute, an organ, a kazoo or an elastic band; the instrument, as we’ll come to understand, is the least important aspect in all this. Drop that recording into Studio Pro, and you can extract the performance as
Extracting notes from an audio event is as simple as right‑clicking it and selecting Extract Notes from the Audio menu. The detected notes will be placed onto a new instrument track, with an instance of Mai Tai loaded up and ready to play them.
MIDI and build a whole arrangement around it. But it also has a lot more uses than that in areas such as drum replacement, tonal adjustments, using your voice to write synth lines, or really enjoying a guitar loop and wishing it was played on a harmonica. The process is really easy, and Studio Pro has retained Studio One’s workflow ethos of always offering more than one way to do a thing.
Taking Notes You start with the audio event sitting on an audio track. It could be a loop, or a section of a recording, just whatever you’d like to pull the notes from. It doesn’t have to be in time or on a grid, Right-click on the event and navigate to Audio and Extract Notes under the Audio Processing section. Studio Pro will give it some thought for a few moments, then create a new instrument track and throw the results onto it as a MIDI clip or event. Along with the instrument track, it conveniently inserts a Mai Tai virtual instrument with the ‘Chord Preview’ preset loaded. Mute the original track and hit Play to hear the results. The loaded preset is When you extract drums from a clip, Studio Pro will also load up an instance of Impact.
120
April 2026 / www.soundonsound.com
terribly basic, and so it may sound pretty ropey; however, the pitch and rhythm of the extracted notes are uncannily similar to the original performance. You can also do the same by highlighting the audio event and selecting Extract Notes from the Audio section of the main menu bar. That’s as difficult as it gets. It works with both monophonic and polyphonic material. You can use a certain amount of common sense to assume that the cleaner the recording, the more precise the extraction will be, but honestly, it can dig the notes out of terrible recordings and from within a mess of effects-laden tracks. Similarly, you would assume that you should only use it on individual and clearly defined instruments, but Studio Pro doesn’t really care. If you try extracting notes from a mixed track, Studio Pro will do it and do it well. Your only issue then is that you’ll have all of those performances merged onto a single track, leaving you with a lot of editing in order to try to separate the piano part from the guitar part and the bass part... It would be better, I think, to use Studio Pro’s other AI-enhanced facility, Stem Separation, to split your mixed track out into individual tracks before applying the note extraction. You are more likely to get the kind of results that will be helpful. I should also note that extracting long pieces of music will take several minutes, rather than a few moments for shorter recordings or samples.
Advanced Note Extraction There’s another way to extract notes that offers a more intentional approach and,
You can also extract notes or drums to an existing instrument track, by dragging your audio onto it.
perhaps more importantly, bypasses Mai Tai and its questionable preset choice. This time, create an instrument track with the virtual instrument or MIDI synthesizer that you are planning to use. So, you might want to add a Rhodes piano sound to your current project, but you want to use a recording of some guitar as the basis for the performance. All you have to do is drag and drop the guitar audio onto your Rhodes instrument track. A window pops up asking whether you are extracting notes or drums; select ‘notes’ and the performance is extracted onto your track as MIDI notes. The sound is there, the performance is there, and you are good to go. Doing it this way round, where you start with your chosen instrument, rather than your chosen performance, opens up a whole different way of thinking about it. Previously, if you were looking for a Rhodes piano performance for your track, you might root around in your sample libraries or search on Splice and find a small number of electric piano samples that you could potentially drop into your track. With the power of note extraction, the original instrument on a sample is now no longer a factor, because the performance, the riff, the notes, and the structure have been captured and are no longer attached to a sound. So, with note extraction, you can expand your search into guitar loops, piano riffs, synth parts or choral harmonies, drag them onto your track, extract the notes, ignore the instrument, and get your Rhodes piano part. Loops and recordings are now sources of performance data, opening you up to a vast range of possibilities. Finally on note extraction, a quick tip on editing the results. You may find that you get the odd ghost note, or trills where the original note was actually sustained. In the piano roll editor, rather than deleting notes and extending others to fill the space,
you can use the Merge command to turn multiple notes into a single note. Just select the notes in question, right-click, and go to Musical Functions / Merge Events under the Time section. You can select a whole bunch of different notes at once, and the merge function will only join the notes of the same pitch.
Drum Extraction Pulling out the drums is very much the same, except this time the AI gets involved in identifying the individual sounds. It seems to understand enough to separate out the kick, snare, hi-hats, cymbals and some toms. These are then scattered appropriately across the drum editor to trigger the relevant sounds in an instance of Impact. So, right-click your audio clip, go to Audio and select Extract Drums under the Audio Processing section. This time, it loads up Impact with a sort of generic
‘Drum Extraction’ kit that also includes rimshot and ride samples. The results are pretty fantastic and even account for dynamics in the velocity levels. You can also try working the other way around: start with an instance of Impact and your favourite kit, then drag drum loops onto it to pull out the performances. You may have to move the sample pads around a little bit to match up with where the extraction places the hits, since it will be unaware of how you’ve set up your kit. Another tip: rather than moving the notes in the drum editor to the correct pad, you could use the copy and paste pad option to rearrange the samples in your kit. Simply right-click a pad in Impact and select Copy Pad, and paste to the destination pad.
Keeping Score Another useful aspect of the extraction is the ability to view and edit audio recordings as scores. In this instance, the audio will need to fit the general grid and tempo of your project so the score can correctly grapple with the time signature. However, you might want to apply some quantisation to pull the notes into a more ordered display. I wouldn’t be at all surprised if, at some point in a future update, all of these functions are automated. You’ll be able to drop a mixed piece of music into Studio Pro, and it will separate the stems and extract the instruments and drums onto individual tracks in a single action, while correctly identifying the instruments and loading up the appropriate ones from Presence...
You can even generate a score from an audio file, though unlike for MIDI note and drum extraction, your audio needs to fit your project’s grid and tempo.
www.soundonsound.com / April 2026
121
Pro Tools
TECHNIQUE
Looking to get started in Dolby Atmos? We show you the ropes. JULIAN RODGERS
I
t’s now more than two years since the internal Dolby Atmos renderer was introduced to Pro Tools Studio and Ultimate. That change made the format far more approachable. Earlier Atmos workflows were technical enough to deter many who were simply curious. This article is aimed at users who haven’t yet taken the first steps, and who want a practical, low-friction way to try Atmos. There are two primary obstacles stopping people from dipping a toe into immersive mixing. The first is monitoring: a proper Atmos loudspeaker array is a significant investment. The second is setup complexity. It isn’t unusual for first-time users to spend more time inside the I/O Setup window than actually mixing. Yet neither of these barriers needs to prevent you exploring Atmos in Pro Tools. Much of the processing and decision-making for an Atmos mix is already present in your stereo mix. Importing those decisions into an Atmos session gives you a starting point from which to experiment. And while new users tend to be drawn to dramatic placements and movement, those techniques are rarely the foundation of an effective Atmos music mix. It’s worth indulging the temptation early — get the wild panning out of your system — but the real strength of Atmos lies in its ability to extend a familiar stereo presentation rather than replace it.
The Dolby Atmos Internal Renderer template, selected in the I/O Setup window, pre-configures your routing with both mono and stereo tracks going to both beds and objects. You can delete/duplicate these as needed for your first Atmos mix.
Before looking at routing and placement, it’s worth addressing two early realities: you’ll spend time in the I/O Setup window, and you’ll almost certainly monitor on headphones at first.
I/O Silver Lining Pro Tools does not offer a built-in shortcut to open I/O Setup, and during your first few Atmos sessions you’ll inevitably go there a lot. A handy tip is to use the new SoundFlow tab on the right-hand sidebar. Search for I/O and the top result, ‘Setup Menu: I/O’, appears as a clickable button. Simply
leave that search active and you have one-click access throughout setup. You can, of course, create something more permanent, but this is a low-effort shortcut. Start by using a template. In the New Session dialogue, tick Create from Template and choose the Dolby Atmos Internal Renderer session. Most of the routing you’ll need is already configured. The template includes mono and stereo audio tracks routed for both beds and objects. Duplicate tracks to match your requirements. With destination tracks prepared and clearly named, use Import Session Data to bring material across from your stereo project. In most cases you’ll retain plug-in, volume and pan settings; the point is to preserve existing mix decisions so that you can focus on spatial choices rather than rebuilding the fundamentals.
Bedding Down Atmos offers two main routing types: beds and objects. Objects get more attention because of their flexibility — they can move freely, be extensively automated, and they offer a size parameter that spreads a source across neighbouring speakers. But beds, typically configured as 7.1.2, remain extremely useful. Especially when you’re learning. Beds behave much like a multi‑channel bus: any number of sources can feed into them, and you can begin exploring spatial placement using the Pro Tools surround panner. Although there are technical reasons why objects can give superior results, for newcomers, routing everything through a bed initially is the most straightforward approach. Once comfortable, you can start assigning selected elements to objects for more nuanced control. Whichever route you choose, beds and objects all flow into the Dolby Atmos Renderer.
Monitoring
To monitor using headphones, go to the Output tab in I/O Setup, click Aux I/O, and select the output that corresponds to your interface’s headphone out.
122
April 2026 / www.soundonsound.com
With setup nearly complete, you’ll have to set up your monitoring correctly. While full speaker monitoring is essential for critical work, headphones are perfectly adequate for learning the workflow. To experience
In stereo, kick and snare typically live at the centre, with tom mics and overheads spreading outward from there. In Atmos, rather than scattering these elements around the room, try maintaining the front perspective but bring the kit slightly forward into the immersive field. Routed through a 7.1.2 bed, this gently distributes some of the energy into the side surrounds, increasing the sense of dimension without losing cohesion. Overheads can be treated similarly, with optional height. Such moves can feel subtle, but subtlety is usually the point.
Reverb
With your headphone output selected, open the Dolby Atmos Renderer and select Binaural from the Monitoring drop-down menu at the top. You’ll now hear your Atmos mix binaurally.
immersion over headphones, however, you must enable binaural monitoring, otherwise you are simply hearing a stereo downmix of the renderer’s output. Using the Internal Dolby Atmos Renderer, you should set the Playback Engine to Dolby Audio Bridge. This virtual device carries audio internally from Pro Tools to the Renderer. After selecting Dolby Audio Bridge, Pro Tools will warn you that a valid monitor path must be configured. Monitoring is handled via a ‘live re-render’. To create a monitor path for headphones, open I/O Setup and go to the Output tab. Click Aux I/O, and in the window that appears, tick the Output box for the interface feeding your headphones. Aux I/O allows Pro Tools to address multiple audio devices simultaneously, whether physical or virtual. Enabling your interface here creates a new output path. In the Dolby Atmos template session, locate the headphones auxiliary (the re-render return from the Renderer) and assign its output to the Aux I/O path you have just created. This routes the Renderer’s output back to your interface for monitoring. Now open the Dolby Atmos Renderer window and, in the the Monitoring dropdown, change the setting from 2.0 to Binaural. Once selected, you will hear the binaural virtualisation over headphones. The Renderer also includes a Headphones Only option. This is intended for workflows where no speaker monitoring exists at all, and can simplify configuration. However, when working from the Pro Tools Atmos template, using the dedicated headphone re-render makes the signal flow explicit and is the more flexible approach.
Pan Labyrinth So with binaural monitoring set up, how do you best use the extra space available
to you? Despite the lure of full 360-degree placement, most music mixes still maintain a coherent forward soundstage. Placing every element around the listener is rarely musically satisfying. The Dolby Atmos Renderer’s visualisation window, accessed via Cmd+Ctrl+= (Mac) or Ctrl+Start+= (Windows), is invaluable when placing objects. When working with beds, the Pro Tools surround panner — opened from the small fader icon on the routing tile — provides a 3D representation of the room. Pan Linking streamlines placement considerably, and here’s a particularly useful tip: when using the surround panner, holding Shift temporarily switches the mouse to control height, allowing fast vertical adjustments without changing views. This makes it much easier to experiment with height placement. A common misunderstanding is the perceived location of ‘ear height’. In the Atmos model, there is no placement below the horizontal plane. If you want something to appear at ear height, it should be positioned on the ground level of the panner, because that is where the ear-level speakers sit. Once the layout is established, the question becomes how to use movement and depth. A drum kit provides a good illustration.
Much of the wraparound quality of an Atmos mix comes from ambience and reverb rather than aggressive repositioning of dry sources. If you’re keeping most dry sources in front of the listener, reverb becomes your main tool for filling the rear and height fields. Pro Tools does not currently include a native immersive reverb; Revibe II reaches 5.1 but no further. Nevertheless, convincing Atmos mixes pre‑date the availability of immersive reverbs, so there are workarounds. Multiple stereo reverbs can work extremely well, provided they are decorrelated. Simply placing identical reverbs in several locations creates one large mono wash. Introducing a small, well-chosen delay between instances breaks this correlation and produces a more satisfying sense of spatial complexity. This approach can be as simple or as elaborate as you wish. An even simpler technique is to use reverbs as spot effects on individual elements and place those reverbs elsewhere in the mix. For example, a stereo vocal reverb routed to an object and positioned to the rear provides instant immersion. To assign a track to an object, enable the object field in the track header and switch its routing from the bed. By default, up to 118 objects are available.
Bus Replacement Service Once your Atmos mix takes shape, you may notice the absence of something that many rely on heavily in stereo: mix-bus processing. In a renderer-based workflow, audio leaves Pro Tools via beds and objects: there is no summing point inside Pro Tools on which to place a bus compressor. This is simply a structural reality of Atmos mixing. Several brands have developed tools to approximate bus processing workflows. The specifics are beyond this article, but the essential point is that the mix bus does not exist in Atmos, and adapting to that is part of learning the format. My first Atmos mixes were full of dramatic panning and height effects. They were entertaining, but distracting. The turning point came when I stopped treating Atmos as a novelty and began trying to build mixes that resembled my stereo work — only better. Starting from existing stereo mixes helped me understand how small spatial enhancements can improve clarity, depth and engagement without overwhelming the music. If you take the same approach, you may well find that restraint produces the most satisfying results. And if you have Pro Tools Studio or Ultimate, you already have everything you need to begin experimenting. www.soundonsound.com / April 2026
123
SPOTLIGHT
LUKE WOOD
Portable PA systems have come a long way in recent years. There are now plenty of compact systems that punch well above their weight in terms of SPL and low-frequency extension, while still being small and light enough to appeal to gigging musicians. Column-type systems are a particularly tempting prospect to many, with their minimal footprint making them a great choice for tight performance spaces, and their lightweight design meaning they’re often far easier to transport and set up than their more traditional counterparts. Some feature typical two- or three-way point-source designs housed in a compact enclosure, while others are able to behave as a line source, making some of the benefits of large-format line arrays — tightly controlled dispersion and less volume drop-off over distance, for example — available in a much more portable and affordable package. Typically, the base unit houses a subwoofer, whilst one or more column arrays covers the midrange and treble. You can’t expect portable systems to offer the same level of control you get from huge PA hangs, but a well-placed column system can still provide more even coverage than a point-source equivalent while occupying significantly less space, and being easier to carry in! Most of the major manufacturers have something to offer in this category, so let’s take a look at what’s available.
Alto TSC Series
Alto’s newly introduced TSC series includes two models. The first, the TS108C, pairs an eight-inch subwoofer with a 6x2.75-inch column array, and includes a built-in three-channel mixer that features two mic/line input channels (fitted with XLR/TRS combo sockets) with a two-band EQ and reverb; there’s also a dedicated playback channel equipped with a 3.5mm mini-jack connector and Bluetooth connectivity. An XLR output is provided for linking multiple systems. The system has 300W RMS power available, and includes a selection of four EQ profiles: Normal, Live, DJ and Custom. Stepping up, the TS112C offers increased playback levels and extended low-end performance thanks to a 12-inch subwoofer and a total of 600W RMS on tap, along with two additional mixer channels: an additional mic/line combo input and a wired stereo line-level input channel. $ $499. W www.altoprofessional.com
124
April 2026 / www.soundonsound.com
Column PA Systems Bigger isn’t always better in the world of live sound!
Behringer C210 Alto TS108C
Behringer C210
Behringer’s sole offering in the world of compact line arrays comes in the form of the C210, a 200W system that combines an eight-inch subwoofer with a 4x2.5-inch column. Its three-channel mixer features a pair of mic inputs on quarter-inch TRS sockets, while instrument and line-level signals can be connected to the third channel via an XLR/TRS combo socket; the master section includes a two-band EQ, and there’s also a mix output for driving additional speakers. As for playback, the C210 offers Bluetooth connectivity, and will also play files from an SD card or USB drive. $ $239. W www.behringer.com
Bose L1 Pro
There are three models to choose from in the Bose range:
the L1 Pro8, the L1 Pro16 and the L1 Pro32. All three are paired with the company’s Sub1 subwoofer, and the Pro32 can be purchased with the larger Sub2 for some additional headroom and low-end extension. All three employ two-inch neodymium drivers that deliver 180-degree horizontal coverage, and the naming convention reflects the number of high-frequency drivers that make up the system’s column element. All of the L1 Pro models feature a built-in three-channel mixer equipped with a pair of mic/line inputs on XLR/TRS combo sockets, along with a dedicated playback channel that includes quarter-inch TRS and mini-jack inputs along with wireless Bluetooth connectivity. The first two channels feature Bose’s ToneMatch EQ, which offers preset curves aimed at different sources — presets and custom profiles can be accessed using the company’s mobile app. There’s also a line output for feeding additional speakers. $ From $1499. Bose L1 Pro32 W www.bose.com
(the Evolve 30M and 50M) have a built-in mixer, which offers four mic/line channels with XLR/TRS sockets (one of which also includes a Hi-Z instrument input), a stereo line-level channel with XLR/TRS, RCA and mini-jack connectors, and a dedicated Bluetooth playback channel. Some onboard effects are provided, too, and everything can be controlled remotely from a mobile application. The Evolve 50, 70 and 90 have fewer onboard connections, and feature a pair of mic/line inputs and a stereo playback channel (wired and Bluetooth wireless). $ From $1499. W www.electrovoice.com
HK Audio Elements
HK Audio Polar / Elements
dB Technologies ES 1203
dB Technologies ES Range
There are four options in the dB Technologies ES range: the ES 503, 802, 1002 and 1203. The ES 503 pairs a 12-inch subwoofer with two 4x3-inch arrays, and has a three-channel mixer that features a mic/instrument channel, a pair of line-level channels and a Bluetooth receiver. The larger ES 1203 steps things up with a dual-12-inch subwoofer, two 4x4-inch columns and a five-channel mixer with one mic/instrument channel, two mic/line channels and a Bluetooth receiver. The ES 503 and 1203 systems can both be run in stereo mode, where the top half of their columns can be detached and mounted on its own tripod. The ES 802 combines a 12-inch subwoofer and single 8x3-inch column, while the ES 1003 pairs a dual-12-inch subwoofer with an 8x4-inch column; both are equipped with a single mic/line input rather than an onboard mixer. $ From $1596. W www.dbtechnologies.com
HK Audio’s Polar and Polar Mk2 families both form part of the company’s current line-up. The Polar 8 pairs an eight-inch subwoofer with a 6x3-inch column, while the Polar 10 and 12 feature 10- and 12-inch subs respectively, along with a 6x3-inch column; all three feature a built-in mixer with a pair of mic/line inputs, an instrument input and a playback channel with both RCA and Bluetooth connectivity. The upgraded Polar Mk2 is available in 10- and 12-inch variants, and boasts improved wireless connectivity thanks to Bluetooth 5.0 with True Wireless Stereo functionality, a built-in USB-C charger and higher SPL capabilities. All Polar Mk2 systems can be expanded using subwoofers from the Sonar series. For those who want to future-proof their setup, there’s the Elements range, a modular system that comprises the E835, an 8x3.5-inch column, and the E 115 Sub D, a 15-inch subwoofer that offers DSP-powered EQ, limiting and delay. As well as allowing you to combine multiple E835 units, the Elements range can also be expanded using units from HK Audio’s Linear family. $ From $929.99. W www.hkaudio.com
Electro‑Voice Evolve
E‑V’s Evolve line-up comprises five systems. Each offers 120 degrees of horizontal coverage, with the maximum SPL and low-end reproduction increasing as you move up the range. Two of the models
Electro‑Voice Evolve 90
JBL PRX One
JBL PRX One / EON One Mk2
JBL’s flagship column system is the PRX One, which pairs a 12x2.5-inch-driver array with a 12-inch bass-reflex subwoofer capable of playing down to 35Hz. Horizontal coverage is quoted as 130 degrees, and the company say that thanks to sophisticated crossover management, the system boasts a smooth, uniform response throughout the entire frequency range. An onboard seven-channel mixer offers four mic preamps with a pair of line-level channels and a dedicated playback channel; built-in Lexicon DSP effects are included, and the system’s channel encoders offer hands-on control over the likes of gain, EQ and effects sends. There’s also the EON One Mk2, which combines an eight-driver array with a 10-inch subwoofer and includes a built-in five channel mixer with three mic/line inputs (XLR/TRS), a line-level input (TRS) and an aux input that features both wired (mini-jack) and wireless (Bluetooth) connectivity. It’s also capable of running for up to six hours on its built-in battery. $ From $1549. W www. jblpro.com
www.soundonsound.com / April 2026
125
SPOTLIGHT
COLUMN PA SYSTEMS
LD Systems Maui 5 GO
LD Systems Maui
There’s no shortage of options from LD Systems, whose Maui range includes a staggering 20 models to choose from! The entry-level system is the Maui 5, an ultra-compact 800W system with a built-in mixer that accepts mic, line and instrument sources along with wired (3.5mm mini-jack) and wireless (Bluetooth) playback. The Maui 5 is also available in a GO variant that can run on battery power. The Maui 11, 28 and 44 then deliver increasing amounts of low-end power and higher SPLs, with a choice of options available for each model. All three have G2 and G3 options, the latter of which feature cardioid columns with the option of adding a second subwoofer to extend the cardioid behaviour to the low end; the Maui 28 and 44 feature line-level inputs and are designed to be paired up with an external mixer, and the 28 is also available in a MIX variant that includes a built-in four-channel mixer. $ From $829. W www.ld-systems.com
Mackie SRM Flex
Mackie’s offering comes in the form of the SRM Flex, a compact system designed to cater to audiences of up to 100 people. It combines a 10-inch subwoofer with a six-driver column, and has
1300W of power on tap. It includes a built-in six channel mixer boasting two mic/line/instrument inputs with a two-band EQ and a reverb send, a wired stereo line-level channel (dual quarter-inch TRS sockets) and a dedicated playback channel that offers both wired (3.5mm mini-jack) and wireless (Bluetooth) connectivity. Its master section includes Music, Speech and Live EQ presets along with a choice of three reverbs, and it’s possible to pass a signal on to other speakers or systems thanks to a mix output. Along with its local controls, the SRM Flex can be operated remotely using a mobile app. $ $899.99. W www.mackie.com
Peavey LN
Peavey’s LN 1063 is a compact unit that consists of a column There are six options of six 2.75-inch drivers to choose from in placed atop an the RCA line-up. The Peavey LN1063 eight-inch subwoofer. Evox J8 kicks things Its built-in mixer features a pair of mic/ off with a 12-inch subwoofer and 8x2-inch line/instrument inputs (XLR/TRS combo driver column, and delivers up to 128dB sockets) with a two-band EQ and reverb, whilst covering a range of 40Hz-20kHz; along with a stereo line-level channel and the Evox J9 swaps the column drivers out an aux input equipped with mini-jack and for a 6x3-inch array, and offers a increased Bluetooth connectivity. Despite its compact maximum SPL of 130dB. Both the J8 footprint, it’ll play down to 55Hz and boasts and J9 have a MIX variant that comes a maximum SPL of 120dB. If you need equipped with an eight-channel mixer a bit more of a kick, the LN 1263 ups the providing four mic/line channels with EQ column’s driver count to 12 and and compression opts for a 12-inch subwoofer, (the fourth also taking the maximum SPL to accepts instrument 127dB and extending low-end signals) and a pair performance down to 35Hz. Its of stereo line-level mixer gets an upgrade, too, and channels, the features two additional mic/line/ second of which instrument inputs along with features Bluetooth per-channel compression and connectivity. The a selection of EQ presets. flagship Evox J11 $ From $999. then boasts a 12-inch W www.peavey.com subwoofer and 12x3-inch column array that deliver SPLs of up to QSC’s KC12 132dB and span (or K Column) a frequency range aims to squeeze of 37Hz‑20kHz. the performance and $ From $999. sound of the company’s W www.rcf.it K Series line-up into a more QSC KC12
RCF Evox
QSC KC12
Mackie SRM Flex
126
April 2026 / www.soundonsound.com
compact system. Unlike many column-style speakers, the KC12 follows a more typical three-way design, combining a pair of four-inch midrange drivers with a one-inch compression driver, but thanks to the company’s own waveguide design, the system still offers 145-degree horizontal and 35-degree vertical dispersion. As for specs, the KC12 measures -6dB at 45Hz and 18.5kHz, and will deliver an SPL of 132dB. In order to cater to stage and floor-mounted applications, the column can either be mounted directly to the 12-inch subwoofer, or spaced out with an additional pole. An onboard mixer accepts two mic, line-level and instrument sources, as well as offering wireless playback via Bluetooth. $ $1999.99. W www.qscaudio.com
of 37Hz to 20kHz. The key difference lies in their mixing capabilities: the Stagepas includes a built-in five-channel mixer, while the DXL1K simply features two inputs — a switchable mic/line channel and a line-only channel. Opting for the Stagepas gets you a mic/line channel along with two mic/line/instrument channels (on XLR/TRS combo sockets), all of which are equipped with a one-knob EQ and reverb, as well as a dedicated stereo playback channel that supports both wired (dual quarter-inch TRS and 3.5mm mini-jack) and wireless (Bluetooth) devices. Link and monitor outputs are provided, and the obvious choice for those looking to pair the Stagepas with a second system is, of course, the DXL1K! $ From $1229.99. W www.yamaha.com
RCF Evox 12
Samson Resound VX8.1
Samson Resound VX8.1
Samson’s lightweight Resound VX8.1 is said to be an ideal solution for singer-songwriters and mobile DJs in search of an easy-to-carry PA system. It pairs a 12-inch subwoofer with a column of eight 3.5-inch drivers, and the column is made up of two units that can be arranged in-line for 120-degree horizontal coverage, or rotated left and right to cover 200 degrees — a mode switch on the subwoofer ensures the tonal response remains consistent in both configurations. The Resound VX8.1 has a built-in three-channel mixer equipped with mic/line and line/instrument channels — both feature XLR/TRS combo sockets, and the latter is also equipped with RCA connectors — and a dedicated Bluetooth playback channel. Music, Live, Speech and DJ EQ profiles are available, and there’s an XLR output that can carry either a full mix output, or pass on the signal from channel 1. $ $999.99. W www.samsontech.com
Turbosound iNSPIRE
The iNSPIRE range comprises four compact systems that draw on the technology found in Turbosound’s large-format line arrays. The smallest, the iP500, pairs an eight-inch subwoofer with a six-driver column, while the iP1000 steps things up with a dual-eight-inch subwoofer and nine column drivers. Moving up to the iP2000 increases the column driver count to 17 and bolsters low-end
Turbosound iNSPIRE iP3000
performance with a 12-inch subwoofer, and the flagship iP3000 takes things further still, pairing a dual-12-inch subwoofer with an 18-driver column. All four models feature a built-in digital mixer, and come equipped with a pair of XLR/TRS combo sockets that’ll accept mic and line-level signals — wireless playback is provided by Bluetooth connectivity. There’s also some onboard Klark‑Teknik DSP that analyses the incoming signal and adjusts the system’s EQ, crossover, compressor/limiter and amplifier settings to help deliver the best possible performance. Helpfully, everything can be controlled remotely from a mobile app. $ From $539. W www.turbosound.com
Yamaha Stagepas / DXL1K
There are two options in the Yamaha range: the Stagepas 1K MkII and the DXL1K, which at first glance appear to be all but identical. Both are 1100W units that combine a 12-inch subwoofer with a 10x1.5-inch column array that offers 170 degrees of horizontal dispersion, produce up to 125dB SPL and cover a bandwidth Yamaha Stagepas 1K MkII
Yorkville EXM / YXL
Yorkville’s EXM and YXL ranges both include two options in the column PA field. The EXM400 features a 10-inch subwoofer and a pair of 2 x 3.5-inch speakers. A built-in three-channel mixer includes mic/instrument, mic/ line and line-level inputs — the first two are on XLR/TRS combo sockets and feature a tone control and reverb, while the third accepts quarter-inch TRS and 3.5mm mini-jack connectors and sports a two-band EQ. There’s also a dedicated Bluetooth channel. The EXM Mobile Tower then offers a three-way design with similar mixer specs, and has the advantage of being able to run on a built-in battery. Yorkville YXL Tower12 Both EXM units can be run in pairs for increased power and channel counts. The YXL range then includes the Tower10 and Tower12, both of which feature a column loaded with four three-inch midrange drivers and a 0.75-inch high-frequency driver; the latter offers extended low-end performance thanks to a 12-inch subwoofer. Their onboard three-channel mixers accept mic/instrument, mic/line and line-level sources, and wireless playback is provided by Bluetooth. It’s possible to link up to 16 YXL units, and up to three of their onboard mixers can be active within the linked system. $ From $999. W www.yorkville.com www.soundonsound.com / April 2026
127
CL A SSIC TRACK S
The United States Of America. From top left: Joeseph Byrd, Dorothy Moskowitz, Gordon Marron, Rand Forbes and Craig Woodson.
The United States Of America ‘The Garden Of Earthly Delights’ TOM DOYLE
V The United States Of America released a single album of uniquely experimental music in 1968. Decades later the rest of the world began to catch up to what was almost a lost classic of the psychedelic era. 128
April 2026 / www.soundonsound.com
irtually ignored upon its release in 1968, the self-titled album by Los Angeles band the United States Of America is now regarded as an underground classic, particularly due to its standout psychedelic pop track, ‘The Garden Of Earthly Delights’. Characterised by its driving, frenetic beats, reverb-heavy electric harpsichord riff, proto synth effects fed through swathes of echo, and singer Dorothy Moskowitz’s haunting vocal, its
influence was later to be heard, in the ’90s and beyond, in the music of Stereolab, Portishead and Broadcast. Moskowitz, now 85, tells SOS that she was unaware for many years that the band had made any impact whatsoever. “I had no idea,” she laughs. Only, she says, with the 2004 reissue of The United States Of America by US label Sundazed did she first begin to learn that she had made such an impression on a younger generation of singers. “I became aware of the late Trish Keenan’s interest,” she says of the Broadcast singer who passed away aged 42 in 2011. “I knew about Beth Gibbons. I learned about Laetitia Sadier, but this was much, much later.” The USA’s unique blend of rock, jazz, tape collage and eerie sonics was a product of the fact that they were formed outside of any traditional music scene. The group originally evolved from UCLA student Joseph Byrd’s New Music Workshop, a loose gathering of progressive musicians influenced by African and Indian styles and the minimalist compositions of Terry Riley and La Monte Young. “Sound was the main thing,” says Moskowitz. “Trying to change the sound of things. Believe it or not, we didn’t know the word ‘psychedelic’ when this recording was done. That was applied to us by the media. We called ourselves ‘experimental’ or ‘sound musicians’.”
Early Music Going back further, Dorothy Moskowitz’s first experience of recording her voice didn’t involve a studio. Sometime in 1947, as a seven-year-old at Playland, an amusement park in her native New York, she and her elder sister were given 35 cents by their mother to record themselves singing, direct to disc, in a Voice-O-Graph booth. “You could get a minute of recording time,” she remembers. “We sang this song, ‘Goodnight, Sweet Dreams, Goodnight’. My memory was that the clock was running down, and so somewhere around the halfway mark, we started accelerating the tempo.” Her interest sparked, she chose to further pursue music as she grew older. In the late 1950s, at Barnard, a women’s art college affiliated with Columbia University, Moskowitz studied under Otto Luening, an early pioneer of artful tape manipulation and electronic sounds.
“Being around him, I developed a curiosity about electronic music very early on,” she explains. “What Luening did for me personally, he taught me about modal writing, and he encouraged me to follow my heart, to follow my ear, and not get too wound up with the technicalities of it.” After graduating, Moskowitz ended up working in the admin department of RCA Victor’s Red Seal classical label. A perk of the job was access to free concert tickets, leading Moskowitz to Carnegie Hall one evening to a performance by lute player Julian Bream, where she had a chance meeting with Joseph Byrd, soon to become her boyfriend and bandmate in the United States Of America.
When Moskowitz arrived back in Los Angeles, Byrd and Agnello were already developing a song they’d given the working title of ‘Mouse’ — soon to become ‘The Garden Of Earthly Delights’. Byrd asked her to complete its lyrics. “I remember Byrd and Michael practising that complex opening riff,” she says. “Joseph had a few lines written. “He let me change the title... he was flexible in the early days,” she adds, hinting at the future creative difficulties between the pair. “I mean, he was really flexible about having me finish off the second and third verses.” Having recorded a demo tape that included an early version of ‘The Garden
“I think it stood the test of time because we didn’t borrow from ‘Summer Of Love’ clichés. In fact, we satirised them. And truthfully, not to brag, but I think it was too sophisticated to attain a grassroots following back then.” Byrd was at the time working as a staff arranger at Capitol Records, and Moskowitz soon joined him at the company where together they worked on a series of idiosyncratic projects including a compilation of Christmas music for Life magazine. “I assisted him,” Moskowitz says of Byrd. “I did a couple of arrangements and a lot of research for the liner notes.” In 1963, the couple moved across country to California, where both studied music at UCLA. Among the notable characters that Moskowitz encountered there were jazz trumpeter/composer Don Ellis, and future synth designer Tom Oberheim, who would later help out the USA on the technical side. “There were times at the end of the day where Joseph and I wanted to hang out with Tom, but he was off to the university organ room to practice,” Moskowitz laughs.
Experiments & Exploration But a line-up of the United States Of America featuring Dorothy Moskowitz almost didn’t happen. In 1966, she’d moved back to New York, when Joseph Byrd asked her to return to California to be part of a group he was forming with organist Michael Agnello. Their idea was to mix electronics and sonic experiments with rock band instrumentation.
Of Earthly Delights’ led by Michael Agnello’s organ and featuring disorientating tape echo on Moskowitz’s voice in its choruses, the USA bagged a deal with Columbia Records. Agnello, feeling that the others had sold out to a major corporation, decided to quit the group. The incarnation of the band that was to record The United States Of America album featured Moskowitz, Byrd, electric violinist Gordon Marron, bassist Rand Forbes, drummer Craig Woodson and new organist/pianist Ed Bogas. Recording sessions took place in December 1967 in Studio A at Columbia Studios in Hollywood, aided by Tom Oberheim, who built amplifiers for the band and helped Woodson in his experiments with attaching contact microphones to his drums and even coiled Slinky springs to his cymbals (for added sizzling effect). “Craig was exploring new sounds,” says Moskowitz, “and the mystery was how to amplify contact microphone sound. It was a very primitive time. Craig was getting his contact mics from Radio Shack [laughs]. Tom helped to get them organised in an amplification mode to make them sound alive and not distorted. Although, in some cases, the distortion was intentional. “The other thing was Craig Woodson wound up with a degree www.soundonsound.com / April 2026
129
FE ATURE
Hear The Sound W https://open.spotify.com/
track/1BBtng1KOF0JuC6bSNgGmp
W www.youtube.com/
watch?v=Tyjxnb8hVp4
Minogue, to name but a few. Asked to pick out a favourite sound from the many he’s created, Supple nominates the percussion on ‘Low’ from Coldplay’s 2005 album X & Y.
Danton Supple • Coldplay ‘Low’ J O E M AT E R A
D
anton Supple is a London-based producer, engineer and mixer who began his career in the mid-1980s at the legendary SARM Studios in London under the tutelage of producers Trevor Horn, Steve Lipson and Julian Mendelsohn. Always wanting to expand his horizons, he later moved into production and mixing work. With a career that now spans 40 years, Supple has worked with artists across a wide range of genres, including Coldplay, Pet Shop Boys, Morrissey, Suede, U2, Spandau Ballet, Elbow and Kylie
Recording The Hits “I was looking to add some kind of percussive element to an instrumental section of this song, which comes in at the 2:03 mark, to change the mood and drive it along. I brought the band into Townhouse Studios where we recorded this, and gave each person two drumsticks and stood them next to various objects such as a piano, a chair, a metal plate, a fire extinguisher and some glasses — whatever was in reach. Then I just ran the click track and they all played along to it. No planning, just seeing what rhythms would appear between them. “As we listened through the three minutes, there were a couple of bars here and there where it suddenly came into a great pattern between everybody and there’s this great moment between the glasses, the fire extinguisher and
Danton Supple: “There’s this great moment between the glasses, the fire extinguisher and a chair.” 132
April 2026 / www.soundonsound.com
a chair. Everyone’s individual patterns aligned, both rhythmically and tonally. “I used whatever mics were up in the room from previous drum and piano takes, so there was a nice mix of close and ambient sounds. Also, there were different compressors kicking in fairly randomly to add to the dynamics, too. For a percussion track, it was a somewhat exhaustive collection of mics, with a whole range of dynamics and condensers: Neumann 47s and 87s, Coles mics and Shure SM57s. The ‘smash mic’ — so called because it smashes the sound with a heavy pumping 1176 compressor doing lots of the work — was a Sennheiser 441, and with that on the kit, it was also creating its own rhythm with the fire extinguisher, making it pump away, but that and a wine glass really brought the tonal side in. The final result was this very colourful percussion interlude.”
AT E ! RE U G L VA
Discover SOS For Artists : A Complete Platform for Modern Music Creators
The SOS For Artists Pro subscription gives you access to 64 quality Plug-ins from leading brands with more being added on a regular basis at no extra cost. Name AAS - Session Bundle Rekraft TimeShaper 3 MixBox SE EON-Arp Groove Shaper Flare & Fusia Texturize LoFi - Pitch Dropout LoFi - Flux Light Live 12 Lite Cubase LE 15 U73b Compressor Dirty Dyna Korvpressor LANDR VoxChain LaCreme3 Model 5000 Pythor MixChecker Ultra MixChecker GK Amplification 3 Pro RZ062 Equalizer 1A Equalizer NEED 73 Console EQ BlackQ3 FlashBack AXXESS SynthMaster 2 Player LANDR Synth X CUBE Mini MiniRaze
Brand Applied Acoustics Systems Beatskillz CableGuys IK Multimedia Modalics Pitch Innovations Puremagnetik Soundghost Yum Audio Yum Audio Ableton Steinberg Audified Beatskillz Klevgrand LANDR Tone Empire Tone Empire Tone Empire Audified Audified Audified Audified Audified NoiseAsh Tone Empire Beatskillz GForce KV331 LANDR Lunacy Audio MOK
Type Bundles Creative FX Creative FX Creative FX Creative FX Creative FX Creative FX Creative FX Creative FX Creative FX DAW DAW Dynamics Dynamics Dynamics Dynamics Dynamics Dynamics Dynamics Emulation Emulation Emulation EQs EQs EQs EQs Instrument Instrument Instrument Instrument Instrument Instrument
Name Originals Intimate Grand Piano BioTek 1 USynth Core Digital Synsations LANDR Mastering Plugin PRO Rev PLATE-140 LANDR VoxVerb Analog Lab INTRO Bolly X GRX SampleX v3 Sequel 2 Vinylistik M-Tron Select SampleTank 4 SE LANDR Sampler LANDR Chromatic Orakle The Orchestra Elements U78 Saturator Valves TAIP CrushStation Reelight Pro Valvekult V3 LANDR VoxTune LANDR VoxDeEss LANDR FX Voice VocAlign 6 Pro RePitch Standard RePitch 2 Standard LANDR Stems
Brand Spitfire Audio Tracktion UJAM UVI LANDR Arturia LANDR Arturia Beatskillz Beatskillz Beatskillz Beatskillz Beatskillz GForce IK Multimedia LANDR LANDR MNTRA Sonuscore Audified AudioThing Baby Audio Eventide Tone Empire Tone Empire LANDR LANDR LANDR SynchroArts SynchroArts SynchroArts LANDR
Type Instrument Instrument Instrument Instrument Mastering Reverb Reverb Samplers Samplers Samplers Samplers Samplers Samplers Samplers Samplers Samplers Samplers Samplers Samplers Saturation Saturation Saturation Saturation Saturation Saturation Vocal Processing Vocal Processing Vocal Processing Vocal Processing Vocal Processing Vocal Processing Workflow
(Note - only 19 are included in the Essentials plan)
FREE PLAN
ESSENTIALS
ign up and explore S the features Kickstart your creativity with 7,800 samples Preview the LANDR Mastering tool Preview Distribution
or $12.99* per year per month $1,000 worth of Tools inc 18 Plug-ins 1200 Sample Credits U nlimited MP3 + up to 36 WAV masters U nlimited Distribution
ONLY
99
$
* Monthly price does not offer same number of Plug-ins or Sample Credits ** Also available in most countries worldwide in your local currency.
PRO
199
$
or $19.99* per year per month $2,000 worth of Tools inc 64 Plug-ins 2400 Sample Credits Unlimited MP3, WAV + HD WAV masters Unlimited Distribution
ONLY
www.sosforartists.com
INSIDE TRACK
Adam Thein • Djo ‘End Of Beginning’ Adam Thein in his current home studio.
PAUL TINGEN
“I
t’s extremely bizarre. We definitely didn’t think it would ever get to this level. We both lived in the Midwest, and have a very DIY attitude to music. We just went, ‘We’ll just do it all ourselves, and who cares if we only have computers and headphones, we’ll figure it out.’ For the music we made like that to become so far-reaching, we never expected that to happen. It’s very confusing. And yes, it’s absolutely life-changing. I was thinking a few years ago that maybe I’d have to go back to working in the mail room or the grocery store. It’s been an incredible gift to be able to make music every day since then.” The ‘we’ mentioned above are actor Joe Keery, famous for his starring role in the Netflix drama Stranger Things and as artist Djo, and musician/producer Adam Thein. The ‘then’ is what happened to Djo’s song ‘End Of Beginning’ in 2024, and again in 2026. Initially released in September 2022 on Djo’s second album Decide, it unexpectedly went viral in early 2024, and after being released as a single in March of that year, reached number 11 in the US and 4 in the UK, making it Djo’s most successful release by far. “UMG and TikTok had a disagreement, and UMG pulled a bunch of their music off TikTok
134
April 2026 / www.soundonsound.com
Adam Thein mixed Djo’s second album entirely on headphones — including a hit that went viral twice and topped charts five years after its release. [February 1st 2024]. Within a week of that happening, ‘End Of Beginning’ started to do better. It seems people were looking around for different music to use for their video clips. There’s a comedy drama series called The Bear that takes place in the city of Chicago, and people were making edits of it, and using ‘End Of Beginning’ as backing music. That appears to have contributed to it going viral.” Then, in January this year, three and a half years after its initial release, ‘End Of Beginning’ charted again, becoming one of the most successful hit singles of the year so far and topping charts in the UK as well as a dozen other countries. The reason was, apparently, the Stranger Things Netflix series, which wrapped up its fifth and final season on December 31st, 2025. ‘End Of Beginning’ never actually featured in the series, so its newfound success was purely due to the song’s association with Keery.
Sweet Home Chicago Joe Keery and Adam Thein originally met in 2015. “He was in Chicago, not far from us. Many of the people in Joe’s touring
band and who we record with today met during that time. We’re a group of friends that’s stuck together for the last 10-12 years. Joe contacted me again in 2017, by which time my wife and I were living in Eugene, Oregon. Joe said he needed some help finishing an album he’d made by himself while shooting Stranger Things. A friend of his had suggested me, and Joe recalled us meeting two years earlier. At that time I was working a mail room job, and spent time doing mixes at home overnight. “Joe originally asked if I could master his album. I listened to it and thought, ‘Wow, these songs are great.’ They really blew me away. Joe had done the entire album in Logic, with programmed drums and so on, and I suggested that it’d be worth spending a little more time on the songs and I encouraged him to re-record the drums, which he ended up doing in Chicago, with a couple of friends of ours. When all the material was complete, we mixed the album together over the Internet, communicating via Zoom. It was the first project I worked on as a mixer on which I was not also a musician. In the
Photo: Carolina Hernandez
end, Heba Kadry mastered it, in May 2018, and Twenty Twenty was released in the summer of 2019.” Joe Keery had recorded Twenty Twenty in a caravan on the Stranger Things set, on a laptop running Logic, with Shure SM57 and AKG C214 mics, and a Focusrite two-channel interface. For Decide, he had moved on to Ableton Live and a Mojave 301 FET mic, while listening back on Apple AirPods. Adam Thein, for his part, used a desktop PC running Ableton, an Audient iD44 interface, and Audeze LCD-X headphones. “At the beginning of the pandemic, Joe and I both had nothing to do, so we starting making an album together, which became Decide. That’s when I decided to quit my other work, and go full-time into music. We were each making instrumental demos at home, and sent them back and forth, and did sessions via Zoom. So I co-produced the entire album, and co-wrote most songs, though not ‘End Of Beginning’. Once the instrumentals were close to being finished, Joe would develop ideas for vocal melodies and lyrics, and he self-recorded his vocals at home. “In September 2021, when the world was opening up again, we decided to go to a studio to replace the drums with real drums and re-record Joe’s vocals. We ended up also re-recording some guitars, synths and a few other things. These sessions took place at the Sound Factory in LA, with our friend Ted Mathews on drums, and Davide Cinci engineering. Another friend, Matt Williams, layered a few guitars. Decide was a very in-the-box album that was augmented in the studio. It was mostly about plug-ins in Ableton, and headphones.
At that time I used many Ableton sounds and soft synths by Arturia and U-he, like Diva and Repro.”
Beginning Of End Of Beginning ‘End Of Beginning’ did not emerge until the end of the making of Decide. “In April or May 2021, Joe had started the instrumental for the song. At that point, we already had a full list of tracks for the album. I recall receiving his demo, and it was all programmed, with an electric guitar part that he had played directly into his Focusrite interface, and some bits of a chorus melody. I thought that it was a good start for a song, but it felt rather different from the other songs we had, which were very 16th-note electronic feeling. So I suggested we might use the new demo for a later project. “A few months later, in September 2021, we were at Sound Factory for 10 days, replacing drums and vocals, doing 12 hours a day, trying to cram in as much as possible. By day six or seven we were a little burnt out and fatigued. So Joe was like, ‘Why don’t we do this new song, playing it together live? It’s just three chords.’ So we tracked it live with Ted on drums, Joe on a Gibson J45 acoustic, and myself on bass. While playing together, we worked out a tempo, arrangement and structure quite quickly. It was a total rebuild from the demo. We started from zero, whereas with the other songs on that album we used the
‘End Of Beginning’ was granted a new lease of life this year thanks to the attention surrounding the final series of Netflix’s Stranger Things — even though it never appeared in the show.
demos as the foundation, muted any parts that we wanted to replace, and overdubbed to the demo. “Joe took that ‘End Of Beginning’ instrumental back home, lived with it, and wrote the lyrics and melody. In December 2021, we went back to the Sound Factory, and did all the vocal tracking and other
The original tracks for ‘End Of Beginning’ were recorded at the Sound Factory by engineer Davide Cinci (left). Ted Mathews (centre, left) played drums, Adam Thein (centre, right) was on bass and Joe Keery aka Djo (right) played acoustic guitar.
www.soundonsound.com / April 2026
135
TALKBACK
e.m.arson WILLIAM STOKES
E
mmally Parsons, aka e.m.arson, is a British producer and musician who blends sampling, electro-acoustic instrumentation and sonic manipulation in extraordinary ways. Her latest full-length record is The Pillbox. At the moment I can’t stop listening to So, I’m one of those people who listens to such an eclectic mix of music, at all times! It’s gonna have to be Cindy Lee. I always go back to her Diamond Jubilee album. I think it’s such a clever album. Like, words don’t do it justice, in any shape or form. The sonics, the storytelling of it all, is immaculate. I think it’s really cool how it’s kind of ‘punk-but-not-punk’, it being a twohour release as well. It really sticks to her roots. I love all the jangly pop guitar of it, the lyricism and the whole arc of the story from the beginning of the album to the end. Aside from that, I’ve been sitting in church a lot! Doing sound recordings and tour recordings and listening to choral concerts for research. So that would be like another thing that I can’t stop listening to at the minute. I’m constantly taking field recordings, all the time, for my own field recording ‘database’. I’ve been really interested in how one voice or tone — in terms of spectral music — can be then layered or pulled apart to make something bigger. The artist I’d most like to collaborate with Laurie Anderson. Or Suzanne Ciani. Those would be my top two people that I’d love to collaborate with. It would be really important to work with another femme in the musical field, especially in terms of experimental music, and I’m really interested in artists who are pushing boundaries and want to innovate and play music in a non-conventional way. It could be a super girl group! Get Meredith Monk in there as well!
138
April 2026 / www.soundonsound.com
The first thing I look for in a studio A piano. It doesn’t even have to be a piano that’s in tune. Just something that can be a ‘touch point’, where I can noodle in between writing or recording. I often find that I create more music with sparse objects and with limitations than I do if I’m overwhelmed with choice. When I enter music studios, I’m just grateful for that time and space, that quiet time to think and actually map things out. I mean, my studio is more of like a multi-disciplinary art space where I paint, I write, I make music. Having things set up, having a wide variety of instruments and materials to play with, whether that means conventional instruments or bits of scrap metal or discarded wooden instruments in the corner that someone wants to take to the charity shop... I’ll be like, ‘Let me use those!’ I’ve always explored that in both my visual practice and my music practice. How I can repurpose things, to make something new. The person I would consider my mentor I’ll say two. Both of them have passed away now; but my grandad, who was like my dad to me, and my uncle who was his bandmate. Growing up, I didn’t really have conventional ‘music lessons’, so when we were in the car or doing long drives, I guess without realising it I started to develop my ear and learn how to listen to music. You can really learn, just through hearing and watching people play music. I’m really thankful: just from seeing them playing in a band, from a young age I was exposed to live music — and I learnt things, like how to advocate for yourself with a sound guy! Which is maybe not the most important lesson, but it’s a valuable lesson as a woman in the music industry. I learned to trust my gut and my instincts and my ability to contribute. Trusting my own creative direction as well, and how much value that contributes.
My go-to reference track or album When I create my own work, I actually do my best to not listen to other music, so that everything is coming from a place of authenticity for me, and from a clear mind. Of course, we’re all influenced subconsciously or consciously, but I try not to reference other tracks. I think, when I create music, it’s more from about: what story am I trying to tell? What am I trying to portray? So I actually work from more visual elements. I have more of a visual ‘research board’ that I approach the work from, rather than “OK, this is a reference track that I would like to use.” So can I give you a reference painting? It would be The Tower Of Babel by Pieter Bruegel the Elder. I’ve used it in so many projects. I like all the miniature conversations within it; there are so many different storylines in one piece. I try and create that within my own work. My secret weapon in the studio is My little Stylophone Theremin! I’m a huge nerd for ergonomic tech that’s portable and that can travel with you. So that would be my go-to miniature piece of kit. With the live sets I’m making at the minute, a lot of my instruments are karaoke microphones I’ve got taped together as a trio to create feedback and reverb. It’s a real DIY approach! But I think my mindset is really important. Without a good creative mindset, flow just doesn’t happen. Turning up to the studio with intentionality and openness; I think that is my secret weapon. I feel that with music, with things that might go ‘wrong’, I can be like: OK how can I make this into something that’s interesting and will contribute to to the set, or to a sound? I think my skill, my secret weapon, is that curiosity and openness to experimenting and making something out of nothing, even if it’s not going the way you expected. The studio session I wish I’d witnessed Immediately, I think of Laurie Anderson recording ‘O Superman’: layering her
of Arab women from the medieval period. She bridges the worlds of art and music so seamlessly. It’s so rigorous and emotionally resonant, and sonically adventurous. The studio experience that taught me the most I did a studio session recently where I was trialling different sound loops and samples that I’ve not been able to use in my wider solo project. Sounds which are a lot noisier, more industrial, a lot heavier, a lot grittier. I was using a DJ setup to sort of play around with sampling, but through decks. And that was really interesting. It really taught me a lot about how I can actually develop my own practice at the minute and bring in heavier sounds alongside more ethereal sounds in a more coherent way. Keeping that improvisational ability while bringing in my DJ’ing background as well. I’ve also recently been working with some local musicians as well, developing a live show for The Pillbox and expanding to a wider band setup, and playing with other improvisational experiments musicians has taught me a lot about the language of music. I’m not classically trained, so having to translate work and meeting people where they’re at to make a wider sound — while still keeping the essence of the album — has been a huge learning curve and an absolutely wonderful opportunity. Honestly, it’s so cool to work with like-minded people. A dream come true.
vocoder, exploring themes of technology and its failures, experimenting so fearlessly. It would be endlessly awe-inspiring. But, I’m going to say the session where Paul Flaherty, Thurston Moore and Bill Nace made the tracks ‘Sex’, ‘Drugs’ and ‘Lavender’. It’s ferocious but meditative! So much texture and emotional depth. I would have loved to have been a fly on the wall for that session: seeing them improvise together, how they listened to one another and responded and built something entirely in the moment. But also in between making the tracks themselves, I think it would have been really fascinating to hear their conversations. Maybe they were just, you know, discussing things like, “Do you want a cup of tea or something?”, or maybe it was something more deep.
The producer I’d most like to work with Fatima Al Qadiri! She’s not technically a producer, but she is another experimental musician and multidisciplinary artist. I feel as though when I work in a wider team, especially with producers, what I look for is being able to approach things in an experimental and improvisational way, similar to how I would produce my own record. So someone who really aligns with that is something I value immensely when it comes to production. I think it would push me to think critically about sound and composition, and storytelling, so she would be incredible to work with. I’m a huge fan of her work as well, especially her album Medieval Femme, which is all about melancholic longing in the poetry
The advice I’d give myself of 10 years ago I remember sitting in a rented room when I was in Brighton making like loops and splicing with a sort of cut-and-paste approach. I knew deep down that I wanted to make music, but I always danced around the subject of doing it, like, I had imposter syndrome. I still do. I still struggle with that: just not being able to feel like I was of value to the scene. So if I could sit myself down with myself 10 years ago I would probably say: there’s never a right time. Just explore your true north without any hesitation at all. Go and play, make noise, learn — actively learn. Participate. Be bolder and braver. Don’t be scared. Just explore it and be honest with yourself about what you want to do. I feel like I was so unhappy for so long, because I just didn’t take that leap of faith. And now I am. I’m learning along the way, and it’s been a wonderful adventure. www.soundonsound.com / April 2026
139
Q
Why are the direct out levels from my mixer too low for my interface?
I recently bought a used Tascam M3500 inline mixer. I wanted to use it mainly for the preamps and for summing mixes (and to look cool in my studio). I am using an Antelope Orion 32 Gen4 audio interface, so I have the ability to lay out every channel of my mixer to individual channels on my interface. But I’ve noticed now that the signal coming from the mixer’s direct outs is kinda low. If I push it slightly into the red on my mixer, it’ll arrive in my DAW still very much in the green (I hope that makes sense!). Is there any solution to this? Is the problem on the mixer’s side or with my interface? Did tape machines back then have higher input volumes? Thanks! SOS Forum post
Q
Hugh Robjohns, Technical Editor The unbalanced direct outputs from the Tascam desk are designed to work with a nominal level of -10dBV — that was the standard for Tascam’s semi-pro tape recorders. This level is roughly -8dBu, or 12dB, below the +4dBu standard for professional balanced gear, which is what the Orion is designed for. However, I think the Orion’s A-D line inputs have an adjustable input trim, and I would suggest dialling it down by 12dB, so that 0dBFS (digital clipping) is achieved with an input level of +12dBu (instead of the default +24dBu). That would give you the industry-standard 20dB of headroom above the -8dBu (-10dBV) nominal output level from the Tascam channel direct outputs. With the default settings you’d have 32dB headroom between the desk’s nominal direct output level and digital clipping, which is why you’re seeing signals well down “in the green”.
The direct outs on the Tascam M3500 are handy, but intended for tape machines operating at -10dBV — around 12dB lower than the Antelope Orion’s +4dBu operating level.
Should I gain‑stage to -6dBFS or -18dBFS?
I’m a bit confused about conflicting advice I keep seeing about gain‑staging. Some people say to adjust the gain until the sound sits at -6dBFS, and others say -18dBFS. And then others say it doesn’t really matter at all any more, as long as you’re not clipping at the audio interface. Is there a right answer? Jake Bowen, via Facebook Matt Houghton, Reviews Editor I’m not surprised you’re confused because all those statements could be right! The first thing to say — and I’m going to assume you’re working in a DAW here, rather than entirely in the analogue domain — is that the considerations for recording and for mixing can be slightly different. When recording, the bottom line is that you need to ensure you’re capturing a healthy signal (relative to the noise floor) without clipping your interface’s converters. Ensuring the peak signals hit around -6dBFS will certainly do that, but 6dB isn’t a huge amount of headroom, and as long as you’re recording through 24-bit conversion (never mind 32-bit), you don’t need to sail so close to clipping; the noise floor will be low enough that you can leave more headroom. In this context, the -18dBFS figure you mention would refer to an average (RMS) level, rather than the peak. The idea being that this leaves almost as much headroom as professional analogue gear does — which means you just don’t need to think about the peaks. Let’s turn our attention now to mixing in your DAW. Assuming the DAW is operating with 32- or 64-bit floating-point processing, you won’t clip anything while working inside the DAW. So, on a purely technical level, gain-staging inside the DAW is unnecessary — as long as the levels on channels routed to your physical audio interface outputs never exceed 0dBFS. (Even True Peak meters aren’t perfectly precise, so it’s good to keep at least a dB or two in hand there). Yet, there are still some practical reasons why it’s good to be disciplined about the signal levels inside your DAW. For example, if your signal levels are all over the place, then your DAW’s meters
142
April 2026 / www.soundonsound.com
A VU meter embedded in a Reaper track control panel, along with the settings used.
won’t serve any useful purpose. If you want to bypass plug-ins to A/B compare with the unprocessed sound, or to swap out and compare different insert effects/plug-ins, it’s handy to be able to do so without having to compensate for level differences every time. And if you’re working with plug-in processors with a fixed threshold or that model the non-linear behaviour of analogue gear, they might need the input signal to be at or around a particular level if you’re to get the intended results from them. In this context, there’s little point thinking in terms of the sample peak levels — each process has the potential to change a signal’s peak level pretty dramatically, so matching output peak levels to input ones isn’t helpful. Better, if possible, to set your DAW meters to an RMS mode, or use a dedicated VU meter calibrated so that 0VU is indicated at -20, -18 or -16dBFS. Unless you’re integrating hardware gear into your system, it doesn’t much matter which figure you pick as long as you’re consistent. I configured my Reaper system with VUs on every channel, and set the 0VU reference to -18dBFS, with a peak LED at -6dBFS. For a deeper dive into this topic, check out the in-depth article I wrote back in SOS September 2013, which is free to read on our website (https://sosm.ag/gain-staging-in-your-daw).
NEXT MONTH IN Buchla Touché Revisited
An eight-voice, computer-controlled polysynth sounds surprisingly normal by Don Buchla’s standards. The Touché even had a conventional keyboard — but inside, it was unlike anything else. We delve into the archives to uncover a lost chapter in synth history.
Subscribe at www.soundonsound.com/subscribe
AD INDEX To Advertise in Sound On Sound please contact: usadsales@soundonsound.com ACE Studio............................................................................................. 56-57
iamReverb...................................................................................................45
AIM Audio....................................................................................................93
Ilio..............................................................................................................IFC
Allen & Heath...............................................................................................87
Kenton Electronics.......................................................................................77
AMS Neve....................................................................................................41
Lynx Studio Technology........................................................................... 33
API Audio.....................................................................................................65
Millennia Media....................................................................................... 15
Burl Audio.................................................................................................. IBC
Munstre Studio Furniture.............................................................................35
Cranborne Audio..........................................................................................11 DPA Microphones......................................................................................105 Electro-Voice............................................................................................ 25 Eventide................................................................................................... 51 FabFilter......................................................................................................29 Garbage Ideas.............................................................................................83 Genelec.......................................................................................................21 GIK Acoustics...............................................................................................39
QSC Audio Products................................................................................. 13 RAD Distribution..........................................................................................79 Radial Engineering.......................................................................................69 SOS For Artists................................................................................... 109, 133 Soundtoys...................................................................................................97 Soundbridge................................................................................................19 SPL USA......................................................................................................53
Goodhertz....................................................................................................91
Steinberg.............................................................................................. OBC
Grace Design.................................................................................................7
Sweetwater...................................................................................................9
Harrison Audio......................................................................................... 23
Toontrack Music..........................................................................................75
Heritage Audio.............................................................................................63
Yorkville (ART).............................................................................................55
SHOWCASE
David Carson (Regional Sales Manager): david.carson@soundonsound.com
Kludge Audio 506 Equalizer
THE ANALOGUE EQUALIZER FOR THE 96 KHZ AGE
http://www.kludgeaudio.com/500
Piano Organ Synth
Note-for-Note Sheet Music - MIDI Files
TRANSCRIPTIONS Learn Your Favorite Keyboard Parts Exactly As They Were Recorded
Visit ManyMIDI.com Free Sample
Find the BEST acoustic fabrics from top brands at the LOWEST prices… Guilford Of Maine
Maharam
Luum
Knoll Textiles
DesignTex
…and more!
…up to 95% OFF retail bstockfabric.com 144
April 2026 / w w w. s o u n d o n s o u n d . c o m
Money Back Guarantee
NEW
AUDIO & VIDEO CABLES, PANELS, CONNECTORS, ACCESSORIES.
Experience acoustic perfection anywhere with the only studio trailer designed specifically for recording artists, composers, musicians, podcasters, and video personalities.
What you need, when you need it.
De s i g n yo u r d rea m stu d i o at : m o b i l e s o u n d stu d i o s .c o m
SCAN ME
TO SUBSCRIBE
!
REDCO AUDIO
1-203-502-7600
SUBSCRIBE & SAVE TABLET | WEB | REPLICA | PRINT
• Go DIGITAL - get 12 monthly Tablet issues + all locked Web articles + monthly Full Issue PDF download the day the issue goes live. • Go PRINT+DIGITAL - get the best of both worlds and save over 50%.* SMARTPHONE COMPATIBLE
1 ICONIC MAGAZINE 6 GREAT WAYS TO READ IT TABLET - PHONE - WEB - PDF - REPLICA - PRINT All this for less than the price of a Coffee+Muffin each month!
iOS / ANDROID
Every Digital sub includes a 5-device licence to our App: mix and match across iOS/Android Tablet and Smartphone.
ONLY READING SOS IN PRINT?
Choose our full Print+Digital bundle for unlimited 24/7 access.
www.soundonsound.com/subscribe * The 50% discount offer is based on the US retail price of the Print magazine, Tablet and Web subscription w w w. s o uwhen n d o n s osold u n d . cseparately. o m / April 2026 Subscriptions can be cancelled at any time and you will receive a pro-rata refund for all outstanding issues.
145
IMPROVISATION S I M O N PAT E R S O N
I
mprovisation is something we’re all capable of, even if we’ve been conditioned over time to reject it, or never had the chance to explore it in the first place. Even if you’re not making jazz or ‘free’ music, or composing at all, improvisation can be a powerful way of learning, evolving, and developing your engineering and sound‑design skills. Musicians have a long history of taking tools and working out what they can do with them. For some, the best way to learn is through hands-on experimentation. I learned EQ whilst left alone at a Trident console and blindly experimenting. I learned as much about synthesis in the same way. We tend to think of improvisation in terms of
rhythm, melody or harmony, but the same curiosity and spontaneity can, and should, extend to the studio. Improvising with sound itself means engaging with synthesis and processing tools from a place of exploration, being open to ideas, and learning to trust your own intuition. Chick Corea once said “What you think is beautiful, that’s what’s beautiful.” In other words, be willing to be surprised. After all, the most inventive creators rarely rely on presets. They venture into the unknown, trusting their ears and instincts just as much as, or often more than, their technical knowledge. They explore the relationship between the analytical and the intuitive, and allow inspiration to arise from unexpected places. Learn the rules, but be willing to break them.
“The more you let yourself explore, the more fluent you can become in the language of sound.” 146
April 2026 / www.soundonsound.com
While synths and processors typically present their controls in series, their effect on each other is fluid and multi‑dimensional. Learning how these elements interact, and how adjusting one impacts the whole, is part of the fun. I don’t see sound design as a linear signal path, more as a continuum. So, instead of tweaking isolated parameters one at a time, think of the process as a dynamic, interconnected loop. Select a waveform, shape it with a filter, mould it further with an envelope, throw in some reverb or delay, maybe a compressor, then circle back to adjust the oscillator again. Keep moving through this loop until the sound begins to speak to you. As your track evolves, this same improvisatory logic can scale up to inform your broader compositional and production decisions. Improvisation also means allowing so-called ‘mistakes’ to re‑brand as ‘creative
opportunities’. Maybe you’re building a bass patch and end up with a wild arpeggiated lead instead. Great! Save it, duplicate the channel, label it, and keep going. Remember, the journey is always the fun part, and these detours often lead to the most inspiring results. And don’t be shy — really push those parameters. Most plug‑ins let you copy settings to the clipboard, so you can afford to go extremes, knowing you can always revert. Crank the resonance, detune the oscillator, modulate the decay... then reflect and refine. What did you learn? What did you discover? The more you let yourself explore, the more fluent you can become in the language of sound. Unlike traditional paper-based composition, working in a DAW offers immediate feedback and presents sonic possibilities that can surprise and inspire. Sometimes, the less we know and the less fixed our expectations, the more room there is for discovery.
In the Beginning...
There Was...
NEW
Everything for Perfect Drums and Percussion Groove Agent is a complete groove and beat-making environment, with a vast collection of fresh drum sounds, deeply sampled acoustic kits, and authentic percussion sets. Get everything you will ever need for drums in one smoothly designed, resizable VST plug-in.
steinberg.net/grooveagent All specifications are subject to change without notice. Copyright © 2026 Steinberg Media Technologies GmbH. All rights reserved.
FREE eBook RECORDING TECHNOLOGY
BASICS &BEYOND SECOND EDITION
Get your FREE digital publication from Sound On Sound This FREE illustration-rich eBook is aimed primarily at newcomers to the subject, but will prove equally valuable to anyone struggling with the complexities of today’s sophisticated recording technology. The purpose of this 170-page guide is to introduce readers to the essential components of a modern recording system and to explain the recording process in an easy-to-follow way, demystifying the inevitable jargon, both as it crops up, and with a comprehensive glossary. Written in the accessible, no-nonsense style of the Sound On Sound team of authors and editors, Recording Technology: Basics & Beyond covers: ■ What to buy ■ Studio setup ■ Computers for audio ■ Audio interfaces ■ Monitoring ■ Acoustic treatment ■ Mic techniques ■ How digital audio works ■ Understanding your DAW software ■ Upgrading your system
■ Software instruments ■ Wiring your studio ■ Plug-ins ■ Recording audio ■ Understanding MIDI ■ Recording vocals ■ Mixing ■ Compressors ■ Equalisation ■ Mastering ■ A.I. - in Music
Don’t miss out! Sign up and share the link with friends and colleagues on social media.
https://sosm.ag/recording-ebook