The speed that you can travel across open countryside is determined by the type of terrain you are crossing on a given leg of your journey. See chart below for guidance, however a correct estimate can only be determined by calculating your pace over a 100 meter distance. This is particularly necessary if crossing boggy ground or difficult terrain such as high heather or ferns. Weather can also be a factor in your calculations especially in driving rain, wind or snow conditions. These items should be taken into account as you proceed along your journey and recalculations may need to be made as you complete each leg. Always have alternative routes or escape routes planned into your journey in case weather conditions change or there is a need to get to safety quickly.
Step 1. Measure the distance from the map along the lenght of the chosen leg as accurately as possible.
Step 2. Estimate the time necessary to travel this distance, from chart and from your own experience.
Height Climbed
10 minutes for every 100 metres climbed 1 minute for every 10 meters climbed 30 minutes for every 1000 feet climbed 3 minutes for every 100 feet climbed
Rest Time
Allow 15 minutes per hour rest time over the period of your journey. Allow time for lunch usually 30 minutes
Step 3. Calculate the height gained over a given leg. (Do not add in time for descending unless the terrain is very steep or difficult).
Step 4. Add the two times together to give overall estimated time for completing the leg and enter this time on your route card
ON THE MOVE
Ph.
Walking the trail
Walking is a natural skill and anyone who can walk can hike. But hiking often involves long distances and rough terrain, and therefore added stress. Here are a few suggestions on how to make you walk more enjoyable.
You should walk with your toes pointing forward, not to the sides. An inward or outward orientation of the foot causes an unnatural torque, or twist, on your ankles.
On level terrain, try to hold your torso (upper body) as vertical as possible. A fully erect posture distributes body weight efficiently and is especially important when carrying a pack.
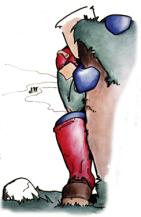
When going uphill, your initial tendency is to lean too far forward. This causes strain, and you will tire more quickly. So lean forward only slightly. Don’t over compensate for the uphill slope.
Going downhill is even more tricky. As you travel downhill, your knees act as brakes, absorbing the forces of gravity and momentum.
Steep downhill grades are hard on the knees and leaning backwards only makes things worse. It can also cause your feet to lurch right out from under you. If your knees begin to ache, bend slightly forward. This seems awkward, but with practice you will get the hang of it.
Another thing about coming downhill; If your boots are too small, or laced tightly, your toes will ram into the front of the boot. This is painful and can even cause the loss of a toenail if unchecked. So, when choosing new boots, stand on your toes. If the boots hurt then, they’ll hurt going downhill too.
ON THE MOVE
Never jump or leap while carrying your rucksack. With the extra weight on your legs as you land it can result in injury, as well as the hazards of falling off balance.
Care should be taken when hiking over rocky or uneven ground. Place your feet deliberately from step to step this will prevent stumbling.
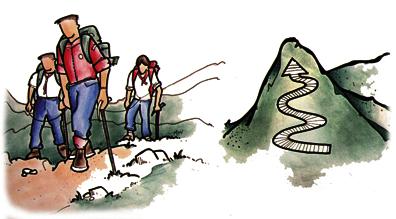
For steep uphill travel, take your time and travel at a steady pace. You should travel up the hill be a method of traversing from side to side in a zig zag fashion rather than a direct assault.
Some hikers find a walking stick or stave is useful. When crossing rivers the stick can act as a third leg that helps you keep your balance. It can also assist you in descending steep slopes.
When traveling over rough terrain navagation can be difficult. Using natural ‘handrails’ such as tracks or rivers to make travel easier. Likewise you can also travel along a contour line rather than take the more direct ‘over the top of the hill’ method. You can also bypass an obstacle by detouring. Do not reset your compass. Travel around obstacle to selected point on other side and continue on route. If conditions are bad then travel around obstacle by adding and subtracting 90 degrees from your compass bearing
Leading a party / group
Setting the pace
The pace of the group should be that of the slowest member. A comfortable pace will allow everyone to talk freely. If there is a lot of huffing and puffing then the pace is too fast. On uphill sections your pace should be slow and calculated bringing the whole group up the hill together. It should not be necessary for the leader to be out front setting the pace, although this maybe necessary if the group are walking too fast.
Keeping the group together
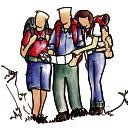
In traversing the countryside the leader needs to be able to keep the group together this can be done in a number of ways.
Setting a manageable pace ( see above) and avoid crowding or stringing out the group
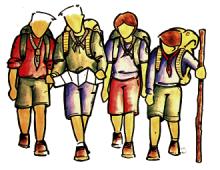
Every group should have a person who acts as the ‘rear man’. His/her job is to ‘bring up the rear’ and advise the leader if the Patrol is
becoming strung out. The ‘rear man’ should be a senior and more experienced member of the Patrol. The ‘rear man’ is literally that they should be the last person in the Patrol they never let anyone fall behind them.
The Patrol should wait after obstacles to reform the Patrol before setting off.
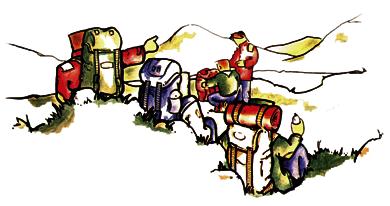
The leader of the hike should take an active interest in their surroundings and should be able to point out interesting features and points of interest. You may also want to check map reading skills or show new members of the Patrol how to read a map. These are methods which can be used to bring the Patrol together, rest the Patrol and add more interest into the hike.
Encourage your Patrol members to lead different legs of the hike so that they can develop their skills.
If you have a problem with members pushing ahead too quickly it is a good idea to put them to the back of the Patrol to assist with the stragglers.
ON THE MOVE
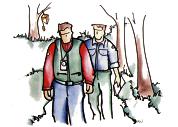
The leader of the hike should find a central position in the group so that it is possible to control and monitor the Patrol from the front and rear.
Crossing rivers, bogs and marshes
While on the trail you will cross many types of terrain. Rivers, bogs, and marshes have their own particular hazards. Care should be taken while crossing them. Avoid jumping from boulder to boulder while crossing rivers. Jump from tuff to tuff while crossing bogs. Stay clear of wet, boggy, peaty ground in the troughs of bogs. Skirt around this type of ground rather than following your bearing to the letter. Avoid crossing
stretches of bright green moss on marshes. As you cross you will notice that it moves, it is floating on water. If you are unfortunate to find yourself sinking into a bog ‘swim’ with a breast stroke to firm ground - don’t try to jump. Spreading your body over the surface distributes your weight. It is a good idea to cross these obstacles in single file. The person in front finding the safest route across.
River Crossing
River crossing at the best of times are hazardous, but in heavy rain mountain streams can turn into massive rivers, sometimes covering stepping stones and low bridges or fording places. River crossing in such conditions should be approached with caution - if in doubt turn back or seek a safer crossing point. If there is no other option but to cross the river then take note of the following points.
The river should be crossed at a point where the river is flowing slowly rather than at rapids just because it appears to have a number of stepping points available. It is often safest between bends. The bottom is often good and the water shallower. The water is also shallower when the river widens and the safest place to cross is usually a point on the river where a number of islands have been created as the river has swollen in size. Before attempting any crossing you should try to survey the river from a high point which will enable you to view other hazards which may not be visible from the river bank. Prepare your group before you attempt to cross. Remove your trousers and heavy jackets to reduce drag and friction and keep them dry. Remove your socks also and wear your boots as you cross.
Rucksacks belts and straps should be left open or loosened so that the pack can be jettisoned if you fall while crossing. If your pack has to be jettisons hold on to it. It will probably float so you can use it to right yourself.
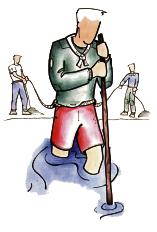
A pole or stave should be used to provide a ‘third leg’ . It should be used in a pyramid fashion, using it if front of your body to probe the bottom of the river, put you weight of it only when you know it is secure. Cross the river facing the oncoming current this will prevent you from falling over.
Buoyancy aids can be created by using survival bags, billies, bottles. Or you may want to place all your dry clothing and rucksacks in a survival bag and transport it separately.
The crossing of all rivers in flood should be done with the aid of a rope. If a rope is unavailable then reconsider your situation.
Secure a rope on each side of the bank. Each member of the group should be secured to the rope, so that a link is formed with those on each bank of the river.
A leader should be the first to cross the river. Apart from the difficulties of fording the river the leader should also try and determine any underwater obstacles as he/she crosses so as to plot a safe route across.
A diagonal crossing method is recommended. You should travel upstream and across if possible.
The leader should check every member of the group before they cross and that every member is secured at all times as they cross. Once on the other side they should dry off and get into dry clothing.
Safety notes -
Particularly for those leading a hike or adventure in wild countryside
Before you set out on a trip obtain as much information about the area that you can.
Check all equipment before you start. This should include the checking of the contents of individual rucksacks by the Patrol Leader, you should be wearing boots and have proper raingear. Improper or inappropriate gear will lead to problems, problems you can do without in open countryside if things get difficult.
Make sure that your route card is left with a responsible person who will after a agreed time contact the emergency services if you have not returned to base
or been contacted by you to explain a delay. Your parents should be made aware that delays can happen and that if the group is delayed it can be related to a lot of different factors such as difficult terrain, weather, missing the bus!! and that all delays are not due to an accident. However, this is not a excuse for bad planning.
See that you have a first aid kit , adequate for the trip planned, including some emergency rations ready to be brought on the trip.
Check the weather and know its effect in your selected area ( micro climates - see later). Listen to the detailed weather forecast on radio or dial the weather forecast service. Check times of buses, trains etc.
Safety should be uppermost in your mind. Don’t take unnecessary risks. If you think you will require extra equipment then ensure you have it with you. It is a good idea to have a walking rope with within the Patrol equipment as well as a survival bag and a sleeping bag. Exposure is a very real emergency you may have to deal with it and a survival bag and sleeping bag are invaluable in its treatment. A walking rope is useful if you have to cross rivers or even as an aid in descending loose scree or slippery grass or rocks. This extra safety equipment can be shared among the Patrol. You should have your own survival bag, individual survival kits and personal first aid kit.
Plan for an emergency and identify escape routes from any part of your proposed route. These escape route should be indicated on your route card so that the contact person is aware of your plans in case of difficulties
Take note of the health of your Patrol. Is any one sick or has a cold. Has anybody got an injury such as a blister on their foot or a sports injury such as a bruised knee etc. Does any member of your Patrol need special medical attention such as diabetics, or asthmatics etc. You should also be aware of the capabilities of your Patrol. There will be strong, medium and below average
walkers and this cannot be judged by assessing their build or apparent strength. No - one likes to admit to being below average or unfit but they must be persuaded to be truthful. In a stress situation the below average person is more likely to be the first casualties. Take time in your training period to develop walking skills and increase fitness of the Patrol in safety near home.
Lastly, before you depart you should brief your Patrol as to where you are going and what you intend to do during the activity. This briefing should be given to all the Patrol and the Scout Leader.