Make a compass
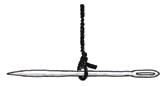
A metal item such as a paper clip or a small needle becomes a compass needle when it is magnetized and can be suspended to allow free movement that is not affected by wind or other forces.
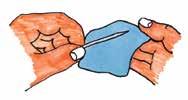
To magnetize the needle use a magnet and stroke the needle about 20 - 30 times in the same direction.
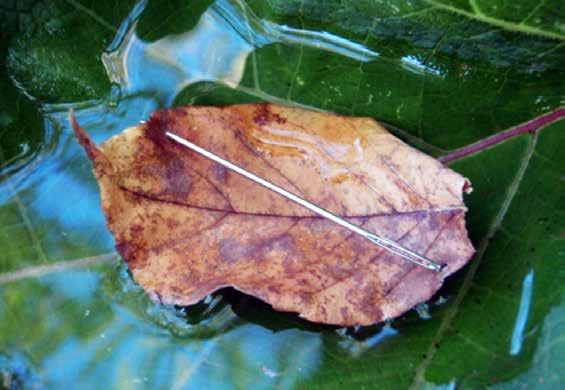
Find a small pool of water away from the wind and careful place your needle either on a small piece of grass or leaf. The surface tension of the water will prevent the needle from sinking and it will turn easily clockwise or counter-clockwise to orient itself north-south on the grass or leaf.
Print off sheet.
Cut out mission sheet.
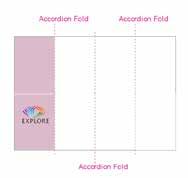
Accordion fold along fold lines
Then fold in half to credit card size
Make an ogham stick
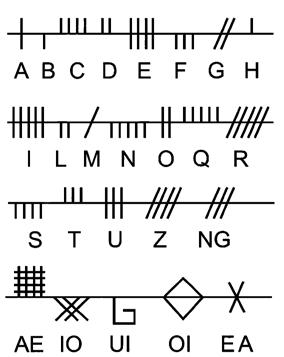
Ogham is an ancient form of writing used in Celtic times. Across our landscapes ancient monuments such as standing stones, ring forts and dolmens sometimes display pieces of ogham writing carved into the stone.
The central line represents the edge of the stone and cuts are place to the right or left of this line to represent letters.
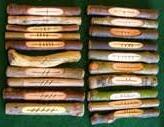
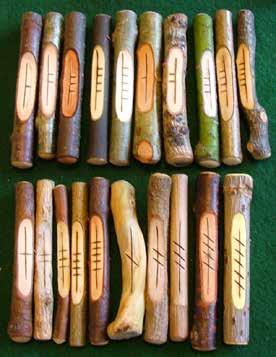
As you walk along the trail collect some small sticks. These can be cut to short lengths and trimmed at their ends. Now slice a small bit of the
bark away from the stick and you have your writing surface.
Draw a line along the stick and then create your name using ogham writing. A small hole can be drilled through the top of the stick and it can be hung around your neck.
names are written from the bottom up
Print off sheet.
Cut out mission sheet.
Accordion fold along fold lines
Then fold in half to credit card size
Get on your bike and start exploring.
There are many cycle lanes along way marked trails and are suitably signposted. Many offer easy cycling on level pathways.
You can travel on the waterway network tow paths rail cycle paths and some way marked trails.
As you travel along the cycle trails you will be away from immediate help therefore make sure you bike is in working order, tyres are pumped up and brakes are working properly.
Can you fix a puncture? it’s a useful skill to know.
Print off sheet. Cut out mission sheet. Accordion fold along fold lines
Then fold in half to credit card size
When exploring on a bike, one advantage is that you can travel further and faster. In travelling faster however you also miss some of the beauty that is around you - so stop often along the trail and absorb the world around you and visit a lot of interesting things nearby.
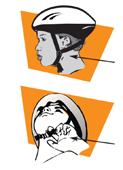
Make sure you have a cycle helmet Don’t have any loose clothing that might get caught in the mechanical elements of your bicycle.
Have proper footwear for cycling ( not flip flops and loose fitting shoes or boots) It’s always a good idea to have some other protection gear in case of rain or cool winds.
A reflective jacket or belt is also good practice on all roads and trails.
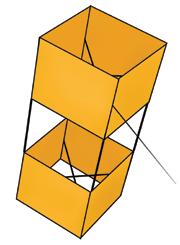
Make a Kite
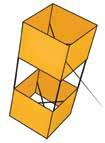
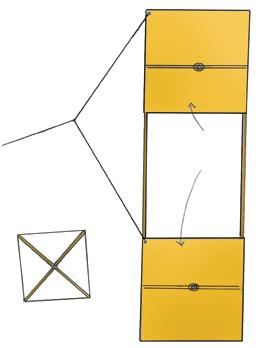
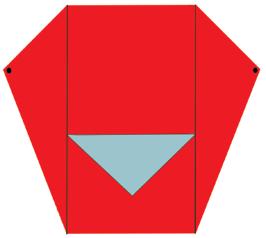
Tape on corners and fix kite string here
Place light bamboo canes along these lines
Sled kite
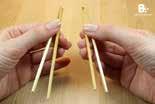
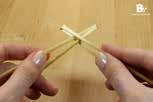
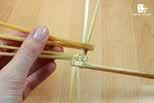
The sled kite is a simple kite to make using some light bamboo canes and a lightweight rubbish bag. The bamboo canes are fixed to the plastic using duct tape.
It is also necessary to re-enforce the string holders using another piece of duct tape to prevent tearing. The inner triangle is cut out from the kite shape to aid stability.
Cut a length of string 3 meters long and attach it to each of the fixing holes. At the midway point attach your kite line.
Print off sheet.
Cut out mission sheet.
Accordion fold along fold lines
Then fold in half to credit card size
Make a video
Tips
The Mission
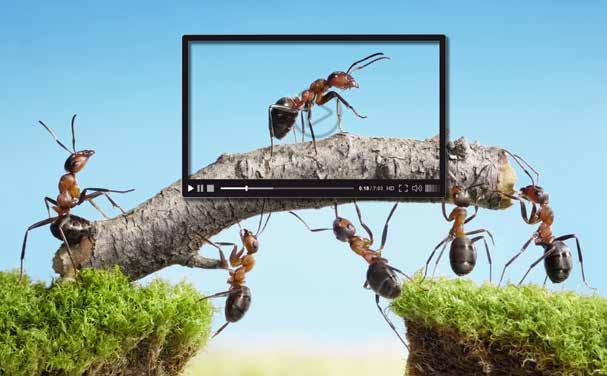
You and your team are to produce a series of nature movies - like a BBC David Attenborough documentary - exploring and showing the diversity of nature along the trail.
• Turn your phone on its side when shooting.
• Move in to the subject and fill the frame.
• Don’t zoom -just get closer
• Watch your fingers - you don’t want them in the shoot.
• Don’t talk while filming - your phone sound microphone will be open and recorded on your video.
• Plan, Plan, Plan - plan each shot before you take it. Practice the move and panning within the shoot
• Make a small storyboard before you start shooting show you know what shoots are required to make your video.
Print off sheet. Cut out mission sheet. Accordion fold along fold lines
Then fold in half to credit card size
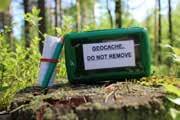
This is the type of tresure box you are looking for.
Geocaching
Geocaching is an outdoor adventure where players use a free mobile app or a GPS device to find cleverly hidden treasure containers called geocaches.
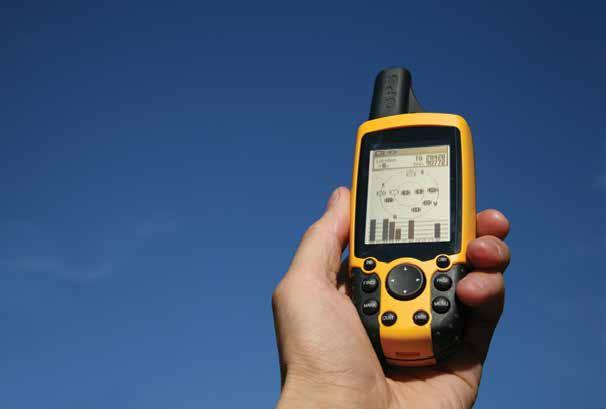
You will need a GPS device or download a geocaching app to discovery hides all over the countryside, under park benches, in the forest and probably a short walk from where you are right now.
GPS
Print off sheet. Cut out mission sheet. Accordion fold along fold lines
Then fold in half to credit card size
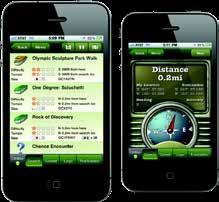
Once you have the app on a phone you seek treasure in a particular area and the phone will direct you to the general location then you have to hunt around that location for the tresure cache.
Compass device
Geocaching app for a phone
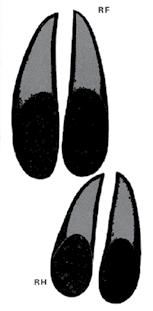
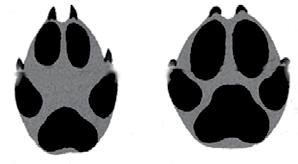
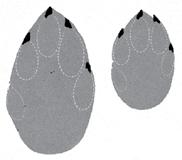
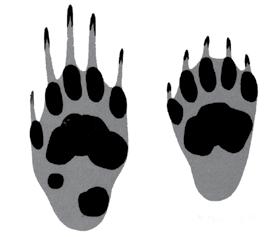
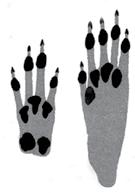
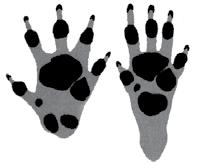
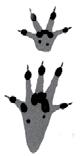
Plaster cast of an animal track
Print off sheet.
Cut out mission sheet.
Grease some card with Vaseline and place around the track.
Place a piece of string, for hanging later, in the plaster before, it sets.
Mix up Plaster of Paris per instructions.
Lift up the cast and turn over. This is a negative image and you’ll need to make another casting to make a positive one
Pour the plaster into the mould and allow to set.
Grease the top of the casting and place new card around the cast to create a mould.
When the cast is set, work around edges with a knife and prise apart with care
Accordion fold along fold lines
Then fold in half to credit card size
Deer
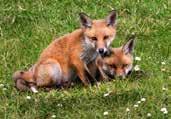
Fox
Rabbit
Badger
Squirrel
Hedgehog Rat
Make the depth of a river or canal
This mission is best done near a bridge as you can use the bridge to cross to each bank and to drop your weight easily to get readings.
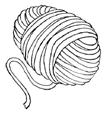
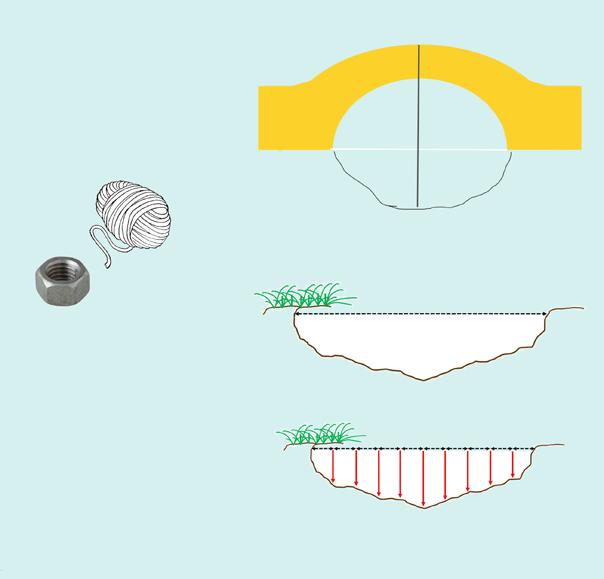
You will need a ball of string and a weight - a big nut is good. Tie the nut to the end of your string. Then with a permanent marker place marks at set distance so you have a measuring string.
You will need to take measurements of the depth at equal distances - say every 60cm. Do this by dropping the line into the water slowly and let it drop into the water until it sinks to the bottom, pull the string taut and note the number of marks on the string as it descends the water.
To create a map of the bottom of the canal or river you must first measure the width of the river.
Throw the string to a friend on the other side of the river. Pull it tight and then count the marks across the river to get the distance.
Take depth readings by dropping the weighted string into the water as set distances and note how deep the water is by counting the marks on the string.
Print off sheet. Cut out mission sheet. Accordion fold along fold lines
Then fold in half to credit card size
Draw a straight line on a piece of paper and mark off set distances. Then plot the depths at each point and join the ends of each depth line to reveal the profile of the river bottom
Make a Sound Map
Make a sound map
Take some time - about 5-10 minutes to sit down, close your eyes and listen to the world around you.
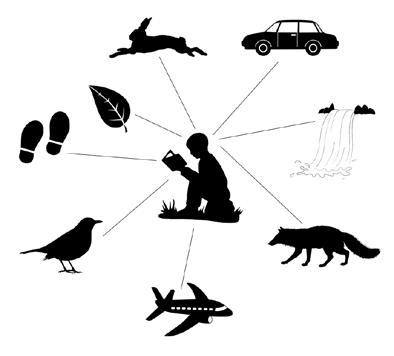
Take a piece of paper and mark an X in the middle - this represents you. Now listen...if you hear a bee buzzing nearby place a mark on the paper that shows it location to you and how far it is away from you. Perhaps there is a squirrel running in a tree you can hear, birds singing, water flowing, the rustle of leaves and even the distant sounds of cars, or trains.
For example, a few wavy lines could represent a gust of wind, or a musical note could indicate a singing bird. Making simple marks keeps the focus on listening rather than on drawing.
if a number of people are doing this exercise together sit so-em distance apart and when you have completed your sound map it can be compared to others.
Print off sheet. Cut out mission sheet. Accordion fold along fold lines
Then fold in half to credit card size
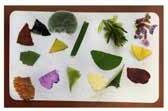
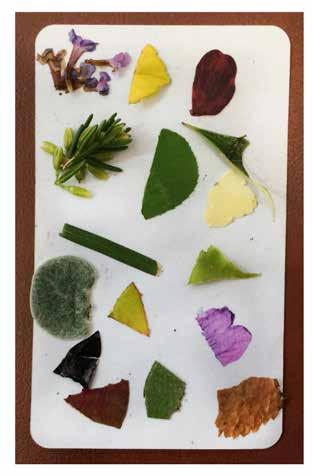
In nature there are many colours that create the landscape. Big and large trees, wild flowers and grasses, colourful fruit and seeds. To create your personal colour palette you will need a sticky label (name tag size). Use the label to place small specks of colour from the area of your exploration or along the trail. You will notice that there are many different colours and that there really are ‘40 shades of green’
Create a colour palette
When creating a colour palette or a journey stick only pick a very small sample or items that are already on the ground. Don’t pick wild flowers or damage the environment for others.
Make a colour palette
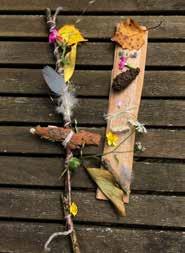
You can also create journey sticks and boards. Find a stick and make some small bindings with wool or string. Place objects on your stick as you walk along. You can also put some double sided tape on a piece of card and stick items to it
Print off sheet. Cut out mission sheet. Accordion fold along fold lines
Then fold in half to credit card size
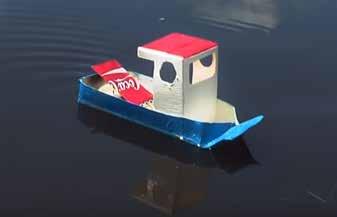
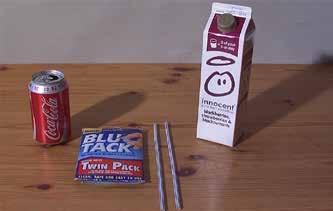
You will need an empty drink can, two straws, a milk or drink container and some ‘Blutack. You will also need a scissors, pen and ruler, and a tea light candle. Watch the video for full instructions on how to build it - easy.
The container will be cut to make a simple boat.
You will use then use the metal from the drinks can and the straws to create a small steam boiler. The blu tack will seal all the joints.
The candle is then placed in the back of the boat and steam is created in the small boiler that power your boat.
Have fun!!
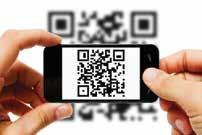
Scan the QR code with a tablet or phone to see video.
Print off sheet. Cut out mission sheet. Accordion fold along fold lines
Then fold in half to credit card size
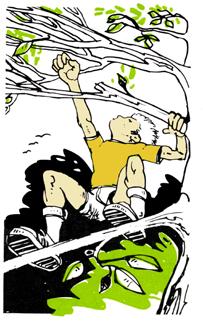
Climb a tree
Find a tree that you can climb. Climb up and discover the landscape from a high position.
Some things to keep in mind.
Firstly, don’t do anything stupid, such as climb a tree that you can’t get down from, or one that is too weak to hold you or climb a tree when it is wet.
Pick the tree carefully. Look for a tree that has a strong trunk, and thick branches.
Keep an eye out for any dead or decaying branches that could break.
Choose trees with branch positions that welcome climbing – the branches should be relatively close together with no need for big stretches and near the trunk where they are stronger.
Take it slowly, examining the tree as you move upwards. Always test a new hand or foothold before placing all their weight onto it by pressing down on the area to ensure it’s sturdy enough.
Don’t look down while you are climbing – be aware of all the branches around you. Looking up is also a great way to keep an eye on the route, and determine which way would
be the most suitable to continue climbing upwards.
Always use the 3 point rule - only move one limb at a time with three limbs secure as footholds and handholds - never jump for a branch.
When coming down move slowly, one limb at a time. Have a friend point out the route or suggest the next branch to reach for.
Print off sheet. Cut out mission sheet. Accordion fold along fold lines
Then fold in half to credit card size
Climb a tree
Make a bivvy shelter
Print off sheet. Cut out mission sheet. Accordion fold along fold lines
Make a bivvy shelter
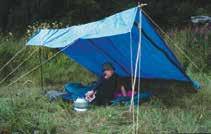
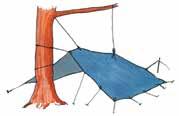
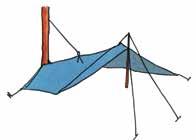
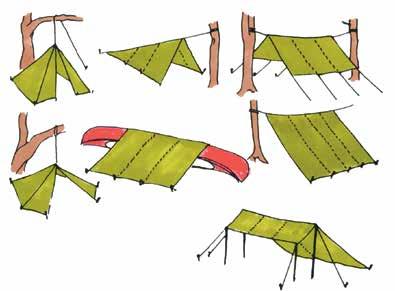
To make a basic lean- to shelter it is necessary to construct a simple framework on which the bivvy sheet is stretched to form a shelter. Many designs are possible; see opposite. A number of tent pegs can be used to peg the sheet to the ground. You could also tie off the sheet to a log or large stone. When constructing the framework- keep it simplechoose forked sticks to cut down on lashings. A simple arrangement of the guys will keep the frame straight. The design shown will keep you dry, and at the same time give you that ‘back to nature feel’ which you want to experience when living backwoods style.
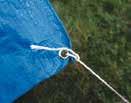
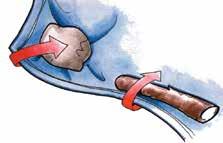
If you are using plastic sheeting, wrap a small rock or piece of wood at the guy point and tie your cord around it. This will give you something to grip and will prevent the plastic ripping or your guy slipping off under tension.
Then fold in half to credit card size
Using
your watch as a compass
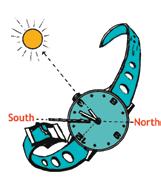
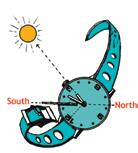
You can use your watch to tell the direction. This is done by using the hour hand and the 12 o’clock mark on your watch.
Find North
Mission Card 19
To discover where South is - point the hour hand towards the sun. Then divide the angle between the hour hand and the 12 o’clock mark on your watch.
This will give you the North - South line, the direction towards the sun is South.
Once you know where one of the directional points lies it is easy to discover the others.
Shadow
method
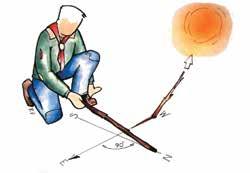
Place a stick in a upright position in level ground ( 90 degrees to the ground) and mark the tip of the shadow cast. Wait at least 15 minutes and again mark the tip of the shadow. A line can be drawn between the two tips, is the East - West line. If you scribe a line at right angles to this line you have North and South
A magnetised needle can be used to find North. Magnetise it by rubbing it with a silk or nylon cloth in the same direction.
Pointers
The location of North can be determined from the stars using the Pole Star. The ‘Plough’ Constellation is visible all year round as it moves around the Pole Star.
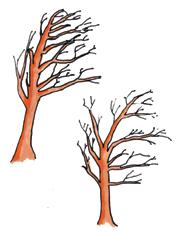
Almost every area has what is called a prevailing wind -that is a wind that blows longest and strongest from a particular direction. Confirm your findings by observing several trees in the same vicinity.
Mosses and lichens will tend to grow more on the North side of a tree trunk, rather than on the Southern sun facing side.
Print off sheet. Cut out mission sheet.
Accordion fold along fold lines
Then fold in half to credit card size
Signal with a mirror
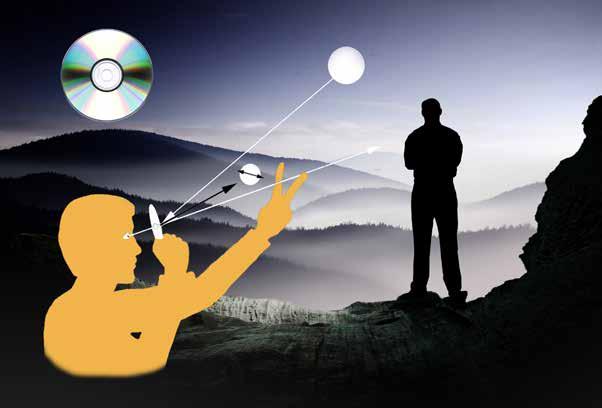
Signal to a friend with a mirror or CD
You can use a CD or a mirror as a signal device using the reflective rays of the sun.
First use you mirror to find the sun reflected on the ground and see how it moves around.
To redirect the sun rays over a distance, so it can be seen by others - move the mirror so it catches the light and then direct
it through your extended fingers towards its target. If you are using a CD this is done by looking through the hold on the CD.
Morse code is a series of dots and dashes that can be used to send a message. A dot can be a quick flash ( a second) and a dash a longer flash (2 seconds). This is done by moving the mirror slightly away from the viewer.
Print off sheet.
Cut out mission sheet.
Accordion fold along fold lines
Then fold in half to credit card size