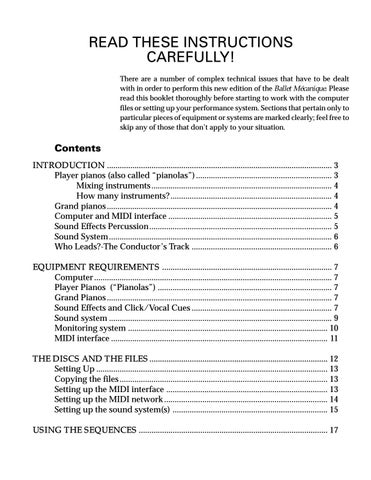
READ THESE INSTRUCTIONS CAREFULLY! There are a number of complex technical issues that have to be dealt with in order to perform this new edition of the Ballet Mécanique. Please read this booklet thoroughly before starting to work with the computer files or setting up your performance system. Sections that pertain only to particular pieces of equipment or systems are marked clearly; feel free to skip any of those that don’t apply to your situation.
Contents INTRODUCTION .......................................................................................................... 3 Player pianos (also called “pianolas”) ................................................................ 3 Mixing instruments ..................................................................................... 4 How many instruments? ............................................................................ 4 Grand pianos .......................................................................................................... 4 Computer and MIDI interface ............................................................................. 5 Sound Effects Percussion ...................................................................................... 5 Sound System ......................................................................................................... 6 Who Leads?-The Conductor’s Track .................................................................. 6 EQUIPMENT REQUIREMENTS ................................................................................ 7 Computer ................................................................................................................ 7 Player Pianos (“Pianolas”) .................................................................................. 7 Grand Pianos .......................................................................................................... 7 Sound Effects and Click/Vocal Cues .................................................................. 7 Sound system ......................................................................................................... 9 Monitoring system .............................................................................................. 10 MIDI interface ...................................................................................................... 11 THE DISCS AND THE FILES .................................................................................... 12 Setting Up ............................................................................................................. 13 Copying the files .................................................................................................. 13 Setting up the MIDI interface ............................................................................ 13 Setting up the MIDI network ............................................................................. 14 Setting up the sound system(s) ......................................................................... 15 USING THE SEQUENCES ......................................................................................... 17
BALLET
MECANIQUE
WORKING WITH PLAYER PIANOS ...................................................................... 20 Compensating for player-piano delay.............................................................. 20 Other piano issues ............................................................................................... 23 WORKING WITH SAMPLERS ................................................................................. 24 Using other samplers .......................................................................................... 25 THE SOUND EFFECTS ............................................................................................... 26 Propellers .............................................................................................................. 26 The Siren ............................................................................................................... 27 The Bells ................................................................................................................ 28 THE CLICK TRACK .................................................................................................... 29 Modifying the click track.................................................................................... 29 Quarter-note and eighth-note time signatures ................................................ 30 The first measure: Countoff ............................................................................... 30 Non-standard measures and re-barrings ......................................................... 30 THE VOCAL CUE TRACK ......................................................................................... 35 Rehearsal Letters ................................................................................................. 35 Countdowns ......................................................................................................... 36 REHEARSING AND PERFORMING THE BALLET MÉCANIQUE .................. 37 Choosing the Tempo ........................................................................................... 37 Rehearsal techniques........................................................................................... 37 TECHNICAL SUPPORT.............................................................................................. 38
2
INSTRUCTIONS
INTRODUCTION The Ballet Mécanique is a piece very reliant on technology—so reliant, in fact, that when George Antheil wrote it, it was not playable using the technology available to him. Today that situation has changed, but familiarity with the technology needed to perform the piece is crucial to its success. To perform Ballet Mécanique you will need a computer, a MIDI interface, the appropriate software, and MIDI instruments to reproduce the piano sounds. We have provided the digital equivalent of player-piano rolls (a computer sequencer file) and digital samples of some of the percussion instruments that the piece calls for. There are different types of MIDI instruments that are suitable for the player pianos as well as other options for creating a successful live performance.
Player pianos (also called “pianolas”) Antheil’s score calls for 16 synchronized player pianos, playing four parts. Performing the piece on conventional pneumatic-driven player pianos is not possible, since there is no way to synchronize such instruments with the precision the piece requires. The player pianos, therefore, must be MIDI-compatible. The player piano tracks can be played on mechanical instruments or electronic instruments, but not both.
The instruments that can be used fall into two categories: 1. Acoustic pianos with mechanical actions that are driven by MIDIcontrolled microprocessors. These include Yamaha Disklaviers, and pianos using the QRS or PianoDisc systems, which are sold under a number of brand names. 2. Digital pianos, which produce the piano sounds using electronic amplifiers and speakers, and whose keyboards do not move in response to incoming MIDI data. This category includes three sub-categories: a. full-sized instruments with built-in sound systems b. table-top keyboard synthesizers containing piano sounds, either with or without built-in sound systems c. MIDI synthesizer modules which contain piano sounds but have no keyboards. Digital instruments that do not include their own amplifiers and speakers need to have external amplifiers and speakers or they will not be heard. At least one channel of amplification and one speaker is required for each instrument. 3
BALLET
MECANIQUE
Note: Yamaha DGT Disklavier models are a combination of both categories since produce sounds digitally and their keyboards move in response to MIDI data.
Mixing instruments When performing the Ballet MÊcanique, all of the player pianos must belong to one category or the other. This is because the different categories of instruments behave very differently in response to MIDI data, and if you attempt to mix them, there will be serious problems in synchronization. For this purpose, the Yamaha DGT Disklavier models would be considered as category 1 instruments. Within the first category, it is also unwise to mix instruments that use different player systems: you should use all Disklaviers, or all PianoDiscequipped systems, or all QRS-equipped systems. You may safely mix different brands or models of pianos, as long as they all use the same player system. It is perfectly acceptable if, for convenience’s sake, you wish to use different instruments for rehearsal (i.e., digital synthesizer modules) than for performance. You will, however, have to make adjustments in the MIDI sequences when you switch from one to the other. Those adjustments are detailed later in this document.
How many instruments? Although Antheil specified 16 player pianos, it is acceptable to perform the piece on four, eight, or 12 player pianos. It is important, however, that each group of pianos be identical-for example, if part 1 is performed on two upright Disklaviers and a Disklavier DGT, the other three parts should also each be performed on two upright Disklaviers and a DGT. Since rehearsing with a full complement of player pianos may not always be practical, we have included special sequencer tracks that will allow rehearsals with only two digital pianos or modules. Details follow.
Grand pianos The grand pianos may need amplification. The player piano tracks can be played on acoustic instruments or digital instruments, but not both.
4
The two grand piano parts can be played on conventional grand pianos, but it may be difficult to hear them over the player pianos. If that is the case, the grand pianos can be amplified with high-quality microphones, amplifiers, and speakers. A more practical solution may be to have the pianists play digital pianos, which can be amplified (through appropriate amplifiers and speakers, at least one per instrument) without using microphones.
INSTRUCTIONS
Computer and MIDI interface You will need a computer to play the enclosed sequence files. You can use a Macintosh or Windows PC, which is equipped with one of the following software sequencing programs: Vision (Mac), Performer (Mac), or Cakewalk (PC). You will also need a MIDI interface capable of transmitting MIDI data on four separate MIDI cables. An ordinary MIDI interface with four outputs will not work—the density of the MIDI data is too high. If you are using more than one player piano on a part, you will need several MIDI splitters or “Thru boxes” to make sure the MIDI data gets to all of the instruments.
Sound Effects Percussion The provided digital samples of the sound effects need a MIDI-compatible digital sampler.
The Sound Effects (propellers, bells, and siren) can be produced either mechanically or electronically. Any combination of mechanical and electronic sounds can be used. Mechanical Effects For the propellers, since real airplane engines are difficult to start and stop instantaneously (not to mention the other practical problems of having them on a concert stage), you can use a rapidly whirling device, such as an electric fan, into which some kind of “interferer” can be inserted and removed on cue, such as a stick or leather strap. For the siren, a hand-cranked or electrically-driven siren with a very fast rise and fall can be used. For the bells, an array of seven electric bells, each with individual switches, can be used. Such an array, equipped with a MIDI converter so that it can be played from a standard MIDI keyboard or from the computer sequencer, is available from Paul Lehrman. Electronic Effects Playing the sound effects electronically, because they vary considerably in length at different points in the piece, requires a MIDI-compatible digital sampler capable of playing looped samples. The samples you need are provided on the enclosed CD-ROMs, and must be loaded into the sampler’s memory, or RAM. Note: A conventional computer sound card (or Macintosh’s internal audio) does not support this function and cannot be used for the sound effects.
5
BALLET
MECANIQUE
Sound System If any of the effects are being played electronically, a sound system (power amplifiers and speakers) is necessary to play the samples. Ideally this system would have three channels of amplification and three speakers for the propellers, two channels for the siren (the provided sample is in stereo), and two channels for the bells.
Who Leads?-The Conductor’s Track It is possible to have the player pianos follow the conductor in a performance of the Ballet Mécanique, but it may not be practical. MIDI sequencers are capable of changing tempo while they play, using either some kind of control such as a knob or wheel, or by “listening” to a musician tap the tempos on a keyboard, but in the case of the Ballet Mécanique, with its highly complex time signatures and extended silences, this would be difficult to implement. It is more practical to have the sequencer-and therefore, the player pianosbe the leaders, and the conductor follow and keep the ensemble together. To facilitate this, the MIDI sequence includes several conductor’s tracks which include timing clicks, spoken rehearsal numbers, and spoken “countdowns” at several key points, including the beginning. The click track can be played from a drum synthesizer, a General MIDI synthesizer, or a sampler. The voice cue track can be played from an internal sound card (or Macintosh internal sound) or a sampler. If more than one audio source is used, a mixer must be used to combine the sources into a single channel. These tracks are to be fed to the conductor over a headphone or earphone system, so that only he or she can hear them. Wired or wireless ‘phones can be used: the best solution is the type of in-the-ear wireless system used by rock performers, but other solutions are possible. Most likely, the conductor will want to hear the cue tracks in only one ear. An ensemble that would like to perform the piece without a conductor could do so if every member of the ensemble were fed the conductor’s tracks.
6
INSTRUCTIONS
EQUIPMENT REQUIREMENTS Here is a detailed list of what equipment is necessary and the options available.
Computer Macintosh Power Macintosh, using System 7.6 or later, equipped with MIDI sequencing software: Mark of the Unicorn Performer 6.0 or later; or Opcode Vision DSP or Studio Vision 4.0 or later. OR PC with Pentium processor, using Windows 95 or 98, equipped with MIDI sequencing software and sound card (for voice cue). Software: Cakewalk 8.0 or later.
Player Pianos (“Pianolas�) 4, 8, 12, or 16 other MIDI-compatible acoustic player pianos OR 4, 8, 12, or 16 MIDI-compatible digital pianos, synthesizers, or piano modules with amplification. For performance, the instruments must be in four identical groups. For rehearsal, two digital pianos or modules, with appropriate amplification, may be sufficient.
Grand Pianos In order to be heard over the pianolas, it may be necessary to amplify the two grand pianos, in which case appropriate microphones, amplifiers, and speakers will be required. A simpler solution might be to have the two pianists play on digital pianos, or MIDI keyboards connected to piano modules or synthesizers, which can then be amplified directly, without the need of any microphones and the extra adjustments they require.
Sound Effects and Click/Vocal Cues If you are using a digital sampler for any or all of the sound effects, it must have at least 12 megabytes of RAM (8 megabytes if you are using real bells), and have sufficient discrete audio outputs so that each sound produced can be controlled separately. A compatible CD-ROM (or Iomega Zip) drive to load the samples is also required. A dedicated hard drive (either internal or external) is advisable, as it will make loading of the samples faster, and allow editing of the samples and programs.
7
BALLET
MECANIQUE
Propellers: Mechanical propeller machines (for example, electric fans with objects stuck in the blades to make noise) OR Digidesign SampleCell card and SampleCell Editor software (Macintosh only) OR Akai 1000 or 3000 series, or Kurzweil 2000 or 2500 series MIDIcontrolled digital sampler. The propellers require three separate audio outputs (for three mono samples). Siren: Electrically-driven siren with fast (< 1 second) rise time OR SampleCell, Akai, or Kurzweil sampler, as above (stereo sample, requires two outputs) Bells: Array of seven different-sized electric bells with power supplies and individual push-buttons OR Array of seven electric bells with MIDI-to-contact-closure convertor for control from sequencer or separate MIDI keyboard. This device is available from Paul Lehrman. OR SampleCell, Akai, or Kurzweil sampler, as above (stereo sample, requires two outputs) For click track and vocal cues: SampleCell, Akai, or Kurzweil sampler, as above (requires one output, two outputs preferred) OR Sound card (Windows) or internal sound generator (Macintosh); and Drum synthesizer or General MIDI synthesizer
8
INSTRUCTIONS
The Propellers, Siren, and Bells can be triggered automatically from the sequencer, or they can be played manually. If manual play is desired, then one or more MIDI keyboards (depending on the number of musicians playing the parts) are required. These can be any MIDIcompatible keyboards.
Sound system Required if digital samplers are used for any of the sounds. A mixing console is necessary that is large enough to accommodate all of the sources being used: two channels for the stereo siren, two channels for the bells arrayed in stereo, and three channels for the three propellers. Ideally, each mixer channel should feed its own amplifier and speaker. Amplifiers should be good-quality professional sound-reinforcement types with ≼150 watts of power, and speakers should be full-range sound reinforcement speakers capable of delivering at least 96 dB SPL at one meter. If fewer amplifer/speaker channels are available, it’s permissible to combine sounds; however, it is not advisable to use fewer than three amplifers and speakers if you are using the propeller samples, as the sound may get extremely muddy if you try to combine the signals. For example, a minimal three-channel (Left, Center, Right) system for the propeller, bells, and siren samples can be configured as follows: Propellers: 1-Left, 2-Center, 3-Right Siren: L-left/center, R-right/center Bells: L-left, R-right
3-channel sound system
9
BALLET
MECANIQUE
A five-channel system would have: Propellers: 1-Far Left, 2-Center, 3-Far Right Siren: L-Near Left, panned halfway between left and center; R-Near Right, panned halfway between right and center Bells: L-Near Left, R-Near Right
5-channel sound systme
Note that a simpler sound system can be used for rehearsal, although the relative sound levels need to be monitored carefully to prevent distortion. If you are using amplified piano modules or synthesizers, either for the pianola or the grand piano parts, these systems need their own mixing channels, amplifiers, and speakers. It will be easiest to set up a separate stand-alone system for each instrument requiring amplification. The amplifer and speaker requirements are the same as for the digital samplers.
Monitoring system The system for monitoring the click track and vocal cues requires its own separate mixing system to combine and balance the sounds. (If the mixing console you are using for the samples has extra assignable outputs, you can use one of them for the monitor, if it’s convenient.) The output of the monitor mixer is fed to an earphone for the conductor to wear. The conductor will probably want to have the click and cue tracks only in one ear, so they should be combined into a single mono output.
Shure wireless monitor system
10
A conventional headphone (preferably an “open-air” type so as not to block the sound of the ensemble) is acceptable for rehearsal. For performance, however, it is best if the conductor wears a wireless in-ear system, such as a Shure PSM-600 “personal monitor.” This allows maximum freedom of movement; is nearly invisible; and the “in-ear” aspect prevents the audience from hearing the click during the silent passages starting at m. 1134. (The conductor may want to turn down the click at that point, or the velocity of the clicks can be adjusted in the sequence itself.)
INSTRUCTIONS
Should the entire ensemble want to be able to hear the click track, multiple receivers for any wireless system are easily obtained and require no special installation, other than making sure they are all set to the same frequency. Each receiver has a volume control, so players can set their individual volumes to taste.
MIDI interface Compatible with the selected computer, and capable of running in “Fast” (MIDI x 2 or greater) mode. It must provide at least four discrete addressable MIDI outputs for the four groups of pianolas—preferably five if any other outboard MIDI devices (samplers, synthesizers) are used. Combining multiple pianola parts on a single MIDI cable will cause audible timing errors. Recommended models include Mark of the Unicorn MIDI Time Piece or MIDI Express; Opcode Studio 64X or Studio 128X; Emagic Unitor 8; Roland MPU64; and MIDIMan BiPort 2x4s or Winman 4x4/s.
Mark of the Unicorn MIDI interface
11
BALLET
MECANIQUE
THE DISCS AND THE FILES There are four CD-ROM disks available for use with the Ballet Mecanique. Depending on what equipment you will be using, you will need one or two of them. Make sure you have received the correct disk(s) before trying to use them. In addition, an audio CD is provided for rehearsal purposes. There are no playable audio files on the CD-ROM discs— do not attempt to play them with an ordinary audio CD player.
Files Disc (1) — Macintosh files OR Files Disc (2) — Windows files These two discs contain the following files: MIDI sequences Macintosh: Opcode Vision, Mark of the Unicorn Performer, Standard MIDI File (SMF) Windows: Cakewalk, Standard MIDI File (SMF) MIDI setup files Macintosh only: Example setups for Opcode’s OMS MIDI Sysex files Standard MIDI File for use in setting up MIDI Solutions’ R8 relay box, to control “live” electric bells Samples Macintosh: Digidesign SampleCell Bank containing airplane propellers, electric bells, siren, click track, and voice cues. Raw samples in AIFF format. Windows: Raw samples in .WAV format. SamplesDisc (1) — Bank for Akai 1000/3000 series samplers (also compatible with some Roland and E–Mu samplers) Samples Disc (2) — Bank for Kurzweil K2000/K2500 samplers Audio disc Contains recordings of four pianola parts in Left channel, and click track and voice cues in Right channel. First recording is at = 100; second is at = 120.
12
INSTRUCTIONS
SETTING UP Copying the files All of these files are © 2000 G. Schirmer, Inc., and are the sole property of the publisher. You may not copy them except as per these instructions, for a specific performance of the Ballet mécanique and associated rehearsals. Please destroy all copies of the files on your computer and/or sampler when you return the performance materials.
The sequences and other files will load much faster if you first copy the file(s) you plan to use from the CD-ROM to your computer’s hard disk. Each sequence takes up about 2.3 megabytes. If you will be using your computer’s built-in audio circuitry or an audio card to produce the vocal cue track (as opposed to a standalone sampler), you should copy the files in the folders “Counts+Beeps” and “Letters” to your hard drive, placing them at the same directory level (i.e., inside the same folder) as the sequence. If you will be using a Digidesign SampleCell card for the sound effects and/or vocal cues, then you need to copy the SampleCell bank and its associated sample files to the hard drive. Where these files reside on your hard drive is not crucial, but be careful to move all of the files in one operation, and not change their position relative to each other, or else the SampleCell software will have trouble locating all of the files. In addition, if you are using a stand-alone sampler and it has a dedicated hard-disk drive (internal, external, or removable), copy the files from the appropriate CD-ROM or Zip disk onto that drive.
Setting up the MIDI interface
Each group of pianolas must have its own dedicated MIDI cable, due to the density of the MIDI data. Combining parts on a single cable will lead to serious timing errors and possibly missed notes.
The MIDI interface must be configured so that each group of pianos is on its own MIDI cable. If you are on a Macintosh, use Opcode MIDI System (OMS) to set up each group as single instrument, as shown below. The OMS Setup file on the CD-ROM can be used as a starting point for your Setup. If you are using Performer, configure it to recognize OMS, or else to use FreeMIDI in “OMS Emulation” mode. It is strongly recommended that you do not use Apple’s MIDI Manager (Macintosh). If you are using SampleCell for the samples and/or vocal track, you must make sure that your Setup includes that card. If you are on a PC, make sure the driver for the multiport MIDI interface that you are using is correctly installed. Then using the Windows Multimedia Extension (MME), assign
Typical Macintosh MIDI setup using OMS, MIDI Time Piece, and SampleCell card 13
BALLET
MECANIQUE
each pianola track to a separate output cable, corresponding to your actual MIDI setup. A fifth cable should be used for any external MIDI devices—a sampler, a drum machine, and/or a MIDI Bell Box—that are being driven from the computer sequencer. If more than one of these devices is in use, you can “daisy chain” them (connect one device’s MIDI Thru jack to the next one’s MIDI in, and so on) since the data density on these tracks is relatively low. Just be sure that each track is assigned to a unique MIDI channel, and that the channels in the sequence match the receive channels of the external devices. If your MIDI interface has only four MIDI cable outputs, you will have to “double up” the click track and/or sampler with one of the pianos, using a MIDI splitter, as detailed below. If you are going to be triggering the bells, propellers, and/or siren manually from one or more MIDI keyboards, then those keyboards should be connected to the multiport MIDI interface, and the interface’s own routing software set up so that the input from each keyboard gets to the proper destination. If you are triggering the sound effects manually and the device producing the sound (sampler or bell box) is only being triggered manually — that is, it is not providing any of the click or cue sounds—then you can connect the MIDI keyboard directly to the device without going through the multiport MIDI interface.
Setting up the MIDI network Most MIDI player pianos do not have usable MIDI Thru jacks, and therefore splitters will be required in many situations.
If you are using only four pianolas (one on a part), then setting up the MIDI cables for the pianolas is simple: run a MIDI cable from each MIDI output on the interface to each piano. If you are using more than one pianola on a part, however, the MIDI network is not so straightforward. If your pianos use the PianoDisc system, or if they are digital pianos (but not Disklavier DGTs), or you are using synthesizers or piano modules to produce the sounds, there are most likely MIDI Thru jacks on the back of each of the units. A MIDI Thru jack echoes, with no delay, the MIDI data that is received at the unit’s MIDI In jack. Therefore, multiple devices receiving the same data can be “daisy-chained”: one device’s MIDI Thru jack is connected to the next one’s MIDI In, and so on. Connecting four devices in this way should present no problems. However, you can’t do this with many acoustic player pianos. QRS pianolas do not have MIDI Thru jacks. Yamaha Disklaviers (including DGTs) have MIDI Thru jacks, but the data going out of the jack is delayed
14
INSTRUCTIONS
MIDI network wiring
500 msec (one-half second) relative to the time it comes into the MIDI In jack. Therefore, daisy-chaining multiple Disklaviers would cause each one to play one-half second later than the one before it in the chain— with four Disklaviers, the total delay would be two seconds! To overcome this, it is necessary to use a MIDI splitter box, also known as a MIDI Thru box, which has one MIDI In jack and multiple MIDI Thru jacks. MIDI Thru boxes are made by MIDIMan, Anatek, and several other companies. In addition, more elaborate MIDI interfaces can be reconfigured as MIDI Thru boxes using their internal controls or external software. (Do not, however, configure your main MIDI Interface to transmit identical data on multiple MIDI ports: this will slow down the data and cause timing errors.)
Setting up the sound system(s) The size and complexity of the sound system you are using will dictate how you set it up, but here are some guidelines: Each of the propeller sounds should have its own speaker, and the speakers should be placed as far apart as possible (Stage Left, Stage Center, and Stage Right), so that the individual sounds can be distinguished. 15
BALLET
MECANIQUE
The siren samples are in stereo, and sound more realistic in stereo than in mono. The two speakers should be relatively close together, approximately 4 to 6 feet, so that the image is not too diffuse. If it is absolutely necessary, the siren can be played in mono. The bell samples are mono samples, but are panned to different positions within a stereo field. The speakers can be a little further apart than the siren speakers, approximately 6 to 10 feet, but any further than that may cause the image to be too “big”. As stated earlier, if necessary, it is permissible to combine the bells and sirens into one pair of speakers; and to combine all of the samples into three speakers. In rehearsal, a simpler sound system can be used: two channels should suffice for the bells, propellers, and siren combined. However, if you are also using synthesizers or piano modules to play the pianola parts, two more channels should be dedicated to them—trying to combine everything in one pair of speakers will sound very muddy.
Suggested audio wiring. If you are using mechanical sound effects, or sampled bells, or if you have a separate mixer for the conductor ’s monitor, your system will vary accordingly. 16
INSTRUCTIONS
USING THE SEQUENCES Rather than create different sequencer files for different situations, we have created one master sequence which can be used in rehearsal and performance, which includes all of the tracks you will need for all situations. At any one time, you will not be using several of the tracks; which ones will depend on your situation.
One sequence is provided (in each format) which you will use for rehearsals and performance. Be sure to delete the tracks you will not be using.
Instead of “Muting” the tracks you will not be using, it is better to erase them completely. This will place a lighter load on your computer and MIDI interface. When you delete tracks for a rehearsal or performance, save the resultant sequence under a different name, so that you always have a “virgin” copy of the original on your computer’s hard disk. This allows you to easily go back to the original without needing to copy it again from the CD-ROM. The complete list of tracks is as follows: 4 pianola tracks for use with digital pianos and PianoDisc player pianos 4 pedal tracks for the pianolas 4 pianola tracks customized for Yamaha Disklavier, Baldwin ConcertMaster, and QRS player pianos 2 pianola tracks combining parts 1-2 and parts 3-4, for rehearsal Tracks for triggering sampled airplane propellers and siren, and sampled or relay-controlled bells Click track (for sampler or drum synthesizer) Vocal cue track (for sampler) Vocal cue track (for Macintosh internal audio or PC sound card) Here is how and when they are used: 4 pianola tracks for use with digital pianos and PianoDisc player pianos Use these tracks when the pianola parts are going to be played on electronic pianos or synthesizers whose polyphony is 24 notes or greater. Piano Disc player pianos have a maximum polyphony of 32 notes, so they can play these tracks as well. All of the notes on these tracks have a constant velocity of 96.
17
BALLET
MECANIQUE
4 pedal tracks for the pianolas These tracks are optional, but recommended. There are no pedal markings in Antheil’s manuscript for the Ballet mécanique; however, there are pedal markings in an earlier version of the piece that Antheil wrote for pianolas only (no percussion). Make sure that each pedal track is assigned to the same MIDI cable and channel as the pianola track it accompanies. (If you like, you can merge each pedal track with its associated pianola track, to avoid possible confusion.) If you are using electronic pianos, it is possible that the pedals will cause their polyphony limit to be exceeded. If this happens (you will hear notes “drop out” in dense passages when the pedal is held down), you can mute the pedal tracks, or remove the pedal data in those sections where you encounter problems. (When editing pedal data, make sure you don’t leave any “hanging” pedal-on commands—the last command in a section should always be a pedal-off: Controller #64=0.) This should not be a problem with acoustic player pianos. If you use the pedal tracks, and you are time-shifting the pianola tracks (see below), make sure the pedal tracks are time-shifted as well. 4 pianola tracks customized for Yamaha Disklavier, Baldwin ConcertMaster, and QRS player pianos Since Antheil’s pianola parts call for, in places, chords containing 23 notes on each instrument, and since Yamaha Disklaviers (including DGT models), QRS, and Baldwin pianos can only play 16 notes at a time, these tracks have been modified to reflect those instruments’ polyphony limits. Fortunately, wherever these huge chords are called for in the score, all four pianolas are playing the same part. Therefore, a few notes are removed from each chord—different ones from each part. The effect should not be audible. The notes on these tracks have a constant velocity of 80, except some trills and tremolos have velocities of 96, so that the pianos will respond properly (fast notes at lower velocities sometimes don’t recover completely). 2 pianola tracks combining parts 1-2 and parts 3-4, for rehearsal In these tracks, each pair of pianola parts has been combined into one part. This allows the piece to be rehearsed with only two instruments, a convenience if you don’t have ready access to 16 player pianos. These tracks should be used only with electronic pianos, since the polyphony sometimes gets very high. 18
INSTRUCTIONS
Tracks for triggering sampled airplane propellers and siren, and sampled or MIDI-controlled bells Use these tracks when you are automatically triggering any or all of the sound effects from a digital sampler, or a MIDI-controlled bell array. Click track (for sampler or drum synthesizer) Assign this track to a MIDI sampler (with the included cowbell and snare sounds) or to a drum synthesizer or General MIDI synthesizer. Vocal cue track (for sampler) Use this track for the vocal cues (rehearsal letters and countdown) and “beep” if you are triggering them from a MIDI sampler. Vocal cue track (for Macintosh internal audio or PC sound card) Use this track for the vocal cues (rehearsal letters and countdown) and “beep” if you are playing them with a PC sound card or the Macintosh’s internal audio.
19
BALLET
MECANIQUE
WORKING WITH PLAYER PIANOS Compensating for player-piano delay Most MIDI-compatible acoustic player pianos involve some form of circuitry which delays notes that are received at the MIDI In jack, in inverse proportion to the velocity of the received note command. This allows notes of different velocities, when they are sent from a MIDI source, to sound simultaneously. Without this delay, high-velocity notes would sound earlier than low-velocity notes. To compensate for this delay, some of the tracks in the sequences must be moved earlier, so that the pianola parts synchronize correctly with the click track and the sampled sounds. Yamaha Disklaviers, QRS, and ConcertMaster pianos Yamaha Disklaviers can be operated in one of two modes: Velocity mode (Delay=500ms) or Standard mode (Delay=OFF). In Velocity mode, all notes, regardless of velocity, sound exactly 500 msecs after their respective MIDI commands are received. In Standard mode, the delay is much shorter, but will vary according to the velocity. It is highly recommended that if you are working with Disklaviers, that you use them in Velocity mode. You will therefore have to select all of the notes in the pianola and the pedal tracks, and move them so that they occur 500 msec earlier. The Baldwin Concert Master series and pianos with QRS systems have a built-in non-defeatable delay of 500 ms. Regardless of how you calculate the move value, it will change if you change the tempo.
How to move tracks Many sequencers allow you to enter an absolute time value for moving events, so select the appropriate tracks, set the “move” value to “500 msec earlier”, and execute. If the sequencer requires this value to be in “frames”, then set the move value to “15 frames earlier” (assuming 30 frames per second, North American standard).
The “Move” window from Opcode’s Vision 20
INSTRUCTIONS
before (L) and after (R) a move operation
If the sequencer you’re using only lets you change event timings in terms of beats and sub-beats (or “ticks”), then you will have to calculate the proper value based on the tempo you are playing the sequence at. Use the following formula: Number of ticks to move the notes = (30 ÷ tempo in beats per minute) x (sequencer resolution in ticks per quarter-note) So for example, if the tempo is 125 and your sequencer resolves 480 ticks per quarter-note, the number of ticks earlier you must move the pianola and pedal tracks is (30/125) x 480 = 115.2, or the nearest whole number, which is 115. Note: Regardless of how you calculate the “move” value, it will change if you change the tempo. If you used the milliseconds or frames method described above, and you decide to speed up or slow down the tempo during the rehearsal process, you will have to restore the tracks to their original position (“500 msec or 15 frames later”), change the tempo of the sequence, and then repeat the move. If you are using the beats and ticks method, you will have to restore the tracks to their original position (“x ticks later”), recalculate the new number of ticks based on the new tempo, and then execute the move again. 21
BALLET
MECANIQUE
PianoDisc pianos Pianos equipped with PianoDisc systems have two MIDI inputs, one on the control unit at the front of the piano and one on the mechanical “rail” that is attached directly underneath the action. If you are using the control unit, you have to set it up in Passthrough mode: press the MODE button twice to get to Page 2 of the control parameters, then press MIDI (either button 1 or button 2 depending on the model), and then press button 4 (“Passthrough”). The delay time created by the control unit will vary according to the “Piano Delay” parameter. This parameter is used to synchronize the timing of notes of different velocities. Since all the notes in the sequences are the same velocity, it is not necessary for you to worry about or adjust this parameter—only to be aware that it does affect the delay. Delays in these models, when played through the control unit, will range from 60 to 160 msec. You can determine how much to compensate the pianola tracks by doing the following: “Solo” one pianola track in the sequence, and assign it to one of the pianolas. Also solo the click track, and listen to it on the drum synth or sampler that you will be using in performance, but feed the sound to a speaker near the piano. Now play the sequence, and move the pianola track earlier in time by small intervals until the pianola and the click track are sounding simultaneously. Note how much you have moved the pianola track, and move all of the remaining pianola (and pedal) tracks that same amount. If you plan to change tempos later, you should write down this “offset” figure, and determine its value in milliseconds, so that you can recalculate it easily at a different tempo. Use this formula to determine the offset time: Offset time in millseconds = (60000 ÷ tempo in beats per minute) x (offset in “ticks” ÷ sequencer resolution in ticks per quarter-note) Once you have determined the offset time, if you change the tempo, use this formula to determine the new offset (after you have restored the tracks to their original timing): Number of ticks to move the notes = (offset time in ms x .06 x sequencer resolution ) ÷ tempo in beats per minute 22
INSTRUCTIONS
If you are using the rail unit, the delay is shorter, typically about 50 msec, and is not adjustable. You can use the method described earlier to check this, or you can take our word for it and move the pianola and pedal tracks 50 msec earlier, using the above formula. A disadvantage of using the rail unit is that it has no “Thru” jack, so multiple PianoDisc instruments on one pianola part cannot be “daisychained”, but instead must be used with MIDI splitters (or “Thru boxes”) as described earlier.
Other piano issues Mixing pianos It is possible to play the pianola tracks on dissimilar instruments, although there are several pitfalls to watch out for. It is important, for the sake of volume and tonal balance, that each group of four (or fewer) be identical with all the other groups. Since different brands of instruments have different delay characteristics, should you be using mixed instruments with dissimilar delays on a part, it will be necessary to construct extra sequencer tracks with different offsets to accommodate the different instruments e.g., a PianoDisc playing Pianola 1 will be on its own track with its own offset, while a Disklavier plahing Pianola 1 will have a second track with a different offset, and so forth. You will also have to couple the pedal tracks. There is the real possibility of computer slowdown and MIDI data “choke” in such a situation, however, due to the density of the pianola tracks. Since the different tracks are offset from each other, the situation would not be as bad as if you were merely doubling tracks, but you should listen carefully for any timing problems. Setting velocities and volumes There are no dynamic markings on the score for Ballet mécanique, and in his notes, Antheil writes that the pianola parts are to be played “as loud as possible”. You may want to temper this advice somewhat, based on the balance between instruments in your particular performance situation.. As stated before, the notes on the “non-customized” piano tracks all have a velocity of 96, while the notes on the “Yamaha-customized” tracks have a velocity of 80, except for trills and tremoloes, which are at 96. This can easily be changed up or down by selecting all of the pianola tracks, and resetting the velocities of all of the notes. Keep in mind that if you are using Disklaviers, lowering the velocity may cause some notes not to sound, and if you are using PianoDisc instruments with the MIDI going to the rail unit, major changes in velocity may change the delay time. 23
BALLET
MECANIQUE
WORKING WITH SAMPLERS The samples for the sound effects, click track, and vocal cue tracks are provided in three formats: Digidesign SampleCell, Kurzweil K2000/ 2500/2600, and Akai S1000/3000. If you are going to be using any of the sampled sounds, it is strongly recommended that one of these instruments be used. Other samplers may be able to do the job, but the files will require considerable adjustments. A sampler is only necessary if you are using it to play one or more of the sound effects: bells, siren, and/or propellers. If you are producing the sound effects by other means, then a standard digital audio card (or if you are using a Macintosh, the computer’s internal sound circuitry) is sufficient to provide the vocal cues for the conductor. A full-blown sampler layout, from Digidesign’s SampleCell Editor software is shown here. The Akai and Kurzweil files contain similar program and output mappings.
24
INSTRUCTIONS
You may customize your sampler’s layout to reflect your individual situation, and it will change depending on how many sounds you are using the sampler for, and how large your sound system is. While customizing, keep in mind the following: • Each sound source needs to be on its own MIDI channel, so that it can be easily controlled from the sequencer. • As much as possible, each sound source should be assigned to a different physical audio output, so that the balances can be easily controlled from an external mixer. In this layout, since SampleCell assigns its outputs in pairs, the third propeller is assigned to the same output pair as the vocal cues and clicks, but the propeller is panned far left, so it only comes out of one channel, and the vocal cues and clicks are panned far right so they come out of a different channel, which is routed to the conductor’s monitor. Notice also in this layout, the two “propellers” programs are assigned to different areas of the keyboard. This is so their outputs can be isolated — in the Kurzweil and Akai files, since an individual program can be assigned to more than two outputs, this “doubling” of the propeller program is not necessary, and all the propeller sounds are contained in a single program.
Using other samplers The Akai-format samples can be read by some Roland and E-Mu samplers, but may require customizing. If you wish to use a different model of sampler, you can construct your own keyboard maps and programs using the raw AIFF or WAV files on the CD-ROMs. Construct the keyboard maps using the diagrams in the previous section and on page 30 (for the vocal cue track). The propeller, bell, and long siren samples will need to have their loops turned “on,” which will be a specific software switch in the sampler you are using. In addition, the siren sample needs to have its “release loop” turned on, so that the siren dies naturally after the key is released. Consult your sampler manual for instructions.
25
BALLET
MECANIQUE
THE SOUND EFFECTS The sound effects can be produced mechanically or electronically. If they are being produced electronically, you must use a MIDI-controlled sampler. Since the sounds will be different lengths in different places (and at different tempos), they must be “looped”—that is, continue to sound indefinitely until told to stop. A standard PC audio card cannot deal with looped samples—it can only play sounds as “one-shot” triggered events—and so it is not usable for these sound effects.
Propellers Antheil’s score calls for “Small Wood”, “Large Wood”, and “Metal” propellers. These can be simulated mechanically using some sort of fan or rotating spoke wheel, into which an object is placed at the proper moments—the way kids put baseball cards into their bicycle spokes. Apparently in Antheil’s day, they used electric fans, and leather strops attached to wooden poles, which were lowered into the blades on cue. Different sizes and materials for the strop will create different sounds. The samples provided are taken from three real airplanes. There is a small engine with much piston noise (“Small Wood”); a larger engine with piston noise (“Large Wood”); and a higher-pitched, more modern engine with little piston noise (“Metal”). They are arranged in the sample banks to be played on one MIDI channel, with the sounds arranged on the keys as follows:
Pressing any key within the indicated range will play the selected sound at the correct pitch.
The propeller sounds can be played automatically, using the Propeller track in the MIDI sequence, or manually using a MIDI keyboard connected directly to the sampler. The pitch of each propeller does not change as you move up and down its range—if you wish to change the pitch of any of the propeller sounds, you can do so using a sound editing program like Sound Designer, Peak, or Sound Forge, or by using the editing functions built into the sampler. The propeller sounds do not have any doppler shift—i.e., they do not change in pitch the way a moving airplane would. This is most likely the way Antheil would have expected them to sound. If, however, you would
26
INSTRUCTIONS
like to add doppler shift, you can do so by putting appropriate pitchbend commands into the sequencer track, or if you are playing the sounds from a keyboard, using the pitch wheel.
The Siren The siren sound can be produced using a real siren, or from the sampler. A hand-cranked siren may not be suitable, since the sound has to start and stop very quickly (as the poor soul playing the siren in the 1927 Carnegie Hall performance found out, to his great embarassment). Use a motor-driven siren with as fast a “rise” time as possible, and a mechanical brake, to shut the siren off as fast as possible. There are three siren samples provided: Short (a one-shot sound, which plays through regardless of how long you hold the key down, about 2 seconds long), Medium (one-shot, about 5 seconds long), and Long (a looped sound with a long rise and fall). They can be played from the Siren track in the sequencer, or manually from a MIDI keyboard connected to the sampler. The key layout for the sirens is as follows:
If you are playing the siren manually from a keyboard, be aware of the long fall time on the looped sample, and be sure to let go of the key early enough that the sound can die away within its proper duration.
The Bells There are several ways to play the bell sounds: an array of electric bells connected to a set of push-buttons; an array of electric bells connected to a MIDI-to-relay-contact convertor, which can be controlled from the sequencer or “live” from a MIDI keyboard; or using the provided bell samples, which can also be played from the sequencer or live from a MIDI keyboard. Use the same sequencer track whether you are using sampled bells or real ones.
27
BALLET
MECANIQUE
Antheil’s score is somewhat vague and contradictory in terms of how many bells are called for, but seven seems to be the most practical number. If you are constructing a bell array yourself, look for bells that have different pitches but are as close as possible in volume. A bell array custom-made for performing the Ballet Mécanique, which includes all necessary power supplies and a MIDI-to-relay convertor, and can be used either with the sequencer or a live keyboard, is available from Paul Lehrman, the programmer of the MIDI sequences. You can contact Mr. Lehrman by e-mail at lehrman@pan.com, or through G. Schirmer. If you use this custom bell array, you have to program the convertor using the enclosed System-Exclusive MIDI File. Open the file in your sequencer, make sure the output of the track that the information appears on corresponds to the cable going to the bell array, and play the sequence. All of the bell samples are looped, and will sound as long as the key is held down. Below is the key layout for the sampled bells. The custom bell array uses the same key layout for its seven bells, so you can use the same sequencer track regardless of whether you are using sampled or real bells—set the channel to 6 to use a sampler, and set it to 1 to use the bell array (you may also have to set the cable destination).
28
INSTRUCTIONS
THE CLICK TRACK The click track provides an audible metronome that follows the changes in time signatures. It serves three purposes: • It insures that the conductor and the pianolas start together by giving the conductor a three-beat countoff. (There is also an audible countdown—see the section on The Vocal Cue Track.) • It helps the conductor to follow the pianolas, especially during those portions of the piece where the time signatures get very complicated • It allows the conductor to keep track of the long instrumental tacet and silent passages such as in bars 367–383 and bar 1134 to the end. The click track can be played on any synthesizer that has the appropriate sounds (e.g., a General MIDI Drum bank); or on a sampler using the sounds included with the sample banks. The downbeat of each measure is characterized by a “cowbell” sound, and all the other beats use a “snare drum” sound. These sounds were chosen because they are very different from what the on-stage percussionists are playing, and so will be more easily discerned by the conductor than the standard “kick” and “sidestick” sounds one usually hears in a click track.
Modifying the click track You may modify the click track as you wish, using other sounds by changing the notes in the track itself, or by using non-General MIDI devices; deleting sections where the click might be superfluous or confusing; or adjusting its volume (using MIDI velocities or MIDI volume control) for different sections of the piece. For safety’s sake, it would be best to make a copy of the original click track and modify the copy, while muting the original track.
29
BALLET
MECANIQUE
Quarter-note and eighth-note time signatures Typically, all measures in the piece with quarter-note time signatures use a quarter-note click, e.g., 4/4 . All measures with eighth-note time signatures use an eighth-note click, e.g., 5/8 . The exceptions (and there are many) appear in the tables on the following pages—the conductor should note these in the score.
The first measure: Countoff The first measure is 6/4, with the first three beats empty except for the click. These three beats are a countoff for the conductor, and are accompanied on the vocal track with a “3-2-1” countdown (see The Vocal Cue Track). A secondary downbeat occurs on the fourth beat, which is the actual downbeat of the piece:
Besides being convenient for the conductor, the extra three beats in measure 1 are essential if the pianola tracks are being played by pianos which have delayed response to MIDI commands—it allows their tracks to be shifted earlier in time to compensate for the delay. See Compensating for Player Piano Delay for details.
Non-standard measures and re-barrings The tables on the following pages show the measures that have a click rhythm that deviates from the standard above. There are also several re-barrings to help the conductor and the players: Measures 870-872 are counted as a 3/4 bar, followed by a 2/4 bar. Measure 873 is a normal 3/8 bar. Measures 888-891 are counted as two 3/4 bars. In measures 1044-1049, the click is in quarter notes, in the pattern 4/4 + 4/4 + 3/4 + 5/4. Measures 1124-1134 are counted as seven measures of 1/4.
30
INSTRUCTIONS
Measure #
Time Click Rhythm Signature
Measure #
Time Click Rhythm Signature
50 – 53
7/16
1024
2/16
54 – 56
8/16
1025–1026
4/16
57
7/16
1027
5/16
58–59
5/16
1029
3/32
70–76
5/16
1030 and 1031
treated as a single 5/16 bar
380–381
7/16
1032–1033
4/16
382
9/16
1034
5/16
383
7/16
1035
6/16
384–387
5/16
1036
5/16
870-872
re-bar
1037
6/16
1038
8/16
1039
6/16
1040
15/16
1041
7/16
1042
8/16
1043
6/16
888-891
1013
1014–1015
1016–1017
1023
re-bar
5/16
7/16
11/16
3/16
Table of Measures with non-standard clicks - 1 31
BALLET
Measure #
Time Click Rhythm Signature
re-bar these measures 1044–1049 in quarternote divisions
MECANIQUE
Measure #
Time Click Rhythm Signature
1102
7/16
1103
8/16
1057
7/16
1104
6/16
1058
9/16
1105
10/16
1059
7/16
1106
7/16
1060
15/16
1107
8/16
1061
7/16
1108
6/16
1062
9/16
1120
3/16
1063
7/16
1121-1123
10/16
1064–1079
2/16
1124–1133
re-bar as 7 1/4 measures
1080–1086
5/32
1134-1136
10/8
1087–1090
9/16
1137
4/16
1092–1093
5/32
1138
10/8
1094
7/32
1139
4/16
1095–1097
8/32
1140–1141
10/8
1098–1101
7/32
1142
4/16
≈
≈
Table of Measures with non-standard clicks - 2 32
INSTRUCTIONS
Measure #
Time Click Rhythm Signature
Measure #
Time Click Rhythm Signature
1143–1144
10/8
1178
10/8
1145
4/16
1179
17/8
1146
15/8
1180
3/16
4/16
1181
6/8
1151
1182
8/8
10/8
1183–4
9/8
9/8
1185
12/8
1186
13/8
1187
10/8
1188
4/8
1189
5/8
1190–1191
4/8
1192
3/8
1193
5/8
1194
3/8
1195
4/8
1154
1156
1164
1165
1167
1168
1169
25/8
3/16
3/16
9/8
3/16
1171
9/8
1173
12/8
1174
3/16
1175–1176
10/8
1177
3/16
Table of Measures with non-standard clicks - 3 33
BALLET
Measure #
Time Click Rhythm Signature
MECANIQUE
Measure #
Time Click Rhythm Signature
1196
2/8
1210
12/8
1197
24/8
1211–1212
8/8
1198
3/8
1213
16/8
1200
3/8
1214
20/8
1201–1202
4/8
1215
64/8
1203
5/8
1216
24/8
1205
3/8
1217–1218
32/8
1206–1207
4/8
1219–1220
40/8
1208
5/8
1221–1222
64/8
1209
32/8
1223–1232
various
1233–1239
32/16
1240
11/8
Table of Measures with non-standard clicks - 4 34
(downbeats only)
INSTRUCTIONS
THE VOCAL CUE TRACK The vocal cue track provides audible reference points at each of the rehearsal letters in the score. It also provides “countdowns” at the beginning of the piece, and at certain points in the score where the rhythm being played by the pianolas may not be clear. The vocal cue track can be used either with a MIDI sampler, or the internal audio circuitry (Macintosh) or a sound card (PC). Mute or (better) delete the track from the sequence that you will not be using. If you like, you can change the volume of the vocal cues relative to the click track: if you are using MIDI, then changing the velocities or MIDI volume on the vocal tracks will affect the cues; if you are using a sound card, then you may have volume control over individual audio events in the sequencer itself, or you may have to use the sound card’s software mixer.
Rehearsal Letters The rehearsal letters go from “A” to “Z”, leaving out “W”, and then “AA” and “BB”, which are heard, respectively, as simply “A” and “B”. Before each rehearsal letter is a beep-tone warning, which sounds one quarternote before the letter, except as noted below: Rehearsal Letter
Beep sounds
C D F G J L S T V X Y Z AA BB
On downbeat of m. 76 On downbeat of m. 104 On downbeat of m. 186 On downbeat of m. 259 3/8 before letter On downbeat of m. 461 On downbeat of m. 935 On downbeat of m. 965 3/8 before letter 3/16 before letter 1/8 before letter On downbeat of m. 1120 no beep no beep
The sampler keyboard mapping for the vocal cues appears on the following page.
35
BALLET
MECANIQUE
Keyboard layout for rehearsal letters and countdown samples
Countdowns The countdowns are a recording of a voice saying “4-3-2-1” (sometimes starting at 3), to provide a very accurate audible pointer to a particular downbeat. The implied “zero” is where the downbeat occurs. Countdowns are used at the following locations: Measure 1, the three quarter-notes prior to the actual start of the piece. Measure 1032-3, counting off four eighth-notes. Measure 1072-1079, counting off four groups of two measures. Measure 1128-1133, counting off four quarter-notes before 1134. Measure 1239, counting off four quarter-notes before 1240.
36
INSTRUCTIONS
REHEARSING AND PERFORMING THE BALLET MÉCANIQUE Choosing the Tempo Antheil’s tempo marking is “PIANOLA = 85”. Rex Lawson, noted pianola expert, says that this means that the piano roll is to move at 8.5 inches per second. Taking into account the spacing of the notes on Antheil’s original rolls, this figure translates to = 152. It is unlikely that any ensemble will actually be able to play the piece this fast. In fact, Yamaha Disklaviers and other MIDI-compatible player pianos are probably not capable of playing the sequences faster than about = 132. The tempo you choose will depend on the abilities of your players and conductor. The first performance of the piece in its current form, using a well-rehearsed student ensemble, was at = 100, and that is the tempo of the provided sequences. Whatever tempo you choose, you must remember to advance the pianola tracks by an appropriate amount, according to the formulas in the section Compensating for Player Piano Delay. (The pianola tracks in the sequences as provided are not adjusted for tempo.) If you wish to change the tempo of the sequence by any appreciable amount (one or two metronome markings probably won’t make an audible difference), you must re-adjust the position of the tracks. To do this, you must first move the pianola tracks back to their original position (starting on Beat 4 of Measure 1), then put the new tempo into the sequence, do the appropriate calculations with the new tempo, and finally move the tracks forward accordingly. If you don’t reset the tracks to their original position, they will end up very far away from where they are supposed to be. It has been suggested that some ensembles may want to play the bulk of the piece faster, and slow down the tempo between measures 1008 and 1134 to allow this. If you do this, remember that the compensation times in those bars is going to be different from the compensation in the rest of the piece, and the files will have to be adjusted accordingly.
Rehearsal techniques Since a stage full of player pianos may not be available over an extended rehearsal period, some ensembles may choose to use electronic MIDIcompatible piano modules to cover the pianola parts while the percussionists and live pianists rehearse with the conductor. To make this process as simple as possible, sequencer tracks have been provided 37
BALLET
MECANIQUE
that combine the four pianola parts into two, suitable for playing by a MIDI piano module. Do not attempt to play these tracks on an acoustic player piano—they will not work properly. Also remember that MIDI piano modules respond instantaneously to MIDI, and therefore these tracks do not require compensation, regardless of the tempo. While it is possible to conduct the instrumentalists without using the click track, it is strongly advised that whenever the pianola parts are being played, whether from electronic or acoustic pianolas, the conductor listen to the click track. Besides helping to negotiate the long stretches of silence after measure 1134, the click track will also help the conductor sort out many of the more difficult rhythms and time signatures in the score, which may not be readily audible by listening to the pianolas alone. Should the ensemble want to perform the piece without a conductor, it is crucial that every member be listening to the click track at all times. It is possible that during the rehearsal process, if you play the piece very slowly, the samples (especially the siren) will seem to cut off prematurely. That is because these samples have release envelopes that are timed to work with the sequence played at approximately = 100. If your tempo is much slower than that, the envelopes will end early. Be assured that when the piece is played at the intended tempo, the samples will end at the correct point. One exception to this is if you play the piece much faster than = 100. Under those circumstances, the long siren loops will end too late.If this is the case, you can shorten the siren notes in the sequence so that they start their release loop early. A little trial and error to find exactly the right note length will probably be required.
TECHNICAL SUPPORT It is strongly recommended that any ensemble attempting to perform the Ballet MĂŠcanique with these materials employ the services of a trained MIDI musician, familiar with computer sequencers, multiport MIDI interfaces, and sampler programming. Paul Lehrman, the creator of these sequences, is available to answer specific simple technical questions from performing groups on an informal basis. He can be reached by e-mail at lehrman@pan.com. More detailed help is available by arrangement with Mr. Lehrman. 38