
Product: TRACK LOADER
Model: 973C TRACK LOADER LDX
Configuration: 973C TRACK-TYPE LOADER LDX00001-UP (MACHINE) POWERED BY C9 Engine
Disassembly and Assembly
973C Track-Type Loader Machine Systems
i02115340
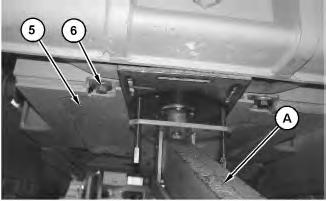
Bottom Guard - Remove and Install
SMCS - 7153-010
Removal Procedure
Table 1
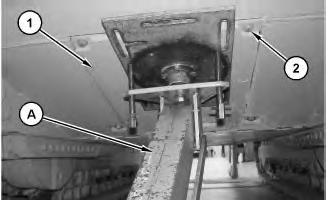
Illustration 1
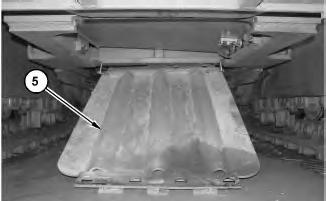
1. Attach Tooling (A) to rear bottom guard (1). Remove bolts (2) and lower rear bottom guard (1) .
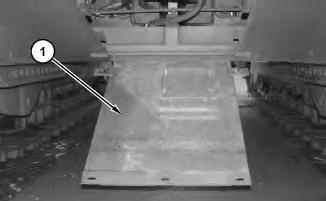
2
2. Use two people or install a suitable lifting device in order to remove rear bottom guard (1). The weight of rear bottom guard (1) is approximately 32 kg (70 lb).

Illustration 3
g01077537
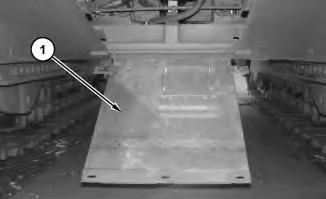
3. Attach Tooling (A) to middle bottom guard (3). Remove bolts(4) and lower middle bottom guard (3) .

4 g01022978
4. Attach a suitable lifting device to middle bottom guard (3) and remove middle bottom guard (3). The weight of middle bottom guard (3) isapproximately 50 kg (110 lb).
5. Repeat Step 3 and Step 4 for the other middle bottom guard.
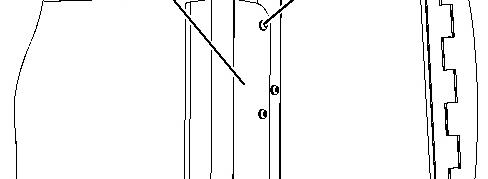
6. Attach Tooling (A) to front bottom guard (5). Remove bolts(6) and lower front bottom guard (5) .
6
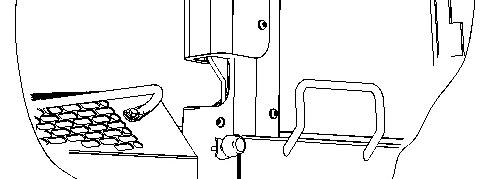
7. Attach a suitable lifting device to front bottom guard (5) and remove front bottom guard (5). The weight of front bottom guard (5) isapproximately 73 kg (160 lb).
Installation Procedure
Table 2 RequiredTools
7
1. Attach a suitable lifting device to front bottom guard (5) and raise front bottom guard (5). The weight of front bottom guard (5) is approximately 73 kg (160 lb).
Illustration 8
g01077553
2. Attach Tooling (A) to front bottom guard (5). Install front bottom guard (5) and install bolts (6) .
This is the sample of the manual
Click on the download link for complete Manual
Illustration 9 g01022978
3. Attach a suitable lifting device to middle bottom guard (3) and raise middle bottom guard (3). The weight of middle bottom guard (3) is approximately 50 kg (110 lb).

Illustration 10 g01077537
4. Attach Tooling (A) to middle bottom guard (3). Install middle bottom guard (3) and install bolts (4) .
5. Repeat Step 3 and Step 4 for the other middle bottom guard.
6. Use two people or install a suitable lifting device in order to raise rear bottom guard (1). The weight of rear bottom guard (1) is approximately 32 kg (70 lb).
7. Attach Tooling (A) to rear bottom guard (1). Install rear bottom guard (1) and install bolts(2).
Product: TRACK LOADER
Model: 973C TRACK LOADER LDX
Configuration: 973C TRACK-TYPE LOADER LDX00001-UP (MACHINE) POWERED BY C9 Engine
Disassembly and Assembly
973C Track-Type Loader Machine Systems
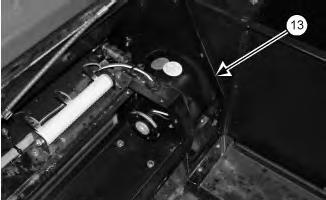
Receiver-Dryer - Remove and Install
SMCS - 7322-010
Removal Procedure
Personal injury canresult from air conditioning system pressure.
The air conditioning system will become a pressure system when charged.
To avoid personal injury see the Air Conditioning and Heating Service Manual for instructions oncharging the system.
Personal injury or deathcan result from inhaling refrigerant through a lit cigarette.
Inhaling air conditioner refrigerant gas through a lit cigarette or other smoking method or inhaling fumes released from a flame contacting air conditioner refrigerant gas, can cause bodily harm or death.
Do not smoke when servicing air conditioners or wherever refrigerant gasmay be present.
i02156960
Personal injury or deathcan result when charging an air conditioning system with a liquid.
The compressor will pump the refrigerant back into the charging cylinder with the possibility of rupturing (exploding) the cylinder.
Do not operate the engine whencharging witha liquid.
Never charge liquid or gas throughthe discharge (high side of the system) with the engine running.
Keep all other personnel either away from the machine or where they can be seen when working onthe air conditioning system.


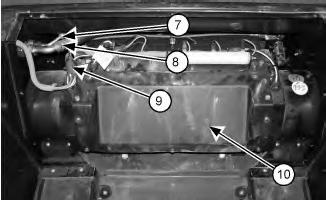
1 g01093978
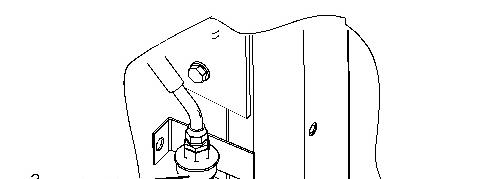
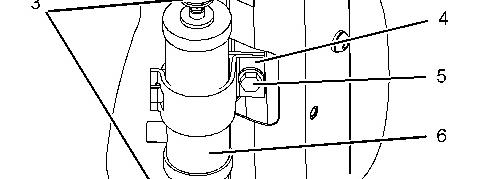
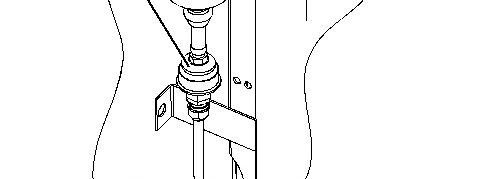

Illustration 2 g01093981
2. Disconnect quick couplers (3) from dryer (6) .
3. Remove bolt (5) and the washer in order to release clamp (4). Remove dryer (6) .
Installation Procedure
2.
Illustration 3 g01093981
Illustration 4 g01093978
Copyright 1993 - 2021 Caterpillar Inc. All Rights Reserved.
Network For SIS Licensees. Fri Jan 8 12:59:59 UTC+0530 2021
Product: TRACK LOADER
Model: 973C TRACK LOADER LDX
Configuration: 973C TRACK-TYPE LOADER LDX00001-UP (MACHINE) POWERED BY C9 Engine
Disassembly and Assembly
973C Track-Type Loader Machine Systems
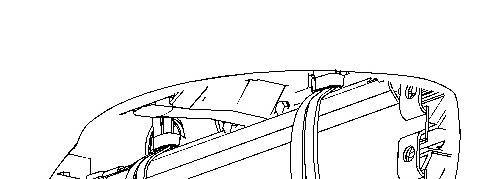
Refrigerant Evaporator Coil - Install
SMCS - 7343-012
Installation Procedure
i02156908
Note: Cleanliness is an important factor. Before assembly, all partsshould be thoroughly cleaned in cleaning fluid. Allow the parts to air dry. Wiping clothsor ragsshould not be used to dry parts. Lint may be deposited on the partswhich may cause later trouble. Inspect all parts. If any parts are worn or damaged, use new parts for replacement.

Illustration 1
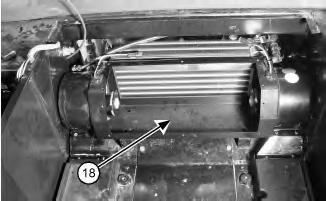
1. Install evaporator coil (24) and bolts(23) .
2. Install hose assembly (7) .
g01013514
5.
6.
7.
2
3
.
4
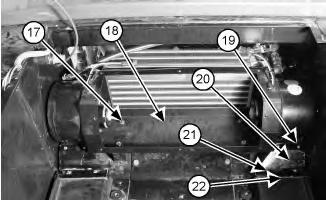
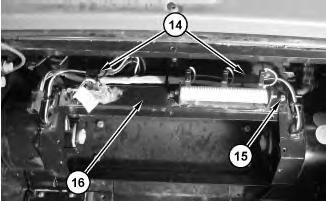
8. Connect harness assemblies(14) .
9. Install cover (16) and bolts (15) .
5
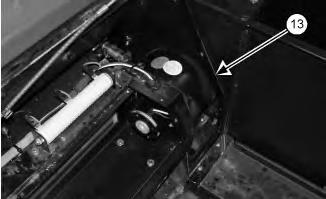
10. Install brackets (13) on both sides.

7
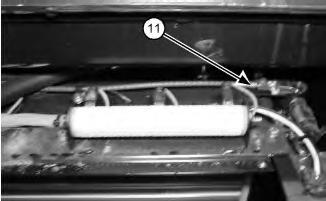
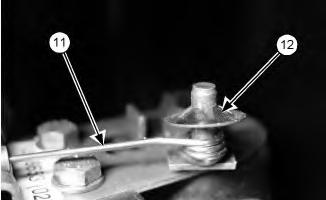
11. Connect cable assembly (11) and install retaining ring (12). Replace retaining ring (12) with a newpart.
8
12. Connect harness assembly (9) .
13. Install hose assembly (8) .
14. Connect hose assembly (7) .
15. Install cover (10) .
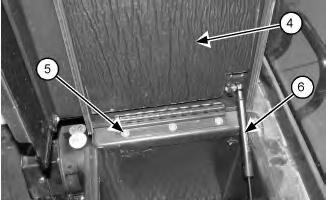
Illustration 9
16. Install armrest (4) and bolts (5). Repeat this step for the other armrest.
17. Connect gasspring (6) on armrest (4) .

10
18. Install cover (3) .
19. Connect hoses (2) .
20. Install cover (1) .
21. Charge the air conditioner system. The correct charge is2.5 kg (5.5 lb). Refer to Service Manual, SENR5664, "Air Conditioning and Heating Systems with R-134a Refrigerant"for the correct procedure. Refer to Special Publication, NEDG5065, "Air Conditioning Tools"for the correct tools.
End By:
a. Install the seat. Refer to Disassembly and Assembly, "Seat - Remove and Install".
b. Install the engine enclosure. Refer to Disassembly and Assembly, "Engine Enclosure - Remove and Install". Copyright 1993 - 2021 Caterpillar Inc.
Fri Jan 8 12:59:45 UTC+0530 2021
Product: TRACK LOADER
Model: 973C TRACK LOADER LDX
Configuration: 973C TRACK-TYPE LOADER LDX00001-UP (MACHINE) POWERED BY C9 Engine
Disassembly and Assembly
973C Track-Type Loader Machine Systems
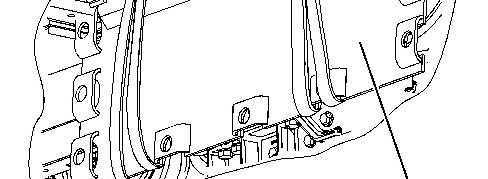
Refrigerant Evaporator Coil - Remove
SMCS - 7343-011
Removal Procedure
Start By:
i02156887
A. Remove the engine enclosure. Refer to Disassembly and Assembly, "Engine EnclosureRemove and Install".
B. Remove the seat. Refer to Disassembly and Assembly, "Seat - Remove and Install".
Note: Cleanliness is an important factor. Before the disassembly procedure, the exterior of the component should be thoroughly cleaned. This will help to prevent dirt from entering the internal mechanism.
NOTICE
Care must be taken to ensure that fluidsare contained during performance of inspection, maintenance, testing, adjusting and repair of the product. Be prepared to collect the fluid with suitable containers before opening any compartment or disassembling any component containing fluids.
Refer to Special Publication, NENG2500, "Caterpillar Tools and Shop Products Guide" for tools and supplies suitable to collect and contain fluids on Caterpillar products.
Dispose of all fluids according to local regulationsand mandates.
Note: Put identification marks on all lines, on all hoses, on all wires, and on all tubes for installation purposes. Plug all lines, hoses, and tubes. This helps to prevent fluid loss and this helpsto keep contaminantsfrom entering the system.
Personal injury canresult from contact with refrigerant.
Contact with refrigerant can cause frost bite. Keep face and hands away to help prevent injury.
Protective goggles must always be worn when refrigerant lines are opened, even if the gauges indicate the system is empty of refrigerant.
Always use precaution when a fitting is removed. Slowly loosen the fitting. If the system isstill under pressure, release it slowly in a well ventilated area.
Personal injury or deathcan result from inhaling refrigerant through a lit cigarette.
Inhaling air conditioner refrigerant gas through a lit cigarette or other smoking method or inhaling fumes released from a flame contacting air conditioner refrigerant gas, can cause bodily harm or death.
Do not smoke when servicing air conditioners or wherever refrigerant gasmay be present.
Use a certified recovery and recycling cart to properly remove the refrigerant from the air conditioning system.
1. Recover the air conditioner refrigerant from the air conditioner system. Refer to Service Manual, SENR5664, "Air Conditioning and Heating Systems with R-134a Refrigerant"for the correct procedure. Refer to Special Publication, NEDG5065, "Air Conditioning Tools"for the correct tools.


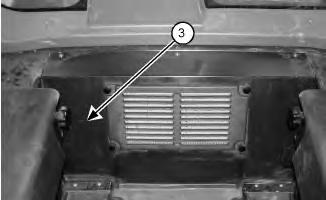
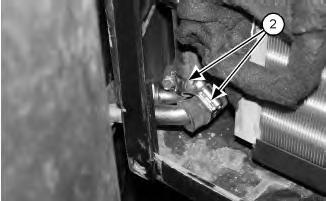
Illustration 3 g01013503
4. Remove cover (3) .
Illustration 4
5. Disconnect gas spring (6) from armrest (4) .
6. Remove bolts (5) in order to remove armrest (4). Repeat thisstep for the other armrest.

Illustration 5
7. Remove cover (10) .
8. Disconnect hose assembly (7) .
9. Remove hose assembly (8) .
10. Disconnect harnessassembly (9) .
This is the sample of the manual
Click on the download link for complete Manual
11. Remove retaining ring (12) in order to disconnect cable assembly (11) .