

Product:WHEELSKIDDER
Model:528WHEELSKIDDER51S
Configuration:528SKIDDER51S00001-00128(MACHINE)
OperationandMaintenanceManual 528SKIDDERANDGRAPPLESKIDDER
MediaNumber-SEBU6089-01PublicationDate-01/06/1990DateUpdated-11/10/2001 Every3000ServiceHoursor2Years
CoolingSystem
ChangetheCoolant
Atoperatingtemperature,theenginecoolantishotandunderpressure.
Steamcancausepersonalinjury.
Checkthecoolantlevelonlyaftertheenginehasbeenstoppedandthe fillcapiscoolenoughtotouchwithyourbarehand.
Removethefillcapslowlytorelievepressure.
Coolingsystemconditionercontainsalkali.Avoidcontactwiththeskin andeyestopreventpersonalinjury.
Drainthecoolantearlierwheneverthecoolantisdirtyorfoamingisobserved.
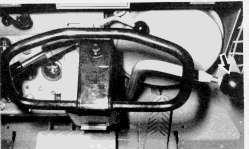
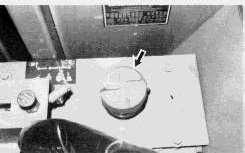
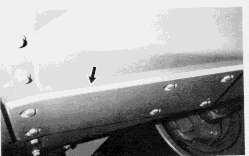
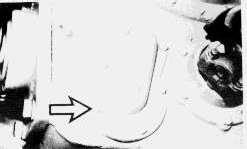
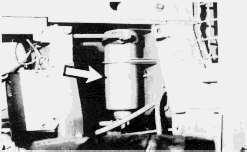
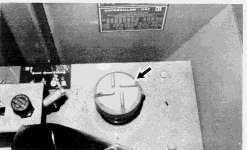
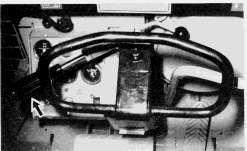
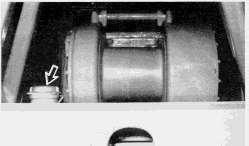
Theradiatorcapislocatedinthetopofthehood.
1.Removetheradiatorcapslowlytorelievepressure.
2.Openthedrainvalveandallowthecoolanttodrain.Drainvalveislocatedundertheradiator.
3.Closethedrainvalve.Fillthesystemwithcleanwateranda6to10%concentrationofcooling systemcleaner.
4.Startandruntheenginefor11/2hours.Stoptheengineanddrainthecleaningsolution.
5.Flushthesystemwithwater,withtheenginestopped,untilthedrainingwaterisclear.
6.Closethedrainvalve.
7.Addthecoolantsolution.See"CoolingSystemSpecifications"and"LubricantViscositiesand RefillCapacities."
NOTE:Donotaddsupplementalcoolantadditiveorchangeelementatthistime,unlessyouare notusingCaterpillarAntifreezewhichcontainsadditive.
8.Starttheengineandoperateitwiththeradiatorcapoff,untilthethermostatopensandthelevel stabilizes.
9.Maintainthecoolantleveltowithin1cm(1/2in)ofthebottomofthefillpipe.
10.Installthecap.
11.Stoptheengine.
Copyright1993-2025CaterpillarInc. AllRightsReserved. PrivateNetworkForSISLicensees.
SatMay1715:56:46UTC+05302025
Product:WHEELSKIDDER
Model:528WHEELSKIDDER51S
Configuration:528SKIDDER51S00001-00128(MACHINE)
OperationandMaintenanceManual 528SKIDDERANDGRAPPLESKIDDER
MediaNumber-SEBU6089-01PublicationDate-01/06/1990DateUpdated-11/10/2001
HydraulicSystem
ChangeOil-WashFillerScreen
Hotoilcancauseburns.
Atoperatingtemperature,thehydraulictankishotandunderpressure.
Removethefillcaponlywhentheengineisstopped,andthecapiscool enoughtotouchwithyourbarehand.Removethefillcapslowlyto relievepressure.
Themachinemustbelevelandtheoilwarm.Lowerthedozerbladewithslightdownpressure. Applytheparking/secondarybrakeandstoptheengine.
1.Movethehydrauliccontrolstohelprelievethesystempressure.
2.Removethefillcapslowlytorelievethepressure.
3.Removethetankdrainplug.
4.Allowtheoiltodrain.Changethefilterelement,seethetopic"HydraulicSystem"under "Every500ServiceHoursor3Months."
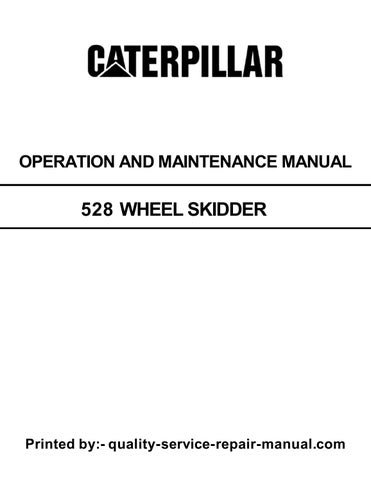
5.Removethefillerscreenretainingring.
6.Removethefillerscreen.
Pressureaircancausepersonalinjury.
Whenusingpressureairforcleaning,wearaprotectivefaceshield, protectiveclothingandprotectiveshoes.
Themaximumairpressuremustbebelow205kPa(30psi)forcleaning purposes.
Useallcleaningsolutionswithcare.
7.Cleanthefillerscreeninaclean,nonflammablesolvent.Shakeorblowitdry.
8.Installthefillerscreenandtheretainingring.
9.Inspectthedrainplugseal.Replacetheseal,ifitisdamaged.Cleanandinstallthedrainplug.
10.Fillthetank.Seethe"RefillCapacities"chart.Installthefillercap.
11.Starttheengine.Operatethehydrauliccontrolsslowlytocirculatetheoil.
12.Observethesightgauge.Addoil,ifnecessary,tobringtheoillevelabovetheADDmark.
Hotoilandcomponentscancausepersonalinjury.Donotallowhotoil orcomponentstocontactskin.
1.Positioneachwheelwiththedrainplugdown.Removethedrainplugsanddraintheoil.
2.Removethefrontdifferentialaccessplug,locatednearthefrontofthefrontcaseguard.
3.Removethereardifferentialaccessplug,locatedneartherearoftherearcaseguard.
4.Removethefrontandreardifferentialdrainplugsandallowtheoiltodrain.
5.Cleanandinstallalldrainplugsandaccessplugs.

6.Removethefrontdifferentialandfinaldrivefillplug,locatedattheleftrearofthefrontaxle housing.
7.Removethereardifferentialandfinaldrivefillplug,locatedattherightfrontoftherearaxle housing.
8.Fillthefrontdifferentialandthefinaldrivesthroughfillopening.Seethe"RefillCapacities" chart.
9.Fillthereardifferentialandfinaldrivesthroughthefillopenings.Seethe"RefillCapacities" chart.
10.Ifthecompleteamountofoillistedinthe"RefillCapacities"chartwillnotgointothe housing,installtheplug.Runthemachineonlevelgroundafewminutestoequalizetheoilinthe differentialandfinaldrives.
11.Removethefillplugandaddtheremainingoil.

12.Operatethemachineafewminutesandrechecktheoillevel.Oilshouldbetothebottomof thefillplugopening.
Topreventpossibleinjury,donotusethestartermotortoturnthe flywheel.
Hotenginecomponentscancauseburns.Allowadditionaltimeforthe enginetocoolbeforemeasuringvalveclearance.
NOTICE
Measurethevalvelashwiththeenginestopped.Toobtainanaccurate measurement,allowatleast20minutesforthevalvestocooltoengine cylinderheadandblocktemperature.
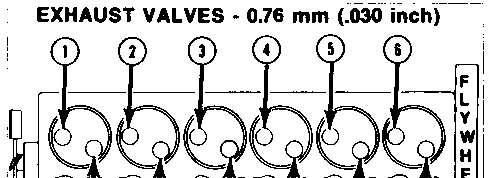
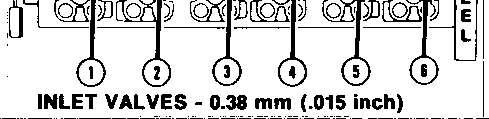
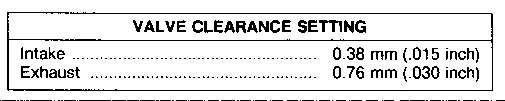
Adjustthevalveclearancetowithin±0.08mm(.003in)oftheclearancesettinggiven.
RefertotheServiceManualoryourCaterpillardealerforthecompletevalveadjustment procedure.
Aftersettingvalveclearancesandbeforeinstallingthevalvecover,checkvalverotators.Seenext topic.
EngineValveRotators
ObserveRotationofValvesWithEngineIdlingAfterSettingtheValveClearances
Wheninspectingthevalverotators,protectiveglassesorfaceshieldand protectiveclothingmustbeworn,topreventbeingburnedbyhotoil spray.
Aftersettingallvalveclearancesandbeforeinstallingthevalvecover:
1.Starttheengine.
2.Movetheacceleratorpedalcontroltolowidleposition.
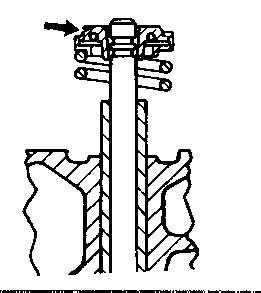
3.Watchthetopsurfaceoneachvalverotator.Eachvalverotatorshouldturnslightlyeachtime thevalvecloses.
Ifavalvefailstorotate,contactyourCaterpillardealer.
Copyright1993-2025CaterpillarInc. AllRightsReserved. PrivateNetworkForSISLicensees.
SatMay1715:56:15UTC+05302025
This is the sample of the manual Click on the download link for complete Manual
Product:WHEELSKIDDER
Model:528WHEELSKIDDER51S
Configuration:528SKIDDER51S00001-00128(MACHINE)
OperationandMaintenanceManual 528SKIDDERANDGRAPPLESKIDDER
MediaNumber-SEBU6089-01PublicationDate-01/06/1990DateUpdated-11/10/2001
ChangeOil-CleanScreen
Hotoilandcomponentscancausepersonalinjury.Donotallowhotoil orcomponentstocontactskin.
Themachinemustbelevelandtheoilwarm.Lowerthedozerbladewithslightdownpressure.
Applytheparking/secondarybrake.Stoptheengine.

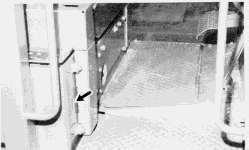
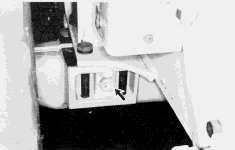
1.Liftthehingedcoverintheleftfloorplate.Removethetransmissionfillerplug.
2.Removetheaccessplateneartherearofthefrontcaseguard.
3.Removethetransmissiondrainpluganddraintheoil.
4.Changethefilterelement.Seethetopic"Transmission"under"Every500ServiceHoursor3 Months."
5.Removetheaccessplatejustforwardofthetransmissiondrainaccessplate.
6.Removethetransmissionscreencoverbolts.

7.Removethecoverandthescreenassembly.Becarefultoavoiddamagetothescreen.

8.Removethescreenretainingboltandthescreen.
Pressureaircancausepersonalinjury.
Whenusingpressureairforcleaning,wearaprotectivefaceshield, protectiveclothingandprotectiveshoes.
Themaximumairpressuremustbebelow205kPa(30psi)forcleaning purposes.
Useallcleaningsolutionswithcare.

9.Washthescreeninclean,nonflammablesolvent.Shakeorblowthescreendry.
10.Cleanthecover.Inspectthecoverseals.Replacetheseals,iftheyaredamaged.
11.Installthescreenonthecover.Tightenthescreenretainingbolt.

12.Installthescreenandthecover.Installtheaccessplate.
13.Cleanandinstallthetransmissiondrainplug.Installtheaccesscover.
14.Fillthetransmissionwithnewoil.Seethe"RefillCapacities"chart.
15.Installthetransmissionfillerplug.Closethehingedcoverinthefloorplate.
16.Starttheengine.
17.Movethetransmissioncontrolslowlythroughthedirectionalandspeedsequencestocirculate theoil.
18.Stoptheengine.Measuretheoillevelwiththedipstick.
19.Ifnecessary,addoiltobringtheoilleveltotheFULLmarkonthedipstick.
20.Inspectthefillerplugseal.Replacetheseal,ifitisdamaged.
21.Installthefillerplug. Winch
Hotoilandcomponentscancauseinjury.Donotallowhotoilor componentstocontacttheskin.
1.Removethefillplug.
2.Removethemagneticdrainplugandallowtheoiltodrain.Cleanandinstallthedrainplug.
3.Fillthewinch.MaintaintheoilleveltotheFULLmarkinthesightgauge.
4.Cleanandinstallthefillplug.
5.Cleanandinstalltheoillevelplug.
6.Removethebreather.Washthebreatherinclean,nonflammablesolvent.Installthebreather.
AirDryer-(IfEquipped) ChangeDesiccant
Stoptheengineanddraintheairreservoirbeforeperforming maintenanceontheairdryer.
ToavoidpossibleweakeningoftheRolloverProtectiveStructure (ROPS),consultaCaterpillardealerbeforealteringtheROPSinany way.TheprotectionofferedbytheROPSwillbereducedifithasbeen subjectedtostructuraldamageorhasbeeninvolvedinanoverturn incident.
1.InspecttheROPSstructure.
2.Tightenthe16mountingboltsonthemachineto360±50N·m(265±60lbft).
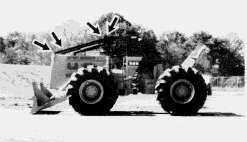
3.Alsotightenthefourmountingboltsonthesweepto150±20N·m(110±15lbft).
4.Inspectforcracks,etc.
Copyright1993-2025CaterpillarInc. AllRightsReserved. PrivateNetworkForSISLicensees.
SatMay1715:55:50UTC+05302025
Product:WHEELSKIDDER
Model:528WHEELSKIDDER51S
Configuration:528SKIDDER51S00001-00128(MACHINE)
OperationandMaintenanceManual 528SKIDDERANDGRAPPLESKIDDER
MediaNumber-SEBU6089-01PublicationDate-01/06/1990DateUpdated-11/10/2001
HydraulicSystem
ChangeFilter
Atoperatingtemperature,thehydraulictankishotandunderpressure.
Hotoilcancauseburns.
Removethefillcaponlywhentheengineisstopped,andthecapiscool enoughtotouchwithyourbarehand.Removethefillcapslowlyto relievepressure.
Themachinemustbelevelandthehydraulicoilwarm.Lowerthedozerbladewithslightdown pressure.
Applytheparking/secondarybrake.Stoptheengine.
1.Movethehydrauliccontrolstohelprelievethepressure.
2.Removehydraulictankcapslowlytorelievethepressure.

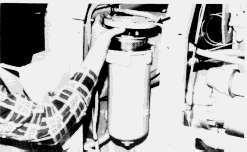
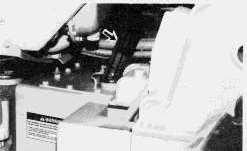
3.Removetheleftenginecover.
4.Removefilterdrainplug.Allowoiltodrain.Useapantopreventaccumulationofoilinbottom guards.
5.Removefilterhousinganddiscardfilterelement.
6.Cleanthehousingandbase.
7.Inspectgasket.Replacethegasketifdamaged.
8.Installanewfilterelement.
9.Installthefilterhousing.Tightentheboltto58±5N·m(43±4lbft).
10.Cleanandinstallfilterhousingdrainplug.
11.Installthehydraulictankfillercap.Starttheengine.
12.Applytheserviceblake.Movethehydrauliccontrolsslowlytocirculatetheoil.
13.Stoptheengine.Inspectthehydraulictanksightgauge.Oilshouldbevisibleinthesight gauge.
14.Removethetankfillercapslowlytoreleaseanypressure.Addoil,ifnecessary.Installthe fillercap.
15.Installtheleftengineguard.
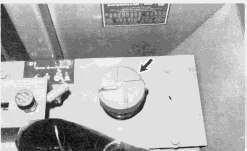
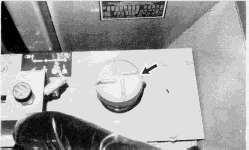
Transmission
ChangeFilter
Hotoilandcomponentscancausepersonalinjury.Donotallowhotoil orcomponentstocontactskin.
Pressureaircancausepersonalinjury.
Whenusingpressureairforcleaning,wearaprotectivefaceshield, protectiveclothingandprotectiveshoes.
Themaximumairpressuremustbebelow205kPa(30psi)forcleaning purposes.
Useallcleaningsolutionswithcare.
Themachinemustbelevelandtheoilwarm.Lowerthedozerbladewithslightdownpressure.

Applytheparking/secondarybrake.Stoptheengine.
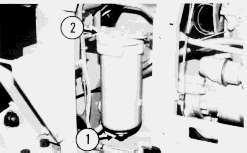
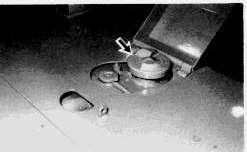
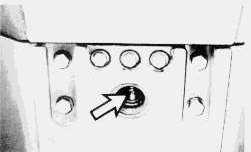
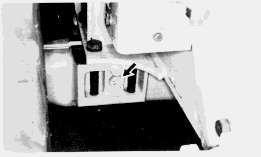
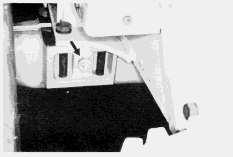
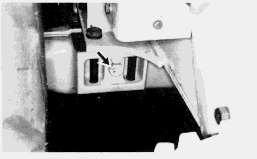
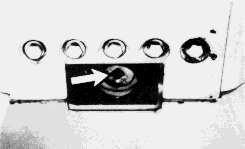
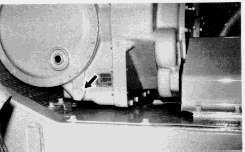
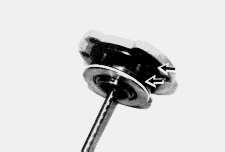
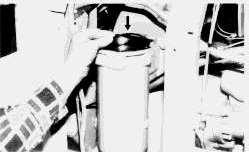
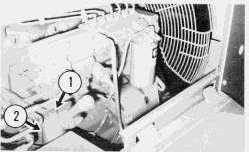
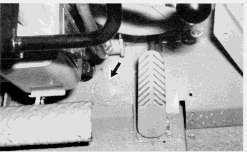
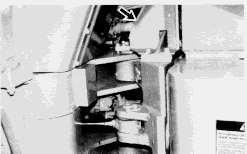
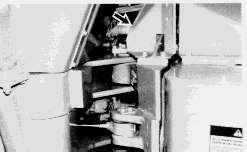
1.Removefilterhousingdrainplug(1).Drainthefilterhousing.
2.Removefilterhousingcoverbolts(2).
3.Removethecoverandtheelementassembly.Becarefultoavoiddamagetotheseals.
4.Removetheelementretainingnutandtheretainer.Discardtheusedelement.
5.Inspectthecoverseals.Replacetheseals,iftheyaredamaged.
6.Inspectthefilterhousingseal.Replacetheseal,ifitisdamaged.
7.Cleanthefilterhousingandthecover.
8.Cleanandinstallthefilterhousingdrainplug.
9.Assembleanewfilterelement,theretainerandtheretainingnutonthefilterhousingcover.
10.Tightentheretainingnutto15±3N·m(10±2lbft).
11.Insertthefilterassemblyintothefilterhousing.Becarefultoavoiddamagetotheseals.
12.Installandtightenthecoverbolts.
13.Starttheengine.
14.Movethetransmissioncontrolslowlythroughthedirectionalandspeedsequencestocirculate theoil.
15.Stoptheengine.Measuretheoillevelwiththedipstick.

16.Ifnecessary,addoiltobringtheoilleveltotheFULLmarkonthedipstick.
17.Inspectthefillerplugseal.Replacetheseal,ifitisdamaged.
18.Installthefillerplug.
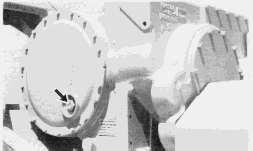
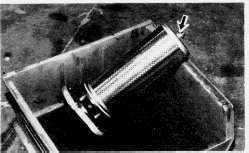
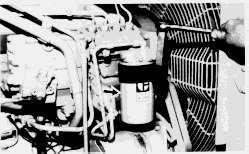
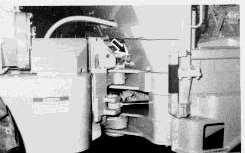
1.Loosenfiltercaseretainingbolt(1).
2.Removecase(2)andtheelementfromthefilterbase.
3.Removethefilterelementfromthecase.
Pressureaircancausepersonalinjury.
Whenusingpressureairforcleaning,wearaprotectivefaceshield, protectiveclothingandprotectiveshoes.
Themaximumairpressuremustbebelow205kPa(30psi)forcleaning purposes.
Useallcleaningsolutionswithcare.

4.Washtheelementinaclean,nonflammablesolvent.Shakeorblowitdry.
5.Cleanthecasewithacloth,orastifffiberbrush.
6.Inserttheelementinthecase.
7.Installthecaseandelementonthebase.Tightentheretainingbolt.
8.Starttheengineandcheckforleaks.
1.Removethefuelfilterwithastrap-typewrench.
2.Cleanthefilterbasegasketsurface.Removealloftheoldgasket.
3.Lubricatethenewfiltergasketwithcleandieselfuel.
4.Installthenewfilterelementbyhand.Whenthegasketcontactsthebase,tighten1/2turnmore. Donotovertightenthefilterelement.
5.Primethefuelsystem(seethenexttopic).Starttheengineandcheckforleaks.
PrimingtheFuelSystem
1.Unlocktheprimingpumpplunger.
2.Operatetheplungeruntilaresistanceisfelt.
3.Closethepumpandlocktheplunger.
4.Starttheengineandinspectforleaks.
5.Iftheenginewillnotstart,primethefuelsystemagain.
6.Iftheenginestartsandcontinuestomisfireorsmoke,continuehandpriming.
Whenusingpressureairforcleaning,wearaprotectivefaceshield, protectiveclothingandprotectiveshoes.
Themaximumairpressuremustbebelow205kPa(30psi)forcleaning purposes.
2.Washallcappartsinaclean,nonflammablesolvent.
3.Oiltheelementslightly.Assemblethecap.
4.Removethefillscreen.Washthescreeninclean,nonflammablesolvent.Shakeorblowitdry.
5.Installthefillscreen.

6.Inspectthefueltankcapgasket.Replacethegasket,ifitisdamaged.
7.Installthefueltankcap.
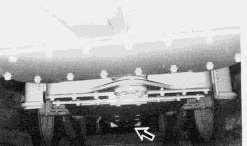
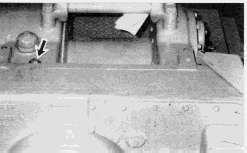
1.Liftupthepluginthefloorplate.Lubricateonefittingintherearuniversalofthefrontshaft. Lowerthefloorplate.
3.Lubricateonefittingintherearuniversalofthecentershaft.
5.Lubricateonefittingintherearuniversaloftherearshaft.Totalfivefittings.
This is the sample of the manual Click on the download link for complete Manual