Hot and Cold integrated, tap water filtered and directly drinkable.
Engineered with a five-stage filtration, deep purification, hydrogen concentration ≥ 1000ppb, and a smart safety child lock.
Instruction Manual
Model #: SKU P830
Instruction Manual
Please read this instruction manual carefully before using the product and keep it properly!
Dear User: Thank you for purchasing our company’s intelligent pipeline machine / intelligent Hydrogen direct drinking machine. The careful design and standardized production of this product are in line with standard specifications. All its components have passed strict quality inspection and reliable performance life test. We believe that the excellent product quality will definitely meet your needs.
Product Features
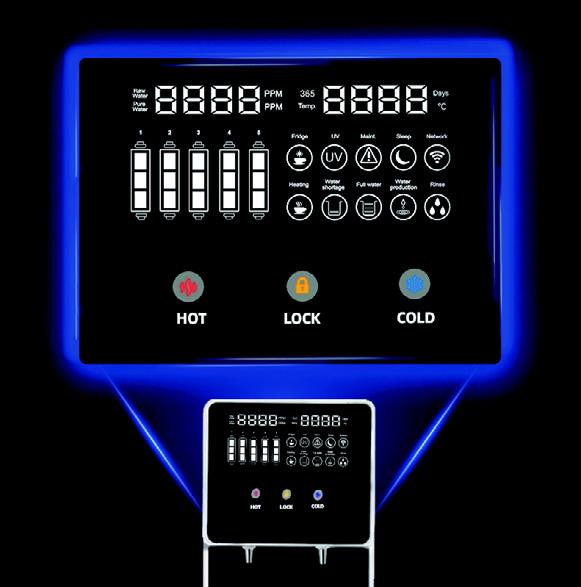
Intelligent Control Function
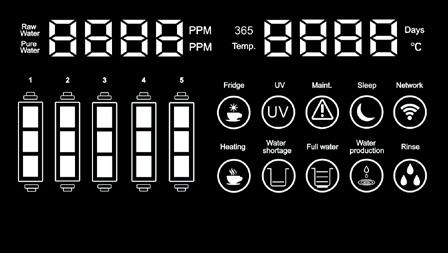
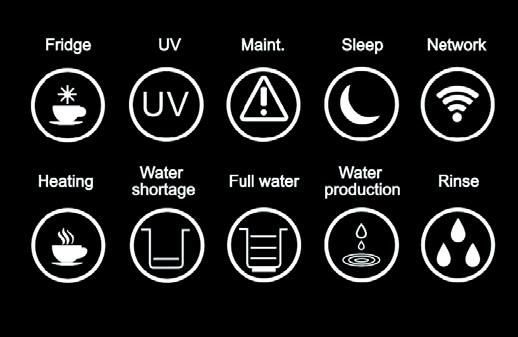
1. This product is controlled by a microcomputer chip, with a large temperature display screen, and adjustable heating temperature settings suitable for various places; intelligent touch-control one-button water extraction; reminder to replace the filter element when the filter element of the direct drinking machine series expires; working status display function. The direct drinking machine series can be equipped with a TDS water quality detection function, and the TDS function display can be manually turned on or off.
Button Intelligence Control
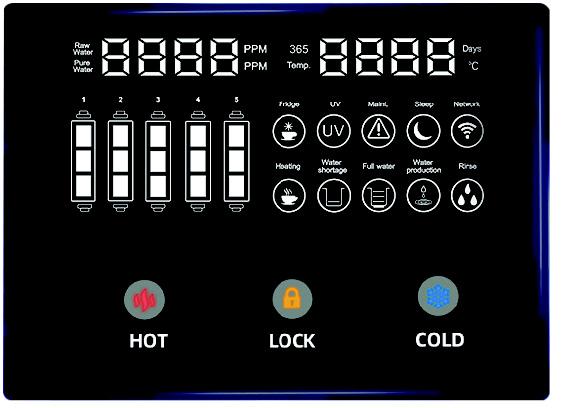
2. The button adopts intelligent touch control to dispense water with one key, and has a safe and scalding-proof child lock function. The touch button that meets the requirements of simple design is adopted. Users only need to touch it lightly with their fingers to automatically dispense water, which improves the convenience of use.
Multiple Functions
3. One machine can provide normal temperature Hydrogen drinking water, hot drinking water and ice drinking water, which improves the convenience and practicality of use. (Ice water is optional)
Faucet Water Outlet Design
4. The water outlet adopts a specially designed solenoid valve, which has a stable and reliable flow rate and is durable. The electronic touch design allows the faucet to flow out drinking pure water after touching the corresponding water outlet button.
Inner Liner Design
5. Selected 304 thickened stainless steel inner liner, which heats up quickly, does not rust, is corrosionresistant, durable, and is made of maternal and infant food grade material, allowing you to use it with confidence.
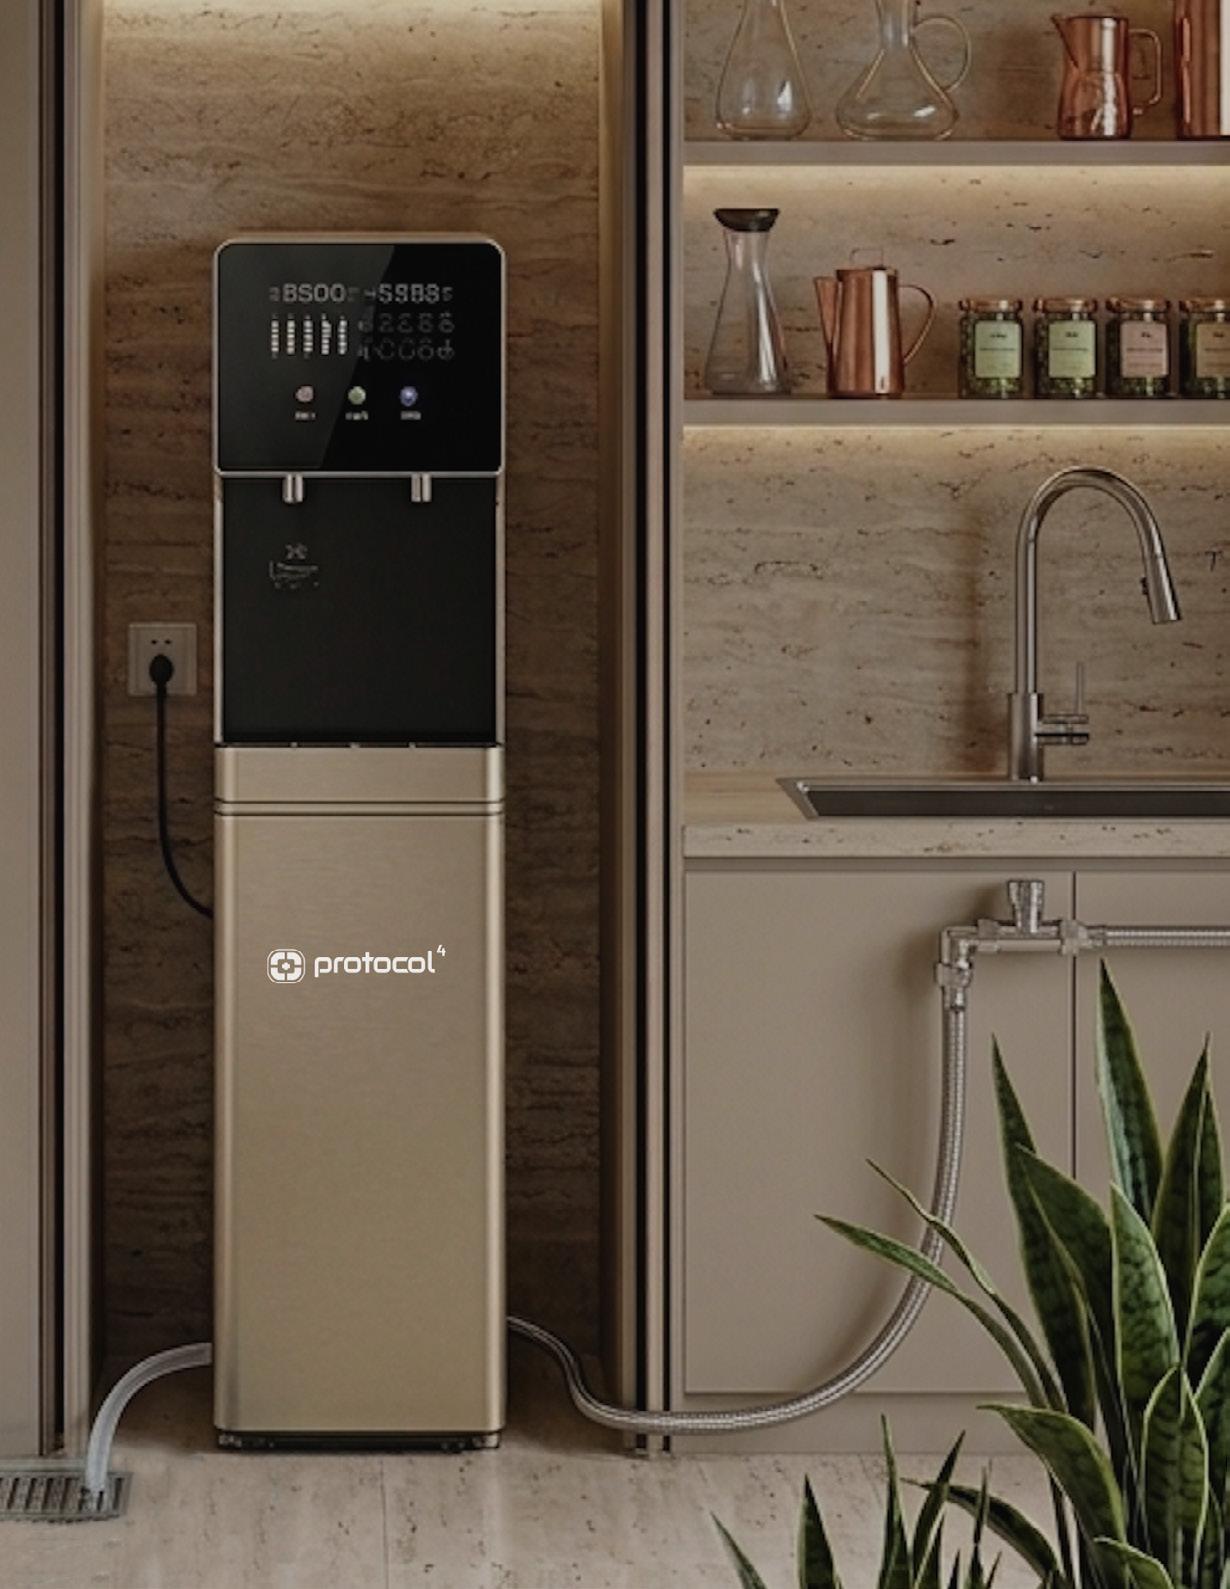
Aesthetic Design
6. The design adopts a modern and fashionable appearance, taking into account the convenience of customers, and can give people a refreshing aesthetic feeling no matter where they are. (Each model has its own characteristics, and the pictures are for reference only)
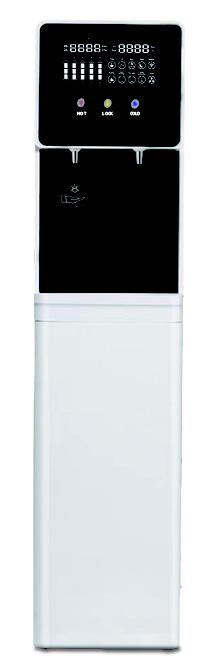
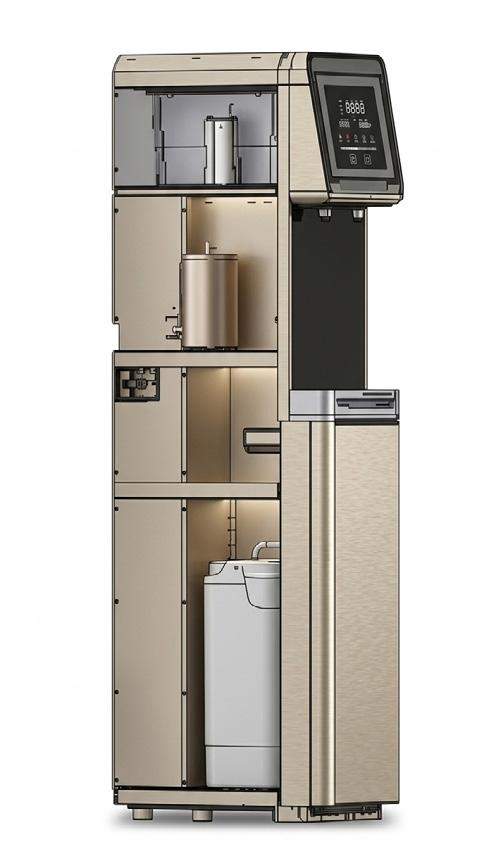
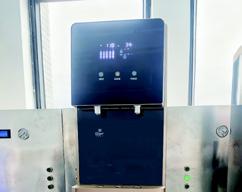
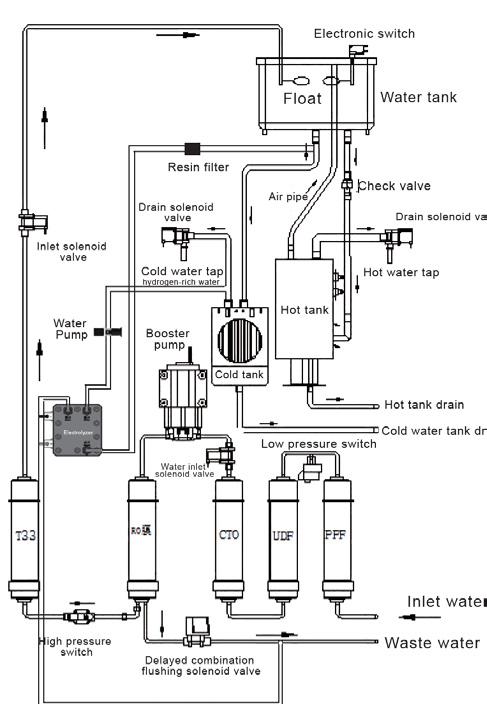
Product Structure Details
Safety Precautions
Precautions are divided into two types:
“Warning” and “Caution”, each indicating the following.
Warning: Failure to follow the instructions may result in serious injury or death.
1. If the product is damaged or has functional problems or the power cord is damaged, please unplug the power plug and contact our authorized sales service center for repair or replacement to avoid unnecessary danger.
2. Don’t use a damaged or loose socket. There is a risk of electric shock or fire.
3. Please use a single plug to avoid sharing multiple electrical appliances in a single socket to avoid abnormal heating of the socket and fire.
4. Please don’t place any objects on the product and don’t place the product near hot appliances to avoid danger.
5. Please fully insert the plug of the power cord into the base to prevent the power plug from loosening. If the contact is poor, it will cause a fire.
6. Please don’t forcibly bend the power cord or squeeze the power cord with heavy objects to prevent damage to the power cord, causing electric shock and fire hazards.
7. The socket or power strip used for this product must be reliably grounded, and the grounding must be firm, otherwise it will cause the machine to cause electric shock in the event of leakage.
8. Please use a socket with leakage protection.
The following contents are for correct use of the product and prevention of physical damage. Please be sure to follow them.
Caution: Violation of the marked items may result in injury or property loss and product performance degradation.
1. The temperature of hot water is high. Please use a high-temperature resistant cup when taking water to avoid being scalded by hot water.
2. Before cleaning the inside of the product, be sure to unplug the power cord. If there is dust, water, etc. on the pin contact part of the power cord plug, wipe it clean with a dry cloth.
3. Don’t operate the product without maintaining balance. (Otherwise, it will cause malfunction and failure.) When moving the product, avoid tilting the product more than 45°. (If the tilt angle is too large, the product performance may deteriorate).
4. Don’t place it in a tilted position or unstable place. (It will cause product performance degradation, serious or cause injury or product failure.)
5. Don’t place it in a place where the ambient temperature may drop below 0°C.
6. After the product is placed, please tidy up the power cord to prevent people from stepping on the power cord or tripping.
7. When unplugging the power plug, don’t pull the wire directly. Plug and unplug the power plug. If the wire is damaged, it may cause electric shock and fire.
Introduction to Operation
Switch Function Description
1. Turn on the rocker switch (the rocker switch is located on the upper part of the back panel of the product), the machine enters the whole machine power supply state, the panel display lights up, disconnect the rocker switch, the machine exits the whole machine power supply state, and the panel display turns off.
Heating
After entering the standby state, the machine is connected to the water source and power supply, and the machine automatically replenishes water and heats. The hot water temperature is displayed as the actual water temperature, and the heating indicator light is dynamically displayed. When the water temperature reaches the set temperature, the heating indicator light goes out and the insulation indicator light flashes at the same time. The machine will stop heating.
Cooling
Turn on the green cooling switch on the back to turn on the cooling function. The cooling indicator light flashes dynamically. When the water temperature reaches the set temperature, the cooling indicator light stops flashing and the machine stops cooling. (Note: If you turn off the refrigeration switch midway, there is a 3-minute waiting time before turning it back on.) In the following process, (heating and cooling are on) if the hot water temperature drops to 5°C below the set temperature, the heating function will be automatically turned on to maintain the water temperature.
2. The machine is set to fully automatic control, which is easy to operate. The machine automatically replenishes water when it is turned on, and the heating function is automatically turned on when the water level reaches the set position. If the water level does not reach the set position, it will be displayed as E0. When the water level reaches the set position, the current hot water tank temperature is displayed. (The hot water faucet will not produce water if the step-by-step heating hot water temperature does not reach 80°C.)
Temperature Settings
When the water dispenser is low on water, the indicator light on the control panel will flash continuously. Simply connect it to the municipal water supply and wait 15-30 minutes. To activate cooling, press and hold the cooling button for 8-10 seconds until the green cooling icon appears on the screen for 1-2 seconds before returning to normal. The unit will then enter cooling mode, and the temperature will be displayed on the control panel. To activate heating, press and hold the heating button for 8-10 seconds until the heating icon appears on the screen. The unit will then enter heating mode.
The temperature of the pipeline machine (Figure 2) is set to child lock button for more than 30S, the temperature on the digital screen flashes, then press the hot water touch button, the heating temperature 50°C-95°C cycles. UV sterilization function (optional). When the UV lamp is installed, the UV sterilization will automatically start. Each time the power is turned on, the sterilization will start for 60 minutes, and then it will automatically sterilize for 15 minutes every 60 minutes.
Child Lock Mode Description
1. Child lock function: When the child lock is locked, hot water cannot be dispensed after the hot water button is clicked. Click the child lock button first, then the child lock light goes out, and then click the hot water button to dispense hot water normally.
2. Child lock situation: a. The child lock button is locked by default when powered on. b. Within 10 seconds after taking hot water, the water dispenser button is automatically locked without any operation.
3. How to remove the child lock function: a. Press and hold the hot water button and the child lock button at the same time for 10 seconds, and the child lock button indicator light goes out. Don’t remove the child lock function in places where children are present to prevent scalding.
4. How to restore the child lock function: a. Press and hold the hot water button and the child lock button for 10 seconds at the same time, and the child lock button indicator will light up.
5. Fault Protection Function. (Fault code)
A. E1: The hot water probe reaches 105 degrees (actual temperature)
E2: The hot water probe is not detected:
E3: Water leakage Display: When E1\E3 is reported, the machine completely stops all work; when E2 is reported, the hot tank heating is stopped
B. Overheat protection function, the machine is equipped with an overheat thermostat. When the machine heating temperature exceeds the overheat thermostat setting temperature, the heating tube is powered off to prevent further heating to protect the machine until the user contacts after-sales service and repairs the manual reset of the overheat thermostat, and the machine can work normally.
Drainage Method
If this product is not used for a long time, it is recommended to drain the water inside the machine to prevent the water inside the machine from deteriorating. The following steps must be followed:
1. Child lock function: When the child lock is locked, hot water cannot be dispensed after the hot water button is clicked. Click the child lock button first, then the child lock light goes out, and then click the hot water button to dispense hot water normally.
2. Turn off the heating or cooling setting function.
3. Unplug the power plug.
4. Unscrew the nut of the hot water drain port (cold water drain port) on the back of the machine, unplug the drain plug, and completely drain the hot water in the hot tank (cold water in the cold tank) and the water in the water tank. It is best to use a water collection basin or water collection bucket to collect water. After the water is drained, plug the drain plug back in place and screw the drain nut back in place. (Note: Be careful when draining hot water, be careful not to get burned!)
Precautions For Use
1. Avoid placing the product in the following places:
a. Places near fireworks.
b. Places with high humidity.
c. Places exposed to direct sunlight.
d. Outdoor places where the temperature is below 0 degrees or may drop below 0 degrees.
d. Water quality: Meets municipal tap water. If the water quality used is not within the above range, please consult with our company. If water quality outside the above range is used without consultation, it will be excluded from the free warranty period.
3. Ensure the safe operation of the product:
Please keep the side and back of the product at a distance of more than 20cm from the wall to ensure smooth ventilation.
4. Careful with electrical products:
Don’t place other electrical products near the back heat sink
5. Please don’t use an unqualified socket:
Otherwise, it may cause electric shock or fire.
6. Please don’t connect hot water (above 38°C) to the product:
Otherwise, it may cause malfunction or reduce the cooling function.
7. Connecting the water pipe:
When connecting the water pipe, please avoid the water pipe being removed or pressed by heavy objects. If the water pipe is blocked, the water flow will decrease sharply, eventually causing the machine to stop running or malfunction.
8. Prevent the water discharge:
To prevent the water discharged from the water pipe from splashing around, please fix the water pipe. If the water flowing out of the drain hose is put into a bucket, it can be used for cleaning, housekeeping, washing and other miscellaneous water, thus preventing unnecessary waste of water. However, water flowing out of the drain hose must not be used for drinking (eating) or cooking.
9. Similar product use:
If one or more similar products (water purifiers, dishwashers, etc.) are installed in the same place, this product should be equipped with a separate water source and drainage pipe.
10. Moving the product:
a. When the product needs to be moved, please note that the water inside the machine should be drained first.
Steps: First turn off the water supply. When the product is powered on, press the water dispensing button, wait until the hot water and warm water (cold water) are completely drained, then turn off the power and unplug the power plug. If the product is tilted and moved without completely draining, the water in the water tank will flow out, which may cause unnecessary damage to the product or water flow from the bottom.
b. When moving this product (compressor water dispenser), please don’t tilt the product more than 45°. After moving the product, please connect the power supply after 30 minutes to stabilize the product.
11. Power supply:
The rated power supply used by this product is: 220V/50Hz.
12. Receiving hot water:
When receiving hot water, please use a scalding container to avoid scalding your hands and body.
13. Product use:
If the product is not used for a long time, please unplug the power plug, turn off the water switch and drain the water inside the machine.
14. Filter element:
The filter element in the pure water filter is a consumable part and needs to be replaced regularly.
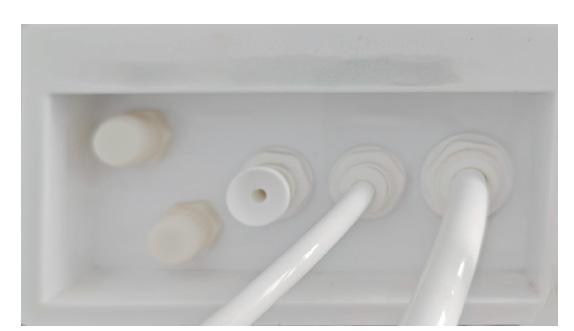
Installation and Use
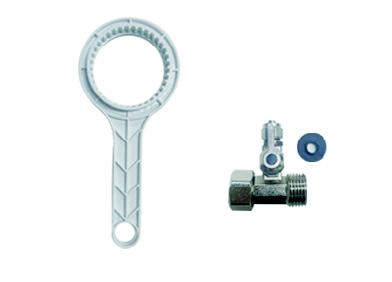
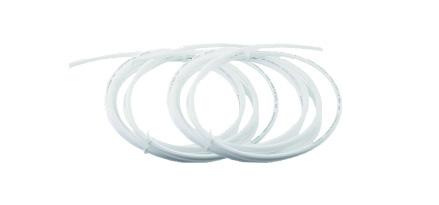
Parts and Accessories
2-point and 3-point Water Pipes
1. First, place the product in a suitable flat place or room, and then remove the dust plugs from the water inlet and waste outlet.
2. Turn off the water supply valve at the front end of the installation or the main valve in the home, then unscrew the connection part of the water supply location to be connected, and then connect the water source connector. Be careful not to let the sealing ring (O-ring) at the connection part fall off or damage the thread, otherwise it will cause leakage.
3. Insert the hose into the water source connector and the water source connection part on the back of the product to connect.
4. Insert the connecting hose into the wastewater outlet on the back of the product and the tap water inlet, and connect the wastewater drainage hose to the drain outlet or water collection bucket that discharges to the sink or toilet.
5. Open the front water supply valve or the main valve in the home and turn the water source connection valve to the open position to supply source water (municipal tap water) to the product.
6. Check whether there is any leakage at each connection part.
7. To ensure the stable operation of the cooling system and the safe use of the product, plug the power plug into the 220V/50Hz power socket 30 minutes after the product is installed.
8. Confirm whether water is supplied to the inside of the product and whether there is any leakage at the connection.
9. After running for half an hour, press the water dispensing button to confirm whether water flows out.
10. When installing the direct drinking machine, the filter element must be rinsed first. The first three levels of rinsing time are 10 minutes (if not rinsed, the service life of the RO membrane will be greatly reduced), the RO membrane rinsing time is 30 minutes (after the RO membrane protection liquid is rinsed, the post-carbon tastes better), and the post-activated carbon is rinsed for 10 minutes (if not rinsed, black carbon powder or small particles of carbon will enter the water outlet valve of the water tank, causing the machine faucet to leak).
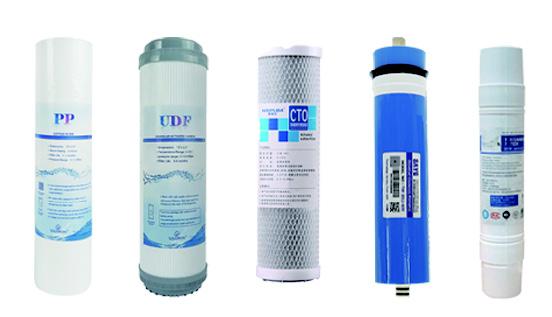
Filter Element Function Introduction
First Level PP cotton filter
Second Level UDF filter Cartridge
Coarsely filter the raw water to remove the sand, impurities, rust, suspended matter, etc.
Absorb and remove organic matter such as color, odor, residual chlorine, halogenated hydrocarbons, etc. dissolved in water
Third Level Compressed activated carbon filter element
Fourth Level Reverse Osmosis RO Membrane
Further treat the raw water, deeply absorb the harmful substances such as discoloration, odor, residual chlorine, halogenated hydrocarbons and other organic substances in the water, and effectively improve the taste of the water.
The filtration accuracy reaches 0.001~0.0001 microns, only water molecules are allowed to pass through, and impurities such as pesticides, heavy metal ions and other harmful substances contained in the water are almost completely intercepted and removed. The water passing through the RO membrane is pure water
Fifth
Adjust the taste of pure water to keep it fresh, sweet and pure in taste.
Note: The above filter element names, levels and function configurations are appropriately adjusted and reasonably configured according to different products, and are also appropriately adjusted according to the filter elements provided by customers.
Special Tips
1. Do not attempt to use a standard US 110V/15A outlet. The system draws 3500W during peak cooling; insufficient voltage will damage the 3 HP chiller and void the warranty.
2. The filter element replacement cycle is an estimated period, which varies according to the region of use, water quality and usage, and season (summer, winter).
3. Only by replacing the filter element in time can you drink clean water.
4. When replacing the filter element, please choose a regular product and be careful of counterfeit and shoddy filter elements.