The Mettu Children’s Hospital at Pikeville Medical Center features state-of-the-art technology in a child-friendly environment with highly skilled pediatricians and hospitalists on hand.
Families can stay close to home, reducing the inconvenience and financial burden of traveling to children’s hospitals hundreds of miles away when their children need care.
Advanced Women’s Care Center
Information for breastfeeding families Newborn Feeding Log
Newborn Feeding Log
Day 1
Circle
Notes:
Day 2
Notes:
Day 3
Circle
Notes:
Notes:
4
Notes:
5
Notes:
6
Information for breastfeeding families Newborn Feeding Log
Newborn Feeding Log
Day 7
Circle
Notes:
8
Notes:
Day 9
Circle
Notes:
Notes:
Notes:
12
Notes:
Wet diapers may exceed those indicated in this chart in the first few days. The numbers of stools per day is a better indicator of adequate intake than wet diapers.
Babies show several cues in readiness for breastfeeding. Tuning into your baby’s cues will make your feeding more successful and satisfying for both your baby and for you.
Your baby does not have to cry to let you know he is hungry. Crying is the last hunger cue!
Rooting towards the breast (turning the head and opening the mouth)
Hand to mouth activity
Crying beginning softly and gradually growing in intensity
Try to catch your baby’s feeding cues early in the cycle – avoid crying – and begin breastfeeding!
Po sit ioning & La t ch -on :
Positioning & Latch-On:
Baby-Led Latching
B a by -led La t chin g
The way you hold your baby and how he latcheson to the breast, are the keys to comfortable feeding for you and full feedings for your baby. Correct positioning and latch -on can prevent many of the common problems mothers encounter when starting to breastfeed.
Baby-led latching is good for the first feeding and for all feedings after that when the baby is awake and willing to participate.
Positioning your baby
Positioning Your Baby
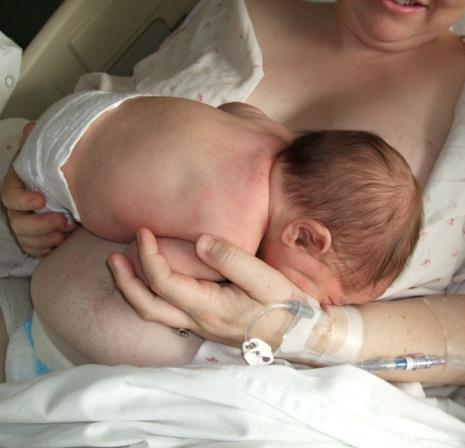
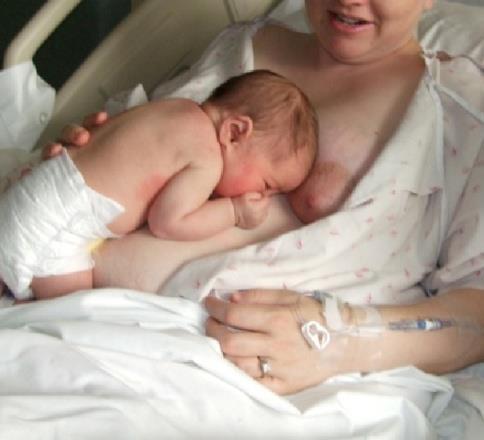
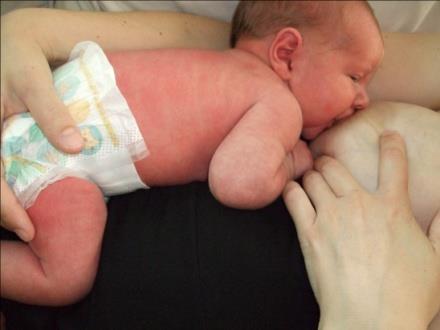
Position the baby between your breasts and allow your baby to wake skin -to-skin. Holding your newborn skin-to-skin is one of the best ways to make breastfeeding easy!
Be
Be Patient
Patient
Getting comfortable
Getting Comfortable
Choose a bed or sofa where you can lean back about half way or more, whatever is comfortable for you.
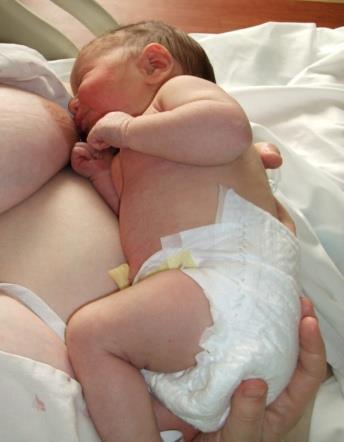
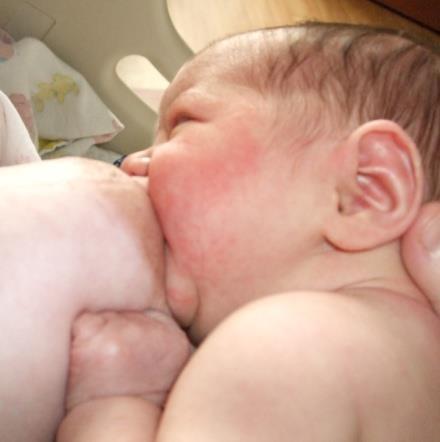
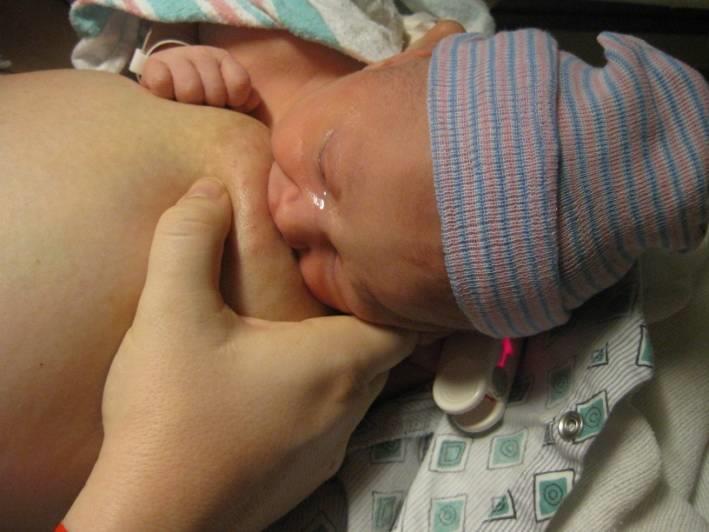
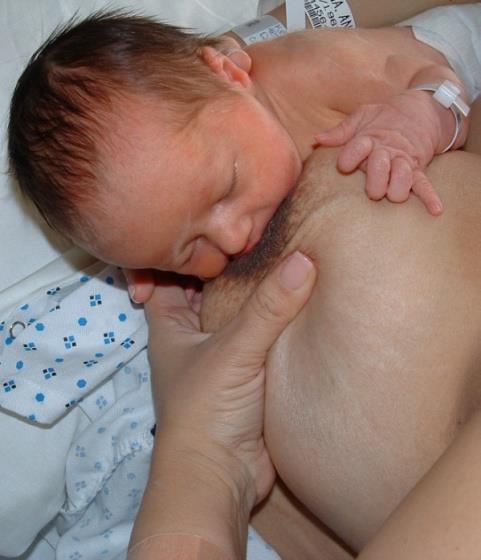
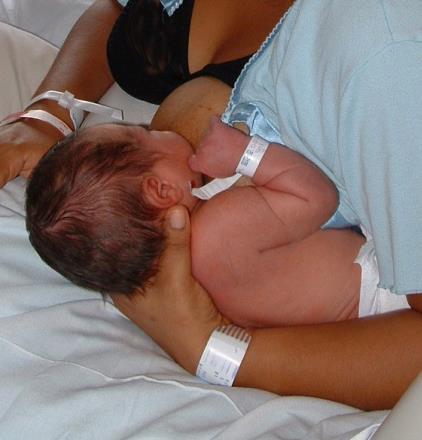
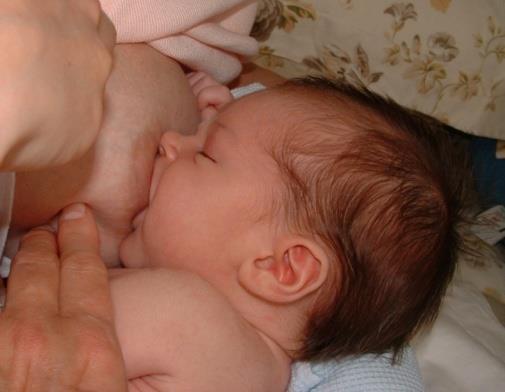
Your baby will gradually realize where he is and that food is nearby! He will slowly begin to move towards the breast. Provide support and assist a bit if it seems necessary, but avoid directing the baby. Your baby will locate the nipple and latch -on with minimal assistance from you. Let your baby lead the way.
This baby located the breast and latched on independently
Importance of Skin to Skin contact
The Importance of Skin to Skin Contact
Babies tend to feed best when they have direct contact with mother, in skin-to-skin contact. Not only does it keep baby warm, the smells and feel of the breast encourage the baby to locate the breast and begin feeding.
Mix & Match Techniques
Mix & Match Techniques
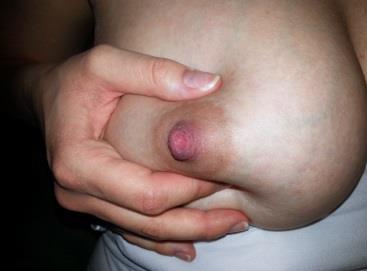
You may find that the sandwich hold would help your baby get a deeper latch-on the breast. Place thumb near the baby’s nose and fingers on the opposite side of the breast, and gently compress the breast into a “sandwich”. Listen for swallows to assure that your baby is drinking milk.
Feel free to use any of the Mother-led Latching techniques from the handout “Mother-led Latching” if they seem to work better at the time.
If you find breastfeeding painful or your baby is not gaining weight (2/3 to 1 oz per day), please seek the help of a lactation consultant to give you personalized guidance.
Although breastfeeding is natural, it is a learning process for both you and your baby. Allow yourself several weeks to perfect these techniques.
At any time that you are unsure that you are feeding correctly, seek the help of a lactation consultant or other knowledgeable health care provider. Once breastfeeding is fully established, it can be one of the most rewarding experiences of new motherhood.
Lactation Education Resources. This handout may be freely duplicated. Please be aware that the information provided is intended solely for general educational and informational purposes only. It is neither intended nor implied to be a substitute for professional medical advice. Always seek the advice of your physician for any questions you may have regarding your or your infant’s medical condition. Never disregard professional medical advice or delay in seeking it because of something you have received in this information. 2016 www.LactationTraining.com
Sandwich hold
Positioning & Latch-On: Mother-Led Latching
Information for breastfeeding families P o sitio ning & Lat ch - on : M o t her-led Lat c hing
The way you hold your baby and how he latcheson to the breast, are the keys to comfortable feeding for you and full feedings for your baby. Correct positioning and latch -on can prevent many of the common problems mother’s encounter when starting to breastfeed.
Mother-led latching is good for any time the baby needs additional assistance, is too sleepy to latch spontaneously or you have sore nipples.
Positioning your baby
Positioning Your Baby
With any position you choose to hold your baby, turn your baby completely onto his side, "tummy to tummy", so his mouth is directly in front of the breast and he does not need to turn his head at all to get to the nipple.
Position your baby with his nose to your nipple so he has to "reach up" slightly to grasp the nipple. His chin should touch the breast first, then grasp the nipple.
Getting comfortable
Getting Comfortable
Choose a comfortable chair or sofa with good support for your back. Use a footstool to bring your knees up so your lap is slightly inclined and the pressure is off the small of your back. Position pillows where ever needed to support your arms and relax your shoulders.
Look for a straight line from the baby’s ear to the shoulder to the hips. His head should not be tipped back or on his chest.
Place your baby’s lower arm around your waist. This will draw him close to you. Look for a straight line from your baby’s ears, to shoulders, to hips. His legs should curl around your waist.
Basic positions for breastfeeding
Beginner's Positions (first few days or weeks)
Cross Cradle Hold
Football Hold
Advanced Positions (after the latch-on is easy and quick)
Cradle Hold
Side Lying
The Cross-Cradle Hold
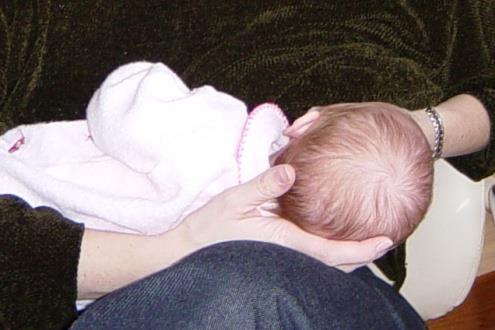
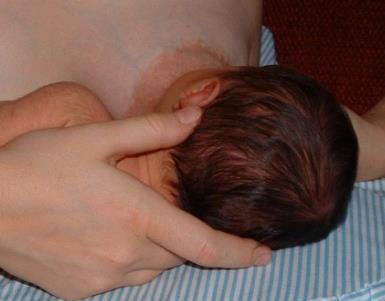
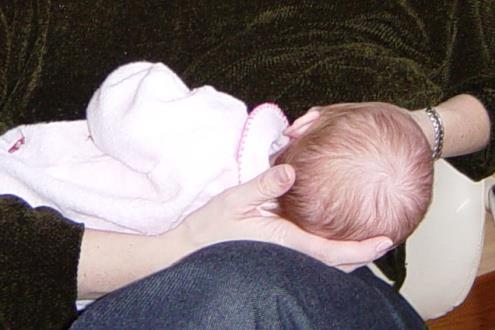
The cross-cradle hold is one of the preferred positions for the early days of breastfeeding. You will have good control of the position of your baby’s head when you place your hand behind your baby’s ears. Roll the baby to face you "belly to belly".
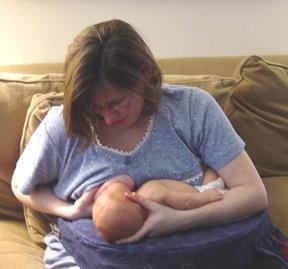
The football hold (clutch hold) is good for mothers who have had a cesarean delivery because the weight of the baby is not on the abdomen. Tuck the baby under your arm with pillow support to place the baby at breast height. Tuck a pillow or rolled receiving blanket under your wrist for support.
Place your baby’s head in the bend of your arm or on your forearm and support his body with your arm in the cradle hold. Roll the baby towards you "belly to belly".
Lying
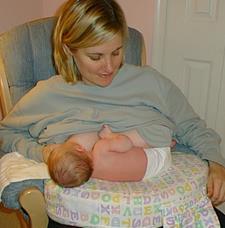
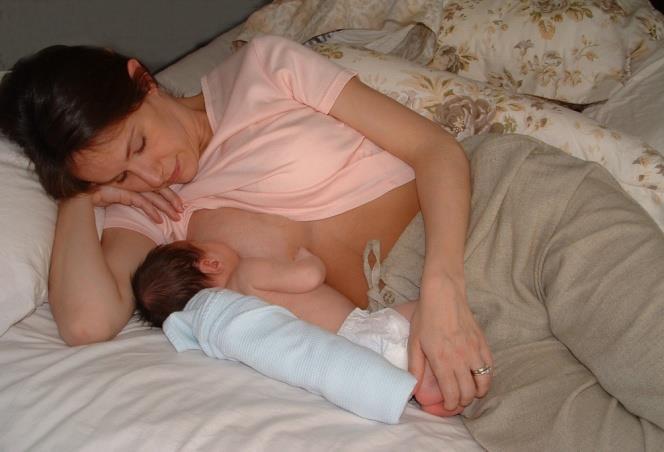
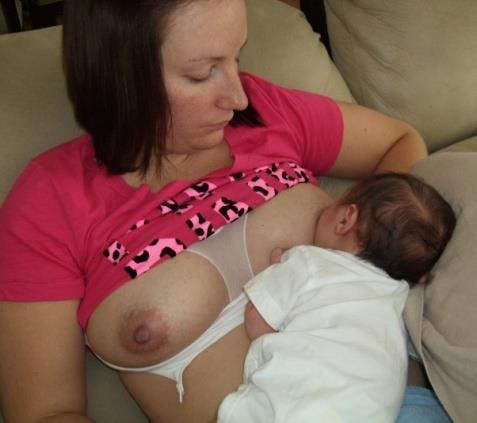
Side lying is great for getting a bit of rest while your baby nurses or if you want to avoid sitting because of soreness. Notice the pillow support and your back and the baby's back, and between your legs. Roll the baby towards you "belly to belly".
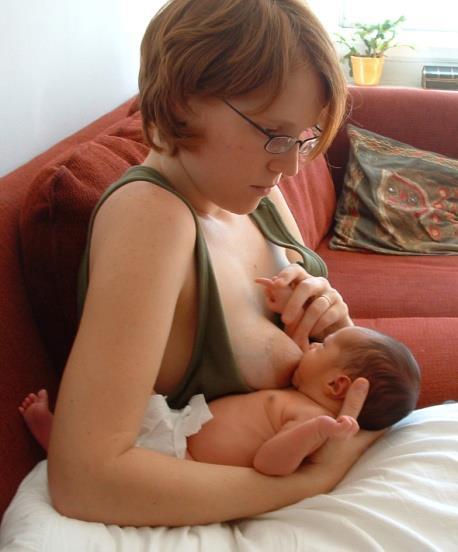
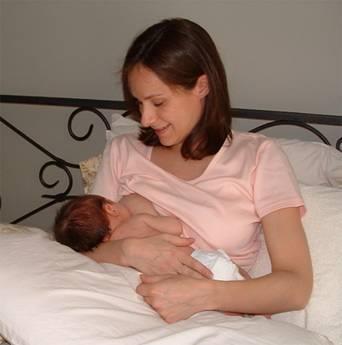
The Cradle hold is great for after the baby is nursing easily and the latch -on is easy. It is the most common position and you will often see this in pictures of breastfeeding mothers. Please wait to use this position until your baby latches easily.
Lactation Education Resources 2016. This handout may be freely duplicated. Please be aware that the information provided is intended solely for general educational and informational purposes only. It is neither intended nor implied to be a substitute for professional medical advice. Always seek the advice of your healthcare provider for any questions you may have regarding your or your infant’s medical condition. Never disregard professional medical advice or delay in seeking it because of something you have received in this information.
The Football Hold
The Cradle Hold
Latch-on
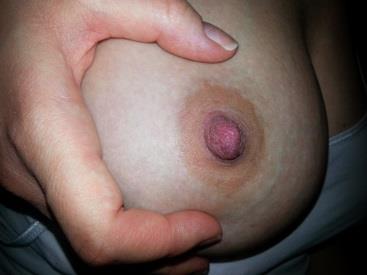
Compress your areola slightly to make a "nipple sandwich" for the baby. This will allow the baby to get a deeper latch -on. Make sure your fingers are well behind the edges of the areola (1 to 1 ½ ‘’ from the base of the nipple). Allow your baby’s head to lean back slightly so his chin touches the breast first.
An easy way to remember how to hold your hand is to keep your thumb by your baby's nose and your fingers by the baby's chin. That way you will automatically rotate your had to match the baby's positioning.
Touch your nipple to the philtrum (the skin between his nose and lips). Your baby will open wide and you can bring him on to the breast. If he doesn’t, tickle the philtrum and wait until he opens WIDE (like a yawn) and his tongue comes forward. He should get the nipple and a "big mouthful" of the areola (the dark brown part of the breast) in his mouth. Bring the baby to the breast, not the breast to the baby!
Listen for swallowing every 3 to 5 sucks (May not be apparent until your milk comes in). Once your milk is in you will notice swallowing with every suck.
Let the baby nurse for 15 -20 minutes on each breast or 20 -30 on one breast. 8 - 12 feedings each 24 hours is normal for a newborn. Refer to the handout "How do I know my baby is getting enough?" for details.
Check your latch -on
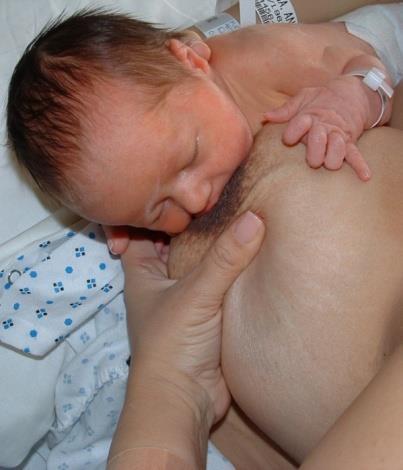
Your baby’s chin should touch the breast, his nose should be free.
Worried that your baby can’t breathe while at the breast? Don’t! If the baby truly can’t breathe, he will let go. Usually, babies can breathe easily even when pressed close to the breast because they can breathe around the "corners" of their noses. Do not press on the breast to make a breathing passage for the baby to breathe. This can distort the shape of the nipple in the baby’s mouth and contribute to soreness as well as limit the drainage from the area of the breast above your fingers. If necessary, pull the baby’s hips in closer to you. This should free up his nose.
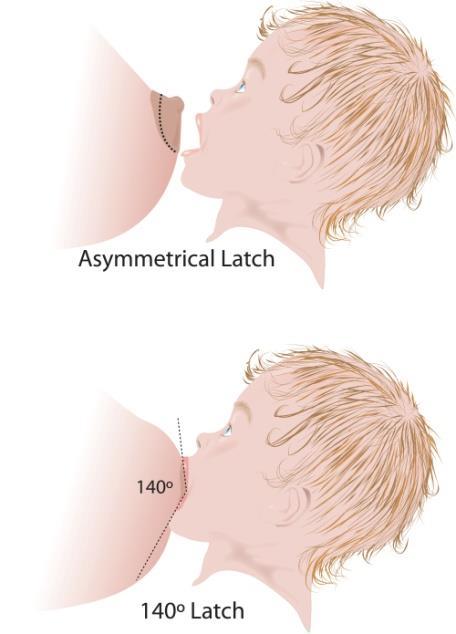
Some mothers describe pain as their baby latches-on that eases as the milk begins to flow. This will subside over time, as your body adapts to breastfeeding. If it persists, remove your baby from the breast and re -attach him. The angle of your baby's lips at the breast is greater than 140 degrees or greater.
Most of the areola is in your baby's mouth and both upper and lower lips are flanged (rolled out). You feel deep pulling sensation as the baby nurses. It should not be sharp pain or last more than a moment during the latch -on.
If you need to remove your baby from the breast, slip your finger between his lips and gums to break the suction. Wait for the suction to release, and remove him.
C he ck L ist f or
ssen ti a ls of P ositi on in g A n d L a tch -o n
Essentials of Positioning & Latch-On Checklist
Positioning
Getting Comfortable
Hold head behind ears
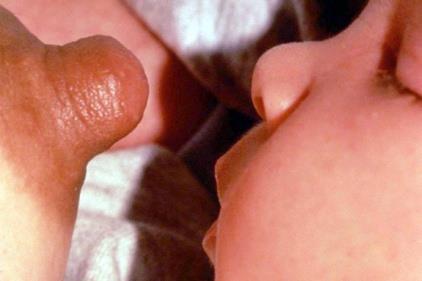
Nose to nipple
Belly to belly
Offer the breast
Offer the Breast
Sandwich hold
Stroke nipple from nose to chin rolling out lower lip
Bring baby to breast, not breast to baby
Check the latch-on
Check on the Latch
Flanged lips, open mouth to 140o
No pain, no wedged or creased nipple
Chin touching breast, asymmetrical latch-on
Assess milk transfer
Assess Milk Transfer
Wide jaw excursion
Consistent sucking
Audible swallowing (after milk comes in)
Information for breastfeeding families
Sign s of a G ood F eed in g
Signs of a Good Feeling
A good latch-on is the key to a good feeding. Regardless of the position you hold your baby, the latch-on remains the same.
Signs of a good feeding
Hearing swallowing at least every third suck once the milk comes-in. Seeing milk in the baby’s mouth
Signs of a good latch -on
Signs of a Good Latch
The baby has a deep latch with an angle where the lips meet the breast of at least 140 o
Both upper and lower lips are flanged (rolled out)
All or most of your areola is in the baby’s mouth (at least 1” from the base of the nipple). More from the bottom of the areola than the top (asymmetrical latch-on).
You are comfortable through the feeding. There may be some “latch-on” pain that subsides quickly.
There is movement in the baby’s temples with sucking and the jaw moves up and down an inch or more.
There is slight movement of your breast near the baby’s lips.
Consistent sucking with only brief pauses
The breasts are softer after feedings
Appropriate output for age. (1 wet diaper on day 1, 2 wet diapers on day 2, 3 wet diapers on day 3, 6 wet diapers on day 4 and on, and several stools each day)
Feeling strong, deep, "pulling", sucking, no sharp pain
Leaking from the other breast or feeling of a "letdown" reflex or noticing a change in the baby’s sucking rhythm from faster to slower
15 - 20 minutes vigorous sucking on each breast or 20 - 30 minutes on one side for a newborn. 5 -10 minutes for an older baby
Your baby nurses 8 -12 times per day (24 hour day). Less than 8 or more than 12 is a concern
Your baby latches-on easily with minimal attempts and stays latched-on.
Minimal weight loss during the first few days (<10% of birth weight) and return to birth weight by 2 weeks
Lactation Education Resources 2016. Worksite Perinatal Consultants. This handout may be freely duplicated. Please be aware that the information provided is intended solely for general educational and informational purposes only. It is neither intended nor implied to be a substitute for professional medical advice. Always seek the advice of your healthcare provider for any questions you may have regarding your or your infant’s medical condition. Never disregard professional medical advice or delay in seeking it because of something you have received in this information.
Information for breastfeeding families
Sto rage a n d Ha n dl ing of B reastm ilk
Storage & Handlingof Breastmilk
Working mothers or others who are pumping breastmilk for their infants should store the milk in the cleanest and safest way. It can be stored in any clean container: plastic, glass or nurser bags. Recommendations for storage temperatures and times vary greatly from one authority to another. We are recommending guidelines based on research and common sense.
Room Temperature
Room Temperature
Freshly pumped breastmilk can be kept at room temperature for 4 hours. If it will need to be kept longer, please refrigerate. Milk that has been previously chilled should be kept at room temperature for no longer than an hour or so.
Refigerated
Refrigerated
Breastmilk may be stored in a refrigerator 4 -8 days. If you think that you may not use it within that time period, freeze it. If you find you have milk that has almost reached its expiration date in the refrigerator, you may freeze it for later use.
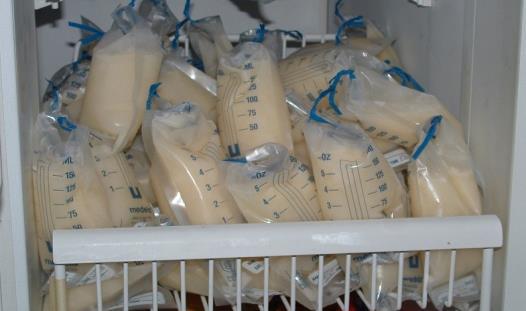
It is best to freeze milk in feeding sized quantities. If you are just starting to pump, you may not yet have an idea of what will be the right size for your baby. Freeze in 2-3 oz quantities to start. You don’t want to thaw out more milk than your baby will take in 24 hours. You can always get more if necessary, but you will be dismayed if you have to discard pumped breastmilk. After you have some experience with how much your baby takes from a bottle, you can freeze milk in that quantity.
Thawed
Thawed
Frozen
Frozen
Breastmilk may be stored in a freezer for up to 3 months and in a deep freeze for up to 12 months. The freezer is cold enough if it keeps your ice cream solid. That will be about 0o F or -20o C. It should be placed in a part of the freezer that will not be subject to changes in temperature as the door is opened and closed. If plastic nurser bags are used, they should be doubled or protected from being bumped and torn in the freezer.
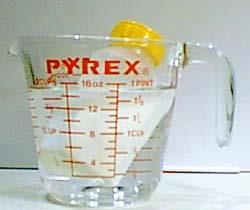
Breastmilk can be thawed lukewarm water in just a few minutes. Then it can be warmed to serving temperature in the same manner. Never make it warmer than body temperature. Never use a microwave to thaw or warm breastmilk. Discard any milk left in a bottle after a feeding. Thawed breastmilk must be discarded after 24 hours. Do not re-freeze it.
Layering Breastmilk
Layering Breastmilk
You may add “new” milk to previously chilled or frozen milk. Chill the “new” milk prior to adding it to he container of milk. The expiration date of that container of milk will be from the date of the original milk
Transporting
Transporting
Chill any milk that you pump at work either in a refrigerator or a portable cooler bag. A cooler bag can be used to transport the milk home.
Information for breastfeeding families
Hand Expression
Ha n d E xp ressio n
Hand expression is a handy skill to have whenever you need to empty your breasts and you are not with your baby or your baby is temporarily unable to breastfeed. In the first few days after birth, hand expression can be more effective at removing colostrum than using a breast pump. If your baby needs a supplement in the first week or so, use hand expression to provide the milk he needs!
Hand expression routine:
Hand Expression Routine
1. Apply heat, massage and stroke breasts
2. Position fingers behind areola
3. Press back towards chest
4. Compress fingers together to express milk
5. Relax and repeat, getting a rhythm going
6. Express for 5-7 minutes
7. Move fingers to a different position
8. Massage and stroke the breast
9. Press back towards chest
10. Compress fingers together to express milk
11. Express milk for 3-5 minutes
12. Massage and stroke breasts
13. Move fingers to a different position
14. Express milk for 1-2 minutes
15. Complete cycle takes 20-30 minutes
Watch thes videos while are are hand expressing to see the technique in action
Watch these videos while you are hand expressing to see the technique in action!
Tender and sensitive nipples are normal as you begin breastfeeding your new baby. However, very sore, cracked or bleeding nipples are not. Usually this problem is related to the way your baby latches-on to the breast. It is important that your baby get a big "mouthful" of the nipple and areola.
Positioning
Positioning
ears
Laid back breastfeeding
Recline with your baby “on top”. Use pillows to support you and your baby as needed.
This is an excellent position for feeding and may just be the trick to remedy sore nipples.
1. Hold your baby’s head behind his
2. Align him “nose to nipple”
3. Roll him “belly to belly”
Football hold
Cross-cradle hold
Latch-on
Use a “sandwich hold” to achieve a better latch -on. Gently squeeze the breast to shape it like an oval that fits deeply in your baby’s mouth.
Look for a wide mouth on the breast
If breastfeeding hurts, break the suction and try the latch-on again. Do not continue with a feeding if you experience pain.
Treatment
Correct position and latch -on
Check wide open 140o wide mouth
Apply your expressed breastmilk or purified lanolin to nipples after feeds
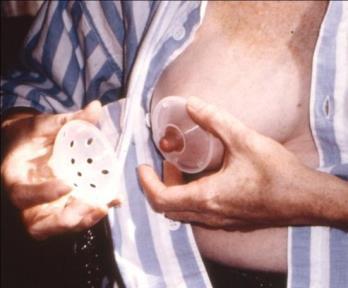
Use breast shells to protect the nipple
Look for a wide mouth on the breast
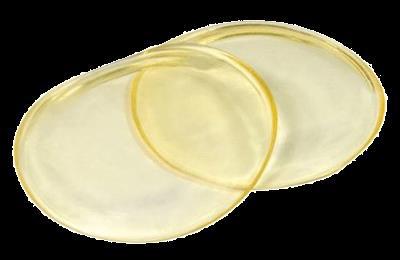
Use hydrogel dressings to speed healing
Feed for short, frequent feedings
S tart on the least sore side
Rotate the position of your baby at each feeding
If your breasts are very full, hand express some milk, use reverse pressure softening (see handout on engorgement) or use a breast pump
These measures may help you resolve uncomplicated problems with sore nipples. There are circumstances where sore nipples indicate a more severe problem. Please seek help if your problem does not resolve quickly.
Lactation Education Resources 2016. This handout may be freely duplicated. Please be aware that the information provided is intended solely for general educational and informational purposes only. It is neither intended nor implied to be a substitute for professional medical advice. Always seek the advice of your healthcare provider for any questions you may have regarding your or your infant’s medical condition. Never disregard professional medical advice or delay in seeking it because of something your have received in this information
Information for breastfeeding families
The Employed Breastfeeding Monther
T he E m ployed B r east feeding M ot her
No doubt about it, returning to work can be a stressful situation and an emotional one for you. You may experience some conflicting emotions: guilt for leaving your new baby and maybe being glad to get out the house and "life as usual" at work.
The American Academy of Pediatrics encourages mothers to provide breastmilk for the first six months of your baby's life for optimum health, and to continue for the first year or longer) as you add more solid foods to his diet after about 6 months.
The good news is you CAN do it. You will find that motherhood helps you increase your efficiency and you learn to better manage your time both at home and at work. You become more organized because there is no extra time in your day to waste!
Getting Ready
Choosing someone to care for your baby is one of your most important decisions. You may select someone close to your home or close to your workplace If care is available in your workplace, that is ideal since you could breastfeed at work.
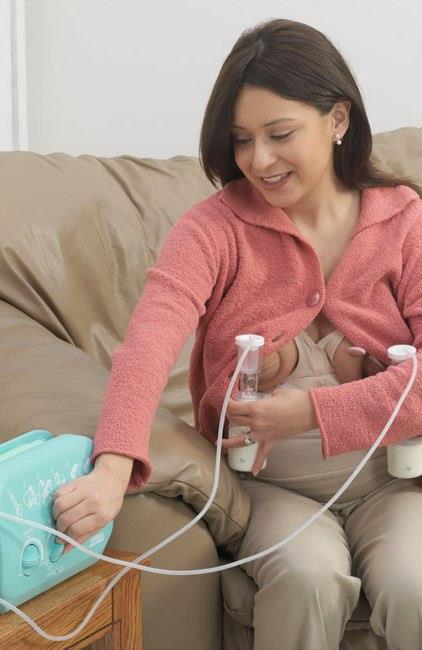
Purchase the best pump you can afford. It will be worth it. Or you may choose to rent a breast pump for as long as you plan on breastfeeding. The better quality pump you use, the better you will be able to maintain your breastmilk supply. Select one that can pump both sides at the same time.
There are hospital grade breast pumps, personal use pumps, small electric and battery operated pumps and manually operated pumps. A rental hospital grade pump or a personal use breast pump are most suitable for a mother who wishes to maintain her supply by pumping at work. Commonly recommended pumps are Medela and Ameda, but there are many other brands on the market you might select.
Talk to your employer about a private, clean place that you can use your pump. Some employers have a designated room, and some even provide a hospital grade breast pump for the use of several women. Make sure you know how to attach your pump kit and how to use the pump. You may want to do a practice run, timing how long it takes to travel, locating where you can store your milk, and using your breast pump.
Although it is not required, you may want to stockpile some milk prior to returning to work to use as a “back-up”. About 2 weeks’ worth of milk in your freezer will give you confidence (about 60 oz) that you have some breastmilk to fall back on if you are not able to pump quite enough as you get adjusted to the new routine.
Pumping
Plan to use a breast pump the same number of times that the baby will be feeding while you are gone. That may be 2-4 times. Try to maintain a routine in your scheduled pumping sessions. Avoid skipping or postponing pumping. Doing this too often will affect your milk supply. Do the best you can. If you have a long commute added to your work day, try to add another pumping session. The more you pump the more milk you will make, so make a priority of pumping on a regular basis. Pump 2-3 times per day.
Photo credit: Medela Inc
Pumping
Start the suction on low each time you pump and gradually increase the suction (over the first 2 -3 minutes) to the maximum setting that is comfortable for you. That is different for everyone. The pump is pre-set to the strength of a normal infant's suck so it is unlikely you will find it too strong. If you do, stop increasing the suction just when it begins to pinch. Too much suction can collapse your milk ducts and result in poor milk emptying.
Do a 10–15 minute session or watch for 2 -3 letdown reflexes (time when the milk is flowing faster, then it will slow down again). Pump for 2 -3 minutes after the last drops of milk. If you are pressed for time, short frequent sessions are better than just one long one.
Maintaining your breastmilk supply
Pump regularly and breastfeed when you are at home. That is the best way to keep up an abundant milk supply. If you see your supply wane during the week, breastfeed exclusively on your days off and do a bit of extra pumping if you have time.
Mother’s Milk Tea, cooked oatmeal and an occasional beer are common recommendations to increase breastmilk supply. If you need additional help, contact a lactation consultant.
Leaking
at work
Most women have no trouble with this, but it can be embarrassing. If you do occasionally leak, have a ready source of breast pads, re-usable or disposable. For more problematic leaking, try LilyPadz or Blis Leakage Inhibitor.
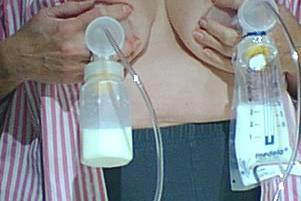
Pump directly into a feeding bottle or a plastic storage bag
Success as an employed breastfeeding mother depends on consistent pumping when not with your baby.
Your baby will thank you for your efforts!
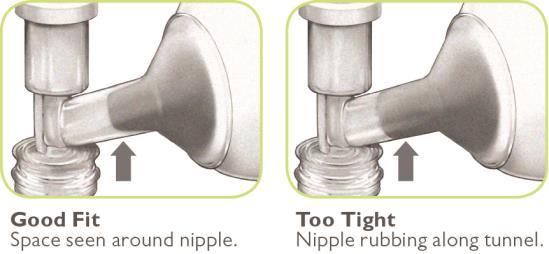
Make sure your pump kit fits you
You should see your nipple move in and out with each suction cycle. There should be no white ring round the nipple and your breasts should empty completely. If it hurts or you are not getting milk, it is probably too small and you need larger flanges. They can be obtained from hospitals, lactation consultants and online stores.
Your flange fits you if:
Your nipple moves in and out with each suction/release phase
Your breast empties all over, no pockets of hardness
The flange supports the breast and areola, none of the areola is pulled into the nipple tunnel
There is slight movement in the breast with each cycling of the pump
The nipple is not sore or cracked and there is no pressure ring or blanched skin around the nipple
Storing
your milk
You may just close your bottle of pumped breastmilk with a tightly fitting lid and put it in your purse to take home. Or you can use plastic mother’s milk bags.
Freshly pumped breastmilk is good at room temperature for 4 hours. Or you may choose to chill it for the trip home if it will be longer than 4 hours. Freezer packs are handy for this and come with most personal use pumps.
Breastmilk stored in the refrigerator is good for 5 -7 days
Breastmilk can be frozen for 3 -6 months. Once you have thawed previously frozen breastmilk, it is only good for 24 hours!
It is a good idea at first to keep milk in small quantities until you have a good idea of how much your baby will take at one time. Milk left over in the bottle must be discarded if not consumed. You will hate to do that! Choose bottles that are not made of polycarbonate due to the concerns about BPA contamination of breastmilk stored and heated in them.
Image credit: Ameda , Inc
Providing Care to Happy Eastern Kentucky Families for Generations
Visiting Hours: 9am-10pm
After 10pm, visitor passes must be obtained at the Information Desk on the 2nd Floor
OB -Limit to four (4) visitors at one time. No children under the age of 12 unless they are siblings of the newborns.
Labor & Delivery: Three (3) visitors max, no changing in or out, and no siblings allowed until after delivery.