
Everything NovemberArts


Contents: November Calendar:
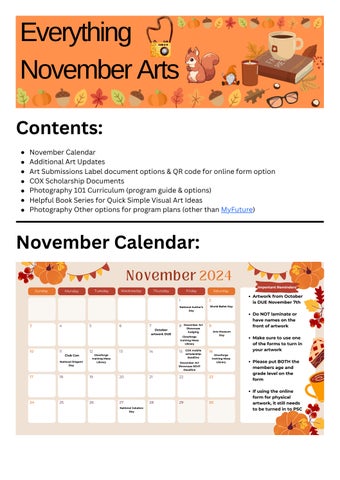
November Calendar
Additional Art Updates
Art Submissions Label document options & QR code for online form option
COX Scholarship Documents
Photography 101 Curriculum (program guide & options)
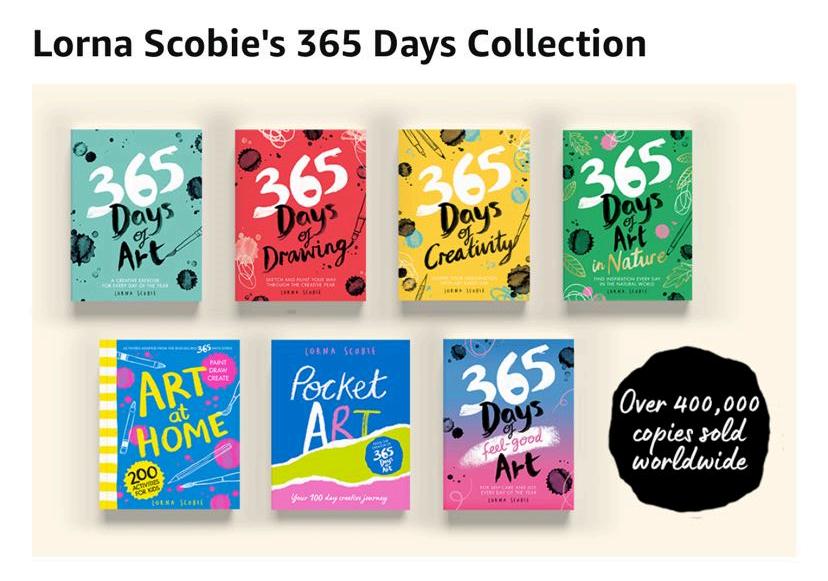
Helpful Book Series for Quick Simple Visual Art Ideas
Photography Other options for program plans (other than MyFuture)
DoNOTlaminateor havenamesonthe frontofartwork
Makesuretouseone oftheformstoturnin yourartwork
PleaseputBOTHthe membersageand gradelevelonthe form
Ifusingtheonline formforphysical artwork,itstillneeds tobeturnedintoPSC
Art Updates
All previous month’s artwork (September’s and October’s) that has not been turned in needs to be turned in by November 7th end of day.
Reminder it is one piece per month, per grade, including teens
If you have a teen specialist, it is up to your club how you choose to give the teens art programming, but they do need to have it monthly as well
Reminder that the COX Scholarship is for high schoolers (9th-12th grade) only.
Starting with November’s artwork and going forward this year, the categories of artwork will be:
Applied Arts – artwork that applies design and decoration to everyday, practical objects to make them aesthetically pleasing. Examples include Jewelry, woodwork, fashion design, and furniture design.
Digital Arts – artwork that uses digital technology as part of the creative or presentation process. It encompasses a wide range of techniques, from digital drawings, filmmaking, and illustration to photos and videos.
Literary Arts – artwork in this category involves the creative expression of thoughts, ideas, and emotions through written formats. Examples of literary art forms are fiction, nonfiction (articles, essays, speeches, prose, etc.), poetry, and scriptwriting.
Performing Arts – artwork that features a presentation to an audience and draws on voices, physical movement, and instruments to create sounds and movement. Examples of performance arts are such acting, poetry, music, and dance
Visual Arts – artwork that is primarily visual in nature drawing upon elements like colors, shapes, and textures. Examples of visual arts include ceramics, drawings, paintings, and sculptures.
Works in progress (things I’m working on for the Arts):
Art Showcase Judging this Friday Club Con organizing
Board Paperweight gifts
Checking in artwork
December version of this document
December Art Showcase details, posters, etc.
November focus: helping Swift and Guad art sta�, on call for Homes, if you need me reach out and I can help you too ��
Solving some arts tech issues and finding solutions
Connecting with resources to learn 3D printing & Glowforge basics to share with everyone
Trainings for the new year (Programming 101: Arts Edition Online, & Technology in the Arts In-Person) for Arts sta� based on the responses I received
Monthly Artwork Forms:
DO NOT put members address on this form, PLEASE!
only one of these two (or the online form) need to be filled out for physical artwork submissions
National Arts Contest Labels
National Arts Contests

Region:
Artist Full Name:
Organization Name:
Club Name:
Address (Shipping):
City/State/ZIP:
Artwork Title:
Category:
Age:
Contact Full Name:
Contact Email:
Camera Type (for photo entries only):
National Arts Contests
Region:
Artist Full Name:
Organization Name:
Club Name:
Address (Shipping):
City/State/ZIP:
Artwork Title:
Category:
Age:
Contact Full Name:
Contact Email:
Camera Type (for photo entries only):

CUSTOMFORM ARTWORK
BRANCHINFORMATION
BranchName:
NameofIndividualSubmittingArtwork:
EmailofIndividualSubmittingArtwork:
ARTWORKINFORMATION(GROUP=WRITEALL NAMESANDAGESANDGRADESINVOLVED)
Whatmonthistheartworkfrom?
Whatgradeisthispiecefor?
ArtistAge:
ArtworkTitle:
ArtistName(firstandlast):
CUSTOMFORM ARTWORK
BRANCHINFORMATION
BranchName:
NameofIndividualSubmittingArtwork:
EmailofIndividualSubmittingArtwork:
ARTWORKINFORMATION(GROUP=WRITEALL NAMESANDAGESANDGRADESINVOLVED)
Whatmonthistheartworkfrom?
Whatgradeisthispiecefor?
ArtistAge:
ArtworkTitle:
ArtistName(firstandlast):
for digital artwork or as an option for physical ones (note they still have to be turned in to PSC if you choose this option)

here is the link for this code: https://forms o�ce com/r/hS4r06m1Fq
https://app.smartsheet.com/b/form/d9b8ebdbb64a40489569583ebc8b71d2


BGCA + Cox Mobile Phone Case Design Contest 2024
Rules & Regulations
Boys & Girls Clubs of America Phone Case Design Contest: Official Rules
NO PURCHASE NECESSARY A PURCHASE OR PAYMENT OF ANY KIND WILL NOT INCREASE YOUR CHANCES OF WINNING. VOID WHERE PROHIBITED.
Official Rules
Entry Period: Wednesday, October 2
pm EST
Prize(s):
12:00 am EST – Friday, November 15th 11:59
Grand Prize: $25,000 post-secondary education scholarship to youth winner. Their Club will also receive a technology refresh via a Cox Innovation Lab grant valued at a minimum of $20,000
22 Regional Club Winners will receive a Connectivity prize package valued at a minimum of $500 How It Works
Encourage as many teens within the following Cox markets (Central Florida, Gulf Coast, Hampton Roads, Middle Georgia, Northern Virginia, Rhode Island, Roanoke, Arkansas, Acadiana, Baton Rouge, Kansas, Nebraska/Iowa, New Orleans, Oklahoma City, Tulsa, Orange County, Phoenix, San Diego, Santa Barbara, Southern Arizona, Sun Valley, and Vegas) to submit artwork for a chance to be featured as a design on a phone case to be sold in Cox Mobile stores.
Teens (grades 9 – 12 during the 2024-2025 school year)) that are active members of an officially chartered Boys & Girls Club are eligible to submit artwork. Artwork must reflect the theme of “A World Within Reach.” This theme encourages participants to envision their dreams, aspirations and the limitless possibilities that lie ahead Artwork must be designed using the phone case template and can be submitted either as a physical drawing or a digital piece, provided it fits within the template's outline Artwork must include an artist statement. An artist statement is a short-written explanation by an artist that helps people understand what their artwork means, why they created it, and what inspired them to make art. An artist statement should be between 300 words max.
Prizes • Grand Prize
: $25,000 post-secondary education scholarship to youth winner Their Club will also receive a technology refresh via a Cox Innovation Lab grant valued at a minimum of $20,000
• 22 Regional Winners: will receive a Connectivity package for their Club valued at a minimum of $500
The organization’s teen that wins the grand prize, will receive a grant for a Cox Innovation Lab, and the grant must be fulfilled by December 31, 2025 The grand prize winner awarded a scholarship will have their scholarships sent directly to their school of choice They may defer their scholarships until needed Scholarships can only be used for post-secondary educational needs.
1. Eligibility: BOYS & GIRLS CLUBS OF AMERICA PHONE CASE DESIGN BOYS & GIRLS CLUBS OF AMERICA PHONE CASE DESIGN CONTEST
CONTEST:
(the “Promotion”) is open only to entries submitted by Boys & Girls Clubs located within the following Cox markets (Central Florida, Gulf Coast, Hampton Roads, Middle Georgia, Northern Virginia, Rhode Island, Roanoke, Arkansas, Acadiana, Baton Rouge, Kansas, Nebraska/Iowa, New Orleans, Oklahoma City, Tulsa, Orange County, Phoenix, San Diego, Santa Barbara, Southern Arizona, Sun Valley, and Vegas) who satisfy the following eligibility: To be eligible to enter and win, each entry must be submitted by a local Boys & Girls Club (“Club”) employee or volunteer who must (1) be a legal resident of the 50 United States; (2) be a current Club employee or volunteer of the Club that he or she is representing; (3) be at least 18 or older (19 or older if a resident of AL or NE) time of entry/registration; and (4) have permission from the parent/legal guardian of each minor (at least 14 years of age) participating in the contest and their consent to the rules of this contest Entrants agree and acknowledge that they are entering on behalf of the Club where they are employed (“Entrant Club”) and that they have consent from the Club member(s)’ parent or legal guardian to use the member(s)’ name, design, and artist statement in the entry and as provided for in these Contest Rules. Void where prohibited by law Contest is subject to all federal, state, and local laws and regulations
2. Sponsor: The Promotion is sponsored by Boys & Girls Clubs of America and Cox (collectively, “Sponsor”), which operates or is the franchisor of the participating Cox Mobile stores (“Stores”). 6205 Peachtree Dunwoody Road, Atlanta, GA 30328
3 Timing: The Promotion begins on October 2, 2024, at 12:00 a m Eastern Standard Time ("EST") and ends on November 15, 2024, at 11:59 p.m. EST (the "Promotion Period") Sponsor’s computer is the official time-keeping device for this Promotion
4 To Participate: All entries to be submitted to the following online form We will begin accepting entries from 10/2/24 – 11/15/24. All entries must follow the standard guidelines below All submissions received through 11/15/24 will then be voted on by a panel of judges compromised by Cox corporate employees, BGCA national staff and possibly BGCA Alum. Winners will be selected based on the below grading rubric following the submission deadline. Any entry may be eliminated if the entry does not
comply with the official rules. The voting will be held on or about 12/1/24 – 01/15/25. All voting by the panel of judges will be final. The winners will be contacted on or about 2/15/25 by BGCA. Prize winners will be notified via email. Final designation as a contest prize winner depends on verification of eligibility as determined by BGCA and execution of a media and art release. Return of any notification of potential winners as undeliverable or failure to accept any prize within the specified time period will result in disqualification and forfeiture of the prize.
5 Entry Conditions and Release: By entering, each participant agrees to: (a) comply with and be bound by these Official Rules and the decisions of the Sponsor which are binding and final in all matters relating to this Promotion; (b) release and hold harmless the Sponsor, Boys & Girls Clubs of America, and each of their respective parents, stores, subsidiary, and affiliated companies, the prize suppliers and any other organizations responsible for sponsoring, fulfilling, administering, advertising or promoting the Promotion, and all of their respective past and present officers, members, directors, employees, agents and representatives (collectively, the “Released Parties”) from and against any and all claims, expenses, and liability, including but not limited to negligence and damages of any kind to persons and property, including but not limited to invasion of privacy (under appropriation, intrusion, public disclosure of private facts, false light in the public eye or other legal theory), defamation, slander, libel, violation of right of publicity, infringement of trademark, copyright or other intellectual property rights, property damage, or death or personal injury arising out of or relating to a participant’s entry, creation of an entry or submission of an entry, participation in the Promotion, acceptance or use or misuse of prize (including any travel or activity related thereto) and/or the broadcast, exploitation or use of entry; and (c) indemnify, defend and hold harmless Released Parties from and against any and all claims, expenses, and liabilities (including reasonable attorney’s fees) arising out of or relating to an entrant’s participation in the Promotion and/or entrant’s acceptance, use or misuse of prize 6 Prize and Approximate Retail Value: Participants have the chance to win the following:
• One (1) $25,000 post-secondary education scholarship to one youth winner. Their Club will also receive a technology refresh via a Cox Innovation Lab grant valued at a minimum of $20,000.
• 22 Regional Winners: will receive a Connectivity prize package valued at a minimum of $500
Prizes are non-transferable No substitutions are allowed except in Sponsor’s sole discretion. Sponsor reserves the right to substitute prizes of the same approximate retail value. Prizes consist only of items specifically listed as part of the prize. Certain conditions and restrictions may apply. All costs and expenses not specified herein,
related to any prizes, and other expenses incurred by accepting the prizes are the sole responsibility of the prize winners.
Publicity: Except where prohibited by law, participation in the Promotion and/or acceptance of a prize constitutes consent to Sponsor, BGCA and its agents’ use of Entrant Club and participating members’ first name and last initial, likeness, photograph, voice, opinions, art, statements made by or attributed to winner and/or hometown and state for promotional purposes in any media now known or hereafter discovered, worldwide, without further notice, review, approval, payment or consideration, including without limitation, the World Wide Web
7. General Conditions: By entering, all participants agree to accept and abide by the Official Rules of this Contest and the decisions of Sponsor Participants further acknowledge that, upon entry, all entries will be the exclusive property of Cox Mobile and may be shared by others and/or adapted, edited, or modified without any additional permission or consent of entrant. The winning entry may be featured in Sponsor’s locations, on Sponsor’s webpage, its social media assets, or other advertising platforms. Each participant acknowledges and agrees that such participant will not be entitled to any compensation as a result of any Sponsor or Contest Entity's use of any such similar or identical material. All entries must represent original ideas that have not been previously published; do not infringe upon the copyrights, trademarks (including but not limited to corporate logos, brand names, or intellectual property) of any entity, rights of privacy, publicity or other intellectual property or other rights of any person or entity. You agree you have obtained appropriate permissions for each person whose name is used in your entry and agree that publication of your entry via various media including websites, will not infringe on the rights of any party or otherwise be objectionable.
Entries must not have been accepted for previous publication or submitted previously in a giveaway or promotion of any kind. Any entry deemed inappropriate or unsuitable will be disqualified Entries must not contain material that is inappropriate, indecent, profane, obscene, hateful, tortious, defamatory, slanderous, libelous, violent, or illegal Entries must not contain or depict material that promotes bigotry, racism, hatred, or harm against any group or individual or promotes discrimination, including without limitation, discrimination based on race, sex, religion, nationality, disability, sexual orientation, or age.
Sponsor reserves the right in its sole discretion to disqualify any individual it finds to be tampering with the entry process the operation of the Promotion or to be acting in violation of these Official Rules or any other promotion or in an unsportsmanlike or disruptive manner. Any attempt by any person to deliberately undermine the legitimate operation of the Promotion may be a violation of criminal and civil law, and should such
an attempt be made, Sponsor reserves the right to seek damages from any such person to the fullest extent permitted by law. Sponsor’s failure to enforce any term of these Official Rules shall not constitute a waiver of that provision.
8 Limitations of Liability: The Released Parties are not responsible for: (a) any incorrect or inaccurate information, whether caused by entrants, printing errors or by any of the equipment or programming associated with or utilized in the Promotion; (b) technical failures of any kind, including, but not limited to malfunctions, interruptions, or disconnections in phone lines or network hardware or software; (c) unauthorized human intervention in any part of the entry process or the Promotion; (d) technical or human error which may occur in the administration of the Promotion or the processing of entries; or (e) any injury or damage to persons or property which may be caused, directly or indirectly, in whole or in part, from entrant’s participation in the Promotion or receipt or use or misuse of any prize If for any reason an entrant’s entry is confirmed to have been erroneously deleted, lost, or otherwise destroyed or corrupted, entrant’s sole remedy is another entry in the Promotion, provided that if it is not possible to award another entry due to discontinuance of the Promotion, or any part of it, for any reason, Sponsor at its discretion, may elect to hold a random drawing from among all eligible entries received up to the date of discontinuance for any or all of the prizes offered herein
9 Disputes: All issues and questions concerning the construction, validity, interpretation, and enforceability of these Official Rules or the rights and obligations of Entrants and Sponsor in connection with the Promotion shall be governed by and construed in accordance with the law of the State of Georgia without giving effect to any choice of law or conflict of laws rules or provisions. Any legal claims arising from or relating to the Promotion, or these Official Rules must be brought in the federal or state courts located in Atlanta, GA. All descriptive headings of sections and paragraphs are intended solely for convenience, and no provision of this Agreement is to be construed by reference to the heading of any section or paragraph. These Official Rules cannot be modified or amended in any way except in a written document issued in accordance with the law by a duly authorized representative of Sponsor. The invalidity or unenforceability of any provision of these Official Rules shall not affect the validity or enforceability of any other provision. In the event that any provision is determined to be invalid or otherwise unenforceable, or illegal, these Official Rules shall otherwise remain in effect and shall be construed in accordance with the terms as if the invalid or illegal provision were not contained herein
10. Phone Case Design Rules: DESIGN SPECIFICATIONS
Creative Prompt:
• Create a design for a phone case that goes along with the theme “A World Within Reach” by following these specifications:
o All mediums accepted (examples include, but are not limited to markers, crayon, pencil, photography, digital design, i e , Canva, paint, charcoal, etc.)
o Template: 8.5 inches x 11 inches (letter size)
o Portrait only – no landscape entries allowed
o All designs must be uploaded or scanned as a PNG, PDF or JPG and submitted through the submission form
o All images must be as clear as possible.
o This theme encourages participants to envision their dreams, aspirations and the limitless possibilities that lie ahead.

Photography 101
Important Notes:
Created for 4 program days/week for all ages, adjust as needed (example timelines at the end).

You can choose other activities for photography, but they should still stay within these themes and cover the objectives below.
After theme and objectives, there are example activities that progress and build on each other. They are resources to help guide your programming. Feel free to use them, change them, or modify as needed.
Theme 1 = Subject Matter: Character Creation & Development
Objectives = Members should learn about character design, backdrop/scenery creation, and share their inspiration with peers.
Sample Reflection Questions:
What character did you choose and why?
What inspired your character design?
What’s your character’s story?
What is the significance of the background/scenery to the character?
How did their story impact the background/scenery you chose?
How did the background/scenery add to the characters story?
What made you select this particular part of their story to showcase?
Sample Activities:
Drawing Characters
Character Design

Members will spend time drawing their characters, emphasizing details like clothing, expressions, and accessories. They can use various materials (colored pencils, markers, etc.) to make their characters vibrant and unique.
Group Character Sharing

Once drawings are complete, members gather in small groups, each sharing their character and describing why they each chose their character.
Backdrop Creation


After sharing, members will create backdrops for their characters. They can either draw or paint scenery that suits their character’s personality or story.
Character Gallery & Presentation
Host an informal “art gallery” where members display their characters and backdrops. They can take turns presenting their pieces to the group, explaining their design choices and why they chose what they did.
Creating 3D Characters (could draw and then 3D print characters and take photos of the progress as well)
Sculpting/Building Characters
Members use air-dry clay, to sculpt their characters, concentrating on individual features and details.
Building the Scene
Members use air-dry clay or drawings to create the scene around their characters.
Painting & Decorating
Once the sculptures are dry, members can paint and add unique decorations to their characters.
Group Character Sharing
Members present their 3D characters and scenes in small groups, sharing the inspiration behind their designs with their peers.
Theme 2 = Lighting: The Highs and Lows of Light
Objectives = Members should learn how lighting changes the mood and effects their photographs message.
Sample Reflection Questions:
How did lights impact your photographs story?
How did the shadows impact your photographs story?
How do shadows and lights tell your characters story?
What comes to mind when you look at the light focused photos? What about the shadow focused ones?
Which would benefit the part of your character’s story you are showcasing more and why?
Sample Activities:
Exploring the Light (highlights)
Members will experiment with using natural light from windows and other lights. They can set up their characters on a table and take pictures using different light sources to observe how light changes the mood and effect of their photograph.
Playing with Shadows (lowlights)
Have them cut out their characters (if drawings) and use a flashlight to create fun shadow puppets. They’ll take photos of the shadows cast on the wall or paper.
Light Storytelling
Members use their characters in a simple scene set up and play with different light arrangements to capture their scene the way they want it to be portrayed. Encourage

them to think about how light affects visuals.
Reflections
Take mirrors or reflective surfaces and let members examine how light interacts with their characters. They can take pictures from different angles to explore shadows and reflections.
Theme 3 = Composition & Framing
Objectives = Members should learn about composition rules (rule of thirds and balance) and how they can be used to create visually appealing and impactful photographs with their existing characters and backdrops. They should also learn about the concept of focus and how to use negative space effectively.
Important Terms Explained:
Rule of Thirds
Imagine dividing your photo into three equal parts both horizontally and vertically. Placing important things along those lines or at their intersections makes your photo more interesting.
Balance
How different elements in a photo are arranged to create a sense of stability. A balanced photo feels good to look at, while an unbalanced one can feel chaotic.
Focus
The part of the photograph that is clear and sharp, drawing the viewer's attention. Members can experiment with what they want to highlight in their photos and what they want to remain less prominent.
Negative Space
The empty space around your subject. It helps to highlight the main subject and can create a feeling of simplicity or loneliness.
Sample Reflection Questions:
How did you use the rule of thirds in your photo?
How did you make your photo feel balanced?
What parts of your photograph are in focus, and which parts are not? How did you choose that?
How did you use negative space to emphasize your subject?
Sample Activities:
Composition Challenge
Start with a simple subject that everyone can access (like a common object or a nature item) to practice composition techniques. Transition to using their existing characters and backdrops. Members photograph their characters using the composition techniques discussed (e.g., rule of thirds and balance).
Focus Exploration

Members take photos focusing on specific parts of their scenes. They can decide which elements they want to be sharp and clear and which they want to be softer or less defined.
Dynamic Angles
Members take photos of their characters and scenes from various angles (low, high, bird's-eye, worm's-eye). They can discuss how the chosen angle alters the story or mood of the photograph.
Negative Space Exploration
Members create simple scenes with their characters and experiment with negative space. They can discuss how this empty space affects the overall feel of the photo and emphasizes their subject. They can add and remove elements they’ve created (like the background, etc.) from their photographs.
Theme 4 = Storytelling & Displaying
Objectives = Members should learn how to edit & then present their photography. They will take their final photographs, edit, print their edited photographs and then create displays for their artwork, allowing them to take home a personalized keepsake.
Important Terms Explained:
Storytelling
Using photographs to share a narrative or express an idea. Each photo can represent a moment in a larger story.
Framing
The way a photo is presented, which can enhance its visual appeal and focus the viewer's attention on the subject
Decoration
The process of adding personal touches to an object to make it unique and expressive.
Sample Reflection Questions:
What story does your photo tell?
How did you choose to decorate your frame, and what does it represent?
How does framing your photo change the way it looks?
What is your favorite part of your photo and frame, and why?
What does photography mean to you now?
What was your favorite part of learning about photography and why?
Sample Activities:
Cohesive Final Photo Creation
Members will use everything they have learned in the previous themes to create a final photo. They will apply composition techniques, focus, and negative space to capture an image that tells a story. This could involve using their characters, backdrops, and any other elements they have access to.
Editing

After capturing their final photo, members will print their photographs and be introduced to basic editing techniques. They can adjust brightness, contrast, cropping, and any other enhancements to improve their images. This helps them refine their storytelling through editing.
Popsicle Stick Camera Frame Creation
Members will create popsicle stick frames designed to look like cameras. They can assemble the frame using popsicle sticks, glue, and other supplies. After creating the frame, they can decorate it the way they want, using markers, stickers, or other craft materials to express their style.
Final Touches
After constructing and decorating their frames, members will insert their printed photos and add final decorations to the frames. They can personalize their frames to reflect their photo's story and their artistic expression.
Quick & Simple Art Activities:
This is a great book series, doesn’t cost a lot but o�ers quick and easy yet creative activities It’s a great resource if an art sta� is out as well. I would recommend making copies and reusing the books.
Photography Activity Options:
Activity 17: Alphabet Photography (Ages 6-9)
SessionObjective:Youthwillexplore photographyandtheideaofperspectiveby takingpicturesofeverydayobjectsthatform theshapeofletters
Preparation
FortheFacilitator:
Read through the entire activity before facilitating
Review the key terms for the activity
Review the Alphabet Photography website, and ensure it will open on all computers
Test the “create a word” function at the top of the page to ensure it works on all computers
Ensure all digital cameras are fully charged
Ensure a memory card is placed in each camera
Check that your facilitator computer can open and display the memory cards you are using in the cameras
Ensure your screen or projector can display a digital image
RoomSetup:
Set up your computer or projector to display digital images from the cameras’ memory cards.
Openalphabetphotography comoneachcomputer
Click “create a word” at the top of the page to open the correct page on the website
Place all cameras on a table, turned off
WarmWelcome
Greet youth by name as they enter your program area. Engage in meaningful conversation
CommunityBuilder:AlphabetBodies
•
Say: “Today we are going to see if we can make letters using our bodies We all need to find a partner So look around and find someone wearing the same color as you Ready? Go!”
Say: “Now that you have a partner, I am going to call out a letter Work with your partner to make your bodies into that letter ”
60 minutes
YOUTH ARTS ACTIVITY GUIDE
Supplies Needed
Internet access
• Computer with web browser (1 per 2 youth)
• Digital cameras (1 per 2 youth)
• Memory cards that fit camera (1 for each camera)
None
• Computer with slot for memory card (1 for facilitator use)
• Computer screen or projector to show digital photographs
Links to Resources
Alphabet photography website for use in MainActivity:alphabetphotography com
Social-Emotional Skills
• Self-Confidence
• Curiosity
• Communication
• Collaboration With Peers
Creative Skills
• Imagination
• Creativity 10 -25
Key Terms
• Inspiration: Ideas or a feeling to try something by seeing what someone else has done before
• Perspective: The way you see something; point of view
Digital Arts
Ages 6-9
Photography
Ages 6-9
Photography
Ask: “Would someone volunteer to do an example with me?” Choose a young person to model a letter. Say: “We are going to make the letter M ” Lift your arms in the air and stand facing the volunteer Bend at your waist to the ground toward the volunteer Instruct the volunteer to face and copy you to make a letter M –your hands should meet in the middle
Say: “Thank you for volunteering! Now its everyone’s turn to try.”
Call out several letters, giving 30-45 seconds before calling a new letter (e g , X, A, T, V, H)
Ask: “How did it feel to work together with your partner?”
Say: “Now it’s time for us to start our activity Everyone, please find a seat at a computer with your partner.”
Step-by-Step Directions 3 766
Main Activity: Letters in Perspective
Introducing Youth to the Activity (35 minutes)
Say: “Today we are going to use cameras to take digital photographs. Let’s look around to see if we can find objects shaped like letters of the alphabet ”
Step 1
: View inspiring images.
• Say:
“Before we start taking our own photographs, let’s get some inspiration from the Alphabet Photography website Inspiration is when you get ideas or a feeling to try something by seeing what someone else has done before On the computer in front of you, the website is open for you to try Type in a word, or letters, and click ‘create my word’ to see examples of alphabet photography.”
Allow three to five minutes for youth to explore making different words.
Ask participants: ›
“What types of objects do you see in these pictures?”
“Is it easy to see the letter in each of these photographs?”
“What is making it easy or difficult to see the letters?”
“Do you see things around the room that might look like a letter?”
“What are they?”
Say: “The photographers who take these pictures work hard to find a different perspective when they look at things Perspective is the direction or angle that you look at something from ”
• •
Take the photos.
“Now that we have some inspiration, let’s try taking some of our own photos You and your partner will get a camera to share Each person will get a chance to take pictures. When it is time to switch turns, I will say, ‘Switch ’”
Pass out a camera to each pair
› › ›
• Say: Step 3:
Explain any specific technology rules your Club may have in place Here are some example policies.
Wear the camera strap when holding the camera
Before you take a picture of a person, ask them if it is OK to do so.
Turn the camera off when you are finished Return the camera to the table when you are done
• • • Allow Call out: Walk
10-15 minutes for groups to take photographs.
“Switch!” every three to five minutes around the room checking on progress, and use the following prompts
› › › ›
• Say:
•
• • Step 2:
“Which letters have you found so far?”
“Have you tried changing the way you look at that?”
“How could that change your perspective?”
“What is your favorite photograph so far?”
“How are you and your partner working together?”
• •
Display your photos
“Now it’s time for us to see each other’s photographs Please bring your cameras to me and then have a seat with your partner.”
Remove memory cards from cameras and open the image files on your computer
Share the images on the screen or projector
Ask participants:
› › › “Can you tell which letter this is?”
“Which group took this photo?”
“What letter is it?”
Repeat this step with several photographs from each camera. Say: “Now that we have shared our photos with each other, let’s talk about what we did today ”
Ages 6-9 Photography
•
Reflection
Facilitator Note: “What” questions ask about what happened during the activity; “So What” questions ask why the learnings from the activity were important; “Now What” questions ask how to apply the learnings of the activity to “real life ” Ask youth the following questions to help them reflect on the activity
• What? – “What are some letters we found today? Where did we find them?”
Recognition (2 minutes) (5 minutes) (3 minutes)
• • Ask youth to clean up the space and be sure to put all the materials in designated spaces
So What? – “So what happened when we looked at things from a different perspective?”
Now What? – “Now what could happen if we looked at other things from a new perspective?”
Give youth a minute or two to make their handshakes.”
Closing
• • • Say: “Today let’s recognize your partners for working together by making a special handshake Take a minute to do a special handshake with your partner and say, ‘Thanks ’”
Provide youth with clear instructions for the transition to their next program area or activity
2 1
Activity 18: Alphabet Photography (Ages 10-12)
Session Objective: Youth will explore perspective photography by taking pictures of everyday objects that form the shape of letters to create words.
Preparation
For the Facilitator:
Read through the entire activity before facilitating
Review the key terms for the activity.
Review the Alphabet Photography website, and ensure it will open on all computers
Test the “create a word” function at the top of the page to ensure it works on all computers
Ensure all digital cameras are fully charged
Ensure a memory card is placed in each camera
Check that your facilitator computer can open and display the memory cards you are using in the cameras
Room Setup:
60 minutes
Supplies Needed
• Internet access
• Computer with web browser (1 per 2 youth)
• Digital cameras (1 per 2 youth)
• Memory cards that fit camera (1 for each camera)
None
• Computer with slot for memory card (1 for facilitator use)
• Computer screen or projector to show digital photographs
Links to Resources
Alphabet photography website for use in Main Activity: alphabetphotography.com
Social-Emotional Skills
• Self-Confidence
• Curiosity
• Communication
• Collaboration With Peers
Creative Skills
• Imagination
• Creativity 10 -25
Set up your computer or projector to display digital images from the cameras’ memory cards.
Open alphabetphotography.com on each computer.
Click “create a word” at the top of the page to open the correct page on the website
Place all cameras on a table, turned off
Warm Welcome
Greet youth by name as they enter your program area Engage in meaningful conversation
Community Builder: Alphabet Bodies
• •
Ensure your screen or projector can display a digital image (2 minutes) (10 minutes)
Say: “Today we are going to see if we can make letters using our bodies We all need to find a partner So look around and find someone wearing the same color as you. Ready? Go!”
Give youth a chance to find their partners.
Key Terms
• Inspiration: Ideas or a feeling to try something by seeing what someone else has done before
• Perspective: The way you see something; point of view
Ages 10-12
Photography
Say: “Now that you have a partner, I am going to call out a letter Work with your partner to make your bodies into the shape of that letter ”
Ask: “Would someone volunteer to do an example with me?”
Choose a young person to model a letter
Say: “We are going to make the letter M”
Lift your arms in the air and stand facing the volunteer
Bend at your waist to the ground toward the volunteer
Instruct the volunteer to face and copy you to make a letter M – your hands should meet in the middle
Say: “Thank you for volunteering! Now it’s everyone’s turn to try ”
Call out several letters, giving 30-45 seconds before calling a new letter (e g , X, A, T, V, H)
Ask: “How did it feel to work together with your partner?”
Say: “Now it’s time for us to start our activity. Everyone, please find a seat at a computer with your partner ”
Main Activity: Letters in Perspective Introducing Youth to the Activity (35 minutes)
Say: “Today we are going to use cameras to take digital photographs Let’s look around to see if we can find objects shaped like letters to make words.”
Step-by-Step Directions
Step 1:
• Say:
View inspiring images
“Before we start taking our own photographs, let’s get some inspiration from the Alphabet Photography website Inspiration is when you get ideas or a feeling to try something by seeing what someone else has done before On the computer in front of you, the website is open for you to try. Type in a word, or letters, and click ‘create my word’ to see examples of alphabet photography ”
Allow three to five minutes for youth to explore making different words
Ask participants: › › › › ›
“What types of objects do you see in these pictures?”
“Is it easy to see the letter in each of these photographs?”
“What is making it easy or difficult to see the letter?”
“Do you see things around the room that might look like a letter?”
“What are they?”
Say: “The photographers who take these pictures work hard to find a different perspective when they look at things Perspective is the direction or angle that you look at something from ”
• • • •
•
Take the photos.
“Now that we have some inspiration, let’s try taking some of our own photos First, you and your partner need to decide what word you are trying to find the letters to make. For example, you might choose the word ‘Club’ or ‘happy ’”
Give youth one or two minutes to brainstorm a word
Say: “You and your partner will get a camera to share Each person will get a chance to take pictures. When it is time to switch turns, I will say, ‘Switch ’”
Pass out a camera to each pair
Explain any specific technology rules your Club may have in place
› › › ›
• Say: Step 3:
Here are some examples
Wear the camera strap when holding the camera
Before you take a picture of a person, ask them if it is OK to do so.
Turn the camera off when you are finished
Return the camera to the table when you are done
• • Allow Call out: Walk
10-15 minutes for groups to take photographs
“Switch!” every three to five minutes around the room checking on progress, and use the following prompts
› › › › ›
• Say:
•
• • • • Step 2:
“Which letters have you found so far?”
“Have you tried changing the way you look at that?”
“How could that change your perspective?”
“What is your favorite photograph so far?”
“How are you and your partner working together?”
Display your photos
“Now it’s time for us to see each other’s photographs Please bring your cameras to me and then have a seat with your partner ”
Remove memory cards from cameras and open the image files on your computer
Share the images on the screen or projector
Ask participants:
› › › “Can you tell which letter this is?”
“Which group took these photos?”
“What word were you photographing?”
Repeat this step with several photographs from each camera
Say: “Now that we have shared our photos with each other, let’s talk about what we did today ”
Reflection
Recognition (2 minutes) (5 minutes) (3 minutes)
Provide youth with clear instructions for the transition to their next program area or activity. 4
Facilitator Note: “What” questions ask about what happened during the activity; “So What” questions ask why the learnings from the activity were important; “Now What” questions ask how to apply the learnings of the activity to “real life ” Ask youth the following questions to help them reflect on the activity
What?
– “What are some letters we found today? Where did we find them?”
So What? – “So what happened when we looked at things from a different perspective?”
Now What? – “What could happen if we look at other things from a new perspective?”
Say: “Today let’s recognize our partners for working together by making a special handshake Take a minute to make up a special handshake with your partner and say, ‘Thanks!’”
Give youth one or two minutes to make their handshakes ”
Closing
Ask youth to clean up the space and be sure to put all the materials in designated spaces
Activity 19: People of Our Club (Ages 6-9)
Session Objective: Youth will explore portrait photography by practicing taking “selfies,” or self-portraits. Preparation
For the Facilitator:
Read through the entire activity before facilitating.
Review the key terms for the activity.
Print the handout: People of Our Club Questionnaire (Ages 6-9) for each artist
Review the handout to prepare to assist youth
Ensure all digital cameras are fully charged.
Ensure a memory card is placed in each camera.
Turn on Place Place Place Choose all computers all cameras on a table, turned off. a handout and pencil at each seat scissors and a glue stick at each seat a wall to hang youths’ work when completed.
Warm Welcome
(2 minutes)
Greet youth by name as they enter your program area Engage in meaningful conversation
Community Builder: Strike a Pose
Room Setup: •
(5 minutes)
Say: “Today we are going to practice striking a pose A pose is the way we position our bodies when someone is taking our picture
Everyone is going to start by finding a partner One of you will need to act like the photographer, and the other is going to pose
When I say, ‘Strike a Pose!’ the person posing will pose, and the photographer is going to take their picture When I say, ‘Switch!’ you are going to switch who is the photographer and who is posing ” Ask: “Is everyone ready to try?”
Listen for all youth to say they are ready
Call out the two prompts in random order, going faster and faster between rounds (e.g., pose, pose, pose, switch, pose, switch, pose, pose, switch, pose, pose, pose)
Supplies Needed
• Pencils (1 per artist)
• Paper (1-2 per artist)
• Digital cameras (1 per artist)
• Scissors (1 per artist)
• Glue sticks (1 per artist)
• Memory cards that fit camera (1 for each camera)
• Computer with slot for memory card (1 per artist)
• Color printer to print portraits
• Tape (1 roll to hang work up)
Links to Resources
None 60 minutes
Social-Emotional Skills
• Self-Expression
• Self-Awareness
• Communication
• Respect for Others 10 -25
Creative Skills
• Imagination
• Creativity
Key Terms
• Self-portrait: A piece of art that artists create of themselves
• Background: The environment or scene behind something
6-9
Ages 6-9
Photography
• •
participants:
“How did it feel to pose?”
“How did it feel to be photographed?”
“Now it’s time to start our activity Please find a seat ”
Main Activity: People of Our Club
Introducing Youth to the Activity (35 minutes)
Say: “Today we are going to practice taking a self-portrait A self-portrait is an image a photographer takes of themselves. Sometimes people call it a ‘selfie ’”
Ask participants:
› ›
“Has anyone in this group ever taken a selfie before?”
“What was it like?”
Step-by-Step Directions
Step 1:
Take your selfie
• • • Say: Pass out Explain
• • • Ask › › Say:
“Let’s start taking some of our own photos ” cameras to each artist. any specific technology rules your Club may have in place Here are some examples
› › › › Wear the camera strap when holding the camera.
Before you take a picture of a person, ask them if it is OK to do so
Turn the camera off when you are finished
Return the camera to the table when you are done
Say: “We need to stay in this space while we take our selfies, but look around and think about what you might want to be in the background of your selfie The background includes the things behind you that make a scene ”
• • Allow Walk
10-15 minutes for youth to take photographs around the room checking on their progress, and use the following prompts
› › › › “Which selfie is your favorite so far?”
“Have you tried changing the way you pose in your selfie?”
“How could you try a new pose?”
“Have you tried different backgrounds in your selfie?”
•
Choose your favorite selfie.
• Say:
“Now it’s time to look through the photos you took and choose your favorite Please take your camera and head to your seat.”
Instruct youth to remove memory cards from the cameras and open the image files on their computers
• • • • Ask: Say: Allow Say: Step 3:
•
•
“How will you decide which selfie you like best?”
“Look at your pose and the background of each photograph ” five minutes for youth to choose their favorite photograph.
“Keep your favorite photograph open on your screen ”
Tell the story.
• • Say: Read Give Walk
•
•
“Our last step today is filling out the questionnaire at your seat.” the questions from the handout aloud for youth youth five to 10 minutes to fill out their answers to the questions around the room and save each of the favorite photograph images youth have open on their screens.
› › › You may choose to save them in a shared folder, like Google Drive, or on a thumb drive
Save to a location where you can print them during the next step Suggested file naming: Youth First Name Selfie
Call out: “You have five minutes left to finish your questionnaire ” Ask: “What steps do you still have for your writing to feel finished to you?”
• Print Step 4:
each of the favorite photos in color, if available.
Finish your piece
• Say:
• Step 2:
“Let’s add a photo to your questionnaire I will give each of you a photograph to cut out and glue into the space on your paper ” Allow three to five minutes for youth to glue their photographs
(8
Facilitator Note: “What” questions ask about what happened during the activity; “So What” questions ask why the learnings from the activity were important; “Now What” questions ask how to apply the learnings of the activity to “real life ” Ask youth the following questions to help them reflect on the activity
• • • What? – “What self-portrait did you choose as your favorite?”
Reflection Recognition (2
So What? – “So what story does your photo tell about you?”
Now What? – “How can we use images to communicate about ourselves and others?”
minutes) (5 minutes)
Give youth the remaining time to hang their photographs
Closing
• • • • Say: “To recognize your hard work today, let’s hang your photographs up in the room That way everyone can see your selfies and learn more about you!”
minutes)
Ask youth to clean up the space and be sure to put all the materials in designated spaces
Provide youth with clear instructions for the transition to their next program area or activity
Activity Handout: People of Our Club Questionnaire (Ages 6-9)
About Me ‘Selfie’:
My favorite color is:
The school I go to is:
One special thing I did this year was:
Glue Selfie HERE
BOYS & GIRLS CLUBS OF AMERICA
Activity 20: People of Our Club (Ages 10-12)
60 minutes
Supplies Needed
• Pencils (1 per artist)
• Paper (1-2 per artist)
• Digital cameras (1 per artist)
• Scissors (1 per artist)
• Glue sticks (1 per artist)
• Memory cards that fit camera (1 for each camera)
• Computer with slot for memory card (1 per artist)
• Color printer to print portraits
• Tape (1 roll to hang work up) Pages 92
Links to Resources
None
• Self-Expression
• Self-Awareness
• Communication
• Respect for Others 10 -25
Creative Skills
• Imagination
• Creativity
Key Terms
• Self-portrait: A piece of art that artists create of themselves
• Background: The environment or scene behind something
Digital Arts
Ages 10-12
Photography
Session Objective: Youth will explore portrait photography by practicing taking “selfies,” or self-portraits. Preparation
For the Facilitator:
Read through the entire activity before facilitating.
Review the key terms for the activity.
Print the handout: People of Our Club Questionnaire (Ages 10-12) for each artist
Review the handout to prepare to assist youth
Ensure all digital cameras are fully charged. Ensure a memory card is placed in each camera.
Room Setup:
Turn on Place Place Place
Choose all computers all cameras on a table, turned off. a handout and pencil at each seat scissors and a glue stick at each seat a wall to hang youths’ work when completed.
Warm Welcome
(2 minutes)
Greet youth by name as they enter your program area Engage in meaningful conversation
Community Builder: Strike a Pose
(5 minutes)
Say: “Today we are going to practice striking a pose A pose is the way we position our bodies when someone is taking our picture Everyone is going to start by finding a partner ”
Allow youth one minute to find their partners
Say: “Now one of you will need to act like the photographer, and the other is going to pose When I say, ‘Strike a Pose!’ the person posing will pose, and the photographer is going to take their picture When I say, ‘Switch!’ you are going to switch who is the photographer and who is posing ”
Ask: “Is everyone ready to try?”
Listen for all youth to say they are ready.
• •
•
Call out the two prompts in random order, going faster and faster between rounds (e.g., pose, pose, pose, switch, pose, switch, pose, pose, switch, pose, pose, pose)
Ask participants:
› › “How did it feel to pose?”
“How did it feel to be photographed?”
Say: “Now it’s time to start our activity Please find a seat ”
Main Activity: People of Our Club
Introducing Youth to the Activity (35 minutes)
•
•
Say: “Today we are going to practice taking a self-portrait A self-portrait is an image a photographer takes of themselves Sometimes people call it a ‘selfie.’”
Ask participants:
› › “Has anyone in this group ever taken a selfie?”
“What was it like?”
Step-by-Step Directions
Step 1:
Take your selfie
•
• • Say: Pass out
“Let’s start taking some of our own photos ” cameras to each artist
Explain
any specific technology rules your Club may have in place. Here are some examples
› › › › Wear the camera strap when holding the camera
Before you take a picture of a person, ask them if it is OK to do so
Turn the camera off when you are finished.
Return the camera to the table when you are done
• • • Allow Walk
Say: “We need to stay in this space while we take our selfies. Now, look around and think about what you might want to be in the background of your selfie The background includes the things behind you that make a scene.”
10-15 minutes for youth to take photographs around the room checking on their progress, and use the following prompts
› › › › “Which selfie is your favorite so far?”
“Have you tried changing the way you pose in your selfie?”
“How could you try a new pose?”
“Have you tried different backgrounds in your selfie?”
•
•
•
•
•
• • •
Step 2:
• Say:
Choose your favorite selfie. “Now it’s time to look through the photos you took and choose your favorite Please take your camera and head to your seat.”
Instruct youth to remove memory cards from cameras and open the image files on their computers
Ask: “How will you decide which selfie you like best?”
Say: “Look at your pose and the background of each of your photographs ”
Allow five to seven minutes for youth to choose their favorite photograph.
• Say:
Step 3:
“Keep your favorite photograph open on your screen ”
Tell the story
• Say:
“Our last step today is filling out the questionnaire at your seat ”
• Read
• Give
• Walk
the questions from the handout aloud for youth youth five to 10 minutes to fill out answers to the questions around the room and save each of the favorite photograph images youth have open on their screens.
› › ›
You may choose to save them in a shared folder, like Google Drive, or on a thumb drive.
Save them to a location where you can print them during the next step
Suggested file naming: Youth First Name Selfie
Give youth a three-minute warning before time for writing is up.
Call out: “There are five minutes left to finish your questionnaire ”
Ask: “What steps do you still have for your writing to feel finished to you?”
Step 4:
• Say:
each of the favorite photos in color, if available
Finish your piece
“Let’s add our photos to our questionnaire I will give each of you your photograph to cut out and glue into the space on your paper ”
Allow three to five minutes for youth to glue their photographs
Ages 10-12
Photography
Reflection
Facilitator Note: “What” questions ask about what happened during the activity; “So What” questions ask why the learnings from the activity were important; “Now What” questions ask how to apply the learnings of the activity to “real life ” Ask youth the following questions to help them reflect on the activity
• • • What? – “What self-portrait did you choose as your favorite?”
Recognition (2 minutes) (8 minutes) (5 minutes)
So What? – “So what story does your photo tell about you?”
Now What? – “How could you pose differently in pictures to change the story you tell about yourself?”
Give youth remaining time to hang their photographs
Closing
Ask youth to clean up the space and be sure to put all the materials in designated spaces
• • • • Say: “To recognize your hard work today, let’s hang your photographs up in the room That way everyone can see your selfies and learn more about you!”
Provide youth with clear instructions for the transition to their next program area or activity
Activity Handout: People of Our Club Questionnaire (Ages 10-12)
About Me ‘Selfie’:
My favorite color is:
The school I go to is:
One special thing I did this year was:
(name)
Glue Selfie HERE