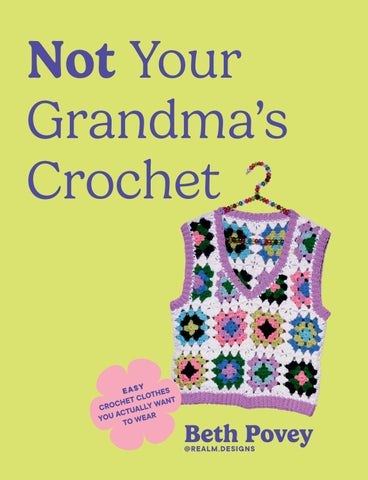
Not Your Grandma’s Crochet
E A S Y THES T CLO ANT E H C CRO TUALLY W AC YOU TO WEAR
Beth Povey @REALM.DESIGNS
SKILL BUILDERS 001
002 NOT YOUR GRANDMA’S CROCHET
Not Your Grandma’s Crochet
Not Your Grandma’s Crochet
E A SY T H E S LO T ET C H C WAN O Y L CR L A ACTU EAR U O Y TO W
Beth Povey
Contents
006
Skill Builders
All out summer 089 holiday
008
Before you begin
092
Sunglasses case
010
Essential crochet stitches
096
Summer flower top hat
014
Finishing your pieces
102
Hold my ruffle bag
016
Changing yarn
108
Daisy chain bag
018
“Join as you go” (joining pieces together) 117
Chilled 023 and comfy 026
Coaster
030
Bookmark
034
Granny squares & stripes cardigan
046
Raglan short-sleeved sweater
057
Out and about in the city
060
Granny stripe collar
066
Grandad’s vest
078
Love heart scrunchie
082
Retro flower bag
Cozy winter vibes
120
Retro flower scarf
126
Retro flower sweater
140
Mittens
146
The Wally hat
151
Festival ready
154
Miniskirt
162
Checked flower vest
174
Granny square hat
180
Granny square crossbody bag
186
Thank you
188
Project notes
Skill Builders
SKILL BUILDER
Before You Begin
US CROCHET TERMS AND ABBREVIATIONS Slip knot Slip stitch (ss) Chain (ch) Single crochet (sc) Half double crochet (hdc) Double crochet (dc) Treble crochet (tr) Single crochet 2 together (sc2tog) Double crochet 2 together (dc2tog) Front post double crochet (fpdc)
Tension and Gauge It is super important to get your tension correct. If you do not, the size of the piece and the amount of yarn needed will be affected. It may feel time consuming to make a gauge swatch but it can save you A LOT of time in the long run. A gauge swatch is a sample square made with your chosen yarn and the stitch used in the pattern to create the fabric. Everyone’s tension is different, so to check if your tension is correct for the pattern you need to make a gauge swatch. To make a gauge swatch, look at the pattern to find out what hook size and stitch is needed. Usually tension/ gauge is measured in 4" X 4" square but I would always recommend making your swatch bigger (5"–6") as this will give you a more accurate swatch. Once your gauge swatch is complete, lay it out flat
and measure how many stitches and rows are in 4" X 4" (or the measurements the pattern shows). If you have the right amount of stitches that’s great! If the amount of stitches is fewer than what is stated, go up a hook size; if the number of stitches is more, go down a hook size. Repeat the swatching process until you have the right tension. Sizing All the patterns in this book show you how to make sizes XS–5XL. To find the best size for you, measure around the fullest part of your bust. Use the table in the pattern to find which size will work best for you. If the design is a tight-fitting piece but you would prefer it to be more oversized, go up a size or two and vice versa.
SKILL BUILDERS 011
SKILL BUILDER
Essential crochet stitches These are the stitches you need to know to be able to create the crochet patterns in this book. Once you have the basics, you should be able to make pretty much anything!
Slip knot This is used to attach your yarn to your hook. Create a loop with your yarn and insert your hook into the loop, pull through the working end of the yarn. Pull the tail end of the yarn to tighten the loop onto your hook. Chain (ch) Wrap the yarn around your hook and pull through the loop on your hook.
Slip stitch (ss) This is often used to join a round or to move the hook/yarn to a new point. Insert your hook into your work, yarn over, and pull through the work and the loop on your hook.
Single crochet (sc) Insert your hook into your work, yarn over, and pull through the work, you will then have 2 loops on your hook. Yarn over and pull through 2 loops.
SKILL BUILDERS 013
SKILL BUILDER
Half double crochet (hdc) Wrap the yarn around your hook, insert your hook into your work, yarn over, and pull through the work, you will then have 3 loops on your hook. Yarn over and pull through all 3 loops.
Double crochet (dc) Wrap the yarn around your hook, insert your hook into your work, yarn over, and pull through the work, you will then have 3 loops on your hook. *Yarn over and pull through 2 loops* twice.
Treble crochet (tr) Wrap the yarn around your hook twice, insert your hook into your work, yarn over, and pull through the work, you will then have 4 loops on your hook. *Yarn over and pull through 2 loops* 3 times.
Single crochet 2 together (sc2tog) Insert your hook into your work, yarn over, and pull through the work. Insert your hook into the next stitch, yarn over, and pull through the work, you will then have 3 loops on your hook. Yarn over and pull through 3 loops.
Front post double crochet (fpdc) Wrap the yarn around your hook, insert your hook behind the double crochet stitch post (from front to back, then back to front, so the post is in front of the hook). Yarn over and pull up a loop around the post of the stitch, *yarn over, pull through two loops* twice.
Double crochet 2 together (dc2tog) Wrap the yarn around your hook, insert your hook into your work, yarn over, and pull through the work. You will then have 3 loops on your hook. Yarn over and pull through 2 loops. Wrap the yarn around your hook, insert your hook into the next stitch, yarn over, and pull through the work. You will then have 4 loops on your hook. Yarn over and pull through 2 loops. Yarn over and pull through all 3 loops.
SKILL BUILDERS 015
SKILL BUILDER
Finishing your pieces Once the crochet is done, there are a few things to do to finish off your piece. These tips will help to make your pieces look, fit, and feel the best they can!
Blocking Blocking is used to relax the fibres and make the piece sit in the position you want it to. There are a few ways to block your pieces. Some patterns may require you to block individual parts/squares before assembling and others may suggest blocking the piece once it is finished.
Wet blocking is done by using some gentle detergent and soaking the piece in warm water for 30 mins. Rinse and drain the water, squeeze out as much water as you can but do not ring out the piece. Place the piece on a dry towel and roll up the towel with the piece inside. Squeeze it to get as much water out as possible. Place the piece onto blocking mats (or you can use a towel) and pin (using rust free pins) into place, following the measurements provided. Leave to air dry completely before unpinning. For synthetic fibres like acrylic, steaming will work better. Pin the piece out into the measurements required and use a
steamer to lightly run over the piece. Leave to air dry completely before unpinning. To block granny squares, pin the squares into the measurements required or you can use a wooden blocking board. Spray the squares with water and leave to air dry completely before unpinning. Sewing in your ends I recommend leaving quite a big tail when fastening off your work. This allows you to easily sew in your ends so nothing comes undone. Using a sewing needle with a large eye, thread your end. Use the rule of 3 to pass the yarn back and forth 3 times into the back of your work.
I recommend sewing in your ends as you go to make it more enjoyable. Having lots of ends to sew in once the project is finished can be boring. However, make sure what you have done is correct before sewing in an end; it will be much harder to frog a piece if you have already sewn the end in.
SKILL BUILDERS 017
SKILL BUILDER
Changing yarn color Changing your yarn color during a project is a great way to make patterns. Once you have mastered this skill, you will be able to make lots of retro flower patterns!