- 4.2 Final Garment: Skirt with hooks and eyes attached to corset with boning
Assignment 5 (Oral Presentation and Process book)
- 5.1 Visual and oral presentaion
- 5.2 Fashion Process Book - 5.3 Academic essay
Table of content - Basic Bodice 1.Draping Experiments
Pattern Development
Construction Process
Reflection
3. Pin final proof 4. Check final proof 5. Reflection Process - Basic Bodice
1. Drape muslin for front and back 2. True up the muslin drape onto the paper
Draping - Basic Bodice
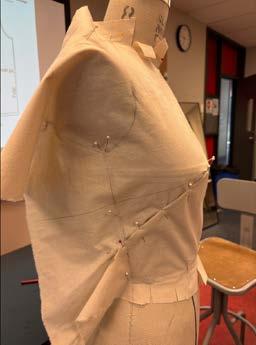
1.Drape front and back 2. Make all key area after draping on dress
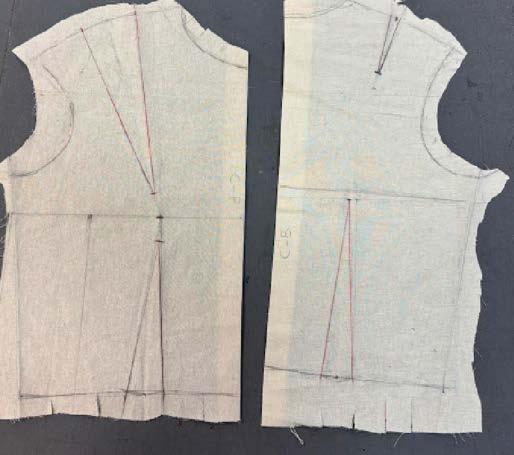
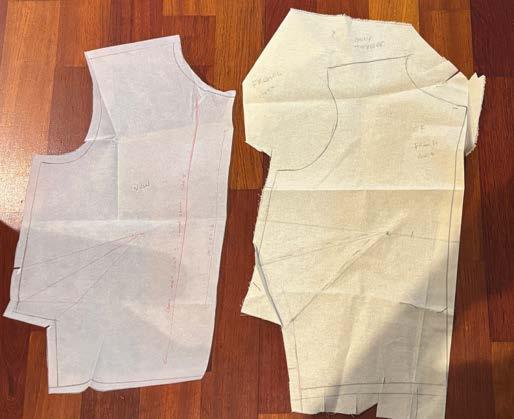
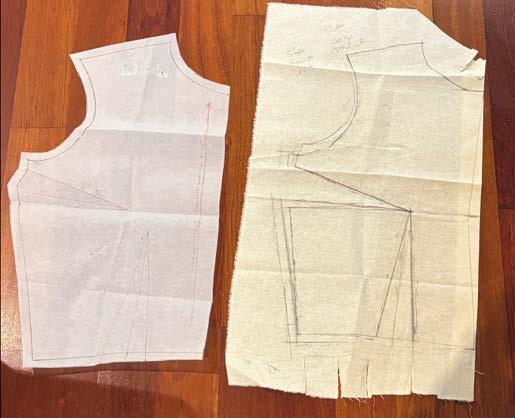
1. True the Muslin drapes on paper 2.Add seam allowance - CB: 1” - Others 1/2” Truing and Pattern - Basic Bodice
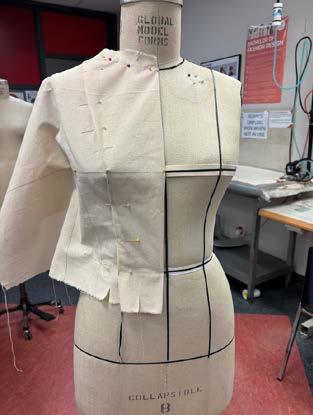
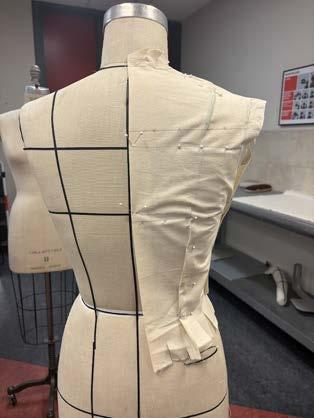
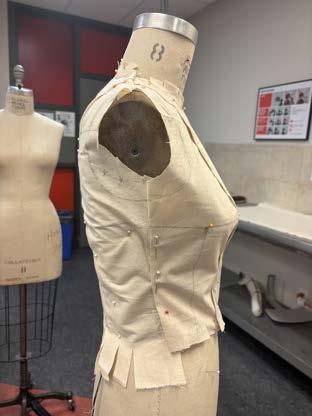
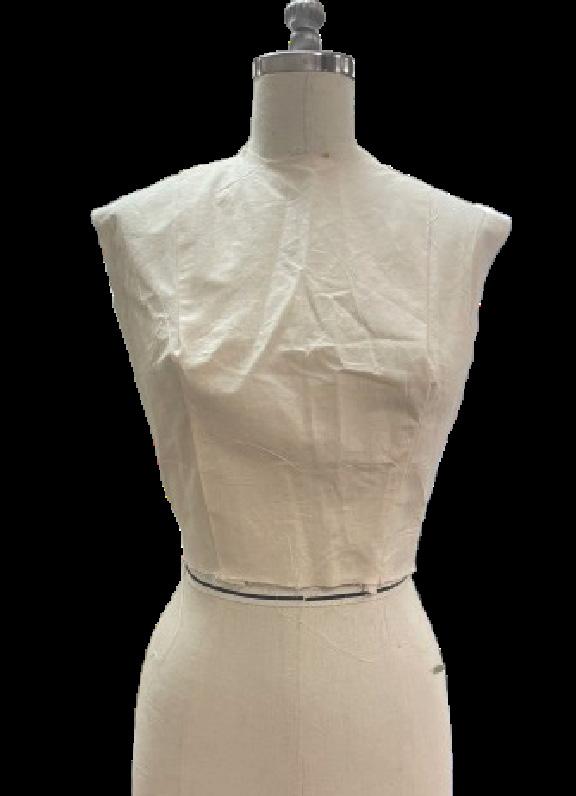
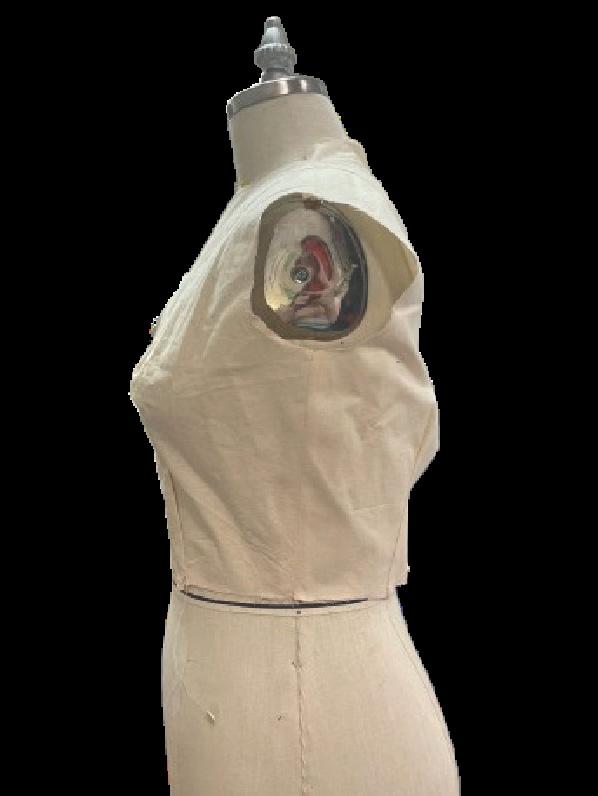
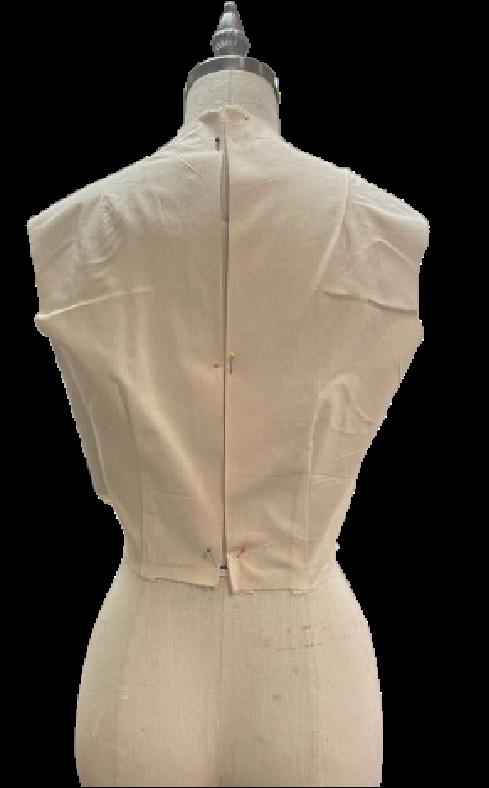
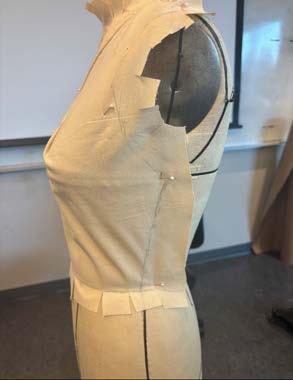
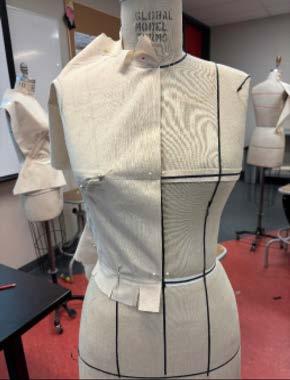
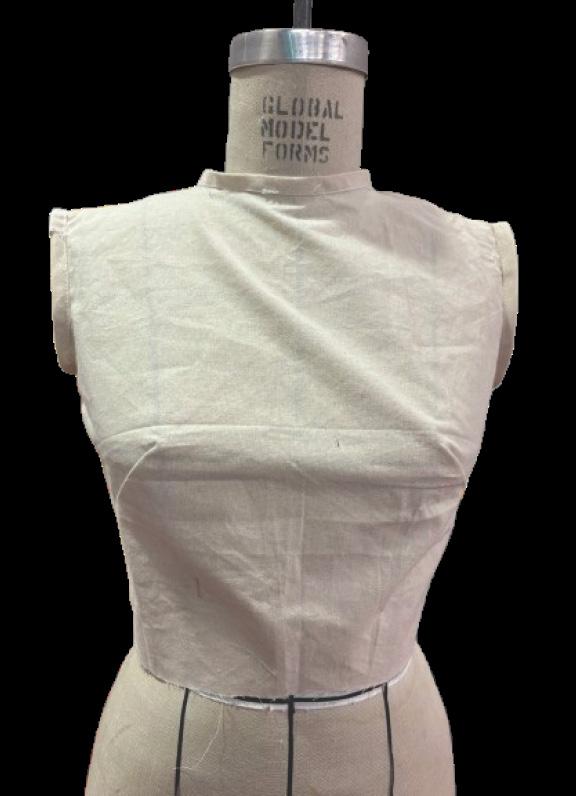
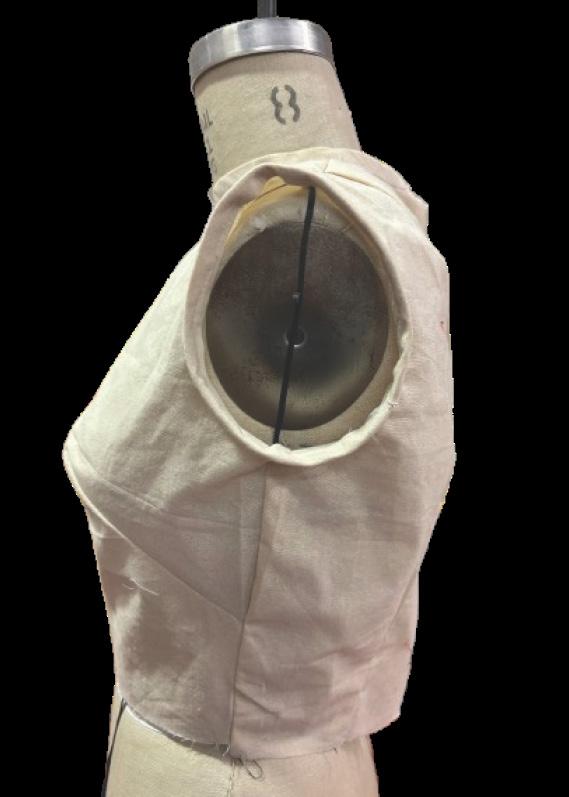
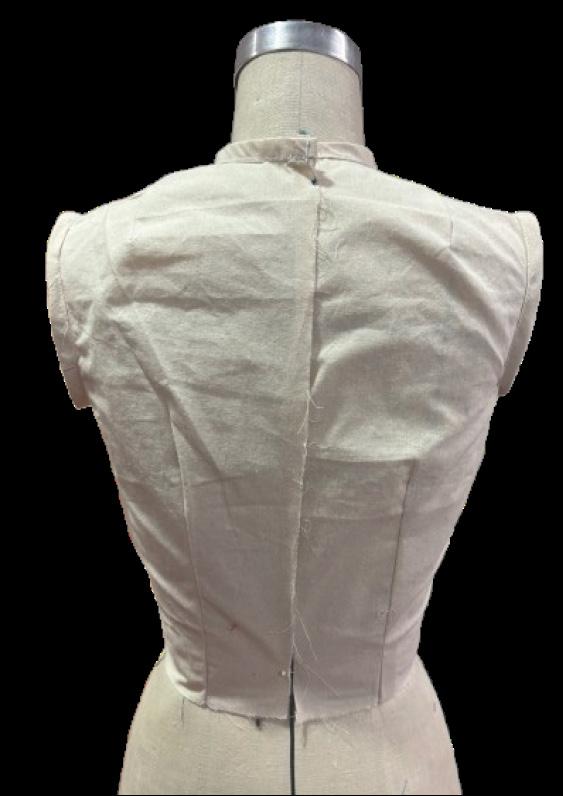
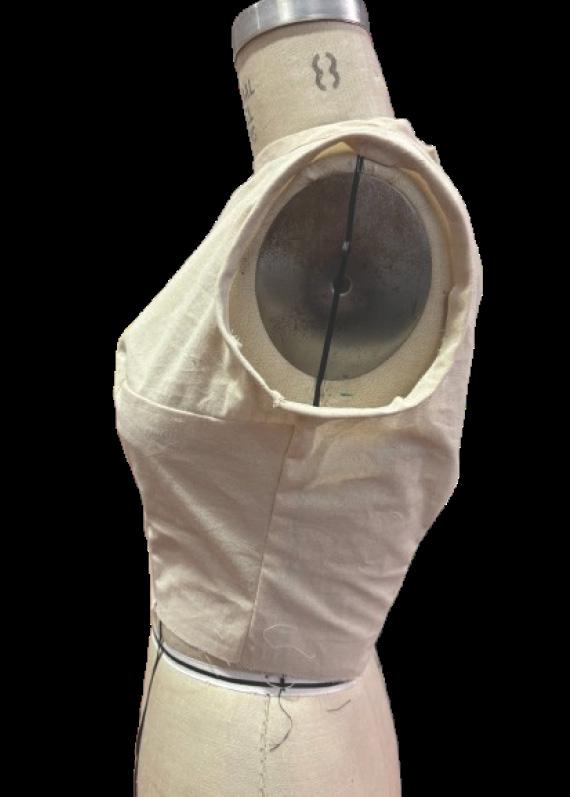
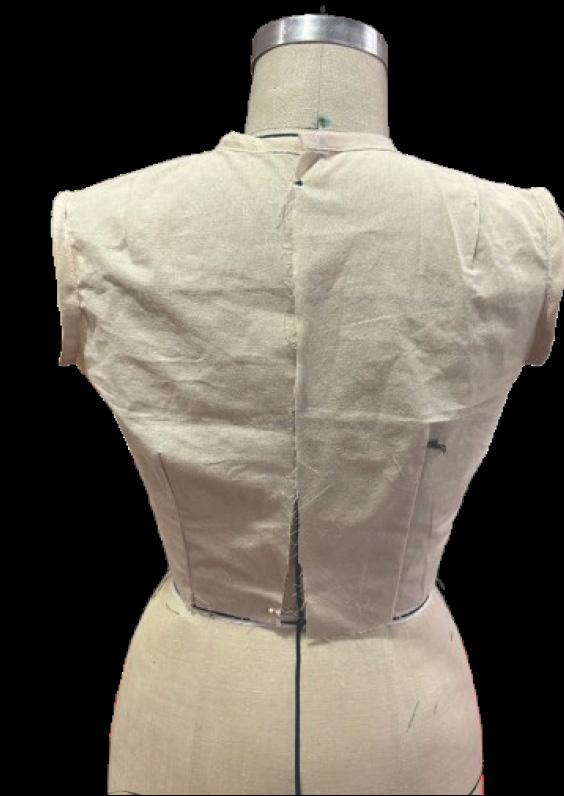
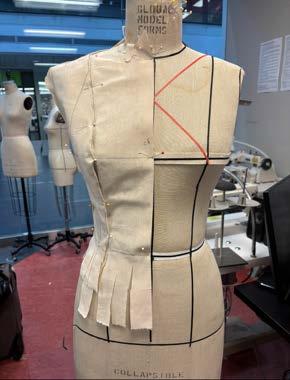
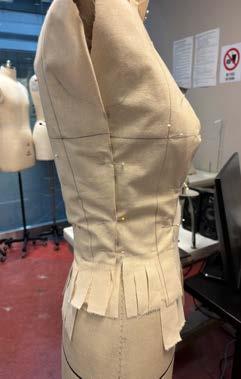
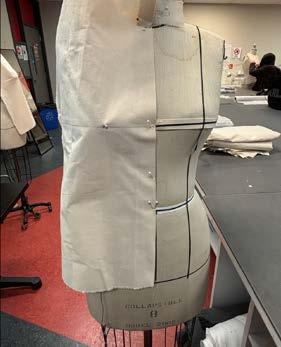
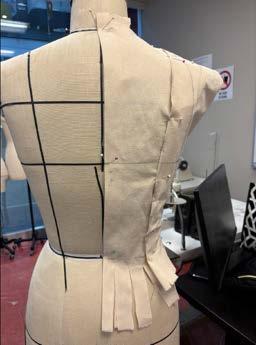
Checking Final Proof - Basic Bodice
Front Side Back
Reflection
Draping a bodice is a creative and hands-on process, almost like sculpting fabric to complement the body’s natural curves. Starting with muslin, I carefully marked key lines such as the center front, bust, and waist, ensuring a strong foundation. Pinning and smoothing the fabric onto the dress form helped refine its shape, allowing me to see how each adjustment impacted the fit. Manipulating the darts and using a curved ruler to perfect the pattern was challenging, requiring patience and precision to create balanced proportions. With guidance from my teacher and peers, I refined each detail, improving the accuracy and overall structure of the design. The process was rewarding, revealing how small technical changes can make a big difference in both style and fit. If I were to improve anything, I’d focus on achieving even smoother transitions from draped fabric to a finalized pattern while experimenting with more complex design elements to push creativity further
Table of content - Basic Skirt
Draping Experiments
Pattern Development
Construction Process
Reflection 1. Drape muslin for front and back 2. True up the muslin drape onto the paper
3. Pin final proof 4. Check final proof 5. Reflection Process - Basic Skirt
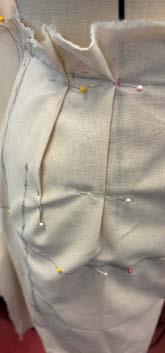
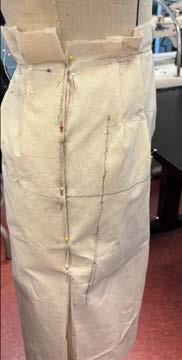
Draping - Basic Skirt
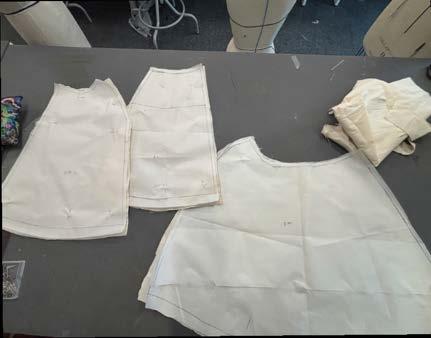
1. Drape front and back
2. Mark all key area after draping on dress form
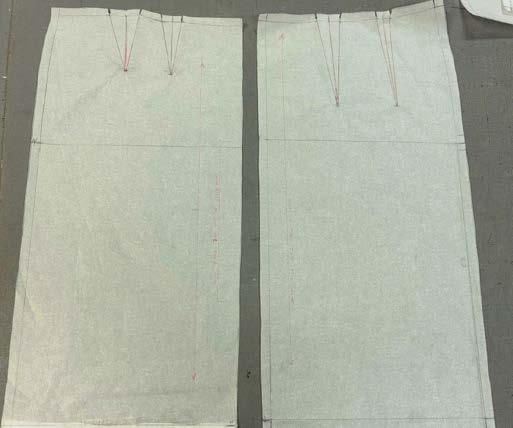
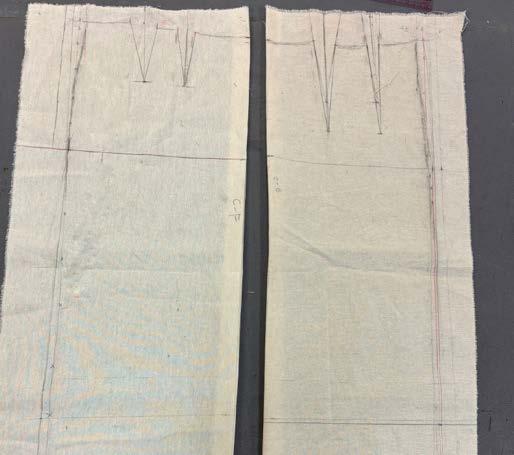
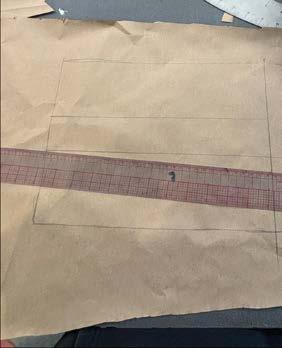
1. True the Muslin drapes on paper 2.Add seam allowance - CB: 1” - Hem 1” - Others 1/2” Truing and Pattern - Basic Skirt
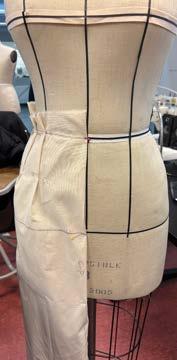
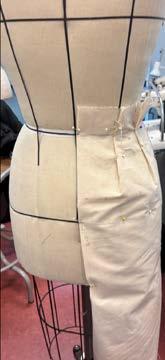
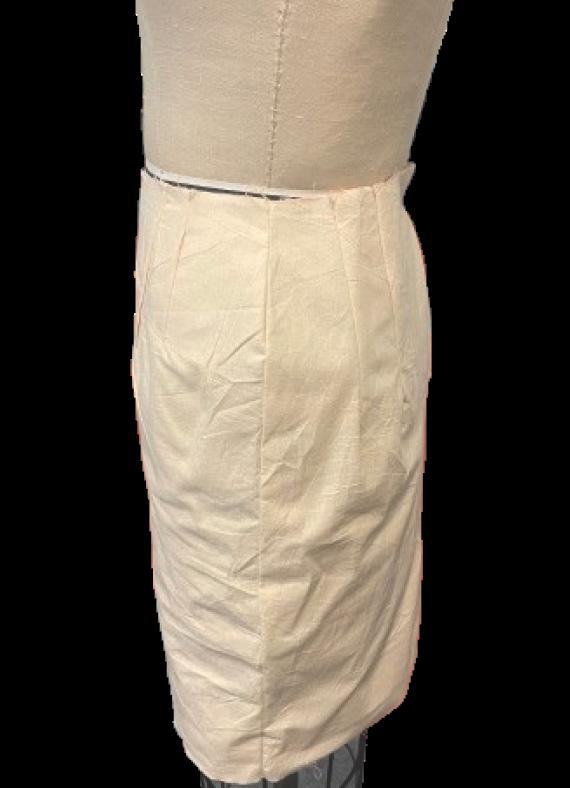
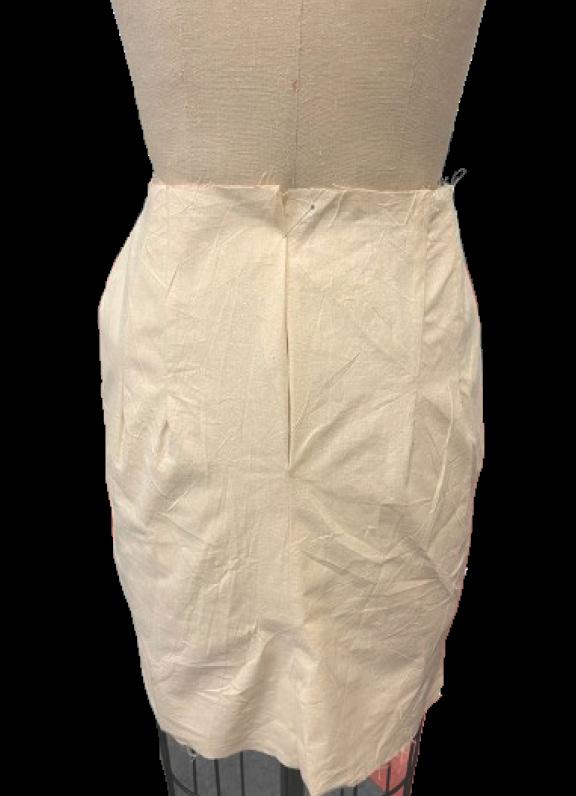
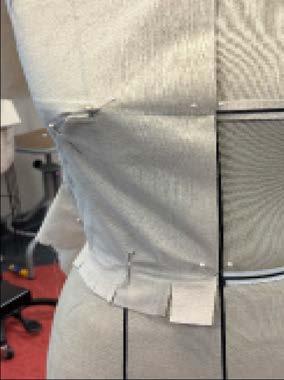
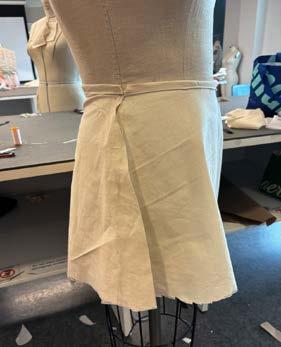
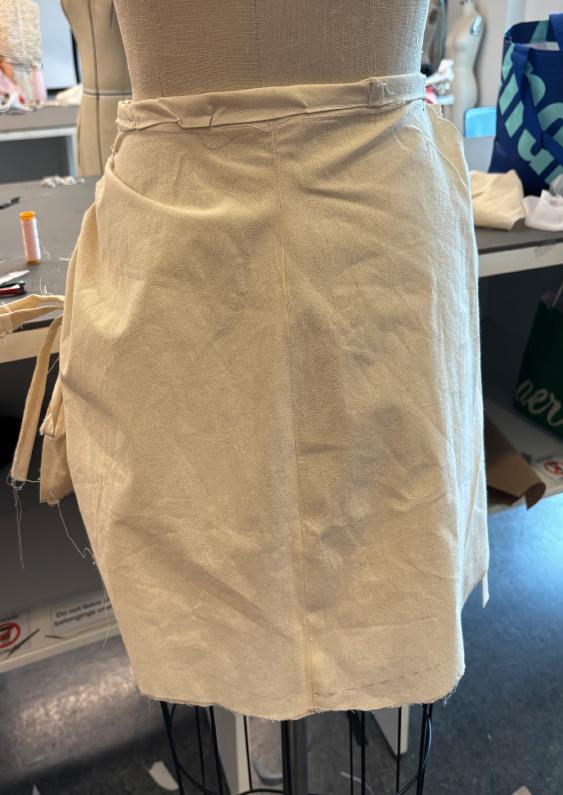
Checking Final Proof - Basic Skirt
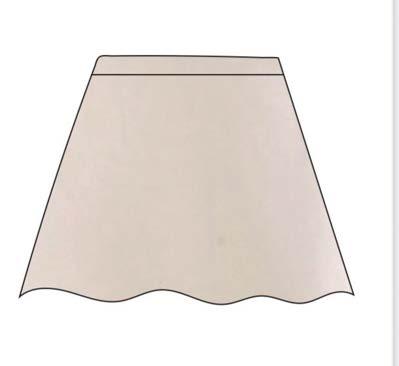
Front Side Back
Reflection
Draping a skirt was a rewarding process that deepened my understanding of fabric shaping and fit. Preparing the muslin properly by marking grainlines, balance lines, and key reference points helped establish a strong foundation, making the rest of the draping smoother. Pinning and shaping the fabric over the dress form was an enjoyable step, as adjusting the darts and refining the silhouette showed how small tweaks could make a big difference. However, working around curved areas, especially the hips, proved to be a challenge—it required patience and precision to ensure a natural and balanced shape. Truing the pattern after draping was also essential, helping correct any uneven seams and creating a clean final design. Feedback from my teacher was invaluable, offering guidance on refining the fit and improving the accuracy of the pattern. If I were to improve anything, I would focus on mastering the transitions between curved lines and darts while experimenting with different draping techniques to enhance creativity in future skirt designs.
Table of content - Asymmetrical top 1. Draping Experiments 2. Pattern Development
3. Construction Process 4. Reflection
1. Drape muslin for front and back
2. True up the muslin drape onto the paper
3. Pin final proof
4. Check final proof
5. Reflection Process - Asymmetrical top
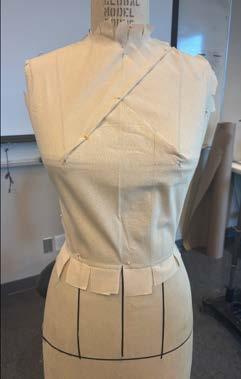
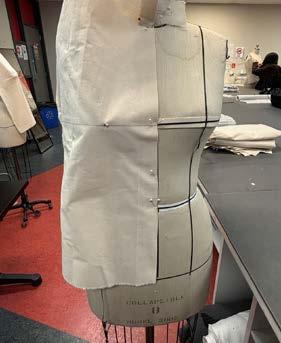
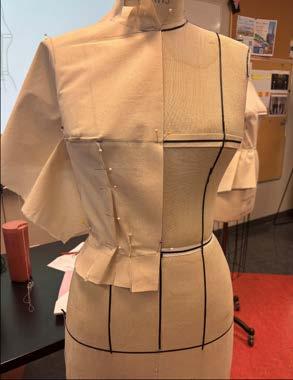
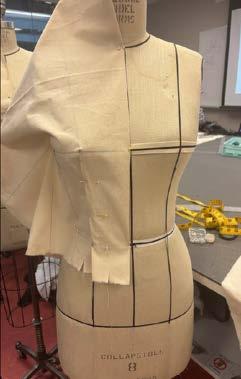
Draping - Asymmetrical top
1. Drape front and back
2.Mark all key area after draping on dress form
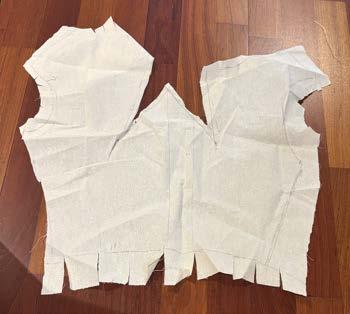
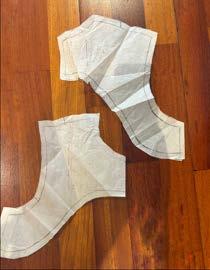
1. True the Muslin drapes on paper 2.Add seam allowance - CB: 1” - Others 1/2” Trueing and Pattern -Asymmetrical top
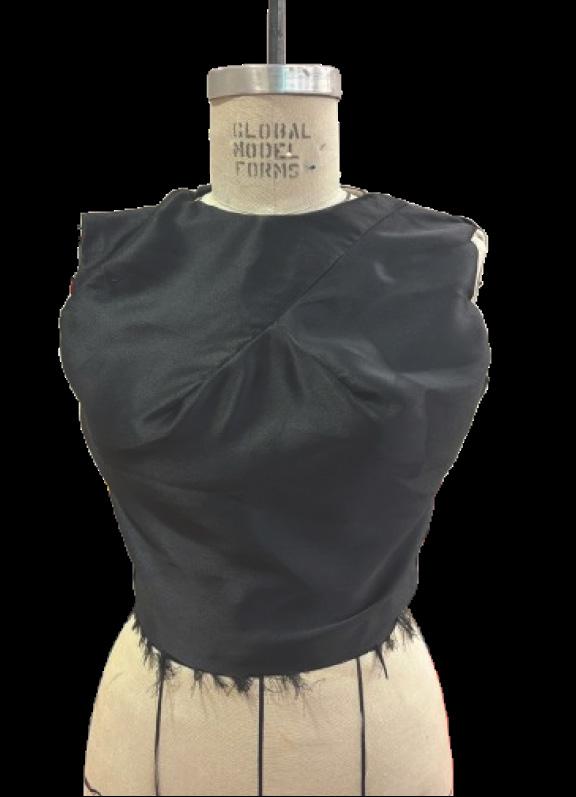
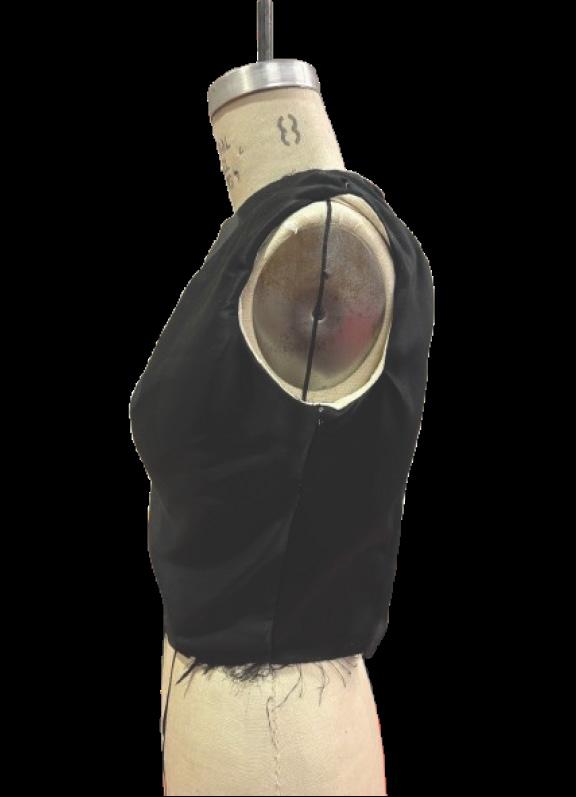
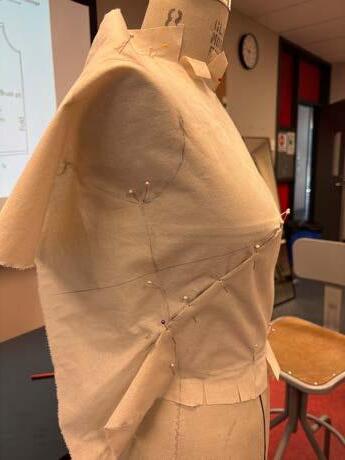
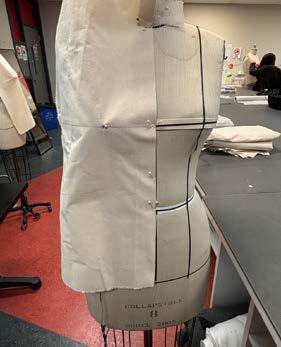
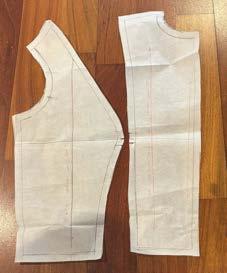
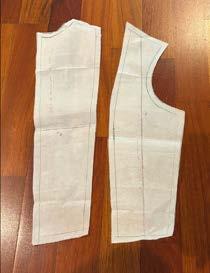
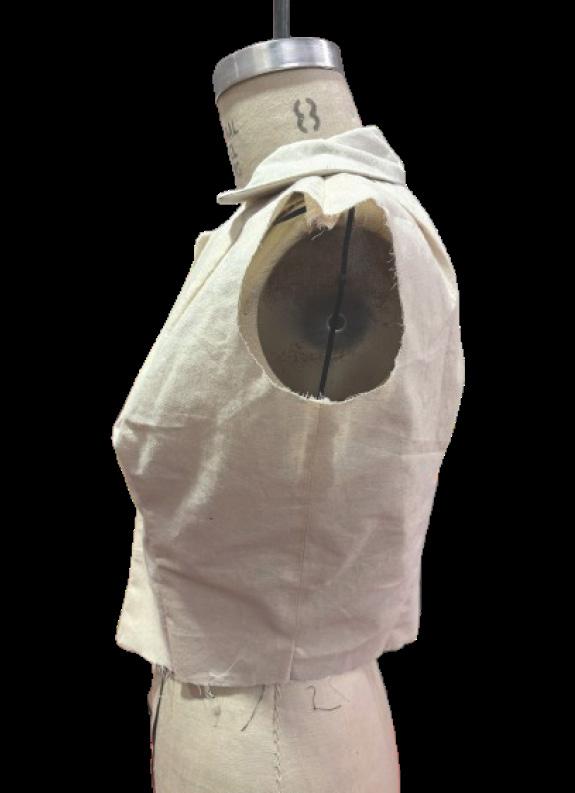
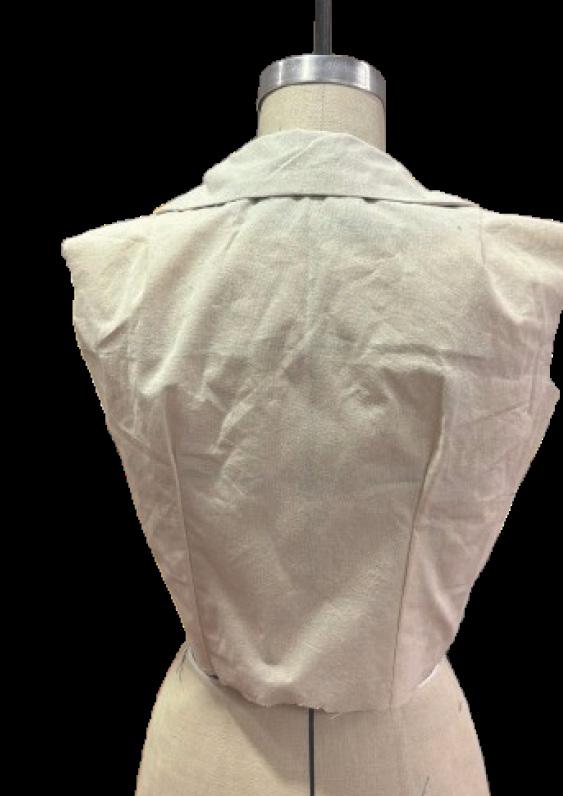
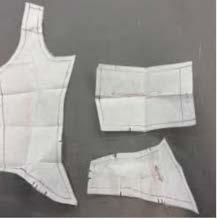
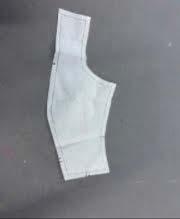
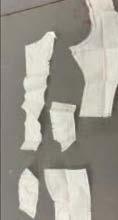
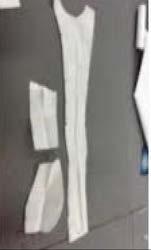
Checking Final Proof - Asymmetrical top
Front Side Back
Reflection
Draping was a great way to shape the asymmetrical top, helping to adjust the fit while keeping its unique design. Since the top isn’t evenly balanced, it took extra care to make sure everything flowed well and looked intentional. One of the trickiest parts was blending the seams smoothly, especially around the neckline and armholes. The all-in-one facings helped keep the edges clean, but they needed precise handling to avoid bulk and make sure the transitions felt seamless. To make the design even stronger, focusing on refining the draping process and practicing advanced finishing techniques would help bring out the top’s structure while keeping its stylish asymmetry.
Table of content - French Dart
Draping Experiments
Pattern Development
Construction Process
Reflection
Reflection Process - French Dart
Drape muslin for front and back
True up the muslin drape onto the paper
Pin final proof
Check final proof
Draping - French Dart
1. Drape front and back
2.Mark all key area after draping on dress form
Truing and Pattern - French Dart
1. True the Muslin drapes on paper 2.Add seam allowance - CB: 1” - Others 1/2”
Checking Final Proof - French Dart
Front Side Back
Reflection
French darts helped shape the garment, giving it a smooth and fitted look. Draping made it easier to place the darts correctly before turning them into paper patterns. Getting the shape just right was tricky, though, it took some careful adjustments to keep everything balanced. The bias-tape finishing made the edges look clean and polished, which worked well. But to improve the darts, better placement and more practice with finishing techniques would help create a sharper, more precise shape.
Table of content - Side Seam Top
Draping Experiments 2. Pattern Development 3. Construction Process 4. Reflection 1. Drape muslin for front and back 2. True up the muslin drape onto the paper
3. Pin final proof 4. Check final proof 5. Reflection Process - Side Seam Top
Draping - Side Seam Top
1. Drape front and back
2.Mark all key area after draping on dress form
Truing and Pattern - Side Seam Top
1. True the Muslin drapes on paper 2.Add seam allowance - CB: 1” - Others 1/2”
Checking
Final Proof - Side Seam Top
Front Side Back
Reflection
Draping really helped shape the side-seam top, making it easier to get the right fit before turning it into a final pattern. The process worked well, but keeping everything balanced took some extra adjustments. The design was asymmetrical, blending the seams smoothly was a bit tricky. The neckline and armholes needed careful attention to avoid any bulky edges. Using bias tape helped keep everything looking clean and finished. To make the top even better, tweaking the shaping along the side seam and practicing different finishing techniques would help refine the overall structure and fit.
Table of content - Princess Seam top 1. Draping Experiments 2. Pattern Development
3. Construction Process 4. Reflection
1. Drape muslin for front and back
2. True up the muslin drape onto the paper
3. Pin final proof
4. Check final proof
5. Reflection Process - Princess Seam Top
Draping - Princess Seam Top
1. Drape front and back
2.Mark all key area after draping on dress form
Truing and Pattern - Princess Seam Top Seam / Facing
1. True the Muslin drapes on paper 2.Add seam allowance - CB: 1” - Others 1/2”
Checking Final Proof - Princess Seam Top
Front Side Back
Reflection
The princess seams played a crucial role in shaping the top, offering both structure and a flattering fit. Draping allowed for precise contouring along the body, making it easier to refine the seam placement before transferring it to the paper pattern. However, working with princess seams introduced challenges, especially when ensuring smooth transitions between sections and maintaining balance. The asymmetry added another layer of complexity, requiring extra attention to achieve clean lines and proper shaping. Moving forward, refining the technique for aligning and securing princess seams would enhance precision and elevate the overall finish of the garment.
Table of content - Stand Collar
Draping Experiments
Pattern Development
Construction Process
Reflection
Reflection Process - Stand Collar
Drape muslin for front and back
True up the muslin drape onto the paper 3. Pin final proof
Check final proof
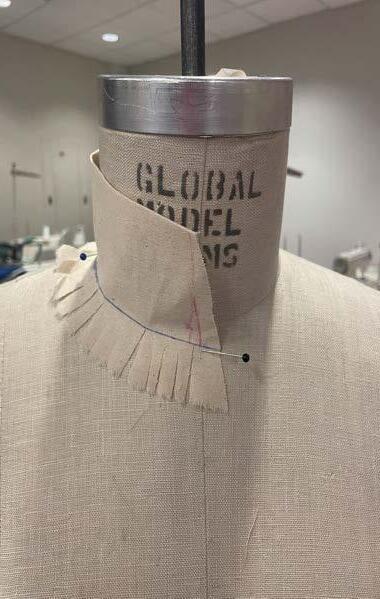
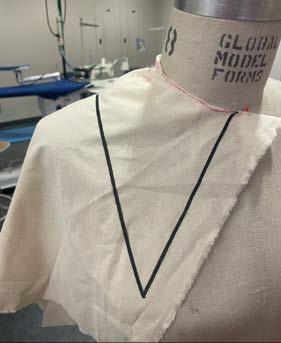
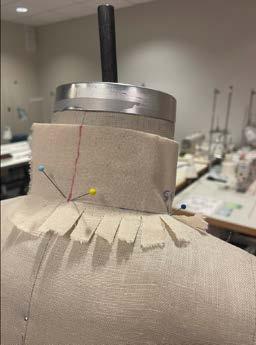
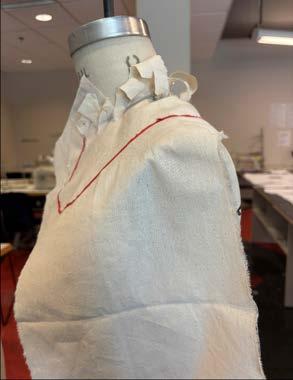
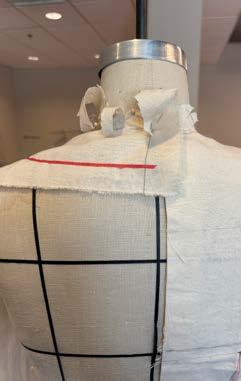
Draping - Stand Collar
1. Drape front and back
2.Mark all key area after draping on dress form
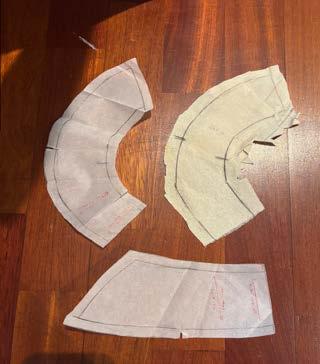
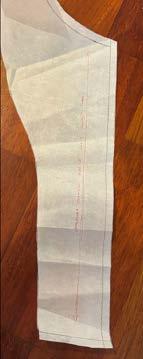
1. True the Muslin drapes on paper 2.Add seam allowance - CB: 1” - Others 1/2” Truing and Pattern - Stand Collar / Extension
Checking Final Proof - Stand Collar
Front Side Back
Reflection
Making the stand collar was a mix of frustration and fun. Getting the curve right was harder than I expected, small adjustments made a big difference in how it sat on the neckline. But experimenting with different materials and techniques was interesting, especially seeing how interfacing affected the final shape. To improve, I’d spend more time refining the draping process to make sure the collar flows naturally. Getting better at transferring the draped shape to the pattern would help with accuracy, and fine-tuning materials would make the whole thing look more polished. Overall, this process gave me a new appreciation for the small details that make a collar work!
Table of content - Peter Pan Collar
Draping Experiments 2. Pattern Development 3. Construction Process 4. Reflection
1. Drape muslin for front and back
2. True up the muslin drape onto the paper
3. Pin final proof
4. Check final proof
5. Reflection Process - Peter Pan Collar
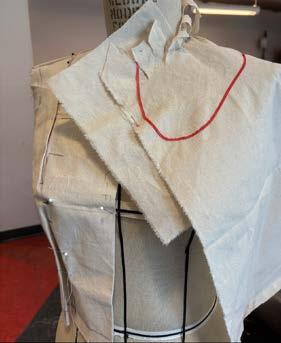
Draping - Peter Pan Collar
1. Drape front and back
2. Mark all key area after draping on dress form
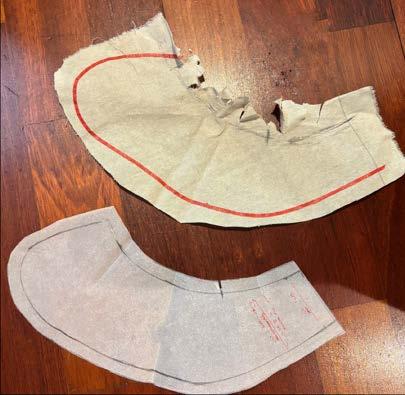
1. True the Muslin drapes on paper 2.Add seam allowance - CB: 1” - Others 1/2” Truing and Pattern - Peter Pan Collar
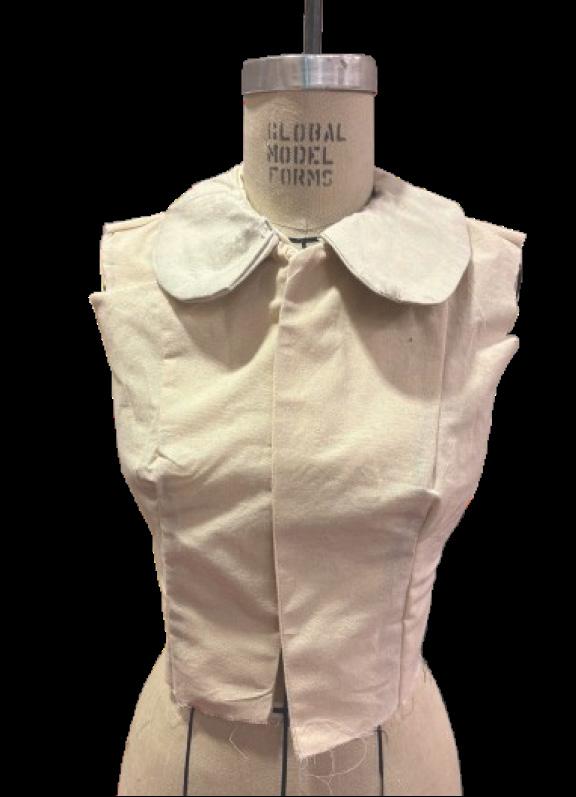
Checking Final Proof - Peter Pan Collar
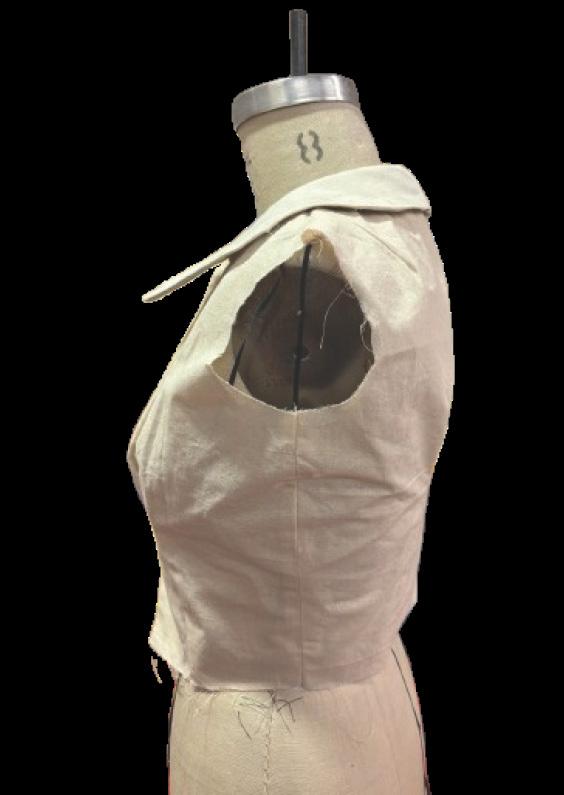
Front Side Back
Reflection
Creating a Peter Pan collar was both fun and frustrating. The hardest part was getting the curve just right, it needed to look soft and even without feeling stiff or awkward.
Small tweaks in the draping stage made a big difference, and transferring the shape into the pattern required extra care to maintain accuracy. I really enjoyed working on the delicate details, especially exploring different interfacing options to add the right amount of structure without losing the collar’s signature softness. Seeing it come together was satisfying, and it gave me a deeper appreciation for how small adjustments impact the overall design. To improve, I’d focus on refining the roll and shape during draping to make sure the curve flows naturally. Better pattern transfer would help maintain accuracy, and fine-tuning interfacing techniques would give the final piece a clean, polished finish. Overall, this process was a great lesson in precision and craftsmanship.
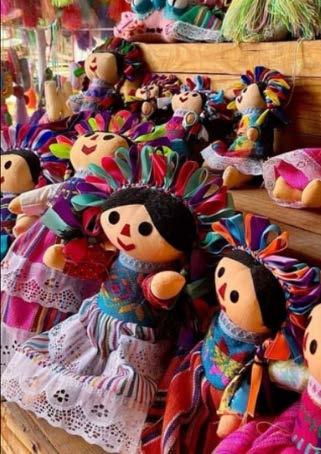
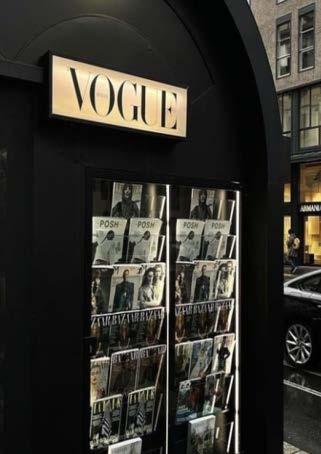
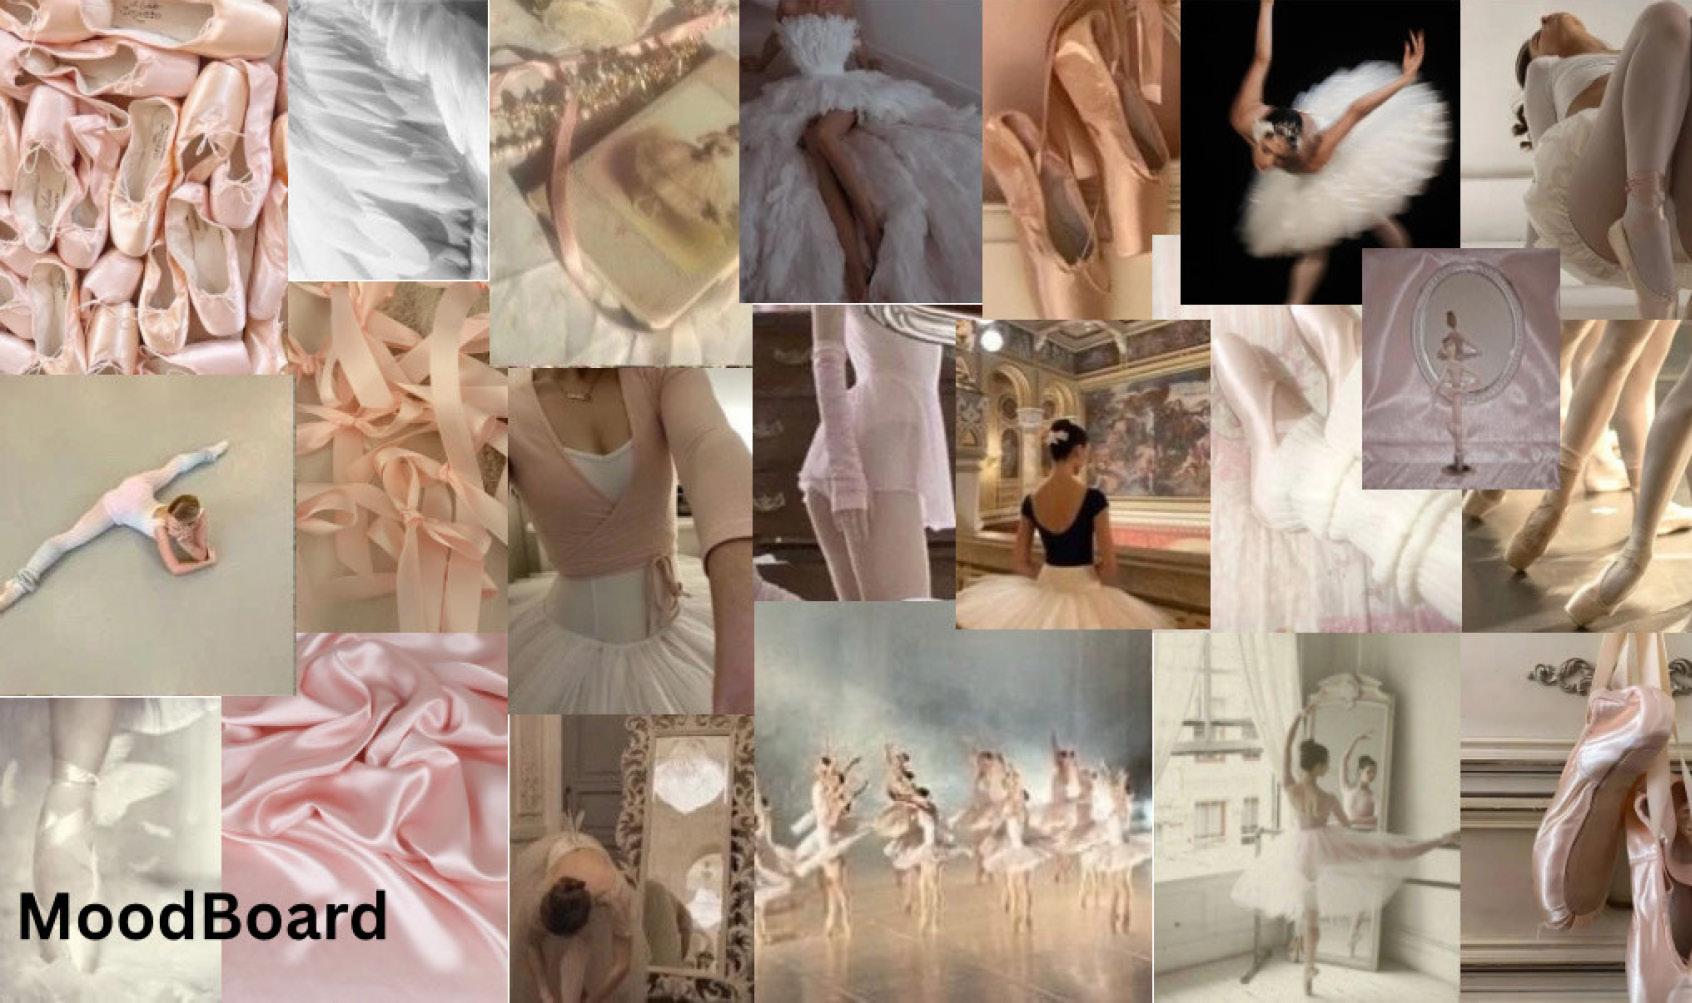
Mood Board
Research and Inspiration
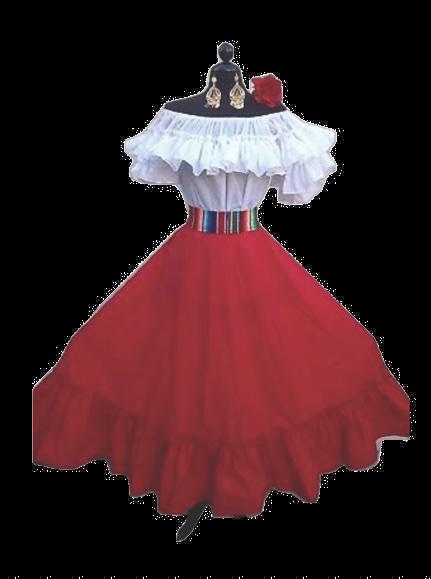
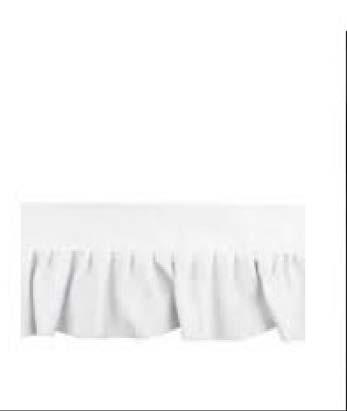
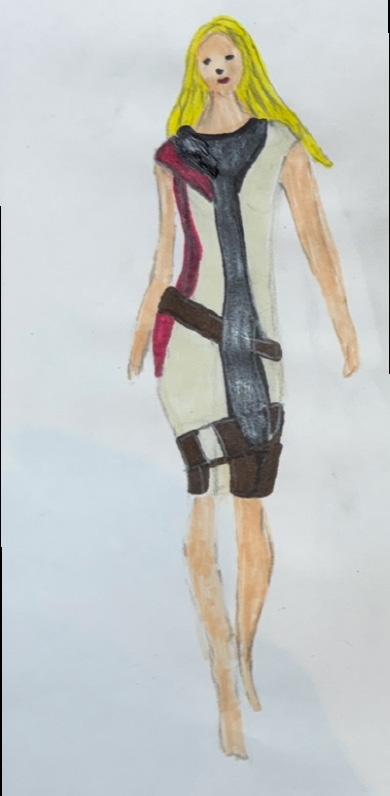
Inspired by my heritage, Mexican culture shaped this design. The flag’s colors and traditional white ruffles bring my vision to life.
Fabric / Trims:
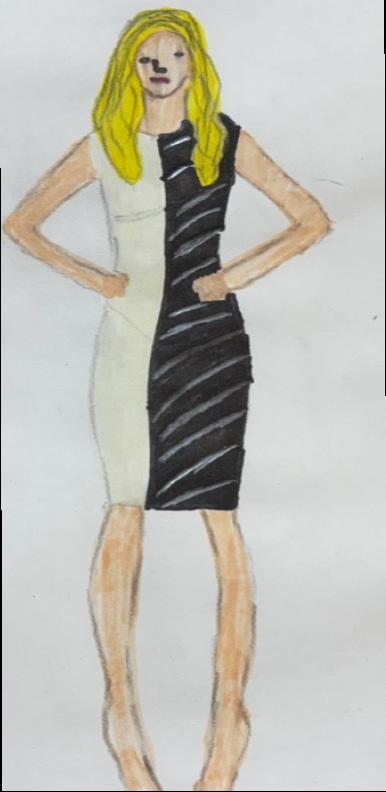
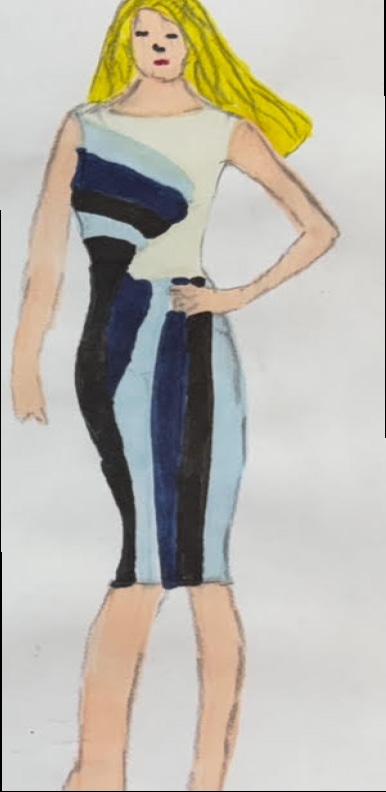
Concept Sketches:
Linen
Red
Black
Linen dress Red, Green, White and black dress. Blue and white
denim dress. With lines
Cotton dress Black and White dress with folding
Technical Fats
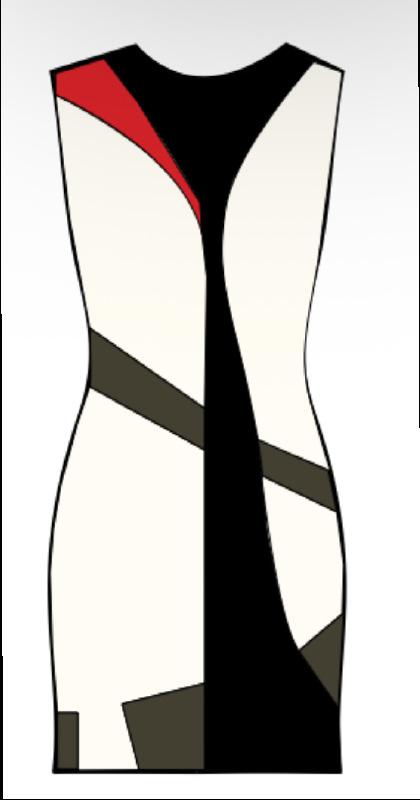
Technical Flats with color:
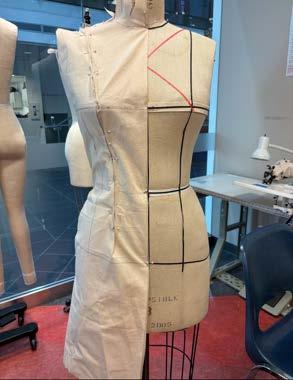
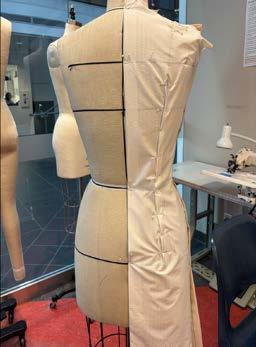
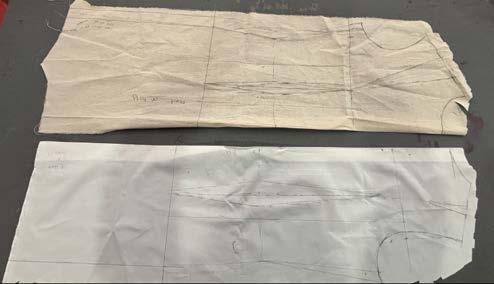
Draping - Sheth Dress
1. Drape front and back
2.Mark all key area after draping on dress form
1. True the Muslin drapes on paper 2.Add seam allowance - CB: 1” - Others 1/2” Truing and Pattern - Sheth Dress
Checking Final Proof - Sheth Dress
Front Side Back
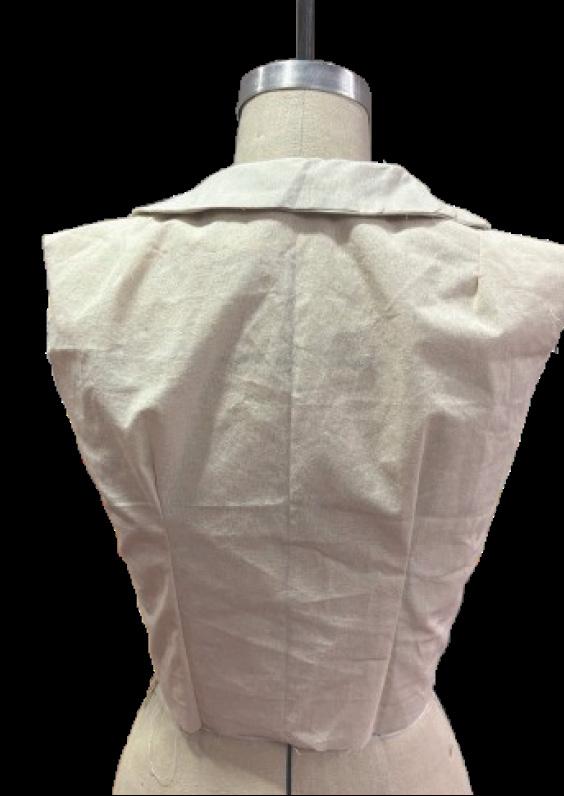
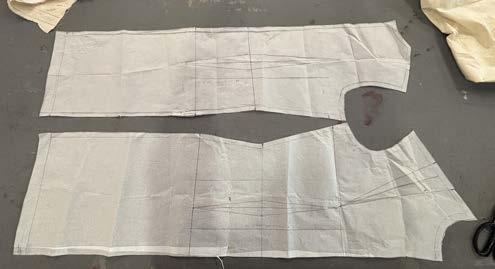
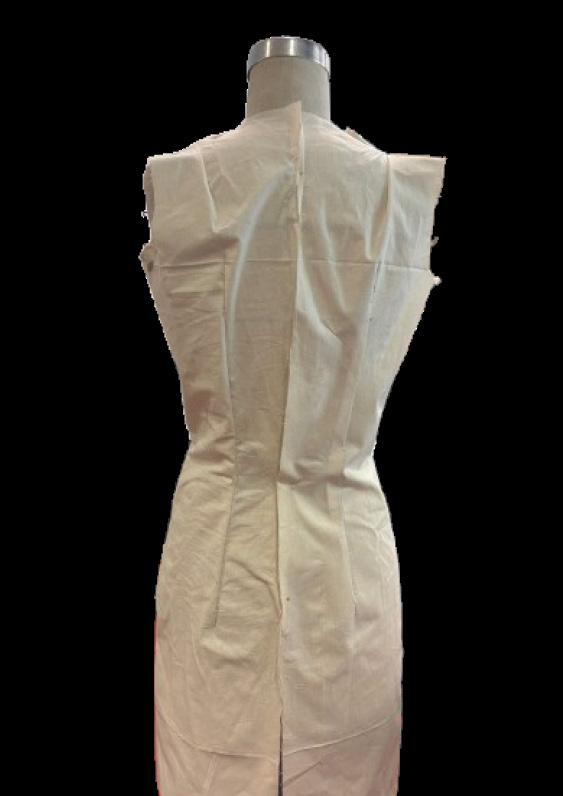
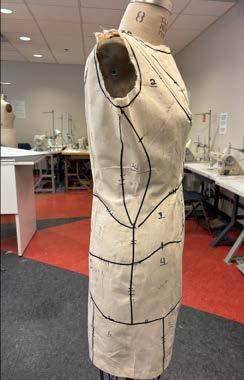
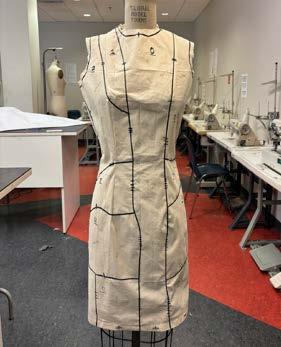
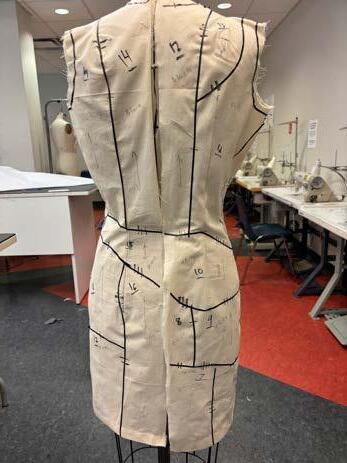
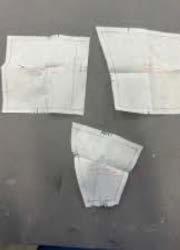
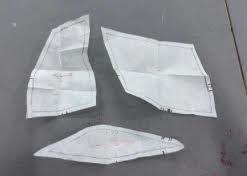
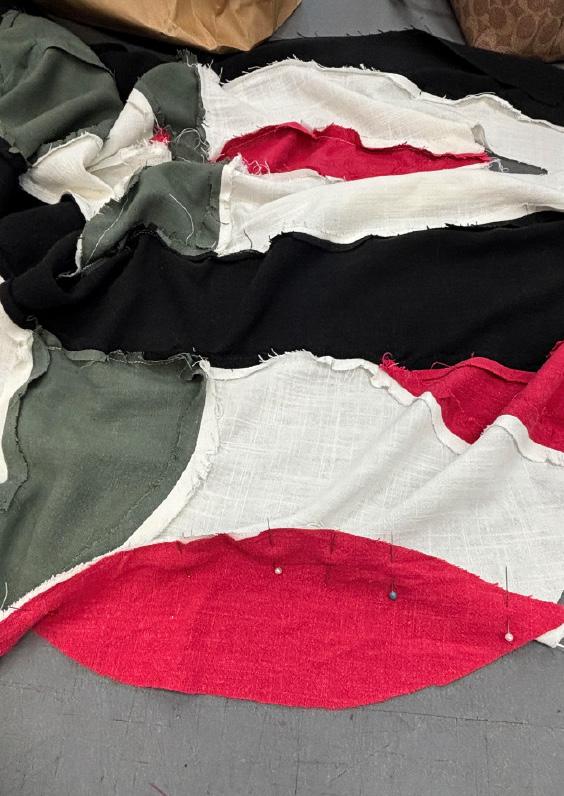
Draping - Transformational Reconstruction of a Dress
1. Drape front and back
. .. Mark all key area after draping on dress form
Trueing and Pattern - Transformational Reconstrution of a Dress Construction Processes - Transformational Reconstruction of a Dress
1. True the Muslin drapes on paper
2. Add seam allowance
- CB: 1” - Others 1/2”
3.Pin and sew all seams together according to the 1.Cut pieces with seam allowance.
2.Place on mannequin to see how it would look
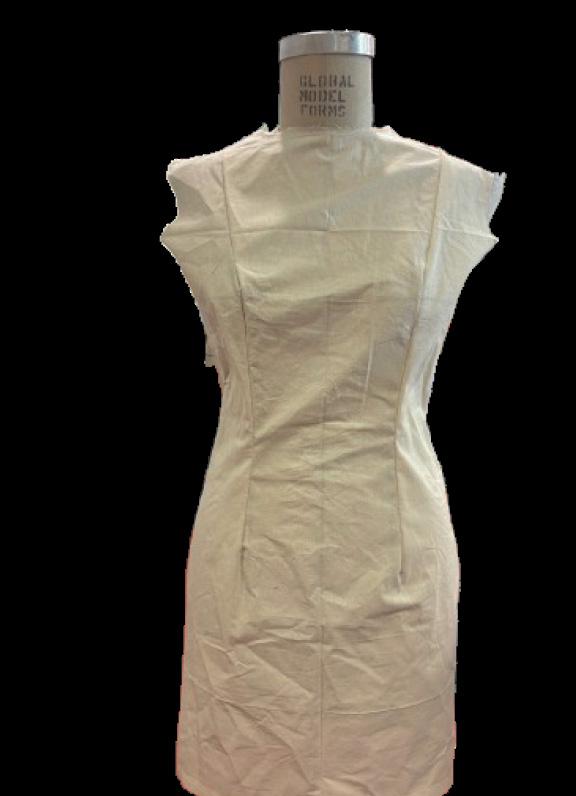
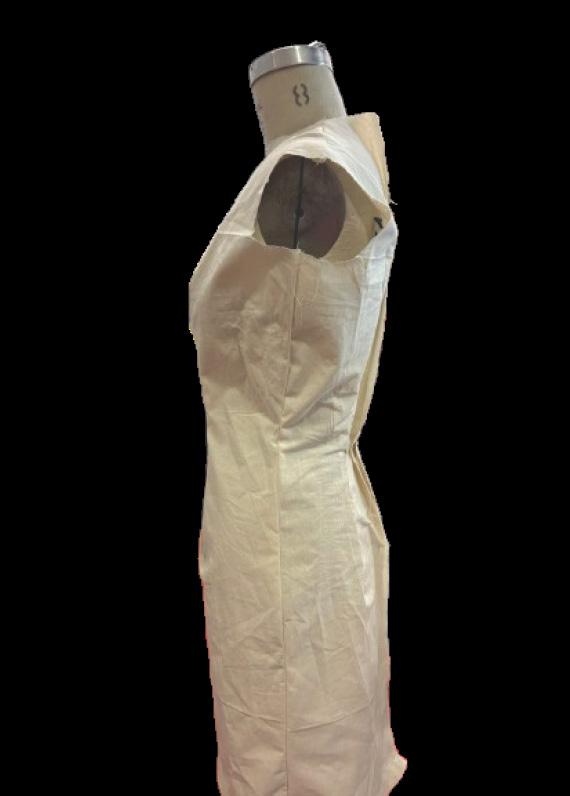
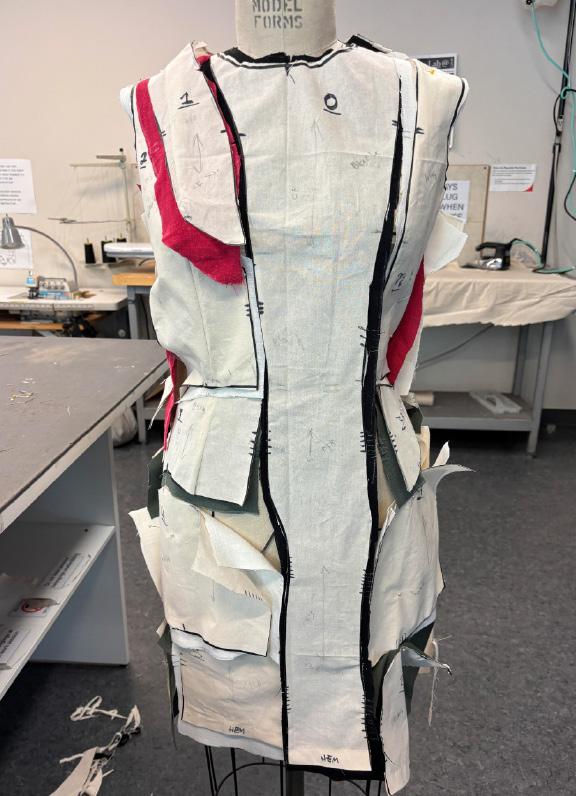
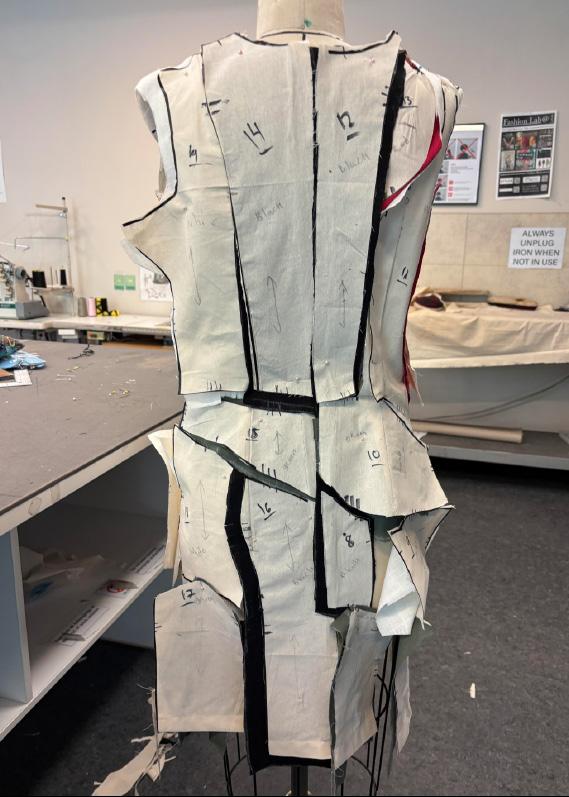
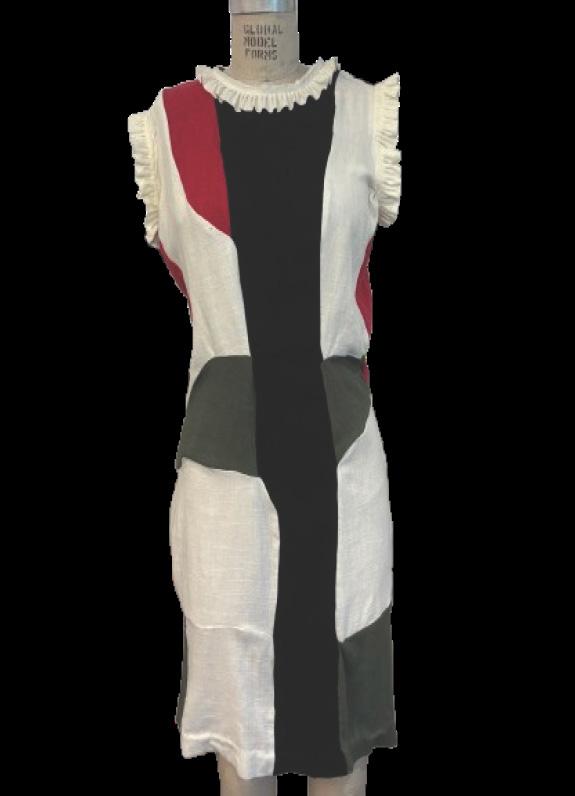
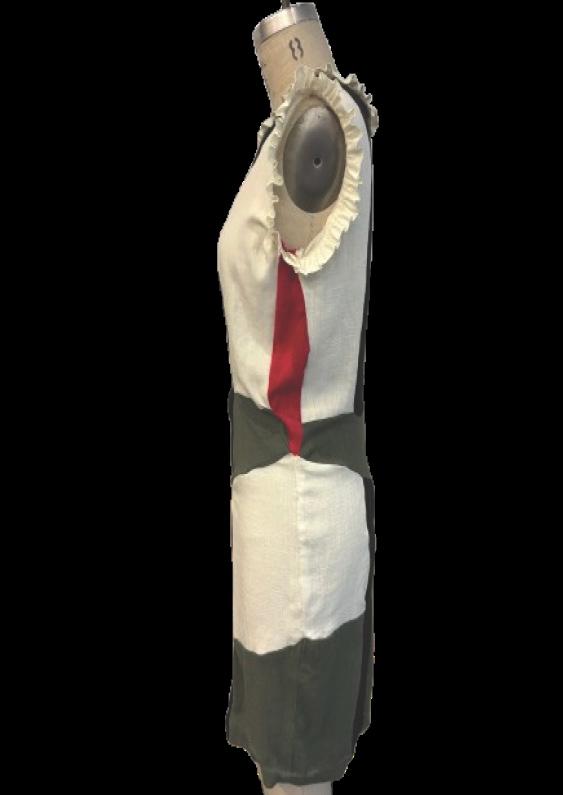
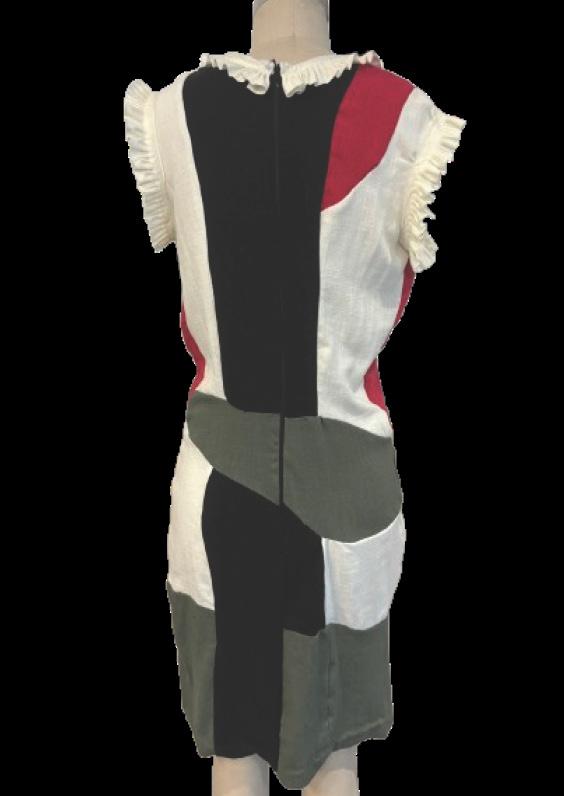
Checking Final Proof - Transformational Reconstruction of a Dress Front Side Back Reflection
Applying the Shingo Sato method reshaped my approach to draping, using bold cuts and geometric shifts for seamless designs. Mapping style lines with tape ensured accuracy, though refining placement required extra care. My design, inspired by Mexican dark elegance, embraced asymmetry and movement. This method challenged traditional pattern making, proving how unconventional cuts enhance creativity. Planning my first reconstruction project helped define my vision and refine material choices. Balancing movement with structure was challenging, but feedback helped improve accuracy. Moving forward, I aim to enhance precision and push creative boundaries
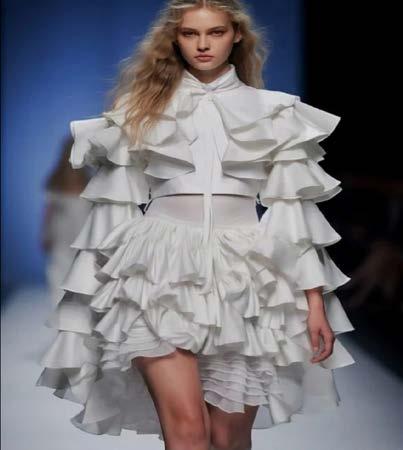
Research and Inspiration
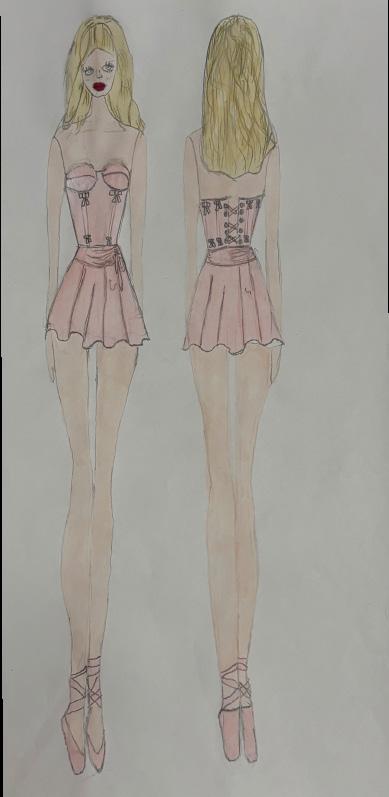
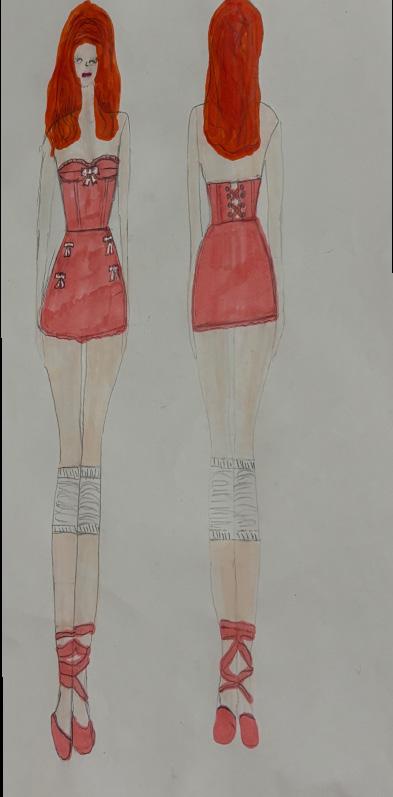
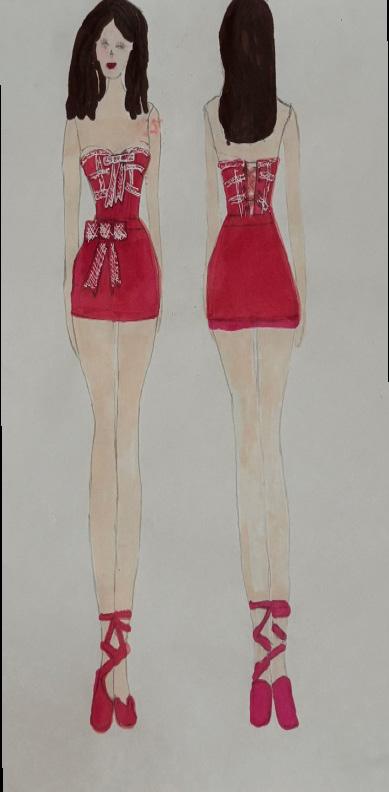
Elegance in every stitch, ballet & Margot Robbie’s barbie runway inspired outfit, grace meets thoughtful design.
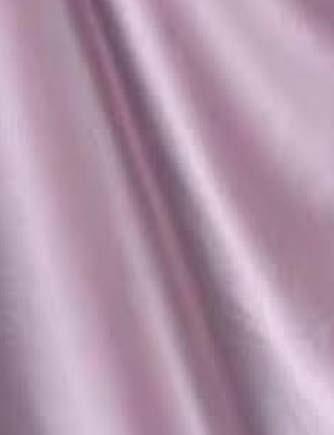
Fabric / Trims:
Concept Sketches:
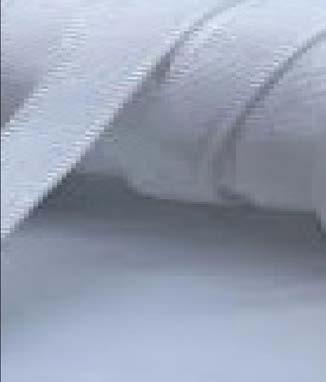
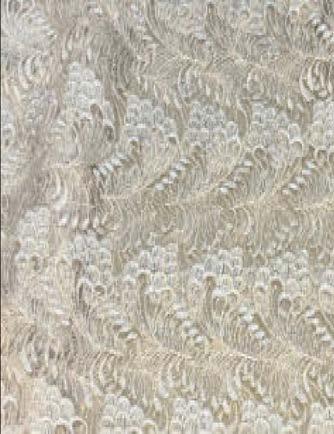
100% Polyester- Baby Lace - White Welf fuse - White
Boning - White
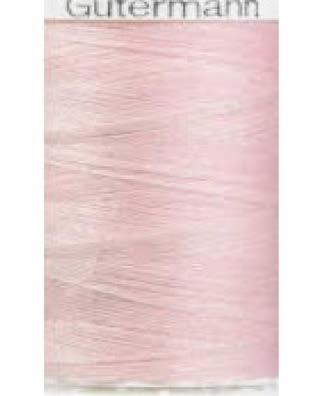
Tread - Baby Pink
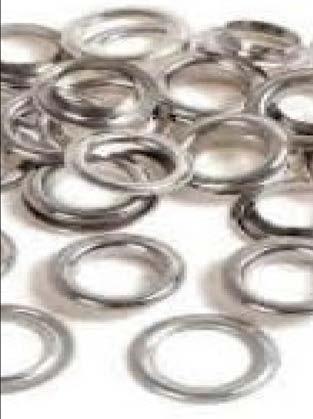
Boning Case - Ribbon - Baby Pink Eyelets - Silver
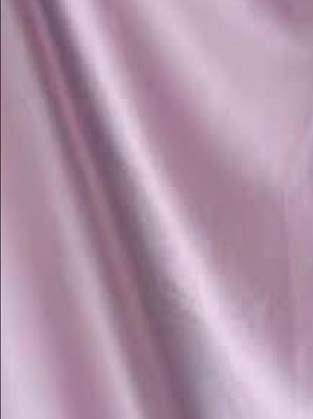
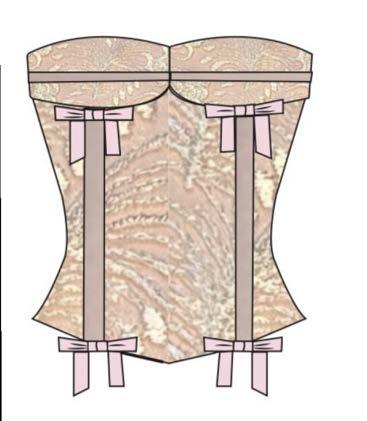
100% Pink Satin & White lace with pink ribbon and Pink bows
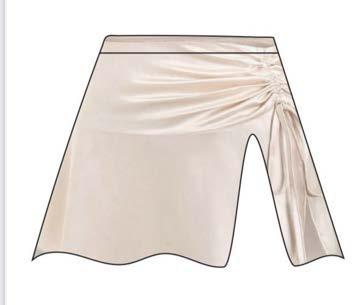
100% Pink Satin with lace bow on middle point and on side of skirt
100% Pink Satin with lace 3D bow decoration with skirt and lace bow
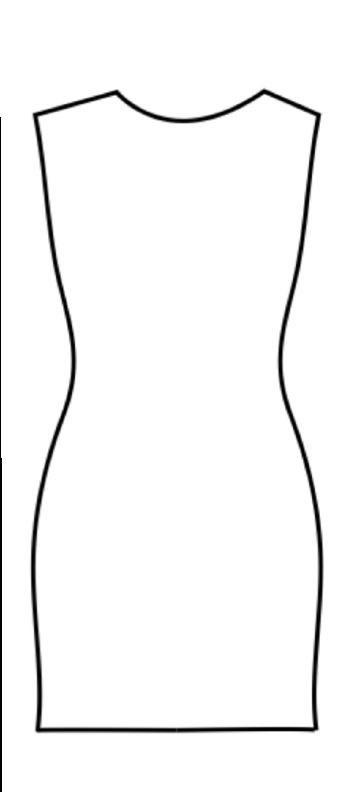
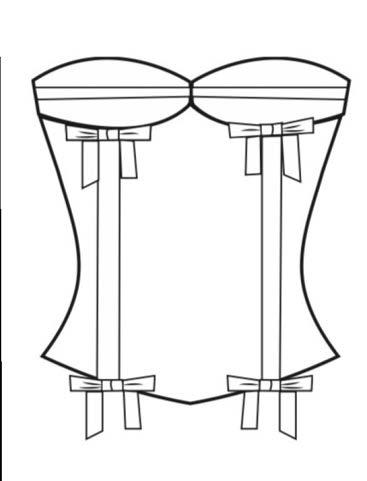
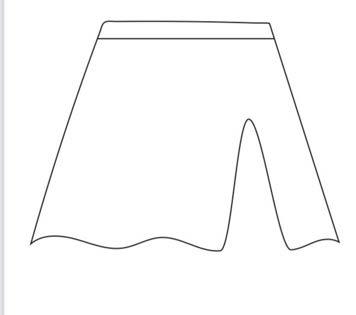
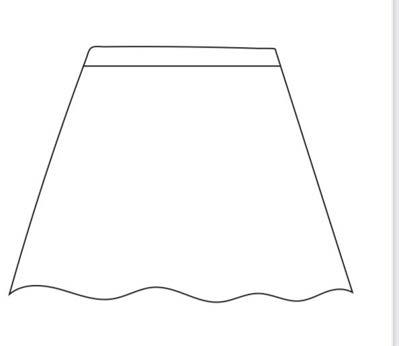
Technical flats no colour:
Technical flats with colour:
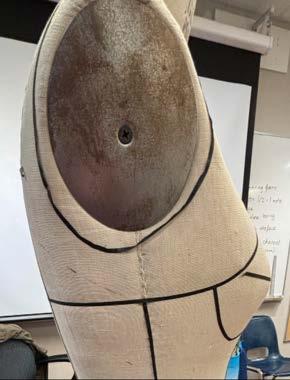
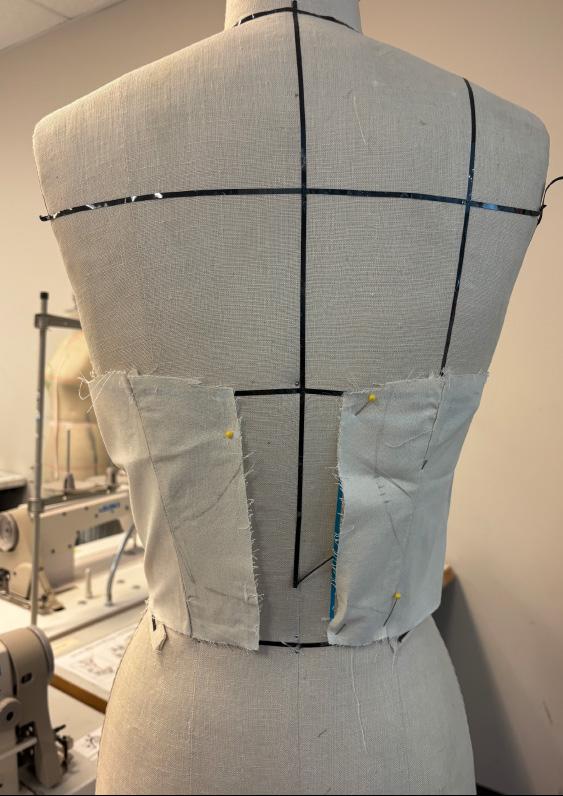
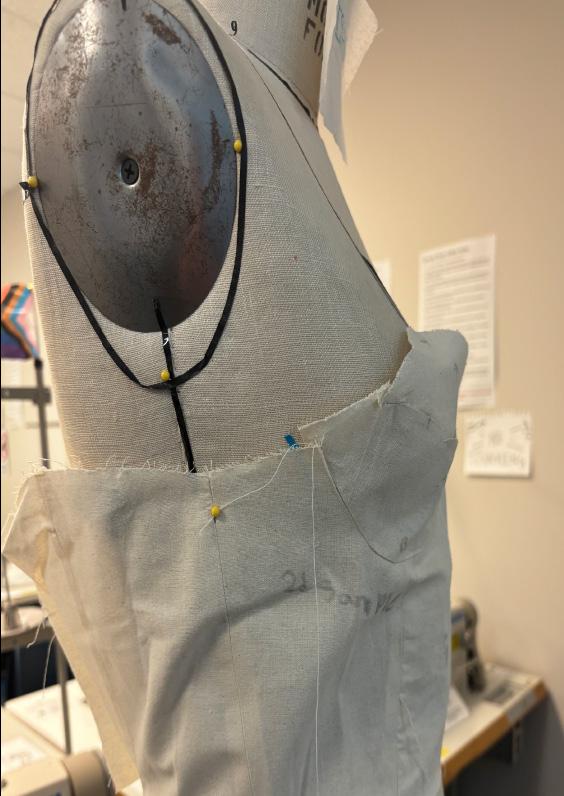
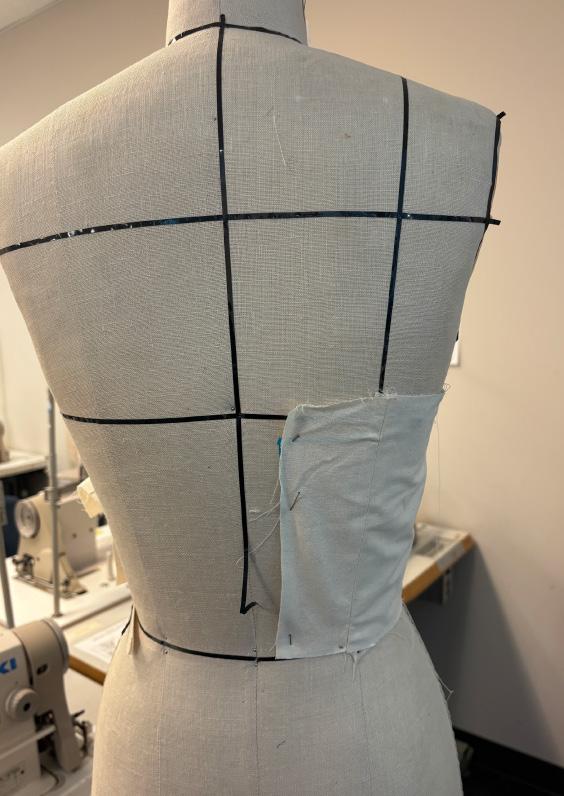
Draping - Corset
1.Drape front and back 2. Make all key area after draping on dress form
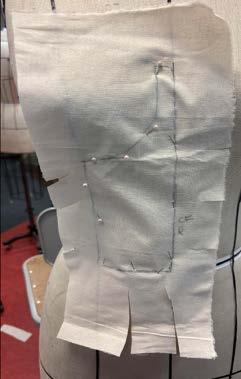
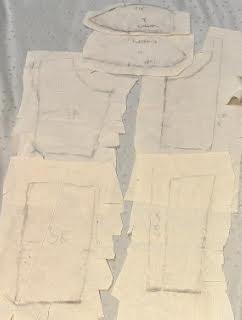
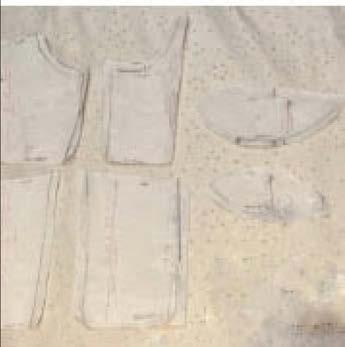
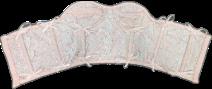
Truing and Pattern - Corset
1. True the Muslin drapes on paper 2.Add 1/2” seam allowance - No SA on CB, bottoms or tops - Top cup no SA on top area
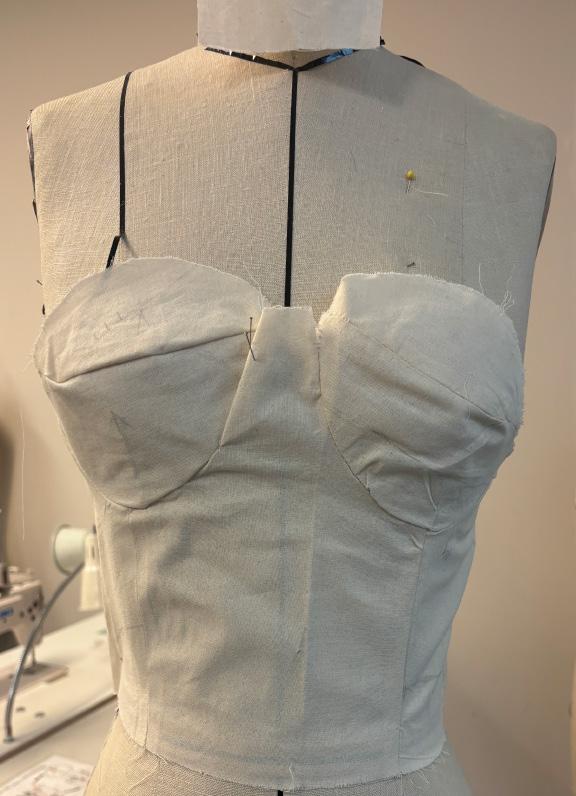
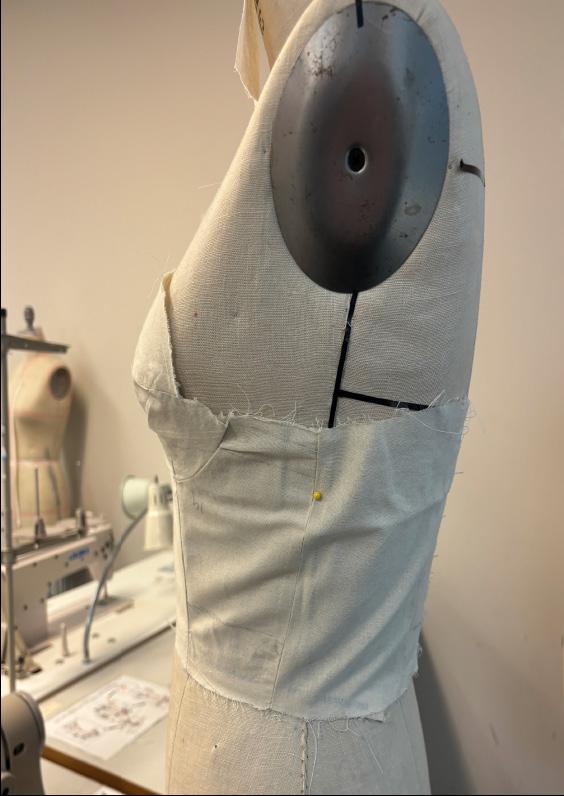
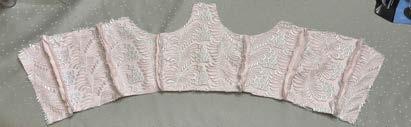
Checking Final Proof - Corset Top First Sample
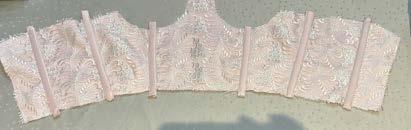
Checking Final Proof - Corset Top Second Sample
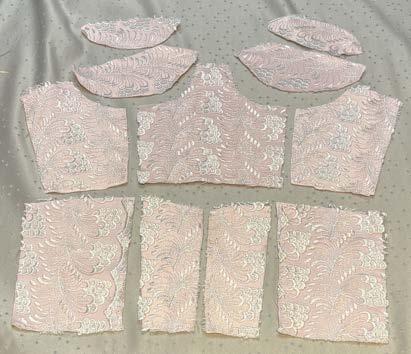
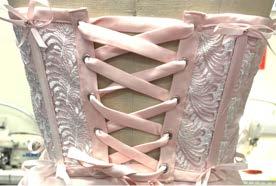
Construction Processes - Corset
1. Lace appliqué.
2. Sewing pieces together after lace applique.
3. Sewing bowling channels with top stitch close to both edges onto corset.
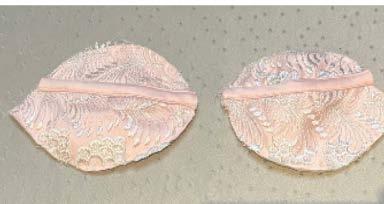
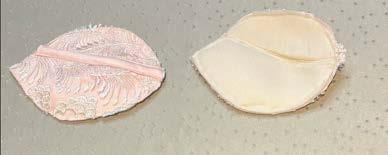
5. Sewing trim 0.5cm foam cups together then sew and on raw edge and attach to cup with basting stitch.
4. Attach the bias tape onto the cups and top stitch close to both. edge
6. Attach White Bone casing onto cups 0.5cm away from sewn cup edge on both sides.
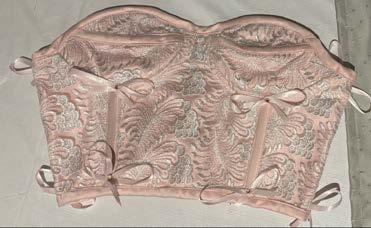
7. Sewing Bias tape on top and bottom and shand ssew bows onto boning.
8. Sew beads on bows for decoration.
9 Make and Sew ribbon / lace up.
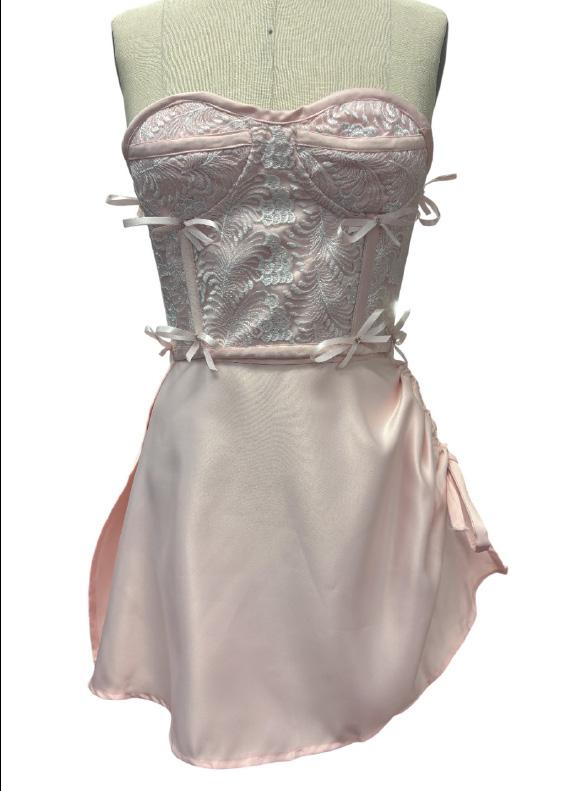
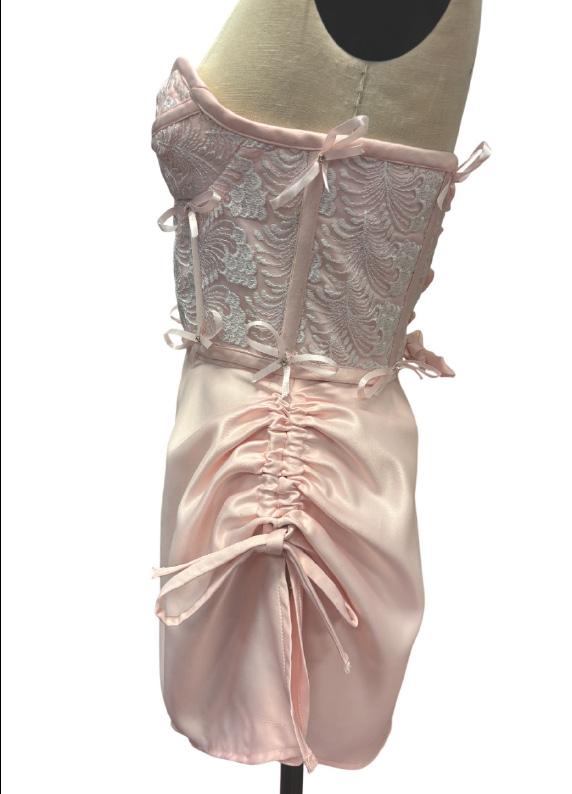
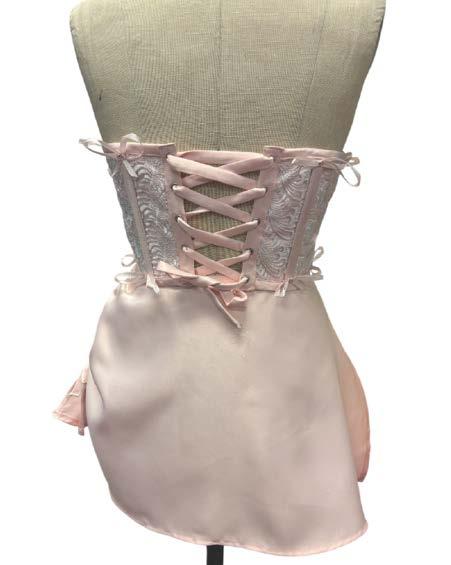
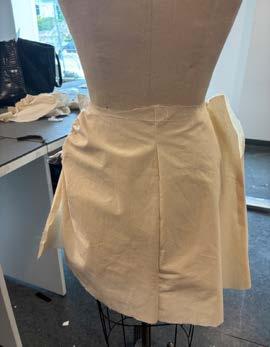
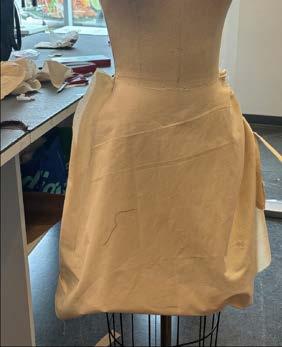
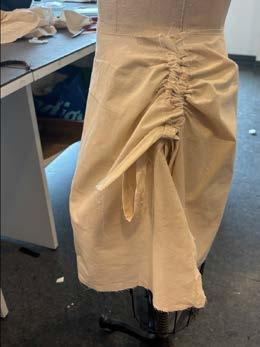
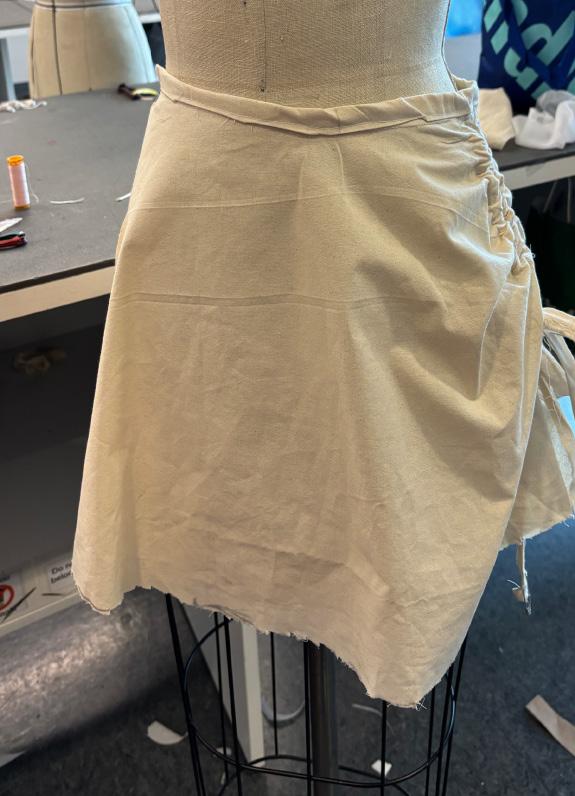
Checking Final Proof - Corset - Skirt
Reflection
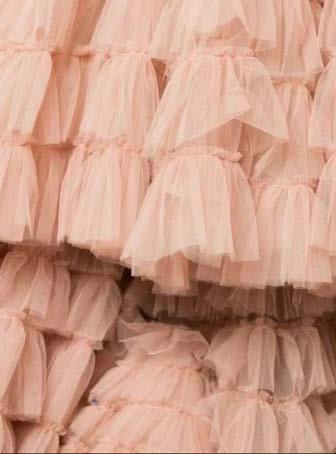
Creating this baby pink satin corset and skirt felt like bringing a vision to life, elegant, structured, and full of movement. Inspired by ballet costumes and Margot Robbie’s Barbie runway look, I mixed soft, airy fabrics with bold details. The white feather lace adds a dreamy touch, silver eyelets bring a hint of edge, and the gem-studded pink bow ties it all together.Working with satin was tricky, It’s smooth but slippery, making it tough to shape. Placing the lace just right and balancing the embellishments took patience, but feedback helped refine the final design. Next time, I want to try more layering, hand stitched beadwork, and ruching for extra depth. Adding flowing fabrics like chiffon or silk organza could create a nice contrast between softness and structure.
Table of content - Skirt
1. Mood Board
2, Research & Inspiration
3. Concept Skeches
4. Draping Experiments
5. Pattern Development
6. Construction Process
7. Final Garment photo shoot
4. Reflection
1. Drape muslin for front and back
2. True up the muslin drape onto the paper
3. Pin final proof
4. Check final proof
5. Reflection Process - Skirt
Research and Inspiration
Elegance in every stitch, ballet & Margot Robbie’s barbie runway inspired outfit, grace meets thoughtful design.
Fabric / Trims:
100% Polyester- Baby Pink Lace - White Welf fuse - White
Tread - Baby Pink
Concept Sketches:
Pink Satin with lace bow on middle point and on side of skirt
100% Pink Satin & White lace with pink ribbon and Pink bows
100%
100% Pink Satin with lace 3D bow decoration with skirt and lace bow