
Title: Aviation Adventures Gliders
Grade Level: 6-8
Duration: 45-60 minutes
Objective: Students will learn about the forces involved in flight and apply this knowledge as they build a functional model glider. They will collaborate with a partner through the steps of the Engineering Design Process and measure the speed of their glider through several attempted flights.
Learning Goals:
• Students will learn about forces that affect flight.
• Students will calculate the average speed of gliders by measuring distance and time.
Background:
• What is a glider? A glider is a fixed-wing aircraft that is supported in flight by the force of air against its lifting surfaces, and whose free flight does not depend on an engine.
• What is a force that will act on your glider? Many forces act on an aircraft in flight, but we’re going to focus on four:
o Lift: an upward force that is created by the effect of airflow over and under the wing.
o Weight: the force of gravity attracting an object to earth.
o Thrust: a forward force that propels an aircraft through the air, usually provided by the engine system.
o Drag: the resistance of the atmosphere relative to the motion of the aircraft. It opposes thrust and limits airspeed.
• How do gliders move? The glider will have two types of control surfaces that you can adjust in order to alter its flight path: ailerons on the wings and a rudder on the tail.
o Ailerons are horizontal flaps in the middle of wither wing. If they are moved in opposite directions, they can cause the glider to climb or descend at a steeper angle than it would otherwise.
o The rudder is a vertical flap in the tail that can move from side to side. If the rudder is turned, air will push on it and steer the glider to the side.
• Speed: Distance traveled (m) / Travel time (s)
Materials:
Substitution
32 students)
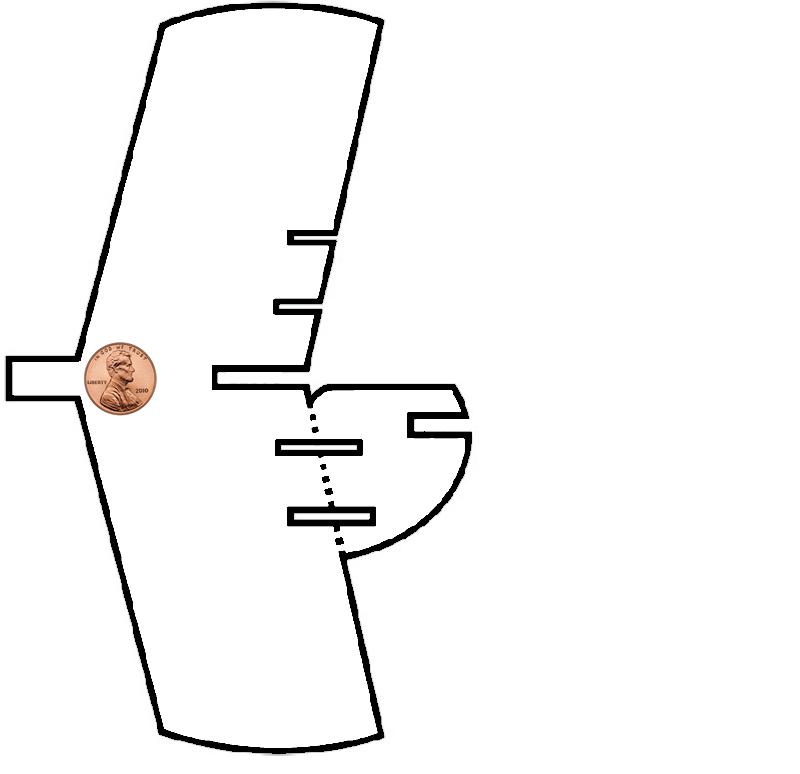
Glider template 32
Foam plate (9") 150 other disposable plate
Paper plate (9") 150
Cardstock 150 manila folder, recycled food packaging
Tape measure 32 ruler
Masking tape 32 scotch tape, painter’s tape
Paper clips 200 other small weights
Washers 100 dime, nickel, pennies
Prep:
• Create a runway on a clear area using masking tape and the measuring tape to mark every 50 cm until 3 meters or 300 cm.
• Set out one set of materials on the demo table to act as a visual aid when showing students their options for materials.
• Print one template on cardstock and cut it out. Use one paper plate and a Styrofoam plate, trace the template on each, and cut them out.
• Set out pieces of pre-built glider that you will assemble in real time in the demo:
o Glider template
o 2 wings pieces and 2 tale pieces cut-out from each type of plate
o Penny
o Tape
Engage (10 minutes):
We are doing a STEM engineering design challenge to explore aviation and flight. We’ll go over some background science knowledge that will help you succeed at this challenge. Your goal today is to design and create a functional model glider. The glider is considered successful if it meets these criteria: the glider needs to glide at least 3 meters before touching the ground; the glider should travel and land in one piece, and you must determine the average speed of your glider.
Have a short discussion about engineering. Use the following questions:
• What is an engineer?
o Engineers are people that use their knowledge to design, create, and improve technology.
• What is technology?
o Anything human-made that solves a problem.
• Mention something that you think is technology.
• Have you used the Engineering Design Process before? What is the EDP?
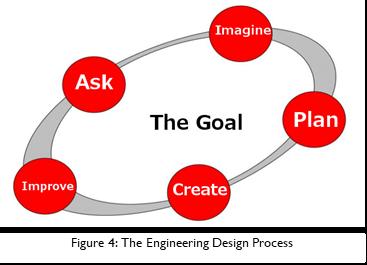
Explain the Engineering Design Process to your students and let them know that these are the steps that they will be using to create their model glider.
1. ASK questions that will help you achieve your goal. These questions should focus on:
a. Criteria: What does the design need to do in order to successfully meet the goal?
b. Constraints: What are we limited by?
c. Content: Math and science concepts that will need to be applied when solving the problem
2. IMAGINE at least two possibilities for design.
a. What could be some solutions?
b. Brainstorm ideas individually
3. PLAN the design before building.
a. Combine ideas with engineer teammates to come up with a final design.
b. Make a list of the materials needed.
4. CREATE at least one design solution.
a. Follow the plan and create it.
b. Test it out!
5. IMPROVE the design based on evidence around the original design criteria.
a. Make the design better.
b. Test it out!
Activity (30 minutes):
Remind students of the goal: Design and create a functional model glider that glides at least 3 meters (300 cm) before touching the ground; the glider should travel and land in one piece, and you must determine the average speed of your glider.
Students will use the glider template as a base for their design. They can change the glider wings and structure, but they need to keep the ailerons and rudder.
• IMAGINE: you will now have 2 minutes to imagine individually a design for your glider and draw 2 ideas.
• PLAN: now share your ideas with your partner. You can combine aspects of several different ideas into one plan. Make sure your plan meets the requirements of the goal. Students should also use this time to select their materials.
• CREATE: you will have 10 minutes to build your glider.
• TEST 1: after 10 minutes, call groups together to test their designs.
o Stand at one end of the runway you taped down earlier.
o Make any last-minute adjustments to your ailerons and rudder to help the glider fly as far as possible.
o Gently throw the glider forward with one hand. Start your timer with the other.
o Stop the timer as soon as the glider touches the ground. Record the flight time on your worksheet.
o Measure the distance from the starting point to the glider, using the markings on your runway as a guide.
o Show students how to calculate their glider’s speed by dividing the distance traveled by travel time.
• IMPROVE: give groups 8 minutes to improve their design. They must first draw their improved design on their worksheet and then make changes according to their new design. They can get extra building materials if needed.
• TEST 2: after 8 minutes, tell groups to stop building and that is it is time to test the gliders. Have them test using the same procedures done previously.
Wrap-Up (5 minutes):
• How did your gliders perform?
• What was successful about your gliders design?
• How did the shapes used in your designs affect the flight path?
• What was your glider’s best average speed?
Standards:
• SC.6.P.13.1: Investigate and describe types of forces including contact forces and forces acting at a distance, such as electrical, magnetic, and gravitational.
• SC.6.P13.2: Explore the Law of Gravity by recognizing that every object exerts gravitational force on every other object and that the force depends on how much mass the objects have and how far apart they are.
• SC.6.P13.3: Investigate and describe that an unbalanced force acting on an object changes its speed, or direction of motion, or both.
• SC.6.N.1.1: Define a problem from the sixth grade curriculum, use appropriate reference materials to support scientific understanding, plan and carry out scientific investigation of various types, such as systematic observations or experiments, identify variables, collect and organize data, interpret data in charts, tables, and graphics, analyze information, make predictions, and defend conclusions.
• SC.6.N.1.4: Discuss, compare, and negotiate methods used, results obtained, and explanations among groups of students conducting the same investigation.
• SC.7.P.11.2: Investigate and describe the transformation of energy from one form to another.
• SC.7.N.1.1: Define a problem from the seventh grade curriculum using appropriate reference materials to support scientific understanding, plan and carry out scientific investigations of various types, such as systematic observations or experiments, identify variables, collect and organize data, interpret data in charts, tables, and graphics, analyze information, make predictions, and defend conclusions.
• SC.8.N.1.1: Define a problem from the eighth grade curriculum using appropriate reference materials to support scientific understanding, plan and carry out scientific investigations of various types, such as systematic observations or experiments, identify variables, collect and organize data, interpret data in charts, tables, and graphics, analyze information, make predictions, and defend conclusions.
• SC.68.CS-CS.1.3: Evaluate what kinds of real-world problems can be solved using modeling and simulation.
• SC.68.CS-CS.2.2: Solve real-life issues in science and engineering (i.e., generalize a solution to open-ended problems) using computational thinking skills.
Title: Package Drop
Program: Aviation Adventures – Extension Lesson
Grade Level: 6-8
Duration: 45 minutes
Objective: Students will use their STEM skills to design a method of dispersing a “seed” by the wind.
Background:
Package engineering involves the design, development, and production of packages. Packages are all around us in the form of boxes, envelopes, food containers, and medicine bottles, just to name a few. Most people don’t take a lot of time to think about all of the engineering that goes into the packages we see around us every day.
There are seven main functions (or jobs) of packages that packaging engineers need to think about. These functions include: contain, communicate, carry, display, dispense, protect, and preserve. We will focus on the protective, display, and communication functions of packages as they design an aid drop package. They will need to be sure that the supplies inside are not damaged (protect), the package is easy to see when it lands (display), and the package lets people know what is inside (communicate).
When people are cut off from essential supplies, sometimes the only way to quickly deliver food, water, medicine, and other necessities is through humanitarian airdrops. Aid drops are generally short-term projects, since dropping aid from the air can be more difficult to coordinate than delivering aid using trucks or person-to-person delivery. Aid drops can also be very expensive.
Aid drops have been used in Thailand to deliver aid to people living in areas isolated by flood waters during monsoon season. Aid drops have also been implemented in Afghanistan after the landslide in 2010, and in Haiti after the 2010 earthquake.
If package supplies are not properly protected, they can be damaged upon impact. If the people who need the supplies cannot easily find the aid drop packages, or are not certain that what is inside is safe and meant to help them, the supplies may go to waste.
Prep:
1. Create a materials table or make one bag for each group with the materials available.
2. Reserve a testing area in the classroom. Label it with a sign or mark the area using tape.
Engage (10 min):
FEMA engineers need your help. They are planning a humanitarian mission after Hurricane Maria and they need a package to protect the payload during its descent to the surface. Your goal today is to be engineers that will design and create a prototype package that will protect pasta inside from breaking when dropped from a 5 ft height.
Have a short discussion about engineering. Use the following questions:
• What is an engineer? Engineers are people the use their knowledge in math and science to design, create and improve technology.
• What is technology? Anything human made that solve a problem or fulfill a desire.
o Mention something that you think its technology. Students may say: computers, TVs, cars, planes, robots… Tables, chairs, markers, shoes, and others are also technology.
• Have you used the Engineering Design Process before? What is the EDP? (pause and take answersPossible answers may include time to design and build, what materials do we have, why are we using an egg.)
o Define a GOAL for the design and ASK questions to establish design criteria.
§ What is the problem?
§ What have others done?
o IMAGINE at least two possibilities for design.
§ What could be some solutions?
§ Brainstorm ideas.
o PLAN the design before building.
§ Draw a diagram.
§ Make a list of the materials needed.
o CREATE at least one design solution.
§ Follow the plan and create it.
§ Test it out!
o IMPROVE the design based on evidence around the original design criteria.
§ Make the design better.
§ Test it out!
Before we start using the Engineering Design Process, let's start with the ASK step: What do you need to know in order to reach your goal? (Pause and take answers)
What is a delivery package for a humanitarian mission?
• After some natural disasters, transportation and communications systems stop working and people are uncommunicated. Helicopters, gliders and even drones can be used to send food and first aid in payloads. Because of the conditions, they won’t be able to land, they drop the payload so people in need have access to their necessities.
What forces act on the payload that is going to be drop? (Pause and take answers) Gravitational Potential Energy!
o Gravitational potential energy is the energy an object has because of its position in a gravitational field. Heavy objects hit the ground with more force than lighter ones as Newton’s 2nd Law (force = mass x acceleration) describes.
o That enormous amount of potential energy is converted to kinetic energy when the payload is in motion. In order to land and deliver the payload to the surface, this kinetic energy must be safely transformed (energy cannot be created or destroyed.) Part of the kinetic energy needs to be transfer from the payload to the parachute. But in order to bring a payload to a safe touchdown, an additional landing system is necessary to transform the remaining kinetic energy.
Why are we using uncooked pasta?
o The uncooked pasta represents the payload with all of its fragile and expensive kits, food and beverage, etc. We need to protect supplies from any harm that would prevent the payload to be damage.
How are we going to test?
o When it is time to test, one member of each team will stand on the front of the classroom. The student will hold their team’s package on one hand and stretch the arm above the head (around 5ft). When they are all ready, they will let go the package at the same time.
Now that you know the forces involved, you need to know the materials you have to complete the challenge and your budget. You will get a $500 budget to purchase materials. (Give each team a copy of the price list and go over it with them.)
Due to FEMA’s recent budget cuts, they want to purchase the prototype design that would cost the least so keep that in mind when planning.
ACTIVITY (30 minutes):
Remind students of the goal: Design and create a prototype package that will protect 4 Farfalle pasta inside of it from breaking when dropped from a 5 ft. height.
For the purposes of this challenge: If the pasta breaks or cracks, you did not reach your goal.
• IMAGINE: You will now have 2 minutes to imagine individually a design for a package and draw 2 ideas. Your pasta needs to be place inside the package before being tested, remember to leave an opening for the pasta.
• PLAN: Now share your ideas with your group and decide on one plan. You can combine aspects of several different ideas into one Plan for the group. Make sure your plan meets the requirements of the goal.
o Give instructions on how to buy materials from instructor.
§ ONE person per team with list in hand may come to buy materials.
§ Return policy: only if materials have been UNUSED.
§ Remind students not to spend all their money in the first trial and to keep some in case they need to buy more materials later.
§ They may not use their tools as part of their package.
• CREATE: You will have 10 minutes to build your package device. (Start time. Give regular time updates to teams so they can use their time appropriately.)
• Test 1: After 10 minutes, call groups together for test.
o When you call up all the teams to test, have them only send one team member up for the test.
o Ask the team member to share their package with the class.
§ Describe your package design.
§ What materials did you choose? Why did you choose those materials?
§ How much money did you spend?
o Ask the student to place 4 pieces of pasta inside the package and to hold in with one arm. Raise the arm above the head and let you know when ready. Drop the package to the ground.
o After each test, ask the team the following questions:
§ Was it successful? Did it meet the goal? Open the package carefully and check the pasta.
§ What parts worked well? How do you know?
§ Which parts didn’t work well? How do you know?
o Make sure that all the teams shared.
o After all tests, discuss with students which designs worked best and why. Discuss which designs were the least expensive. Which design would FEMA want to purchase? Why?
• IMPROVE: Give groups 8 minutes to improve their design. They must first draw their improved design on their worksheet and then make changes according to their new design. They can then go up to the Instructor table to make purchases.
• Test 2: After 8 minutes, tell groups to stop building and that it is time to test the packages.
o Before testing, have groups share their improved package with the class.
§ How did you ‘Improve’ your package design?
o Follow the same test procedures done previously. Have students answer the following questions after the test.
§ Were your improvements successful? How do you know?
§ What parts of your design worked well? How do you know?
§ What parts did of your design did not work well? How do you know?
§ What would you do to improve this design?
o Make sure that all the teams shared.
Wrap-up (5-10 min):
• How can we use our knowledge of gravitational potential energy, the Engineering Design Process, and our creativity to design packages for different types of payload?
• Were you able to improve the package?
• What was the easiest part of the challenge?
• What was the hardest part of the challenge?
Title: Stop Motion Animation
Program: Aviation Adventures – Extension Lesson
Grade Level: 6-8
Duration: 45 minutes
Objective: Students will use the glider designed in the previous workshop to create a stop motion animation movie that explains the forces of flight and how ailerons function.
Background:
Stop motion animation is a film making technique that makes inanimate objects appear to move on their own. To make it work, you place an object in front of a camera and snap a photo. Then, you move the object a tiny bit and snap another photo. Repeat this process twenty to ten thousand times, play back the sequence in rapid progression, and the object appears to move fluidly across the screen.
A glider is a fixed-wing aircraft that is supported in flight by the force of air against its lifting surfaces, and whose free flight does not depend upon an engine.
Many forces act on aircraft in flight, but we’re only going to focus on four today:
1. Lift: an upward force that is created by the effect of airflow over and under the wing. The difference in air pressure above and below the wing causes a net upward force on the aircraft.
2. Weight: the force of gravity attracting an object to Earth.
3. Thrust: a forward force that propels that aircraft through the air. Usually this is provided by an engine system.
4. Drag: the resistance of the atmosphere relative to the motion of the aircraft. It opposes thrust and limits airspeed. This is a form of friction.
Airplanes have streamlined shapes. This means that they fly through the air with minimal drag, which means that it takes less energy to fly through the air.
Ailerons are horizontal flaps in the middle of either wing. If they are moved in opposite directions, they can cause the glider to bank or roll to its side. If they are moved in the same direction, they can cause the glider to climb or descend at a steeper angle than it would otherwise.
The rudder is a vertical flap in the tail that can move from side to side. If the rudder is turned, air will push on it and steer the glider to the side.
Prep:
1. Charge tech. (iPads, tablets or smart phones)
2. Download Stikbot Studio 2.0 to the mobile devices.
3. Create a materials table
Engage (10 min):
Today, we are going to use stop motion animation technology to recreate a simulation. You'll be utilizing your glider from the previous workshop.
Ask the students:
• Do you know what stop motion animation is?
• How stop motion animation works?
Explain: Stop motion animation is a film making technique that makes inanimate objects appear to move on their own.
• Images are captured in a sequence and then played back in quick succession to create the illusion of movement over time.
• Stop motion makes use of a still-image camera to capture a single image at a time.
• The character movement is then made before the next photograph in the series is taken. The movement itself is never actually captured just the result of it.
• Then, when the image sequence is viewed at a high enough frame rate, the experience of movement is achieved.
• Reference: https://blog.pond5.com/12735-stop-motion-animation-101-how-to-createthe-illusion-of-movement/
• Play the example.
Ask students to explain how it works in their own words to make sure they understood. Then explain:
• To make it work, you place an object in front of a camera and snap a photo. You then move the object a tiny bit and snap another photo. Repeat this process twenty to ten thousand times, play back the sequence in rapid progression, and the object appears to move fluidly across the screen.
For this project, we will be using the Stikbot Studio 2.0 App in the iPads or your mobile devices to create the animation.
• You'll be working in pairs (or individually) and you’ll able to use one or both of the gliders you designed previously.
• You will discuss with your partner the story line for your animation. Remember, it needs to explain the forces of flight and how the ailerons work. You’ll need to combine your ideas to have one design.
• After you have agreed to the scenario and the materials needed, each group can raise their hand, show the plan to the teaching team and get the materials to start working.
Let's talk about how to use the Stikbot Studio 2.0 app (demonstrate):
• Unblock the mobile device you will be using.
• Open the Stikbot Studio 2.0 app.
• Click on “Create Movie”.
• The camera will come up. On the top, you’ll see that for each second you will need 12 pictures.
• The camera will work the best if it’s stable on a secure position, instead of moving it around every time you take a picture. The objects are the ones being move.
• You can see the progress of your movie by clicking on the arrow to your right.
• Step by step to create a stop motion animation:
Step 1: Choose your characters. For this animation, your main character is your glider.
Step 2: Set your camera and light your scene. Your camera will be the one from the iPad. It’s a good idea to set your camera in a fixed position to minimize the movement.
o The goal is to have the camera angle remain consistent in each shot, while the character’s position changes from one frame to the next.
Step 3: Capture an image, reposition your characters, and repeat.
o In order to achieve a smooth motion from one point to another, your character(s) should be repositioned by a consistent distance from frame to frame.
o The further a character is moved between increments, the faster it will appear to move when played back. Likewise, if it travels a shorter distance between increments, it will appear to slow down.
o In animation, the process of speeding up or slowing down is called ramping or cushioning.
Step 4: Play back the image sequence.
• Clarify all the student's questions before starting the activity.
Activity (20 min):
1. Talk with your partner about your ideas for the scenario for the simulation. Then, make a design (your story) for the animation. Remember that the main characters are your gliders.
a. Add the list of materials to your plan.
2. When your plan is approved by the teaching team, you can get the materials you need.
a. Having your plan approved means this means that you can explain the scenario, what materials you will use and how you’ll create each movement.
b. Remember to be considerate with the materials, every group will use them. Share!
3. Find a spot in the classroom to start working on your project. Please use your communication and collaboration skills to solve any issue that you encounter.
4. Let's the students work for 20 minutes. The teaching team should walk around asking questions and helping with the tech.
5. Give times warnings.
6. When it’s 5 minutes to the end of the session, ask students to clean. Ask them to put all their materials together and name them. Please check the floor and tables.
Wrap-up (5-10 min):
Have a brief discussion with the students where they can share their experience while creating the stop motion animation. Use the following guided questions:
• Were you able to follow your story line or did you make changes in the process?
• What was easy about creating a stop motion animation? What was hard?
• If you had more time, what would you change about your animation?
• Would you use stop motion animation to explain other STEM topics?

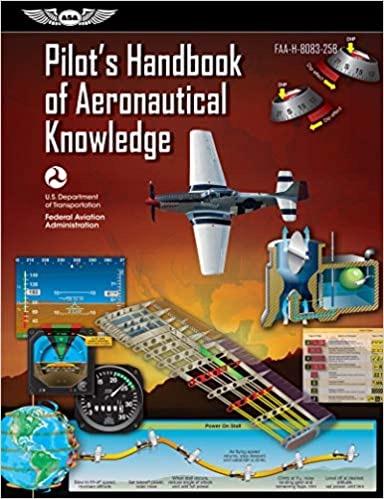
Pilot's Handbook of Aeronautical Knowledge
This invaluable learning tool begins with a basic introduction to flying and a history of flight, then explores the role of the FAA, criteria for earning the various pilot certificates, how to select a flight school and instructor, and the tests associated with earning a pilot certificate.
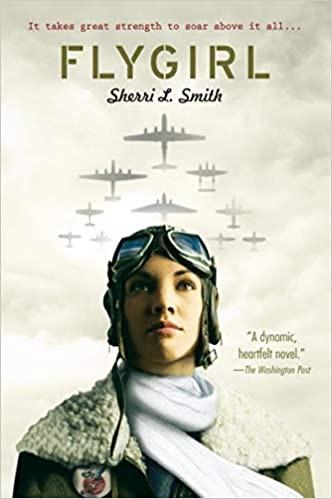
Flygirl by Sherri L. Smith
All Ida Mae Jones wants to do is fly. Her daddy was a pilot, and years after his death she feels closest to him when she's in the air. But as a young black woman in 1940s Louisiana, she knows the sky is off limits to her, until America enters World War II, and the Army forms the WASP-Women Airforce Service Pilots.
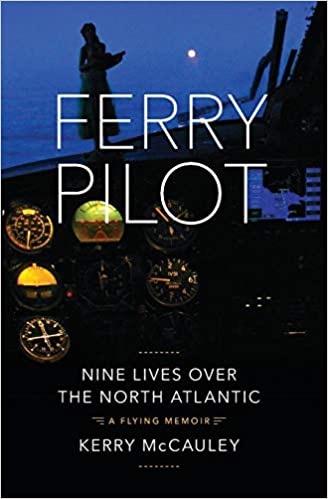
Ferry Pilot: Nine Lives Over the North Atlantic by Kerry McCauley
What could possibly go wrong? A LOT, if you spend 30 years flying small airplanes over the North Atlantic! Join Kerry McCauley in the cockpit as he battles a fuel system malfunction over the Atlantic, a total electrical failure at night over the Sahara, being struck by lightning off the coast of Portugal and losing his engine in a thunderstorm.
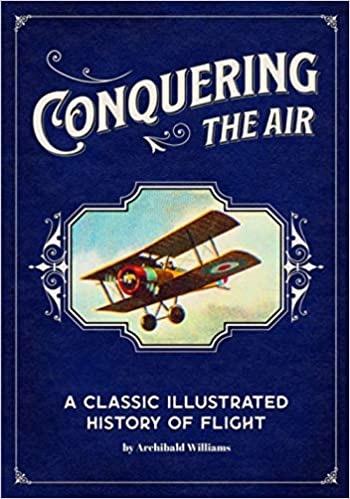
Conquering the Air: A Classic Illustrated History of Flight by
Archibald Williams
Revisit the romantic age of aeronautics when the rapid development of balloons, dirigibles and airplanes changed the world forever. This book will take you to an informative journey through the early days of air travel for readers of all ages in 1926, covering the earliest ascents in balloons through the Wright Brothers, trans-Atlantic flights.

Helicopter Game
Aircraft Basic Science, Eighth Edition
This textbook is a valuable resource for students of aviation technology that provides updated information needed to prepare for an FAA airframe and powerplant maintenance certification. This expanded edition includes recent advances in technology, such as the use of composite aircraft materials, with revised examples and figures to more accurately reflect the state of the industry.
Flight: The Complete History of Aviation
Take a sky-high journey through the Wright brothers’ first powered flight, to Concorde’s final voyage, to the tragic crash of the Columbia, and more, in this stunning book packed with information on the history of aviation.
Paper Survive Game
Get ready for a true test of your helicopter flying abilities! Helicopters 2 is a fun and addicting helicopter flying game where you must skillfully navigate a little chopper through a series of tricky platform challenges.
Flight Simulation Game
In Airplane Simulator Island Travel, it is your job to safely navigate across the globe by visiting lots of different islands. Experience the ultimate freedom as you take to the skies in this immersive flight simulator game. This is not easy as it is designed to replicate the challenges of the real world of flying an airplane!
Aerospace History Timeline
Learn how today’s aerospace world evolved from the earliest dreams of flying to the 12second airplane flight that gave humanity its wings to a planet driven by aerospace and now venturing ever deeper into space.
Begin your dream of a career in the aviation industry here. Paper Survivor is a true flying extravaganza with lots of different challenges that you will need to pass! Get your paper plane ready for take-off!
Helicopter Rescue Simulation
Are you ready to fly? You better be because Helicopter Rescue Operation 2020 is the ultimate helicopter challenge, and it is calling your name. Time to fly high and save some people!
Wings Over Indiana
As special one-hour edition of the Emmy Award winning science series Indiana Expeditions, host Rick Crosslin travels across the state and to the NASA Dryden Flight Research Center in California, to look at Indiana's connections to the history and science of aviation.