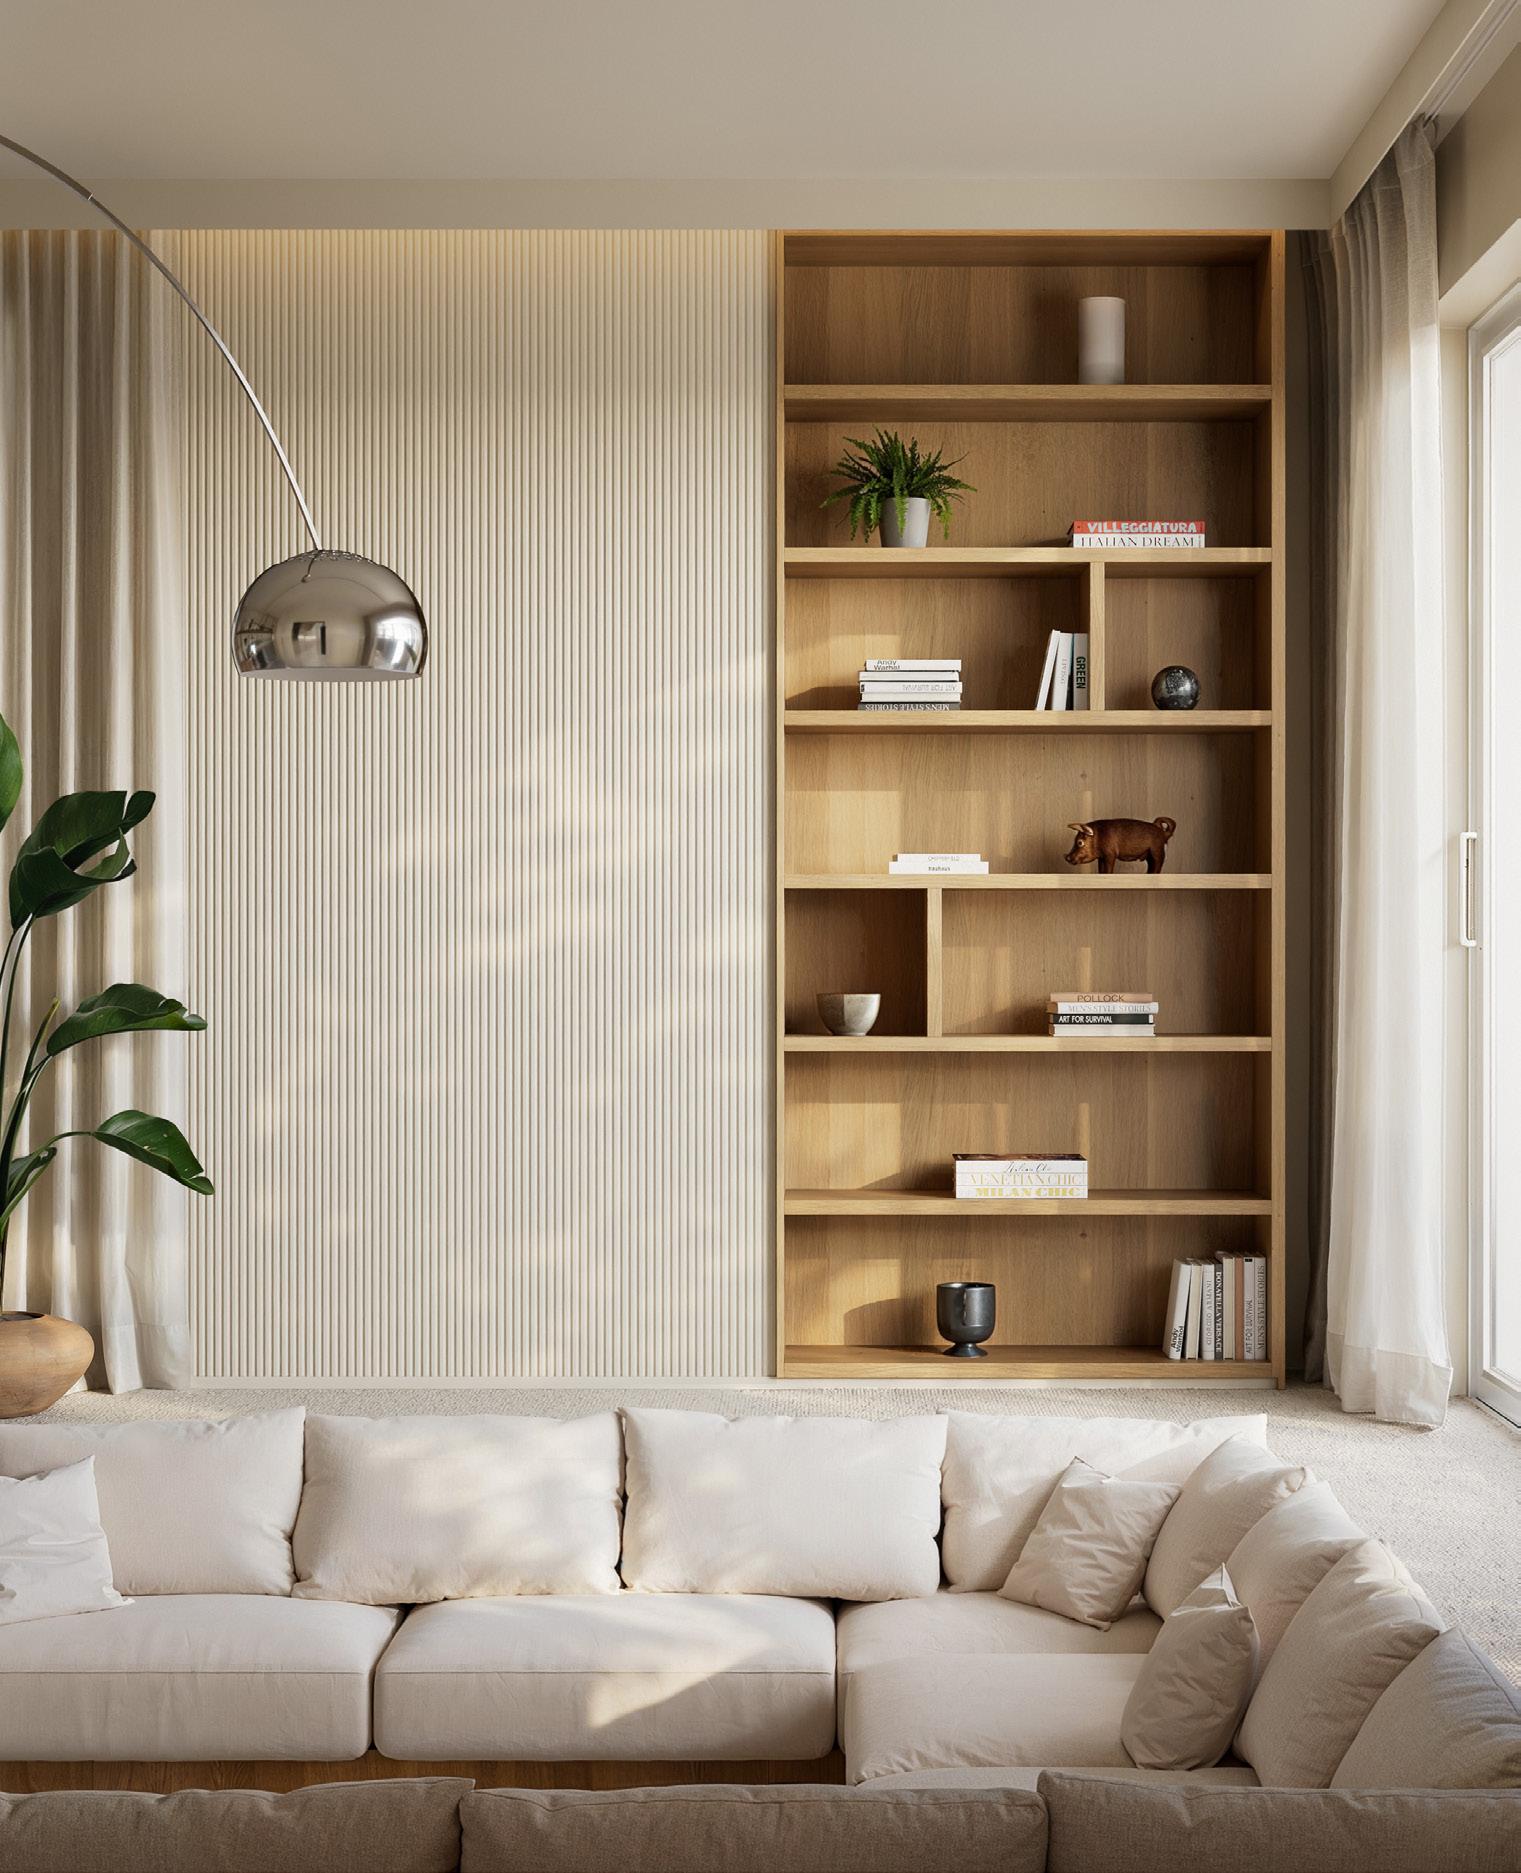

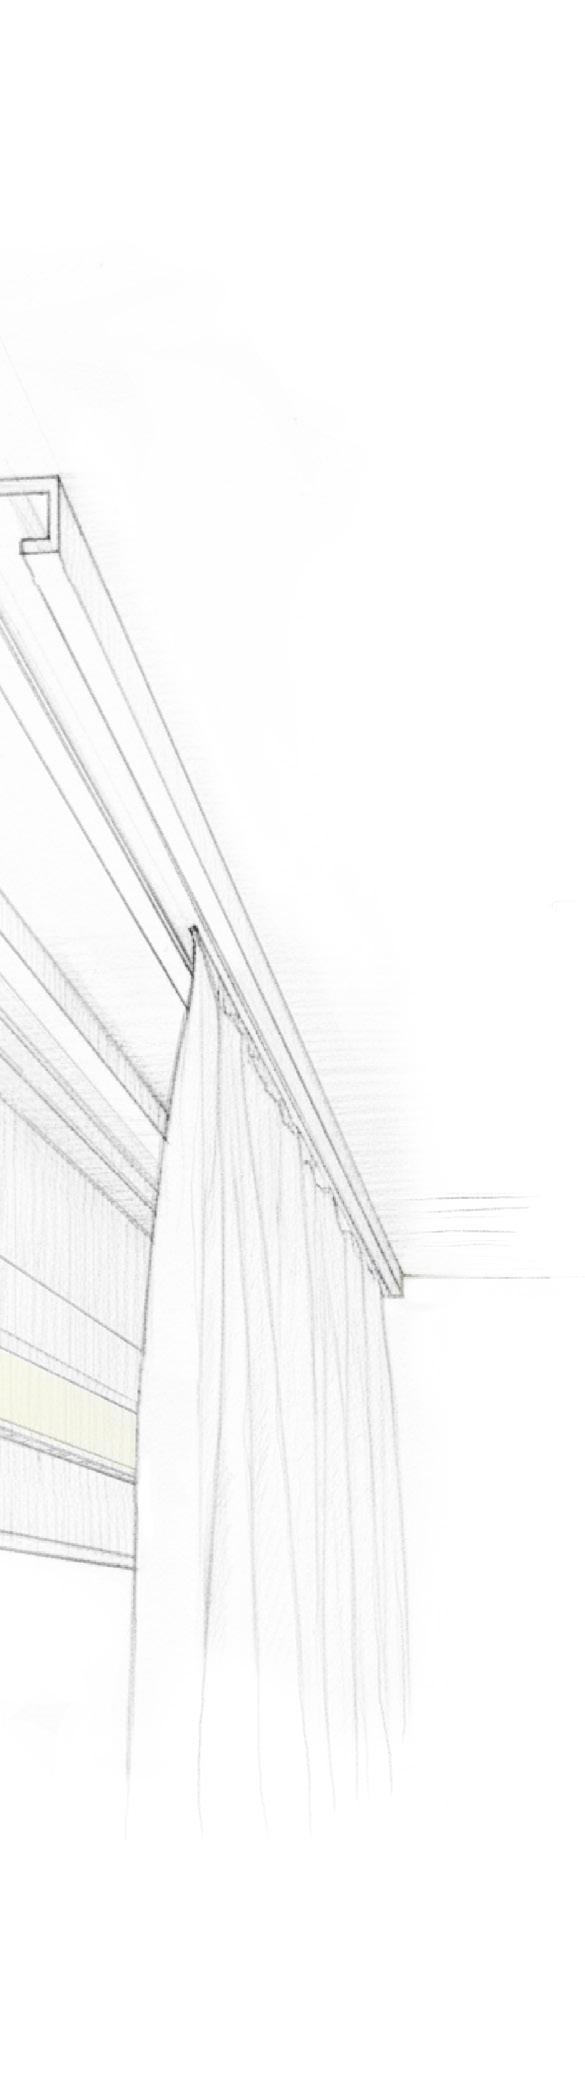
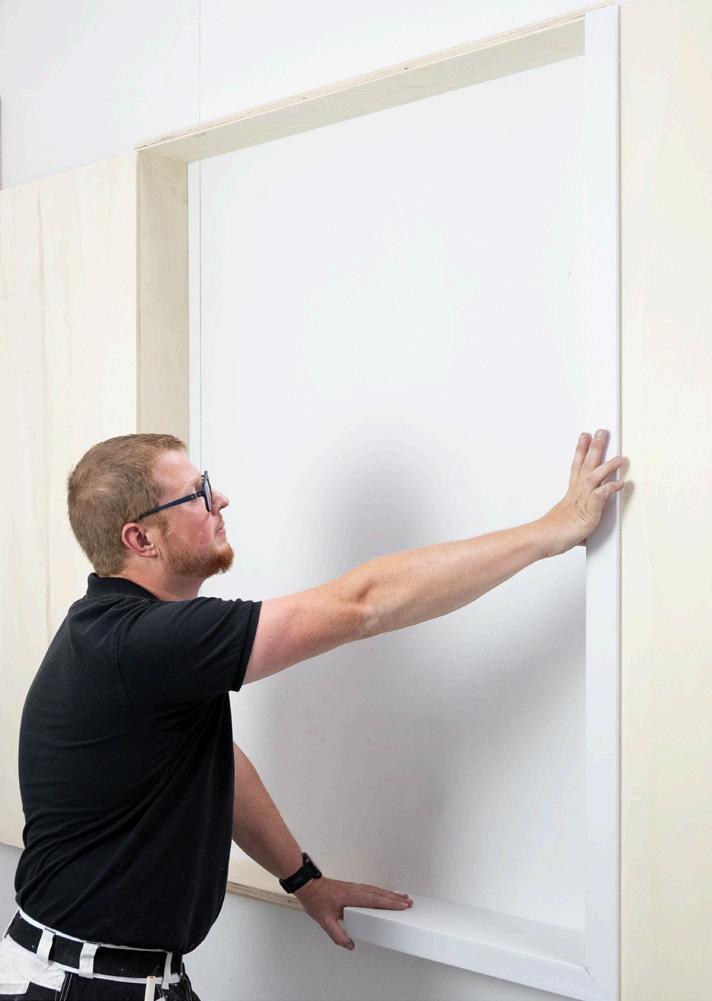
LEDGE is an all-in-one concept: subtle cornice, curtain profile and lighting solution. Easy to install, multifunctional and perfect for sleek, stylish interiors.
NL
LEDGE is een alles-in-één concept: subtiele sierlijst, gordijnprofiel en verlichtingsoplossing in één. Eenvoudig te installeren, multifunctioneel en perfect voor strakke, stijlvolle interieurs.
FR
LEDGE est un concept tout-en-un : À la fois corniche discrète, profil pour rideaux et solution d’éclairage indirect, il se distingue par sa simplicité d’installation et sa polyvalence. L’alliance parfaite pour sublimer les intérieurs contemporains au style épuré et raffiné.
DE
LEDGE ist ein All-in-One-Konzept: Dezente Stuckleiste, Gardinenverblendung und Profil für die indirekte Beleuchtung in einem. Einfach zu installieren, multifunktional und perfekt für moderne, stilvolle Innenräume.
ES
LEDGE es un concepto todo en uno: cornisa discreta, perfil para cortinas y solución de iluminación. Fácil de instalar, multifuncional y perfecta para interiores elegantes y contemporáneos.
NL Geschikt voor alle interieurstijlen en projecten.
— Slimme en subtiele designoplossing
FR Convient à tous les styles d’intérieur et s’adapte à chaque projet, du plus classique au plus contemporain.
— Une solution design à la fois astucieuse et discrète
DE
Geeignet für alle Einrichtungsstile und Projekte.
— Eine clevere und dezente Designlösung
ES
Adecuado para todos los estilos de interior y proyectos.
— Una solución de diseño inteligente y sutil
CX215-2600 LEDGE
Duropolymer®
260 x 9,5 x 4,5 cm
CX215-2600 LEDGE
CURTAIN PROFILE
Duropolymer®
260 x 9,5 x 4,5cm
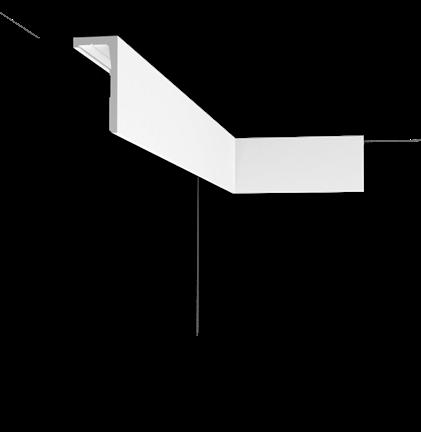
CX215-2600 LEDGE
CURTAIN PROFILE + LED* Duropolymer®
260 x 9,5 x 4,5 cm
CX216-2600 LEDGE
Duropolymer®
260 x 12,5 x 4,5 cm
CX216-2600 LEDGE
CURTAIN PROFILE
Duropolymer®
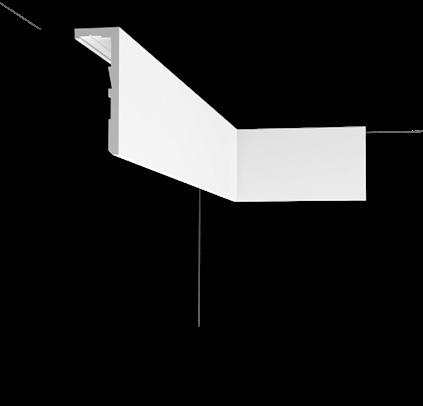
CX216-2600 LEDGE
CURTAIN PROFILE + LED* Duropolymer®
260 x 12,5 x 4,5 cm

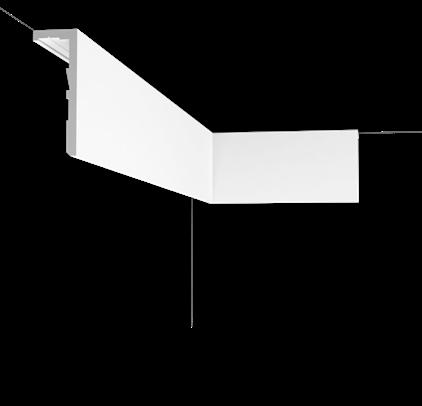
CX217-2600 LEDGE Duropolymer®
260 x 15,5 x 5 cm
CX217-2600 LEDGE
CURTAIN PROFILE
Duropolymer®
260 x 15,5 x 5 cm
CX217-2600 LEDGE
CURTAIN PROFILE + LED* Duropolymer®
260 x 15,5 x 5 cm
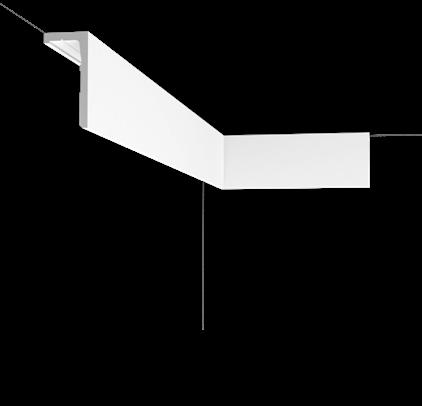
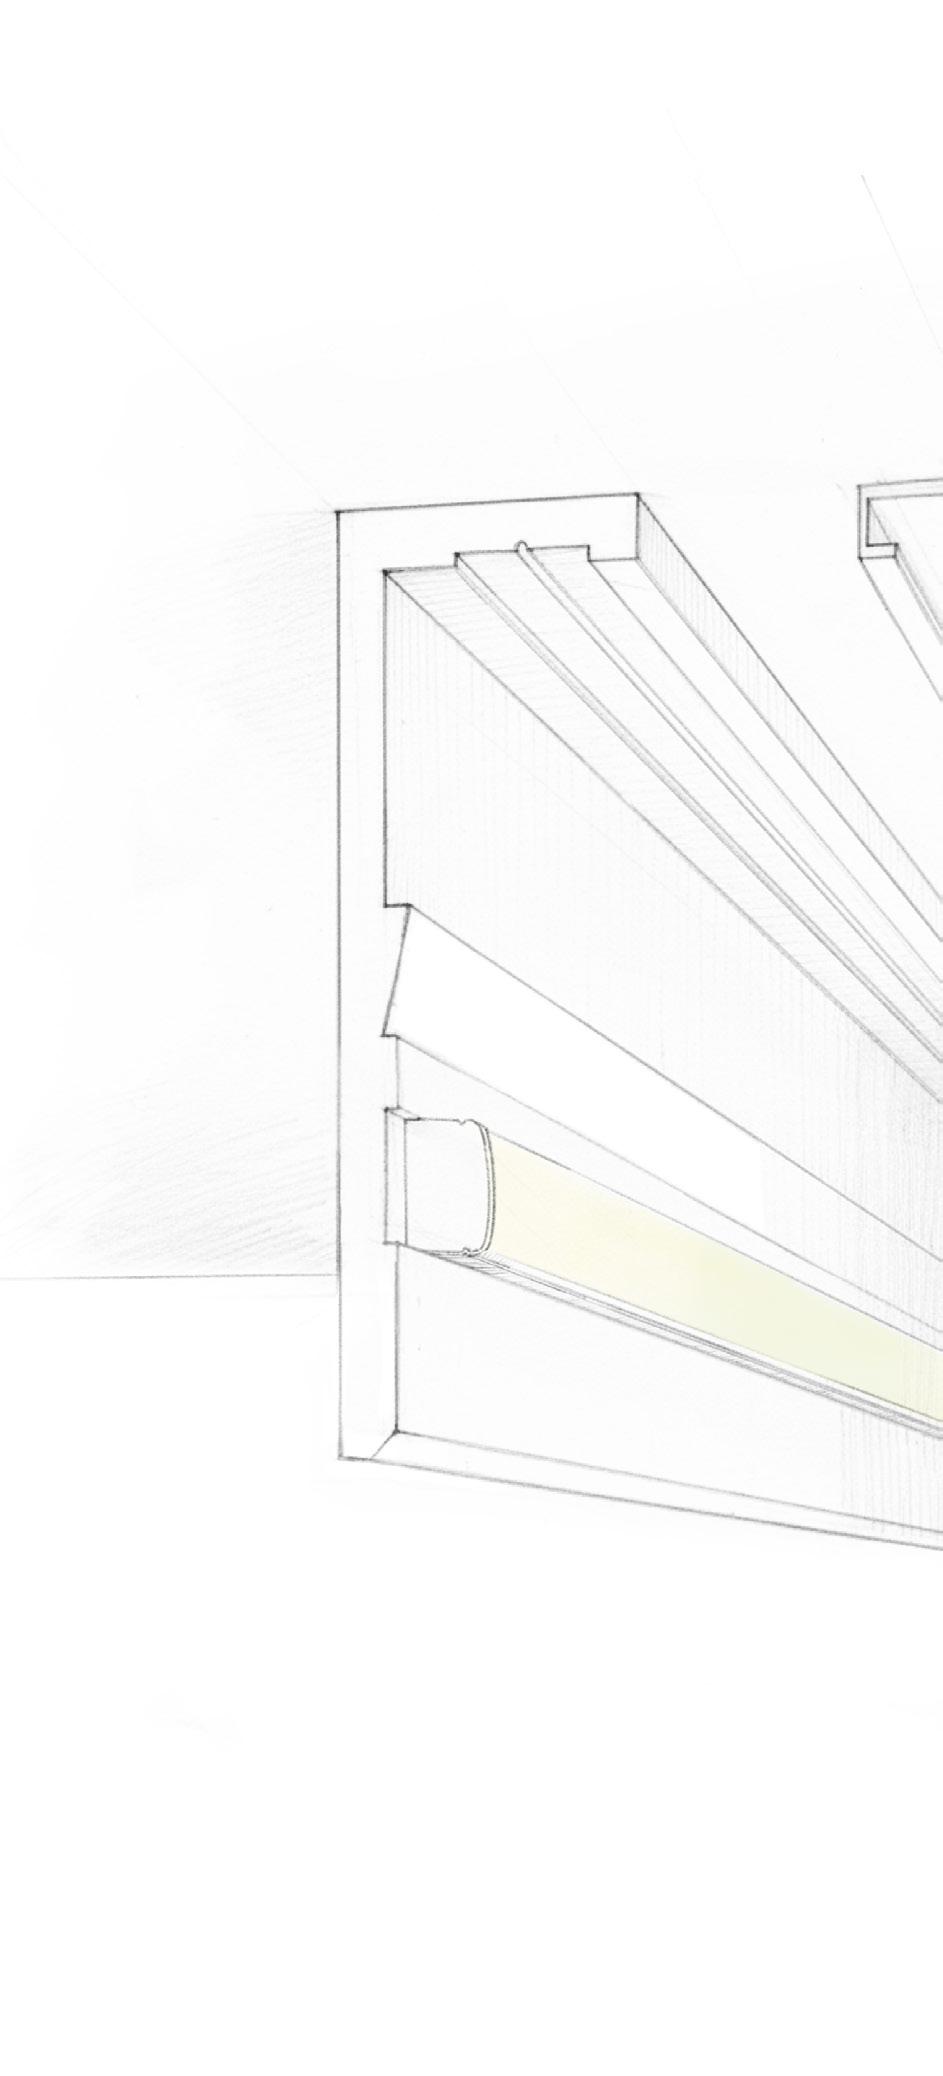
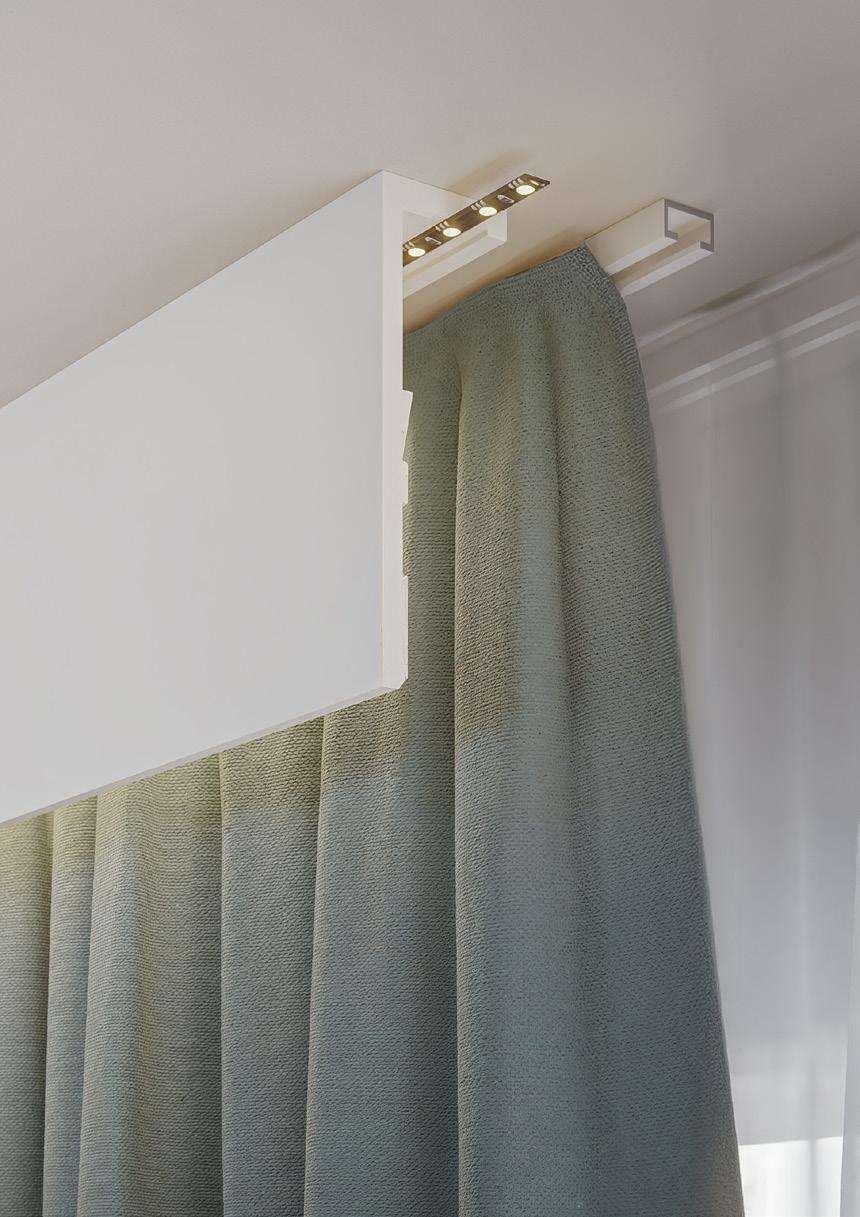
1 Lightweight & easy installation
Apply Decofix Power (FDP700) to the top of the profile, or use screws if the surface allows it. Your choice.
2 V-notch
Provides a clear indication of where to place the screws for straightforward installation.
3 Curtain rail
Place the curtain rail behind the lightweight profile for a seamless appearance. Conceals unwanted elements and ceiling imperfections for a clean, polished look.
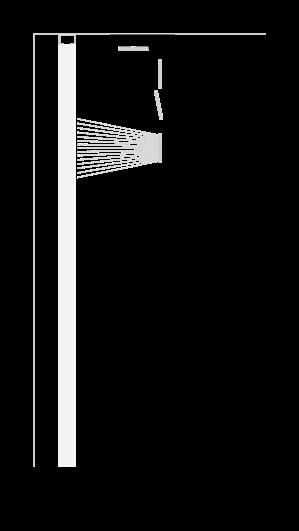
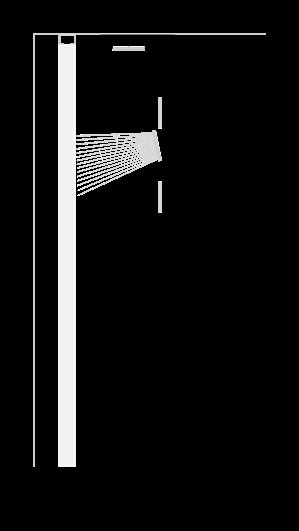
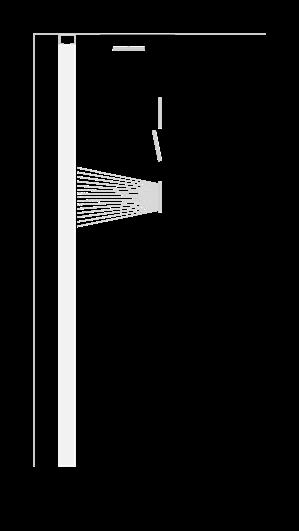
4 LED profile placement
The intensity of the diffused light depends on the LED profile’s position. Slotted locations ensure 100% straight LED placement, with 22 mm space for the LED bar.
5 Chamfered edge
Adds a slim, architectural touch and allows smooth curtain movement behind the profile
6 Paintable surface
Easily paint the profile in any colour to match your interior style.
Toon het gordijn, verberg de rail.
1. Lichtgewicht & eenvoudig te installeren Breng DecoFix Power (FDP700) aan op de bovenkant van het profiel, of gebruik schroeven als het oppervlak dit toelaat. De keuze is aan jou.
2. V-notch Geeft een duidelijke aanwijzing waar de schroeven moeten worden geplaatst voor een eenvoudige installatie.
3. Gordijnrail Plaats de gordijnrail achter het LEDGE-profiel voor een naadloze uitstraling. Verbergt ongewenste elementen en plafondoneffenheden voor een strakke, verfijnde afwerking.
4. Plaatsing van het LED-profiel De intensiteit van het diffuse licht hangt af van de positie van het LED-profiel. De gleuven zorgen voor een 100% rechte plaatsing van de LED, met een ruimte van 22 mm voor de LED-strip.
5. Afgeschuinde rand Voegt een smalle, architecturale toets toe en zorgt voor een soepele beweging van de gordijnen achter het profiel.
6. Overschilderbaar oppervlak Schilder het profiel eenvoudig in elke gewenste kleur om perfect bij jouw interieurstijl te passen.
Mettre le rideau en valeur, cacher la tringle.
1. Léger & facile à installer Appliquez DecoFix Power (FDP700) sur la partie supérieure du profilé, ou fixez-le à l’aide de vis selon le support. Deux options simples, à vous de choisir la plus adaptée.
2. V-notch Indique clairement où placer les vis pour une installation simple et rapide.
3. Profil pour rideaux Placez la tringle à rideaux derrière le profilé léger pour un rendu sans joint. Elle dissimule les éléments indésirables et les imperfections du plafond pour un aspect propre et raffiné.
4. Position du profilé LED L’intensité de la lumière diffusée dépend de la position du profilé LED. Les fentes garantissent un alignement parfaitement droit de la LED, avec un espace de 22 mm pour la barre LED.
5. Bord chanfreiné Apporte une touche fine et architecturale et permet un mouvement fluide des rideaux derrière le profilé.
6. Surface à peindre Peignez facilement le profilé dans la couleur de votre choix pour l’harmoniser avec votre style intérieur.
Vorhang im Blick, Schiene versteckt.
1. Leichtgewichtig & einfach zu installieren Tragen Sie DecoFix Power (FDP700) auf die Oberseite des Profils auf oder verwenden Sie Schrauben, wenn die Oberfläche dies zulässt. Sie haben die Wahl.
2. V-Fuge Gibt eine klare Markierung an, wo die Schrauben platziert werden sollen, um eine einfache Installation zu gewährleisten.
3. Gardinenverblendung Platzieren
Sie die Gardinenschiene hinter dem Ledge-Profil für ein einwandfreies Erscheinungsbild. Verdeckt unerwünschte Elemente und Deckenunebenheiten für ein sauberes, elegantes Finish.
4. Positionierung des LED-Profils Die Intensität des diffusen Lichts hängt von der Position des LED-Profils ab. Die vorgegebenen Positionen gewährleisten eine absolut gerade LED-Platzierung mit 22 mm Abstand für die LED-Leiste.
5. Abgeschrägte Kante Verleiht eine dezente, architektonische Note und ermöglicht ein reibungsloses Bewegen der Vorhänge hinter dem Profil.
6. Überstreichbare Oberfläche
Das Profil lässt sich ganz einfach in jeder gewünschten Farbe streichen, passend zu Ihrem Einrichtungsstil.
ES
Luce la cortina, oculta el riel.
1. Ligero & fácil de instalar Aplica DecoFix Power (FDP700) en la parte superior del perfil, o utiliza tornillos si la superficie lo permite. Tú eliges.
2. V-notch Indica claramente dónde colocar los tornillos para una instalación sencilla y precisa.
3. Perfil para cortinas Coloca el riel de cortina detrás del perfil ligero para un acabado uniforme. Oculta elementos no deseados e imperfecciones del techo, logrando un aspecto limpio y pulido.
4. Colocación del perfil LED La intensidad de la luz difusa depende de la posición del perfil LED. Las ranuras garantizan una colocación perfectamente recta del LED, con un espacio de 22 mm para la tira LED.
5. Borde biselado Aporta un toque elegante y arquitectónico y permite un movimiento suave de las cortinas detrás del perfil.
6. Superficie pintable Pinta fácilmente el perfil en cualquier color para adaptarlo al estilo de tu espacio.
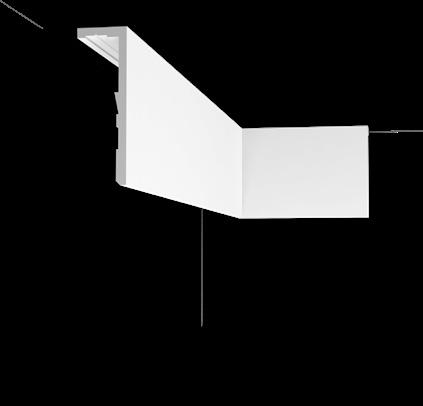
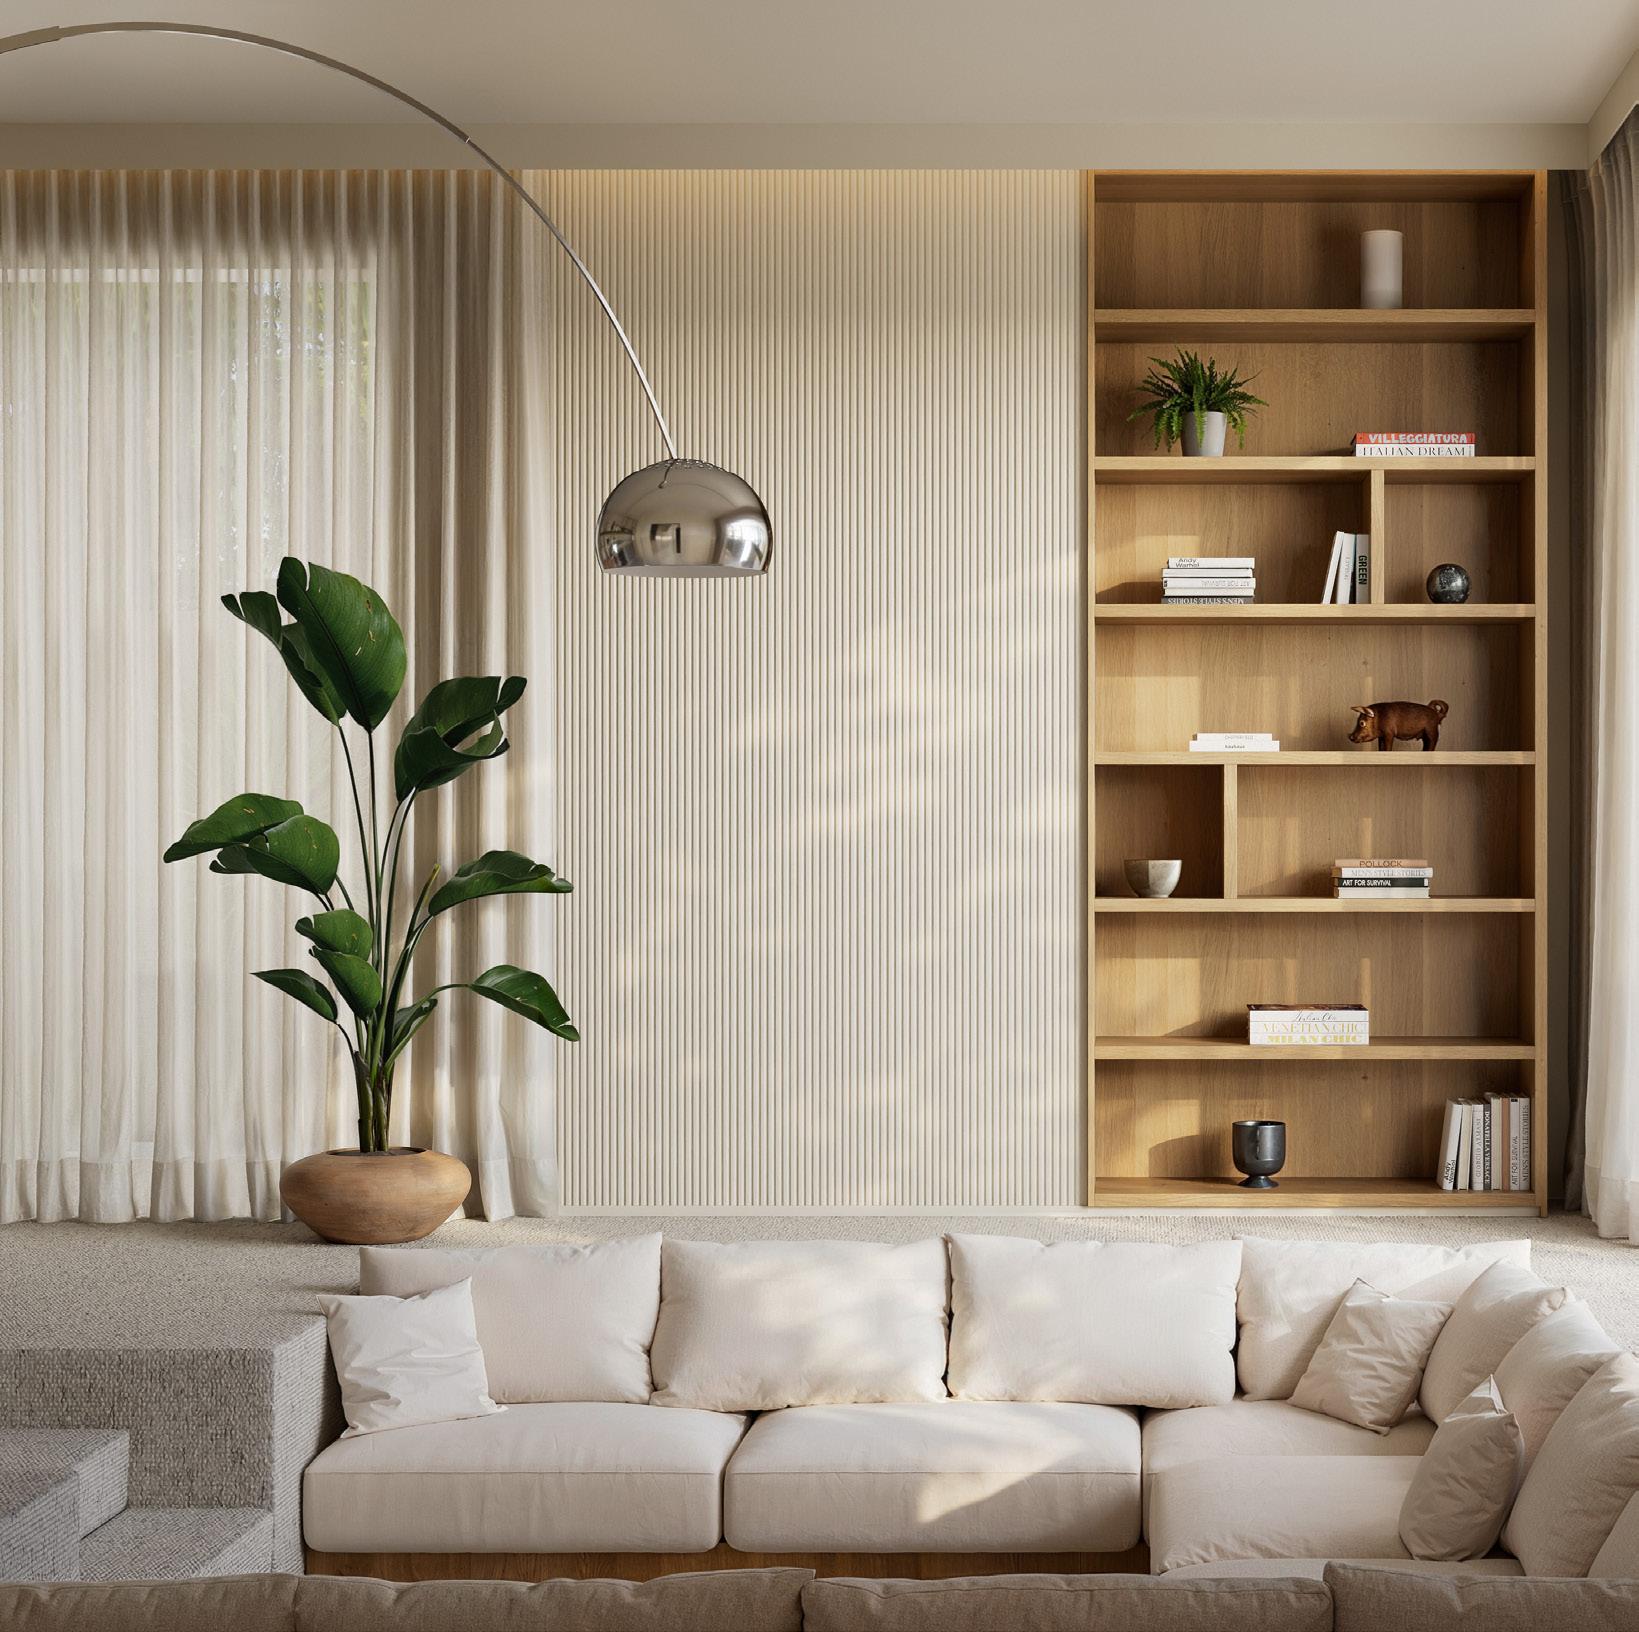
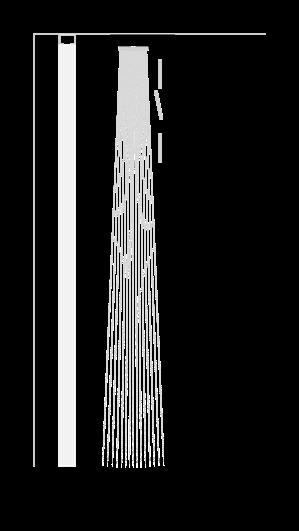
Seamless profile applied continuously across the entire wall, offering a unified and modern finish.
1
NL Van muur tot muur
Naadloos profiel dat door de hele wand wordt toegepast en zorgt voor een uniforme, moderne afwerking.
— Vergroot de ruimte visueel
FR De mur à mur
Profilé sans joint, appliqué de manière continue sur l’ensemble du mur, offrant une finition uniforme et moderne.
— Agrandit visuellement l’espace
DE Von Wand zu Wand
Nahtloses Profil, das über die gesamte Wand verläuft und ein einheitliches, modernes Finish bietet.
— Vergrößert den Raum optisch
ES De pared a pared
Perfil continuo aplicado a lo largo de toda la estancia, ofreciendo un acabado moderno y uniforme. — Amplía visualmente el espacio
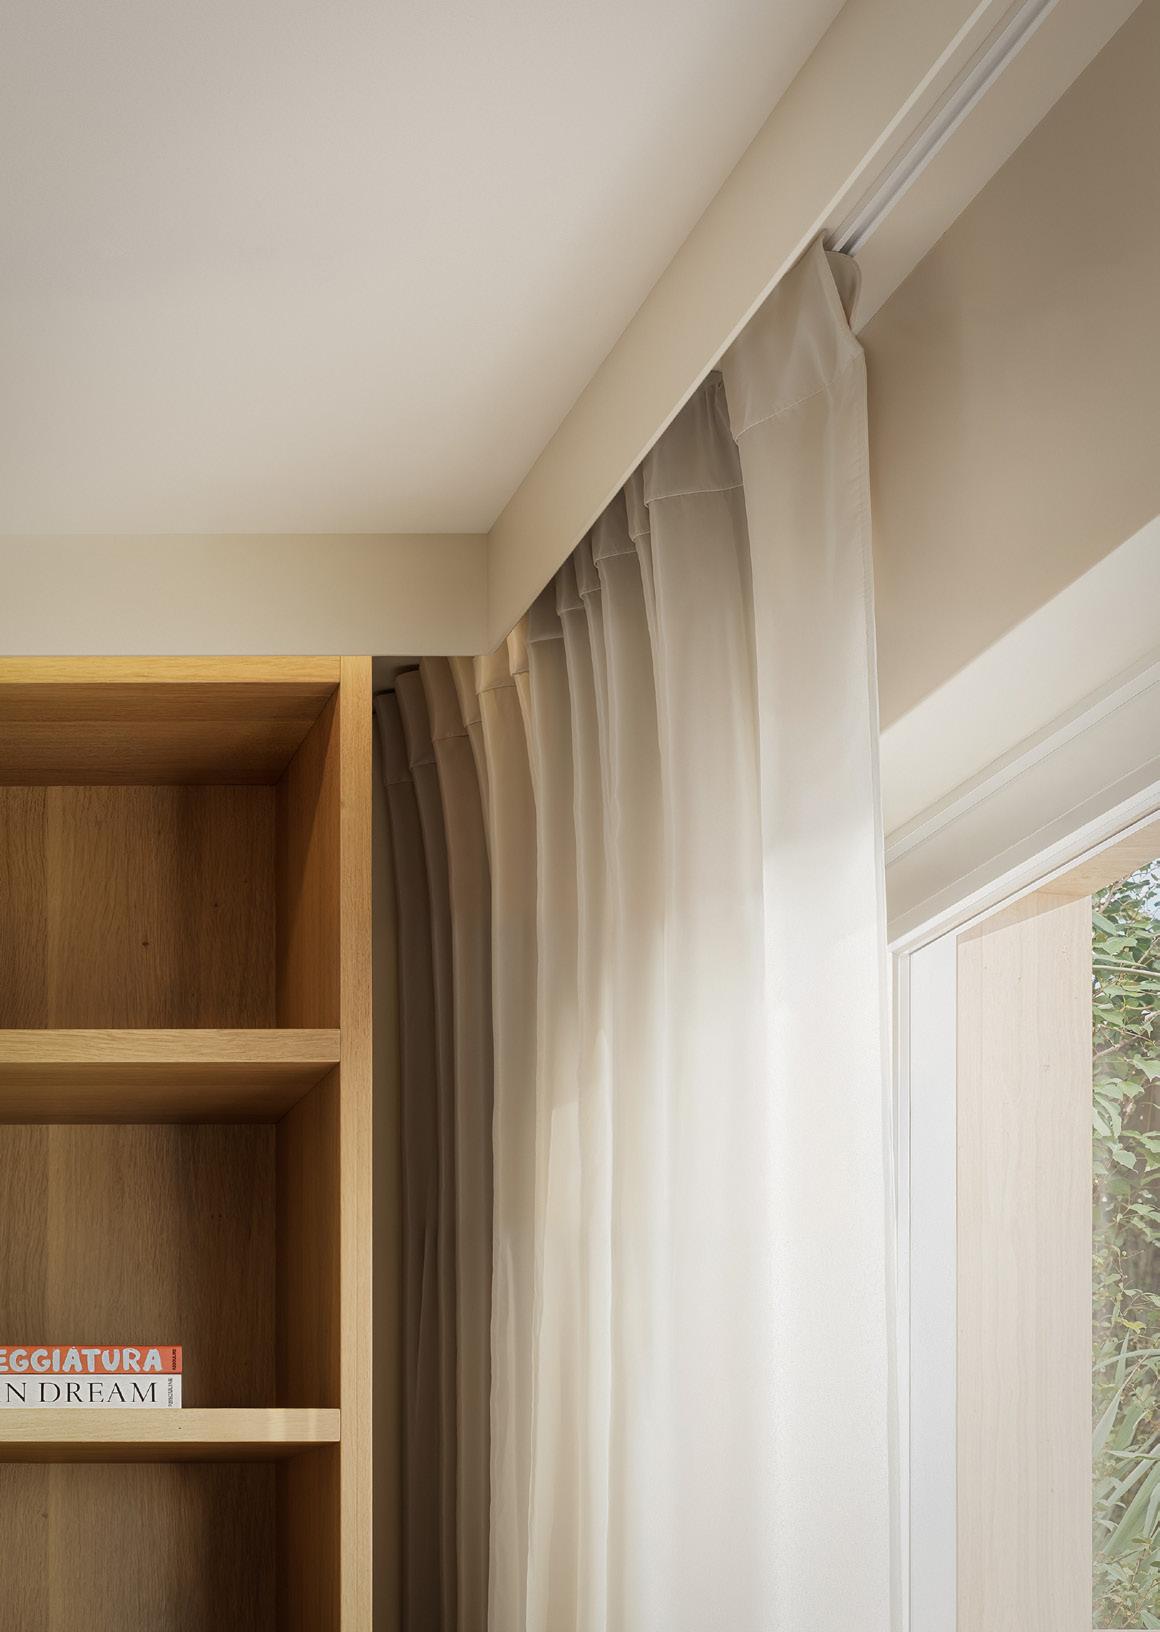
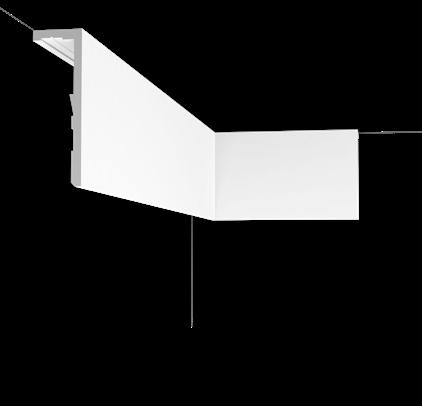
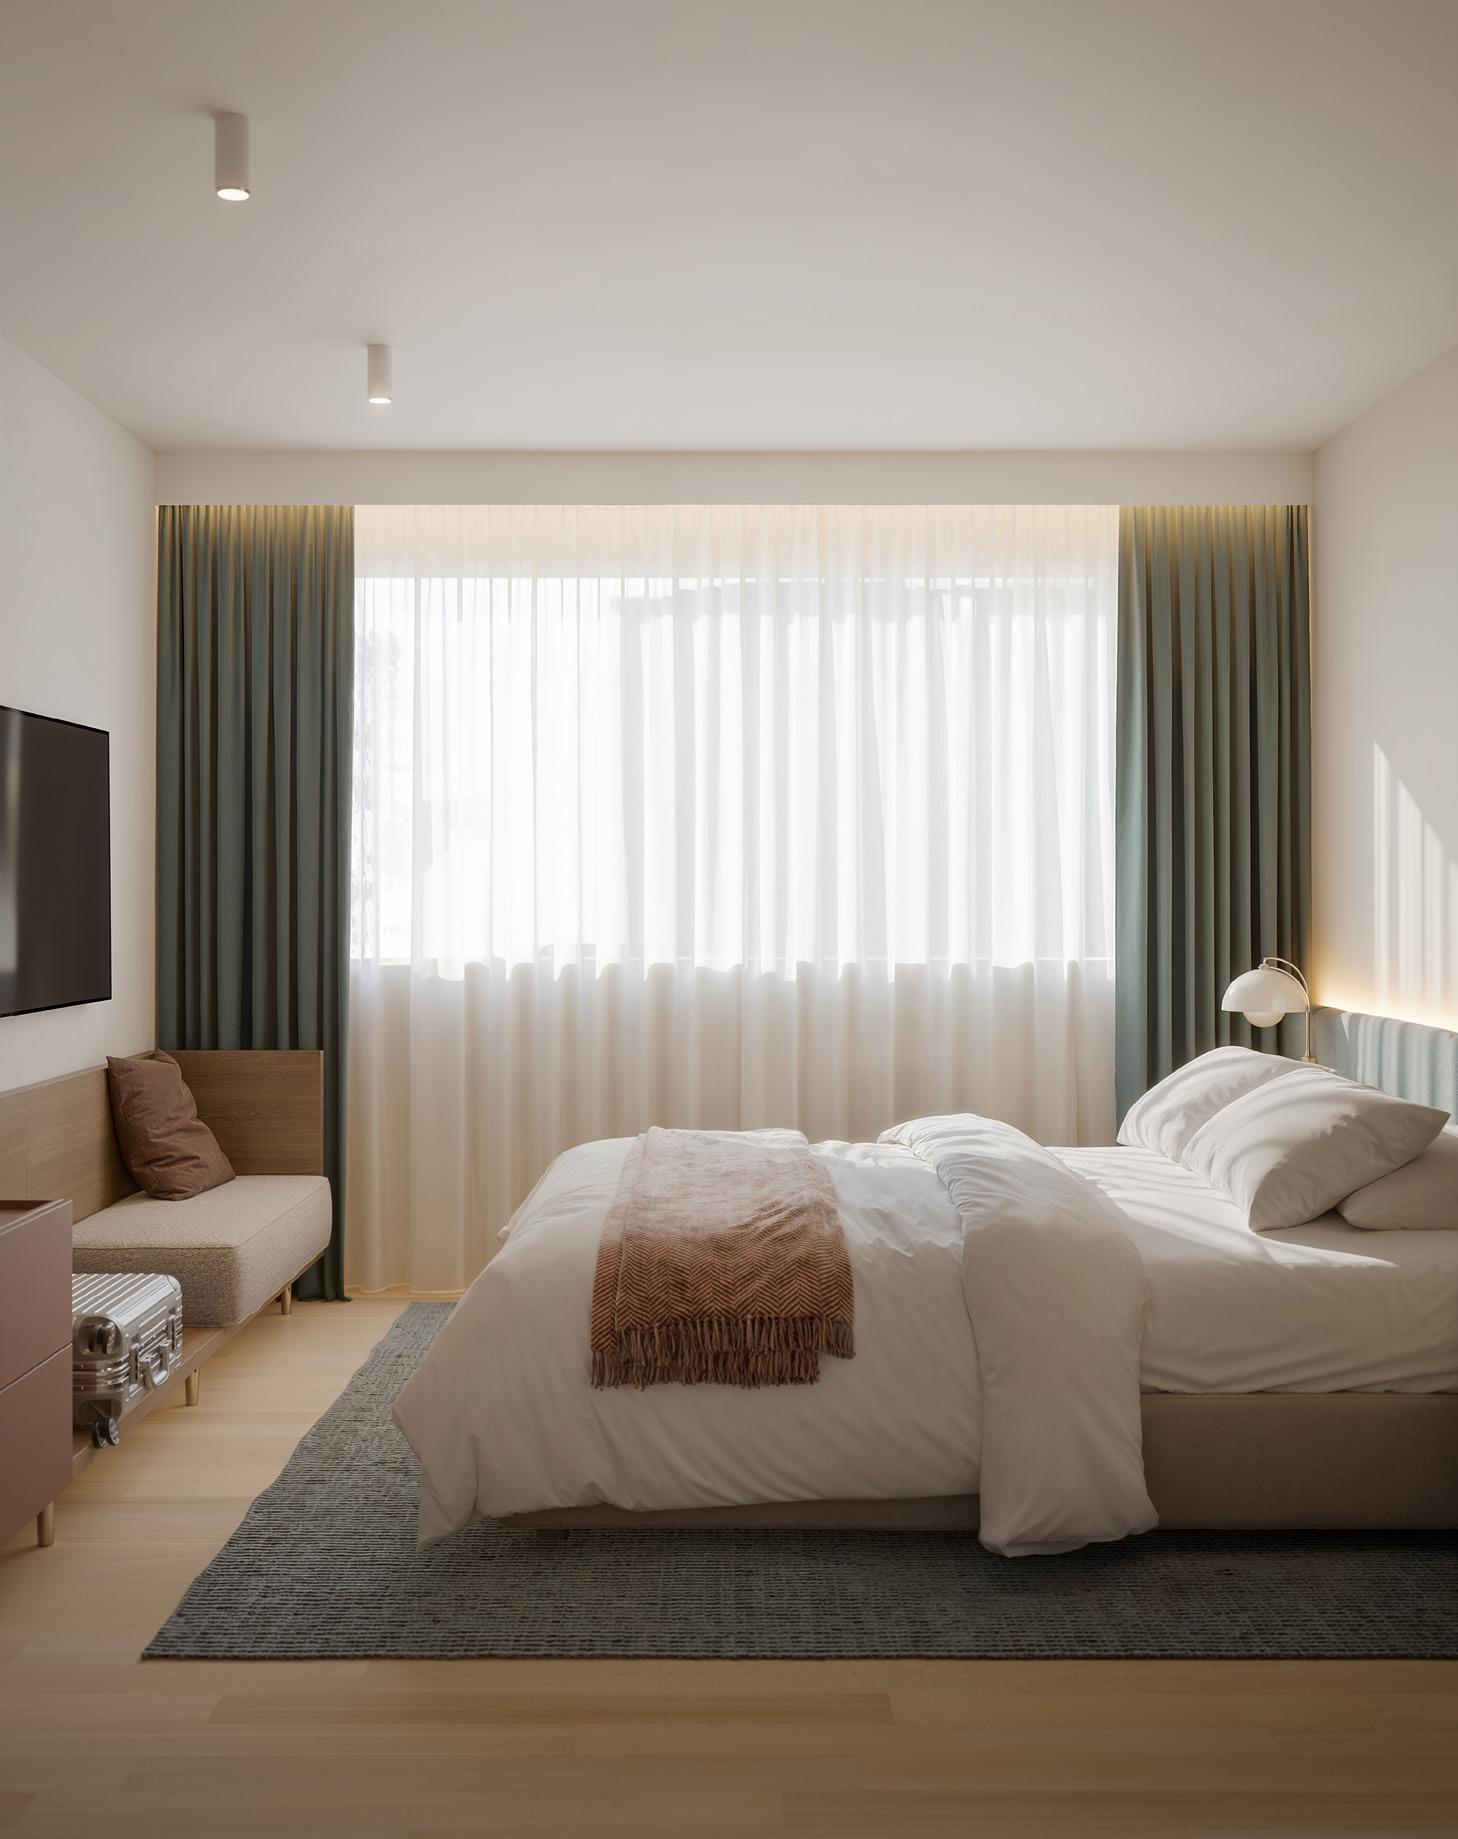
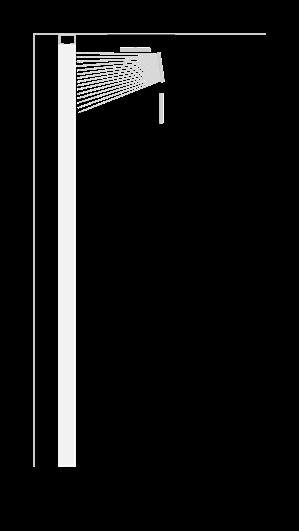
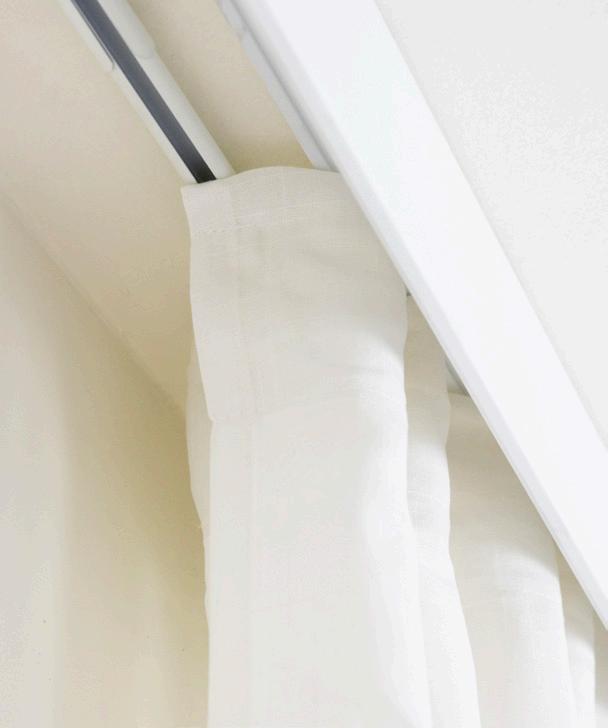
Designed to conceal any curtain track or blind system. Beyond aesthetics, it enhances comfort by blocking unwanted light from above the curtains.
NL Gordijnbak
Ontworpen om elke gordijnrail of ander gordijnsysteem te verbergen. Naast het esthetische aspect verhoogt het ook het comfort door ongewenst licht boven de gordijnen te blokkeren.
FR Caisse à rideaux
Conçu pour dissimuler tout rail de rideaux ou système de stores.
Au-delà de l’esthétique, il améliore le confort en bloquant la lumière indésirable au-dessus des rideaux.
DE Gardinenverblendung Entwickelt, um jede Gardinenschiene oder jedes Rollosystem zu verbergen. Neben der Ästhetik erhöht es den Komfort, indem es unerwünschtes Licht oberhalb der Vorhänge abhält.
ES Cajón cortinero Diseñado para ocultar cualquier riel de cortina o sistema de persianas. Más allá de la estética, mejora el confort bloqueando la luz no deseada que entra por encima de las cortinas.
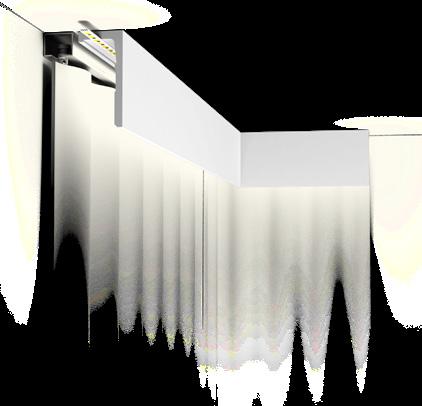
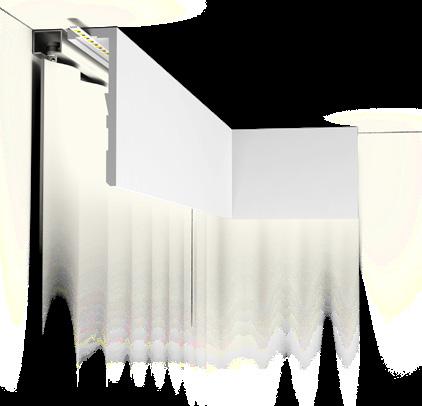
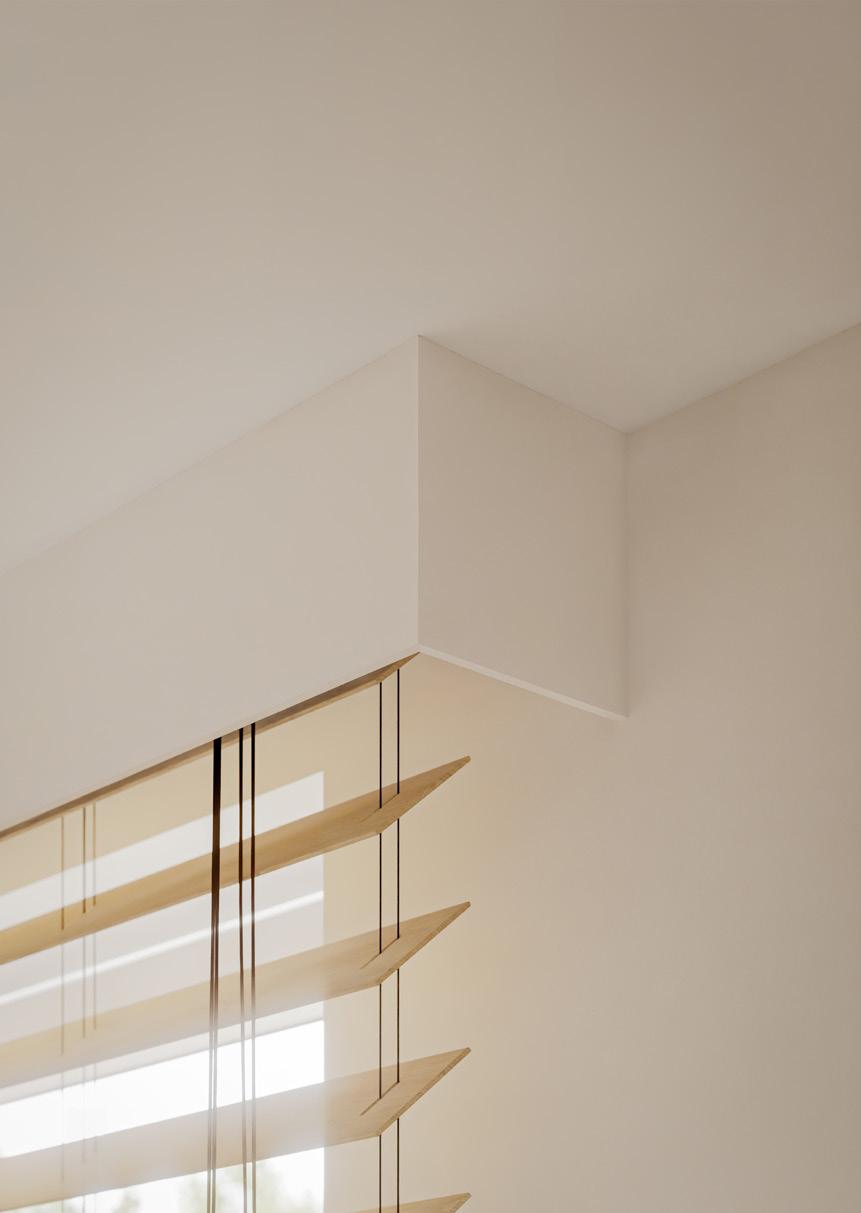
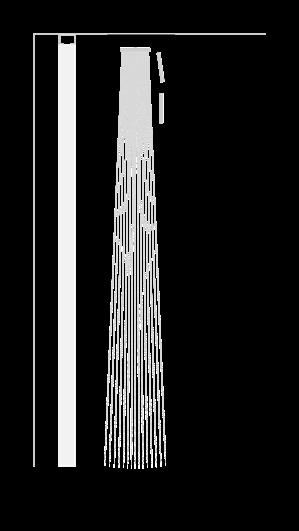
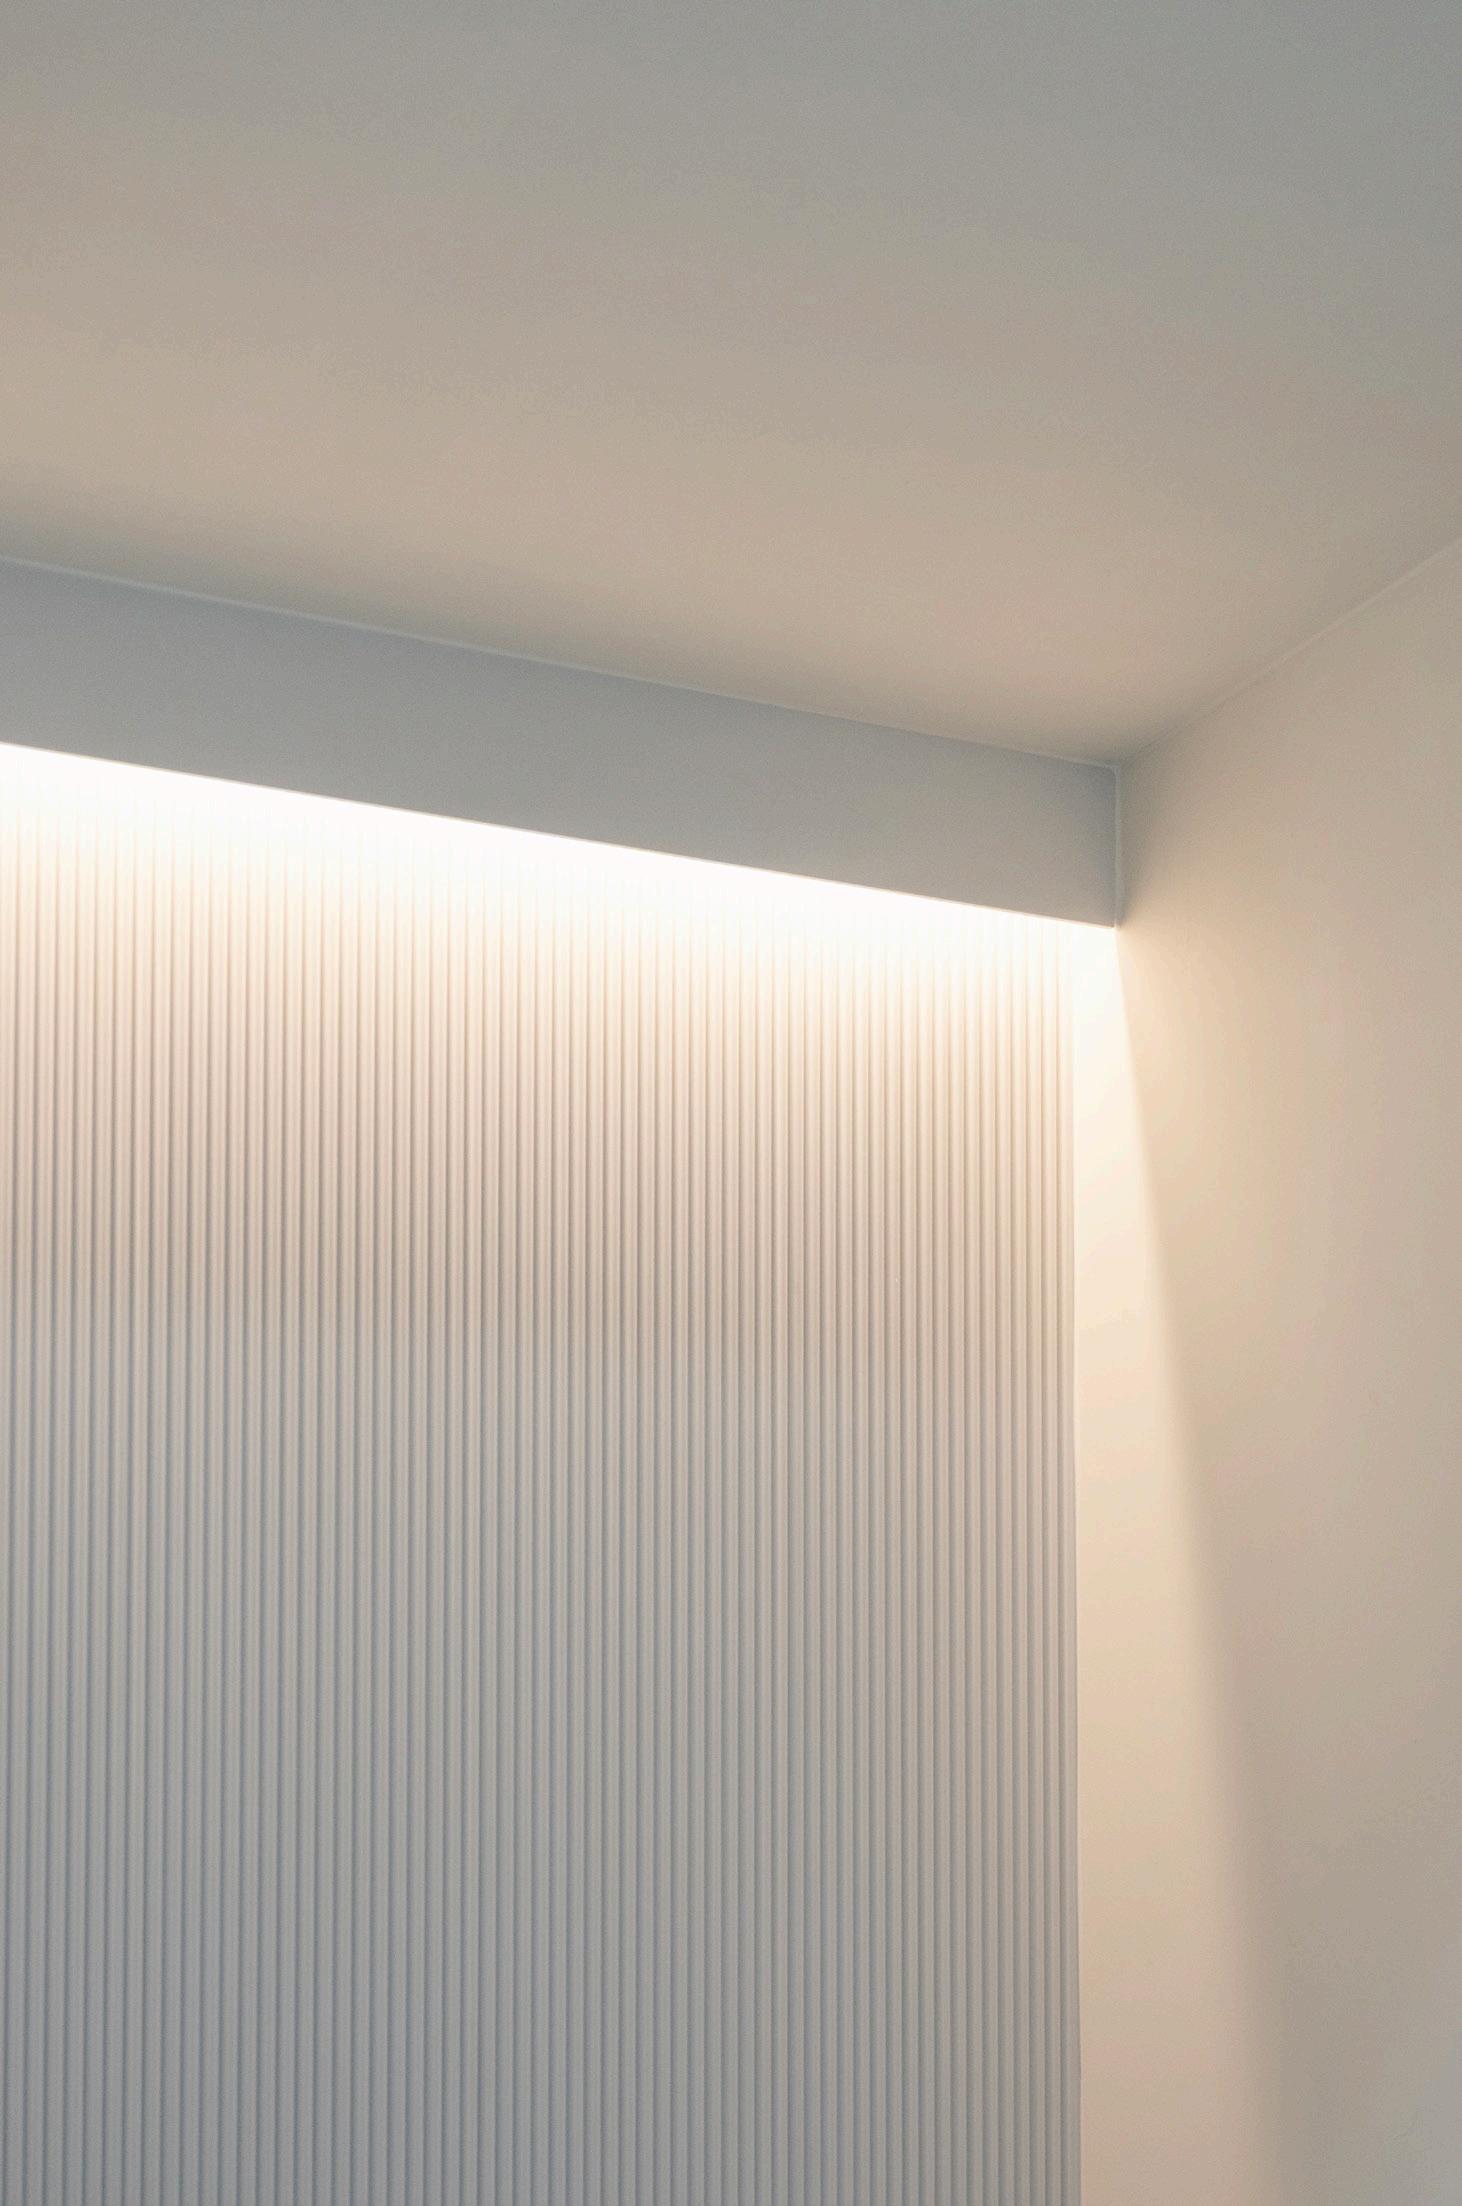
The ultimate application of LEDGE, wrapping continuously around the entire room. Curtain tracks or blind systems can be hidden, indirect LED lighting can be also be added.
It transforms both walls and ceilings into a cohesive architectural feature.

NL Volledige kamerinstallatie
De ultieme toepassing van LEDGE, die zich naadloos rondom de hele kamer uitstrekt. Gordijnrails of rolgordijnsystemen kunnen worden verborgen, en indirecte LEDverlichting kan eenvoudig worden toegevoegd. Het transformeert zowel muren als plafonds tot één samenhangend architecturaal geheel. — Compatibel met indirecte verlichting
FR Installation dans toute la pièce L’application ultime de LEDGE, qui se déploie en continu tout autour de la pièce. Les rails de rideaux ou systèmes de stores peuvent être dissimulés, et un éclairage LED indirect peut également être ajouté. Transforme à la fois les murs et les plafonds en un ensemble architectural cohérent.
— Compatible avec un éclairage indirect
DE Installation im gesamten Raum
Die ultimative Anwendung von LEDGE, die sich nahtlos um den gesamten Raum zieht. Gardinenschienen oder Rollosysteme können verborgen werden, und indirekte LED-Beleuchtung kann ebenfalls integriert werden. Verwandelt Wände und Decken in ein harmonisches architektonisches Gesamtelement. — Kompatibel mit indirekter Beleuchtung
ES Instalación en toda la habitación
La aplicación definitiva de LEDGE, recorre de forma continua toda la estancia. Permite ocultar rieles de cortina o sistemas de estores, y añadir iluminación LED indirecta. Transforma paredes y techos en un único elemento arquitectónico coherente. — Compatible con iluminación indirecta
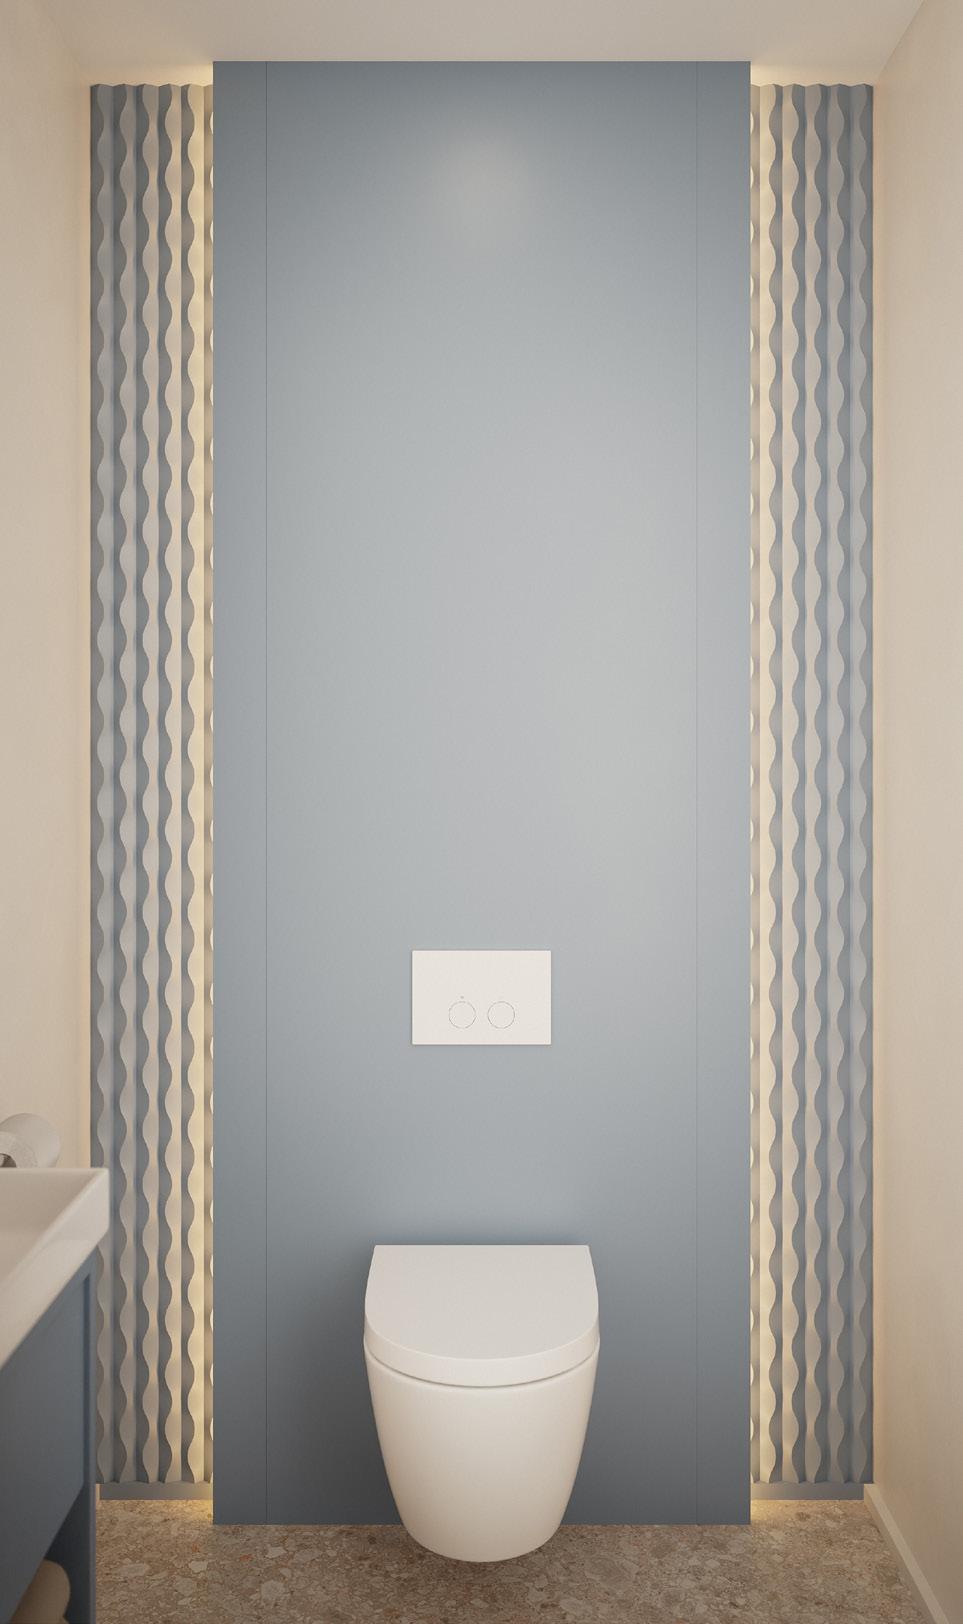
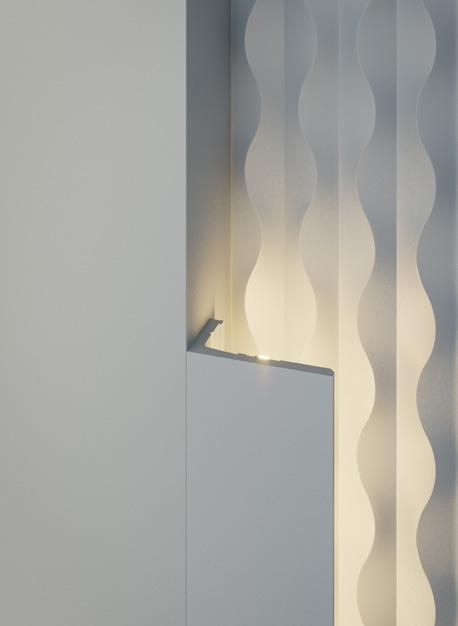
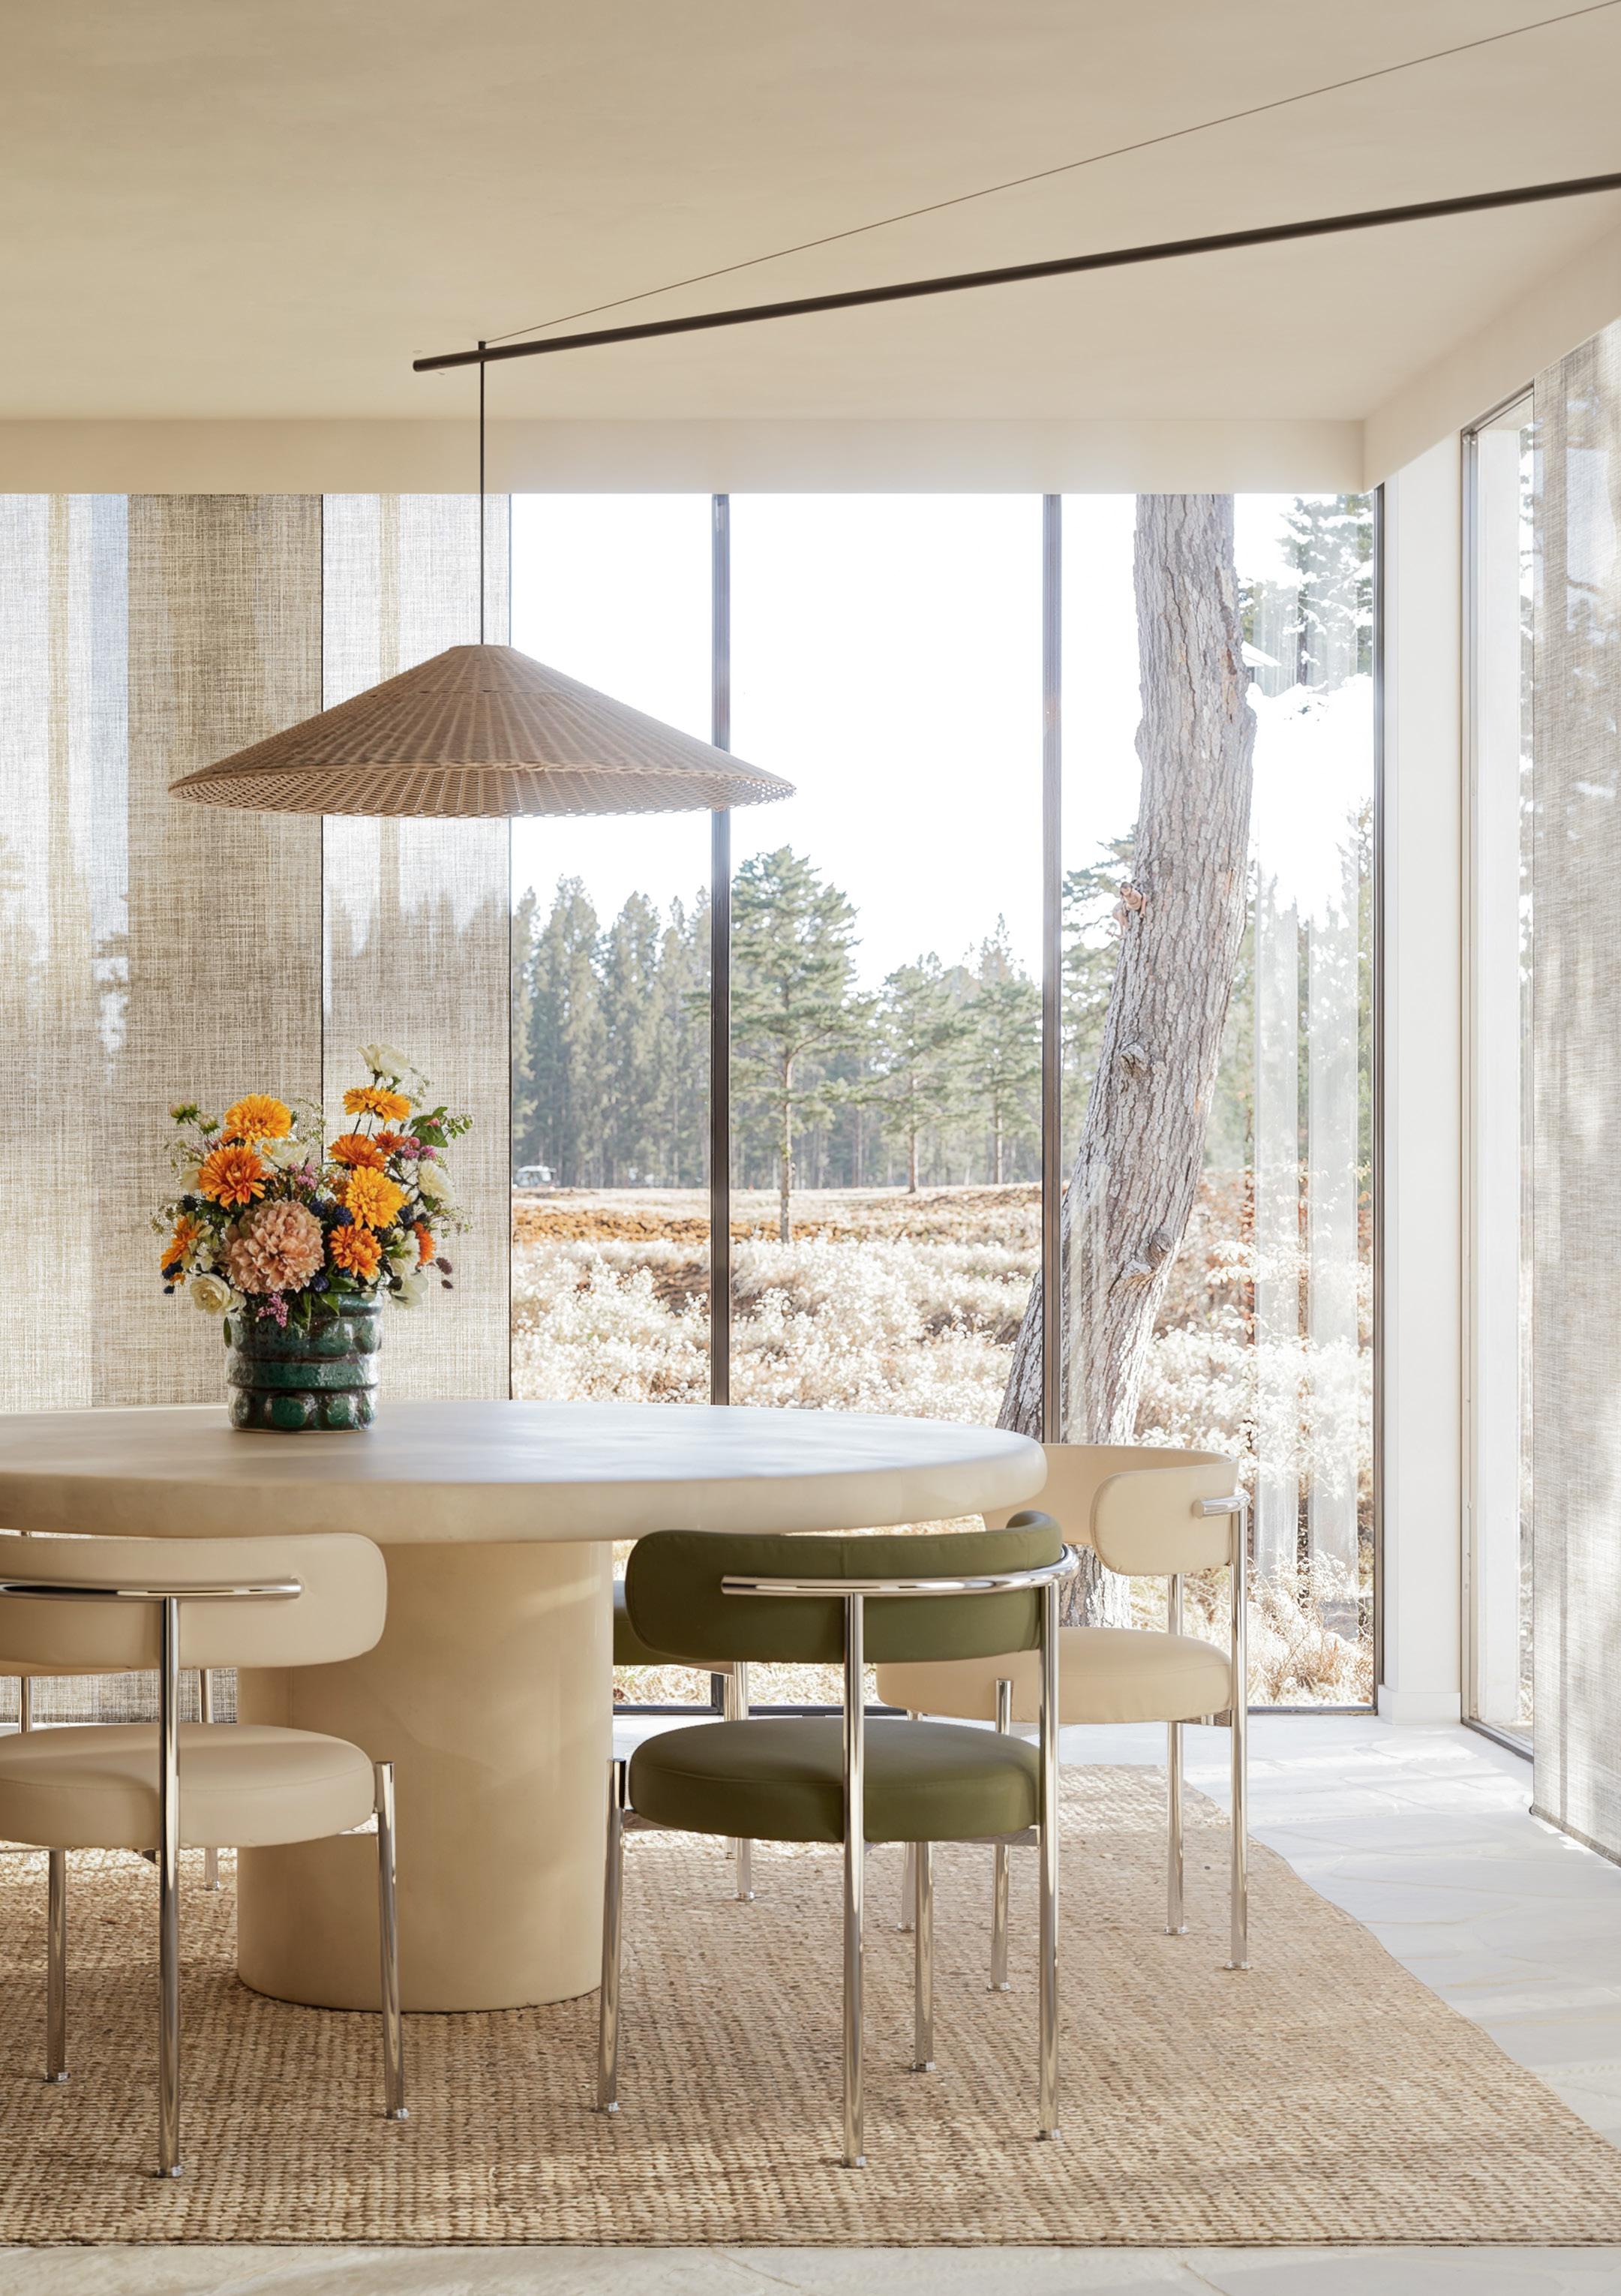
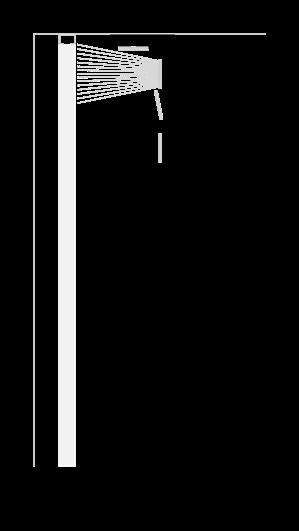
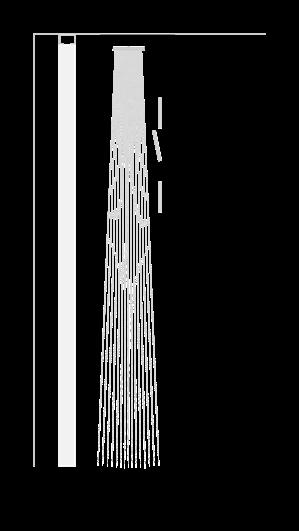
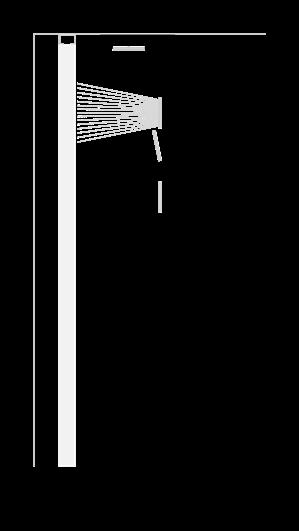
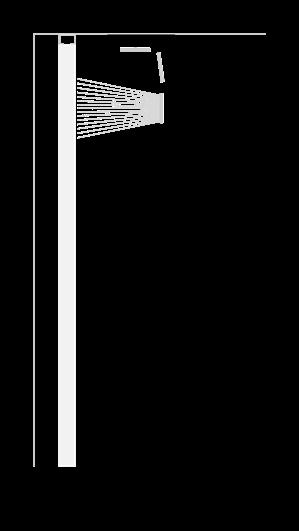
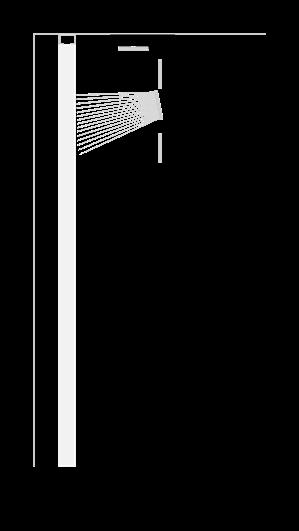
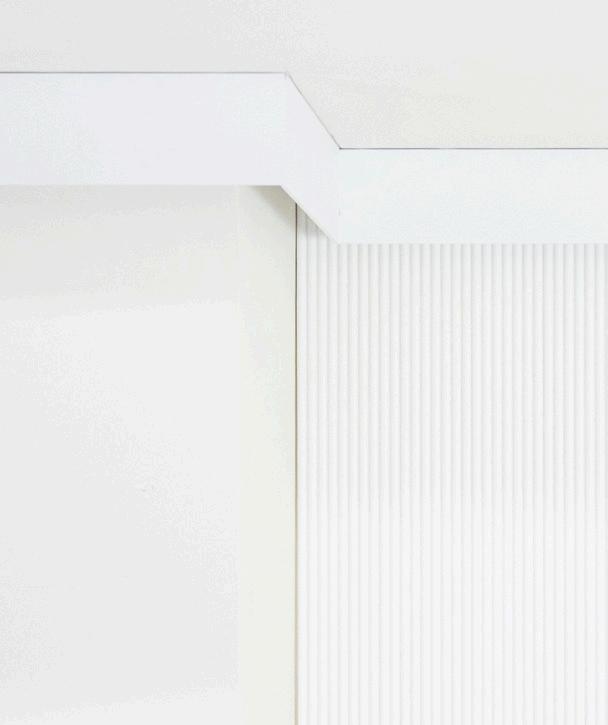
Play with direction, vertical or horizontal. Let light become part of the story — or embrace its natural form. Combine with our 3D wall coverings and create a space that is uniquely yours.

NL
Speel met richting, verticaal of horizontaal. Laat het licht deel worden van het verhaal of omarm gewoon zijn natuurlijke vorm. Combineer met onze 3D-wandbekleding en creëer een unieke ruimte die helemaal van jou is.
FR
Jouez avec les directions, verticale ou horizontale. Laissez la lumière devenir partie intégrante de l’histoire – ou embrassez sa forme naturelle. Associez-les à nos revêtements muraux 3D et créez un espace qui vous ressemble.
DE
Spielen Sie mit der Ausrichtung — vertikal oder horizontal. Lassen Sie das Licht Teil der Geschichte werden – oder zelebrieren Sie seine natürliche Form. Kombinieren Sie sie mit unserer 3D-Wandverkleidung und gestalten Sie einen Raum, der ganz Ihnen gehört.
ES
Juega con la dirección, vertical u horizontal. Deja que la luz forme parte de la historia –o abraza su forma natural. Combínalo con nuestros revestimientos 3D y crea un espacio que sea solo tuyo.
CX215-2600
CX216-2600
CX217-2600
NL LED-profielplaatsing
FR Positionnement du profilé LED
DE LED-Profilplatzierung
ES Colocación del perfil LED
1 Analyse and plan Before beginning installation, take time to carefully analyze the space and plan your setup. Proper preparation ensures a seamless and professional finish.
2 Select application(s)
A. LEDGE LIGHTING PROFILE
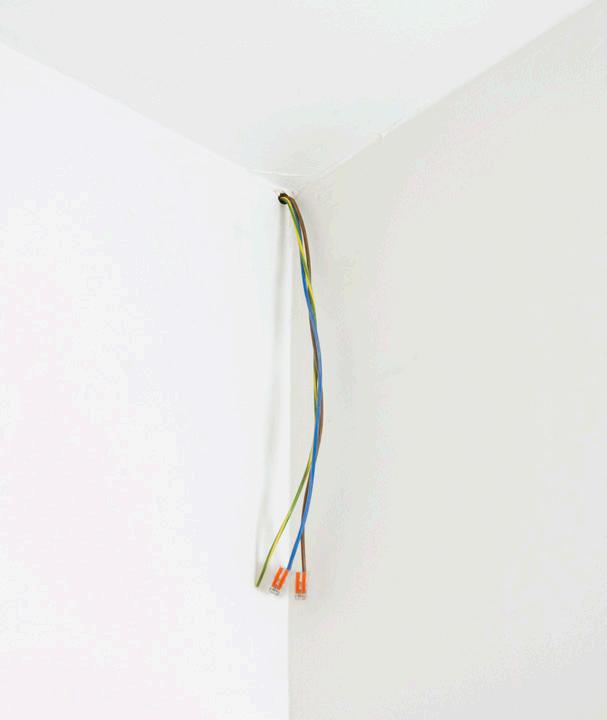
Ensure that electrical cables and the transformer are installed in advance. Leave sufficient space for the LED bar, if included.
B. 3D PANELS
Always install 3D panels first before adding the LEDGE profile.
C. CURTAIN PROFILE
Mark the installation position precisely. Leave space to press the profile firmly to the ceiling. Keep enough distance for the curtain folds.
3 Install the LEDGE profile
4 When adding a LED bar, allow the glue to dry fully
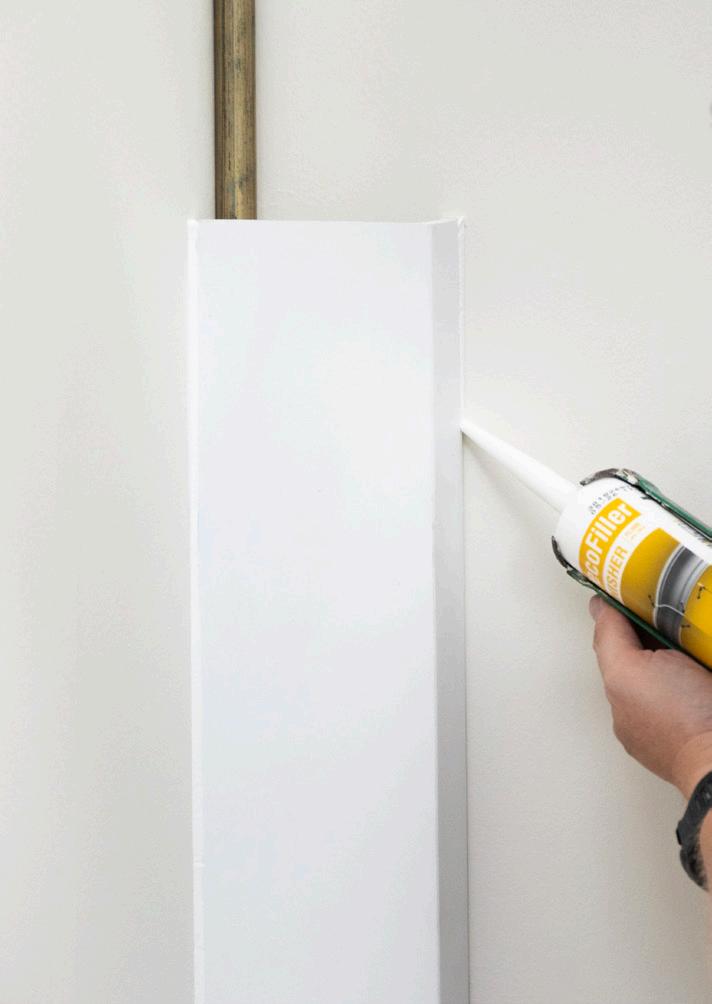
5 Finish with our DecoFiller (FL300) and paint in your desired colour
Een perfect resultaat begint met een goede voorbereiding.
1. Analyseer en plan Neem vóór de installatie de tijd om de ruimte zorgvuldig te bekijken en uw opstelling te plannen. Een goede voorbereiding zorgt voor een naadloze en professionele afwerking.
2. Selecteer toepassing(en)
A. LEDGE VERLICHTINGSPROFIEL
Zorg ervoor dat de elektrische bekabeling en de transformator vooraf worden geïnstalleerd. Laat voldoende ruimte vrij voor de LED-strip, indien van toepassing.
B. COMBINEREN MET 3D-PANELEN
Installeer altijd eerst de 3D-panelen voordat u het LEDGE-profiel toevoegt.
C. GORDIJNPROFIEL
Markeer de installatielocatie nauwkeurig. Laat voldoende ruimte om het profiel stevig tegen het plafond te drukken. Houd voldoende afstand voor de plooien van de gordijnen.
3. Install het LEDGE-profiel
4. Als je een LED-strip toevoegt, laat de lijm dan volledig drogen
5. Werk af met onze DecoFiller (FL300) en schilder in de gewenste kleur
FR Des résultats parfaits commencent par une bonne préparation.
1. Analyser et planifier Avant de commencer l’installation, prenez le temps d’analyser attentivement l’espace et de planifier votre mise en place. Une bonne préparation garantit une finition fluide et professionnelle.
2. Sélectionner l’application
A. PROFILÉ D’ÉCLAIRAGE LEDGE
Assurez-vous que les câbles électriques et le transformateur soient installés à l’avance. Prévoyez suffisamment d’espace pour la barre LED, si elle est incluse.
B. ASSOCIATION AVEC LES PANNEAUX 3D Installez toujours les panneaux 3D avant d’ajouter le profilé LEDGE.
C. PROFIL POUR RIDEAUX
Marquez avec précision la position d’installation. Laissez l’espace nécessaire pour appuyer fermement le profilé contre le plafond. Préservez une distance suffisante pour les plis des rideaux.
3. Installez le profilé LEDGE
4. Si vous ajoutez une barre LED, laissez la colle sécher complètement
5. Terminez avec notre DecoFiller (FL300) et peignez dans la couleur de votre choix
DE — Perfekte Ergebnisse beginnen mit der richtigen Vorbereitung.
1. Analysieren und planen Nehmen Sie sich vor Beginn der Installation die Zeit, den Raum sorgfältig zu analysieren und Ihre Anordnung zu planen. Eine gute Vorbereitung gewährleistet ein nahtloses und professionelles Ergebnis.
2. Anwendung(en) auswählen
A. LEDGE PROFIL FÜR DIE INDIREKTE BELEUCHTUNG
Stellen Sie sicher, dass die elektrischen Kabel und der Trafo im Voraus installiert werden. Lassen Sie ausreichend Platz für das LED-Band, falls vorhanden.
B. KOMBINATION MIT
3D-WANDGESTALTUNG
Installieren Sie immer zuerst die 3D-Paneele, bevor Sie das LEDGE-Profil anbringen.
C. GARDINENVERBLENDUNG
Markieren Sie präzise die Position der Installation. Lassen Sie ausreichend Platz, um das Profil fest an die Decke zu drücken. Halten Sie ausreichend Abstand für die Falten der Vorhänge.
3. Installiere Sie das LEDGE-Profil
4. Wenn Sie eine LED-Leiste hinzufügen, lassen Sie den Kleber vollständig trocknen
5. Schließen Sie die Installation mit unserem DecoFiller(FL300) ab und streichen Sie das Profil in der gewünschten Farbe.
Los resultados perfectos empiezan con una buena preparación.
1. Analizar y planificar Antes de empezar la instalación, analiza bien el espacio y planifica cada detalle. Una buena preparación garantiza un acabado uniforme y profesional.
2. Seleccionar aplicación(es)
A. PERFIL DE ILUMINACIÓN LEDGE Asegúrate de instalar con antelación los cables eléctricos y el transformador. Deja espacio suficiente para la tira LED, si se va a incluir.
B. COMBINACIÓN CON PANELES 3D Instala siempre primero los paneles 3D antes de colocar el perfil LEDGE
C. PERFIL PARA CORTINAS Marca con precisión la posición de instalación. Deja espacio para presionar bien el perfil contra el techo y asegúrate de mantener suficiente distancia para el pliegue de las cortinas.
3. Instala el perfil LEDGE
4. Si vas a añadir una tira LED, deja que el adhesivo se seque por completo
5. Termina con nuestro DecoFiller (FL300) y pinta del color que elijas
Before beginning installation, take time to carefully analyze the space and plan your setup. Proper preparation ensures a seamless and professional finish.
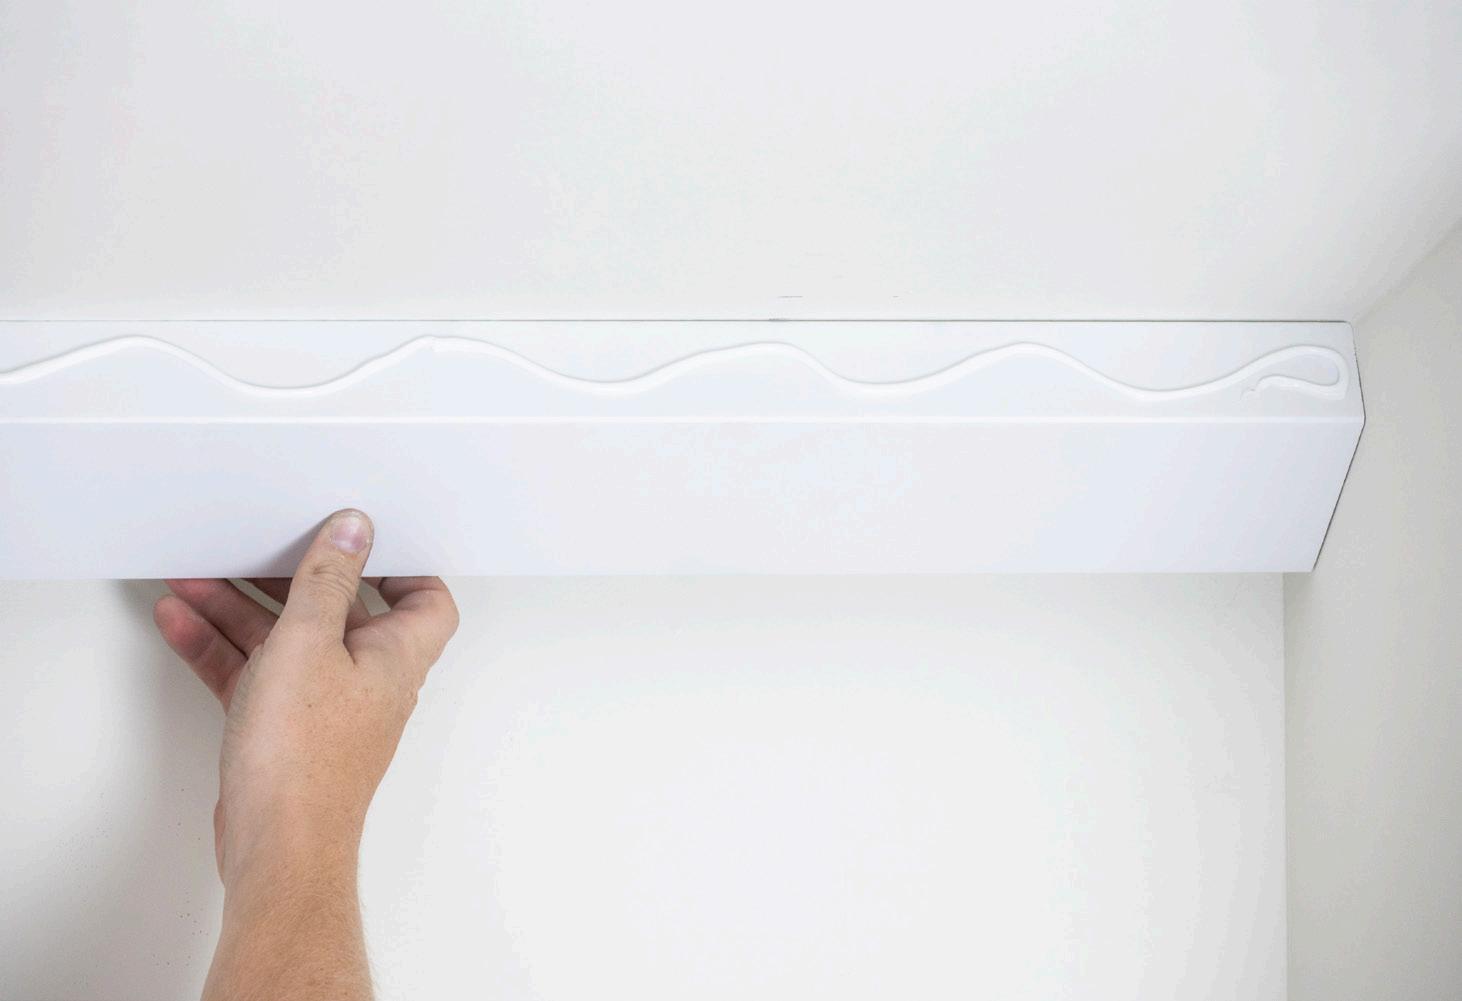
We recommend using FDP700 DecoFix Power. Apply the glue in a zigzag manner on the top of the profiles, keeping it away from the edges to prevent spills.
NL Bevestigingsmethode
Neem vóór de installatie de tijd om de ruimte zorgvuldig te analyseren en je opstelling te plannen. Een goede voorbereiding garandeert een naadloze en professionele afwerking.
Lijm We raden aan om FDP700 DecoFix Power te gebruiken. Breng de lijm zigzaggend aan op de bovenkant van de profielen, houd afstand tot de randen om morsen te voorkomen.
Schroef Je kunt ook schroeven gebruiken, als de ondergrond (plafond) dat toelaat. Houd 50 cm afstand tussen de schroeven en gebruik de V-vormige inkeping als plaatsingsgids.
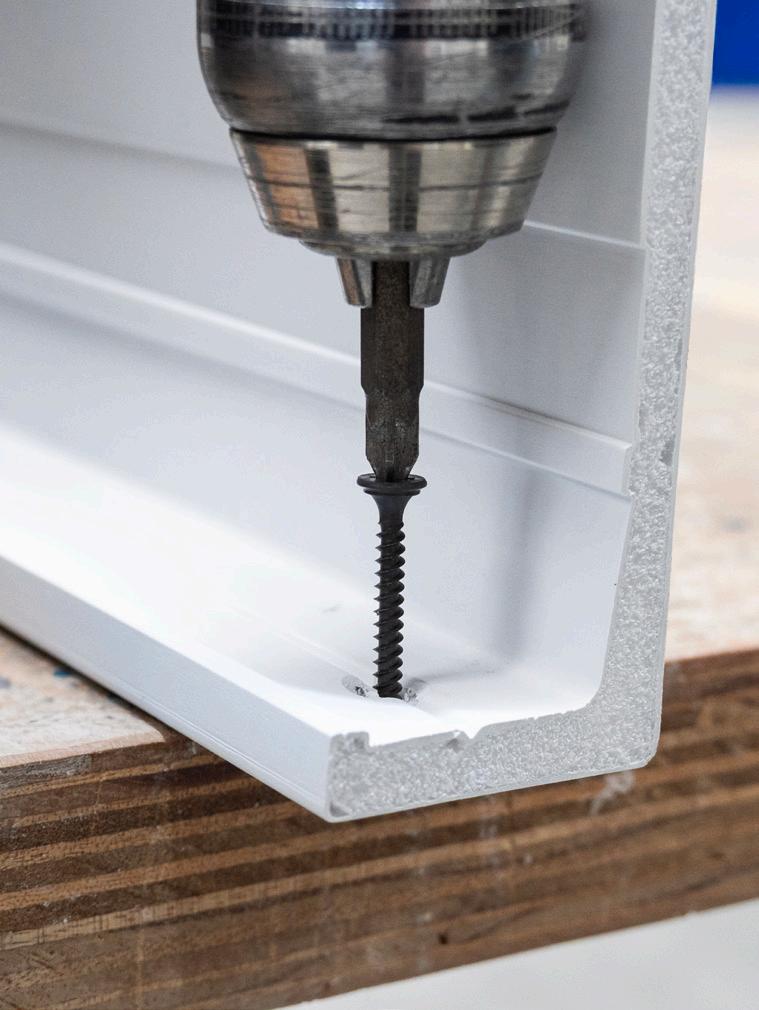
You can also use screws, if the surface (ceiling) allows it. Keep 50 cm between screws and use the V-notch as a placement guide.
Méthode de fixation
Avant de commencer l’installation, prenez le temps d’analyser attentivement l’espace et de planifier votre mise en œuvre. Une bonne préparation garantit une finition fluide et professionnelle.
Colle Nous recommandons d’utiliser le FDP700 DecoFix Power. Appliquez la colle en zigzag sur le dessus des profilés, en évitant les bords pour prévenir les débordements.
Vis Vous pouvez également utiliser des vis, si la surface (plafond) le permet. Espacez les vis de 50 cm et utilisez l’encoche en V comme guide de positionnement.
DE Befestigungsmethode
Bevor Sie mit der Installation beginnen, nehmen Sie sich Zeit, den Raum sorgfältig zu analysieren und Ihre Anordnung zu planen. Eine gute Vorbereitung sorgt für ein nahtloses und professionelles Ergebnis.
Kleber Wir empfehlen die Verwendung von FDP700 DecoFix Power. Tragen Sie den Kleber in Zickzackform auf die Oberseite der Profile auf, dabei Abstand zu den Kanten halten, um Austreten des Klebers zu vermeiden.
Schraube Sie können zudem auch Schrauben verwenden, wenn die Oberfläche (Decke) es zulässt. Halten Sie 50 cm Abstand zwischen den Schrauben und nutzen Sie die V-förmige Einkerbung als Orientierungshilfe.
ES Método de fijación
Antes de empezar la instalación, tómate un momento para analizar bien el espacio y planificar el montaje. Una buena preparación garantiza un acabado uniforme y profesional.
Adhesivo Recomendamos usar FDP700 DecoFix Power. Aplica el adhesivo en zigzag sobre la parte superior de los perfiles, evitando los bordes para prevenir derrames.
Tornillo También puedes usar tornillos, si la superficie (techo) lo permite. Deja 50 cm entre tornillos y utiliza la muesca en forma de V como guía de colocación.
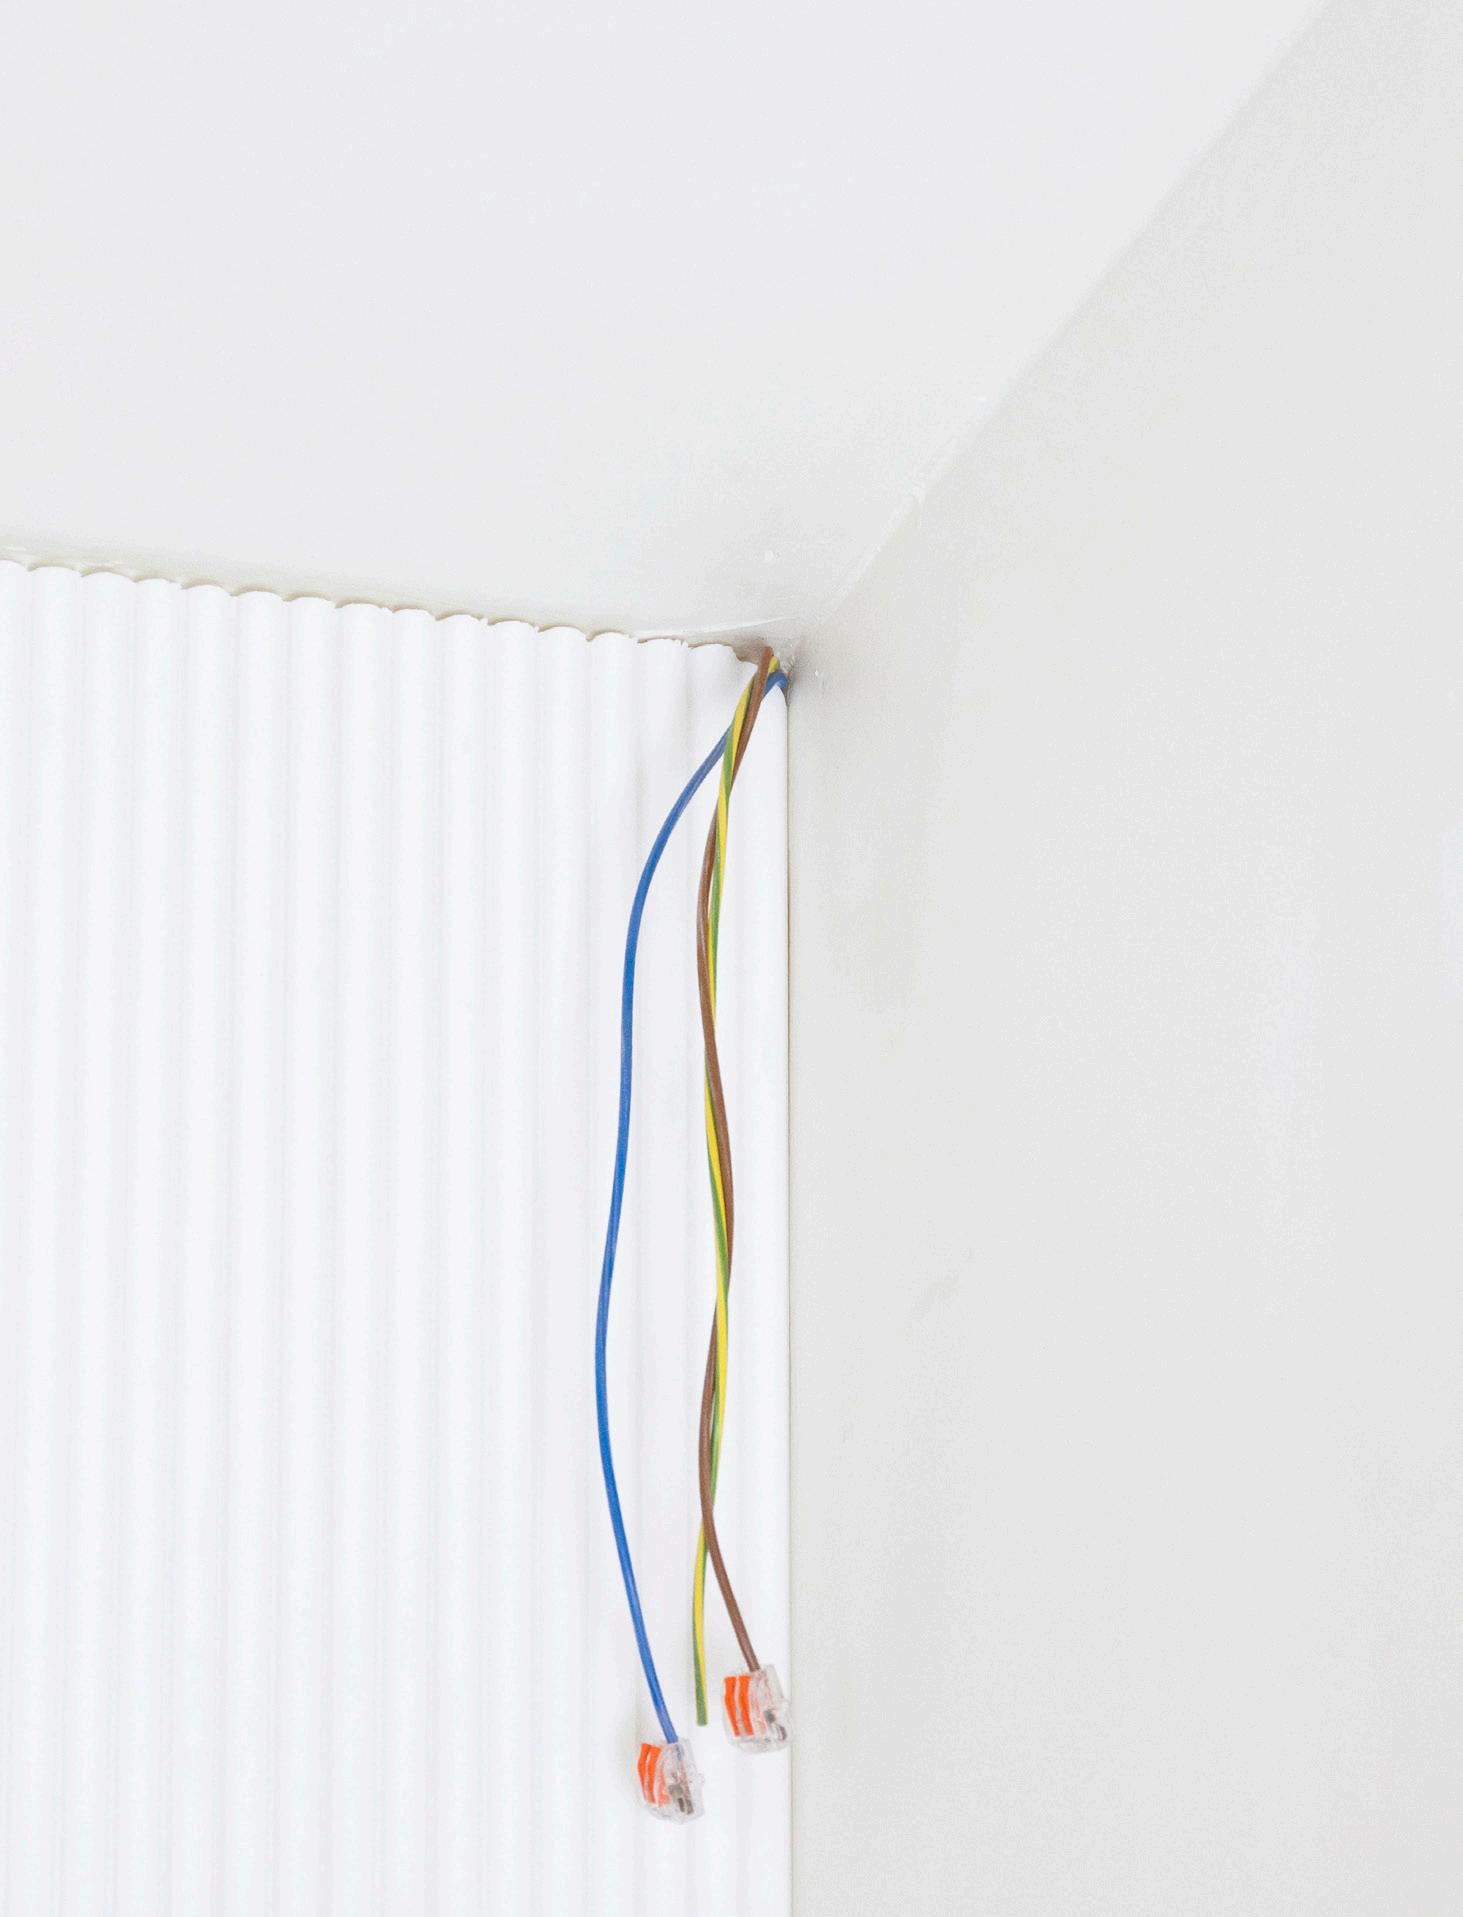
For indirect lighting, plan the cable and driver in advance and avoid power LEDs.
Keep the contact temperature below 65 °C.
Follow your LED supplier’s guidelines on distance from wall/ceiling, fixation method, ventilation, use of aluminium profile (mandatory).
— Orac is not responsible if these recommendations are not followed.
NL LED-verlichting
Voor indirecte verlichting: plan de bekabeling en driver op voorhand en vermijd power-LED’s. Zorg dat de contacttemperatuur onder 65 °C blijft. Volg steeds de richtlijnen van je LED-leverancier over: afstand tot wand/plafond, bevestigingsmethode, ventilatie en het gebruik van een aluminium profiel (verplicht).
— Orac is niet verantwoordelijk als deze aanbevelingen niet worden gevolgd.
FR Éclairage LED
Pour l’éclairage indirect, pensez à planifier à l’avance le câblage et le driver, et évitez les LED haute puissance. Maintenez une température de contact inférieure à 65 °C. Suivez les recommandations de votre fournisseur LED concernant : la distance au mur/ plafond, la méthode de fixation, la ventilation et l’utilisation d’un profilé en aluminium (obligatoire).
— Orac décline toute responsabilité en cas de non-respect de ces recommandations.
DE LED-Beleuchtung
Bei indirekter Beleuchtung:
Planen Sie Kabel und Trafo im Voraus und vermeiden Sie Power-LEDs.
Die Kontakttemperatur sollte unter 65 °C bleiben. Beachten Sie die Empfehlungen Ihres LEDLieferanten bezüglich: Abstand zur Wand/Decke, Befestigungsmethode, Belüftung und der Verwendung eines Aluminiumprofils (verpflichtend).
— Orac übernimmt keine Verantwortung, wenn diese Empfehlungen nicht eingehalten werden.
ES Iluminación LED
Para iluminación indirecta, planifica con antelación el cableado y el transformador, y evita el uso de LEDs de alta potencia. Mantén la temperatura de contacto por debajo de los 65 °C. Sigue siempre las recomendaciones de tu proveedor de LED sobre distancia respecto a la pared o el techo, m étodo de fijación, ventilación, uso de perfil de aluminio (obligatorio).
— Orac no se hace responsable si no se siguen estas indicaciones.
Use the LEDGE profile to conceal pipes, cables, or tubes (max. contact temperature 65 °C). Recommended: CX216-2600, CX217-2600.
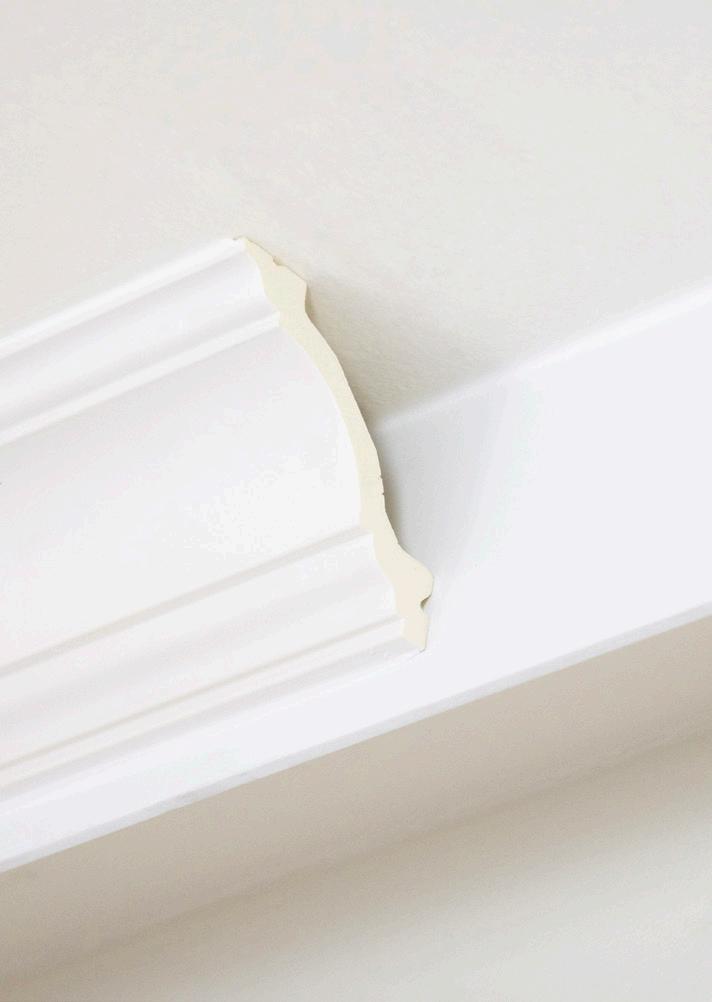
Keep the top profile below the LEDGE height. A small step adds a refined look. Use FDP700 DecoFix Power to glue profiles together.
NL Veelzijdigheid in toepassing
Oneffenheden verbergen
Gebruik het LEDGE-profiel om leidingen, kabels of buizen weg te werken (max. 65 °C).
Aanbevolen: CX216-2600, CX217-2600
Plafondlijst ondersteuning
Houd het bovenprofiel lager dan de hoogte van het LEDGE-profiel. Een klein niveauverschil zorgt voor een verfijnde uitstraling.
Gebruik FDP700 DecoFix Power om de profielen aan elkaar te lijmen.
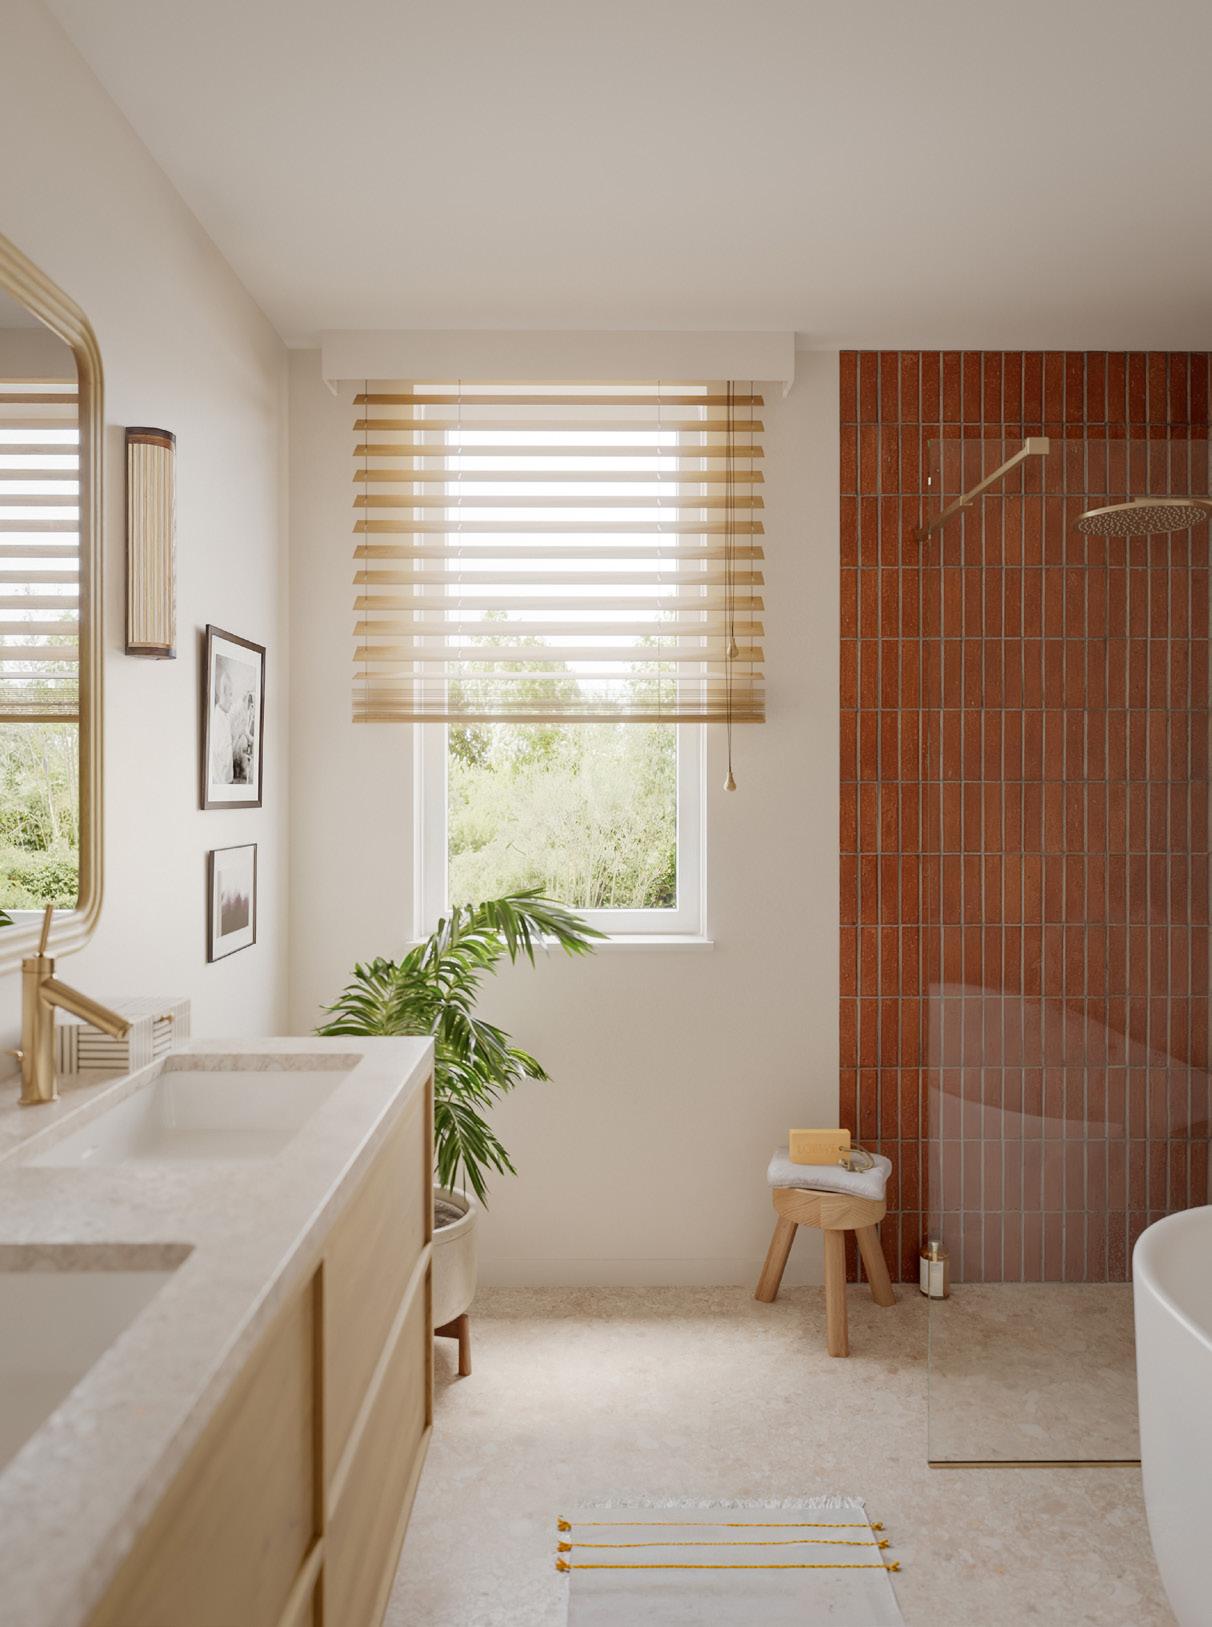
Afwerking rond ramen en deuren
FR Polyvalence d’application
Masquer les imperfections
Utilisez le profilé LEDGE pour dissimuler des tuyaux, câbles ou conduites (max. 65 °C). Recommandé : CX216-2600, CX217-2600
Support pour corniche
Gardez le profil supérieur en dessous de la hauteur du LEDGE. Un léger décalage apporte une touche raffinée. Utilisez FDP700 DecoFix Power pour coller les profils entre eux.
Encadrements pour fenêtres et portes
DE Vielseitigkeit in der
Anwendung
Unschöne Stellen verbergen
Verwenden Sie das LEDGE-Profil, um Rohre, Kabel oder Leitungen zu kaschieren (max. 65 °C). Empfohlen: CX216-2600, CX217-2600
Unterstützung für Stuckleisten
Das obere Profil sollte eine geringere Höhe als das LEDGE Profil haben. Ein kleiner Absatz sorgt für eine elegante Optik. Verwenden Sie FDP700 DecoFix Power, um die Profile miteinander zu verkleben.
Fenster- und Türumrandung
ES Versatilidad en la aplicación
Ocultar imperfecciones
Usa el perfil LEDGE para disimular tubos, cables o conductos (máx. 65 °C).
Recomendado: CX216-2600, CX217-2600
Soporte para cornisa
Mantén el perfil superior por debajo de la altura de LEDGE. Ese pequeño escalón aporta un acabado más refinado. Usa FDP700 DecoFix Power para unir los perfiles.
Molduras para ventanas y puertas
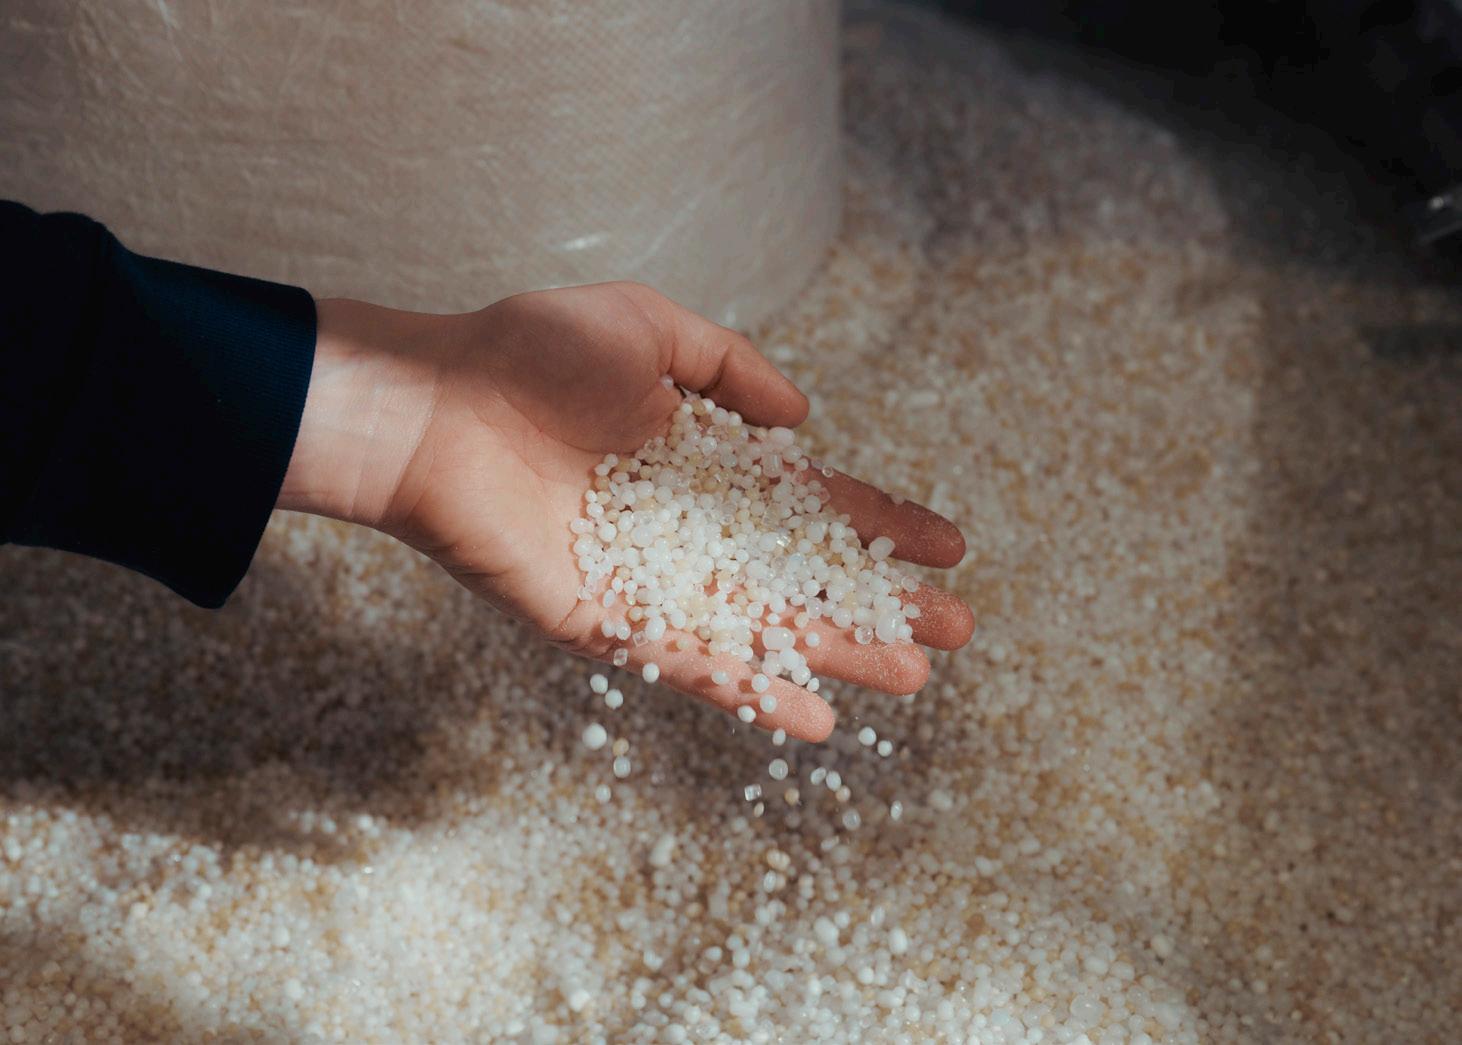
LEDGE contains more than 40% sustainable materials. The ideal choice for those who want to realise projects that are not only stylish, but also future-proof.
NL Een toekomstbestendige oplossing
LEDGE bestaat voor meer dan 40% uit duurzame materialen. De ideale keuze voor wie stijlvolle én toekomstbestendige projecten wil realiseren.
FR Une solution pensée pour l’avenir LEDGE contient plus de 40 % de matériaux durables. Le choix idéal pour celles et ceux qui souhaitent réaliser des projets à la fois élégants et tournés vers l’avenir.
DE Eine zukunftssichere Lösung LEDGE besteht zu über 40 % aus nachhaltigen Materialien. Die ideale Wahl für alle, die nicht nur stilvolle, sondern auch zukunftssichere Projekte verwirklichen möchten.
ES Una solución pensada para el futuro LEDGE contiene más de un 40% de materiales sostenibles. La elección ideal para quienes buscan crear proyectos con estilo y pensados para el futuro.
ORAC Headquarters | nv Orac sa
Biekorfstraat 32
8400 Ostend, Belgium
T +32 59 80 32 52 info@oracdecor.com
ORAC Benelux
Biekorfstraat 32
8400 Ostend, Belgium
NL: T +31 852 08 40 59
BeLux: T +32 59 79 02 82 benelux@oracdecor.com
ORAC Bulgaria
T +40 (31) 630 06 19 bulgaria@oracdecor.com
ORAC Deutschland
Boltensternstraße 159A 50735 Köln, Deutschland
T +49 221 747 499 39 deutschland@oracdecor.com
ORAC España
C/ del Rosselló, 229 08008 Barcelona, España
T +34 938 56 49 00 spain@oracdecor.com
ORAC Estonia
T +372 58 55 8668 eesti@oracdecor.com
ORAC Export
T +32 59 79 02 83 export.cs@oracdecor.com
ORAC France
13 Rue Séguier 75006 Paris, France
T +33 188803631 france@oracdecor.com
ORAC Ireland
T +35 381 8000 280 ireland@oracdecor.com
ORAC Italia srl
Corso Giacomo Matteotti, 5/H
23900 Lecco (LC), Italia
T +39 0341 362062 italia@oracdecor.com
ORAC Latvija
T +371 264 888 31 latvija@oracdecor.com
ORAC Lietuva
T +370 6999 0006 lietuva@oracdecor.com
ORAC Österreich
T +43 662 23 49 27 oesterreich@oracdecor.com
ORAC Polska
ul. Pomorska 106A 91-402 Łódź, Polska
T +48 42 203 60 56 polska@oracdecor.com
ORAC Romania
Blvd. I.C. Bratianu nr. 10, floor 1, district 3 Bucharest, cod 030174, Romania
T +40 31 630 06 19 romania@oracdecor.com
ORAC Schweiz
T 0800 562 118 switzerland@oracdecor.com
ORAC Slovakia s.r.o.
Kpt. Nalepku 6 08271 Lipany, Slovakia
T +421 232 784 952 slovakia@oracdecor.com
ORAC UK ltd.
The Courtyard
30 Worthing Road Horsham RH12 1SL
T +44 1403 240 102 uk@oracdecor.com