momaha.com
VOLUME 10 · ISSUE 8 AUGUST
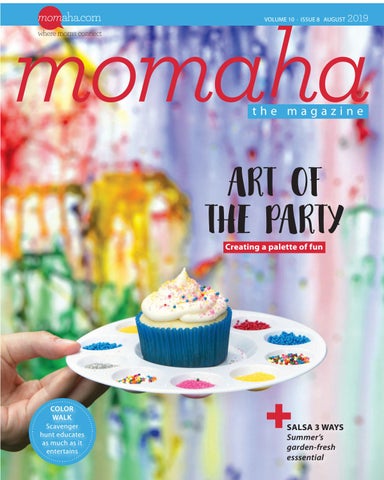
ART OF THE PARTY Creating a palette of fun
COLOR WALK Scavenger hunt educates as much as it entertains
SALSA 3 WAYS Summer’s garden-fresh esssential
2019
When children are your everything, Anything can be. At Children’s Hospital & Medical Center, science and heart lead us to even greater pediatric breakthroughs. We provide the very best in pediatric specialty care, advance pediatric research, educate tomorrow’s experts and advocate for children, families and entire communities – to improve the future of medicine, and the life of every child. To find a physician for your child, call 1.800.833.3100 or visit ChildrensOmaha.org.
Education
•
Research
•
Advocacy
•
Care 0000048418-01
1
KILEY CRUSE
CONTENTS
2
REAL MOMS + ADVICE
SEASONAL
4 Editor’s Column 6 On Our Radar 9 Momaha Bookshelf 26 Be Well 32 Get Organized
12 Salsa 15 Painting Party 24 Solar Oven 28 Color Scavenger Hunt 30 Pesky Stains
August 2019
SPONSORED FEATURES 7 Huntington Learning Center 10 YMCA of Greater Omaha 22 Boys Town National Research Hospital
momaha where moms connect
VOLUME 10 . ISSUE 8 . AUGUST 2019 editor in chief CHRIS CHRISTEN chris.christen@owh.com 402-444-1094
creative director + designer KILEY CRUSE cruse@owh.com 402-444-1375
assistant editor MARJIE DUCEY marjie.ducey@owh.com 402-444-1034
copy editor SHELLEY LARSEN shelley.larsen@owh.com 402-444-1143
momaha.com editor ASHLEE COFFEY ashlee.coffey@owh.com 402-444-1075
content contributors AMY TOKOS
cover photo KILEY CRUSE
account manager L AURE N KRUGE R lauren.kruger@owh.com 402-444-1261
account executive DEBORAH FERNSELL deborah.fernsell@owh.com 402-444-1209
account executive E M I LY M A R T I N emily.martin@owh.com 402-444-1411
account executive M A R I LY N M A R T I N marilyn.martin@owh.com 402-444-1405
Momaha Magazine is a monthly publication of the Omaha World-Herald, 1314 Douglas St., Suite 700, Omaha, NE 68102. Momaha is a registered trademark, and all content is copyright 2019 by the Omaha World-Herald. All rights reserved. The opinions and perspectives published herein are those of the authors and should not be construed as those of Momaha Magazine.
3
MOMAHA.COM EDITOR ASHLEE COFFEY Wife to Kevin Coffey, music critic for the Omaha World-Herald. Mom to Sam and Elliott. Follow her on Twitter: @AshleeCoffeyOWH
PARTIES ARE US!
B
irthdays are a very big deal in my family. They always have been. Our traditions range from Dairy Queen ice cream cake for my dad’s August birthday to sibling cake smashes that leave our faces covered in icing. My parents always let us pick out whatever meal we wanted on our special day. It really was all about us. I’ve tried to continue the tradition with my own kids. At 5 and 2, they’re a bit young to enjoy and laugh at having their faces smashed into a cake. Except for their first birthday, when they happily — and messily — shoved their smash cake into their mouths. But I do let them pick out their own theme. Sam’s fifth birthday party had a Harry Potter theme, and it was amazing. We might have gone overboard, but since I never got to have a Harry
Potter birthday party (it wasn’t a big deal back then), I decided to live vicariously through him. We made a Platform 9¾, as well as the opening to Diagon Alley. We had Hogwarts letters flying out of our fireplace, chocolate frogs and Bertie Bott’s Every Flavored Beans. The Goblet of Fire made an appearance, as well as Harry’s Firebolt broomstick. Every kid got a wand. It was magical. Later this month, my son Elliott will have a “Paw Patrol” party for his third birthday. What fun! We have plenty of props from when Sam was obsessed with those six adorable rescue pups. For a super colorful gender-neutral party idea, turn to page 15. The Momaha team had tons of fun dreaming up and trying out every detail. Have a great summer!
GET SOCIAL FACEBOOK /momahacom
4
August 2019
TWITTER @momaha_owh PINTEREST /momahaowh INSTAGRAM /momaha_owh
0000056152-01
5
ON OUR RADAR MARJIE DUCEY
THINGS TO TRY THIS MONTH
ROOTED IN SUSTAINABILITY Totes by Out of the Woods get an ecofashion boost from SuperNatural Paper, a sustainable material with the strength and aesthetics of leather. Our girl boss loves the two-toned insulated zippered Mini Shopper lunch tote and still can’t believe the value for the price: $12.99. The welltailored vegan collection includes daily carryalls, backpacks, shoppers, coolers and wine totes, $5.99 to $29.99. Navy or herringbone. Available at select Target and Office Depot stores.
PRECIOUS MEMORIES Start recording precious memories in these beautifully bound, linen hardcover books that last a lifetime. There are a ton of themes online – pregnancy, baby, Christmas, recipe, travel, gratitude, etc. Each journal provides open-ended prompts for details and space to write several paragraphs and attach photographs or other mementos. The pregnancy journal is $34.95; baby’s first year, $59.95. Pricey, but they’ll look pretty on your coffee table or bookshelf. writetomeshop.com
A ROCKIN’ GOOD TIME “Are You Dumber Than a Box of Rocks?” is a quick, fun game for all ages. The youth group that tested it laughed a lot answering questions that ranged from super easy to super hard. Each has three answers (0, 1 or 2). Rocks with numbers are rolled to give the rock’s “answer.” Just hope you are smarter or there will be more laughs. $15.95, amazon.com
BETTER BEACH EXPERIENCE The CGEAR Sand-Free Beach Towel can’t keep you free of sand on the beach. But it does something no beach towel I had used before did. It lets gravity sift away the sand that feet and wind kick onto your towel. And it doesn’t let sand filter back through. This designer towel is for people who like to lay on the beach without leaving looking like a powdered donut. It does this job well. It’s not the best beach towel replacement for drying off after laying out. The texture of the towel is coarser than typical, which could irritate sunburned skin. It should be viewed as a lighter, easier-to-pack replacement for a beach mat. $49.99, cgear-sandfree.com
ROCK-A-BYE BABY The Rockit Portable Baby Rocker promises to lull your fussy newborn to sleep in her stroller. The bulbous Rockit is easy to install once you find a screwdriver that’s skinny and long enough to reach the screws holding the battery hatch in place. It’s simple to use and seems to do its job, which is pretty straightforward. Simply park your stroller, push the power button and twist a dial to reach the desired intensity of rock you want for your child. Our tester’s 1-month-old is often at peace in her stroller, even when stopped, but in the odd moments when she wasn’t calm, the Rockit managed to convince her that she was still in motion. $49.99, rockitrocker-usa.com
6
August 2019
.
0000056157-01
7
8
August 2019
MOMAHA BOOKSHELF MARJIE DUCEY
Hot off the presses
COZY WHITE COTTAGE: 100 WAYS TO LOVE THE FEELING OF BEING HOME
By Liz Marie Galvan Galvan offers her best home decor and design tips to help readers create homes they love coming home to. Hint No. 37: Window treatments are that missing factor that can make you feel safer and warmer as you snuggle into your spaces. They ground a space and make it feel complete. Or No. 81, chalkboards. They are the perfect way to fill a space. In a mudroom, they keep track of schedules or in an entryway, they can be used to welcome party guests. She has tips for editing your home, too.
THE LITTLE UPHOLSTERY BOOK
By Shelly Miller Leer Are you ready to breathe new life into a tired piece in your home? Leer shares her expertise in this book for beginners. She covers the tools you need, how to tear down a piece of furniture and then how to transform it into something beautiful. Our favorite was the dining room and kitchen chair redo, because that’s something we all can tackle. Someday, we’ll try the Rockin’ Moroccan hanging headboard.
ROCKET TO THE MOON!
By Don Brown This graphic novel celebrates the 50th anniversary of the U.S. landing on the moon in a series called “Big Ideas That Changed the World.” It starts with the history of flying a rocket. It even shares which foot Neil Armstrong placed first on the moon in 1969. And did you know there was no toilet on Apollo 11? Austronauts had to use plastic bags!
HOPE
By Matthew Cordell Looking for something sweet to give the newest member of your family? In this book by Cordell, a Caldecott medalist, grandparents welcome their new grandchild into the world and express all the ways this new life has expanded their world, and the hope they hold for his future. It’s told from the perspective of two lions, with charming pictures.
THE MOVIE MAKING MAGIC OF MARVEL STUDIOS: HEROES + VILLIANS
By Eleni Roussos This book shares the story of some of the very colorful characters Marvel Studios has presented through the years. You’ll read firsthand accounts of heroes and villians as they were brought to life, as well as items created and captured during the production processes such as concept art, storyboards and behind-the-scenes photography. It will give you a glimpse of the Marvel Studios process from page to screen.
9
.
0000056142-01
10
August 2019
11
SUMMER SALSAS So easy, you’ll be trying new combos for every meal TEXT + PHOTOGRAPHY Kiley Cruse
Tomato and Sweet Pepper Salsa, front, and Corn and Black Bean Salsa.
12
August 2019
When fresh produce fills my garden and farmers market stands, my weekly meal plans begin to revolve around homemade salsas. The variations are endless, and salsas are an easy way to get your fill of fruits and vegetables. These recipes are great over chips, as a topping on a salad or grain bowl, or as a side with any protein.
Black Bean and Corn Salsa • 15-ounce can black beans • 15-ounce can sweet yellow corn • 1 red bell pepper, diced • 1 orange bell pepper, diced • 1 avocado, diced • ½ sweet onion, diced • 1 jalapeno, diced • ½ cup cilantro, chopped • ½ teaspoon cumin • ½ teaspoon garlic salt • 2 tablespoons lime juice • For serving: Tortilla chips
1. Drain and rinse canned corn and black beans. 2. Mix all ingredients together and serve immediately with chips. 3. If not eating right away, wait to add avocado until just before serving. www.garnishandglaze.com
***
Tomato and Sweet Pepper Salsa • 2 medium tomatoes, diced • 1 small red or yellow pepper, seeded and diced • 1 jalapeño pepper, seeded and diced, optional • 5 tablespoons red onion, chopped • 4 tablespoons cilantro, chopped • ¼ teaspoon dried oregano • 2 teaspoons red wine vinegar • 2 teaspoons olive oil • 1 teaspoon minced garlic • ¼ teaspoon sugar • Salt and pepper to taste
1. Combine all ingredients in a non-metalic bowl. 2. Cover and refrigerate until ready to serve. This recipe can be prepared up to two days in advance. Adapted from a recipe by Chris Machian
The Best Pineapple Salsa • 1½ cups small diced pineapple • ¾ cup orange pepper, diced • ¾ cup red pepper, diced • ½ cup red onion, diced • 2 tablespoons minced cilantro • 1 teaspoon lime zest • 3 tablespoons fresh lime juice • ½ teaspoon salt
1. In a large bowl, combine ingredients and stir well. 2. Serve immediately or refrigerate in an airtight container for up to three days. www.justataste.com
13
100 Bancroft St., Omaha | (402) 346-4002 For a full schedule of events, visit lauritzengardens.org 0000056076-01
14
August 2019
pARTytime! STYLING + PHOTOGRAPHY Kiley Cruse
A
rt isn’t just fun and games. It encourages creative thinking, boosts self-esteem, provides a sense of accomplishment and even expands your ability to interact with the world around you. Best of all, there’s a little Picasso in all of us. To illustrate the point, we invited Lyla, 9, and Hazel, 6, to join us for a mini styled shoot with an art party theme. The girls, who
are cousins, had a blast decorating cupcakes, popping paint-filled balloons and painting canvases. Their engagement was so genuine and spontaneous (and their works of art so impressive), we couldn’t wait to share our how-to here. This party idea isn’t just for birthdays. Or kids. Adapt it for any age or occasion. Each gathering will be a masterpiece!
Find art and baking supplies for this party at Mangelsen’s.
15
Hazel and Lyla paint canvases.
CREATE YOUR MASTERPIECE What you need
What you do
• Canvases (we used 16-by-20-
1. Cut a shape or letter from permanent vinyl using a Cricut or similar cutting device. If you don’t have a cutting device, ask a crafty friend or neighbor to help. (Mangelsen’s also will cut custom vinyl with 24-hour’s notice.) 2. Lay the canvas over a large coffee-table-sized
inch versions) • Permanent vinyl, cut into shape(s) of your choice • Vinyl transfer tape (clear contact paper is an inexpensive alternative) • Nylon pan scraper • Washable paints • Paintbrushes, various sizes
16
August 2019
book to create a hard surface for adhering the vinyl. 3. Using vinyl transfer tape, center the design on the canvas. Press firmly to canvas using a nylon pan scraper. Carefully peel away the transfer tape. Vinyl sometimes doesn’t stick well to canvas so this step may take some patience.
4. Hang canvas on a fence or place on easel for easy painting. Apply paint over the top of the vinyl for transfer effect. Don’t worry about being precise. 5. Let canvas dry completely. 6. Carefully peel away the vinyl to reveal the design. You may need a craft knife to gently start an edge.
Washable tempra paints are the best option for kids if you are worried about their clothes. If you want paintings that will last longer, acrylic paints are better. Give painters a variety of brush sizes and shapes to add to the fun.
Encourage party-goers to paint over the vinyl. If there is white canvas showing around the vinyl the shape won’t stand out as much after you peel it off the canvas.
17
These invitations take the cake WHAT YOU NEED • Spray adhesive • 4 Scotch Brite natural clean sponges, rectangle shape • Mod Podge original glue/sealant • Paintbrush • Quick-dry silicone caulk • Rotary cutter and/or sharp utility scissors • Ruler • Plastic disposable butter knife • Disposable cake piping bag and star tip
WHAT YOU DO
1. Begin by finding the center of the short side of a sponge and marking it with a dot. Using a ruler, draw a line from the dot to the opposite corners of the sponge. Cut along line with scissors or a rotary cutter. It will likely take a few cuts to get through the thickness of the sponge, and you’ll need to apply a lot of pressure if using a rotary cutter. Repeat with three remaining sponges to create four sponge triangles.
18
August 2019
(The eight smaller triangle scraps can be used to make two smaller cake slices.) 2. Alternating between the dark brown and light brown sponge sections, stack the triangles to resemble a multilayer cake slice. Using spray adhesive, glue the horizontal layers into place. 3. Cut cardstock into a rectangular shape in the same dimension as the tall face of the cake slice. Glue cardstock to the stack with spray adhesive. 4. Apply a generous coat of Mod Podge to the opposite side of the stack to help retain its shape. Optional: Apply a coat of clear spray paint to fully seal the sponges. Let
Mod Podge (or spray paint) dry completely. 5. Use the quick-dry silicone to frost the top and back side of the cake slice. Squeeze some silicone into a disposable piping bag fitted with a star tip and pipe decorative swirls onto the sides of the cake as desired. TIP: Use a disposable butter knife to prop the cake off the work surface so the silicone doesn’t adhere to the paper. Let dry overnight before handling. 6. Write party details on the cardstock and deliver your invitation. (The invitation can be mailed, but postage will run a few dollars each.) Adapted from www.deliacreates.com and www.sheknows.com
Create the cupcake of your dreams Paint trays are perfect for holding all your sprinkles
Cupcakes
We used a box cake mix and elevated the flavor of our cupcakes with homemade buttercream frosting.
Vanilla Buttercream Frosting • ½ cup butter • 4 cups powdered sugar • 2-3 tablespoons cream or milk • 2 teaspoons vanilla
1. Cream butter for 2 minutes. Add powdered sugar, vanilla and 2 tablespoons milk or cream. 2. Add milk or cream, a teaspoon at a time, until frosting is the correct consistency to pipe onto cupcakes. 3. Using a cake decorator set, frost the cooled cupcakes as desired.
Paint tray cupcakes • Plastic paint trays • Variety of sprinkles, both in color and texture, that match color scheme of party. • Frosted cupcakes
1. Carefully fill paint wells with sprinkles. Tip: The center crease of a card or folded sheet of paper works great as a trough to guide sprinkles into each well. 2. Place cupcake in center of tray. 3. Let the decorating begin!
19
Artful palette It’s a cake and a cookie at the same time Tap your creativity with this gigantic chocolate chip cookie in the shape of an artist’s palette. Trust us, the kids will eat it up!
Chocolate Chip Cookie Cake Serves 16
• 12 tablespoons butter • 1 cup brown sugar • ¼ cup sugar • 1 egg • 1 egg yolk • 2 teaspoons vanilla • 1¾ cup flour • 1 teaspoon cornstarch • 1 teaspoon baking soda • ¾ teaspoon salt • 1½ cups chocolate chips • 4 or 5 colors of candy melts
1. Heat oven to 350 F. Spray a 9-inch springform pan with nonstick cooking spray. 2. In a large mixing bowl, cream butter, brown sugar and sugar for 3 to 4 minutes, scraping the sides of the bowl often, until
light and creamy. 3. Add egg, egg yolk and vanilla. Mix for 1 minute. 4. Stir in flour, cornstarch, baking soda and salt, just until combined. Stir in chocolate chips.
5. Spread cookie dough into springform pan. 6. Bake for 20-23 minutes. If the cookie is browning too much, cover with foil halfway through baking time. 7. Check for doneness by inserting a toothpick in the center of the cookie. Remove from oven and set aside to cool. 8. Once cookie is cooled, use a 2-inch cookie or biscuit cutter to cut a hole about 1 inch from the edge of the cookie to mimic shape of a painter’s palette. Remove from springform pan to a larger serving platter or plate. Melt colored candy melts in microwave oven according to package directions. Using a spoon, add dollops of colored candy melts to the top of the cookie to mimic paints. Optional: Dip the tip of an artist’s paintbrush into one color of candy melts. Let dry and set on palette cookie. Adapted from www.modernhoney.com
Brush on the flavor These tasty treats get a splash of color • 6 tablespoons butter • 9 cups mini marshmallows • 9 cups crisp rice cereal • Spray oil • 12 wooden sticks • Candy melts • Clear treat bags + twist ties • Ribbon
1. Spray the sides and bottom of a 9-by-13inch pan. 2. Melt butter and mini marshmallows in a 4-quart microwaveable bowl, stirring every 30 seconds. 3. Add cereal and stir until well-coated. 4. Pour mixture into pan. Using a buttered spatula, press mixture firmly and evenly into the pan. Let cool. 5. Cut into 12 equal squares. Press a wooden stick into the short side of the treat. 6. Melt candy melts in microwave according
20
August 2019
to package directions. Dip treats in candy melt about 1/3 of the way up. Set on waxed paper or silicone baking mat to harden.
7. Once hardened, put paintbrushes into treat bags. Secure with twist ties. Embellish with ribbon bows.
Art with a pop T
his game is so much fun and the results are awesome — but, oh my, so messy! When you prep this game, make sure you are wearing clothes you don’t mind getting paint on them.
What you need • Large painting canvas • Water balloons • Washable tempra paints • Straw • Empty bottle with tip that will fit into neck of balloon • Safety pins or T-pins • Plastic-tip darts • Easel
What you do
1. Blow up balloons and then deflate them. This stretches them out so they can hold more paint.
2. Put paint into bottle with a long tip. Carefully squeeze paint into balloon. 3. Stick straw into the balloon, pinch edges and blow up balloon. The more air you put in the balloon, the more splatter affect you will get. 4. Tie balloon end and carefully attach to the canvas — stick the safety pin or T-pin through the very end, near the knot. 5. Repeat until canvas is full. Our canvas was 22 by 28 inches, and we used about 20 to 25 balloons. 6. Set canvas on an easel and let the kids toss darts at the canvas. 7. As the balloons are popped, a masterpiece will unfold.
Use a straw to blow up the paint-filled balloons.
21
.
0000056134-01
22
August 2019
0000056134-02
23
MAKE OVEN, ADD SUN STYLING + PHOTOGRAPHY Kiley Cruse
A
solar oven works by catching sunlight using a reflector and a black surface (we used a black sheet of paper). The black surface transforms the light into heat and an upside-down glass bowl traps the heat inside. (Think of the heat inside a car on a hot summer day.) Our oven reached 215 F on a sunny day with temps in the 90s.
DIY solar oven WHAT YOU NEED • Large, flat cardboard box • Craft glue • Aluminium foil • Duct tape • A sheet of black paper or something dark like a black oven tray • Heat-proof glass bowl or casserole dish • Thermometer (our classic dial-style oven thermometer was perfect because it has a large, easily readable face) • Hot day with minimal cloud cover (ideally the temperature should be at least 85 degrees)
WHAT YOU DO
1. Modify your box to have a single flap as a lid. This can be done by removing three of the flaps, leaving only one long flap in place. Attach the flap your removed to the one left in place with staples and duct tape. It doesn’t matter that your single flap is slightly shorter than the width of the box because it is used only as a reflector. 2. Line inside of box and flap with aluminium foil and secure with craft glue. Anchor the edges of the foil around the outside of the box with duct tape. 3. Use the discarded cardboard from the short side flaps to create legs to prop the lid open. Do this by trimming the legs into thin strips (approximately 2 inches wide) with an angle on one end. Cover with aluminum foil. Position the legs at an angle using duct tape. The flexible duct tape joint will enable the
24
August 2019
legs to fold inside the box for storing. It also will enable the lid to be set at various angles to best catch the sun’s rays. 4. Place black paper inside the box with
an upside-down glass bowl on top. Place thermometer underneath the bowl. If you have a second thermometer, place it outside the oven to compare temperatures.
How to use your DIY solar oven 1. Set your oven in full sun, with the reflector facing directly at the sun. Monitor how hot it gets inside. When the temperature is above 158 F, it is warm enough to start using. As the sun moves across the sky, adjust the direction of the reflector accordingly. This will ensure maximum temperature inside your oven. 2. We found that the temperature inside the oven was lower at noon than at mid- to late afternoon. Be sure to use a tea towel to remove the glass bowl from the oven. 3. Store your solar oven where it can be easily used again.
Rainbow Crayons Test the baking power of your solar oven with this experiment.
1. Chop up old crayons and place the shavings into silicon cupcake liners. 2. Set the liners inside the oven and watch what happens. It took about 30 minutes for our crayons to fully melt. 3. Remove crayon creation from oven and allow to cool completely before popping out of liners.
Rocky Road Bites
These chocolate-and-marshamallow treats are ideal for a solar oven. One reason: Chocolate is best cooked at low temperature. 1. Place about six to eight chocolate melts in a silicon cupcake liner along with a scattering of mini marshmallows and chopped nuts of your choice (we used almonds). 2. Set liners in oven. Once the ingredients have melted into a lump that resembles Rocky Road, remove the bites from the oven and refrigerate until set. Our bites took about 1½ hours to fully cook, but they were worth the wait. www.thecrafttrain.com
25
BE WELL MARJIE DUCEY
WORKING MOM’S GUILT
A
• Be a role model. Tell your s the mother of four with a children that you are going to give highly demanding job, Dr. a big talk instead of just saying Sasha Shillcutt knows all you’re going on a business trip. about a working mom’s guilt. Help yourself and them feel pride “I don’t think there is a woman in what you’re accomplishing. on the planet who doesn’t have • Find someone you can lean some guilt about on. Women are under constant something,’’ she pressure to be the best mom, says. the best wife, the best employee, But you can thereby creating more guilt when have all the guilt they feel they don’t live up to in the world about that standard. So it’s important working, she to have a community with similar says, and it won’t Dr. Sasha struggles. That normalizes the change how your Shillcutt difficulty that comes with being kids turn out. a mother and having a career. It actually can Studies show that sharing about harm them. Maybe you don’t discipline your children when they a difficult situation actually makes it feel easier. “When we are deserve it or you do unhealthy balancing work and home life, we things out of guilt. can often feel like we’re failing,” “We have to let it go,’’ she says. Shillcutt says. “That’s when we But how? really need to lean on each other, Shillcutt, a professor and vice as it can alleviate the feeling of chair of strategy and innovation in guilt.’’ the department of anesthesiology • Stop separating your work life at the University of Nebraska from your home life. Just as you Medical Center, offers this advice share things about work with your based on her experience. children, share things about your • Be honest with your children family colleagues. “We about your work life. KIDZ Let them SHOPPE • with HIZyour & HERZ Kidz Shoppe & Herzthat Consignment Sales healthy organizations know what you do. Share with and Hizknow in West Omaha. websites for and information have women men at the them if you are in the middle of a See our and upcoming sale dates. top, and in reality, many women big project or under extra stress in KIDZSHOPPEOMAHA.COM are both mothers and leaders,’’ your job. HIZANDHERZOMAHA.COM
KIDZ SHOPPE
•
Shillcutt says. “I don’t hide the fact that I am a mom at work, and I don’t hide the fact that I work at home.’’ • Accept that sometimes you will have to miss something at home or at the office. Be upfront with your employer − and don’t feel guilty − when you can’t make a work dinner because of something scheduled at home. If your kids are upset that you won’t be at an activity, make sure to schedule time to debrief with them about what you missed. • Utilize technology. Use FaceTime when you’re out of town. Or take time to catch up with the kids one-on-one when you return home. “You have to give yourself some grace with that,’’ Shillcutt says. • Recognize that you can’t always balance it all. There’s no guarantee that you won’t have guilt or struggle with issues related to guilt. “You have to recognize it and realize guilt doesn’t lead to better outcomes. Be very transparent with friends and colleagues,’’ Shillcutt says. “We need to recognize people who are trying to balance it all and let them know they can talk to us about it.’’
HIZ & HERZ
Kidz Shoppe and Hiz & Herz Consignment Sales in West Omaha. See our websites for information and upcoming sale dates. KIDZSHOPPEOMAHA.COM HIZANDHERZOMAHA.COM
26
August 2019
0000056161-01
27
COLOR WALKS Make a game of finding things in nature STORY+ PHOTOGRAPHY Ashlee Coffey
B
eing outside is one of my favorite things about summer. Lately, my kids have been asking to go on walks. It’s been fun to stop and talk about the plants and bugs we spy along our routes. My kids will crouch to watch ants or cautiously follow a fat bumblebee from flower to flower. We might only circle our block, but it’ll take us a good 20 minutes because we have to examine everything. We love to talk about nature and the seasons. Their favorite thing is picking random flowers for Mommy. (Dandelions are my favorite.) I recently found an outdoor color scavenger hunt on the blog I Heart Crafty Things. It was unbelievably fun
28
August 2019
and — best of all — super easy to put together. To start, I took a plain piece of white paper and a handful of markers in various colors from my kids’ giant tub of art supplies. I scribbled small squares of color onto the paper. (My 5-year-old helped pick them out.) You can do as many or as few colors as you like. That’s it. You’re ready for your outdoor color scavenger hunt. We grabbed a bag to hold our colorful nature finds and set out on a neighborhood sidewalk. Things in browns, greens and grays were easy to find. Not as easy were flowers in the pretty pink and red shades (that we could pick). It also took some hunting
to find the orange and yellow hues. I think those might be easier once fall rolls around. Our color search spurred some hilariously adorable conversations with my 5- and 2-year-olds. Especially since my 2-year-old is still learning his colors. So it was also a fantastic learning experience for him. The best thing about an activity like this is that you can do it anywhere. I think it would be a great way to explore a vacation spot. After we were done, I stuck the paper in our art supplies closet. I’m thinking we’ll pull it out this fall and see what new things we can find. Maybe I’ll even add a few new hues to match the season.
29
Don’t panic: Here’s how to undo your kids’ messes and stains Stay calm and blot — never rub! STORY Elizabeth Mahew
L
ydia Fenet does it all. She works full time at Christie’s auction house, just wrote her first book and has three kids under the age of 6. She gracefully moves from the boardroom to the playroom, solving problems and cleaning up messes with a calm, can-do attitude. So when she recently found her 2-year-old, Eloise, pouring a bottle of green nail polish onto a cream-colored carpet, she did not yell or scream, but rather did what most people do: She frantically channeled her energy into rubbing it with stain remover. When the stain did not come out, she just flipped the carpet around, hiding the damaged portion under her daughter’s bunk bed.
30
August 2019
On another occasion, her son’s container of sparkly purple slime cracked open and sat overnight, drying on her living room rug. “I am terrible in these situations because even though I know what I am doing is wrong, I do it anyway,” she says. “In the case of purple slime, I immediately dumped a ton of water on it, which, I learned after calling a professional rug cleaner, is exactly what you don’t want to do.” Although Fenet didn’t tackle the stains using the best cleaning practices, she did deal with her children using the best parenting practices: She did not lose her temper. “I have resigned myself to the fact that with children comes a
fair amount of nail polish, slime, sticky fingers and haircuts that do not come from a licensed professional.” The first thing you should do when your child makes a mess is breathe through your initial reaction, says Shelby Riley, a licensed marriage and family therapist and owner and director of Shelby Riley, LMFT and Associates in Chester Springs, Pennsylvania. “If you can stay calm, your child will feel less defensive and be more open to learning from the experience.” Riley advises that you narrate back to your child what you see (in your most neutral voice): “I see there’s purple slime on the carpet.” Then explain that slime sticks to everything, so it should be used
only in the kitchen or outside. Then involve your child in the cleanup. “Let them experience some of the pain and hardship that comes with cleaning; it will help them remember not to do it again,” Riley says. I wish I had met Fenet before the nail polish or slime incidents. As a longtime magazine editor and mother of two, I’ve learned a lot about cleaning over the years. Here are some of my best solutions for clothes, fabrics, walls and carpets — the spots where kids tend to make the biggest messes. • Stains should be treated as soon as possible. That doesn’t mean you should follow your kid around with a Clorox pen, but the sooner you pre-treat a stain with a stain remover such as Shout or OxiClean, the better chance you have of removing it. • Never rub a stain; blot or dab it using clean white towels or paper towels. Rubbing a stain will only work the dirt deeper into the fibers. When dabbing, rotate to a clean side of the towel as you blot so you don’t spread the stain. • Always wash a stained item in the hottest water that the fabric will allow. (Protein-based stains are an exception. See below.) Hot water will help to loosen and remove dirt. • Check to see whether a stain has disappeared before you put it in the dryer; dry heat will “bake” the stain into the fibers. If you have a stubborn stain that doesn’t come out after one wash, treat it again with a stain remover and re-wash. • When using harsh chemicals such as nail polish remover or hair spray or to remove a stain, make sure you try it on a hidden area first; it may damage the color of the fibers.
COMMON MESSES
Protein-based stains. Formula, milk, diaper accidents, blood. All of these are protein-based stains, so the first thing you want to do is soak the item in cold water for about 20 minutes to loosen the stain (if you pre-soak these stains in hot water, you risk baking in the stain). Remove the item from the
water and treat the stain with a dab of an enzyme-based detergent such as Biz, Era Plus, Wisk or Axion and let it sit for 30 minutes. If the stain persists, dab it with some diluted white vinegar or diluted ammonia to lighten the stain. Machine wash. Urine. For clothing, rinse the item in cold water, then wash in a normal cycle. For mattresses, first blot the area with towels. In a spray bottle, combine one part white vinegar to two parts water. Spray the mixture over the affected area, then blot with towels. Cover the area in baking soda and let it sit for eight to 10 hours. Vacuum the baking soda, then allow it to dry completely.
Crayon. For stains on clothing, place the item stain-side down on a clean white cloth or stack of paper towels. Spray with WD-40 or Goo Gone and let sit for several minutes. Turn the item over and apply WD-40 to the other side of the stain and let set for several more minutes. Dab the stain on both sides with dishwashing detergent and wash in hot water. Remove crayon marks from painted or wallpapered walls with a dry cleaning sponge or a Mr. Clean Magic Eraser. Colorful foods. Think sweet potatoes, berries, fruit juice, ketchup and mustard. You can remove most of these stains by pre-treating them with a pre-wash stain remover, then washing the item with detergent in hot water (if the item can withstand the heat). After washing, if the stain persists, dab it with some diluted white vinegar or diluted ammonia to lighten the stain. Machine wash. (This advice goes for grass stains, too.)
Acrylic or water-based paint. Dab off as much as you can with a paper towel. Sponge on a solution of liquid laundry detergent and warm water to soften the paint. Scrape off as much of the paint as you can with a dull knife. Rinse and repeat. If the stain persists, apply a small amount of hair spray, rubbing alcohol or nail polish remover to the spot and allow it to sit for 15 minutes. Blot with clean dry cloths. Repeat until the stain is gone. For clothing, machine wash. For carpets, run a steam vacuum over the spot or flush the spot with cold water and blot until most of the moisture is removed. Chalk. Shake the item outside to remove as much of the chalk as possible. Lay the clothing on a clean white towel and blot the spot with rubbing alcohol. Rinse thoroughly. Dab the spot with liquid laundry detergent. Machine wash. Play-Doh. Do not use hot water or cleaning solutions of any kind. Allow Play-Doh to dry completely, loosen it with a stiff brush, then vacuum the pieces. If necessary, dab the area with a gentle soap and cold water. Slime. To remove slime (homemade or store-bought), first remove as much as you can with your hands. Mix two parts white vinegar with one part water in a spray bottle. Spray the mixture on the slime and allow it to soak, then blot the area with paper towels or a clean white cloth. Keep spraying and blotting until the slime is gone. Nail polish. Use paper towels or a clean cloth towel to dab up as much of the wet nail polish as possible. Once you’ve absorbed the excess, spray a small amount of non-acetone nail polish remover on the stain (you can use an acetone variety, but make sure you test it on a hidden area, because it can be very harsh and damage your rug). Dab the area with clean paper towels until the stain is lifted. Rinse with cold water and mild soap. Special to The Washington Post. Mayhew, a “Today” show style expert and former magazine editor, is the author of “Flip! for Decorating.”
31
GET ORGANIZED AMY TOKOS Amy Tokos is a Certified Professional Organizer and the owner of Freshly Organized. You can find more organizing tips at freshlyorganized.com.
Survive the back-toschool clutter invasion
T
he kids are headed back to school. You know what that means − backpacks, textbooks, homework, school lunches and more will be invading your hallways and countertops. Try as you might, controlling this chaos can be a losing battle. But containing it, you can do. The key to success is to have spaces for all the items that are easy for the kids to use.
FOOD
Set aside kid spaces in your fridge and pantry for lunch and snack items. Have containers to store like items. Getting rid of box packaging helps kids grab and go, plus you don’t end up with empty boxes in the pantry.
SUPPLIES
Having one space designated for school supplies helps the whole family find what they need. When you’re shopping this year, buy a little extra lead, folders and pencils. Store them with your index cards and other school-related supplies. This will spare you from making emergency runs to the store. The location of the supplies can be anywhere as long as the kids have access. A space close to the homework area works best.
ACTIVITY GEAR
Off-season activity gear needs a central location throughout the year. The worst feeling is when the first game is about to happen and you can’t find your child’s shin guards. Creating a drop zone (a bin in a hall closet works well) for off-season uniforms, shoes and gear is a gamechanger.
BACKPACKS
After school, backpacks will land in the easiest place. Be prepared for
32
August 2019
this. It might be the floor by the door or the kitchen countertop as the kids grab a snack. The key to surviving the backpack clutter is to have some boundaries. Give the kids a chance to land, relax and regroup after school. Let them settle into their homework. Then have a time that items need to be picked up and ready for school the next day. For little kids who don’t have much homework, their backpacks can be picked up, ready for tomorrow and placed on a hook by the door before dinner. For older kids who might need more time for homework, maybe before bedtime works better.
HOMEWORK AND PAPERS
Spelling lists, reading logs and study guides all need a home outside of the backpack. Younger kids may have weekly study items like a spelling list. Have a clip or magnet for hanging the list for quick retrieval during the week. Older students will need to hang on to study guides and other papers. Create a small hanging file box for their papers. You can have a file for each class so they can easily store and retrieve their papers as needed. The best place to keep the file box is in their study area. Maintaining these spaces is key to success. Create a routine to help your child stay organized. Ask lots of questions about what they’re keeping and why. Then help them find a place for the needed items. Young kids might need daily help but as they get older they will become more independent. Our goal as a parent is to give our kids the tools and to coach them on how to maintain their organization. School supplies and spaces are a great practice ground for lifelong organization skills.
SMALL SWIMMERS
Big lessons Classes start weekly
88-degree pool
Small class sizes
Sign up today at diventures.com or call 402-933-6251
2148427-01