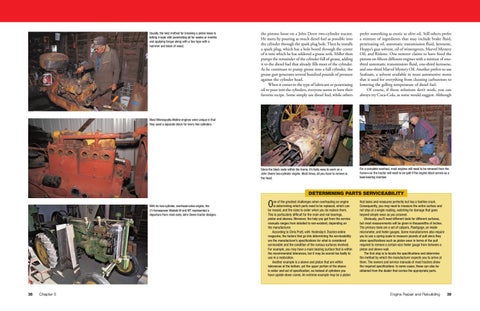
Usually, the best method for breaking a piston loose is letting it soak with penetrating oil for weeks or months and applying torque along with a few taps with a hammer and block of wood.
the pistons loose on a John Deere two-cylinder tractor. He starts by pouring as much diesel fuel as possible into the cylinder through the spark plug hole. Then he installs a spark plug, which has a hole bored through the center of it into which he has soldered a grease zerk. Miller then pumps the remainder of the cylinder full of grease, adding it to the diesel fuel that already fills most of the cylinder. As he continues to pump grease into a full cylinder, the grease gun generates several hundred pounds of pressure against the cylinder head. When it comes to the type of lubricant or penetrating oil to pour into the cylinders, everyone seems to have their favorite recipe. Some simply use diesel fuel, while others
prefer something as exotic as olive oil. Still others prefer a mixture of ingredients that may include brake fluid, penetrating oil, automatic transmission fluid, kerosene, Hoppe’s gun solvent, oil of wintergreen, Marvel Mystery Oil, and Rislone. One restorer claims to have freed the pistons on fifteen different engines with a mixture of onethird automatic transmission fluid, one-third kerosene, and one-third Marvel Mystery Oil. Another prefers to use Seafoam, a solvent available in most automotive stores that is used for everything from cleaning carburetors to lowering the gelling temperature of diesel fuel. Of course, if those solutions don’t work, you can always try Coca-Cola, as some would suggest. Although
Since the block rests within the frame, it’s fairly easy to work on a John Deere two-cylinder engine. Most times, all you have to remove is the head.
For a complete overhaul, most engines will need to be removed from the frame—or the tractor will need to be split if the engine block serves as a load-bearing member.
Most Minneapolis-Moline engines were unique in that they used a separate block for every two cylinders.
DETERMINING PARTS SERVICEABILITY With its two-cylinder, overhead-valve engine, the 21-horsepower Models M and MT represented a departure from most early John Deere tractor designs.
38
Chapter 5
O
ne of the greatest challenges when overhauling an engine is determining which parts need to be replaced, which can be reused, and the sizes to order when you do replace them. This is particularly difficult for the main and rod bearings, piston and sleeves. Moreover, the help you get from the service manuals ranges from detailed to non-existent, depending on the manufacturer. According to Chris Pratt, with Yesterday’s Tractors online magazine, the factors that go into determining the serviceability are the manufacturer’s specifications for what is considered serviceable and the condition of the various surfaces involved. For example, you may have a main bearing surface that is within the recommended tolerances, but it may be scored too badly to use in a restoration. Another example is a sleeve and piston that are within tolerances at the bottom, yet the upper portion of the sleeve is wider and out of specification, so instead of cylinders you have upside-down cones. An extreme example may be a piston
that looks and measures perfectly but has a hairline crack. Consequently, you may need to measure the entire surface and not stop at a single reading, watching for damage that goes beyond simple wear as you proceed. Obviously, you’ll need different tools for different surfaces, but most measurements will be given in thousandths of inches. The primary tools are a set of calipers, Plastigage, an inside micrometer, and feeler gauges. Some manufacturers also require you to use a spring scale to measure pounds of pull since they show specifications such as piston wear in terms of the pull required to remove a certain-size feeler gauge from between a piston and sleeve wall. The first step is to locate the specifications and determine the method by which the manufacturer expects you to arrive at them. The owners and service manuals of most tractors show the required specifications. In some cases, these can also be obtained from the dealer that carries the appropriate parts.
Engine Repair and Rebuilding
39
You’ll need your brakes as soon as you start working with your tractor, whether it’s in the field, in a parade, or in an antique tractor pull, as with this nicely restored Oliver Model 60 Row Crop.
Foot brakes that are adjacent to each other, or can be locked together, need to be adjusted to a comparable setting with an equal amount of free travel. This will prevent the tractor from pulling to one side when both brakes are applied in an emergency.
The brake pedal is incorporated as part of the brake unit on this John Deere model.
After the brakes have been refurbished and reinstalled, adjust the brakes to the point the rear wheels begin to drag and back them off slightly.
is important that the brakes be adjusted. Moreover, foot brakes that are adjacent to each other, or can be locked together, need to be adjusted to a comparable setting with an equal amount of free travel. Otherwise, one brake may be applied while the other just drags. This isn’t a problem, of course, with hand brakes or on tractors where the left and right brake are operated by the corresponding feet. The easiest way to adjust the brakes in most all cases is to raise the rear wheel off the ground and tighten the
brake until you can no longer rotate the wheel by hand; then back it off until the rear wheel turns with only a slight drag. Naturally, the adjustment process will vary depending upon the brake configuration. Quite often the adjustment instructions will also tell you to depress the brake pedal approximately 2 inches and adjust the brake until the lining contacts the drum as a starting point. At the very least, you should end up with around 3/4 inch of pedal free play before the brakes start to contact the drum.
If the brake engages the bull gears on the final drive, or extends into any other oil-enclosed housing, make sure you install a new gasket during assembly.
80
Chapter 7
Final Drive and Brakes
81
For a professional look, you might consider sending the steering wheel to one of several companies that specialize in refurbishing plastic- or wood-rimmed steering wheels.
Just as it is with so many other components on a vintage tractor, cleanliness is next to godliness when it comes to restoring steering components.
Offered as an option on some models, John Deere’s Roll-O-Matic tricycle front axle was intended to help smooth out rough fields by moving the front wheels in opposite directions when a bump or ditch was encountered. As the steering wheel is the part of the tractor you come into contact with most frequently, you’ll appreciate a quality restoration of the wheel every time you take the controls. This early Ford-Ferguson 9N was restored by Palmer Fossum of Northfield, Minnesota. Chester Peterson Jr.
Power steering pump maintenance should be handled in the same manner as hydraulic system inspection and repair.
90
Chapter 8
Front Axle and Steering
91
packings, mechanical seals, metallic seals, and compression packings and gaskets. Troubleshooting, naturally, consists of looking for leaks. However, even though the perfect seal should prevent all leakage, this is not always practical or desirable. In dynamic uses, for instance, a slight amount of leakage is needed to provide lubrication to moving parts. On the other hand, internal leakage, either from static seals or excessive leakage from dynamic seals, is hard to detect. Often, excessive leakage from an internal seal must be indicated by other means, such as pressure testing. As a general rule, it’s usually best to replace all seals that are disturbed during repair of the hydraulic system— assuming they are available. As is the case with the engine, transmission, and most other major components, it’s a lot cheaper to replace a few seals or gaskets during restoration than to come back later and do a repair job to correct leaks.
It may sound a little extreme, but you should also give seals the same care during handling and replacement as precision bearings. This means keeping them protected in their containers and storing them in a cool, dry place free of dirt until you’re ready to use them. Following installation, static O-rings used as gaskets should be tightened a second time after the unit has been warmed up and cycled a few times, to make sure they seal properly. Dynamic O-rings, on the other hand, should be cycled or moved back and forth (as on a hydraulic cylinder) several times to allow the ring to rotate and assume a neutral position. In the process of rotating, the O-ring should allow a very small amount of fluid to pass. This is normal, since it permits a lubricating film of oil to pass between the O-ring and the shaft.
ADAPTER
COVER
BODY ROTOR ASSEMBLY COUPLING
RETAINER
PUMP SHAFT
OIL RING
When rebuilding any type of hydraulic pump, it’s a good idea to replace all bushings and seals.
Most hydraulic pumps utilize either a gear pump, in which two meshing gears operate, or a rotor assembly as illustrated above.
When you start working with implements, a bulldozer blade, or other tractor-mounted tools, you’ll want your hydraulic system on good working order. This 1952 Allis-Chalmers Model WD is fitted with a #33 corn picker. Owner: Duane Eilts. Ralph W. Sanders
96
Chapter 9
Hydraulic System
97
Whether you’re overhauling a starter or generator, it’s worth the time and money to put in new bearings.
If you intend to use your restored tractor strictly as a work tractor, you might want to install an alternator and convert the electrical system to 12 volts.
the appropriate gauge of lacquer-coated, cotton-covered wiring, which was used on most tractors built before the mid-1950s. The wiring harnesses stocked by most restoration supply companies have all the terminals soldered in place and sealed and all wires are numbered and colorcoded to correspond with an installation guide that’s included. All reproduction harnesses are also made up of the appropriate-gauge wire covered by PVC, which, in turn, is covered with cloth loom, cloth braid, nylon braid or tape to match the factory original—giving you the best of both worlds. The main thing to watch for when replacing wiring or installing a new wiring harness is to make sure the ground points are free of paint. Unlike the original manufacturer, most restorers paint all the parts and then assemble the tractor. So make sure you don’t paint over your grounds or else clean the paint from those areas before you do any rewiring.
25,000 volts from bleeding out when the wire is carrying current. Consequently, the resistance-type wires do not handle sharp bending or jerking and can break internally, ruining the wire. Excessive exposure to oil and antifreeze can chemically break down the coating, as well. Perhaps the most damaging effect, though, is caused when someone pulls on the wires to remove them from the spark plugs. This can separate the conducting material, causing internal arcing. Consequently, it’s important that you keep spark plug wires clean and separated from each other with any wire clips that are integral to the routing. To remove wires from the plugs during service or restoration, grasp the rubber boot, not the wires. Keep in mind, too, that secondary wires, including the coil wire and spark plug wires, can appear in good condition, yet be faulty. According to Curtis Von Fange, a tractor enthusiast from Indiana, they can be the cause of irritating engine “poofs” that simply can’t be located or can make an engine run erratic and backfire. If there is any doubt about the condition of the wires, it’s generally best to replace them. However, one way to check their condition is to measure the wire resistance using an ohmmeter. In general, the wires should register around 8,000 to 12,000 ohms per foot. This will also test the wire for continuity, ensuring that there are no breaks in the copper-wire core.
SPARK PLUG WIRES Contrary to their rugged appearance, spark plug wires are quite sensitive. That’s because most secondary wires consist of a soft-copper-core wire surrounded by stainless steel or carbon-impregnated thread mixed with an elastomer-type conductor. The outside covering of a heavy layer of insulation prevents the 12,000 to
RIGHT HEADLAMP STARTING MOTOR
MAGNETO
If there is any doubt, talk to other tractor owners or try to find a well-restored model like your own and take notes. As a general rule, you should use at least 10-gauge wiring for circuits that carry a heavy load, such as those from the generator. Switches and other components can be wired with 14-gauge wire. Remember, the larger the gauge number, the smaller the wire diameter. Typically, if you find sections of wiring that are badly deteriorated, it’s usually bad throughout. Rarely will you find a good section and bad section. Quite often, you’ll find that the insulation on the original wiring, which sometimes consisted of nothing more than waxed paper, has deteriorated to the point it’s only being held together by the cotton braid. When that happens, there’s not much
112 Chapter 10
to keep electric current from jumping through the cotton to a nearby frame rail or component. So now you need to decide whether you want to locate a wiring diagram and rewire the tractor on your own, or purchase a pre-assembled wiring harness. It’s obviously less expensive to buy the wire and all the connectors, but you also have to consider your experience and the amount of time you have available. Your purchase will also depend on whether you’re restoring the tractor as a working machine or an accurate restoration. If the plan is to rebuild it as a work tractor, you can easily substitute modern PVC-coated, automotive-type wiring in the correct gauge and crimp-style connections. However, if you’re going for accuracy, you’ll want to locate
5
AMMETER
MAGNETO SWITCH 4
6 3
1
FUSE LIGHT SWITCH 5
NEGATIVE BATTERY
GENERATOR
LOW CHARGE LIGHTS
S
POSITIVE
HIGH CHARGE RESISTANCE B
REAR LAMP
LEFT HEADLAMP 2
5
A wiring diagram can be a tremendous help when rewiring a tractor or tracing electrical problems. AGCO Corporation
Electrical System 113
One of the most important aspects of tire care is maintaining the correct amount of air pressure.
inch thick. Generally, they come in half-moon shapes so they can be easily inserted into the old tire, where they partially overlap. However, some companies also offer spot reliners. The inner tube is then inserted into the tire, where, once inflated, it holds the reliners in place. Other tire repair products include rubber putty that can be used to repair cracks, gouges, weather checking, and other minor problems. Unfortunately, it can’t be used to repair a hole. Finally, various companies carry a concentrated black tire paint that can be used to revive the color in old, gray-looking tires. Simply mix it with paint thinner according to the directions on the label and apply it as you would paint.
WHEEL AND RIM RESTORATION
If you’re restoring a work tractor, newer tires, with their 23-degree bars, generally offer better traction than the 45-degree lug tires originally found on the tractor.
This vintage Oliver has been nicely restored and fitted with new “shoes” on the front. Unfortunately, finding tires that match the original is sometimes difficult.
148 Chapter 13
If you’ve been fortunate enough to find rims and wheels that are in relatively good shape, the restoration process may be as simple as sandblasting the appropriate parts and applying one or more coats of primer prior to painting. Unfortunately, vintage wheels and rims didn’t take kindly to age, especially if they were ballasted with calcium chloride. They didn’t take well to rust, either. If one or more of the wheels are too far gone, your only choice will be to frequent the auctions, swap meets, salvage yards, and classified ads for a replacement. If you’re only dealing with a few rust holes, however, you should be able to take care of those by thoroughly cleaning the holes and filling them in with small beads of weld. If you’re good with a welder, you may even be able to repair larger rust areas by totally replacing the damaged area. The first step will be cutting out the corroded or rusted portion of the wheel. Quite often, this will be the outer edge of the rim, where it has rested on the ground. Next, you’ll have to find a scrap wheel or rim that is identical in size and style from which you can cut a replacement piece. Make sure all edges have been ground smooth, clamp the splice into position, tack weld around the whole piece to keep it from warping, and carefully weld it into place. Once you’ve finished welding, grind all splices down until they are flush with the surrounding metal and prepare the wheel for painting. If a rim is in very bad shape, though, the best bet is to search the salvage yards or swap meets for a new one.
In order to run steel-wheel tractors on the streets and in parades, some restorers have fitted the wheels with hard-rubber rims.
Tires, Rims, and Wheels 149
Chapter 14 Setting Up Shop for Bodywork and Painting I
f you’re serious about doing a first-class tractor restoration or paint job, the first thing you’re going to need is a good set of basic tools to remove parts such as the shields, fuel tank, and radiator. Make sure you put the emphasis on good. Cheap tools are only going to lead to frustration as they break, strip, or worse, damage a tractor part. Look for a set of automotive-quality tools that come with a warranty, such as those offered by Sears (Craftsman), NAPA, and Snap-On.
BODYWORK TOOLS If you’re going to be doing any sheetmetal repair—and chances are you’ll find it necessary—you’ll need a few basic body repair tools. The truth is that it’s pretty rare to find a tractor that doesn’t have at least a few dents or ripples in the hood, grille, or one or both fenders. In most cases, you can get by with a simple body hammer and dolly. Although body hammers and dollies both come in various sizes and shapes, the role of the hammer is to stretch and shape sheet metal, while the dolly acts as the anvil to keep it from moving too far. Since most shops have a ball-peen hammer in their inventory, you might find that of value as the body
hammer, too, since one end of the head is rounded and the other end is flat. The key is to hold the dolly on the back side of the dent or crease while striking the front side. Another tool that may be valuable in certain situations is a dent puller, though these are generally used in areas where it is hard to gain access to the back side of a dent. In essence, this is a slide-hammer device that is attached to a hole drilled into a dented panel and used to pull it back into place. The drawback is that the holes you make to attach the slide hammer to the sheet metal have to be filled later with body putty. As a result, it’s generally better to remove the panel, grille, or fender and simply use a hammer and dolly. If the sheetmetal component is one that you can remove and relocate to a more solid location, you may even want to invest in some kind of an anvil. You don’t have to run out and spend hundreds of dollars for a commercial shop anvil, though. For what you’ll need most of the time, a 2- or 21/2-foot piece of railroad track rail will do. In fact, the rounded edge of the rail will work better than a real anvil for some sheetmetal repair and fabrication. If you occasionally need a flat surface or a square end for bending, you can weld a piece of bar stock across
If you plan to remove the tires and wheels during the painting process—which generally works best—you’ll need a set of jacks or some type of cribbing to hold up the frame.
152
If you plan to do your own painting, an air compressor with adequate capacity, an inline water filter, and plenty of hose will make the job a lot easier. You’ll find compressed air equally helpful when cleaning parts and components.
You’ll need plenty of air hose to move around the tractor while painting. However, keep in mind that the greater the distance, the greater the air pressure loss. Most paint specialists recommend the hose have at least a 5/16-inch inside diameter to prevent excessive pressure loss.
one or both ends of the rail so it will stand upright when turned rail side down.
grinders come in different sizes, making them more adaptable to your needs. Another thing to consider is that if your needs are limited, a good electric drill may be sufficient. You can find a wide assortment of tools to fit a 3/8-inch drill, including grinding discs, wire brushes, and sanding discs. Plus, you’ll probably need a drill at some point anyway. You won’t be able to get along without a good sander, though. Again, several types are available, including both air- and electric-powered units. Both types can be found as disc sanders, orbital sanders, straight-line sanders, and belt sanders. Perhaps the most popular among those who do a lot of painting and bodywork are the air-powered dual-action (DA) sanders. Because of their dual action, which prevents scratches and swirls from forming, they work equally well for rapid shaping of body filler and fine finishing work. Disc sanders also work well for feathering paint and body filler, and they can be useful for buffing when equipped with a buffing pad. But you need to watch out for swirls if they’re used on a fine finish. The same goes
Grinders, Sanders, and Files Depending on the amount of bodywork you have to do on the sheet metal before painting, you’re going to need some type of grinder, sander, or both. A grinder can’t generally be used for light sanding or buffing because it spins too fast. But if you get the right model, it can be used for an assortment of jobs—including grinding down welds where you’ve had to make a splice, cutting out rust areas, and smoothing rough spots. Equipped with a wire brush, it can also be used for rust or old paint removal. And by substituting a sanding disc for the grinding wheel, you can do some rough shaping. Grinders basically come in two types: electric or air-driven. Both have advantages and disadvantages. Air tools are generally lighter weight and less bulky, but you need to have an adequate air compressor. On the other hand, it’s often easier to drag around an extension cord than a 1/2-inch hose. Also, electric
Setting Up Shop for Bodywork and Painting 153