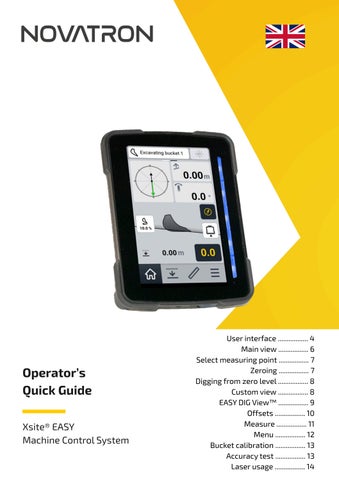
Operator’s Quick Guide Xsite® EASY Machine Control System
User interface ................. 4 Main view ................. 6 Select measuring point ................. 7 Zeroing ................. 7 Digging from zero level ................. 8 Custom view ................. 8 EASY DIG View™ ................. 9 Offsets ................. 10 Measure ................. 11 Menu ................. 12 Bucket calibration ................. 13 Accuracy test ................. 13 Laser usage ................. 14
Thank you for choosing the Xsite® Machine Control System! Founded in Finland in 1991, Novatron is a technology company with long-standing experience in machine control and the earthmoving industry. We design and manufacture Xsite® systems to meet the demands of modern infrastructure construction — helping professionals work with greater accuracy, efficiency, and confidence. This quick guide will help you get started with your new system. For more tutorials, practical tips, and guidance on getting the most out of your digital tools, please visit our website novatron.com and follow our YouTube channel: @NovatronMCS. For local sales, support, and services, please contact your local Xsite® Dealer. Our dedicated and experienced dealer network provides expert assistance throughout the lifetime of your system — from selecting the right solution to user support, field services, and maintenance. You can find local contacts by country at novatron.com/resellers
We hope Xsite® helps make your workdays smoother, easier, and more productive.
Best Regards,
Petri Moisio CEO, Novatron Oy
2
3
Xsite® EASY User interface
Select / Change bucket Select the bucket in use.
Bucket visualization See your bucket's position in real-time with respect to the target.
Home view
4
Heights
Laser Receiver On / Off Toggle laser on/off
Cut / Fill LED-indicator Quick glance LED-lightbar that indicates your distance to the target level
Swing boom degrees (optional)
Reset compass heading (optional)
Select measuring point Select corners or the center of the bucket to be the measuring point or use the automatic selection
Zero reference Set reference to current measuring point height
Access menu
Measuring
5
Main view
Home view is the system main view where are displayed different measuring values, selected tool name, laser receiver ON/OFF button, tool measuring point selection button and zeroing button. After powering system, home view is default view where system starts. Home view can be split into five different parts:
1.
Top bar
4.
Height offset view
2.
Measuring values
5
Navigation bar
3.
Front and side view
Navigation bar is available to user the whole time, except when in EASY DIG View™ or when simultaneous front and side view of bucket is selected.
1.
2.
3.
4.
6
5
Select measuring point In home view, it's possible to change tool measuring point. Default tool measuring point is middle. By pressing measuring point selection button, measuring point is changing in order: middle, right, automatic and left. Automatic measuring point selects lowest point of the bucket. Current selected measuring point is pointed by arrow under the bucket icon.
Zeroing Height and distance values can be zeroed by pressing zeroing button (0.0), which is located next to height offset information. When pressing zeroing button, system sets height and distance to zero with respect to selected measuring point. If operator has set height offset values to the system, then system will calculate set offset from zeroed point.
7
Digging from zero level When digging from zero level, place bucket measuring point to starting point and press zeroing button in home view. After pressing zeroing button, value 0.00 is displayed in height difference meter on display.
Custom view In custom views menu it is possible set 1 to 4 custom measuring values on dashboard in home view. Custom views selection is located in menu settings custom views.
→
→
After setting custom view values in settings, return to home view and swipe measuring value from right to left and set values come to screen. If operator wants go back to height value view, then swipe from left to right.
8
EASY DIG View™ Operator can open EASY DIG View™ to system by swiping screen in home view from bottom up which slides EASY DIG View™ to screen. EASY DIG View™ shows on screen how far tool measuring point is from latest zeroed point. System will automatically open EASY DIG View™ on screen if operator hasn't touched the screen in 10 seconds in home view. This feature can disabled from custom views settings.
9
Offsets In Xsite® EASY system, it's possible to set offset values and slope, depending which mode is currently used. Offset feature works with and without laser. When laser receiver is disabled, user can set height offset and height levels. When laser receiver is enabled, user can set laser offset, laser height and reference point. Offset menu is located in second tile from left in navigation menu.
10
Measure
With the measure feature, the operator can measure from point A to point B by using a bucket measuring point. Measure is located in the third tile from the left in the navigation bar. Follow steps below to use measure feature: 1. Select used measuring point by pressing measuring point selection button (1) 2. Set tool measuring point to starting point (Point A) 3. Press "START" (3) 4. Move measuring point to end point (Point B) and press STOP button. Now user can see on screen length, height, distance and slope from starting point (4). Slope is displayed in percentages (4) 5. If user wants to use measured slope in home view, press "Use as slope" button and go back to home view (5). Note, when compass is enabled to system, “Use as slope” is not available 6. If operator wants to measure again, repeat steps 1-5.
11
Menu
Menu includes all system configurable settings. There user can select display and led bar brightness, set XD3-view and led tolerances, disable/enable volume, select custom view values etc. Menu is located in navigation bar in bottom right corner (Three lines).
12
Bucket calibration
If the bucket is worn or when new buckets are acquired, it must always be calibrated before using it with 2D machine control system. Access the bucket calibration menu by clicking the bucket name at the top of the screen. In the Buckets page, you will find the following functions: Add new bucket Edit existing bucket Remove bucket Select the appropriate calibration method. The system user interface will guide you through the calibration steps. It is recommended to check tool accuracy after calibration.
Accuracy test Accuracy test needs to be done periodically and if tool height difference is not in tolerance, user should check bucket measurements and calibrate tool plumb line. 1. Find stable point from ground 2. Open bucket so only bucket blade is going to touch the point 3. Place selected measuring point to point on ground 4. Press zeroing button 5. Close bucket so measuring point bottom is on the point 6. Check height difference, if difference is more than +/-1cm, recalibrate bucket
13
Laser usage User can use a rotating laser with EASY system. Set rotating laser to visible position where user can reach with receiver to beam. Follow list below to start using laser. 1. Set rotating laser to place where it is easy to see 2. Set laser receiver ON in home view top right corner by pressing icon 3. Button turns red and on screen appear text "Waiting for laser signal" 4. Move laser receiver to laser beam 5. System gives info text "Laser hit registered" and button turns dark 6. System has now registered laser hit and machine height has been aligned with rotating laser height. Work can now begin It is possible to lock the laser state in order to avoid unwanted laser hits while working. Simply click the laser icon once and the icon color will change to yellow.
14
Thank you for choosing Novatron’s Xsite® Machine Control! When it comes to Xsite®, we take a lot of pride in our customer service. Our support and reseller network covers multiple countries all over the world. It's pretty safe to say that almost wherever you are, you're never alone with Xsite®. From Europe to East Asia, and Australia, you'll be provided great know-how and support by ourlocal experts and partners.
Find your local reseller novatron.com/resellers
novatron.com
Xsite® is a registered trademark of Novatron Oy | © 08/2026 Novatron Oy