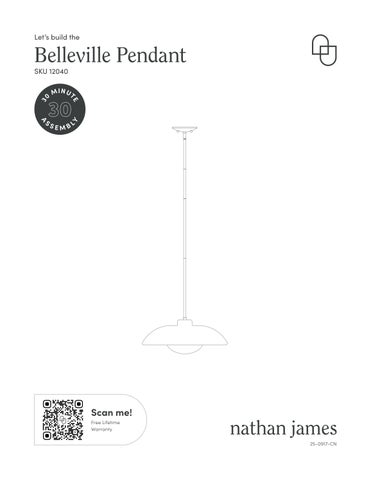
Let’s build the
Belleville Pendant 0
30
SEMBL
Y
A
S
M I N UT E
3
SKU 12040
Scan me! Free Lifetime Warranty 25-0917-CN
Ok, let’s get rolling This should be easy, just follow our instructions and you will be back to Netflix in no time.
What’s included Description
Qty
A
Top Shade Assembly
1
B
Glass Diffuser
1
C
Canopy
1
D
Stem (6”)
2
E
Stem (12”)
2
F
Mounting Plate
1
G
Finial Nuts
2
H
M4*25mm Bolt
2
I
Wire Nuts
3
Estimated time for assembly
30:00 What you need •
•
•
Your favorite snack or energy bar (Save the bubbly for once your fixture is safely installed!) Use the packaging carton as a working surface to prevent product damage during assembly Phillips head screwdriver
Do not use a drill
Scan me!
Toll-free at 1-866-619-1004 Help@nathanjames.com Nathanjames.com/help
Free Lifetime Warranty
2
Safety first, fun later Safe use of this product starts with you.
Do not modify the structure of this product in any way.
Use this light fixture responsibly with the primary concern for your safety. Follow assembly instructions carefully and inspect product upon receipt and each use.
Our products have been tested to meet specific safety measures as they were originally intended to be sold. Any modifications will present the risk of creating significant safety issues which Nathan James will not be responsible for.
Nathan James and its parent companies cannot be held legally responsible for any injuries or death resulted from failure to follow instructions or improper use of this product.
Proper use DO NOT
use for commercial purposes
DO NOT
leave spilled liquid on fixture
DO NOT
use light fixture if damaged
DO NOT
make temporary repairs
DO NOT
use outdoors
WARNING: RISK OF ELECTRIC SHOCK
WARNING Inspect the wire insulation for any cuts, abrasions, or exposed copper that may have occurred during shipping. If there is a defect in the wire, do not attempt installation. Please reach out to our Customer Happiness team at help@nathanjames.com or 1-866-619-1004
Before starting the installation, disconnect the power by turning off the circuit breaker or by removing the appropriate fuse at the fuse box. Turning the power off at the switch is NOT SUFFICIENT to prevent electrical shock. PLEASE CONSULT A QUALIFIED ELECTRICIAN IF YOU HAVE ANY ELECTRICAL QUESTIONS.
3
The goods
E
A
C
B
F
G
D
H
IMPORTANT 1. Do not tighten bolts / screws completely until all bolts / screws are lined up and inserted into holes. 2. Do not over tighten screws and bolts to avoid stripping. 3. Please use hand tools to assemble this product. Do not use power tools.
4
I
Pre-Installation •
Read all instructions prior to beginning assembly.
•
To avoid damaging this product, assemble it on a soft, non-abrasive surface such as carpet or cardboard.
•
Keep the receipt and these instructions for proof of purchase.
•
Suggested Bulb: G40 LED 60 Watt or Equivalent | E26 Medium Base | Dimmable
•
Fixture Max Wattage: 60W
Step 1 It’s as easy as it looks! Remove Finial Nuts (G) to separate the Canopy (C) from the Mounting Plate (F).
F
Helpful tip: Righty-tighty, lefty-loosey!
C
G
G
5
Step 2 Install the Mounting Plate (F) to your pre-existing Electrical Box.
Note: Be sure that you are only making the connections to a 120V AC 60Hz circuit. If you do not have a pre-existing electrical box, we strongly advise using a certified electrician.
F
H
6
H
Step 3 Now thread the Stems (D)(E) together to reach your desired length,
D 6” Cord Stem Length:
D
12” Cord Stem Length:
E
18” Cord Stem Length:
D
E
24” Cord Stem Length: E
E
30” Cord Stem Length: D
E
E
36” Cord Stem Length: D
D
E
E
E
D
Helpful Tip: Braiding the wire cores together then rotating the tube while threading the cord through will make things go a little more smoothly.
E
D
D
D
D
E
E
E
E
E
E
E
7
Step 4 Thread the necessary stem components together to complete the connection between the Canopy (C) and the Top Shade (A).
C
D
1
D
E
protective sleeve
10mm
2
E
A
protective sleeve
Components will vary depending on your desired fixture height.
10mm
8
Step 5 Ground Wire from the Canopy (C) is to be wrapped around the grounding screw on the Mounting Plate (F) and then secured by tightening the screw. Use Wire Nut (I) to join the ground wire from the fixture with the ground wire from the electrical box.
I
I
9
Step 6 Use the Wire Nut (I) to join the remaining matching colored wires (White to White, Black to Black). Once complete, tuck the excess wire into the electrical box. F Black (Hot)
I White (Neutral) I I I
10
Step 7 Secure the Canopy (C) to the Mounting Plate (F) on your pre-installed electrical box using the Finial Nuts (G) that you originally removed in Step 1.
F
To properly fasten the Finial Nuts (G), thread the posts in or out to adjust for proper threading length.
G
G
11
Step 8 Install light bulb (not included). It’s all coming together!
Bulb (not included) We recommend using (1) G40 60 Watt Equivalent | E26 Medium Base. 120V 60Hz AC only.
12
Step 9 Last but not least, install the Glass Diffuser (B) by twisting it over the light bulb. Ta-da! Let there be light!
B
Troubleshooting Problem
Possible Causes
Solutions
The bulb will not light.
The bulb is burned out.
Replace the light bulb. Ensure the power supply is on. Ensure the circuit breaker is in the ON position.
The fuse blows or circuit breaker blows when the light is turned on.
There is an exposed wire.
13
Discontinue use of the light. Contact a qualified electrician or reach out to our Customer Happiness team at help@nathanjames.com or 1-866-619-1004.
Changing the bulb is easy as 1-2-3 Remove the Glass Diffuser (B) from the fixture.
B
Out with the old, in with the new! Insert your new bulb.
Old
Re-attach the Glass Diffuser (B) to the fixure.
B
14
New
Questions? Don’t worry, we’ve got the answers What other light bulbs can fit in this light?
Is this light compatible outside North America?
The bulb must not be greater than the max wattage for the fixture. It must match the base size, and the diameter of any area of the bulb should be less than diameter of any area of shade, so that it can fit.
Our lighting is only warranted in Canada and the United States.
What do I do if the product is not working?
Can I use an LED light bulb?
Try a different light bulb and confirm proper installation.
Yes, so long that the base size matches and the diameter of any area of bulb is less than diameter of any area of shade, so that it can fit.
Can these lights work on a dimmer? Dimmability is related to the light bulb and the wall switch, not the light fixture. All our hardwire fixtures are compatible with dimmable light bulbs. We recommend using a dimmer switch, as it extends the life of the bulb and allows for energy saving and great ambiance. If using a LED bulb, please ensure both your LED bulb and dimmer switch are compatible.
Is this UL/ETL certified? Yes, all our products are either UL or ETL.
Do I need an electrician to set up the hardwire? We recommend using a certified electrician for all hardwiring, although all of our fixtures can be set up without an electrician, as long as you are replacing an existing fixture or have an existing junction box ready for a fixture installation. ENSURE POWER IS OFF WHEN INSTALLING. For all new constructions, please use a certified electrician.
Can I use the fixture outdoors? No, this product was not designed to be used outdoors.
Can I retrofit this hard-wired to a plug-in or vice-versa? Yes, a plug-in fixture can be turned into a hardwire fixture and a hardwire fixture can become a plug-in fixture. For many products we will provide all the necessary hardware to make these changes, if not, you will need to purchase the necessary hardware.
15
No heartburn, when we handle the return Give us a call 1-866-619-1004 or shoot us a message at help@nathanjames.com we will issue you a free replacement with zero hassle.
Our way
Their way
Give us a call
Re-package item
Replacement
Schedule pick up
You
Track package Replacement You
We really don’t want you to go through the hassle of re-packaging your item and sending it back, because let’s be honest…nobody has time for that.
16
We are only in business if you’re happy For starters, thanks for being you. Toll-free at 1-866-619-1004 Help@nathanjames.com NathanJames.com/help
We do our best to ensure your product arrives without any problems, but occasionally mistakes happen—as humans we are imperfect beings. In the event that a part is damaged or missing, we will be more than happy to provide you with replacement part(s) for free.
Warranty This product comes with a lifetime warranty from the date of purchase. Please use your phone to scan the QR code to register your product or visit https://goo.gl/i9dk3q
Did we do alright? Please spread the love! If you are happy with your product, tell your friends and family about us or even better leave us a review online. Spreading the word gives us the opportunity to make more people happy and keep our prices low for your next purchase.
Brooke Burdon Founder, Nathan James
17