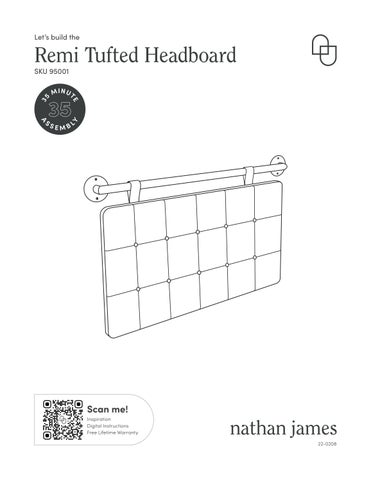
Let’s build the
Remi Tufted Headboard 5
35
SEMBL
Y
A
S
M I N UT E
3
SKU 95001
Scan me! Inspiration Digital Instructions Free Lifetime Warranty 22-0208
Ok, let’s get rolling This should be easy, just follow our instructions and you will be back to Netflix in no time.
What’s included Description
Qty
A
Metal Rail
1
B
Headboard
1
1
M4*35 mm Screw
8
2
Anchors
8
3
Allen Key
1
4
M4*14 mm Bolt
4
5
EVA Pad
6
6
Mounting Installation Template
1
7
Bracket
4
Estimated time for assembly
35:00 What you need •
Some of your favourite bubbly or your preferred relaxant
•
Use the packaging carton as a working surface to prevent product damage during assembly
•
Phillips head screwdriver
•
Drill with 1/4” drill bit
Toll-free at 1-866-619-1004 Help@nathanjames.com Nathanjames.com/help
Scan me! Inspiration Digital Instructions Free Lifetime Warranty
2
The goods
A
B
1
2
6
7
3
4
IMPORTANT 1. Do not tighten bolts / screws completely until all bolts / screws are lined up and inserted into holes. 2. Do not over tighten screws and bolts to avoid stripping. 3. Please use hand tools to assemble this product. Do not use power tools. 3
5
Step 1 Using the Mounting Installation Template Unroll it Unroll paper Mounting Installation Template (6) and remove the adhesive backing.
6
Place it Locate where you would like to mount the headboard and apply Mounting Installation Template (C) to the wall in that location. Make sure the template and holes are level.
6
Mark it Using the template as a guide, mark the location of each hole in the wall. These will become your guides for where to drill the holes for the wall anchors.
6
Remove it 6
Slowly remove the paper, ensuring that all holes have been marked.
Drill it Drill each hole with a 1/4” drill bit.
4
Step 2
2
Install Brackets (7) on the wall. First insert the Anchors (2), then mount the Brackets (7) with the M4*35 mm Screws (1) into the Anchors (2).
7 2
See the graphic below for hole locations and bracket orientation.
7
1
2 7
1
Step 3 Attach the Brackets (7) to the back of the Headboard (B) with M4*14 mm Bolts (4).
7 7 4 B
5
4
1
Step 4 Apply the EVA Pads (5) to the back of the panel.
5
6
Step 5 Mount the panel on the wall by matching up the brackets on the back of the panel with the brackets that you just installed on the wall.
Now it’s time for the Rail (A)! First, insert the Anchors (2), then mount the Rail (A) with M4*35 mm Screws (1) into the wall anchors. 2 2
1
1
A
2 1
2 1
7
Step 6 You made it to the last step! We knew you could do it. Now all that’s left to do is to flip the straps over the rail, snap the buttons together, and tuck the end of the straps behind the headboard. Sweet dreams!
8
No heartburn, when we handle the return Give us a call 1-866-619-1004 or shoot us a message at help@nathanjames.com we will issue you a free replacement with zero hassle.
Our way
Their way
Give us a call
Re-package item
Replacement
Schedule pick up
You
Track package Replacement You
We really don’t want you to go through the hassle of re-packaging your item and sending it back, because let’s be honest…nobody has time for that.
9
Safety first, fun later We want your Remi Button Tufted Hanging Headboard to last as long as possible, so we recommend that you tighten the screws 2 weeks after assembly and for added safety check the tightness of all screws every 2 months. For proper care and treatment of fabric & metal please check our website at NathanJames.com/products
Safe use of this product starts with you.
Do not modify the structure of this product in any way.
Use this headboard responsibly with the primary concern for your safety. Follow assembly instructions carefully and inspect product upon receipt and each use.
Our products have been tested to meet specific safety measures as they were originally intended to be sold. Any modifications will present the risk of creating significant safety issues which NJ will not be responsible for.
Nathan James and its parent companies cannot be held legally responsible for any injuries or death resulted from failure to follow instructions or improper use of this product.
Proper use
DO NOT
use for commercial purposes
DO NOT
put on uneven surface
DO NOT
put hot serving liquid directly on headboard
DO NOT
use headboard if broken or damaged
DO NOT
make temporary repairs
DO NOT
use outdoors
10
We are only in business if you’re happy For starters, thanks for being you. Toll-free at 1-866-619-1004 Help@nathanjames.com NathanJames.com/help
We do our best to ensure your furniture arrives without any problems, but occasionally mistakes happen—as humans we are imperfect beings. In the event that a part is damaged or missing, we will be more than happy to provide you with replacement part(s) for free.
Warranty This product comes with a lifetime warranty from the date of purchase. Please use your phone to scan the QR code to register your product or visit https://goo.gl/i9dk3q
Did we do alright? Please spread the love! If you are happy with your product, tell your friends and family about us or even better leave us a review online. Spreading the word gives us the opportunity to make more people happy and keep our prices low for your next purchase.
Brooklyn Burdon Founder, Nathan James
11