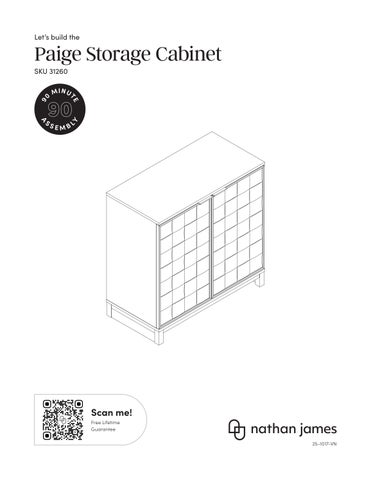
Let’s build the
Paige Storage Cabinet 0
MINU
90
SEMBL
Y
A
S
TE
9
SKU 31260
Scan me! Free Lifetime Guarantee 25-1017-VN
Ok, let’s get rolling
What’s included
This should be easy, just follow our instructions and you will be back to Netflix in no time.
Estimated time for assembly
90:00 What you need
Description
Qty
A
Top Panel
1
B
Side Panel (Left)
1
C
Side Panel (Right)
1
D
Back Panel
1
E
Bottom Panel
1
F
Adjustable Shelf
1
G
Cabinet Stretcher
3
H
Base Panel - Side (Left)
1
•
Some of your favourite bubbly or your preferred relaxant
•
Use the packaging carton as a working surface to prevent product damage during assembly
I
Base Panel - Side (Right)
1
J
Base Panel - Back
1
•
Phillips head screwdriver
K
Base Stretcher (Front)
1
•
Drill
•
1/4” Drill Bit
L
Door (Left)
1
M
Door (Right)
1
Weight Limitation 40
30
100
30
lbs
Scan me!
Toll-free at 1-866-619-1004 Help@nathanjames.com Nathanjames.com/help
Free Lifetime Guarantee
2
The goods A G
C
D G
G
F
B
M
E L
I J K H IMPORTANT 1. Do not tighten bolts / screws completely until all bolts / screws are lined up and inserted into holes. 2. Do not over tighten screws and bolts to avoid stripping. 3. Please use hand tools to assemble this product. 3
What’s included Description
Qty
1
M6 x 35mm Cam Bolt
33
2
15 x 9.5mm Cam Lock (Extra 1pc)
34
3
M8 x 30mm Wooden Dowel (Extra 1pc)
9
4
M3 x 15mm Screw
4
5
Magnetic Door Catch
2
6
Shelf Pin
4
7
M4 x 14mm Screw (Extra 1pc)
25
8
Hinge
4
9
M3.5 x 15mm Screw (for Anti-Tip Kit 2pcs) (Extra 2pcs)
20
10
Metal Catch Plate
4
11
Handle
2
12
Back Panel Bracket (Extra 2pcs)
6
13
M4 x 35mm Screw
3
14
Plastic Bracket (for Anti-Tip Kit)
2
15
Plastic Tether (for Anti-Tip Kit)
1
16
Wall Anchor (for Anti-Tip Kit)
2
17
M4 x 40mm Screw (for Anti-Tip Kit)
2
18
Leveler (Extra)
2
4
1
2
3
4
5
6
7
8
9
10
11
12
13
14
15
16
17
18
1
Step 1 Let’s get this thing fired up! Start by screwing Cam Bolts (1) into the Top Panel (A), Side Panel Left (B), Side Panel Right (C), and Bottom Panel (E), Base Panel - Side (Left) (H), Base Panel - Side (Right) (I) in the holes indicated below.
x 27pcs
1
1
1 1
1
1
A
1
1 1
1
1
B
1
1 1
1
1
C
1
1
1
1 1
1
x27
1
1 1
E
1 1
The grooved side is on the bottom.
5
I
1
H
2
Step 2 Grab your screwdriver for this step! Use the Cam Locks (2) to secure the Base Panel - Back (J) and Base Stretcher (Front) (K) to the Base Panel - Side (Right) (I).
x 6pcs
Then, use the Cam Locks (2) to secure the Base Panel - Side (Left) to the remaining two ends of the Base Panel - Back (J) and Base Stretcher (Front) (K).
J
2 2
K 2
I
H 2
J
2 2
K I
6
How to use cam locks
Did you know? Cam locks are used to join two panels together, usually the edge of one to the flat side of another.
First, your cam bolt (or cam pin) will need to be properly inserted into the flat side of the board. Important Note: Only tighten the cam bolt until it is secure. Do not over-tighten.
Next, you will fit the proper hole on the edge of the associated joining panel over the cam bolt. Important Note: When installed properly, the head of the cam bolt will be visible through the larger hole on the side of the joining panel.
Next, you will notice the cam lock has a “C” shaped back. Commonly, an arrow on the front of the cam lock points in the same direction as the open section on back. Using these as your cue, insert the cam lock into the large hole so the opening of the “C” fits over the head of the cam bolt.
Using a screwdriver, you will turn the cam lock until it stops, usually at 90º or 180º. You will feel the panels pulling closer until they are secured. Important Note: Only turn the cam lock until the panels are fully engaged & feel secure. Turning too far may lead to hardware failure. Still having issues?
If a cam lock seems to be spinning in place or is not “catching” or pulling the panels together as expected, first remove the cam lock & try again while making sure that everything is properly positioned & oriented. If you are still having issues getting things working as expected, first remove the cam lock then unscrew the cam bolt slightly (less than 1 complete turn) to see if that helps with the alignment of the cam lock & bolt. 7
2
3
x 7pcs
x 2pcs
Step 3 Now, secure the base frame completed in Step 2 to the Bottom Panel (E) using the Camlocks (2).
H
J
2 2 2
K
2 2
I
3
3
E
8
13
Step 4 Next, to ensure stability, secure the Base Stretcher (Front) (K) using three M4 x 35mm screws (13).
x 3pcs
13
x3
K
13
E
13
13
Please be careful not to use the wrong screw when installing Base Stretcher (Front) (K).
(13) M4 x 35mm Screw
9
(17) M4 x 40mm Screw
4
5
x 2pcs
x 1pc
Step 5 Secure the Magnetic Door Catch (5) to the Cabinet Stretcher (G) using the M3 x 15mm Screws (4).
4 4 5
FR
ON
T
NT O FR Tip! Door Catcher can be adjusted from front to back for proper door alignment.
4
4 G
5 holes on back
The two small holes face upwards.
10
Step 6 Install the Wooden Dowel (3) into the Back Panel (Left) (B). Then, secure the three Cabinet Stretcher (G) using the Cam Locks (2).
2
3
x 3pcs
x 3pcs
G
G
x3
G
2 2
3
3 2 3
B B 2 3
11
2
3
x 3pcs
x 3pcs
Step 7 Next, install the Wooden Dowel (3) into the three Cabinet Stretcher (G). Then, secure the Side Panel (Right) (C) using the Cam Locks (2).
C
3
3 2
C 3
x3
2
G
3 2
G
2
G
B
12
2
Step 8 Secure the Top Panel (A) to the cabinet frame assembly completed in Step 7 using the Cam Locks (2).
x 8pcs
2 2
C
2
A 2
2 2 2
B
13
2
Step 9 Slide the Back Panel (D) into the grooves on the cabinet.
D
B
C A
14
1
2
x 6pcs
x 6pcs
Step 10 Now, insert the Cam Bolts (1) into the bottom frame assembly you completed in Step 4. Then, secure the bottom frame assembly to the cabinet frame assembly using Cam Locks (2).
1 1
0°
1
18
E
1
1
1
2
2
holes on back
2
2
x6
2
1
B
2
C A
15
4
5
x 2pcs
x 1pc
Step 11 Secure the Magnetic Door Catch (5) to the Bottom Panel (E) using the M3 x 15mm Screws (4).
Tip! Door Catcher can be adjusted from front to back for proper door alignment.
NT O FR
4 4
5
C E
4
B
4 5
E
16
FR
ON
T
6
Step 12 Place the Shelf Pins (6) at your desired shelf height and carefully slide the Shelf (F) to rest on top of the pins.
x 4pcs
x4 6
C 6
F B
17
7
8
9
10
x 8pc s
x 4pcs
x 8pc s
x 4pcs
Step 13 Shut the front door - you’re only six steps away from being done. Speaking of doors - grab the Left (L) and Right (M) doors and secure the four Hinges (8) onto them. Secure the Metal Catch Plate (10) to the tops and bottom of the doors, too!
7
7
8
x4
7 7 8 9
7
10
8
7 7
M
8 7
9 9
7
7
10
10
8
L 9 10
9
9 10
18
x4
7
Step 14 It’s all coming together! Secure the doors to the unit by the Hinges using the M4 x 14mm Screws (7).
x 16pcs
M
7
L
7
19
x4
Is your cabinet door looking crooked or unevenly spaced? Then you’ve come to the right place. Follow the illustrations below to get your cabinet door aligned and ready for action. If your door is too low or too high...
door
Loosen the height screws, then move the door up or down to make it level.
If the space between your doors is off...
door
Loosen the side-to-side screws, then screw counter-clockwise to make the gap wider or clockwise to close any gaps.
If you need to adjust the depth of the doors...
door
Adjust the in-and-out screws until the door is aligned with the side of the cabinet.
20
Step 15 Let’s get those door handles on, and then you’re just four steps away from being done! We’re sorry for keeping you from your Netflix series for so long.
9
9
11
x 4pc s
x 2pcs
11
x2 9
M
11
11 9 9
L
21
Step 16 Time for the finishing details!
x4
HELPFUL TIP: Adjust the levelers to help balance the cabinet, if need be.
22
Is your cabinet door looking crooked or unevenly spaced? If you’re still having trouble lining everything up, your next step should be to try to adjust the feet slightly to square up the cabinet & doors. Follow the illustrations below: If the right door appears to be hanging low, you can adjust the adjustable leveler on the front right until the door is better aligned.
If the left door appears to be hanging low, you can adjust the adjustable leveler on the front left until the door is better aligned.
23
9
12
x 4pc s
x 4pcs
Step 17 To increase the stability of the back panel, use the Back Panel Bracket (12) to secure it at all four corners with the M3.5 x 15mm Screws (9).
12 9
24
x4
Step 18 Safety first! Secure the Plastic Bracket (14) to the back of the unit using two M3.5 x 15mm Screws (9). Next, feed the Plastic Tether (15) through the Plastic Bracket that you just installed.
9
14
15
x 2pcs
x 1pc
x 1pc
14 14 9
9 9
14
15
25
14
16
17
x 1pc
x 2pcs
x 2pcs
Step 19 Find where you want your storage unit to live and then mount the Plastic Bracket (14) to the wall using the provided Wall Anchors (16) and M4 x 40mm Screws (17). We recommend using a 1/4” drill bit. Last, but not least, loop the Plastic Tether (15) through both brackets to safely secure the unit to the wall. You did it! Time for a celebratory pizza? The answer to that is always yes!
Prepare your wall for Anti-Tip Kit Installation Recommended Drill Bit: 1/4” Drill Bit
14 17
16 16
17
pull through to secure
15
14
14
IMPORTANT NOTE: Young children (and/or pets) can be seriously injured by tipping furniture units. You must install the provided anti-tip kit hardware solution, as instructed, to prevent the furniture units from tipping over - which could possibly lead to injuries or damage. The provided anti-tip kit hardware solution is intended only as an additional safety measure & deterrent; it is not a substitute for proper adult supervision. The provided anti-tip kit hardware solution is not an earthquake restraint. If you wish to add the extra security of earthquake restraints, they must be purchased & installed separately. 26
No heartburn, when we handle the return Give us a call 1-866-619-1004 or shoot us a message at help@nathanjames.com we will issue you a free replacement with zero hassle.
Our way
Their way
Give us a call
Re-package item
Replacement
Schedule pick up
You
Track package Replacement You
We really don’t want you to go through the hassle of re-packaging your item and sending it back, because let’s be honest…nobody has time for that.
27
Safety first, fun later We want your product to last as long as possible, so we recommend that you tighten the screws 2 weeks after assembly and for added safety check the tightness of all screws every 2 months. For proper care and treatment, please check our website at NathanJames.com/products
Safe use of this product starts with you.
Do not modify the structure of this product in any way.
Use this product responsibly with the primary concern for your safety. Follow assembly instructions carefully and inspect product upon receipt and each use.
Our products have been tested to meet specific safety measures as they were originally intended to be sold. Any modifications will present the risk of creating significant safety issues which NJ will not be responsible for.
Nathan James and its parent companies cannot be held legally responsible for any injuries or death resulting from failure to follow instructions or improper use of this product.
Proper use
DO NOT
use for commercial purposes
DO NOT
frolic on storage unit
DO NOT
use storage unit as foot stool
DO NOT
leave spilled liquid on storage unit
DO NOT
use if damaged
DO NOT
make temporary repairs
DO NOT
use outdoors
28
We are only in business if you’re happy For starters, thanks for being you. Toll-free at 1-866-619-1004 Help@nathanjames.com NathanJames.com/help
We do our best to ensure your furniture arrives without any problems, but occasionally mistakes happen—as humans we are imperfect beings. In the event that a part is damaged or missing, we will be more than happy to provide you with replacement part(s) for free.
Lifetime Guarantee We believe in making things that last. That’s why every product is backed by our Lifetime Guarantee. No hidden clauses. No runaround. If it breaks, we’ll replace it—plain and simple. This isn’t just a promise—it’s our commitment to quality, and to you. This product comes with a Lifetime Guarantee from the date of purchase. Please use your phone to scan the QR code on the cover of this booklet to register your product or visit https://goo.gl/i9dk3q
Did we do alright? Please spread the love! If you are happy with your product, tell your friends and family about us or even better leave us a review online. Spreading the word gives us the opportunity to make more people happy and keep our prices low for your next purchase.
Founder, Nathan James
29