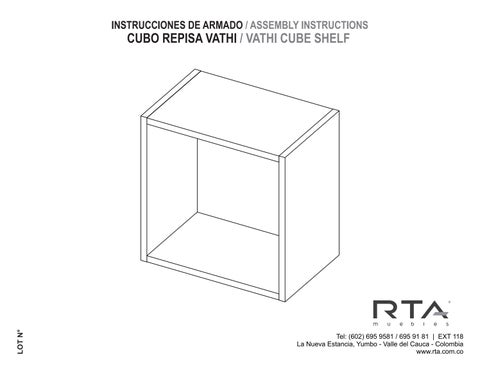
INSTRUCCIONES DE ARMADO / ASSEMBLY INSTRUCTIONS
LOT N°
CUBO REPISA VATHI / VATHI CUBE SHELF
Tel: (602) 695 9581 / 695 91 81 | EXT 118 La Nueva Estancia, Yumbo - Valle del Cauca - Colombia www.rta.com.co
Herrajes Básicos / Basic Hardware
¡ATENCIÓN! / ATTENTION! En las próximas páginas está el contenido de las piezas y herrajes del mueble. Asegúrate de que la cantidad de herrajes y piezas que hay en la caja sea la correcta y todo esté en buen estado. Ya que cuando el mueble esté armado no podrás realizar ninguna reposición.
Aplica estas instrucciones cada vez que vayas a utilizar uno de estos herrajes durante el armado. / Apply these instructions everytime you’re using one of these connectors during the assembly.
On the next pages is the content of the pieces and hardware of the furniture. Make sure the number of hardware and parts in the box is correct and everything is in good condition. When the furniture is assembled you will not be able to make any replacement
Tarugos / Wood Dowels 1. Inserta el tarugo en la perforación indicada y golpéalo suavemente hasta que llegue hasta el final de la perforación. / Put in the dowel inside the indicated hole and softly hit it until it’s fully inside.
Recomendaciones Importantes / Key Recommendations • • •
Ensamble el mueble entre dos personas. / Assemble the cabinet between two people. Ensamble el mueble sobre una superficie plana y lisa, preferiblemente sobre un tapete o el cartón de la caja. / Assemble the cabinet on a flat smooth surface, preferably on a careted floor or the box carton. Se recomendia utilizar un destornillador eléctrico para facilita el ensamble / It is recommended to use an electric screwdriver to facilitate assembly.
2. Verifica que NO se inserte el tarugo en la perforación de la caja minifix. / Verify that the dowel is NOT inserted into the perforation of the minifix cam.
Minifix y Pernos / Minifix Cam & Spreading Bolt pequeña flecha small arrow
1
Herramientas Necesarias / Required Tools
2. Se debe insertar el perno con la parte plástica hacia abajo. / The spreading bolt should be put with the black plastic part facing down.edge.
2 3 Destornillador de estrella Phillips Head Screwdriver
Destornillador de pala Flat Head Screwdriver
Martillo Hammer
1. La caja minifix tiene una pequeña flecha en su parte superior, se debe insertar las cajas minifix con la flecha apuntando hacia la perforación que hay en el borde de la pieza. / The Minifix cam has a little arrow on its upper surface you should insert these cams with the little arrow pointing towards the drilling on the panel’s edge.
3. Luego de unir las piezas, se deben girar 180° las cajas minifix con un destornillador de estrella para ajustar y asegurar el ensamble. / After joining two panels together you should turn the cams 180° with a phillips head screwdriver to adjust and secure the joint.
Herrajes / Hardware
Tarugo / Wood dowel
x7
Caja Minifix / Minifix Cam
x7
Tapa Minifix / Cover Caps
5 11
x10
2"1/2
x7
Perno Minifix / Spreading Bolt
Cargas Máximas / Max Suggested Loads
Chazo + Tornillo / Wall anchor + screw
x2
5 11
*Peso en Kg / Weight in Kg. *Peso en Libras / Weight in Lb
Piezas de Armado / Assembly Parts A - x1 B - x1
D
C - x1 D - x1 E - x1 F - x1
F
E
B
A
C
1
3 F D
D
2
Voltear Rotate
4
F B
5
7
F
D
D
F
A
B
B
6
8 E Desliza el fondo dentro de las ranuras.
A
Slide the back panel inside the grooves.
D
F A B
9
11
Fija el mueble a la pared Fix your cabinet to the wall
perforar los fondos guiandote de las perforaciones de 1 Debes las estructuras con una broca 3/16". / You must drill the bottoms guided by the holes in the structures wiht a 3/16" drill bit. la pared, mide y marca los puntos que te indicamos abajo. 2 En On the wall, measure and mark the points shown below. perforar en los puntos con taladro y una broca de 5/16" 3 Debes Drill on the markings with a 5/16" drill bit. los chazos plásticos en las perforaciones. 4 Inserta Insert the wall anchors inside the drillings.
C
el mueble y asegúralo con los tornillos 2"1/2. 5 Ubica Place the cabinet and secure it with the screws 2"1/2. 10,5 4,13
E
10
D
26,25 10,33
C
E
*Distancia definida por el usuario *User defined distance
A Voltea el mueble Turn over the cabinet
¡Con mucho cuidado! very carefully!
B
*Piso *Floor
Después de ajustar todas las cajas minifix y los tornillos, cúbralas con las tapas adhesivas. After you finish the adjustment of the cams and screws, cover them with the cover caps.
A
*Medidas en cm / Measurements in cm *Medidas en pulgadas / Measurements in inches
12,8 5,03
7,55 2,97
10,5 4,13
Al terminar de armar, desprenda las letras adhesivas. After you finish assembling the cabinet, take off the adhesive letters.