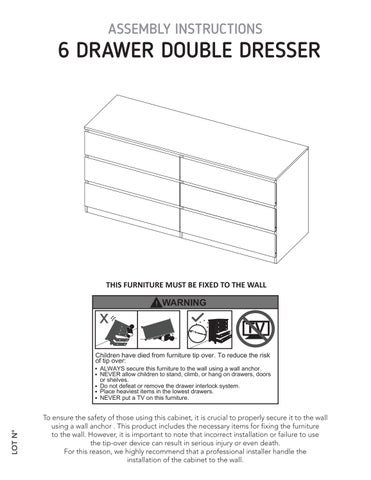
ASSEMBLY INSTRUCTIONS
6 DRAWER DOUBLE DRESSER
THIS FURNITURE MUST BE FIXED TO THE WALL ! WARNING
Children have died from furniture tip over. To reduce the risk of tip over:
LOT N°
ALWAYS secure this furniture to the wall using a wall anchor. NEVER allow children to stand, climb, or hang on drawers, doors or shelves. Do not defeat or remove the drawer interlock system. Place heaviest items in the lowest drawers. NEVER put a TV on this furniture.
To ensure the safety of those using this cabinet, it is crucial to properly secure it to the wall using a wall anchor . This product includes the necessary items for fixing the furniture to the wall. However, it is important to note that incorrect installation or failure to use the tip-over device can result in serious injury or even death. For this reason, we highly recommend that a professional installer handle the installation of the cabinet to the wall.
Index What will you need?
2
Where should you start?
3
What’s in the hardware bag?
4
How do the dowels and Minifix system work?
5
(We also explain what they are)
Let’s start assembling!
6
How much weight does your cabinet resist?
23
Our last recommendations for taking care of your cabinet
24
Hammer
Flat head screwdriver
Phillips head screwdriver
What will you need?
Hi! my name is Armando, and I’ll be with you while you assemble this cabinet.
A flat, smooth surface. You can use the cardboard of the box or a rug.
An electric screwdriver isn’t necessary, but it can make the work much easier :)
2
Where should you start? This is so IMPORTANT! Over the next few pages is the panel and hardware content for this cabinet. Please make sure that the quantity of each one is correct, and that everything is in good shape. (When the cabinet is already assembled there’s no warranty for this)
Panel quantity A - x1
B - x1
C - x1
D - x1
EA - x1
EB - x1
F - x1
G - x1
H - x2
I - x1
J - x1
K - x3
L - x3
M - x1
N - x1
O - x2
P - x2
Q - x6
R - x6
S - x6
T - x6
U - x6
V - x4 3
Spreading bolt
Minifix cam
Cover caps
x72
x70
x70
x72
2"
Slides + screws
Drywall screw
Drywall screw
Nail-on glide
x6
x36
x24
x10
2"1/2
Wood dowel
1"
What’s in the hardware bag?
Wall anchor + screw
x2
Be careful!, try not to lose anything from this bag, its content it’s neccesary for assembling you cabinet.
4
How do the dowels and Minifix system work? this is so important too! Everytime you’re using one of these connectors during the assembly, you should follow these same steps.
Wood dowels They are little wooden cylinders.
Put in the dowel inside the indicated hole and softly hit it until it’s fully inside.
1
2
When joining two panels together, don’t forget to gently hit the panels to adjust the joint.
Minifix system It’s a joint compound of two parts: a spreading bolt and a Minifix cam. small arrow
1
2
This is a Minifix cam. It has a little arrow on its upper surface.
You should insert these cams with the little arrow pointing towards the drilling on the panel’s edge (shown on the left).
3
4
This is a spreading bolt. You should put it with the black plastic part facing down.
After joining two panels together you should turn the cams 180° with a phillips head screwdriver to adjust and secure the joint.
5
1
Let’s start assembling! You can see the last page of this manual to have a full look of the panels of this cabinet.
F
G
2 x2
H
6
3
H F
4
H G
7
5 Drawer slides installation
(apply for steps 5, 11 and 14)
To begin, you must take out the smaller part of the slide, pushing down the black plastic part shown below:
Take the bigger part of the slide and place it over the panel. The plastic stop shoud go towards the back.
2
11
B
Front
Front
6
L x3
8
7
K x3
8
I
9
9
J
10 EA
EB
10
11 4
If you want to recall how to install this part of the slides, go to the 3rd step again.
10
D Front
Turn this panel over
2
11
D
11
12 H F
B EA
L
L L I
13 H F
B EA
D
L
L
L I 12
14 11
2
If you want to recall how to install this part of the slides, go to the 3rd step again.
C Front
15 F EA
H
G
D
H
B N
EB
N I
K
K
K J 13
16
H F EA
G
D
B
L
L
H
EB
L I
K
K
C
K J
14
17 Slide the back panel inside the grooves.
Turn over the cabinet
very carefully!
V V
V V
I
B L
J
D
L
K
L
K
C
K
18
A
15
19 A I
B L
D
J
L
K K
L
C
K
20 x6
S
16
21 x6
T
22 x6 Take tha smaller part of the slide and place it over the panel. The metallic stop should go at the front.
Front
R
Q
Front Front
17
23
Drywall screw 2"
R
S
Q
24 Slide the back panel inside the grooves.
Drywall screw 1"
U T
18
25 M
N
26 x2
P
O
19
27 x2 P
R U O
R
Q
S
U Q
S
28 N
R U S
M
R
Q
U S
Q
20
29
I
A
M J
O
N C
O
P P
Slide the drawers inside the cabinet.
21
Fix your cabinet to the wall
30
1 You must drill the bottoms guided by the holes in the structures wiht a 3/16" drill bit.
2 On the wall, measure and mark the points shown below. 3 Drill on the markings with a 5/16" drill bit. 4 Insert the wall anchors inside the drillings. 5 Place the cabinet and secure it with the screws.
EA
25.69
15.25
29.92
EB
*Dimensions in inches
15.25
22
How much weight does my cabinet resist? 25 17
17
17
17
17
17 *weight in pounds
Congratulations! It’s done But don’t go yet! There are some recommendations left for you to take care of your cabinet correctly from now on.
SUPER IMPORTANT! We suggest fixing the cabinet to the wall, so we can avoid the cabinet tipping and harming anyone. Be specially careful with the kids.
23
Taking care of your cabinet: Do not paint the cabinet. The cabinet it’s exclusively for indoor spaces. Do not expose it to the direct sun. Clean the metallic hardware with a dry cloth. DO NOT overload the cabinet (see suggested loads) Do not hit or hammer the cabinet (only when indicated here). Clean it with thinner, a soft soap solution or simply a damp cloth. Don’t drag the cabinet, lift it up with other people. Avoid direct contact with water, fire or exposing it to high heat.
Cabinet panels A V
EA V EB F
B
H G
I D
L
C
J K
S
U
V
H
L U
V
K Q
S
S
U Q
T
S
T Q
L T
M
R R R
Q
S T
Q T Q T
O
U
S
R
K
R
U
R
U
N O P P
24
WARRANTY POLICY
Furniture has a 1 year warranty coverage in wooden parts and hardware pieces since its manufacturing date, which you can see in the lot number printed on the product box and the assembly instructions leaflet. Warranty covers materials and workmanship imperfections which impair the assembly or correct functioning of the cabinet. This warranty is not valid if the defects or imperfections are caused by the incorrect following of the assembly instructions, warnings and recommendations, misuse, intentional damage, fire or flood, or after modifications or any kind of alteration, or repaired by someone not authorized, when itś been assembled 3 months after the date of purchase. These defects MUST be reported before the warranty coverage period ends. Once the product has been assembled, the company will not be responsible for defective and/or damaged parts. This warranty is ONLY valid for the ORIGINAL PURCHASER, it doesn’t apply if the product has been resold, rented, etc. Furniture will take no liability for incidental or consequential damages caused to or by the product (This may not apply in your state). To make this warranty valid you must write to our customer service email describing the product defect, lot number and submitting your sales reciept or proof of purchase, or contact us at our customer service line. Replaced parts will be under the productś original warranty coverage period. Damaged parts will become property of the company. There are no other warranties applicable to this product.
25