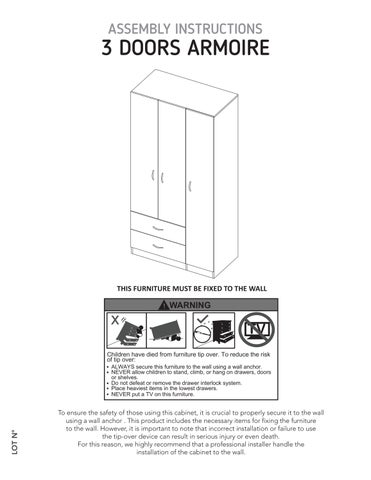
ASSEMBLY INSTRUCTIONS
3 DOORS ARMOIRE
THIS FURNITURE MUST BE FIXED TO THE WALL ! WARNING
Children have died from furniture tip over. To reduce the risk of tip over:
LOT N°
ALWAYS secure this furniture to the wall using a wall anchor. NEVER allow children to stand, climb, or hang on drawers, doors or shelves. Do not defeat or remove the drawer interlock system. Place heaviest items in the lowest drawers. NEVER put a TV on this furniture.
To ensure the safety of those using this cabinet, it is crucial to properly secure it to the wall using a wall anchor . This product includes the necessary items for fixing the furniture to the wall. However, it is important to note that incorrect installation or failure to use the tip-over device can result in serious injury or even death. For this reason, we highly recommend that a professional installer handle the installation of the cabinet to the wall.
! IMPORTANT RECOMMENDATIONS
RECOMENDACIONES IMPORTANTES
Do not paint the cabinet.
No pintar el mueble.
The cabinet MUST be used exclusively indoors, do not expose to direct sun.
El mueble debe ser usado únicamente en interiores, no exponer al sol directo.
Clean metallic hardware with a dry cloth.
Limpiar los herrajes metálicos con un paño seco.
Do NOT overload the cabinet (see suggested loads). NO sobrecargar el mueble (ver las cargas sugeridas).
Do not hit or hammer the cabinet (just when indicated).
No golpear ni martillar el mueble (solo cuando se indique).
Clean with a slightly damp cloth, use gentle soaps.
Limpiar con un paño ligeramente húmedo, usar jabones suaves.
Do not drag, lift and move between two people.
No arrastre el mueble, levántelo entre dos personas.
Avoid direct contact with water, fire or exposure to heat sources.
Evite el contacto directo con el agua, el fuego o la exposición a fuentes de calor.
!
!
WARNING
ADVERTENCIA
Never allow children to climb or manipulate the cabinet, furniture tip over can cause serious injuries or death.
Nunca permita que los niños escalen o manipulen el mueble, la caída de este puede provocar lesiones graves o la muerte.
Page 2
INDEX
ÍNDICE
Assembly Hardware
4
Herrajes para Armado
4
Assembly Parts
5
Piezas de Armado
5
Suggested Loads
6
Cargas Sugeridas
6
Assembly Recommendations
6
Recomendaciones de Ensamble
6
Assembly Steps
7-22 Pasos de Armado
7-22
Warranty
23
23
Garantía
REQUIRED TOOLS*
HERRAMIENTAS NECESARIAS*
*Not included, and not shown actual size.
*No incluidas y no se muestran en tamaño real.
Page 3
ASSEMBLY HARDWARE
HERRAJES PARA ARMADO
Please check that the hardware content is correct. If any item is missing, please call to our customer service line.
Compruebe que el contenido de los herrajes sea el correcto. En caso de que falte alguna pieza, por favor llame a nuestra línea de atención al cliente.
x24
x24
x38
x24
x8
x10
Minifix Cams Minifix
Spreading Bolt Perno Minifix
Wood Dowel Tarugo
Cover Caps Tapa Adhesiva Minifix
Shelf Support Soporte Entrepaño
Flat Head Screw Tornillo Lámina
x2
x10
x8
x1
x50
x2
Closet Rod Bracket Soporte Tubo
Nail-on Glide Deslizador Puntilla
Drywall Screw Tornillo de Ensamble
Closet Rod Tubo Ovalado
Nail Puntilla
Corner Brace Cantonera
x5
x1
x2
x6
x3
x2
Half Overlay Hinge Bisagra Semi Parche
Wall anchor + screw 2 1/2" Chazo + tornillo 2 1/2"
Handle Manija Acero
H profile Perfil H
Drawer Slides Rieles
Hardware items are NOT shown actual size.
Page 4
Full Overlay Hinge Bisagra Parche
Los herrajes no se muestran en el tamaño real.
ASSEMBLY PARTS
PIEZAS DE ARMADO D P E
A
R C F
PI K O K FC
P
M
PM
M
N O
F
Q L
G
L
N
FC
B PD
H
I J
I J A - x1 B - x1 C - x1 D - x1 E - x1 Page 5
F - x2 G - x1 H - x1 I - x2 J - x2
K - x2 L - x2 M - x2 N - x2 FC - x2
PI - x1 PM - x1 PD - x1 O - x2 P - x2
Q - x1 R - x1
MAX SUGGESTED LOADS
22lb
CARGAS MÁXIMAS SUGERIDAS
10kg 18lb
8kg
18lb
8kg
18lb
8kg 20kg 8kg
18lb 18lb
22lb
8kg
10kg
ASSEMBLY RECOMMENDATIONS
RECOMENDACIONES DE ENSAMBLE
Two people are recommended to assemble the product.
Ensamble el mueble entre dos personas.
Assemble the cabinet on a flat, smooth surface, preferably on a carpeted floor or the carton box of the product.
Ensamble el mueble sobre una superficie plana y lisa, preferiblemente sobre un tapete o el cartón de la caja
Carefully read the assembly instructions and identify every wood and hardware part before start assemblying the cabinet.
Lea cuidadosamente las instrucciones e identifique todas las piezas y herrajes antes de empezar a armar el mueble.
Page 6
1
1 2
Full Overlay Hinge Bisagra Parche
x3
x3 A x2 Arrow
! x2 x2
Page 7
4
11
Do NOT tighten the cams in this step. NO apriete las cajas minifix en este paso.
2
1 2
x4
x4 B
x2 Arrow
! Full Overlay Hinge Bisagra Parche
x2
Page 8
x3
Do NOT tighten the cams in this step. NO apriete las cajas minifix en este paso.
3
x3
c
x3 Half Overlay Hinge Bisagra Semi Parche
x2
11
Page 9
4
4
Turn Over Voltear
1 2
x4
x2
C
Arrow
! x4
x2
Page 10
Do NOT tighten the cams in this step. NO apriete las cajas minifix en este paso.
5
x6
D
1
6
2
E Arrow
x2 Page 11
7
1 2
G
Arrow
!
8
x4
Do NOT tighten the cams in this step. NO apriete las cajas minifix en este paso.
H
1 2 Page 12
9
1
x2
Ix2
2
Arrow
! x4
Do NOT tighten the cams in this step. NO apriete las cajas minifix en este paso.
10
J
J
Page 13
H
Jx2
11
Turn minifix cams to the right to tighten. Gire las cajas minifix hacia la derecha para apretar las piezas.
x8
C
J H J
Page 14
B G
12 Turn minifix cams to the right to tighten. Gire las cajas minifix hacia la derecha para apretar las piezas.
x6
A C
E
I
G J H
I J
Page 15
B
13 Turn minifix cams to the right to tighten. Gire las cajas minifix hacia la derecha para apretar las piezas.
x6
D
A C I
E
G J H
I J
Page 16
B
14
!
Be careful turning over the cabinet. Tenga cuidado al voltear el mueble.
1
P
P
2
P P
H Profile Perfil en H
P
R
J
Q I
H
C
E
J I
Page 17
P
A
15
Arrow
! x2
Do NOT tighten the cams in this step. NO apriete las cajas minifix en este paso.
Kx2 Lx2
16
1 2
Nx2
Page 18
17 x2
FC x2 x2
1
18 x2
x2 M
L
2
Page 19
K
19 x2 Slide. Deslice.
O N
K
L M
20 x2 FC
Turn minifix cams to the right to tighten. Gire las cajas minifix hacia la derecha para apretar las piezas.
L O x2 Page 20
M
K
Door Installation Instalación de las Puertas
21
D
Closet Rod Tubo ovalado
C
x6
PI/PD
PI
A PM PD
B
Hinge adjustment Ajuste de las bisagras
2
3
E I Depht adjustment Ajuste de profundidad
1
4
I
5
J
PM
Height adjustment Ajuste de altura
Hinge adjustment Ajuste de las bisagras
2
Page 21
Depht adjustment Ajuste de profundidad
4
3
Side adjustment Ajuste lateral
Side adjustment Ajuste lateral
5
Height adjustment Ajuste de altura
22
Fix your cabinet to the wall Fija el mueble a la pared rill on the markings with a 5/16" drill bit. 1 DDebes perforar en los puntos con taladro y una broca de 5/16" the wall anchors inside the drillings. 2 Insert Inserta los chazos plásticos en las perforaciones. the cabinet and secure it with the screws. 3 Place Ubica el mueble y asegúralo con los tornillos.
1 D Slide the shelves inside the cabinet. Deslice los entrepaños dentro del mueble.
PI
C PM F
2
PD
B
F Slide the drawers inside the cabinet. Deslice los cajones dentro del mueble.
After you finish the adjustment of the cams, cover them with the cover caps. Después de ajustar todas las cajas minifix, cúbralas con las tapas adhesivas.
Page 22
A
After you finish assembling the cabinet, take off the adhesive letters. Al terminar de armar, desprenda las letras adhesivas.
WARRANTY POLICY
Furniture has a 1 year warranty coverage in wooden parts and hardware pieces since its manufacturing date, which you can see in the lot number printed on the product box and the assembly instructions leaflet. Warranty covers materials and workmanship imperfections which impair the assembly or correct functioning of the cabinet. This warranty is not valid if the defects or imperfections are caused by the incorrect following of the assembly instructions, warnings and recommendations, misuse, intentional damage, fire or flood, or after modifications or any kind of alteration, or repaired by someone not authorized, when itś been assembled 3 months after the date of purchase. These defects MUST be reported before the warranty coverage period ends. Once the product has been assembled, the company will not be responsible for defective and/or damaged parts. This warranty is ONLY valid for the ORIGINAL PURCHASER, it doesn’t apply if the product has been resold, rented, etc. Furniture will take no liability for incidental or consequential damages caused to or by the product (This may not apply in your state). To make this warranty valid you must write to our customer service email describing the product defect, lot number and submitting your sales reciept or proof of purchase, or contact us at our customer service line. Replaced parts will be under the productś original warranty coverage period. Damaged parts will become property of the company. There are no other warranties applicable to this product.
Page 23