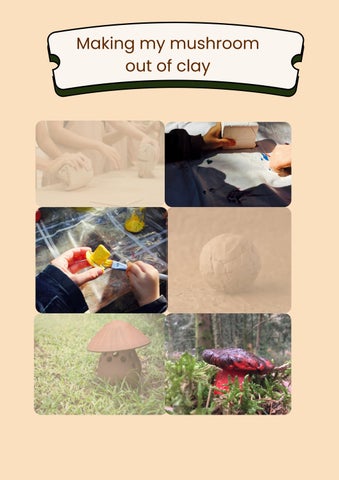
Makingmymushroom outofclay

Here’s a hands-on activity that delights the sense of touch: children knead, shape, roll, squash, form, and reshape…! Plus, it brings a touch of autumn into the home!
Necessary Materials
Step1:ShapingtheMushroom
Show the children how to use the clay cutting wire. A 500g pack of clay will be enough to make about four mushrooms. Let the children manipulate the clay as much as they like; the experience is very similar to working with modeling dough. You can also provide small objects like toothpicks, cookie cutters, or other tools to enrich the activity.
Once the stems and caps are shaped, place them in a dry area to let the clay harden. This process can take anywhere from 24 hours to several days, depending on humidity levels. It’s best to use the entire opened pack of clay, as it will dry out even when well-wrapped.
The advantage of air-drying clay is that it doesn’t require a kiln, making it simple to create figurines and molds. However, note that it is not suitable for items intended for food use.
outofclay
Learninggenius
Once the stems and caps have fully hardened, assemble them using a multi-purpose craft glue (test it beforehand, as many glues can be of poor quality). Next, choose your acrylic paint colors, apply them, and let them dry… and it’s done! These mushrooms can be displayed on a seasonal table, for example. Inspired by Steiner pedagogy, seasonal tables are spaces where various natural objects related to the current season are displayed.