

ISSUE NO. 1: Kitship Cookies
EDITOR IN CHIEF: Jocelyn (Pidge) Robertson
DESIGN DIRECTOR: Renée (Wren) Bidegain
COPYRIGHT: Daughters & Suns, LLC, 2025
PUBLISHED BY: Daughters & Suns LLC. 2782 W. Frontage Rd., Amado, AZ 85645
FIND US AT: kitshipdispatch.substack.com, hello@kitshipclubs.com & kitshipclubs.com,

Wren and Pidge met at work nearly twenty years ago and formed an instant bond, recognizing in each other originality, curiosity, capability, and an enthusiasm for building community. Compatible co-workers became masterful social collaborators, finding joy in planning not just events but experiences that bring people together. Together they’ve orchestrated weddings, coordinated countless happy hours, game nights, dinner parties, and group vacations, always delighting in the little details, whether it’s the perfect playlist, a themed table setting, or sharing a new cookie recipe. Their friendship has weathered distance (they now live in different states), time, texting, parenthood, and even a pandemic. Party People: Kitship Cookies is their first recipe collection. Because cookies are made for sharing with friends.
For more Kitship projects, recipes, games and friend activities join them at kitshipclubs. com, an online community where they share ideas and inspiration for happy, healthy social connections.

AP flour, we like Bob’s Red Mill All-Purpose
unsalted but ter, you can use salted, just reduce the amount of additional salt
kosher salt, we use Diamond Crystal. If you substitute Morton’s use 25% more salt
chocolate chips, our favorite is Guittard when it’s available in our local shop, but Ghirardelli works fine, too. In a pinch, Nestle is fine!
cocoa powder, Guittard Cocoa Rouge is ideal, but we frequently bake with The Saco Pantry brand or Ghirardelli
Never was a food so perfectly built for friendship. What else can you tuck in a box or tin, stack in a lunch bag or set out on a plate that has almost universal appeal? Beloved by young and old alike, perfect for any occasion, or no occasion at all. You can make a lot at once, so you have some to share, and some to keep. Most cookies can be made ahead, and frozen for future use.
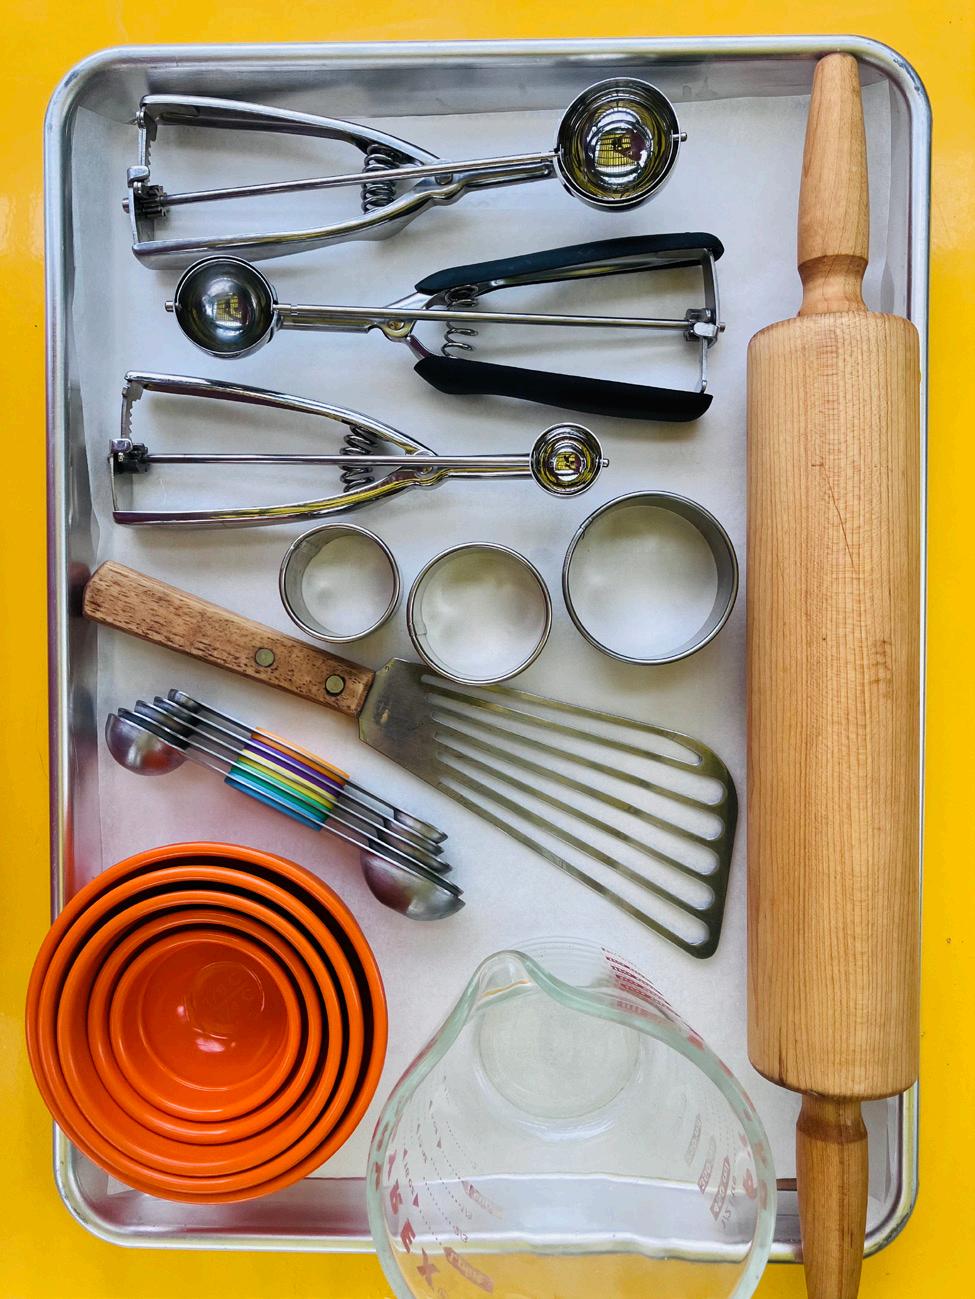
The cookies in this book are for, the most part, easy. But, they’ll be even easier if you have a few tools at the ready: we recommend a stand or hand mixer, a food processor (a nut chopper could work, too), and nearly every recipe utilizes a cookie scoop. Why a cookie scoop? Uniformity when shaping your cookies ensures your cookies will bake evenly and be done simultaneously. Be sure you read a recipe front to back before you start. There is often a step that requires planning ahead, like making sure your butter is room temp., or you may need to chill your dough for an hour or so mid-recipe. So preheat that oven, grab a mixing bowl, and let’s bake cookies!
The sizing on cookie scoops is all over the place. One brands “small” is another brands “large” and they have different numbering systems. In this book we use three sizes: extra-small (#110, 1 tsp. or 12 g.), medium, (#70, 2 tsp.-1 T., 16 g.), and large (#40, 11/2 T., 30 g.) Find a brand you like and get as close to our volume measurements as you can. No biggie if your cookies are a bit larger or smaller!
BAKING SCALE
Highly recommended for ingredient measurements.
MAKES 15-17 sandwich cookies
PREP TIME 11/2 hrs. + chilling
BAKE TIME 15-17 min.
EQUIPMENT food processor, stand mixer, large cookie scoop (#40, 11/2 T., 30 g.), piping bag and tip (optional)
1 c. AP flour (125 g.)
3/4 c. rolled oats (60 g.)
1/4 c. roasted, salted peanuts (40 g.)
1/4 tsp. baking soda
1/4 tsp. kosher salt
1/2 c. unsalted butter, softened (1 stick)
⅓ c. creamy peanut butter (75 g.)
1/2 c. granulated sugar (50 g.)
1/2 c. light brown sugar (50 g.)
1 large egg
1 tsp. vanilla
1/4 c. unsalted butter, room temp. (1/2 stick)
⅓ c. creamy peanut butter (75 g.)
2 1/2 T. apricot or peach jam
1 c. powdered sugar (110 g.)
1 T. fresh lemon juice
1 Pulse flour, oats and peanuts in the food processor until nuts and oats are finely chopped, add baking soda and salt and pulse once or twice to incorporate.
2 Combine butter, peanut butter, and sugars in the bowl of a stand mixer fitted with the paddle attachment. Beat on medium until fluffy and light, 3-5 min. Add egg and vanilla and beat until incorporated. Sprinkle flour mixture over and blend until the mixture comes together. Do not overmix. Refrigerate for an hour or up to 24 hrs.
3 Preheat oven to 350°, racks should be in the center of the oven. Line 2 cookie sheets with parchment paper. Portion dough using a large cookie scoop or 11/2 T. measure. Bake cookies, rotating baking sheets top to bottom and back to front halfway through, until cookies are puffed, and just set around edges (they should look dry), 15-17 min. Transfer pans to wire racks and let cool completely.
4 To make filling, combine peanut butter, butter, and apricot jam in the bowl of a stand mixture, fitted with a paddle. Beat until incorporated then sprinkle ⅓ of the powdered sugar over the top and beat until well-mixed. Repeat, beating until combined after each addition. Beat until filling is light in color and airy.
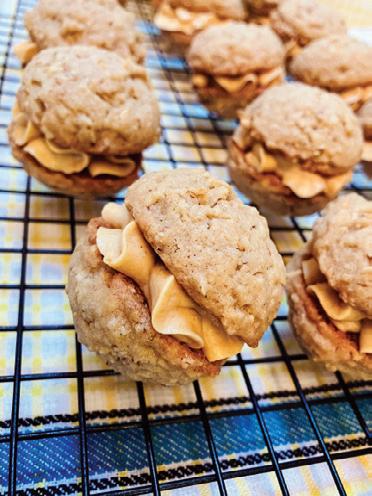
5 Spread or pipe a 1 T. of filling on the flat side of a cookie and then top with a second cookie, pressing lightly to make a sandwich. Repeat with remaining cookies.
6 Transfer to a airtight container and refrigerate until the filling is set.
7 Serve at room temp. Cookies will keep up to a week at room temp. and freeze well.
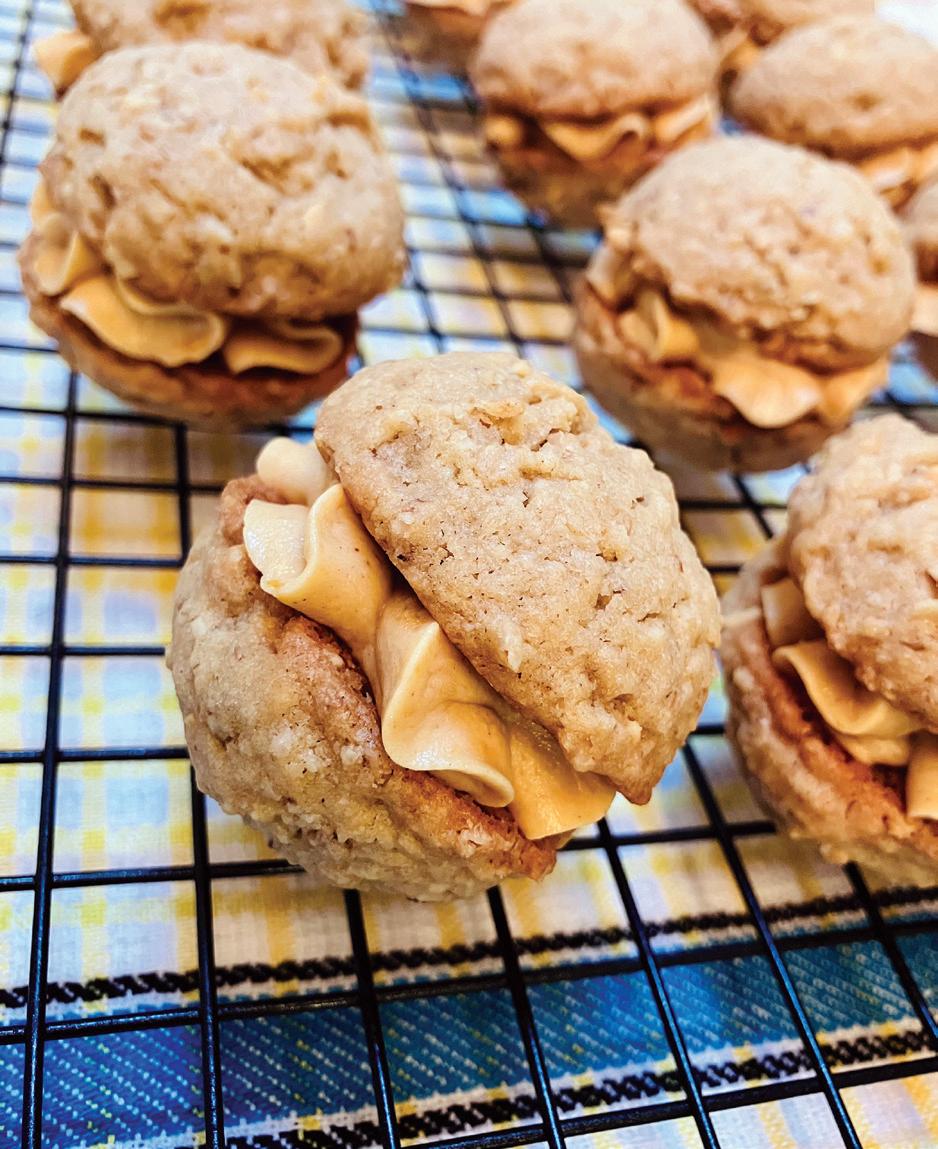
Inspired by peanut butter and jelly sandwiches, Sammies are the perfect blend of sweet and savory, something new that tastes deeply nostalgic. You could use any flavor jam but it may discolor the filling in an unappetizing way so we stick to peach or apricot. For an entirely different but still delicious cookie, try marmalade in place of the jam.
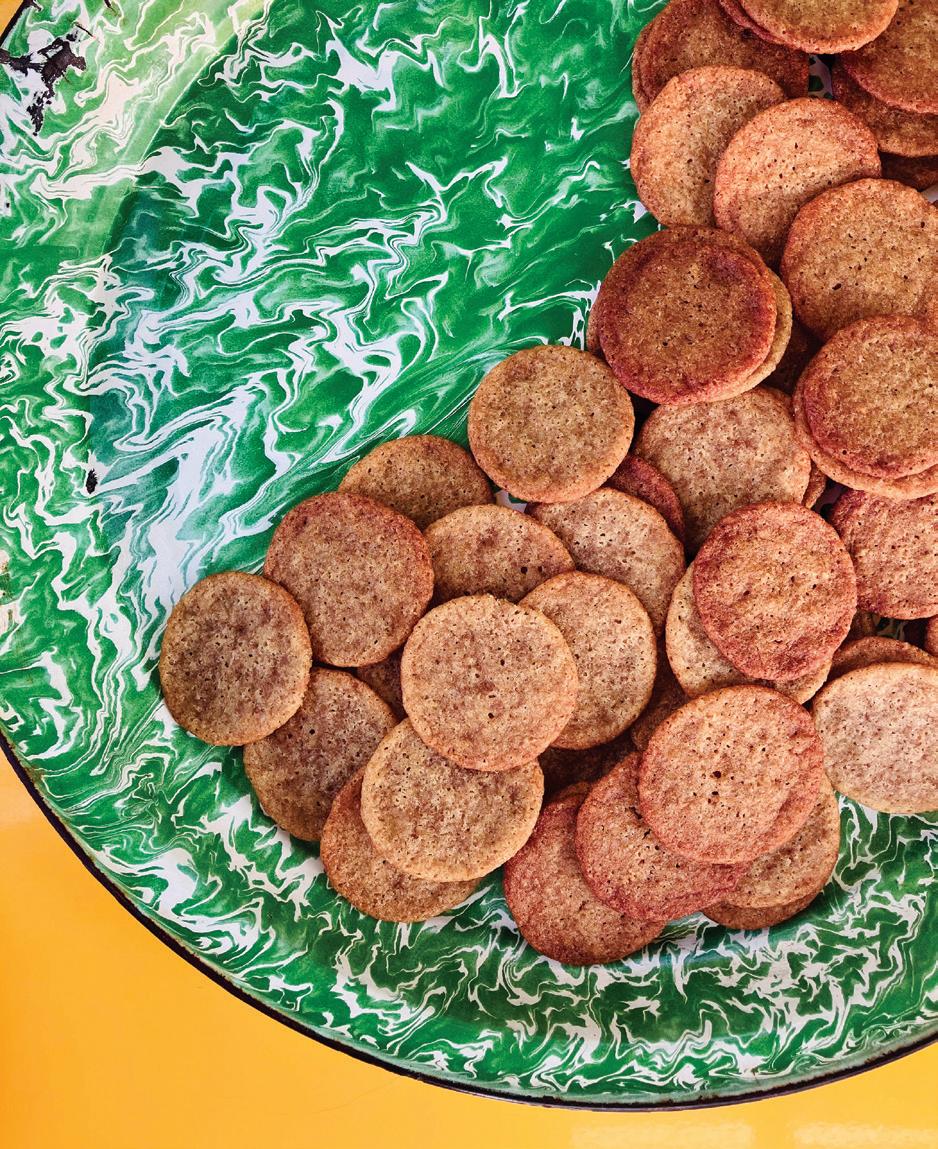
1/2 c. rendered bacon fat, chilled (100 g.) from approx. 1 lb. cooked bacon
1/4 c. unsalted butter, room temp. (1/2 stick)
1/2 c. granulated sugar (50 g.)
1/2 c. light or dark brown sugar (50 g.)
1/4 c. maple syrup (85 g.)
1 large egg
2 c. AP flour (250 g.)
1 tsp. kosher salt
2 tsp. baking soda
1 tsp. ground ginger
1/2 tsp. cinnamon
1/4 tsp. cloves
1/4 tsp. nutmeg
MAKES 75-90 cookies
PREP TIME 15 min. + chilling
BAKE TIME 10 min.
EQUIPMENT food processor, #110 extra-small cookie scoop (#110, 1 tsp. or 12 g.)
1 In a food processor fitted with a metal blade, combine bacon fat, butter, sugars, maple syrup and egg. Pulse a couple of times to blend. In a medium bowl, whisk together flour, salt, soda and spices. Add flour mixture to food processor bowl and pulse until a smooth soft dough forms. Transfer to reserved bowl and cover with plastic wrap. Chill at least two hrs. or overnight.
2 Preheat oven to 350°. Racks should be in the center of the oven. Line 2 cookie sheets with parchment paper.
3 Portion dough using an extra-small cookie scoop or 1 tsp. measure, placing dough balls 2 in. apart; they will spread out as they cook.
4 Bake cookies, rotating baking sheets top to bottom and back to front halfway after 5 min., bake another 5 min., cookies will be light golden brown. Transfer pans to wire racks and let sit for a few min. until cookies set up. Remove cookies from baking sheet and let cool completely. Repeat with remaining dough.
5 Store cookies in an airtight container at room temp. or freeze.
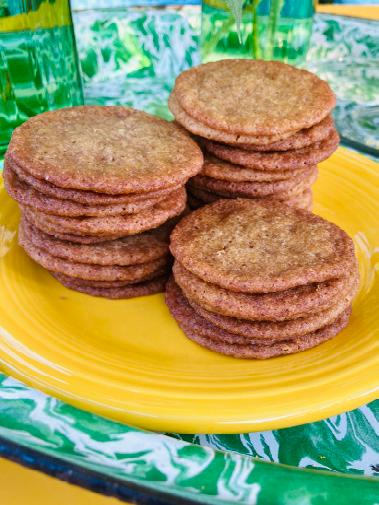
This recipe makes a lot of cookies, but they are very thin and crispy; you’ll want to serve a stack with ice cream or espresso. The bacon fat adds a nice round savoryness to the sweet and spicy flavor.
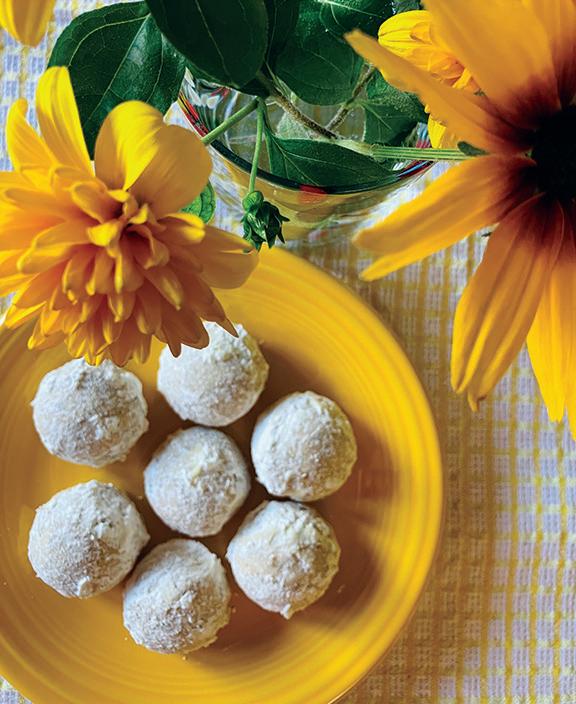
1 c. unsalted butter (2 sticks)
2 tsp. vanilla extract
1 c. pecans, toasted (160 g.)
2 c. AP flour (250 g.)
2 c. powdered sugar, divided (200 g.)
1/2 tsp. kosher salt
1/4 tsp. cinnamon
1/4 tsp. nutmeg
MAKES 30-35 cookies
PREP TIME 20 min. + chilling
BAKE TIME 20 min.
EQUIPMENT food processor, medium cookie scoop (#70, 2 tsp.-1 T., 16 g.)
1 Melt butter in a small saucepan over medium heat, cooking just until brown flecks appear, 6 to 8 min. Pour immediately into a glass measuring cup and stir in the vanilla. Set aside or pop in the fridge to cool.
2 Place pecans in the bowl of a food processor fitted with a metal blade. Pulse until finely chopped. Add the flour, salt, 1/2 c. powdered sugar, and spices.
3 When the butter is cool but not yet solid, pour into the food processor and pulse until just combined. Mixture will be crumbly. Form into two balls and wrap in plastic, refrigerate for 1 hr.
4 Preheat oven to 350°. Racks should be in the center of the oven. Line 2 cookie sheets with parchment paper. Portion dough using a medium cookie scoop or 1 T. measure. They won’t spread so they can be pretty close together.
5 Bake cookies, rotating baking sheets top to bottom and back to front halfway after 10 min., bake another 10 min., cookies will look dry to the touch but not brown. Transfer pans to wire racks and let sit for a few min. until you can handle them.
6 Place the remaining 11/2 c. powdered sugar in a wide pasta bowl or pie tin. Roll cookies in sugar one at a time and place on wire rack to finish cooling completely.
7 Store cookies in an airtight container or freeze.
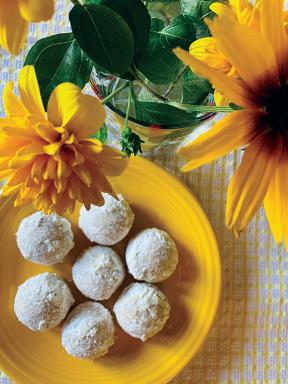
So many cultures and cuisines have a cookie like this: a buttery soft and nutty snowball that puffs with powdered sugar when you bite in to it. You’ll definitely need lick your fingers! This is our take on the Mexican Wedding Cake or Russian Tea Cake, made better with brown butter.
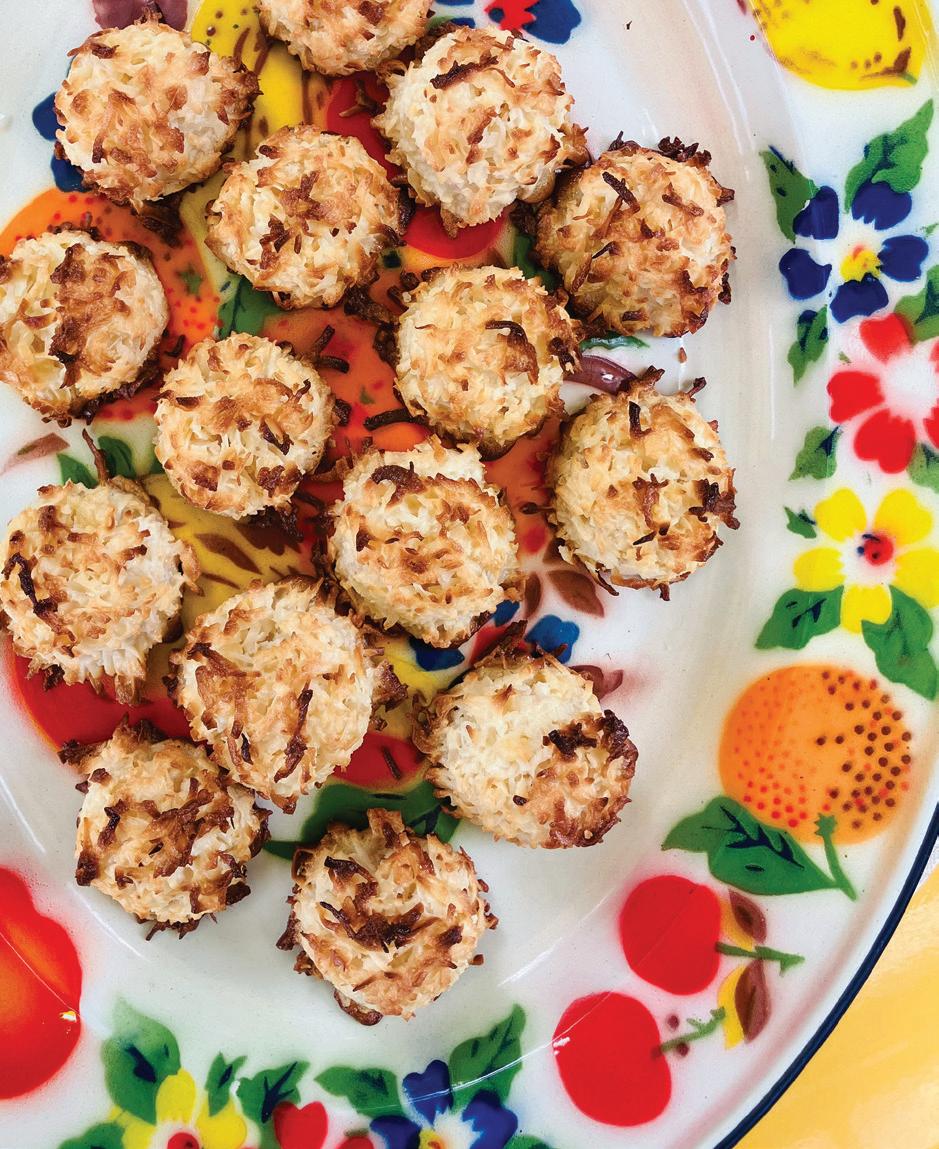
MAKES 16-18 cookies
PREP TIME 15 min.
BAKE TIME 12-15 min.
EQUIPMENT large cookie scoop (#40, 11/2 T., 30 g.)
2 c. unsweetened coconut flake (120 g.)
11/2 c. sweetened, shredded coconut (125 g.)
1/2 c. dried, sweetened diced pineapple, chopped (50 g.)
2 T. cornstarch (15 g.)
Zest of 1 lime, 1 tsp. lime juice
1/4 tsp. kosher salt
11/2 T. Puerto Rican rum
3/4 c. sweetened, condensed milk (235 g.)
1 Preheat oven to 400°. Racks should be in the center of the oven. Line 2 cookie sheets with parchment paper.
2 Measure coconuts and pineapple into a medium bowl, sprinkle with cornstarch, salt and lime zest. Mix well with a wooden spoon. In a glass measuring cup sprayed with cooking spray, mix sweetened condensed milk with the rum and lime juice and then drizzle over coconut mixture. Stir until the ingredients come together.
3 Portion dough using a large cookie scoop or 11/2 T. measure.
4 Bake cookies, rotating baking sheets top to bottom and back to front halfway through, until cookies are golden brown with some dark brown coconut bits, 12-15 min.
5 Transfer immediately to a wire rack, do not leave on the hot cookie sheet or they will continue to cook.
6 As soon as they are cool, transfer to an airtight container. They will soften slightly with time and keep 3-4 days at room temp., or freeze until needed.
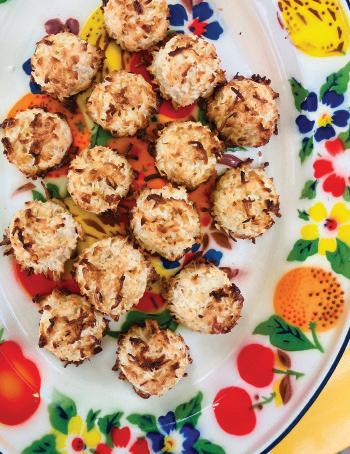
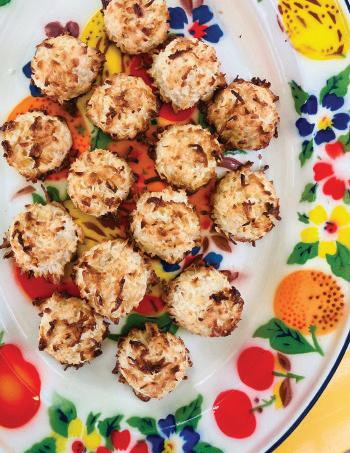
A trip to sunny Puerto Rico gave us the idea for these cookies: a play on a coconut macaroon. They are delightfully crunchy on the outside and gooey tender on the inside with tropical flavors of toasty coconut, warm pineapple, and a splash of rum, they also happen to be gluten-free…and easy!
3 Divide the dough in half. Working with one half at a time, place the dough between two pieces of parchment paper and roll it to a 1/4 inch thickness. Leaving the dough in between the parchment paper, transfer it to a baking sheet. Refrigerate for 30 min. +.
4 Working with one slab at a time, remove the top parchment paper and sprinkle with half of the chocolate chips; turn each chip so the flat side is up and press into the dough. Make indentations all over the dough with a chop stick or other small round implement. Cut with cookie cutter (you may have to move the occasional chip out of the way). Before you move the cookies to the cookie sheets for baking, rechill the dough for 30 min. +.
5 Preheat oven to 350°, racks should be in the center of the oven. Line 2 cookie sheets with parchment paper.
6 Place the cookies on the prepared baking sheets. Sprinkle with Turbinado or sanding sugar. Bake cookies, rotating baking sheets top to bottom and back to front halfway through, until cookies are puffed, and just set around edges (they should look dry), 10-12 min. Cool on the baking sheet for 5 min. before transferring them to a wire rack to cool completely.
7 Put a clean piece of parchment on one of the cookie sheets. In a microwave-safe bowl, melt chocolate chips, vegetable oil and peppermint extract on low or “melt” setting. You can also use a double boiler. Stir well. Using a spoon, scoop a 1 T. dollop of chocolate on your clean parchment and spread into a circle the size of your cookie. Place a cookie on top of the melted chocolate. Repeat with the remaining cookies and chocolate. Chill until the chocolate is firm.
8 Store in an airtight container. Cookies are best served chilled or frozen.
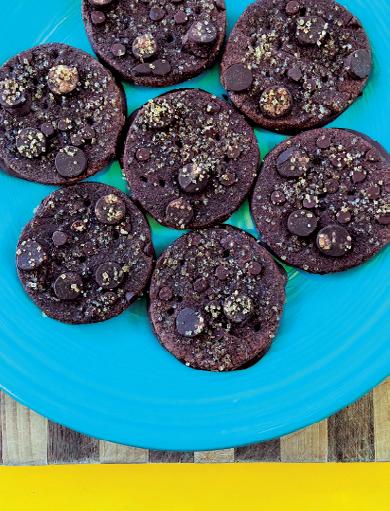
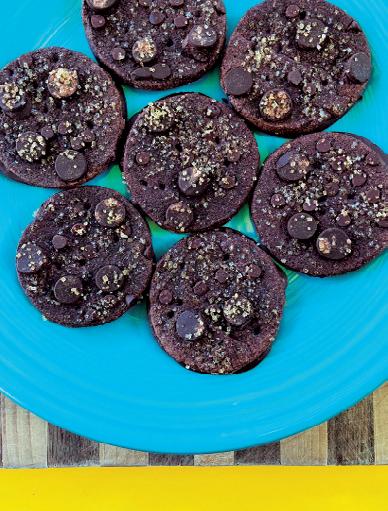
These cookies are as much about texture as they are about flavor: soft chocolate shortbread, studded with gooey chocolate chips (try a mix of mini and standard size) and crunchy sugar with a surprise slick mint-chocolate shell on the back. One of the few cookies that’s even better when served very cold.
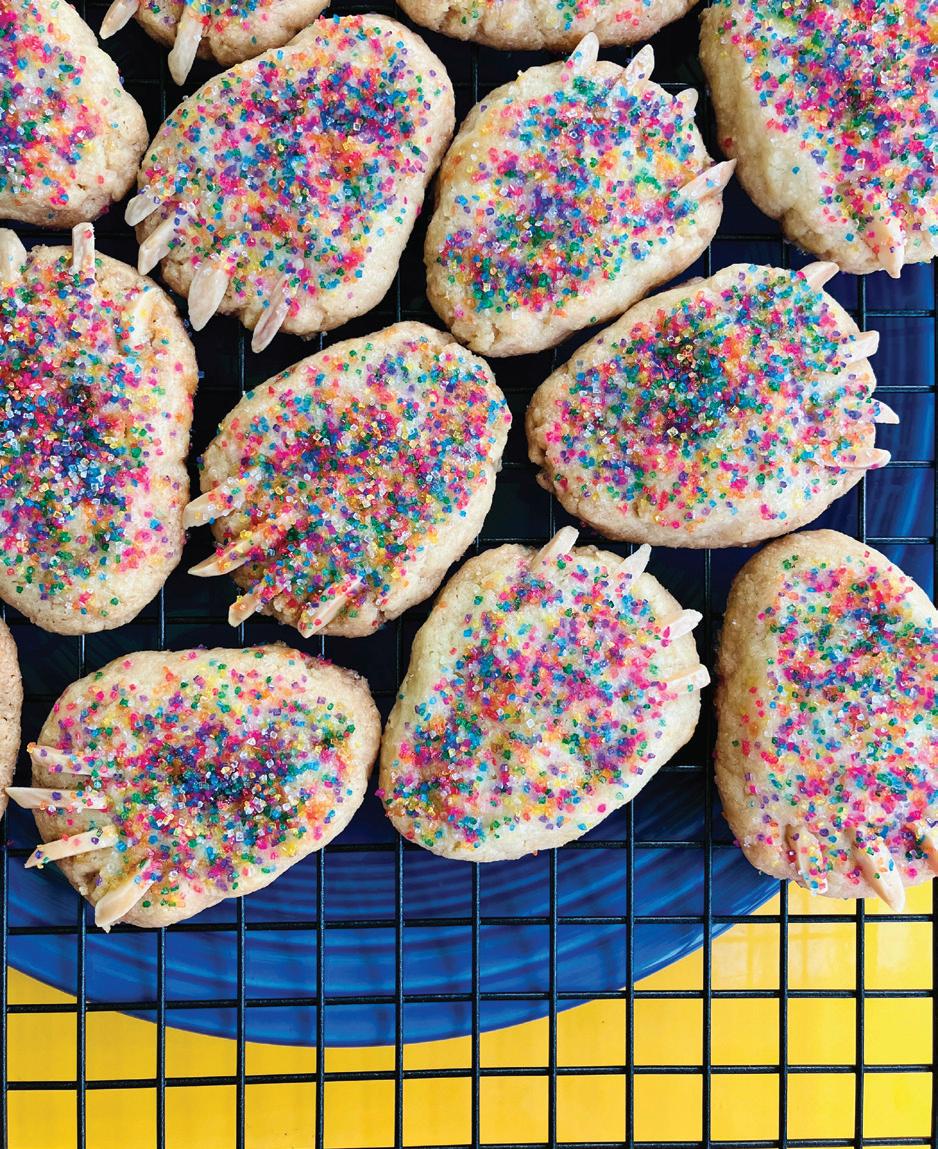
1 c. unsalted butter, room temp.(2 sticks)
1 tsp. kosher salt
1 c. granulated sugar (100 g.)
1 large egg, separated
1 tsp. almond extract
1/2 c. almond flour (50 g.)
2 c. AP flour (250 g.)
Sanding sugar or Turbinado sugar
Blanched, slivered almonds
MAKES 35-40 cookies
PREP TIME 1 hr. + resting
BAKE TIME 20 min.
EQUIPMENT medium cookie scoop (#70, 2
tsp.-1 T., 16 g.), stand mixer
1 In the bowl of a stand mixer fitted with the paddle attachment, combine the butter, salt and sugar. Beat on low speed until incorporated and smooth, scraping down the sides of the bowl as needed. Add the egg yolk and almond extract and mix until just combined. Turn the mixer off and scrape down the sides of the bowl.
2 Add the flours to the bowl all at once and scrape the bottom and sides of the bowl. Turn the mixer speed to low and beat until flour is fully incorporated, scraping the bowl again if needed, about 30 seconds. The dough will be crumbly. Form the dough into a disk and wrap with plastic wrap. Refrigerate for an hour +.
3 When you’re ready to bake, preheat oven to 350°. Racks should be in the center of the oven. Line 2 cookie sheets with parchment paper.
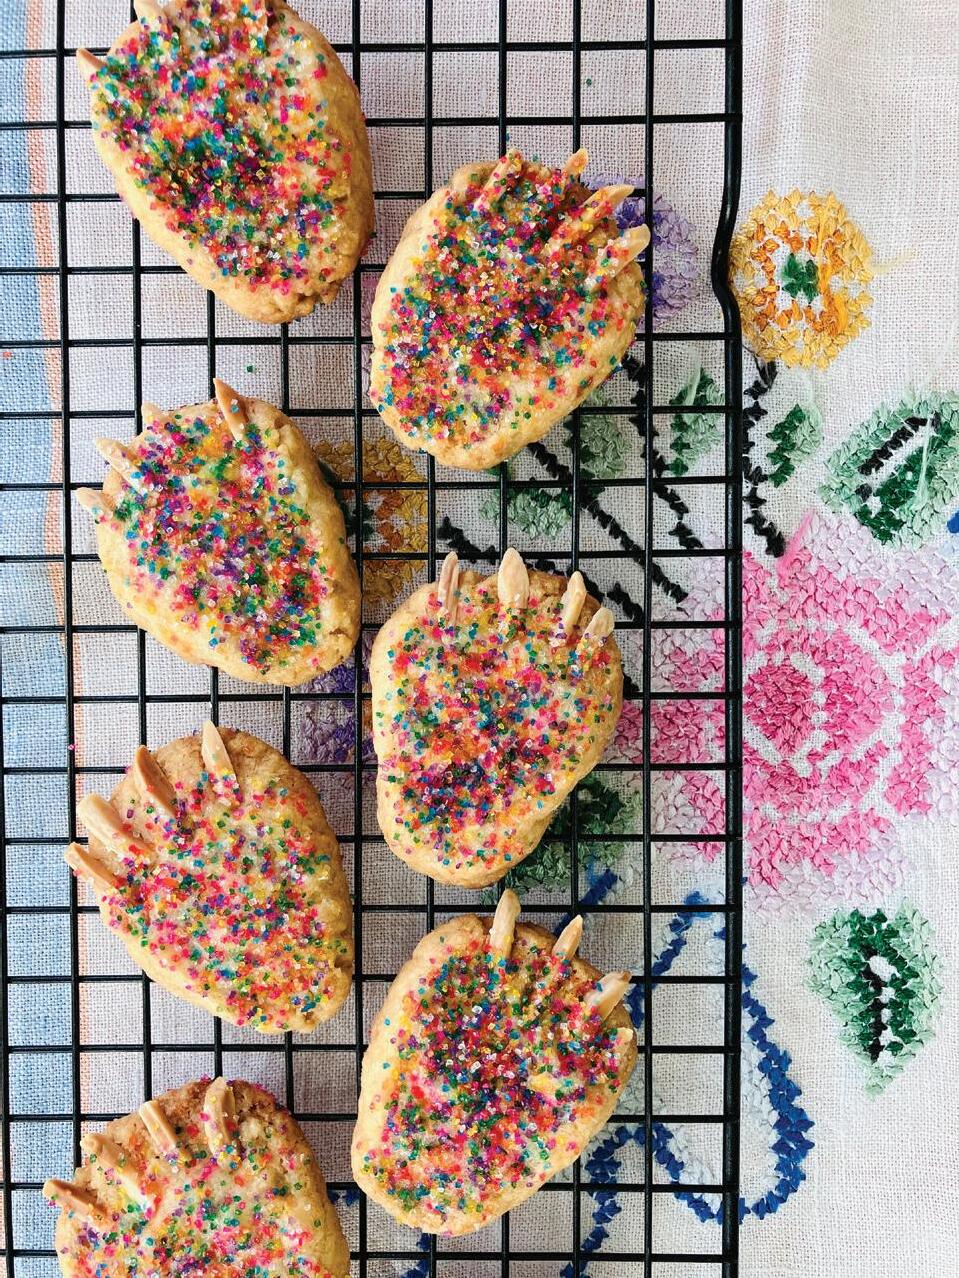
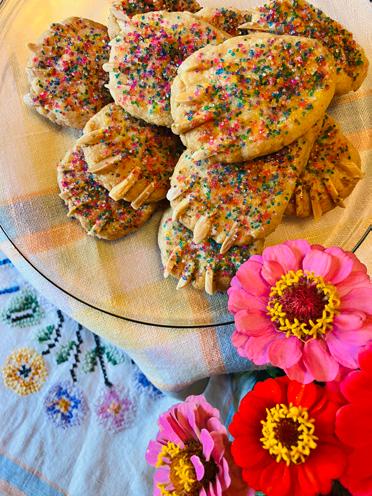
4 Portion dough using a medium cookie scoop or 1 T. measure. Working on the cookie sheet, press each ball into a flat, rounded-edge triangle, about a 1/4 thick. On the wide end of the triangle, press 4 slivered almonds hanging over the edge to make the claws.
5 Lightly beat the reserved egg white in a small bowl. Brush the surface of the cookies with egg white and then sprinkle with sanding sugar or Turbinado sugar.
6 Bake cookies, rotating baking sheets top to bottom and back to front halfway after 10 min., bake another 10 min., cookies will be golden brown on the edges. Transfer pans to wire racks and cool for a few min. on the sheets until they are firm enough to transfer to the wire rack.
7 Store cookies in an airtight container at room temp. or freeze.
Darling and delicious, Kitten Paws have a delicate almond flavor and melt-in-your mouth shortbread texture made even more fine with the addition of almond flour. We like to decorate them with a brightly colored sanding sugar but you can also use Turbinado for a slightly more subdued effect.
3 Bake for 15-20 min. on the center rack until the crust feels dry and sturdy. Cool completely.
4 Sprinkle the chocolate chips over the crust in a single layer. Bake for 6-8 min. until chips become molten (they will hold their shape so don’t be fooled). Spread the melted chocolate with a spatula so it completely covers the graham cracker layer. Cool, then move to the freezer and freeze for 15 min. until chocolate is hard.
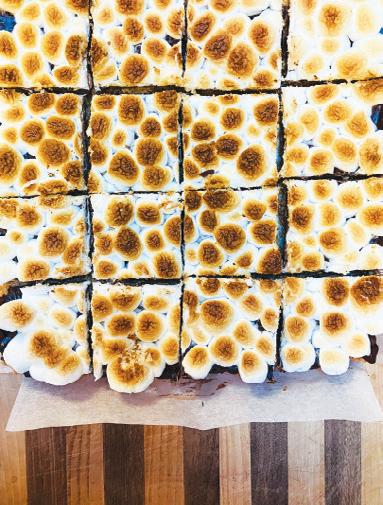
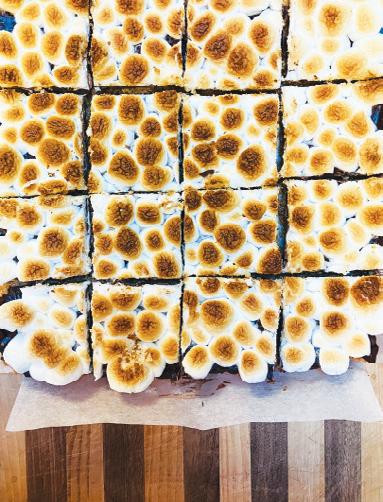
5 Sprinkle the marshmallows to form a single layer over the chocolate. Move the oven rack to the top third of the oven, but not the very top setting. Set the broiler temp. to low or 400°. You want the marshmallows to bubble and brown, but not to burn (warning: they will catch fire if they are too close to the broiler!) Broil for 3-5 min., turning the pan occasionally, until the marshmallows are bubbling and toasty. Cool on a rack and then move back to the freezer for 15-20 min..
6 Take the s’mores out of the pan using the edges of the parchment paper to maneuver onto a cutting board. Cut into 16 pieces with a sharp knife while still frozen. Serve at room temp.
7 Store cookies in an airtight container at room temp. or freeze.
For when you want a campfire treat in the comfort of your home, Indoorsy S’mores are a simple, sweet snack. You do need to have some patience, though, since each layer requires chill time. This recipe can be easily doubled, just use a 9 x 13 in. baking pan instead.
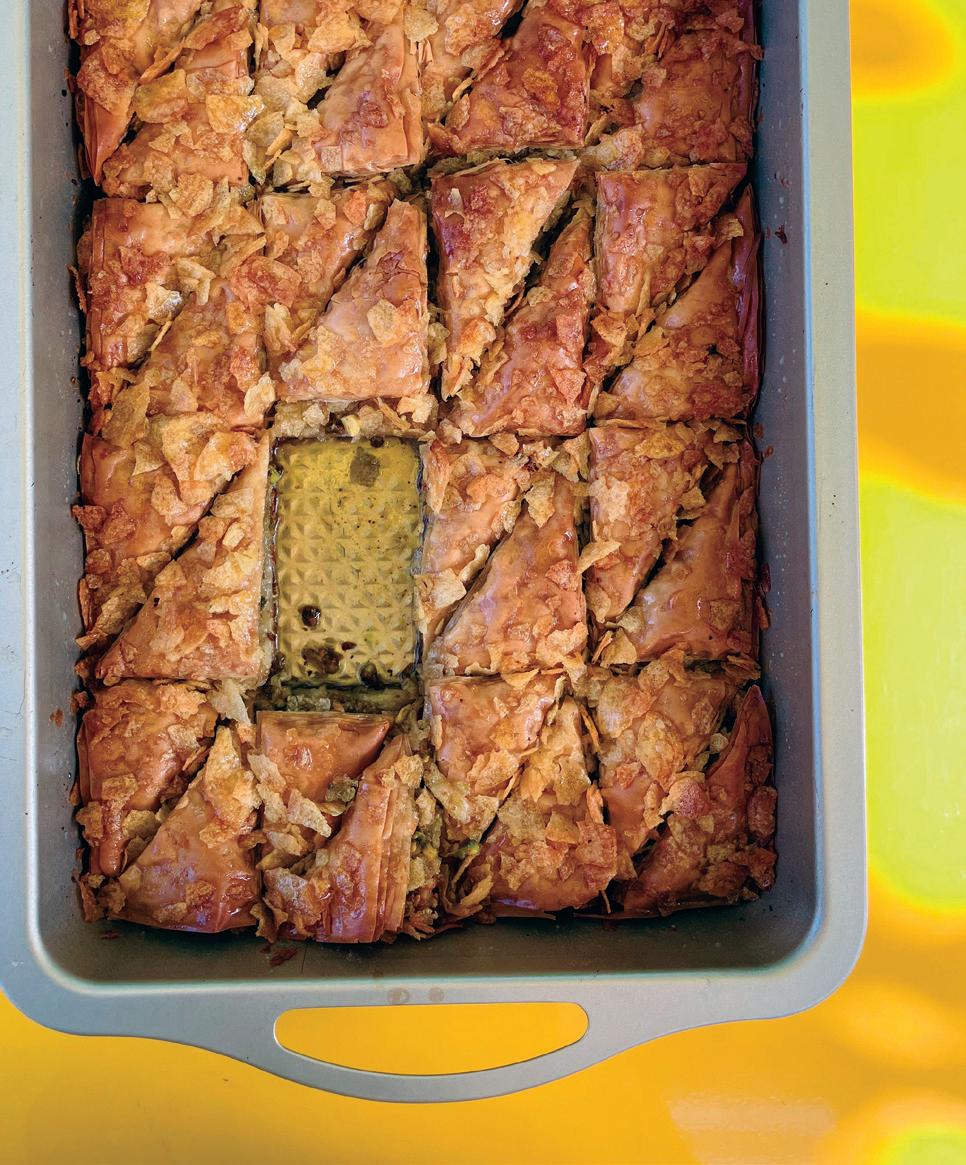
3 c. granulated sugar (300 g.)
1 c. honey (340 g.)
11/2 c. unsalted butter (3 sticks)
2 c. shelled pistachios (320 g., unsalted)
1 8 oz. bag Lay’s Potato Chips, or similar
1 lb. phyllo dough, defrosted overnight in the fridge
1/2 lemon, peel and juice
1 In a food processor fitted with a metal blade, pulse the pistachios until the texture of coarse sand with some larger pieces remaining. Crush the potato chips in a bowl with your hands, you’ll want pieces 1/4-1/2 in. in size.
MAKES 32-40 pieces
PREP TIME 30 min.
BAKE TIME 40-60 min.
EQUIPMENT food processor
2 Clarify the butter by melting it over low heat, then letting it cook until the foam rises to the top and the milk solids fall to the bottom of the pan. Skim off the foam and pour into a jar or glass measuring cup and chill. Once solid, pierce the butter with a skewer or knife and pour off the milky liquid that has settled to the bottom.
3 In a medium saucepan, heat the sugar, honey, and several 1in. pieces of lemon peel with 11/2 c. of water. Bring to a simmer and cook until the
sugar is dissolved and the mixture is slightly thickened. Add lemon juice and stir. Move to a jar or glass measuring cup and refrigerate until cool.
4 Heat oven to 400°. Reheat the butter in a small saucepan until melted. Brush the inside of a 9 in. x 13 in. baking pan with clarified butter. Prepare the phyllo dough by trimming the stack of it with scissors or a sharp knife to fit your baking dish. Cover phyllo layers with a lightly damp kitchen towel, and keep covered.
5 Place 1 piece of phyllo on the bottom of the baking pan; brush lightly with clarified butter. Layer phyllo sheets on top, brushing each sheet with butter as you go, until ⅓ the phyllo is used. Sprinkle evenly with 1/2 the nuts and crushed potato chips. Layer phyllo and butter over nuts and chips, until only phyllo is remaining. Add the final layer of nuts and remaining chips. Layer with remaining phyllo, brushing butter between each sheet.
6 Cut the pastry into squares or triangles, using a sharp knife, up-and-down pressure, rotating the pan if necessary. Make sure to cut all the way through to bottom of pan. Sprinkle with remaining chips and pour any remaining butter evenly over pan.
7 Bake baklava until the top is golden brown, and the lower phyllo layers beneath the pistachios are thoroughly baked through, 40-50 min.. If the top starts to get too brown before the pastry is cooked through, put foil over the top.
8 Remove from the oven and immediately pour the cold syrup evenly over the hot baklava. Cool completely. Served after it has rested and the syrup has been fully absorbed, up 6 hrs. Cover and store at room temp. for 3 days, after which you can transfer to the fridge for another week.
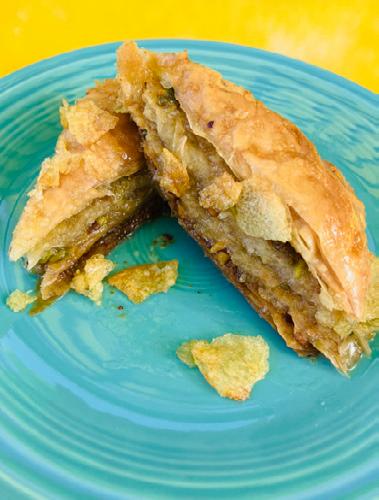
No two ways about it, purists will balk at this bastardized baklava so don’t even try and convince them…! It reminds us of a day at the beach: sunny, sandy, sweet, salty and sticky. Rich golden layers of phyllo and crunchy nuts, piled with crispy potato chips, saturated with lip-smacking butter and sunny honey lemon syrup. More is more.
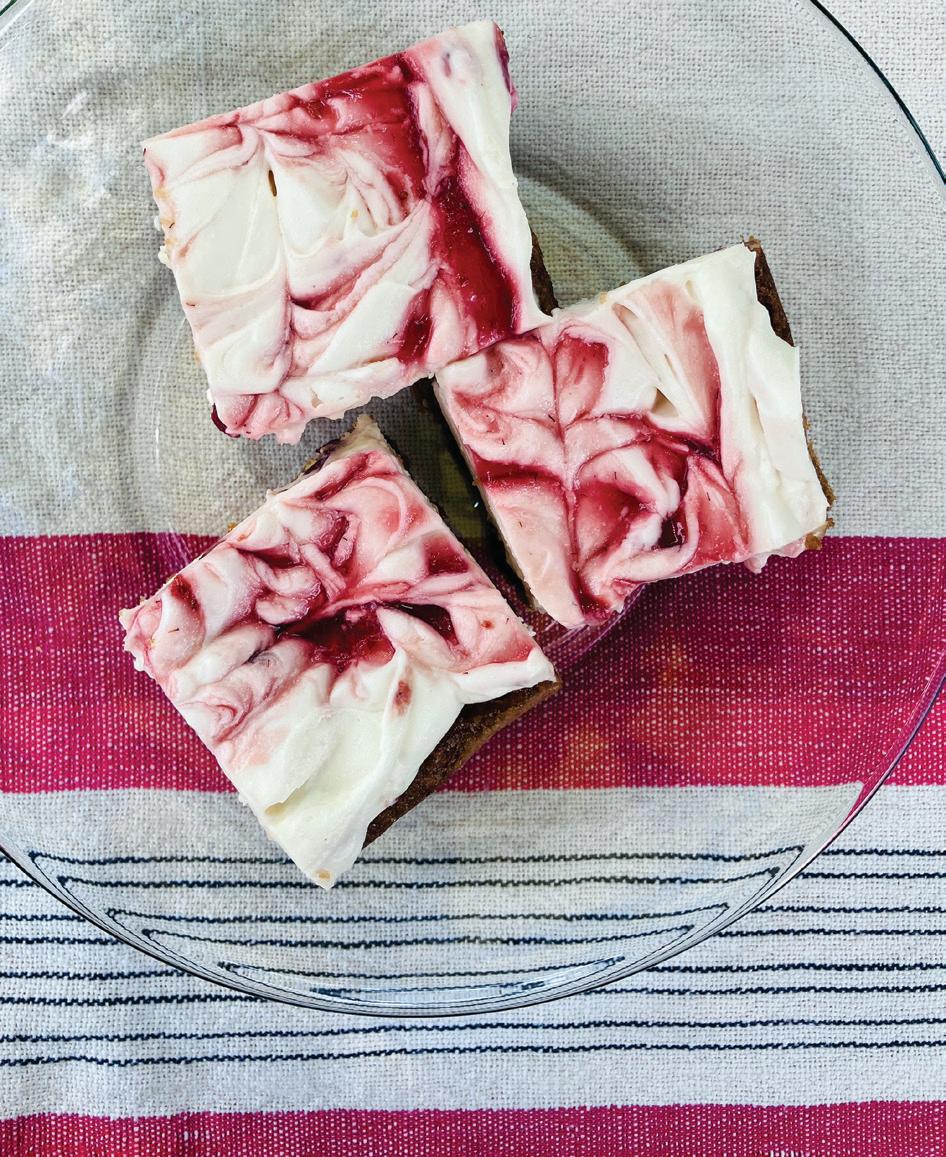
MAKES 16 bars
PREP TIME 30 min. + chill time
BAKE TIME 20-25 min.
EQUIPMENT stand mixer
3/4 c. unsalted butter (11/2 sticks)
1 c. light or dark brown sugar (100 g.)
1 large egg
1 tsp. vanilla extract
1 c. AP flour (125 g.)
1/2 tsp. baking powder
1/4 tsp. baking soda
1 tsp. kosher salt
6 oz. cream cheese, room temp. (170 g.)
3/4 c. powdered sugar (90 g.)
3/4 c. cold heavy cream (175 g.)
1 tsp. vanilla extract
1/2 c. strawberry jam or preserves, or any other red berry jam or preserves (115 g.)
1 Heat oven to 350°. Grease and line an 8 x 8 in. square baking pan with parchment paper, leaving a 2-inch overhang on two sides.
2 In a medium saucepan melt the butter over medium heat, add sugar and whisk until blended well. Remove from heat, let mixture cool for about 10 min., then whisk in the egg and vanilla. Add the flour, baking powder, baking soda and salt, and stir to combine. Transfer to the prepared pan and smooth the top.
3 Bake until the very top looks set and is no longer jiggly, 20-25 min. It will puff up and then collapse with wrinkles around the sides. Cool completely on a wire rack completely before making the topping.
4 In the bowl of a stand mixer fitted with the whip attachment, beat the cream cheese, vanilla and powdered sugar until light and fluffy, 2 to 3 min. Scrape down the sides of the bowl with a spatula. Gradually add the cream a splash at a time and whip until mixture is thick and fluffy, about 5 min.
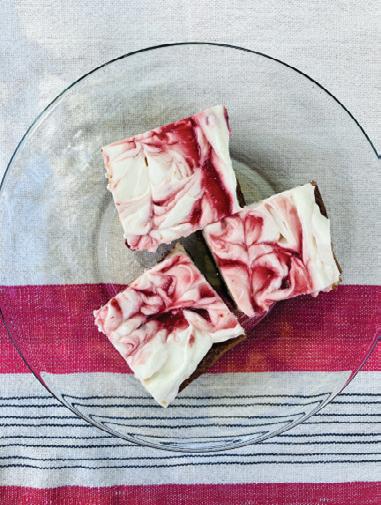
5 In a small pan, heat the jam until warm. Spoon about 3/4 of the jam over the cream cheese mixture and gently fold with a spatula to combine. Scoop the filling over the cake and spread in swoops to cover. Drizzle the remaining jam over the top and lightly swirl the jam into the filling.
6 Freeze until the creamy top is firm. Take the blondies out of the pan using the edges of the parchment paper to maneuver onto a cutting board. Cut into 16 pieces with a sharp knife while still frozen. Store loosely covered in the fridge and serve chilled, but not frozen.
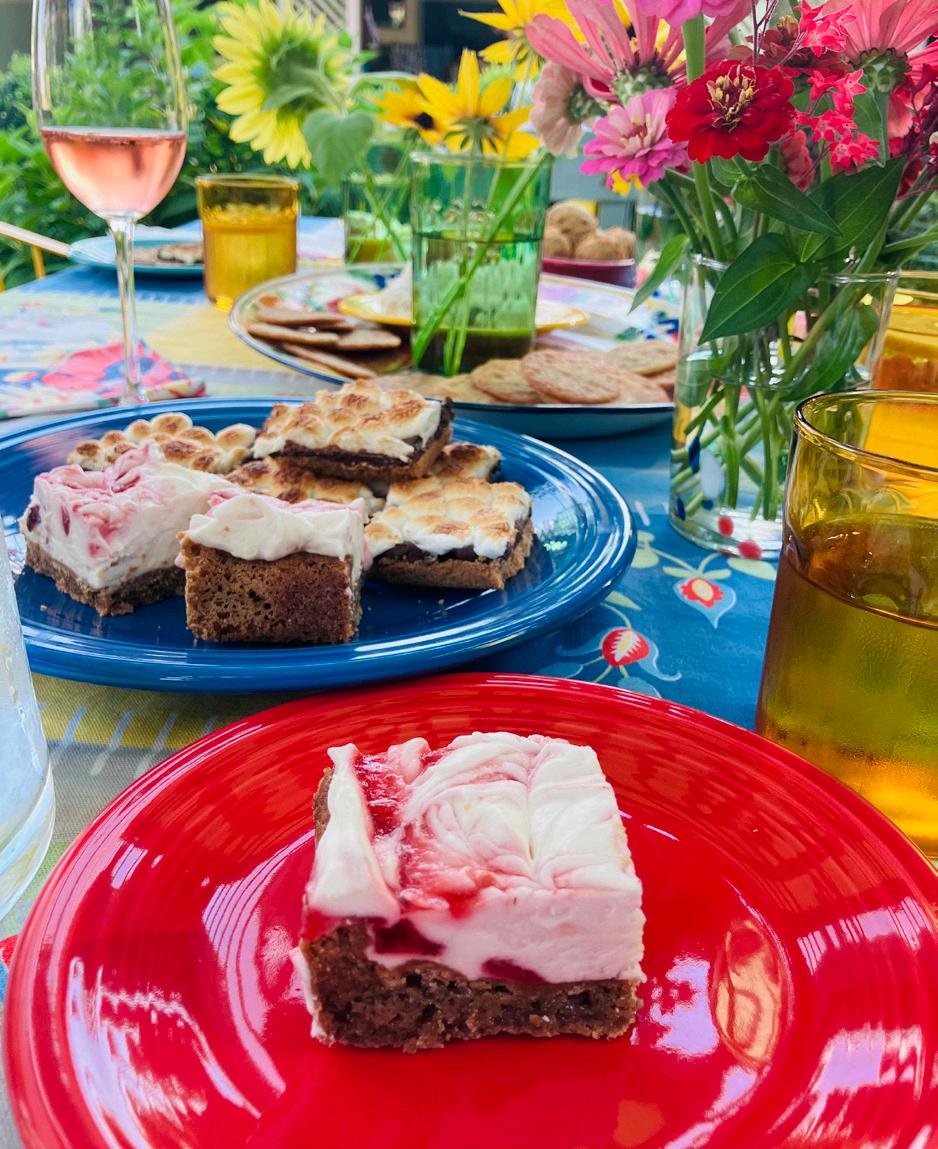
It’s quite a stretch to call these cookies but we’re including them anyway: with a base the consistency of a brownie, and a light as air cream cheese frosting swirled with bright strawberry jam, they land somewhere between cheesecake, a bar, and a snack cake. They’d be fantastic with Champagne, lakeside optional. You can substitute a 9 x 9 in. pan, shorten your cooking time by about 5 min.. The result will be slightly thinner, chewier blondie.
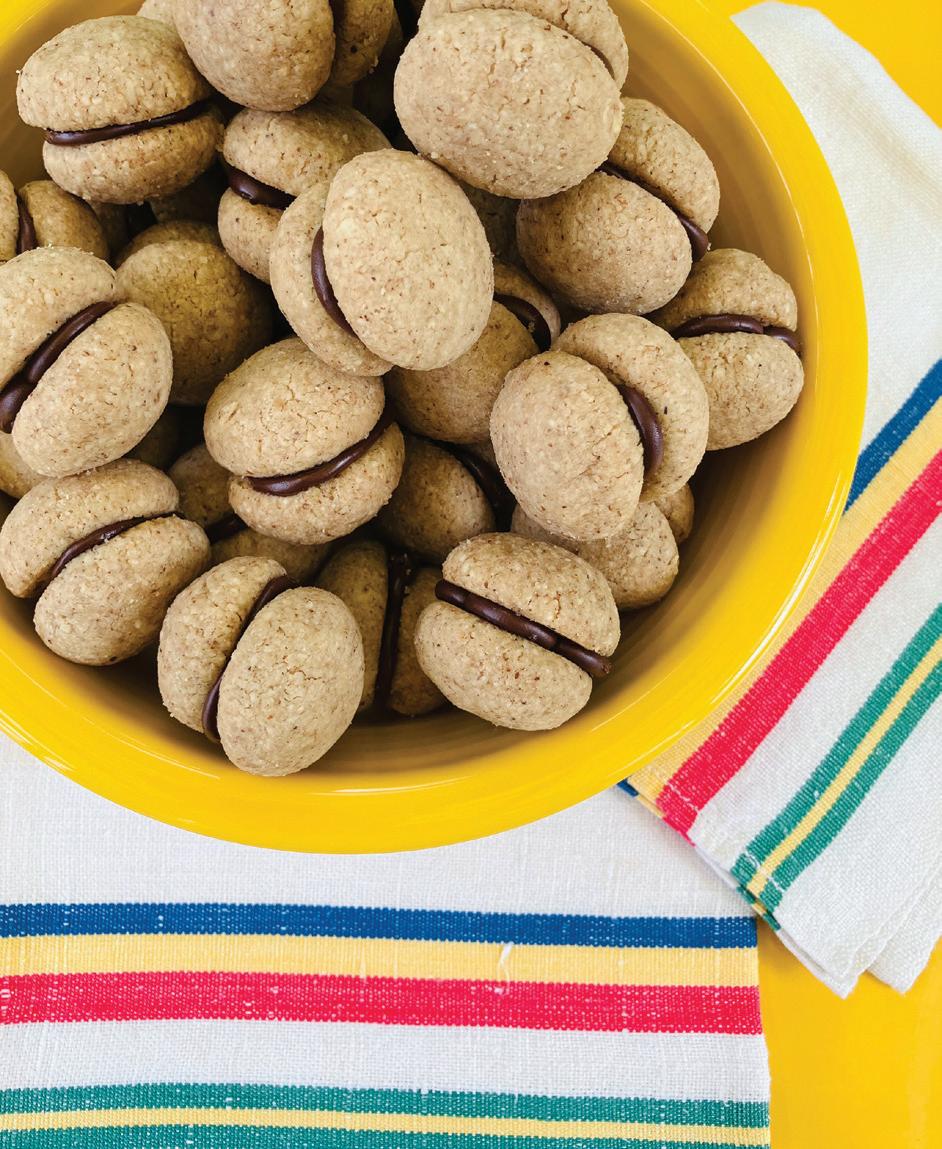
2 c. hazelnuts (320 g.)
1 c. granulated sugar (100 g.)
1/2 tsp. kosher salt
11/2 c. AP flour (188 g.)
14 T. unsalted butter, cut into 1/2 in. pieces and chilled (slightly less than 2 sticks)
1 T. espresso powder
5 oz. dark chocolate chips or discs (145 g.)
1 Preheat the oven to 400°. Spread the hazelnuts on a rimmed baking sheet in a single layer. Roast until golden brown and their skins start to crack, about 10 min. Cool slightly then rub back and forth against each other remove the skins. Not all the skins will come off, which is fine. Discard the skins and allow the nuts cool completely.
MAKES 60-70 sandwich cookies
PREP TIME 40 min. + chill time
BAKE TIME 18-20 min.
EQUIPMENT food processor, extra-small cookie scoop (#110, 1 tsp. or 12 g.)
2 Combine the nuts, sugar, espresso powder and salt in a food processor fitted with a metal blade. Process until the hazelnuts are finely ground. Scrape down the sides of the bowl and sprinkle in the flour. Pulse to combine. Add the butter and process until a soft dough forms.
3 Move dough to a small bowl, cover, and refrigerate for an hour +.
4 Lower oven to 325°. Racks should be in the center of the oven. Line 2 cookie sheets with parchment paper.
5 Portion dough using an extra-small cookie scoop or 1 tsp. measure, placing dough balls 1 in. apart; they will not spread out as they cook.
6 Bake cookies, rotating baking sheets top to bottom and back to front halfway after 10 min., bake another 10 min., cookies will not brown much but will look dry on top. Transfer pans to wire racks and let sit for a few min. until cookies set up. Remove cookies from baking sheet and let cool completely.
7 Lower oven to 200°. Count how many cookies you have. Set aside half of the cookies and turn half of them upside down (flat side up) on a wire rack fitted into a cookie sheet. Place 3-4 chocolate chips or a single chocolate disk on each cookie. Heat in the oven until the chocolate is soft to the touch (chocolate chips will hold their shape so be careful not to overcook). Remove tray from the oven and place on another wire rack to cool slightly.
8 Working quickly, sandwich each chocolate-covered cookie with a non-chocolate covered cookie, flat sides together. Let cool completely.
9 Store cookies in an airtight container at room temp. for up to a week or freeze.
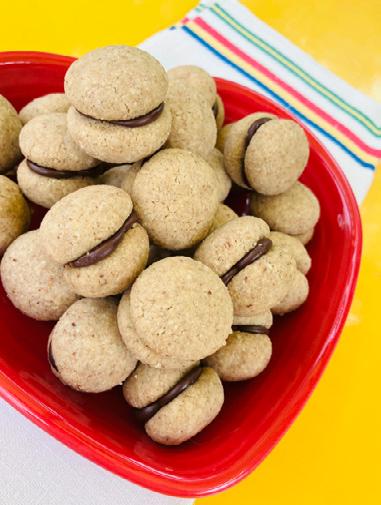
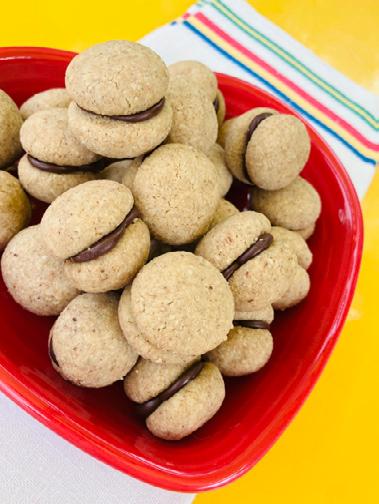
*Sealed with a kiss. The most charming little cookie from Italy with a name, Baci di Dama that translates as “ladies kisses.” We’ve added a splash of espresso to the delicate hazelnut dough and simplified the process for melting the chocolate prior to sandwiching. These cookies are time-consuming but not difficult to make and totally worth the effort.
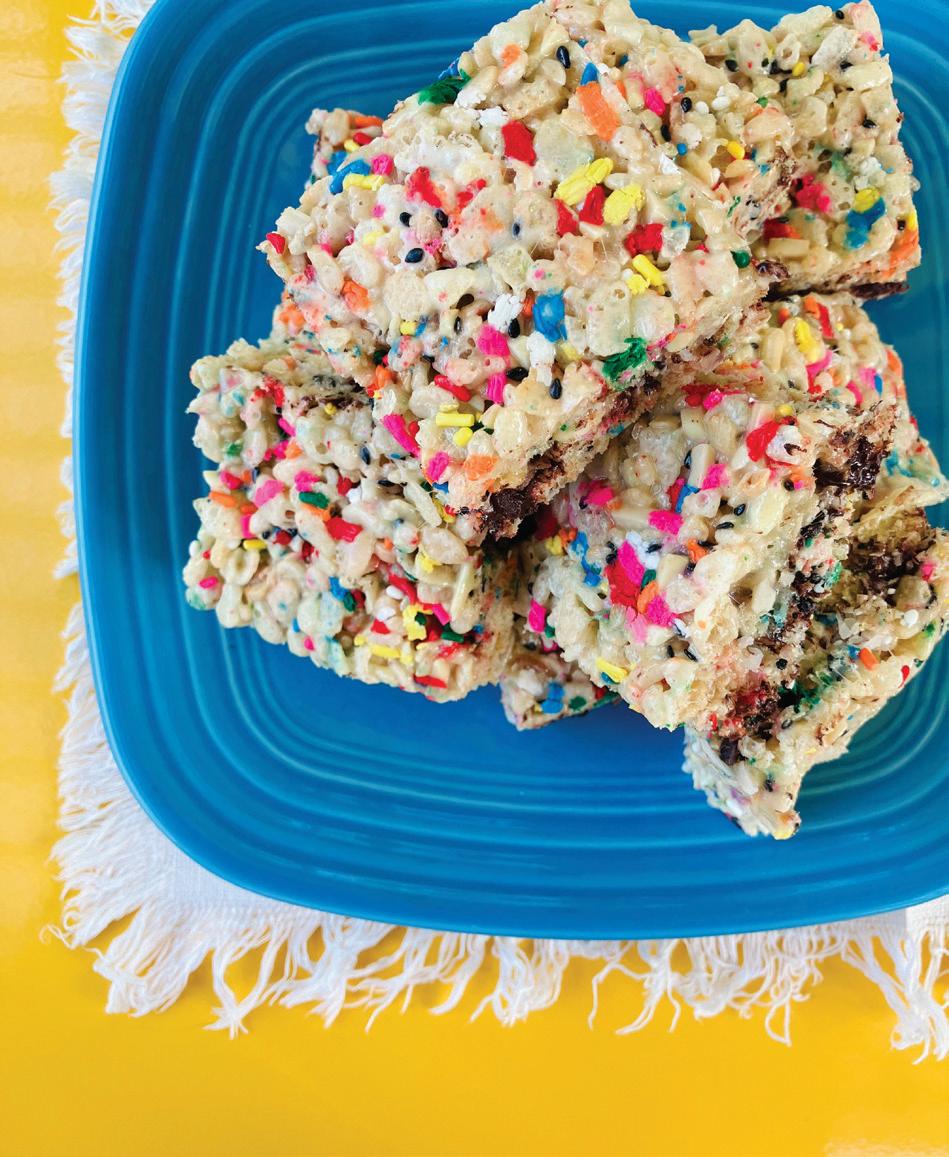
5 c. crispy rice cereal (150 g.)
1/2 c. sliced, blanched almonds or pistachios, chopped (80 g.)
1/2 c. sweetened, shredded coconut (43 g.)
40 jet-puffed marshmallows (300 g.)
1/4 c. unsalted butter (1/2 stick)
4 T. birthday sprinkles
2 T. sesame seeds
MAKES 16 bars
PREP TIME 30 min.
BAKE TIME 15 min.
1 Line an 8 x 8 in. (or 9 x 9 in.) in. baking pan with parchment.
2 Toast almonds in a small pan until golden brown.
3 In a large bowl combine cereal, 3 T. birthday sprinkles, and sesame seeds.
4 In a large pan, preferably non-stick, melt 2 T. butter over medium heat, then stir in 20 (or half) of the marshmallows. When the marshmallows are melted, working quickly, add half or 21/2 c. of the cereal mixture, stir until just combined, then press the mixture into the bottom of the baking pan. Sprinkle with coconut and chocolate and press again using the palm of your hand to flatten as much as possible. Wipe out the pan and return to the stovetop.
5 Add nuts to remaining cereal mixture. Heat remaining butter and marshmallows until melted and quickly add cereal and nuts, stirring until just combined. Scoop into the baking pan over chocolate and coconut. Sprinkle with remaining 1 T. sprinkles. Press the top of the mixture with your palm until flat and even. Cool completely.
6 Cut into 16 squares and serve at room temp.
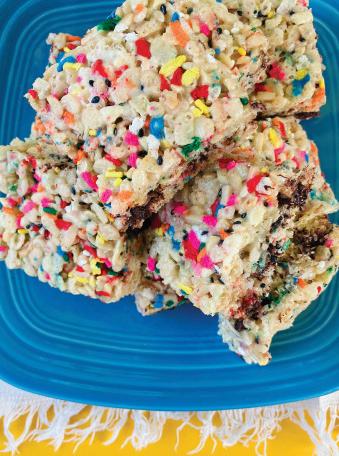
Riffing on the classic Rice Krispy Treat is nothing new; this version is inspired by the recent trend of “birdseed bars,” a healthy-ish nut and seed version served at coffee shops. We add colorful birthday sprinkles and sweetened coconut to bring up the fun factor while maintaining the savory crunch of almonds and sesame.
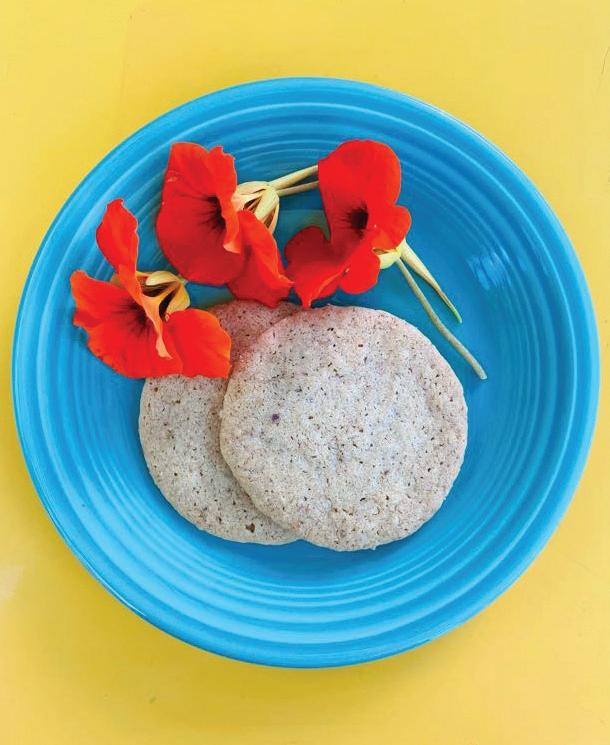
MAKES 36-40
PREP TIME 30 min. for cookies
BAKE TIME 20-24 min.
EQUIPMENT food processor, stand mixer, 11/2 or 2 in. circle cookie cutter
1 c. old-fashioned oats (80 g.)
1/2 c. pecans (40 g.)
11/2 c. AP flour (188 g.)
11/2 tsp. kosher salt
1 tsp. baking soda
1 c. unsalted butter, room temp. (2 sticks)
1 c. granulated sugar (200 g.)
2 T. heavy cream or whole milk
2 tsp. maple syrup
1 In the bowl of a food processor, pulse oats and pecans until the nuts are finely chopped. Add flour, baking soda, and salt and pulse a few more times to blend.
2 In a stand mixer fitted with the paddle attachment, beat butter, and sugar in a medium bowl, scraping down sides and bottom of bowl occasionally, until creamy.
3 Add cream or milk, maple syrup, beat until combined, about 1 min. Add flour mixture and mix until no streaks of flour remain, dough will be stiff and sticky.
4 Split dough into 2, and place each half on a piece of parchment. Cover with another piece of parchment and roll to 1/4 in. thickness. Repeat with remaining dough. Refrigerate until firm, approx. 30 min.
5 Preheat oven to 325°. Racks should be in the center of the oven. Line 2 cookie sheets with parchment paper.
6 Cut cookies with cutter and move quickly to sheets, leaving at least 1 in. between cookies as they will spread. (Pop the dough back in the fridge if it gets too warm and starts sticking.). Bake cookies, rotating baking sheets top to bottom and back to front halfway after 10-12 min., bake another 10-12 min., cookies will be golden brown on the edges. Transfer pans to wire racks and cool completely.
7 Re-roll scraps on new parchment paper, refrigerate, and repeat cutting and baking until you’ve used up most of the dough.
8 Store cookies in an airtight container at room temp. for up to a week or freeze.
This British biscuit is understated but don’t let that deter you, this cookie is a yummy crumbly, crunchy oat and nut sandie. Our version blitzes oats and pecans for a more refined texture than the original. If you can find it, substitute Lyle’s Golden Syrup for the maple syrup. And if you want to dress them up, make them into Woodchucks – recipe follows.
1 Make Hob Knobs as directed. Once all the cookies have cooled, consolidate them all on two cookie sheets to make topping easier.
2 Combine the butter, brown sugar, corn syrup and salt in a small saucepan. Clip the candy thermometer to the side of the pot. Bring to a boil over medium-high heat, stirring occasionally to melt the butter. Continue boiling, stirring occasionally, until dark brown and thickened to the consistency of caramel sauce, approx. 4 min. The candy thermometer should register 230°-240° degrees. Remove from the heat and carefully add the bourbon or vanilla. Stir until incorporated.
3 Moving very quickly (it helps to have an extra set of hands), spoon 1-11/2 tsp. of the caramel onto each cookie and sprinkle generously with nuts, pressing down lightly to adhere. If you’ve got a helper, have one person manage the caramel, and the other the nuts. Cool completely, topping will remain soft and gooey.
4 Store in a single layer (they’ll stick together if stacked) in an airtight container. Serve at room temp.
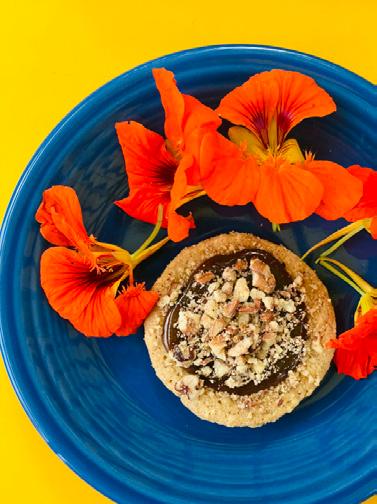
Don’t let the name fool you, Woodchucks only look like wood – they taste like pecan pie! The base is a nutty-oaty Hob Knob, topped with soft dark caramel and toasty pecans. You can also make them into sandwich cookies, just make them smaller and press the topping between two cookies.
21/2 c. AP flour (313 g.)
11/2 tsp. kosher salt
1/2 c. Dutch-process cocoa powder (50 g.)
11/2 c. unsalted butter, room temp. (3 sticks)
1 c. powdered sugar (110 g.)
1 large egg yolk
1 tsp. vanilla extract
MAKES 50-60
PREP TIME 45 min. + chilling
BAKE TIME 10-12 min.
EQUIPMENT stand mixer, rolling pin, 11/2 in. circle cookie cutter
1 Whisk 11/2 c. (200 g.) flour and 3/4 tsp. salt in a medium bowl. Whisk cocoa powder, remaining 1 c. (125 g.) flour, and remaining 3/4 tsp. salt in another medium bowl. One bowl will be your vanilla dough, the other, your chocolate dough.
2 Beat butter and powdered sugar in the bowl of a stand mixer on medium-high speed until light and fluffy, about 3 min., scraping down as needed. Add egg yolk (reserve egg white) and vanilla and beat until smooth. Divide mixture between the 2 bowls of dry ingredients (about 225 g./1+ c.).
3 Scrape vanilla mixture back into stand mixer bowl (save the mixing bowl) and beat on low speed just until combined. Repeat process with chocolate mixture.
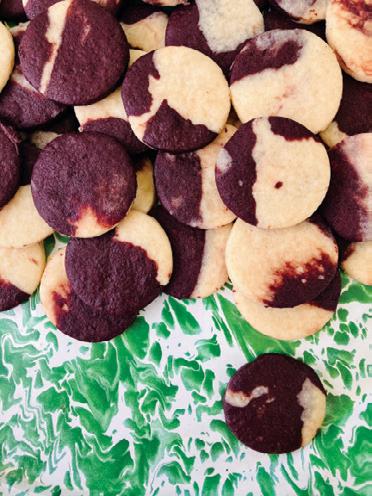
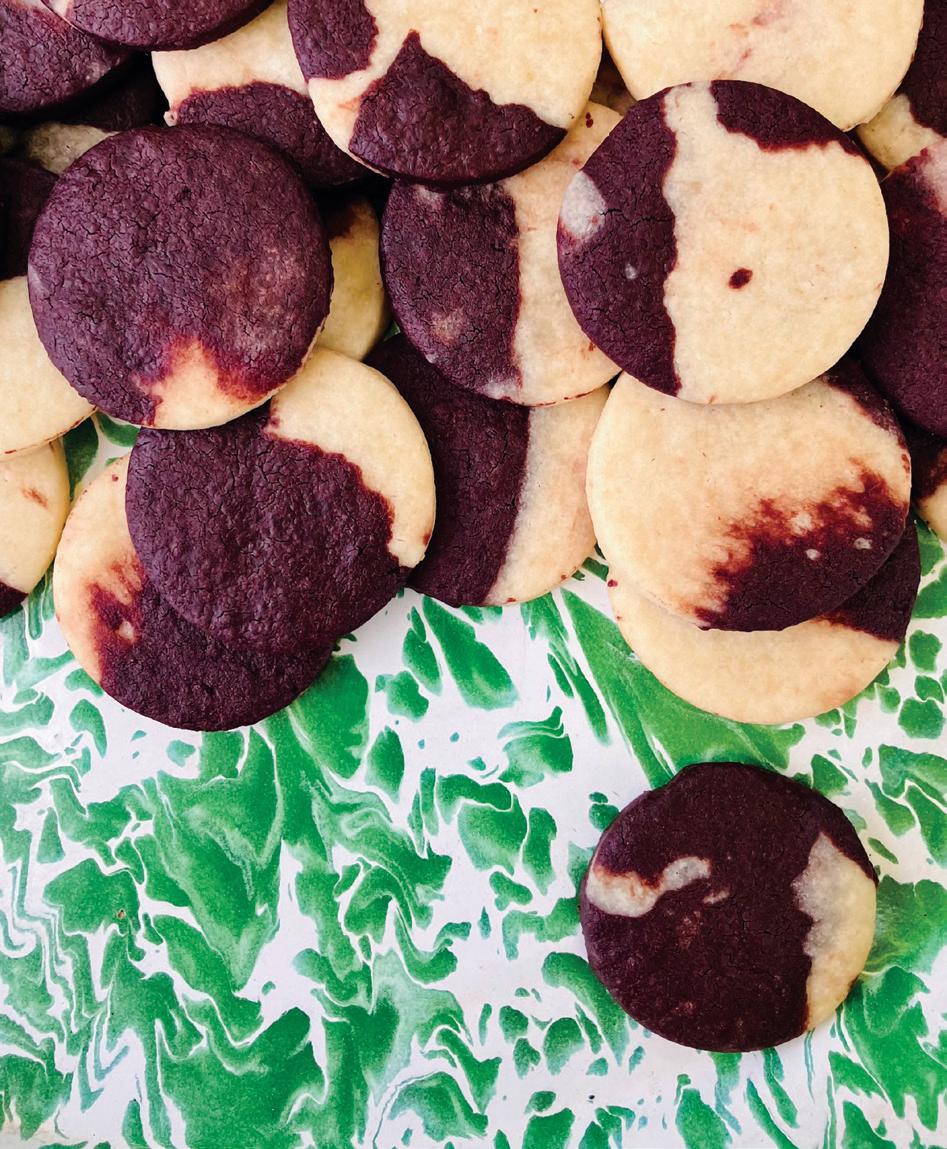
4 Form each dough into a soft disc and then split in two. Using 1/2 the vanilla disc and 1/2 of the chocolate, pinch off knobs of 1-2 in. long and flatten together with your palm on a piece of parchment, making a camouflage patterned disc. Place another piece of parchment over the top of the dough, and press to about 1 in. thick. Repeat with remaining dough. Chill until firm, 30+ min.
5 Preheat oven to 325°. Racks should be in the center of the oven. Line 2 cookie sheets with parchment paper.
6 Roll each disc to 1/4 in. thickness. Cut cookies with a cutter and move quickly to sheets, they won’t spread much. (Pop the dough back in the fridge if it gets too warm and starts sticking.) Bake cookies, rotating baking sheets top to bottom and back to front halfway after 5 min., bake another 4-5 min., vanilla parts will be just starting to brown around the edges. Transfer pans to wire racks until cool enough to move from sheets to racks.
7 Press offcuts together, re-roll and refrigerate. The dough will get more blended and swirled as you go. Bake, then cool completely on racks.
8 Store cookies in an airtight container at room temp. for up to a week or freeze.
What will your Choco-blots reveal? That you’re a sophisticated cookie baker with an artistic flair and a fanatic for flavor! Two shortbread doughs, vanilla and chocolate, are fused and swirled to elegant effect, making a perfect blend of light but rich and tender-crisp.
MAKES 30-60 depending on size
PREP TIME 21/2 hrs. (includes resting)
BAKE TIME 1hr.
EQUIPMENT stand mixer, piping bag, #12 round pastry tip, #32 open star tip, food processor, baker’s dusting wand or fine sieve
2 large egg whites
1/4 tsp. cream of tartar
1/2 c. plus 1 T. superfine sugar (120 g.)
5 oz. white chocolate chips (145 g.)
1 oz. freeze dried strawberries (28 g.)
1 1 hr. before you’re ready to make your meringues, whisk the egg whites with the cream of tartar in the bowl of a stand mixer, cover with saran wrap and let sit at room temp. Line 2 large baking sheets with parchment paper.
2 Beat egg white mixture on medium speed until foamy. Beat in 1 T. of sugar, increase speed to medium-high and continue beating until stiff peaks form. Gradually add remaining sugar and beat until mixture is very stiff and glossy.
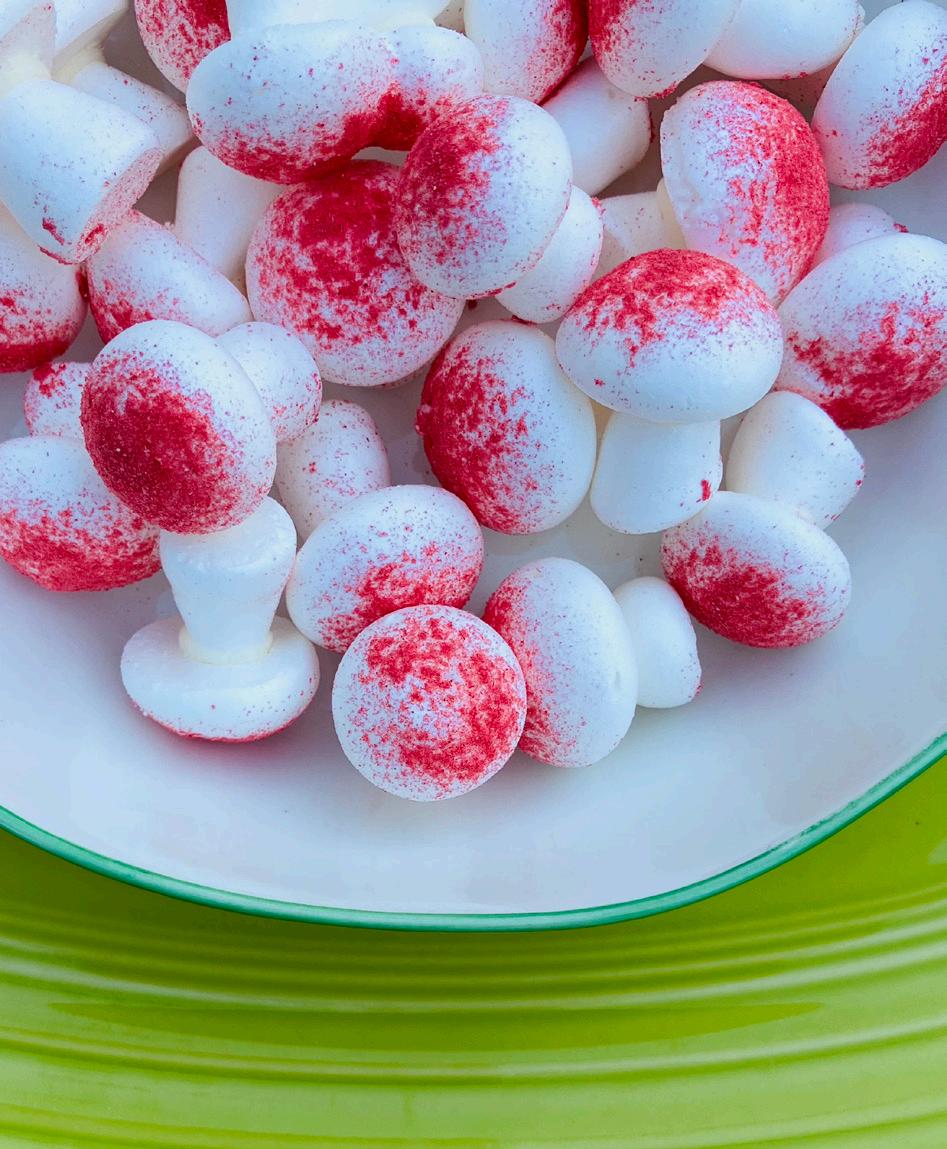
3 Spoon meringue into a pastry bag fitted with round pastry tip. Holding bag vertically, about 1/2 inch above baking sheet, pipe meringue into mounds, ranging in size from about 1-1 1/2 in. in diameter, to resemble mushroom caps. Smooth peaks on top with a damp finger.
4 Still holding the pastry bag vertically, pipe remaining meringue vertically into 1-1 1/4-inchlong lengths to form stems, (make different lengths), making each base about 1 inch in diameter and tapering top end by pulling up on the bag. (Pipe extra caps and stems with any remaining meringue in case of breakage.) Make sure you’ve got an equivalent number of stems and caps.
5 Let the meringue dry on the counter for about an hr.. Preheat the oven to 200° with racks in upper and lower thirds.
6 Bake, switching position of sheets halfway through, until mushrooms caps are crisp and firm to touch, about 1 hr.. Turn off the oven, leaving meringues in oven, with the door closed, 30 min. more. Cool completely on racks.
7 Reheat oven to 200°. Using the star tip as a drill bit, twist a small hollow in the center of the underside (flat side) of each mushroom cap. Place a chocolate chip in each hollow and return cap, chip side up to the cookie sheet. When you’ve got all the caps filled with chips, pop back in the oven for 8-10 min. or until the chocolate is melty enough to press in the stems. Press a stem into each cap and let cool completely.
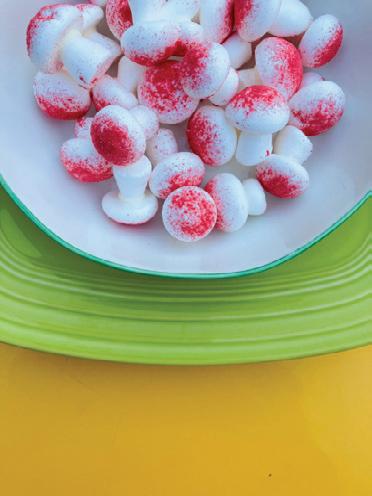
8 Place strawberries in the bowl of a food processor fitted with a metal blade. Pulse to a fine powder. Dust the tops of each mushroom with strawberry powder, using a baker’s dusting wand or a fine sieve.
9 Store airtight at room temp. indefinitely.
Meringue mushrooms are a classic addition to a Bûche de Noël, our version takes them out of a support role with enough style and flavor to stand on their own. And if you pipe them just right, they will stand up!
MAKES 46-50
PREP TIME 45 min. + chilling
BAKE TIME 12-15 min.
EQUIPMENT stand mixer, medium cookie scoop (#70, 2 tsp.-1 T., 16 g.), extra-small cookie scoop (#110, 1 tsp. or 12 g.)
21/2 c. AP flour (313 g.)
1/4 tsp. baking soda
1/4 tsp. kosher salt
11/2 T. poppy seeds
1 c. unsalted butter, room temp. (2 sticks)
3/4 c. granulated sugar (75 g.)
1 large egg
2 tsp. lemon juice
Zest from 1 lemon
3/4 c. lemon curd (173 g.)
1 Whisk flour, baking soda, salt and poppy seeds in a medium bowl. Set aside.
2 In the bowl of a stand mixer fitted with the paddle attachment, beat butter and sugar on medium speed, scraping bowl occasionally, until light and fluffy, 2-3 min. Add egg, lemon juice and zest, beat until fully incorporated, approx. 1 min. With mixer on low, add dry ingredients in stages, beating until just combined. Shape dough into a disk, wrap in plastic, and chill 1 hr. +.
3 Preheat oven to 350°. Racks should be in the center of the oven. Line 2 cookie sheets with parchment paper. Portion dough using a medium cookie scoop or 1 T. measure. Press your thumb or the bottom of a tsp. into the center of each cookie to make a well.
4 Bake cookies, rotating baking sheets top to bottom and back to front halfway, bake for 10-12 min. Transfer pans to wire racks, you may need to re-press the well in some of the cookies, while they are still warm, if they raise too much during baking. Cool completely.
5 Using an extra-small cookie scoop or a tsp., dollop curd into each cookie well.
6 Store cookies in an airtight container at room temp.
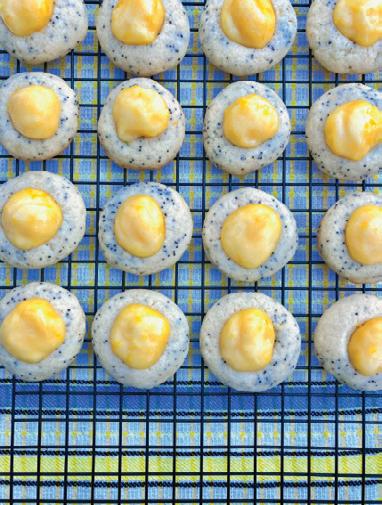
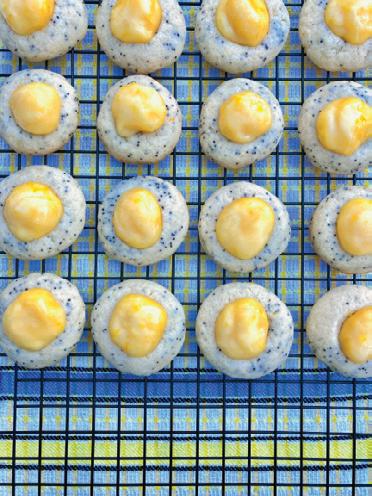
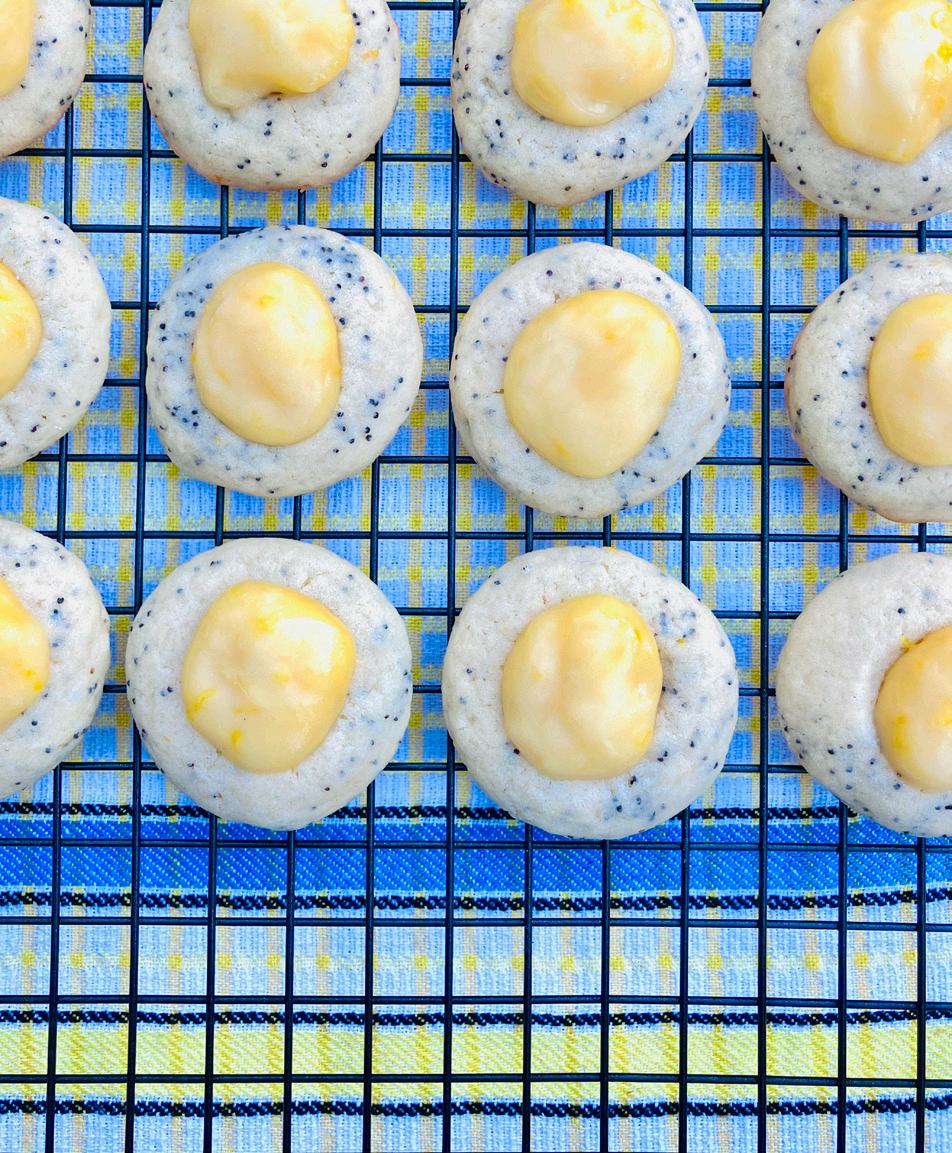
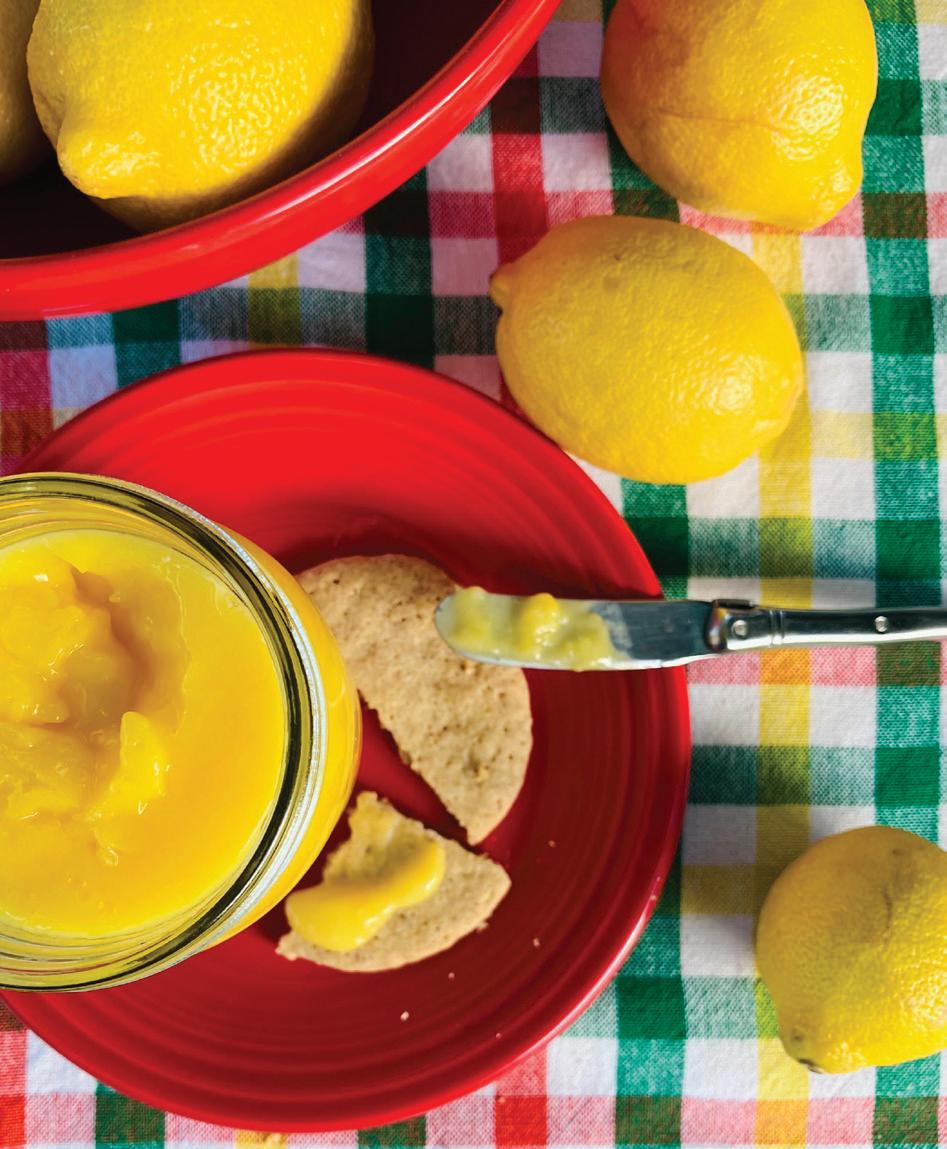
These cookies are sure to brighten your day! Cakey and crunchy thumbprints with a tangy dollop of curd, both the base and topping are bursting with lemon punch. Use a store-bought lemon curd, or any other citrus curd, or make your own, our recipe follows.
6 T. unsalted butter, room temp. (3/4 stick)
1 c. granulated sugar (200 g.)
2 large eggs
2 large egg yolks
⅔ c. fresh lemon juice (155 g.)
Zest from 2-3 lemons
1 In the bowl of a stand mixer fitted with the paddle attachment, beat butter and sugar on medium speed, scraping bowl occasionally, until light and fluffy, 2-3 min. Slowly add the eggs and yolks. Beat for 1 min. Add the lemon juice. The mixture will look curdled, but it will smooth out in cooking.
2 In a medium saucepan, cook the mixture over low heat until the butter melts and it no longer looks curdled. Increase the heat to medium and cook, stirring frequently, until it thickens, about 15 min. Be sure to scrape the bottom of the pan as it cooks as it thickens first closest to the heat. Heat to 170° or until it coats the back of a spoon.
MAKES 13/4 c.
PREP TIME 20 min. + cooling
BAKE TIME 12-15 min.
EQUIPMENT candy thermometer
3 Remove from heat and stir in the lemon zest. Transfer to a jar or glass container. Press plastic wrap on the surface to prevent a skin from forming. Chill in the fridge until thick and creamy.