how to utilize art department resources ensure the quality of tools and safety of others
GCSU DEPARTMENT OF ART
An introduction to the Georgia College and State University Art Department
ART DEPARTMENT STAFF
Department staff and fauclty alongside other student resources offered by the Department 3-4
DEPARTMENT EXHIBIT ETIQUETTE
A guide on viewing and respecting the gallery work of visiting artists and GSCU Students 5-6
2D DESIGN COURSE RESOURCES
A walkthrough of what 2D materials are offered to students and how to properly use them 7-8
PAINTING COURSE RESOURCES
PHOTOGRAPHY DARK ROOM
Comprehensive guide on how to use and respect the photo dark room
A walkthrough of painting materials offered to students and how to use them 9-12 13-16
17-20
DEVELOPING PHOTO FILM
The process of developing photo film using the department resources
DEPARTMENT MAC DEVICES
21-22
How to operate and efficiently use the mac computers located in the Ennis building
USING ADOBE SOFTWARE
23-24
25-26
Brief lists and descriptions of Adobe software available to every GCSU student on both school and personal devices
DEPARTMENT PRINTING
How to operate and print student works while maintaining print quality and reducing printer inefficiency
NEXT WEEKS EDITION
A small peak at nexts week’s edition and the topics to be covered 27-28
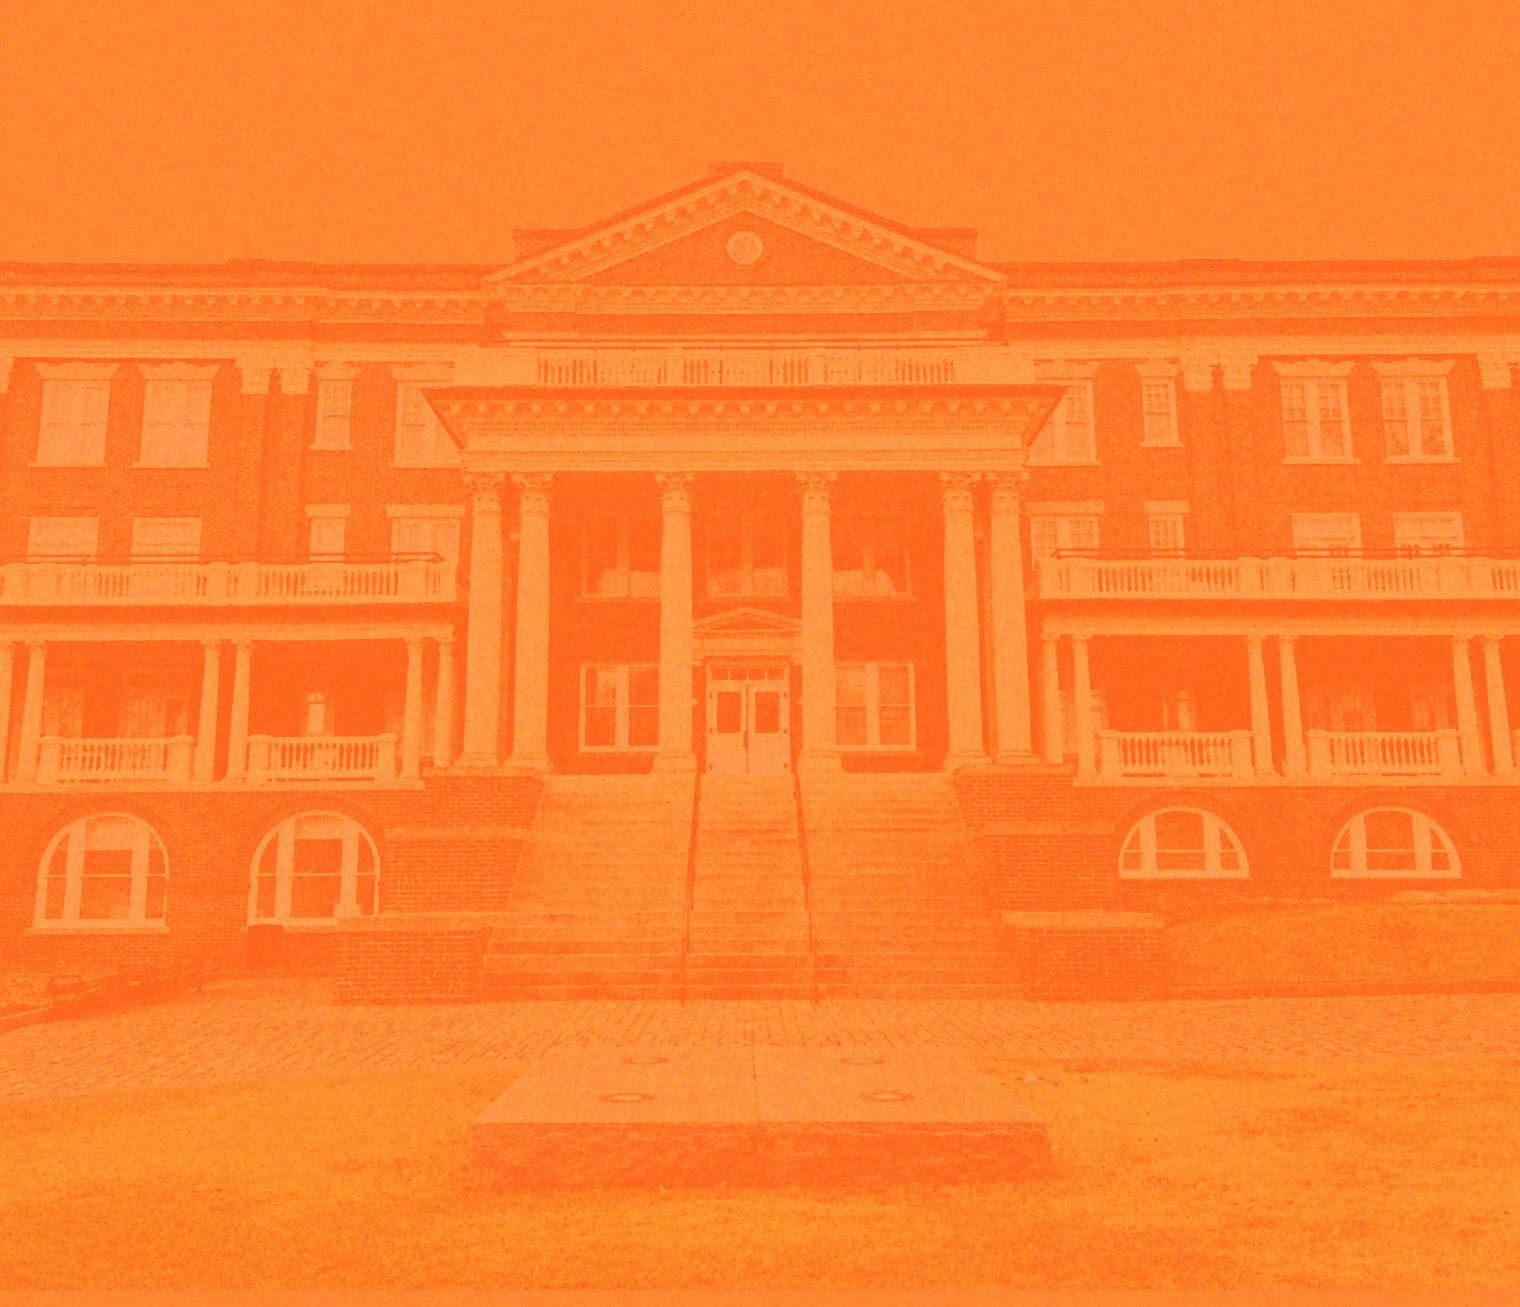
About the gcsu art department
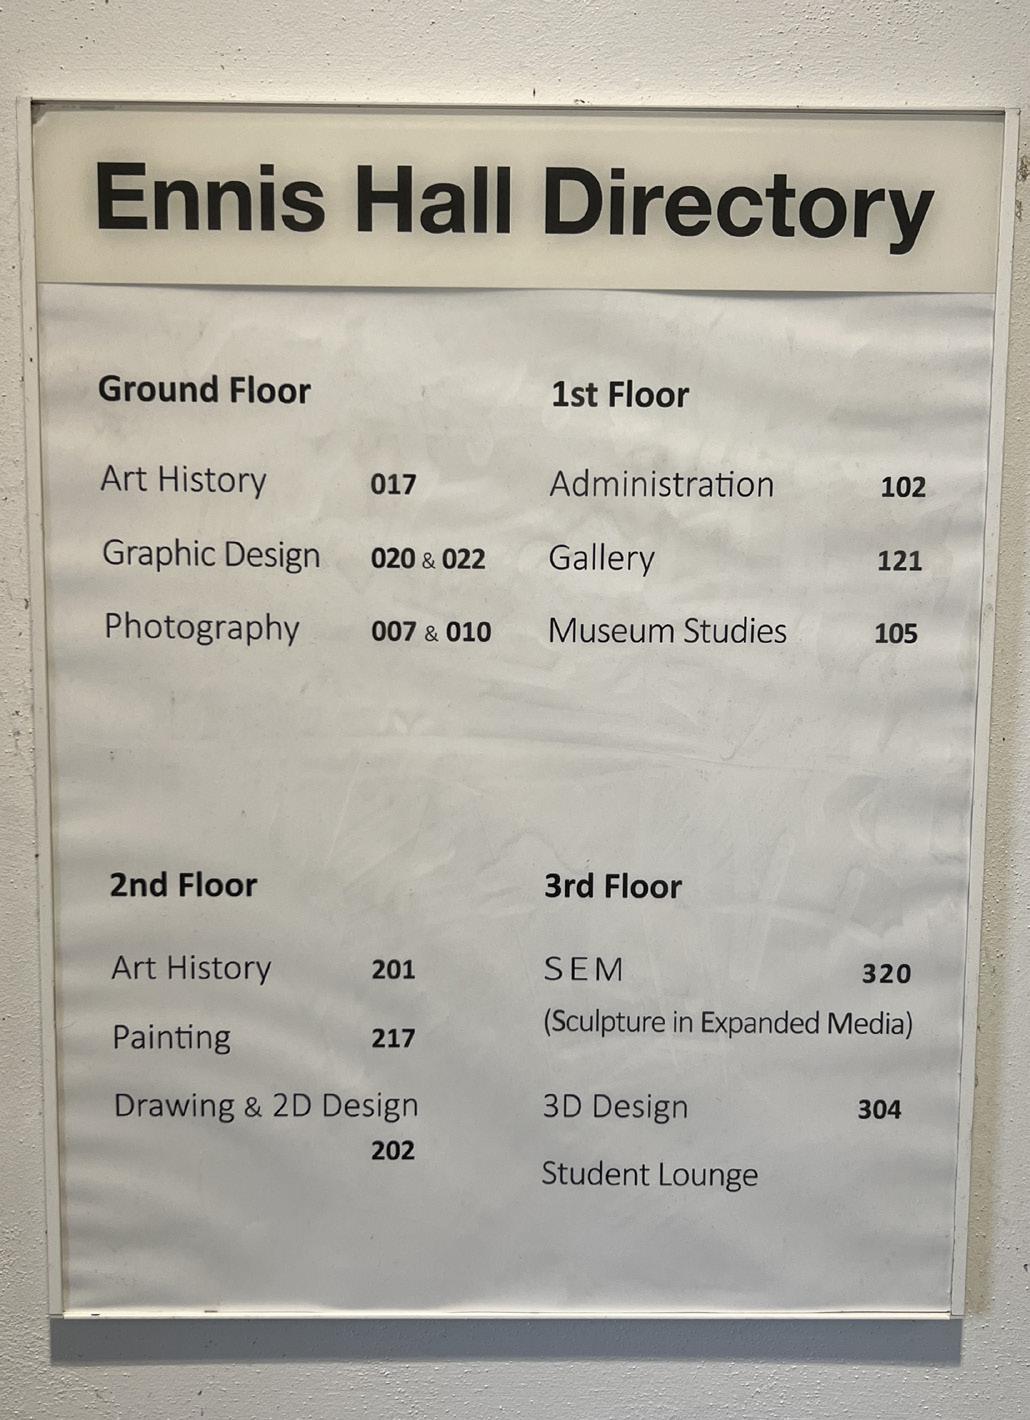
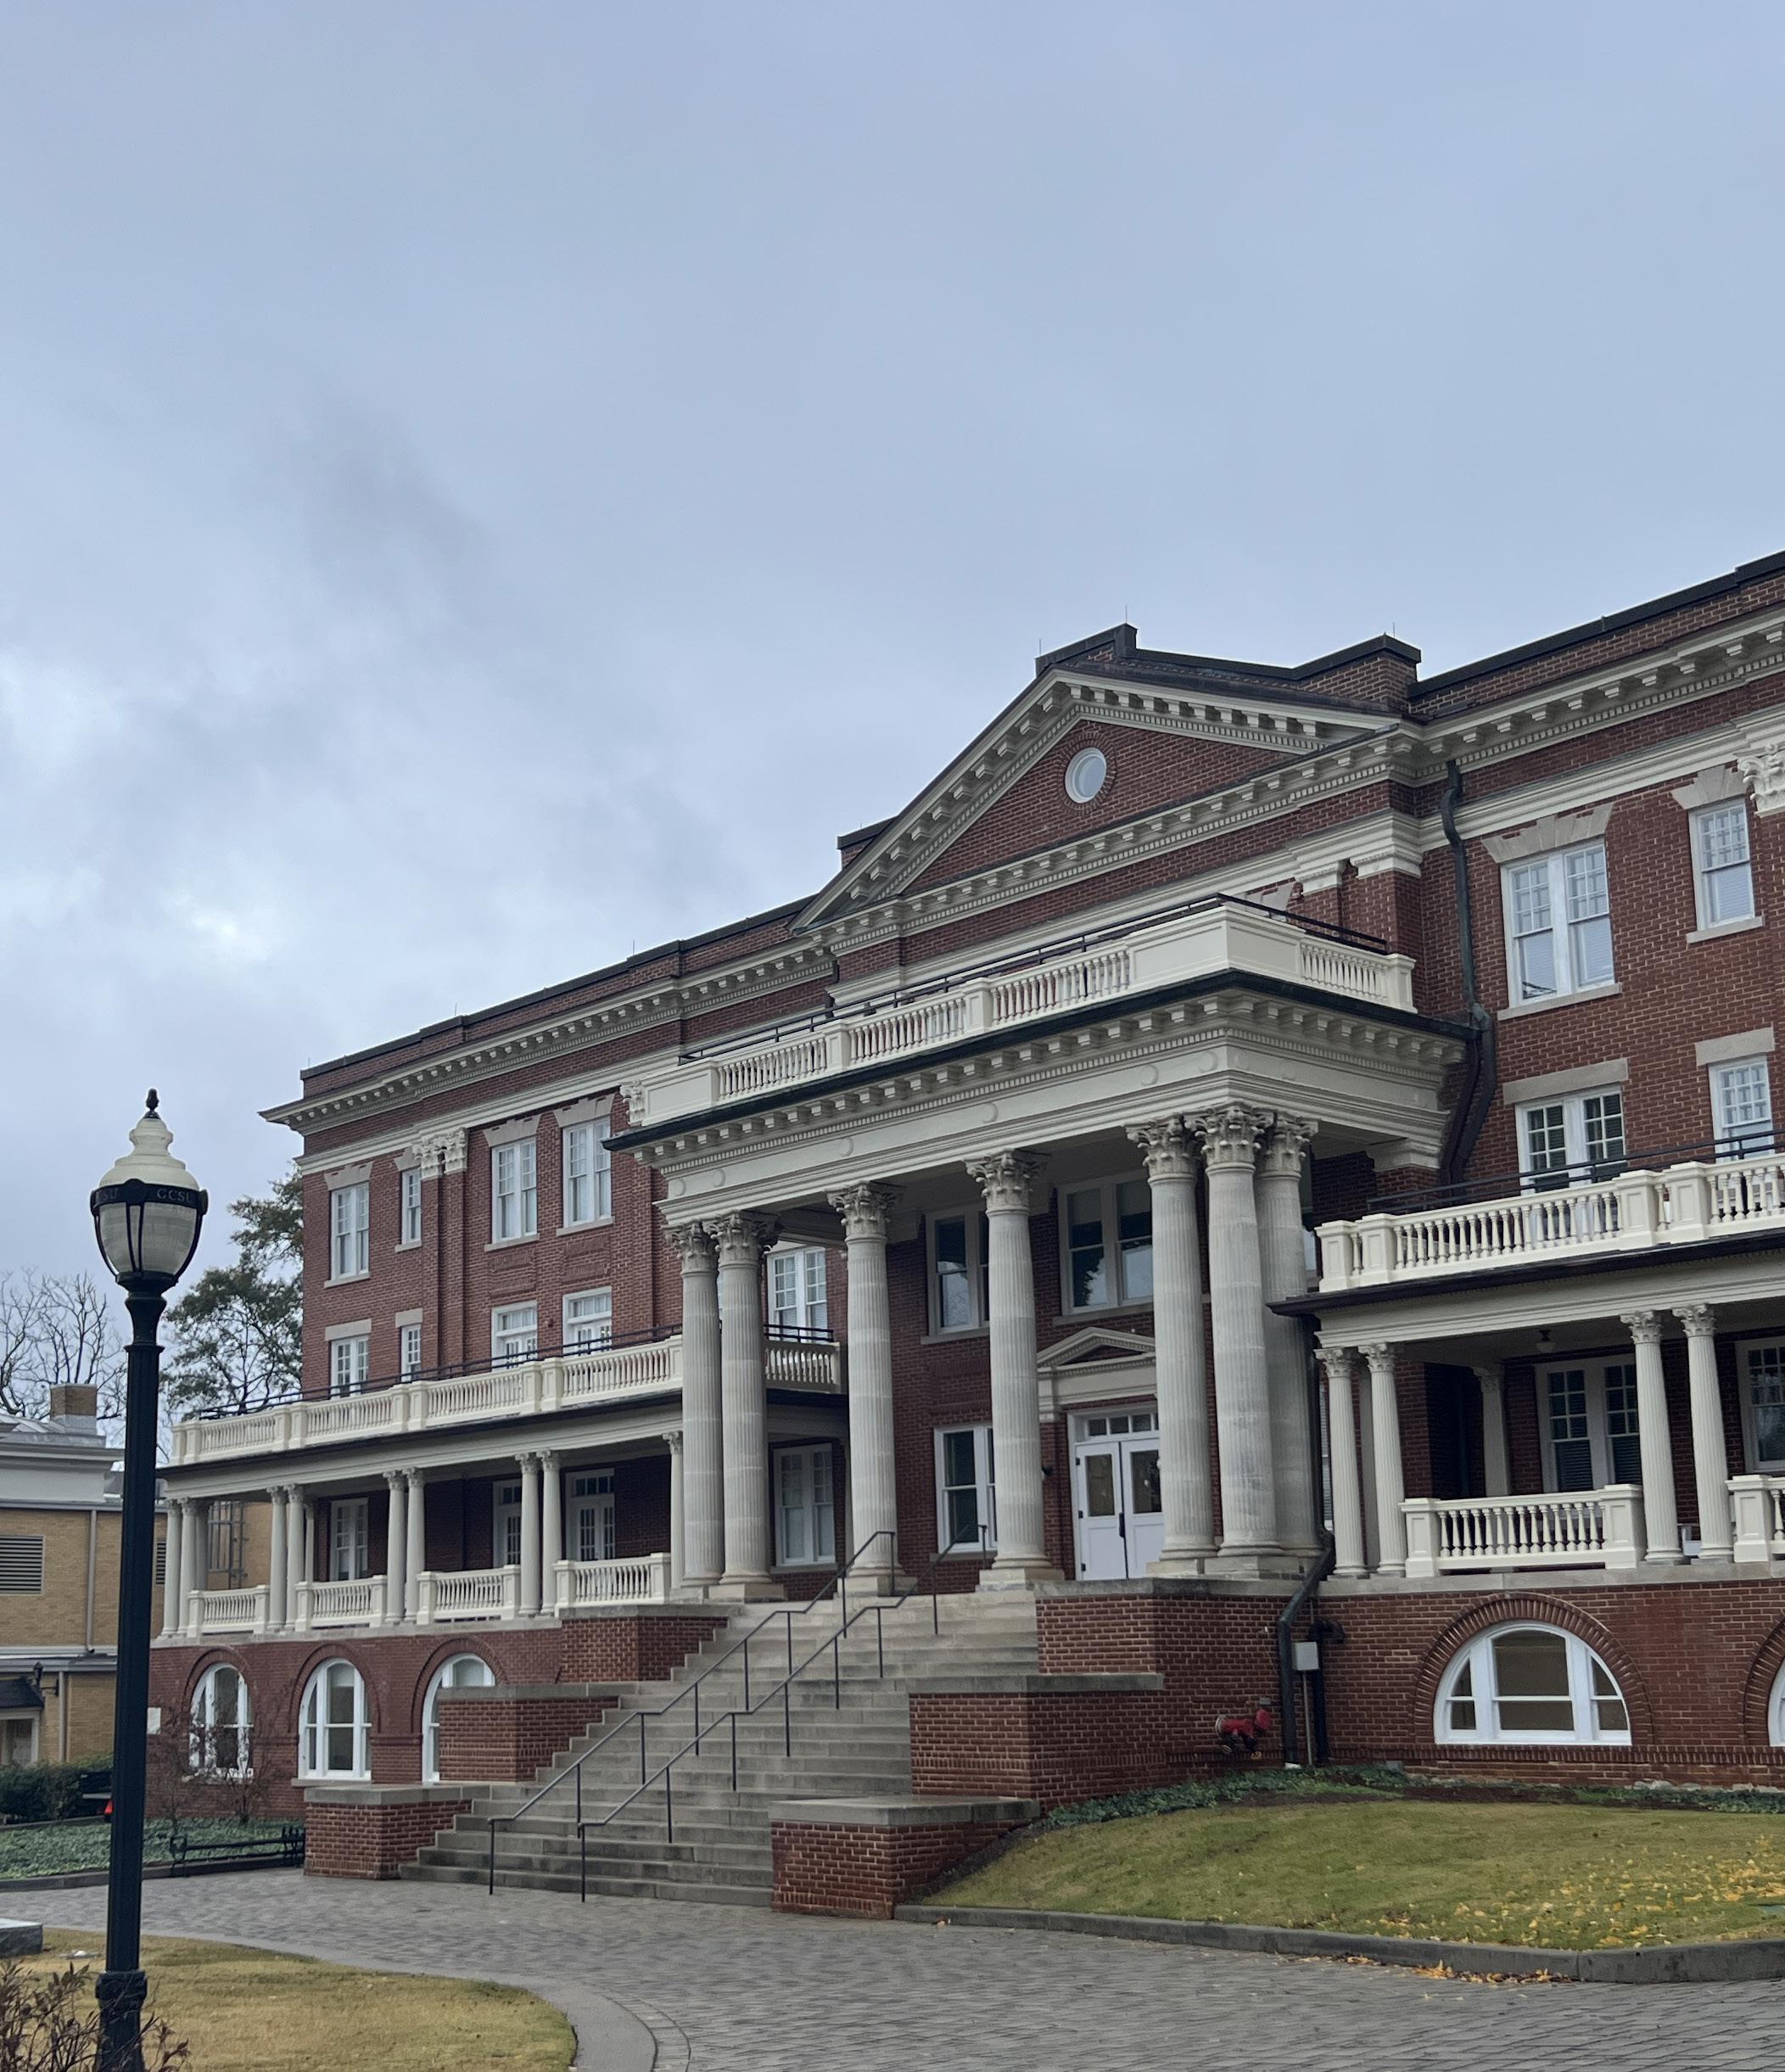
Dedicated in 1920 to Senator J. Howard Ennis (1873-1953) Ennis hall originally served as a residence hall for students attending Georgia College and State University. Several decades later a heavy renovation was performed on the building which was completed in 2014. The same year, in July the GCSU Department of Art made Ennis hall its new residency. Since then the department has continued to expand in both its staff and resources available to the enrolled students.
The goal of Georgia College & State University’s Art Department is to be there to prepare and guide students as art practitioners with the education, experience, and values to help their communities. Students are encouraged to engage in self reflection, artisanship, expression, values, community, politics, and what it means to be an artist.
Students interested in enrolling or currently enrolled have four concentrations as a bachelors of art. Those concentrations include Art History and Visual Culture, Fine Art Studio, Graphic Design, and Museum Studies. Alongside these concentrations students both art majors and non art majors can enroll into eight unique minors. Minors include Art History and Visual Culture, Ceramics, Graphic Design, Museum Studies, Painting, Photography, Printmaking, and Sculpture in Expanded Media.
department staff and faculty
The GCSU Art Department is made up of twelve different members of staff and faculty members. The art history and museum studies concentration is taught by Elissa Aurbach, Megan McNaught, Fadhili Mshana, and Ruben Muñoz. The remaining faculty work in studio art concentrations which are taught by Valeria Aranda, Abraham Abebe, Seth Cook, William Fisher, and Curtis Stewardson.
Elissa Auerbach PhD
Professor of Art History
301 Ennis Hall, elissa.auerbach@ gcsu.edu
Ruben Yepes Muñoz PhD
Assistant Professor of Art History
306 Ennis Hall, ruben.yepes@gcsu. edu
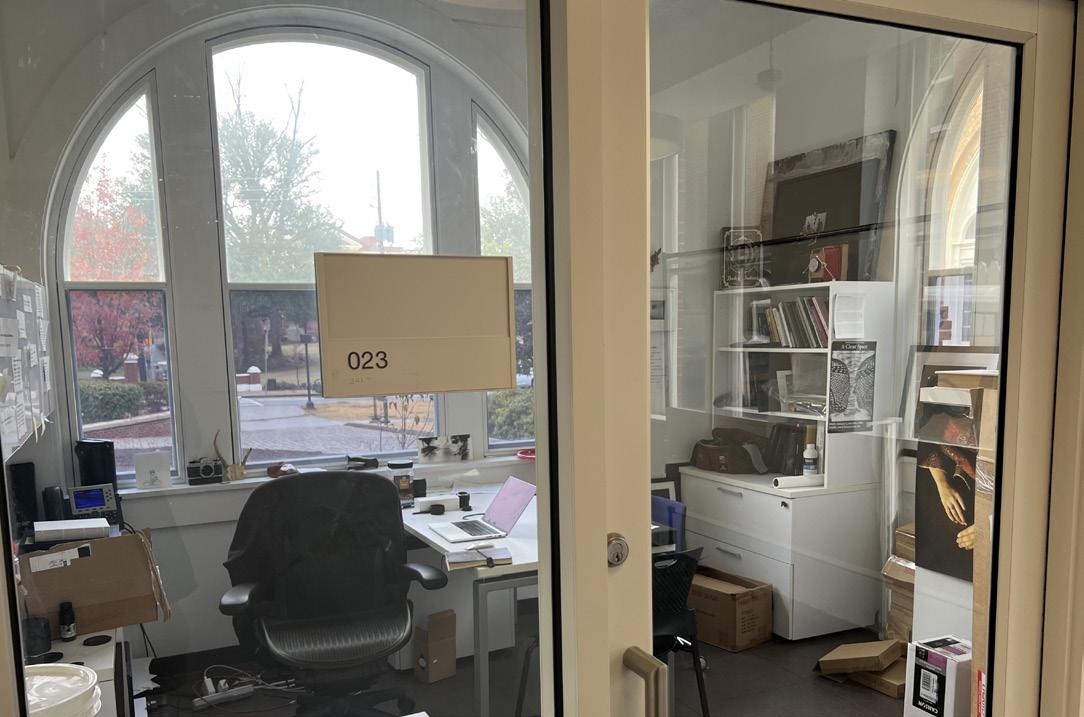
Seth Cook Lecturer
Photography 023 Ennis Hall, seth. cook@gcsu.edu
Megan McNaught Gallery Director and Lecturer of Museum Studies
107 Ennis Hall, megan.mcnaught@ gcsu.edu
Valerie Aranda Professor of Art, Drawing and Painting
218 Ennis Hall, valerie.aranda@gcsu. edu
William Fisher Professor of Art Miller Annex, william.fisher@gcsu. edu
Fadhili Mshana PhD
Professor of Art History
309 Ennis Hall, fadhili.mshana@ gcsu.edu
Abraham Abebe Associate Professor of Art, Graphic Design
110 Ennis Hall, abraham.abebe@gcsu. edu
Curtis Stewardson Ceramics Studio Technician curtis.stewardson@ gcsu.edu
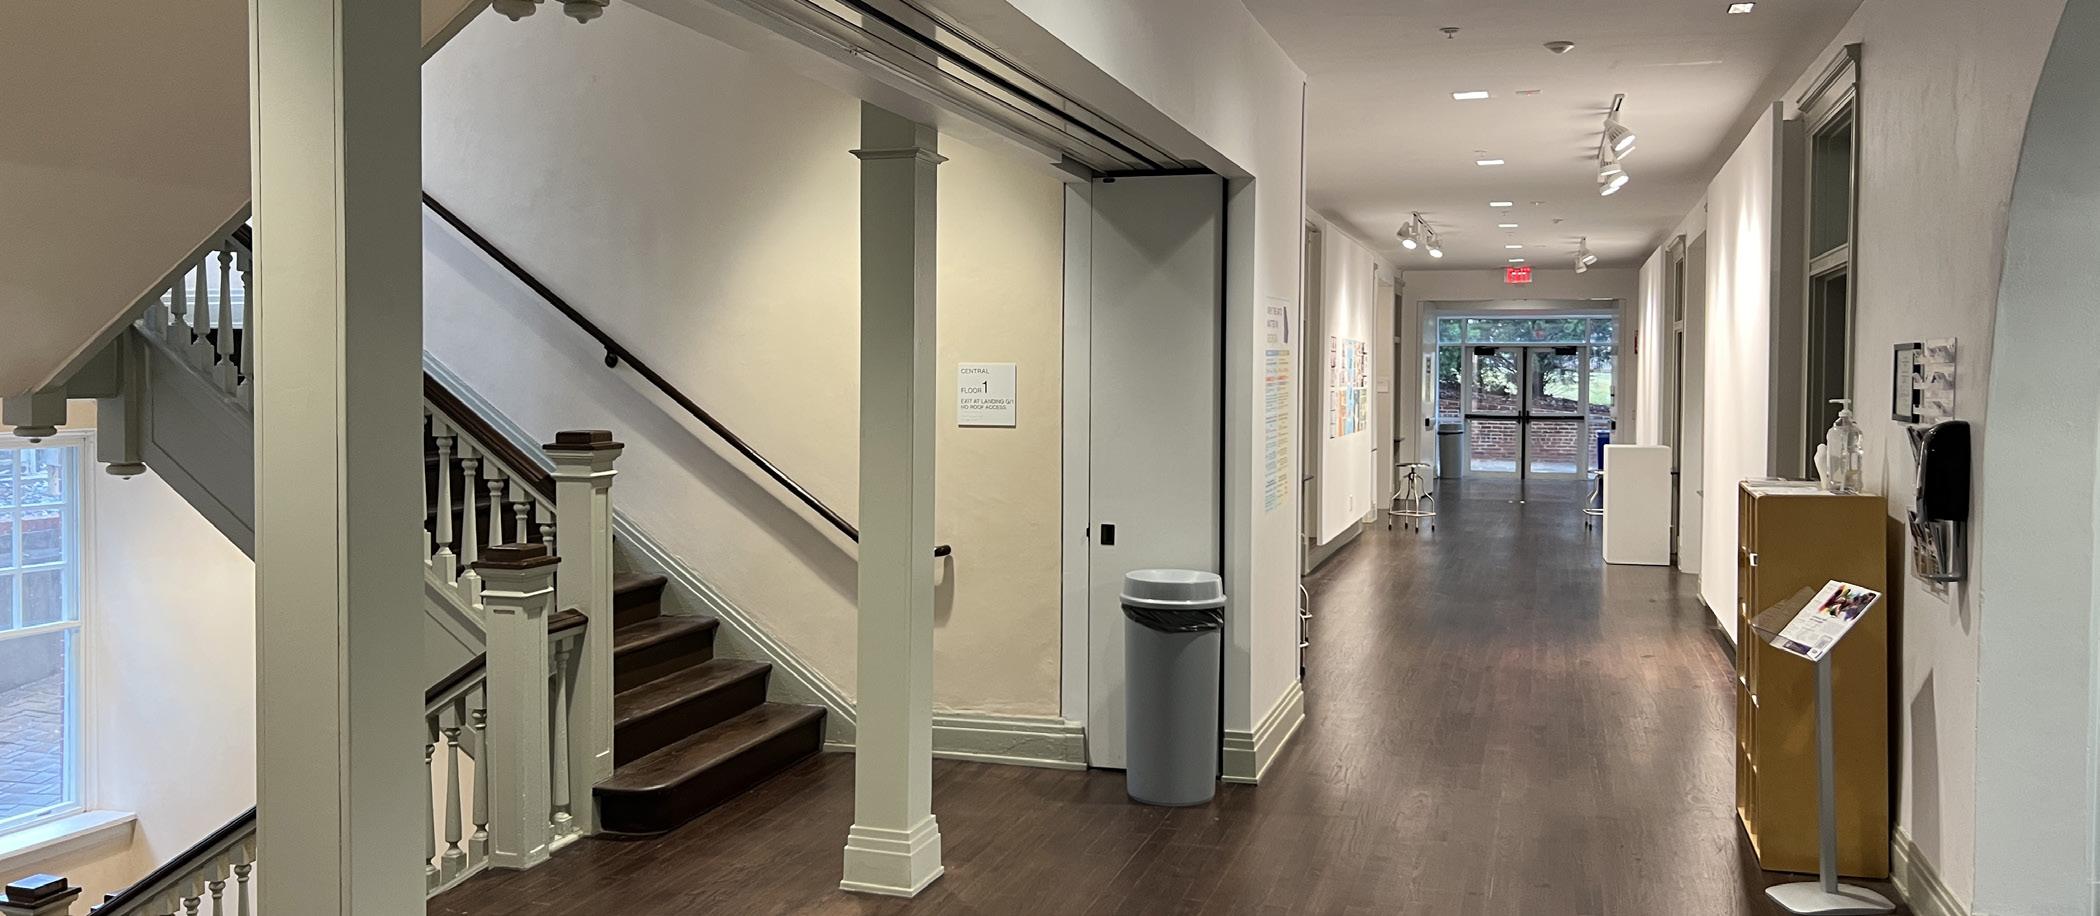
Ennis Secondary floor with faculty offices
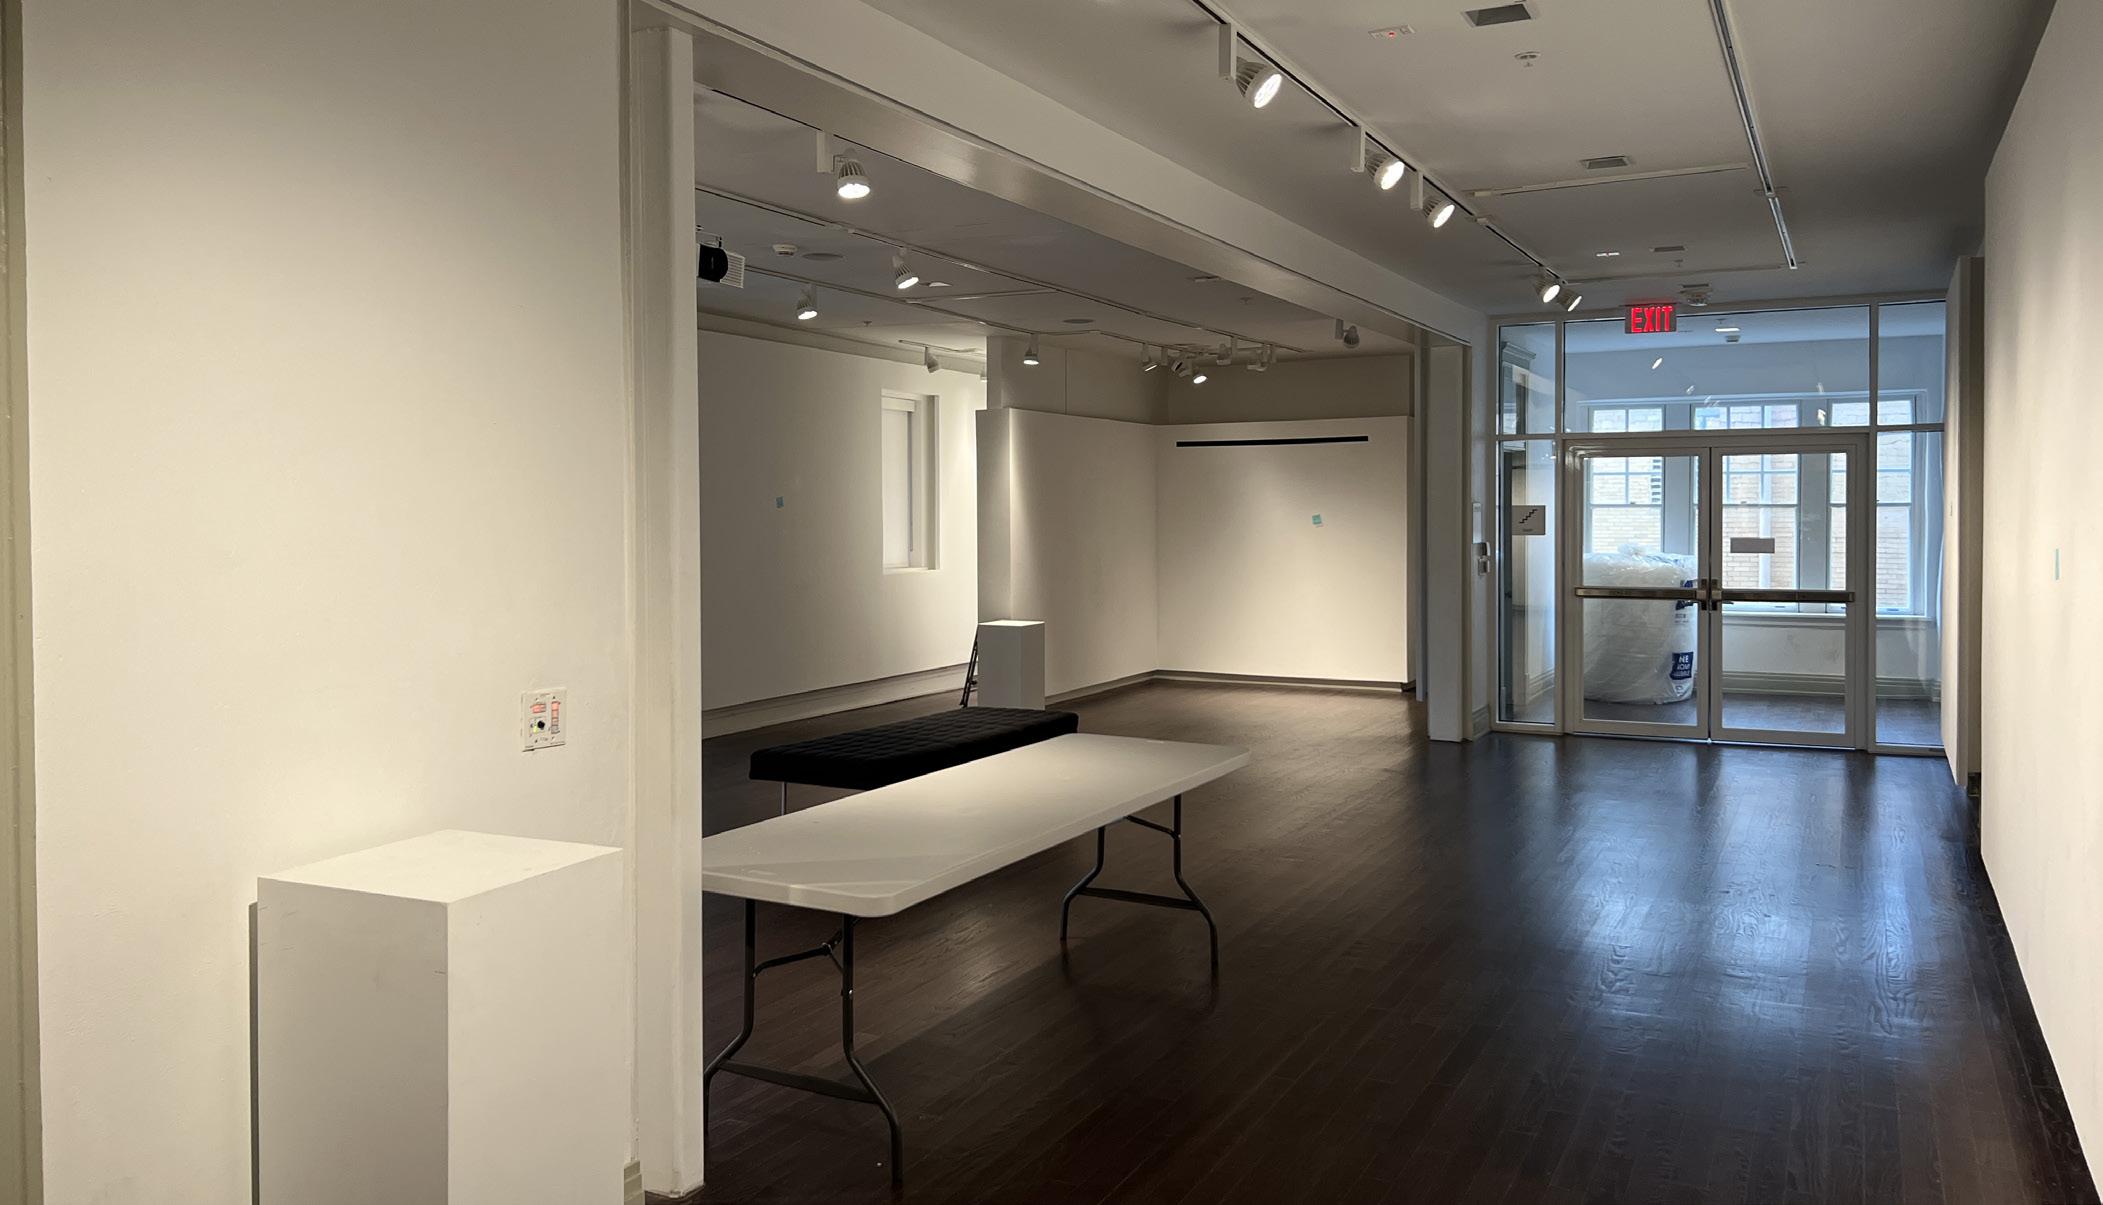
Leland Gallery
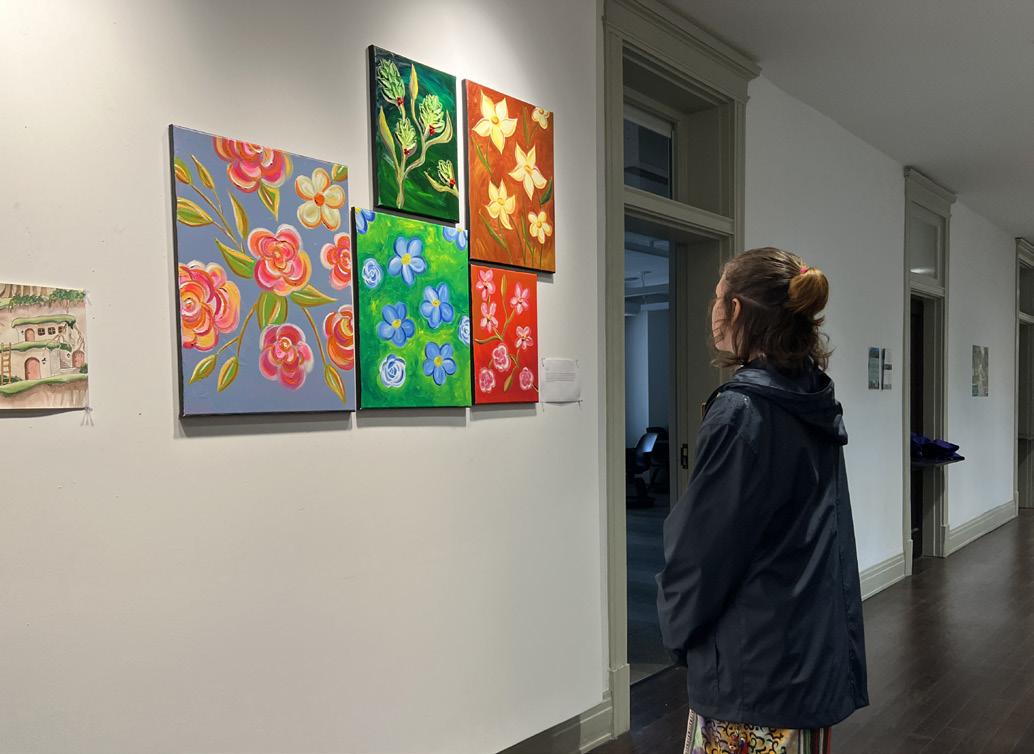
exhibit etiquette leland & underwood gallery
The GCSU Art Department owns two gallery spaces both in Ennis hall and on the school campus.
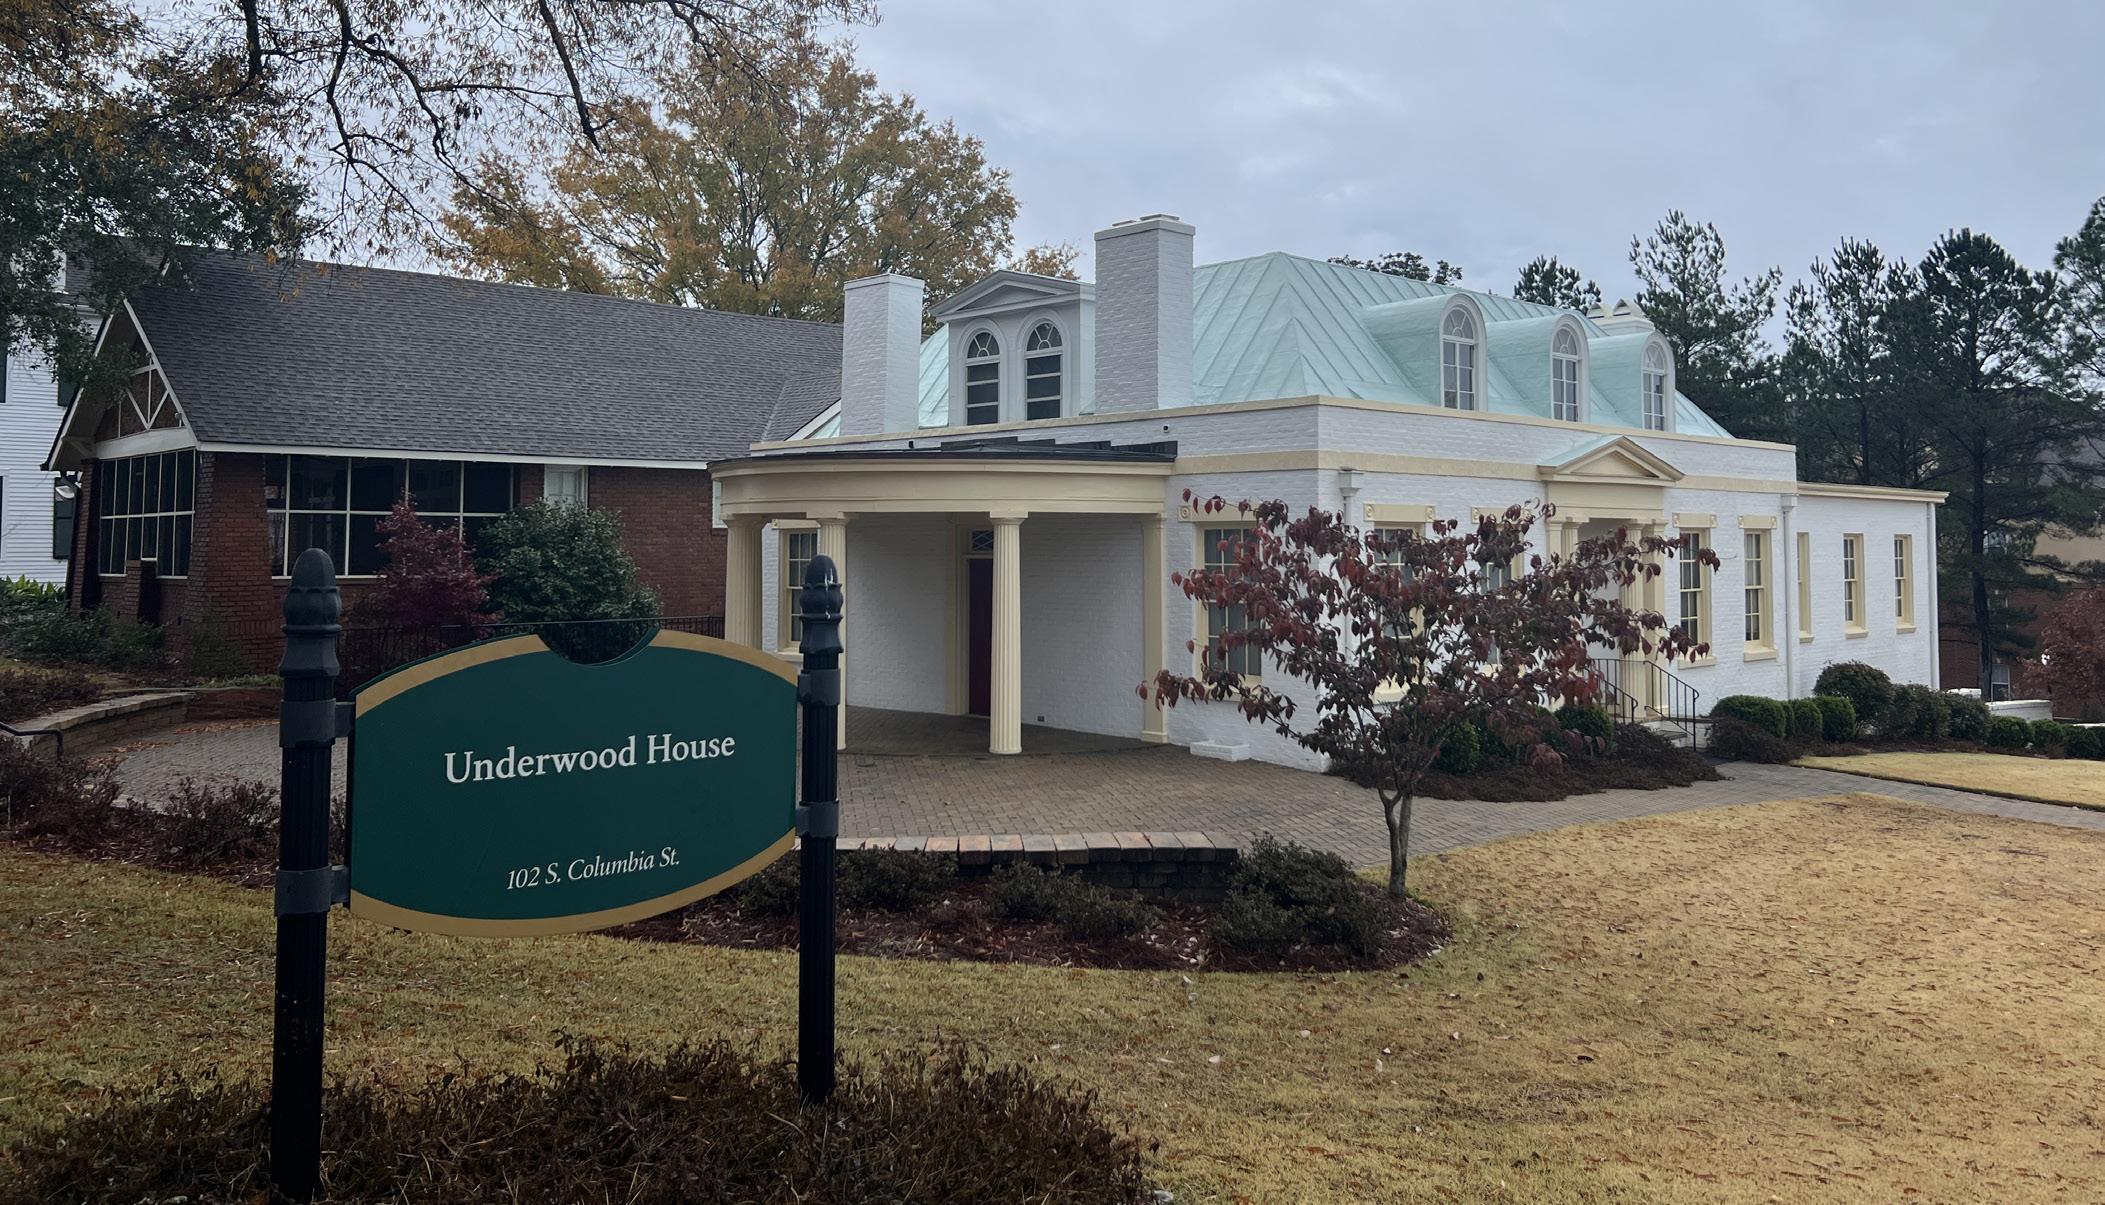
Leland Gallery is located on the second floor of Ennis hall and offers an open space to display both visiting artists and student works. The Underwood House is located outside of Ennis Hall close to student dorms. The space is only used by visiting artists and is a small gallery space inside of a restored historical home.
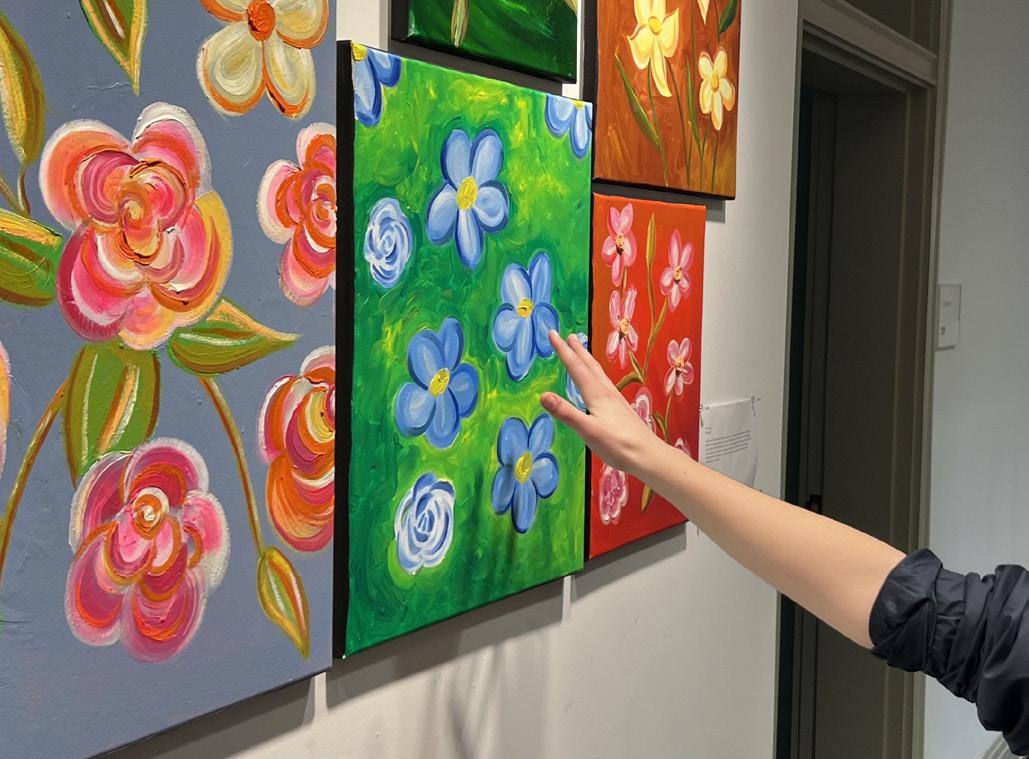
It is expected of GCSU Students and non-student visitors to respect the rules of the art galleries so that the viewing experience and safety of work can be ensured. Typically a gallery space will have an artist’s work alongside a small plaque. These informational pieces can be small, with basic informational detail. Longer plaques will have more information such as the meaning behind the work and an in depth process of its creation.
Visitors of the gallery must view the exhibit work from a distance. Touching the work is not allowed and can put the artwork at risk of being damaged. However, if specified by the artist certain pieces may invite interaction and touching the pieces is allowed. While food and drinks are allowed inside the gallery it’s advised that any drinks have a lid to prevent leaks or spills. Displayed below is the Underwood House (left) and the Leland Gallery (right).
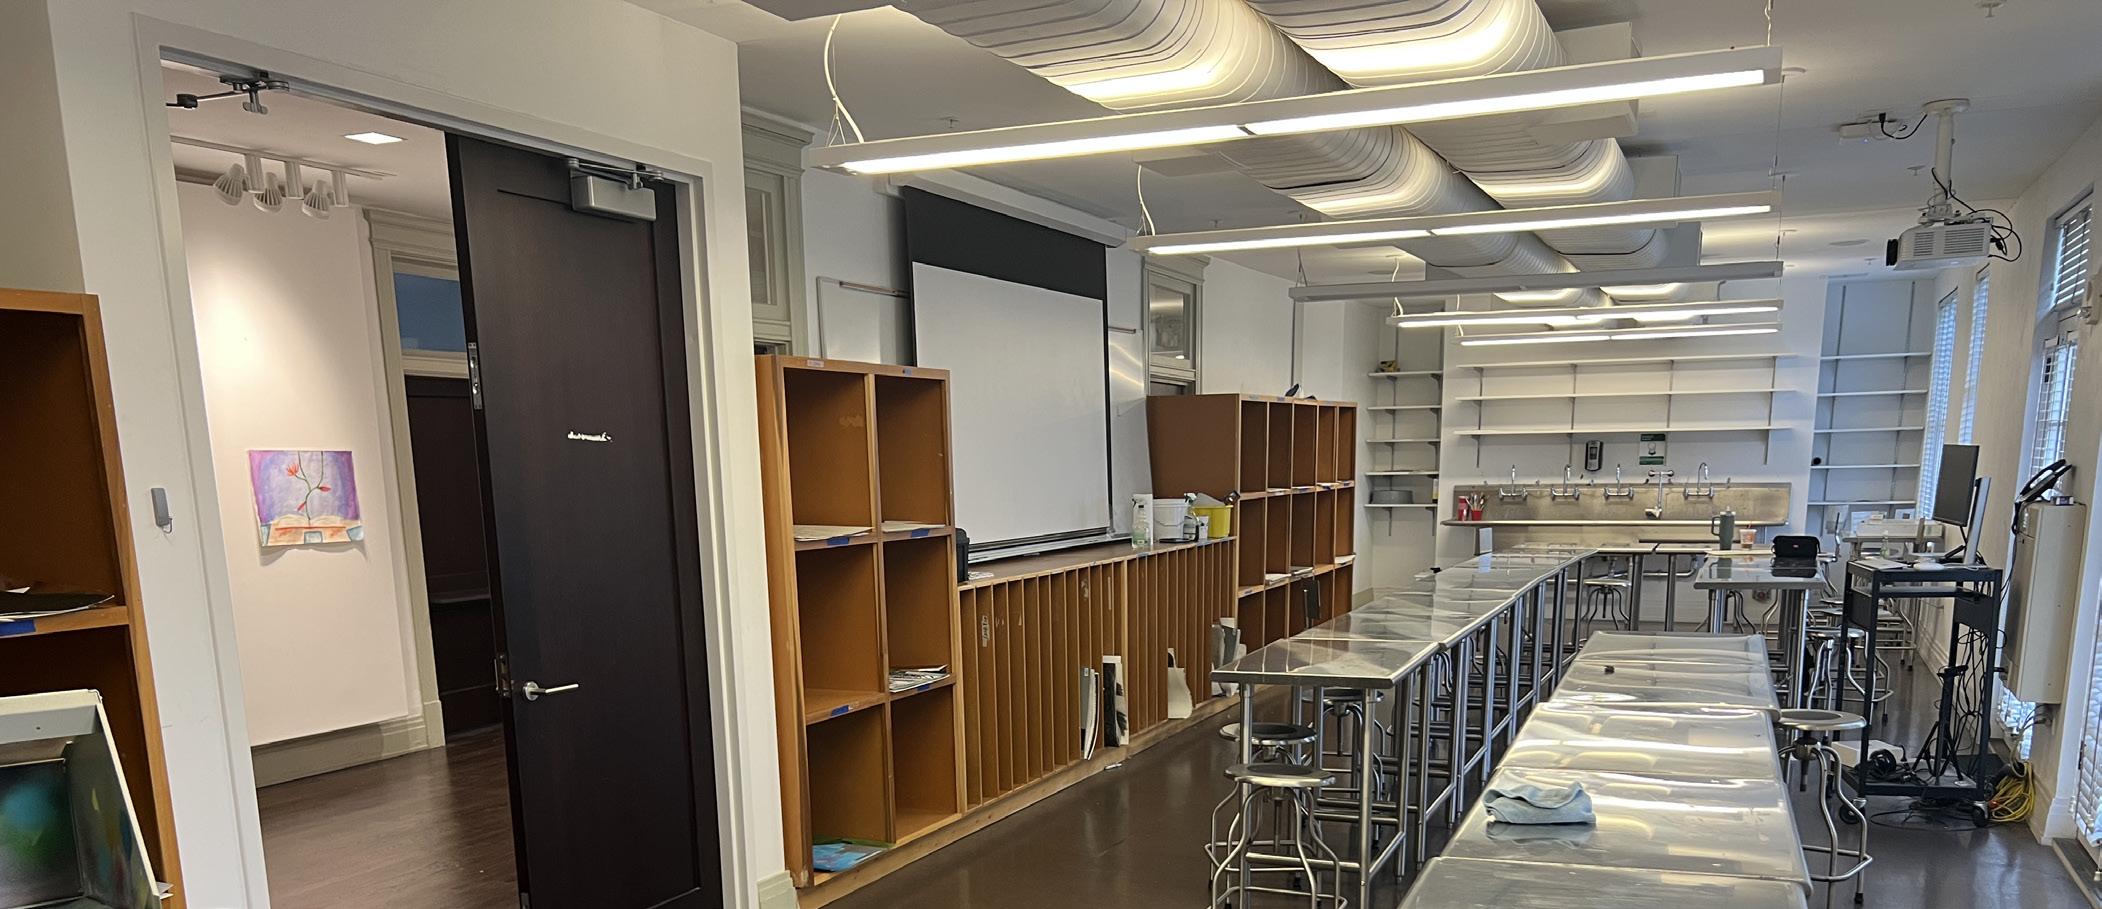
2d design
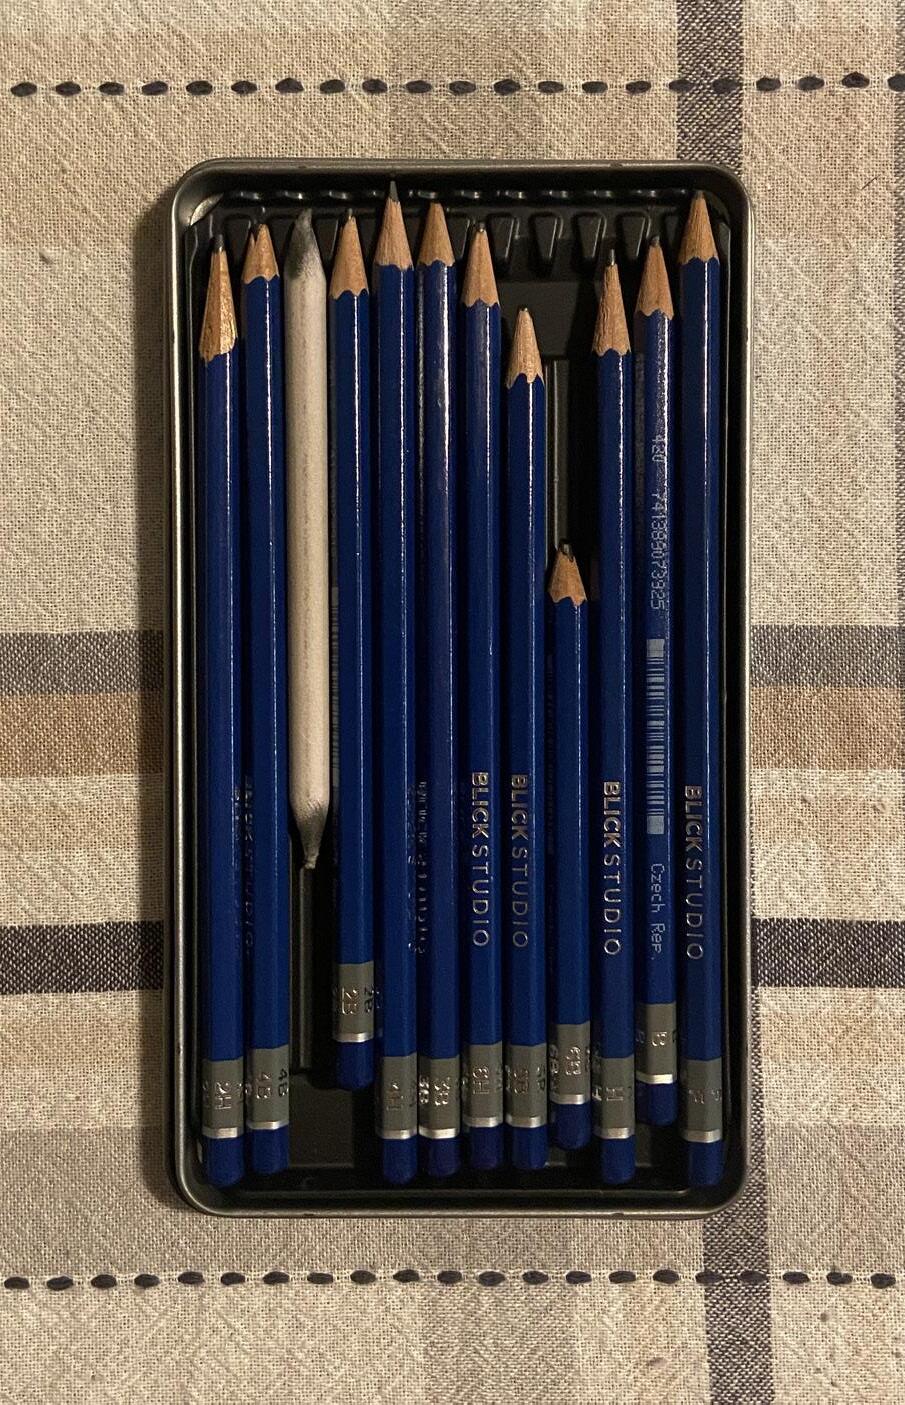
For students just beginning their art pathway at GCSU, one of the preliminary classes they must take is Two dimensional design. The 2D Design course can be found on the third floor of Ennis Hall and is taught in a standard studio classroom. In this course students will be introduced to the elements and principles of two dimensional design. These elements and principles consist of color, value, line, shape, texture, space, form, contrast, movement, balance, repetition, emphasis, and unity. The work students produce can also vary and is not strictly limited to pencil on paper. Certain projects might consist of using pen work, paper cutting or collage, and other two dimensional mediums. Students are also given a set of pencils when enrolling in the class as part of a studio fee for the course. These pencils range in their graphite hardness which refers to the level of intensity the pencil is able to be used, from subtle lines to darker lines.
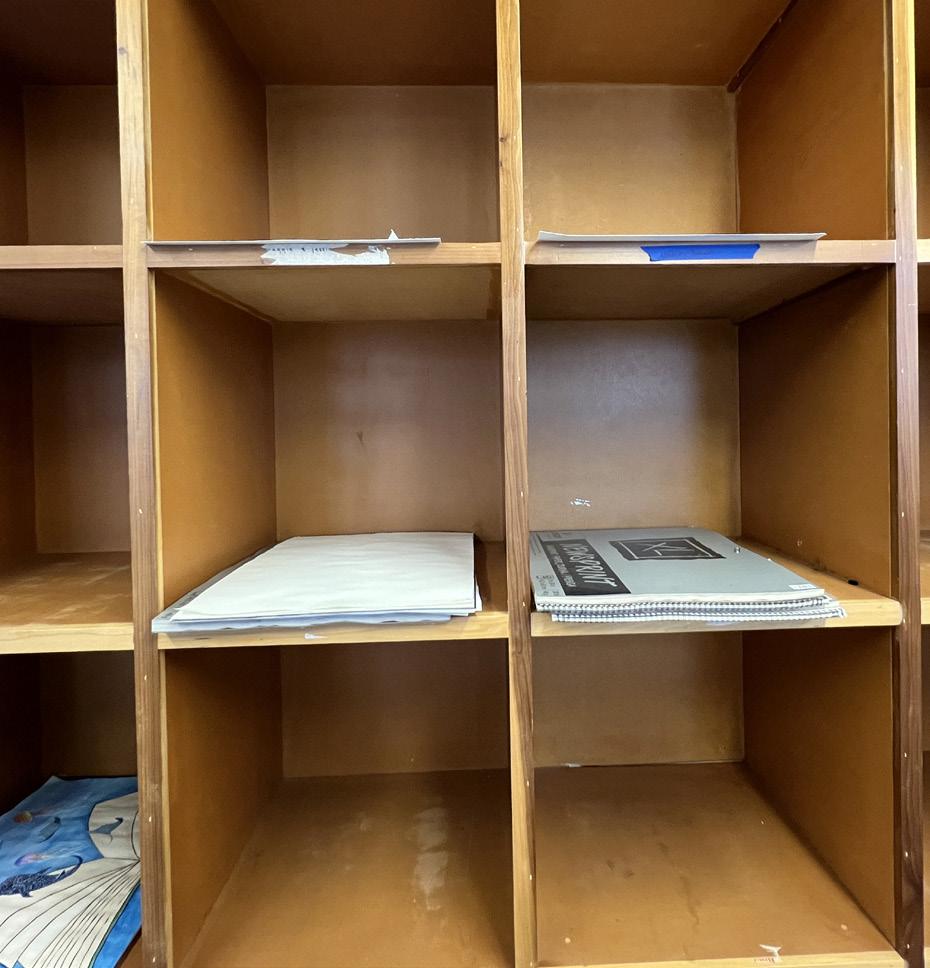
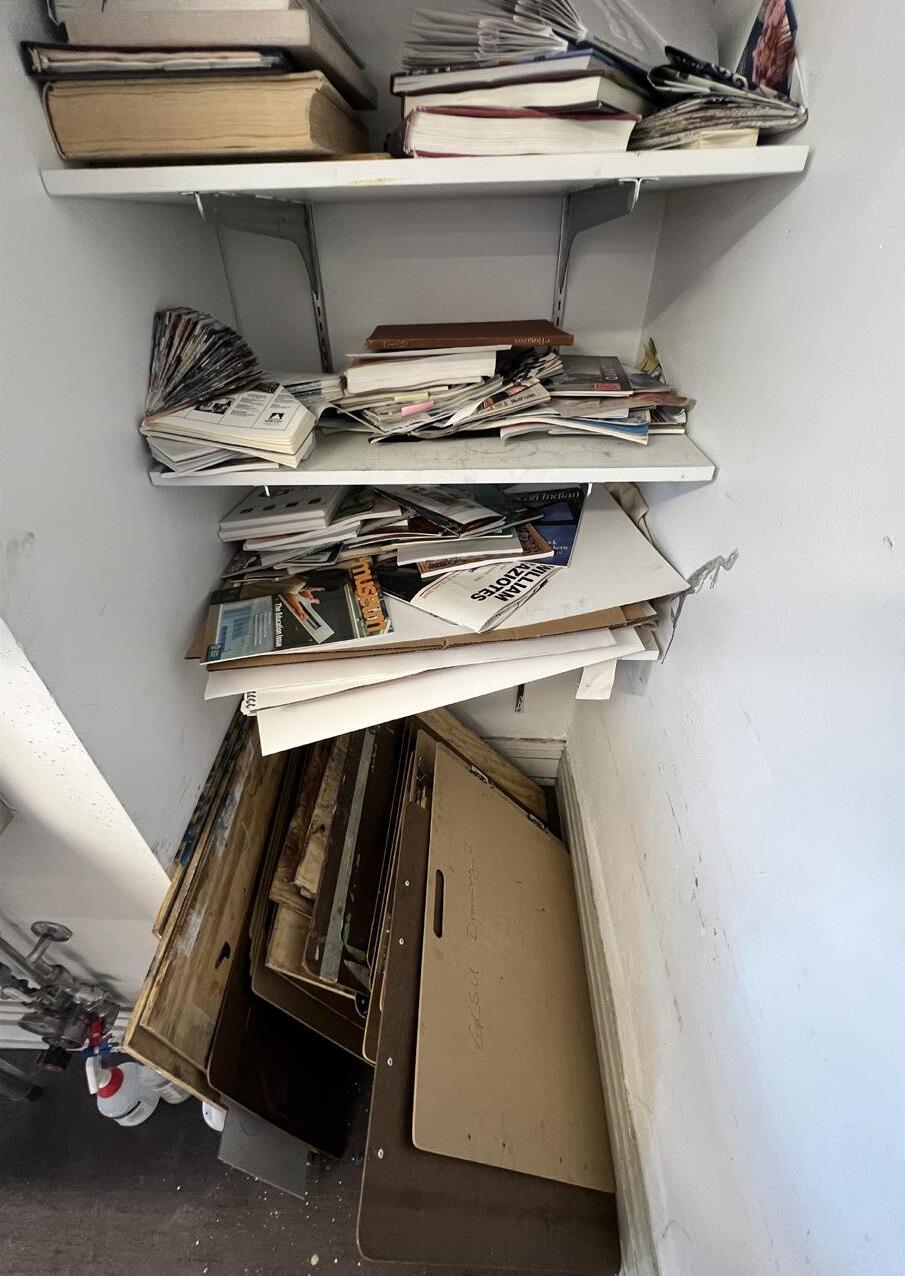
During the course students will have access to space in the classroom to store their work. It is very important for students to utilize these spaces as it can be easy to lose work in the large busy classrooms. By making sure to safely secure and store work can help prevent losing hours of work that have been invested into an assignment. While sketchbooks are not given in the course it is highly recommended that enrolled students purchase their own sketchbook. Allowing students to work on ideas outside the class.
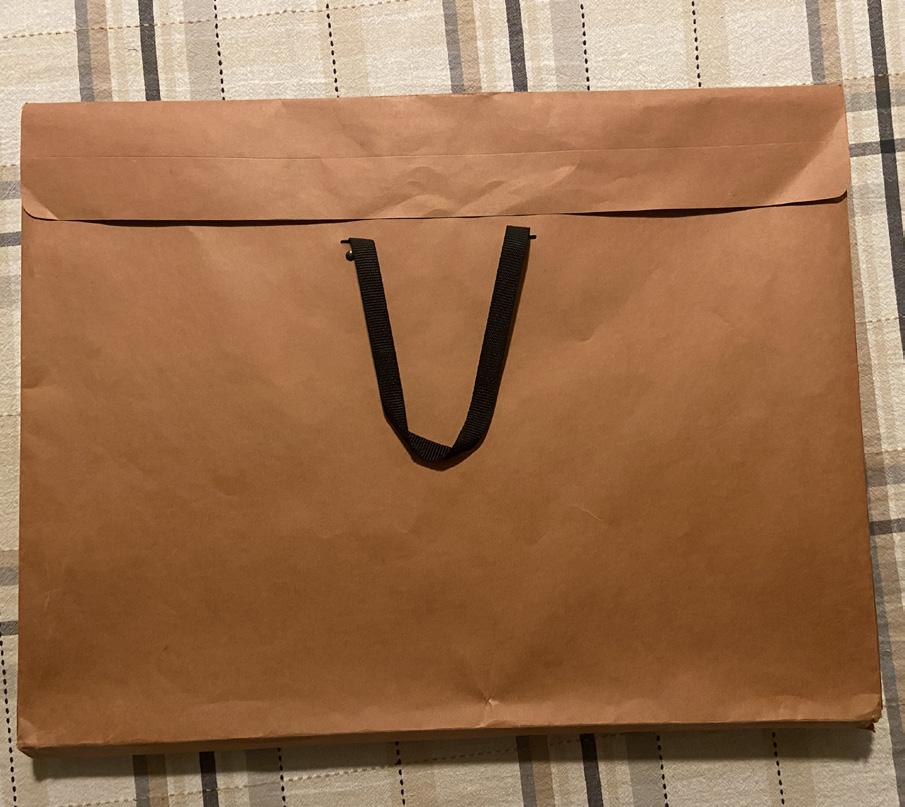
Additionally to the cabinet space in the classroom, students are given portfolios that allow them to take projects outside of class. Having this portfolio is very important for the safety and transportation of student work. It allows students to easily carry larger work from the class to their place of residency without the risk of damaging their work. Students that freely carry work run the risk of damaging their paper either through folding, tearing, or by the natural elements such as rain or strong wind.
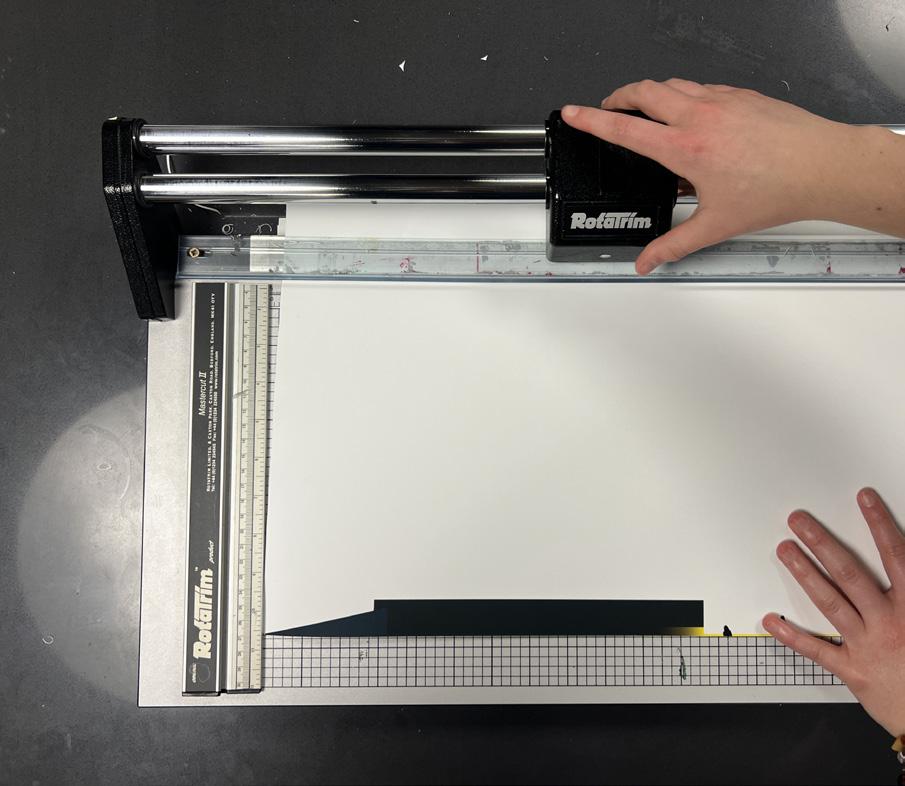
One useful resource offered by the department is the paper trimmer, which may be found in the classroom or on basement floor. These large machines consist of a sliding blade, and a grid which helps to line up paper for trimming. Be very careful to keep foreign objects other than paper away from the sliding blade. Once done the paper trim should also be thrown away to keep a clean space for the next student to use the machine.
painting
The Painting studio can be found on the third floor of Ennis Hall. The painting courses are taught by Valerie Aranda.
materials guide
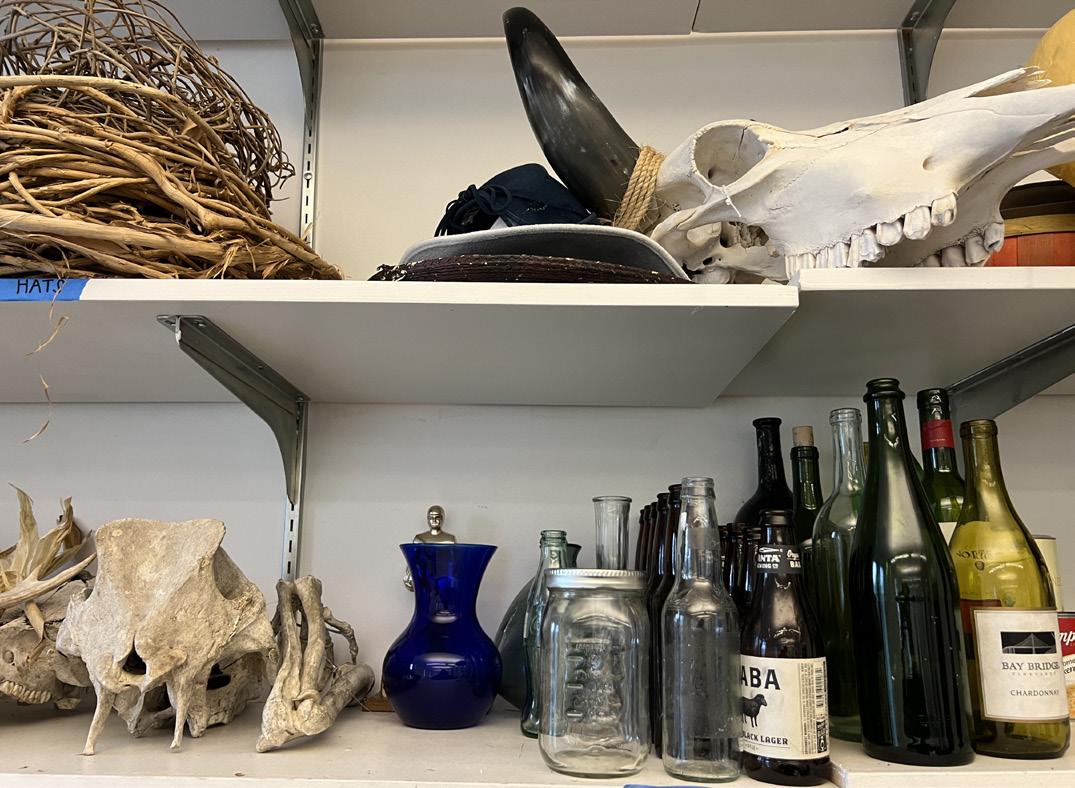
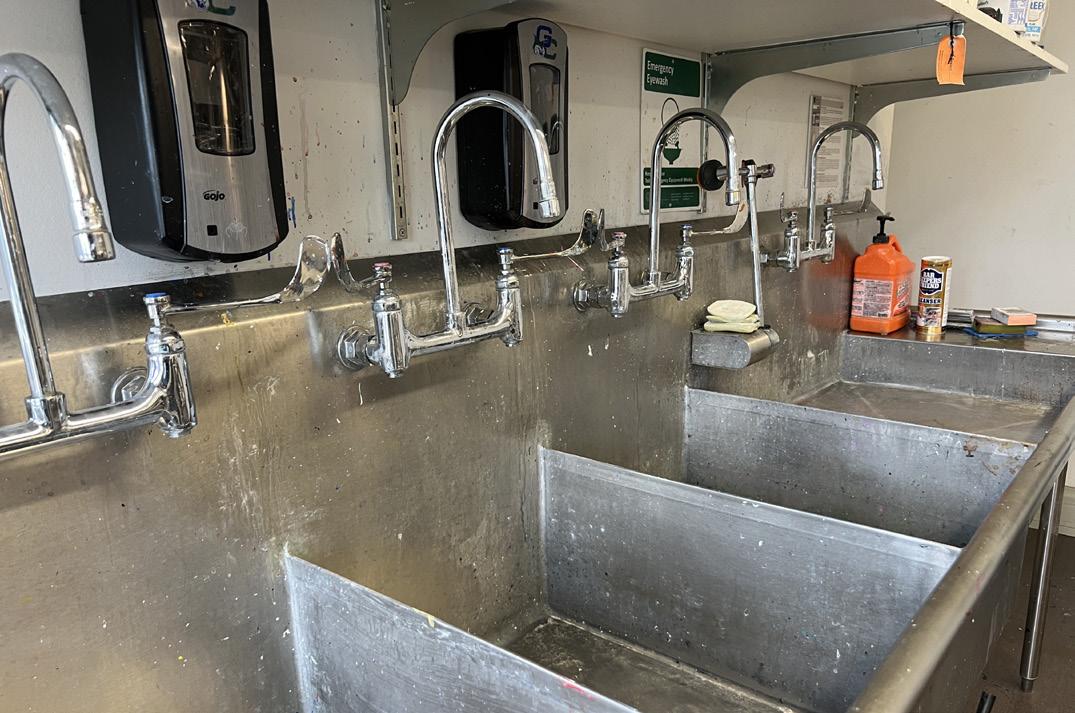
The painting studio offers several unique resources that students can use to complete projects. In the side room of the painting studio are shelves full of varied objects ranging from bottles, bones, sculptures, and fabrics. These objects can be very useful references when painting as they can help students understand form, texture, lighting, and color as they paint. When using objects from the shelf make sure to carefully remove and return the item to its shelf when not in use. Some of these objects are bulky and if not carefully could knock over more delicate items on the shelf such as glass. Putting the items back after use also keeps the studio space clean and ensures that studio items do not go missing. By the sinks in the studio room are also solid cardboard trays. These are useful for students painting on paper canvas.
Enrolled students with a fine arts concentration have the option to pursue a minor in painting alongside their bachelor of arts degree. In this course students will study and practice with aqueous media with emphasis on techniques, concepts, and history. In lower level painting courses, predominantly acrylic paints are used. However students may experiment with other forms of paint such as water colors, guaches, and oils.
painting
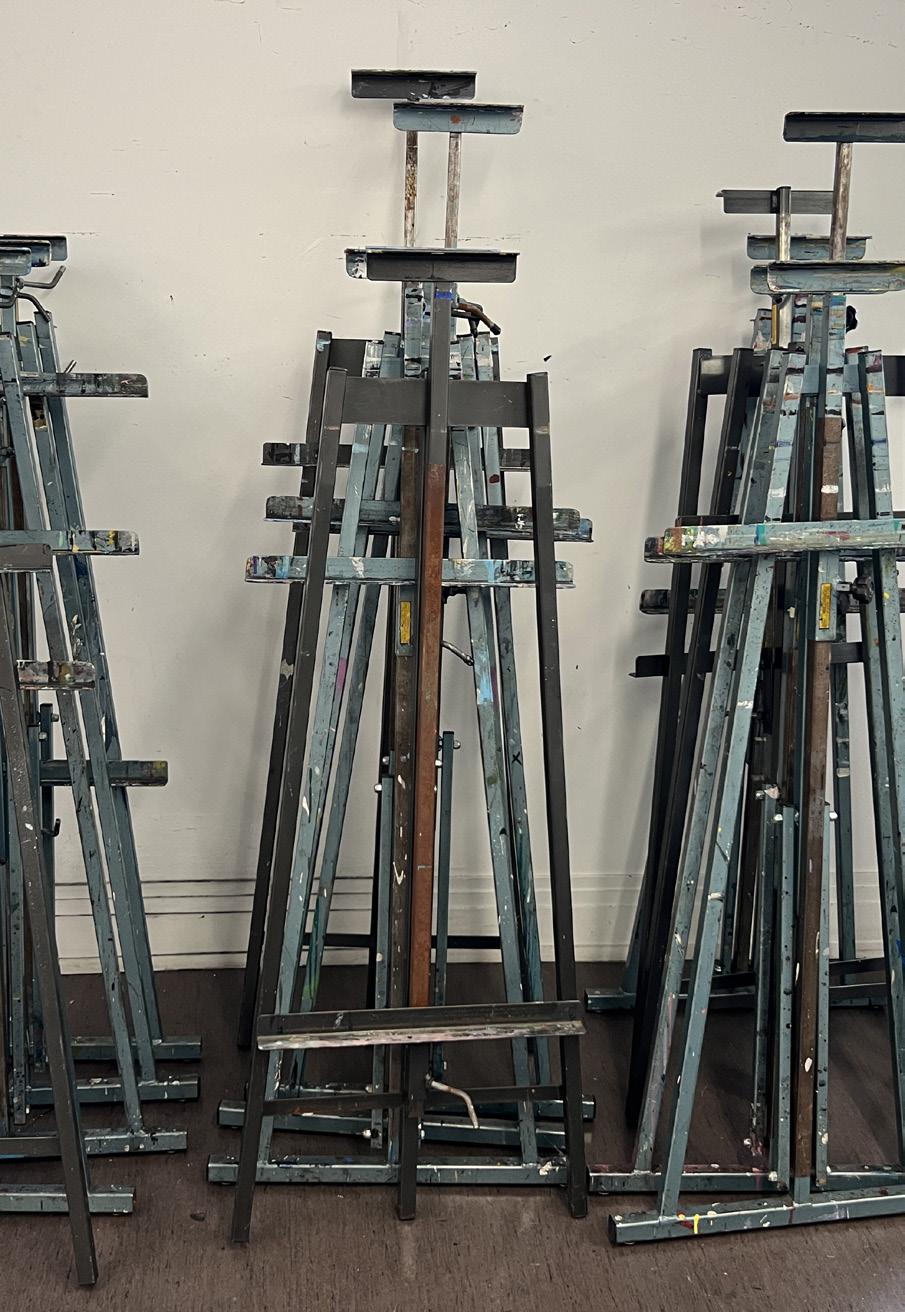
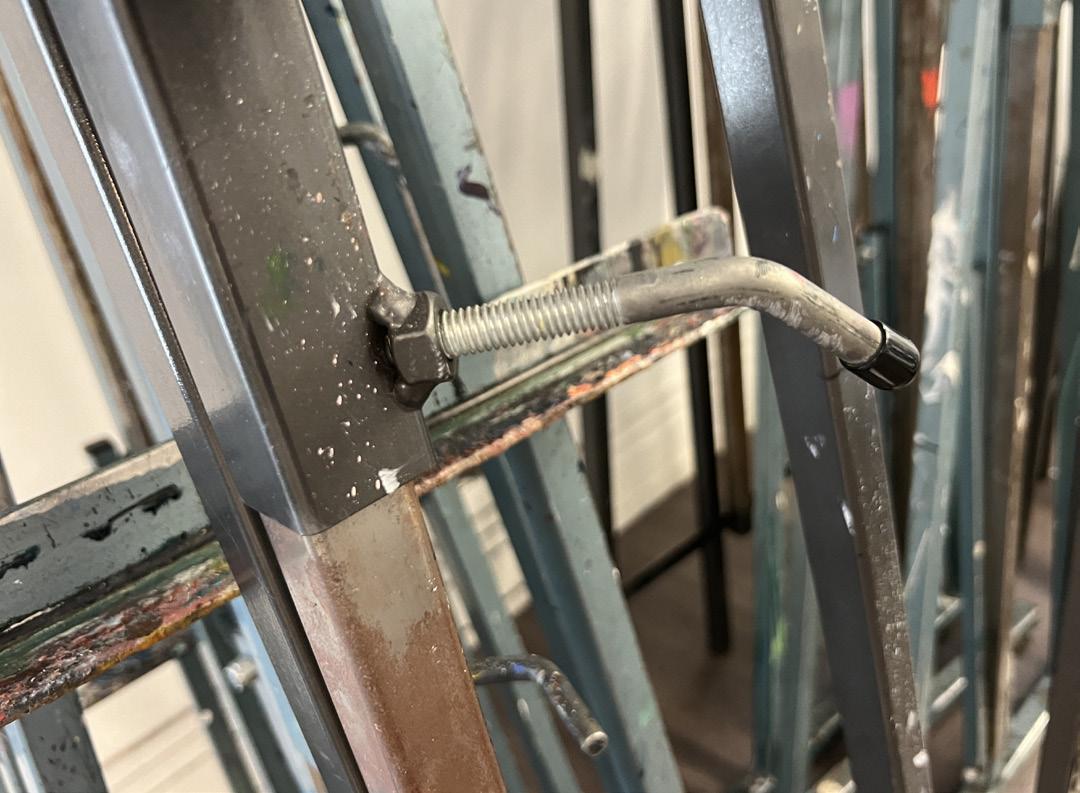
When painting, it is very helpful to use the classroom easels to prop up canvas and paper so that students can work either standing up or on a stool. Great care should be taken when setting up and using the easels as they are very large heavy structures made of metal. Across the easel are screws protruding from the metal rods that have a plastic tip. Twisting them will loosens the easel joints and allow students to set up the easel to their liking.
The studio space has over fifteen easels so there should be no scenario where a student would be unable to use them. When in use be sure to keep the easel steady as rocking them from side to side can run the risk of knocking them over. This not only would be very disruptive to the classroom environment but also puts student work and others at risk of being injured. It can also be helpful for students to place their paint materials on the rolling metal tables found inside the studio space. As the easel itself does not have a place to hold materials it is very helpful having a mobile shelved surface that can hold both paints, brushes, and liquid solutions. Like the objects in the side room of the studio, it is expected that students put up their easels where they got them unless told otherwise by the instructor. Sometimes the easels will be left out on purpose as the following class will use them.
Paint mediums used in the class will have its own unique properties. Lower level painting courses will provide students with a set of acrylic paints to use. Acrylics dry at a much faster rate and can be washed away with just water. Oil paints dry much slower than acrylics and do not wash away in water. However, that does not mean that one medium is superior.
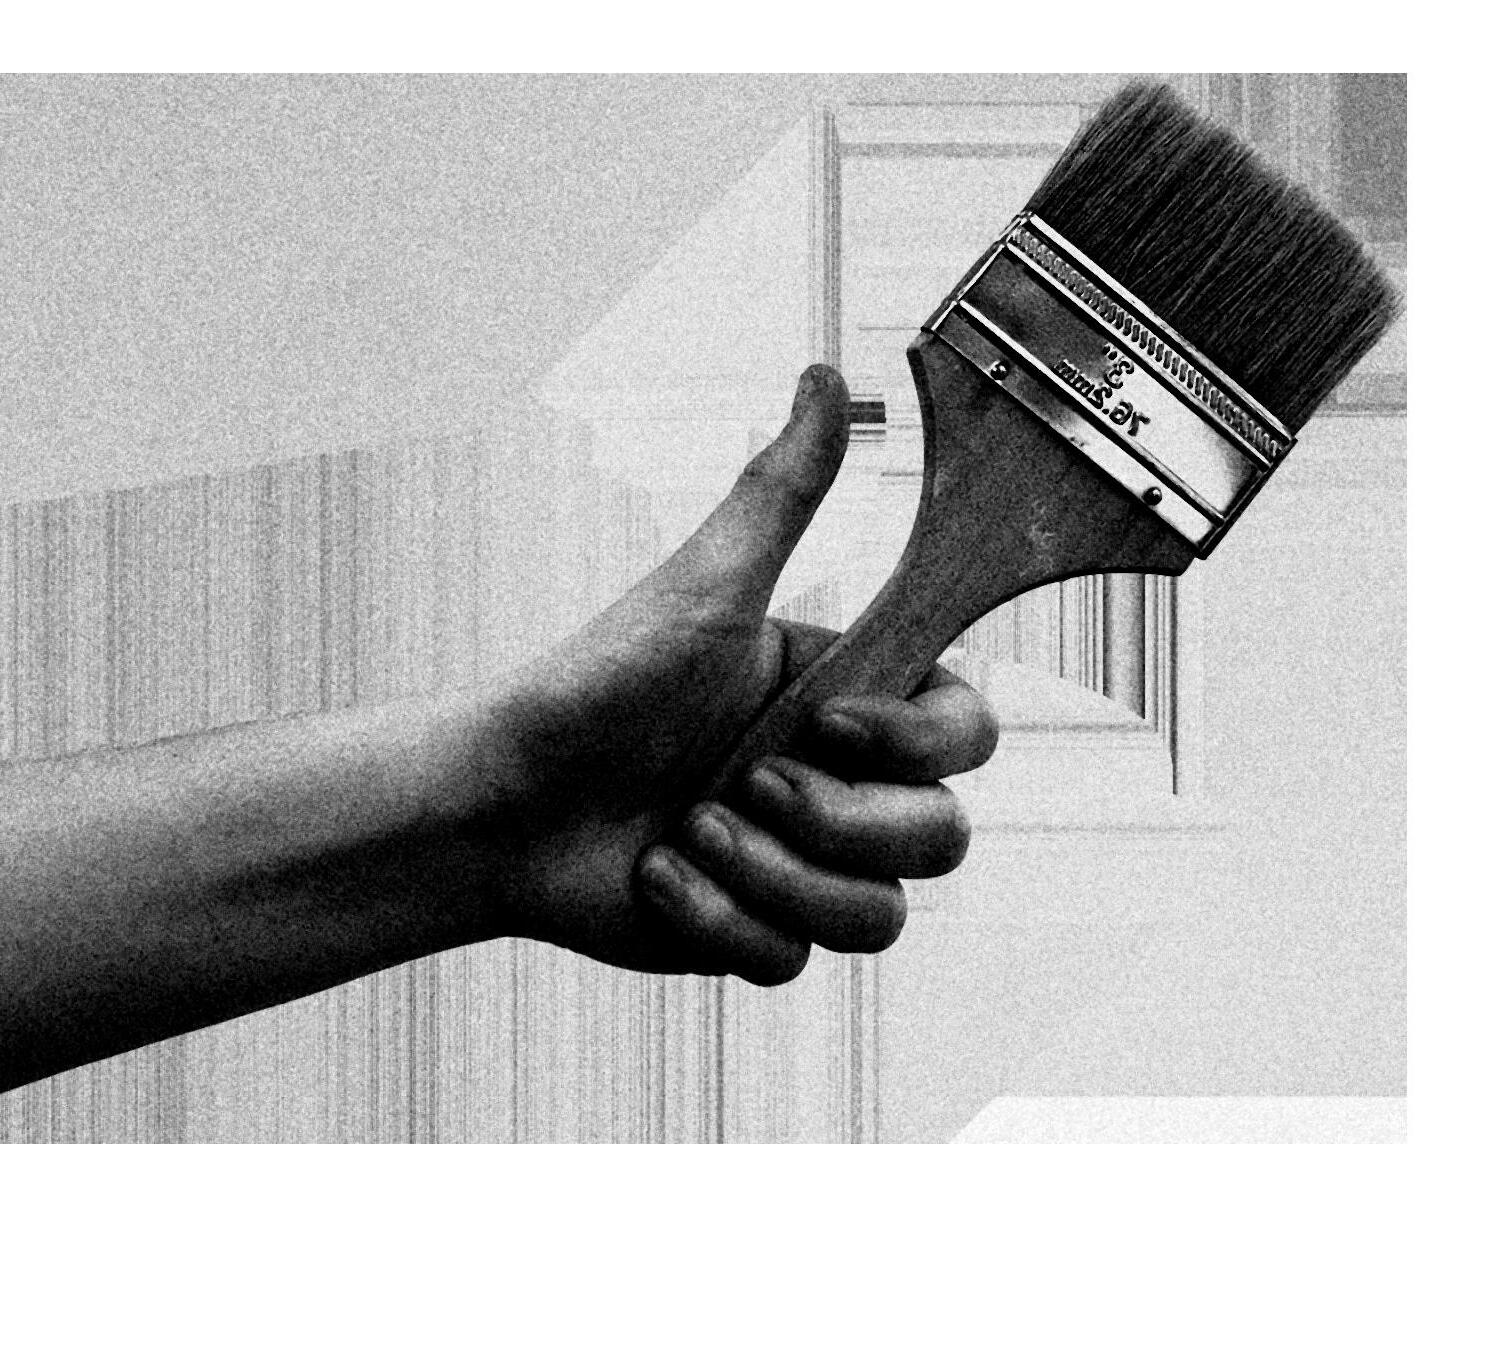
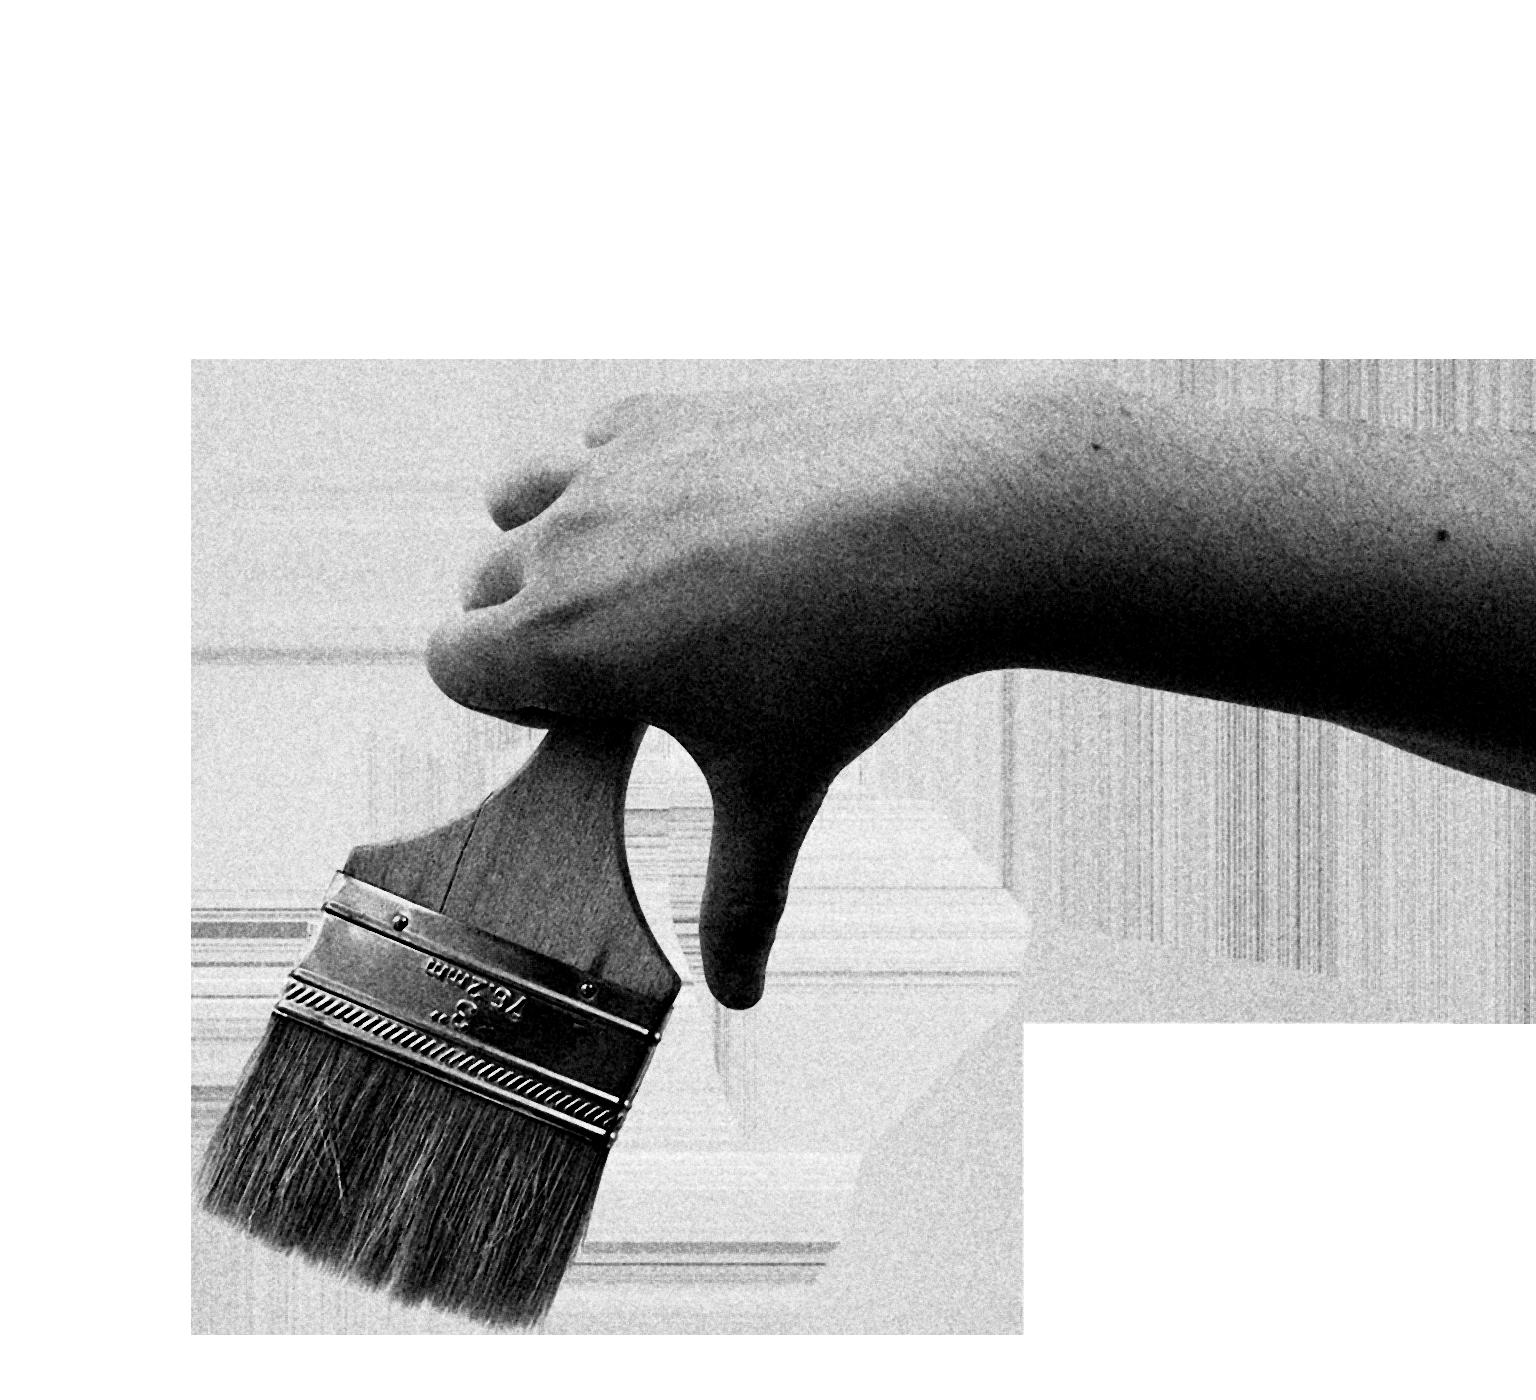
While painting it’s recommended that students have a container of water by their side so they may wash their brushes occasionally. This can make switching from one color of paint to another easier without having to deal with color blending. Students should also always wash their brushes in the studio sinks with warm water and the provided dawn dish soap. Gently running the figers through the brushes.
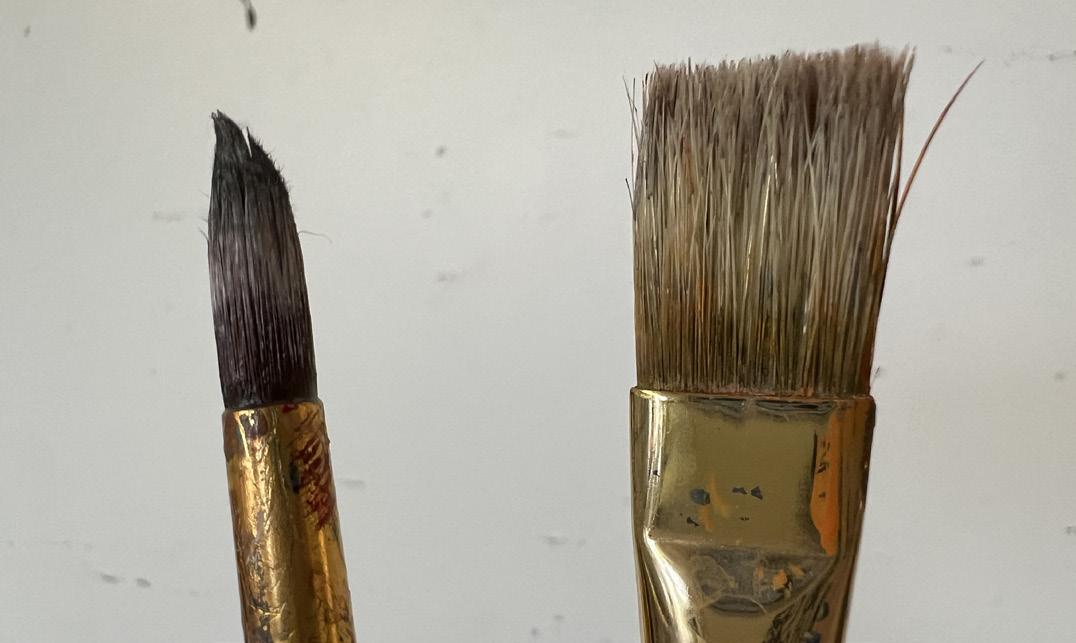
If students do not clean their brushes it will damage them. As the paint hardens the brushes become intertwined making it useless in painting and very hard to clean. Shown on the left is a brush that has been completely solidified keeping a uniform shape while the brush on the right is clean and there is clear definition in the brush bristles. The left brush will be thrown out.
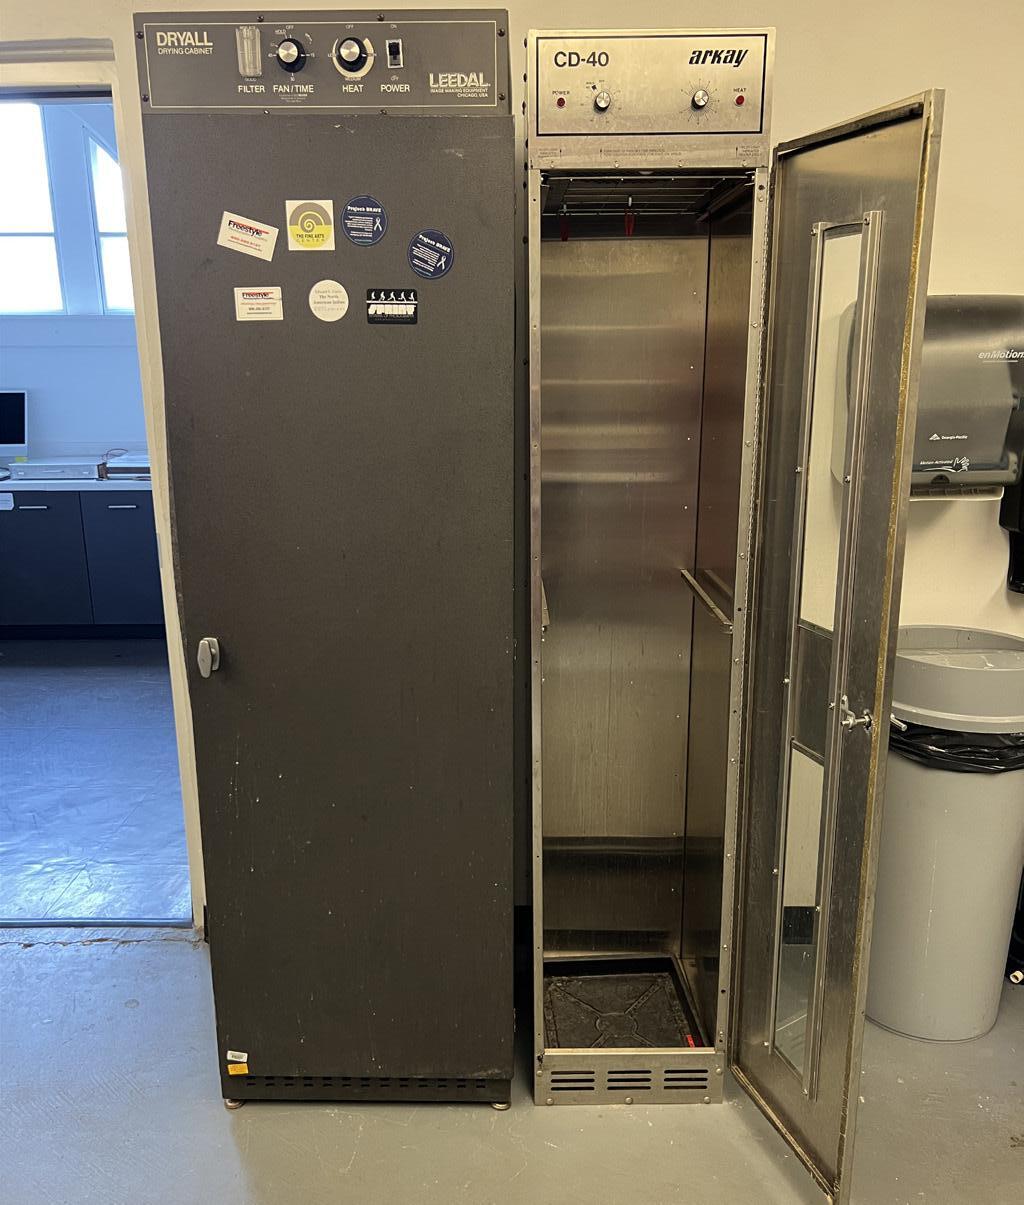
photography darkroom
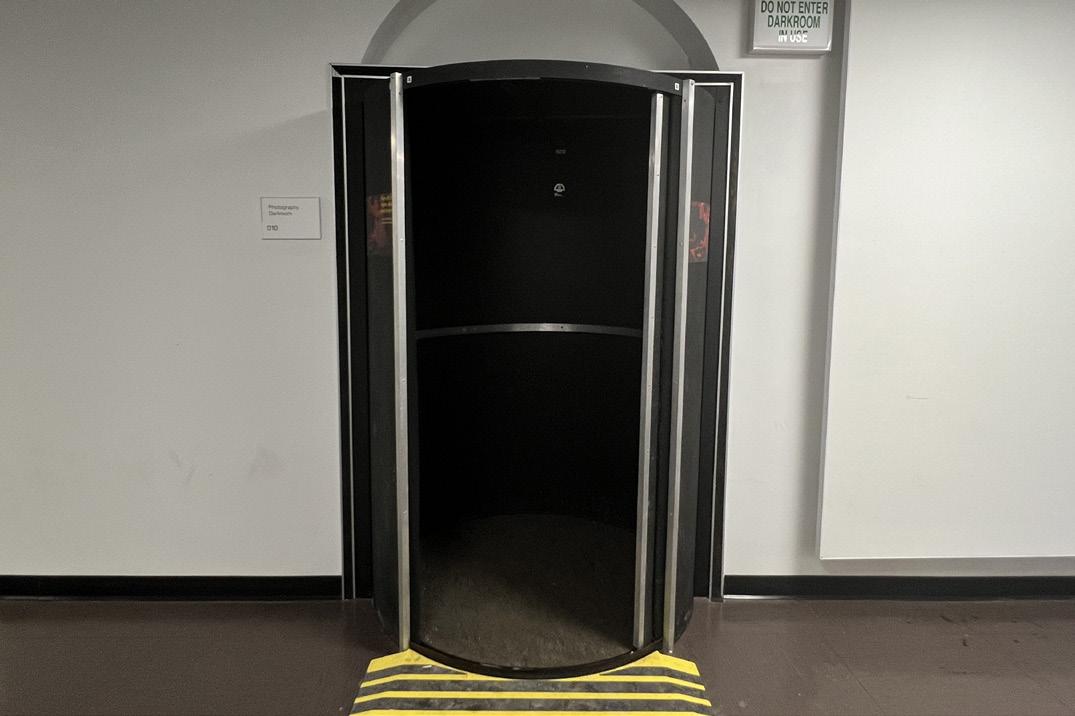
Photography darkroom found on the basement floor of Ennis Hall.
photography darkroom
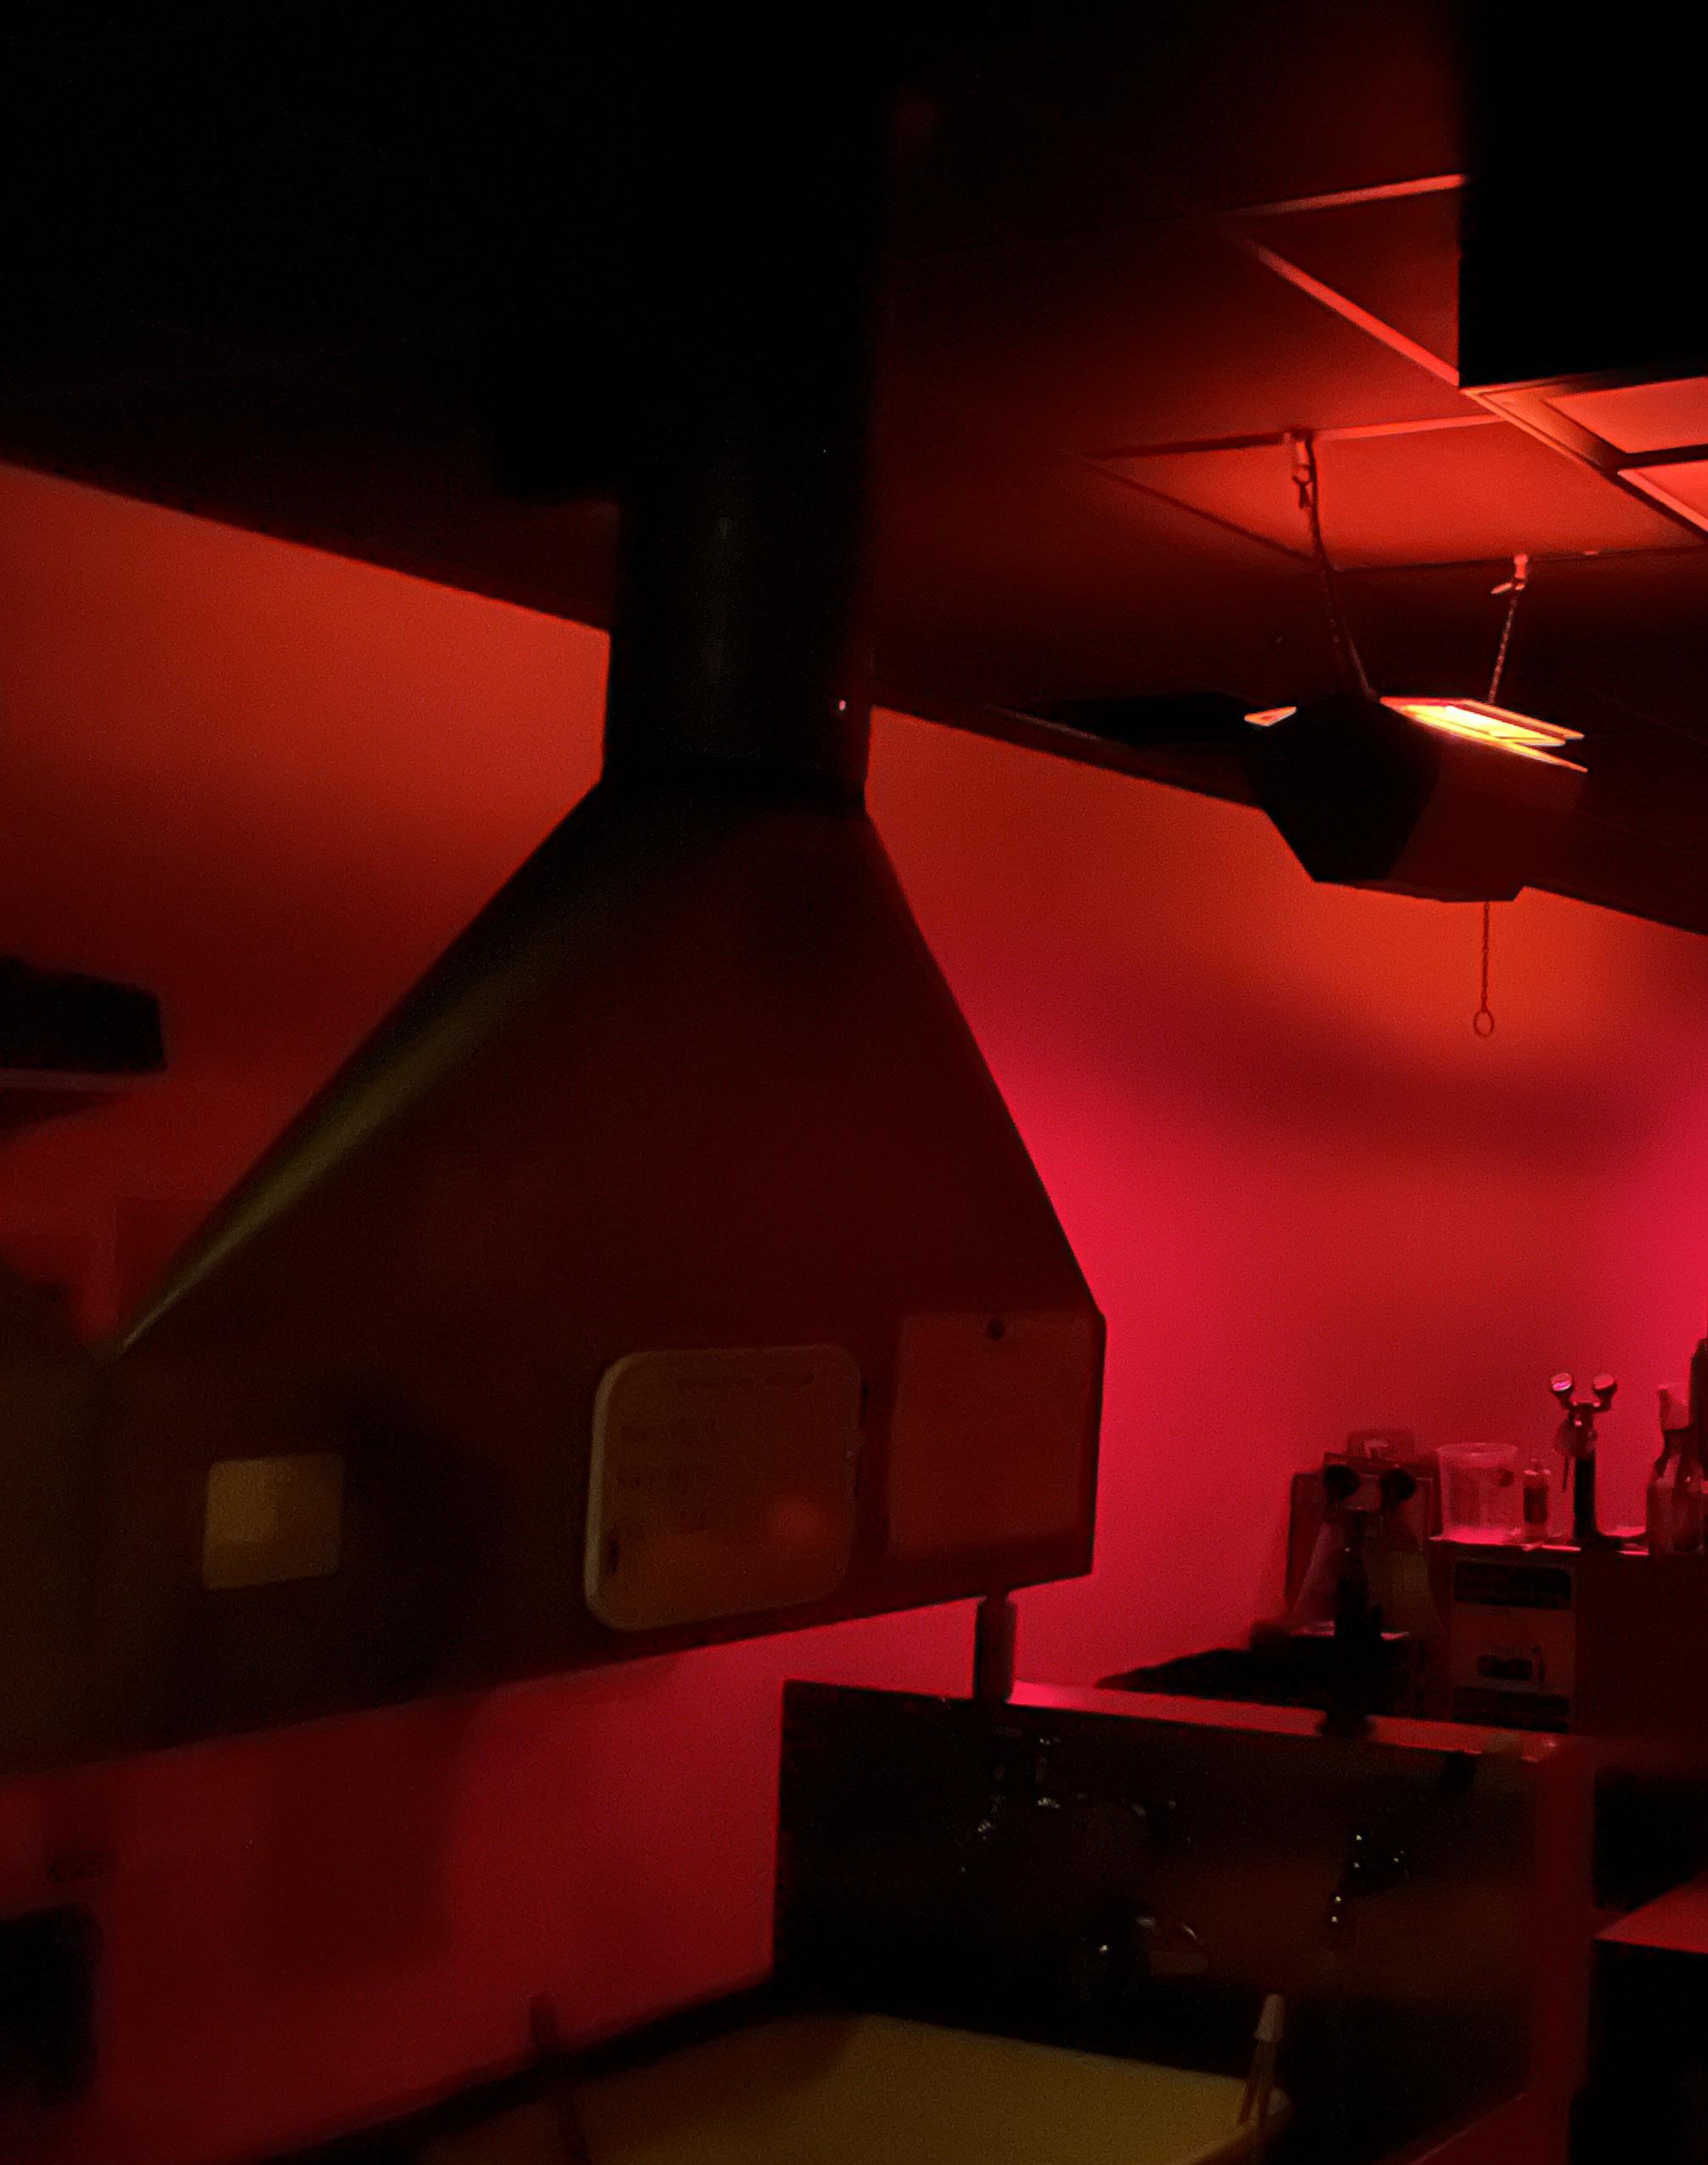
Located on the basement floor of Ennis hall is the department’s photography dark room. The door to the studio room is a unique shape as it helps to prevent unwanted light leaks from getting inside. When entering the darkroom students should stand inside the rotating door and slowly spin the door until the opening faces the interior of the room. Students should not attempt to fit more than two to three people in the door.
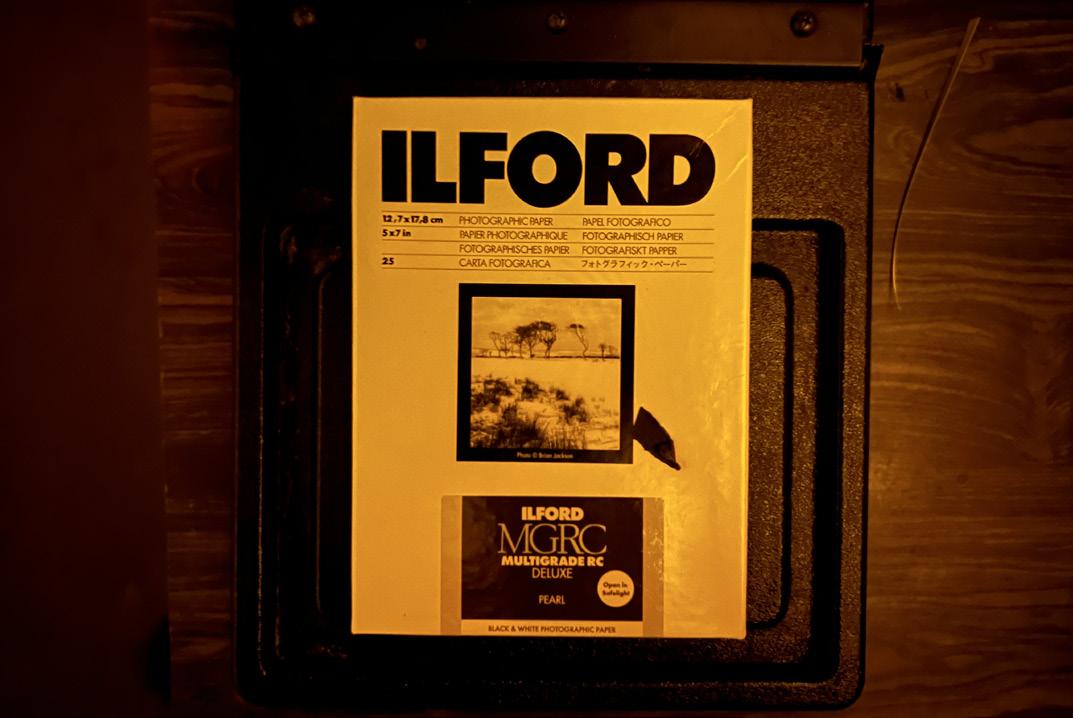
When inside the darkroom it is very important that students only use the red light and amber safelight specified on the lightswitches next to the rotating door. The reason for this is that the photo paper used in the photography classes is extremely light sensitive. If students were to turn on the standard light unaware of exposed paper, the paper would be completely ruined. When developed they would be solid white.
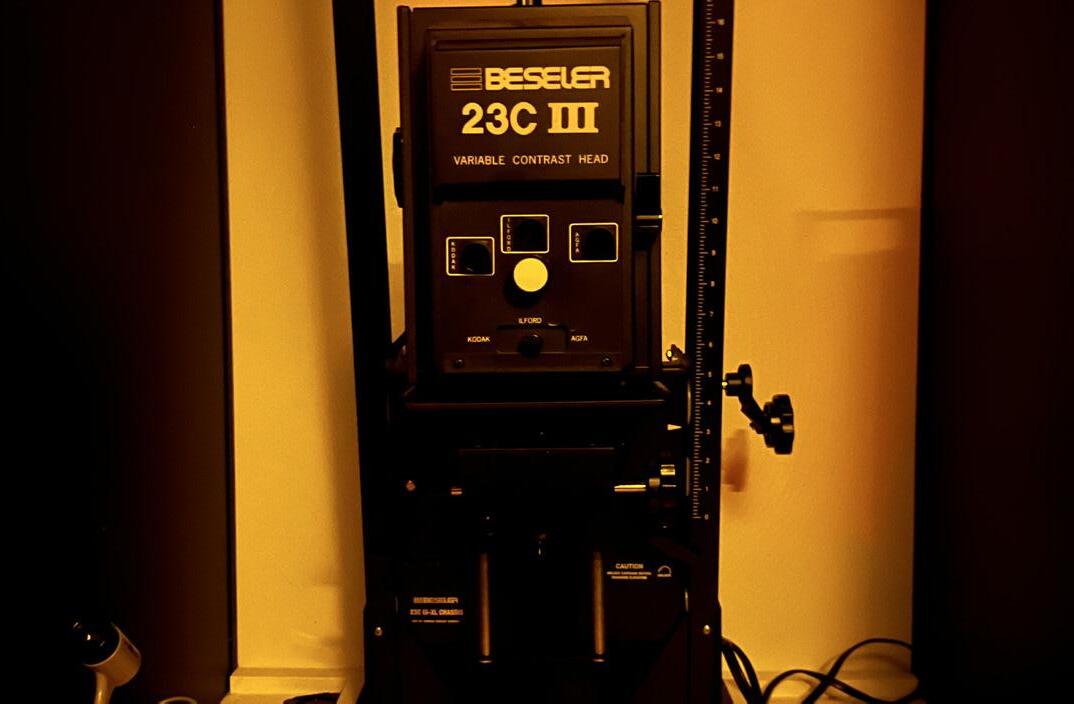
The darkroom contains over 10 photo condensers which are used in transferring photo film to the photo paper. To use the condensers students will put their selected film into a slot on the condenser which then projects light through the film. It is important to test this before actually applying the photo paper underneath. When ready the student can use the condenser to project a light image of the film on the photo paper.
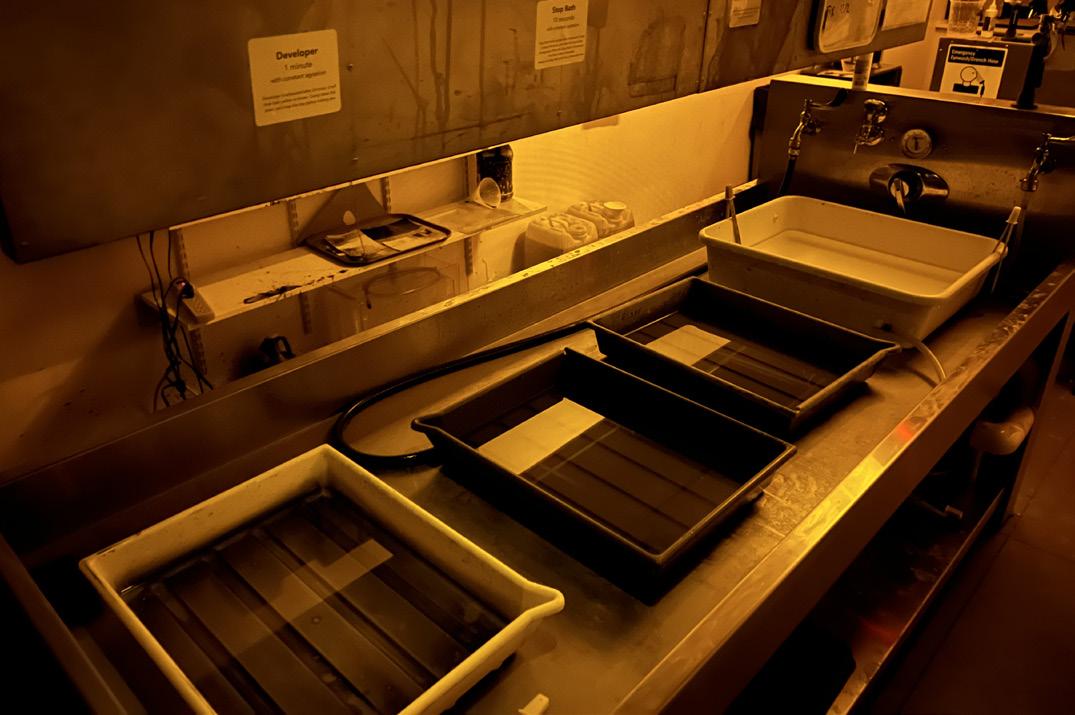
After the photo paper has been hit with the film light projection the student should immediately begin to develop the photo paper. Leaving it exposed for long periods of time in the amber light can slowly affect the paper’s ability to develop. The dark room contains a series of developing chemicals which should be treated carefully as some can stain the skin. Each chemical has a set of instructions to be referenced.
It’s important that students check when the developer chemicals were opened, as they can expire and typically go bad after a week to two weeks at the longest. The darkroom has a set of instructions that students can use as a guide to replacing the photo chemicals. After the photo paper has been run through a series of different developer chemicals, it’s important to give the photo paper one last final wash in water.
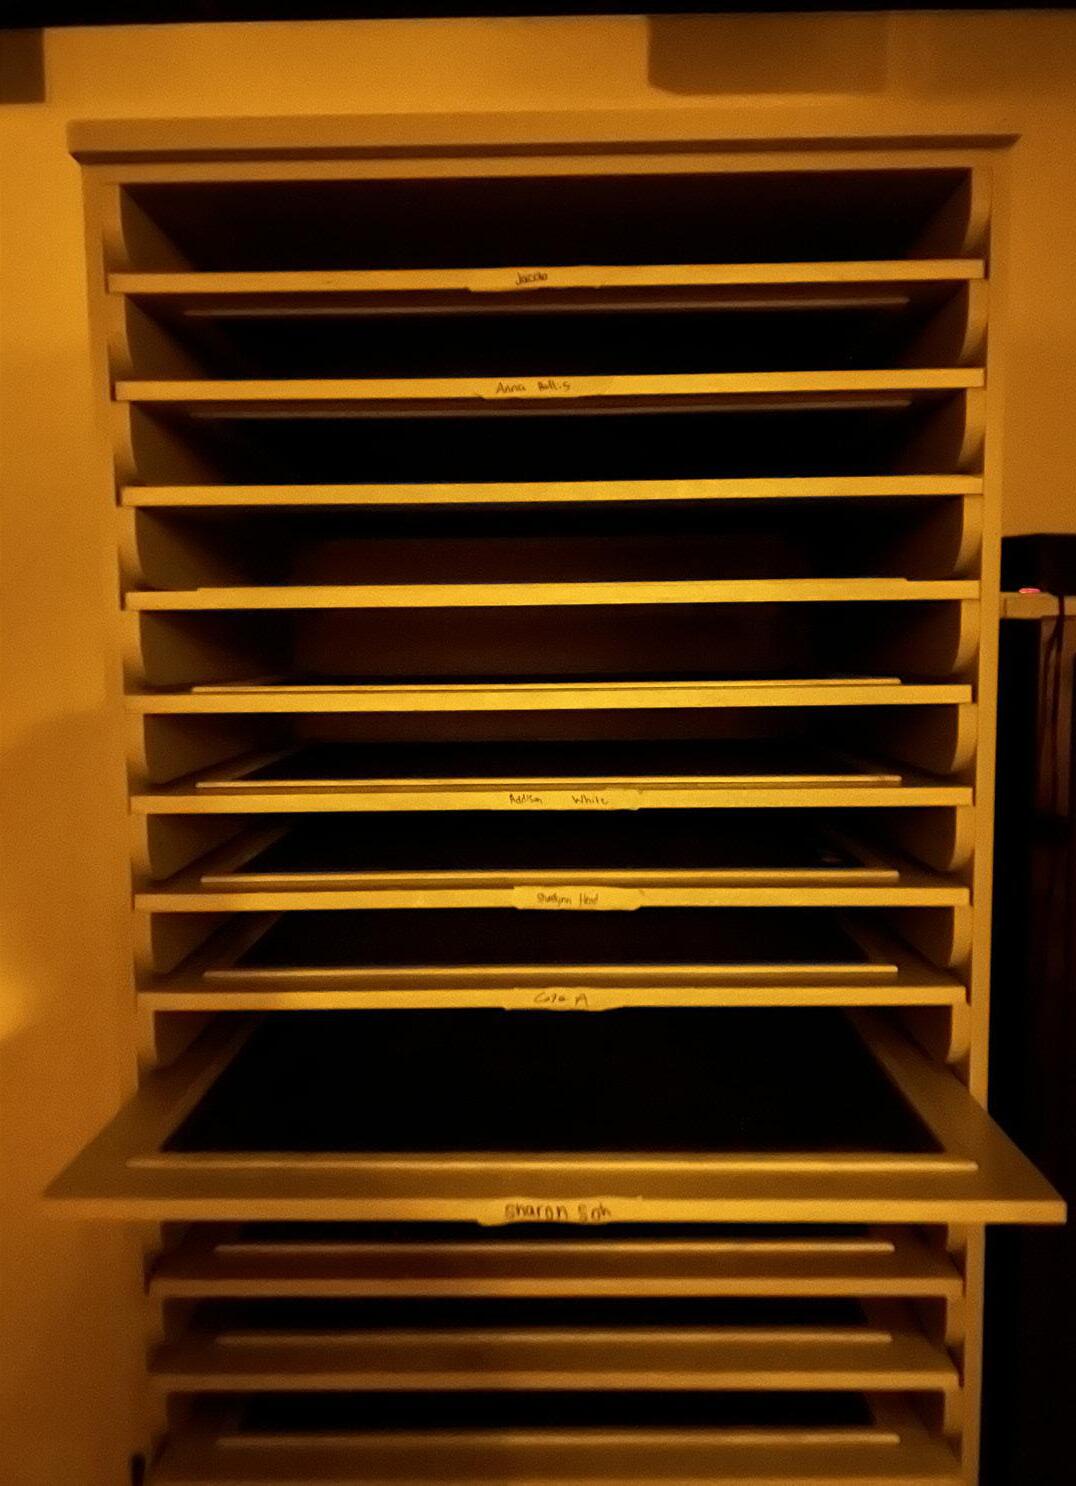
The shortest amount of time the photo paper should be left in the water is around five minutes. However it does not affect the paper if left in the water for longer in the case that a student has multiple photos they are developing. When done students will place the photo paper on the drying rack closest to the door. It is important to not stack photos on top of one another otherwise the water can stain the photo paper.
photo film development
Like the photography darkroom, the film developing room and photo class are also on the basement floor of Ennis Hall. They can be found across the hall from the photo dark room which makes going from one room to the other very convenient. The film developing room consists of three main areas, two additional dark rooms though smaller than the main one and lacking in red light and condensers, and the developing room. The smaller darkrooms are primarily used for cutting and preparing film in the dark so that they do not get ruined by exposure to light. The film developing room contains a large chemical sink where all of the film development is carried out, and also contains a film dryer.
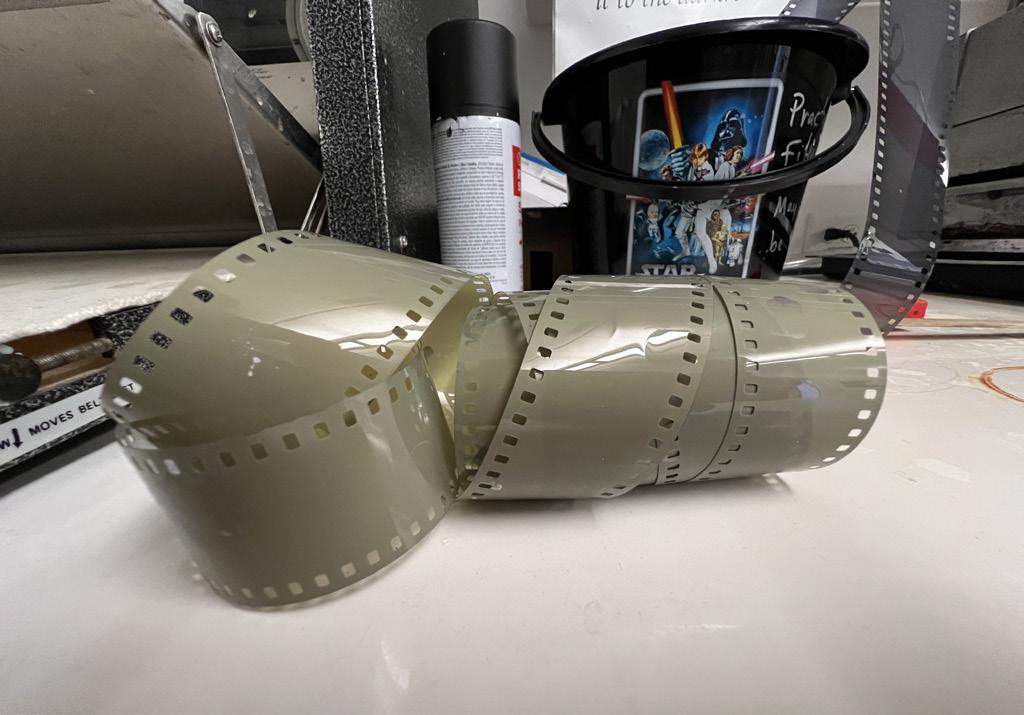
Filler Film itself looks like a long rolled up plastic material that is dark in color and has a series of square holes running along its side. These holes guide the film through the camera as each time a picture is taken it is pushed forward by the camera internally which has mechanical square pegs that fit into the holes pushing the film forward. While it is okay for students to load their film in the light, the film should always be removed in the dark to prevent exposure.
As seen to the right, a series of tools that are used when preparing a film roll to be developed. Film should always be prepared in the dark to prevent exposure to light.
The small metal tool on the left of the image is used to removed the film roll from its capsule that keeps it in place. Once removed scissors can be used to trim excess film making it easier to load into the white spin wheel. When loaded into the white wheel the film and wheel can be put into the dark capsule with orange lid and must be sealed completely.
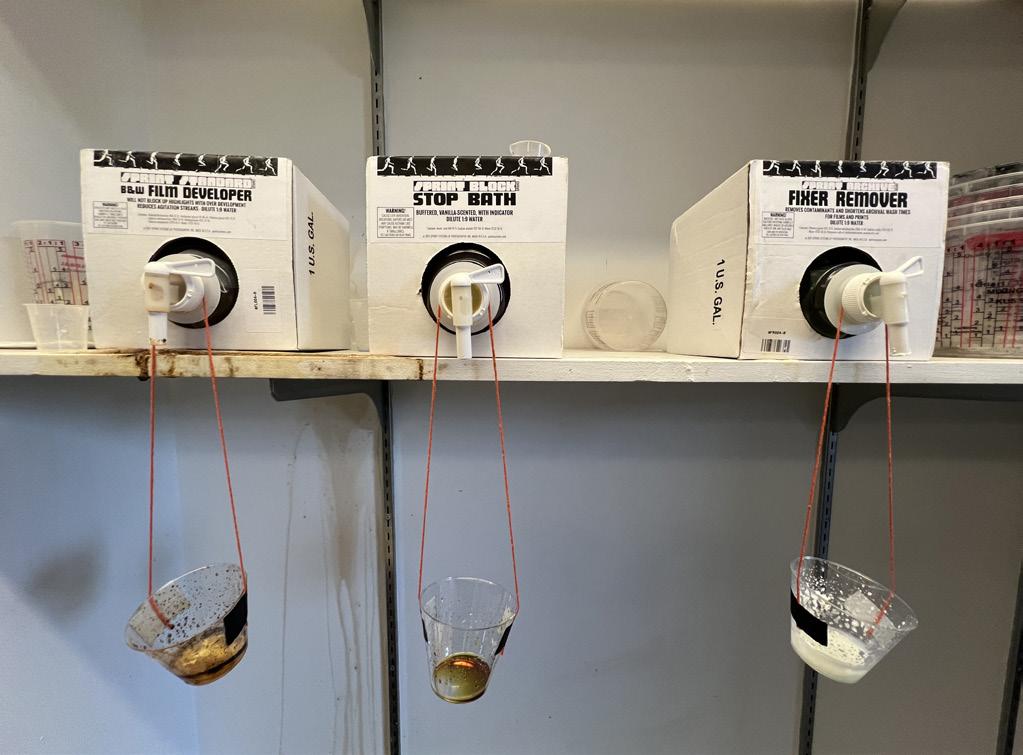
To the left of the chemical sink is a set of three boxes which contain three of the chemicals needed to develop film. The chemicals consist of film developer, stop bath, and film remover which are applied in that order.
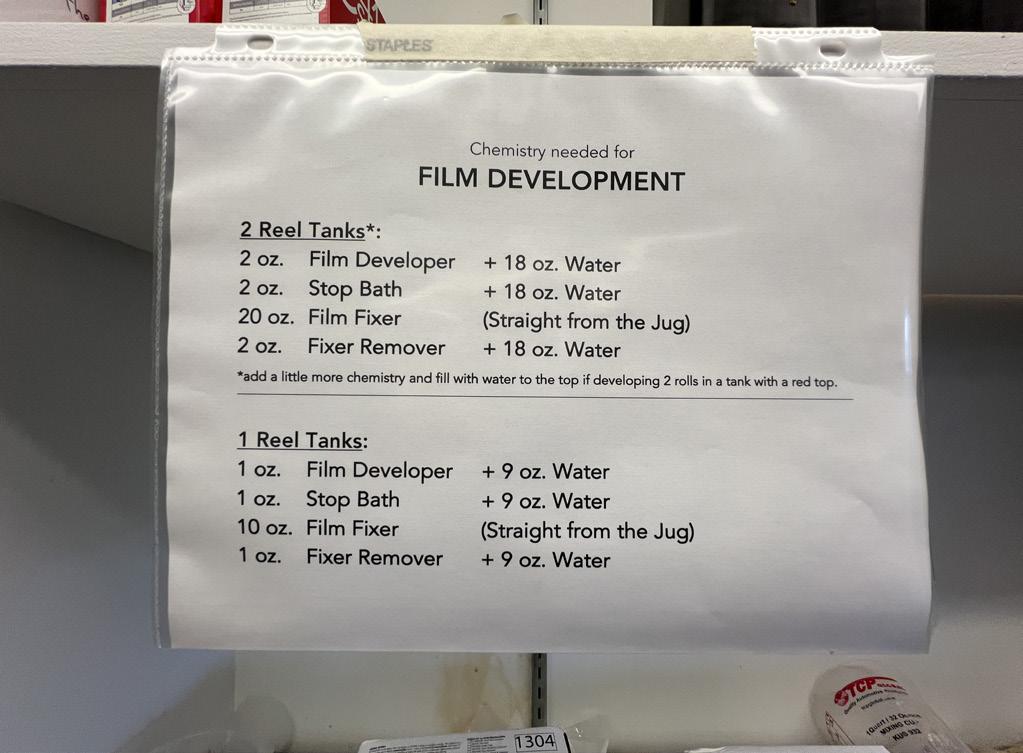
On the same wall as the film developing chemicals is a paper which has detailed instructions. These instructions inform students on how much concentrations of chemical are needed for each step of film development. It is very important to follow this information as straying could lead to the film not developing.
photo film development
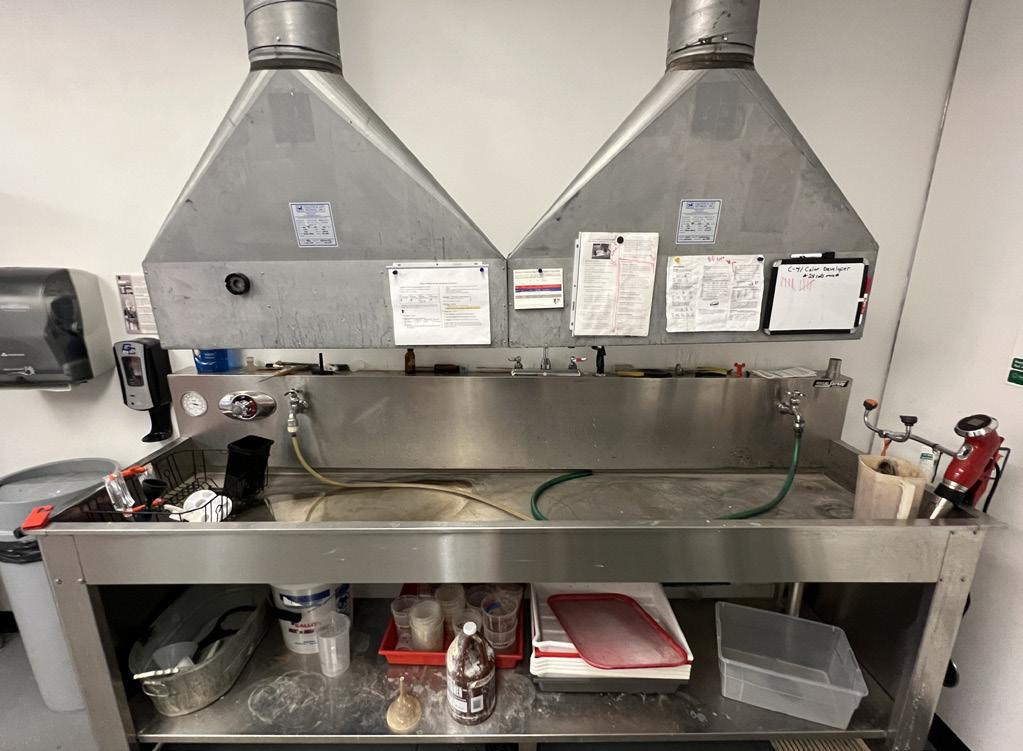
The chemical sink is a large metal trough that has open drains directly underneath it. When developing film it is very important to make sure that students set the temperature of the water to ideal temperatures. The ideal temperatures can be found on the wall above the sink and dictate how long it will take for the film to develop. The temperature gauge can be found on the left side of the sink.
Typically if the temperature is higher it will develop film faster at risk of lower quality, while too low and it will be too slow to develop properly. There are thermostats located on the back of the sink which allow for students to measure the temperature of chemical solutions which can be kept in plastic containers with measurement ticks. Once the chemical solutions and temperatures have been properly set up students can follow the developing guide that is found in paper on top of the sink. It contains thorough instructions on how to properly develop the film.
The long tan colored tube is where the water is projected from in the sink and must be put into the film container initially to clean it. Following each chemical step the container should be thoroughly rinsed to prevent built up chemical reactions. Once the film has been developed it is okay to remove the film roll from the container as the chemical prevents it from being affected by light exposure. Pulling apart the white spin wheel and removing the film, students can unravel it and hold it up to the ceiling light to see whether or not their film was properly developed. Finally, the film can be placed into the film dryers left of the sink.
Once the film has been dried it is recommended that students use the light tables in the photography classroom to check on the quality of the film. If satisfied with the film, they can be trimmed using scissors. For efficient storing and safekeeping students should keep film roll inside of a film sheet so that they do not lose or damage the film. These film sheets will be turned in with projects.
department mac desktop computers
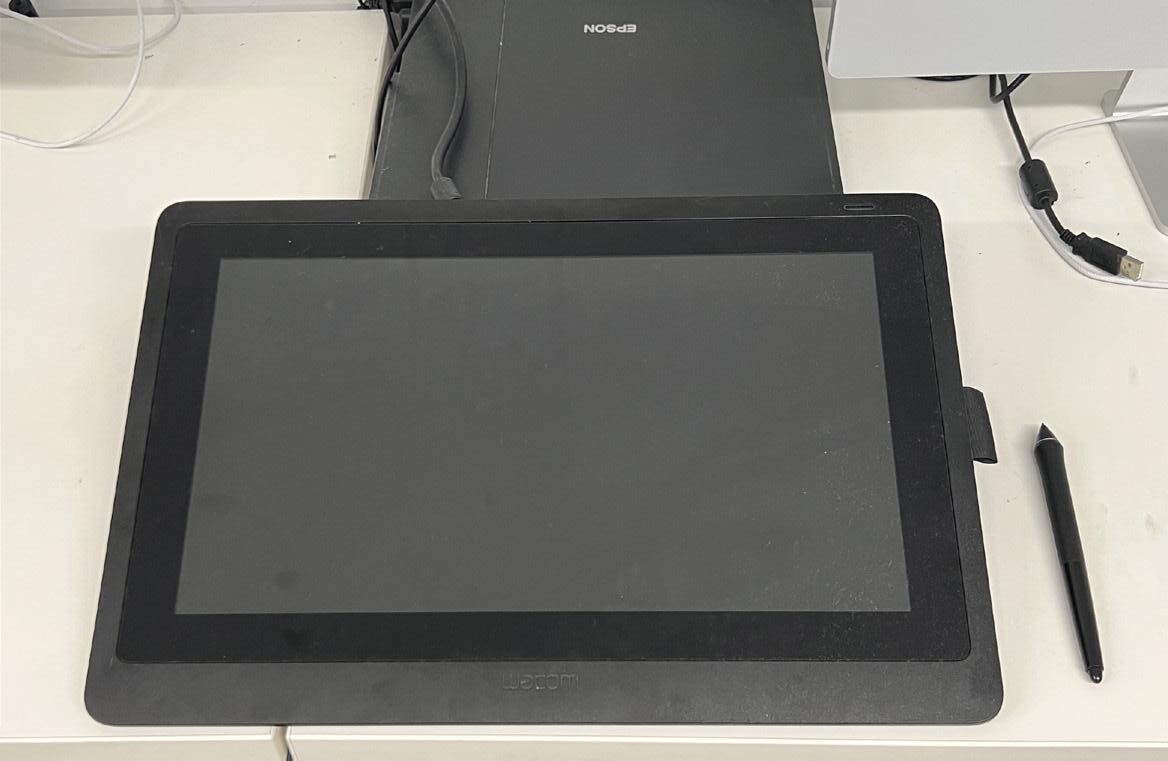
The GCSU Art Department provides students with access to mac computers. These computers may be found in the Ennis Hall basement as well as the graphic design class room. Quick and efficient these computers allow students to use advanced programs useful for producing art. The graphic design classrooms also allow students to make use of wacom tablets which share information across both screens.
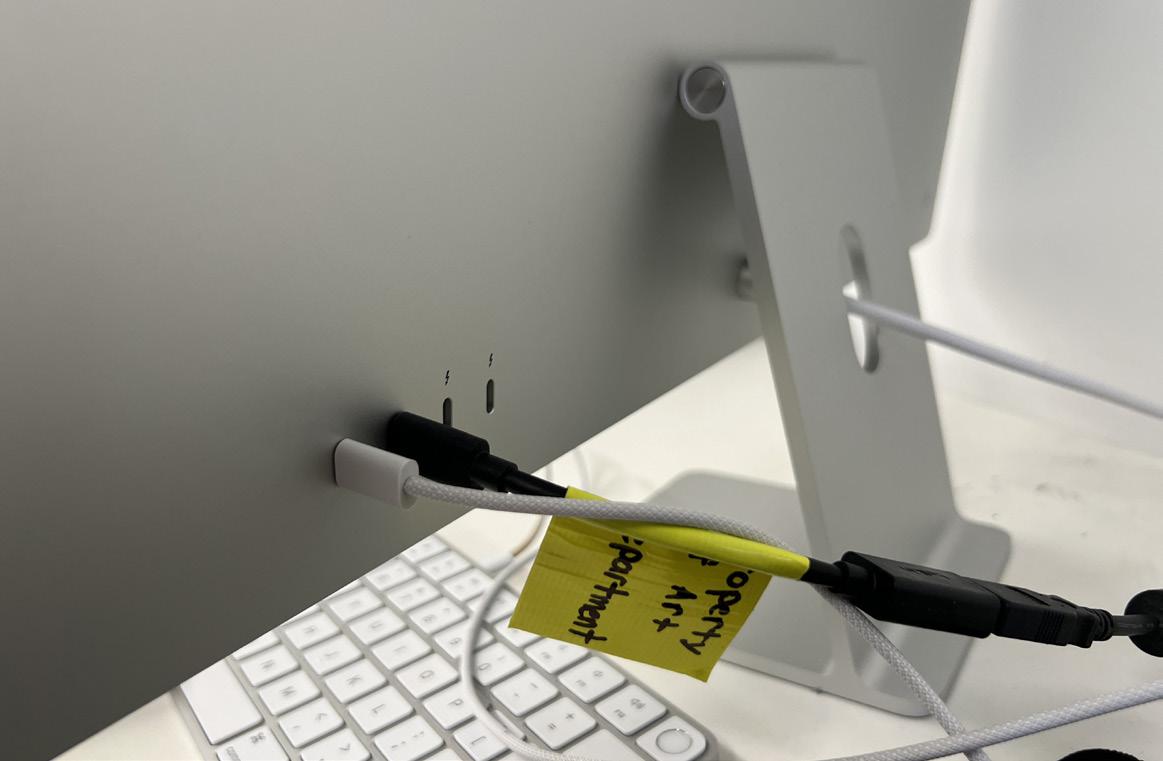
It is highly advised that students make use of file storage devices such as usb drives. These drives are essential for saving and protecting files. They also allow for students to work on multiple computers instead of being restricted to one computer that has the saved file. A special adapter is needed to attach usb devices into the department macs. The mac ports are found on the back.
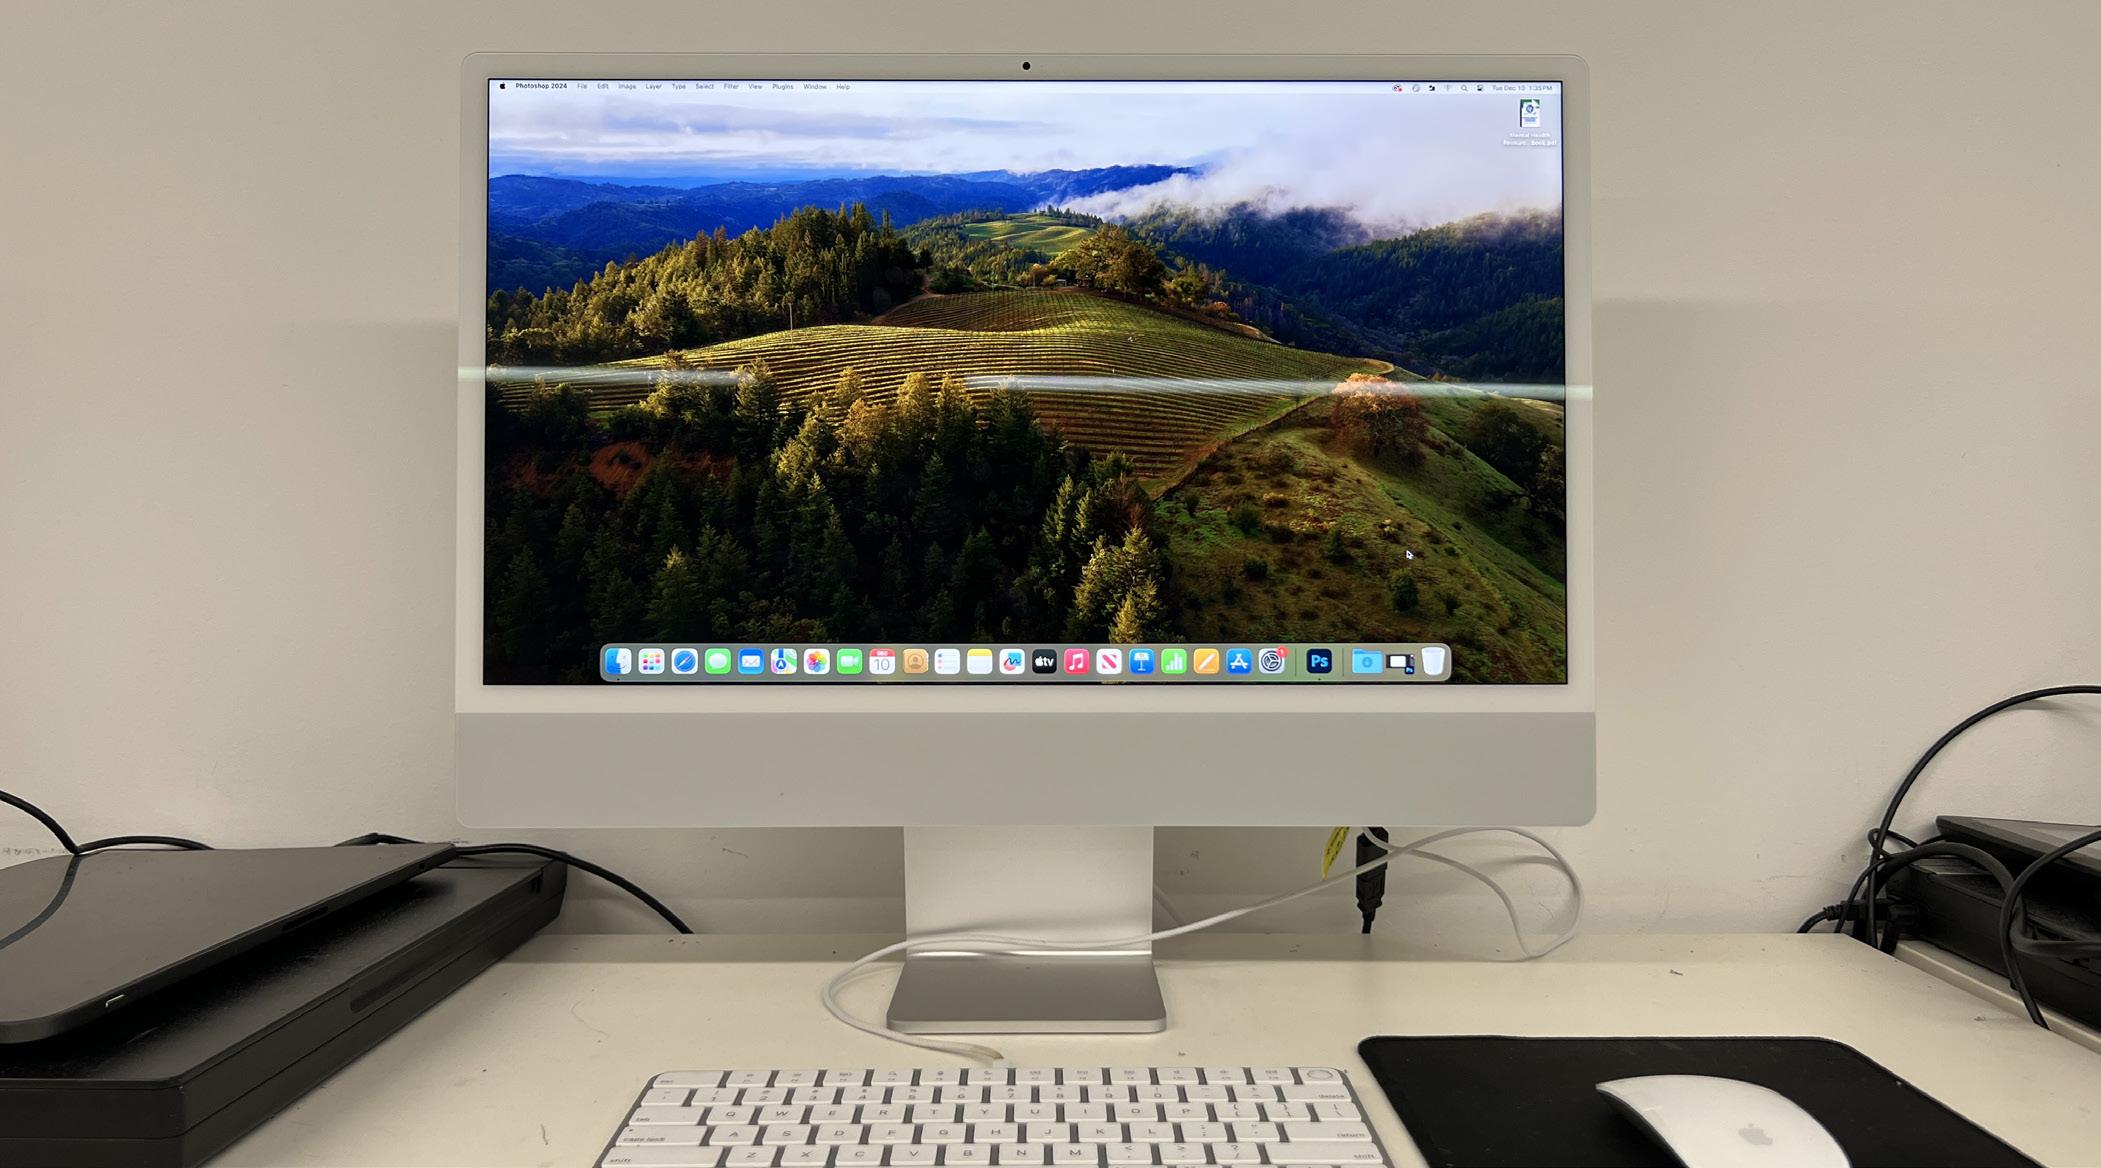
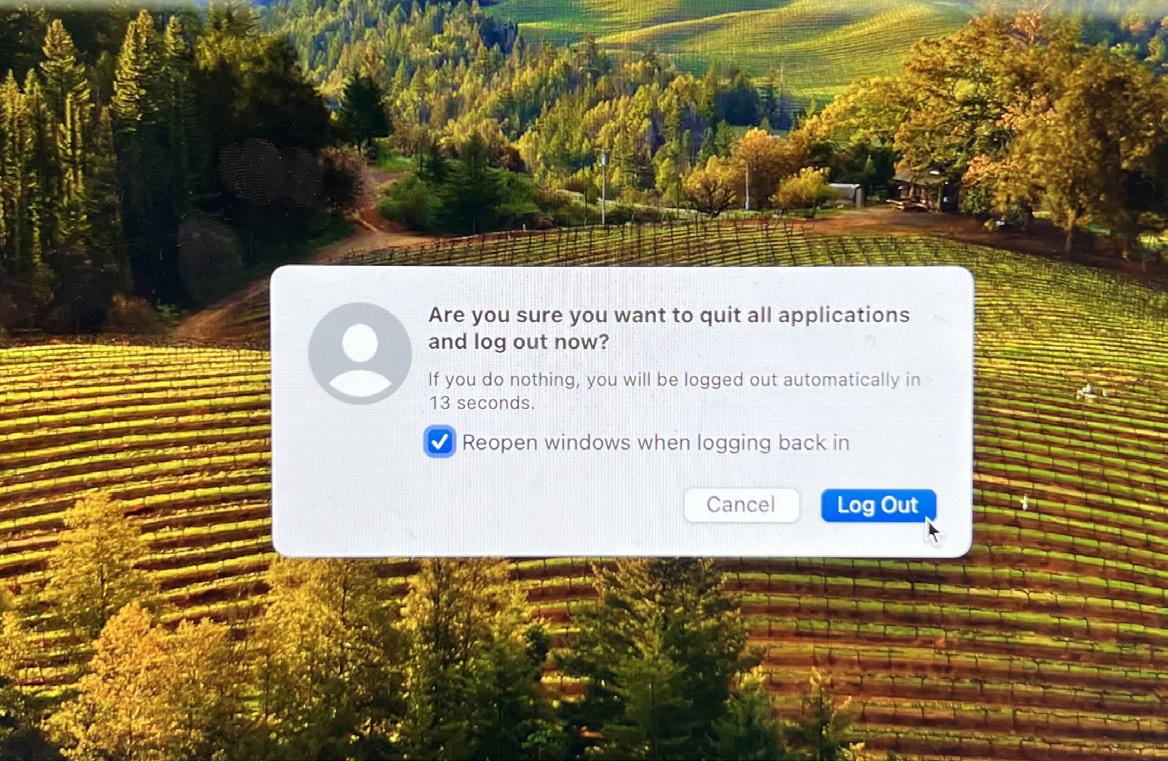
To log onto the mac computers, students simply will enter their school email and password. Upon login students can edit and change settings such as track speed or file shortcuts as it is saved to a personal profile and does not affect other users. When done using the computers students should eject usb drives to prevent file corruptionn and log out for the next class of students.
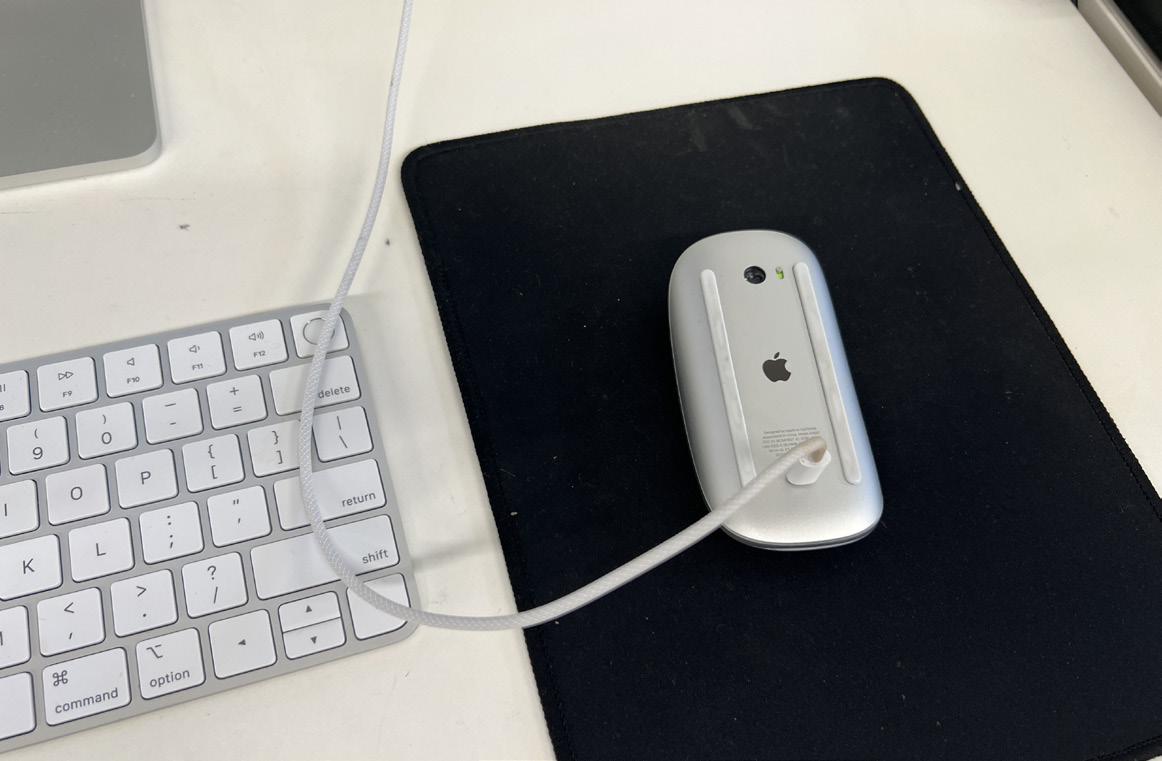
Alongside logging out students should always make sure to unplug the line running to the keyboard. This freed plug should then be put into the mouse as apple mouses lack batteries and need to be charged. This ensures that the mouse is always charged when entering the class and the plug can be removed and put back into the key board when the mac computer is in use.
adobe software
Beyond just the Art Department, GCSU allows enrolled students to utilize adobe products underneath their personal school account. In order to login into the adobe suite, students must simply enter their school email along with their school passowrd. From there the adobe suite can be accessed on either school computers or personal computers without issue. Adobe is a company that specializes in producing highly intricate programs that can be used in producing and creating all forms of art. Typically it is a subscription based service that is very pricey. As students it is a very good resource to use especially when offered free under the school.
Adobe Creative Cloud is a set of applications and services from Adobe that gives subscribers access to a collection of software used for graphic design, video editing, web development, photography, and more.
Adobe InDesign is the industry-leading layout and page design software for print and digital media. It is used to create publications, books, types of print and layout projects. It allows users to work in a series of pages.
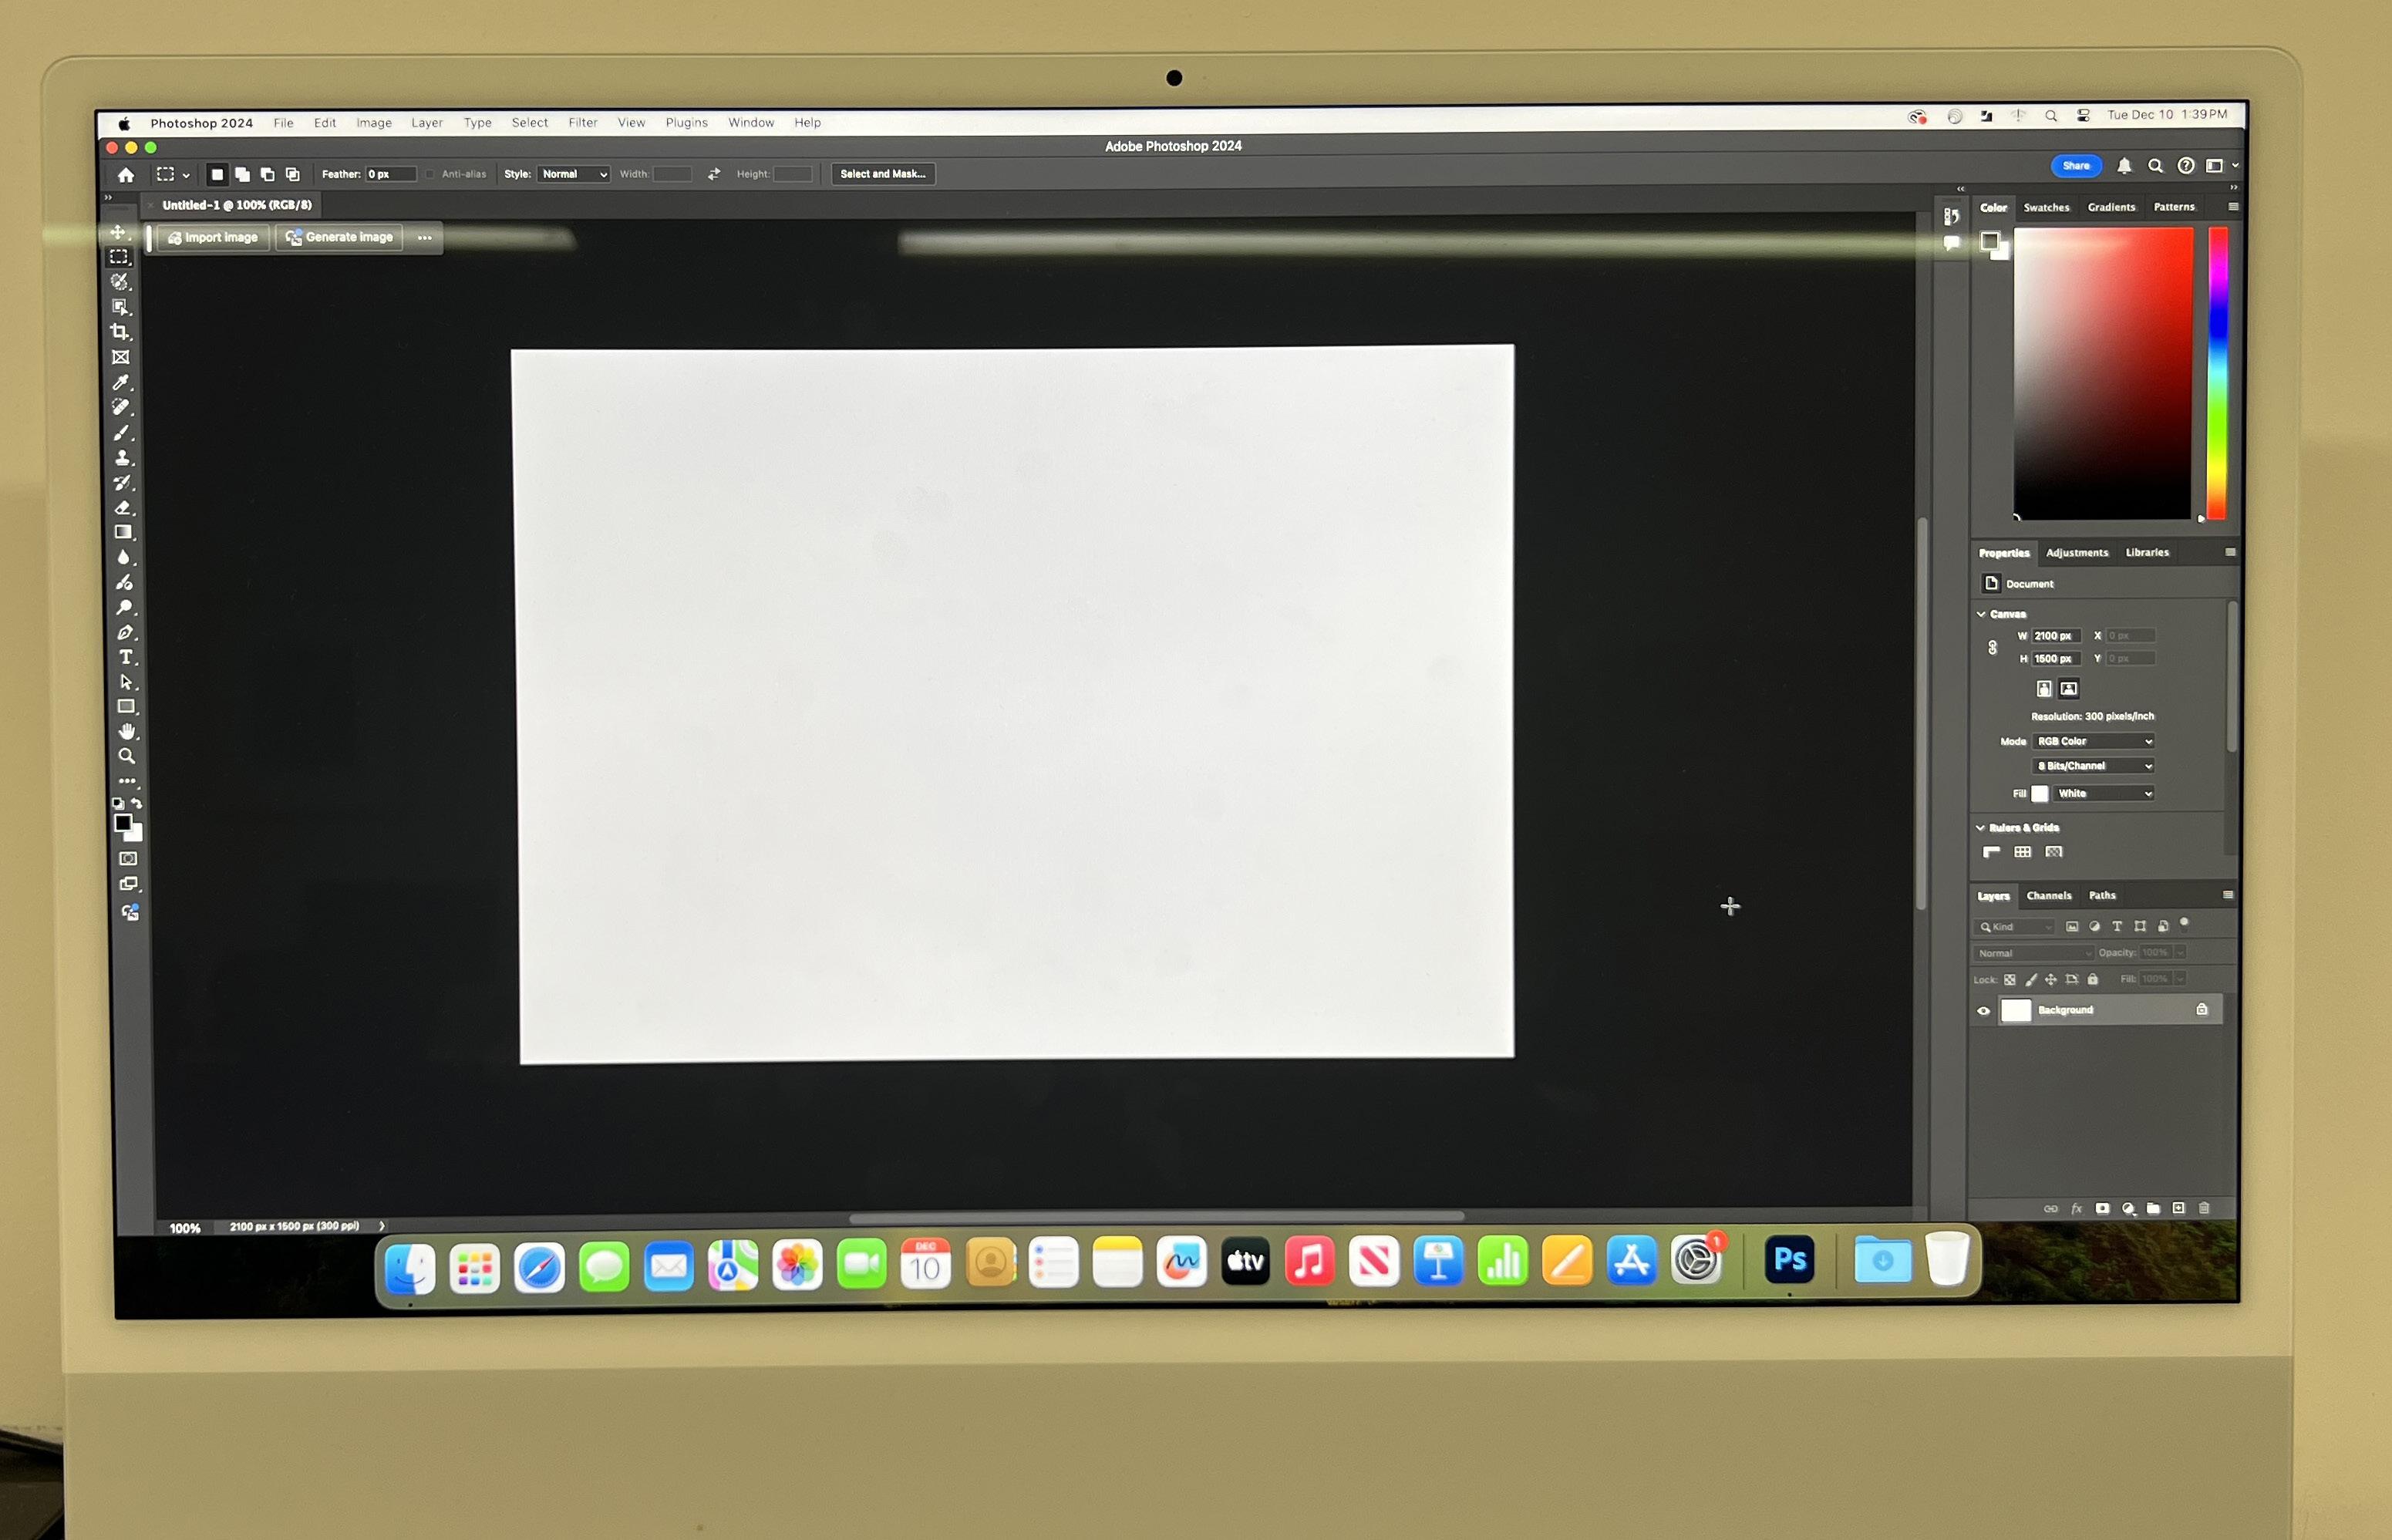
Adobe Photoshop is a graphics editor developed by Adobe. It is widely used for professional digital art, raster graphics editing, and design work. The software allows users to create, edit, and enhance images.
Adobe Illustrator is the companion product of Adobe Photoshop. Illustrator provides results in the typesetting and logo graphic areas of design. It primarily deals with vector based design unlike photoshop.
department printers
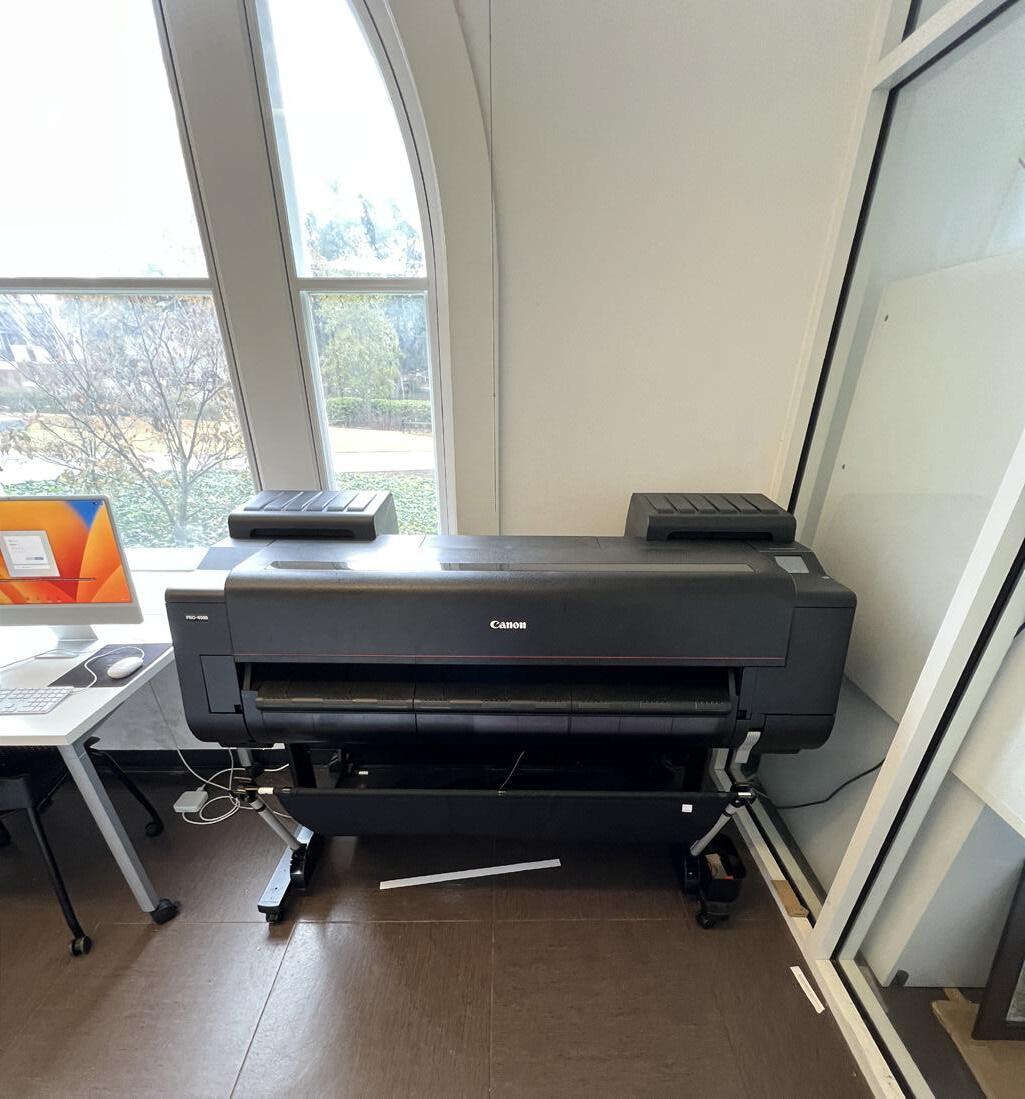
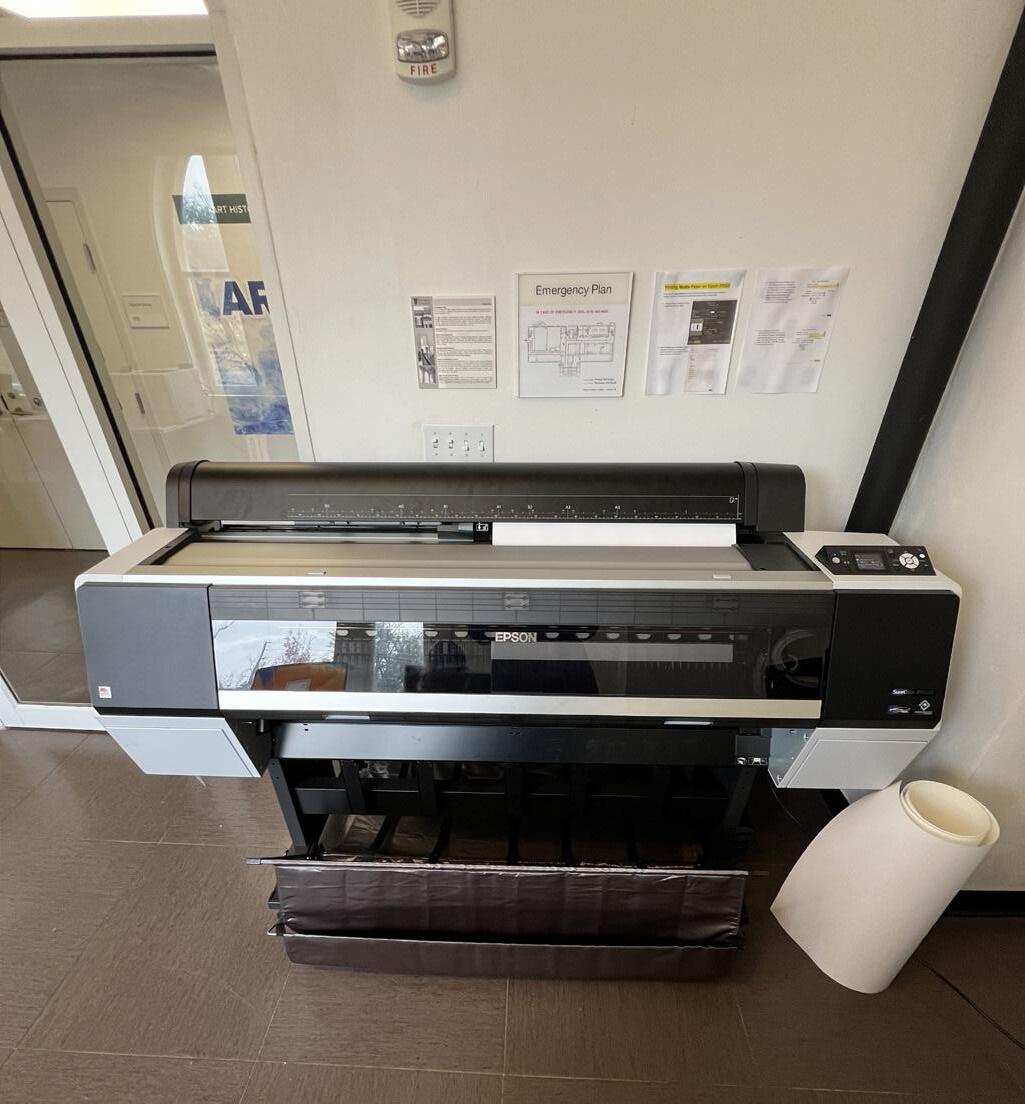
As shown above Canon Printer
As shown above Epson-9000 Printer
Located in the basement of Ennis hall are two large printers, both available to students looking to print out their digital artwork. The Canon printer specializes in printing and scanning solutions for photography, fine art, technical documents, graphics, and textile applications. It offers exceptional speed and quality, with stunning black-and-white prints, detailed gradations, and a wide color gamut. These printers are used in various applications, including graphic arts, architecture, engineering, construction, and retail markets. The other printer is the Epson-9000 which is designed for professional proofing and photographic applications. It incorporates the latest imaging technologies, including an exotic Epson PrecisionCore TFP print head and unique Epson UltraChrome HDX ten-color pigmented ink set. The printer is built with legendary Epson reliability and offers speed and durability for maximum productivity. It is designed to work exclusively with specially formulated Epson inks. Both machines are extremely high quality and should be treated with care.
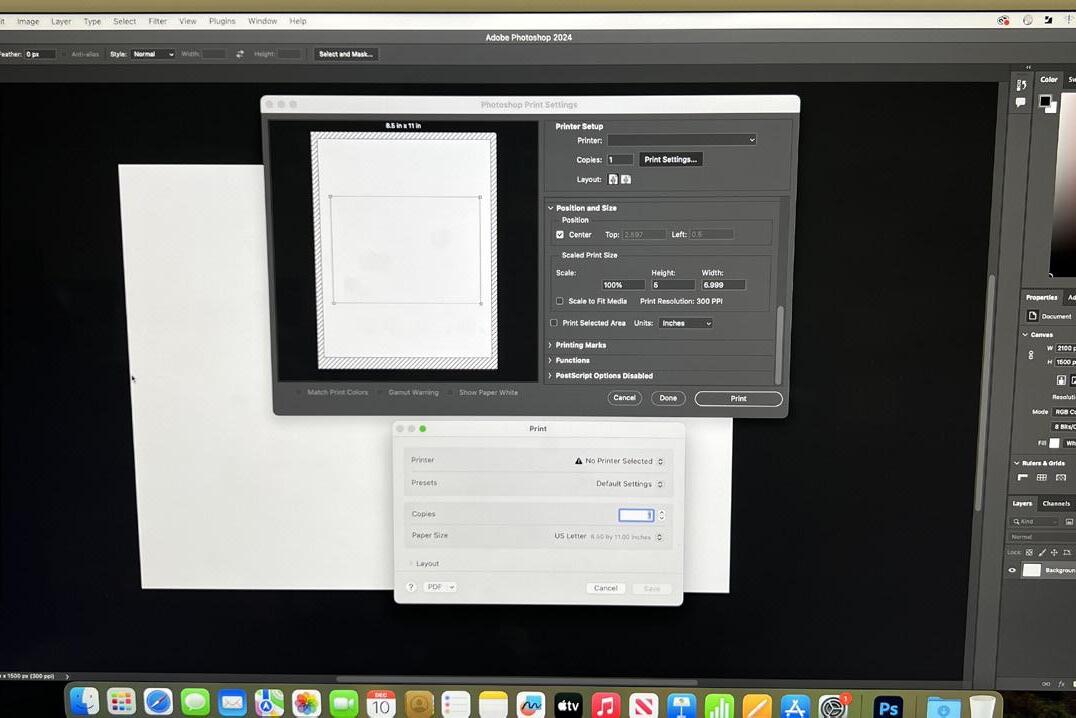
When going to print in both photoshop or illustrator it is important to pay attention to print settings before submitting. Adobe services offers an advanced array of options for printing such as color dynamics, layout options and paper types. In order to make sure a print is within the bounds of the paper the left side of the print menu will have a visual aid. Users can either select the auto fit function or manually correct the page.
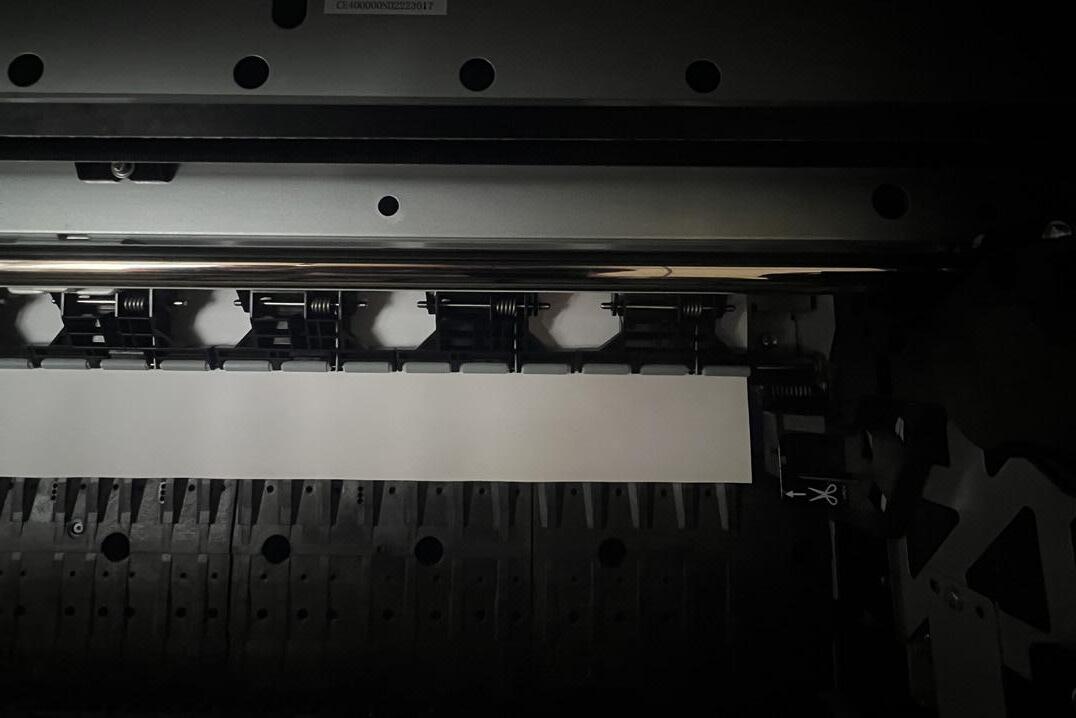
Something all students should keep in mind when using the printer is the price of the materials they are using. Both the paper and inks used by the printers are expensive and high quality and as so should be treated with care and respect. Students should always make sure that what they are printing utilizes just the amount of paper necessary. Printing small designs on large paper is wasteful and affects other students.
While the printers are very high quality and efficient machines they have the downside of being very high matinence. Often times students may encounter issues with the printers that they are unable to fix and lack the knowledge on how to fix. In this scenario it is highly advised that you reach out to department staff such as Abraham Abebe or Seth Cook. Both are willing to help, and this would prevent further issues.
next weeks edition
Learning how to Screen Print
The GSCU Art Department owns a screen printing facility off campus. Students will learn how to use the screen print machines and screen printing techniques
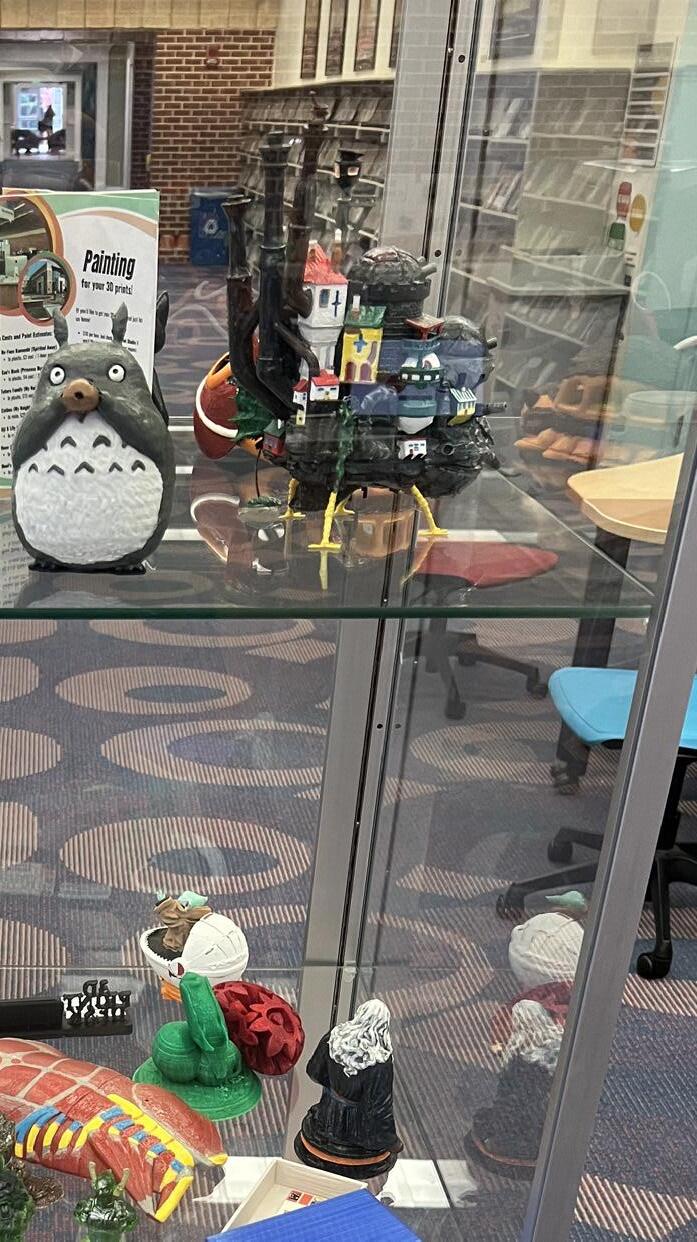
Utilizing Library 3D Printers
Inside the Dillard Russel Library are a multitude of 3D printers open for student use. Students will learn how to use 3D modeling software and what file types are used in 3D printing