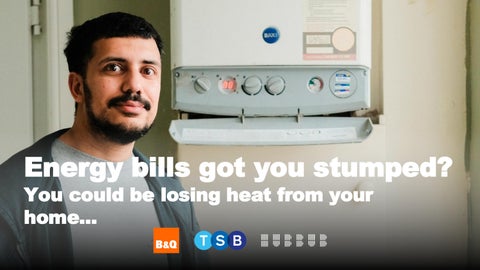
Energy bills got you stumped? You could be losing heat from your home...
Did you know every 1 in £4 spent on heating in the UK is wasted? goes on heating but we're losing
and poorly insulated homes
1
Flir C5 Thermal Imaging Cameras
How to book We're inviting members and friends of Great Horton Park Chapel Cricket Club to borrow one of the Flir C5 thermal cameras. Thermal cameras are a great tool to help you identify heat loss and draughts in your home. Once you have identified these areas, you can take direct steps to keep warmth in, draughts out and bills down.
This quick guide will help you with: 1. How to book the cameras 2. How to use the cameras 3. Where you might find cold spots in your home 4. Getting started beating heat loss
CLICK HERE BOOK A SLOT WITH A THERMAL CAMERA
1
Flir C5 Thermal Imaging Cameras
How to book We ask borrowers to: • • • • •
Keep a camera for no more than 4 days (3 nights) at a time. Return the camera promptly so that someone else can borrow it on time. When transporting the camera, store the camera in the hard case provided. Do not leave the camera unattended in visible or public places. When being used, take care while handling and use the strap provided.
Being part of Thermal Detectives: • • •
•
Read this guide to learn how to use the camera at home Book the thermal camera and take it home Use what you find with the camera to make changes at home o We've got another guide of practical home improvement tips to help o Plus tools like Snugg can help plan for bigger improvements using your postcode by finding local grants, installers and advice. Spend a few minutes telling us what you found with the cameras and what you did as a result in our follow-up surveys. We've got prizes for: o The household that makes the most changes to beat heat loss o The house that helps the most neighbours and friends take thermal imaging too
2
Using the Thermal Imaging Cameras
How to use This 2 min 30 second video shows you how to: 1) Turn on the Flir C5 thermal imaging camera 2) Take a photo 3) Access photos you've taken 4) Upload those photos to a computer via USB cable.
• •
You can access the video on youtube. FLIR user manuals and product documentation: http://support.flir.com/resources/cx
2
Using the Thermal Imaging Cameras
What’s on screen The Flir C5 thermal imaging camera is about the size of a smartphone and works like a digital camera: you can point the camera and see a 'live view' on the screen of the different temperatures. A 'spotmeter' (small dot on screen) can be used to identify the temperature of a specific point on screen. You can move the spotmeter by touching the dot on screen and dragging it to the new point you would like measured.
1. "Spotmeter" 2. Temperature at "spotmeter" 3. Live view button. 4. Gallery button. 5. Settings button. 6. Temperature scale
2
Using the Thermal Imaging Cameras
How to take thermal and normal photos at the same time
1 Select the Settings icon on the bottom righthand side panel of the camera screen
2 Scroll down the options until you get to 'save options & storage' with the folder icon
3 Once you've tapped on 'save options & storage' you'll be in a new menu.
4 Tap 'Photo as separate JPEG' to toggle the function on or off
The FLIR C5 can take both thermal imagine and regular colour photos. This is useful if you want to remember what your thermal image is referring to, sometimes they're not fully obvious You can adjust this in the settings to turn on/off normal colour photo capture according to your preference.
2
Using the Thermal Imaging Cameras
Saving and deleting your images Photos are automatically saved to the camera. Download the photos you would like to keep from the camera and delete your photos from the camera, so that you aren't leaving photos of your home for other borrowers to see. Here's how to download and save your images to a PC or MacBook.
PC
MacBook
Connect the camera to your computer/MacBook using the USB cable.
Connect the camera to your using the USB cable.
The camera should appear as a device called FLIR Camera.
The Camera (C5) should appear as a mass storage device (like a USB drive) on your desktop or in Finder.
The images are located in a folder called 100_FLIR inside the DCIM folder inside Images.
Open the C5 folder and navigate to the DCIM or Pictures folder.
Drag and drop the images to move them to your computer.
Drag and drop the images to a folder on your MacBook.
How to delete images on the camera • Select the Settings icon '️ ' on the bottom righthand side panel of the camera screen • Select ‘Save options & Storage’ • Tap 'delete all saved files' • Tap Delete; this will remove images from the camera.
2
Using the Thermal Imaging Cameras
Adjusting the settings You may need to experiment with the settings to get a good thermal image.
In automatic mode: The camera continuously adjusts. The temperature scale in the upper left corner of the screen shows the upper and lower temperatures of what's currently being shown.
The left image is auto-adjusted and it's hard to analyse different parts of the building. In the right image, the temperature scale has been adjusted to be closer to the temperature of the building, and more detail can be seen in the roof and windows.
In manual mode: You can adjust the temperature scale to values close to the temperature of a specific object in the image. This helps detect anomalies and smaller temperature differences.
In this example of a power line's isolator, the manually adjusted image better highlights where a fault is.
2
Using the Thermal Imaging Cameras
Things to be aware of When taking photography: Check inside and outside a home if possible.
Thermal imaging works best with a minimum temperature difference of 10°C between inside and outside, and ideal difference of between 15-20°C. Turn on your heating for at least 30 mins before taking photographs, and keep windows and doors shut while taking photographs. Stay away from dangerous areas and live electrical components. Reflections: you or the camera can become a source of heat reflection. Surfaces: matte surfaces work better to get temperature measurements, whereas shiny or smooth surfaces may appear warmer or colder than they actually are because they are reflecting the environment. Avoid direct sunlight on the details that you are inspecting, as the sunlight reflects and can trick the camera's temperature sensor.
Top tip: You can test reflections on a shiny metal kettle by applying a small amount of nonreflective tape. The tape will show up hotter than the rest of the kettle because the shiny surface is reflecting the room temperature.
3
What you might see
Challenges to get started Want to get used to what temperature looks like? Here are some fun things to spot temperature differences when you’re getting started. •
• •
• •
Check your hallway – shoes can keep heat for 30mins, so you might be able to spot which pair of shoes were worn last. Check your sofa or chairs - you might see an orange patch if someone sat there recently too. Run hot and cold taps at the same time and you can see the different temperature waters mixing in the sink. If you have a mixer tap, switching from hot to cold or vice versa will show the tap changing colour after the water. Play hide and seek - you can see people hiding under blankets or behind doors or curtains from their heat signature What's the hottest or coldest thing you can find at home?
3
What you might see
Finding cold spots Here's a checklist of places to look over with the thermal camera that are common heat loss spots:
Doors and door frames, including letterboxes
Around the fridge and fridge-freezer seals
Windows and window frames
Radiators and along water piping
Top floor ceilings and attic hatches
Hot water tanks and cylinders
Walls for insulations and any water leaks
Vents or extractor fans
Fireplaces, chimney breasts and covered over
Go outside and check windows, doors, walls
fireplaces
and roofs externally
This list doesn't cover every way heat might escape, so it's worth visiting every room and having a look from top to bottom and left to right, paying attention to patterns of colour that don't seem to fit with what's around it.
3
What you might see
Interpreting images Colour
Meaning
Common Examples
Purple/blue
cold
Air leakage, cold bridge, damp patch
The dark purple shows an area of wetness from an upstairs water leak.
What could different patterns or colours patches mean: •
• Pink/orange
yellow/white
neutral
warm/hot
Background temperature
Heated pipework, radiator, sunlit wall
The majority of this image is pink/orange as the background temp of the room, and the blue strip at the base of door shows a draught. The white/orange spot above the bed is showing a hornets nest in the wall
• • • •
Cold corners behind furniture > poor air flow > condensation/mould risk Linear cold shapes in walls/floors > Thermal bridging (e.g. lintels, joists) Cold around windows/doors > Air leakage, poor sealing Cold streaks after rain > Water ingress, rising damp Radiator cold at top > Needs bleeding Radiator cold at bottom > Sludge build-up (needs flushing)
3
What you might see
A home case study This 11 min video shows an example of what might show up in thermal images when used at home and common places that lose heat, including attic hatches, garage doors and kitchen flooring.
• •
If this doesn't play, you can find the video on youtube. FLIR user manuals and product documentation: http://support.flir.com/resources/cx
4
What to do about it
Beat the heat loss Now you've found where heat is escaping and the cold is getting in go to our next guide. It has tips on how to: • Draught proof uPVC doors and windows • Make a DIY draught excluder • Fit a letterbox or keyhole draught excluder • Insulate and draught proof a loft hatch • Bleed your radiators • Fit a radiator reflection panel • Install lagging around pipes • and more! If you've spotted something that needs a bigger fix, try out the SNUGG platform. Using your postcode, get a list of the energy efficiency measures to put in place in your home, check local grants, find trusted installers and work out the best way to pay.
Thank you Thermal Detectives in Bradford, in partnership with Great Horton Park Chapel Cricket Club, is funded by TSB and B&Q and supported by environmental charity Hubbub. Thermal Detectives is a pilot project to inspire and enable residents in Bradford to make home energy upgrades based on knowledge and skills gained from borrowing thermal cameras. We aim to equip residents with guides, tools and financial support so that they have warmer homes and cheaper bills. TSB, B&Q and Hubbub will use what we learn with Great Horton Park Chapel Cricket Club to create a blueprint for more businesses to help home energy improvement that works with communities.