

DENTAL SOLUTIONS
Welcome to the August/September 2025 Edition of Dental Solutions
In this issue, we shine a spotlight on the evolving landscape of oral health, from early childhood care to advanced restorative techniques highlighting the tools, technologies, and insights that empower dental professionals across Australia.
Building Healthy Smiles from the Start
The start of August 2025 marks Dental Health Week in Australia, to align with the Australian Dental Association’s (ADA) strong focus on paediatric oral health, Henry Schein has also created a number of free patient resources for your practice (see pages X to Y). These offer practical guidance for parents and care givers to support children’s dental development from birth through adolescence. Tools such as “Brushing Basics” and “10 Dental Milestones Every Parent Should Know” provide agespecific tips and highlight the importance of early orthodontic assessments and healthy snacking habits which you can share with your patients.
Preventive Care and Ergonomics
This edition encourages practices to embrace tools and connected technologies like the Colgate Connect app created to help patients track their brushing habits and how practices can promote prevention to reduce their environmental footprint. In “When You Pick It, You’re More Likely to Stick With It,” we explore the benefits of inter dental brushes versus and how giving patients the freedom to choose their interdental brushes can significantly boost daily compliance and improve longterm oral health outcomes.
Innovations in Restorative Dentistry
Explore clinical case studies showcasing the latest in composite technology and aesthetic restorations. From the seamless integration of G-ænial™ A’CHORD in anterior restorations to the dual-shade layering techniques with CLEARFIL MAJESTY™ ES-2 Premium, these features demonstrate how modern materials are transforming patient outcomes.
This edition is packed with insightful articles, real-world case studies, and practical resources, brought to you by leading global manufacturers and respected clinical professionals to support you and your practice every step of the way.
Brushing Basics: Building Strong Habits From The Start
A parent’s guide to confident brushing at every age
Highlighting the importance of children’s oral health, this flyer shows how parents and caregivers can support healthy habits from an early age. Supporting your child’s oral health through each stage of development sets the foundation for a lifetime of healthy smiles.
Birth to 12 months
Wipe your baby’s gums with a soft, clean cloth or silicone finger brush after feeds. Once the first tooth appears, start brushing twice daily with a soft-bristled baby toothbrush Use water onlyno toothpaste yet Schedule your child’s first dental visit by their first birthday
12 months to 3 years
Begin using a small amount of fluoride toothpaste - about the size of a grain of rice. Brush twice daily (especially before bed) Sit your child on your lap or stand behind them while brushing Start gently flossing once any two teeth touch Children this age need full parental assistance when brushing
3 to 6 years
Use a pea-sized amount of fluoride toothpaste
Encourage your child to try brushing, but always supervise and finish the job. Teach them to spit out toothpaste, not rinse
Establish a regular brushing routine in the morning and evening
Use a fun timer or song to help brush for two full minutes
6 years and up
Most children begin brushing more independently around this age, but supervision is still important. Remind them to brush all surfaces - not just the front teeth. Introduce proper flossing technique, or use child-friendly flossers. Reinforce the importance of brushing before school and before bed
Common mistakes to avoid
Using too much toothpaste
Skipping brushing after sugary snacks or drinks
Not brushing for the full two minutes
Letting young children brush unsupervised too early
Forgetting to replace toothbrushes every 3 months or after illness
• Healthy brushing habits support strong smiles
• Brush twice a day with fluoride toothpaste
• Clean between teeth daily
• Eat a diet low in added sugar
• Visit the dentist regularly from age one
For more free patient resources visit:
Henry Schein is proud to support dentists and specialists across Australia with the tools and resources they need to guide families through every stage of oral development. From early childhood to confident teenage smiles, we’re behind every step forward.
When To See An Orthodontist
Understanding your child’s developing smile
Highlighting the importance of children’s oral health, this flyer shows how parents and caregivers can support healthy habits from an early age. Supporting your child’s oral health through each stage of development sets the foundation for a lifetime of healthy smiles.
What age should my child see an orthodontist?
Orthodontists recommend an initial assessment by around age 7. At this stage, children typically have a mix of baby and adult teeth, and the jaw is still growing. Seeing an orthodontist early allows problems to be identified and, in some cases, corrected before they become more complex. Your dentist may suggest a referral earlier depending on your child’s needs.
Signs your child may benefit from an orthodontic check-up
• Early or late loss of baby teeth
• Difficulty chewing or biting
• Mouth breathing
• Crowded, crooked or misplaced teeth
• Thumb sucking beyond age 5
• Jaw shifting, clicking or popping
• Speech difficulties
Even if none of these signs are present, an early review gives the orthodontist a baseline for future development.
What to expect at the first visit
The orthodontist will examine your child’s teeth, jaws and bite, possibly take X-rays or images, and provide advice on any next steps. Sometimes early treatment is recommended, but often the child will simply be monitored over time. Early assessments do not always mean early braces, but they help support the best long-term outcome.
Healthy habits matter at every stage No matter your child’s age or stage, four key habits support lifelong oral health:
• Brush twice daily using fluoride toothpaste
• Clean between teeth daily using floss or interdental brushes
• Eat a nutritious diet low in added sugar
• Visit your dentist regularly
Henry Schein is proud to support dentists and specialists across Australia with the tools and resources they need to guide families through every stage of oral development. From early childhood to confident teenage smiles, we’re behind every step forward.
For more free patient resources visit:
10 Dental Milestones Every Parent Should Know
Supporting your child’s oral health journey, from first tooth and beyond
Highlighting the importance of children’s oral health, this flyer shows how parents and caregivers can support healthy habits from an early age. Supporting your child’s oral health through each stage of development sets the foundation for a lifetime of healthy smiles.
1. First Tooth Erupts (Around 6 Months)
Begin brushing as soon as the first tooth appears - twice a day with a soft baby toothbrush and a smear of fluoride toothpaste.depending on your child’s needs.
2. First Dental Visit (By 12 Months)
Your child should have their first check-up by age 1. Early visits help normalise the dental experience and spot any issues early.
3. First Full Set of Baby Teeth (Around 3 Years)
20 baby teeth should be in place by now. Keep brushing twice a day and begin gently cleaning between teeth with floss or interdental brushes.
4. First Diet Milestone: Reduce Added Sugars
Establish tooth-friendly eating habits early. Limit sticky snacks, juice, and sugary treats - your child’s teeth will thank you.
5. Establishing a Dental Home
By age 2–3, it’s ideal to have a regular family dentist - someone your child knows and trusts.
6. First Loose Tooth (Typically Age 5–7)
Celebrate this milestone! Keep up daily brushing and flossing as adult teeth start to appear.
7. First Sports Mouthguard
Once your child begins playing contact sports, a properly fitted mouthguard is essential to protect those growing teeth.
8. Eruption of First Permanent Molars (Around Age 6)
These “six-year molars” don’t replace baby teeth, so they often go unnoticed. Keep brushing and ask your dentist about protective sealants.
9. Orthodontic Assessment (Around Age 7)
Your dentist may recommend an early visit to the orthodontist to assess jaw development or bite issues - even before all adult teeth are in.
10. Transition to Independent Brushing (Ages 8–10)
Supervise brushing until around age 8, then support your child as they develop good habits on their own. in added sugar
Healthy Habits at Every Stage
No matter the milestone, support your child with these four essentials:
• Brush twice daily with fluoride toothpaste
• Clean between teeth daily
• Eat a nutritious, low-sugar diet
• Visit your dentist regularly
For more free patient resources visit:
Henry Schein is proud to support dentists and specialists across Australia with the tools and resources they need to guide families through every stage of oral development. From early childhood to confident teenage smiles, we’re behind every step forward.
Healthy Snacks for Happy Teeth
Simple swaps to support your child’s smile
Highlighting the importance of children’s oral health, this flyer shows how parents and caregivers can support healthy habits from an early age. Supporting your child’s oral health through each stage of development sets the foundation for a lifetime of healthy smiles.
One of the most impactful habits to get right early is healthy snacking. What your child eats between meals can have a big impact on their teeth.
Why snacks matter
Frequent snacking, especially on sugary or sticky foods, feeds the bacteria that cause tooth decay. Children’s teeth are still developing and need extra protection. Choosing tooth-friendly snacks can help keep enamel strong and gums healthy.
Snack smarter with these ideas
These foods support dental health and are easy to include in lunchboxes or after school:
• Fresh fruit like apple slices or berries
• Vegetables sticks with hummus or tzatziki
• Cheese cubes or slices
• Plain popcorn
• Wholegrain crackers
• Unsweetened yoghurt
• Boiled eggs
• Nut butters (where allergy-safe) on toast or celery
• Water or milk instead of juice or soft drinks
Henry Schein is proud to support dentists and specialists across Australia with the tools and resources they need to guide families through every stage of oral development. From early childhood to confident teenage smiles, we’re behind every step forward.
Snacks to enjoy occasionally
Some snacks are best kept as treats due to their high sugar or acid content, or their tendency to stick to teeth:
• Muesli bars
• Dried fruit
• Fruit juices and flavoured milk
• Lollies, biscuits and cakes
• Soft drinks or sports drinks
If your child does have these occasionally, try to keep them to mealtimes and follow up with water.
Supporting lifelong oral health
Healthy eating is just one part of a strong dental routine. Encourage your child to:
• Brush teeth twice a day with fluoride toothpaste
• Clean between teeth daily with floss or interdental brushes
• See their dentist regularly
• Choose a balanced diet low in added sugar
For more free patient resources visit:
The Importance of Tracking Oral Health
One of the greatest challenges we face as dental professionals is helping our patients be aware of the state of their oral health as well as maintain it in the long term. In this article, I hope to share some insights into the importance of tracking oral health and tools available to help your patients maintain optimum oral health.
Peter Drucker, the renowned management consultant, once famously said that “you can’t improve what you don’t measure”.1 This statement rings true for any habit we have in life, whether consciously or unconsciously. When considering habits that maintain good oral health, we as dental professionals know all too well that brushing and flossing the teeth twice daily is the key. When establishing these habits however, a reliable tracking system is required to reinforce the habit long enough for it to become second nature.
For young children aged less than 6 years of age, it is generally advised that parents brush the teeth for their children as children this age do not yet have the manual dexterity of fine motor control to be able to effectively brush well. Establishing these routines whilst young can ensure that once they start to brush on their own from 6 years old and older, they will automatically continue this habit. Of course in childhood, children seldom keep up habits of their own volition unless supervised and monitored by parents. One great way for children who are learning to brush on their own to track their brushing progress is the use of a daily tracking tool whereby they can tick after they complete the habit. One tool that is available to parents that clinicians can recommend is the Colgate Oral Health Heroes Challenge which is part of the Bright Smiles, Bright Futures educational resources. This includes a brushing challenge that requires children to tick the morning and night boxes for 28 days (4 weeks).2
Whilst the quantity of toothbrushing daily is an important factor towards optimising a person’s oral health, it is ultimately the effectiveness of plaque removal across all tooth surfaces when brushing that is the biggest prevention factor for dental diseases. One method which can be helpful in educating the efficacy of brushing is to use plaque disclosing tablets. These chewable tablets are made with food-grade vegetable dyes that stain plaque either a red or purple colour to show plaque that is still adhered to the tooth surface.3 Whilst these are effective educational tools to help patients improve their brushing efficacy, long-term compliance can be low as one disadvantage is it can temporarily stain the soft tissues around the teeth.
A great solution to this is the use of digital connected health technologies that track brushing duration, habit and brush positioning to ensure effective brushing of all tooth surfaces. One such toothbrush that allows this tracking is the Colgate Pulse Series 2. This electric toothbrush uses bluetooth connection to the Colgate Connect App on any smartphone device. A great functionality of this application is the guided brushing tool which in real time is able to educate users on how to get the most effective brush score up to 100%.4 Other brushing markers that are tracked with this application include brushing angulation as well as brushing pressure, which is a great tool for overzealous brushes who are prone to toothbrush abrasion. In alignment with connected health integration technology platforms available with modern smart technologies, the brushing data from the Colgate Connect App can also be integrated with the Apple Health App. This allows Apple users to see their oral health progress linked in with all other health parameters being recorded summarised in one area.5
Brushing Challenge Oral Health Hero
Brush Morning and Night for 28 days!
Tick when you brush 4
Start here ➜ Week 1
Brush as a family Day 1 Day 2 Day 3 Day 4 Day 5 Day 6 Day 7
Week 2
You’re half way there Day 1 Day 2 Day 3 Day 4 Day 5 Day 6 Day 7
The Colgate Connect App can also be integrated with Amazon Alexa which allows the Alexa smart assistant to send users reminders on when they need to charge their toothbrush, as well as order new replacement brush heads three-monthly. Smart reorders can also be set up with Amazon Alexa so users can ensure they have adequate supply of replacement brush heads. This provides a convenient solution for patients to have a new brush head every three months on their electric toothbrush since brush bristles become less effective with use over time.6
For more activities visit www.colgatebsbf.com.au
Connected care technologies represent the next frontier of tools patients can use to track and optimise their dental health. It is important for dental professionals to stay updated on emerging technologies so they can best empower patients to make the best decisions for their oral health.
References
1. Young Entrepreneur Council. You are what you measure. Forbes. December 4, 2018. Accessed January 23, 2025. https://www.forbes.com/councils/ theyec/2018/12/04/you-are-what-you-measure/
2. Colgate-Palmolive. Colgate Oral Health Heroes Challenge. Colgate Palmolive. Accessed January 23, 2025. https://www.colgate.com.au/oral-health-education/ educational-resources/oral-health-heroes-challenge
3. Colgate Global Scientific Communications. What Disclosing Tablets Can Tell You About Plaque. Colgate-Palmolive. 8, 2024. Accessed January 23, 2025. https:// www.colgate.com/en-us/oral-health/plaque-and-tartar/disclosing-tablets-plaque#
4. Colgate-Palmolive. Guided Brushing. Colgate Connect Support. Accessed January 23, 2025. https://connectsupport.colgate.com/hc/en-au/articles/4418730306578Guided-Brushing
5. Colgate-Palmolive. Use Colgate Connect with Apple Health. Colgate Connect Support. Accessed January 23, 2025. https://connectsupport.colgate.com/hc/enau/articles/4418706873874-Use-Colgate-Connect-with-Apple-Health
6. Colgate-Palmolive. Use Colgate Connect With Amazon Alexa. Colgate Connect Support. Accessed January 23, 2025. https://connectsupport.colgate.com/hc/enau/articles/4418733980818-Use-Colgate-Connect-with-Amazon-Alexa
Week 3
Almost finished...
Week 4
YOU DID IT!
Author
Dr Kaejenn Tchia is a recent graduate working in a corporate private practice in Darwin, Northern Territory. He is the current President of the Australian Dental Association NT Branch Inc. He has also served leadership positions for Bupa Dental Corporation including the Clinical Advisory Panel, Clinical Procurement Committee and currently the Graduate Committee. He is passionate about helping and collaborating with fellow dental colleagues, recently embarking on a new journey to help recent graduates eliminate burnout through a 6-step B.E.L.I.E.F System through his motivational coaching platform, The Limitless Dentist. Kaejenn is a member of the Colgate Advocates for Oral Health: Content Community and hopes to use this platform to raise awareness of the importance of mental health in dentistry and provide mindset tools, which can help his colleagues unlock their next level of growth and success.

Kaejenn Tchia Northern Territory
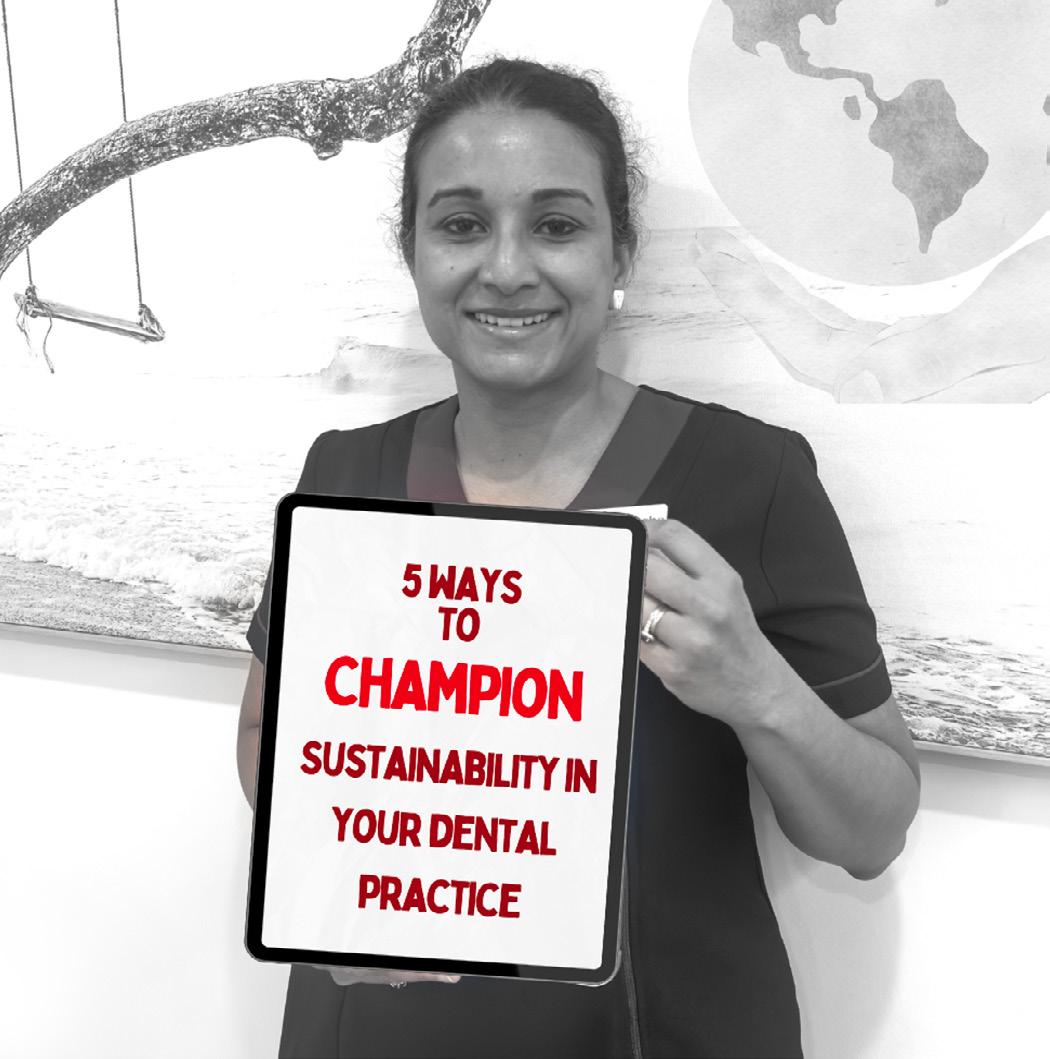
Do It Your Way: 5 Ways to Champion Sustainability in your Dental Practice.
You don’t have to be a practice owner to champion sustainability. And practicing in a sustainable way isn’t just about reusing, recycling and flicking light switches when you leave a room [1] [2]. Here are five ways you can champion your personal sustainable practice no matter where you work and who you work with, or for.
1. Champion prevention to reduce interventions.
Motivate patients to champion prevention to reduce their environmental footprint [2,3]. Many of our patients are aware of their environmental impact, and some may wish to leave a smaller footprint [3]. Prevention reduces the need for interventions to mitigate upstream energy consumption such as manufacturing and transport of treatments and materials, and reduced patient journeys further mitigates carbon emissions [1]
2. Promote and provide optimal long-term interventions
Include environmental costs as a consideration when you discuss treatment options with patients [2, 4]. Opt for materials that have a track record for quality and durability. Durable treatment options reduce long-term financial burden, reduce environmental costs, and increase patient satisfaction. While the initial cost of a temporary solution appears low, long term costs include additional appointments for repairs, that result in wasted materials, resources, and clinical time, and can diminish your career satisfaction [1, 4].
3.
Harness the power of collaboration
Understand the benefits of integrated care [2,4] by involving suppliers, practice staff and patients. Maintain a good stock control system by advocating to order products in bulk to reduce transportation costs, and use materials before expiry [1] .
Plan and communicate your procedures in advance to help your assistant anticipate immediate clinical need to reduce their sterilising load and waste.
Consider batching appointments for families and book long appointments for multiple treatments. As long as it’s financially viable for patients, long appointments reduce surgery turnover, sterilising loads, improves your hourly rate reduces patient visits and consequently, emissions [1, 4].
4.
Strive for dental excellence
Become a lifelong learner and adapt new technologies and methods [4]. Many new technologies are designed with the environmental factors in consideration. For instance, cloud based practice software reduces paper waste and scanning technologies replace impression material.
5. Be the change…
you want to see (attributed to Mahatma Ghandhi). Research shows that our behaviours, beliefs and health outcomes are often shaped by the people close to us [5]. Essentially, we are the sum of the five closest people in our circle, and our habits and behaviours are moulded and influenced by our proximal networks [6]. And in dental practice, our networks are our colleagues, and support staff. We spend more time with our workmates, than we do with our own partners and family. So if you want to influence your fellow workers, be the change you want to see. Start incorporating these practices into your workflow, and you may be surprised the ripple effect and influence in everyone’s behaviour [1]
You don’t have to be a practice owner to champion sustainability. Remember to promote the environmental benefits of prevention, deliver durable dental interventions, unite to mitigate waste, adapt evidence based sustainable practices and champion sustainability in your practice.
References
1. Association., A.D. Sustainable Dentistry: How to Guide for Australian Dental Practices. [Online] 2025 [cited 2025 March 16]; Available from: https://ada.org.au/ resources/sustainable-dentistry.
2. Martin, N. and S. Mulligan, Environmental Sustainability Through Good-Quality Oral Healthcare. Int Dent J, 2022. 72(1): p. 26-30.
3. Byrka, K. and F.G. Kaiser, Health performance of individuals within the Campbell paradigm. International Journal of Psychology, 2013. 48(5): p. 986-999.
4. Duane, B., et al., Sustainability in Dentistry: A Multifaceted Approach Needed. Journal of Dental Research, 2020. 99(9): p. 998-1003.
5. Umberson, D. and J. Karas Montez, Social relationships and health: A flashpoint for health policy. Journal of health and social behavior, 2010. 51(1_suppl): p. S54-S66.
6. Swart, T., The Source: Open Your Mind, Change Your Life. 2019: Random House.
Author
Dr Arosha Weerakoon is senior lecturer and course coordinator at the University of Queensland’s (UQ) School of Dentistry in public health and professional practice, supervises research in dental materials, and is part of a multidisciplinary UQ team working to implement and evaluate the use of AI in higher education. She is principal dentist and owner of Tewantin Family Dental on the Sunshine Coast, serves as Deputy Chair of the Clinical Advisory Council for Country to Coast Queensland, and as an Advocate for Oral Health and Key Opinion Leader for Colgate. She collaborates with industry partners such as Kuraray Noritake Dental, contributes to national and international professional bodies, including the Australian Dental Congress organising committee. Arosha is a Fellow of the Royal Australasian College of Dental Surgeons, International College of Dentists, and the Pierre Fouchard Academy.
Her commitment to professional development was recognised with the 2022 BOQ Specialist Practice Bursary from the Australian Dental Association (QLD) and the Brisbane Lord Mayor’s Convention Trailblazer Grant in 2019. The same year, she won Universities Australia’s Vice Chancellor’s Award for science communication.
As a science communicator, Arosha communicates oral health messages to the public through various media platforms. Globally, Arosha is the top contributor on oral health-related articles for The Conversation Media Group. She is dedicated to enhancing oral and general health through community engagement, interdisciplinary collaboration, and patient empowerment. As a Colgate Advocate for Oral Health, Arosha aims to foster meaningful dialogue among health professionals to improve patient outcomes and inspire greater clinical engagement with research.

Dr Arosha Weerakoon Queensland

When You Pick It, You’re More Likely to Stick With it
Customising interdental brush recommendations
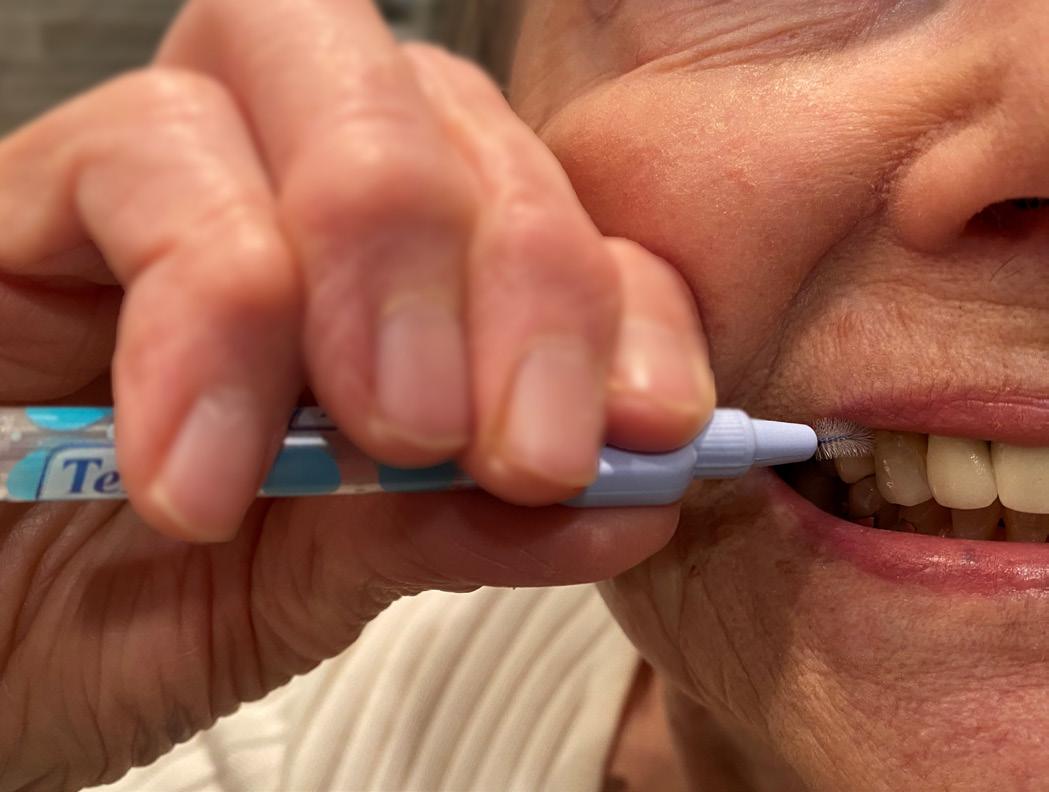
Interdental brushes are the most effective tools for cleaning between teeth, especially for patients with spaces or periodontal disease. Share your knowledge with your patients and allow them to try different interdental brush options available. Patients are more likely to use the brush daily if they can choose the brushes themselves. TePe offers a wide range of interdental brushes, all of which carry the ADA seal of approval. This article highlights the importance of interdental brushes for maintaining oral health, provides practical tips for dental professionals and share everything worth knowing about TePe’s interdental brushes.
Interdental brushes play a key role in daily oral hygiene care
Maintaining good oral health is crucial for preventing periodontal diseases and ensuring overall well-being. Among the various tools available for mechanical plaque removal, interdental brushes have emerged as the most effective for cleaning between teeth and improving gingival health. This article highlights the importance of adding interdental brushes to the daily oral hygiene routine, based on insights from two comprehensive studies: “Sälzer 2021, Contemporary practices for mechanical oral hygiene to prevent periodontal disease” and “Slot 2020, Mechanical plaque removal of periodontal maintenance patients”. Read more, and you will also be presented the range of TePe’s interdental brushes, to facilitate a suitable brush for everyone.
The role of plaque control in periodontal health
Periodontal diseases, such as gingivitis and periodontitis, are primarily caused by the accumulation of dental plaque. Periodontal disease most often starts between the teeth. Gingivitis, the initial stage of periodontal disease, is characterised by inflammation of the gums and can progress to chronic periodontitis if left untreated. Controlling plaque effectively is essential for preventing these conditions and maintaining periodontal health.
Evidence-based recommendations for interdental brushes
Interdental brushes have been identified as the most effective tool for removing plaque between teeth and improving gingival health. The systematic review and network meta-analysis conducted by Slot et al. (2020) emphasised the superiority of interdental brushes over other interdental cleaning devices, such as dental floss and toothpicks. The study found that interdental brushes significantly reduced plaque and gingivitis, making them a fundamental part of the oral hygiene routine for periodontal maintenance patients
Advantages of interdental brushes
1. Superior plaque removal:
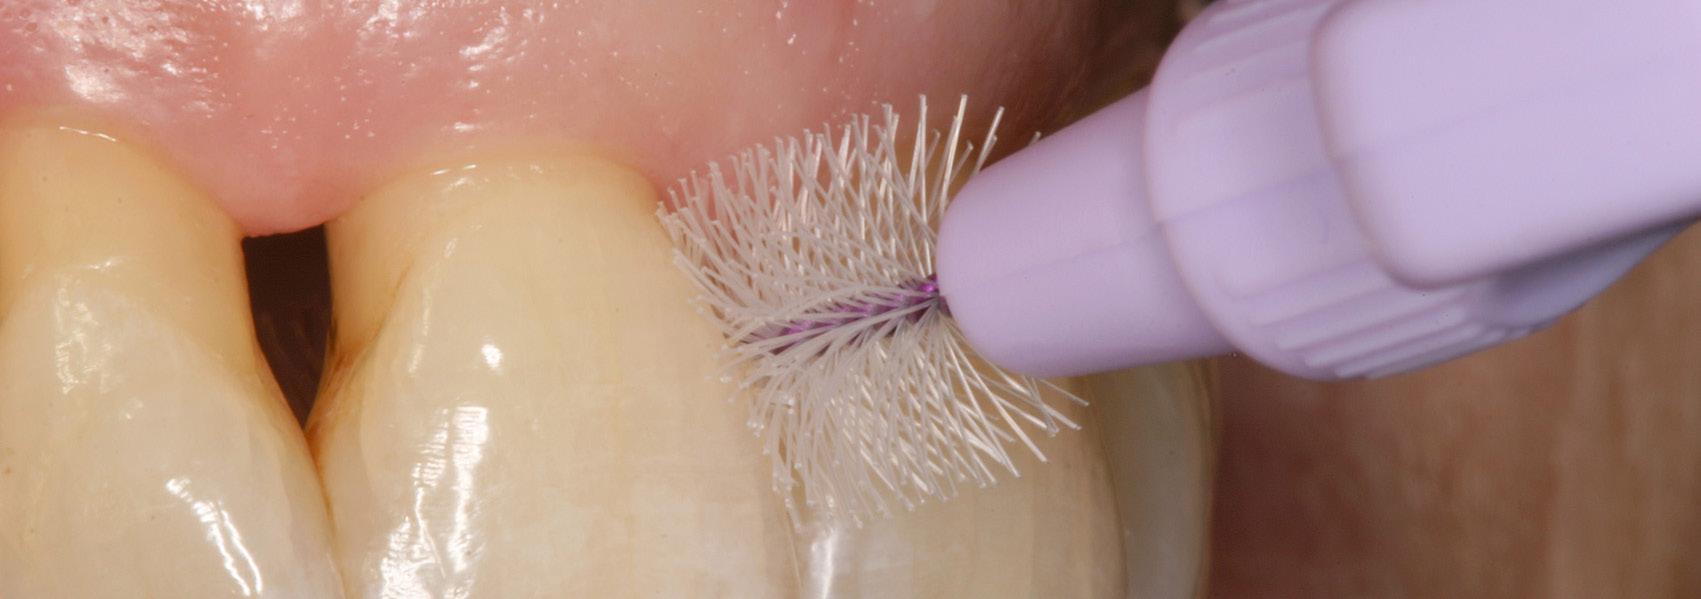
Interdental brushes are designed to reach areas between teeth that regular toothbrushes cannot access. Their bristles effectively remove plaque and food particles, reducing the risk of gingivitis and periodontitis. Numerous studies have shown its superiority over other interdental cleaning tools for decades.
2. Ease of use:
Unlike dental floss, which requires a high degree of skill and motivation, interdental brushes are user-friendly and can be easily incorporated into the daily routine. Their ergonomic design allows for comfortable handling and efficient cleaning.
3. Versatility:
Interdental brushes come in various sizes to accommodate different interdental spaces. This versatility ensures that patients can find the right brush size for their specific needs, enhancing the effectiveness of their oral hygiene routine. ISO has decided upon 9 sizes, ranging from size 0-8.
4. Clinical evidence:
The review by Sälzer et al. (2021) highlighted the importance of evidence-based recommendations for oral hygiene practices. Interdental brushes have been consistently shown to improve gingival health and reduce plaque levels, making them a reliable choice for dental professionals.
5. Prevention of periodontal diseases:
Regular use of interdental brushes can significantly reduce the risk of periodontal diseases. By effectively removing plaque and food particles from between teeth, interdental brushes help prevent the onset of gingivitis and its progression to periodontitis. This preventive measure is crucial for maintaining long-term oral health and avoiding the complications associated with periodontal diseases.

6. Patient compliance:
Interdental brushes are more likely to be used consistently by patients compared to other interdental cleaning tools. Their ease of use and effectiveness make them a preferred choice for many patients, leading to better compliance with oral hygiene recommendations. Dental professionals can further increase patient compliance by providing personalised advice, letting them try different textures/handles and demonstrating how to use the brushes correctly.
7. Cost-effectiveness:
Interdental brushes are a cost-effective solution for maintaining oral health. They are relatively inexpensive and can be reused multiple times before needing replacement. This costeffectiveness, combined with their superior plaque removal capabilities, makes interdental brushes an excellent investment for patients seeking to improve their oral hygiene.
8. Safety:
Interdental brushes are safe to use and have been shown to cause minimal trauma to the gums when used correctly. Unlike toothpicks, which can cause damage to the gums if used improperly, high-quality interdental brushes are designed to clean gently and effectively without causing harm. Dental professionals can provide guidance on the correct technique to ensure safe and effective use.
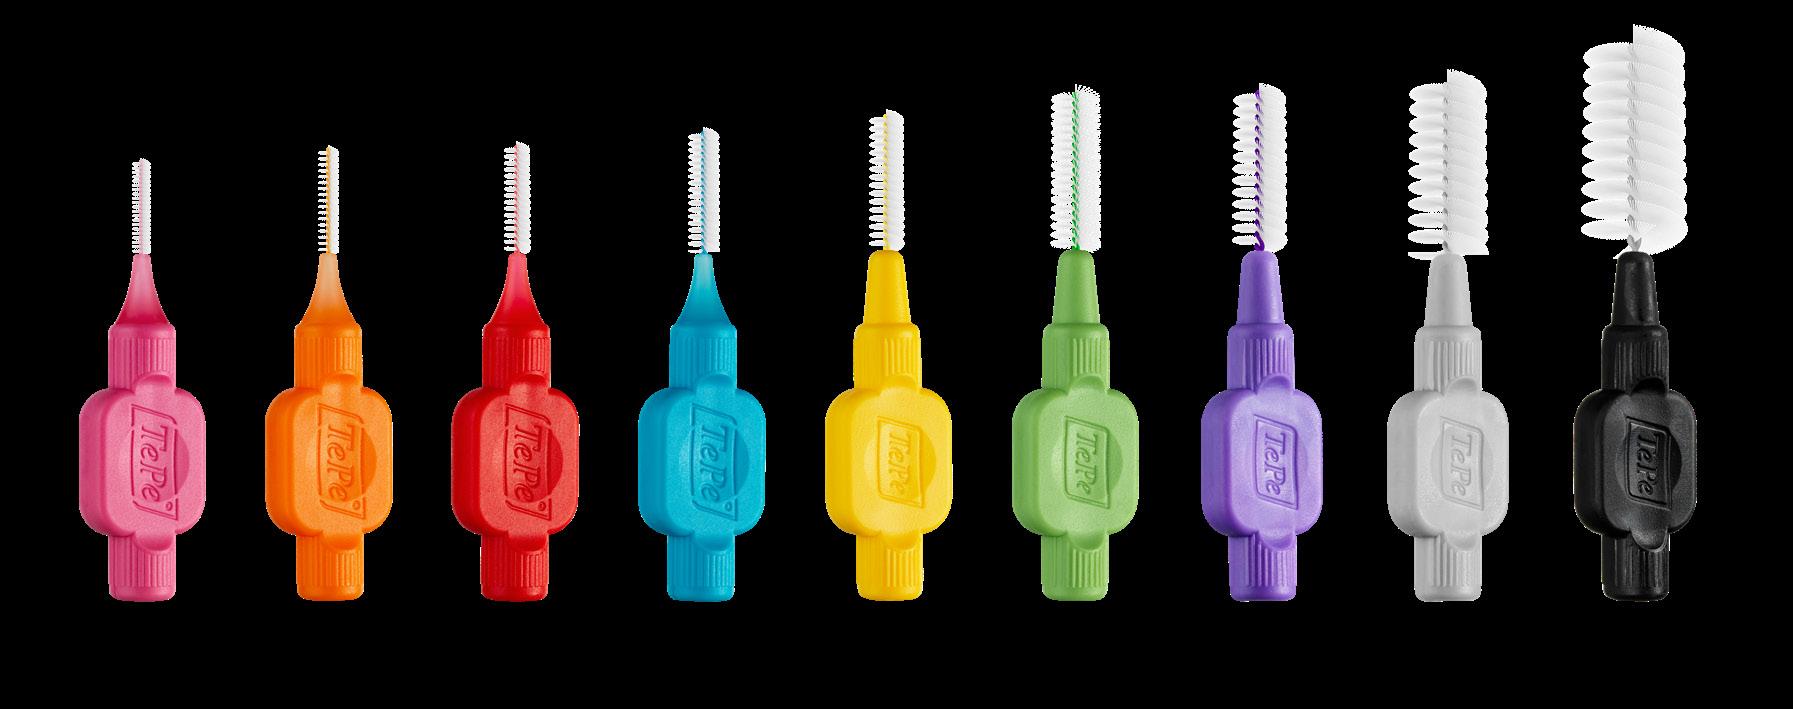
TePe’s interdental brushes
Interdental brushes are the preferred interdental cleaning device to recommend for patients with spaces and periodontal disease. TePe, a leading company with oral health, offers a range of interdental brushes designed to fit different clinical situations and patient preferences. TePe’s range includes TePe Interdental Brush Original, TePe Interdental Brush Extra Soft and TePe Angle, each with unique features to cater to various needs.
TePe’s interdental brushes have many key features, such as:
• Optimal filament coverage of the wire and plastic-coated wire for safety and comfort
• Ergonomic handle for a stable grip and good control for the back-and-forth movements
• Flexible neck on the smaller sizes (ISO 0-3) to allow for increased durability and access to posterior teeth
• Thicker bendable wire on the larger sizes (ISO 4-7) allows for easy access between the back teeth
• Handle and cap are made with renewable materials (via the mass balance approach ISCC PLUS certified)
Nearly all products from TePe are produced in Malmö, Sweden. The production is powered by 100% renewable energy, and all handles for the TePe toothbrushes and interdental brushes are made with renewable or mass balanced materials.*
*TePe sources 100% raw materials for the toothbrush- and interdental brush handles, as well as the flosser, tongue cleaner, travel case, cap and extra grip, from either renewable raw materials or certified renewable raw materials via the mass balance approach, the latter independently certified by the International Sustainability and Carbon Certificate PLUS (ISCC PLUS).
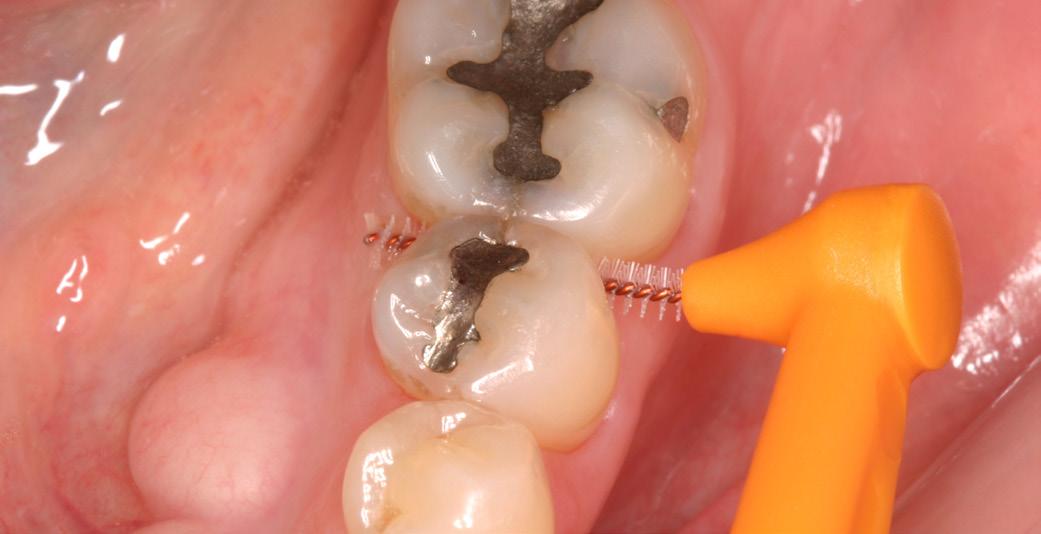
TePe Angle & Extra Soft – Interdental Cleaning for Every Need
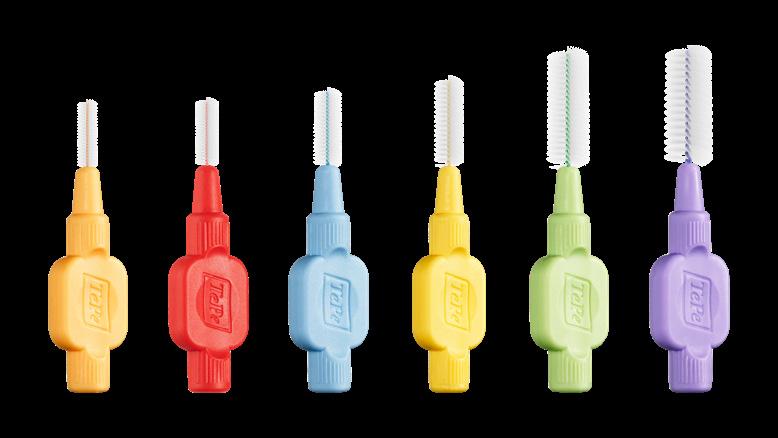
TePe Original Interdental Brush come in all nine ISO sizes (0-8). TePe Interdental Brush Extra Soft is available in six ISO sizes (1-6), and TePe Angle is available in six ISO sizes (0-5).
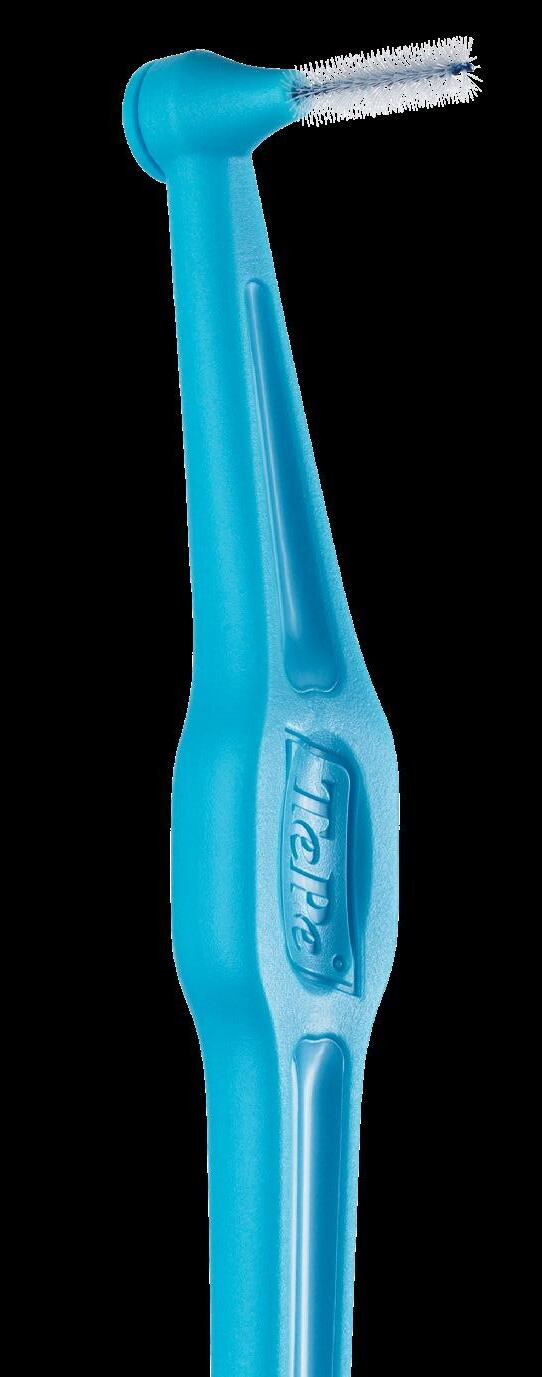
TePe Angle has an angled brush head for easier access, especially when cleaning between posterior teeth. For some patients, it is easier to clean from the buccal side using the pre-angled brush head. TePe Angle is also suitable for cleaning from the lingual/palatal side, as the posterior proximal spaces have wider lingual embrasures. The longer handle is easier for some patients to hold, making TePe Angle a great product for elderly or hospital care, as it is easier to clean between someone else’s teeth with a longer handle

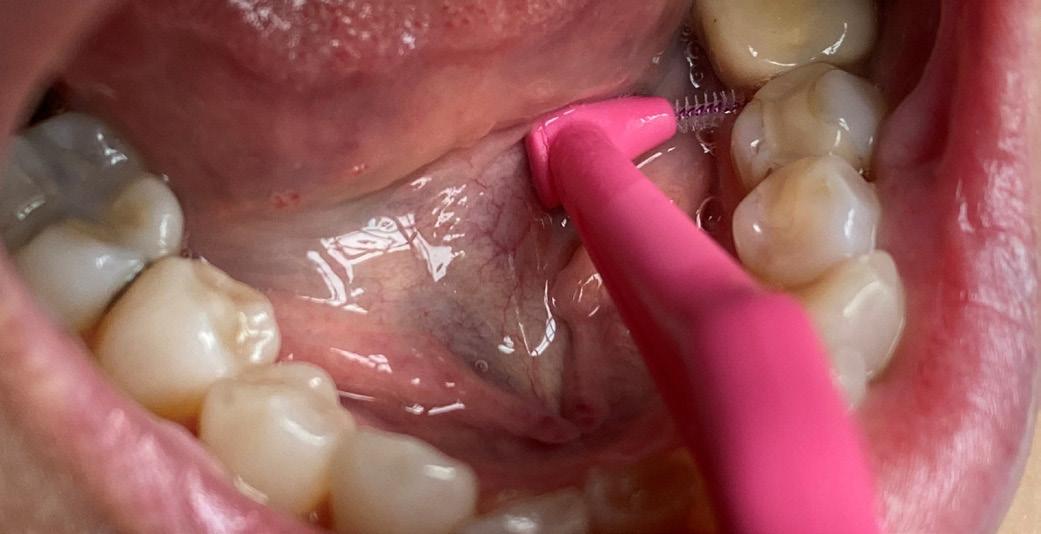

TePe Angle & Extra Soft –Interdental Cleaning for Every Need
TePe Interdental Brush Extra Soft (ISO size 1-6) is designed for gentle cleaning. It is suitable, for example, in patients with sensitive teeth, implants installed in tissue with less keratinised mucosa, sore gingiva, dry mouth, or those who prefer a softer range. The colours are the same as the original, but paler.
Practical tips for dental professionals
1. Patient education:
Dental professionals should educate patients about the benefits of interdental brushes and demonstrate their proper use in their mouths. Providing hands-on training will help patients feel more confident in using these tools into their daily routines.
2. Personalised recommendations:
Tailoring oral hygiene advice to each patient’s needs is essential. Trying different filament textures, assessing the size of interdental spaces and recommending the appropriate brush size, can enhance the usage and effectiveness of plaque removal.
3. Regular monitoring:
Periodic check-ups allow dental professionals to monitor patients’ oral hygiene practices and make necessary adjustments. Encouraging patients to use interdental brushes consistently can lead to long-term improvements in periodontal health.
Concluding reflections
Letting interdental brushes be a natural part of the daily oral hygiene routine is crucial for maintaining a healthy mouth and preventing periodontal diseases. The evidence from the studies by Sälzer et al. (2021) and Slot et al. (2020) underscores the effectiveness of interdental brushes in reducing plaque and improving gingival health. Dental professionals are instrumental in inspiring patients and championing the use of these tools, guiding them towards optimal oral health outcomes.
By prioritising interdental brushes and providing personalised recommendations, dental professionals can help patients maintain a healthy mouth and prevent the progression of periodontal diseases. The integration of interdental brushes into daily oral hygiene routines is a simple yet powerful step towards achieving long-term oral health.
References
Sälzer, S., Graetz, C., Dörfer, C. E., Slot, D. E., & Van der Weijden, F. A. (2021). Contemporary practices for mechanical oral hygiene to prevent periodontal disease. Periodontology 2000.
Slot, D. E., Valkenburg, C., & Van der Weijden, G. A. (2020). Mechanical plaque removal of periodontal maintenance patients: A systematic review and network meta-analysis. Journal of Clinical Periodontology.
Author
Dr von Geijer works part-time at a private dental office in Sweden and TePe HQ in Malmö, Sweden. She has long clinical experience and is particularly interested in prevention and oral health. She has always placed a high value on working with preventive care. Dr von Geijer has held temporary preclinical positions as amanuensis at the University of Lund, including basic research and assistance with education/training at the medical and dental schools. She also has experience lecturing to professionals when employed by pharmaceutical companies and companies within the dental industry. Since 2015 Dr von Geijer has been employed by TePe and a lecturer at universities worldwide.
Michaela von Geijer Doctor of Dental Surgery
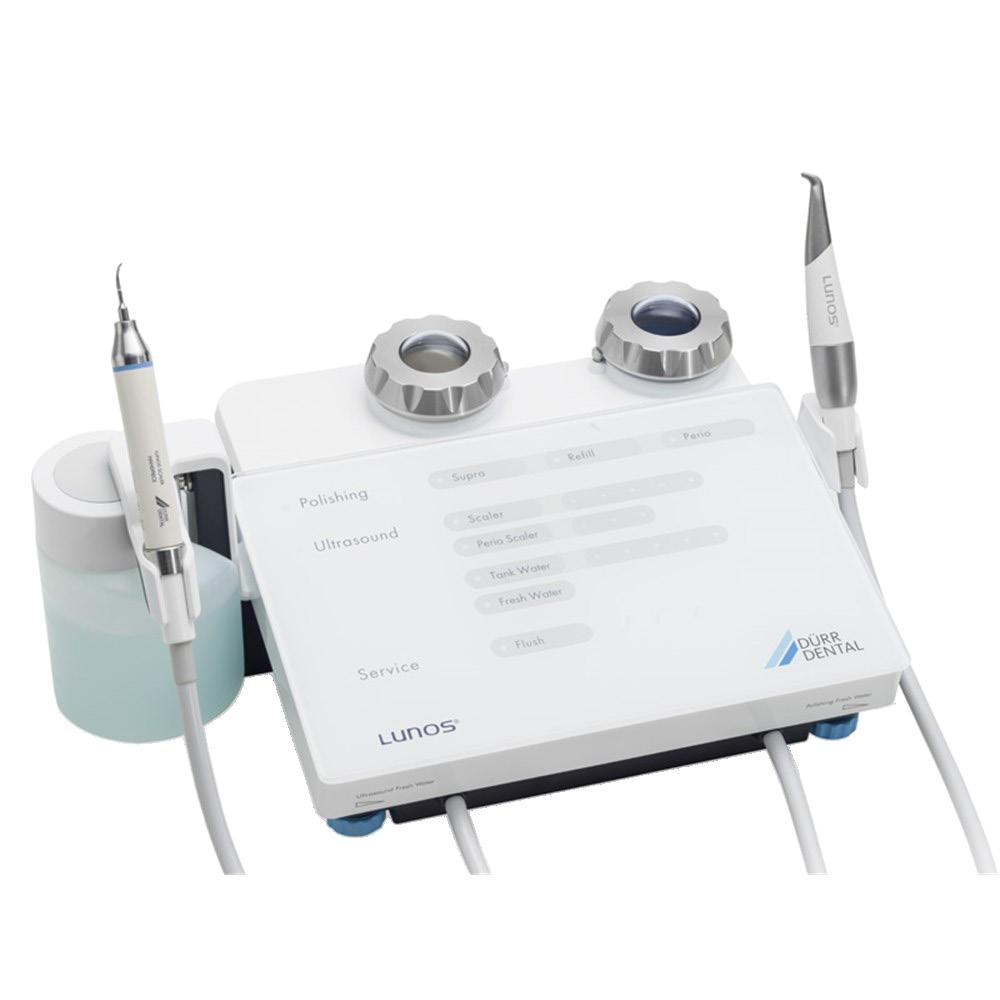
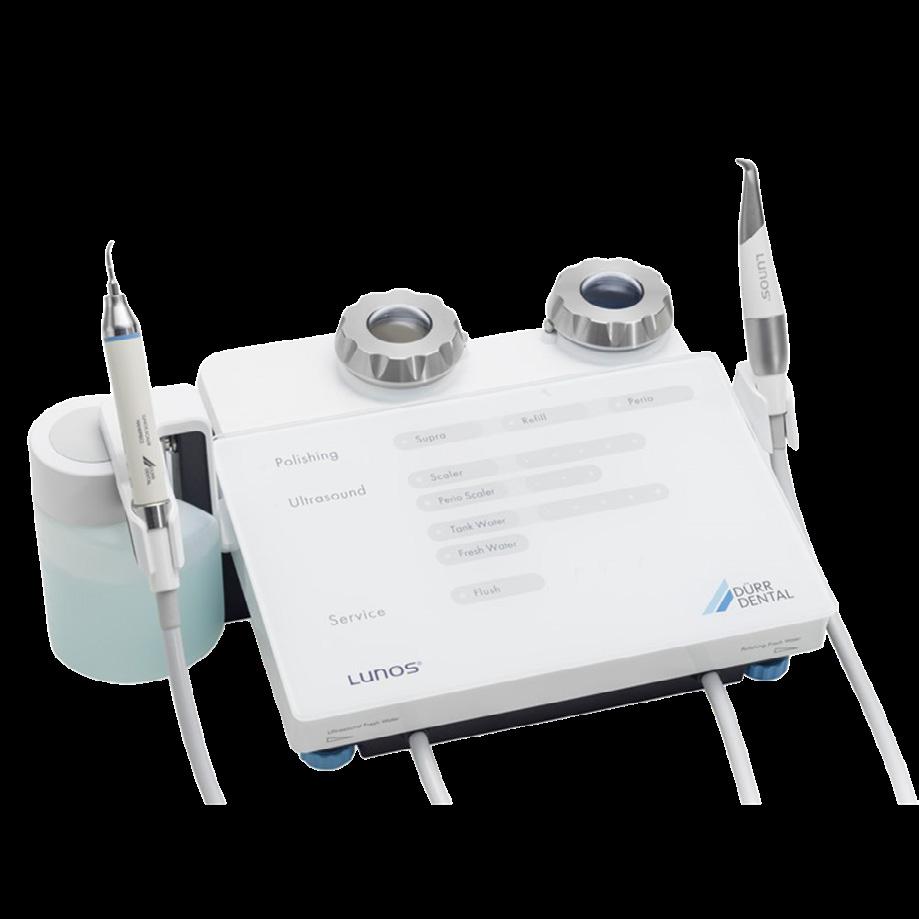
MyLunos Duo
MyLunos Duo combines two of the most important treatment methods for a prophylaxis session: powder jet treatment and ultrasound treatment. The combined unit enables complete prophylaxis and periodontal treatment using just a single device, with highly flexible application tailored to the needs of the individual patient – ranging from ultrasonic removal of supragingival and subgingival calculus to the removal of discolouration and biofilm with the powder jet.
Professional Tooth Cleaning After Orthodontic Treatment
MyLunos Duo Case Report
Practice
Valentina Vidmar Licul, Dentist 51215 Kastav, Croatia
Patient
Male, Age 31
Smoker
Healthy individual, came for the first time in our clinic 3 months after removing fixed braces and cleaning treatment provided in the orthodontic practice. Chief complaint was bleeding of the gums and swollen gums. Oral hygiene average to poor.
Initial Situation
Initial findings were a substantial amount of supragingival plaque and tartar, as well as BOP. No bone loss shown on OPT, PD all less than 3 mm.
Treatment and result
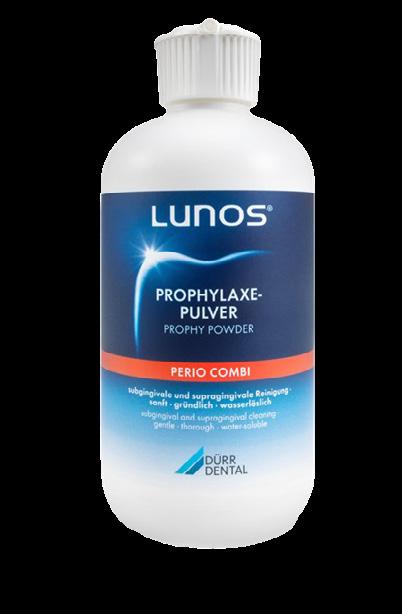
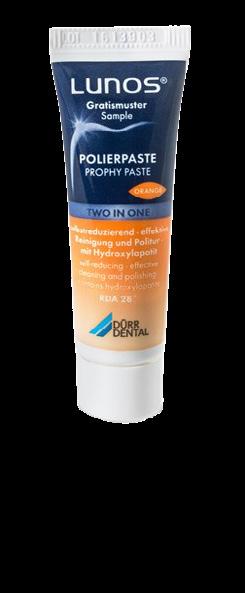
Removal of supragingival plaque and tartar as well as supragingival discolouration with Scaler of MyLunos Duo® and Lunos® polishing paste Two in One. Lunos® Prophy Powder Perio Combi was also used for subgingival biofilm and plaque removal. The treatment was done in one sitting, without local anaesthesia.
First check up was 3 weeks from the cleaning. The gums were significantly less swollen, there was a bit of biofilm and plaque (as expected due to oral health habits). BOP was absent. The patient was very satisfied with the results.
Clinician Feedback
The application and use of all the products was very easy and simple. In a relatively short time of the visit we managed to resolve all of the patient’s chief complaints. The patient was very pleased since the procedure was painless and after just one treatment all of his chief complaints were no more. He also stated that due to smoking, usually after just one week after cleaning the dark spots on the vestibular surfaces of the teeth were visible which was not the case this time (3 weeks after treatment). The patient proceeded to give us a 5 star review on social media and recommended our clinic to his family and friends.
Case Study
Class IV controlled layer concept utilising G-ænial™ A’CHORD in 3 shades
This case study presents the clinical management of a patient who presented with an existing failed anterior composite, requiring a Class IV direct composite replacement. The restoration aimed to achieve seamless integration with the natural dentition while restoring form and function.


Figure 3 - Completion of the Palatal Shelf and interproximal wall with the application of G-ænial™ A’CHORD composite, shade JE. The Interproximal wall was formed with the use of a plastic mylar strip and pull through technique to help develop an anatomical contour.

5 - A chromatic body shade, G-ænial™ A’CHORD shade A2 was then applied and extended beyond the bevel to mask the transition line. Internal anatomy in the incisal third was also sculpted and formed in this increment of composite resin. White tints, Essentia White Modifier (WM) was then utilised to accentuate the mamelons and to replicate similar characteristics present in the adjacent right central incisor.

complete
and functional

4 - The dentine layer was then completed by the application of an opaque shade of G-ænial™ A’CHORD Shade AO2. This is to provide the correct opacity and “block out” effect of the final restoration.

- A final translucent shade of G-ænial™ A’CHORD shade JE was then placed to bring the anatomy to full contour.
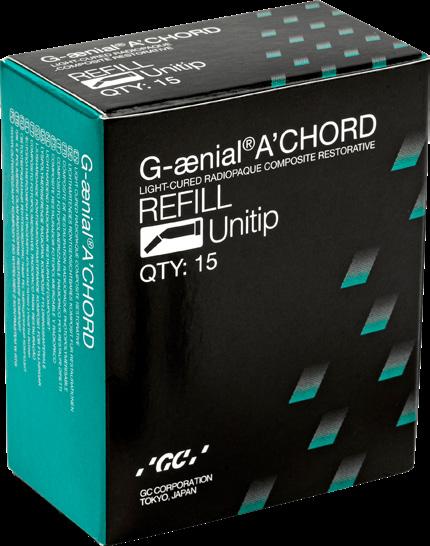
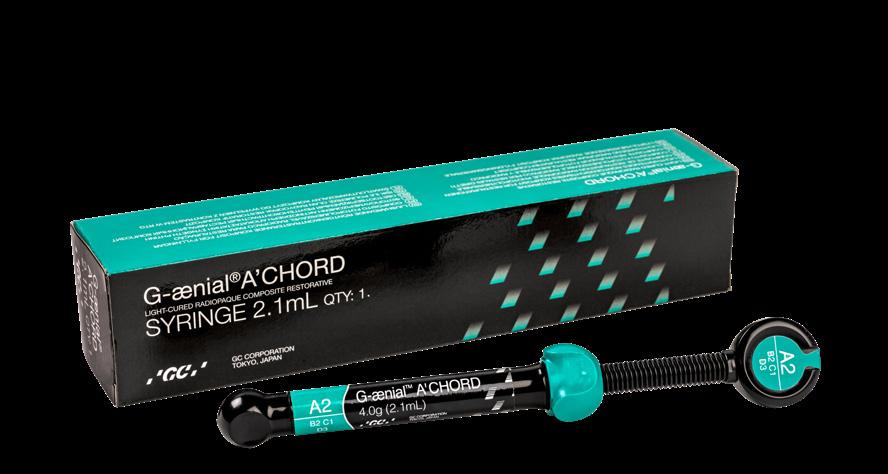
Figure 1 - Pre-Operative presentation, exhibiting a failed direct composite restoration on the upper left central incisor (Tooth 21).
Figure
Figure 7 – 2-week review demonstrating the
optical
G-ænial™ A’CHORD restoration on the tooth 21.
Figure 2 - Tooth surface cleaned and prepared with 37% Phosphoric Acid Etch prior to application of the adhesive with G-Premio BOND.
Figure
Figure 6
Clinical images courtesy of Dr Anthony Mak
Sydney
Get Inspired by our Surgery Setup Solutions
Integrated solutions to bring your vision to life
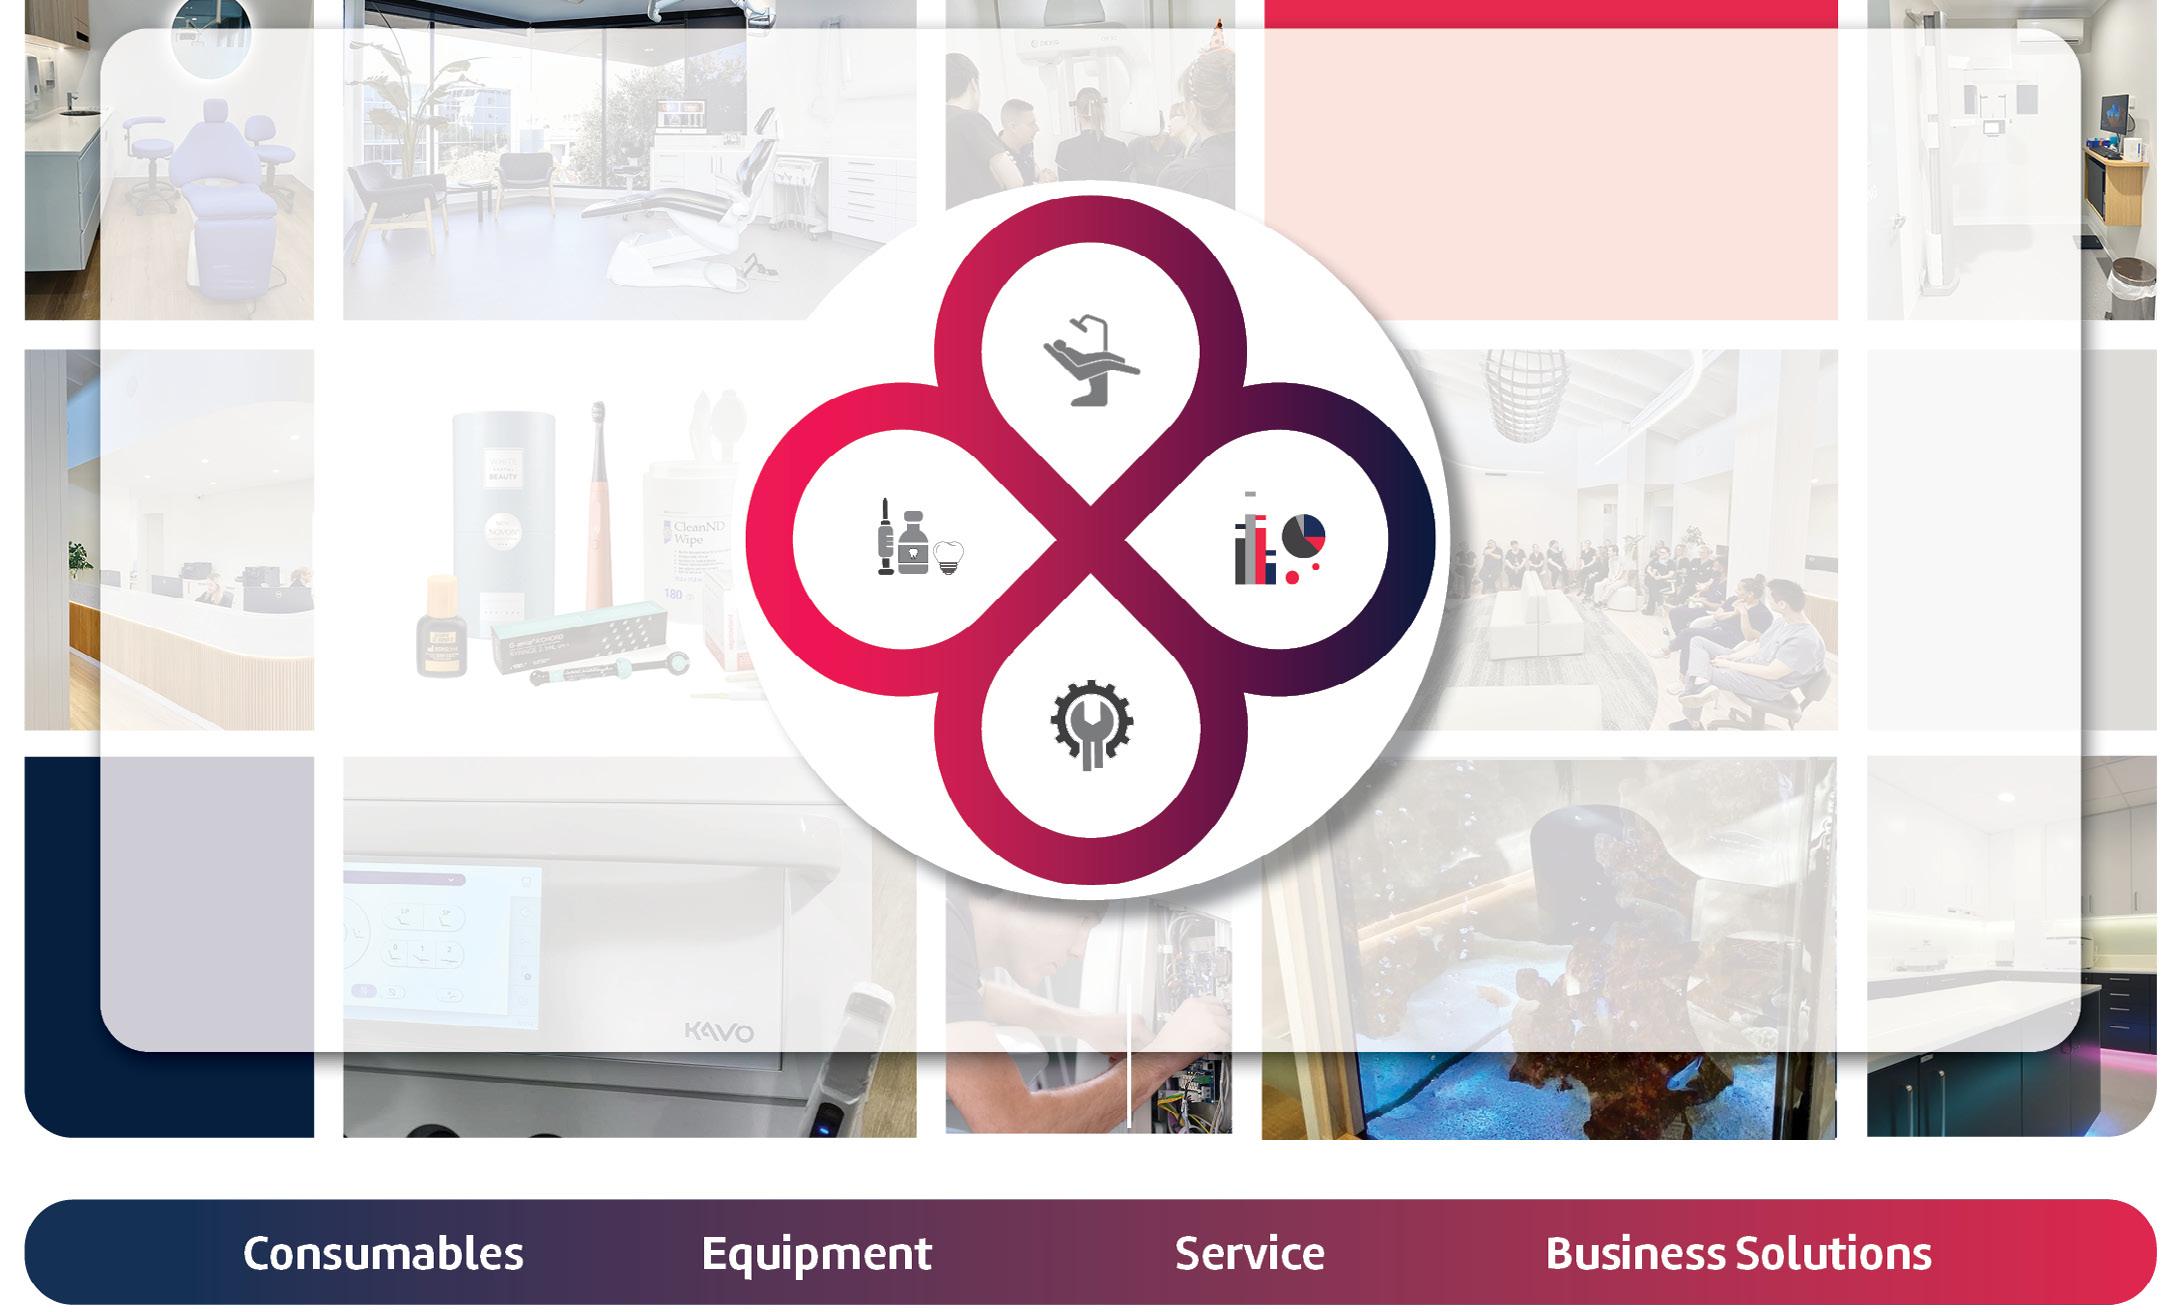
With over 90 years of experience and hundreds of successful surgical setups across Australia, we’re excited to launch our brandnew webpage — your one-stop destination for exploring the Surgery Setup Solutions portfolio like never before.
Showcasing real-world success stories of dental surgeries brought to life through tailored, integrated solutions, the webpage offers a valuable resource hub - featuring the latest articles, interviews, 360° practice tour pictures, videos, and testimonials from dentists, specialists, and key opinion leaders utilising cutting-edge technologies and advanced techniques in dentistry.
This new platform provides a unique opportunity for dentists to explore different solutions, discover fresh ideas, gain insights into key elements of modern dentistry, and how to incorporate those business solutions into a dental practice to create the perfect workflow.
Explore
• 360° Practice Tours
• Interviews with Dentists & Specialists
• Testimonials
• One Stop Shop Solution
• Latest Articles Visit Surgery Setup Solutions
Composite Restorations in the Anterior Region
How Many Shades Do We Need? With CLEARFIL MAJESTY™ ES-2 Premium
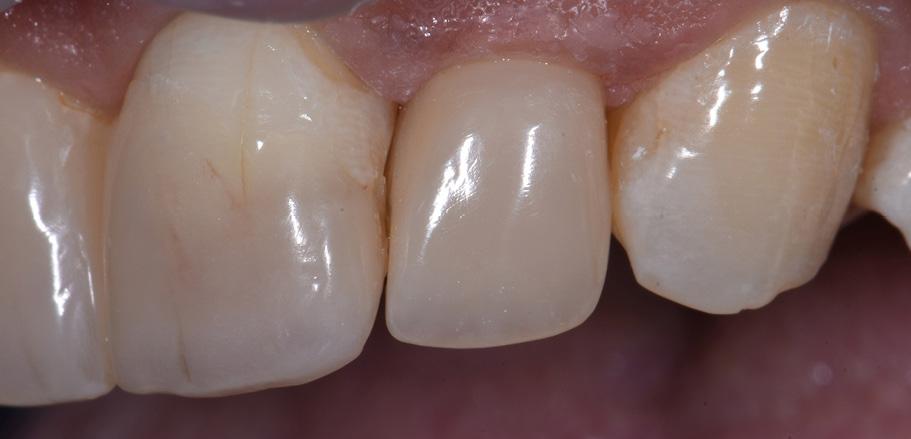
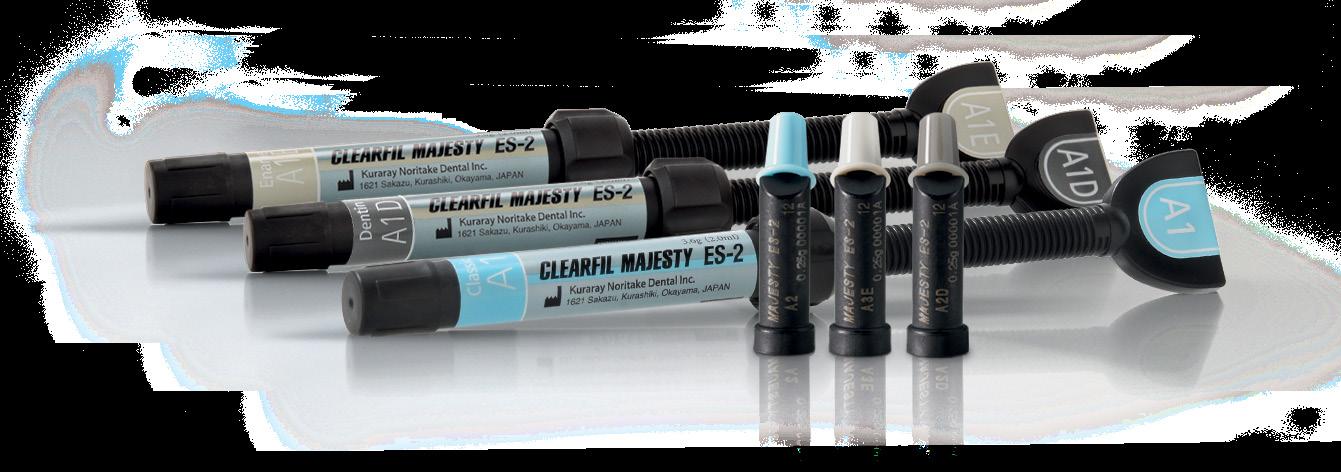
Restoring anterior teeth with large defects using composite seems to be quite challenging. With high-performance materials at hand and a systematic layering concept in mind, however, it is possible to produce highly aesthetic results in a reproducible way. The clinical case below is used to illustrate a dual-shade layering technique with CLEARFIL MAJESTY™ ES-2 Premium, a composite system with pre-defined colour combinations.
Case Example
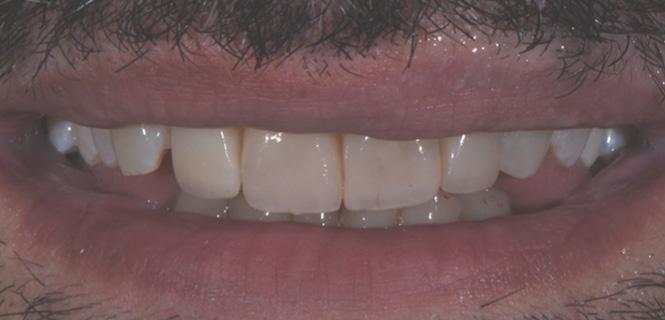
The patient, a young male, was unhappy with the appearance of his maxillary anterior teeth. Several years ago, his central incisors had been restored with composite. These existing restorations had defective and heavily discoloured margins, while their shade did not match the adjacent natural tooth structure. The maxillary lateral incisors were peg-shaped (microdontia). Economic considerations and the desire to save as much natural tooth structure as possible made the team decide to restore all four maxillary incisors with composite. CLEARFIL MAJESTY™ ES-2 Premium became the material of choice as it eliminates the need for complicated shade combination formulas and supports predictable outcomes.
Restoring The Central Incisors
We decided to restore the central incisors first and then focus on the lateral incisors. The tooth shade was determined using the VITA™ classical A1-D4 shade guide, while composite buttons were applied to the teeth to verify the determined shade combination. In order to simplify the restoration procedure, a palatal silicon index was produced before removing the existing restorations. During minimally invasive tooth preparation,
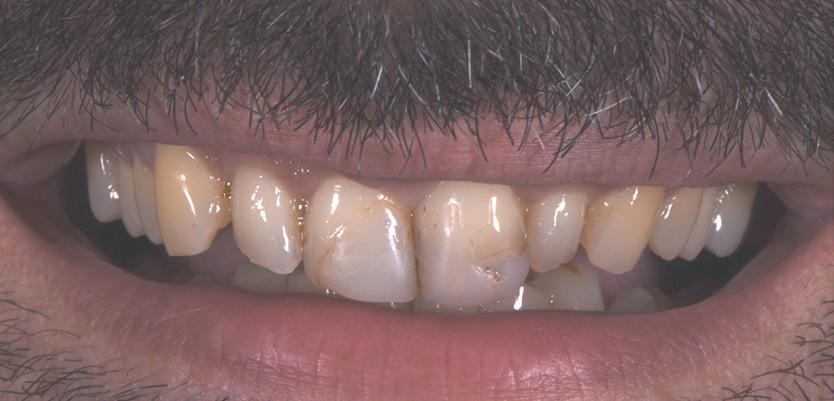
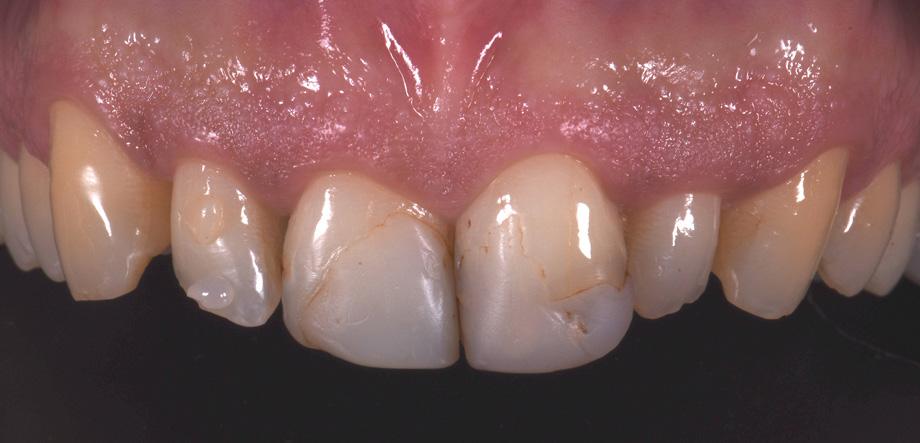
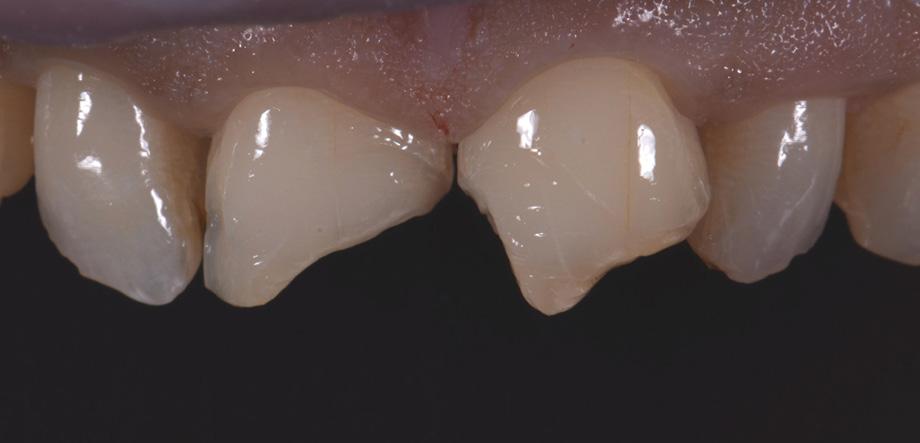
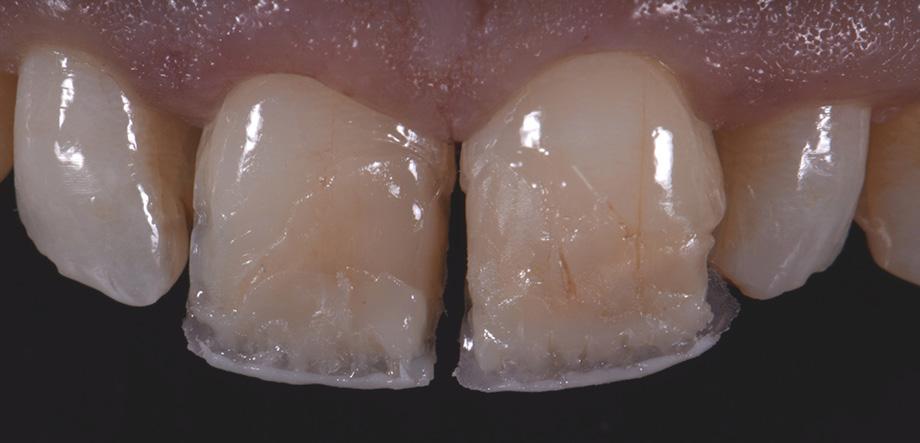
Fig. 2 Intraoral image of the initial situation with defective composite restorations and microdonts. Two composite buttons on the right lateral incisor are used to verify the determined shade combination.
Fig. 3 Central incisors after removal of the old restorations and the beveling of the enamel.
Fig. 1 The patient’s initial smile.
bevels were created at the margins to provide for a smooth optical transition from the natural tooth structure to the composite.
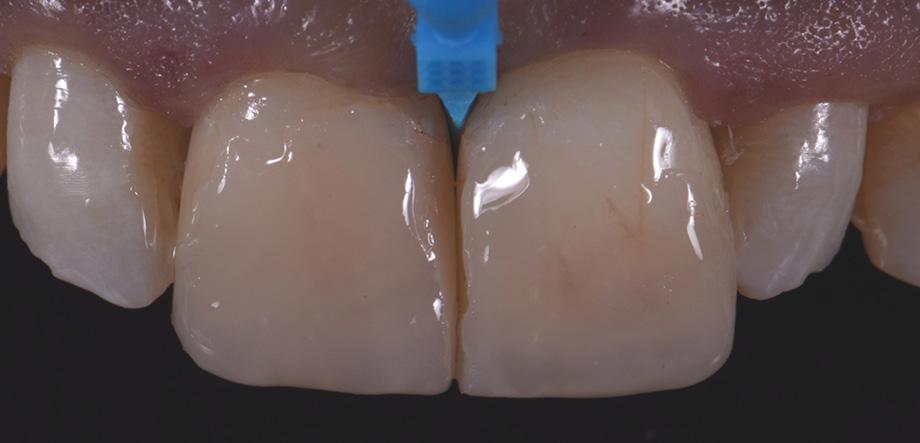
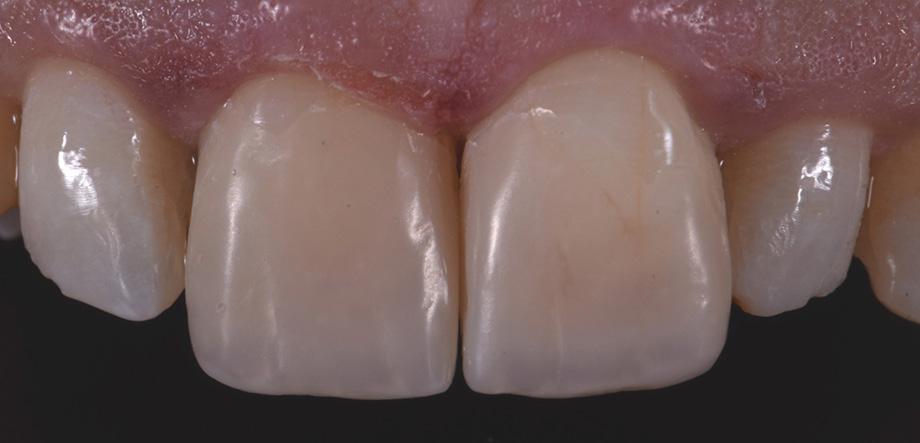
An adhesive (CLEARFIL™ Universal Bond Quick) was applied after selective etching of the enamel to achieve a strong bond. With the aid of the silicon index, it was easy to create the palatal shells of the restorations with CLEARFIL MAJESTY™ ES-2 Premium in the shade A3E (enamel), which matches the determined tooth shade A3. The dentin core was built up with the same composite in the recommended shade A3D (dentin), mamelons were modelled and some CLEARFIL MAJESTY™ ES-2 Premium in the shade WD added for the incisal halo, while some individual effects (like enamel cracks) were imitated with brown stain. The build-up was finalized in the interproximal and labial areas with composite in the shade A3E. Between the central incisors, a wedge was used to retract the papilla and facilitate the designing of the interproximal contact area. The finished and pre-polished restorations already had a natural appearance.
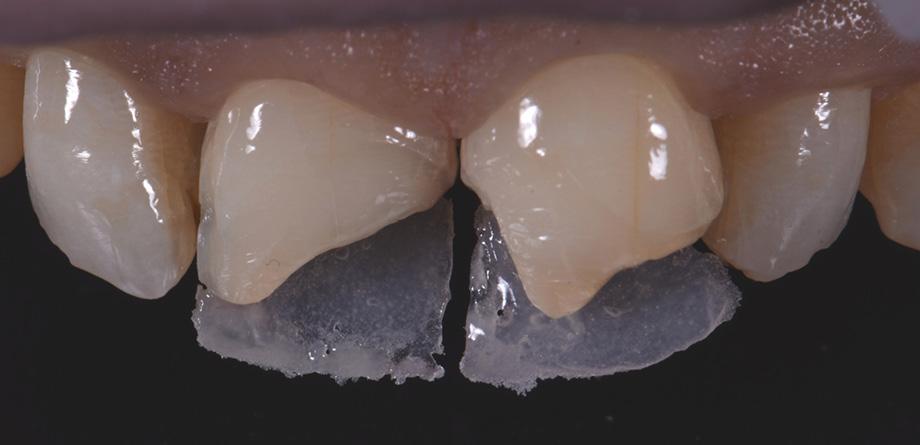
Restoring The Lateral Incisors
Tooth preparation was not required on the lateral incisors. Instead, they were merely cleaned after a slight roughening of the enamel surfaces. The build-up procedure was similar to the one used for the central incisors. The adjacent tooth was protected with PTFE tape, and the palatal shell was created with the aid of a finger instead of a silicone index. Afterwards, we focused on the build-up of the interproximal walls before a small amount of dentin was placed and the shape was finalized by applying the labial enamel layer.
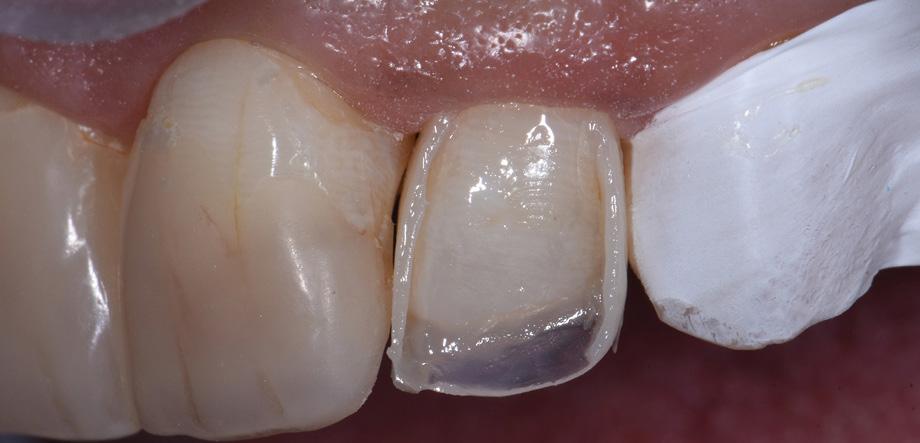
Fig. 6 Situation after finalization of the central incisor restorations with composite in the enamel opacity.
Fig. 4 Light-cured palatal shells made of CLEARFIL MAJESTY™ ES-2 Premium in the shade A3E.
Fig. 7 Central incisor restorations after finishing and initial polishing.
Fig. 5 Build-up of the dentin core with mamelons individualized with the shade WD and brown stain.
Fig. 8 Build-up of the left lateral incisor.
Conclusion
Two different opacities, a single shade combination and some bleached shade plus stain for special effects – in the present patient case, a simple formula allowed us to create lifelike anterior restorations. With one enamel and one dentin paste used, it is possible to simply rebuild the natural anatomy without the risk of ending up with a bulky core that – once reduced – will lose its special optical structure. It is also easy to control the thickness of the final enamel layer with its huge impact on the light-optical properties of the whole restoration. For most patients and teeth with a simple or medium-to-complex internal colour structure, the selected concept is very well suited and will lead to pleasing outcomes.
Case by:
Postgraduate student in Restorative Dentistry program, Faculty of Dentistry, National and Kapodistrian University of Athens, Greece
Fig. 10 Final smile of the patient demands.
Fig. 9 Situation after finishing and polishing.
Gasparatos Spyros
View Product

CLEARFIL MAJESTY™
ES-2 Universal Shades
Clinical Case
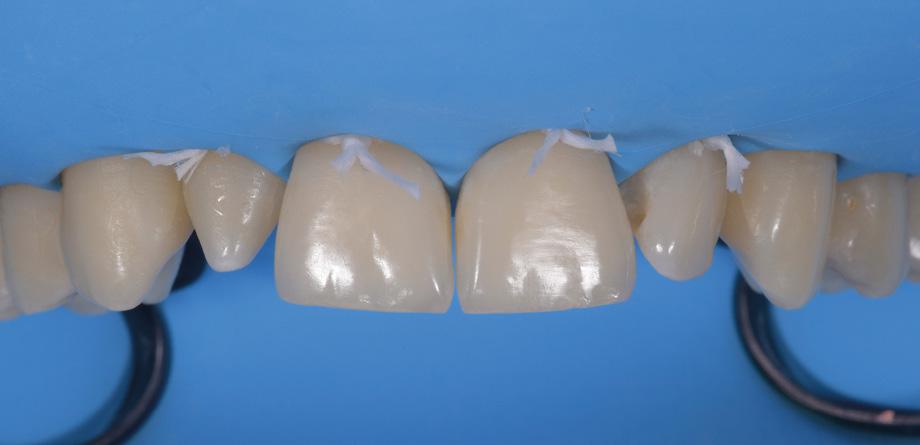
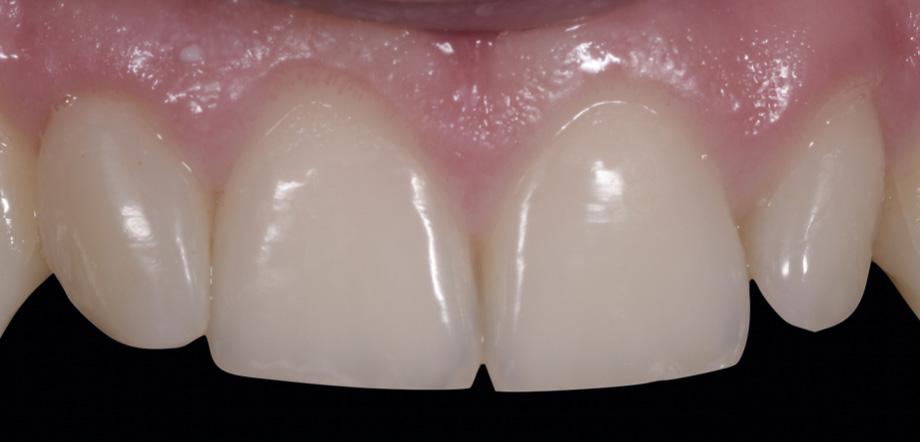
For purely aesthetic reasons, this patient asked for the reconstruction of her cone-shaped upper right lateral incisor (12). The patient was offered a treatment including a first phase of orthodontic therapy aimed at recovering the space necessary to be able to reconstruct the lateral incisor to its ideal size. As the patient refused to undergo this orthodontic therapy, it was decided to restore the tooth with resin composite and match its size to the space already available.
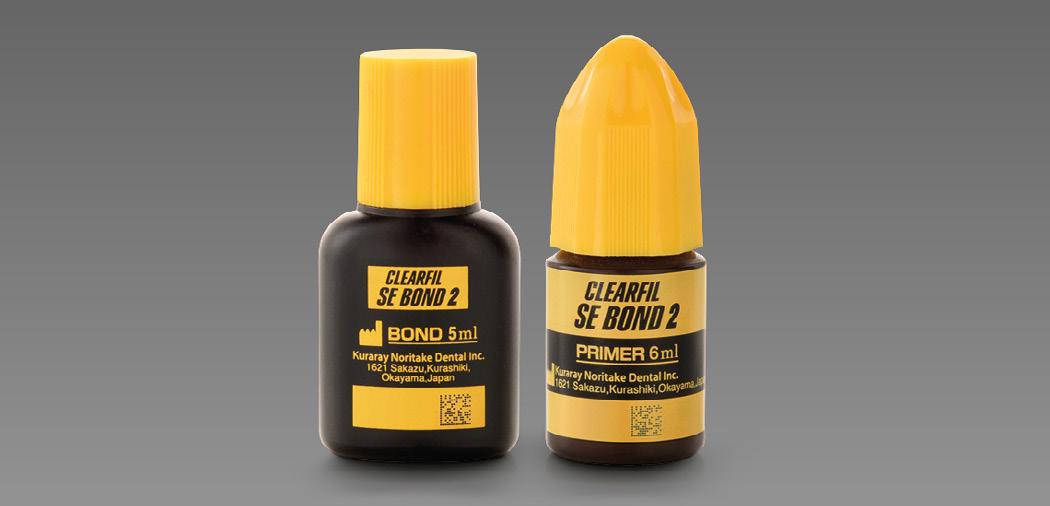
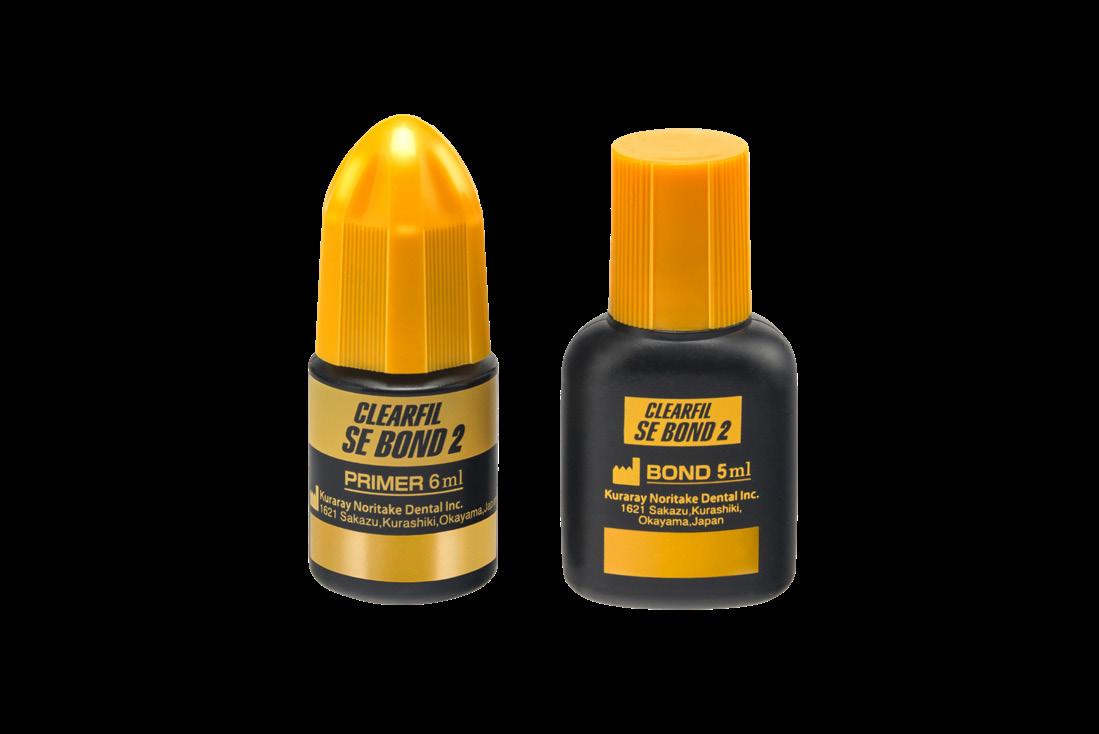
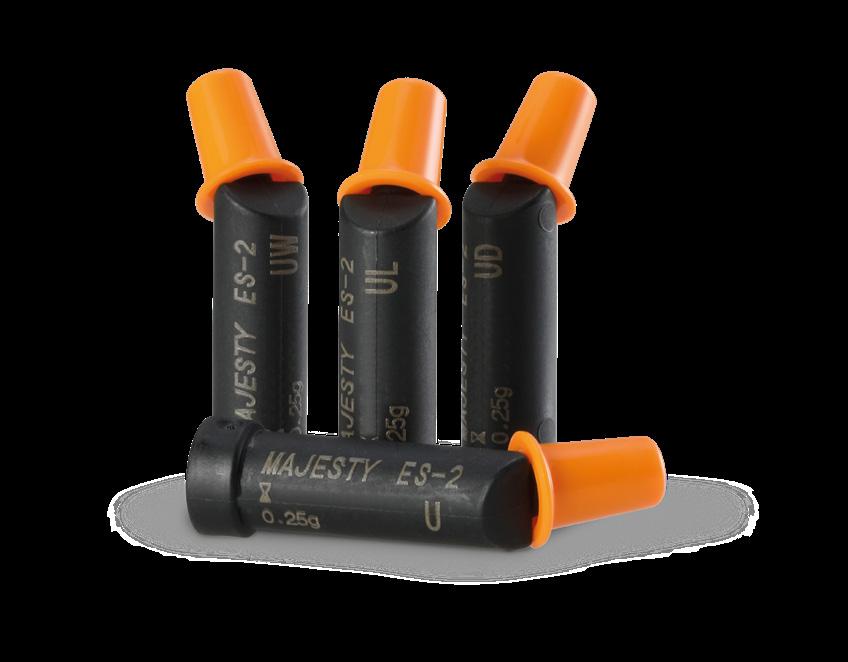
The adhesive system used was CLEARFIL™ SE BOND 2, while the restoration was created with the new composite CLEARFIL MAJESTY™ ES-2 Universal. Although this material is designed for the single-shade technique with only two shades matching the anterior tooth shades, I decided to combine both pastes to achieve the best possible outcome. The shade UD (Universal Dark) was used to reconstruct the cervical and central portion of the lateral incisor. The incisal portion was restored with UL (Universal Light).
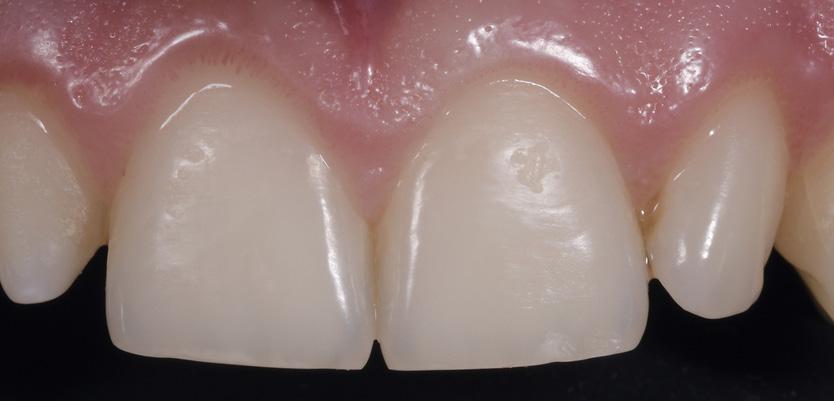
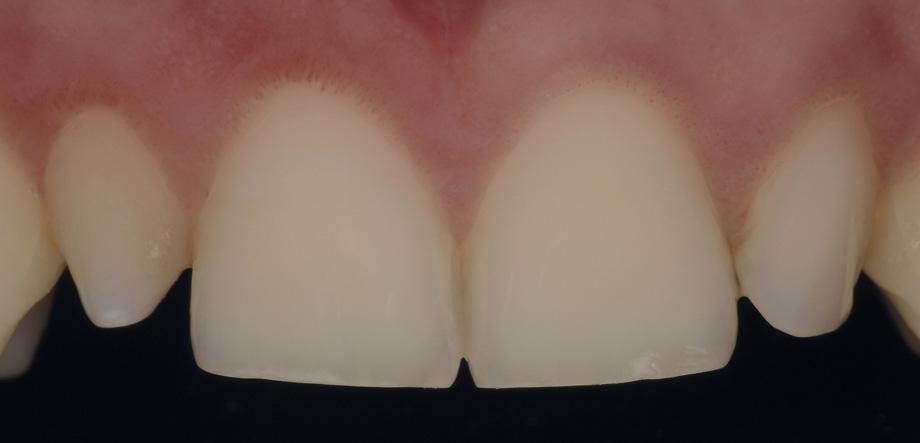
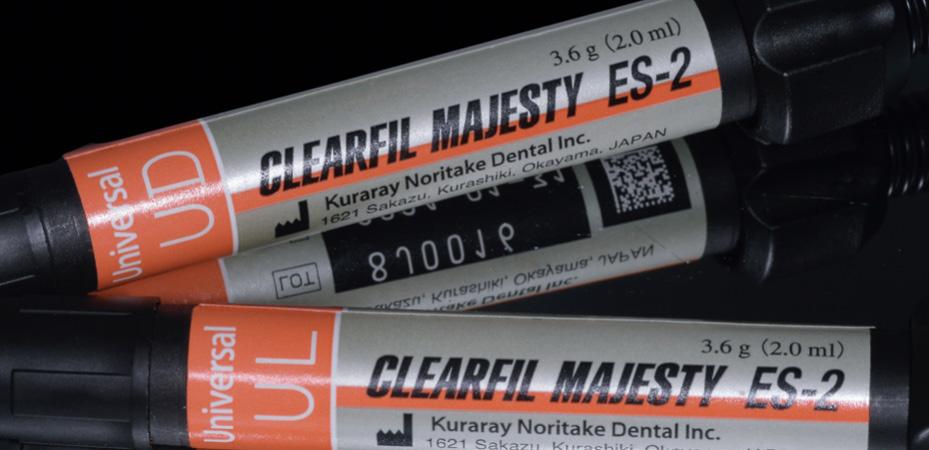
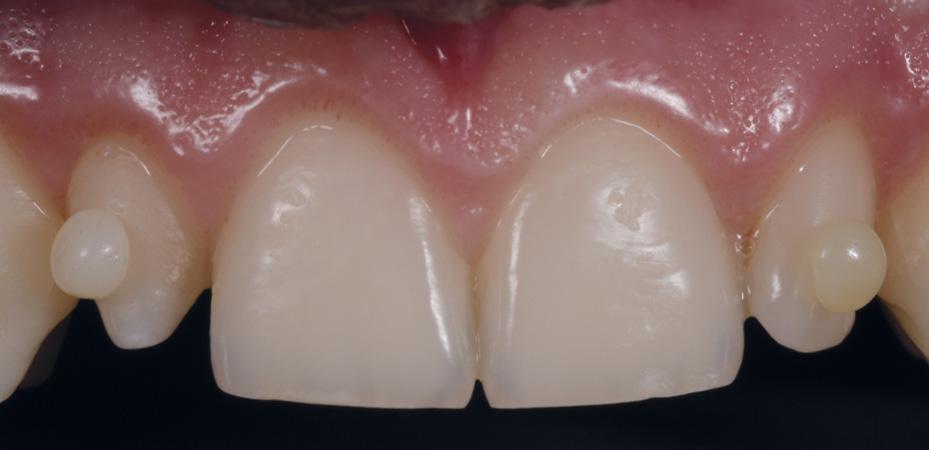
Fig. 2 Image of the initial situation taken with a polarising filter for shade evaluation purposes.
Fig. 3 The new CLEARFIL MAJESTY™ ES-2 Universal composite with only two shades for the anterior region was chosen. It offers a good optical integration thanks to Kuraray Noritake Dental’s Light Diffusion Technology.
Fig. 4 Shade determination with the aid of cured samples of CLEARFIL MAJESTY™ ES-2 Universal UL (Universal Light) and UD (Universal Dark) on the tooth surfaces.
Fig. 1 Initial situation with a cone-shaped upper right lateral incisor (12).

Case by:
• Graduated with honors in Dentistry and Dental Prosthetics at the University of Milan in 2010.
• In 2011/2012 and 2012/2013 he held the position of Adjunct Professor for the teaching of Prosthetic Technologies at the University of Milan-Bicocca.
• Member of SIdp (Italian Society of Periodontology) and AIC (Italian Academy of Conservation).
Dr. Luca Dusi

Fig. 7 The universal composite blends in well with the adjacent teeth regarding its colour and surface finish.
Fig. 5 Isolation with rubber dam.
Fig. 6 CLEARFIL™ SE BOND 2 used for the establishment of a strong bond between the tooth structure and the composite material. View Product
How to Create a Durable Bond to Zirconia
Zirconia is fast becoming the affordable aesthetic material of choice [1, 2]. The yttria-stabilised tetragonal zirconia polycrystals promote high mechanical strength and fracture resistance with optimal marginal fit to reduce microleakage [1, 3, 4]. Yet, many clinicians are challenged to achieve an optimal bond to Zirconia [3, 5]. This challenge can be overcome with novel material developments and advances in materials research and design [1, 5-7]. Here are five clinical tips to enhance your zirconia bonding, streamline your practice, improve your clinical outcomes and keep your patients happy.
1. Tooth preparation: Maximise restorative potential of zirconia.
To maximise zirconia strength and durability, opt for a digital impression following preparation [3]. Optimise the marginal fit by following an anatomical tooth preparation with 1-1.5 mm minimum reduction that includes a shoulder rather than a chamfer finish line with a cement space of 0.25-0.50 mm [3].
2. Pre-cementation: Prepare the tooth and restorative fitting surface.
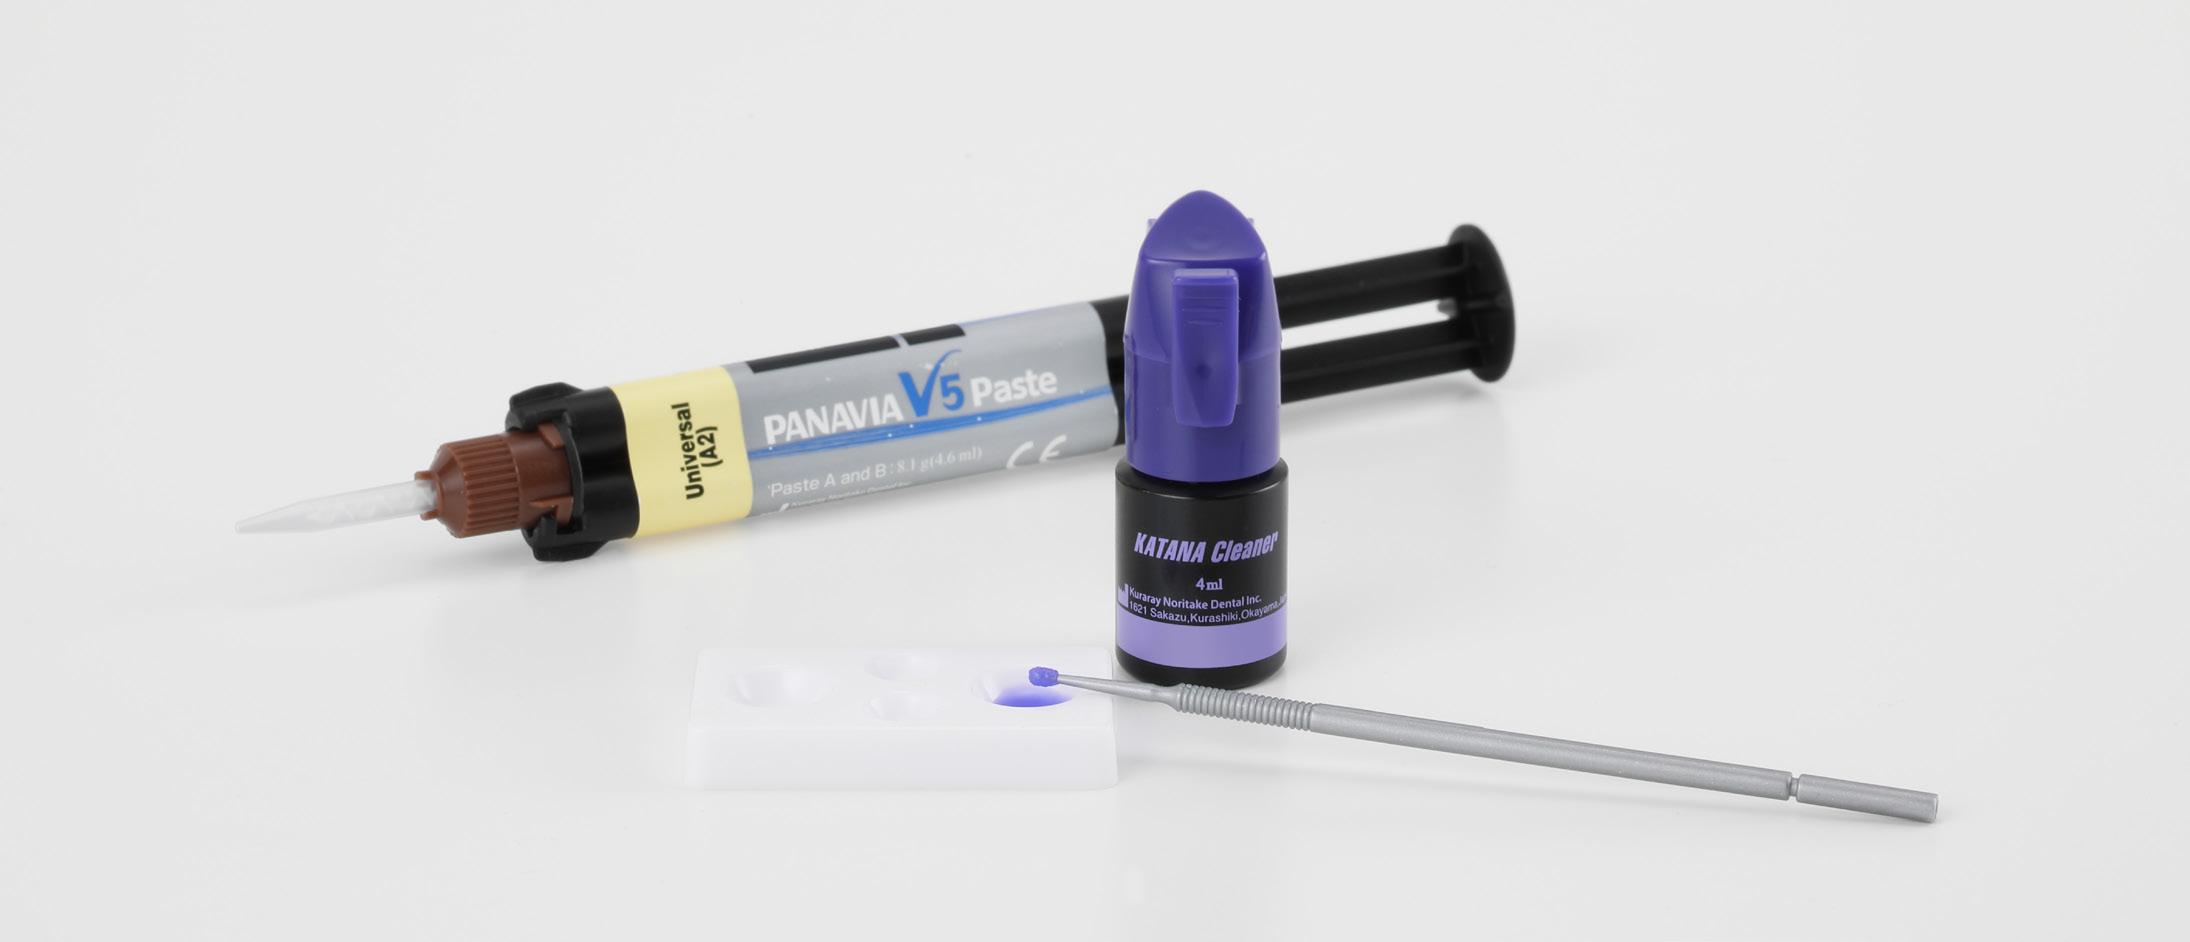
Use an ultrasonic scaler or pumice to remove temporary cement remnants from the teeth and zirconia restoration. Check the restoration fit and increase mechanical retention by air particle abrading the internal surface with aluminium oxide particles (50-60 m alumina at 0.1-0.25 MPa or 14.5-36.25 psi for 15 seconds) [1, 2, 4, 5, 7]. Remove residue such as gypsum and try-in pastes from the prosthesis in an alcohol-soaked ultrasonic bath for 5 minutes [4, 5], or save time and enhance your bond by cleaning the fitting surface with a specialised abutment and fitting surface cleaner such as KATANA™ Cleaner (Kuraray Noritake Dental Inc.) [4, 8].
3. Isolate and decontaminate
Isolate your abutments from saliva, blood and moisture [1, 4, 5, 7]. Abrade the abutment surfaces to remove visible biological materials and contaminants. Select a surface cleaner [5, 7] such as KATANA™ Cleaner (Kuraray Noritake Dental Inc.), the only MDP salt formulation recommended for intra-oral use [9, 10].
4. Select a phosphate monomer-based cement.
Select an acidic functional phosphate monomer-based cement with the handling properties to suit your clinical situation and patient compliance [1, 4, 7]. Cements such as PANAVIA™ V5 and PANAVIA™ SA Cement Universal (Kuraray Noritake Dental Inc.) contain 10-MDP, the manufacturer-prepared acidic functional phosphate monomer to form stable and durable [4, 11] chemical bonds between the metal oxides in the zirconia and tooth mineral [2, 7]. Two cement types you may consider include the dual-cured aesthetic, or self-curing cements to facilitate predictable bonding to zirconia.
Dual-cured aesthetic cements combine the benefits of shade matching with light and self-curing properties to increase working time and enhances practitioner control [2, 7] to allow for flexible curing in light-cure challenged intra-oral regions [4, 7]. Apply the dual-cured aesthetic cement, PANAVIA™ V5 (Kuraray Noritake Dental Inc.) , after treating the fitting surface with a silane and MDP-based CLEARFIL™ CERAMIC PRIMER PLUS (Kuraray Noritake Dental Inc.), and the tooth abutment with PANAVIA™ V5 Tooth Primer (Kuraray Noritake Dental Inc.) [2, 4] [2, 4, 5, 7].
If working time or aesthetics are less essential, a self-adhesive resin cement, PANAVIA™ SA Cement Universal (Kuraray Noritake Dental Inc.) may be the material of choice to adapt your restoration. You can enhance self-adhesive cement performance prostheses that lack retentive features by pre-treating [2, 4] the tooth surface with a MDP-based universal bonding agent such as CLEARFIL™ Universal Bond Quick 2 (Kuraray Noritake Dental Inc.) [5].
5. Follow instructions
Different products have unique application and curing requirements. To optimise results, follow the manufacturer’s instructions to maintain a strict thus predictable bonding protocol [1, 2, 4, 7].
In conclusion, to create durable zirconia bonds, adapt suitable tooth preparation, surface treatments, isolate from contaminants, select clinically appropriate adhesive materials and establish a manufacturer recommended protocol. Increase your satisfaction knowing that your newly acquired knowledge has potential to reduce post-operative sensitivity, increase restoration longevity, reduce warranty work to improve your long-term clinical outcomes, and keep you and your patients happy.
1. Quigley NP, Loo DS, Choy C, Ha WN. Clinical efficacy of methods for bonding to zirconia: A systematic review. The Journal of Prosthetic Dentistry. 2021;125:231-40.
2. Powers JM, O’Keefe KL. Guide to zirconia bonding essentials. New York, NY. 2009.
3. Ahmed WM, Shariati B, Gazzaz AZ, Sayed ME, Carvalho RM. Fit of tooth-supported zirconia single crowns—A systematic review of the literature. Clinical and Experimental Dental Research. 2020;6:700-16. https://doi.org/10.1002/cre2.323
4. Blatz MB, Conejo J, Alammar A, Ayub J. Current protocols for resin-bonded dental ceramics. Dental Clinics. 2022;66:603-25.
5. O´ Connor C, Gavriil D. Predictable bonding of adhesive indirect restorations: factors for success. British Dental Journal. 2021;231:287-93.
6. Comino-Garayoa R, Peláez J, Tobar C, Rodríguez V, Suárez MJ. Adhesion to zirconia: A systematic review of surface pretreatments and resin cements. Materials. 2021;14:2751.
7. Blatz MB, Alammar A, Ayub JM, Rojas F, Conejo J. How to Bond to Current CAD/CAM Ceramics. Compendium of Continuing Education in Dentistry (15488578). 2023;44.
8. Tajiri-Yamada Y, Mine A, Nakatani H, Kawaguchi-Uemura A, Matsumoto M, Hagino R, et al. MDP is effective for removing residual polycarboxylate temporary cement as an adhesion inhibitor. Dent Mater J. 2020;39:1087-95. 10.4012/dmj.2020-132
9. Yazigi C, Kern M, Chaar MS. Comparison of bond strength to three restorative materials after contamination and the use of two cleaning agents. The Journal of Prosthetic Dentistry. 2023.
10. Takahashi K, Yoshiyama T, Yokoyama A, Shimada Y, Yoshiyama M. Effect of decontamination materials on bond strength of saliva-contaminated CAD/CAM resin block and dentin. Dental materials journal. 2022;41:601-7.
11. Yoshihara K, Nagaoka N, Okihara T, Kuroboshi M, Hayakawa S, Maruo Y, et al. Functional monomer impurity affects adhesive performance. Dental Materials. 2015;31:1493-501.
Dr. Arosha Weerakoon
BDSc (hons 1), PhD, MPH, FRACDS, FPFA, FICD

View Product
A New Ally in Fast Posterior and High Quality Restorations
The advent of adhesive dentistry and development of the latest generation composite resins have transformed the way to deal with restorative treatments for back teeth. Recent evidence highlights success rates of 82% to 90% after 10 years, comparable in terms of longevity to amalgam restorations. However, it is sensitive technique and entails performing a large number of steps.
Against this backdrop, the development of photoreactive bulk-fill composites is an interesting way to make the process easier. Larger increments are possible with low volumetric contraction and low polymerisation stress. One point still to be resolved is the excess translucency needed to facilitate the passage of light in increases of up to 5mm, which is limiting when masking discoloured substrates. This makes these photoreactive bulk-fill composites highly dependent on the light curing device to guarantee a suitable degree of conversion. We are therefore pleased with the development of this new bulk-fill composite with flowable consistency, dual cure, simple dispensing and major adaptability, which solves the aforementioned problems.
Being able to measure which strains are present before and after modification of the oral microbiome will be important to not only form evidence-based treatments for the oral microbiome but also to better treat our patients on an individual basis.5
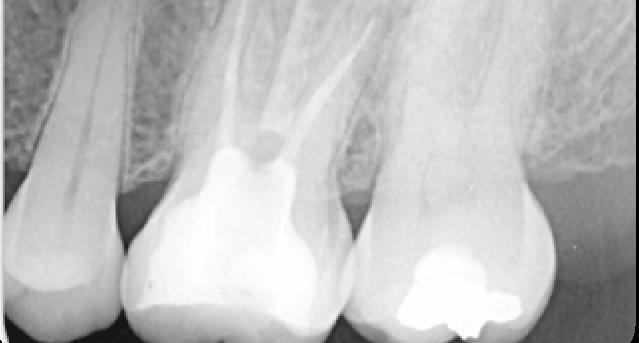
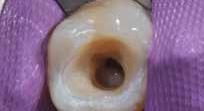
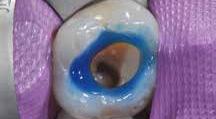
which it was opted to perform a direct technique given the occlusal conditions and the patient’s age (young patient with full dentition).
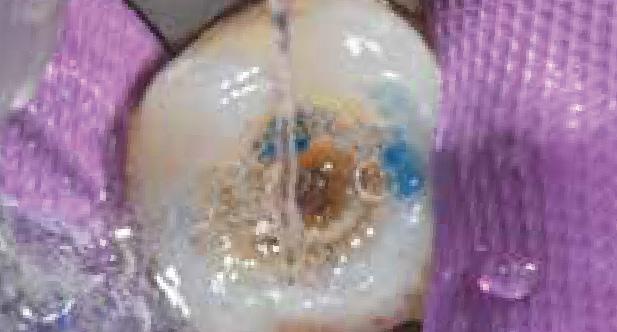
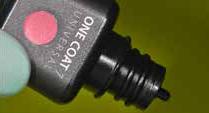
Fig. 2 Endodontic assessment. with major tissue loss, in
Fig. 1 Initial situation tooth 2.6. Endodontic molar
Fig. 4 A selective conditioning technique was chosen by applying only acid to the enamel.
Fig. 5 Profuse washing. The Etchant Gel S (COLTENE) orthophosphoric acid has the feature of simple removal without leaving residues.
Fig. 6 One coat 7 Universal (Coltene).
Fig. 3 Removal of provisional restoration. Complete isolation took place (Flexi-Dam HYGENIC).

Fig. 7 This adhesive system presents unique features such as the possibility of being used for total etching, selective etching or self-etching.
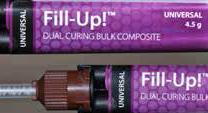
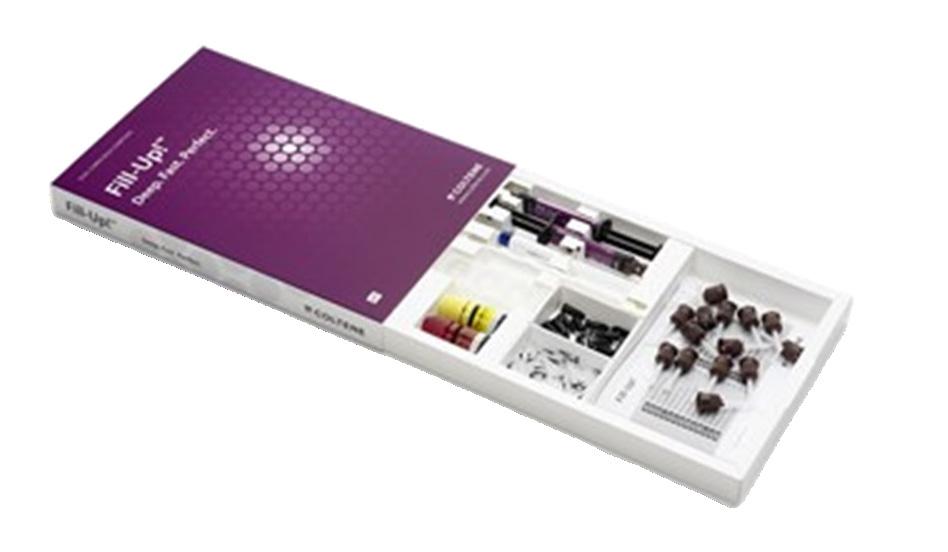
10 Fill-Up! Bulk Composite (COLTENE), which is dual cure and a high capacity for masking.
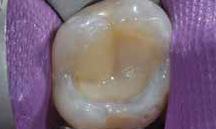
Fig. 13 Insertion and modelling of a single WR enamel layer. Morphology of sulci and cusps must be taken into account.
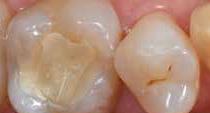
16 Initial situation.
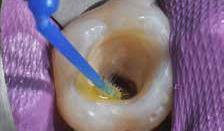
Fig. 8 After active application of ONE COAT 7 UNIVERSAL and Activator (COLTENE) and drying, excesses were removed with a dry microbrush.
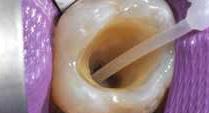
Fig. 11 Insertion of the Fill-Up! composite (COLTENE) with no need for spatula, starting from the deep area of the mouth.
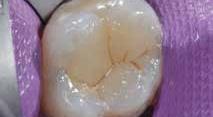
Fig. 14 Application of the Paint on Colour tint with a spatula for thin fissures. In the deep area of the sulcus this must be used in very small amounts. It may also be used under the enamel so that it can appear translucent through it.

17 30 day monitoring.
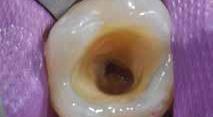
Fig. 9 Photoactivated Adhesive System after light exposure.
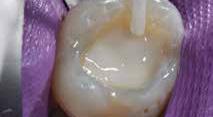
Fig. 12 Almost total filling of the preparation, leaving a small space for MIRIS2 enamel composite, although this is only optional.
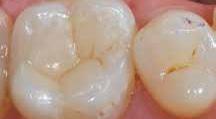
Fig. 15 Final outcome after polishing sequence. Observe the major chromatic and morphological integration with the adjacent tooth.

18 18 month monitoring
Dual Curing Bulk Composite
Dr. Fernando Grandón Villegas DDS, MS, CHILE MAY 2018

Fig.
Fig.
Fig.
Fig.
Fill-Up
Pediatric Dental Cleaning
Regular dental prophylaxis protects our patients from diseases of the dental hard substances and of the soft tissue.
Professional cleaning prevents tooth decay, gingivitis and periodontitis. For this reason, children should undergo regular dental cleaning. Since “practice makes perfect”, dentists can begin with dental cleaning in a playful manner in patients as young as five years old or even younger. Pediatric cleaning poses special challenges for the treatment team. For instance, the small opening of the patient‘s mouth, the intensive taste sensation or the long application time periods needed for fluoride preparations to work can complicate the treatment.
In my case study below, I would like to share some helpful types of prophylactic materials for use in your everyday treatment context.
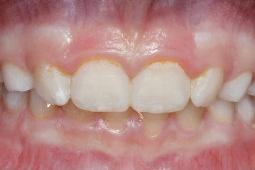
The 10-year-old patient presented to our practice for his twice-yearly check-up and for professional cleaning (Fig. 1). His general history was unremarkable. The patient had mixed dentition with all permanent molars present. Intraoral examination showed cavity-free dentition. The molars were sealed with intact fissure sealant.
Localized plaque-induced gingivitis was present. The plaque was located on the cervical areas of teeth 12 to 22, which also presented extrinsic stains (orange stain). Tooth 12 and the maxillary molars had white spots and teeth 32 to 42 had light brown stains. No tartar was present and there were no signs of abrasion.
With the help of the patient‘s mother we learned more about the young man‘s diet and fluid intake. We also performed saliva testing. Daily fluid intake was slightly less than normal (less than 1170 mL per day). The patient consumed sugar and acid-promoting substances three to five times a day. Fluoridation took place via fluoridated salt, mineral water and adult toothpaste. The salivary test parameters, flow rate, buffer capacity and bacteria assessment were in the normal range.
Prophylaxis and professional cleaning of all tooth surfaces:
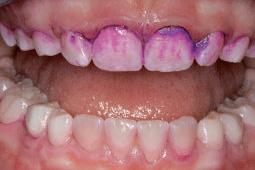
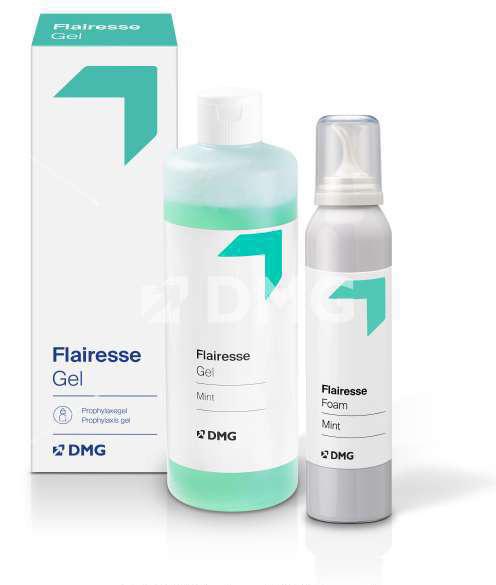
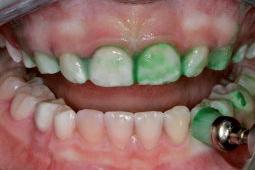
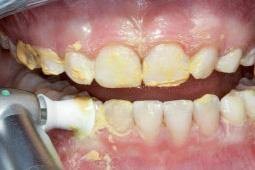
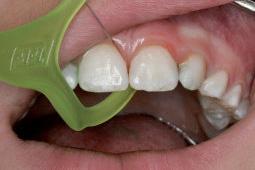
After an in-depth consultation with the patient‘s mother and inspecting the oral cavity, prophylaxis treatment commenced. In line with the patient‘s age, a PSI code of 0–1 was assessed and the plaque test evaluated with 41%. The maxillary and mandibular front teeth as well as the cervical dental surfaces were primarily affected by plaque. For oral hygiene at home, the patient uses an Oral-B power toothbrush (Triumph 5000) and sometimes a manual toothbrush in the morning. The patient uses adult toothpaste. To clean the interdental spaces, the patient uses dental floss. Due to the present structured plaque in the maxillary front teeth, visualized by Mira-2Ton, and the extrinsic stains in the mandibular front teeth (Fig. 2), I performed pre-polishing. For pre-polishing, DMG Flairesse green mint prophylaxis paste is combined with a prophylaxis brush (Fig. 3). The cleaning paste is available in two application forms (tube/single doses). In this case, I used the paste from a tube, since I needed only a small amount for polishing the teeth. While single doses are ideal for hygienic reasons, for pediatric dentistry the amount of paste in the cup is very generous. The fresh mint taste goes over well with adolescents. Boys apparently still like mintflavor chewing gum, so the mild mint flavor is no problem for patients in this age group.The visible green coloring of the prophylaxis paste allows the areas that have already been cleaned to be distinguished from the uncleaned areas. The cleaning paste is easy to apply and distribute. It doesn‘t stick or splatter. It also has excellent homogeneity and produces excellent cleaning results in a matter of minutes. Once the patient has rinsed, all of the paste residue is gone and no sticky residue remains on the gingival margin or on the soft tissue (e.g., tongue, lips). For interdental cleaning after the professional cleaning and to demonstrate oral hygiene techniques, a TePe dental floss was coated with prophylaxis paste and used (Fig. 4).
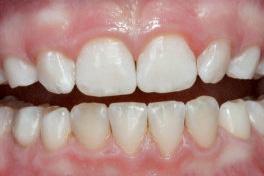
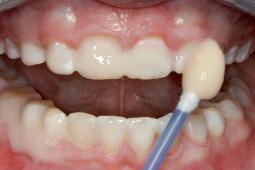
To facilitate use, the thinnest possible coated dental floss should be selected. For fine polishing, I used DMG Flairesse (melon flavored) prophylaxis paste and a fine prophy cup (Fig. 5). Flairesse is ideal for post-cleaning and polishing the cervical areas. The paste adapts well in the prophy cup. Despite the fruit flavor, there is no increase in salivary flow and polishing can be performed well. The melon flavor comes over well: “It tastes good!” After final polishing, the dental surfaces look smooth and even. The choice of fluoridation was easy in this case. I chose to use melon-flavor Flairesse prophylaxis gel (Fig. 6) because it tastes so good. Kids can choose the flavor they prefer themselves. The gel with fluoride / xylitol is available in strawberry, melon and mint flavors. It is easy to apply with a cotton swab. It does not drip, does not form foam or film in the mouth and tastes good. The short application time of 60 seconds means that fluoridation can be performed quickly and cleanly in children‘s mouths.
There‘s nothing easier and treatment concludes with a positive fresh and fruity taste sensation (Fig. 7).
Uniklinik Heidelberg, ZFZ Stuttgart, Germany

Fig. 1 Initial situation
Fig. 2 Staining the teeth
Fig. 3 Pre-polishing
Fig. 4 Interdental cleaning and oral hygiene demonstration
Fig. 5 Fine polishing
Fig. 6 Local fluoridation
Fig. 7 Final results
Sabrina Dogan

Polar Rapid Super. Fast. Whitening.
Advanced Tooth Whitening System
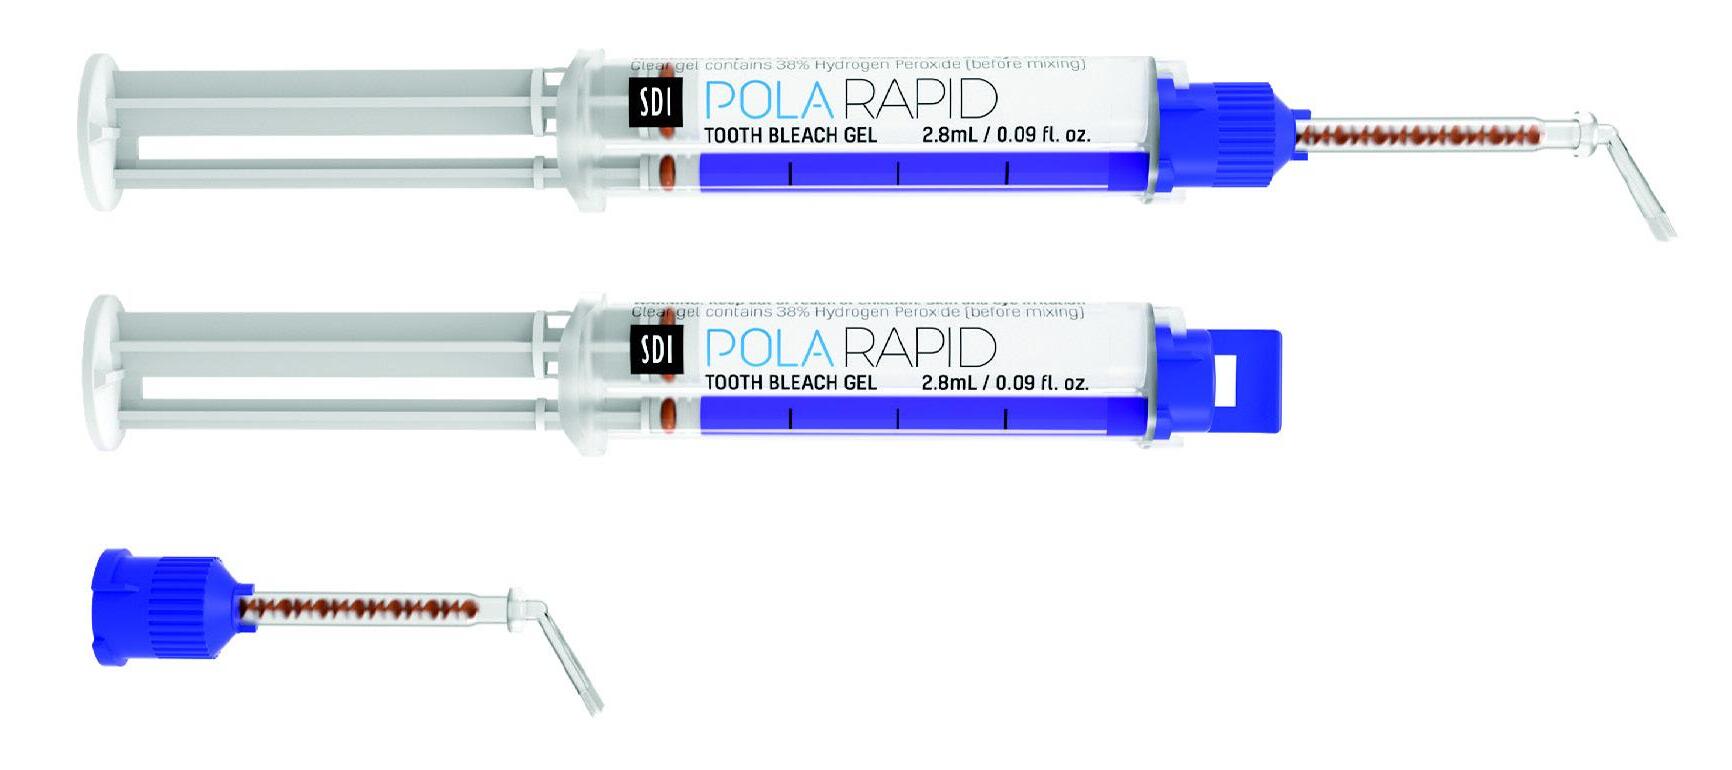
Pola Rapid is the new in office whitening treatment that safely whitens teeth in just 24 minutes.
• 150% Faster treatment time
• Enhanced blue gel for faster application
• Built in desensitisers
• Fluoride releasing to strengthen teeth
Key features:
In-office whitening system
• 38% Hydrogen Peroxide
• Dual-barrel syringe dispenser with brush-tip applicator
Pola Rapid is an advanced in-office tooth whitening system:
• Whitens teeth with an incredibly fast 24-minute application time.
• Features built-in desensitizers and fluoride.
• Uses a3 8% hydrogen peroxide formulation.
• Simple and precise application.
Indication
• In-office teeth whitening.
Unique Attributes
• Blue gel makes for easy application and visibility.
• Faster system - this material only requires 24 minutes of treatment, significantly reducing patient time in the chair.
• The brush tip allows you to place very easily.
• Light is not necessary; however, the Radii Xpert light can be used with the whitening attachment and the Pola Stand.
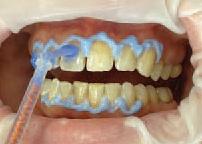
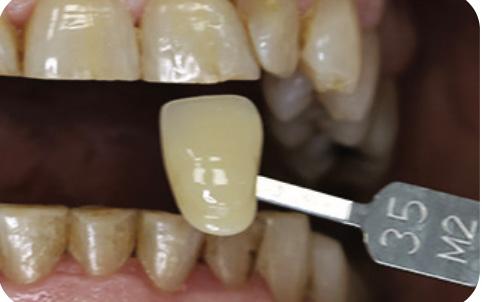
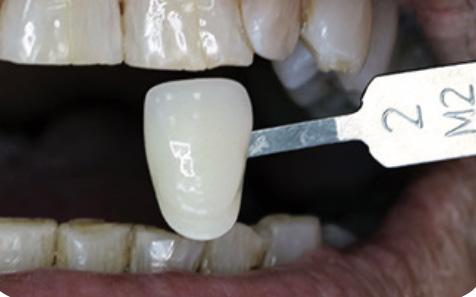
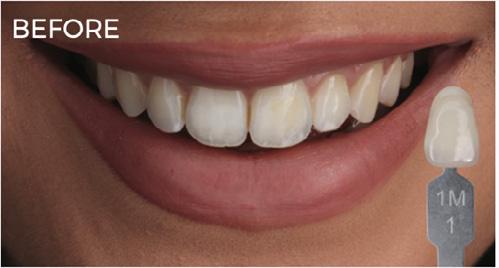
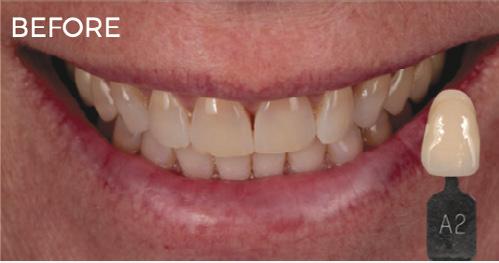
Before
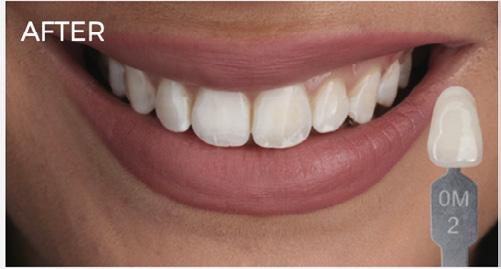
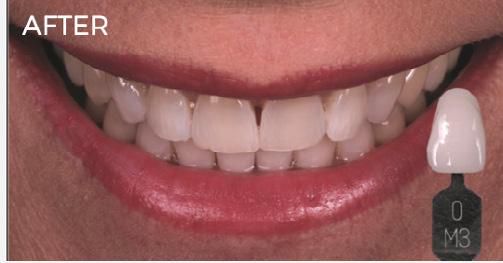
After
Unique Application Tip

Clinical Tips
• Use a surgical suction to remove the whitening gel between applications for fast and precise removal.
• Double check the barrier between each application and make sure there are no areas of leakage.
• Make the time to take before and after photos. It really shows the patient the difference. Even I did not realize there was such a big difference for a couple of patients until I looked at the photos later.
Clinical Case Studies
“I find Pola Rapid a beautiful, easy-to-use product. It is simple to apply and remove with its non-stick and enhanced blue gel formula. A great product to use by clinicians for in-chair whitening with minimal chair time and patient sensitivity, but reliable and immediate results.”
“Pola Rapid has exceptional colour saturation for enhanced visibility during intraoral application. The new non-stick bleaching gel stays where you apply it, and easily wipes away clean with no mess. I found the new system fast, reliable to use with minimal sensitivity for patients.”

Dr Sam Koh
BDSc Melb (Hons)
Melbourne, Australia

Dr Miles Cone
Fellow American College of Prosthodontists
Diplomate American Board of Prosthodontics
Nuance Dental Specialist Portland, Maine, USA
Glass-Fibre-Reinforced Composites as a Core Build-Up in Minimally Invasive Endodontics
Even though dentistry is nowadays focusing more and more on prevention, there is still a considerable amount of patients with extensive caries lesions in need of endodontic treatment. When the damage has already occurred, it’s important to treat the lesion in a minimally invasive way. Preserving the cervical dentine is of utmost importance here, as maintaining a ferrule is necessary for a good prognosis of the restorative treatment.
Since the introduction of microscopes and NiTi files in dentistry, preservation of the cervical dentine has become more simple and predictable.
Several options exist for the post-endodontic treatment1: the treatment plan depends on the remaining tooth structure, wall thickness and the total cavity size.
Heavily damaged teeth often end up in a restorative cycle, with increasingly larger restorations after the original fractured and endodontic retreatments, the prognosis of the tooth becoming more and more challenging each time. Hence, it’s important to implement a correct treatment plan to preserve the teeth not only in the short term, but to avoid catastrophic failures that compromise the long-term survival.
The first step is to preserve the tooth tissue, especially in the cervical part of the crown. Preparation designs based on root canal orientation allow for very conservative access cavities and give a better restorable prognosis in fracture cases2
At the restorative side, fibre-reinforced composites (FRC) can be used to reinforce the cavity. Several studies have highlighted that the fracture pattern and load-bearing capacities of large cavities restored with FRC was more favourable compared to those restored with conventional direct composites3,4 Hence, FRC become a promising solution for post-endodontic treatment, mostly in cases with conservative access.
One of the suitable indications for FRC is the endodontically treated premolar with one big orifice and one large oval canal or deep furcation (Figs. 1-4). In such cases, an FRC can be placed as a Nayyar’s core modification5 without preparing the orifice part with Gates or Largos. The restoration can be finished as usual, directly with a conventional composite.
Endodontically treated molars with conservative access do not require a post. Of course, the final treatment does not only depend on the access type, but also on the size and depth of the cavity. Here, FRC have also proven their worth in complicated cases with internal resorptions (Figs. 5-8).
Even when the endodontic treatment is finished with an indirect restoration (a crown, onlay or overlay), FRC can be used for core build-ups such as a Nayyar’s core. This will be mostly indicated in retreatment cases, were the orifice part of the canal had already been prepared (Figs. 9-13).
EverX Posterior™ and everX Flow™ are excellent options to restore the core of endodontically treated teeth. Together with the preservation of cervical dentine, they are part of a strategy to increase the longevity of the post-endodontic restorative treatment.
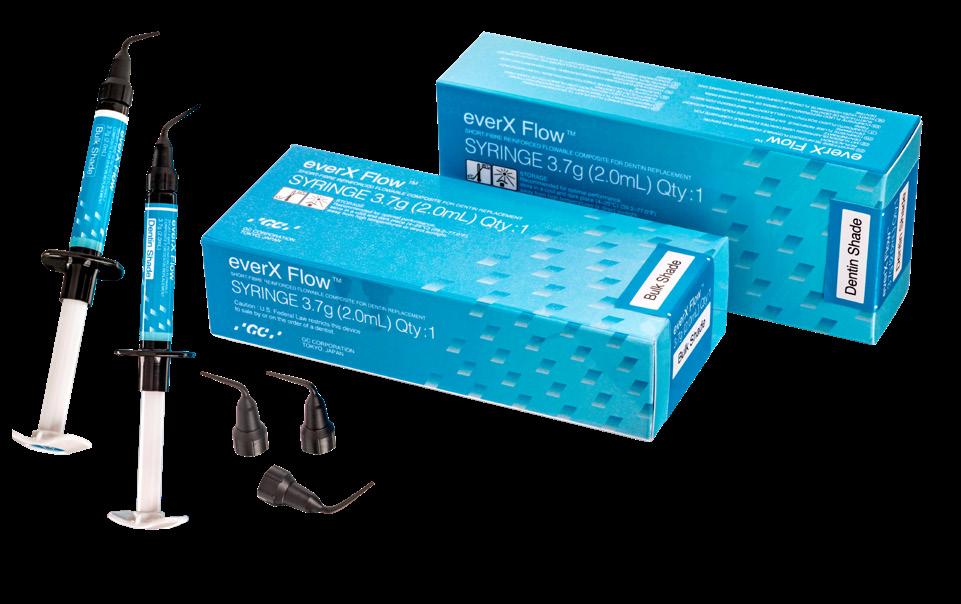
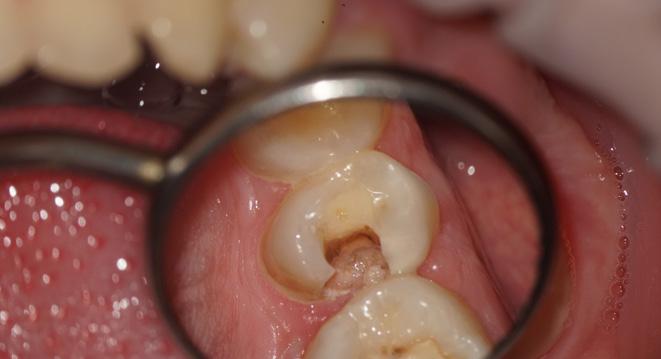
Fig. 1: Pre-operative situation with large orifice.
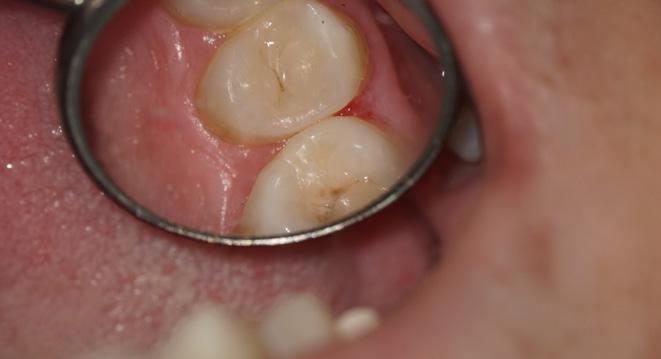
4: Final result.
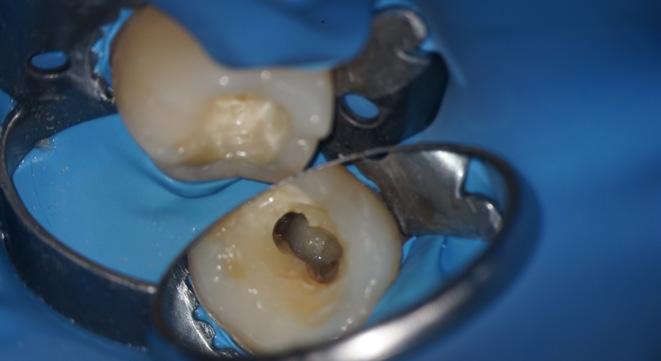
6: (a) Cavity and (b) access view after obturation.
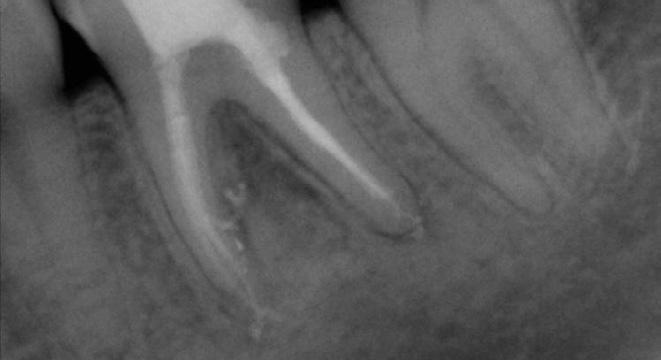
Fig. 8: X-ray at 6-months follow-up, after placement of a full ceramic crown.
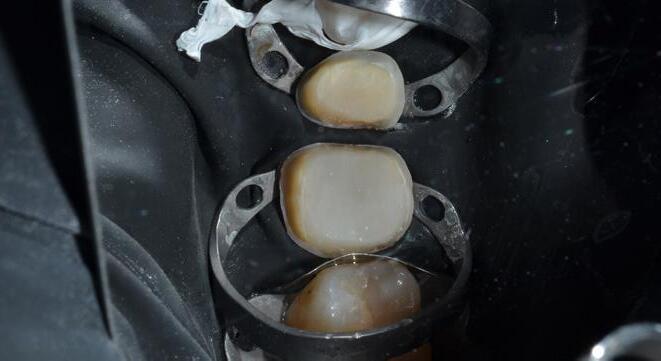
11: Tooth prepared for the adhesive luting of an all-ceramic restoration.
By DR. Kaplan B. Sheudzhen, Russia

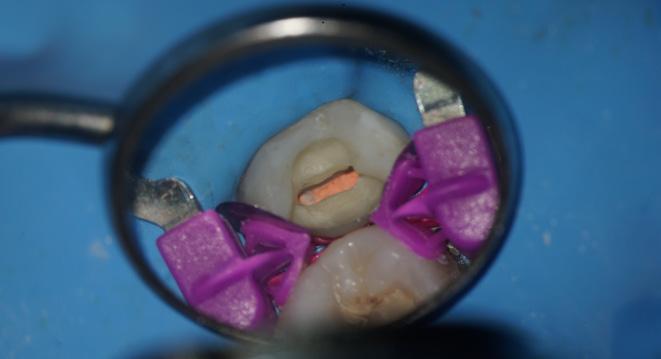
Fig. 2: A free space with a depth of 3-4 mm was created in the orifice part with a heated plugger.
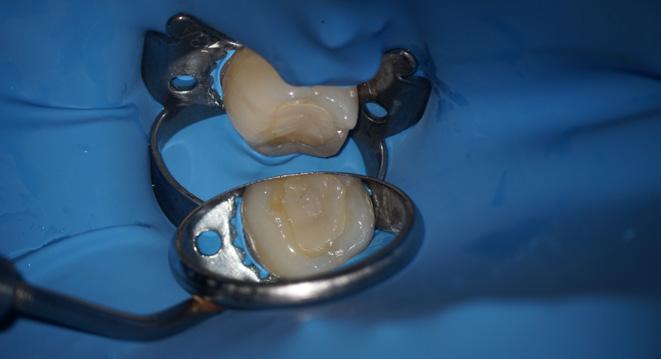
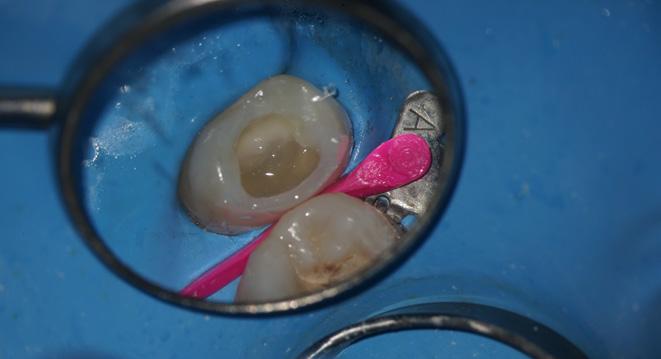
Fig. 3: The proximal wall was created first using a conventional composite. The core was built up with everX Flow (GC), a flowable fibre-reinforced composite
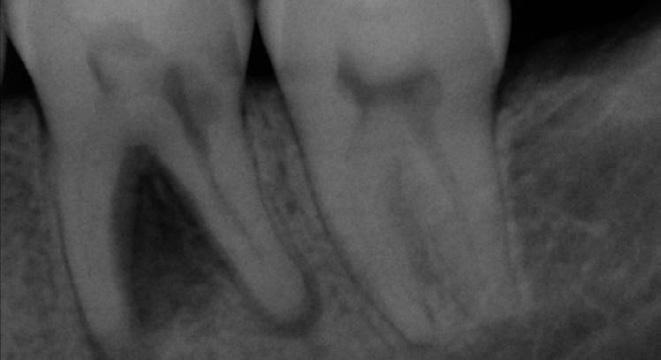
5: Pre-operative situation with large defect and internal resorption (a) Intraoral view (b) X-ray
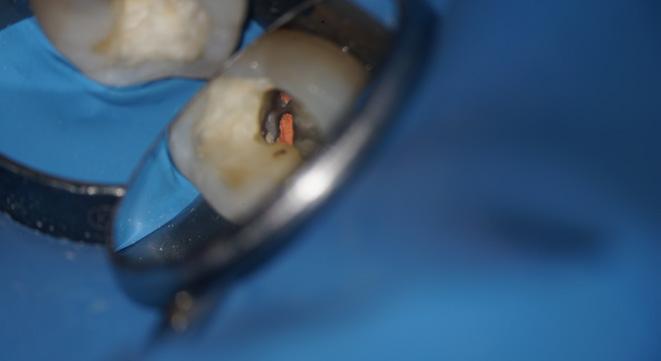
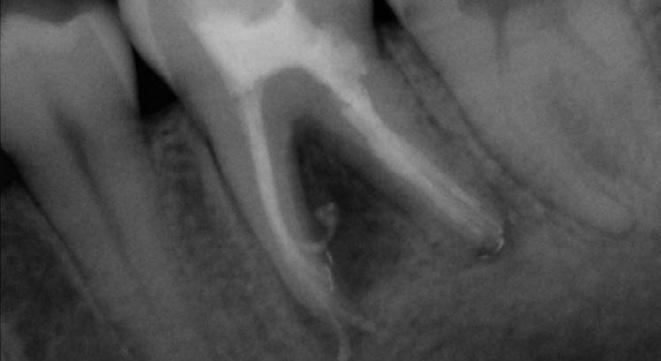
Fig. 7: Final X-ray.
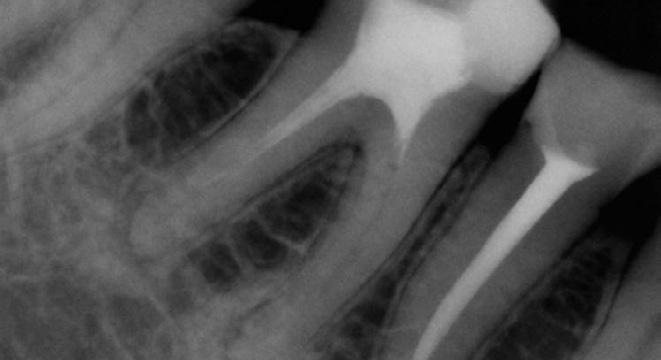
Fig. 9: Pre-operative X-ray.
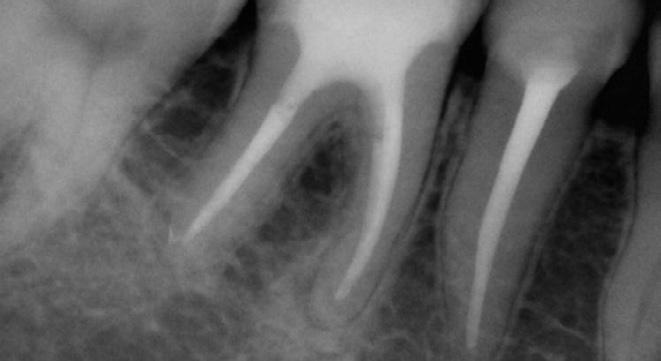
12: Final X-ray.
References
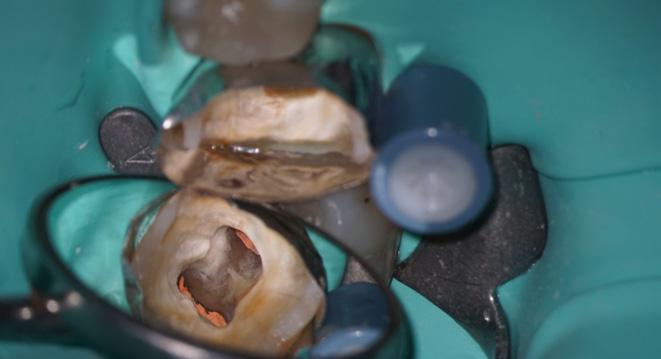
Fig. 10: Cavity before placement of everX Posterior (GC), a fibre-reinforced composite in paste consistency.
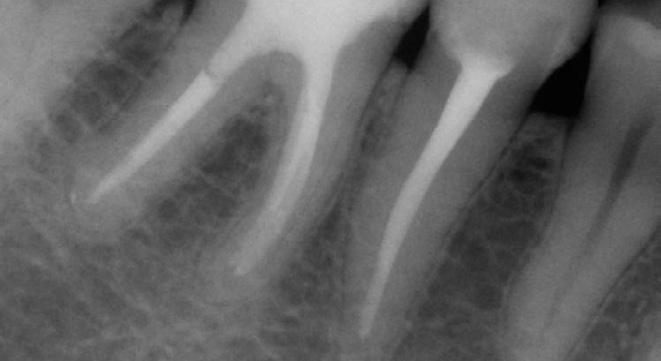
Fig. 13: Follow-up after three years.
1. Zarow M, Ramírez-Sebastià A, Paolone G, de Ribot Porta J, Mora J, Espona J, Durán-Sindreu F, Roig M. A new classification system for the restoration of root filled teeth. Int Endod J. 2018; 51(3):318-334.
2. Özyürek T, Ülker Ö, Özsezer Demiryürek E, Yılmaz F. The Effects of Endodontic Access Cavity Preparation Design on the Fracture Strength of Endodontically Treated Teeth: Traditional Versus Conservative Preparation. J Endod. 2018; 44(5):800-805.
3. Garoushi S, Sungur S, Boz Y, Ozkan P, Vallittu PK, Uctasli S, Lassila L. Influence of short-fiber composite base on fracture behavior of direct and indirect restorations. Clin Oral Investig. 2021 Jan 8 (Online ahead of print).
4. Geerts G, Pitout E, Visser H. Fracture resistance of endodontically treated premolars with fibre-reinforced composite restorations. Eur J Prosthodont Restor Dent. 2011; 19(1):25-31.
5. Nayyar A, Walton RE, Leonard LA. An amalgam coronal-radicular dowel and core technique for endodontically treated posterior teeth. J Prosthet Dent. 1980; 43(5):511-5.
Fig.
Fig.
Fig.
Fig.
Fig.

Dry Tips and Reflective Dry Tips
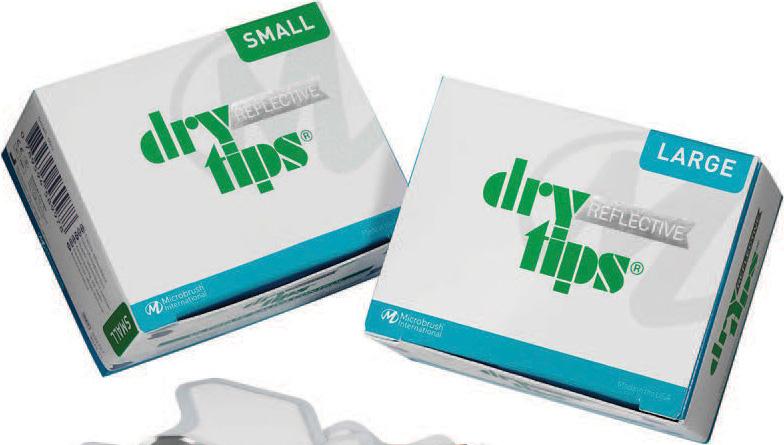
Dry Tips control moisture, protect the cheek, and fit comfortably, while the reflective backing improves visibility in the mouth.
Dr. Marc Levin knows it’s crucial to have a dry working field with good visibility during procedures, whether taking an impression, applying fluoride, or cementing a crown. It’s also important to keep the lips, cheeks, and tongue out of the way to improve visibility and keep the patient safe and comfortable. After using Dry Tips on his patients for several weeks, Dr. Levin called them a great product that kept moisture under control and reflected light, which ultimately allowed him to get his job done faster.
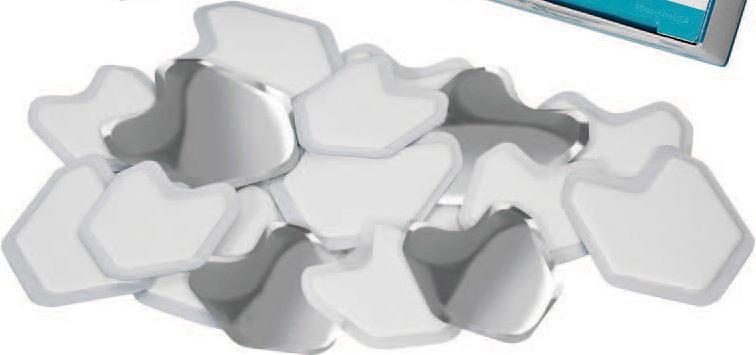
Intended as an alternative to cotton rolls and other absorbent pads, Dry Tips are absorbent, flexible, and comfortable, and they resist leaking while protecting the mouth from sharp instruments. The Reflective Dry Tips have a reflective coating that improves visibility in the oral cavity. They are available in small and large sizes, with a reflective or non-reflective backing.
Absorbing Moisture; Maintaining Dry Field
“Controlling saliva and maintaining a dry field during restorative procedures [is difficult],” noted Dr. Eric Van Zytveld, but after trying this product he found that Dry Tips were excellent at absorbing saliva. Microbrush reports that one of the Dry Tips has a high absorption capacity, far better than cotton rolls and other absorbent pads, and doesn’t lose moisture when handled. “The Dry Tips are so absorbent that I did not get any bleed-through and the tips held all of the saliva in the area,” reported Dr. Joel Doyon. He continued, “It kept the area around the tooth dry, free from salivary contamination to ensure better bonding.” Dr. Sylvia Irwin, who recommended a smaller size for pediatric patients, agreed that the product absorbed moisture very well. She added, “Especially with the growing focus on bonding, maintaining a dry field is more crucial than ever before.”
Patient Comfort and Protection
“This product worked beautifully to keep the patient’s cheeks out of the way,” noted Dr. Mark Offenback. Each tip is coated with polyethylene film to protect patients from sharp instruments, and the flexible edges accommodate cheek movements. The slim profile allows the tip to stay comfortably in place yet keeps cheeks away to allow easier access to the back of the oral cavity.
Dr. Irwin discovered that Dry Tips protect her patients and offer good isolation. “The product enabled isolation of the tongue and soft tissue, eliminating the possibility of laceration as well as adding absorbency,” she said. Dr. Abraham Jaskiel found that the tips protect the teeth well during drilling, and felt it was especially helpful during restorations of the upper 2nd and 3rd molars. He noted that it saved time by allowing him to stop fumbling with cotton rolls, and it improved the patient’s experience because it is not bulky. Dr. Van Zytveld pointed out that using the proper size Dry Tip is important, but added that “using too large a Dry Tip can lead to a patient feeling the sharp edge.” Another dentist, Dr. Mitchell Pasenkoff, liked that the Dry Tips are “small, not bulky” and said, “It made my job easier,” especially when taking digital impression scans.
Dry Tips are specially manufactured with materials that won’t fray or shed fibers. “The Dry Tips were easy to place and remove with no residue left on tissue after removal,” noted Dr. Doyon, who appreciated that there was no cleanup of cotton fibers after use. When a procedure is finished, the tips are easily removed with water spray.
takeaways
Dry Tips
comfortably, while the reflective back4.8
Ability to Reflect Light
• High absorption capacity for ultimate moisture control
“DRY TIPS ARE EXCELLENT AT ABSORBING SALIVA AND AID IN ILLUMINATION”
especially helpful during restorations of the upper 2nd and 3rd molars. He noted that it saved time by allowing him to stop fumbling with cotton rolls, and it improved the patient’s experience because it is not bulky. Dr. Van Zytveld pointed out that using the proper size Dry Tip is important, but added that “using too large a Dry Tip can lead to a patient feeling the sharp edge.” Another dentist, Dr. Mitchell Pasenkoff, liked that the Dry Tips are “small, not bulky” and said, “It made my job easier,” especially when taking digital impression scans.
• Comes in 2 sizes for enhanced patient comfort.
well. She added, “Especially with the growing foon bonding, maintaining a dry field is more crucial ever before.”
The Reflective Dry Tips have a special coating on one side that reflects light and improves visibility during procedures, and the evaluators praised this unique feature. “I have used similar products, but this one also had the added bonus of reflecting light,” shared Dr. Irwin. And Dr. Van Zytveld said, “The ability to reflect light helps illuminate posterior teeth. I used a Dry Tip while accessing a carious lesion on the distal facial of tooth No. 15. The reflective surface tremendously improved my ability to illuminate, visualize and restore the lesion.” Dr. Doyon pointed out an added bonus of the reflective side of the tips: “The reflective surface does not absorb any water spray when I remove etch from the tooth.”
Patient Comfort and Protection
“This product worked beautifully to keep the patient’s cheeks out of the way,” noted Dr. Mark Offenback. Each tip is coated with polyethylene film protect patients from sharp instruments, and the exible edges accommodate cheek movements. The profile allows the tip to stay comfortably in place keeps cheeks away to allow easier access to the of the oral cavity.
Overall Satisfaction
Irwin discovered that Dry Tips protect her paand offer good isolation. “The product enabled isolation of the tongue and soft tissue, eliminating the possibility of laceration as well as adding absorbenshe said. Dr. Abraham Jaskiel found that the tips protect the teeth well during drilling, and felt it was
• Reflective coating aids in illumination of oral cavity.
reflective side of the tips: “The reflective surface does not absorb any water spray when I remove etch from the tooth.”
Overall Satisfaction
The evaluators were so impressed with Dry Tips that they all would recommend the tips to colleagues and purchase them in the future. Dr. Robert Kirchmann said his favorite features were the durability, comfort, and reflective properties. He said he was looking for a product that would
PRODUCT EVALUATION
• Protects cheek from sharp instruments.
• Flexible and allows for easier access to oral cavity.
provide retraction and absorption of fluids, and Dry Tips “met both needs, which made all procedures efficient.” And Dr. Jaskiel concluded, “When working on some teeth, this product is an absolute must have!” For all these reasons, our team of DPS evaluators deemed Dry Tips a “Best Product.” FOR FREE INFORMATION: 800.921.4806
SNAPSHOT
CRITERIA BASED ON AVERAGE SCORE (OUT OF 5)
Ability
Dry Tips are specially manufactured with materials that won’t fray or shed fibers. “The Dry Tips were easy to place and remove with no residue left on tissue after removal,” noted Dr. Doyon, who appreciated that there was no cleanup of cotton fibers after use. When a procedure is finished, the tips are easily removed with water spray.
Ability to Reflect Light
The Reflective Dry Tips have a special coating on one side that reflects light and improves visibility during procedures, and the evaluators praised this unique feature. “I have used similar products, but this one also had the added bonus of reflecting light,” shared Dr. Irwin. And Dr. Van Zytveld said, “The ability to reflect light helps illuminate posterior teeth. I used a Dry Tip while accessing a carious lesion on the distal facial of tooth No. 15. The reflective surface tremendously improved my ability to illuminate, visualize and restore the lesion.” Dr. Doyon pointed out an added bonus of the
The evaluators were so impressed with Dry Tips that they all would recommend the tips to colleagues and purchase them in the future. Dr. Robert Kirchmann said his favorite features were the durability, comfort, and reflective properties. He said he was looking for a product that would provide retraction and absorption of fluids, and Dry Tips “met both needs, which made all procedures efficient.” And Dr. Jaskiel concluded, “When working on some teeth, this product is an absolute must have!” For all these reasons, our team of DPS evaluators deemed Dry Tips a “Best Product.”
Takeaways
• High absorption capacity for ultimate moisture control
• Comes in 2 sizes for enhanced patient comfort.
• Reflective coating aids in illumination of oral cavity.
• Protects cheek from sharp instruments.
• Flexible and allows for easier access to oral cavity.
Patient
Coverage (of
Resistance to leaking (if full)
Cheek protection
Ability to reflect light (only for the reflective option)

“Dry
tips are excellent at absorbing saliva and aid in illumination”
Eric Van Zytveld, DDS Denver,
CO
Eric Van Zytveld, DDS Denver, CO

Factors to Consider when Choosing a Detergent for Dental Instrument
Reprocessing
Selecting an appropriate detergent for cleaning reusable medical devices (RMDs) in a dental practice is more than just a matter of preference—it’s a critical step in ensuring patient safety, instrument longevity, and regulatory compliance.
A well-informed decision should be based on a risk assessment, as guided by AS 5369:2023, which is the Australian Standard for the reprocessing of reusable medical devices. This involves evaluating the potential risks associated with inadequate cleaning and selecting products and processes that mitigate those risks
Start with the Manufacturer’s Instructions for use (IFU)
The first and most essential step in selecting a detergent is to consult the RMD manufacturer’s IFU. Most medical and dental device manufacturers adhere to the European Medical Device Regulation (MDR), which sets stringent requirements for cleaning validation and product compatibility. These validated cleaning protocols often include specific detergent formulations tested during the development of the instrument.
Key Detergent Components to Consider
When reviewing cleaning agents, the following components and characteristics are especially important:
• Surfactants
Lower surface tension to allow water and detergent to reach all parts of the instrument, especially hard-to-reach crevices.
• Builders
Help emulsify and suspend soils, preventing redeposition during the wash cycle.
• Enzymes
Act as biocatalysts to break down organic matter such as blood (proteases), starch (amylases), and fat (lipases). Enzymes work efficiently at lower temperatures and are gentle on instruments.
• Corrosion Inhibitors
Essential for protecting stainless steel and other metals from degradation, helping maintain appearance and function over time.
• Alkalinity
Mildly alkaline detergents are often more effective in breaking down organic matter through saponification (conversion of fats into soap), while remaining material compatible.
• Compatibility with Cleaning Methods
A versatile detergent should be usable in manual cleaning, ultrasonic baths, and washer-disinfectors (both under- and over-bench).
Validated Performance and Global Use
A growing number of dental RMD manufacturers include neodisher® MediClean forte in their validated cleaning protocols, referencing its compatibility and performance across a wide range of instruments.
MediClean forte is a mildly alkaline enzymatic detergent developed by Dr. Weigert, widely adopted across Europe in hospitals, dental clinics, and laboratories. Its unique formulation is designed to:
• Remove denatured blood and organic residues
• Prevent protein re-deposition
• Provide material protection while maintaining cleaning efficacy
• Be effective across all common cleaning modalities (manual, ultrasonic, automated)
Manufacturers that reference MediClean forte in their IFUs include:
BA International™, Dentsply Sirona™, EMS Dental™, Forestadent™, Garrison Dental™, Horico™, Hu-Friedy Group™, KaVo™, Komet™, Morita™, Nobel Biocare™, Premier™, Straumann™, W&H™, MK-Dent™ and others.
Final Thought: Choosing a Trusted Product
While many detergents are available on the market, those supported by validated cleaning data, wide clinical adoption, and long-term material compatibility offer peace of mind for any practice.
neodisher® MediClean forte, available through Henry Schein, is one such detergent—trusted globally and recognised by leading instrument manufacturers. For more information or assistance reviewing IFU requirements, please contact your Henry Schein representative.

Lauren Kontus BSc(EnvSC) Director GKE Australia
The right pH for both the patient and the dental practitioner
A happy patient becomes a longterm patient. A painless anaesthetic injection will quickly dispel any apprehensiveness in the dental practice, and get treatment off to a good start. A 2004 study showed that patients judge their dental practitioner first and foremost on their skill in giving pain-free injections. Injections do not have to be something to fear –on the contrary, they can be the first step in a relationship of trust with the practitioner. To achieve this, the dental practitioner must be able to rely on supplies of the highest quality: not just the syringe and the needle, but also the local anaesthetic chosen. For although they may contain the same active ingredients, brands of local anaesthetic can differ considerably, depending on the manufacturing process, the way they are sterilized, the excipients they include, their pH level, and so on.
pH, an important aspect of local anaesthetics
The pH of the solution has an important place as one of the factors that distinguish between anaesthetics, as it varies from one product to another and one manufacturer to another. While human tissues are pH-neutral (7.4) under normal physiological conditions, solutions used in anaesthesia on the
other hand need to be somewhat acidic.
Each cartridge of injectable solution includes a local anaesthetic, sometimes alone and sometimes mixed with a vasoconstrictor such as adrenalin. The advantage of the vasoconstrictor is that it significantly increases the duration of anaesthesia. But the drawback is that adrenaline requires an acidic or even very acidic pH, if it is to remain stable and active throughout the product’s shelf life. A solution that contains adrenaline will therefore be more acidic than one that contains anaesthetic alone. For this reason, all manufacturers have to lower the pH of their anaesthetic solutions to prevent the vasoconstrictor degrading. Finally, the acidity level, which is set by the manufacturer, will depend on the formulation, and the excipients and preservatives included. The difficulty therefore is to offer the dental practitioner a solution that is stable and effective, but with the least-acidic pH possible.
Negative clinical consequences of an acidic pH
Unfortunately, injecting an acidic solution has clinical consequences for both patients and practitioners, which cannot be ignored. First of all, the more acidic the pH, in other words the further it is from the
neutral physiological level, the more the patient will feel the injection… meaning a more painful injection, irrespective of the practitioner’s technique and experience. This pain has to be taken into account, as it is the main determining factor in the trust between patient and his dental practitioner.
Secondly, another pH-related clinical effect is that the more acidic the solution, the longer the onset time –that unavoidable wait between the moment of the injection and the time the anaesthetic takes effect. There are actually two forms of anaesthetic compound in a solution, in an acid-base balance: ionized forms (which do not penetrate the cell) and non-ionized forms (which go to the heart of the cell, an essential stage in achieving anaesthesia). The balance between the two depends on the solution’s pH. The closer this is to physiological pH, the higher the proportion of non-ionized or “active” forms. When the solution is injected, the body buffers the solution, in other words it brings it up to physiological pH. During this process, the acidbase balance is altered and more active molecules are present. This physiological buffering process takes time, and is a major factor in the anaesthetic’s onset time. So the more

acidic the pH of the injected solution, the longer the body needs to bring the solution to 7.4, with the effect of increasing the onset time.
Tailored pH for Septodont anaesthetics
Top quality anaesthesia is the highest priority for Septodont. That’s why the company focuses on making products with the lowest possible acidity, to limit their adverse effects for both practitioners and patients. The group has spared no expense in developing solutions with higher pH levels, investing over the years in projects to constantly improve and adapt its formulations.
This has enabled Septodont research teams to gradually increase the pH of its leading products, such as Septanest, by developing unique formulations that are compatible with a standard shelf life and the least-acidic pH possible. And now Septanest is available on the market, with a level that is considered to be low-acid compared to competing equivalent forms, at a pH of 4.0–5.5.
Being totally committed to optimal quality, and making constant improvements, is of course a long-
term approach for Septodont. This commitment to excellence makes a real difference in the dental practice, and has enabled Septodont to claim its place as world leader in dental anaesthesia.
An emphasis on quality in product manufacturing
One feature of Septodont unique production process involves including a terminal sterilization stage, a gold standard for the health authorities in the manufacture of sterile pharmaceutical products. This method ensures the highest guarantee
of sterility for all the group’s local anaesthetics, including Septanest. As the world leader in dental anaesthesia, Septodont has the world’s largest production capacity: 9000 square metres over two manufacturing sites (in France and Canada). It produces over 500 million cartridges per year, all benefiting from this terminal sterilization stage.
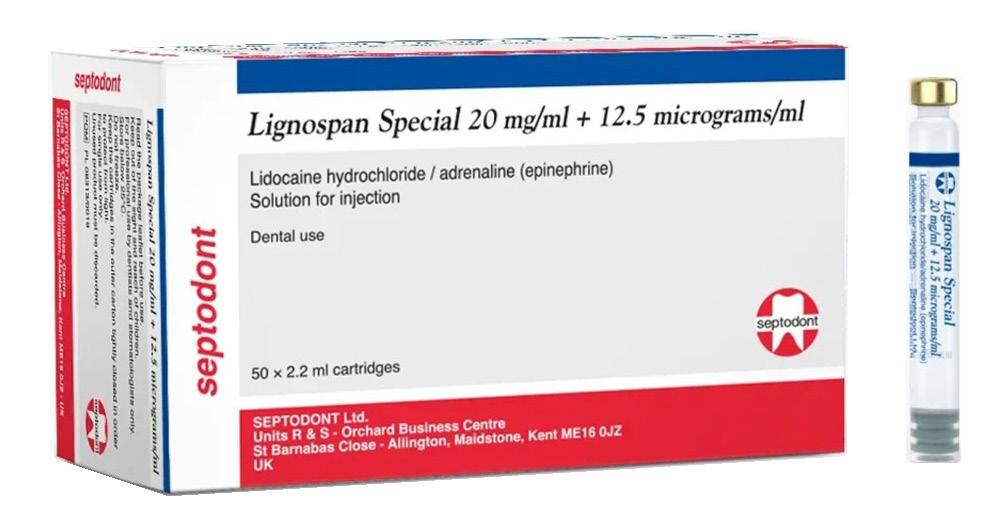
View Product
Helping Dentists to Preserve and Enhance their Livelihood
Can giving an injection actually hurt YOU more than it does your patient?
We hear regularly from Dentists, in all specialties, who share their problems with hand, wrist and arm injuries - caused by repetitive use of a traditional dental syringe. From Surgeries to Arthritis to Carpal Tunnel, the sheer weight of the manual syringe and it’s limitations of use will take a toll over a career, as practitioners “push and pull” using this older anesthetic administration method.
There is a better way!
At 0.25 ounces, the STA single-use handpiece is the lightest and most tactile solution available in Dentistry – both protecting the most valuable tools in your body, and maximizing your injection skill and technique with the patient. It’s simply a Win-Win technology.
• Pen like grasp – allows you to easily roll the handpiece between your fingers when performing an injection
• No palm extension on aspiration
• Just 0.25 ounces, versus a fully loaded dental syringe at approx. 8 ounces
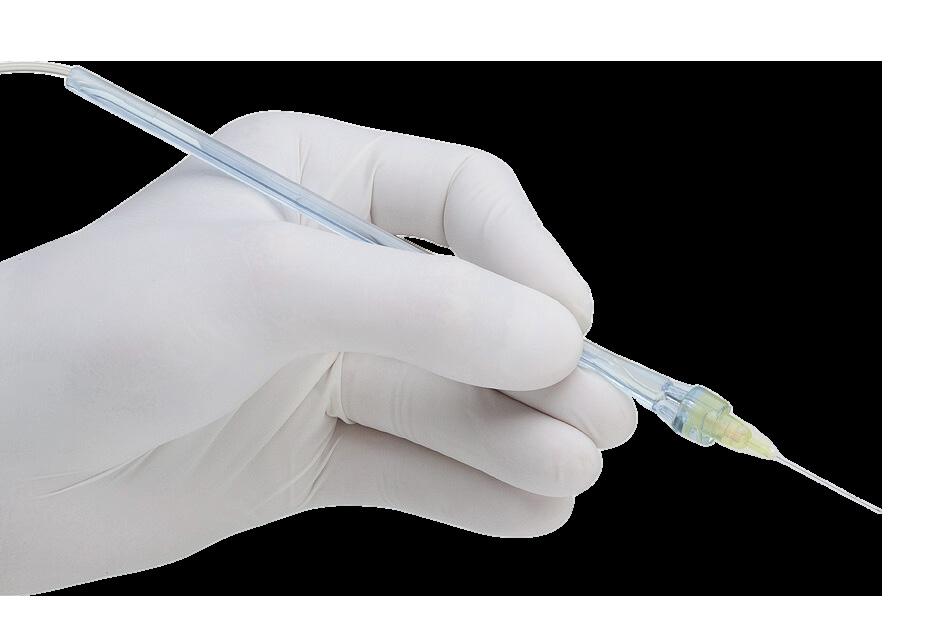
“I could no longer use my thumb for injections, and had to rely on my assistant to push the plunger after I placed the needle. I had been curious about the STA for years, and the injury finally gave me a reason to try it. The STA handles all the pushing to deliver the anesthetic dose, and it made me realize just how much strain the manual syringe had put on my thumb, hand, and wrist over the years. I purchased it for myself, but I absolutely love it for my patients. It allows me to give pain-free injections, even palatal ones! I now use it for every patient injection.”
Beth Snyder, DMD - Doylestown, PA
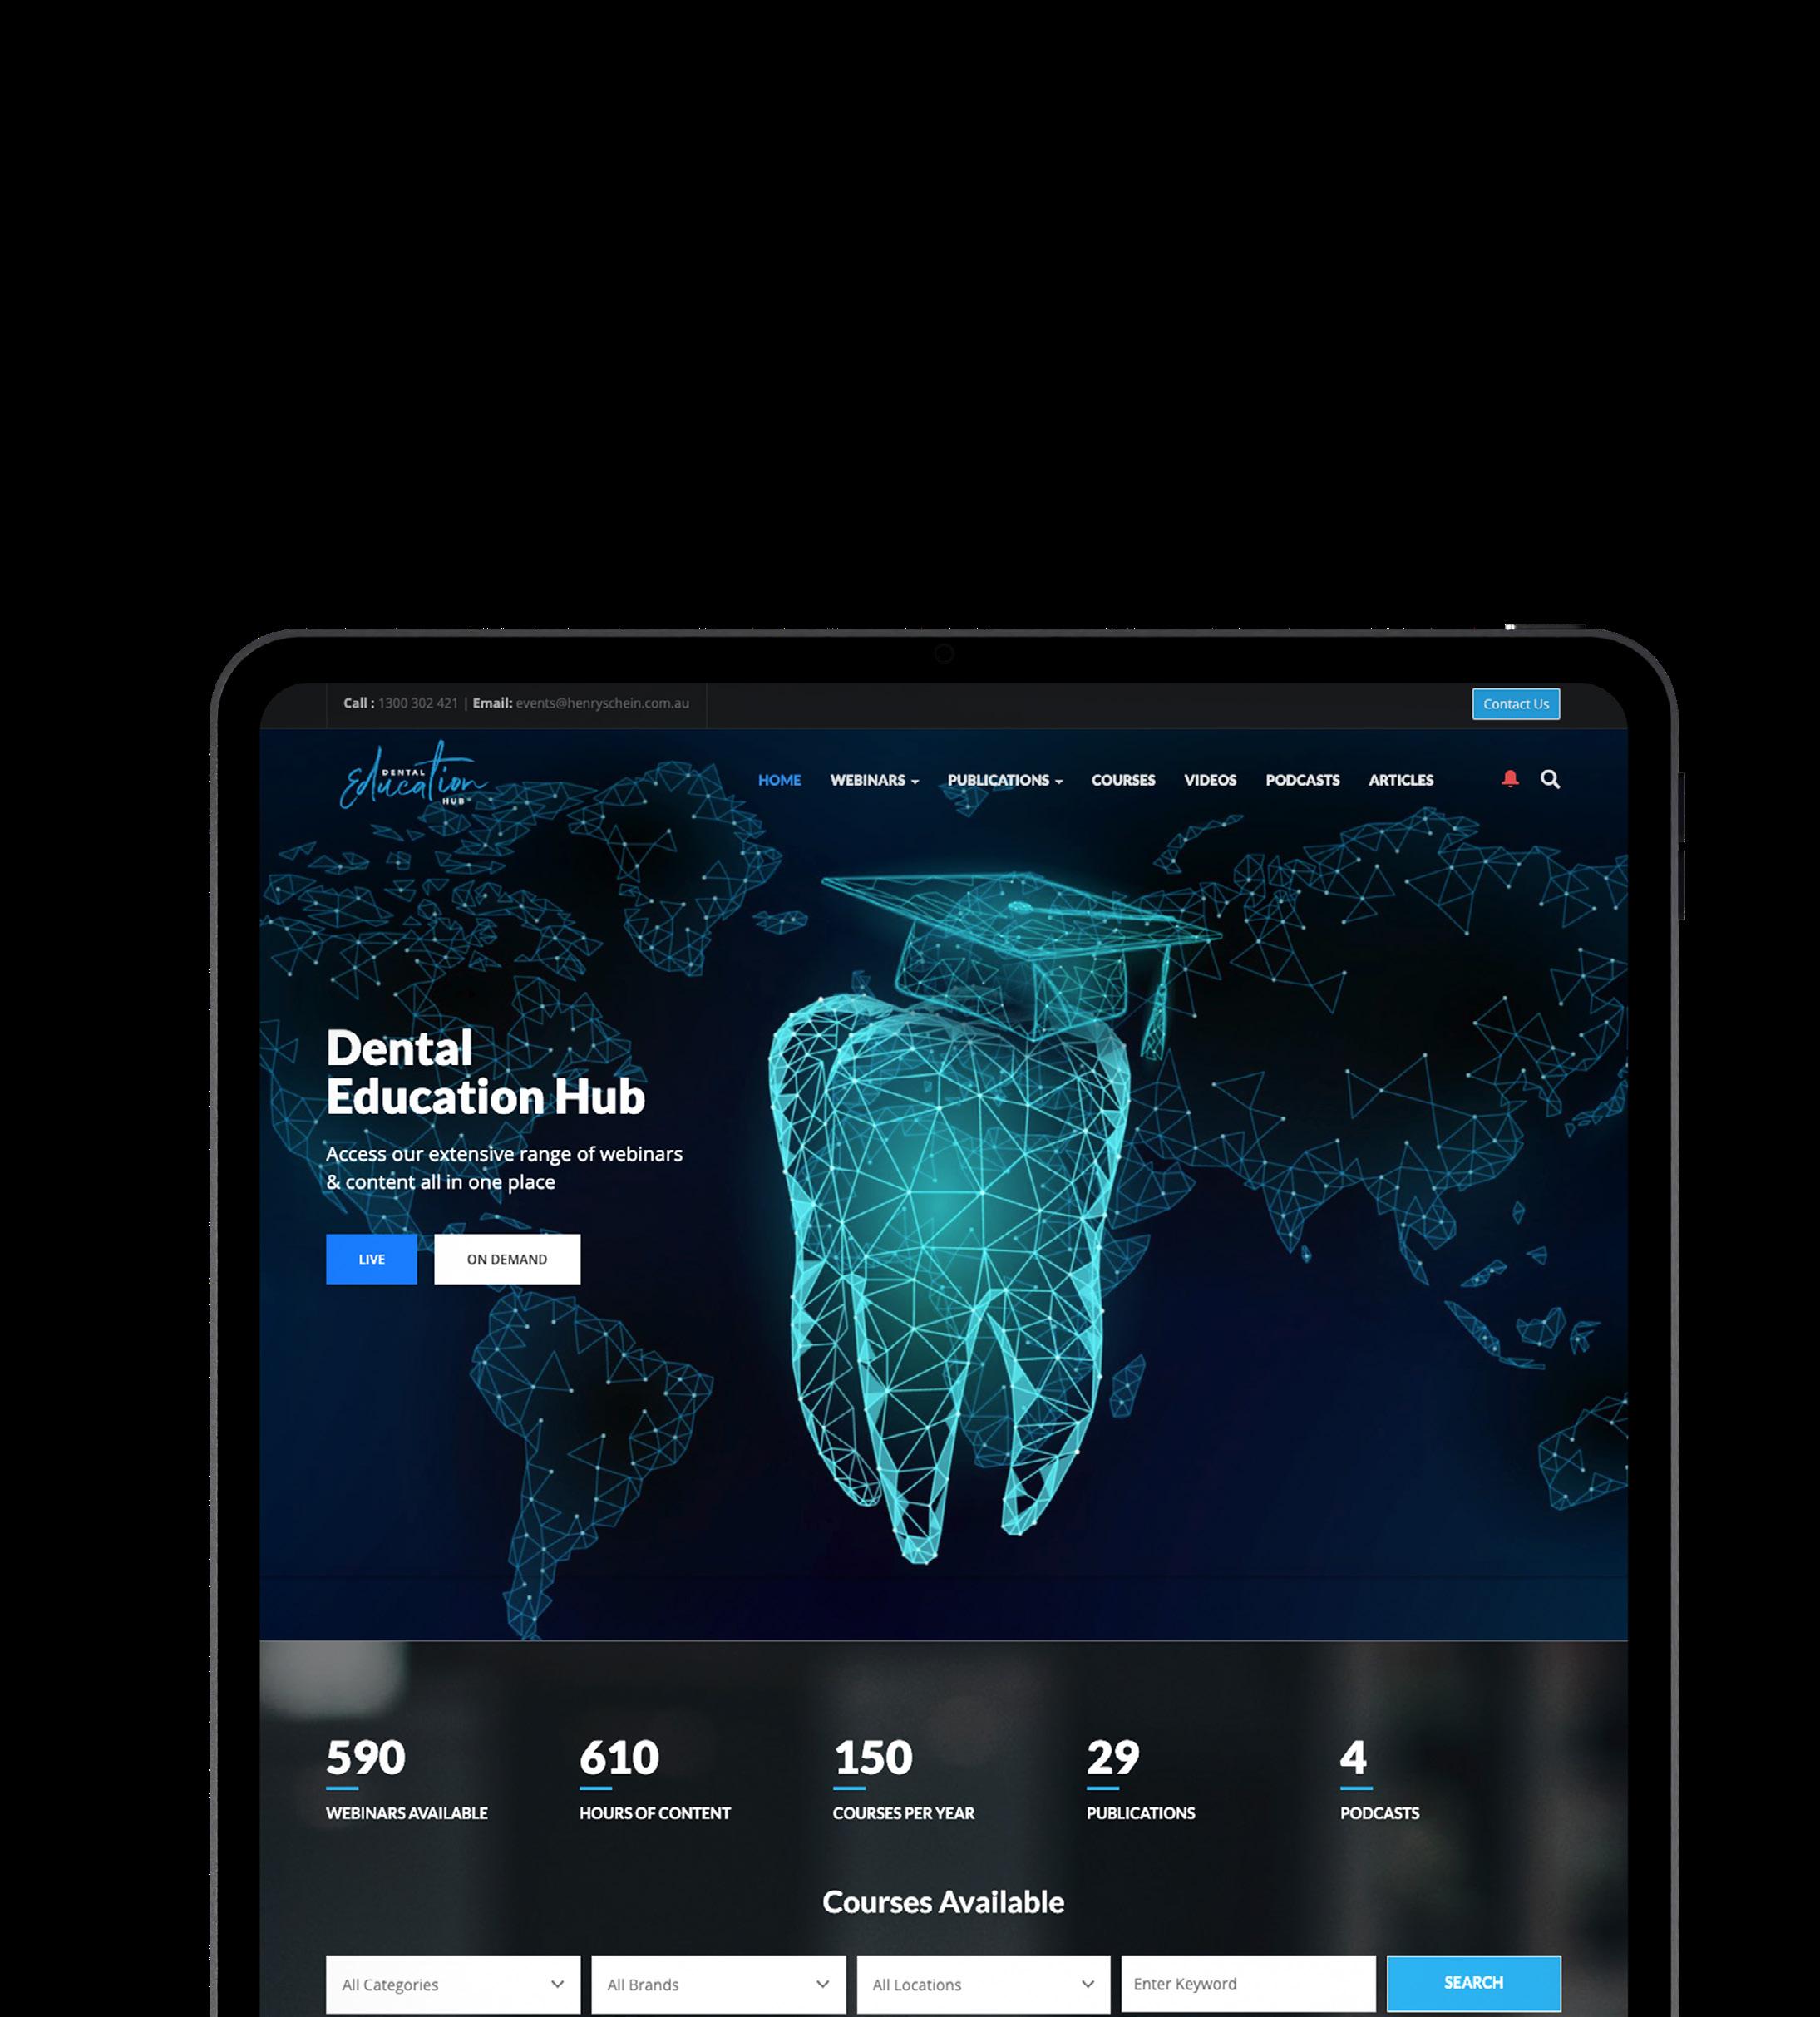
Explore over 600 hours of clinical and business related content all in one place with access to courses, webinars, podcasts and articles.

Evolution of Implantology
with
BioHorizons™
Tapered
Pro design and Camlog™ proven deep conical connection
BioHorizons™ and Camlog™, leaders in dental implant solutions across the American and European markets, merged in 2017. This strategic unification was designed to provide dental practitioners with a comprehensive portfolio of implant systems, regenerative materials, and prosthetic components all under one umbrella. As a result of this, it has facilitated the creation of a new dental implant combining the best of both systems - the implant thread of the Tapered Pro, and the proven deep conical connection.
Camlog™ and the Power of 7.5° Deep Conical Connection
Camlog is recognized for its CONELOG® implant system, which utilizes a 7.5° deep conical implant–abutment connection. This design ensures high mechanical stability, minimizes micro-movement, and reduces bacterial infiltration at the implant-abutment interface.
In Semper Hogg et al. (2015), the CONELOG implantabutment connection was compared to other systems with conical connections, specifically Nobel Active, Ankylos C/X, Astra Tech, Straumann Bone Level and Straumann Tissue level. Each abutment was torque tightened according to the manufacturer’s instructions. CONELOG showed the best results in terms of rotational displacement (Fig 2), canting moment range (Fig 3) and good results in terms of vertical displacement range (Fig 4)[5]
The precision of the implant-abutment connection is of major importance for the fabrication and later fit of the prosthetic restorations and their accuracy from the model to the patient’s mouth. Stability of the implant-abutment connection is strongly influenced by the precision of fit, the connection design (incl. positional index design) and the manufacturing precision.
This provides evidence that the CONELOG implant-abutment connection has high-precision manufacturing and superior positional stability compared with other conical connections available in the market.
Innovative Technologies from BioHorizons™
BioHorizons brings to the table its advanced Tapered Pro Implant System, which incorporates several clinically proven technologies. Reverse buttress threads, designed to enhance implant retention and primary stability by having the flat edge face the bone resulting in improved force distribution, as supported by studies on implant thread geometry [1,2]. Regarding the thread design, thread geometry has been seen to play a significant role in load transfer and osseointegration, with a potential “Five Thread Guideline” - whereby a minimum of five implant cylinder threads is required for better primary implant stability [1,2,4]. A diagram explaining the load forces can be seen in Stanley (Fig 1) [4].
Additionally, the system features Laser-Lok™ microchannels, which promote the maintenance of crestal bone levels by creating a physical connective tissue seal through the perpendicular orientation of collagen fibres [3]. This unique surface technology has been shown to support long-term soft tissue stability and aesthetic outcomes with reduced crestal bone loss.
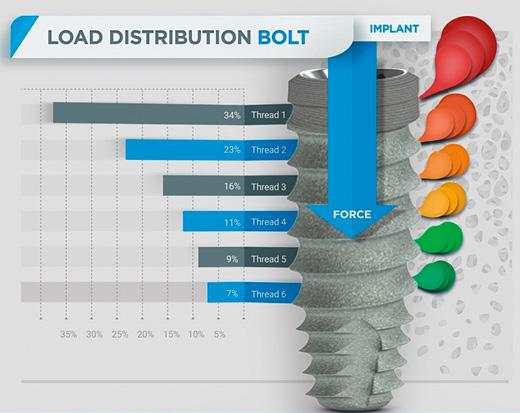
(Fig 1) Graphic illustration of the typical nut-to-bolt stress distribution (left of the implant) compared to crestal stress distributions typically found on dental implants (right of the implant). (Graphic depicted from Robert Stanley 2020)
Conclusion: A Unified Solution for Modern Implantology
Through this unification, a nextgeneration implant system has emerged—the Tapered Pro Conical. This system combines the precisely engineered threads of the BioHorizons™ Tapered Pro with the conical connection design of Camlog™, offering clinicians a streamlined surgical workflow. With simplified platform diameters and enhanced mechanical and biological performance, the Tapered Pro Conical is designed to reduce procedural complexity while maintaining optimal patient outcomes.
References
1. Oswal MM, Amasi UN, Oswal MS, Bhagat AS. Influence of three different implant thread designs on stress distribution: a three-dimensional finite element analysis. J Indian Prosthodont Soc. 2016;16(4):359–365.doi:10.4103/09724052.191283.
2. Steigenga J, Al-Shammari K, Misch C, Nociti FH Jr, Wang HL. Effects of implant thread geometry on percentage of osseointegration and resistance to reverse torque in the tibia of rabbits. J Periodontol. 2004;75(9):1233–1241.
3. Farronato D, Mangano F, Briguglio F, Iorio Siciliano V, Guarnieri R. Influence of LaserLok® surface on immediate functional loading of implants in single tooth replacement: a 2-year prospective clinical study. Int J Periodontics Restorative Dent. 2014;34(1):79–89. doi:10.11607/ prd.1747.
4. Stanley R. The five thread guideline: a new guideline for predicting primary stability with dental implants. J Oral Implantol. 2020;46(1):81–86. doi:10.1563/aaid-joi-D-19-00039
5. Semper Hogg W, Zulauf K, Mehrhof J, Nelson K. The influence of torque tightening on the position stability of the abutment in conical implantabutment connections. Int J Prosthodont 2015;28(5):538-541
(Fig 3) Canting moments of 6 implant systems. (Graphic depicted from Semper Hogg et al. 2015)
(Fig 2) Rotational displacement of 6 implant systems. (Graphic depicted from Semper Hogg et al. 2015)
(Fig 4) Vertical displacement of 6 implant systems. (Graphic depicted from Semper Hogg et al. 2015)
Educating PeopleCentred Dentists For Rural Australia
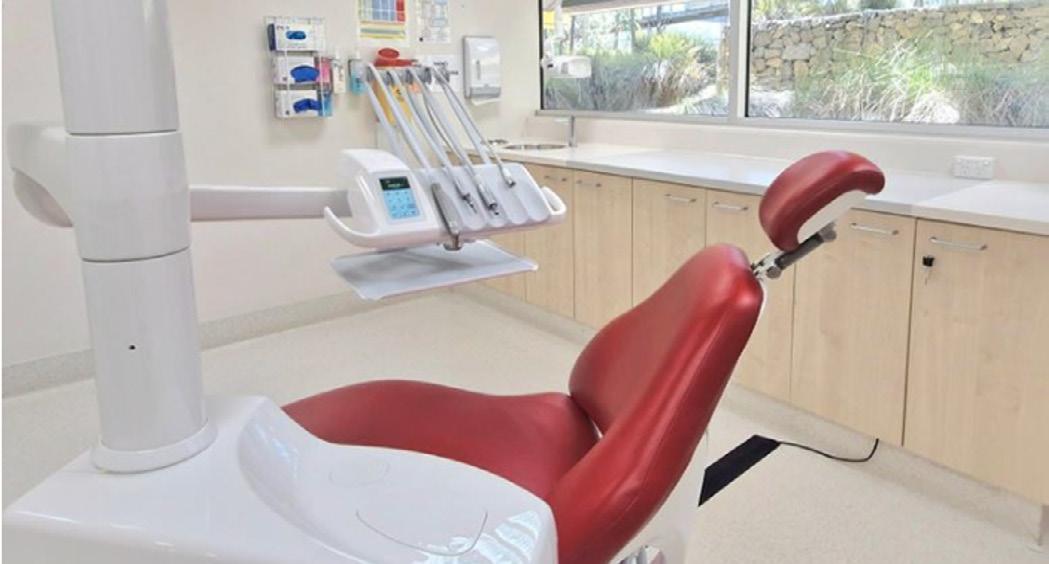
Charles Sturt University recently upgraded the dental units at one of their clinics, significantly enhancing clinical training for students and dental care services for the local community. The decision to choose Planmeca was heavily influenced by their experiences with the previous units and the exceptional service received. Initial feedback on the new units has been overwhelmingly positive – from staff, students, and patients.
Beyond the Blue Mountains, approximately a three-and-ahalf-hour drive west of Sydney, lies the charming rural town of Orange. Further south, on the way to Melbourne, you will find Wagga Wagga, the largest inland city in New South Wales. Both areas have experienced significant growth in recent years.
As more people settle in Orange, Wagga Wagga, and their neighbouring towns, the demand for dental care services has risen. To address this, both towns are home to Dental and Oral Health Clinics run by the School of Dentistry and Medical Sciences at Charles Sturt University (Charles Sturt). These clinics provide essential care for local communities while offering invaluable clinical training to dentistry students.
In addition to the clinics in Orange and Wagga Wagga, Charles Sturt operates facilities in Albury, Bathurst, and Dubbo, forming a network of five clinics across its campuses. Together, these clinics treat approximately 30,000 patients each year. They also serve as the first professional training environments for Charles Sturt dentistry students, where both clinical work and simulation training are conducted using Planmeca solutions, ensuring students receive comprehensive hands-on and simulated experience.
New dental units make a difference
All five clinics are overseen by Jake Ball, Clinical Director of Dental and Oral Health Clinics at Charles Sturt. He works alongside colleagues like Jenny Bevear, Acting Operations Coordinator, who has been with the Dental and Oral Health Clinics since their opening in 2009. In recent years, she has overseen clinic management and serves as the key contact for feedback on the facilities.
Both Jake Ball and Jenny Bevear are pleased with the Planmeca dental units, which were installed at the Dental and Oral Health Clinic in Orange at the end of 2023. The previous units were replaced by 78 Planmeca Compact™ i Classic dental units with Planmeca Solanna® operating lights. These were later complemented with Planmeca Lumo™ dental stools.
According to Jake Ball, the updated learning environment is a source of pride for the entire staff and a key marketing point for attracting applicants to dentistry programmes at Charles Sturt.
“We do have a state-of-the-art facility, and we definitely highlight it to prospective students. Charles Sturt has made a significant investment in our facilities and technology. Having worked at other dental hospitals, I can say that dental units do make a difference. We are very lucky to have these chairs. In terms of design and ease of use, Planmeca units are fantastic. They are perfect for student training, and we haven’t encountered any problems or concerns,” Ball continues.
“Planmeca Compact i Classic a very attractive chair, very nicelooking,” Bevear agrees. “Everyone seems to be very happy with them.”
“The new chairs are very comfortable, both the dental units and the assistant stools. We have really enjoyed using them. Patients have also been reported to find the chairs very comfortable,” Jake Ball tells.

Hands-on learning through simulation
The Charles Sturt School of Dentistry and Medical Sciences offers two programmes leading to a dental profession. The three-year undergraduate Bachelor of Oral Health (Therapy and Hygiene) is based in Wagga Wagga and leads to registration as an oral health therapist. The Bachelor of Dental Science is a five-year undergraduate programme based at the Orange campus.
Additionally, the university offers a two-year postgraduate programme in collaboration with the Australian Dental Association, resulting in a Graduate Diploma of Dental Implantology. Coursework for this programme is conducted through the university, while practical training occurs in private practices.
The bachelor’s programme in dental science places a strong emphasis on hands-on learning. Spanning five years, the programme provides students the opportunity to gain additional clinical experience before graduating.
“The students start quite early within their training programme with practical skills development in the simulation clinic environment, and that is a key feature throughout the programme,” Jake Ball tells.
Charles Sturt University has partnered with Planmeca since 2009, when the first simulation and dental units were installed at Charles Sturt’s Dental and Oral Health Clinics. Charles Sturt has a total of 80 Planmeca Compact™ i bench simulation units, with 60 located in Orange and 20 in Wagga Wagga. Additionally, teachers have their own simulation desks in both clinics. Despite years of constant use, the simulation units remain in excellent condition.
“The simulation units are very well maintained and still look brand new,” Jenny Bevear praises.
Training people-centred practitioners
In their second year, the students begin practicing on each other to learn basic dental examination skills. They start seeing real patients in the latter part of the second year and continue clinical training until the end of the fifth year.
“In addition to training the technical skills required from a dentist, we aim to ensure our students become person-centred practitioners who are culturally safe in their practice. We want them to be prepared to work in rural and regional communities. We value interpersonal skills, which we consider essential for being an excellent practitioner,” Ball tells.
Class sizes in the dentistry programme are kept small to provide students with ample one-on-one instruction. The number of applicants to the Bachelor of Dental Science programme varies annually, sometimes reaching up to 1,000. Applicants who meet the academic threshold must also take a dental school exam assessing their aptitude, critical thinking, and interpersonal skills.
However, there are alternative pathways for students from rural backgrounds or those who have completed or are pursuing other university degrees. Of all applicants, 100 are usually interviewed, and 40 to 50 are accepted.
“We emphasise that education is accessible regardless of your background. Therefore, we also have rural and indigenous pathways for our students. The university also offers excellent support services for financial assistance, inclusion, and accessibility. There is a dedicated team to assist people with disabilities, ensuring their education is tailored so they can fully participate,” Jake Ball tells.
Support for rural communities
Insightful, inclusive, impactful and inspiring. These are the key values of Charles Sturt University, also reflected in its dentistry programme. The university maintains a collaborative relationship with the Centre for Rural Dentistry and Oral Health, which runs the five Dental and Oral Health Clinics.
The rural and regional focus is a major focus point for Charles Sturt, particularly in dentistry. The university is committed to improving opportunities and outcomes for the people of rural and regional Australia. Charles Sturt collaborates with external stakeholders within the regional communities to ensure that the university delivers high-quality oral health services and builds a sustainable health workforce for the long term.
“Regarding the workforce that we are building, one of our priorities is to ensure that our graduates will undertake patientcentred care, that they are culturally safe in managing their patients and that they are really aligning with principles of evidence-based practice,” Jake Ball emphasises.
Students with rural and regional backgrounds are actively being recruited, as they are more likely to stay in the rural areas and provide oral care services locally after graduation. The dentistry programme also focuses on empowering students to make a positive contribution to the health of their local communities.
Community engagement is also a key feature of the clinical training, which links to servicing rural and regional area needs as well. The five Charles Sturt clinics are open to patients from the local community.
“We also have some fantastic up-and-running projects outside our campuses. For example, we send students out to a clinic in Brewarrina in the northern NSW region, which is predominantly an Aboriginal community. The clinic is both a fantastic service to that region but also a fantastic clinical experience and training opportunity for the students. We also send students into nursing homes with a portable dental unit to perform oral health screenings,” Jake Ball tells.
The students also train in metropolitan hospitals to ensure they encounter people from various backgrounds.
Choosing Planmeca for reliable support
One significant factor in choosing Planmeca units for the renewal project was their local distribution partner in Australia, Henry Schein Halas. In addition to project deliveries, local distribution partners handle after-sales services and support, ensuring customers always make the most of their investments.
“The units as well as the service we have received from Planmeca has been fantastic. The units are the most important part in our work, and being able to rely on them is really important. In terms of technology, we have been incredibly happy,” Jake Ball says.
“A major factor in the decision was the service from the Henry Schein Halas team. We wanted to continue with them because of the service, and we felt it was the most important thing. It is not just buying the chairs, it is having the service to back you up when you need them. And the service we got from the technical people of Henry Schein for Planmeca units, it was amazing,” Jennifer Bevear recounts.
When new dental units were installed, some of the previous ones were recycled through local charity projects. For example, the decommissioned units of the Walker clinic were donated to a local men’s shed association, which dismantled the products and used the parts for their building projects. Once again, the university made an effort contributing to the wellbeing of local communities.
“The members of that men’s shed were able to use those materials for their arts and crafts projects. The shed brings people together to work on those kinds of projects, which is fantastic. So being able to supply our old units for their use, that was a really positive thing,” Jake Ball says.
Find Out More
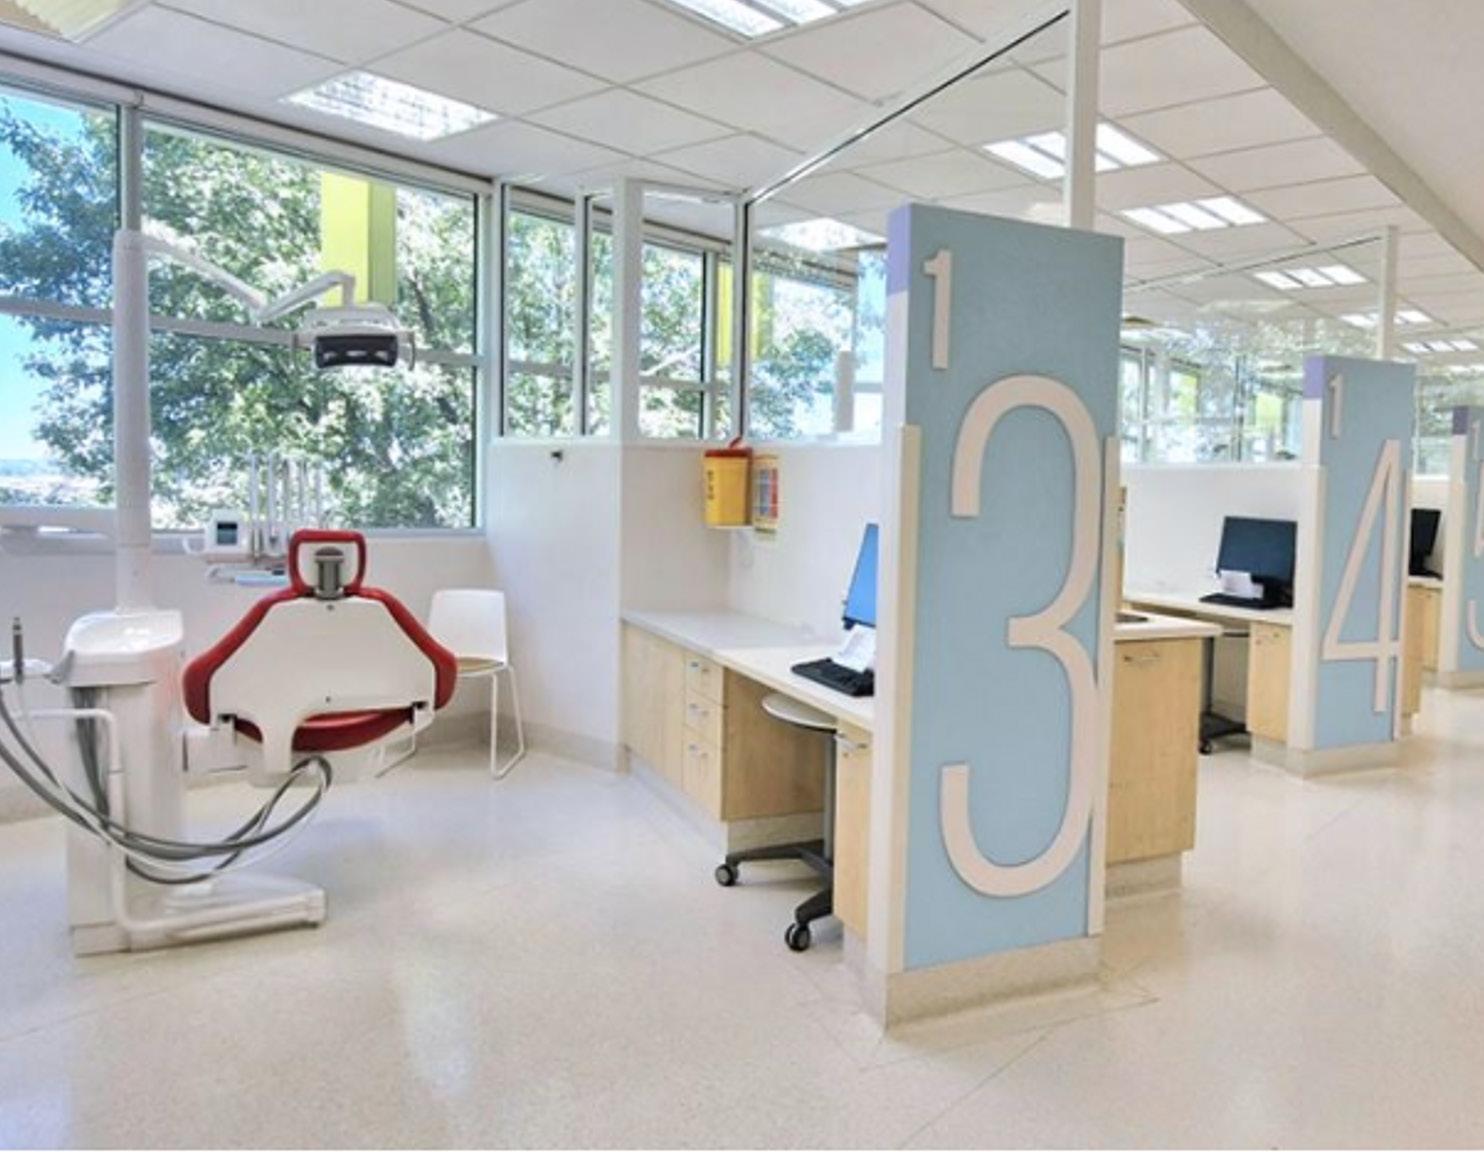
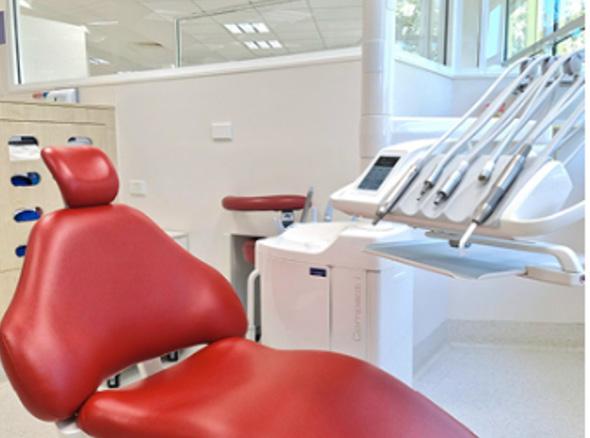

and Oral Health Clinics


Jake Ball
Clinical Director of Dental
Jenny Bevear
Acting Operations Coordinator, Charles Sturt University

What Should you Consider When Buying a New Dental Chair?
Find out more about purchasing a new chair in this article
When purchasing a new dental chair, there are a range of options available to suit the unique needs of your practice. However, the process of selecting from a vast range of choices can be daunting; how do you know which is the best fit for your practice?
Luckily, the team at Henry Schein Dental is here to help, so that you know what to look for when browsing through all the excellent options from KaVo, Morita, Planmeca and A-dec, in order to find the best pick for your practice. There are five key components to a dental treatment centre: the chair itself, the dentist’s delivery system, the assistant’s unit, the operating light, and any multimedia features. Alongside these components, it is also crucial to consider factors such as ergonomics for both the dentist and patient, ease of use, versatility, future-proofing, and the profile of your average patient.
When considering the range of optional extras and preferences, it ultimately comes down to four primary categories: functionality, efficiency, comfort, and aesthetics. By evaluating each of these key areas, you can ensure that you select the optimal dental chair for your practice.
Functionality
The treatment centre needs to enable the dentist to complete the range of treatments the practice offers. It is not enough to be fit for purpose, the dental chair must be perfect for purpose, to enable you to get the most out of your practice. Thankfully, the range of functionality available today is far-reaching, and no matter what you need, the right chair for you exists.
Consider what types of treatments the practice is offering. Do you need the chair to support endodontic treatment? If so, you will want to choose a chair that can offer an apex locator, for example. If your practice offers implantology, you may want to choose a chair where the implant facilities are integrated into the dentist’s unit.
Furthermore, are you planning on expanding your range of treatments in the near future? If so you may want to consider investing in a chair that will enable those new treatments. Or perhaps you want to invest in a chair that is more compatible with digital dentistry, to keep up with the growing industry trends.
If you have a mix of left and right handed dentists and assistants at your practice, you may find it important to select a truly ambidextrous chair, such as the KaVo E30, Planmeca Compact i3 or the A-dec range
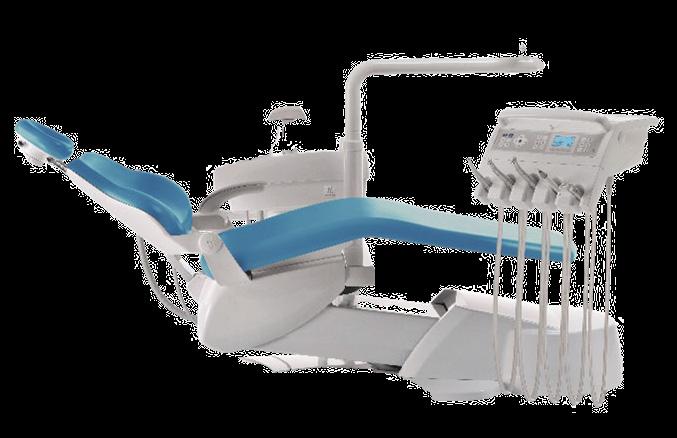
The left-right convertible KaVo E30
Other considerations of functionality include lighting and multimedia:
Will the lighting configuration eliminate shadows and stay cool to work under? Do you need integrated multimedia to be able to effectively deliver treatments and communicate with patients?
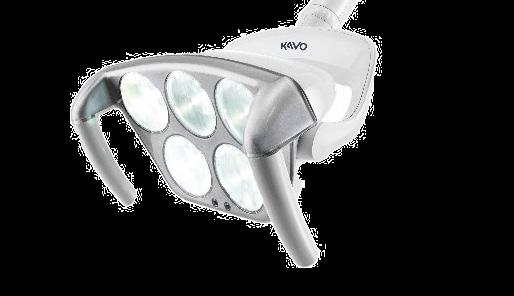
Efficiency
With such a key piece of equipment it often isn’t enough that it can do something if it can’t do it efficiently. No one wants to wait around for sluggish functionality - not the dentist who has more patients to see, nor the patient reclined in the chair.
Often the key to efficiency is integration. If you are going to be doing a high volume of X-rays, then getting intraoral X-ray devices and sensors that are integrated into your dental chair is going to save valuable time. Also, more integrated functionality will often mean that there is less clutter left on surfaces, which will improve efficiency and hygiene, and also remove trip hazards from trailing cables of ancillary items.
If there are multiple dentists using the same room, programmability that allows dentists to save their personalised settings, such as in the KaVo uniQa or Planmeca Compact could be invaluable to your practice efficiency. Another aspect of the dental chair which can be streamlined is the assistant’s unit. You need to consider if it is beneficial for the assistant to be able to quickly access any integrated multimedia from their own unit. Furthermore, some models offer integrated suction tube flushing and disinfection, which can also increase
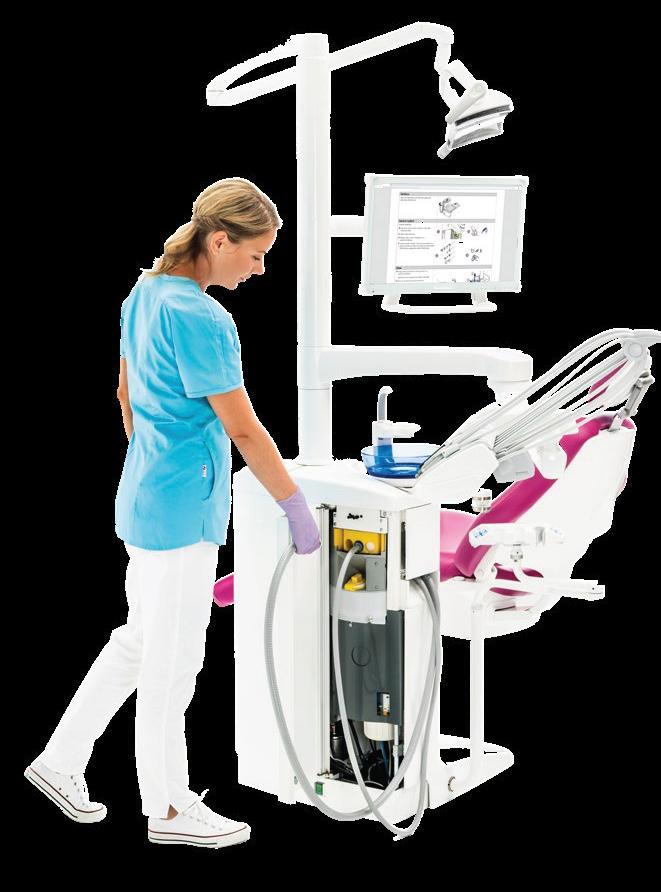

Comfort
Comfort cannot be overlooked when looking for a new dental chair. When thinking about comfort, it’s important to consider both the dental operators and the patient themselves.
Dental chairs are heavily used, and an uncomfortable chair can be miserable for the dentist and assistants working around it all day, as well as potentially increasing the anxiety of patients, especially during long procedures.
Dentists and their assistants will both be working long hours at their dental chair, so their comfort is paramount. The configurations offered by the chair need to allow maximum accessibility for the dentist to get close enough to the patient to work comfortably. Operator stools must be comfortable, adjustable and easily movable – and importantly the stool chosen must suit the individual using it. Uncomfortable seating can lead to back pain, fatigue, and other ergonomic issues, ultimately affecting their ability to perform at their best.
Other important considerations include:
easily adjustable height options, easy reach of foot pedals, touchscreens, and any other controls.
Whether a patient is in for a short checkup or a long treatment, making sure they are comfortable is a must. For one it will play a vital part in making sure their impression of your practice is a positive one, and for two, a comfortable, relaxing dental chair can go a long way to calming nervous patients.
Areas to consider for patient comfort
include:
Headrest - how adjustable is it, will it work for patients of all shapes and sizes?
Upholstery - is it durable and easily cleaned does it offer support for patients with back problems?
Seating - does the chair offer a knee break or fixed leg design?
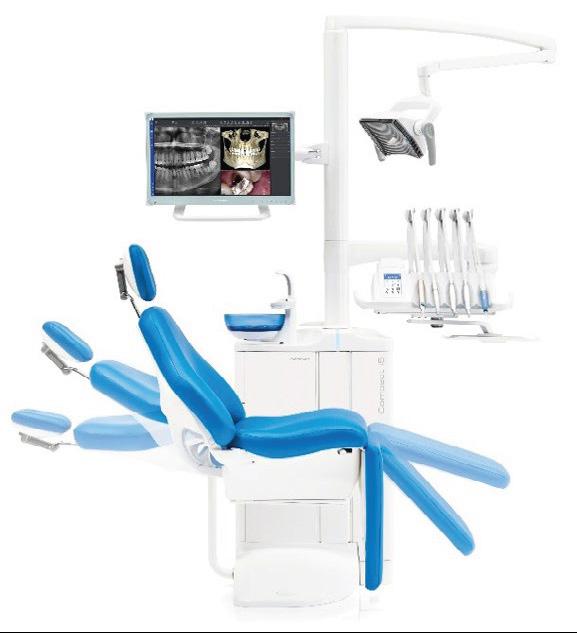
Adjustability - one size will never fit all patients, so an adjustable chair is key.
The popular KaVo 540LED operating light.
Integrated suction cleaning on the Planmeca Compact i5
The Morita T500 offers features such as soft motion technology, rotational headrest, and the option of an extendable backrest, which bring together patient and dentist comfort.
Aesthetics
While not as clinically important as the three categories above, aesthetics is not something you can afford to ignore. As the centrepiece, a sleek dental chair can transform the look and feel of the treatment room, even better if the upholstery matches your branding.
Nature offers spectacular hues in abundance. For KaVo, this kaleidoscope of colours is a source of inspiration that has led to the new ‘Inspired by Nature’ colour collection and to a collaboration with Berlin-based artist Jans Echternacht
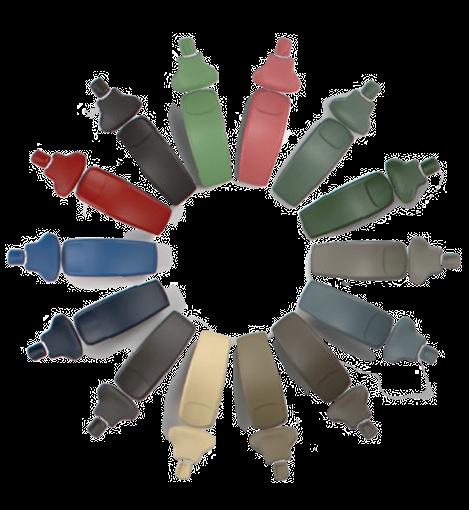
So don’t overlook looks - if there is more than one option which meets your functionality, efficiency, and comfort needs, then think about the aesthetics of your practice and let that be the deciding factor.
Extra advice
For an easy guide to help you navigate the range offered, check out our dental chair comparison matrix, which covers a comprehensive range of models from KaVo, Morita, Planmeca and A-dec.
Finally, Henry Schein has a team of equipment experts available to contact if you have any further queries - general or specific - about which dental chair is best for your practice. Contact us to book a showroom consultation.
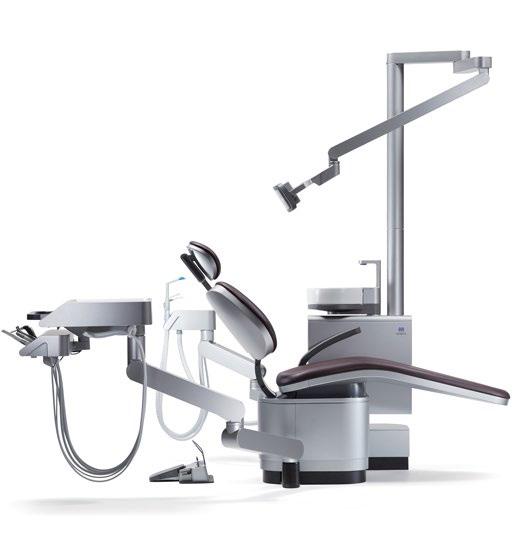
Synchronised movement of the Morita T500
