DOWNLOAD LINK
For some reason if link does not work download this pdf and then click
Illustration 2 g00040620
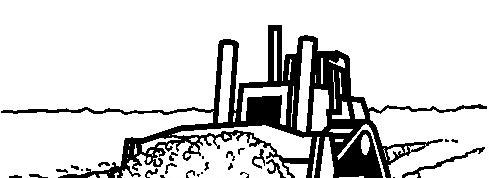
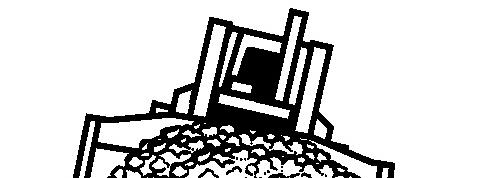
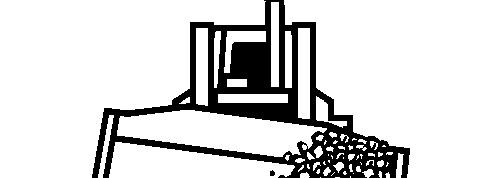
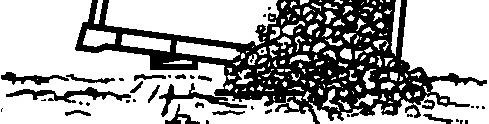
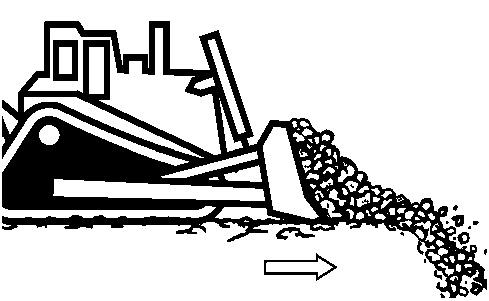
Straight Dozing - Maintain a level cut for the best performance. Fill the bulldozer blade. Carry the load to the dump.
• Avoid lugging or stalling the machine.
• Avoid excessive spinning of the track.
• If turning the machine with a loaded blade is necessary, use the bulldozer tilt cylinders instead of the steering lever to steer the machine.
When you are performing leveling work, a full bulldozer blade manages better than a partially loaded bulldozer blade.
Slot Dozing
Illustration 3 g00040626
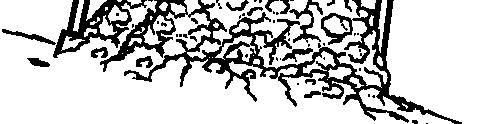
Slot Dozing - When you trap material in a slot, you can carry larger loads in front of the bulldozer blade.
The depth of the slot should not be deeper than the top corner of the bulldozer blade.
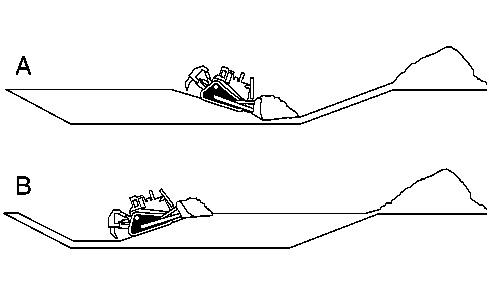
Illustration 4 g00040622
Start the slot at the dump or the spoil end and work rearward. See Figure (A) in Illustration 4. You can load the blade as you are moving downhill. Also, you can then carry the load on a level surface. The technique that is shown in Figure (B) is not as efficient as the technique that is shown in Figure (A). In figure (B), the machine is pushing a load uphill and the operator does not utilize the slot. Dozing level through the entire pit is inefficient because the average distance for pushing the material to the dump will be greater.
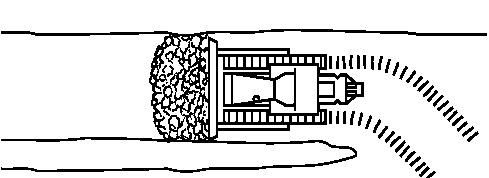
Illustration 5 g00040628
When you are digging parallel slots, the center should be removed from the rear. This procedure permits the operator to maintain a slot until the center is removed. The center berm should be wide enough to stand up without collapsing. Maximum width should be 1/3 of the bulldozer blade.
Machine on a Slope
Machine on a Side Slope
Illustration 6 g00040630
When possible, work on a slope vertically. This method is better than working horizontally.
When you are working on banks, use caution. When you are working on slopes, use caution. Avoid tipping the machine.
If the machine starts to sideslip on a slope, lighten the load and turn the machine downhill.
If you are working horizontally on a slope, start at the top of the slope. Work downhill. Maintain a windrow of material on the low side of the machine in order to provide stability.
Use caution in order not to undercut the slope. Undercutting the slope will increase the slope.
Machine on an Up Slope or Down Slope
Reduce ground speed of the machine to an acceptable level by using the service brake prior to initiating a steering correction.
Do not allow the engine to overspeed when you are unloaded and moving down a slope. Watch the tachometer and use the service brakes. Use the service brakes near the top of the slope to prevent excessive engine speed.
Note: When you approach engine overspeed, the action lamp will flash. If the engine overspeeds, the action lamp will flash and the warning alarm will sound.
V-Ditching
Illustration 7
g00641146
Illustration 8 g00040633
V-Ditching - Tilt the bulldozer blade in order to start the desired slope. Position the corner of the bulldozer blade in the center of the ditch. Cut to the desired depth.
Backfilling
Illustration 9 g00040635
Backfilling - Push the material at a 90 degree angle in order to fill a trench. When you are cutting material with the side of the blade, use caution so that the remaining material does not fall on the machine.
Land Clearing
Illustration 10 g00040067
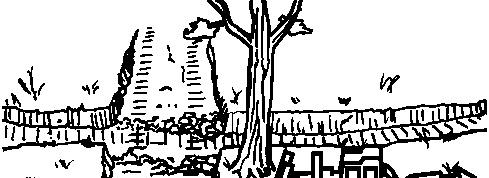
• Beware of all dead limbs. Beware of all limbs that are hanging overhead.
• Cut the roots of the tree in order to fell a large tree.
Illustration 11 g00040073
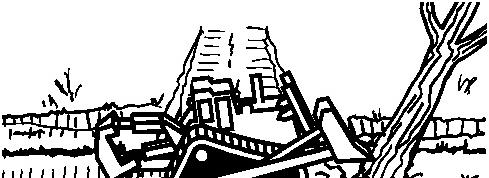
• If additional leverage is needed, you can doze a small ramp near the base of the tree. The ramp allows the machine to make higher contact on the tree. Push the tree in the direction of the intended fall. Advance cautiously. The ball of the root may hang up under the bulldozer blade. This movement could drag the machine off the ramp.
Stump Removal
Illustration 12 g00561004
Stump Removal - Make sure that roots are cut or loosened. Remove the stump by pushing or digging.
Ripping
Use FIRST speed range for ripping operations. Use additional shanks instead of increasing the speed or higher speed ranges.
Use the decelerator in order to match the drawbar pull. Also, use the decelerator in order to prevent spinning the track.
Rip the ground as deep as possible. Sometimes, you may rip at partial depth. You can remove the material in natural layers.
The sizing of the material is controlled by the depth of the pass and by the width of the pass. If the material is loaded with a wheel dozer, the size of the material should be smaller. Finally, the material should be smaller if the material is loaded into a scraper.
NOTICE
Do not turn or back the machine while shanks are in the ground. Twisting strain on the shanks and tips may cause failure.
NOTICE
Inspect the ripper tips frequently for excessive wear.
The multishank ripper is intended for high production. Use the multishank ripper in hard, packed soil and loosened, embedded rock. The multishank ripper is for use in material that can be ripped with AT LEAST two shanks. Use the multishank ripper with a single center shank less than 20 percent of the time.
The multishank ripper is NOT intended for high production in rock with a single center shank.
A single ripper shank in an outside pocket of the ripper is NOT recommended. If necessary, locate the shank in the highest position. Operate the machine at reduced speed. The frame of the ripper is not designed for ripping with a single outside shank at full horsepower.
The multishank ripper is NOT intended for ripping in deep applications. Only use shanks of the specified length.
Use a single shank ripper when deep ripping is required.
Packed Soil, Hardpan, Clay, Shale, or Cemented Gravel
Illustration 13
Multishank ripper with three shanks
g00040571
Three shanks work well in these materials. Use the greatest possible number of shanks to break the material to the desired size. However, the number of shanks that are used should not cause the machine to stall.
Rock with Fractures, Faults, and Planes of Weakness
Illustration 14 g00040576
Multishank ripper with two shanks
The use of two shanks will cause the rocks to break out in smaller pieces. , Then, the machine can manage the job easily. When the machine begins to stall, use only the center shank. If the tracks spin, use only the center shank.
Single Shank Ripper (Solid Rock, Granite, or Hard Spots)
Illustration 15 g00562861
Use one shank in material that tends to break out in large slabs or in large pieces.
Ripper
Shank Adjustment
The length or height of the shank on the ripper is adjustable.
Illustration 16 g00040607
Adjust the length of the shank according to the following procedure.
1. Maintain a length of the shank so that the machine can efficiently pull the shank through the material.
2. Maintain sufficient clearance under the lower ripper frame. This clearance will prevent the machine from catching on large slabs or on large rocks that are brought to the surface.
3. Keep the lower frame assembly as parallel to the ground as possible. This action will evenly distribute the stress.
4. When you remove material with a scraper or with a loader, shallow ripping is recommended.
5. When you are ripping for a scraper, rip in the same direction as the scraper that is being loaded.
6. Never rip to a deeper depth than the depth of the material that is being removed.
7. When you are removing material with an excavator or with a bulldozer, deep ripping is recommended.
Push Loading
Illustration 17 g00040056
1. Contact the push block squarely.
2. The machine should not be moving more than 5 km/h (3 mph).
3. When possible, maintain a straight push.
4. Do not allow the rear of the scraper to come off the ground.
5. When the cut is complete, upshift the machine in order to help the scraper get out of the cut.
Product: TRACK-TYPE TRACTOR
Model: D6K2 LGP TRACK-TYPE TRACTOR JTR
Configuration: D6K2 LGP Track-Type Tractor JTR00001-UP (MACHINE) POWERED BY C4.4 Engine
Operation and Maintenance Manual
D6K2 Track-Type Tractor Supplement
Regulatory Information (Japan)
SMCS - 7000
Qualifications for Machine Operation
The following qualifications are required for the operation of this machine:
Excavation and Loading
i06282234
Completion of the construction machines (for land leveling, hauling, loading, and excavation) operation skill training course. (Qualification by the Industrial Safety and Health Act)
Demolition
Completion of the construction machines (for demolition) operation skill training course. (Qualification by the Industrial Safety and Health Act)
Mining Jobs
Certification by the Director General or Deputy Director General of Bureau of Mine Safety after completion of the safety training course. (Qualification by the Mine Safety Act)
Crane Slinging for the Bucket with a Hook
Completion of the special slinging training for the crane for loads weighing less than 1 ton. (Qualification by the Industrial Safety and Health Act)
Trailer Transportation
In principle, this machine should be transported by a trailer. Select the appropriate trailer regarding the machine weight and measurements shown in the major specifications in the specification part of this manual. Be aware machine weight and transportation measurements differ depending on the various types of attachments.
• In the event heavy items are to be transported, observe the related laws such as Road Traffic Law, Road Laws, Road Transportation Vehicle Laws, and Vehicle Restriction Laws.
• Conduct prior investigation of the road width, ground clearance of road/railway bridges, weight restrictions etc. of the planned transportation route, to confirm the viability of the transportation execution.
Load
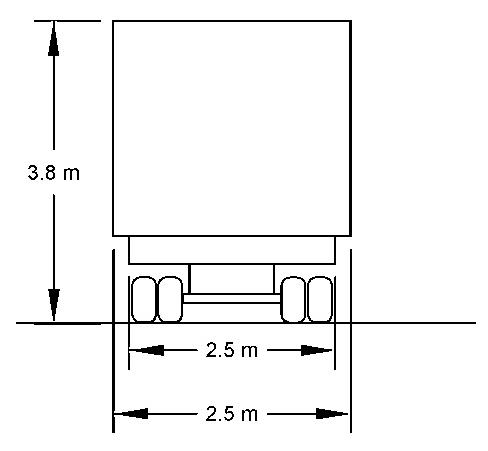
Illustration 1
• Not more than 3.8 m (12 ft 6 inch)
• Not more than 2.5 m (8 ft 2 inch)(Safety Standard)
• Not more than 2.5 m (8 ft 2 inch) (Vehicle Restriction Laws)
g02698738
• Items that protrude out are not allowed. (Government ordinance for Road Traffic Laws)
Transportation weight and measurements are restricted by the Vehicle Restriction Laws. If the actual weight/measurements exceed the limitation figures, you must submit the restriction relaxation request to the pertinent governmental agencies. For details, consult your Cat dealer.
Table 1
Total Length
Not more than 12 m (39 ft 4 inch)
Total Width (A) Not more than 2.5 m (8 ft 2 inch)
Total Height (B) Not more than 3.8 m (12 ft 6 inch) when loaded on the trailer.
Total Weight 20 to 25 ton (depending on road, axle, and vehicle length)
Operation of Construction Equipment and the Governing Laws and Regulations
NOTICE
Various laws and regulations, including Industrial Safety and Health Act, are enforced to ensure prevention of injuries on and around construction equipment and safe and comfortable operation of equipment. Please be sure to obey them.
NOTICE
The notices regarding machine operation, inspection, maintenance and safety contained in this manual are applicable only to cases in which the machine is used for the specified jobs. It is impossible for this kind of manual to cover every kind of operation. Therefore, the content of this manual does not necessarily explain all possible cases.
Be sure to pay careful attention also to the items not covered by this manual and confirm the safety before starting jobs in order to prevent human injury and machine damage accidents.
Qualification of Operators
Operation of construction equipment is limited to those who have any of the following licenses by law.
Note: Employers will face imprisonment up to a maximum of 6 months or a fine of up to a maximum of five hundred thousand yen if they let unqualified personnel operate equipment. Unqualified operators will also be fined up to a maximum of five hundred thousand yen.
• One who completed an operating skill course for vehicle-type construction equipment at a registered training institution.
• One who passed the construction equipment and technologies license examination (Type 13) defined by the Construction Industry Law.
• One who completed an operating training course for construction equipment defined by the Vocational Training Law.
• One who took a special training (rules and skills) at a registered training institution to operate equipment weighing less than 3 tons.
• With an auto-drivers license, an operator does not need to complete an operating skill course for construction equipment to operate equipment on the roads that apply to the rules of the Road Traffic Act. However, the operator needs to complete the course to engage in snow clearing or excavating on the roads.
• Operator needs to be qualified under the Mine Safety Act to operate construction equipment in a mine.
Acquisition of the Qualifications
The company offers training courses for construction machine operation, in addition to other skills. For details, please contact the company's dealer in your area.
Regarding machine operation qualifications, please also refer to the laws related to the construction machines shown at the end of this manual.
Operation of Construction Equipment and the Governing Laws and Regulations
NOTICE
Information of operating skill course for vehicle-type construction equipment (for ground leveling, transporting, loading, excavating)
Industrial Safety and Health Act requires operators of construction equipment weight 3 tons and over to acquire a certificate of completion of an operating skill course. Registered with and authorized by the respective directors general of the regional labor bureaus, we offer operating skill courses for vehicle-type construction equipment and special trainings.
Caterpillar Operating Training Center
Head Office:
Address: 3495-2 Tana, Chuo-ku, Sagamihara-shi
Tel: (042) 763-7130Fax: (042) 761-5540Website: http://cot.jpncat.come-mail: cothonsha@cat.com
Training centers registered with the respective directors general of the regional labor bureaus and special training sites:
Types of equipment that an operator is permitted to operate with the certificate of operating skill course:
Visit Website: http://cot.jpncat.com and contact your local training center for detailed information.
1. Ground leveling, transporting, and loading equipment:
a. Bulldozers
b. Motor graders
c. Tractor shovels
d. Muck loaders
e. Scrapers
f. Scrape dozers
g. Equipment which is defined by the ordinance of the Ministry of Health, Labor, and Welfare and falls into any of the categories 1.a through 1.f.
2. Excavating equipment:
a. Power shovels
b. Drag shovels
c. Draglines
d. Clamshells
e. Bucket excavators
f. Trenchers
g. Equipment which is defined by the ordinance of the Ministry of Health, Labor, and Welfare and falls into any of the categories 2.a through 2.f.
Request for Periodical Self-Inspection
Rules of Periodical Self-Inspection
The employer shall, as provided for by the Ordinance of the Ministry of Health, Labor and Welfare, conduct self-inspection periodically and keep the records of the results in respect to construction equipment such as tractor shovels and power shovels, etc., specified by Cabinet Order. (from Article 45, Industrial Safe and Health Act)
Ordinance on Industrial Safety and Hygiene
Periodical self-inspections Article 167
(1) The employer shall, as regards a vehicle type construction machine, carry out self-inspections for the following matters periodically once every period within a year. However, this shall not apply to the non-use period of a vehicle type construction machine, which is not used for a period exceeding 1 year.
(2) The employer shall, as regards a vehicle type construction machine set forth in the proviso of the proceeding paragraph, carry out self-inspection for abnormalities in each part of a construction machine before resuming the operation.
Periodical self-inspections Article 168
(1) The employer shall, as regards a vehicle type construction machine, carry out self-inspections for the following matters periodically once every period within a month. However, this shall not apply to the non-use period of a vehicle type construction machine, which is not used for a period exceeding one month:
• (i) Abnormalities in a brake, a clutch, a controlling device, and working devices.
• (ii) Damage in a wire, rope, and a chain
• (iii) Damage in a bucket, a zipper, etc.
(2) The employer shall, as regards to the vehicle type construction machine set forth in the proviso of the preceding paragraph, carry out self-inspection for the matters listed in each item of the same paragraph before resuming the operation.
Record of Periodical Self-Inspections Article 169
The employer shall, when having carried out the self-inspections set forth in the preceding two Articles, record the results and retain the records for 3 years.
Specified Self-Inspection Article 169-2
The specified self-inspection pertaining to the vehicle type construction machine shall be the selfinspection (prescribed by Article 167) and carried out by qualified personnel. The employer shall, when having carried out the specified self-inspection pertaining to a vehicle type construction machine, affix an inspection sticker stating the month and year when the said specified selfinspection was carried out at a readily visible location of the said machine.
• Caterpillar Japan has a supporting program for self-inspection as a registered inspection agency. Qualified personnel and inspection equipment are available to help customers who do not conduct internal inspections or do not have time to conduct the specified selfinspections. Please contact a Cat dealer near you for details.
• Maintenance and inspection record book for a record-saving purpose can be purchased at Caterpillar Japan.
• Penalty: Employer who fails to carry out self-inspections and to record the results will face a fine of up to five hundred thousand yen.
Checkup before Commencing the Work Article 170
The employer shall, when carrying out the work using a vehicle type construction machine, check functions of a brake and a clutch before commencing the work for the day.
Besides qualification for operating equipment and self inspections, the following obligations are set forth in the Industrial Safety and Health Act:
• To conduct health and safety training for new recruits and shop foremen.
• To appoint the operation leader or supervisor, and establish health and safety management system.
• To inform employees of a chain of command at the worksite, communication and signal rules, traveling route of equipment, speed limits, signs of restricted areas, etc. for securing safety in the workplace.
Industrial Safety and Health Act further also sets obligations related to mechanical structures and rental activities of equipment.
Safety comes before anything else. Please establish a workplace where no injuries occur by observing the governing laws and by referring to this manual, specifically the descriptions on safety.
Construction equipment and environmental laws
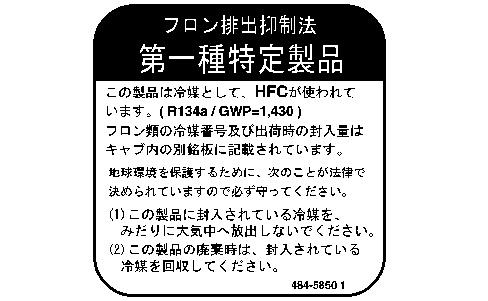
Prohibition of Emissions and Obligations to Recover Fluorocarbons (April 1, 2015)
Flourocarbons Emissions Restraining Law (April 1, 2015)
Being emitted into the atmosphere, fluorocarbons, used as refrigerants of air conditioning, destroy the ozone layer and accelerate the global warming as a cause of environmental destruction. Please follow the instructions below required by law when handling air conditioners in order to protect the global environment.
1. Do not arbitrarily emit the encapsulated refrigerant installed on the product into the atmosphere.
2. Please recover the encapsulated refrigerant when disposing of the product.
Note: Violators of the law will face a maximum one-year imprisonment or a fine up to a maximum of five hundred thousand yen.
When you need to fill, recover a refrigerant or dispose of a product with an encapsulated refrigerant installed, please ask a filling-recovery operator registered with the government of the local prefecture as "class-1 filling-recovery operator." Please carry out the simple inspection of air conditioner and keep the record.
Class-1 Specified Product sold after October 1, 2015 shall have the label inside of the cab showing the type and quantity of refrigerant, GWP (Global Warming Potential) and precautions for use.
Standard Certificate of Transfer
Dear Customers
Japan Construction Equipment Manufacturers Association
Standard Certificate of Transfer
Issued by the Japan Construction Equipment Manufacturers Association
Standard Certificate of Transfer issued by the Japan Construction Equipment Manufacturers Association proves the ownership of your equipment. Please request us to issue the certificate as a proof of transfer of ownership.
Commercial transactions of construction equipment are generally made on a long-term installment plan basis with a special provision of reservation of ownership that the seller retains the ownership of the sold equipment until the buyer completely pays off the installments.
Ownership of some construction equipment can be proved with a vehicle inspection certificate, but the certificate is not issued for most of the equipment. Therefore, the buyer will need to present a third party with a proof of ownership of the sold equipment.
Japan Construction Equipment Manufacturers Association launched a system of standard certificate of transfer in 1971 to normalize trading in construction equipment and establishes a business practice relating to transfer of ownership. Customers are kindly requested to understand the intent of the system and request your seller to issue a certificate of transfer.
1. About the standard certificate of transfer
a. Japan Construction Equipment Manufacturers Association (hereinafter referred to as CEMA) sets the rules and form of standard certificate of transfer (hereinafter referred to as certificate of transfer), and members of the CEMA issue the certificate of transfer. A certificate of transfer proves the ownership of equipment.
2. Purpose of issuance
a. A certificate of transfer will be issued for the purpose of clarifying the ownership of equipment and preventing misconduct such as trades of stolen equipment or fraud.
3. Issuer
a. A certificate of transfer will be issued by a distributor (Primary transferor) who sells new construction equipment and is authorized by the CEMA.
4. Eligibility
a. A certificate of transfer will be issued for the equipment, which is sold by CEMAmember distributors and defined as construction equipment by the CEMA
5. Issuance
a. A certificate of transfer will be issued and directly given to a buyer upon the buyer's request when he/she buys eligible equipment from an issuer.
b. A certificate of transfer may not be issued for the equipment, which was sold as new merchandise more than 10 years ago.
c. A certificate of transfer is not permitted to substitute a vehicle inspection certificate.
6. Prohibition of reissuance
a. Certificate of transfer should be safely stored as it will not be reissued under any circumstances.
7. In case a certificate description runs out of space
a. Discretionary page/s to the certificate will be valid with a tally seal of the issuer at the joint of two pages.
Please contact CEMA-member companies or distributors for more details of the system.
Copyright 1993 - 2025 Caterpillar Inc. All Rights Reserved. Private Network For SIS Licensees. Fri Jan 17 15:38:34 UTC+0530 2025
Product: TRACK-TYPE TRACTOR
Model: D6K2 LGP TRACK-TYPE TRACTOR JTR
Configuration: D6K2 LGP Track-Type Tractor JTR00001-UP (MACHINE) POWERED BY C4.4 Engine
Operation and Maintenance Manual
D6K2 Track-Type Tractor Supplement
Media Number -M0071498-00
Publication Date -01/08/2015 Date Updated -28/04/2016
General Hazard Information - Only Japanese market
SMCS - 7000
Illustration 1
i05926741
g03253902
Attach a "Do Not Operate", or a similar warning tag to the start switch or to the controls before you service or repair the equipment. These warning tags (Special Instruction, RJX88874) are available from your Cat dealer.
Copyright 1993 - 2025 Caterpillar Inc. All Rights Reserved. Private Network For SIS Licensees. Fri Jan 17 15:37:30 UTC+0530 2025
Product: TRACK-TYPE TRACTOR
Model: D6K2 LGP TRACK-TYPE TRACTOR JTR
Configuration: D6K2 LGP Track-Type Tractor JTR00001-UP (MACHINE) POWERED BY C4.4 Engine
Operation and Maintenance Manual
D6K2 Track-Type Tractor Supplement
Media Number -M0071498-00
Additional Messages
SMCS - 7000; 7405
i06679409
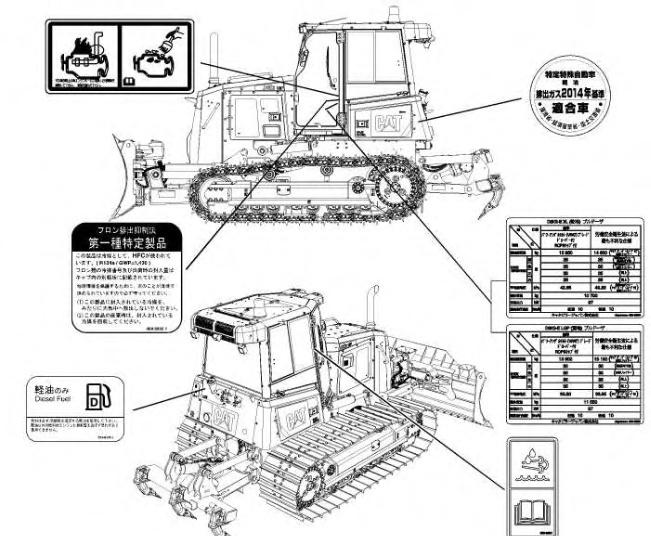
There are several specific messages on this machine. The exact location of the messages and the description of the messages are reviewed in this section. Become familiarized with all messages.
Make sure that all the messages are legible. Clean the messages or replace the messages if you cannot read the words. Replace the illustrations if the illustrations are not legible. When you clean the messages, use a cloth, water, and soap. Do not use solvent, gasoline, or other harsh chemicals to clean the messages. Solvents, gasoline, or harsh chemicals could loosen the adhesive that secures the messages. Loose adhesive will allow the messages to fall.
Replace any message that is damaged, or missing. If a message is attached to a part that is replaced, install a message on the replacement part. Any Cat dealer can provide new messages.
D6K2 Track-Type Tractor, JTR, ; DFR
Illustration 1 g06072578
Recycle HFC Refrigerant
This is the sample of the manual click on the download link for complete manual