DOWNLOAD LINK
For some reason if link does not work download this pdf and then click
b. install remove left engine panel
c. install hood Copyright 1993 - 2024 Caterpillar Inc.
Network For SIS Licensees. Mon Nov 25 10:23:19 UTC+0530 2024
Product: TRACK-TYPE TRACTOR
Model: D3C III TRACK-TYPE TRACTOR 5GS
Configuration: D3C & D3C LGP, XL Series III Hystat Tractors 5GS00001-UP (MACHINE) POWERED BY 3046 Engine
Disassembly and Assembly
3046 ENGINE SUPPLEMENT FOR D3C, D4C & D5C SERIES III HYSTAT
Air Conditioning Accumulator
SMCS - 7320-010
Remove & Install Air Conditioning Accumulator
Effective July 1, 1992 regulations prohibit the venting of any refrigerant into the atmosphere. Refer to Caterpillar publication SENR5664 and NEDG5065 for the proper procedure, equipment and tools to reclaim refrigerant from any Caterpillar machine.
SENR12480023
Always wear goggles when working on air conditioning systems. The system is under pressure at all times, engine running or not. Escaping refrigerant R-134A can cause freezing of human flesh.
Do not smoke while working on air conditioning systems. INHALING REFRIGERANT R-134A THROUGH ANY SMOKING MATERIAL, ALTHOUGH NOT TOXIC OR FLAMMABLE, CAN GENERATE LETHAL PHOSGENE GAS AND CAUSE VIOLENT ILLNESS OR DEATH. ALSO, HEAT MUST NEVER BE APPLIED TO A CHARGED SYSTEM. See Air Conditioning And Heating Service
Manual, Form No. SENR5664, for more information on removal and installation of lines and refrigerant from the system.
1. Using the proper procedure recover the refrigerant from the system.
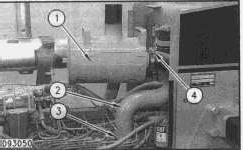
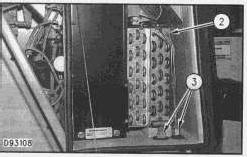
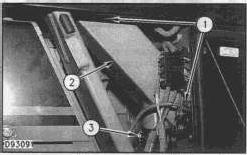
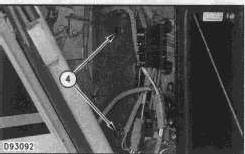
2. Disconnect tube assembly (1) and hose assembly (4) from accumulator (2).
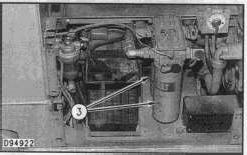
3. Remove two bolts, and washers (3) and remove the air conditioning accumulator (2).
NOTE: For installation of the air conditioning dryer, reverse the removal steps. Check all O-rings for damage and replace where necessary.
NOTE: Some models may be equipped with quick disconnect couplings. If this is the case, it will not be necessary to evacuate and recover the refrigerant.
NOTE: If the machine is not equipped with quick disconnect couplings, plug and cap the air conditioning lines leading to and from the accumulator. This will prevent moisture from entering the system.
NOTE: For charging the air conditioning system refer to Form No. SENR5664.
End By:
install hood
1993 - 2024 Caterpillar Inc.
Product: TRACK-TYPE TRACTOR
Model: D3C III TRACK-TYPE TRACTOR 5GS
Configuration: D3C & D3C LGP, XL Series III Hystat Tractors 5GS00001-UP (MACHINE) POWERED BY 3046 Engine
Disassembly and Assembly
3046 ENGINE SUPPLEMENT FOR D3C, D4C & D5C SERIES III HYSTAT
Media Number -SENR1248-01 Publication Date -01/10/2004 Date Updated -27/01/2005
Air Conditioning Belt
SMCS - 1357-010
Remove & Install Air Conditioning Belt
Start By:
a. remove left engine panel assembly
b. remove right engine panel assembly
SENR12480026
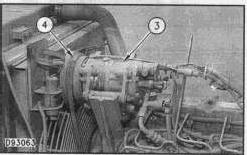
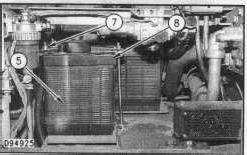
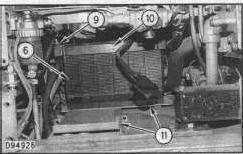
1. Loosen nut (1) to release tension from belt (4). Remove bolt (2, washer and nut holding adjusting block (5) to the air conditioning compressor (3).
2. Remove bolt (6) nut and washers. Remove belt (4) from air conditioning compressor (3) and position the air conditioning compressor (3) out of the way.
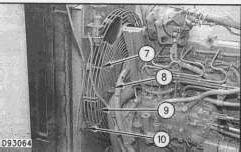
3. Remove two bolts (8) connecting the upper fan guard (7) and the lower fan guard (9). Remove eight bolts (10) and washers and remove both guards.
4. Remove belt (4) by moving the belt around the fan blade and off of the engine.
NOTE: Install the belt in reverse order. Adjust nut (1) to obtain the proper tension. Consult the Operation & Maintenance Manual for proper belt tightening specifications.
End By:
a. install left engine panel assembly
b. install right engine panel assembly
Product: TRACK-TYPE TRACTOR
Model: D3C III TRACK-TYPE TRACTOR 5GS
Configuration: D3C & D3C LGP, XL Series III Hystat Tractors 5GS00001-UP (MACHINE) POWERED BY 3046 Engine
Disassembly and Assembly
3046 ENGINE SUPPLEMENT FOR D3C, D4C & D5C SERIES III HYSTAT
Air Conditioning Compressor
SMCS - 1802-010
Remove & Install Air Conditioning Compressor
Start By:
a. remove hood
Effective July 1, 1992 regulations prohibit the venting of any refrigerant into the atmosphere. Refer to Caterpillar publication SENR5664 and NEDG5065 for the proper procedure, equipment and tools to reclaim refrigerant from any Caterpillar machine.
SENR12480022
Always wear goggles when working on air conditioning systems. The system is under pressure at all times, engine running or not. Escaping refrigerant R-134A can cause freezing of human flesh.
Do not smoke while working on air conditioning systems. INHALING REFRIGERANT R-134A THROUGH ANY SMOKING MATERIAL, ALTHOUGH NOT TOXIC OR FLAMMABLE, CAN GENERATE
LETHAL PHOSGENE GAS AND CAUSE VIOLENT ILLNESS OR DEATH. ALSO, HEAT MUST NEVER BE APPLIED TO A CHARGED SYSTEM. See Air Conditioning And Heating Service Manual, Form No. SENR5664, for more information on removal and installation of lines and refrigerant from the system.
1. Using proper recovery procedures, recover the refrigerant from the system.
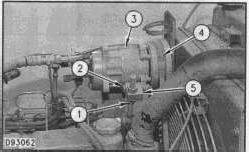
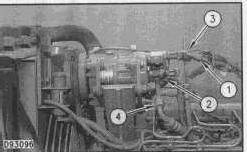
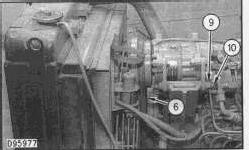
2. Place identification marks on all wiring harnesses and hose assemblies. Disconnect two wiring harnesses (1) and (2) at the quick disconnects.
3. Disconnect two hose assemblies (3) and (4) from the back side of the air conditioning compressor.
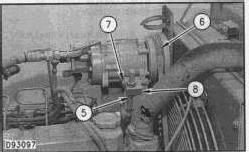
4. Loosen nut (5) to release tension from vee belt (6). Remove bolt (7), washer and nut holding adjuster block (8) to the compressor.
5. Remove nut and washer (9) from threaded rod (10). Remove threaded rod (10) out of bracket and compressor from the machine.
NOTE: For the installation of the compressor, reverse the removal procedure. Prior to installation, check all O-rings for wear or damage and replace if necessary.
NOTE: Check Operation And Maintenance Manual for the proper belt tension to apply on the compressor belt.
NOTE: Some models may be equipped with quick disconnect couplings. If this is the case, it will not be necessary to evacuate and recover the refrigerant.
NOTE: If the machine is not equipped with quick disconnect couplings, plug and cap the air conditioning lines leading to and from the compressor. This will prevent moisture from entering the system.
NOTE: For charging the air conditioning system refer to Form No. SENR5664.
End BY:
a. install hood
Copyright 1993 - 2024 Caterpillar Inc. All Rights Reserved. Private Network For SIS Licensees.
Mon Nov 25 10:25:33 UTC+0530 2024
Product: TRACK-TYPE TRACTOR
Model: D3C III TRACK-TYPE TRACTOR 5GS
Configuration: D3C & D3C LGP, XL Series III Hystat Tractors 5GS00001-UP (MACHINE) POWERED BY 3046 Engine
Disassembly and Assembly
3046 ENGINE SUPPLEMENT FOR D3C, D4C & D5C SERIES III HYSTAT
Air Conditioning Condenser
SMCS - 1805-010
Remove & Install Air Conditioning Condenser
Effective July 1, 1992 regulations prohibit the venting of any refrigerant into the atmosphere. Refer to Caterpillar publication SENR5664 and NEDG5065 for the proper procedure, equipment and tools to reclaim refrigerant from any Caterpillar machine.
SENR12480024
Always wear goggles when working on air conditioning systems. The system is under pressure at all times, engine running or not. Escaping refrigerant R-134A can cause freezing of human flesh.
Do not smoke while working on air conditioning systems. INHALING REFRIGERANT R-134A THROUGH ANY SMOKING MATERIAL, ALTHOUGH NOT TOXIC OR FLAMMABLE, CAN GENERATE LETHAL PHOSGENE GAS AND CAUSE VIOLENT ILLNESS OR DEATH. ALSO, HEAT MUST NEVER BE APPLIED TO A CHARGED SYSTEM. See Air Conditioning And Heating Service
Manual, Form No. SENR5664, for more information on removal and installation of lines and refrigerant from the system.
1. Using the proper procedure recover the refrigerant from the system.
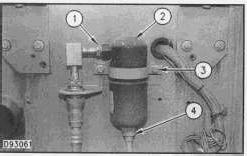
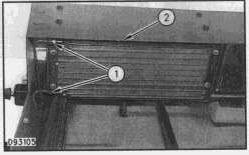
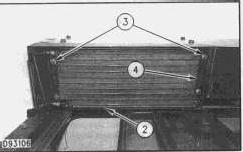
2. Disconnect tubes (1) from condenser (2).
3. Remove four bolts (3), two strips (4), and four spacers (not shown).
NOTE: Make note of the position of each of the spacers for exact placement during installation.
4. Remove condenser (2) from housing.
NOTE: Use care when removing and installing the air conditioning condenser. The core of the condenser is made of soft metal and can be damaged or punctured very easily.
NOTE: For installation of the air conditioning condenser, reverse the removal steps. Check all Orings for damage and replace where necessary.
NOTE: Some models may be equipped with quick disconnect couplings. If this is the case, it will not be necessary to evacuate and recover the refrigerant.
NOTE: If the machine is not equipped with quick disconnect couplings, plug and cap the air conditioning lines leading to and from the condenser. This will prevent moisture from entering the system.
NOTE: For charging the air conditioning system refer to Form No. SENR5664. Mon Nov 25 10:26:05 UTC+0530 2024
Product: TRACK-TYPE TRACTOR
Model: D3C III TRACK-TYPE TRACTOR 5GS
Configuration: D3C & D3C LGP, XL Series III Hystat Tractors 5GS00001-UP (MACHINE) POWERED BY 3046 Engine
Disassembly and Assembly
3046 ENGINE SUPPLEMENT FOR D3C, D4C & D5C SERIES III HYSTAT
Air Conditioning Evaporator Coil
SMCS - 7343-010
Remove & Install Air Conditioning Evaporator Coil
Effective July 1, 1992 regulations prohibit the venting of any refrigerant into the atmosphere. Refer to Caterpillar publication SENR5664 and NEDG5065 for the proper procedure, equipment and tools to reclaim refrigerant from any Caterpillar machine.
SENR12480025
Always wear goggles when working on air conditioning systems. The system is under pressure at all times, engine running or not. Escaping refrigerant R-134A can cause freezing of human flesh.
Do not smoke while working on air conditioning systems. INHALING REFRIGERANT R-134A THROUGH ANY SMOKING MATERIAL, ALTHOUGH NOT TOXIC OR FLAMMABLE, CAN GENERATE LETHAL PHOSGENE GAS AND CAUSE VIOLENT ILLNESS OR DEATH. ALSO, HEAT MUST NEVER BE APPLIED TO A CHARGED SYSTEM. See Air Conditioning And Heating Service
Manual, Form No. SENR5664, for more information on removal and installation of lines and refrigerant from the system.
1. Using the proper procedure recover the refrigerant from the system.
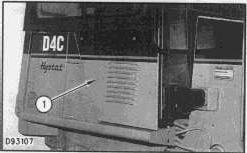
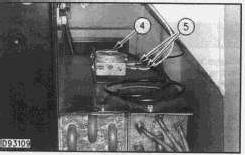
2. Open access door (1).
3. Disconnect lines (3) from evaporator coil (2).
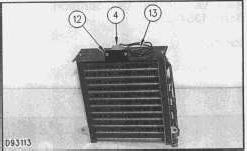
4. Disconnect the wires (5) from the switch (4).
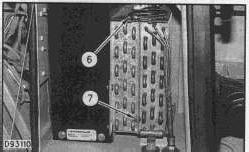
5. Remove bolt (6) and bolt (7).
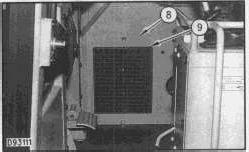
6. Remove access panel (8) and filter (9).
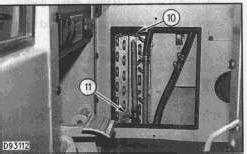
7. Remove bolt (10) and bolt (11).
8. Remove air conditioning evaperator coil (2) through access panel (1).
9. Remove screws (12). Remove switch (4) by removing the thermostat probe (13).
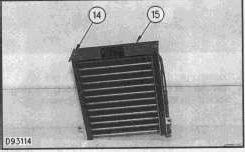
10. Remove bolts (14) and plate (15).
NOTE: Use care when removing and installing the air conditioning evaporator. The core of the evaporator is made of soft metal and can be damaged or punctured very easiy.
NOTE: For installation of the air conditioning evaporator, reverse the removal steps. Check all Orings for damage and replace where necessary.
NOTE: Some models may be equipped with quick disconnect couplings. If this is the case, it will not be necessary to evacuate and recover the refrigerant.
NOTE: If the machine is not equipped with quick disconnect couplings, plug and cap the air conditioning lines leading to and from the evaporator. This will prevent moisture from entering the system.
NOTE: For charging the air conditioning system refer to Form No. SENR5664. Copyright 1993 - 2024 Caterpillar Inc.
Product: TRACK-TYPE TRACTOR
Model: D3C III TRACK-TYPE TRACTOR 5GS
Configuration: D3C & D3C LGP, XL Series III Hystat Tractors 5GS00001-UP (MACHINE) POWERED BY 3046 Engine
Disassembly and Assembly
3046 ENGINE SUPPLEMENT FOR D3C, D4C & D5C SERIES III HYSTAT
Media Number -SENR1248-01 Publication Date -01/10/2004 Date Updated -27/01/2005
Air Conditioning Fans And Motors
SMCS - 7316-010
Remove & Install Air Conditioning Fans And Motors
SENR12480016
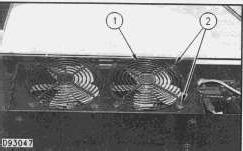
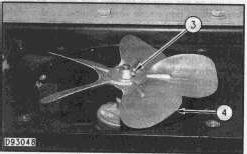
1. Remove four bolts (2) and remove guard (1).
2. Loosen setscrew (3) and remove fan (4).
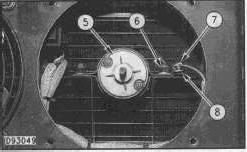
3. Disconnect wiring connector (7).
4. Remove two nuts (6) and washers. Remove one clip (8), and remove motor (5).
5. Use the same procedure to remove the other fan and motor.
NOTE: Install in reverse order.
Copyright 1993 - 2024 Caterpillar Inc. All Rights Reserved. Private Network For SIS Licensees. Mon Nov 25 10:23:00 UTC+0530 2024
Product: TRACK-TYPE TRACTOR
Model: D3C III TRACK-TYPE TRACTOR 5GS
Configuration: D3C & D3C LGP, XL Series III Hystat Tractors 5GS00001-UP (MACHINE) POWERED BY 3046 Engine
Disassembly and Assembly
3046 ENGINE SUPPLEMENT FOR D3C, D4C & D5C SERIES III HYSTAT
Media Number -SENR1248-01 Publication Date -01/10/2004 Date Updated -27/01/2005
Alternator Belt
SMCS - 1357-010
Remove & Install Alternator Belt
Start By:
a. remove air conditioning Belt
SENR12480027
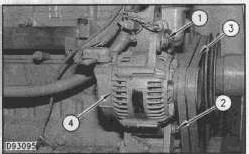
1. Loosen bolts (1) and (2). Move alternator (4) towards the engine and remove two Vee belts (3).
NOTE: Install the belt in reverse order. If replacement is necessary, only replace alternator belts in sets of two. Adjust alternator (4) to obtain the proper tension. Consult the Operation & Maintenance Manual for proper belt tightening specifications.
End By:
a. install air conditioning belt
Copyright 1993 - 2024 Caterpillar Inc. All Rights Reserved. Private Network For SIS Licensees. Mon Nov 25 10:28:11 UTC+0530 2024
Product: TRACK-TYPE TRACTOR
Model: D3C III TRACK-TYPE TRACTOR 5GS
Configuration: D3C & D3C LGP, XL Series III Hystat Tractors 5GS00001-UP (MACHINE) POWERED BY 3046 Engine
Disassembly and Assembly
3046 ENGINE SUPPLEMENT FOR D3C, D4C & D5C SERIES III HYSTAT Media Number -SENR1248-01
Alternator
SMCS - 1405-010
Remove & Install Alternator
Start By:
a. remove right engine panel assembly
Updated -27/01/2005
SENR12480028
Disconnect the batteries prior to the performance of any work on the alternator.
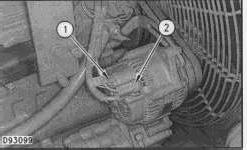
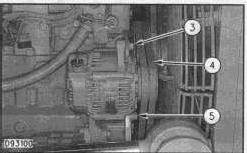
1. Disconnect wire connector (1) and disconnect wires from terminal (2).
2. Loosen bolt (3) and alternator mount bolt (5) and remove belts (4) from the pulley.
3. Remove bolt (3) and alternator mount bolt (5) and remove alternator.
NOTE: Install alternator in the reverse order. See Operation & Maintenance Manual for belt tightening specifications. Replace belts in sets of two on the alternator.
4. Tighten the nut at terminal (2) to a torque of 110 ± 17 N·m (81 ± 13 lb ft)
End By:
a. install right engine panel assembly
Copyright 1993 - 2024 Caterpillar Inc. All Rights Reserved. Private Network For SIS Licensees.
Mon Nov 25 10:28:26 UTC+0530 2024
Product: TRACK-TYPE TRACTOR
Model: D3C III TRACK-TYPE TRACTOR 5GS
Configuration: D3C & D3C LGP, XL Series III Hystat Tractors 5GS00001-UP (MACHINE) POWERED BY 3046 Engine
Disassembly and Assembly
3046 ENGINE SUPPLEMENT FOR D3C, D4C & D5C SERIES III HYSTAT
Media Number -SENR1248-01
Publication Date -01/10/2004
Batteries
SMCS - 1401-010
Remove & Install Batteries
Start By:
a. remove ripper (if equipped)
1. Turn battery disconnect switch to the "OFF" position.
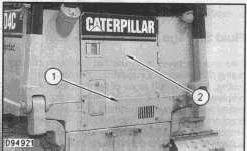
2. Remove rear access panel (1) and open access door (2).
Date Updated -27/01/2005
SENR12480039
3. Remove two hydraulic oil filters (3).
NOTE: At installation, replace all lost hydraulic oil.
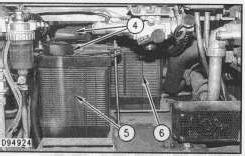
4. Disconnect battery cables (4) from batteries (5) and (6).
NOTE: To prevent injury or battery damage always remove negative cables from the ground side of the battery, first.
5. Loosen and remove two holddown clamps (7).
6. Slide battery (5) with bracket (8) still in place, out of the battery compartment.
NOTE: The position of the positive and negative terminals for proper installation.
7. Loosen and remove two holddown clamps (9). Remove bracket (10) from front of battery (6).
8. Slide battery (6) out of the battery compartment in a similar manner as the first battery.
NOTE: The position of the positive and negative terminals for proper installation.
NOTE: Install in reverse order.
Copyright 1993 - 2024 Caterpillar Inc.
Product: TRACK-TYPE TRACTOR
Model: D3C III TRACK-TYPE TRACTOR 5GS
Configuration: D3C & D3C LGP, XL Series III Hystat Tractors 5GS00001-UP (MACHINE) POWERED BY 3046 Engine
Disassembly and Assembly
3046 ENGINE SUPPLEMENT FOR D3C, D4C & D5C SERIES III HYSTAT
Media Number -SENR1248-01 Publication Date -01/10/2004 Date Updated -27/01/2005
Blower Fans & Motor
SMCS - 7316-010
Remove & Install Blower Fans and Motor
Start By:
a. remove heater core
SENR12480013
1. Loosen clamp (3) and remove hose.
2. Remove four bolts (1) and remove duct (2).
This is the sample of the manual click on the download link for complete manual