
Previous Screen
Product: ARTICULATED TRUCK
Model: D35C ARTICULATED TRUCK 2GD
Configuration: D35C ARTICULATED DUMP TRUCK 2GD00001-00124 (MACHINE) POWERED BY 3306 ENGINE
Operation and Maintenance Manual
D25C, D30C, D35C, D350C ARTICULATED DUMP TRUCK
Media Number -SEBU8641-02
When Required
Servicing Procedures
Engine Air Intake
Service When Indicated
Publication Date -24/01/1995
Date Updated -11/10/2001
NOTICE
Never service air cleaners when the engine is running.
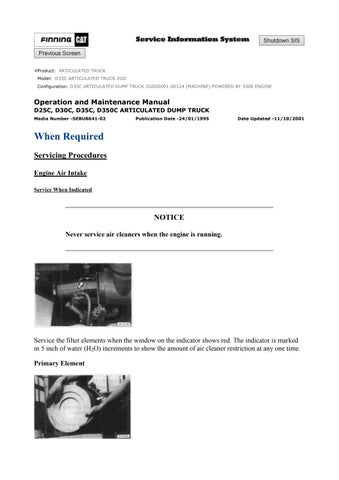
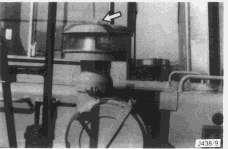
Service the filter elements when the window on the indicator shows red. The indicator is marked in 5 inch of water (H2O) increments to show the amount of air cleaner restriction at any one time.
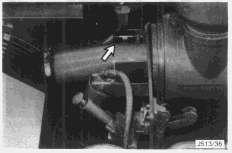
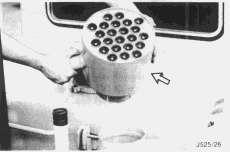
Primary Element
1. Loosen the cover retaining screws and remove the cover and element.
2. Clean and inspect the element. See the section "Cleaning Air Cleaner Elements."
NOTICE
Always inspect the primary element before and after cleaning with a light bulb inside the element. Discard the element if any rips, tears, or damage are evident.
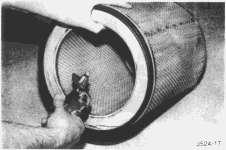
3. Loosen the clip and remove the precleaner screen.
4. Clean the screen and check that the gauze has not been punctured.
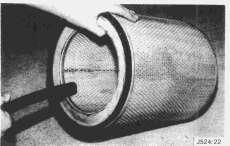
5. Loosen the clip and remove the body.
6. Thoroughly clean out the body.
7. Assemble the body and precleaner screen to the filter housing.
8. Mark the secondary element to indicate the number of times the primary element has been cleaned or replaced.
9. Clean the inside of the filter housing and cover. Install a clean element and replace the cover. Tighten the retaining screws finger tight.
If the indicator shows red after the installation of a clean primary element, or if the exhaust smoke is still black, change the secondary element.
The primary element should be discarded after it has been cleaned a maximum of six times.
Replace the secondary element when the primary element is serviced for the third time.
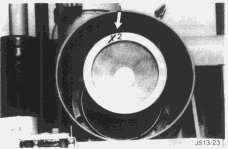
Secondary Element
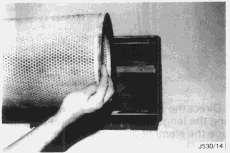
1. Remove the cover and primary element.
2. Unscrew eight bolts and remove the secondary element. Leave the top and bottom bolt in place. Discard the element.
NOTICE
Always replace the secondary element. Never attempt to re-use it by cleaning.
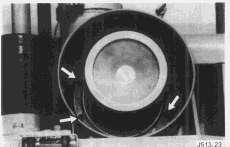
3. Cover the air inlet opening and clean the inside of the housing.
4. Uncover the air inlet opening and install a new secondary element. Tighten the eight bolts to a torque setting of 27 ± 7 Nm (20 ± 5 lb. ft).
5. Install a clean primary element and replace the cover.
Alternative Precleaner
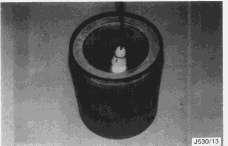
An alternative precleaner may be installed which should have the cup emptied when dirt reaches the indicator mark.
Loosen the wing nut, remove the cup and empty. Wash the precleaner in water if necessary and dry.
Cleaning Air Cleaner Elements
Pressure air can cause personal injury.
When using pressure air for cleaning, wear a protective face shield, protective clothing and protective shoes.
The maximum air pressure must be below 205 kPa (30 psi) for cleaning purposes.
NOTICE
Do not clean the elements by bumping or tapping them.
Inspect the elements after cleaning. Do not use an element with damaged pleats, gaskets or seals.
Elements can be cleaned with pressure air, pressure water, or detergent.
When cleaning with pressure air, use 205 kPa (30 psi) maximum pressure to prevent element damage.
When cleaning with pressure water, use 280 kPa (40 psi) maximum pressure to prevent element damage.
Pressure Air - 205 kPa (30psi) Maximum
1. Direct the air inside the element along the length of the pleats.

2. Direct the air outside the element along the length of the pleats. Direct the air inside the element along the length of the pleats.
3. Inspect the element.
Water - 280 kPa (40 psi) Maximum
1. Direct the water inside the element along the length of the pleats.

2. Direct the water outside the element along the length of the pleats.
3. Rinse and air dry thoroughly.
4. Inspect the element.
1. Wash the element in warm water and nonsudsing household detergent.
2. Rinse with clean water. See preceding topic.
3. Air dry thoroughly. Inspect the element.
Inspecting Elements
1. Insert a light inside each clean and dry element and inspect it. Discard the element if rips or tears are found.

2. Wrap and store all good elements in a clean, dry place.

The radiator matrix must be kept clean to help maintain cooling system efficiency.
Remove all trash and debris from the grille and inspect the radiator matrix. If necessary, remove the grille (four bolts) and wash down the matrix with a low pressure water jet.
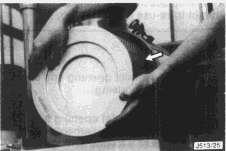
Cab Roof Fan (if equipped)
Wash Filter
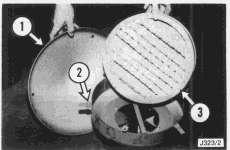
1. Remove the top cover (1) by unscrewing three bolts.
2. Slacken three bolts (2), swing the three retaining tags out of the way and remove the filter element (3).
3. Inspect the gasket between the housing and cab roof. Replace if damaged.
4. If the fine "micretain" filter element is installed, discard the element completely and install a new one. If the coarser sponge type element is installed it is permissible to wash the element, dry completely and reuse it.
5. When the clean element is installed, swing the tabs back in position and tighten the bolts (2).
6. Install the top cover (1).
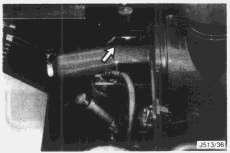
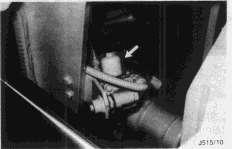
Differential Lock Cylinder
Clean or Replace Breather
The differential lock cylinder breather should be cleaned or replaced on a schedule established by service experience. A blocked breather can interfere with the correct engagement and disengagement of the inter-axle differential.
Breather - Early Machines
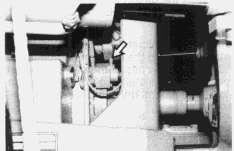
Breather - Later Machines
1. Unscrew the breather from the cylinder.
2. Wash in clean solvent and wipe dry.
3. If undamaged, screw the breather back into the cylinder. If the breather is damaged install a new one.
Seat Belts
Inspect for Damage
It is recommended that the seat belt is carefully inspected periodically for wear and correct operation.
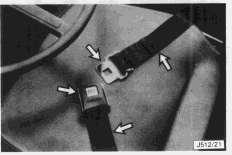
1. Check the belt webbing for wear or fraying. Replace if damaged.
2. Check the buckles for correct operation. The buckles should snap firmly shut and release promptly when the button marked "PRESS" is operated.
3. Check that the belt mountings are secure.
The seat belt is provided for the safety of the operator. Ensure that it is always working correctly. The best check for correct operation is continuous use!
The seat belt should be replaced every three years, regardless of appearance.
Body and Frames
Inspect for Cracks or Damage and Repair
All earthmoving equipment is subjected to a high degree of wear and tear. This makes it necessary for them to be inspected periodically for structural damage and for correct operation of all systems. This is particularly important for off highway trucks which can be subjected to very arduous work cycles.
It is important that regular inspections are carried out in order to minimise the risk of accidents and down time. The interval between these inspections depends on factors like the age of truck, the severity of the application, loading, haul road condition and the amount of routine servicing which has been carried out. Older trucks or trucks in particularly severe applications will require more frequent inspections but, in general, it is recommended that these inspections should be carried out at intervals not exceeding 1000 service meter hours or six months.
If the truck has been involved in a collision or any kind of accident it must be taken out of service immediately and inspected thoroughly, regardless of when the last full inspection was made.
In order to carry out a proper inspection it is essential that the truck is thoroughly cleaned. It is impossible to inspect the truck properly if it is dirty.
Early detection and repair of faults will ensure continued operation of the truck and will improve availability while reducing the risk of accidents. However, proper repair of frames and structures requires specific knowledge of materials used, frame member construction and manufacturers recommended repair techniques. If the need arises to carry out repairs it is recommended that you contact your local Caterpillar Dealer who is qualified to carry out repairs on your behalf. We do not advise that repairs are carried out by anyone other than a Caterpillar Dealer but, if you decide to carry out your own repairs, contact your dealer for advice regarding recommended repair techniques.
The front and rear frames, oscillating hitch and dump body should be thoroughly inspected for cracks and defects, particularly in welded structures.
NOTICE
The areas highlighted are of particular importance but other areas must not be neglected. The entire structure should be carefully examined.
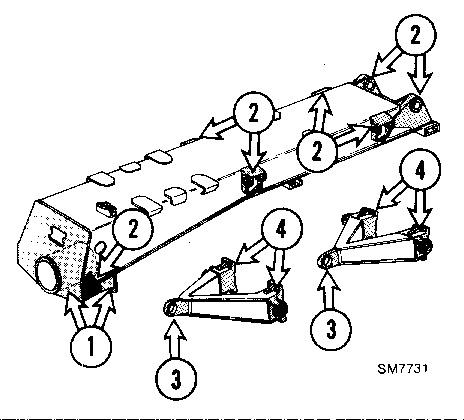
Front Frames
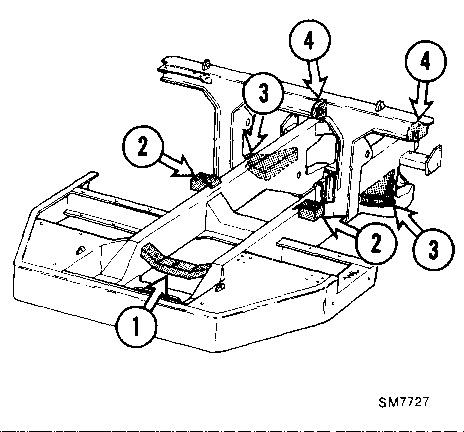
Inspect the front engine mounting (1), two rear engine mountings (2), steering cylinder lugs (3) and cab mounts (4).
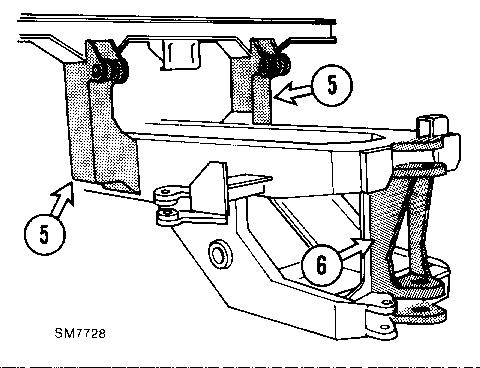
Inspect the base of the cab mounting pillar (5) and the rear sub-assembly and hitch lugs. (6).
Inspect the entire suspension frame.
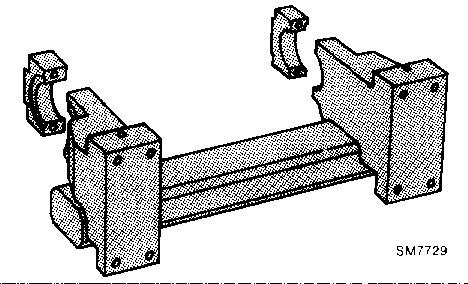
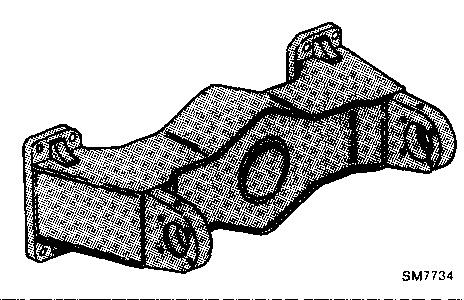
Oscillating Hitch

The entire oscillating hitch should be thoroughly inspected. The upper and lower hitch pin lugs (1) and the steering cylinder lugs (2) are particularly important but all areas of the hitch should be checked.
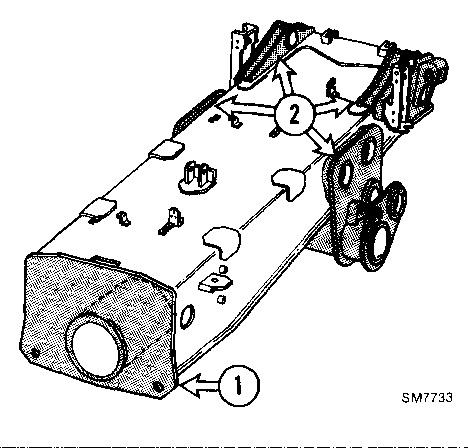
Rear Frames
Three Axle Machines
Inspect the oscillating hitch tube and front plate (1) and the mounting brackets (2). Inspect the Aframe heads (3) and mounting brackets (4).
Two Axle Machines with Rigid Rear Axle

Inspect the oscillating hitch tube and front plate (1) and the mounting bracket assemblies (2).
Two Axle Machines with Rear Suspension
Inspect the oscillating hitch tube and front plate (1) and the mounting bracket assemblies (2).
Inspect the entire suspension frame.
Dump Body

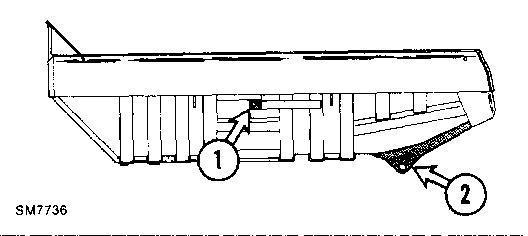
Inspect the hoist cylinder mountings (1) and dump body mountings (2).
Windshield Wiper and Washer
Replace Wiper Blades and Fill Reservoir
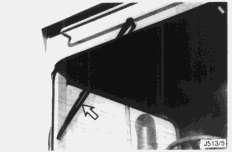
Inspect the wiper blades, replace if hardened, damaged or worn.
Fill the windshield washer reservoir.
NOTICE
When operating in freezing conditions use any commercially available non-freezing washer solvent.
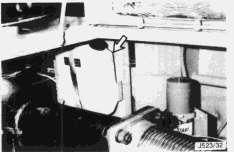
Ether Cylinder
Change Cylinder
Ether is poisonous and flammable.
Breathing ether vapors or repeated contact of ether with skin can cause personal injury.
Use ether only in well ventilated areas.
Use ether with care to avoid fires.
Do not smoke while changing ether cylinders.
Do not store ether cylinders in the operator's compartment or living areas.
Do not store ether cylinders in direct sunlight or at temperatures above 49°C (102°F).
Discard ether cylinders properly. Do not puncture or burn ether cylinders.
Keep ether cylinders out of the reach of unauthorized personnel.

Loosen the clamp and remove the old cylinder. Install a new cylinder. Always use the new gasket supplied with the new cylinder. Tighten the new cylinder hand tight and fasten the clamp.
Copyright 1993 - 2025 Caterpillar Inc. All Rights Reserved.
Private Network For SIS Licensees. Tue Jun 17 16:25:34 UTC+0530 2025