Add The Engine Oil
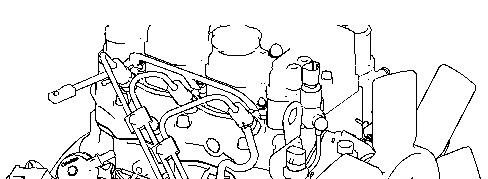
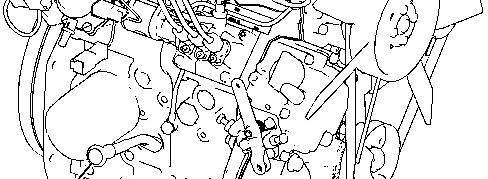
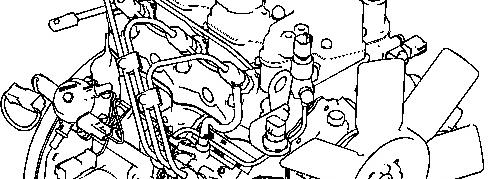
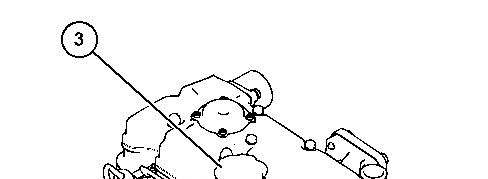
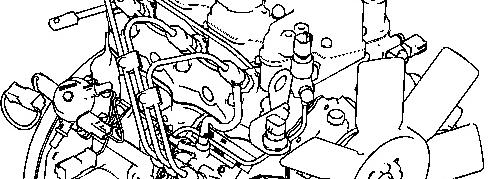
Illustration 2
1. Open the engine compartment.
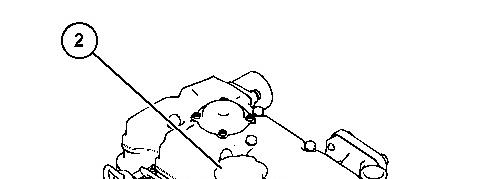
2. Remove oil filler cap (2).
3. Add the oil.
4. Clean oil filler cap (2). Install oil filler cap (2).
5. Close the engine compartment.
Copyright 1993 - 2025 Caterpillar Inc. All Rights Reserved. Private Network For SIS Licensees.
Wed Apr 30 02:12:54 UTC+0530 2025
g06266302
Product: VIBRATORY COMPACTOR
Model: CB1.7 VIBRATORY COMPACTOR SA7
Configuration: CB1.7 Vibratory Utility Compactor SA700001-UP (MACHINE) POWERED BY C1.1 Engine
Operation and Maintenance Manual
CB1.7 and CB1.8 Utility Compactors
Media Number -M0082430-01
Publication Date -01/12/2017
Engine Mounts - Inspect
SMCS - 1152-040
Open the engine compartment.
Date Updated -25/12/2017
i07016190
There are four engine mounts. There are two engine mounts on the right side of the engine and there are two engine mounts on the left side of the engine.
Engine vibration can be caused by improper mounting of the engine. Engine vibration can be caused by loose engine mounts or deteriorated engine mounts.
Inspect the engine mounts for deterioration.
Replace any engine mount that is deteriorated.
Inspect the engine mounts for correct bolt torque.
Tighten the mounts if the mounts are loose.
Close the engine compartment.
Copyright 1993 - 2025 Caterpillar Inc. All Rights Reserved. Private Network For SIS Licensees.
Wed Apr 30 02:12:54 UTC+0530 2025
Product: VIBRATORY COMPACTOR
Model: CB1.7 VIBRATORY COMPACTOR SA7
Configuration: CB1.7 Vibratory Utility Compactor SA700001-UP (MACHINE) POWERED BY C1.1 Engine
Operation and Maintenance Manual
CB1.7 and CB1.8 Utility Compactors
Media Number -M0082430-01 Publication Date -01/12/2017 Date Updated -25/12/2017
Engine Air Filter Secondary Element - Replace
SMCS - 1054-510-SE
NOTICE
Always replace the secondary filter element. Never attempt to reuse the secondary filter element by cleaning the element.
When the primary filter element is replaced, the secondary filter element should be replaced.
The secondary filter element should also be replaced if the exhaust smoke is still black.
1. Open the engine access door.
2. See Operation and Maintenance Manual, "Engine Air Filter Primary ElementClean/Replace". Remove the air cleaner cover from the air cleaner housing. Remove the primary filter element from the air cleaner housing.
i07016181
3. Remove the secondary filter element.
4. Cover the air inlet opening. Clean the inside of the air cleaner housing.
5. Remove the cover from the air inlet opening.
6. Install the new secondary filter element.
7. Install the primary filter element.
8. Install the air cleaner cover and close the latches securely.
9. Close the engine access door.
Product: VIBRATORY COMPACTOR
Model: CB1.7 VIBRATORY COMPACTOR SA7
Configuration: CB1.7 Vibratory Utility Compactor SA700001-UP (MACHINE) POWERED BY C1.1 Engine
Operation and Maintenance Manual
CB1.7 and CB1.8 Utility Compactors
Media Number -M0082430-01
Engine Oil Sample - Obtain
SMCS - 1000-008
Hot oil and hot components can cause personal injury. Do not allow hot oil or hot components to contact the skin.
Obtain the Sample and the Analysis
In addition to a good preventive maintenance program, Caterpillar recommends using S·O·S oil analysis at regular scheduled intervals in order to monitor the condition of the engine and the maintenance requirements of the engine.
Each oil sample should be taken when the oil is warm and when the oil is well mixed. The sample should be taken at this time in order to ensure that the sample is representative of the oil in the crankcase.
Obtain the S·O·S Sample
Use the following method in order to obtain an S·O·S sample:
• Use a 1U-5718 Vacuum Pump or use an equivalent pump that is inserted into the sump.
To avoid contamination of the oil samples, the tools and the supplies that are used for obtaining oil samples must be clean.
Consult your Caterpillar dealer for complete information and assistance in establishing an S·O·S program for your engine.
i07016302
If you fill the engine too fast with oil, the oil may saturate the engine breather. If the breather is saturated with oil, oil will blow out of the breather hose until the breather is free of oil. Add the engine oil at a rate of 2 L/min (0.5283 US gpm). This will help prevent saturating the breather with oil.
Copyright 1993 - 2025 Caterpillar Inc. All Rights Reserved. Private Network For SIS Licensees.
Wed Apr 30 02:12:42 UTC+0530 2025
Product: VIBRATORY COMPACTOR
Model: CB1.7 VIBRATORY COMPACTOR SA7
Configuration: CB1.7 Vibratory Utility Compactor SA700001-UP (MACHINE) POWERED BY C1.1 Engine
Operation and Maintenance Manual
CB1.7 and CB1.8 Utility Compactors
Media Number -M0082430-01 Publication Date -01/12/2017 Date Updated -25/12/2017
Engine Air Filter Primary Element - Clean/Replace
SMCS - 1054-070-PY; 1054-510-PY
NOTICE
Service the air cleaner only with the engine stopped. Engine damage could result.
i07016179
Service the air cleaner filter element when the air filter service indicator has triggered and shows red in the indicator window. Refer to Operation and Maintenance Manual, "Operator Controls".
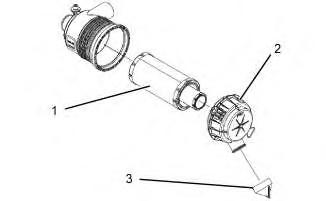
Illustration 1 g02874496
1. Remove cover (2) for the air filter housing by unlatching the 2 clips holding the cover onto the filter housing.
2. Remove primary filter element (1) from the air filter housing.
3. Clean the inside the air filter housing.
4. Clean dust cap (3).
5. Install a clean primary air filter element. Install the cover for the air filter housing with the dust cap pointing down.
6. Close the hood.
After cleaning the primary filter element, if the air filter indicator triggers after starting the engine or the exhaust smoke is still black, install a new primary filter element. If the air filter indicator remains activated, replace the secondary element.
Cleaning Primary Air Filter Elements
NOTICE
Caterpillar recommends certified air filter cleaning services available at participating Caterpillar dealers. The Caterpillar cleaning process uses proven procedures to assure consistent quality and sufficient filter life.
Observe the following guidelines if you attempt to clean the filter element:
Do not tap or strike the filter element in order to remove dust.
Do not wash the filter element.
Use low pressure compressed air in order to remove the dust from the filter element. Air pressure must not exceed 207 kPa (30 psi). Direct the air flow up the pleats and down the pleats from the inside of the filter element. Take extreme care in order to avoid damage to the pleats.
Do not use air filters with damaged pleats, gaskets, or seals. Dirt entering the engine will cause damage to engine components.
The primary air filter element can be used up to six times if the element is properly cleaned and if the element is properly inspected. When the primary air filter element is cleaned, check for rips or tears in the filter material. The primary air filter element should be replaced at least one time per year. This replacement should be performed regardless of the number of cleanings.
NOTICE
Do not clean the air filter elements by bumping or tapping. This could damage the seals. Do not use elements with damaged pleats, gaskets, or seals. Damaged elements will allow dirt to pass through. Engine damage could result.
Visually inspect the primary air filter elements before cleaning. Inspect the air filter elements for damage to the seal, the gaskets, and the outer cover. Discard any damaged air filter elements.
There are two common methods that are used to clean primary air filter elements:
• Pressurized air
• Vacuum cleaning
Pressurized Air
Pressurized air can be used to clean the primary air filter element. Do not clean the primary air filter with pressurized air more than two times. Pressurized air will not remove deposits of carbon and oil. Use filtered, dry air with a maximum pressure of 207 kPa (30 psi).
Note: When the primary air filter elements are cleaned, always begin with the clean side (inside) to force dirt particles toward the dirty side (outside).
Aim the hose so that the air flows inside the element along the length of the filter to help prevent damage to the paper pleats. Do not aim the stream of air directly at the primary air filter element. Dirt could be forced further into the pleats.
Vacuum Cleaning
Vacuum cleaning is another method for cleaning primary air filter elements which require daily cleaning because of a dry, dusty environment. Cleaning with pressurized air is recommended prior to vacuum cleaning. Vacuum cleaning will not remove deposits of carbon and oil.
Inspecting the Primary Air Filter Elements
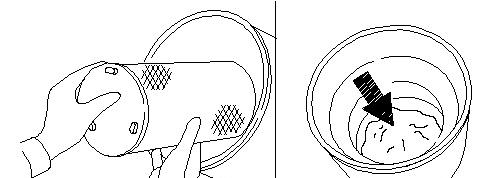
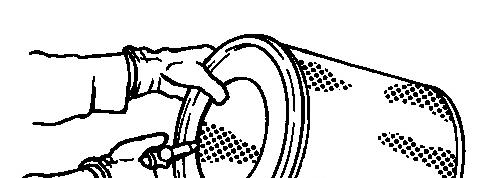
Illustration 2 g00281692
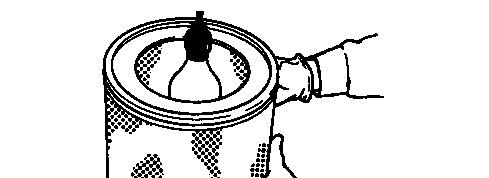
Illustration 3 g00281693
Inspect the clean, dry primary air filter element. Use a 60 watt blue light in a dark room or in a similar facility. Place the blue light in the primary air filter element. Rotate the primary air filter element. Inspect the primary air filter element for tears and/or holes. Inspect the primary air filter element for light that may show through the filter material. If it is necessary to confirm the result, compare the primary air filter element to a new primary air filter element that has the same part number.
Do not use a primary air filter element that has any tears and/or holes in the filter material. Do not use a primary air filter element with damaged pleats, gaskets, or seals. Discard damaged primary air filter elements.
Storing Primary Air Filter Elements
If a primary air filter element that passes inspection will not be used, the primary air filter element can be stored for future use.
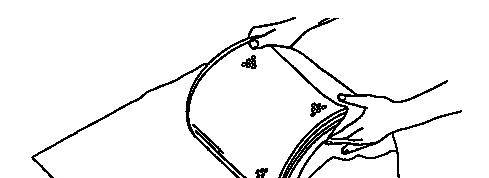
Illustration 4 g00281694
Do not use paint, a waterproof cover, or plastic as a protective covering for storage. An air flow restriction may result. To protect against dirt and damage, wrap the primary air filter elements in Volatile Corrosion Inhibited (VCI) paper.
Place the primary air filter element into a box for storage. For identification, mark the outside of the box and mark the primary air filter element. Include the following information:
• Date of cleaning
• Number of cleanings
Store the box in a dry location.
Product: VIBRATORY COMPACTOR
Model: CB1.7 VIBRATORY COMPACTOR SA7
Configuration: CB1.7 Vibratory Utility Compactor SA700001-UP (MACHINE) POWERED BY C1.1 Engine
Operation and Maintenance Manual
CB1.7 and CB1.8 Utility Compactors
Media Number -M0082430-01
Date -01/12/2017 Date Updated -25/12/2017
Engine Oil and Filter - Change
SMCS - 1318-510
i07016308
Run the engine to warm up the oil. Stop the engine before you drain the oil. When the oil is warm, the waste particles are suspended in the oil. The waste particles will be removed when the oil is drained.
As the oil cools, the waste particles settle to the bottom of the oil pan. The waste particles will not be removed if the oil is too cool.
The waste particles can recirculate through the engine lubrication system if the recommended procedure is not followed.
1. Open the engine hood. Refer to the Operation and Maintenance Manual, "Access Doors and Covers". Illustration 1
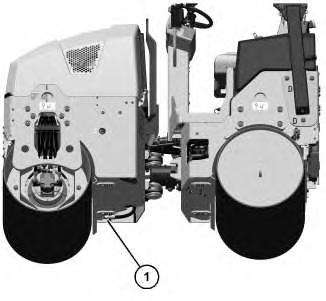
2. Place a suitable container under the drain plug (1). The drain plug is located below the front frame. Remove the drain plug. Refer to the Operation and Maintenance Manual, "General Hazard Information" for information that pertains to containing fluid spillage.
3. Allow the oil to drain.
4. Reinstall the drain plug.
Illustration 2
5. Remove filter element (2).
Note: Discard the used filter element according to local regulations.
6. Clean the filter housing base. All the old filter seal must be removed from the filter housing base.
7. Apply a thin coat of engine oil to the seal of the new filter element.
8. Install the new filter by hand. When the gasket contacts the filter base, tighten the filter element for an extra 3/4 turn. This will tighten the filter sufficiently.
Every new oil filter has rotation index marks that are spaced at 90 degree increments. Use the rotation index marks as a guide for tightening the oil filter.
g06266361
Illustration 3 g06266366
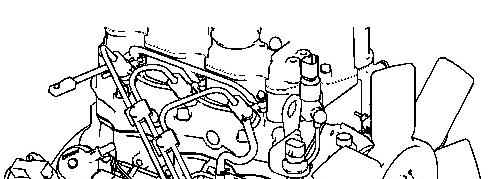
9. Remove oil filler cap (3). Fill the crankcase with new oil. See Operation and Maintenance Manual, "Lubricant Viscosities" and Operation and Maintenance Manual, "Capacities (Refill)" for further information. Clean the oil filler cap and install the oil filler cap.
Illustration 4 g06266369
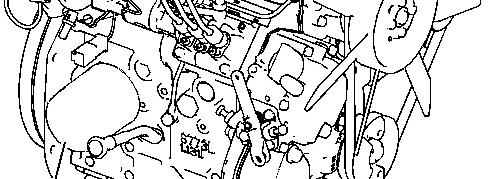
10. Before you start the engine, check the oil level on engine oil level gauge (4). The oil level must be between the "MAX" and "MIN" marks.
11. Start the engine. Run the engine for 2 minutes. Inspect the machine for leaks. Stop the machine.
12. Wait for 10 minutes to allow the oil to drain back into the crankcase. Check the oil level. Maintain the oil level between the "MAX" and "MIN" marks on the engine oil level gauge.
13. Close the engine hood.
Copyright 1993 - 2025 Caterpillar Inc. All Rights Reserved. Private Network For SIS Licensees. Wed Apr 30 02:12:22 UTC+0530 2025
Product: VIBRATORY COMPACTOR
Model: CB1.7 VIBRATORY COMPACTOR SA7
Configuration: CB1.7 Vibratory Utility Compactor SA700001-UP (MACHINE) POWERED BY C1.1 Engine
Operation and Maintenance Manual
CB1.7 and CB1.8 Utility Compactors
Media Number -M0082430-01 Publication Date -01/12/2017 Date Updated -25/12/2017 i07023880
Drum Scrapers - Inspect/Adjust/Replace
SMCS - 6607-025; 6607-040; 6607-510
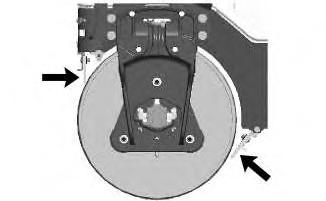
Illustration 1
Inspect Scrapers
1. Remove dirt and debris from scrapers.
2. The drum scraper should be adjusted in order to touch the width of the drum.
Replace Scrapers
1. Loosen the bolts and remove the damaged scraper.
2. Install the new scraper and tighten the bolts. The recommended torque for the bolts is 34 N·m (25 lb ft).
3. The drum scraper should be adjusted in order to touch the width of the drum.
Wed Apr 30 02:12:21 UTC+0530 2025
Product: VIBRATORY COMPACTOR
Model: CB1.7 VIBRATORY COMPACTOR SA7
Configuration: CB1.7 Vibratory Utility Compactor SA700001-UP (MACHINE) POWERED BY C1.1 Engine
Operation and Maintenance Manual
CB1.7 and CB1.8 Utility Compactors
Media Number -M0082430-01
Publication Date -01/12/2017
Engine Valve Lash - Check
SMCS - 1105-535
Date Updated -25/12/2017
i07016309
This maintenance is recommended by Caterpillar as part of a lubrication and preventive maintenance schedule in order to help provide maximum engine life.
For additional information refer to the engine manual for the machine.
NOTICE
Only qualified service personnel should perform this maintenance. Refer to the Service Manual or your Caterpillar dealer for the complete valve lash adjustment procedure.
Operation of Caterpillar engines with improper valve adjustments can reduce engine efficiency. This reduced efficiency could result in excessive fuel usage and/or shortened engine component life.
Copyright 1993 - 2025 Caterpillar Inc. All Rights Reserved. Private Network For SIS Licensees. Wed Apr 30 02:12:12 UTC+0530 2025
Product: VIBRATORY COMPACTOR
Model: CB1.7 VIBRATORY COMPACTOR SA7
Configuration: CB1.7 Vibratory Utility Compactor SA700001-UP (MACHINE) POWERED BY C1.1 Engine
Operation and Maintenance Manual
CB1.7 and CB1.8 Utility Compactors
Media Number -M0082430-01
Cooling System Pressure Cap - Clean/Replace
SMCS - 1382-070; 1382-510
-25/12/2017
Personal injury can result from hot coolant, steam and alkali.
At operating temperature, engine coolant is hot and under pressure. The radiator and all lines to heaters or the engine contain hot coolant or steam. Any contact can cause severe burns.
Remove cooling system pressure cap slowly to relieve pressure only when engine is stopped and cooling system pressure cap is cool enough to touch with your bare hand.
Do not attempt to tighten hose connections when the coolant is hot, the hose can come off causing burns.
Cooling System Coolant Additive contains alkali. Avoid contact with skin and eyes.
1. Open the engine compartment. Refer to the Operation and Maintenance Manual, "Access Doors and Covers".
i07016173
This is the sample of the manual click on the download link for complete manual
DOWNLOAD LINK
For some reason if link does not work download this pdf and then click