
C18 MARINE ENGINE

Note: Use Bookmarks panel to navigate
This is the sample of the manual click on the download link for complete manual
DOWNLOAD LINK
For some reason if link does not work download this pdf and then click

Product: MARINE ENGINE
Model: C18 MARINE ENGINE T2P
Configuration: C18 Marine Engine T2P00001-UP
Disassembly and Assembly
C18 Generator set and C18 Marine Engines
Aftercooler - Install
SMCS - 1063-012
S/N - C1J1-UP
S/N - CKH1-UP
S/N - CYN1-UP
S/N - GBM1-UP
S/N - GEN1-UP
S/N - GES1-UP
S/N - J2K1-UP
S/N - KJT1-UP
S/N - MGS1-UP
S/N - NAX1-UP
S/N - NAY1-UP
S/N - PHW1-UP
S/N - PLE1-UP
S/N - T2P1-UP
S/N - WKB1-UP
Installation Procedure
i06750448
Guide Bolt 3/8 - 16 by 4 inch
B 369-9451 GreaseNOTICE
Keep all parts clean from contaminants.
Contaminants may cause rapid wear and shortened component life.
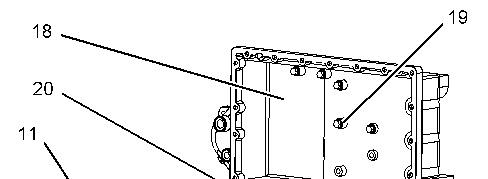
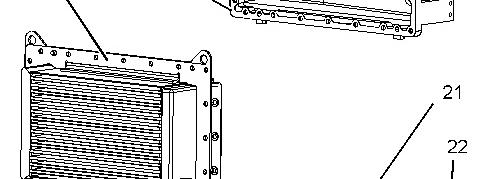
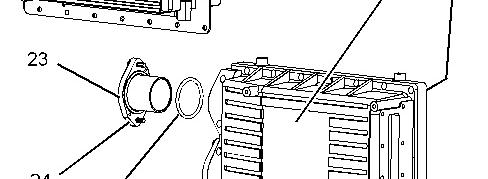

Illustration 1 g01053285
1. Install the O-ring seals on bolts (19). Position base assembly (18) on the cylinder block and install bolts (19).
2. Install Tooling (A) in the base assembly. Install gasket (20) on Tooling (A).
3. Attach a suitable lifting device to aftercooler core (11). The weight of the aftercooler core is approximately 14 kg (31 lb).
4. Install aftercooler core (11) on Tooling (A).
5. Install gasket (22) and cover (21) on Tooling (A).
6. Install O-ring seals (25) on adapters (23). Install the adapters and install bolts (24).
2
7. Install bolts (12).
8. Remove Tooling (A) and install remaining bolts (12).
9. Install three bolts (13) on the back side of the aftercooler.
Note: Check the alignment of the adapters for the aftercooler prior to installation of the tube assemblies.
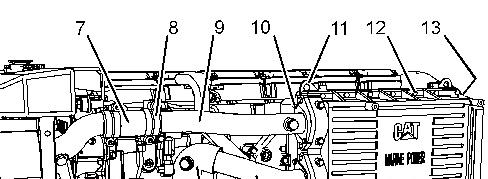
10. Install the O-ring seal on tube assembly (9). Apply Tooling (B) to the O-ring seal. Install the retainer sleeve on the tube assembly. Install the tube assembly in the aftercooler.
11. Align tube assembly (9) with the heat exchanger. Slide hose (7) in position. Tighten hose clamps (8).
12. Install bolts (10).
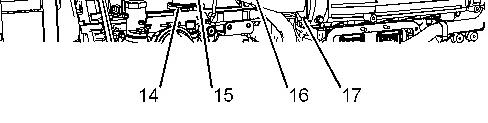
13. Install the O-ring seals on tube assembly (16). Apply Tooling (B) to the O-ring seals. Install elbow (15) on tube assembly (16). Install the retainer sleeve on the tube assembly. Install the tube assembly in the aftercooler.
14. Tighten clamp assembly (14). Install bolts (17).
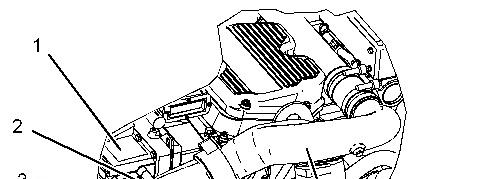
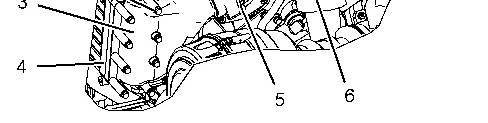
Illustration 3 g01053209
15. Install the O-ring seals on the air pipe. Install adapter (3) on air pipe (6). Position gasket (4) between aftercooler (1) and the adapter. Install the spacers and bolts (2).
16. Install the plates and bolts (5).
17. Fill the cooling system. Refer to Operation and Maintenance Manual, "Cooling System Coolant - Change".
Note: It is not necessary to fill the cooling system on sea water aftercooled applications.
Product: MARINE ENGINE
Model: C18 MARINE ENGINE T2P
Configuration: C18 Marine Engine T2P00001-UP
Disassembly and Assembly
C18 Generator set and C18 Marine Engines
Aftercooler - Remove
SMCS - 1063-011
S/N - C1J1-UP
S/N - CKH1-UP
S/N - CYN1-UP
S/N - GBM1-UP
S/N - GEN1-UP
S/N - GES1-UP
S/N - J2K1-UP
S/N - KJT1-UP
S/N - MGS1-UP
S/N - NAX1-UP
S/N - NAY1-UP
S/N - PHW1-UP
S/N - PLE1-UP
S/N - T2P1-UP
S/N - WKB1-UP
Removal Procedure
i02733036
Guide Bolt 3/8 - 16 by 4 inch 2
NOTICE
Care must be taken to ensure that fluids are contained during performance of inspection, maintenance, testing, adjusting, and repair of the product. Be prepared to collect the fluid with suitable containers before opening any compartment or disassembling any component containing fluids.
Refer to Special Publication, NENG2500, "Dealer Service Tool Catalog" for tools and supplies suitable to collect and contain fluids on Cat® products.
Dispose of all fluids according to local regulations and mandates.
NOTICE
Keep all parts clean from contaminants.
Contaminants may cause rapid wear and shortened component life.
1. Drain the coolant from the cooling system into a suitable container for storage or disposal. Refer to Operation and Maintenance Manual, "Cooling System Coolant - Change".
Note: It is not necessary to drain the cooling system on sea water aftercooled applications.
Illustration 1 g01053209
2. Remove bolts (5) and the plates.
3. Remove bolts (2) and the spacers from adapter (3).
4. Remove adapter (3) from air pipe (6). Remove the O-ring seals from the air pipe. Remove gasket (4) from aftercooler (1).
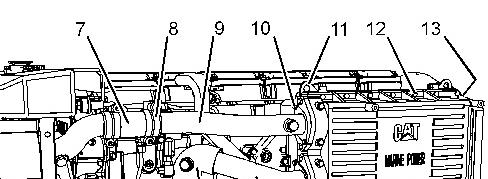
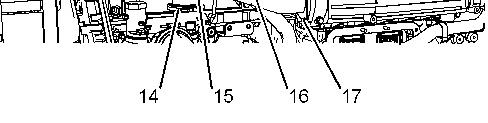
Illustration 2 g01381170
5. Loosen hose clamps (8). Slide hose (7) onto tube assembly (9).
6. Remove bolts (10). Remove tube assembly (9) from the aftercooler. Remove the retainer sleeve and the O-ring seal from the tube assembly.
7. Loosen clamp assembly (14).
8. Remove bolts (17). Remove tube assembly (16) and elbow (15) from the aftercooler. Remove the retainer sleeve and the O-ring seals from the tube assembly. Remove elbow (15) from the tube assembly.
9. Remove two bolts (12) and install Tooling (A).
10. Attach a suitable lifting device to aftercooler core (11). The weight of the aftercooler core is approximately 14 kg (31 lb).
11. Remove remaining bolts (12). Remove three bolts (13) from the back side of the aftercooler.
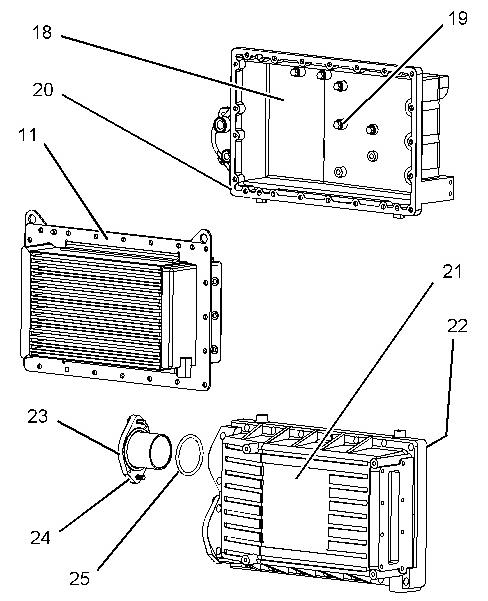
Illustration 3 g01053285
12. Remove bolts (24). Remove adapters (23) and O-ring seals (25).
13. Remove cover (21). Remove gasket (22) from the cover.
14. Remove aftercooler core (11) from base assembly (18). Remove Tooling (A).
15. Remove bolts (19). Remove the O-ring seals from the bolts.
16. Remove base assembly (18). Remove gasket (20) from the base assembly.
Copyright 1993 - 2024 Caterpillar Inc. All Rights Reserved. Private Network For SIS Licensees.
Fri Jul 12 01:12:19 UTC+0530 2024
Product: MARINE ENGINE
Model: C18 MARINE ENGINE T2P
Configuration: C18 Marine Engine T2P00001-UP
Disassembly and Assembly
C18 Generator set and C18 Marine Engines
Air Lines - Remove and Install
SMCS - 1071-010
S/N - C1J1-UP
S/N - CKH1-UP
S/N - CYN1-UP
S/N - GBM1-UP
S/N - GEN1-UP
S/N - GES1-UP
S/N - J2K1-UP
S/N - KJT1-UP
S/N - MGS1-UP
S/N - NAX1-UP
S/N - NAY1-UP
S/N - PHW1-UP
S/N - PLE1-UP
S/N - T2P1-UP
S/N - WKB1-UP
Removal Procedure
i06750392
NOTICE
Keep all parts clean from contaminants. Contaminants may cause rapid wear and shortened component life.
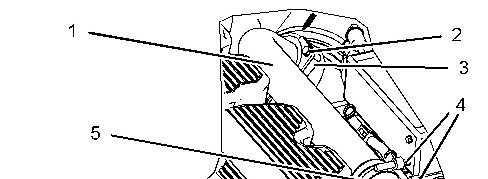
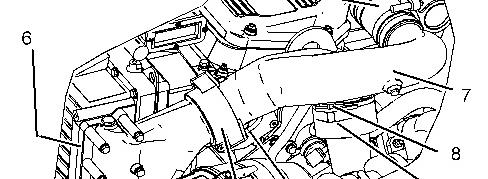

Illustration 1 g01052465
1. Remove bolts (2) and the plates.
2. Loosen hose clamps (4). Slide hose (5) onto tube assembly (1).
3. Remove tube assembly (1) from turbocharger compressor housing (3). Remove the O-ring seals from the tube assembly.
4. Remove bolt (8) and the retainer.
5. Remove bolts (10) and the spacers from adapter (11).
6. Remove pipe (7) from turbocharger compressor housing (9). Remove gasket (6) from the aftercooler.
7. Remove bolts (12) and the retainers. Remove adapter (11) from pipe (7). Remove the O-ring seals from pipe (7).
Installation Procedure
Table 1
Required Tools
Tool Part Number Part Description Qty
A 369-9451 GreaseNOTICE
Keep all parts clean from contaminants.
Contaminants may cause rapid wear and shortened component life.
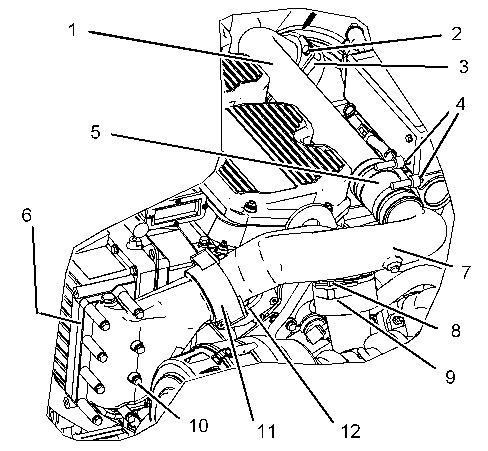
Illustration 2 g01052465
1. Install the O-ring seals on pipe (7). Apply Tooling (A) to the O-ring seals. Install adapter (11) on pipe (7). Install the retainers and bolts (12). Do not tighten the bolts at this time.
2. Install pipe (7) in turbocharger compressor housing (9). Install the retainer and bolt (8). Do not tighten the bolt at this time.
3. Position gasket (6) between the aftercooler housing and adapter (11). Install the spacers and bolts (10).
4. Tighten bolts (12) and bolt (8).
5. Install the O-ring seals on tube assembly (1). Apply Tooling (A) to the O-ring seals. Install tube assembly (1) in turbocharger compressor housing (3). Install the plates and bolts (2). Do not tighten the bolts at this time.
6. Align tube assembly (1) with pipe (7). Slide hose (5) onto pipe (7). Tighten hose clamps (4).
7. Tighten bolts (2).
1993 - 2024 Caterpillar Inc.

Product: MARINE ENGINE
Model: C18 MARINE ENGINE T2P
Configuration: C18 Marine Engine T2P00001-UP
Disassembly and Assembly
C18 Generator set and C18 Marine Engines
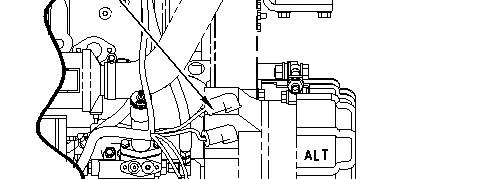
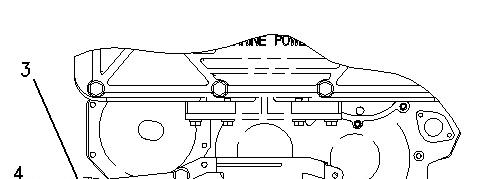
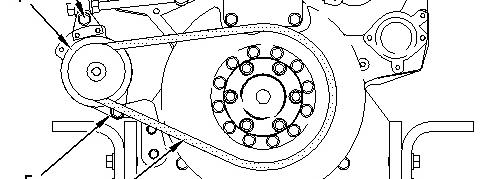
Alternator - Remove and Install
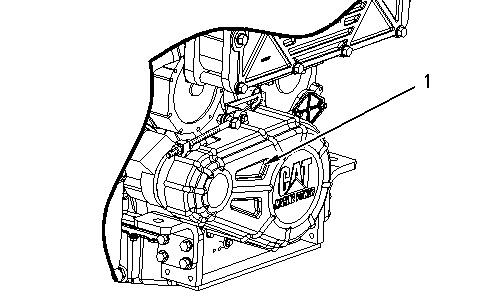
Removal Procedure
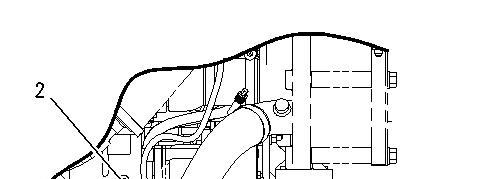


Installation Procedure
Product: MARINE ENGINE
Model: C18 MARINE ENGINE T2P
Configuration: C18 Marine Engine T2P00001-UP
Disassembly and Assembly
C18 Generator set and C18 Marine Engines
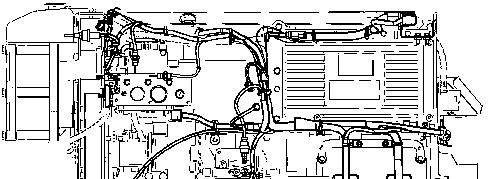
Atmospheric Pressure Sensor - Remove and Install
S/N -
S/N -
S/N -
S/N -
S/N -
S/N -
S/N -
S/N -
S/N -
Removal Procedure
NOTICE
Keep all parts clean from contaminants.
Contaminants may cause rapid wear and shortened component life.
Installation Procedure
Keep all parts clean from contaminants. Contaminants may cause rapid wear and shortened component life.
This is the sample of the manual click on the download link for complete manual
DOWNLOAD LINK
For some reason if link does not work download this pdf and then click