
Product: COMPACT WHEEL LOADER
Model: 902 COMPACT WHEEL LOADER 7ES
Configuration: 902 Compact Wheel Loader 7ES00001-UP (MACHINE) POWERED BY 3024 Engine
Disassembly and Assembly 902 and 906 Wheel Loaders Power Train
Media Number -SENR1283-04 Publication Date -01/06/2006 Date Updated -12/06/2006
i01442162
Axle Planetary - Assemble
SMCS - 4050-016
Assembly Procedure
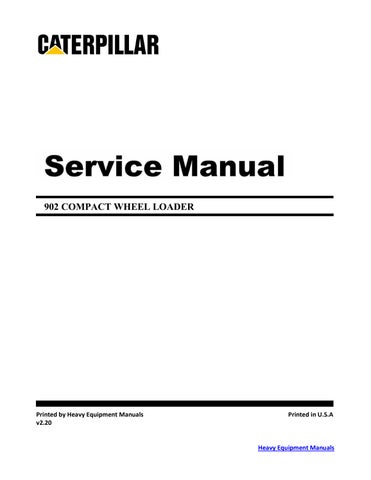
Illustration 1
g00467088
1. Lower the temperature of bearing cup (1), and drop in place.
2. Repeat Step 1 for the opposite side.
2

3
This is the sample of the manual click on the download link for complete manual
DOWNLOAD LINK
For some reason if link does not work download this pdf and then click
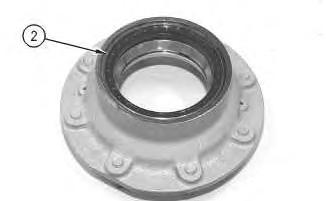
Illustration 4
5. Install bearing cone (4) .
g00467091
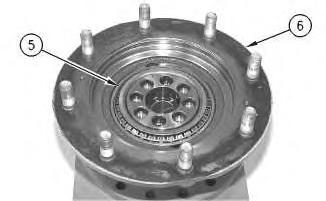
Illustration 5
6. Install hub (6), and bearing cone (5) .
g00467092
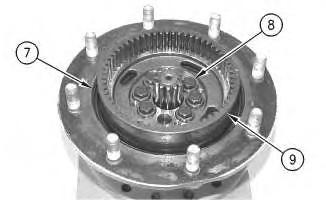
Illustration 6
g00467093
7. Install sun gear (9) with six bolts (8). The torque for bolts (8) is 120 N·m (88.5 lb ft).
8. Install seal (7) .

9. Install planetary carrier (10) with two bolts (11). The torque for bolts (11) is 25 N·m (18.5 lb ft).
10. Fill the planetary assembly with oil. The capacity of the planetary assembly is 0.7 L (0.18 US gal). Refer to Operation and Maintenance Manual, SEBU7137 for the correct procedure.
End By: Install the Planetary Assembly. Refer to Disassembly and Assembly, "Axle PlanetaryInstall". Copyright 1993 - 2021 Caterpillar Inc. All Rights Reserved. Private Network For SIS Licensees.
Product: COMPACT WHEEL LOADER
Model: 902 COMPACT WHEEL LOADER 7ES
Configuration: 902 Compact Wheel Loader 7ES00001-UP (MACHINE) POWERED BY 3024 Engine
Disassembly and Assembly 902 and 906 Wheel Loaders Power Train
Updated -12/06/2006
i01735453
Axle Planetary - Assemble
SMCS - 4050-016
Assembly Procedure
Table 1
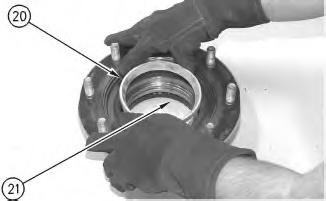
Illustration 1
1. Lower the temperature of bearing cup (20). Install bearing cup (20).
2. Repeat Step 1 for bearing cup (21) on the opposite side.

Illustration 2
3. Install seal (19) to hub (16). Use Tooling (B) to install seal (19) .

Illustration 3
4. Install seal (18) to hub (16). Use Tooling (A) .

Illustration 4
5. Install bearing cone (17) .
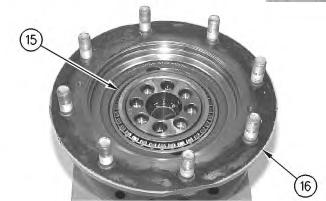
Illustration 5
6. Install hub (16) and bearing cone (15) .
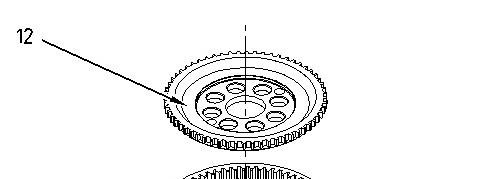


Illustration 6 g00896198
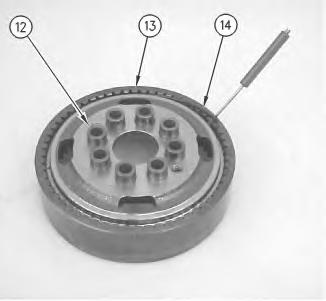
Illustration 7 g00894975
7. Install carrier wheel (12) to ring gear (13) .
8. Install retaining ring (14) .
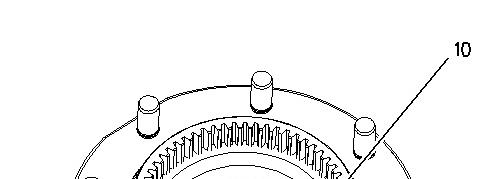
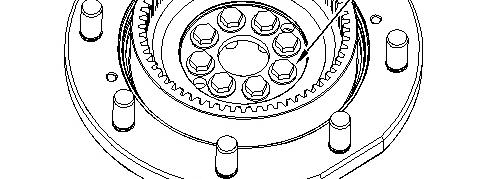

Illustration 8 g00921181
9. Install ring gear (13) to axle (8) .
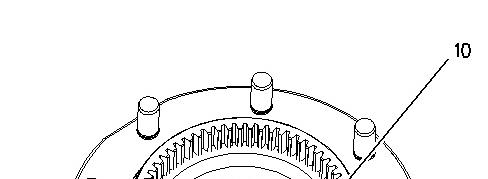
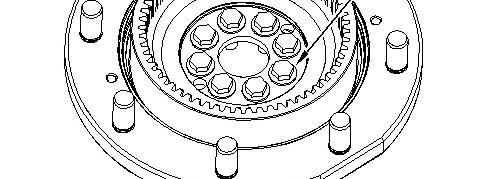

Illustration 9 g00921218
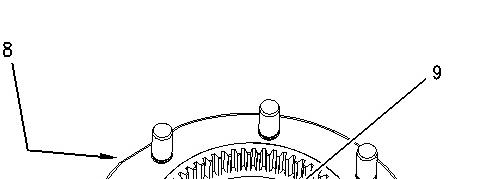
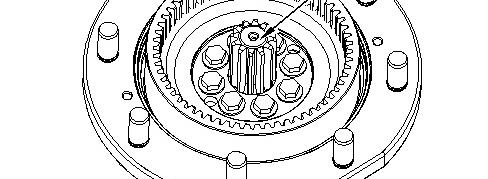

Illustration 10 g00921179
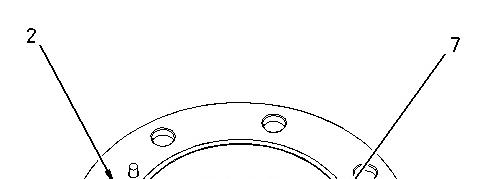


Illustration 11 g00896191
12. Install the bottom row of bearings (7) .
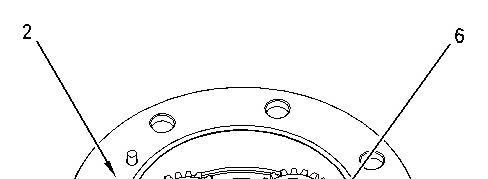
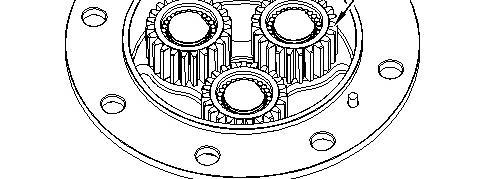

Illustration 12 g00894942
13. Install gear (6). The top row of bearings (7) go on with gear (6) .
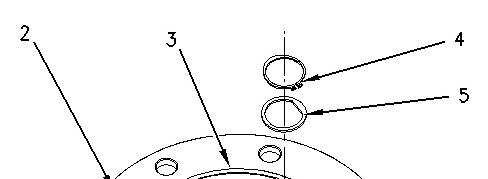
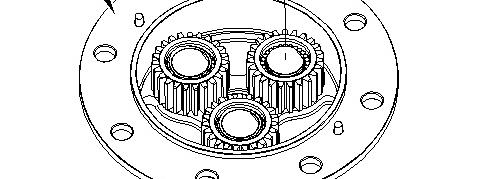

Illustration 13 g00912428
Install washer (5) .
15. Install retaining ring (4) .
16. Repeat Steps 12 through 15 for other gears (6) .
17. Install O-ring seal (3) to cover (2) .
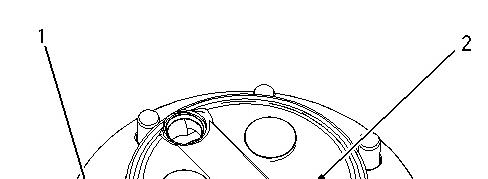
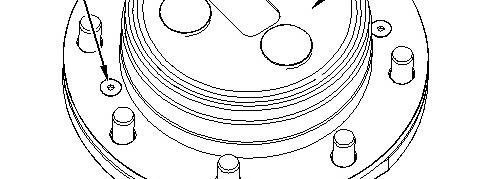

Illustration 14 g00894938
18. Install cover (2). Install allen head bolts (1). Tighten bolt (1) to a torque of 25 N·m (18.5 lb ft)
19. Fill the planetary assembly with oil. The capacity of the planetary assembly is 0.7 L (0.18 US gal). Refer to Operation and Maintenance Manual, SEBU7137 for the correct procedure.
End By: Install the Planetary Assembly. Refer to Disassembly and Assembly, "Axle PlanetaryInstall". Copyright 1993 - 2021 Caterpillar Inc. All Rights Reserved.
Product: COMPACT WHEEL LOADER
Model: 902 COMPACT WHEEL LOADER 7ES
Configuration: 902 Compact Wheel Loader 7ES00001-UP (MACHINE) POWERED BY 3024 Engine
Disassembly and Assembly 902 and 906 Wheel Loaders Power Train
Axle Planetary - Disassemble
SMCS - 4050-015
Disassembly Procedure
Table 1 Required Tools
i01734673
Start By:
A. Remove the Planetary Assembly. Refer to Disassembly and Assembly, "Axle PlanetaryRemove".
NOTICE
Care must be taken to ensure that fluids are contained during performance of inspection, maintenance, testing, adjusting and repair of the product. Be prepared to collect the fluid with suitable containers before opening any compartment or disassembling any component containing fluids.
Refer to Special Publication, NENG2500, "Caterpillar Tools and Shop Products Guide" for tools and supplies suitable to collect and contain fluids on Caterpillar products.
Dispose of all fluids according to local regulations and mandates.
1. Drain the oil from the planetary assembly into a suitable container. The capacity of the planetary assembly is 0.7 L (0.18 US gal).
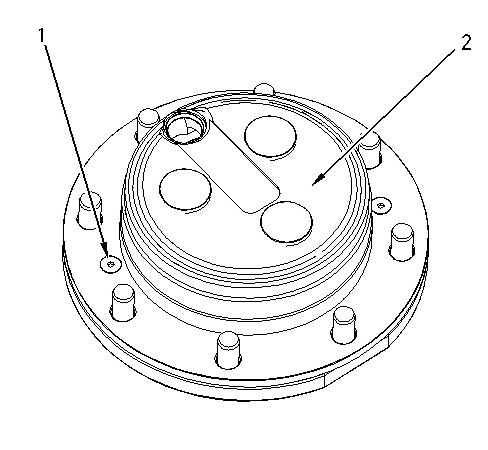
Illustration 1 g00894938
2. Remove allen head bolts (1), and cover (2) .
3. Remove O-ring seal (3) from cover (2) .
Illustration 2 g00912428
4. Remove retaining ring (4) from housing (2) .
5. Remove washer (5) from housing (2) .
Illustration 3 g00894942
6. Remove gear (6). The top row of bearings (7) will come off with gear (6) .
Illustration 4 g00896191
7. Remove the bottom row of bearings (7) .
8. Repeat Steps 4 through 7 for other gears (6) .
Illustration 5 g00921179
Illustration 6 g00921181
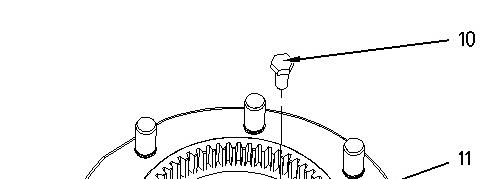


Illustration 7 g00921182
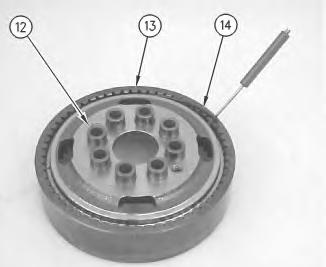
Illustration 8 g00894975
12. Remove ring gear (13) .
13. Remove retaining ring (14).
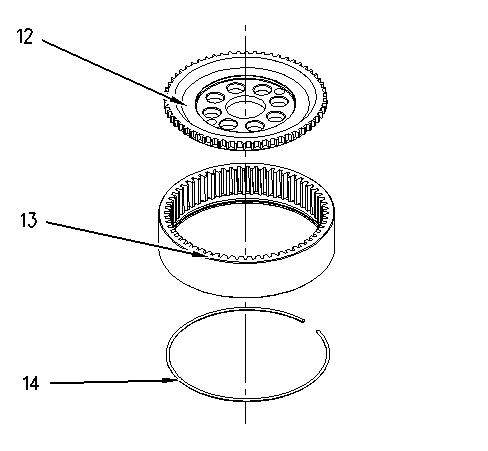
Illustration 9 g00896198
14. Remove carrier wheel (12) from ring gear (13) .
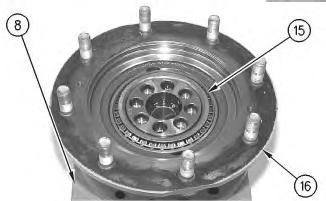
Illustration 10
g00921187
15. Remove bearing cone (15), and hub (16) from axle (8) .
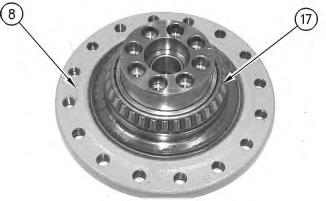
Illustration 11
16. Remove bearing cone (17) from axle (8) .
g00921189

Illustration 12 g00896220
17. Remove seal (18) .
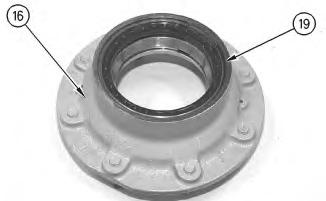
Illustration 13
18. Remove seal (19) .
g00896221
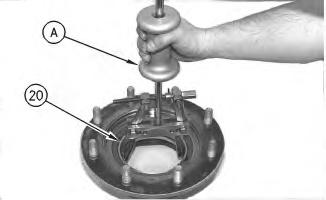
Illustration 14
g00896224
19. Use Tooling (A) and (B) to remove bearing cup (20) .
20. Repeat Step 19 in order to remove the bearing cup (19) on the opposite side of hub.
21. Repeat Steps 5 through 21 for the other axle.
This is the sample of the sample click on the download link for complete manual
DOWNLOAD LINK
For some reason if link does not work download this pdf and then click