


This is the sample of the manual click on the download link for complete manual
For some reason if link does not work download this pdf and then click

Product: TRUCK
Model: 777G TRUCK TNM
Configuration: 777G Off-Highway Truck TNM00001-UP (MACHINE) POWERED BY C32 Engine
Disassembly and Assembly
C27 and C32 Engines for Caterpillar Built Machines
Air Inlet Elbow - Remove and Install
SMCS - 1087-010-E4
Removal Procedure Table 1
i06746352
Start By: a. If necessary, remove the catalyst (module).
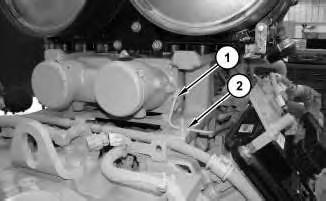
Illustration 1
View from the front of the engine.
1. Disconnect tube assembly (1).
g02245414
2. Remove stud bolt (2) and position the tube assembly out of the way.
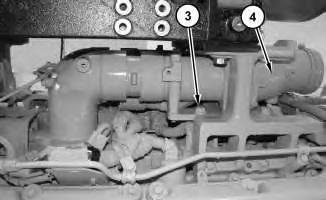
Illustration 2
3. Remove four bolts (3).
4. Remove manifold (4) as an assembly.
g02245498
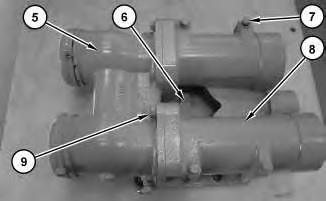
Illustration 3 g02291533
5. Remove bolts (7) and separate mixing tube (8) from plate (6).
6. Remove bolts (9) and separate mixing tube (8) from air inlet manifold (5). Remove and discard the O-ring seals.
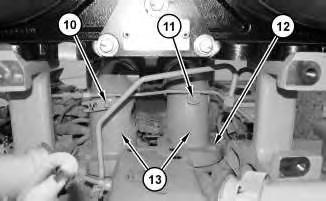
Illustration 4
g02291578 View from rear of the engine.
7. Remove bolt (11) from elbow (13).
8. Remove stud bolt (10) from elbow (13).
9. Remove eight bolts (12) and remove elbows (13).
Installation Procedure
1. Install manifold (4) in the reverse order of removal.
a. Apply Tooling (A) to the O-ring Seals for elbows (13).
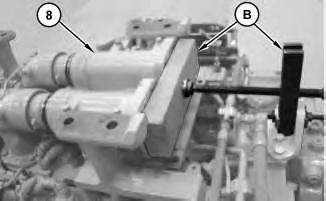
Illustration 5
g02733037
b. Position Tooling (B) and a suitable block of wood on the engine. Use Tooling (B) to install mixing tube (8) and install bolts (3).
Tue Mar 11 13:33:44 UTC+0530 2025
Product: TRUCK
Model: 777G TRUCK TNM
Configuration: 777G Off-Highway Truck TNM00001-UP (MACHINE) POWERED BY C32 Engine
Disassembly and Assembly
C27 and C32 Engines for Caterpillar Built Machines
Media Number -KENR8148-10
Atmospheric Pressure Sensor - Remove and Install
SMCS - 1923-010
Removal Procedure NOTICE
Keep all parts clean from contaminants.
Contaminants may cause rapid wear and shortened component life.
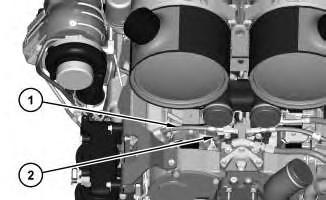
1. Disconnect hose assembly (1) .
2. Disconnect harness assembly from atmospheric pressure sensor (2). Remove atmospheric pressure sensor (2) .
Installation Procedure
1. Install atmospheric pressure sensor (2) in the reverse order of removal.
a. Tighten atmospheric pressure sensor (2) to a torque of 10 ± 2 N·m (89 ± 18 lb in).
Copyright 1993 - 2025 Caterpillar Inc. All Rights Reserved. Private Network For SIS Licensees. Tue Mar 11 13:45:11 UTC+0530 2025
Product: TRUCK
Model: 777G TRUCK TNM
Configuration: 777G Off-Highway Truck TNM00001-UP (MACHINE) POWERED BY C32 Engine
Disassembly and Assembly
C27 and C32 Engines for Caterpillar Built Machines Media
Bearing Clearance - Check
SMCS - 1203-535; 1219-535
Measurement Procedure Table 1
Required Tools
198-9142
Plastic Gauge (Green) 0.025 to 0.076 mm (0.001 to 0.003 inch)
Plastic Gauge (Red)
to 0.006 inch)
Plastic Gauge (Blue)
to 0.229 mm (0.004 to 0.009 inch)
Plastic Gauge (Yellow) 0.230 to 0.510 mm (0.009 to 0.020 inch)
Note: Plastic gauge may not be necessary when the engine is in the chassis.
NOTICE
Keep all parts clean from contaminants.
Contaminants may cause rapid wear and shortened component life.
Note: Cat does not recommend the checking of the actual bearing clearances particularly on small engines. This is because of the possibility of obtaining inaccurate results and the possibility of damaging the bearing or the journal surfaces. Each Cat engine bearing is quality checked for specific wall thickness.
Note: The measurements should be within specifications and the correct bearings should be used. If the crankshaft journals and the bores for the block and the rods were measured during disassembly, no further checks are necessary. However, if the technician still wants to measure the bearing clearances, Tooling (A) is an acceptable method. Tooling (A) is less accurate on journals with small diameters if clearances are less than 0.10 mm (0.004 inch).
NOTICE
Lead wire, shim stock or a dial bore gauge can damage the bearing surfaces.
The technician must be very careful to use Tooling (A) correctly. The following points must be remembered:
• Ensure that the backs of the bearings and the bores are clean and dry.
• Ensure that the bearing locking tabs are properly seated in the tab grooves.
• The crankshaft must be free of oil at the contact points of Tooling (A).
1. Put a piece of Tooling (A) on the crown of the bearing that is in the cap.
Note: Do not allow Tooling (A) to extend over the edge of the bearing.
2. Use the correct torque-turn specifications in order to install the bearing cap. Do not use an impact wrench. Be careful not to dislodge the bearing when the cap is installed.
Note: Do not turn the crankshaft when Tooling (A) is installed.
3. Carefully remove the cap, but do not remove Tooling (A). Measure the width of Tooling (A) while Tooling (A) is in the bearing cap or on the crankshaft journal. Refer to Illustration 1.
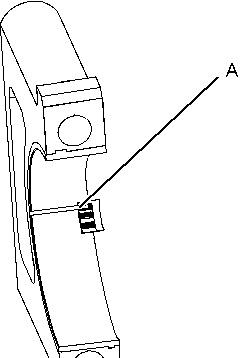

Illustration 1 g01152855
Typical Example
4. Remove all of Tooling (A) before you install the bearing cap.
Note: When Tooling (A) is used, the readings can sometimes be unclear. For example, all parts of Tooling (A) are not the same width. Measure the major width in order to ensure that the parts are within the specification range. Refer to Specifications Manual, "Connecting Rod Bearing Journal" and Specifications Manual, "Main Bearing Journal" for the correct clearances. Copyright 1993 - 2025 Caterpillar Inc. All Rights Reserved.
Product: TRUCK
Model: 777G TRUCK TNM
Configuration: 777G Off-Highway Truck TNM00001-UP (MACHINE) POWERED BY C32 Engine
Disassembly and Assembly
C27 and C32 Engines for Caterpillar Built Machines
Media Number -KENR8148-10
Belt Tensioner - Remove and Install
SMCS - 1358-010
Removal Procedure Table 1 Required Tools
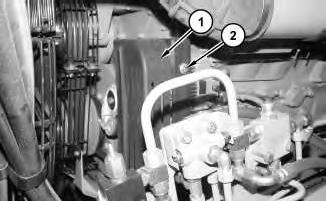
Illustration 1
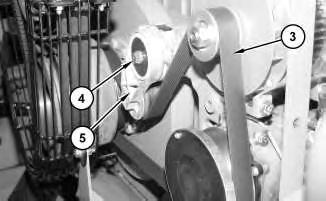
1. Remove bolts (2) and guard assembly (1).
2
2. Use Tooling (A) to remove belt (3). Refer to Operation and Maintenance Manual, "BeltsInspect/Adjust/Replace".
3. Remove bolt (4) and belt tensioner (5).
Installation Procedure Table 2
3
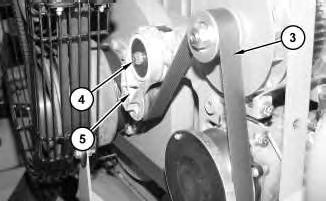
1. Position belt tensioner (5) and install bolt (4).
2. Use Tooling (A) to install belt (3). Refer to Operation and Maintenance Manual, "BeltsInspect/Adjust/Replace".
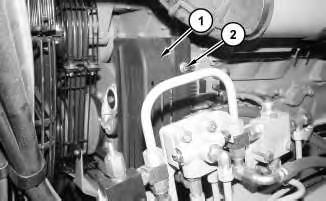
3. Position guard assembly (1) and install bolts (2).
Copyright 1993 - 2025 Caterpillar Inc.
All Rights Reserved.
Private Network For SIS Licensees.
Tue Mar 11 13:48:15 UTC+0530 2025
Product: TRUCK
Model: 777G TRUCK TNM
Configuration: 777G Off-Highway Truck TNM00001-UP (MACHINE) POWERED BY C32 Engine
Disassembly and Assembly
C27 and C32 Engines for Caterpillar Built Machines
Media Number -KENR8148-10
i04042668
Boost Pressure Sensor - Remove and Install
SMCS - 1917-010
Removal Procedure NOTICE
Keep all parts clean from contaminants.
Contaminants may cause rapid wear and shortened component life.
1 g02252733
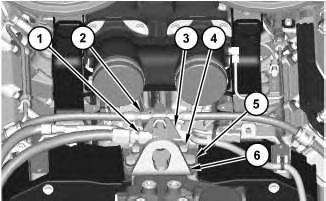
1. Disconnect hose assemblies (1) and (2).
2. Remove bolts (4) and position manifold (3) out of the way.
3. Remove bolts (5) and remove bracket (6).
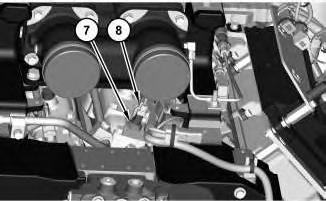
Illustration 2
4. Disconnect harness assembly (8) and remove boost pressure sensor (7).
Installation Procedure
1. Install the boost pressure sensor (7) in the reverse order.
2. Tighten boost pressure sensor (7) to a torque of 10 ± 2 N·m (89 ± 18 lb in).
Copyright 1993 - 2025 Caterpillar Inc. All Rights Reserved. Private Network For SIS Licensees. Tue Mar 11 13:47:56 UTC+0530 2025
Product: TRUCK
Model: 777G TRUCK TNM
Configuration: 777G Off-Highway Truck TNM00001-UP (MACHINE) POWERED BY C32 Engine
Disassembly and Assembly
C27 and C32 Engines for Caterpillar Built Machines
Camshaft - Remove and Install - C27
SMCS - 1210-010
S/N - FHS1-UP
S/N - JA31-UP
S/N - MHM1-UP
S/N - MJ91-UP
S/N - NHG1-UP
S/N - PHB1-UP
S/N - WHH1-UP
Removal Procedure Table 1
Start By: a. Remove the rocker arms and the rocker shafts.
NOTICE
Keep all parts clean from contaminants.
Contaminants may cause rapid wear and shortened component life.
NOTICE
Do not turn the crankshaft or the camshaft while the camshaft gear is removed. If the rear gear group is not correctly timed during installation, interference can occur between the pistons and the valves, resulting in damage to the engine.
NOTICE
Care must be used when removing or installing the camshaft. Do not damage the finished surfaces of the camshaft or the camshaft bearings.
1. Drain the coolant from the cooling system into a suitable container for storage or disposal. Refer to Operation and Maintenance Manual, "Cooling System Coolant - Change".
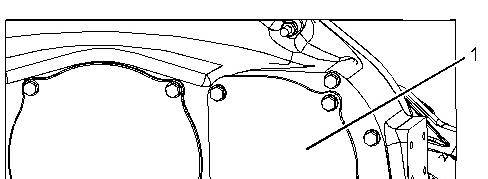
2. Remove cover (1).
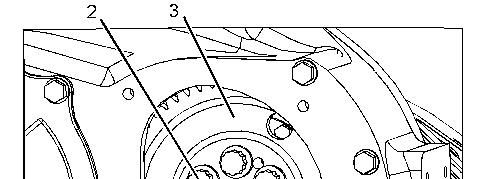
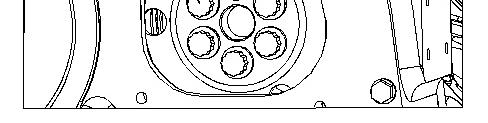
Illustration 2
3. Remove bolts (2). Reposition gear (3) inside the flywheel housing.
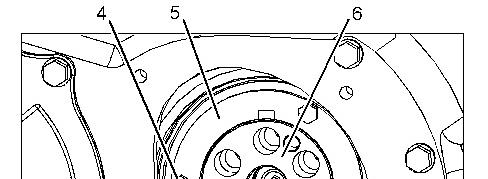
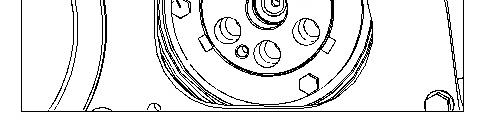
Illustration 3
4. Remove bolts (4), thrust plate (5), and adapter assembly (6).
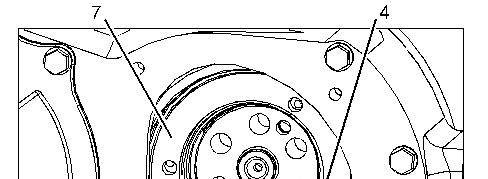
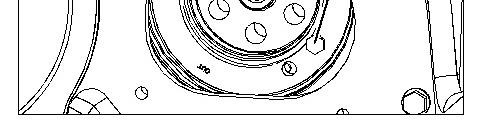
Illustration 4 g01148241
5. Use bolt (4) in order to remove sealing plate (7). Remove the O-ring seals.
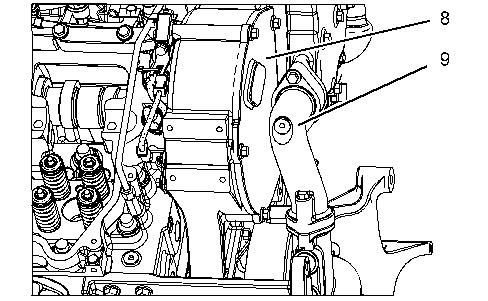
Illustration 5 g01265946
6. Remove elbow (9) and cover (8).
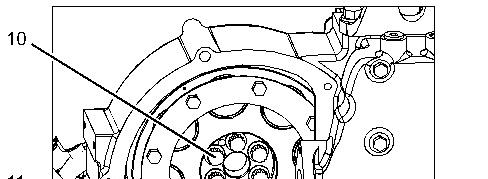
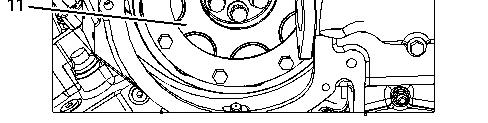
Illustration 6 g01160259
7. Remove bolts (10) and damper (11).
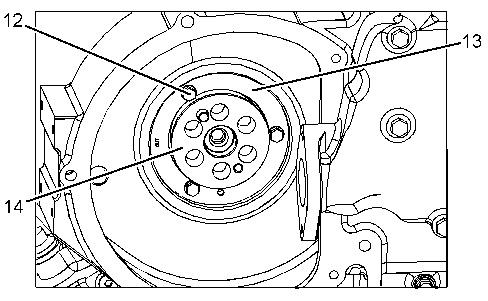
Illustration 7 g01160261
8. Remove bolts (12). Remove sealing plate (13) and adapter assembly (14).
8
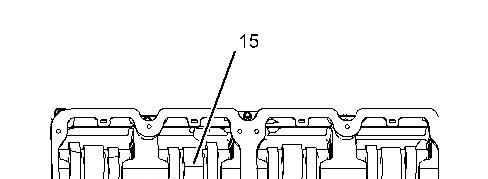
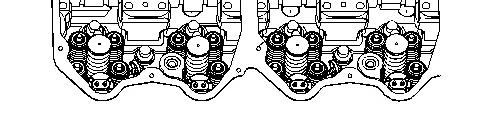
9. Install Tooling (A) and Tooling (B) on the rear of camshaft (15). Install Tooling (A) on the front of camshaft (15).
10. Install Tooling (C) on the front housing or the rear housing. Tooling (C) is used to support the camshaft.
Note: Install Tooling (A) and Tooling (B) on the camshaft. Tooling (A) and Tooling (B) will support the camshaft as the camshaft is moved out of the cylinder head and into Tooling (C). Align the camshaft with the bore of Tooling (C).
Note: Avoid lifting the camshaft. The camshaft should rest on Tooling (A) and Tooling (B). Lifting the camshaft can lead to misalignment as the camshaft is removed, resulting in damage to the camshaft bearings.
11. Carefully slide the camshaft out of the cylinder head for removal. Use two people to remove the camshaft. Keep the camshaft level while the camshaft is being removed from the cylinder head. The weight of the camshaft is approximately 35 kg (77 lb).
Note: Rotate the camshaft during removal to prevent the camshaft from binding in the camshaft bearings.
Installation Procedure
Table 2
(1) Front Removal
(2) Rear Removal
NOTICE
Keep all parts clean from contaminants.
Contaminants may cause rapid wear and shortened component life.
NOTICE
Do not turn the crankshaft or the camshaft while the camshaft gear is removed. If the rear gear group is not correctly timed during installation, interference can occur between the pistons and the valves, resulting in damage to the engine.
NOTICE
Care must be used when removing or installing the camshaft. Do not damage the finished surfaces of the camshaft or the camshaft bearings.
1. Ensure that the camshaft and camshaft bearings are thoroughly clean. Lubricate the camshaft lobes with a 50/50 mixture of Tooling (D) and clean engine oil. Apply a thin coat of clean engine oil on the camshaft bearings.
Illustration 9 g01160265
2. Install Tooling (A) and Tooling (B) on the rear of camshaft (15). Install Tooling (A) on the front of camshaft (15).
3. Install Tooling (C) on the front housing or the rear housing. Tooling (C) is used to support the camshaft.
4. Use two people to install the camshaft. Use Tooling (C) to assist in aligning the camshaft with the camshaft bearings. Carefully slide the camshaft into the cylinder head. Keep the camshaft level while the camshaft is being installed in the cylinder head. The weight of the camshaft is approximately 35 kg (77 lb).
Note: Rotate the camshaft during installation to prevent the camshaft from binding in the camshaft bearings.
5. Remove Tooling (A) and Tooling (B) from the camshaft.
Illustration 10 g01160261
6. Install sealing plate (13) and adapter assembly (14). Install bolts (12).
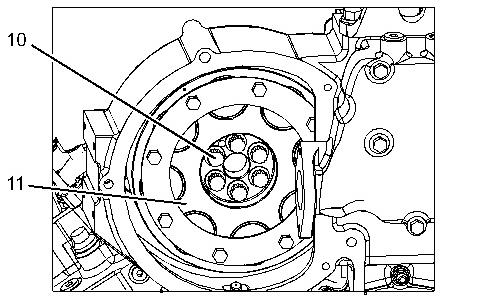
Illustration 11 g01160259
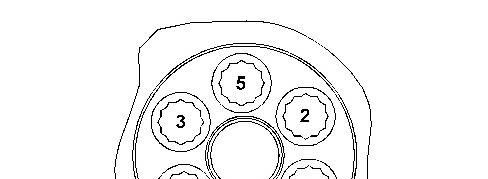
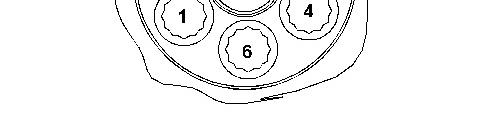
Illustration 12 g02748956
7. Install damper (11) and bolts (10).
8. Tighten the bolts to a torque of 240 ± 40 N·m (177 ± 30 lb ft). Tighten using the above illustrated sequence. Tighten bolts illustrated as 1 and 2 an additional 240 ± 40 N·m (177 ± 30 lb ft).
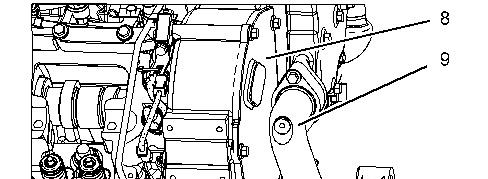
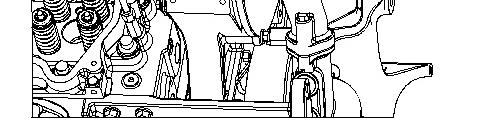
Illustration 13 g01265946
9. Install cover (8) and elbow (9).
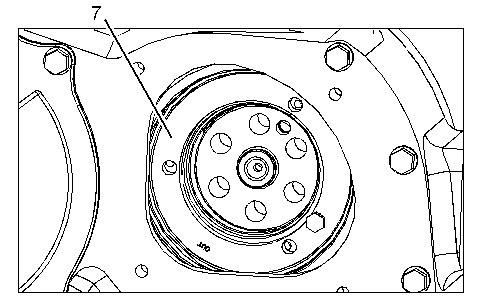
Illustration 14 g01148835
10. Install new O-ring seals and sealing plate (7).
Note: Ensure that the O-ring seals remain in position on sealing plate (7) during installation.
This is the sample of the manual click on the download link for complete manual
For some reason if link does not work download this pdf and then click